Items will be used in making Sales Transaction, Stock In, Stock Out, Stock Count, Inventory, etc.
Note: If the EasyPOS has an EasyFS Integration, the setting of items or adding of items should be done in the EasyFS system. The item detail that you should be attentive to is the “Tax Code” for each “Tax Type” saved in each system. In EasyFS it is “SI VAT” and in EasyPOS it is “Sales VAT”. Otherwise you will be getting an error in integration that says “Output Tax Mismatch”.
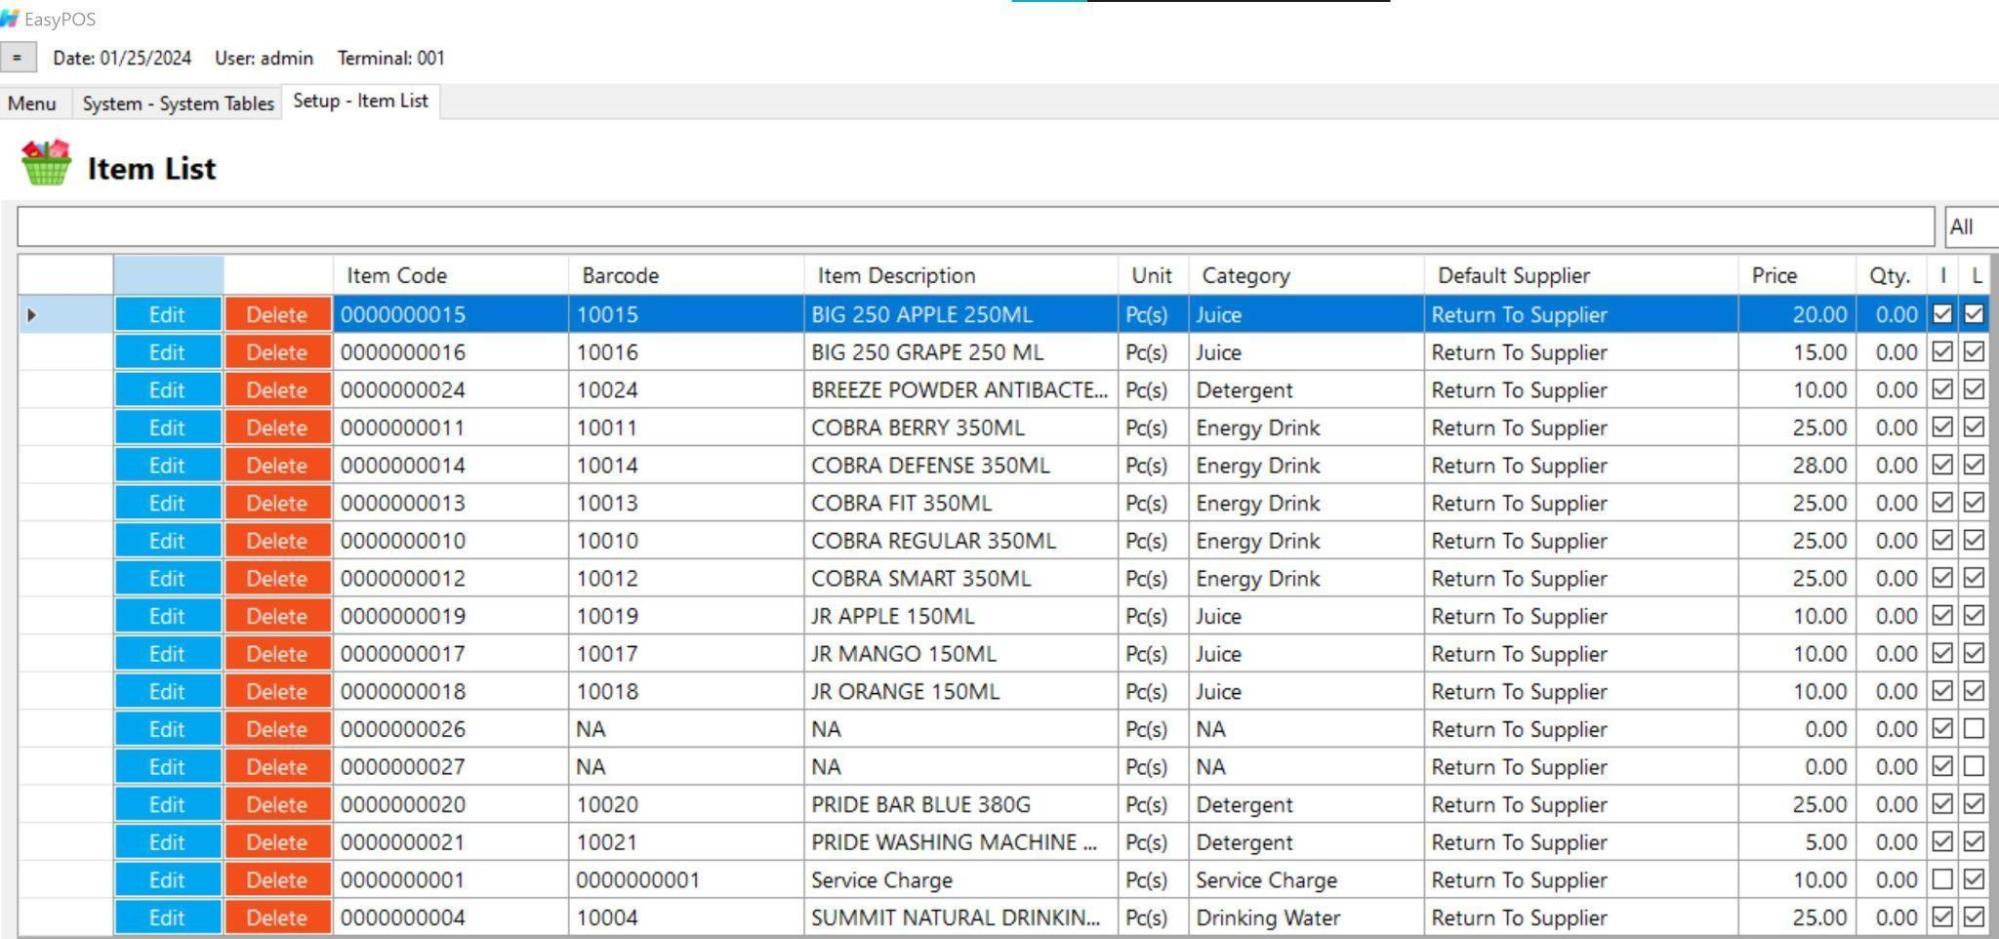
Item List
Shows the list of all added items.
Delete button will proceed to deleting unlocked item record detail.
Edit button will proceed to updating item detail.
Item Code – generally refers to a unique identifier or code assigned to a specific item or product within a system, database, or inventory management system. Item codes are used to uniquely distinguish and identify individual items in a standardized and efficient manner.
Barcode – A barcode is a graphical representation of data that consists of parallel lines or geometric patterns that can be scanned and interpreted by a barcode scanner. Barcodes are widely used for various purposes, primarily for encoding information about products, inventory items, or other objects in a machine-readable format.
Item Description – refers to a written or verbal representation that provides details and information about a specific item or product. It is a concise explanation or narrative that describes the characteristics, features, and specifications of the item.
Unit – Refer to the definition or explanation of a particular unit of measurement, including its dimensions and significance.
Category – meant to classify and describe the different types of products
Default Supplier – typically refers to the predefined or default supplier associated with a particular product or item.
Price – the amount of money required to purchase a product that a person sometimes uses.
Qty – refers to the amount or number of items, units, or objects of a particular kind. It is a measure of the extent, size, or magnitude of something.
I – (inventoriable or non-inventoriable) – if the items being sold is inventoriable (with check) or non-inventoriable (without check)
L – (Lock or Unlock) Locking an item means that particular part of your items can’t be edited while it is locked. You can easily unlock items that you need to edit and lock them back up when you’re done. Lock (with check) and unlock (without check)
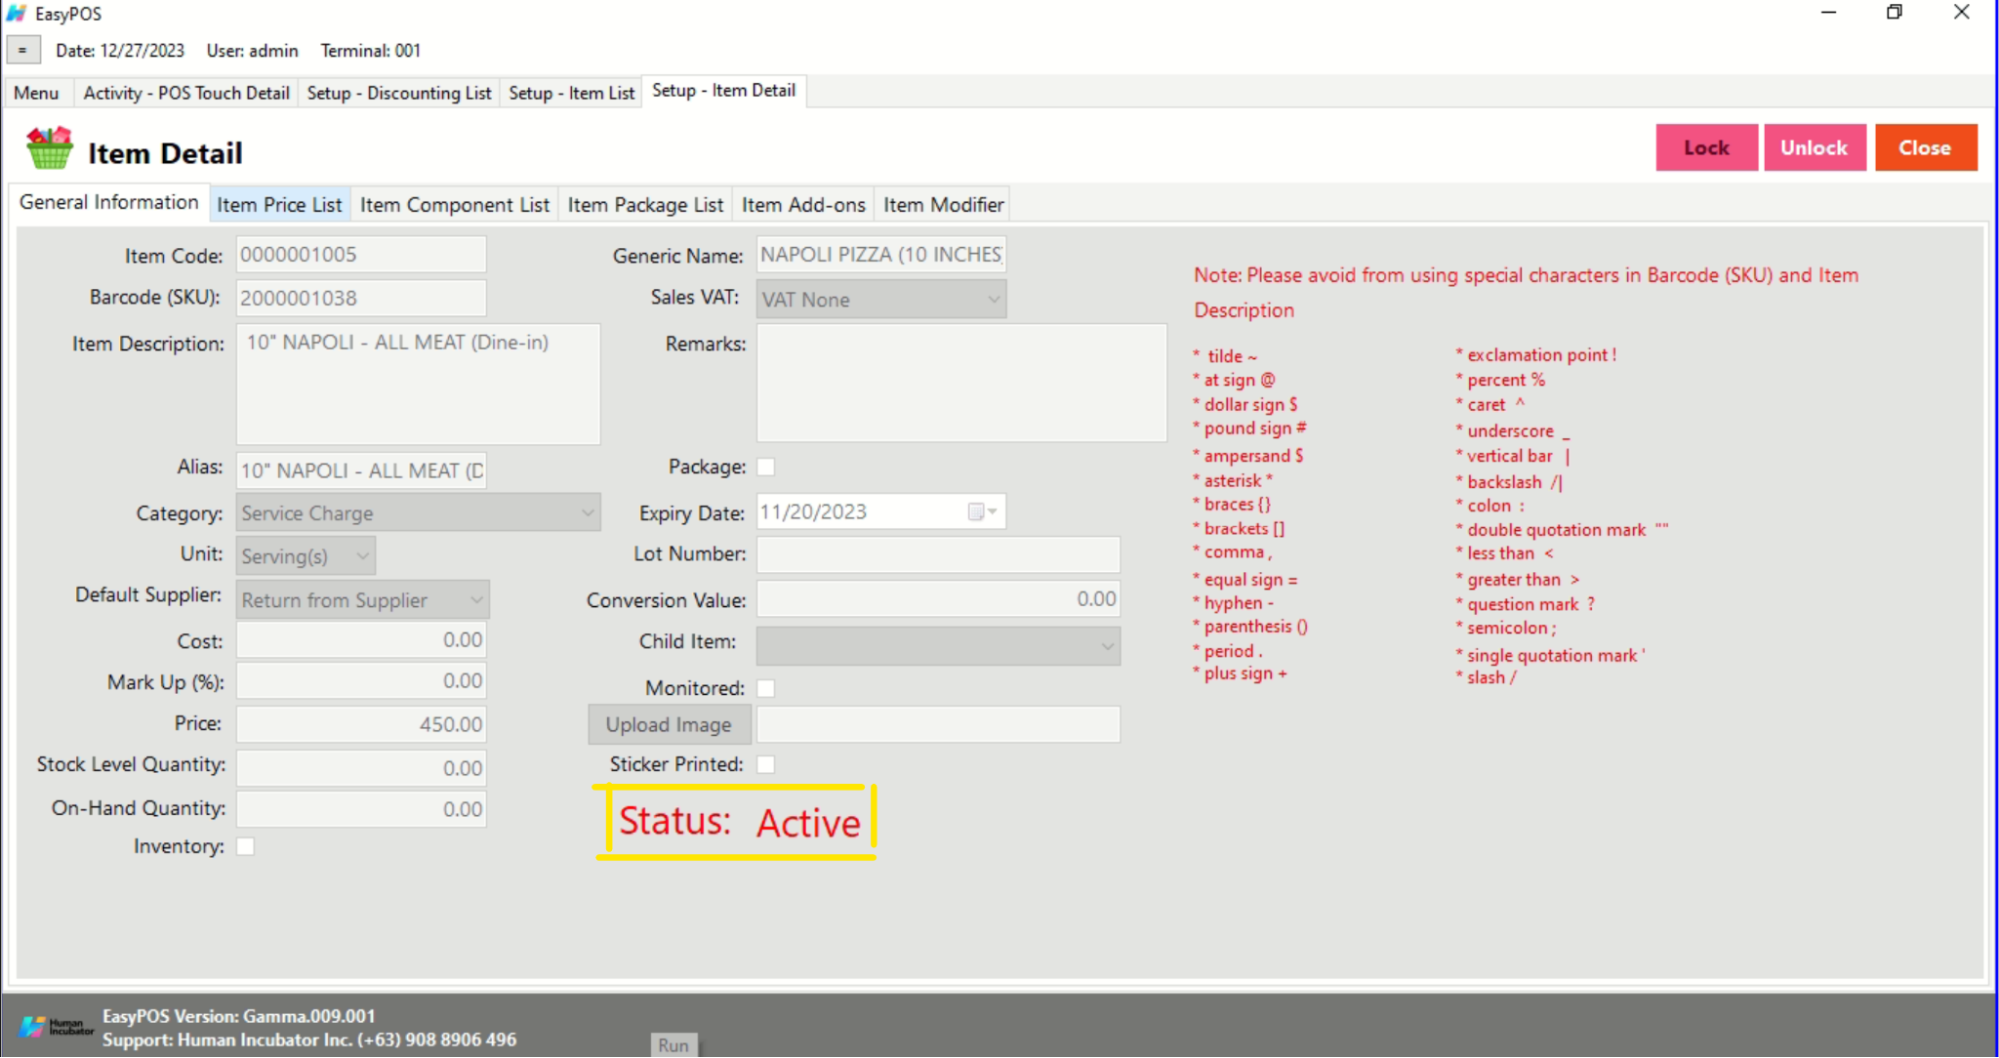
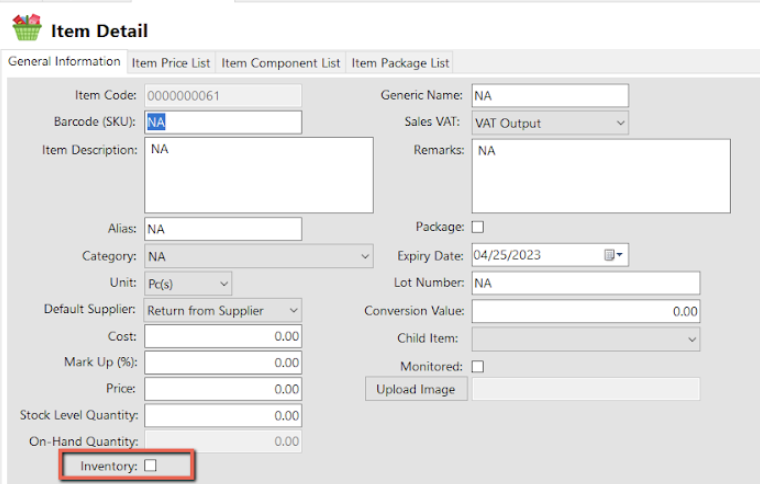
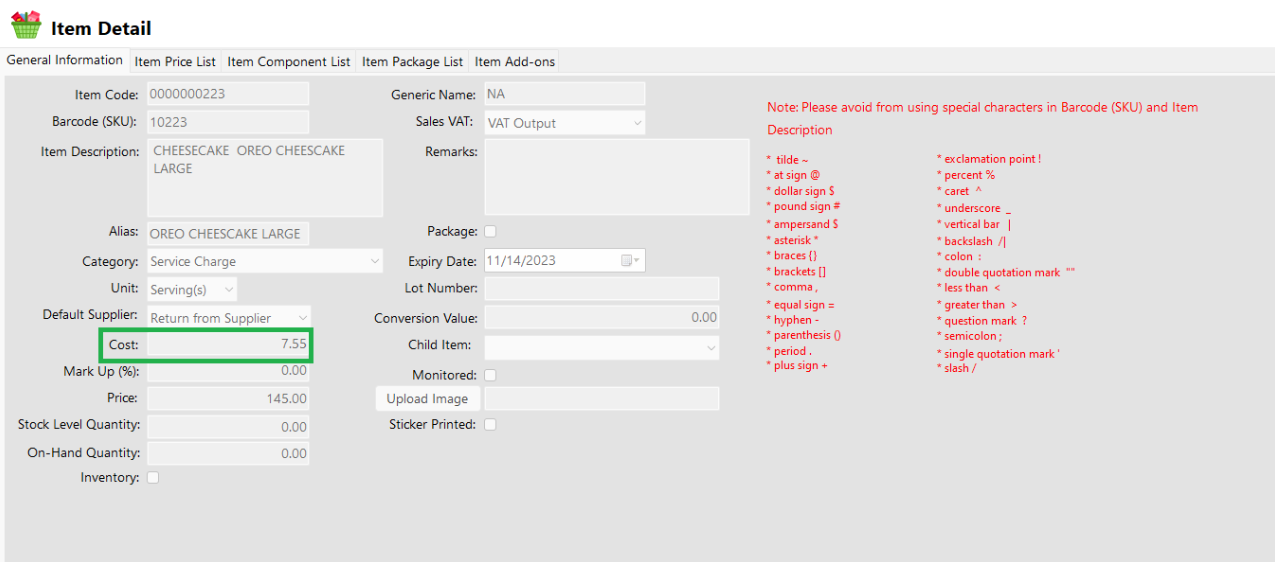
Item Detail
Assumption: Add button is already clicked on the upper right corner in the item list.
Fill up all the necessary information like
Bar Code, Description, Alias, Cost, Price
Please take note also to add the right category and unit for the item
If the Item has item components, the total cost of the item component will automatically display in the cost of the item general information tab.
It has a maximum limit with 255 characters in Item code, Barcode, Item Description, Alias and Category
Avoid using special characters in All fields in Item Details like: at sign (@), dollar sign ($), pound sign (#), ampersand (&), asterisk (*), blank () , braces ({ }), brackets ([ ]), comma (,), equal sign (=), hyphen (-), parenthesis ( ), period (.), plus sign (+), semicolon (;), single quotation mark (‘), slash (/) and etc. Special Characters: ~ ` ! @ # $ % ^ & * ( ) – _ + = { } [ ] | \ / : ; ” ‘ < > , .?
If some fields have special characters, a prompt message will appear when locking or saving the data.
Default value: NA and 0.00
Some fields are optional like Stock Level Quantity, Package, Monitored, Conversion Value, Lot Number.
In the Inventory checkbox, check if the item is Inventory and if the item is non-inventory just leave uncheck.
In the Sticker Printed checkbox, check if it is a Quick Service setup and required for a sticker printed and if the setup is not a Quick Service and not required for sticker printed, just leave it unchecked.
Add Status “Active” if the item detail is lock and “Inactive” if the item detail is unlock
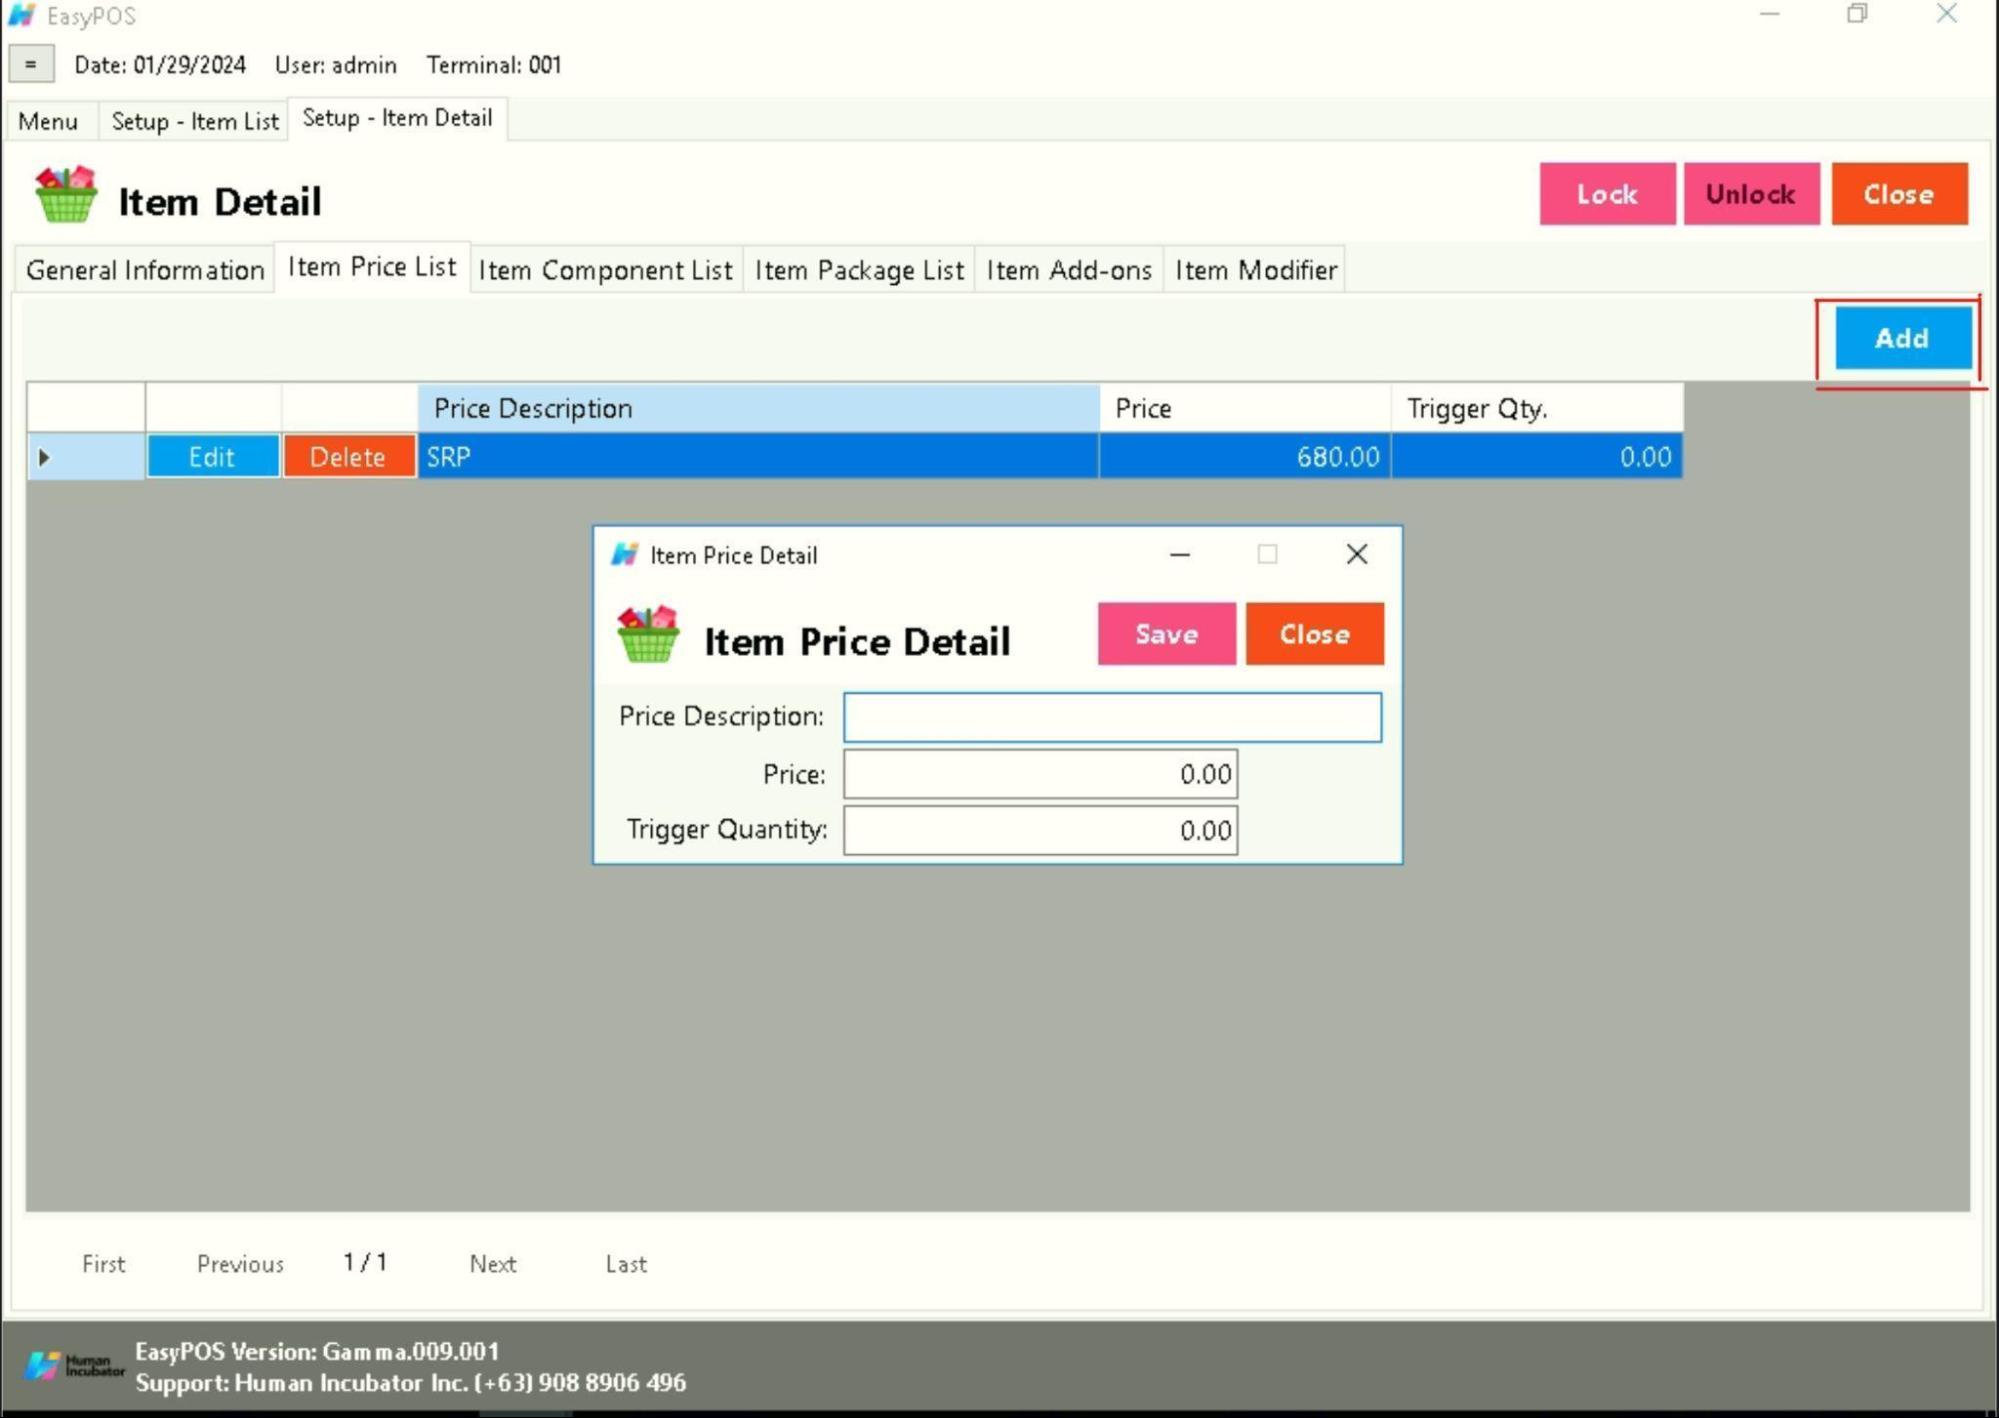
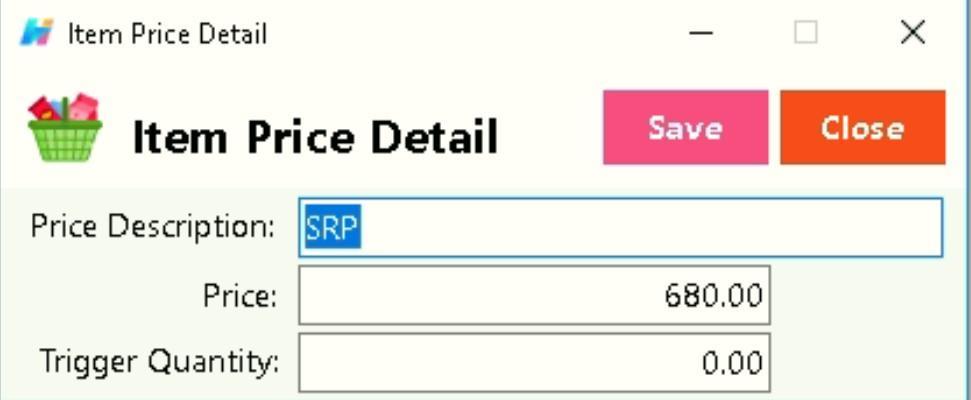
Item List Price
The item price list tab is used when items have multiple prices.
Just click the ADD button to add item price details.
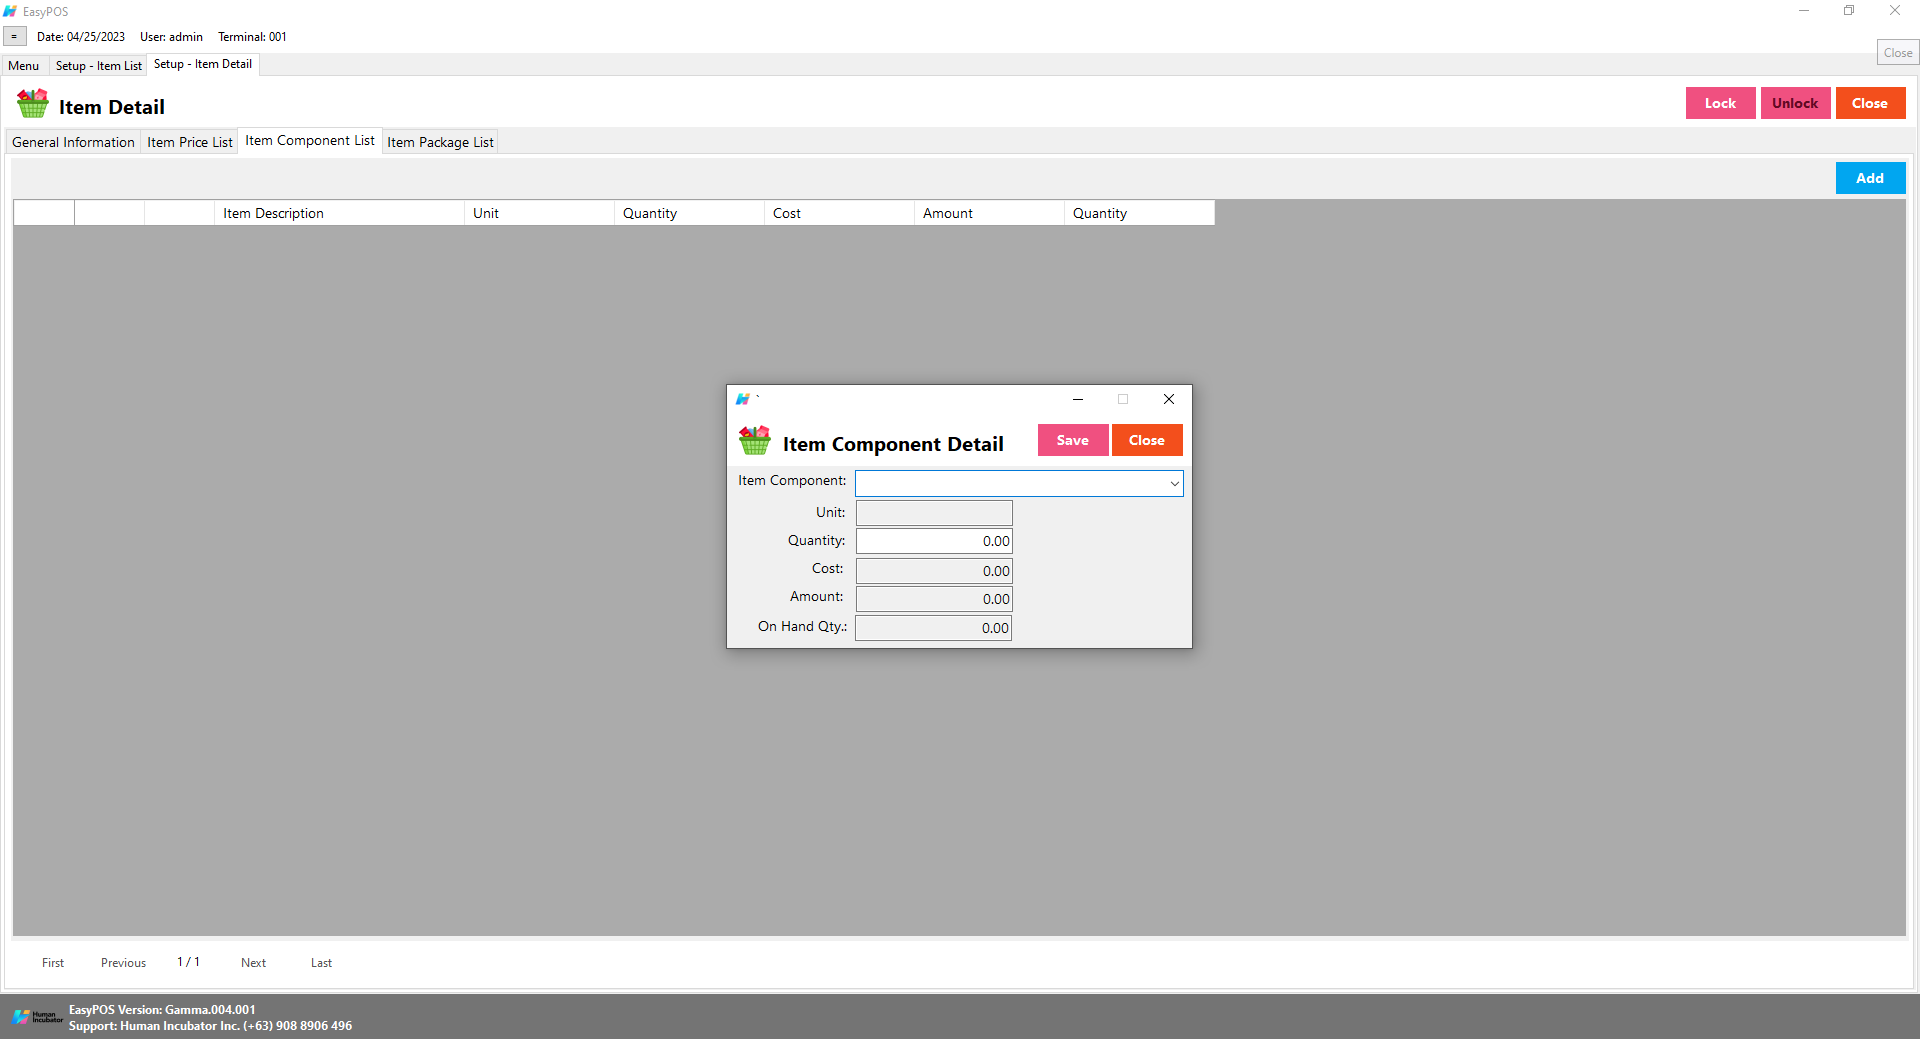
Item Component List
The Item Component List tab is used to add the raw materials that were used to produce the finished products/goods. This is only applicable if the item created is a finished good/product. Make sure to set the Inventory checkbox to False before setting an item component(s).
Just click the ADD button to add item component details.
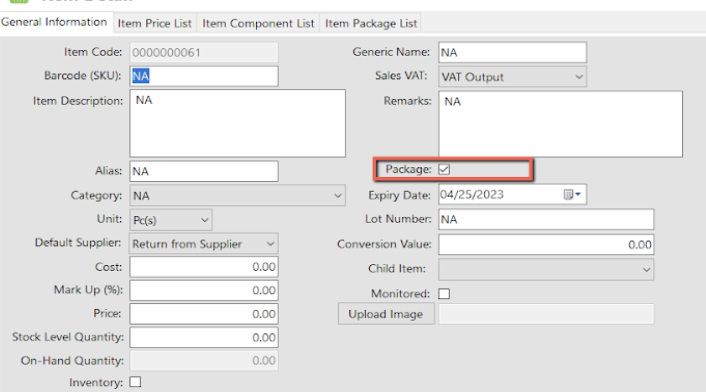
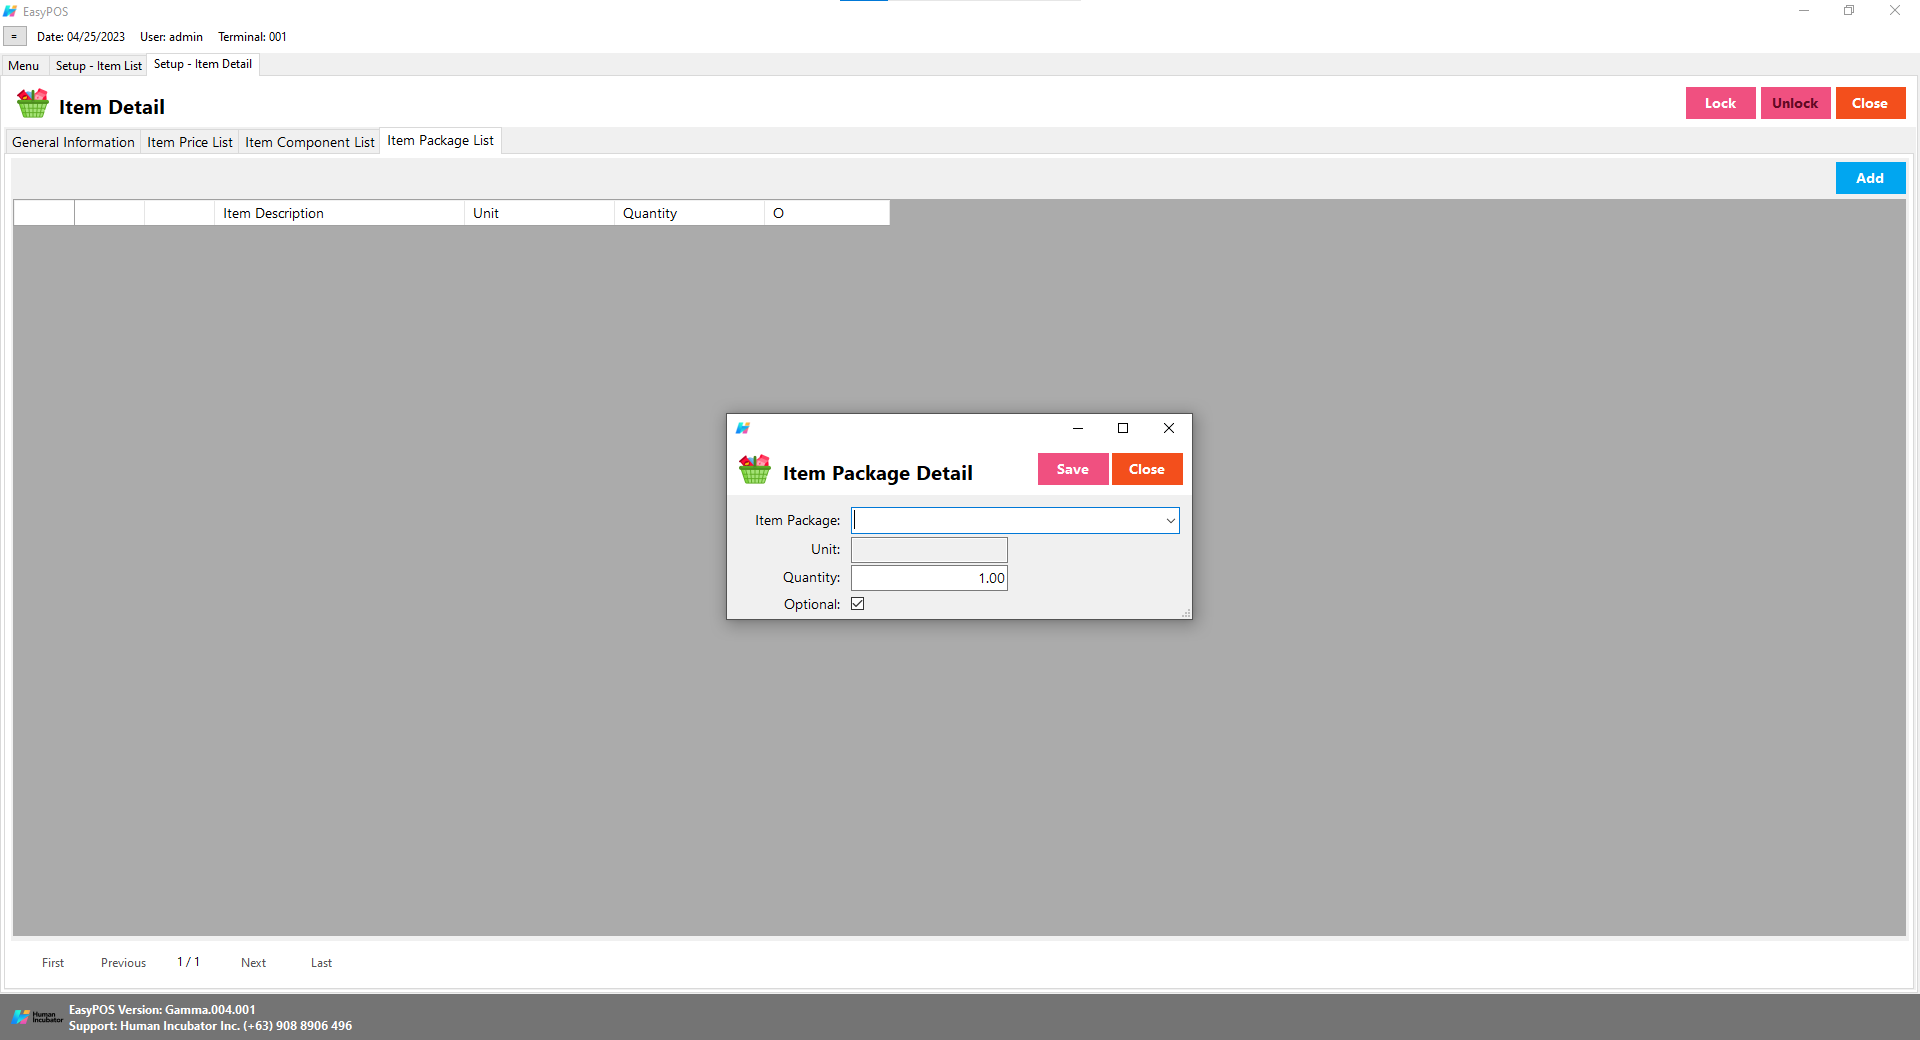
Item Package List
The Item Package List Tab is only used when the created item is a package. Meaning to say, this is the list of items that is included on the created package. Make sure to set the Packaged checkbox to True before setting an item component(s).
Just click the ADD button to add item package details.
The total cost of the item component will automatically reflect the cost of the general information item detail.
Save/Lock
Make sure to save/lock the record so that in every transaction the item will show.
Struggling to accept online payments? Discover how HII Online Payment Service solves your credit card merchant dilemma. HII Online Payment Service. Coming soon!
Struggling to accept online payments? Discover how HII Online Payment Service solves your credit card merchant dilemma. HII Online Payment Service. Coming soon!
Take advantage of Free easyFS Usage for Accounting Firms in the Philippines. Contact Us at +639176280355 or email at hiisales@humedit.ph
Take advantage of Free easyFS Usage for Accounting Firms in the Philippines. Contact Us at +639176280355 or email at hiisales@humedit.ph
Struggling to accept online payments? Discover how HII Online Payment Service solves your credit card merchant dilemma. HII Online Payment Service. Coming soon!
Struggling to accept online payments? Discover how HII Online Payment Service solves your credit card merchant dilemma. HII Online Payment Service. Coming soon!
Take advantage of Free easyFS Usage for Accounting Firms in the Philippines. Contact Us at +639176280355 or email at hiisales@humedit.ph
Take advantage of Free easyFS Usage for Accounting Firms in the Philippines. Contact Us at +639176280355 or email at hiisales@humedit.ph
Struggling to accept online payments? Discover how HII Online Payment Service solves your credit card merchant dilemma. HII Online Payment Service. Coming soon!
Struggling to accept online payments? Discover how HII Online Payment Service solves your credit card merchant dilemma. HII Online Payment Service. Coming soon!
Take advantage of Free easyFS Usage for Accounting Firms in the Philippines. Contact Us at +639176280355 or email at hiisales@humedit.ph
Take advantage of Free easyFS Usage for Accounting Firms in the Philippines. Contact Us at +639176280355 or email at hiisales@humedit.ph
Struggling to accept online payments? Discover how HII Online Payment Service solves your credit card merchant dilemma. HII Online Payment Service. Coming soon!
Struggling to accept online payments? Discover how HII Online Payment Service solves your credit card merchant dilemma. HII Online Payment Service. Coming soon!
Take advantage of Free easyFS Usage for Accounting Firms in the Philippines. Contact Us at +639176280355 or email at hiisales@humedit.ph
Take advantage of Free easyFS Usage for Accounting Firms in the Philippines. Contact Us at +639176280355 or email at hiisales@humedit.ph
Struggling to accept online payments? Discover how HII Online Payment Service solves your credit card merchant dilemma. HII Online Payment Service. Coming soon!
Struggling to accept online payments? Discover how HII Online Payment Service solves your credit card merchant dilemma. HII Online Payment Service. Coming soon!
Take advantage of Free easyFS Usage for Accounting Firms in the Philippines. Contact Us at +639176280355 or email at hiisales@humedit.ph
Take advantage of Free easyFS Usage for Accounting Firms in the Philippines. Contact Us at +639176280355 or email at hiisales@humedit.ph
Struggling to accept online payments? Discover how HII Online Payment Service solves your credit card merchant dilemma. HII Online Payment Service. Coming soon!
Struggling to accept online payments? Discover how HII Online Payment Service solves your credit card merchant dilemma. HII Online Payment Service. Coming soon!
Take advantage of Free easyFS Usage for Accounting Firms in the Philippines. Contact Us at +639176280355 or email at hiisales@humedit.ph
Take advantage of Free easyFS Usage for Accounting Firms in the Philippines. Contact Us at +639176280355 or email at hiisales@humedit.ph
Struggling to accept online payments? Discover how HII Online Payment Service solves your credit card merchant dilemma. HII Online Payment Service. Coming soon!
Struggling to accept online payments? Discover how HII Online Payment Service solves your credit card merchant dilemma. HII Online Payment Service. Coming soon!
Take advantage of Free easyFS Usage for Accounting Firms in the Philippines. Contact Us at +639176280355 or email at hiisales@humedit.ph
Take advantage of Free easyFS Usage for Accounting Firms in the Philippines. Contact Us at +639176280355 or email at hiisales@humedit.ph
Struggling to accept online payments? Discover how HII Online Payment Service solves your credit card merchant dilemma. HII Online Payment Service. Coming soon!
Struggling to accept online payments? Discover how HII Online Payment Service solves your credit card merchant dilemma. HII Online Payment Service. Coming soon!

 Log in to Messenger