System tables are used to add information categories of a company, multiple languages and accounts for integration.
(Note: Do not use special characters only “+”, “-” are allowed)
There are 3 tabs in system tables
Code Tables
Labels
Accounts
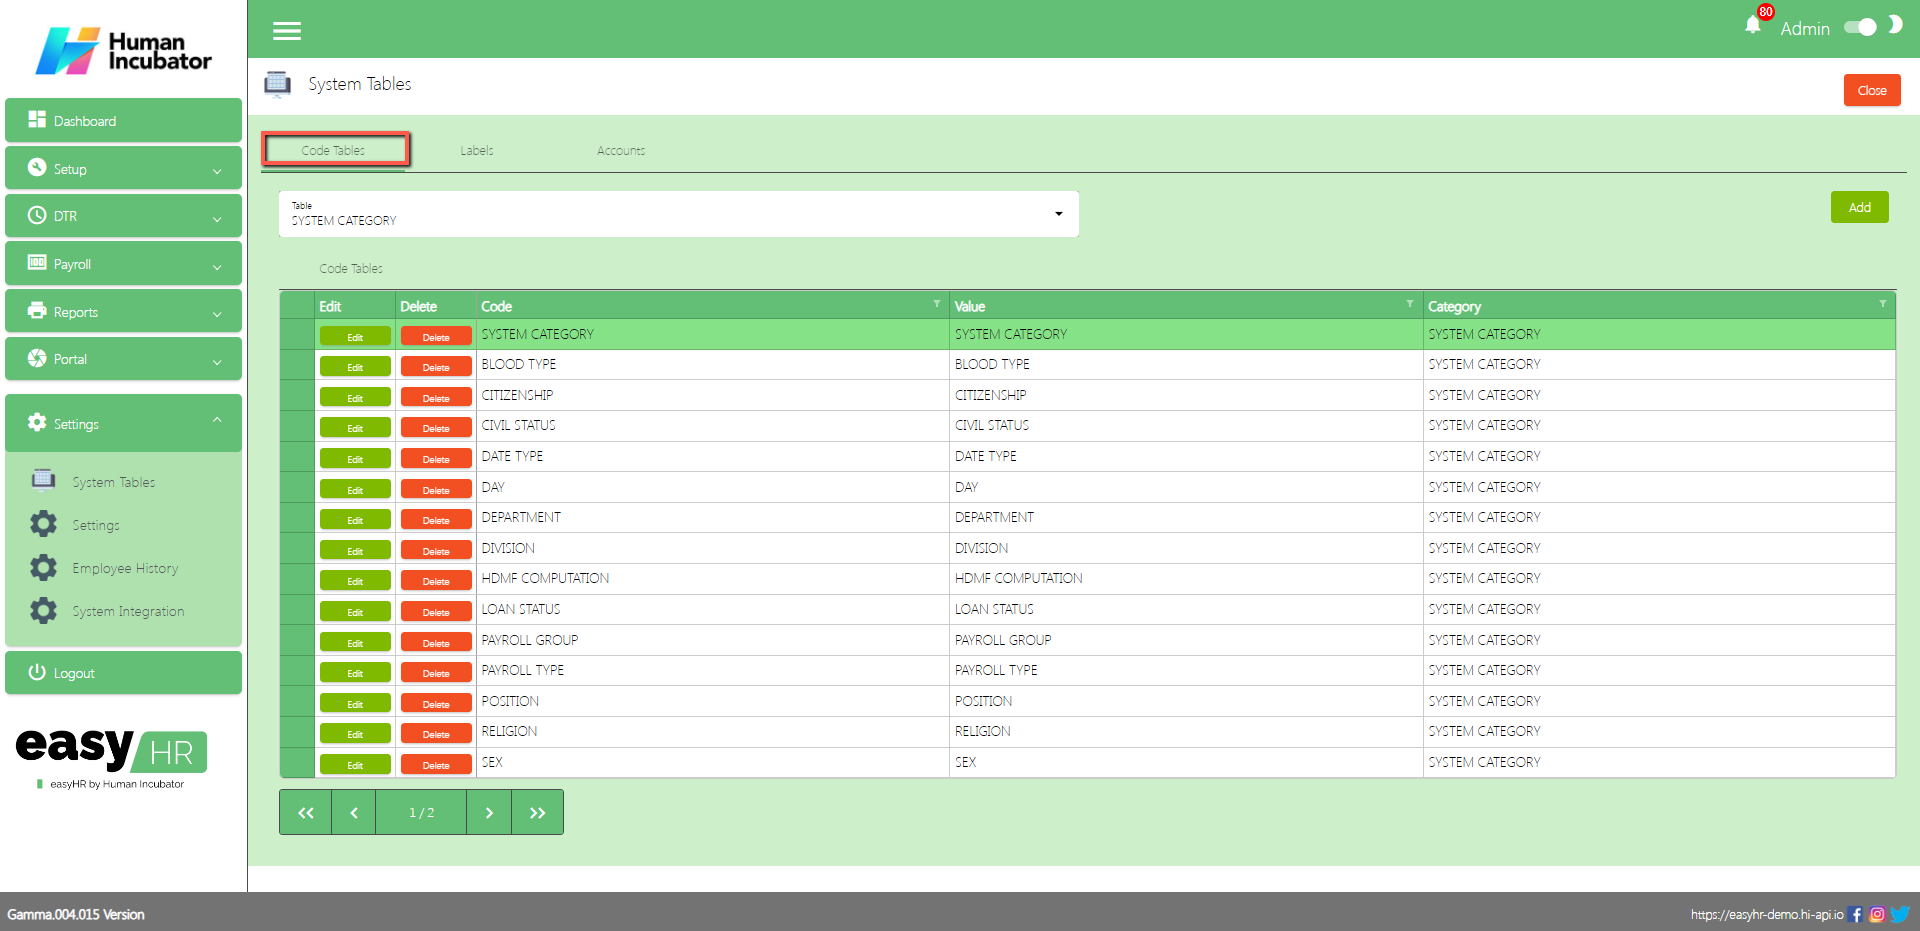
Code Tables
In the Code Tables tab the user can add information about the category of company.
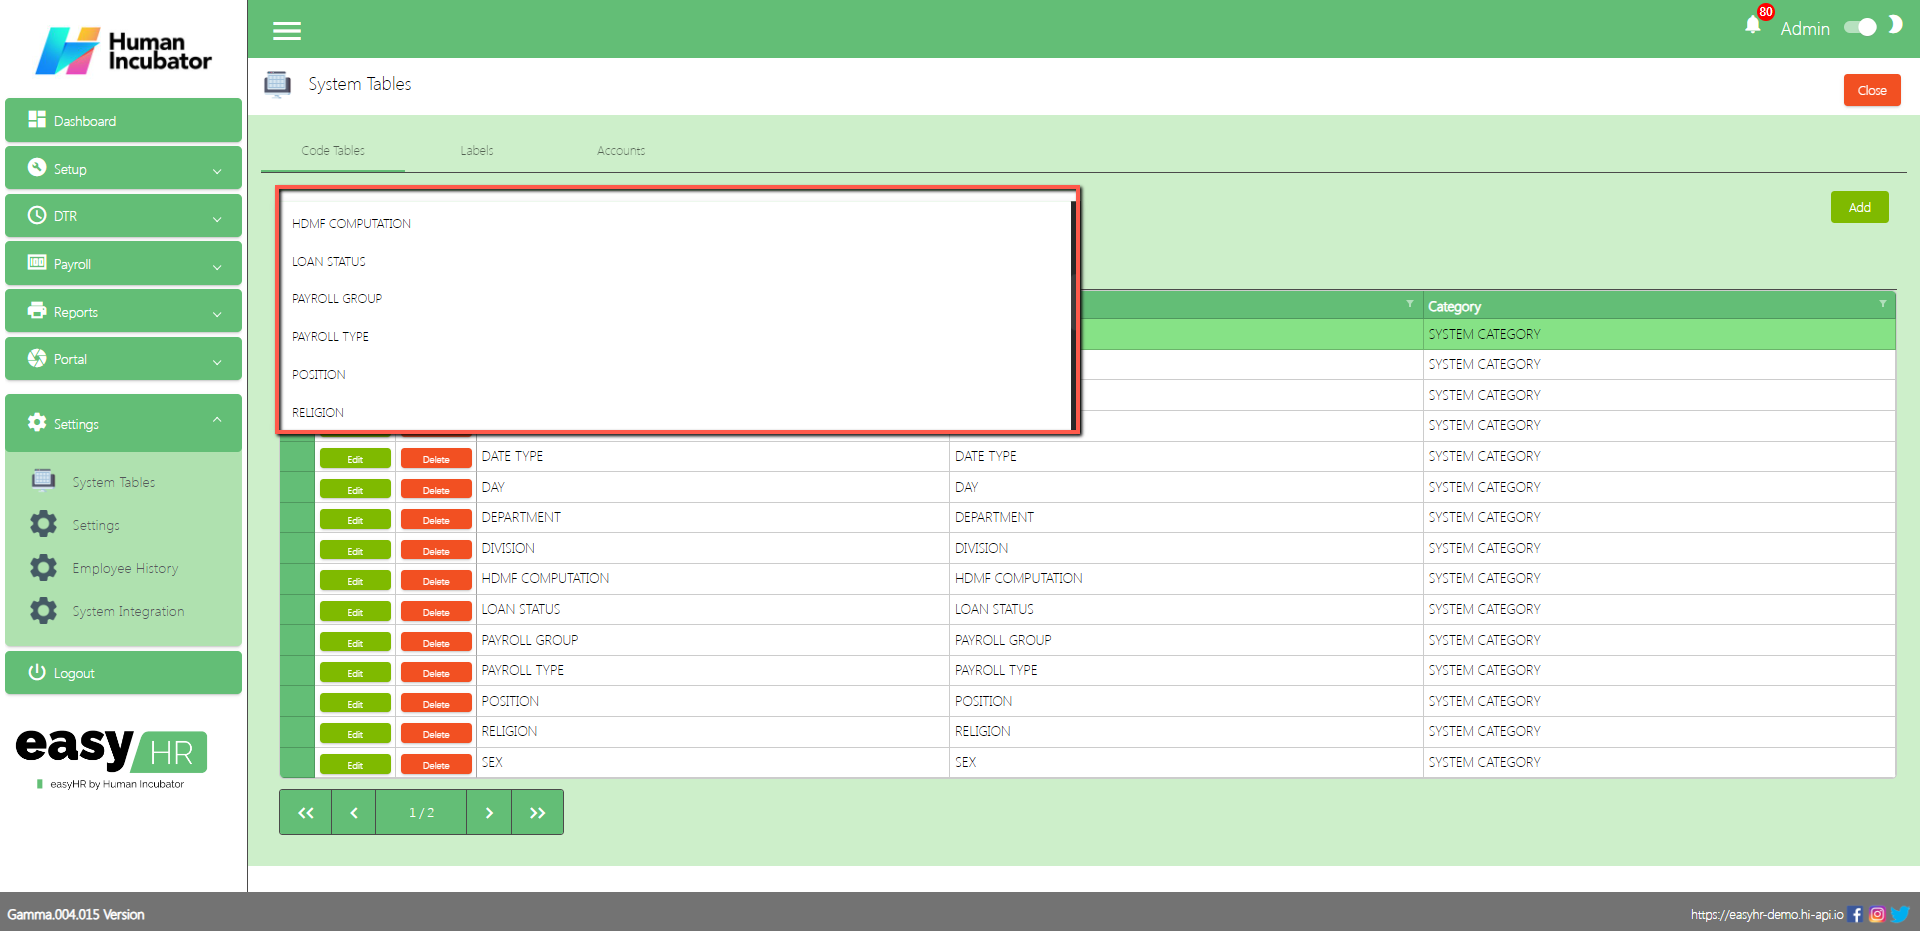
Select category in dropdown table
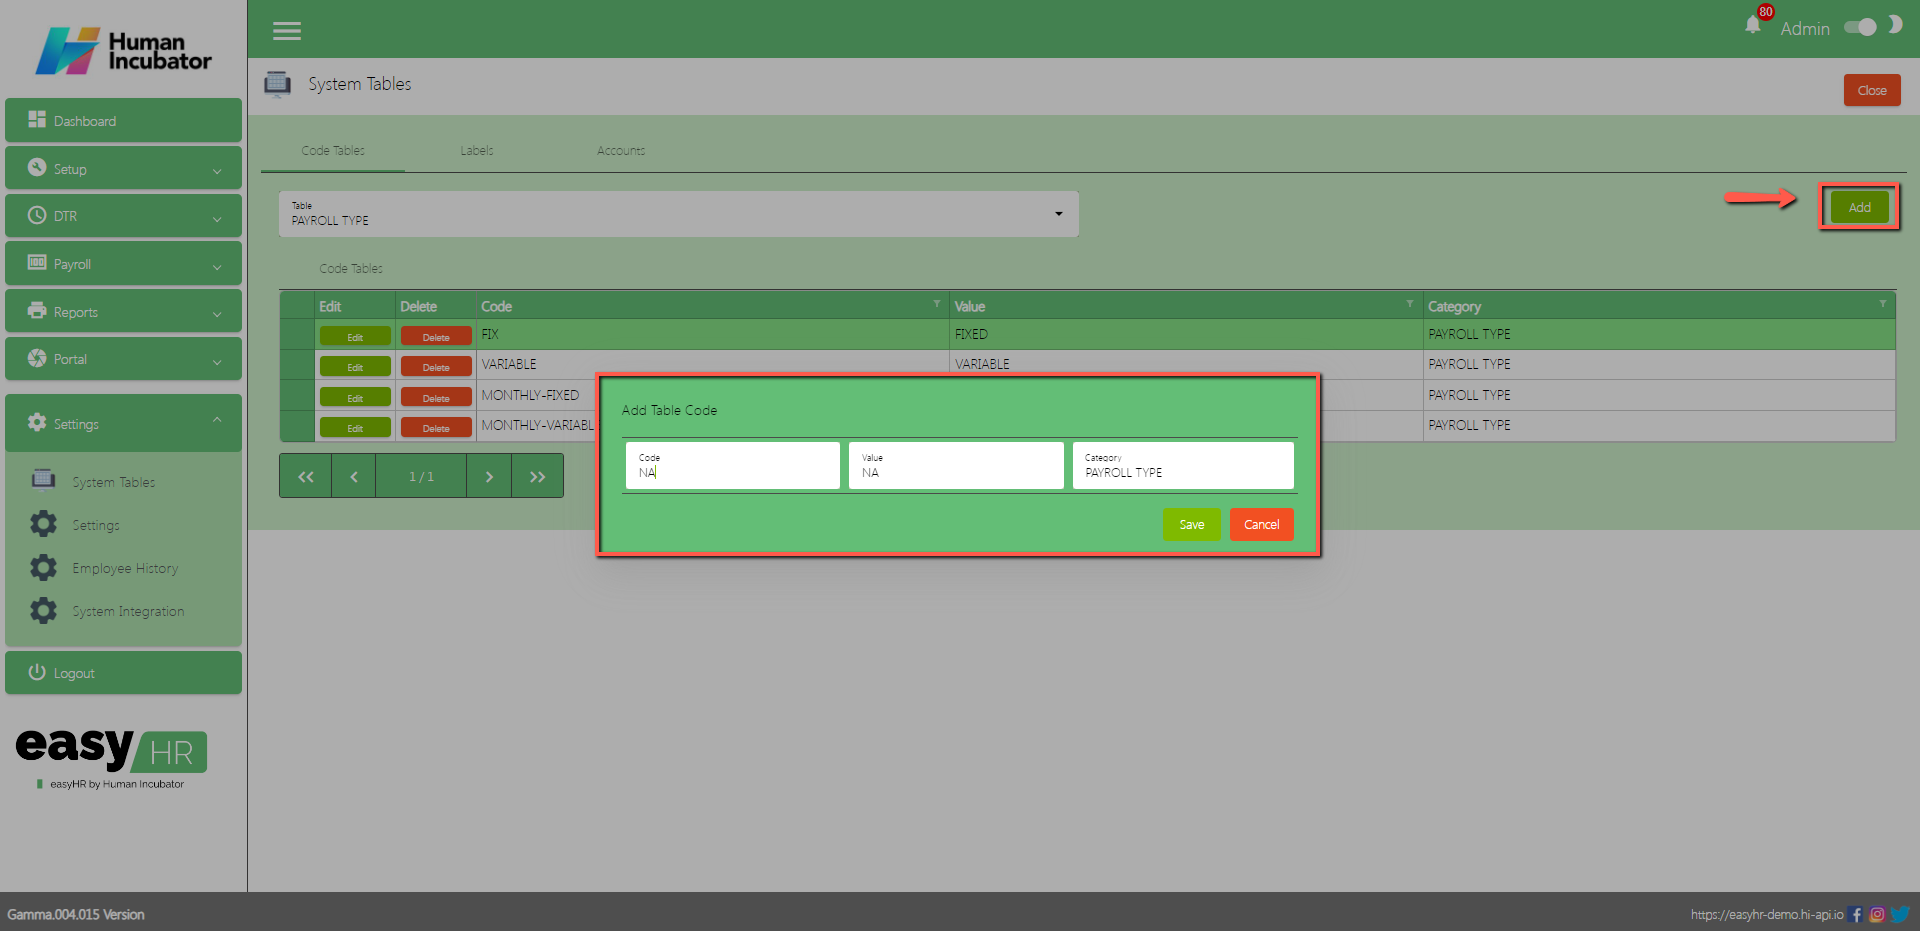
Assumption: The employee already clicked the Add button on the right side in the code tables tab.
Input Code
Input Value
Click Save button to add in code tables list.
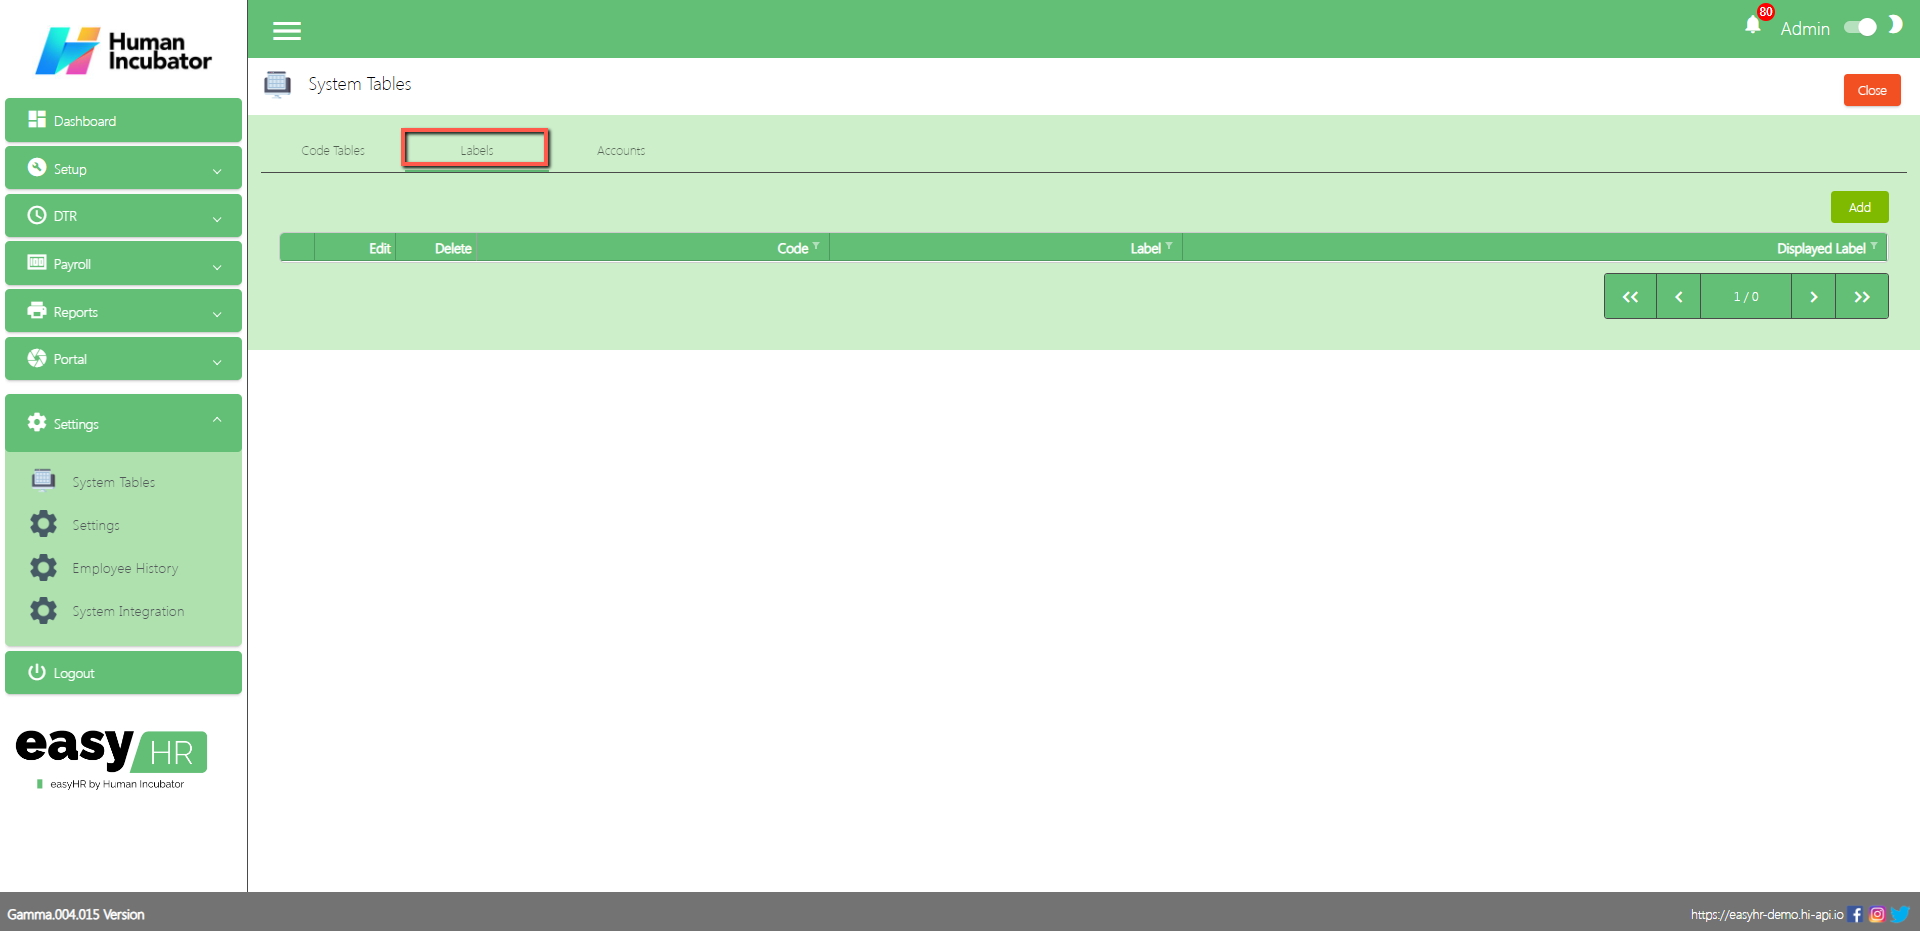
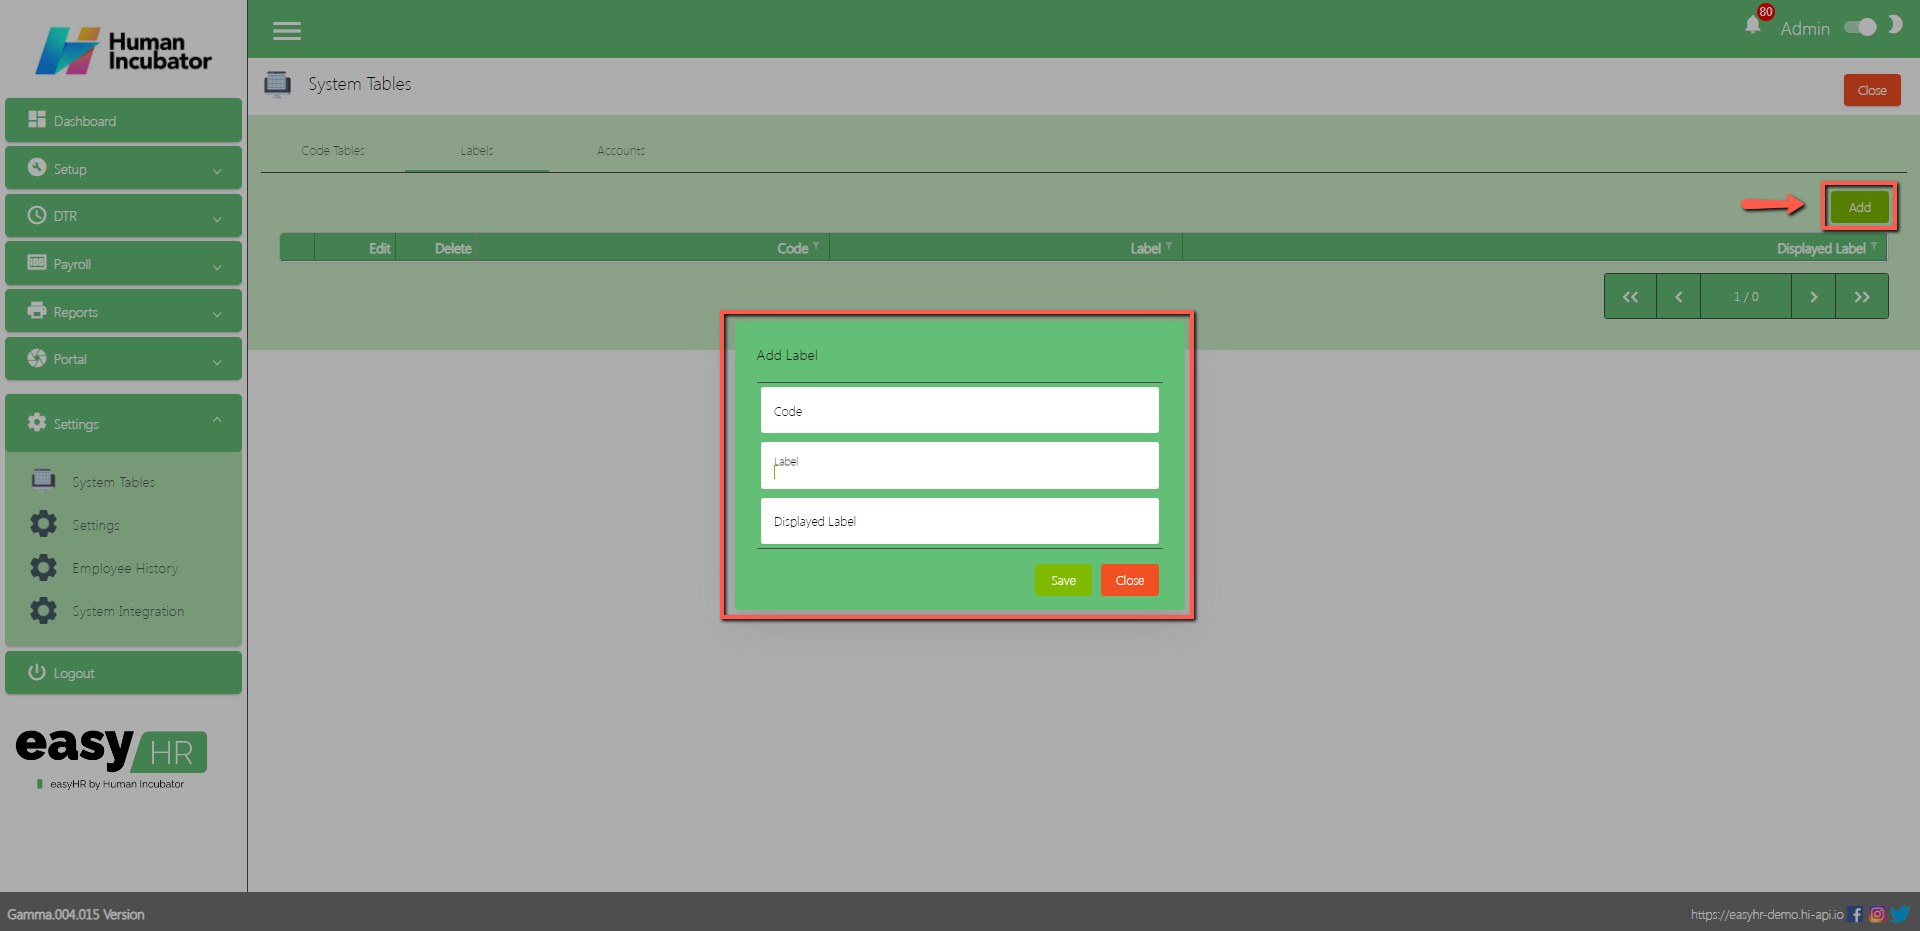
Labels
In the Labels tab the user can add multiple languages.
Assumption: The employee already clicked the Add button on the right side in the labels tab.
Input Label
Input Displayed label
Click Save button to add in the label table list.
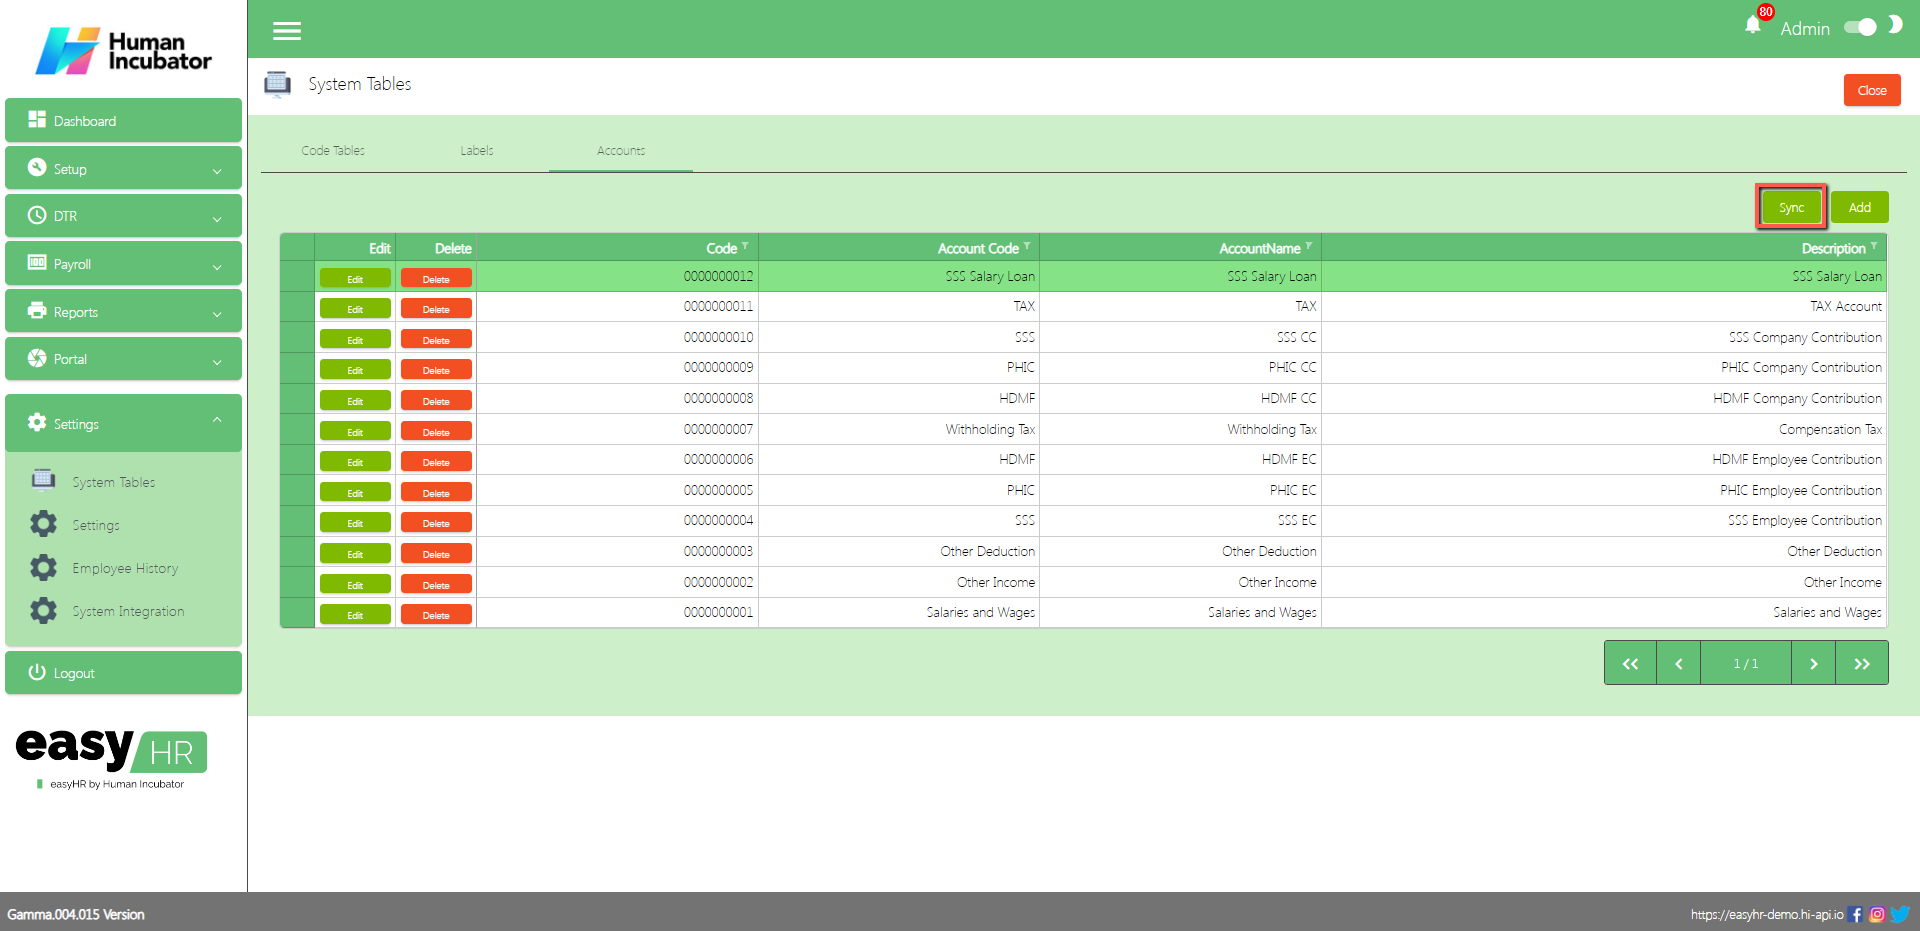
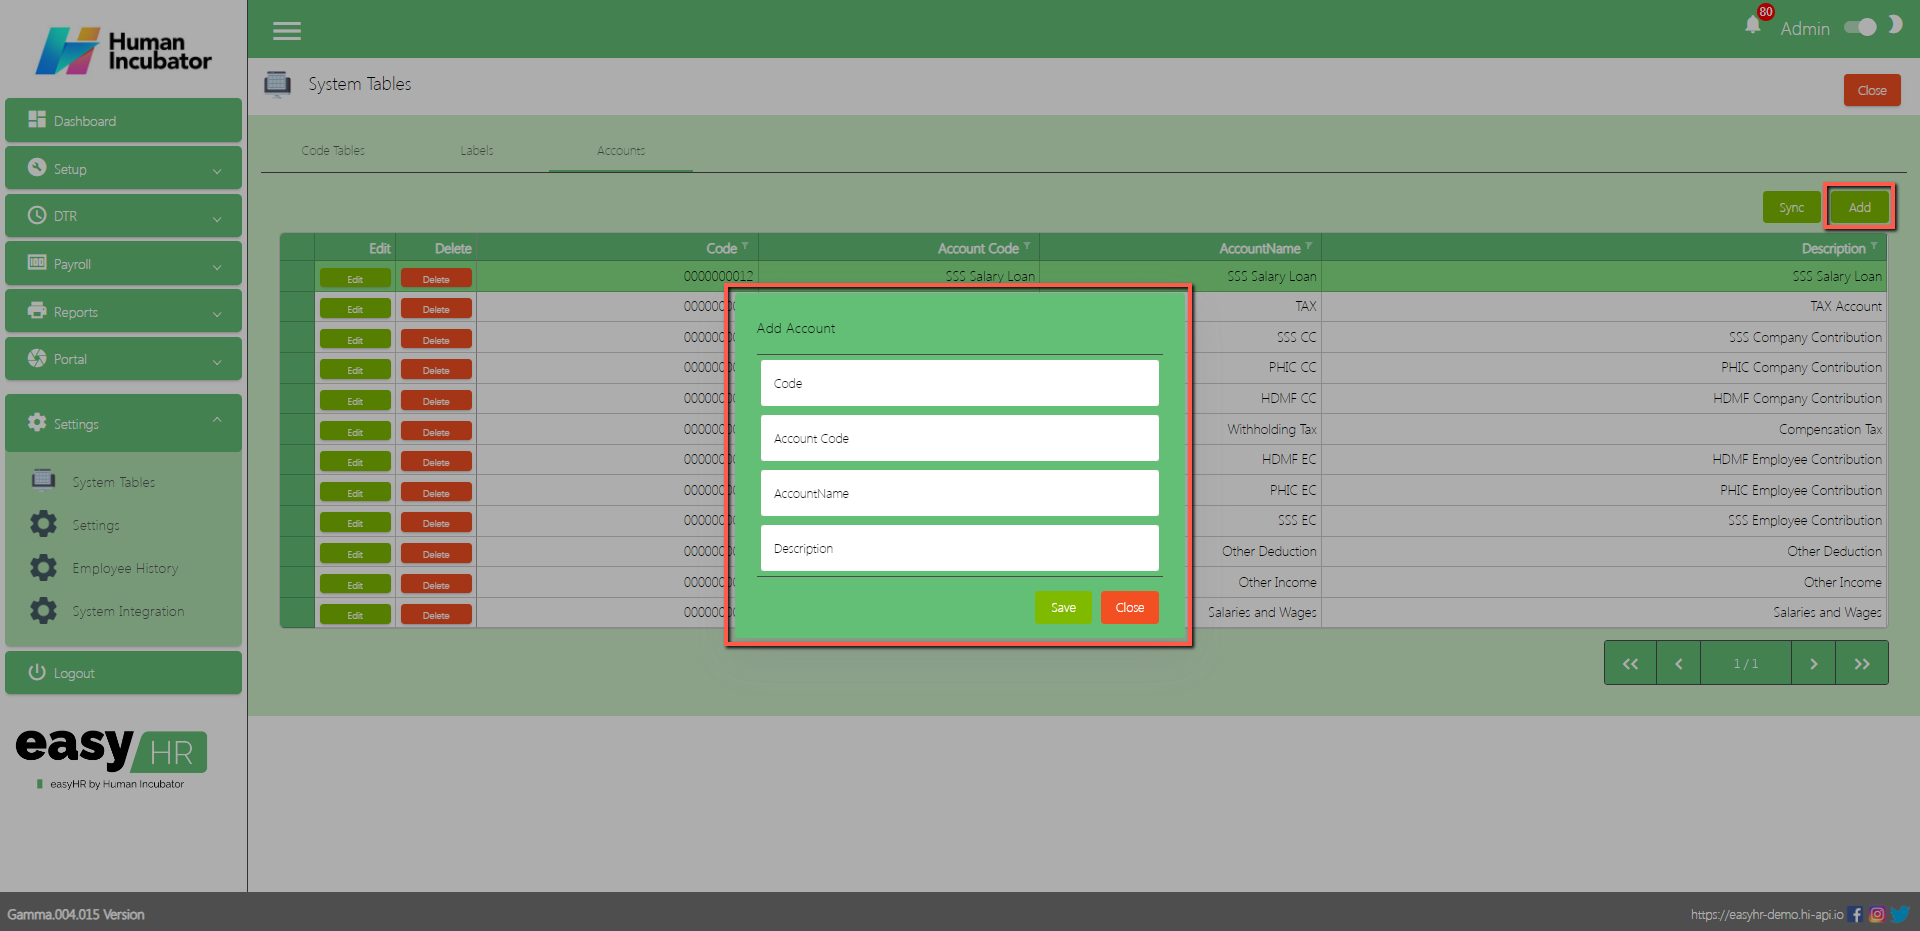
Accounts
In the Accounts tab the user can sync to EasyFS and add an account.
The user click the Sync button and all the accounts will sync to the EasyFSsystem.
The purpose of the Add button is to add another account.
Click Add button
Input Account Code
Input Account Name
Input Description
Click Save button to add in Accounts table list.
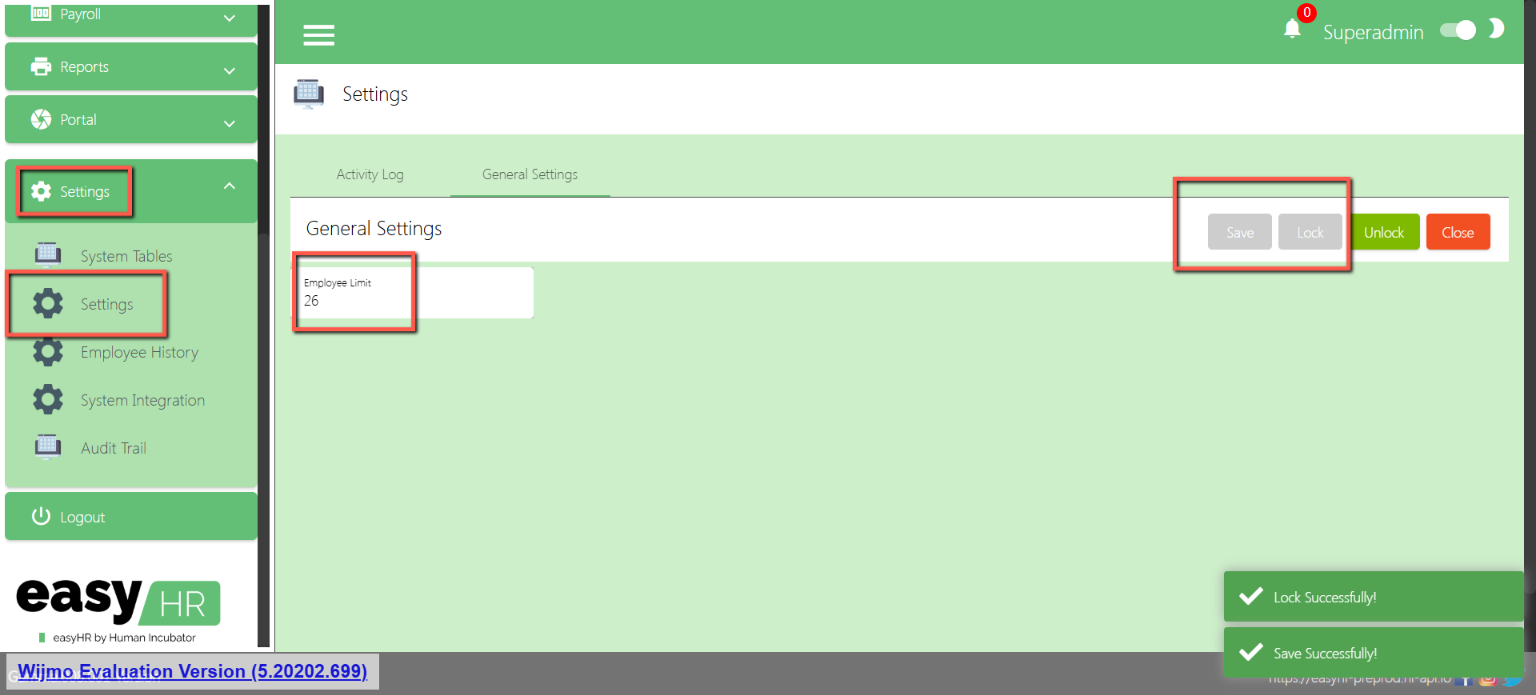
Settings
Overview
This is where you can setup for the employee limit. If the employee count is already at limit, you will no longer be able to add new employees.
Login as Superadmin
Input Employee limit
Click Save & lock
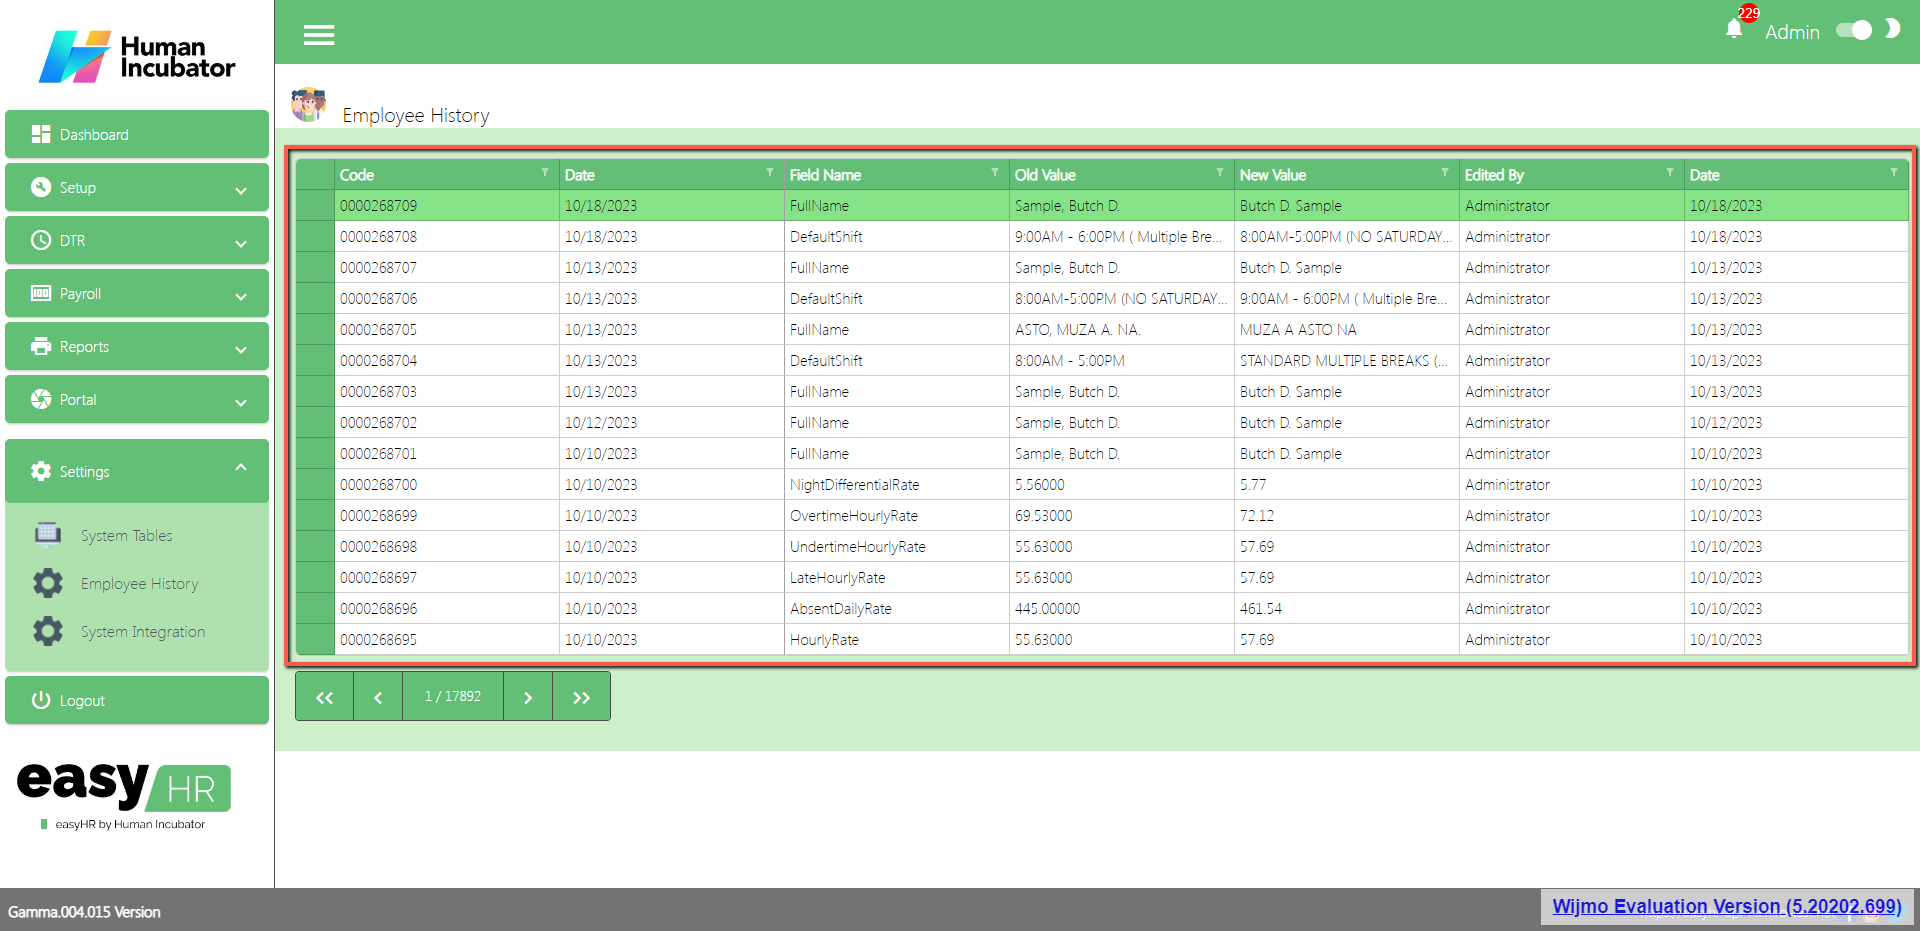
Employee History
Overview
Employee history is utilized to observe the recent modifications made to employee 201, and it provides visibility into the editor responsible for these changes.
Employee History
Shows all the list of employee history.
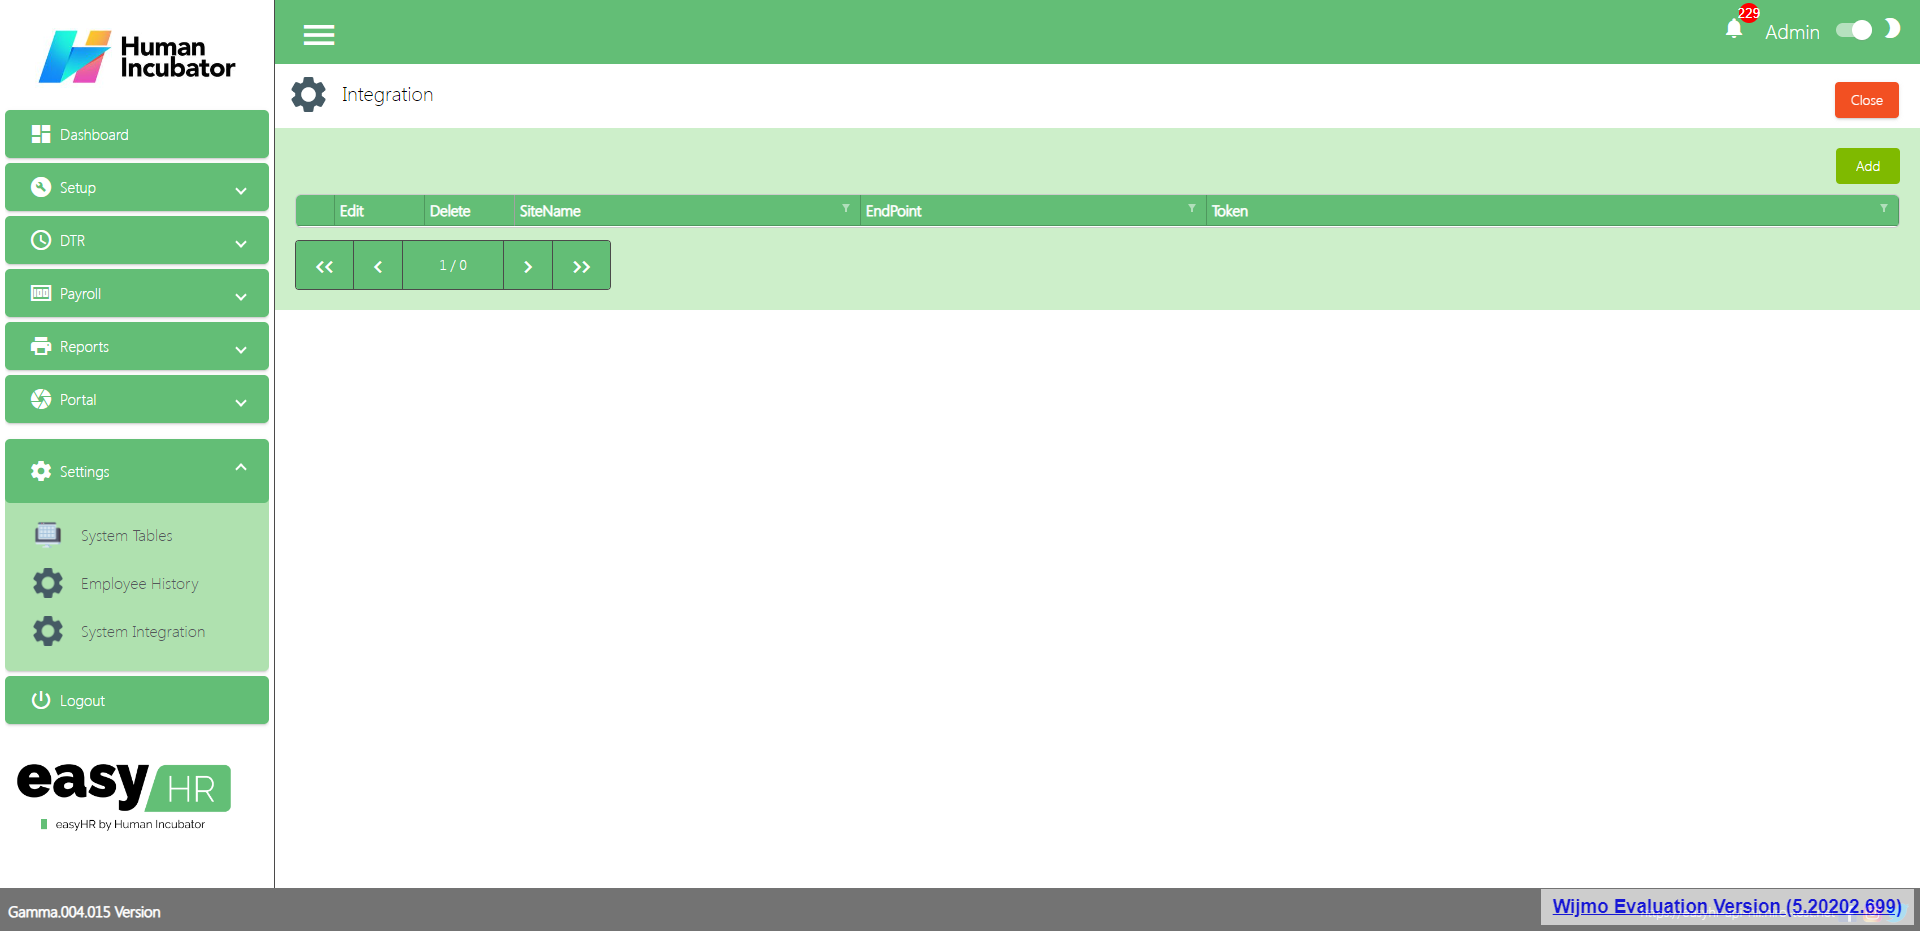
System Integration
Overview
System Integration is used to integrate to another system like EasyFS.
Integration
Show the list of integration
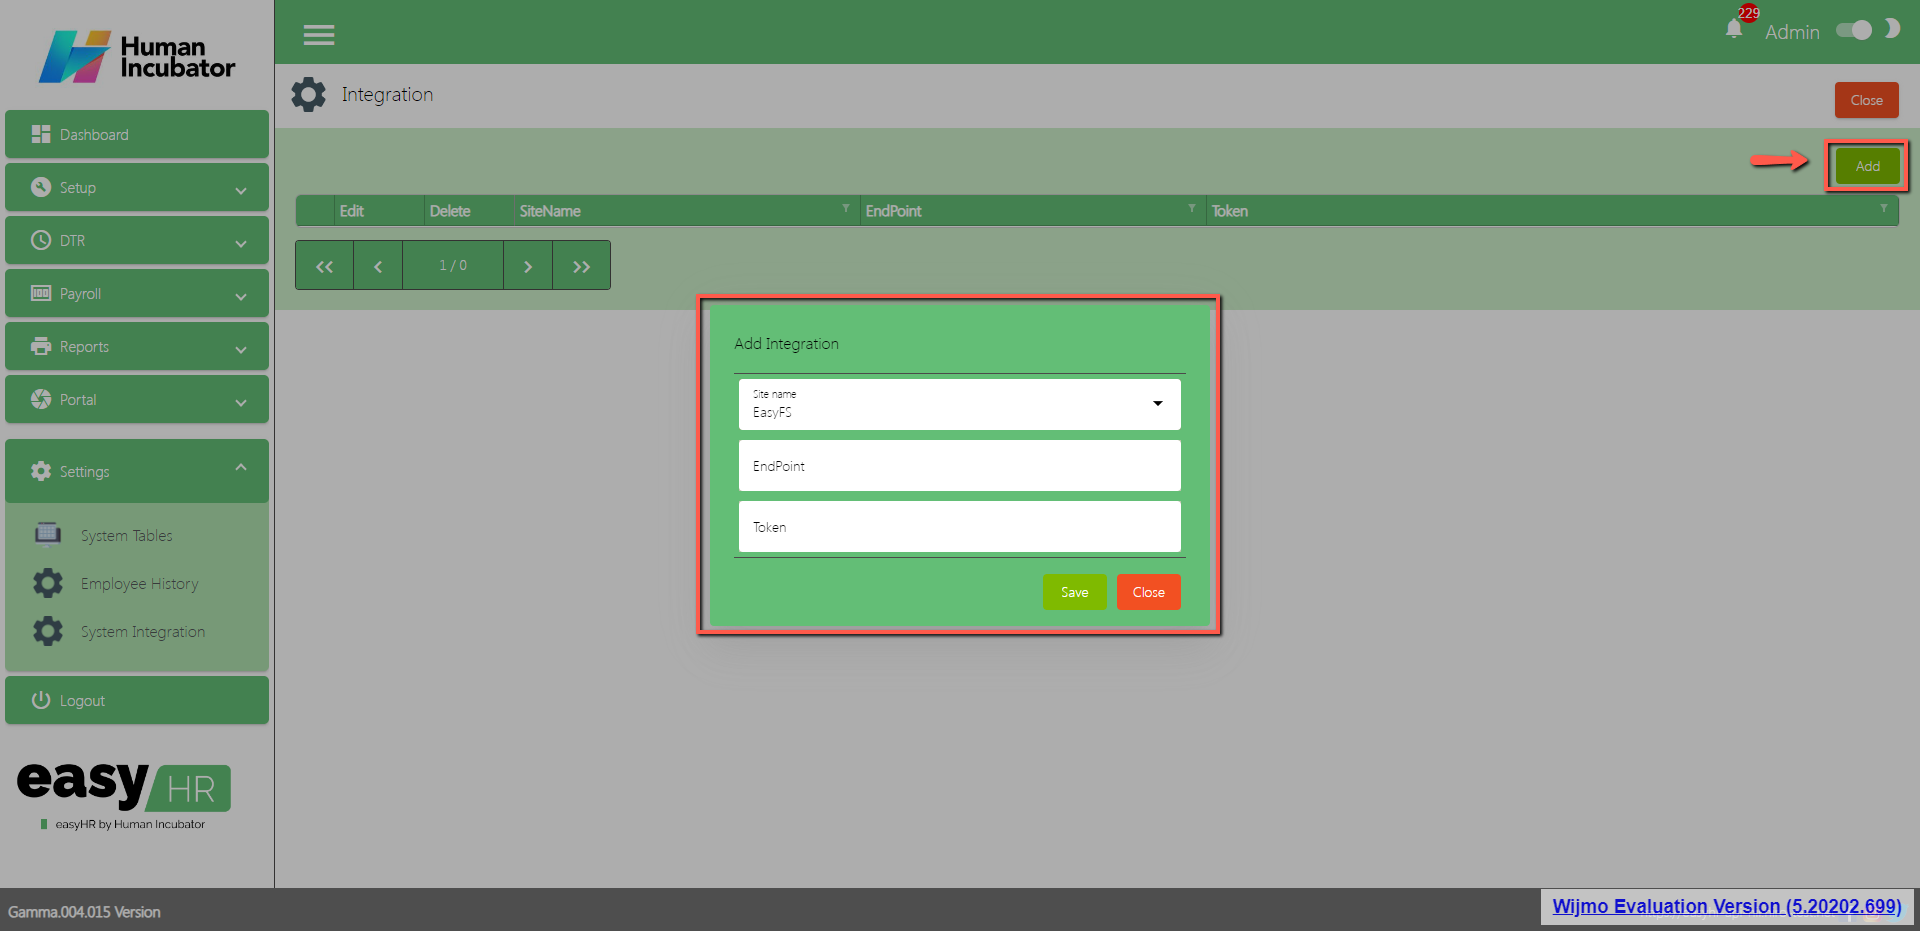
The purpose of the Add button is to add integration.
Click Add button
Select Site Name
Input EndPoint
Input Token
Click Save button to add in the Integration table list.
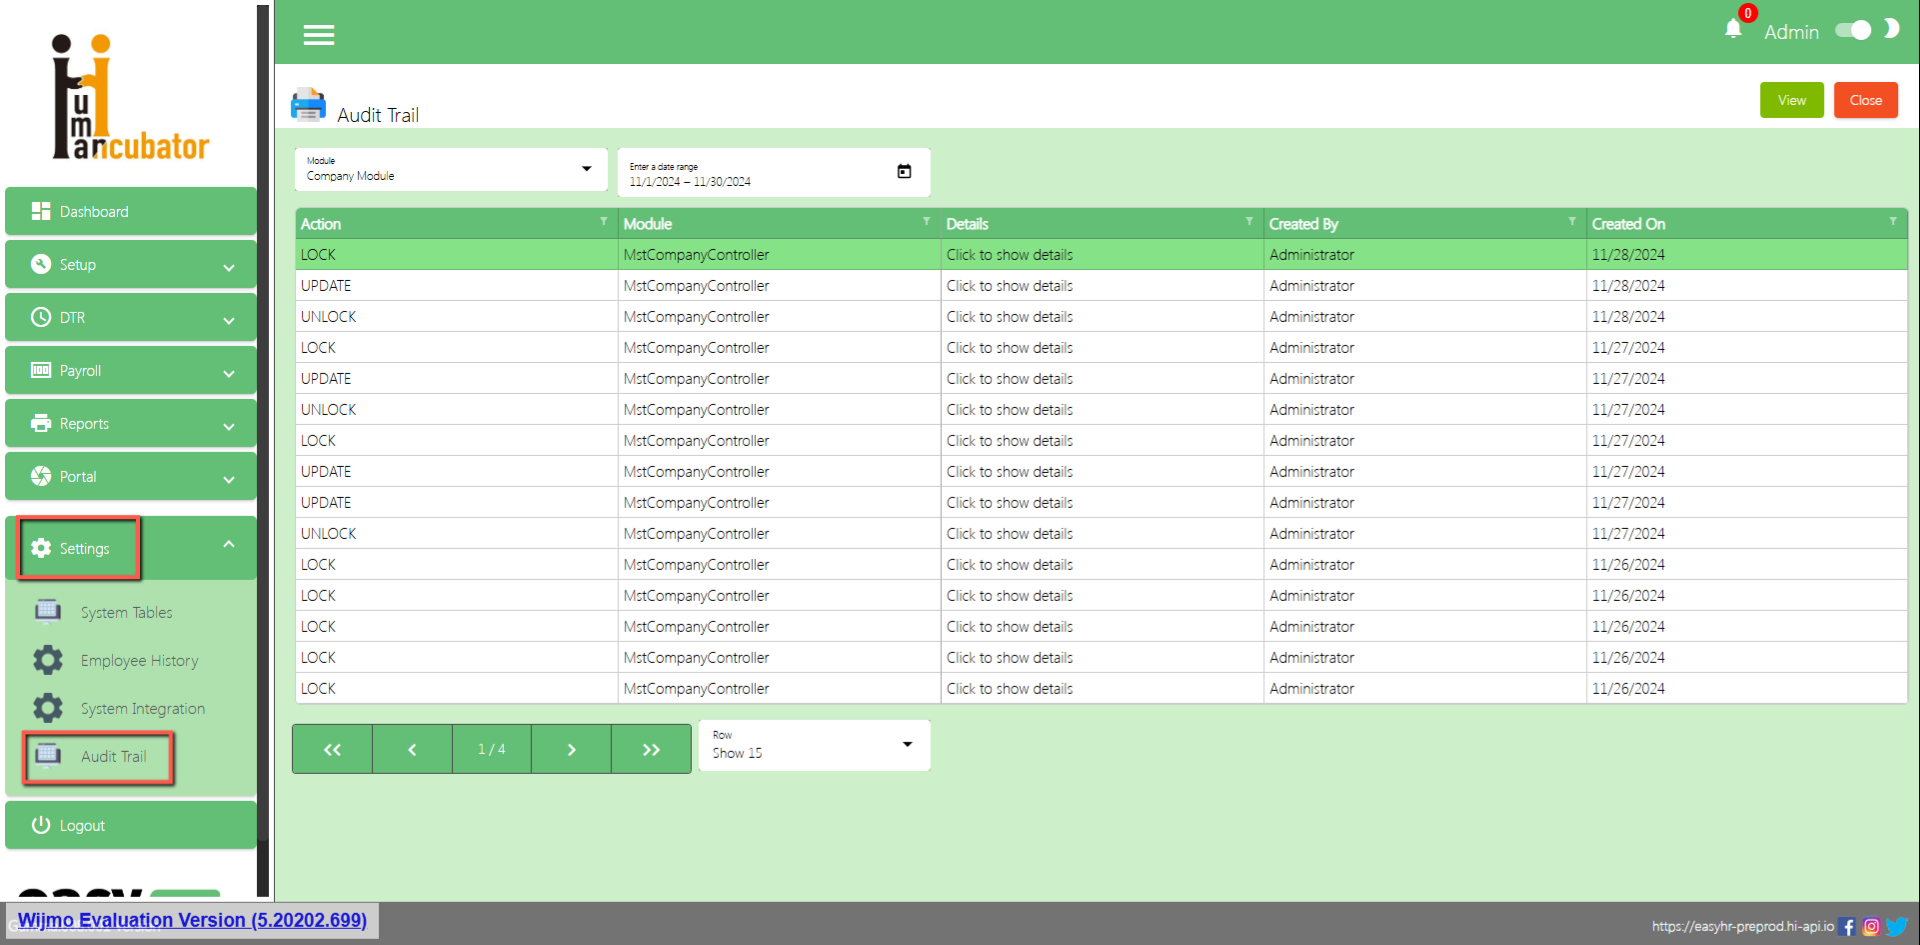
Audit Trail
Overview
A detailed record or log that tracks the series of activities or events happening in the system.
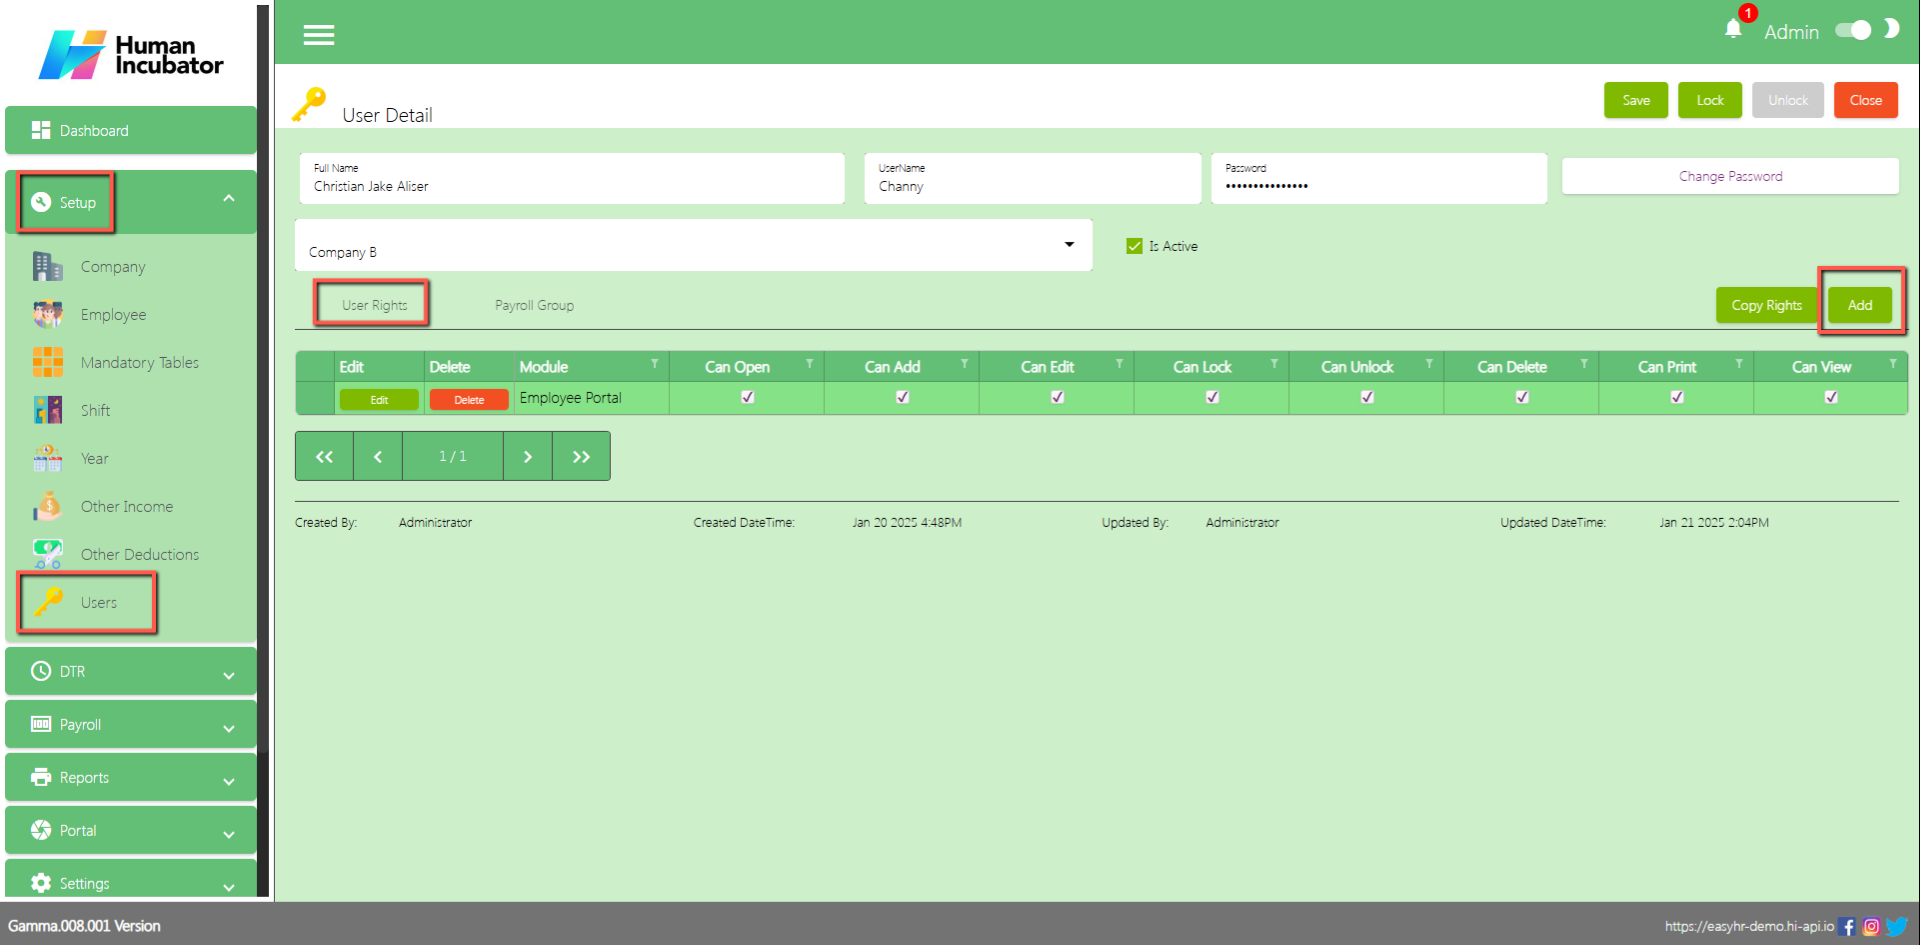
First you need to setup the audit trail in the user rights
Go to Setup
Go to Users
Edit User
Unlock User
Go to User Rights Tab
Click Add
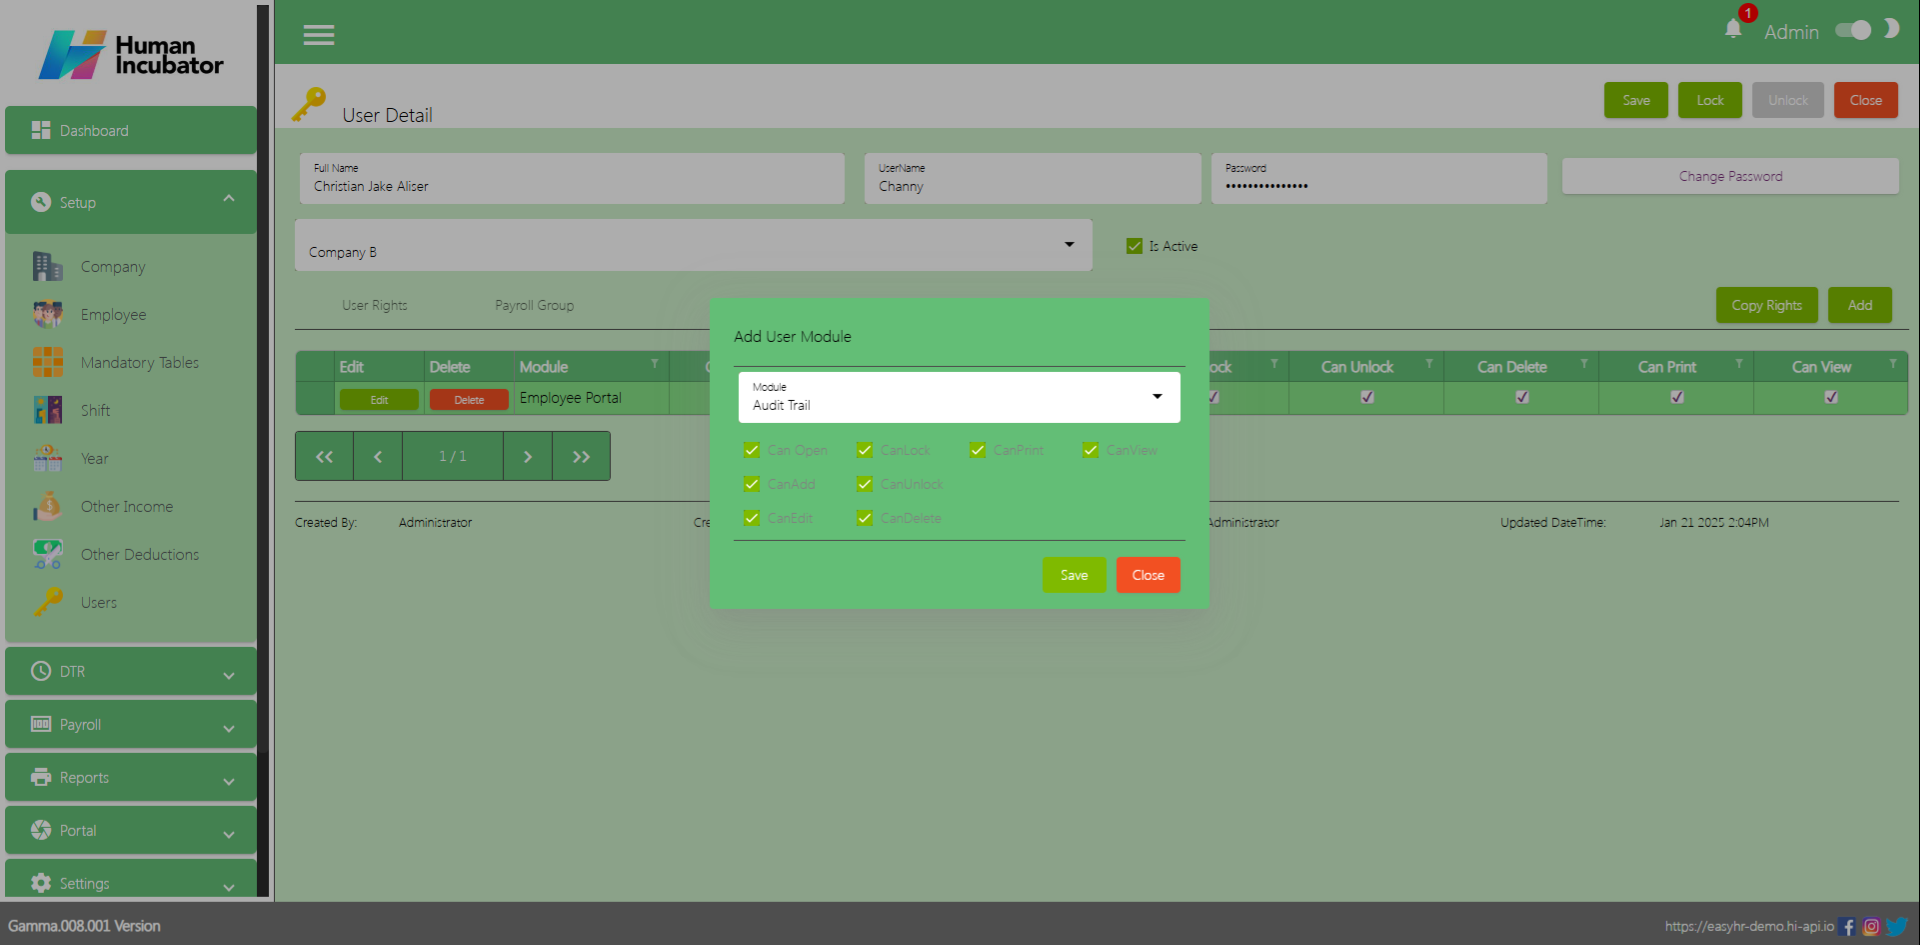
Select Audit Trail in the module field
Check all the check box (Can Open, Can Add, Can Edit, Can Lock, Can Unlock, Can Delete, Can Print and Can View) then Click Save
Click Save and Lock
Audit Trail
Record consisting of Action, module, details, who created and when was the action created.
Struggling to accept online payments? Discover how HII Online Payment Service solves your credit card merchant dilemma. HII Online Payment Service. Coming soon!
Struggling to accept online payments? Discover how HII Online Payment Service solves your credit card merchant dilemma. HII Online Payment Service. Coming soon!
Take advantage of Free easyFS Usage for Accounting Firms in the Philippines. Contact Us at +639176280355 or email at hiisales@humedit.ph
Take advantage of Free easyFS Usage for Accounting Firms in the Philippines. Contact Us at +639176280355 or email at hiisales@humedit.ph
Struggling to accept online payments? Discover how HII Online Payment Service solves your credit card merchant dilemma. HII Online Payment Service. Coming soon!
Struggling to accept online payments? Discover how HII Online Payment Service solves your credit card merchant dilemma. HII Online Payment Service. Coming soon!
Take advantage of Free easyFS Usage for Accounting Firms in the Philippines. Contact Us at +639176280355 or email at hiisales@humedit.ph
Take advantage of Free easyFS Usage for Accounting Firms in the Philippines. Contact Us at +639176280355 or email at hiisales@humedit.ph
Struggling to accept online payments? Discover how HII Online Payment Service solves your credit card merchant dilemma. HII Online Payment Service. Coming soon!
Struggling to accept online payments? Discover how HII Online Payment Service solves your credit card merchant dilemma. HII Online Payment Service. Coming soon!
Take advantage of Free easyFS Usage for Accounting Firms in the Philippines. Contact Us at +639176280355 or email at hiisales@humedit.ph
Take advantage of Free easyFS Usage for Accounting Firms in the Philippines. Contact Us at +639176280355 or email at hiisales@humedit.ph
Struggling to accept online payments? Discover how HII Online Payment Service solves your credit card merchant dilemma. HII Online Payment Service. Coming soon!
Struggling to accept online payments? Discover how HII Online Payment Service solves your credit card merchant dilemma. HII Online Payment Service. Coming soon!
Take advantage of Free easyFS Usage for Accounting Firms in the Philippines. Contact Us at +639176280355 or email at hiisales@humedit.ph
Take advantage of Free easyFS Usage for Accounting Firms in the Philippines. Contact Us at +639176280355 or email at hiisales@humedit.ph
Struggling to accept online payments? Discover how HII Online Payment Service solves your credit card merchant dilemma. HII Online Payment Service. Coming soon!
Struggling to accept online payments? Discover how HII Online Payment Service solves your credit card merchant dilemma. HII Online Payment Service. Coming soon!
Take advantage of Free easyFS Usage for Accounting Firms in the Philippines. Contact Us at +639176280355 or email at hiisales@humedit.ph
Take advantage of Free easyFS Usage for Accounting Firms in the Philippines. Contact Us at +639176280355 or email at hiisales@humedit.ph
Struggling to accept online payments? Discover how HII Online Payment Service solves your credit card merchant dilemma. HII Online Payment Service. Coming soon!
Struggling to accept online payments? Discover how HII Online Payment Service solves your credit card merchant dilemma. HII Online Payment Service. Coming soon!
Take advantage of Free easyFS Usage for Accounting Firms in the Philippines. Contact Us at +639176280355 or email at hiisales@humedit.ph
Take advantage of Free easyFS Usage for Accounting Firms in the Philippines. Contact Us at +639176280355 or email at hiisales@humedit.ph
Struggling to accept online payments? Discover how HII Online Payment Service solves your credit card merchant dilemma. HII Online Payment Service. Coming soon!
Struggling to accept online payments? Discover how HII Online Payment Service solves your credit card merchant dilemma. HII Online Payment Service. Coming soon!
Take advantage of Free easyFS Usage for Accounting Firms in the Philippines. Contact Us at +639176280355 or email at hiisales@humedit.ph
Take advantage of Free easyFS Usage for Accounting Firms in the Philippines. Contact Us at +639176280355 or email at hiisales@humedit.ph
Struggling to accept online payments? Discover how HII Online Payment Service solves your credit card merchant dilemma. HII Online Payment Service. Coming soon!
Struggling to accept online payments? Discover how HII Online Payment Service solves your credit card merchant dilemma. HII Online Payment Service. Coming soon!

 Log in to Messenger