Change shift is used for setup a start date and end date per cut-off and also the user can approve if the employee filed a change shift
The user file change shift in employee portal it is automatically seen by approver or admin
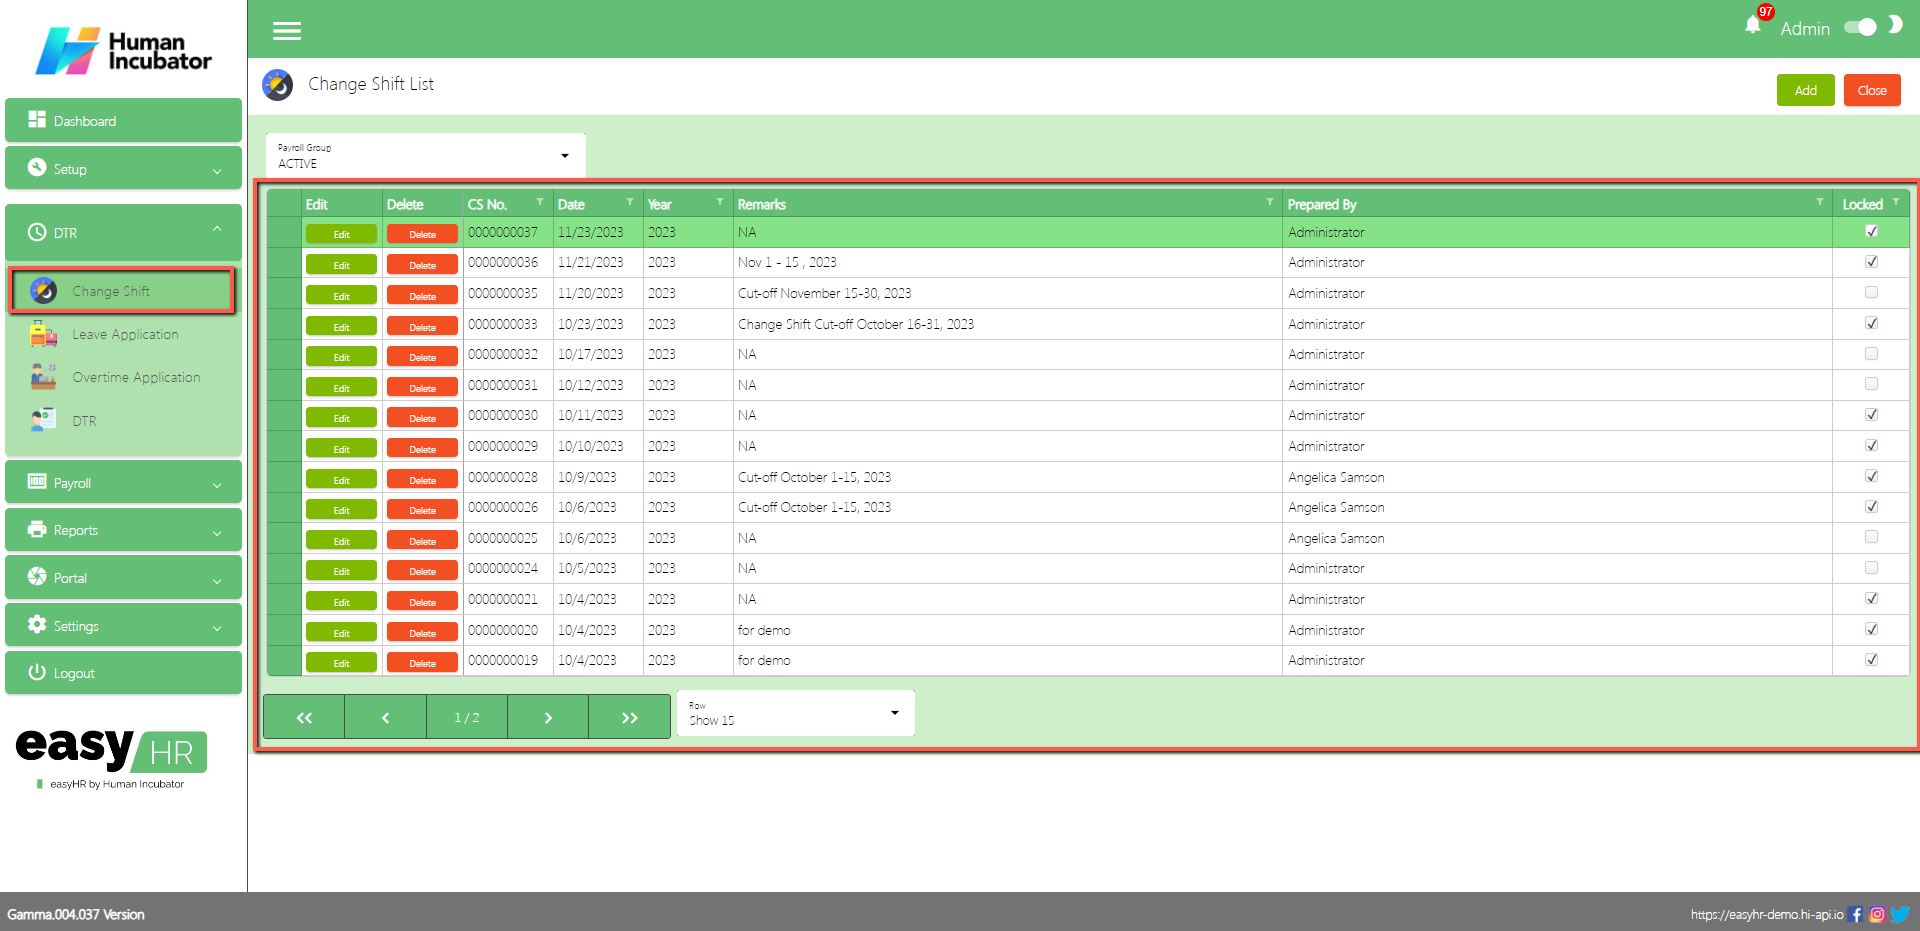
Change shift List
Shows all list of Change Shift setup per cut off
Select Payroll Group
Table Column
Edit: This has a function to edit the Change Shift
Delete: This has a function to Delete the Change Shift (Note: You will not be able to delete the Change Shift if it has still a Change Shift lines or the DTR connected is already locked)
CS No.: This for the Change Shift number (Note: It will automatically generate according to the sequence of the added Change Shift)
Date: Date of the Change Shift created
Year: This is for the Year
Remarks: You can input any remarks
Prepared By: This is for the name of the login user who prepared the change shift
Locked: If the change shift is locked you can select it for the DTR
Change Shift Detail
To Add a new change shift detail, click the Add button that can be seen on the right side of the screen
Fill all the important fields in Change Shift detail like:
Select Date Start
Select Date End
Input Remarks
Select Prepared By
Select Check By
Select Approved By
(Note: Do not Save and Lock so that this shift code seen in employee portal)
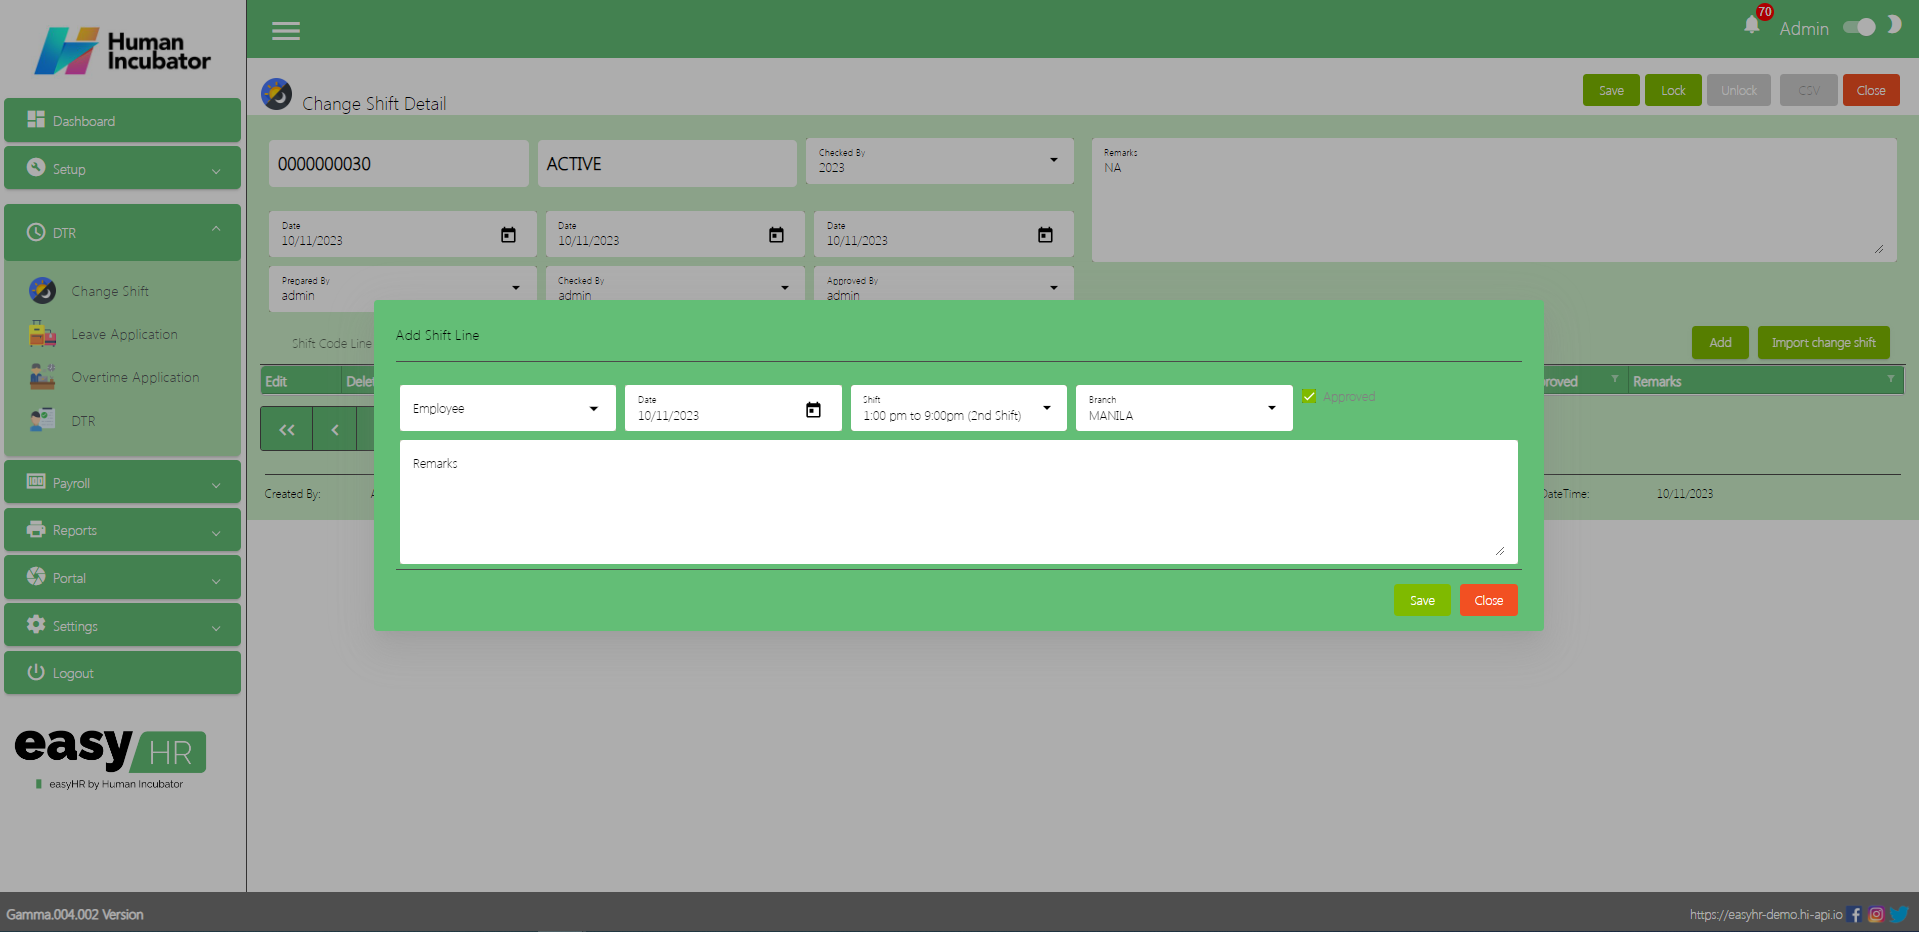
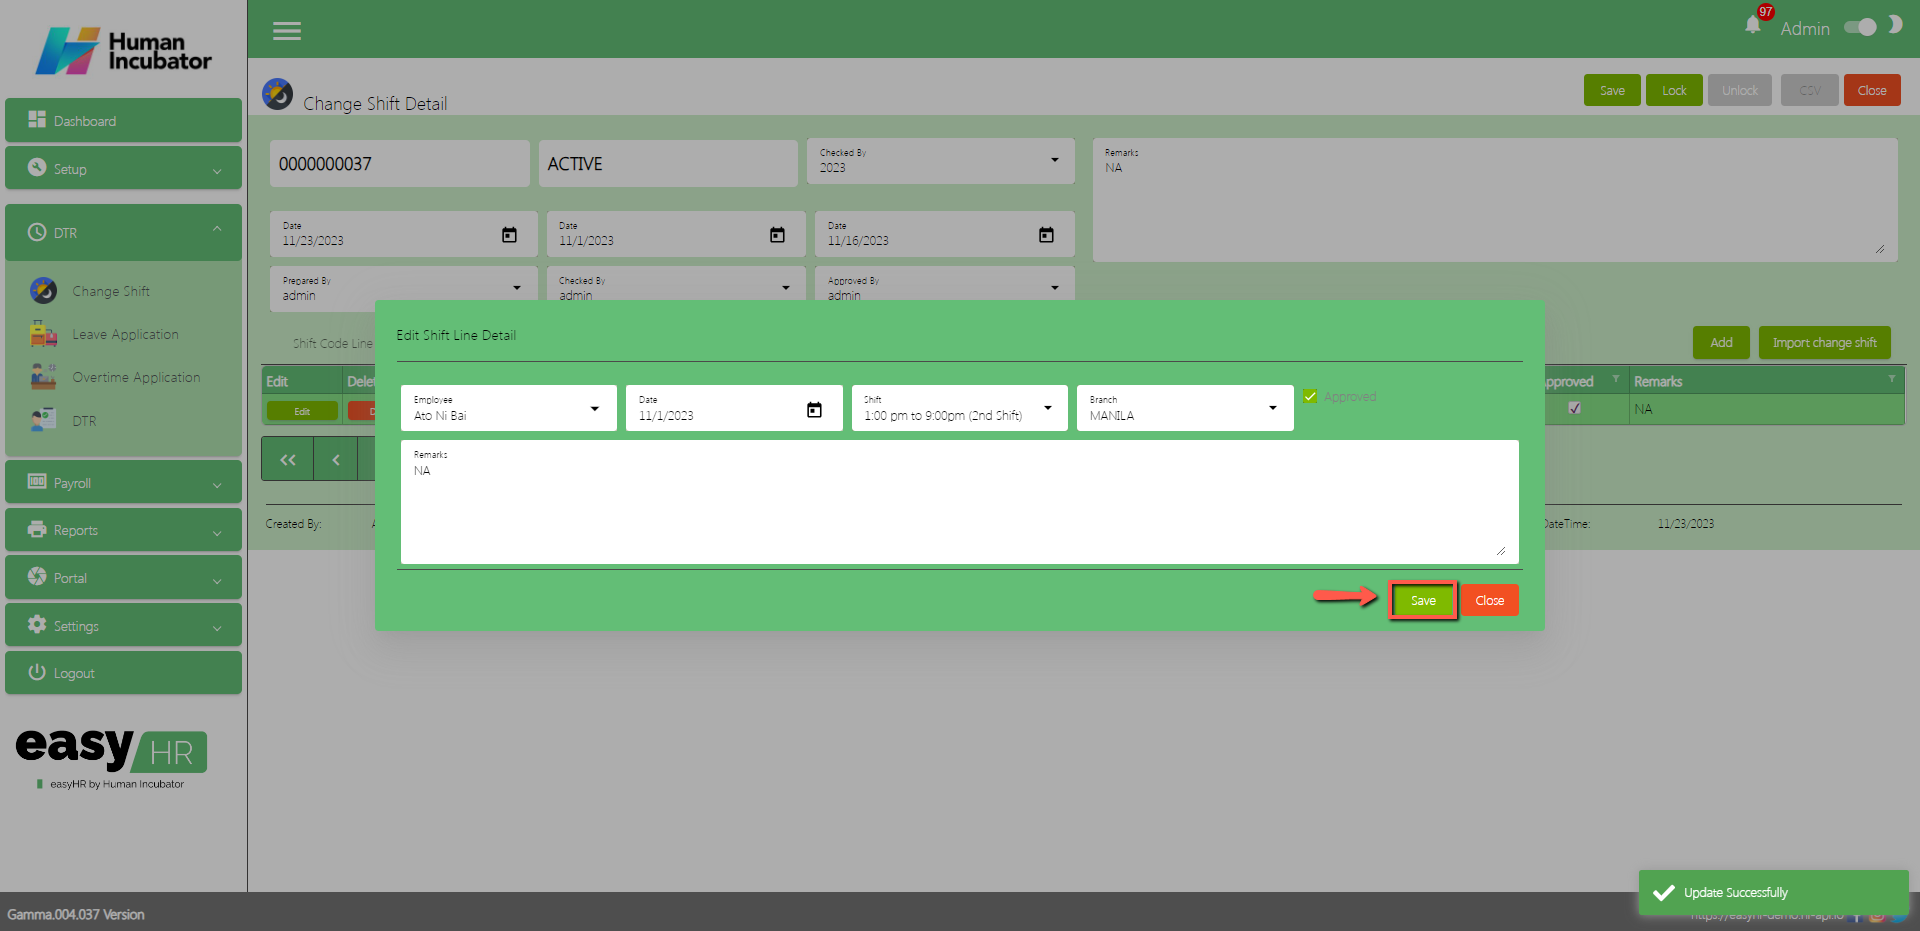
Add Change Shift Manually
Click Add button to add manually change shift of employee
Fill all the important fields Shift line like:
Select Employee
Select Date
Select Shift
Select Branch
Check Approved
Input Remarks
Click Save (Note: You can add multiple date as along as you don’t click the close button)
Click Close
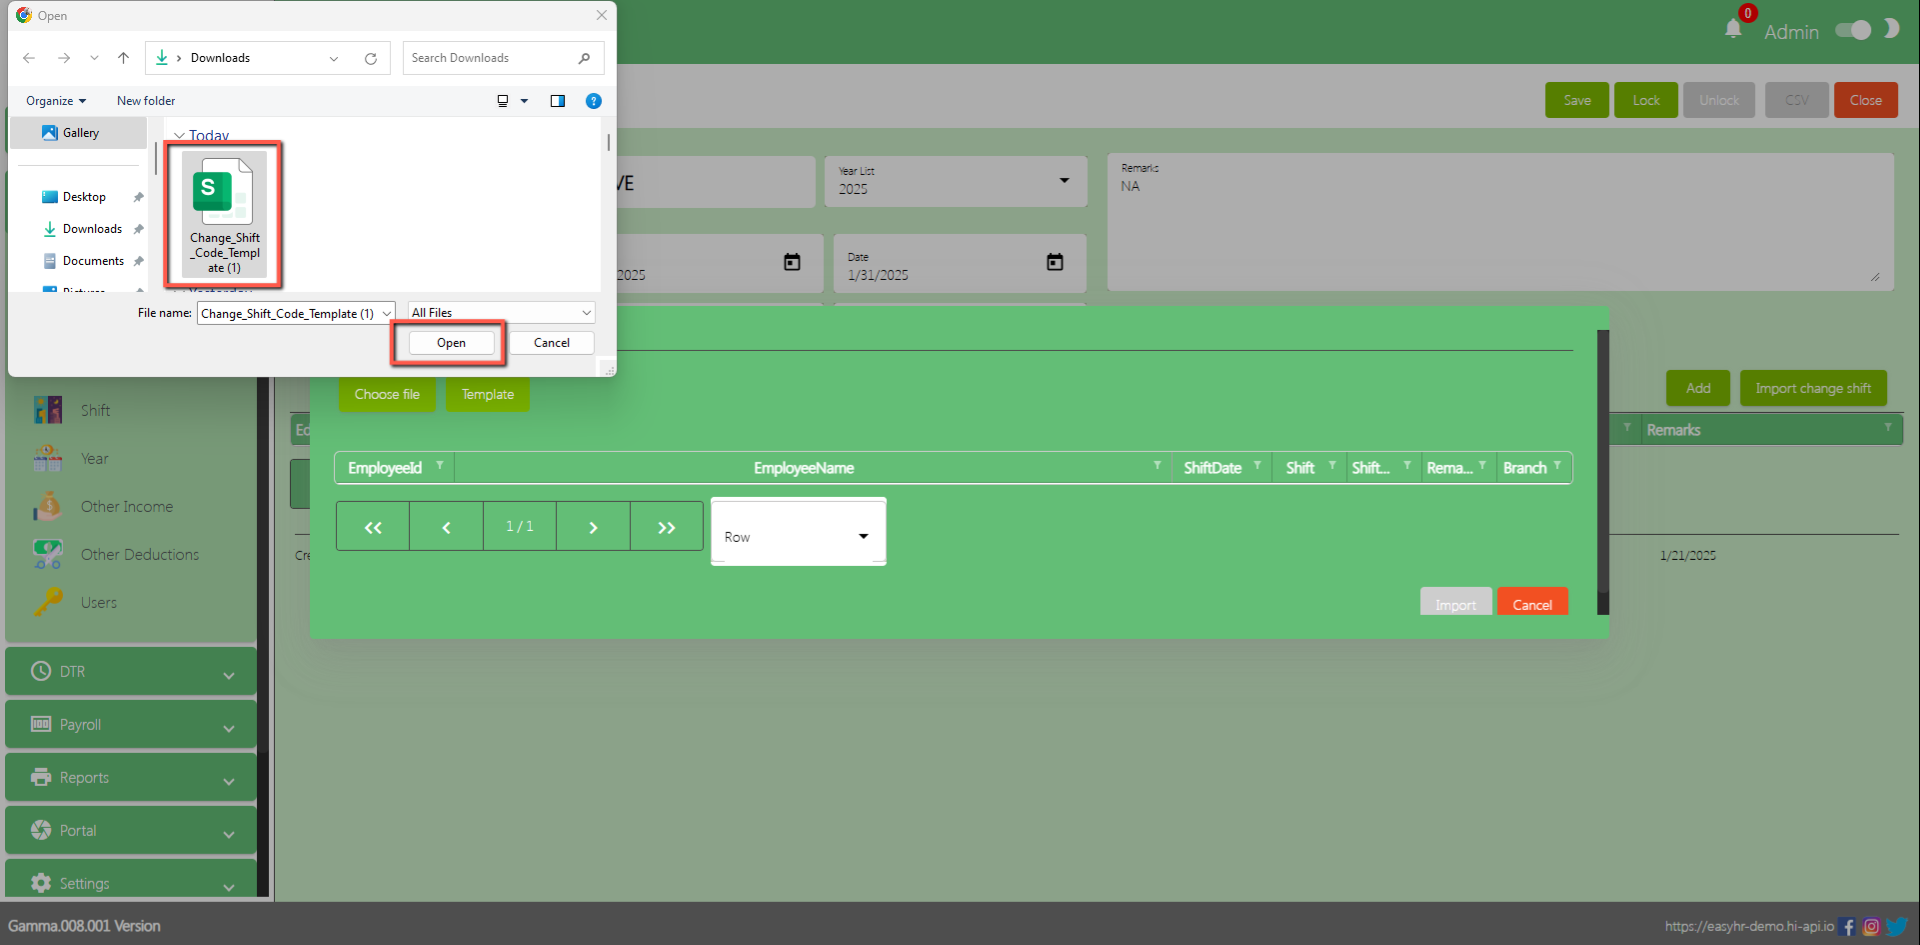
Import Change Shift
Click Import Change Shift to import the master file
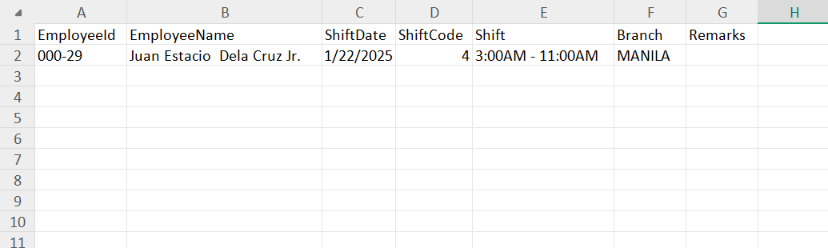
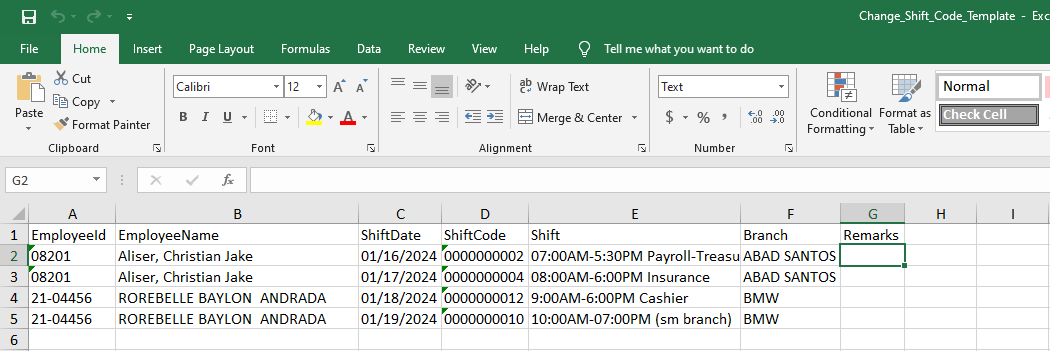
Click Template to download the template
In the Template input Employee ID, Employee Name, ShiftDate, ShiftCode, Shift, Branch and Remarks (Optional)
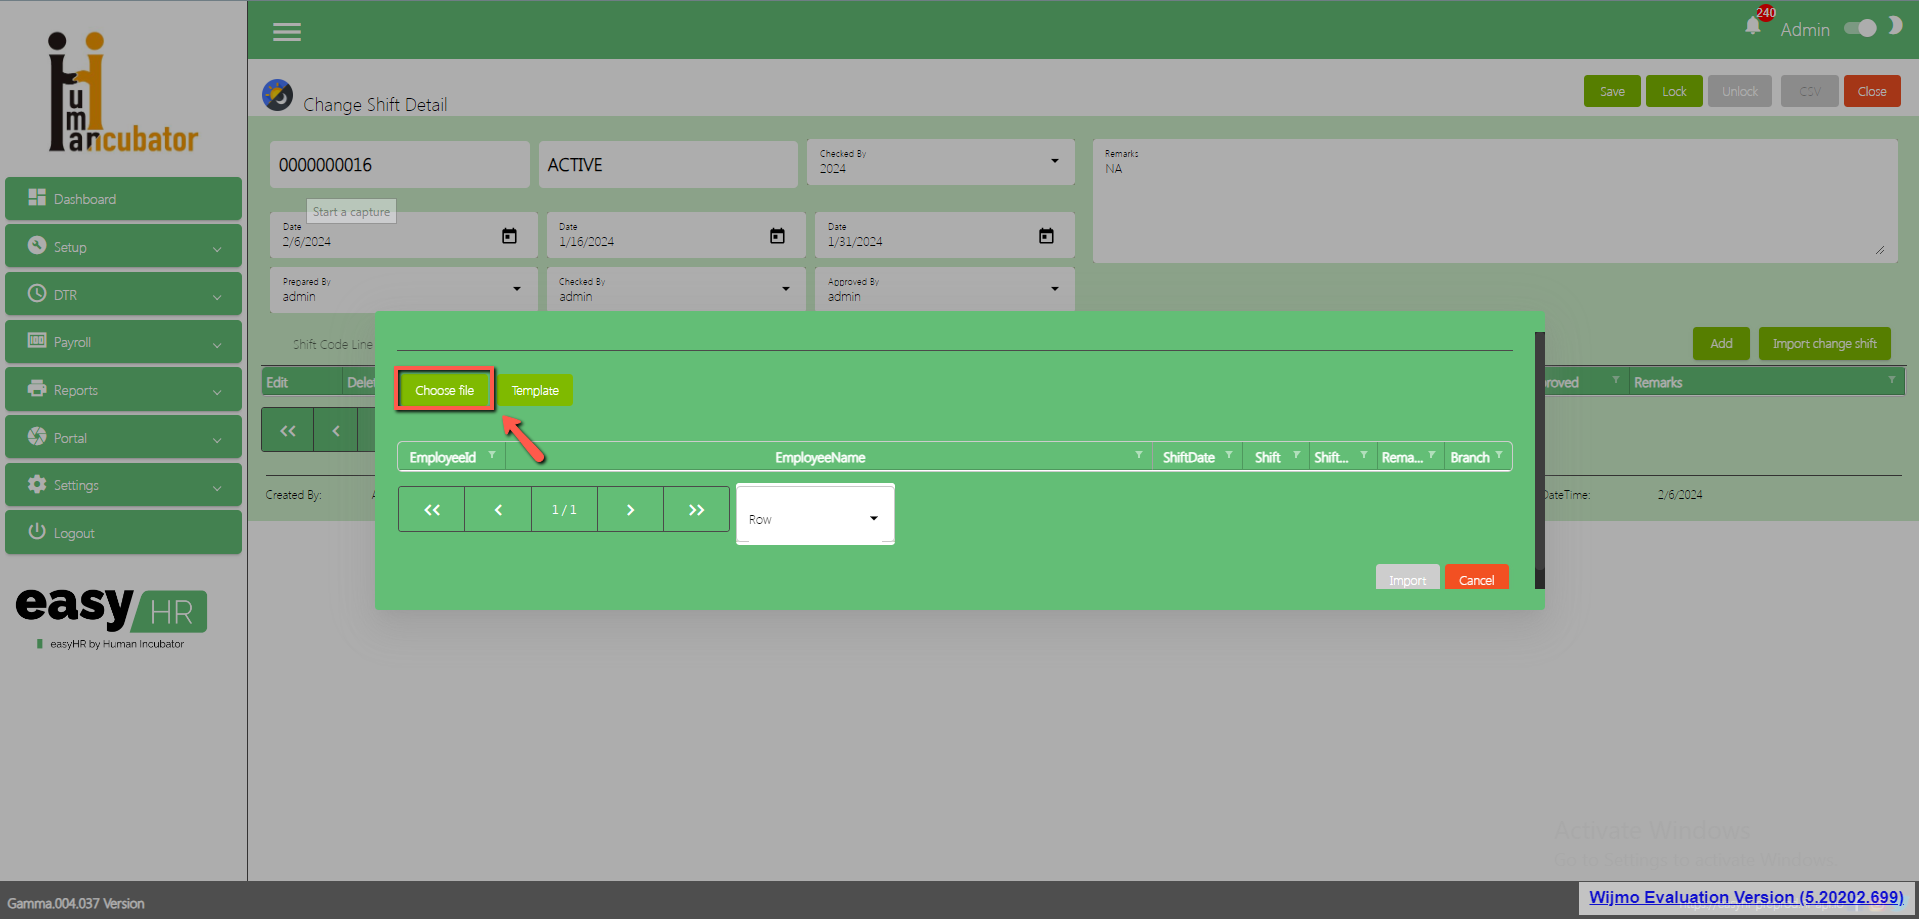
Choose file
Select file
Click Open
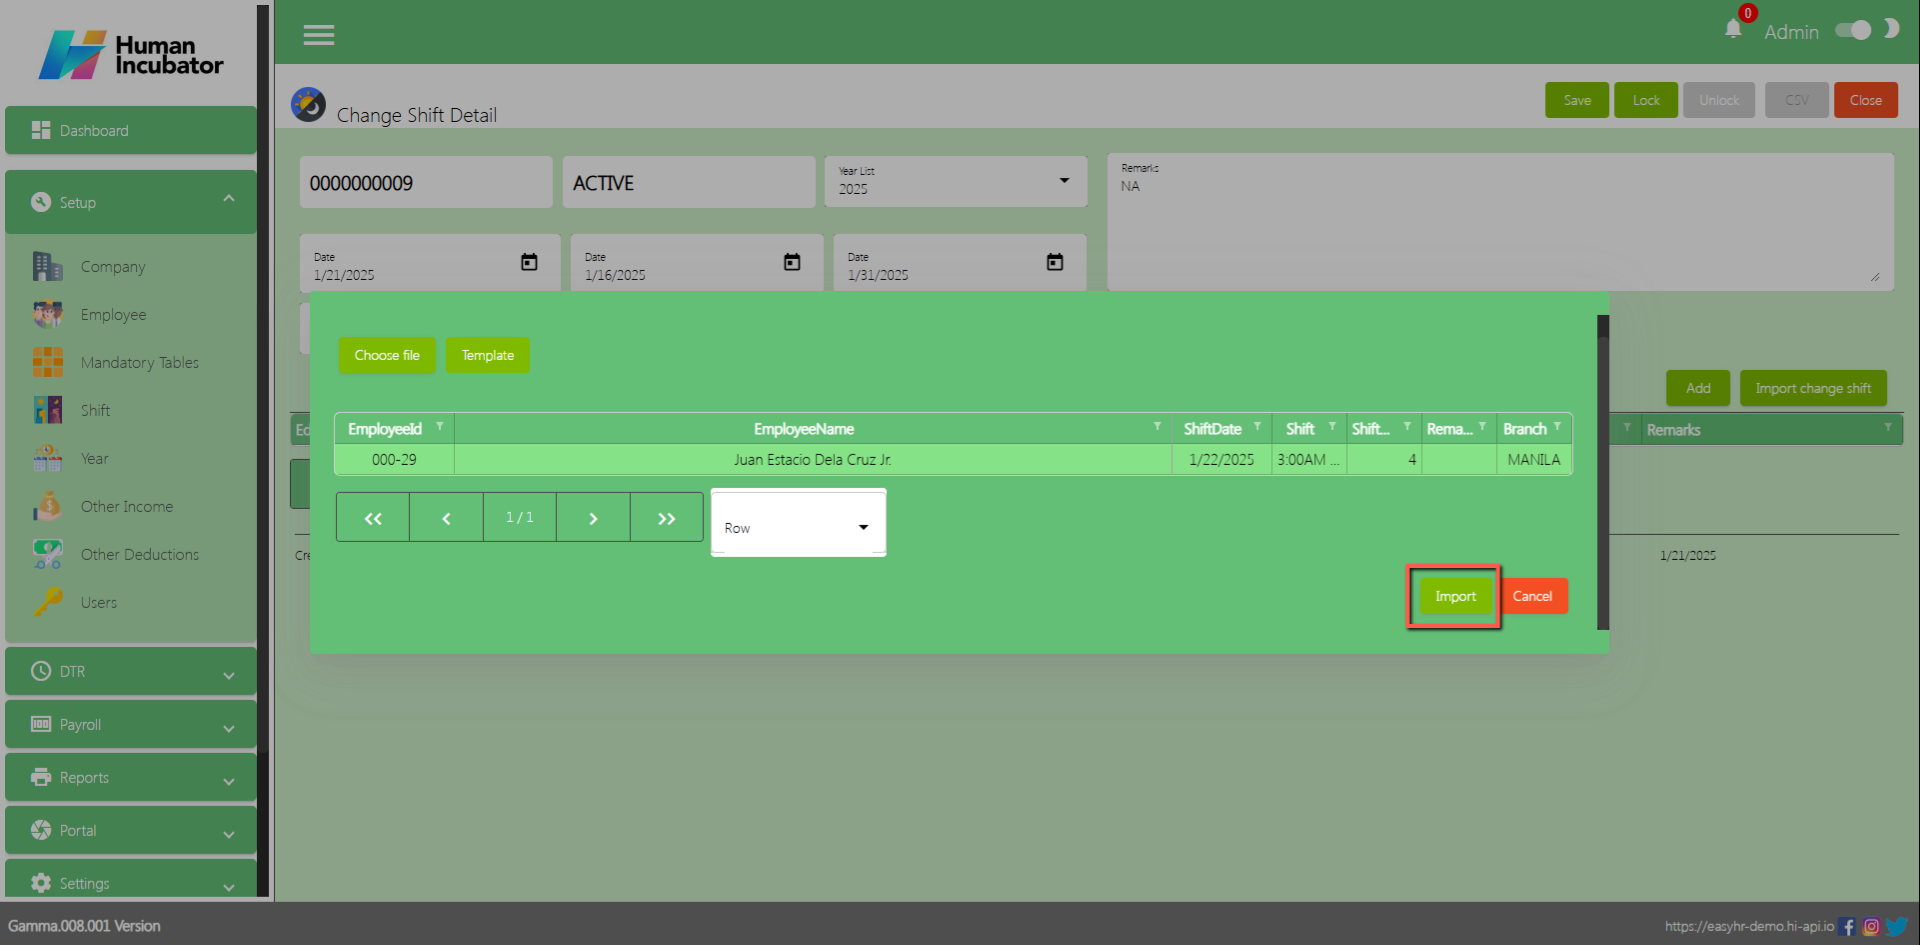
Click Import button to add in the shift code line
Change Shift already imported
Change Shift Error Message
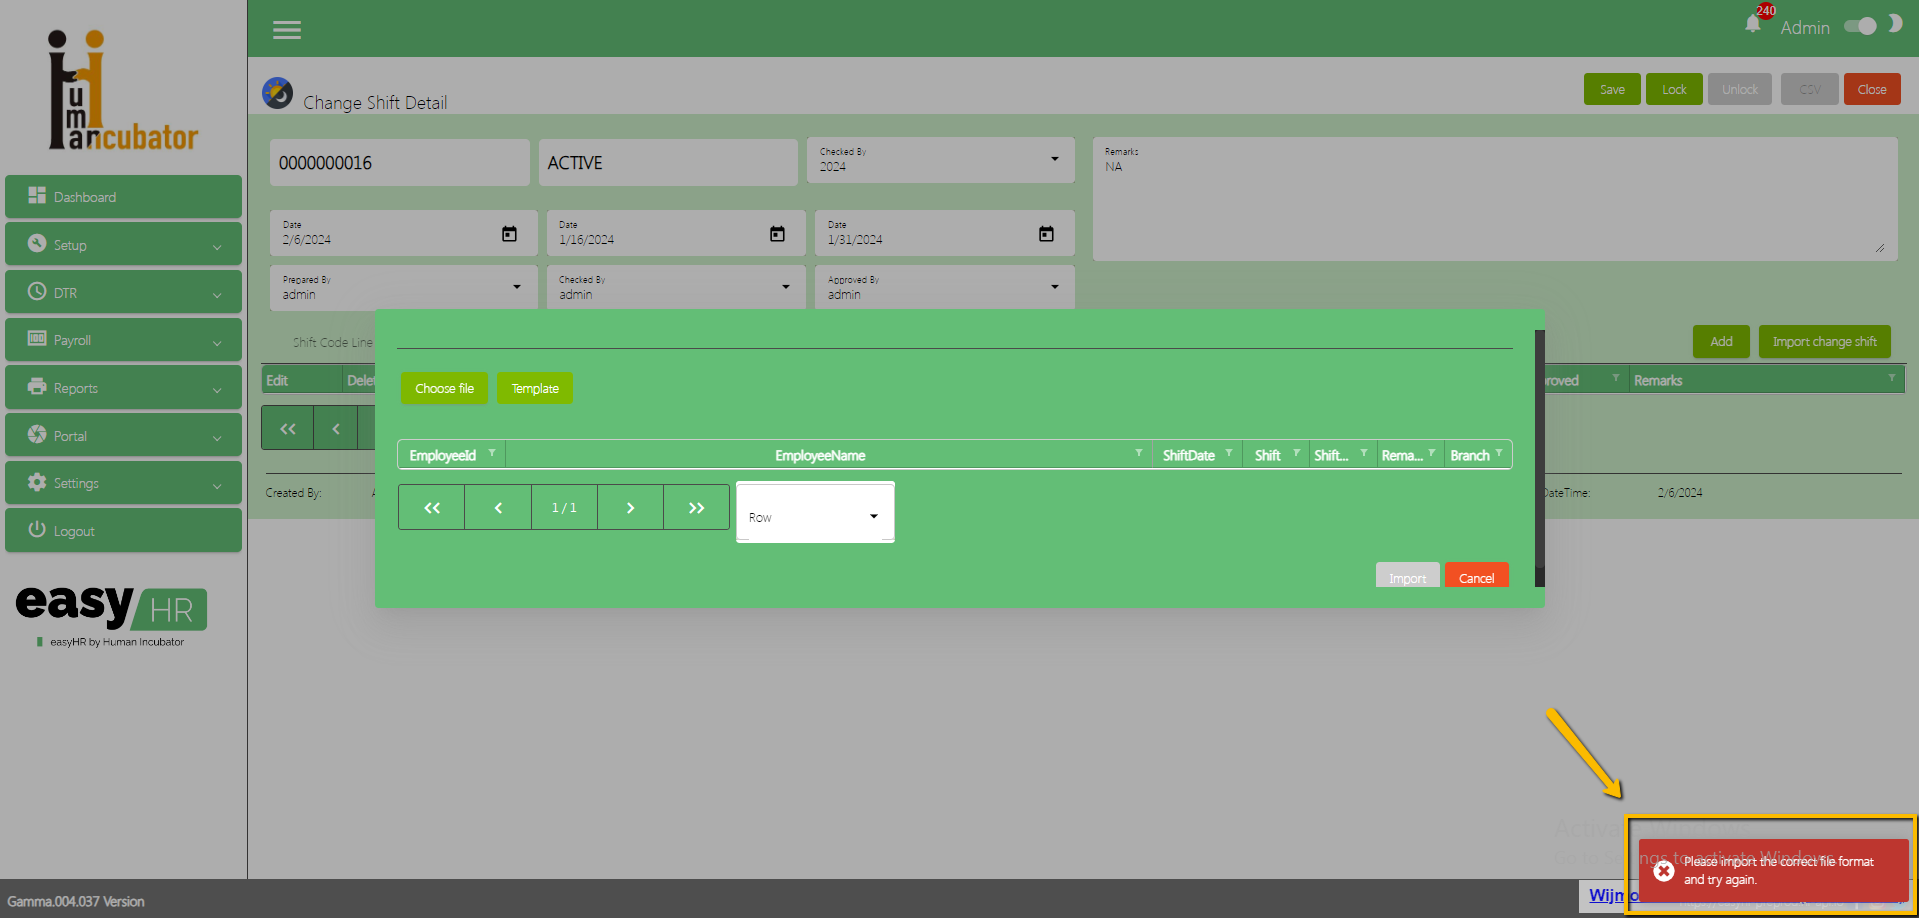
If you import Change Shift with a wrong format an error message will pop-up (Example: Empty field in the Remarks) (Note: do not leave the field empty, should put at least NA in the field)
Select File to Import
Error Message will appear
Approved Change Shift
Click Edit button to approve the change shift file in Employee portal
Check the Approved
Click Save button
Click Close button
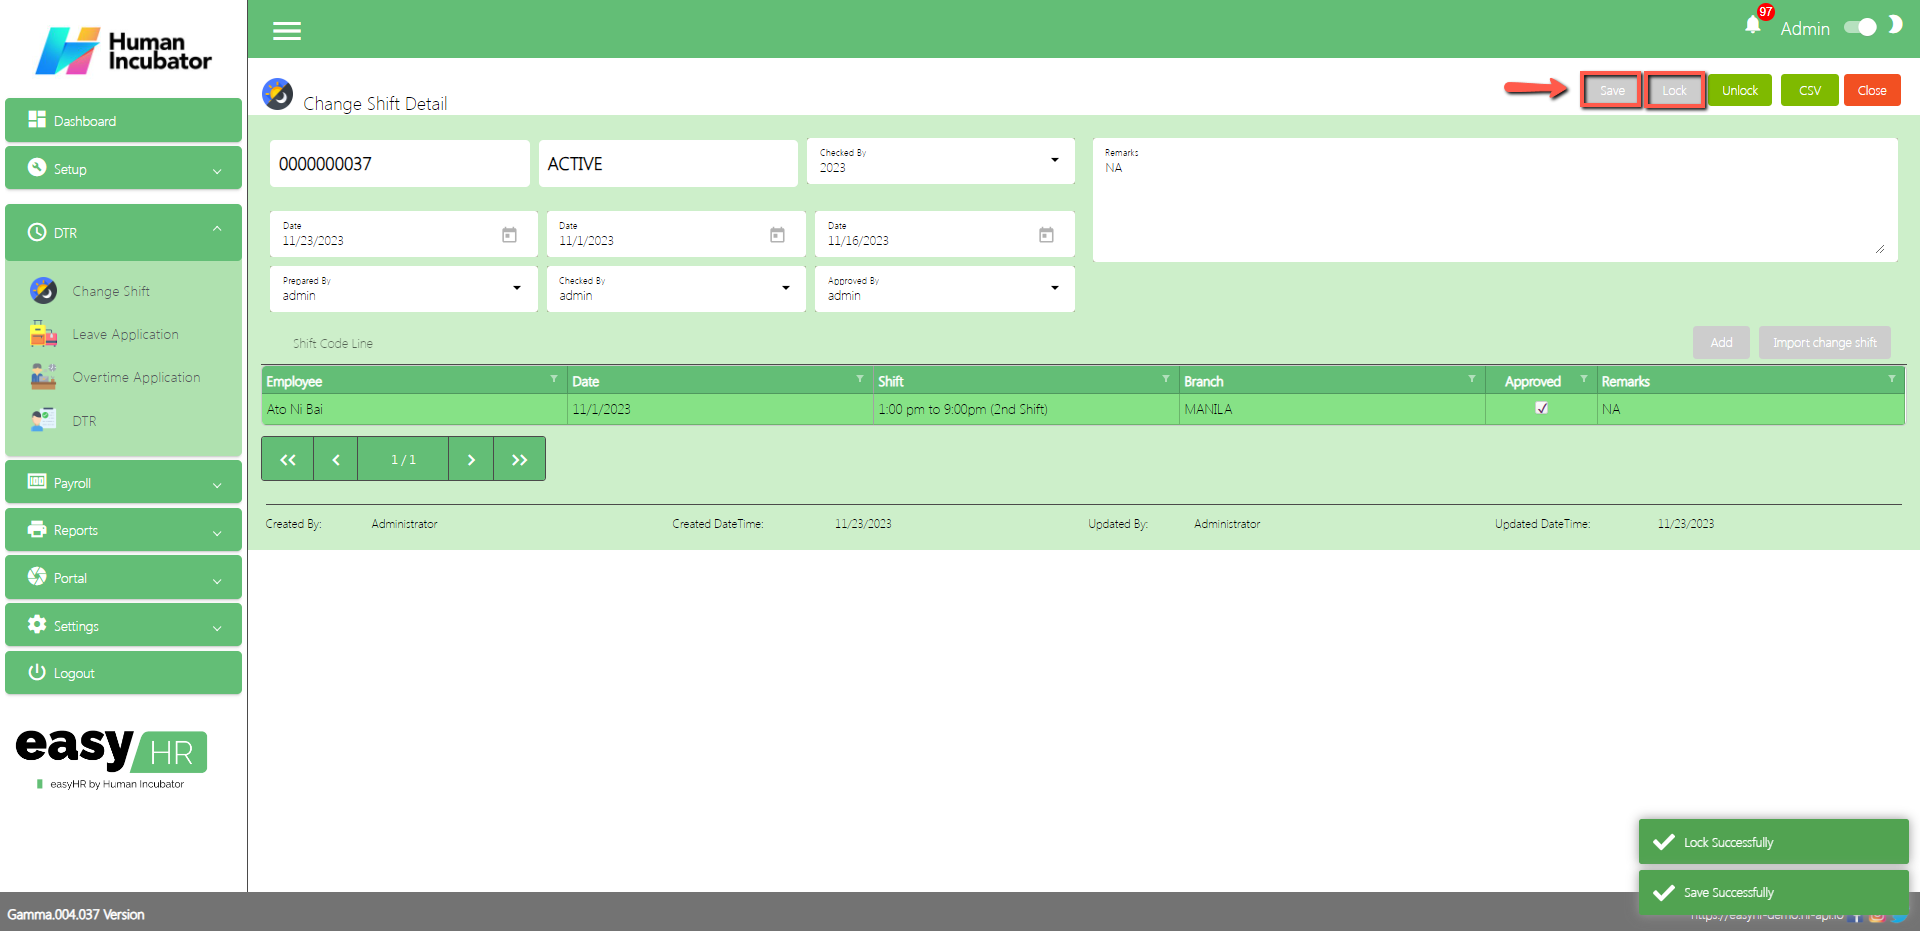
Save/Lock
Make sure to save/lock so the this record read and compute in system
(Note: Do not Save and Lock unless this cut-off will not yet finish and make sure all file change shifts are approved)
Column Table
Employee: Name of the Employee
Date: Date of the applied change shift
Shift: Name of the shift schedule
Branch: Employees Branch
Approved: Check if it is already approved
Remarks: You can input any remarks
Leave Application
Overview
Leave Application is used for setup a start date and end date per cut-off and also the user can approve if the employee filed a Leave Application
The user file Leave in employee portal it is automatically seen by approver or admin
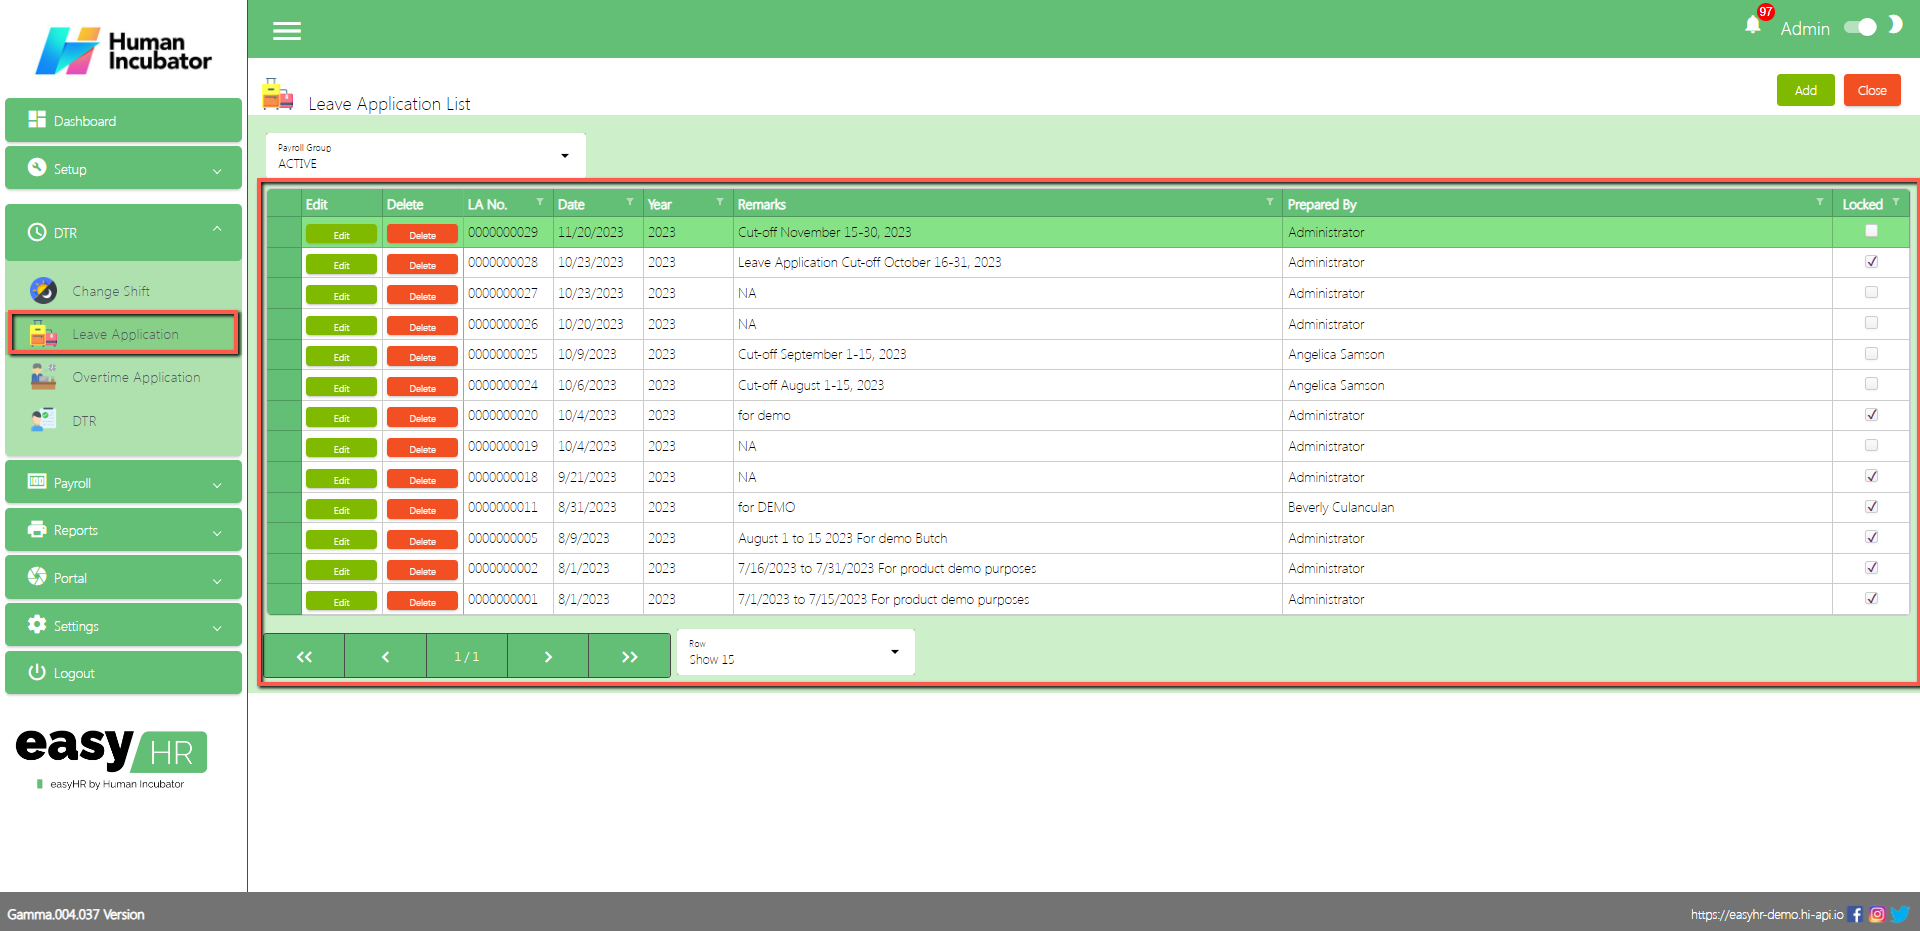
Leave Application List
Shows all list of Leave Application setup per cut off
Select Payroll Group
Column Table:
Edit: This has a function to edit the Leave Application
Delete: This has a function to Delete the Leave Application (Note: You will not be able to delete the Leave Application if it has still a Leave Application lines or the DTR connected is already locked)
LA No. This is for the Leave Application number (Note: It will automatically generate according to the sequence of the added Leave Application)
Date: Date of the Leave Application created
Year: Year date of the Leave Application
Remarks: You can input any remarks
Prepared By: Full Name of the user who created the change shift
Locked: If the Leave Application is locked you can select it for the DTR
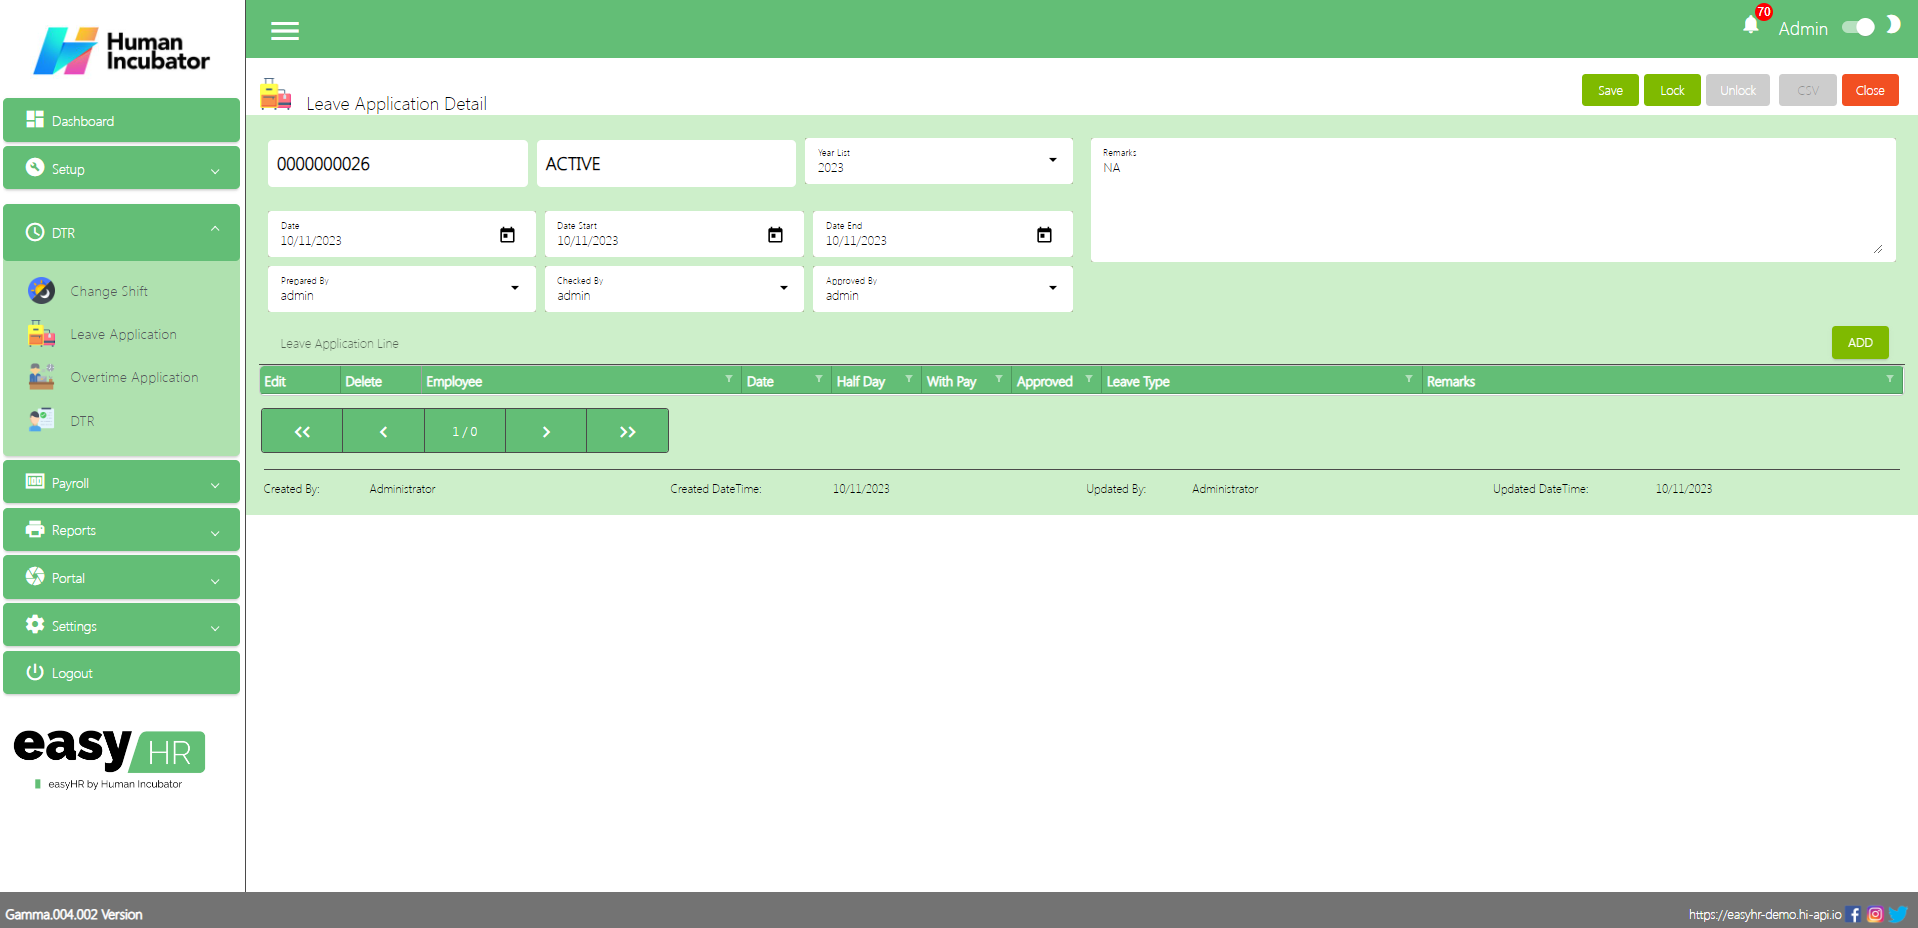
Leave Application Detail
To Add a new Leave Application detail, click the Add button that can be seen on the right side of the screen
Fill all the important fields in Leave Application detail like:
Select Date Start
Select Date End
Input Remarks
Select Prepared By
Select Check By
Select Approved By
(Note: Do not Save and Lock so that this shift code seen in employee portal)
Add Leave Application Manually
Click Add button to add manually leave application of employee
Fill all the important fields Shift line like:
Select Employee
Select Date
Select Leave Type
Check the Checkbox of Half Day/ With Pay
Check Approved
Input Remarks
Click Save button
Click Close button to add in table
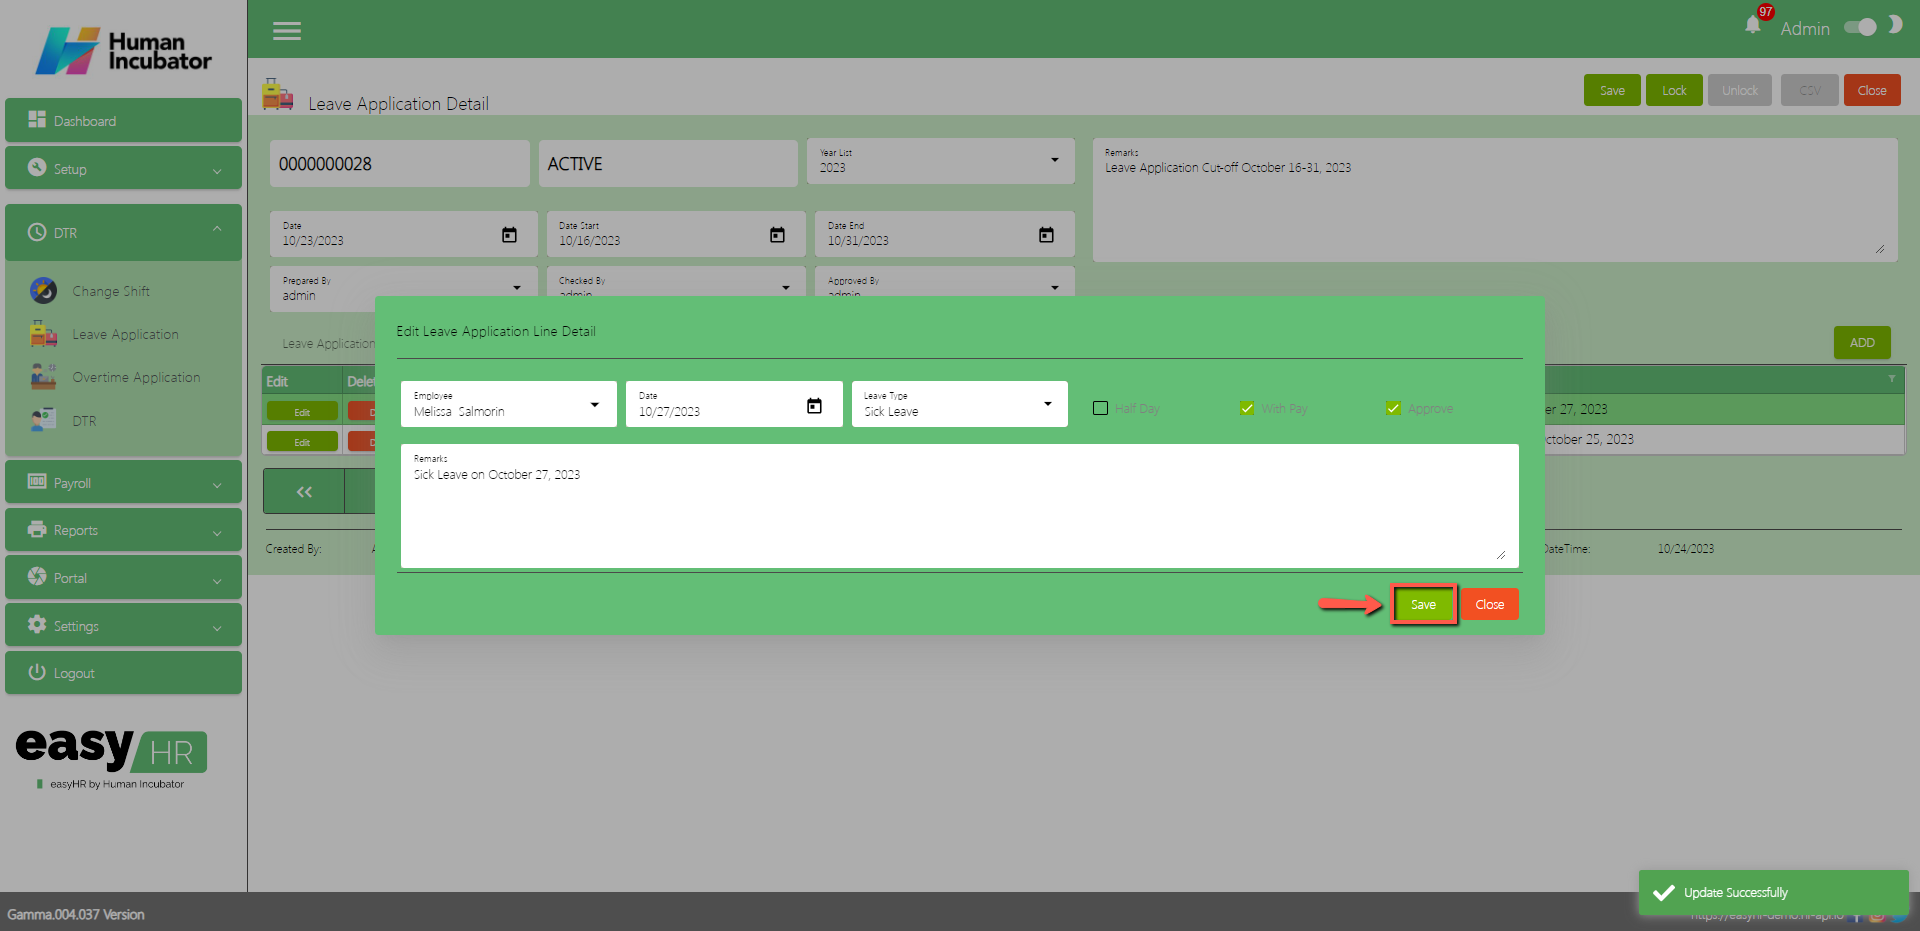
Approved Leave Application
Click Edit button to approve the leave application file in Employee portal
Check the Approved
Click Save button
Click Close button
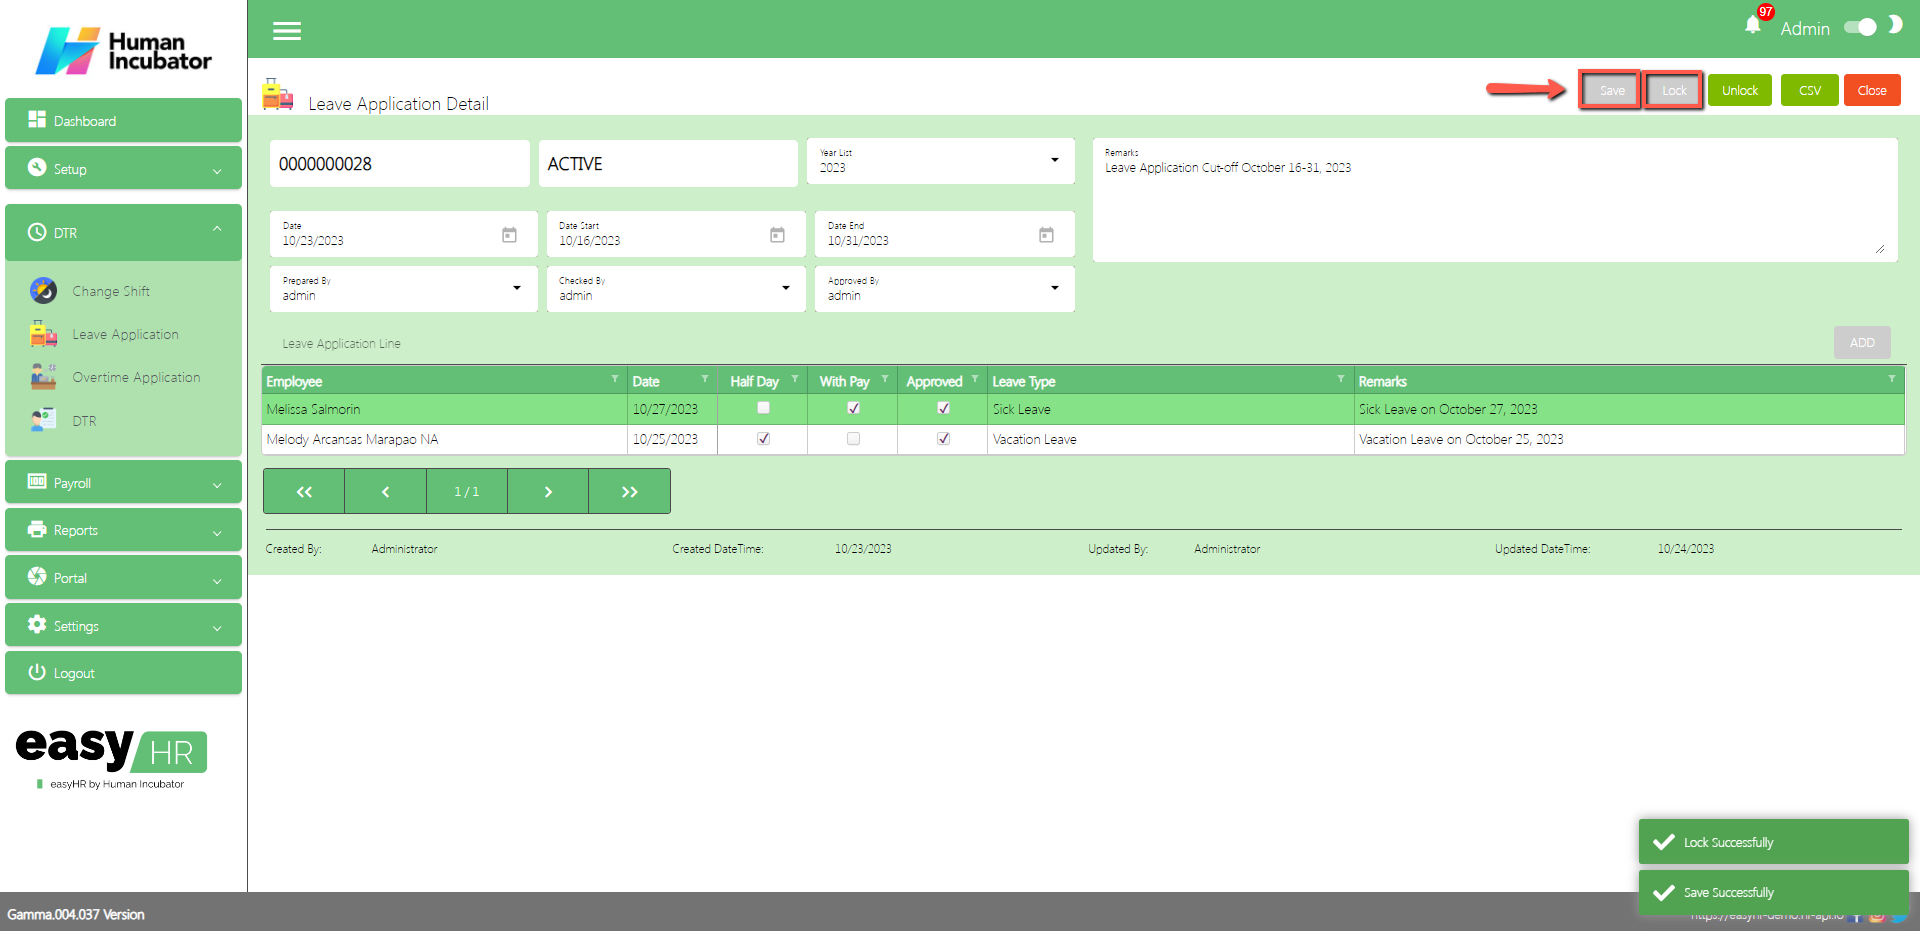
Save/Lock
Make sure to save/lock so the this record read and compute in system
(Note: Do not Save and Lock unless this cut-off will not yet finish and make sure all file leaves are approved)
Column Table
Employee: Name of the Employee
Date: Date of the applied Leave
Halfday: Check if it is halfday
With Pay: Check if it is with pay
Approved: Check if it is already approved
Leave Type: Type of leave, Vacation leave or Sick leave
Remarks: You can input any remarks
Overtime Application
Overview
Overtime Application is used for setup a start date and end date per cut-off and also the user can approve if the employee filed a Overtime Application
The user file Overtime in employee portal it is automatically seen by approver or admin
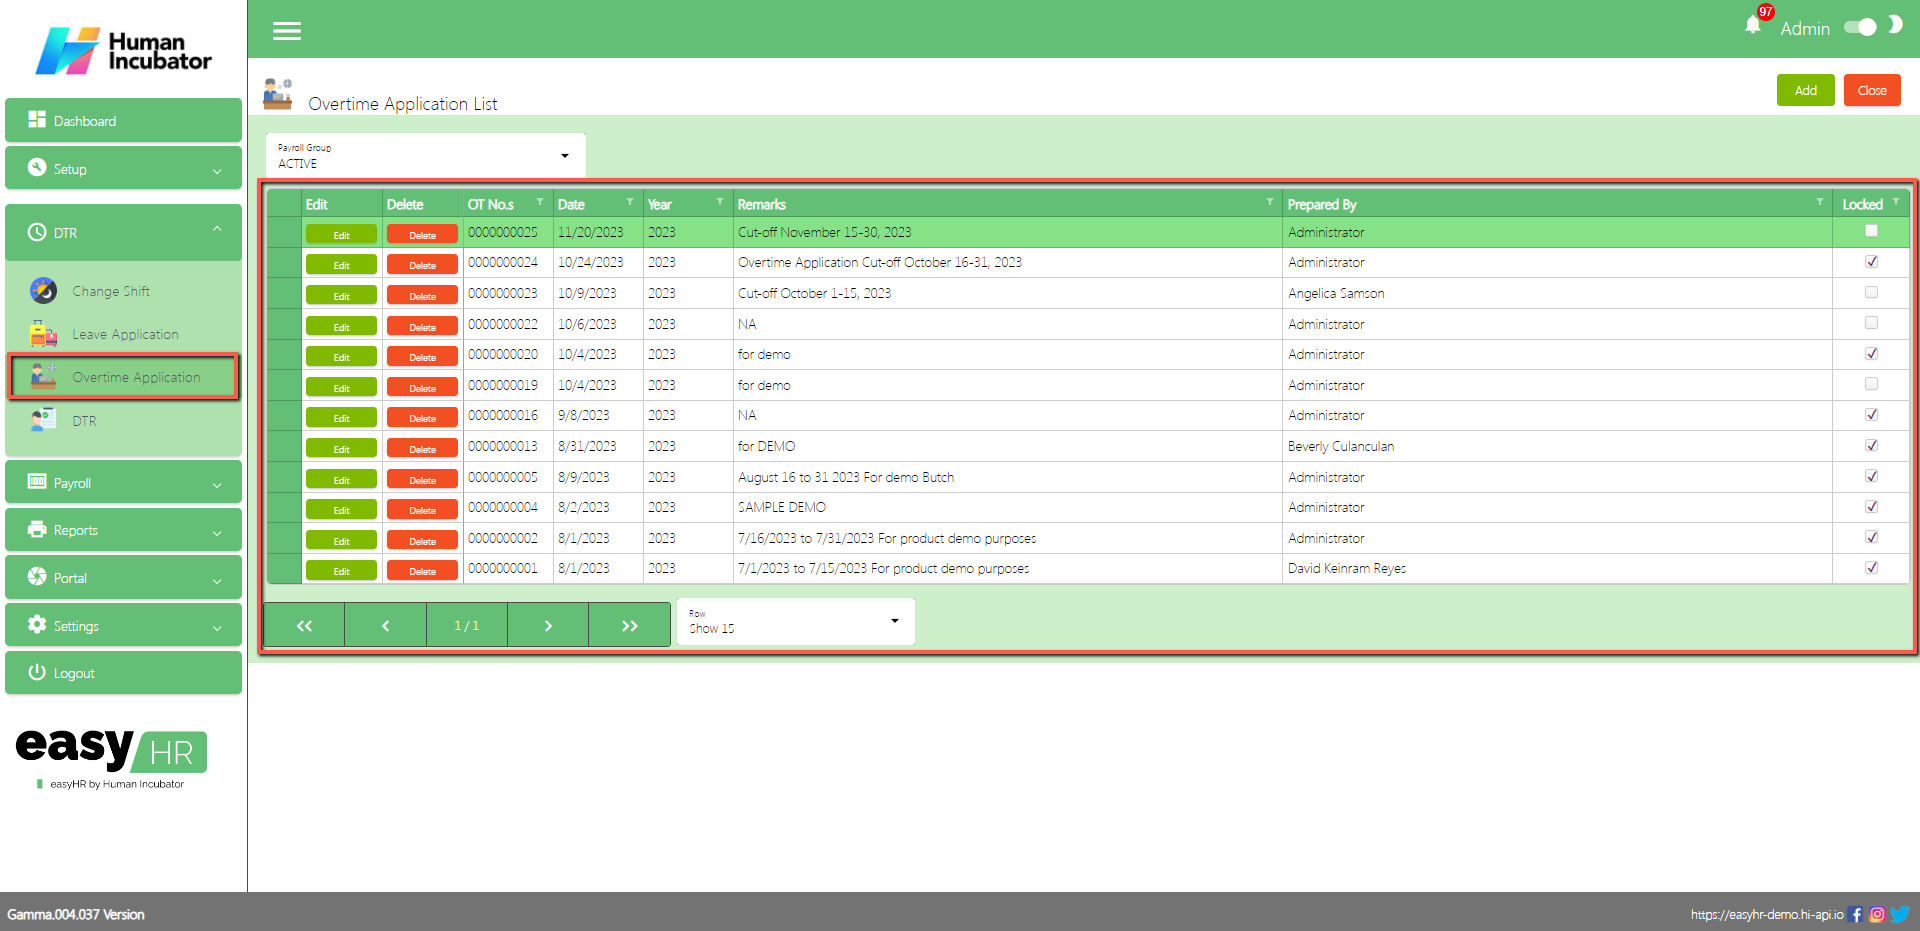
Overtime Application List
Shows all list of Overtime Application Setup per cut off
Select Payroll Group
Column Table
Edit: This has a function to edit the Overtime Application
Delete: This has a function to delete the Overtime Application (Note: You will not be able to delete the Overtime Application if it has still a Overtime Application lines or the DTR connected is already locked)
OT No.: This is for Overtime Application number (Note: It will automatically generate according to the sequence of the added Overtime Application)
Date: Date of the Overtime Application added
Year: Year Date of the Overtime Application
Remarks: You can input any remarks
Prepared By: Full name of the user who created the Overtime Application
Locked: If the Overtime Application is locked you can select it for the DTR
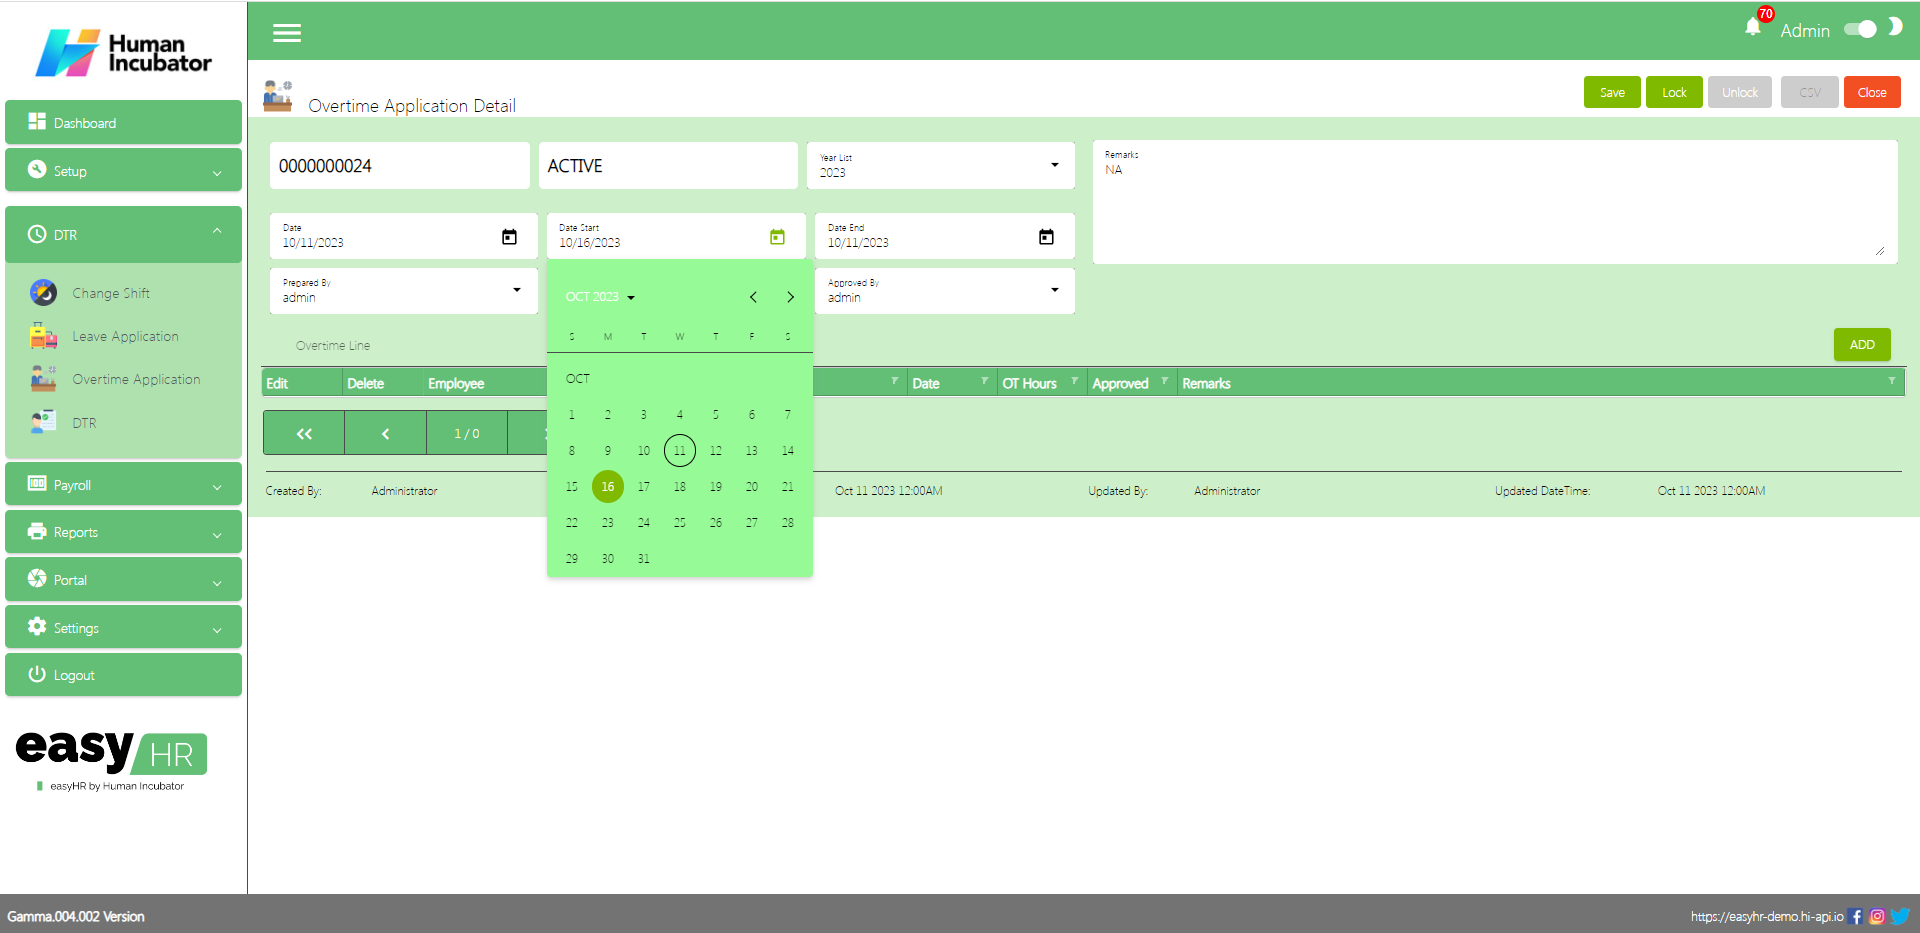
Overtime Application Detail
To Add a new Overtime Application detail, click the Add button that can be seen on the right side of the screen
Fill all the important fields in Overtime Application detail like:
Select Date Start
Select Date End
Input Remarks
Select Prepared By
Select Check By
Select Approved By
Add Overtime Application Manually
Click Add button to add manually Overtime application of employee
Fill all the important fields Shift line like:
Select Employee
Select Date
Input OT hours
Check Approved
Input Remarks
Click Save button
Click Close button to add in table
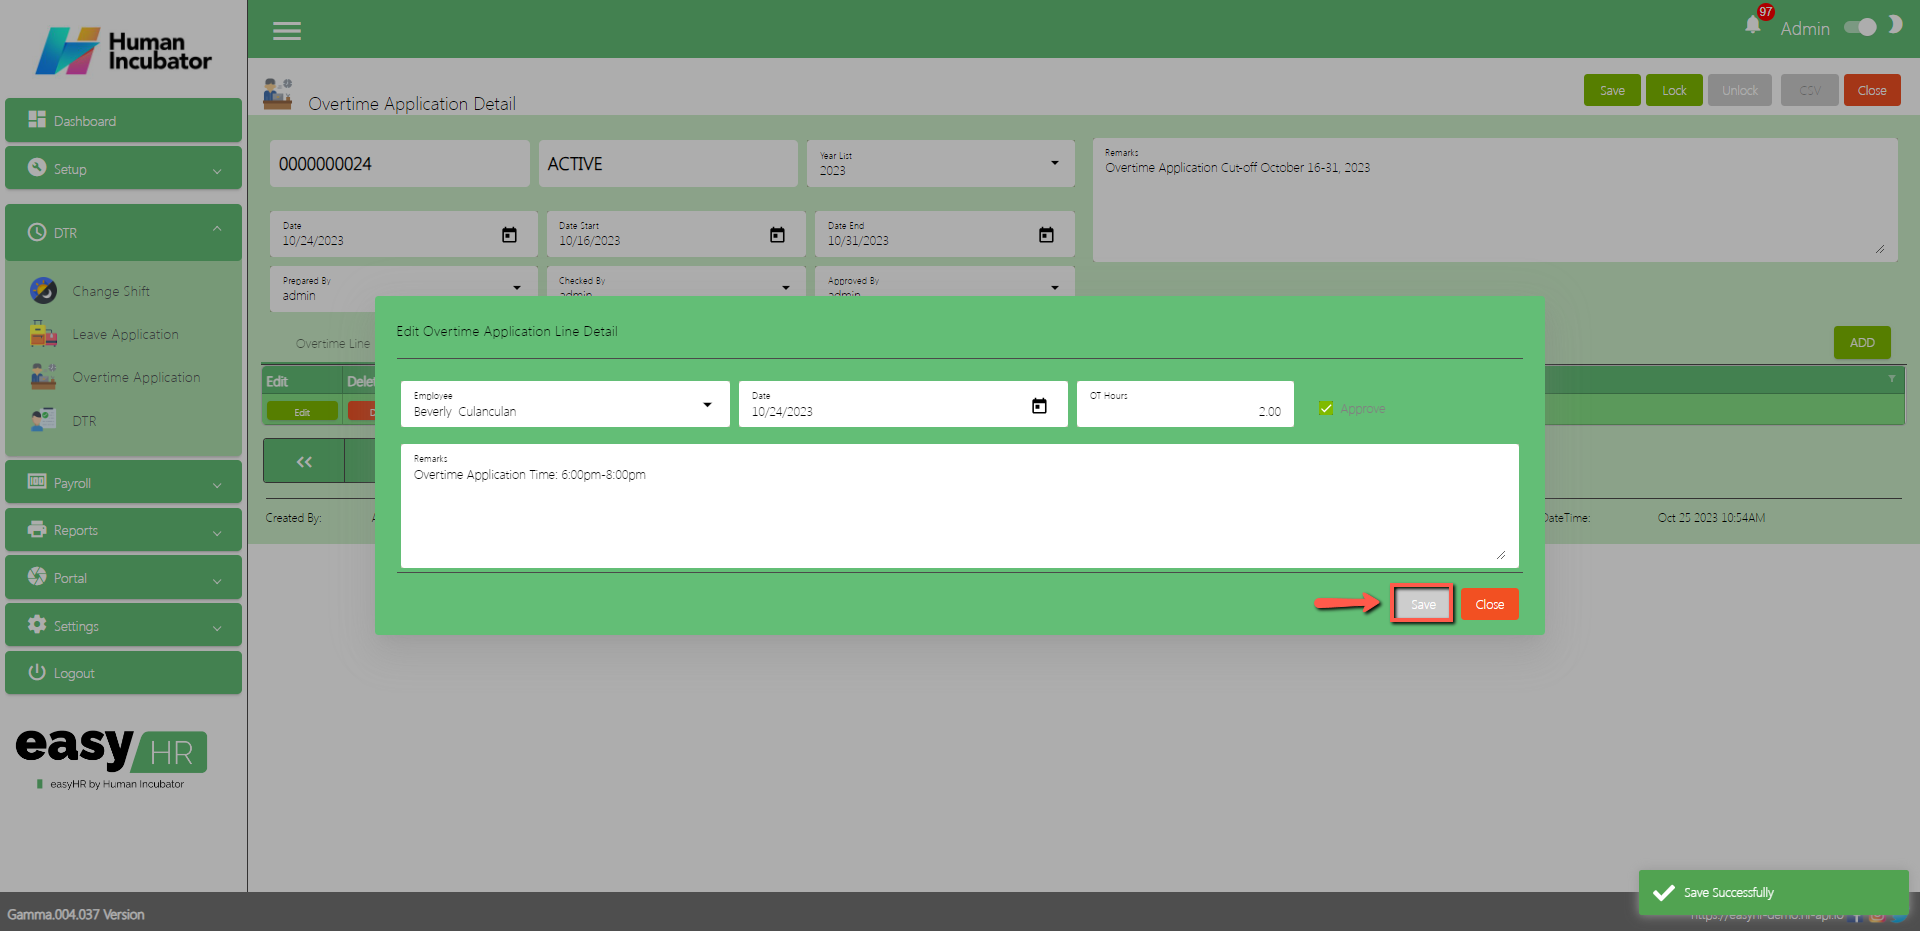
Approved Overtime Application
Click Edit button to approve the overtime application file in Employee portal
Check the Approved
Click Save button
Click Close button
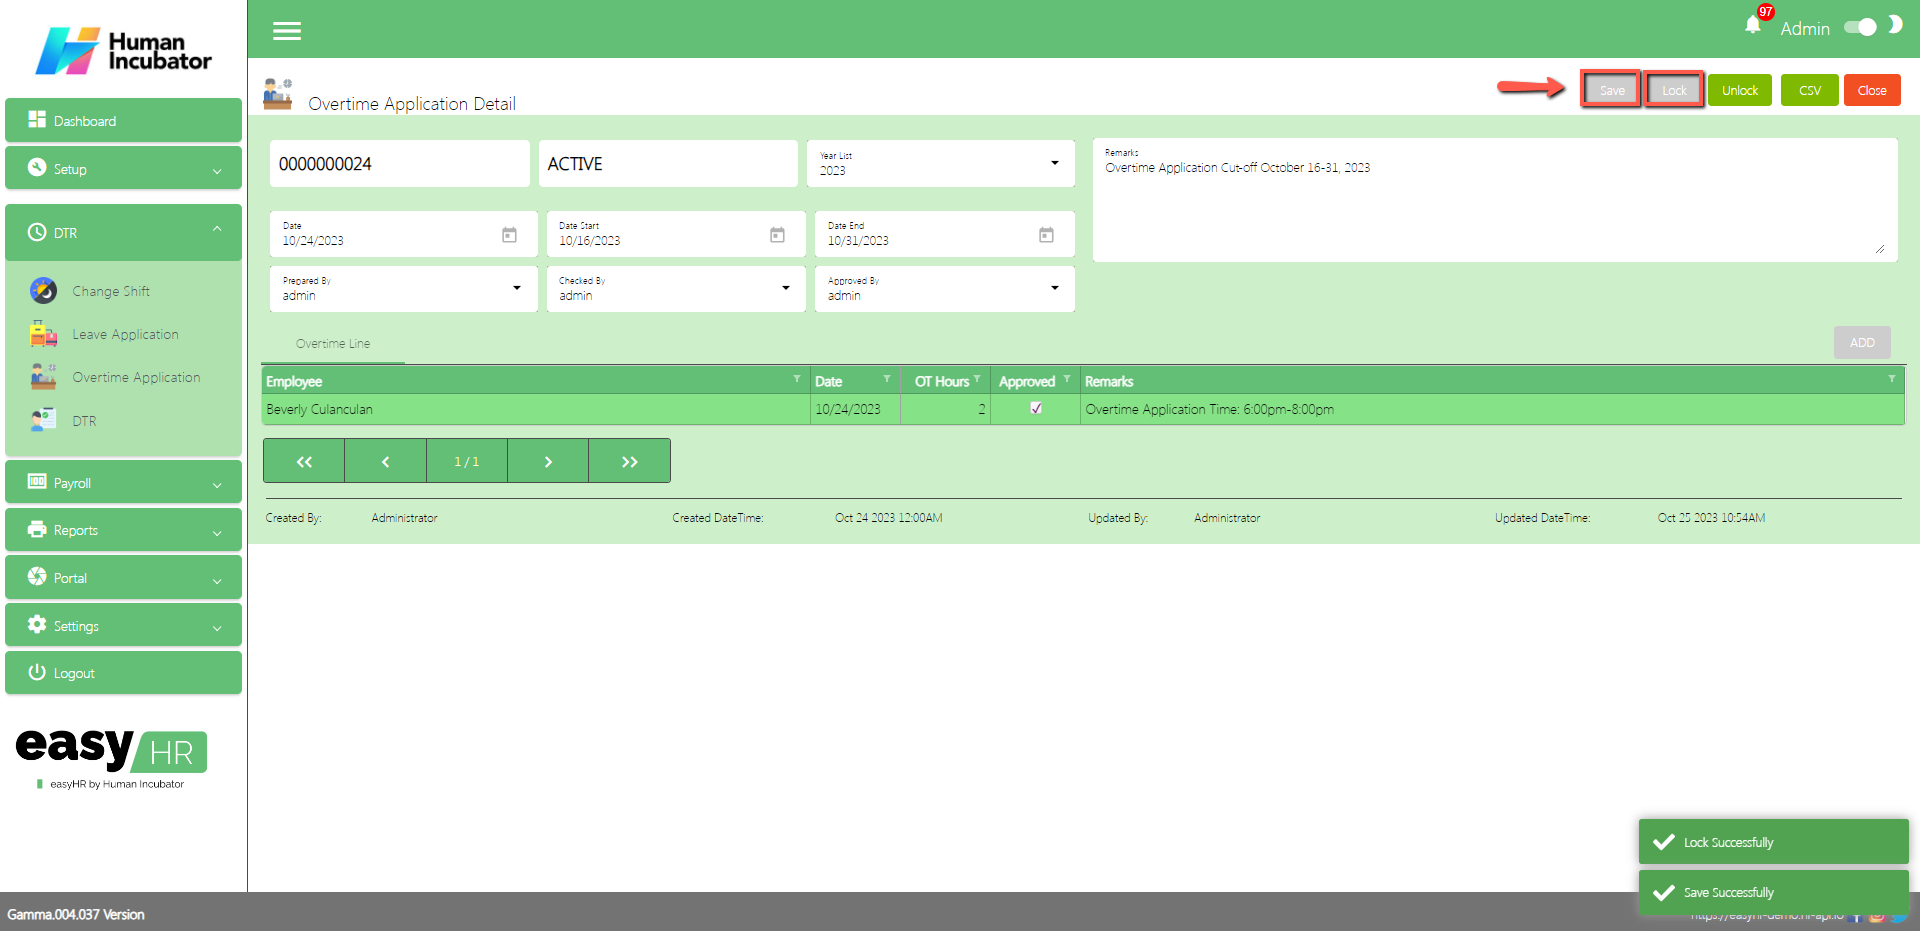
Save/Lock
Make sure to save/lock so the this record read and compute in system
(Note: Do not Save and Lock unless this cut-off will not yet finish and make sure all file overtime are approved)
Column Table
Employee: Name of the Employee
Date: Date of the applied Overtime
OT Hours: Applied Overtime Hours
Approved: Check if it approved
Remarks: You can input any remarks
DTR
Overview
DTR is used for adding a DTR logs, Import DTR logs for employee and also compute the total net pay, Overtime and Additional Allowance
DTR List
Shows all list of DTR per cut off
Select Payroll Group
Table Column
Edit: This has a function to edit the DTR
Delete: This has a function to Delete the DTR (Note: You will not be able to delete the DTR if it has still a DTR lines or the Payroll connected is already locked)
DTR No.: This is for the DTR number (Note: It will automatically generate according to the sequence of the added DTR)
Date: Date of the added DTR
Year: Year Date of the added DTR
Date Start: Cut-off date start
Date End: Cut-off date end
Remarks: You can add any remarks
Prepared By: Full Name of the login user who created the DTR
Locked: If the DTR is locked you can now select it for payroll
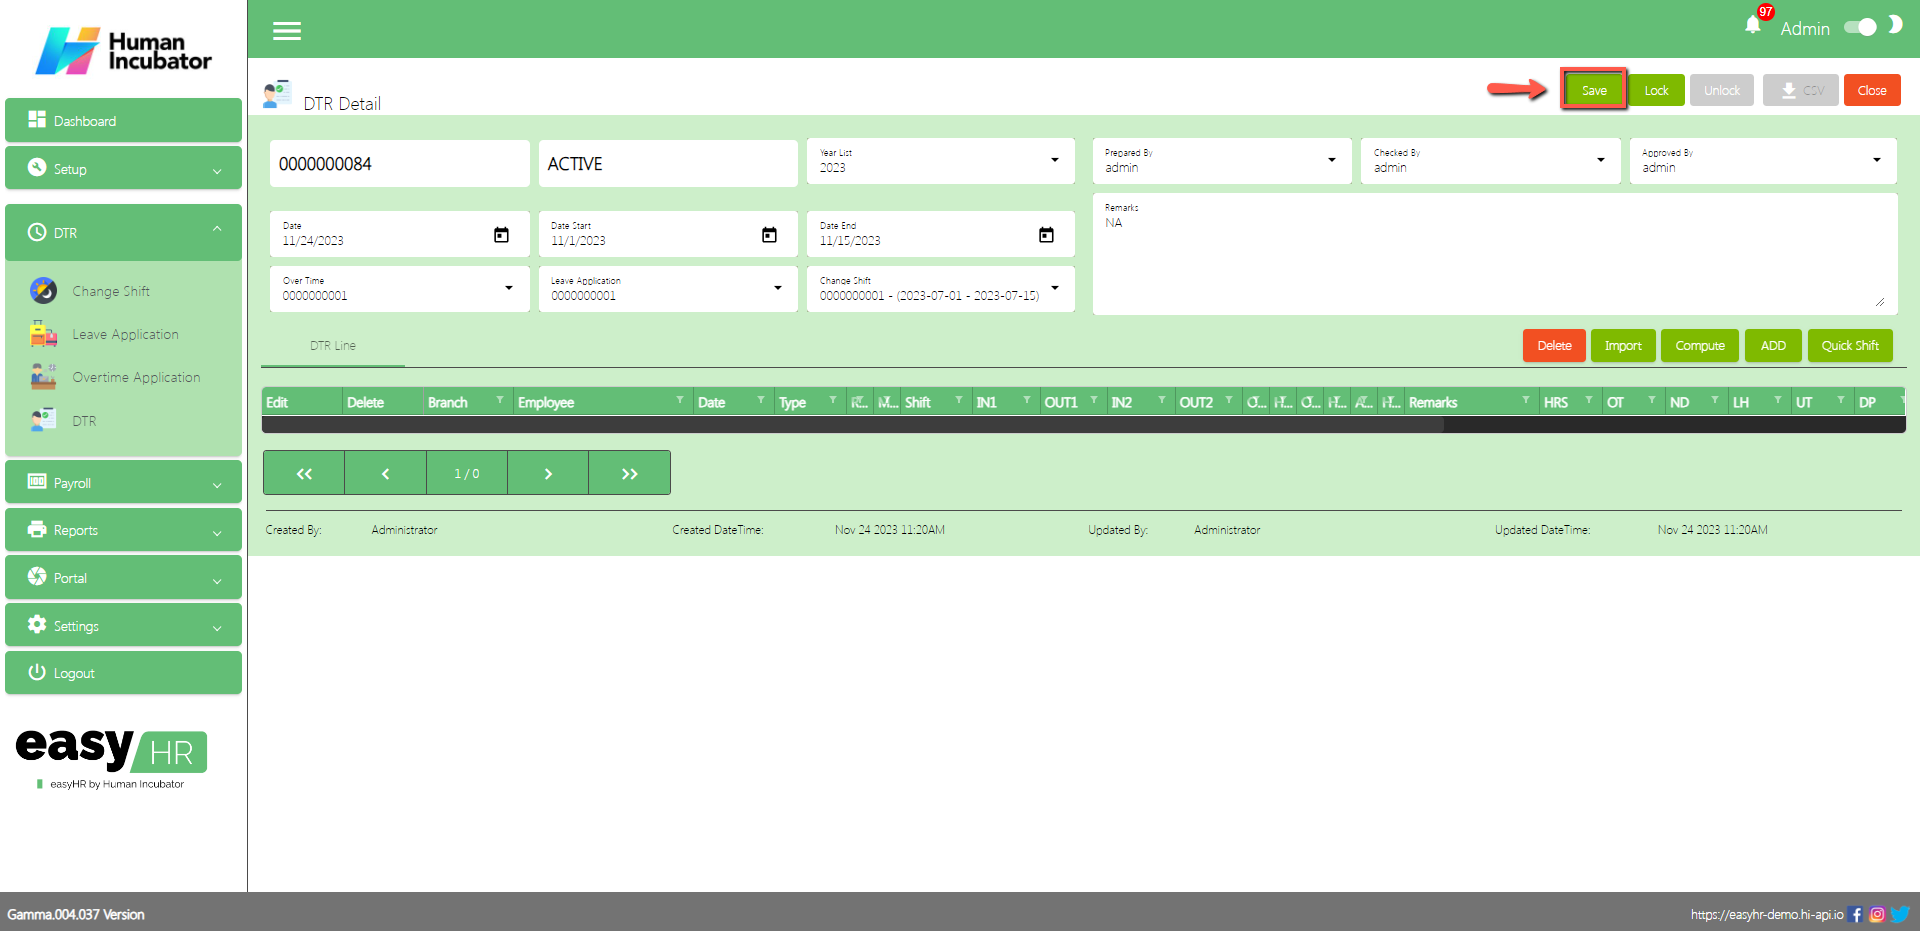
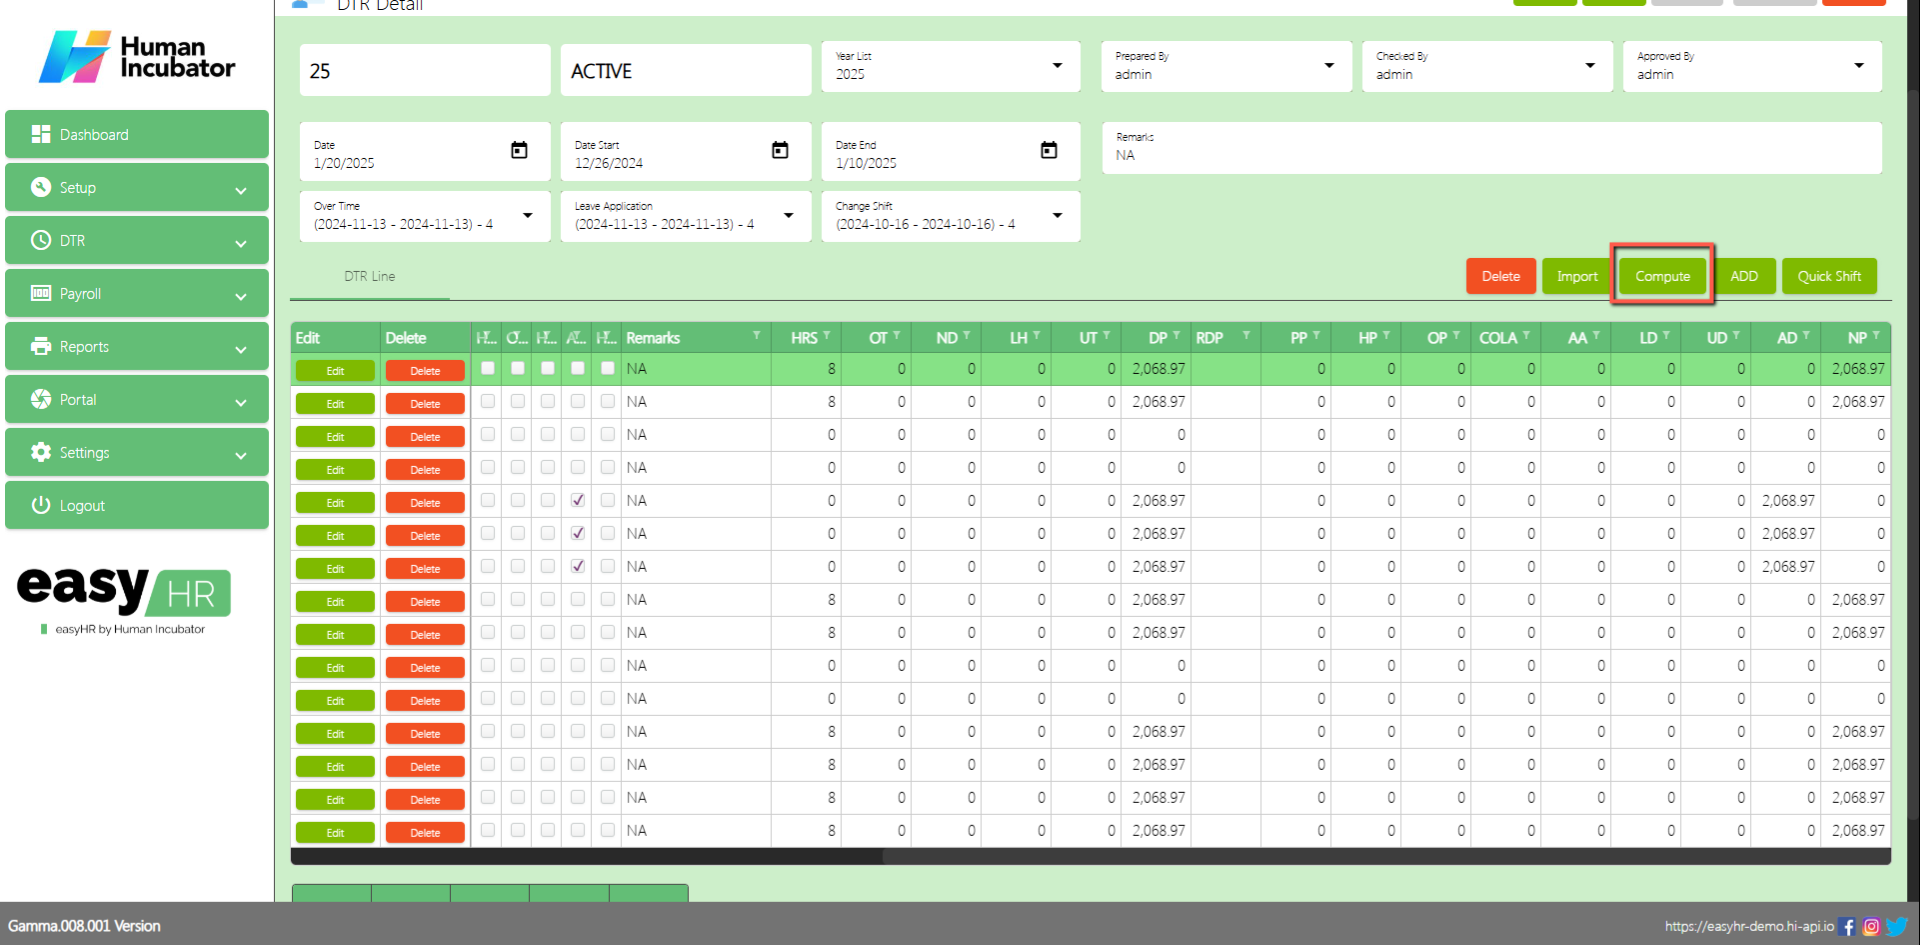
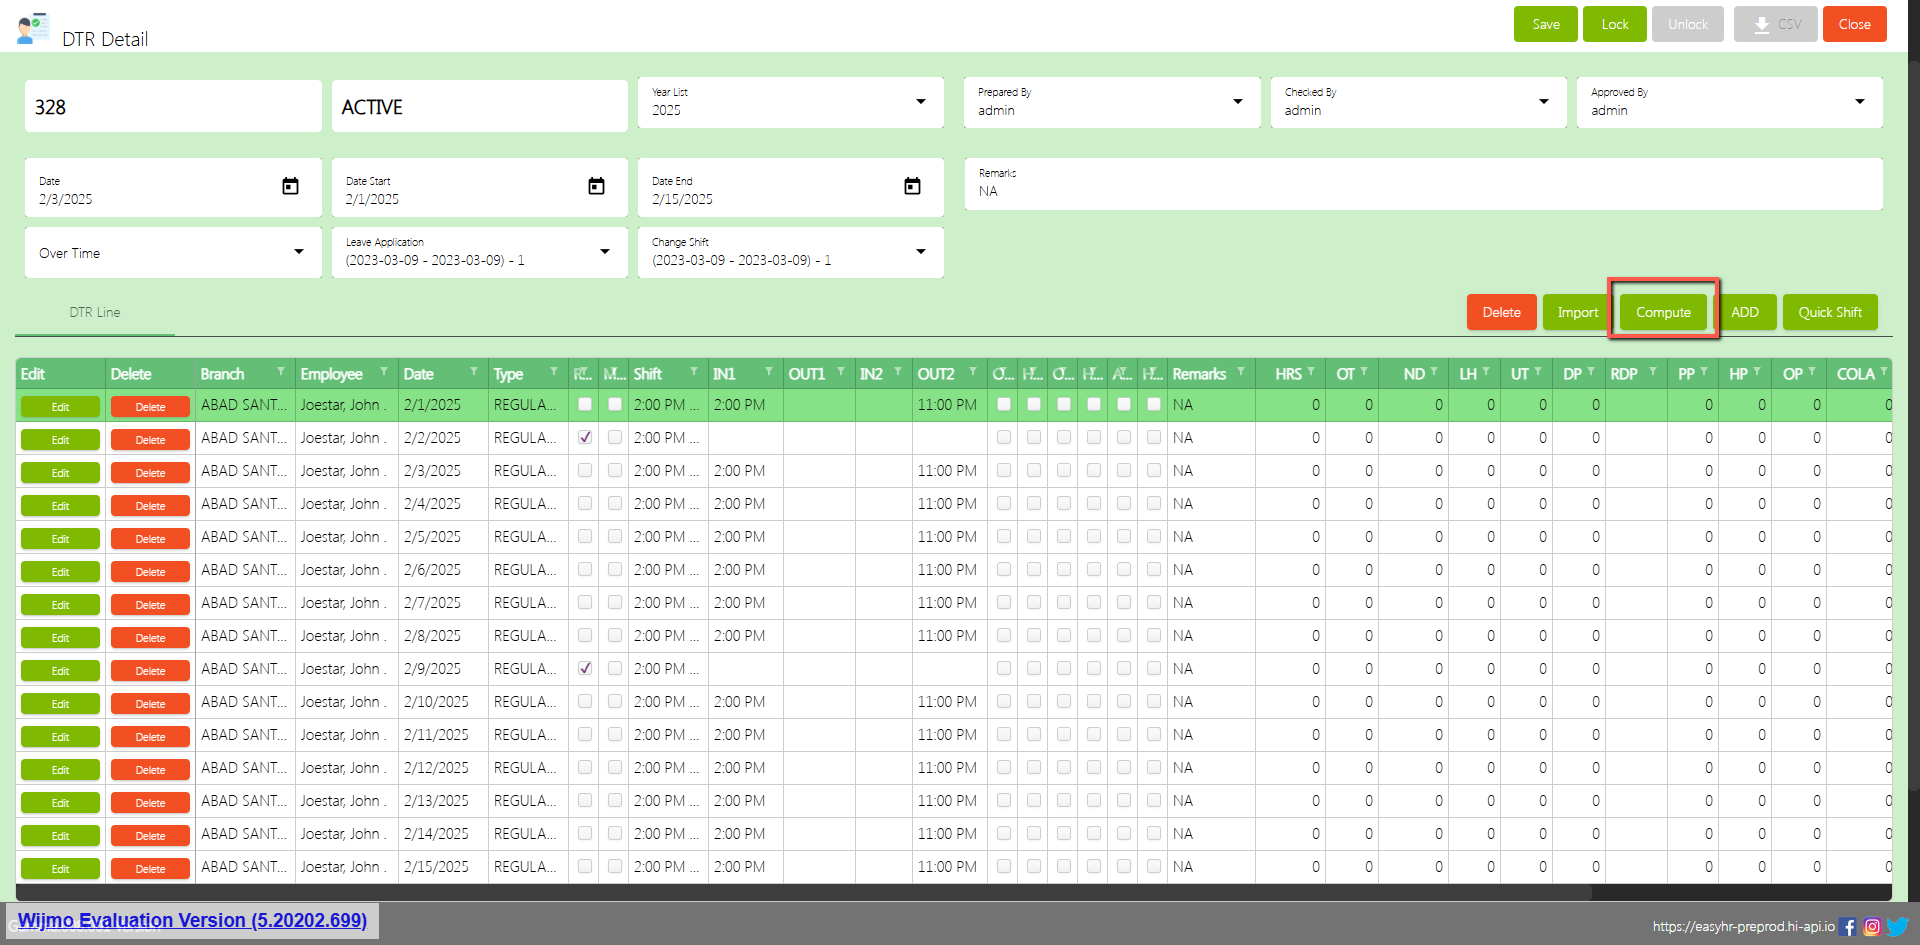
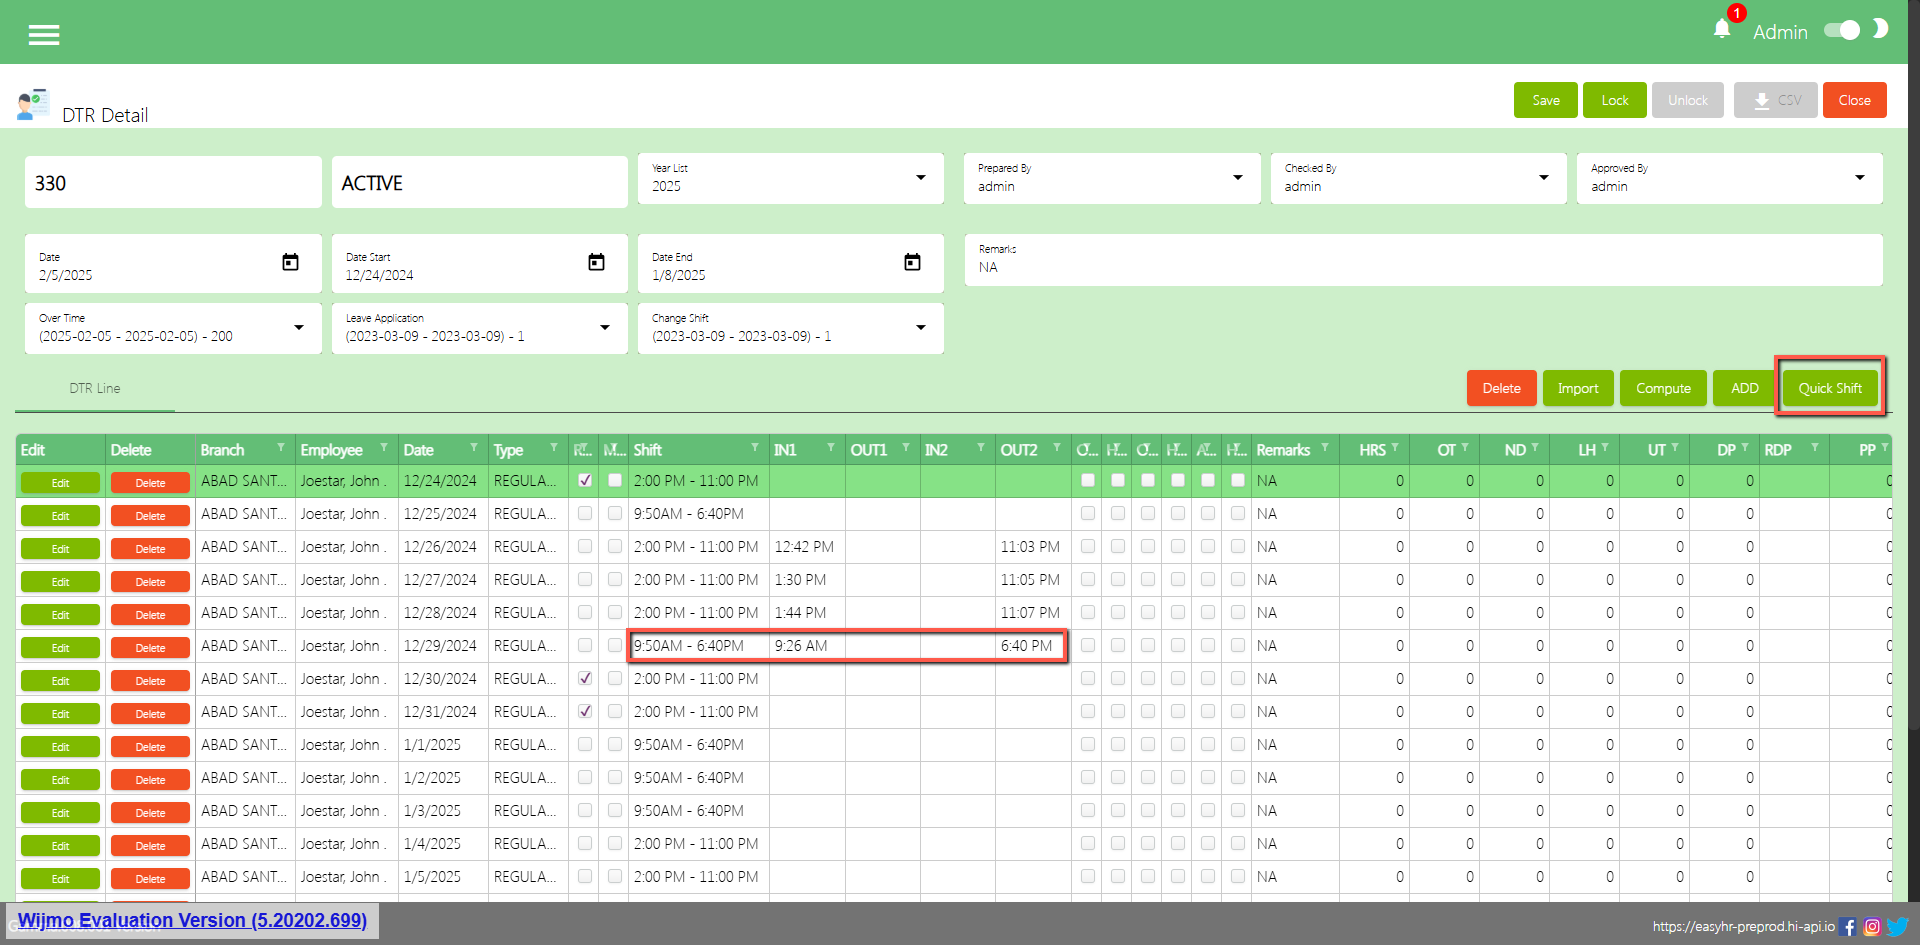
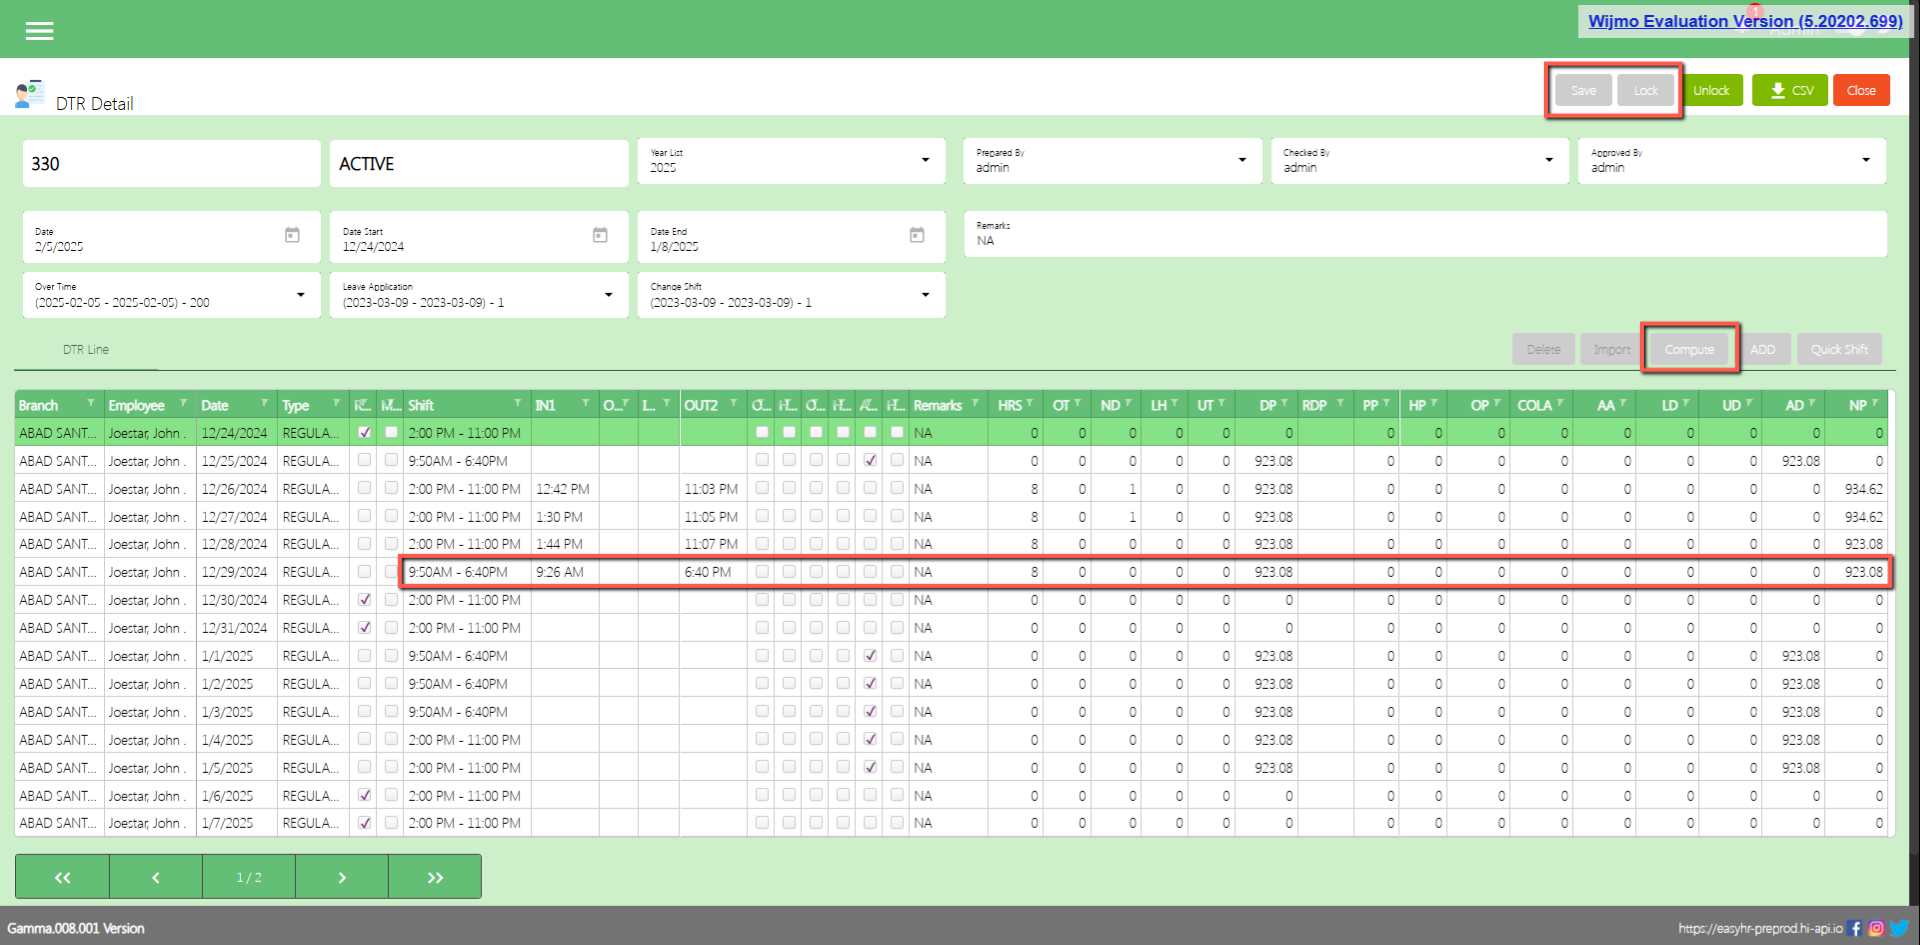
DTR Detail
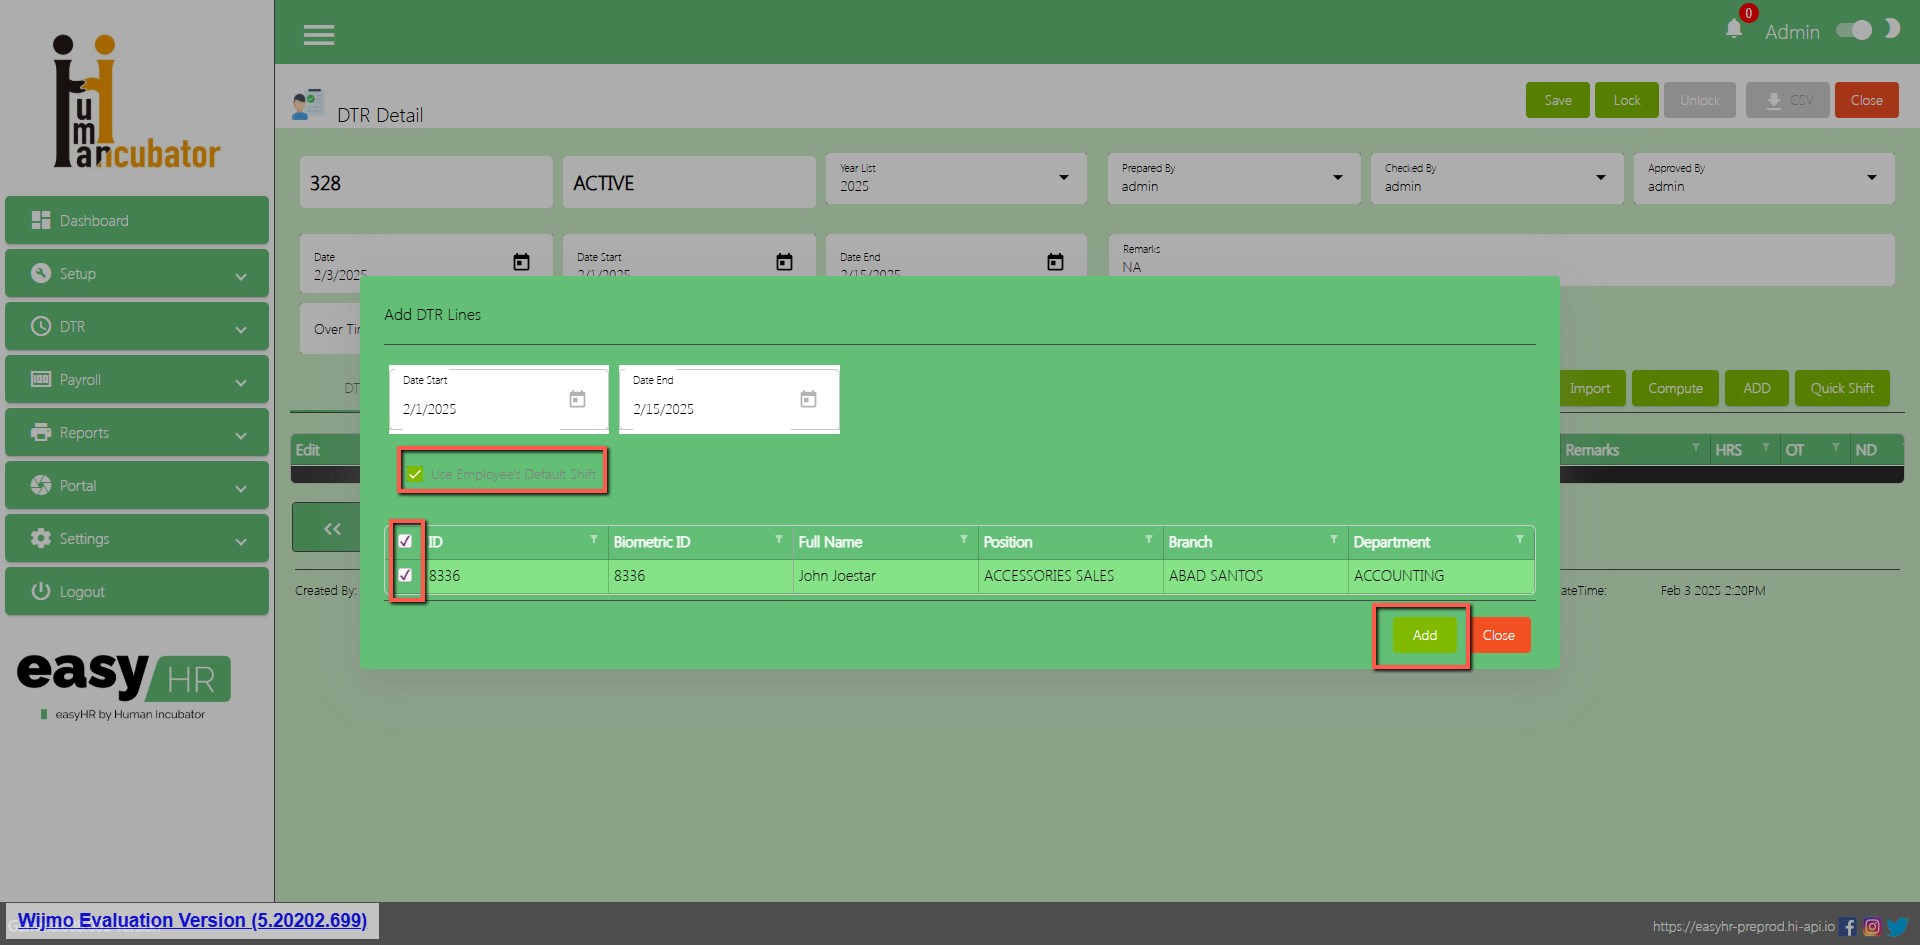
To Add a new DTR detail, click the Add button that can be seen on the right side of the screen
Fill all the important fields in DTR detail like:
Select Date Start cut-off
Select Date End cut-off
Select Overtime Code (Choose the code that aligns with the DTR’s cut-off date)
Select Leave Application Code (Choose the code that aligns with the DTR’s cut-off date)
Select Change Shift Code (Choose the code that aligns with the DTR’s cut-off date)
Select Prepared By
Select Checked By
Select Approved By
Input Remarks
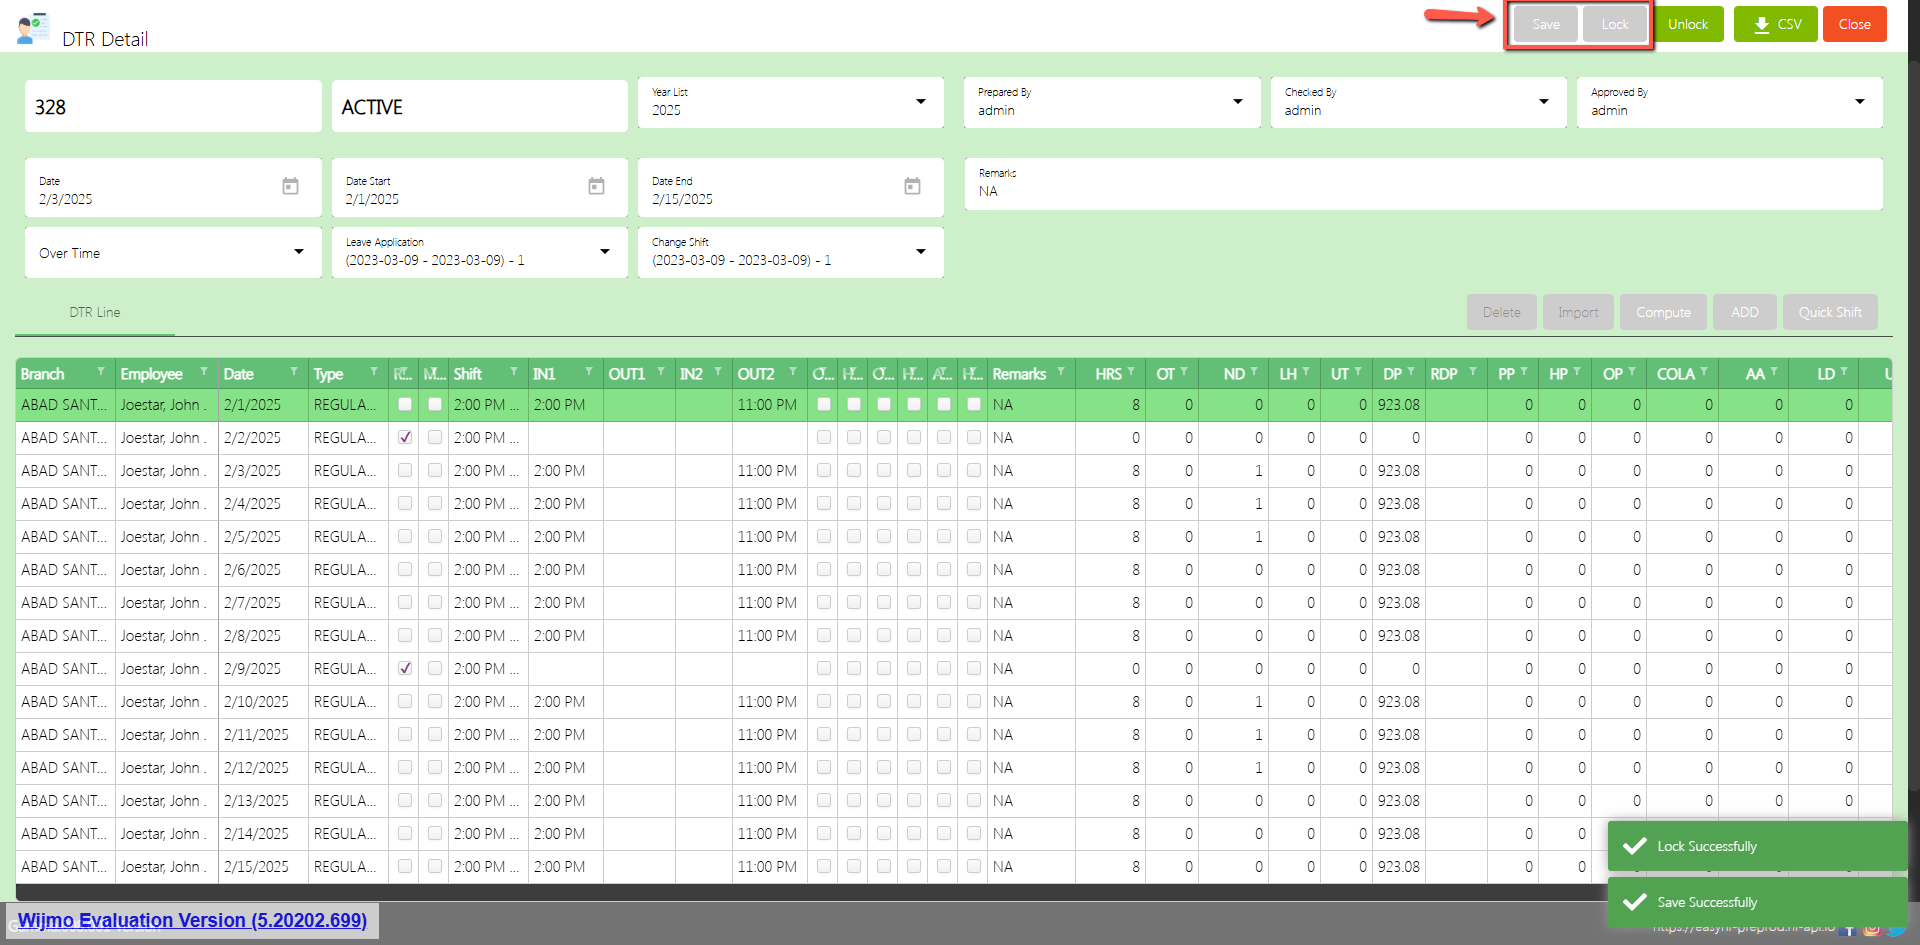
Click Save button to save all selected fields
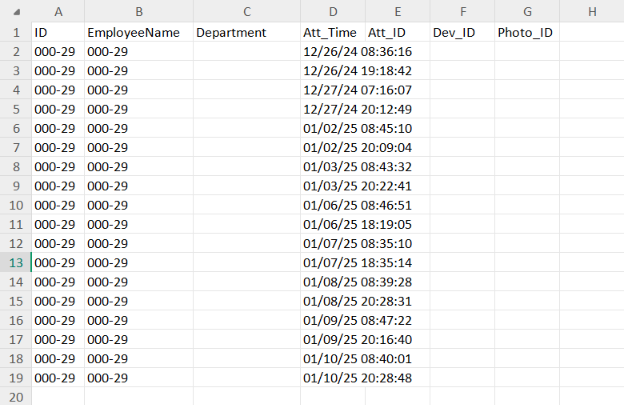
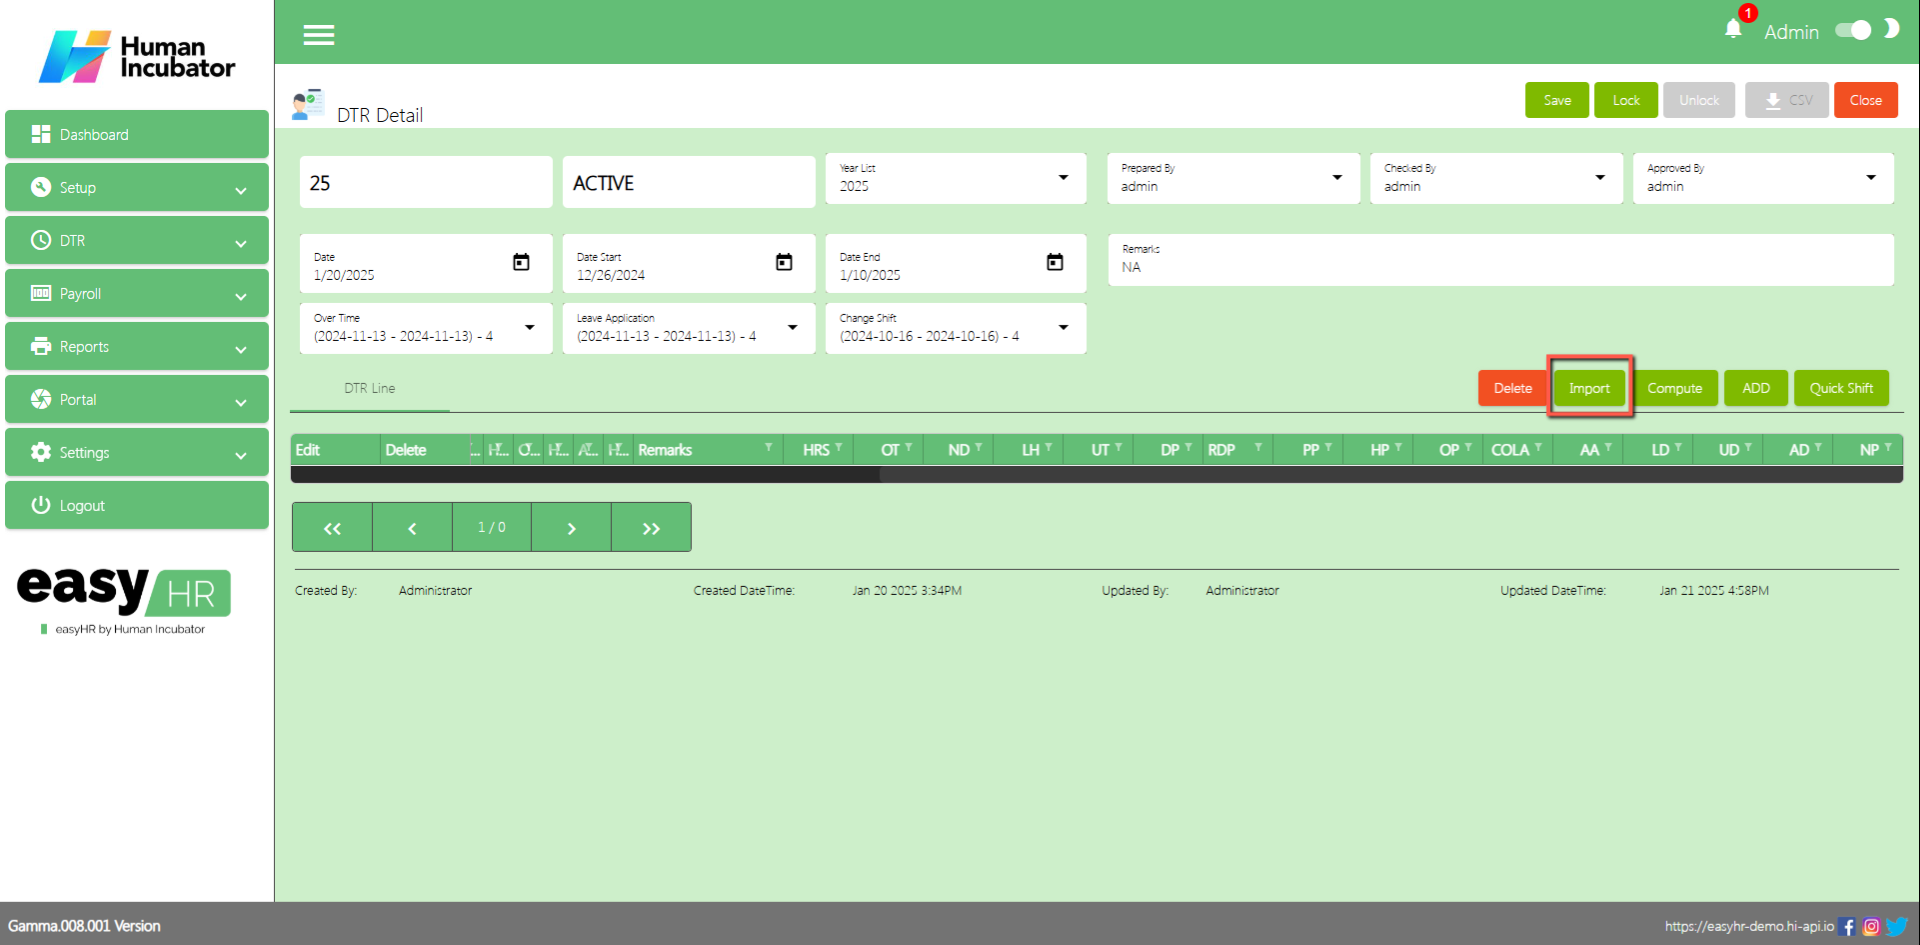
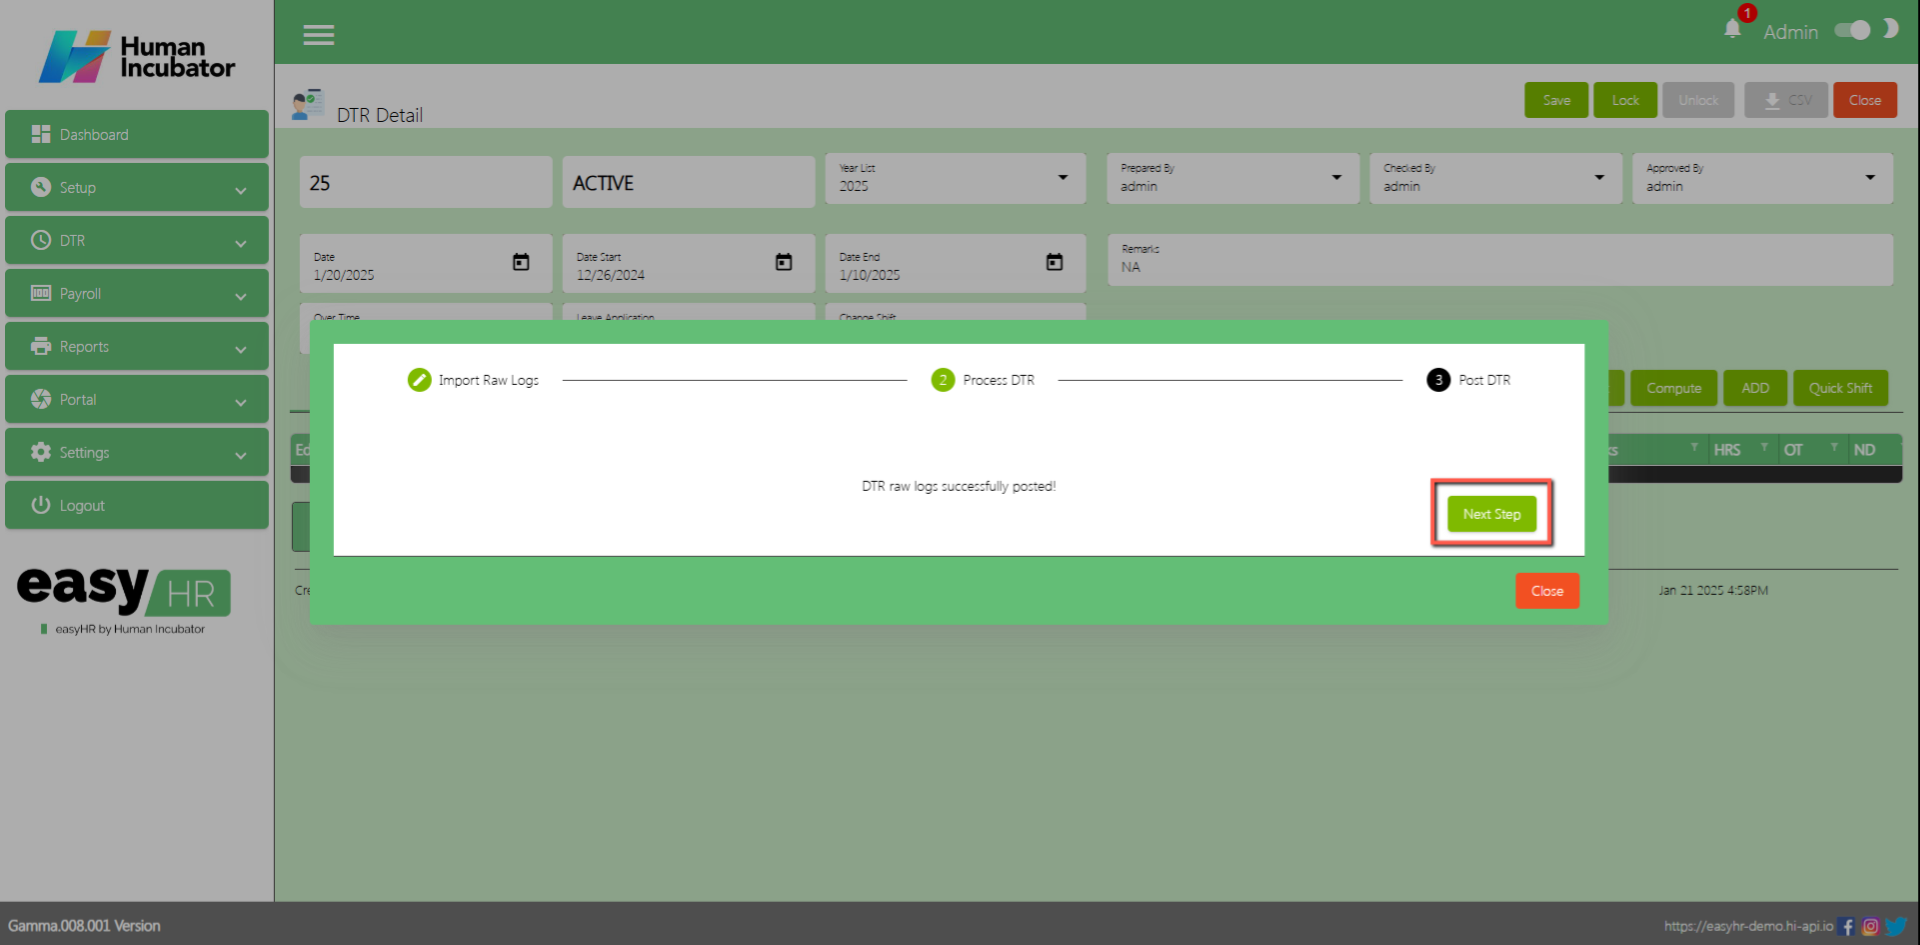
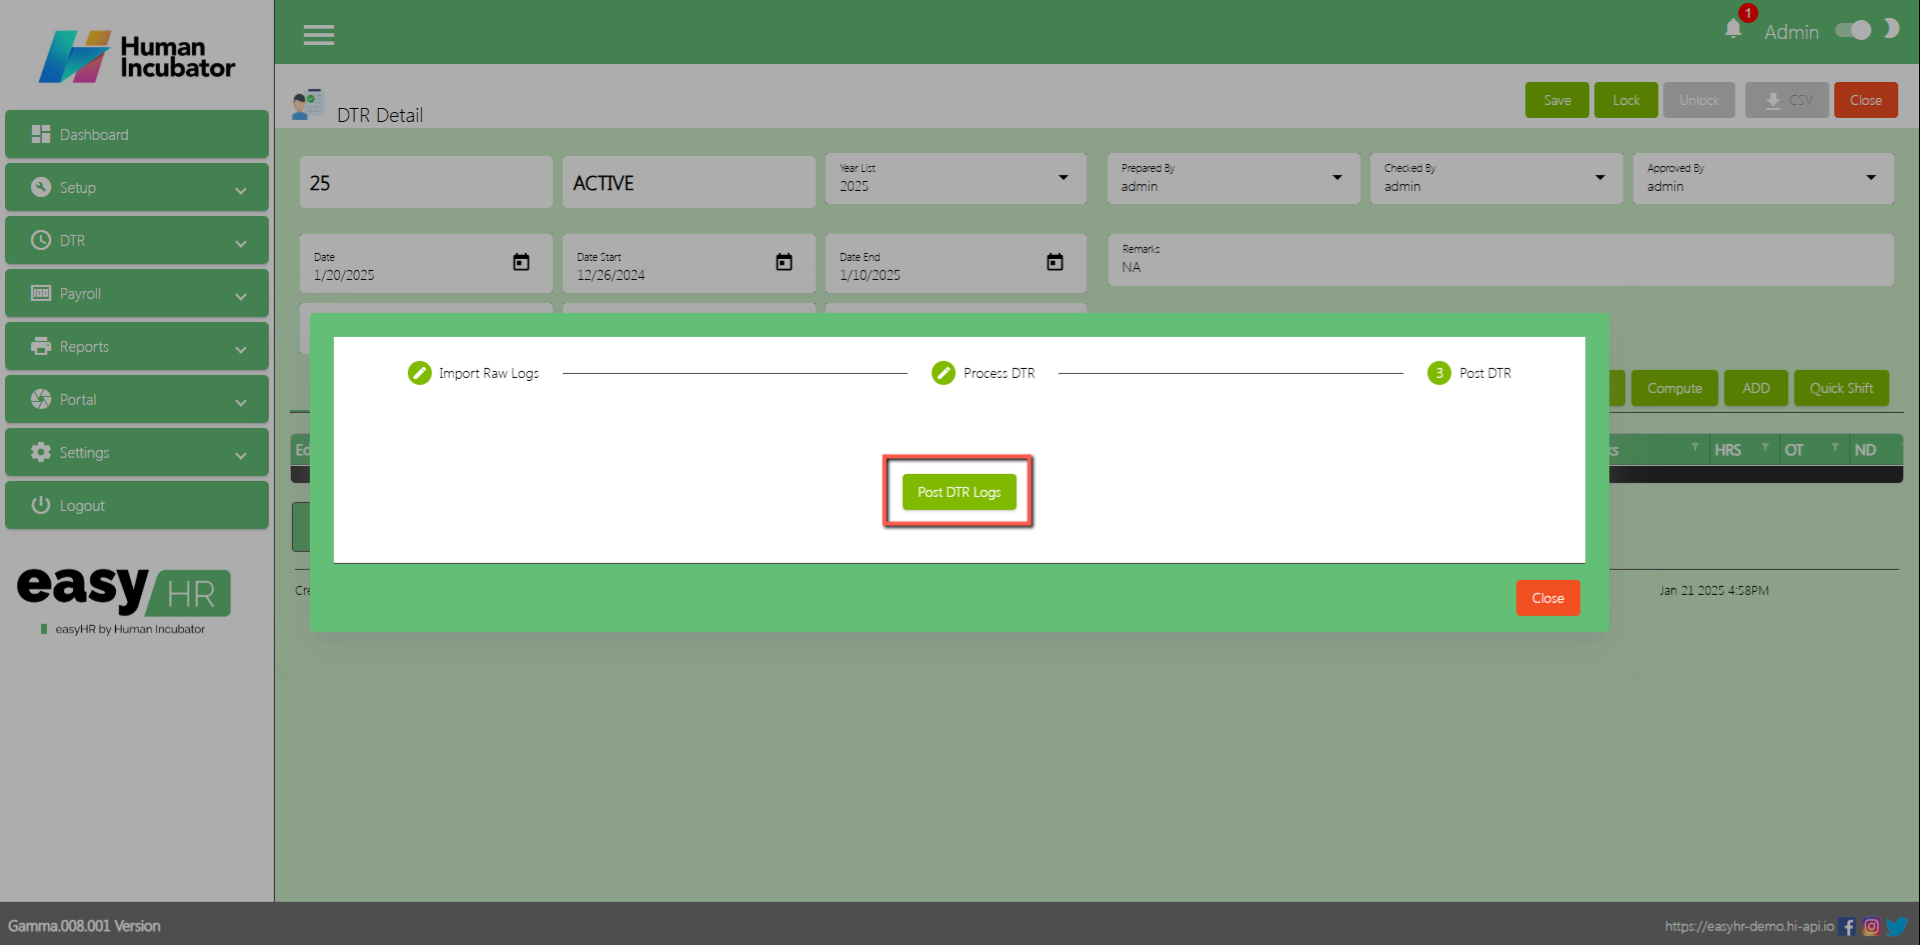
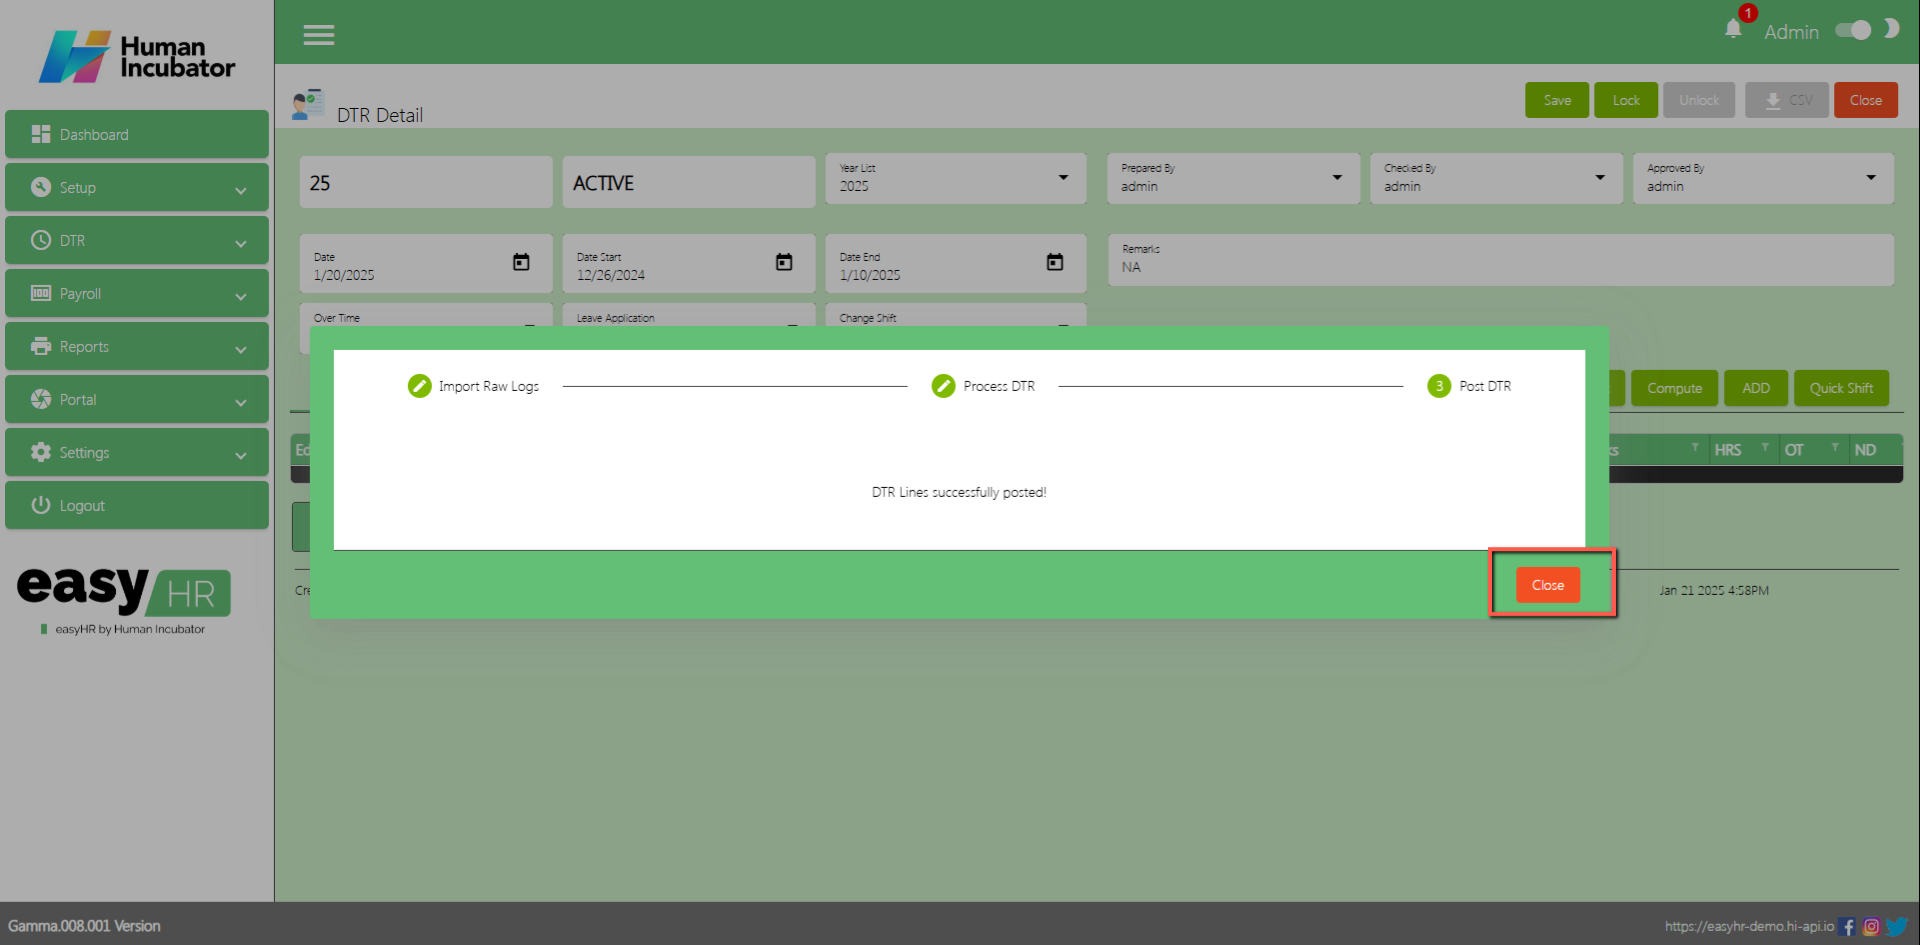
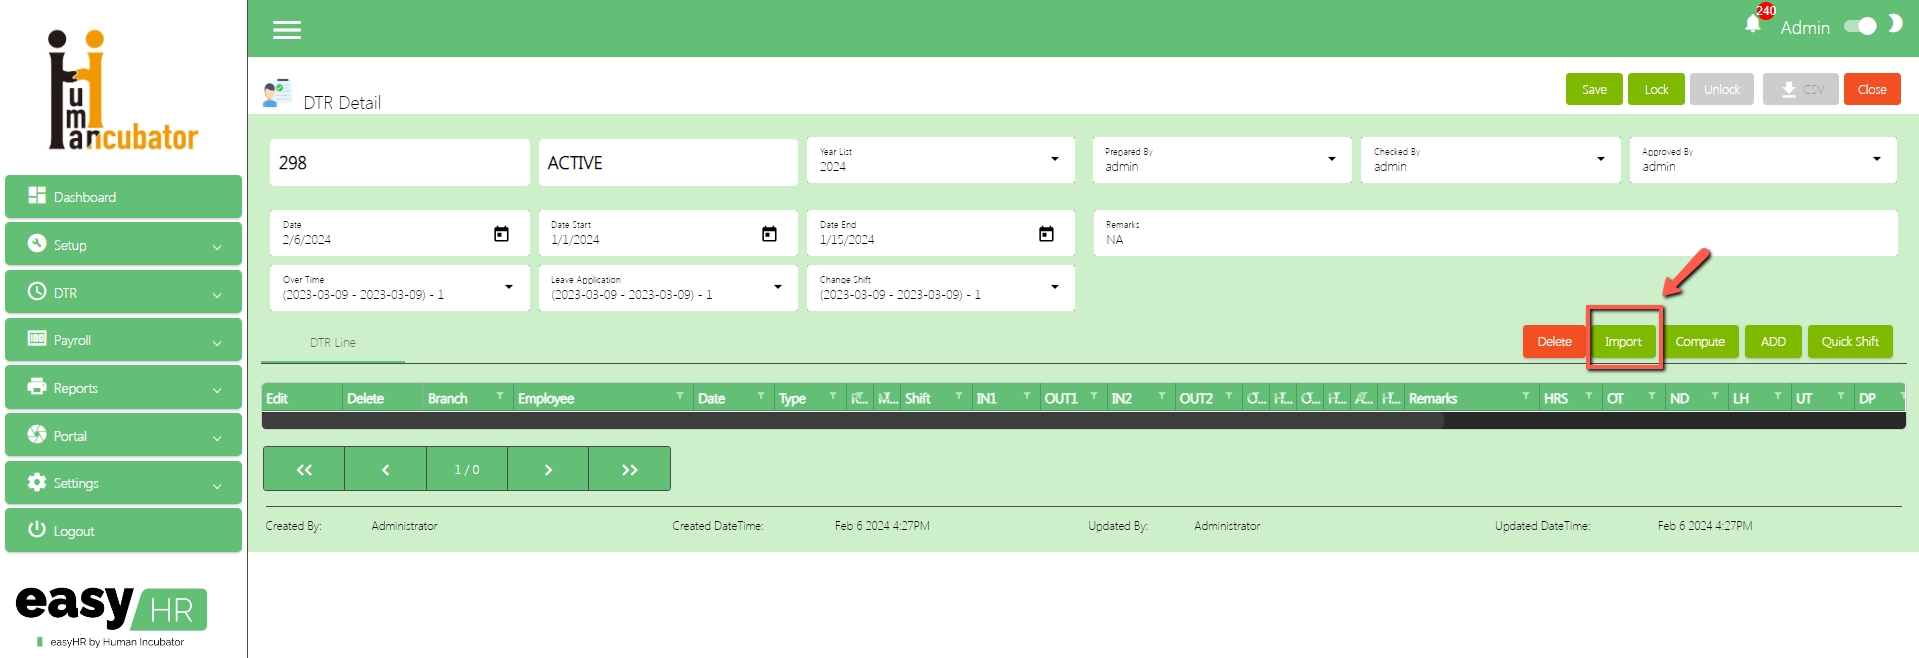
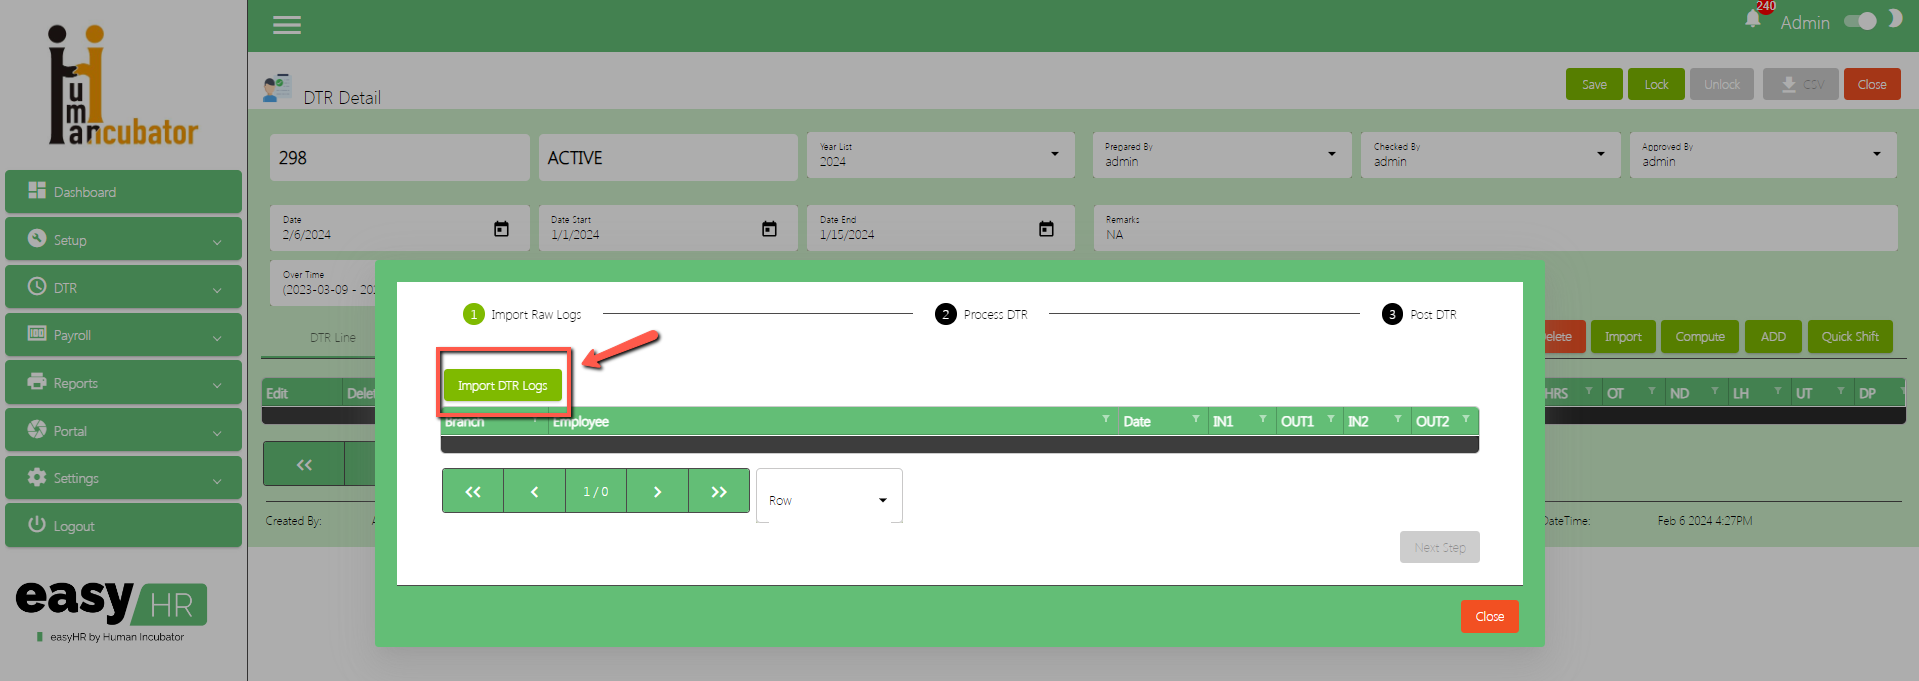
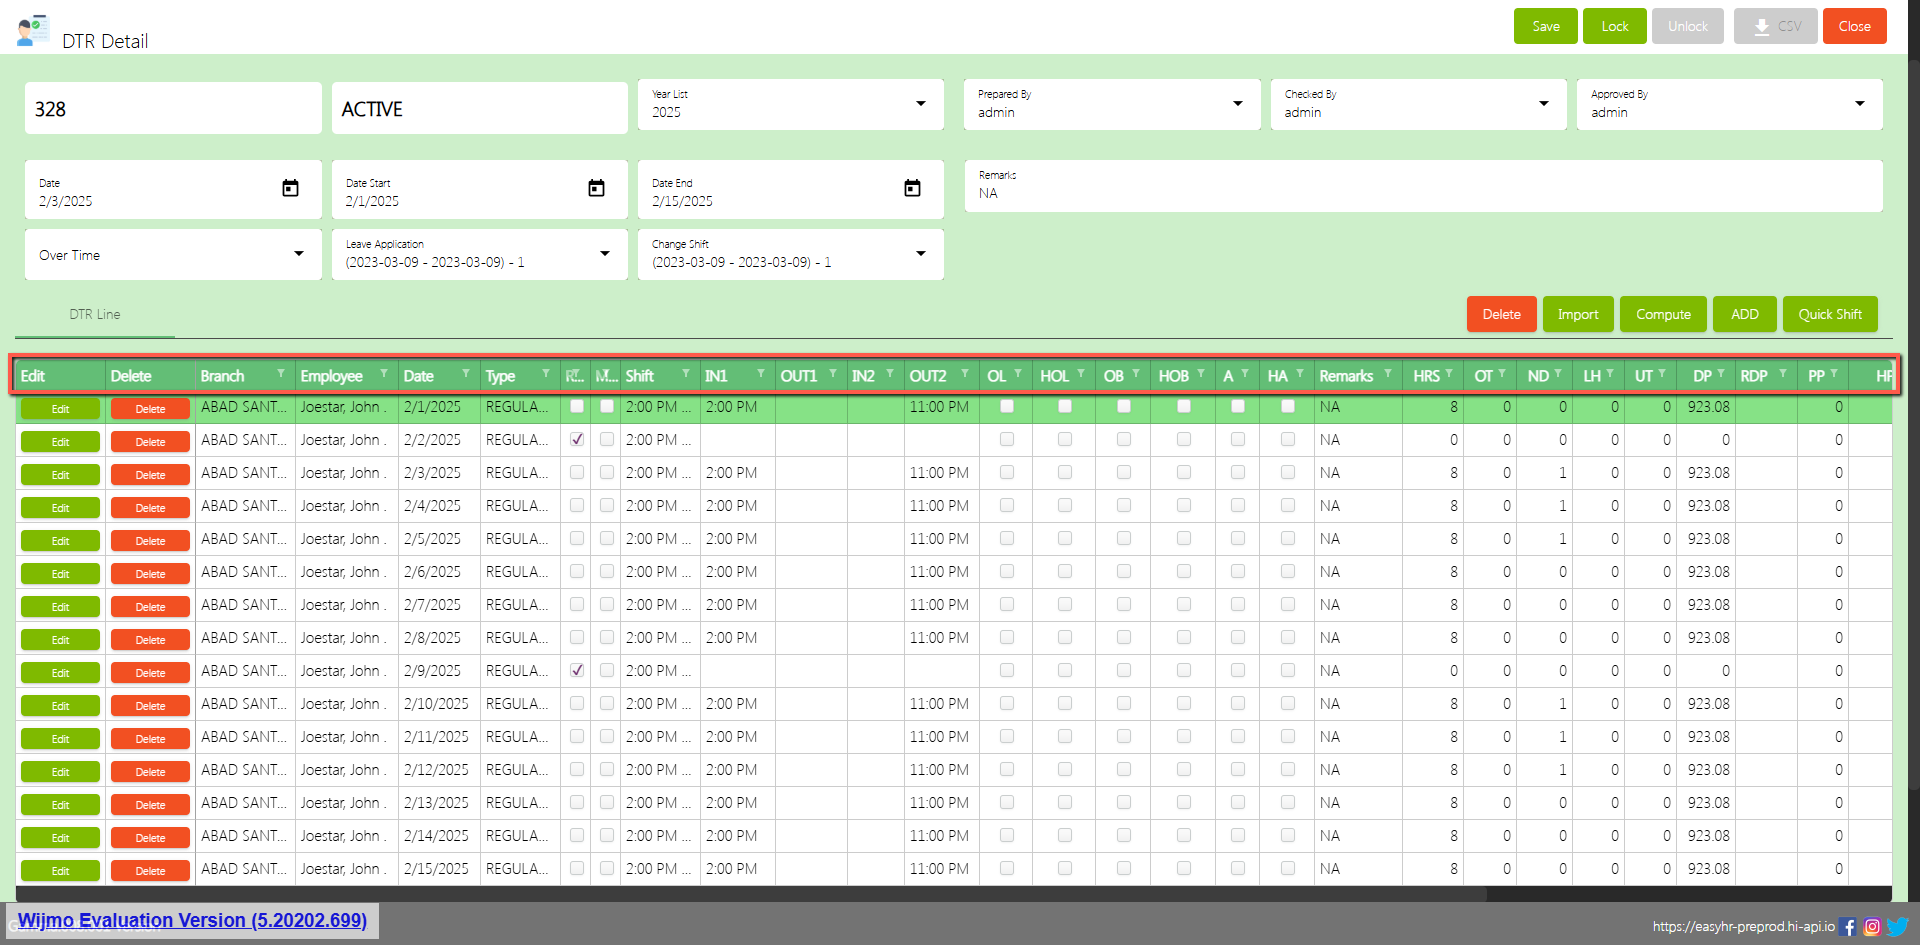
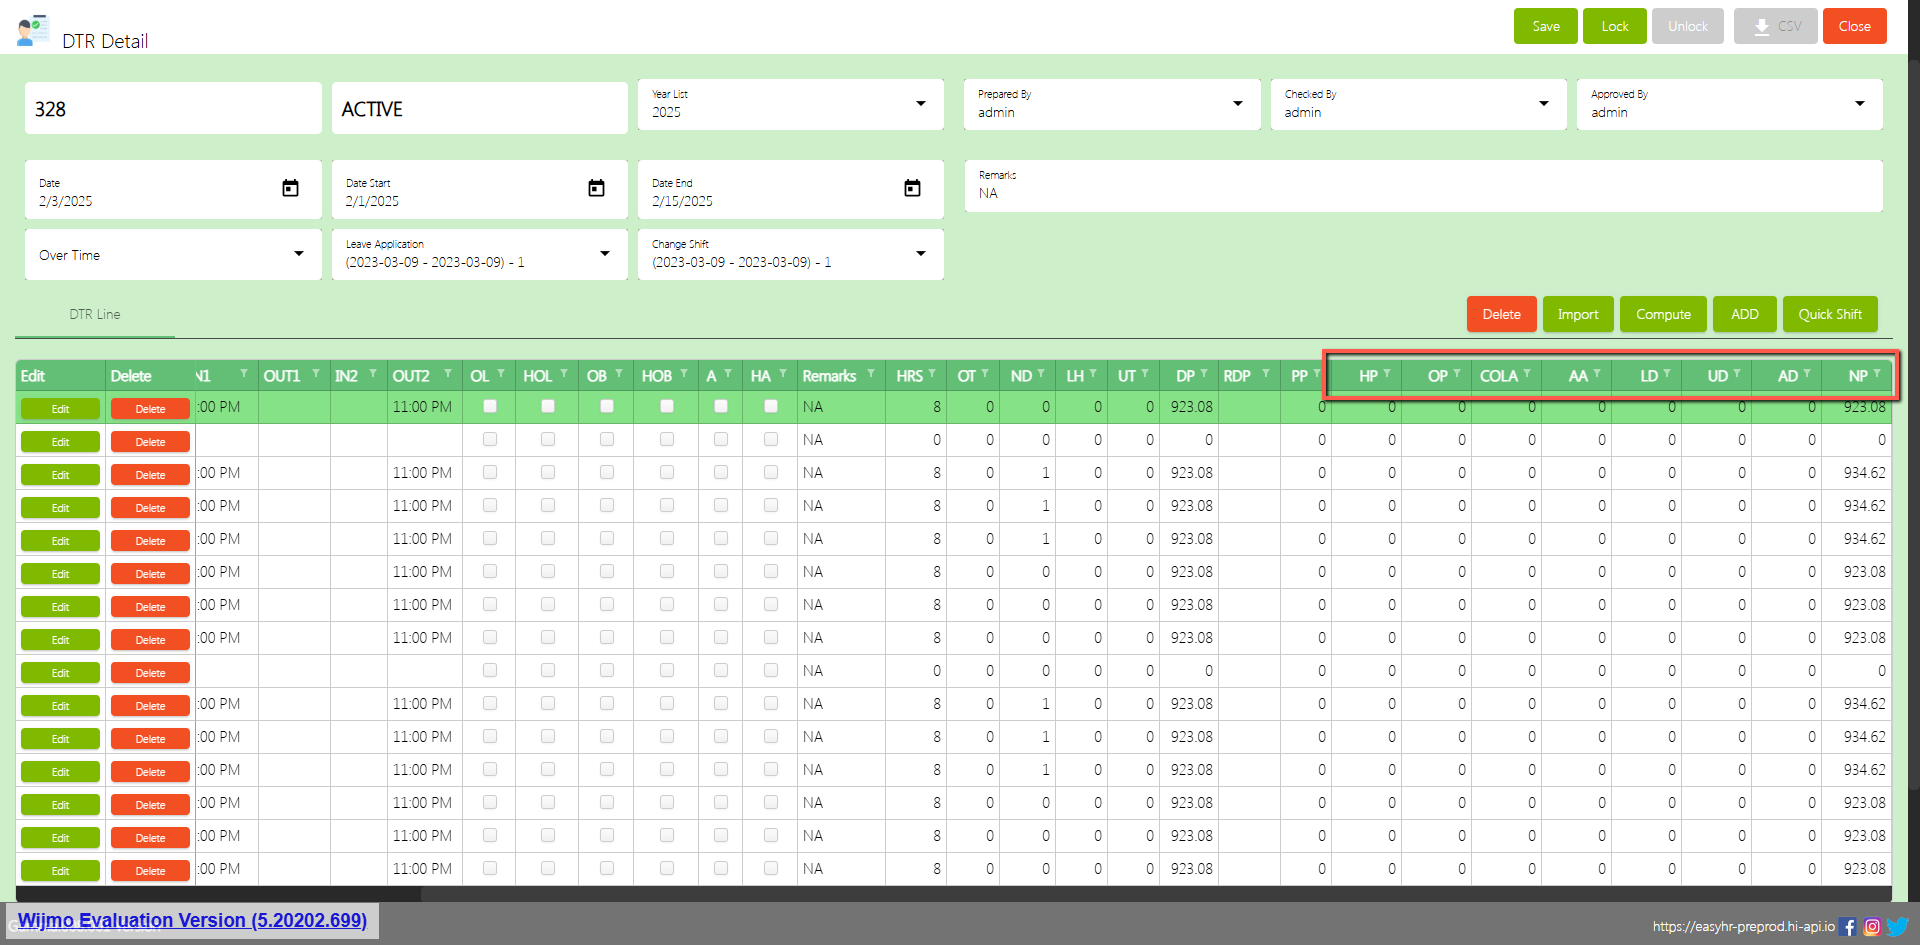
Import DTR
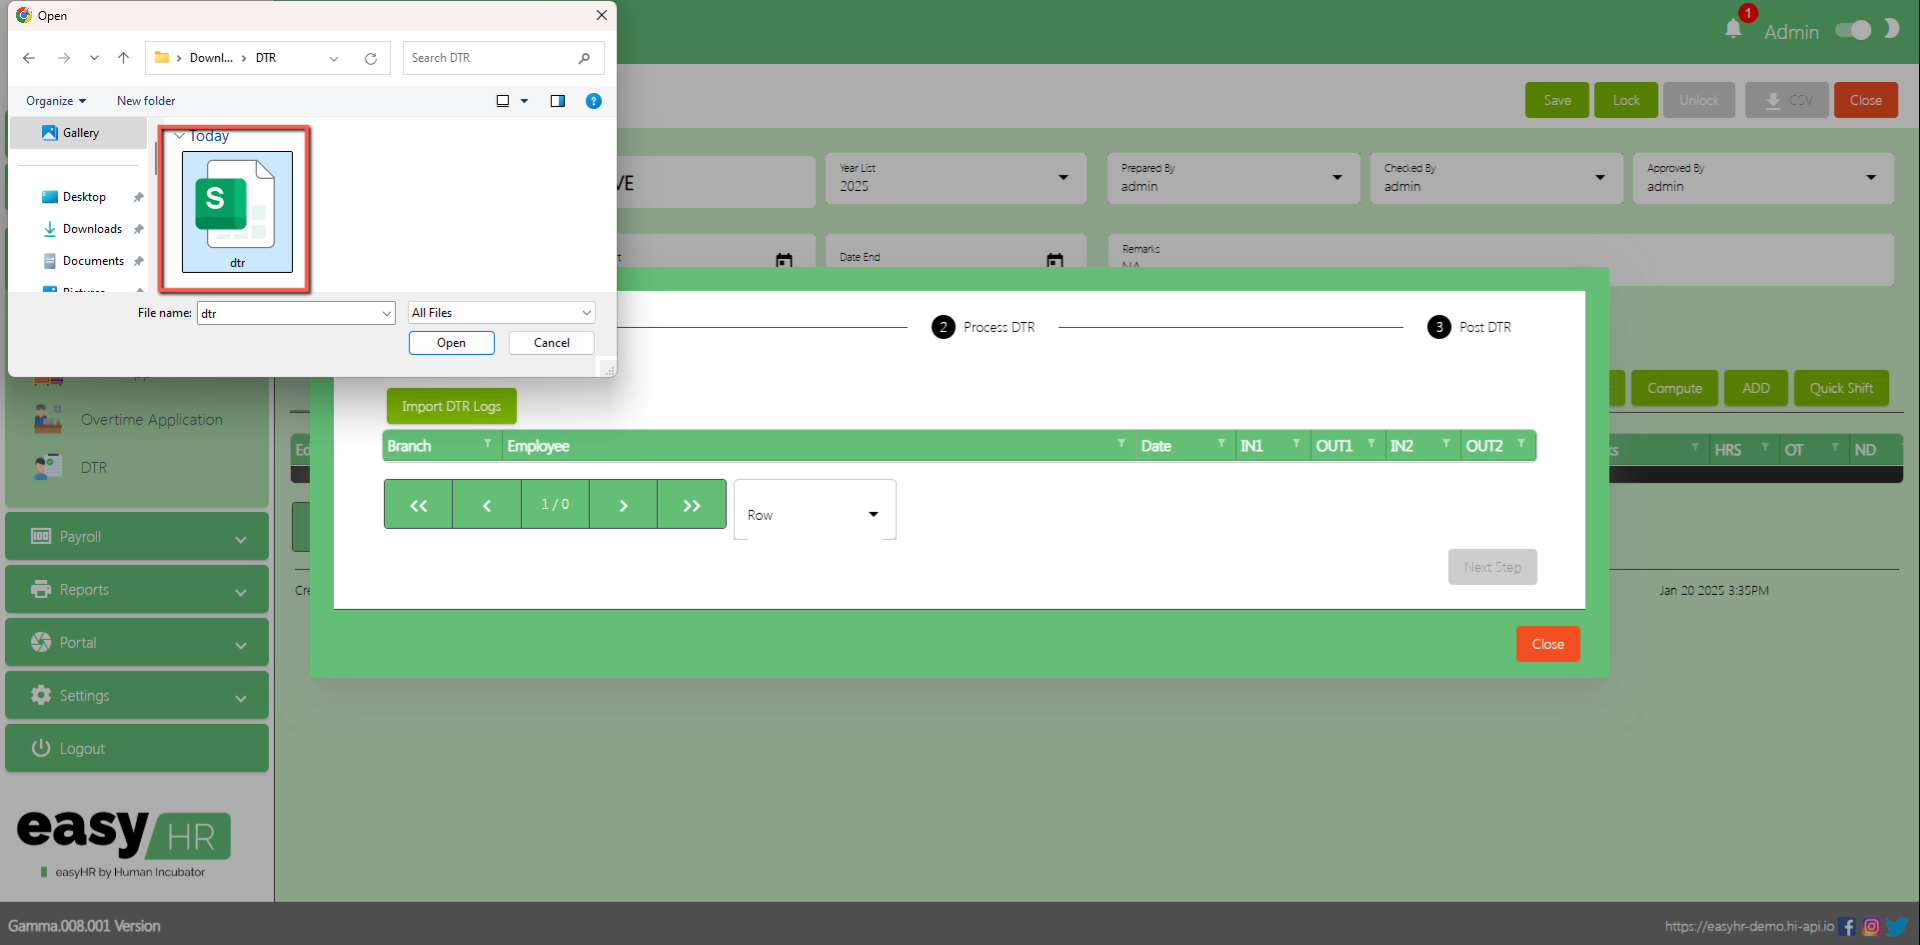
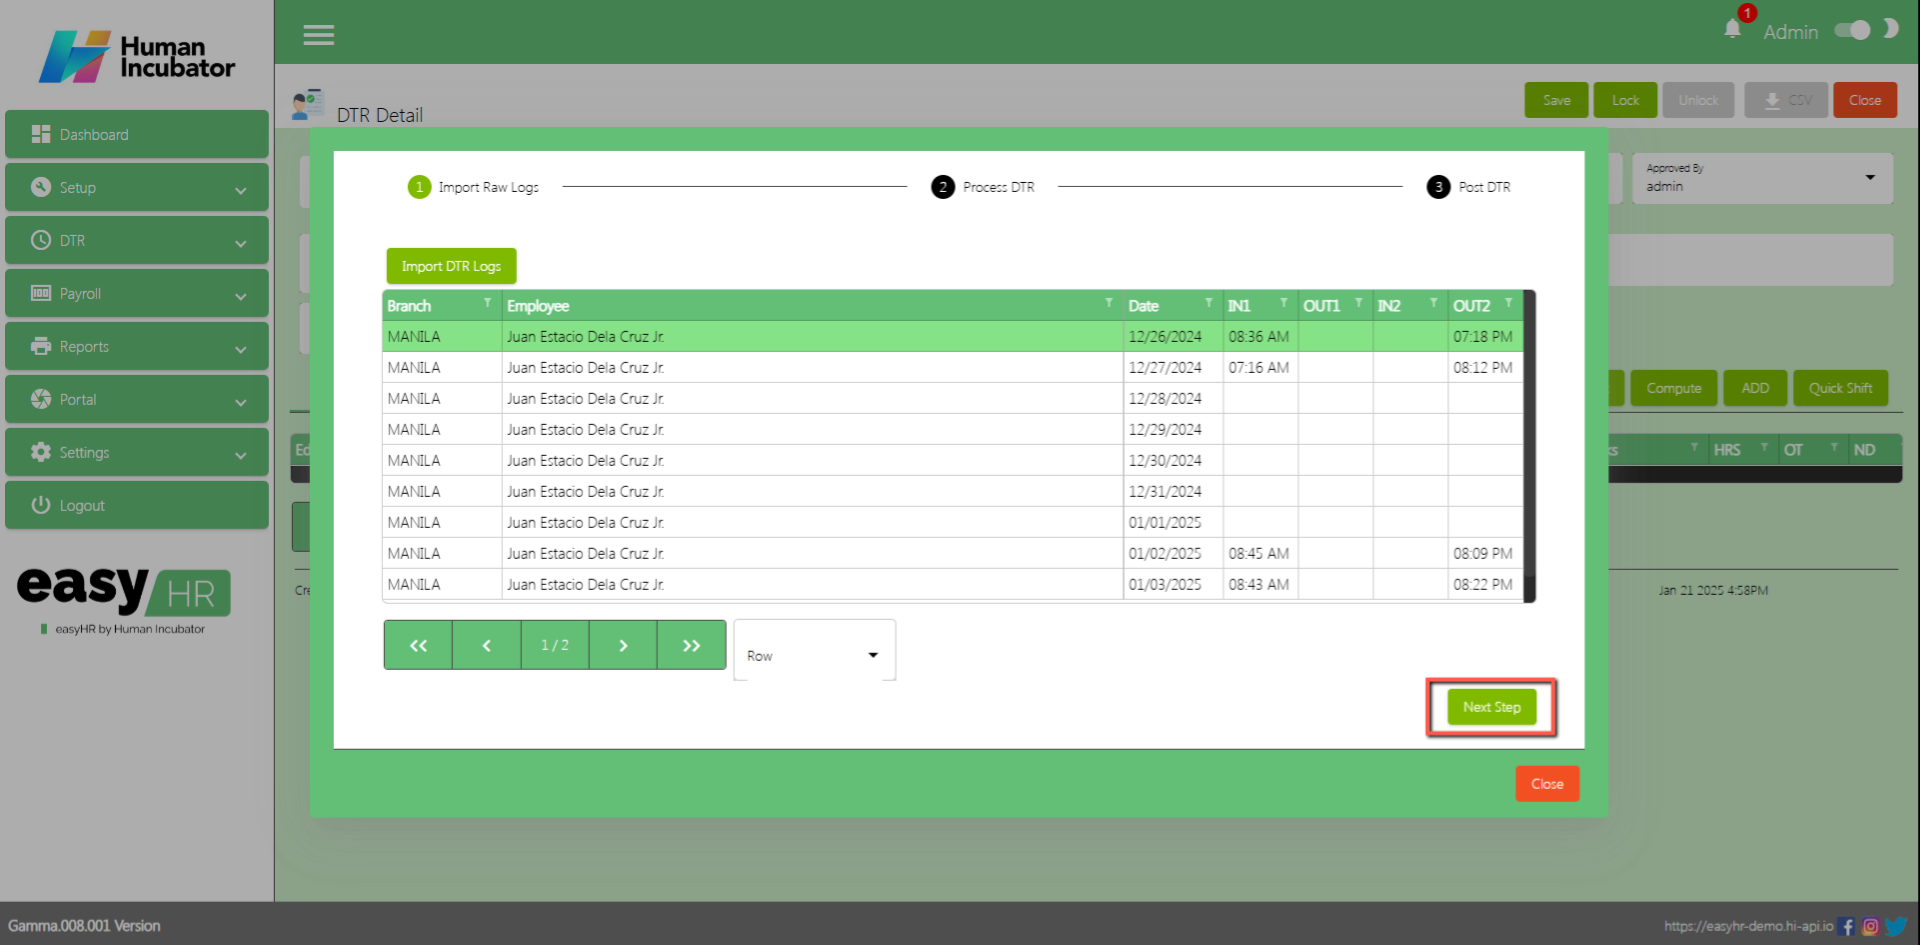
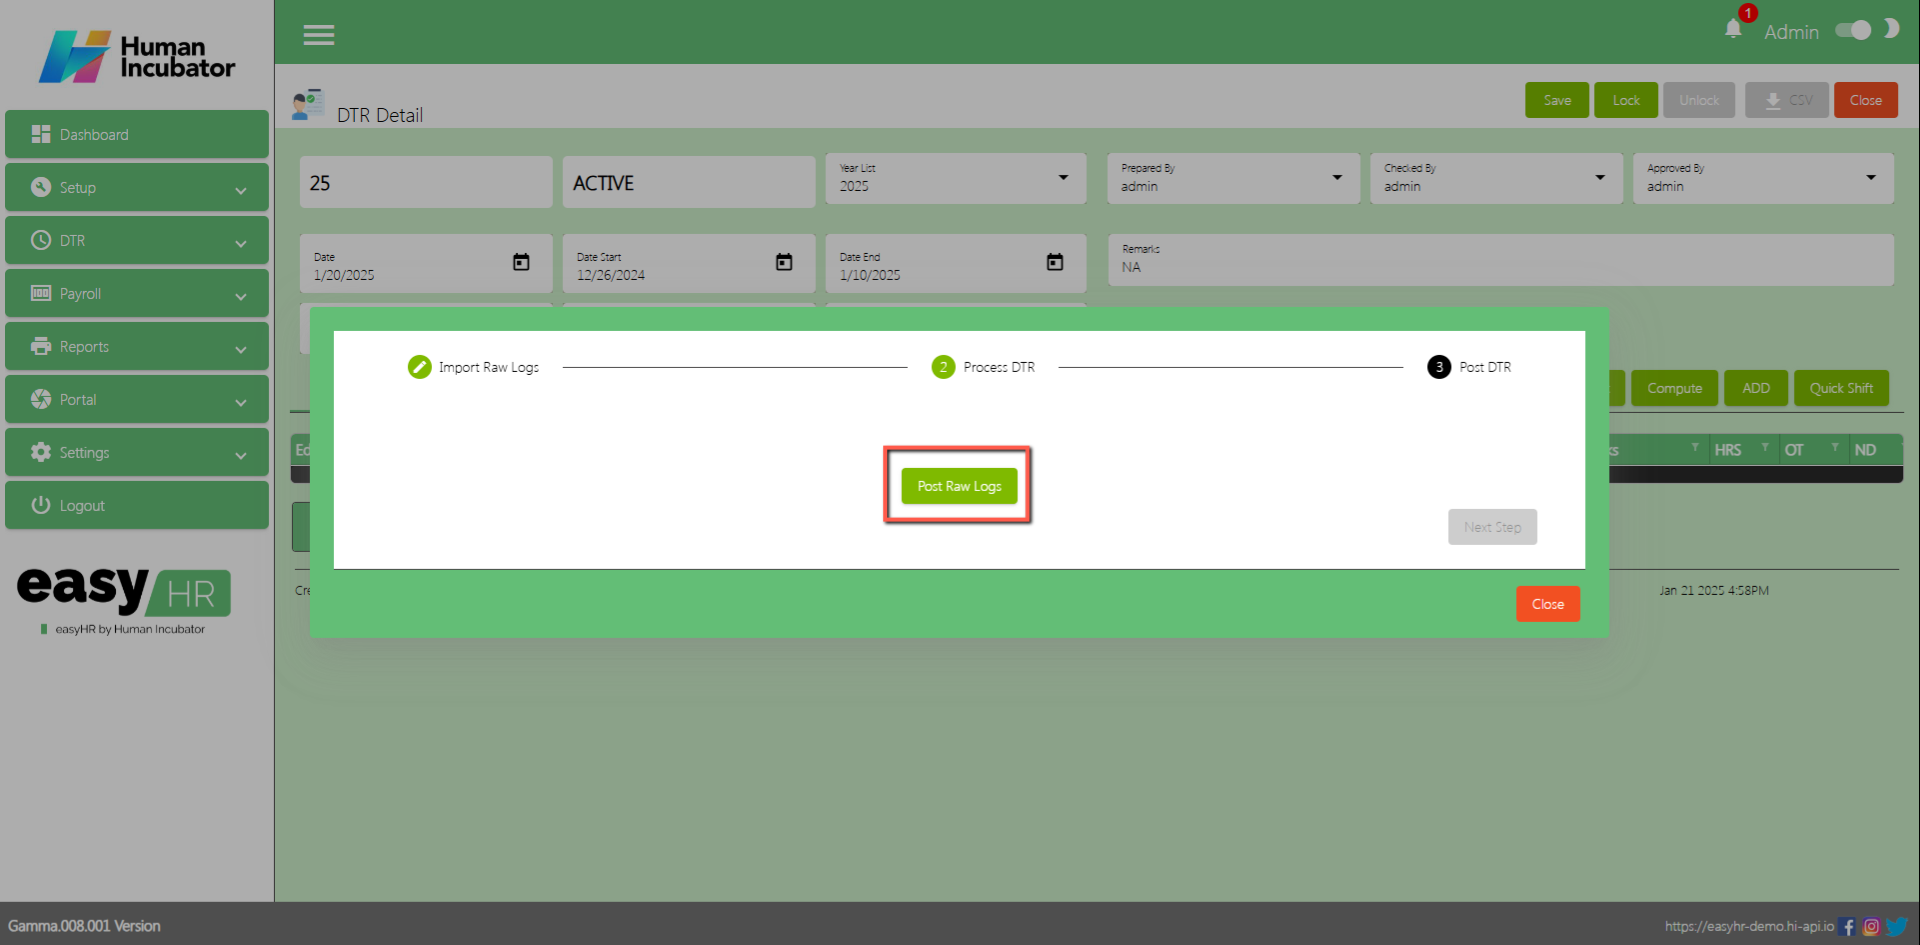
Click Import button to import DTR logs for employee
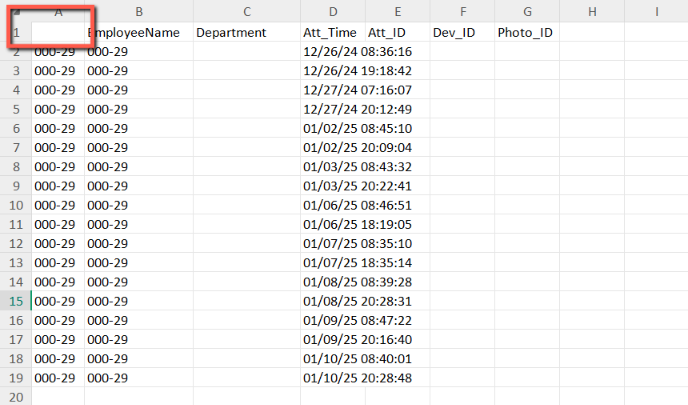
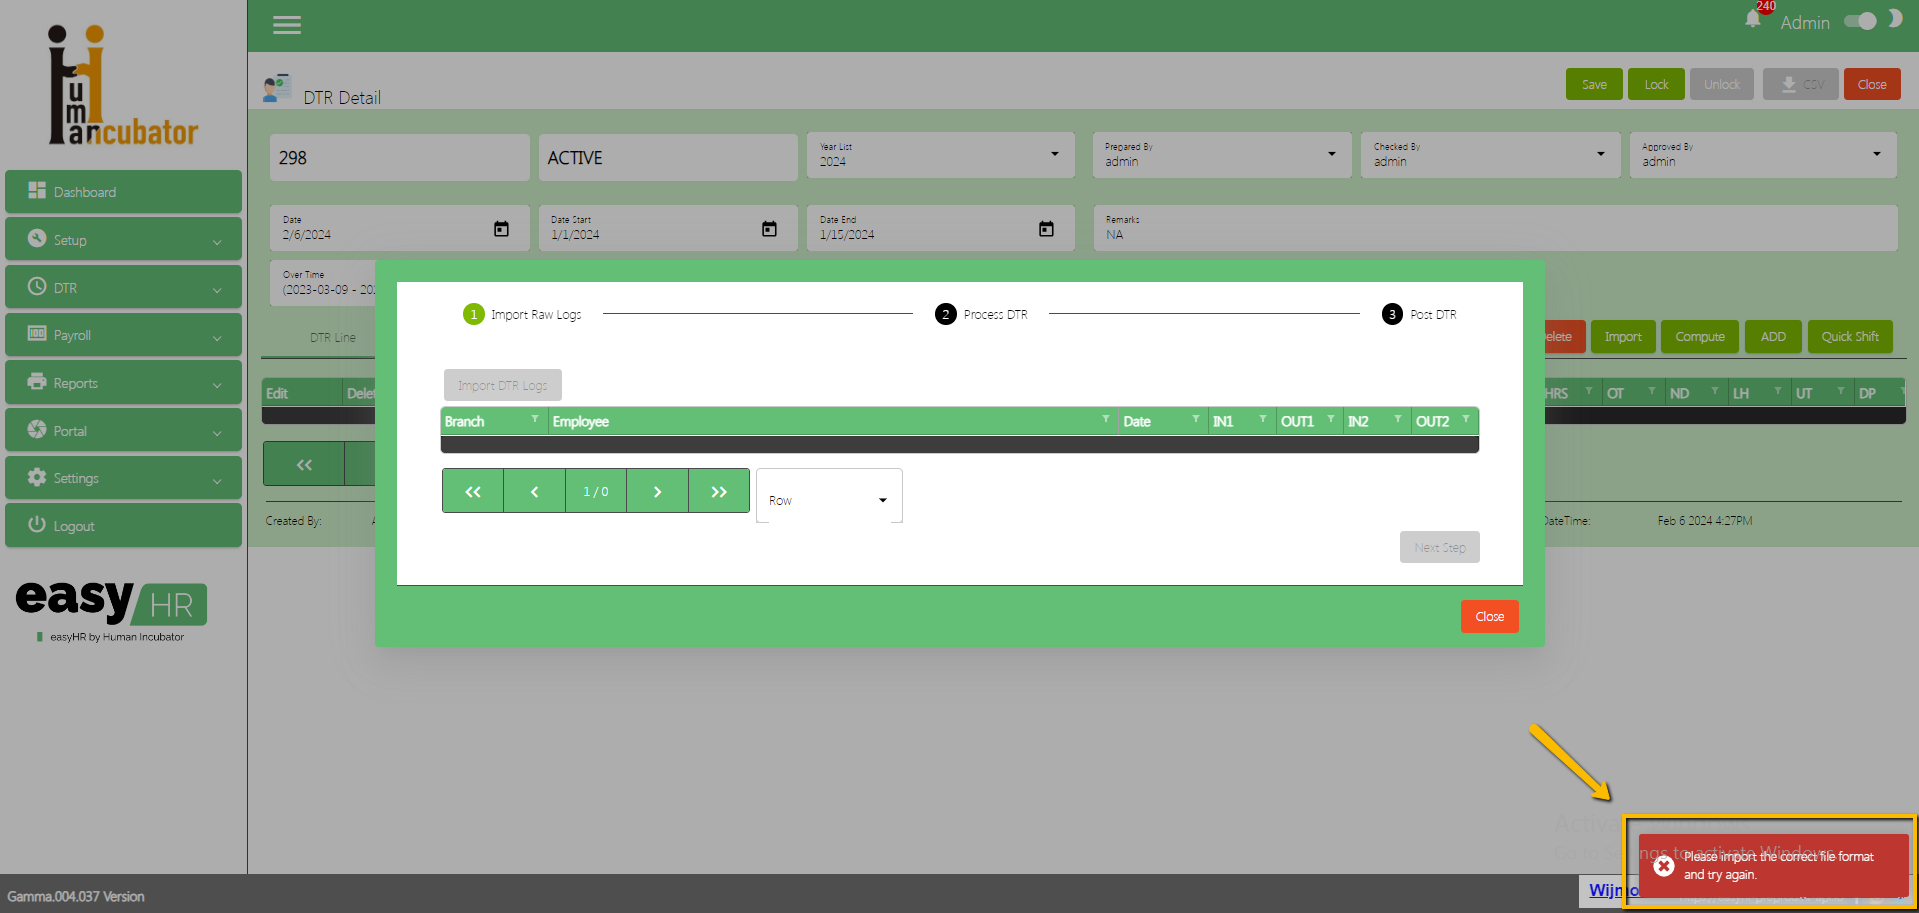
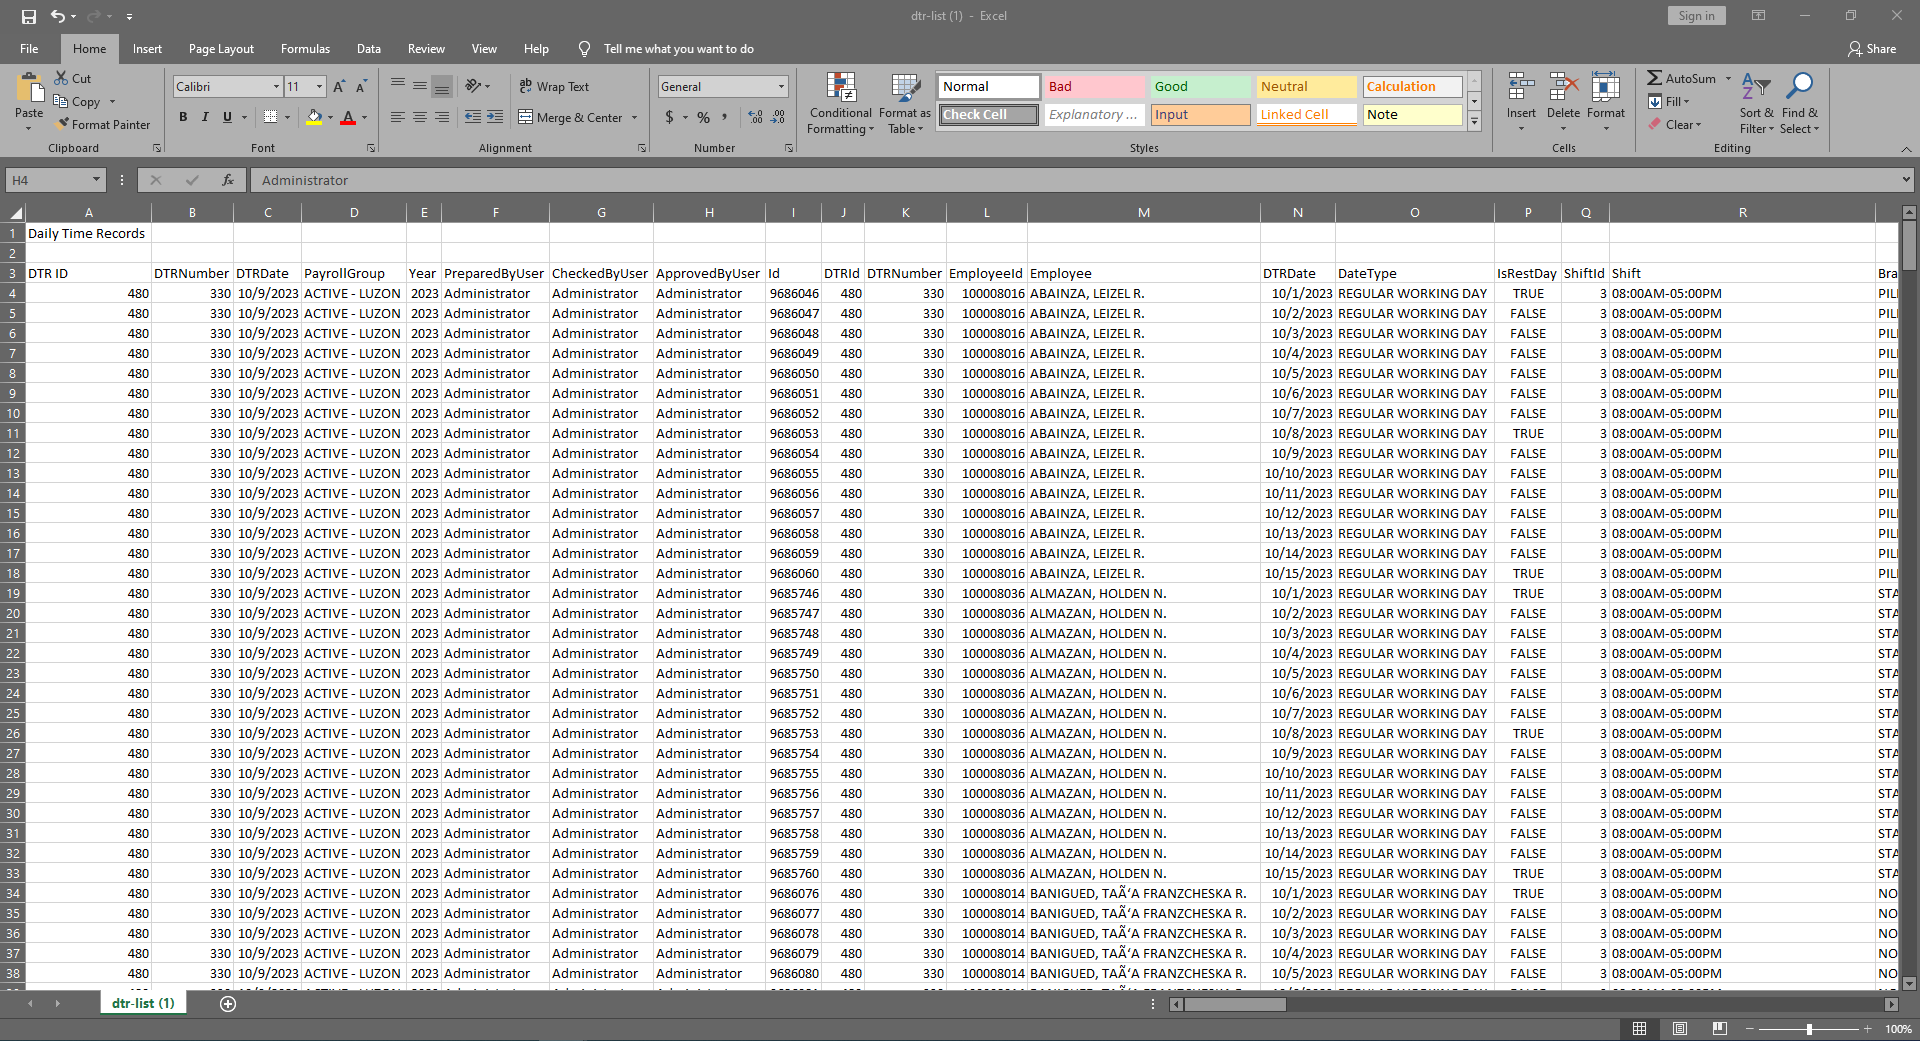
DTR Excel file format (Note: The DTR excel file will be given during configuration phase, It is the setting up of masterfiles)
Struggling to accept online payments? Discover how HII Online Payment Service solves your credit card merchant dilemma. HII Online Payment Service. Coming soon!
Struggling to accept online payments? Discover how HII Online Payment Service solves your credit card merchant dilemma. HII Online Payment Service. Coming soon!
Take advantage of Free easyFS Usage for Accounting Firms in the Philippines. Contact Us at +639176280355 or email at hiisales@humedit.ph
Take advantage of Free easyFS Usage for Accounting Firms in the Philippines. Contact Us at +639176280355 or email at hiisales@humedit.ph
Struggling to accept online payments? Discover how HII Online Payment Service solves your credit card merchant dilemma. HII Online Payment Service. Coming soon!
Struggling to accept online payments? Discover how HII Online Payment Service solves your credit card merchant dilemma. HII Online Payment Service. Coming soon!
Take advantage of Free easyFS Usage for Accounting Firms in the Philippines. Contact Us at +639176280355 or email at hiisales@humedit.ph
Take advantage of Free easyFS Usage for Accounting Firms in the Philippines. Contact Us at +639176280355 or email at hiisales@humedit.ph
Struggling to accept online payments? Discover how HII Online Payment Service solves your credit card merchant dilemma. HII Online Payment Service. Coming soon!
Struggling to accept online payments? Discover how HII Online Payment Service solves your credit card merchant dilemma. HII Online Payment Service. Coming soon!
Take advantage of Free easyFS Usage for Accounting Firms in the Philippines. Contact Us at +639176280355 or email at hiisales@humedit.ph
Take advantage of Free easyFS Usage for Accounting Firms in the Philippines. Contact Us at +639176280355 or email at hiisales@humedit.ph
Struggling to accept online payments? Discover how HII Online Payment Service solves your credit card merchant dilemma. HII Online Payment Service. Coming soon!
Struggling to accept online payments? Discover how HII Online Payment Service solves your credit card merchant dilemma. HII Online Payment Service. Coming soon!
Take advantage of Free easyFS Usage for Accounting Firms in the Philippines. Contact Us at +639176280355 or email at hiisales@humedit.ph
Take advantage of Free easyFS Usage for Accounting Firms in the Philippines. Contact Us at +639176280355 or email at hiisales@humedit.ph
Struggling to accept online payments? Discover how HII Online Payment Service solves your credit card merchant dilemma. HII Online Payment Service. Coming soon!
Struggling to accept online payments? Discover how HII Online Payment Service solves your credit card merchant dilemma. HII Online Payment Service. Coming soon!
Take advantage of Free easyFS Usage for Accounting Firms in the Philippines. Contact Us at +639176280355 or email at hiisales@humedit.ph
Take advantage of Free easyFS Usage for Accounting Firms in the Philippines. Contact Us at +639176280355 or email at hiisales@humedit.ph
Struggling to accept online payments? Discover how HII Online Payment Service solves your credit card merchant dilemma. HII Online Payment Service. Coming soon!
Struggling to accept online payments? Discover how HII Online Payment Service solves your credit card merchant dilemma. HII Online Payment Service. Coming soon!
Take advantage of Free easyFS Usage for Accounting Firms in the Philippines. Contact Us at +639176280355 or email at hiisales@humedit.ph
Take advantage of Free easyFS Usage for Accounting Firms in the Philippines. Contact Us at +639176280355 or email at hiisales@humedit.ph
Struggling to accept online payments? Discover how HII Online Payment Service solves your credit card merchant dilemma. HII Online Payment Service. Coming soon!
Struggling to accept online payments? Discover how HII Online Payment Service solves your credit card merchant dilemma. HII Online Payment Service. Coming soon!
Take advantage of Free easyFS Usage for Accounting Firms in the Philippines. Contact Us at +639176280355 or email at hiisales@humedit.ph
Take advantage of Free easyFS Usage for Accounting Firms in the Philippines. Contact Us at +639176280355 or email at hiisales@humedit.ph
Struggling to accept online payments? Discover how HII Online Payment Service solves your credit card merchant dilemma. HII Online Payment Service. Coming soon!
Struggling to accept online payments? Discover how HII Online Payment Service solves your credit card merchant dilemma. HII Online Payment Service. Coming soon!

 Log in to Messenger