1.3 Purpose of this User Manual
1.4 Who Should Use This Manual
1.4 Best Practices and System Limitations
1.4.1 Setting up the Master Files
4.1.1.1 How to Add an Item Manually
4.1.1.2 Add Item Via Import Function
4.1.2.2 Add Customer Via Import Function
4.1.3.2 Add Supplier Via Import Function
List of All Users that were added to the System
4.1.6.1 Chart of Accounts Lists
4.1.6.2 Manual Add Chart of Accounts
4.1.6.2 Add Chart of Accounts via Upload Account
4.1.8.2 Manual Add of Currency
4.2.1.1 Manual Update Item Detail
4.2.1.2 Update Item Detail in Bulk
4.2.2.1 Manual Update Supplier Detail
4.2.2.1 Update Supplier Detail in Bulk
4.2.3.1 Manual Update Customer Detail
4.2.3.1 Update Customer Detail in Bulk
5.2 Purchases Transaction Module
Cancel Purchase Request Transaction
Purchase Order Transaction via Upload Template
Cancel Purchase Order Transaction
Cancel Receiving Receipt Transaction
Cancel Disbursement Transaction
Debit Memo Transaction via Upload Template
Sales Order Transaction via Upload Template
Cancel Sales Order Transaction
Sales Invoice Transaction via Upload Template
Cancel Sales Invoice Transaction
Collection Transaction via Upload Template
Scenario 3: Extra-Ordinary Activities
Scenario 4: Multi-Branch with EasyPOS Integration
Accounts Payable Voucher Report
Accounts Payable By Currency Report
Purchase Request Summary Report
Purchase Request Detail Report
Purchase Order Detail With Balance Report
Receiving Receipt Summary Report
Receiving Receipt Detail Report
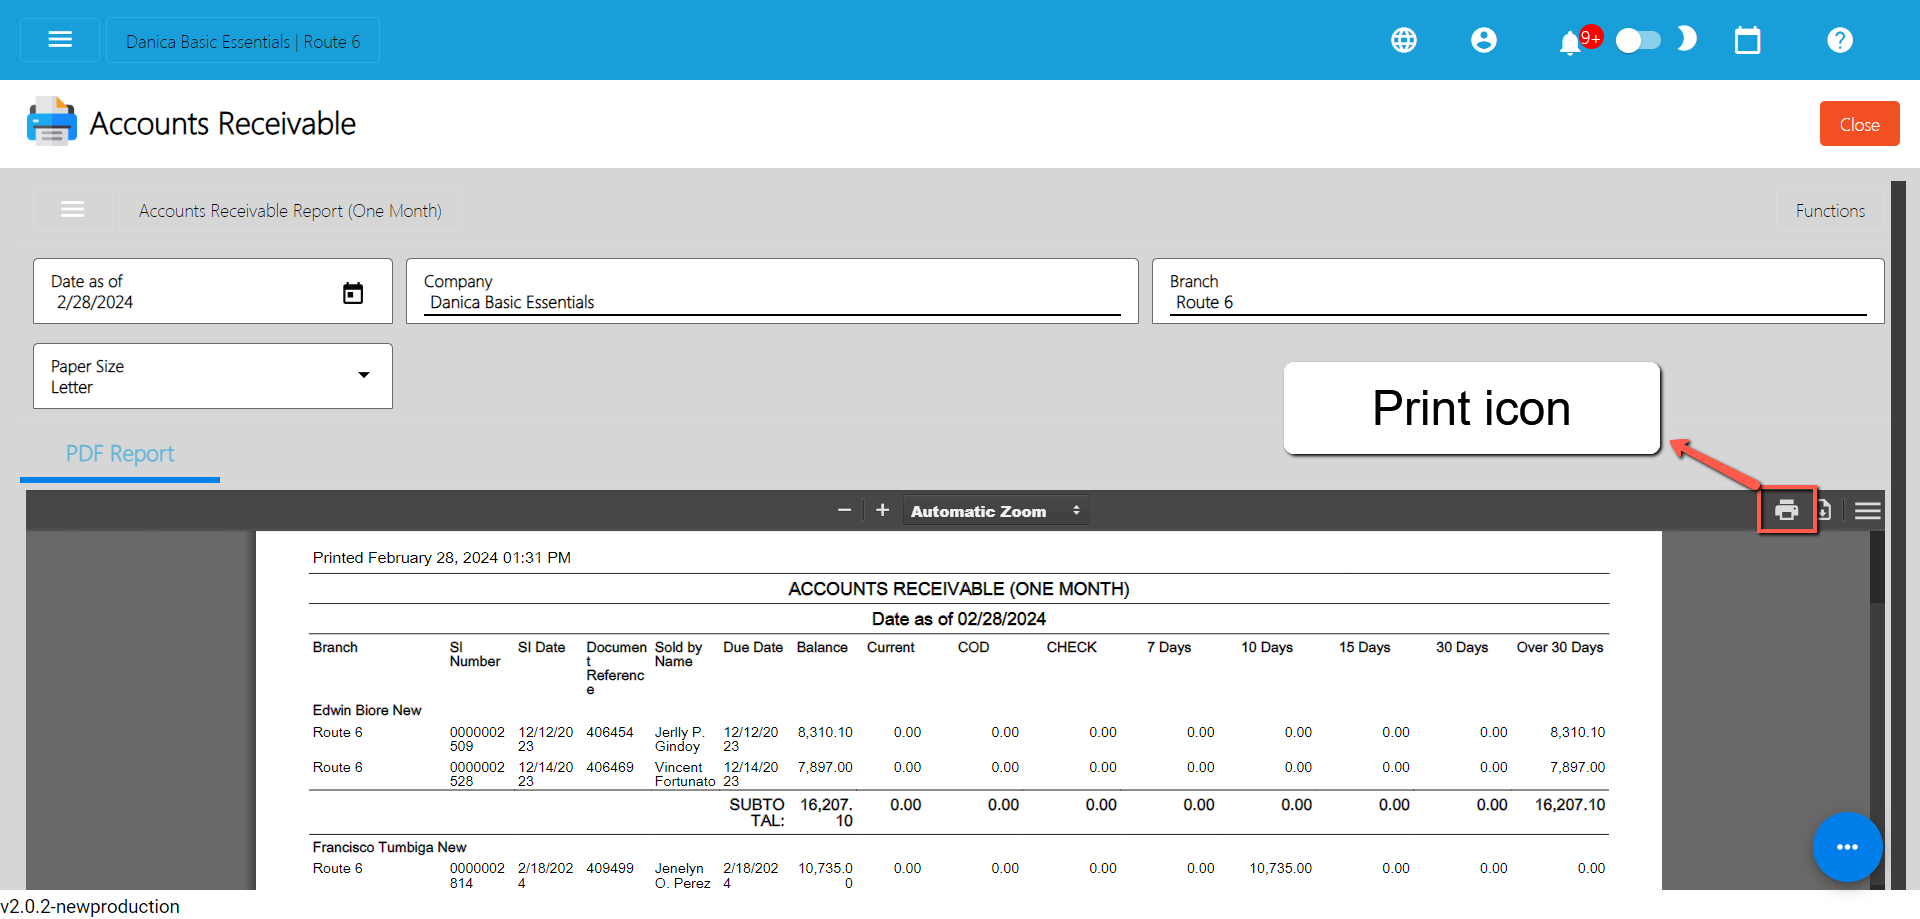
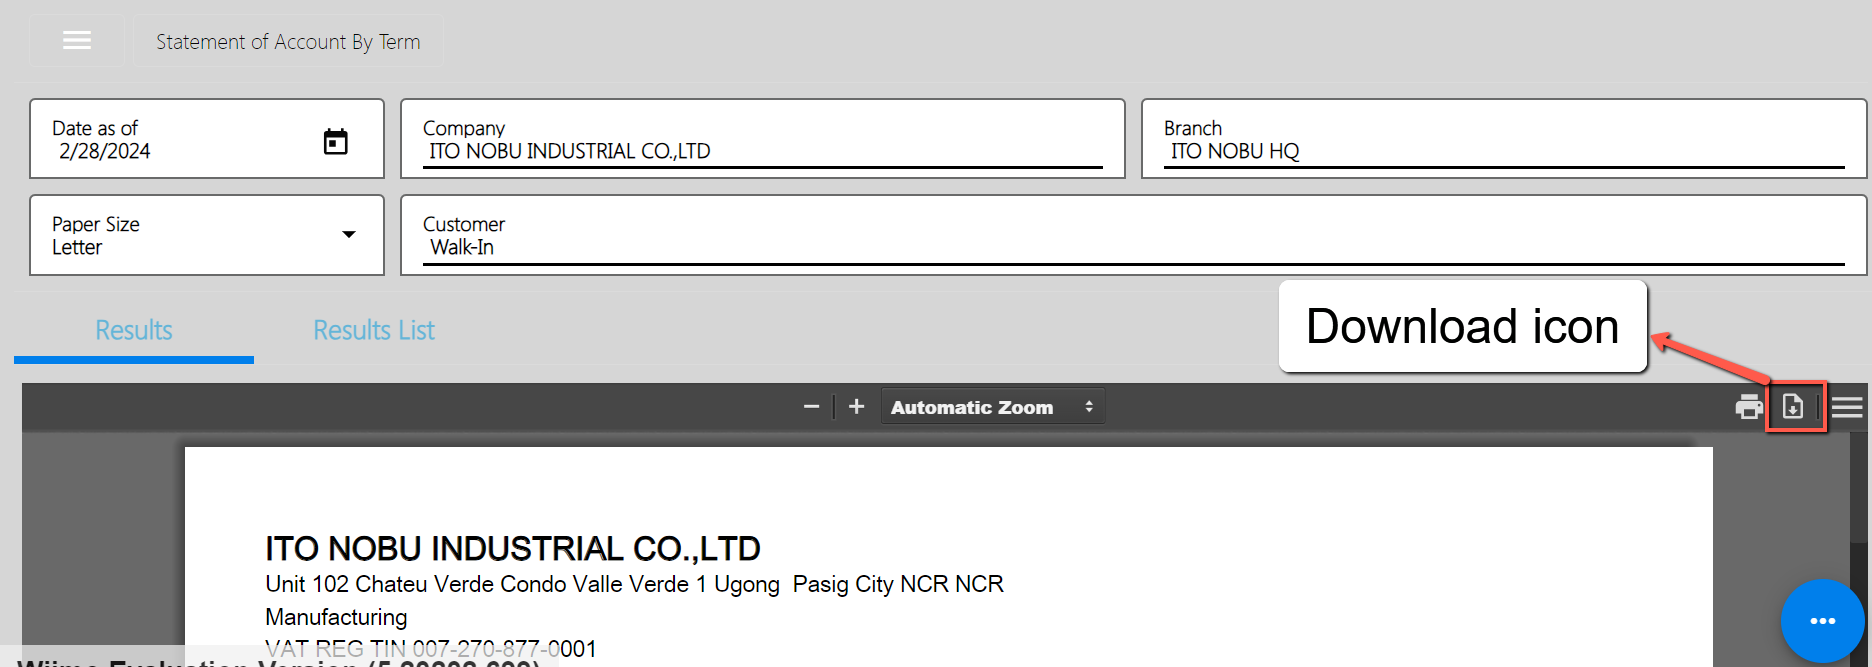
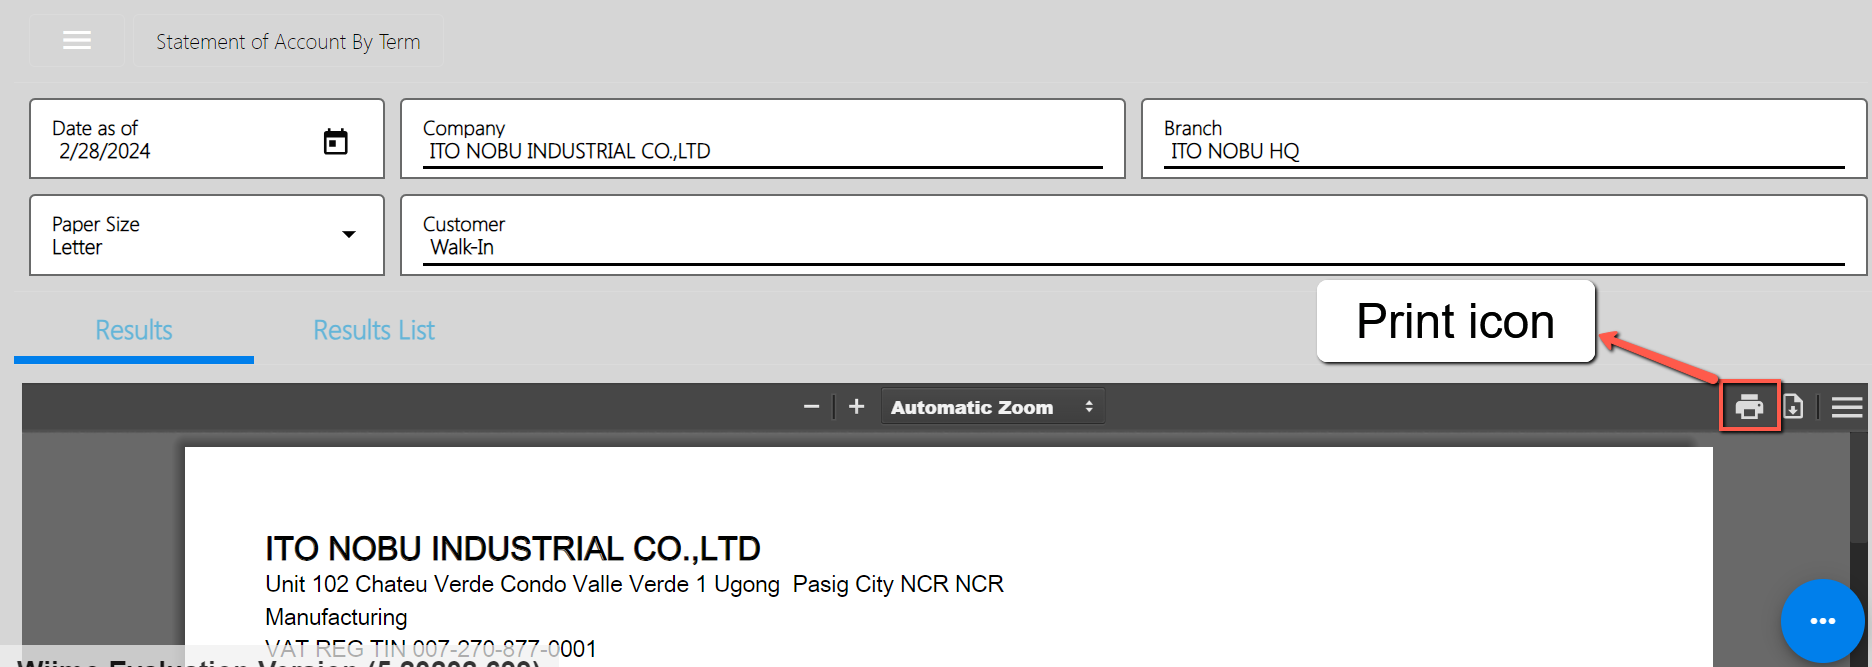
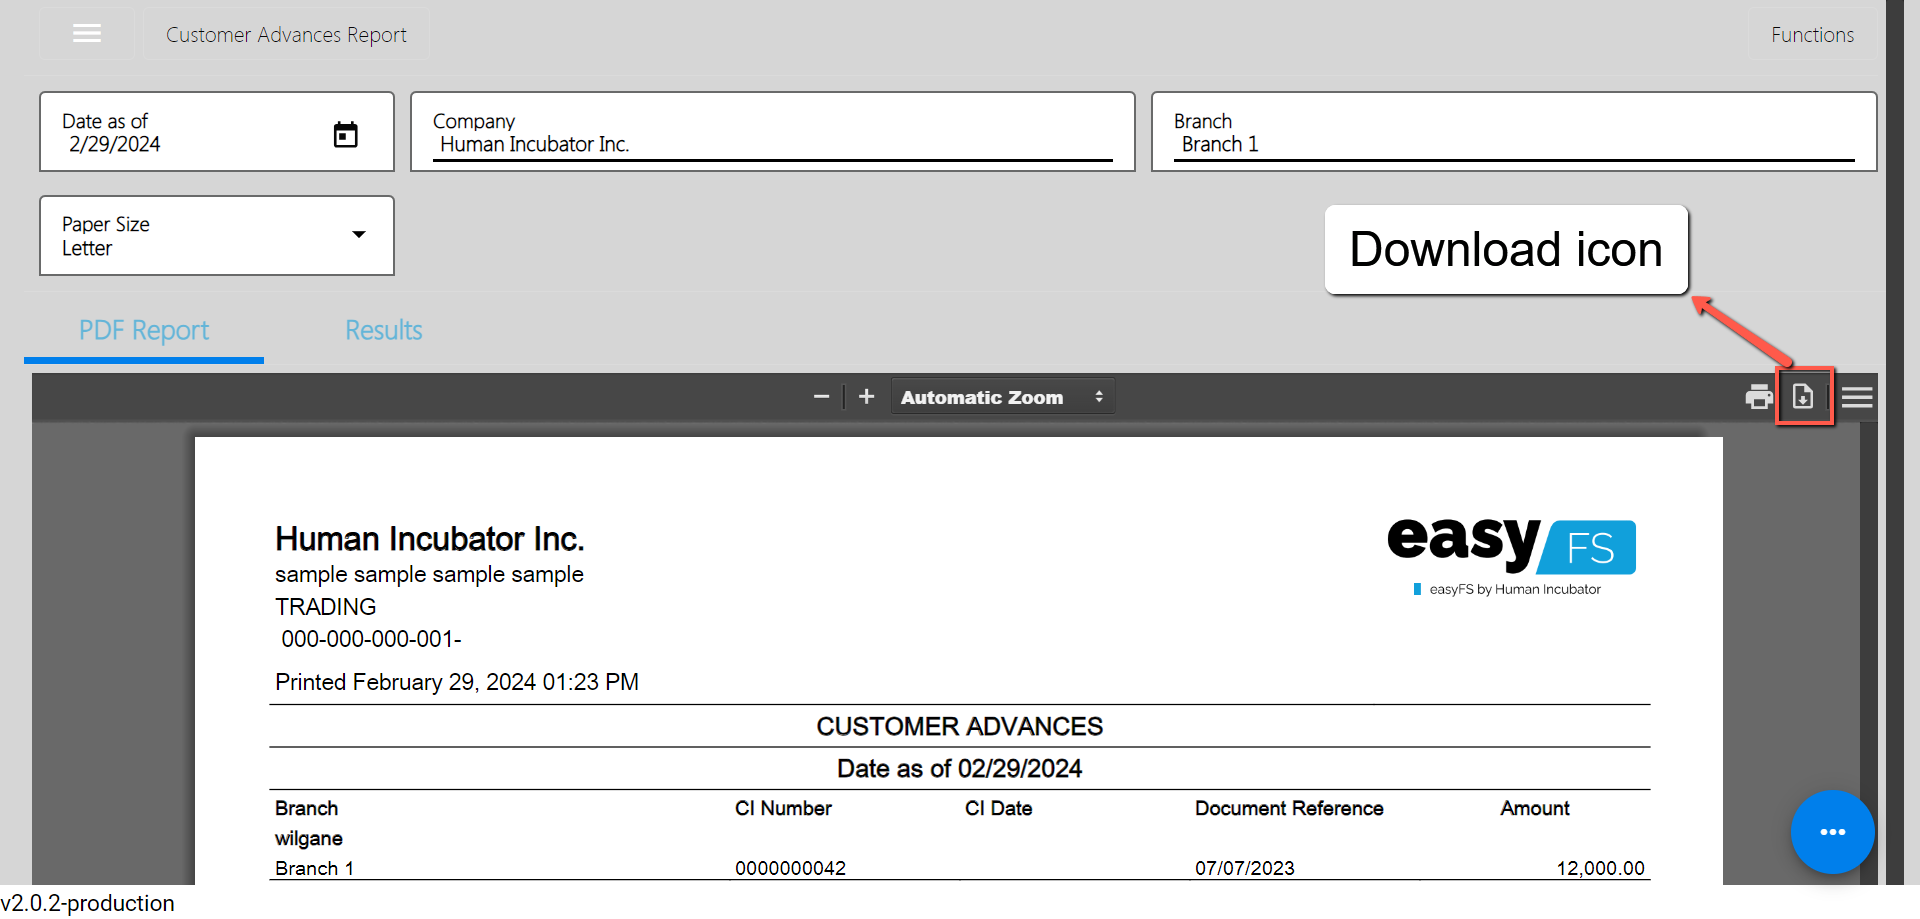
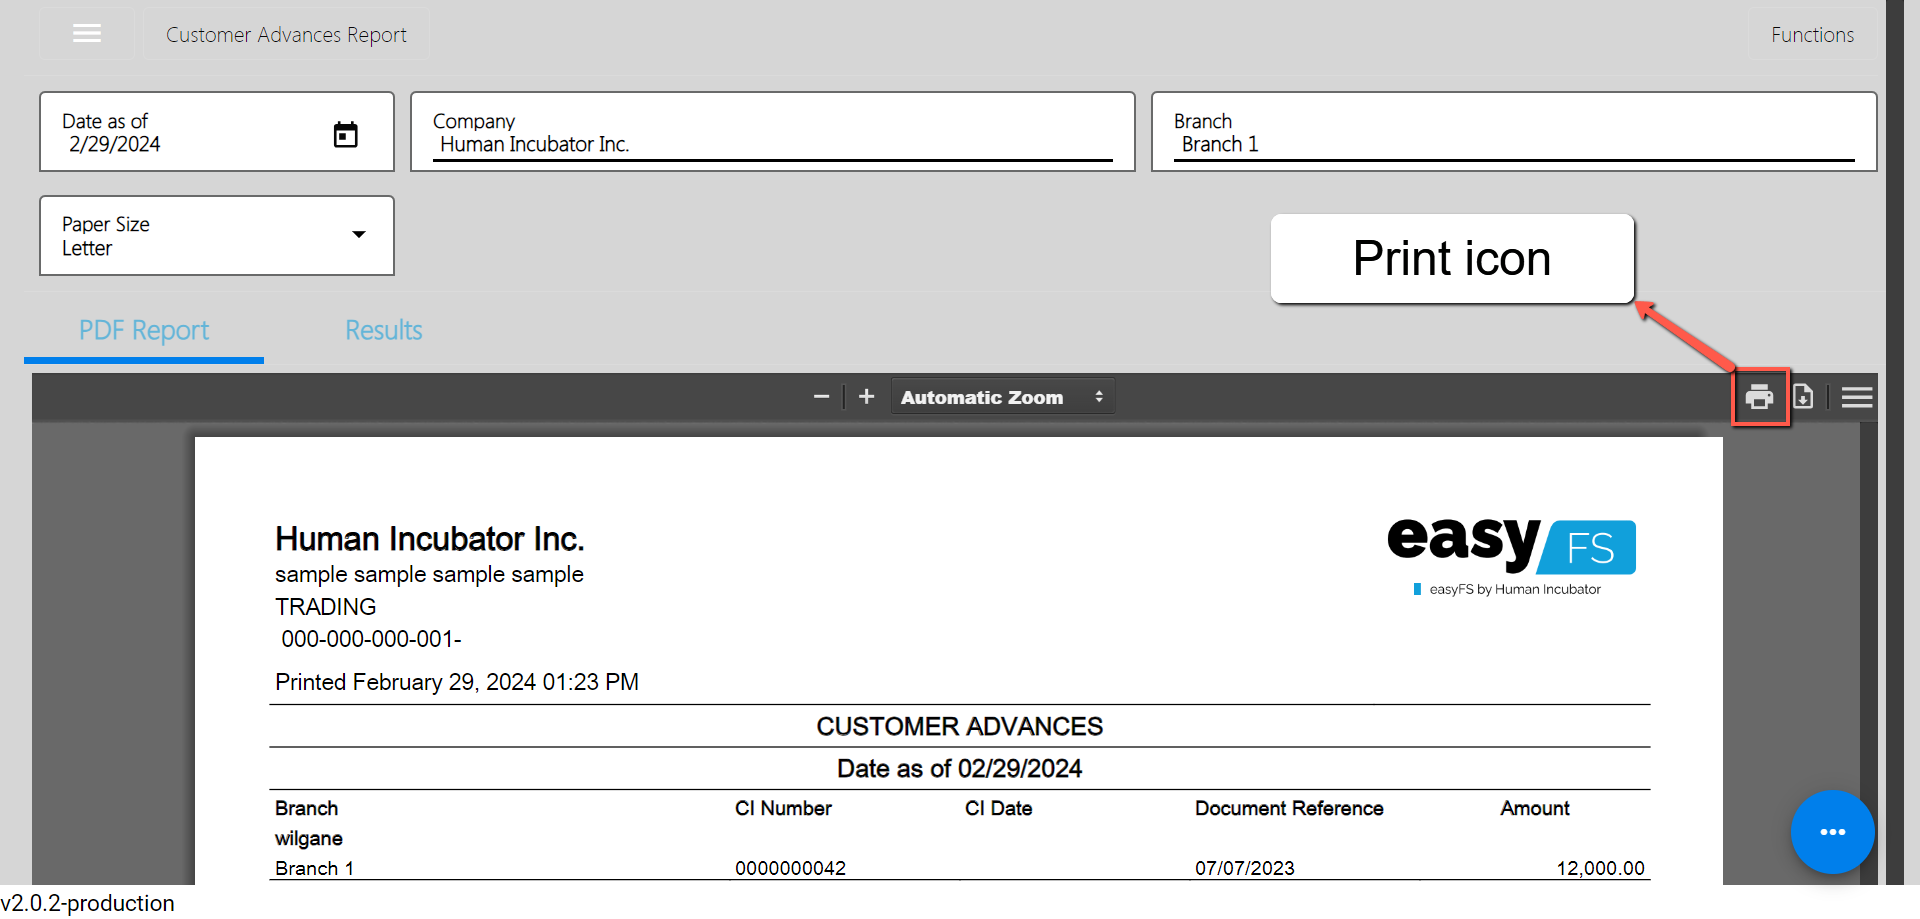
Print or Download the PDF Report
Available Item Per Batch Report
Cancelled Purchase Request Report
Cancelled Purchase Order Report
Cancelled Receiving Receipt Report
Accounts Receivable Summary Report
Accounts Receivable by Term Report
Accounts Receivable by Currency Report
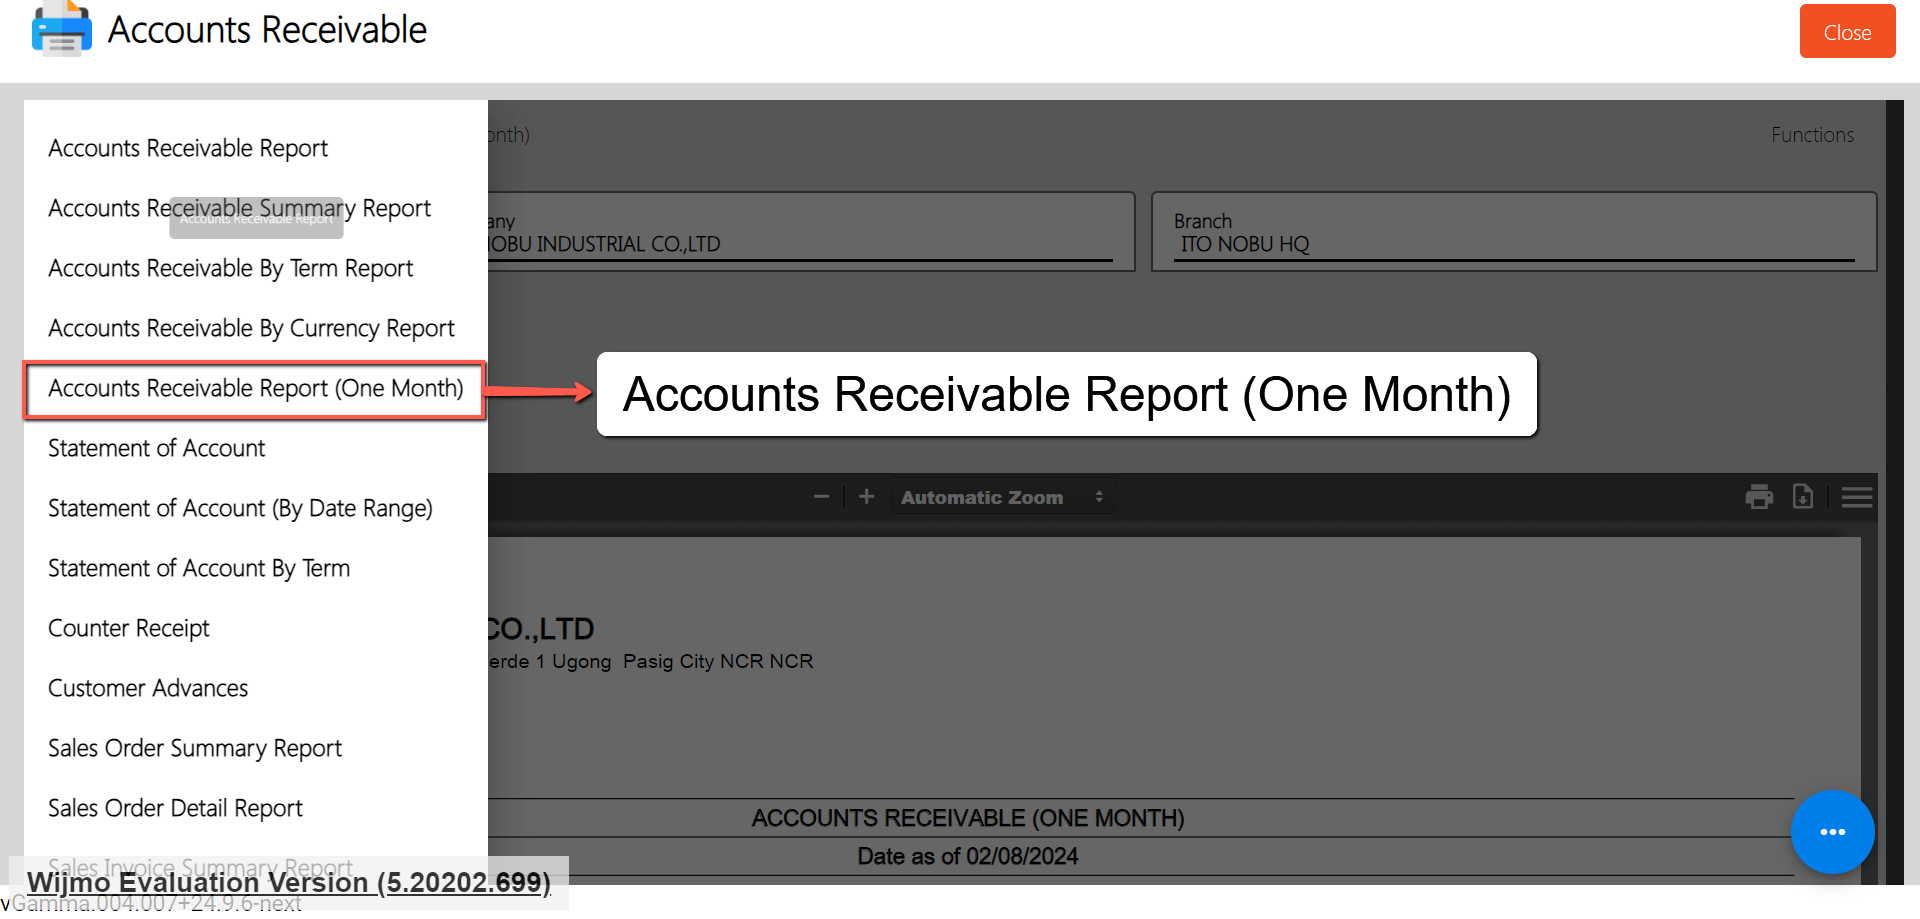
Accounts Receivable Report (One Month)
Statement of Account (By Date Range)
Collection Summary by PayType Report
Cancelled Sales Invoice Report
Sales Invoice Detail Report with Cost
Stock Transfer Detailed Report
13.1.1 Benefits of Integration
13.2.1 EasyPOS Integration Overview
13.3 How to Set Up Integrations
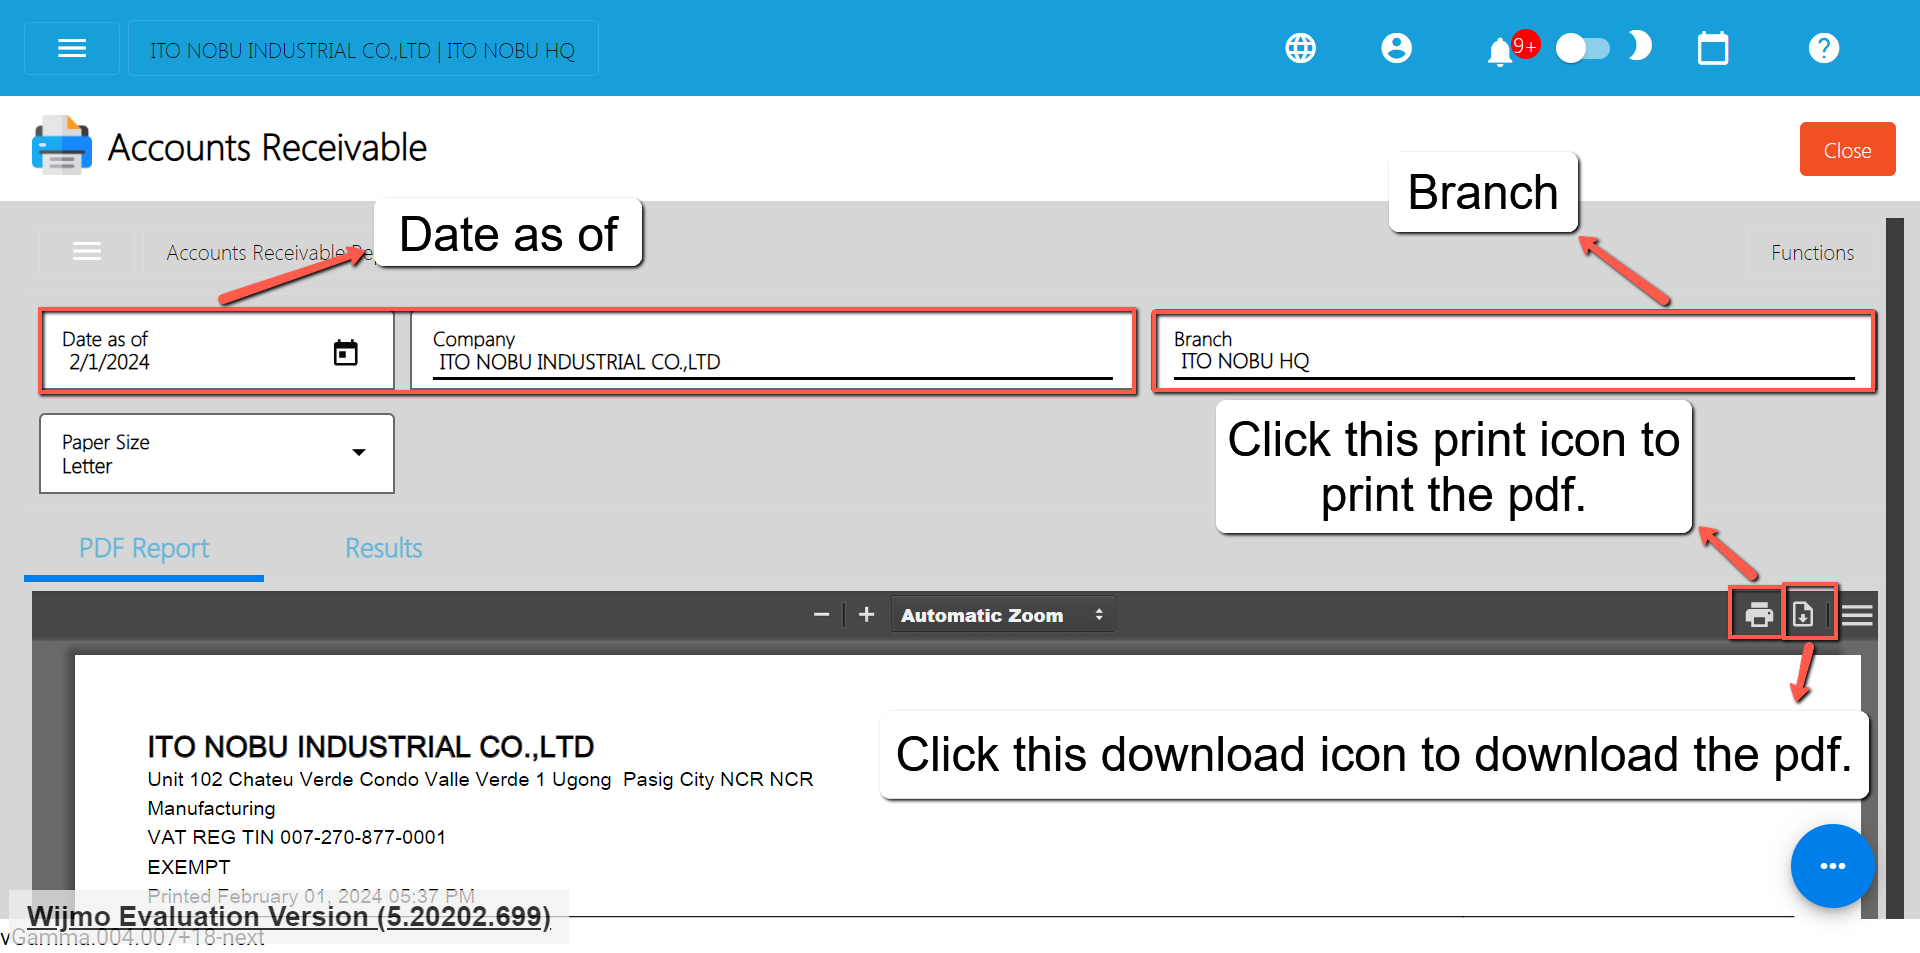
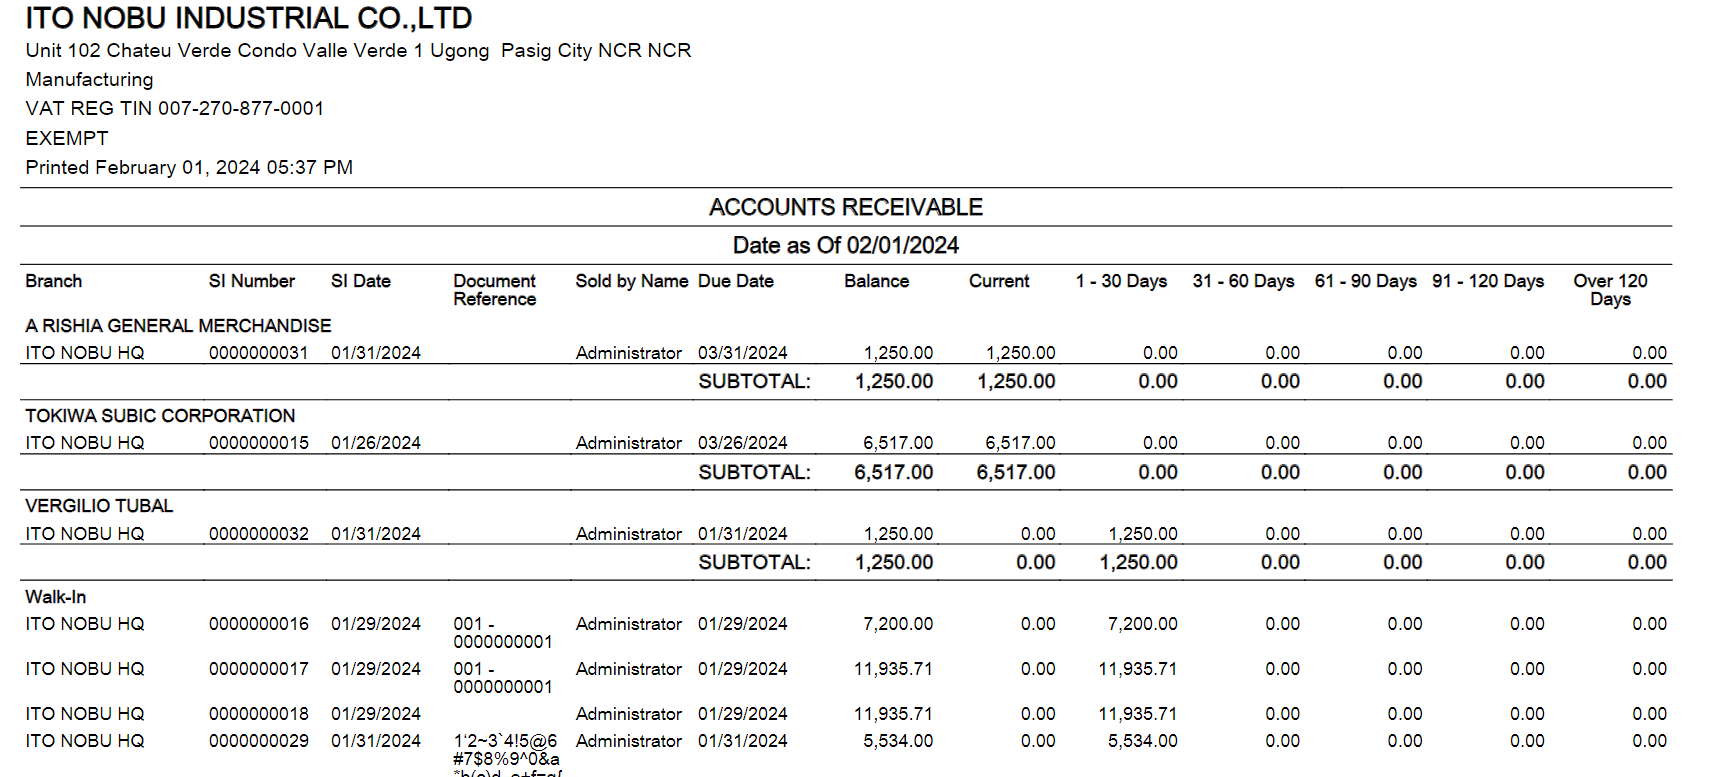
.toc-wrapper .c27{margin-left: 6pt}.toc-wrapper .c46{margin-left:14pt}.toc-wrapper .c46 .c14 a,.toc-wrapper .c50 a{font-size:13px}.toc-wrapper .c50{margin-left:18pt;} .manual-content table td, .manual-content table th{padding:0;border: 1px #aaa solid;padding: 10px;} .manual-content table td span,.manual-content table td p,.manual-content table td li{font-size:11px!important;}Accounts Receivable is an aging report in which the total amount per Sales Invoice transaction is reflected. It shows outstanding receivables or collectibles from a customer within specified terms, such as 30 days, 60 days, 90 days, and over 120 days.
Accounts Receivable are recorded as part of the assets on the Balance Sheet. These receivables are typically settled through the collection of money or credit memos (adjustments) from customers according to the agreed-upon terms.
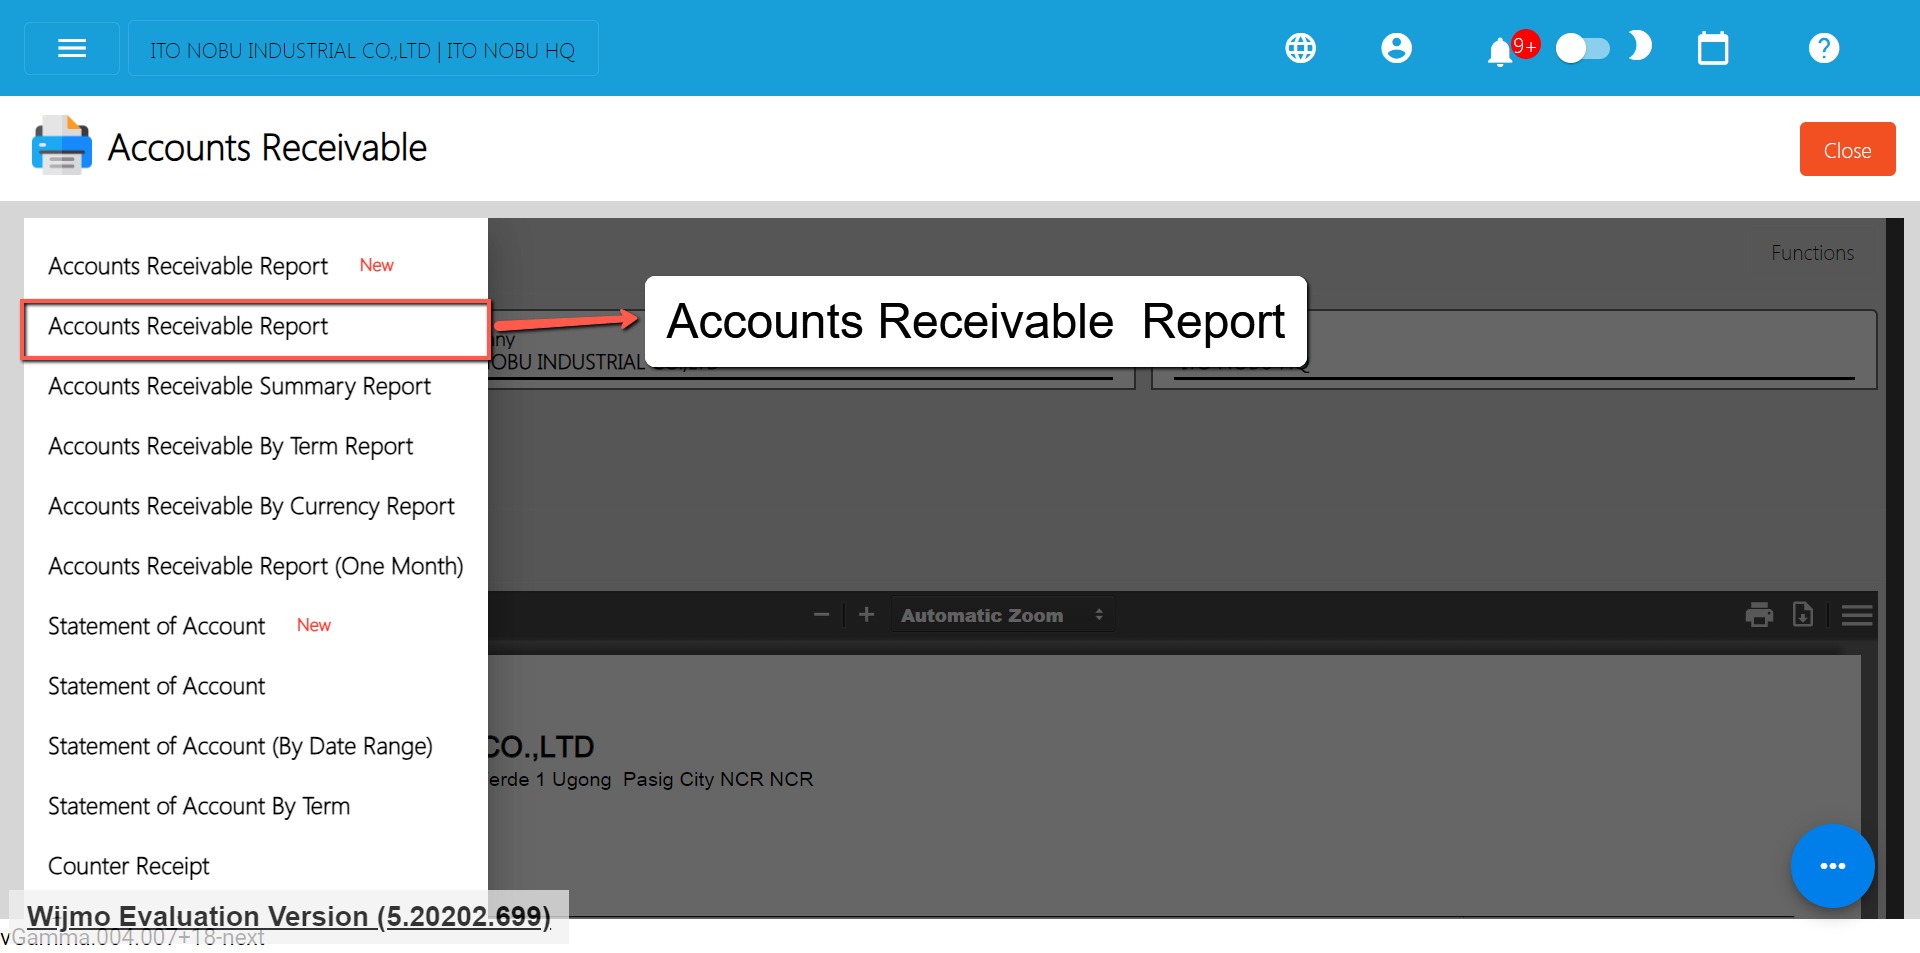
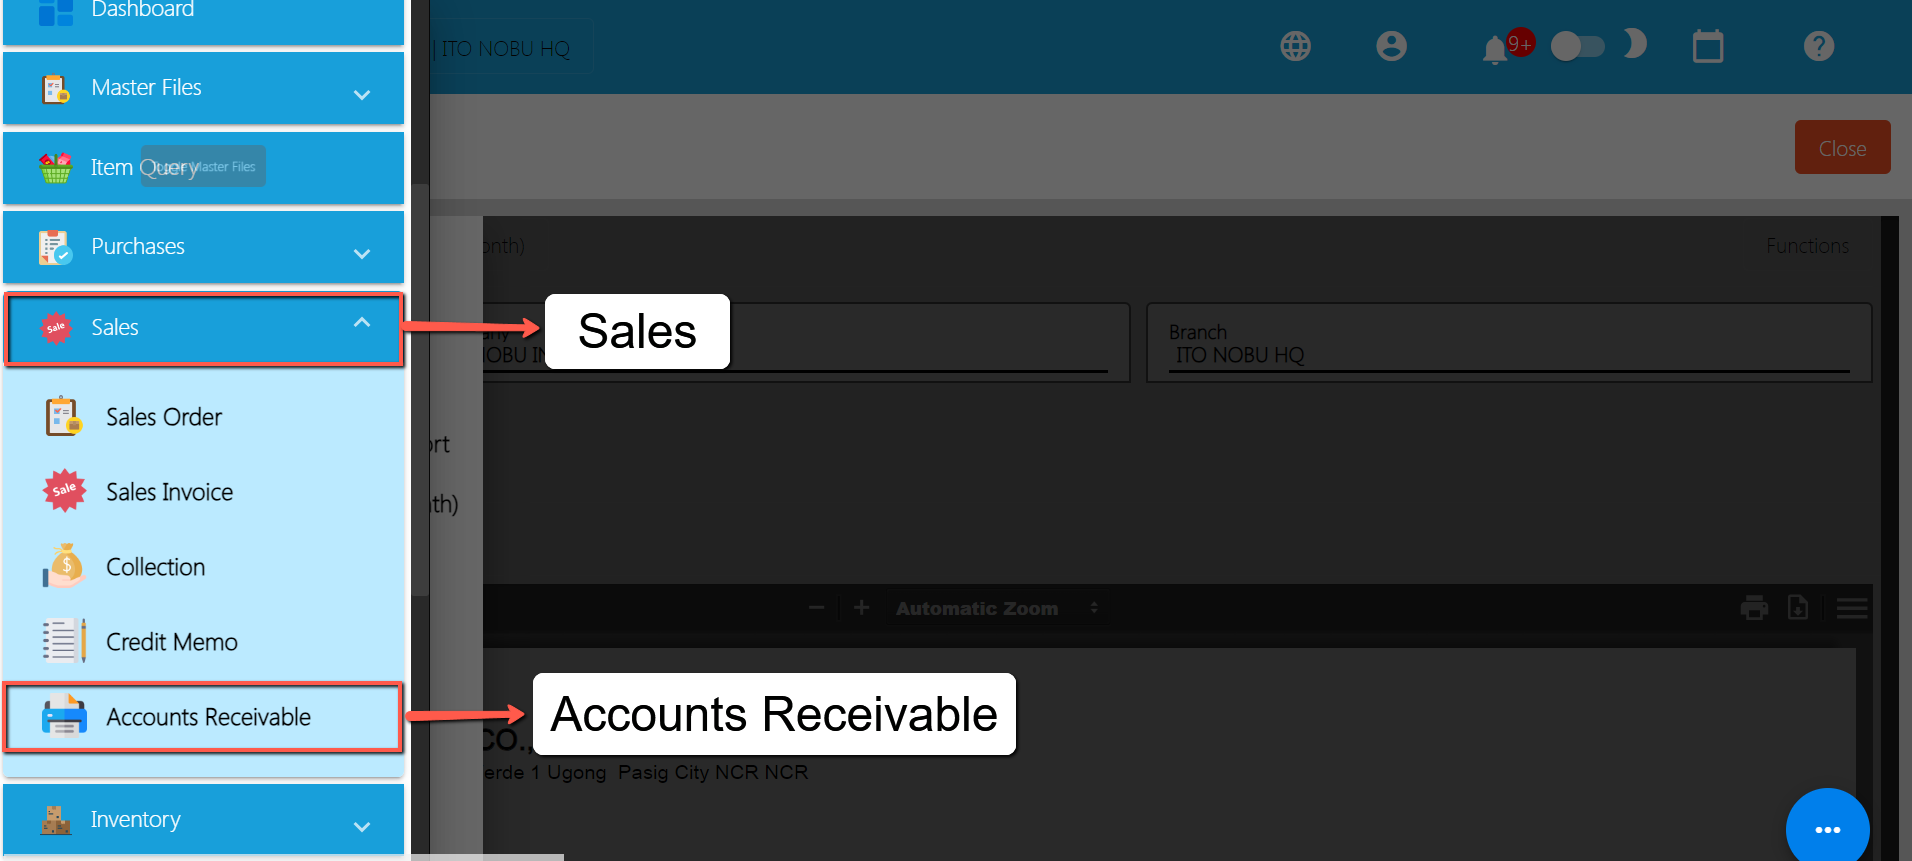
To open or generate Accounts Receivable Report here are the steps to follow:
1. Go to Sales
2. Select Accounts Receivable
3. Click Accounts Receivable Report
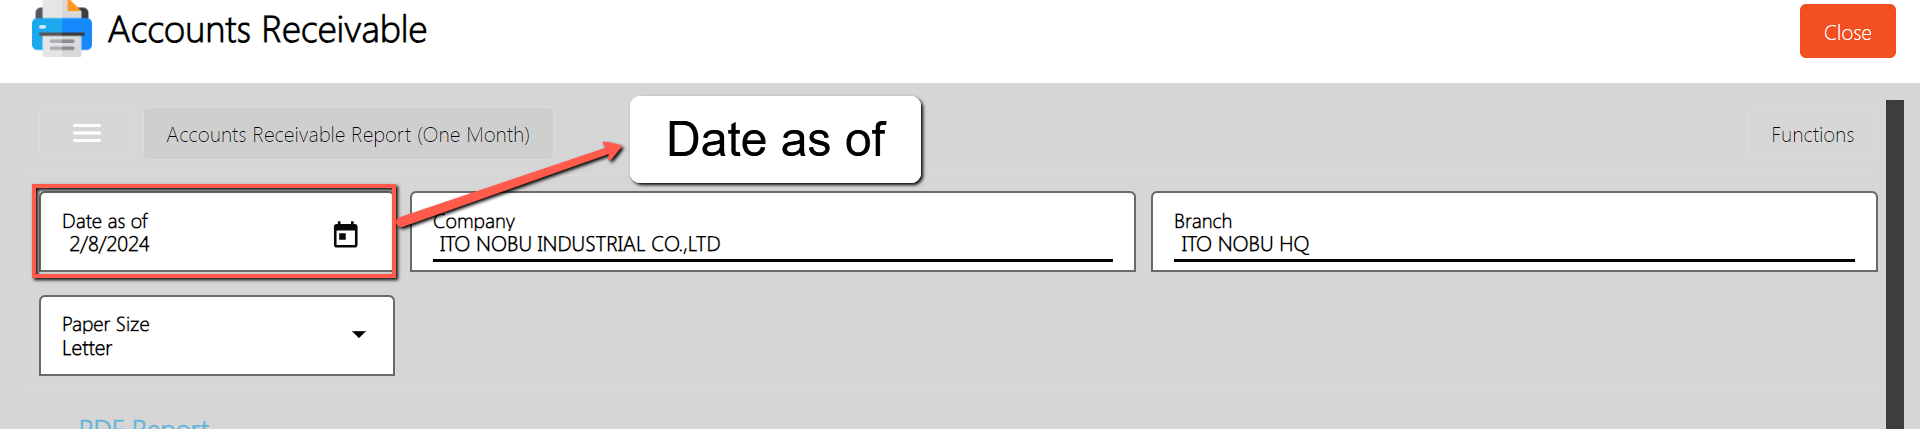
4. Enter Date as of
5. Select branch you want to generate
6. You can have the option to Print or Download the PDF Report.
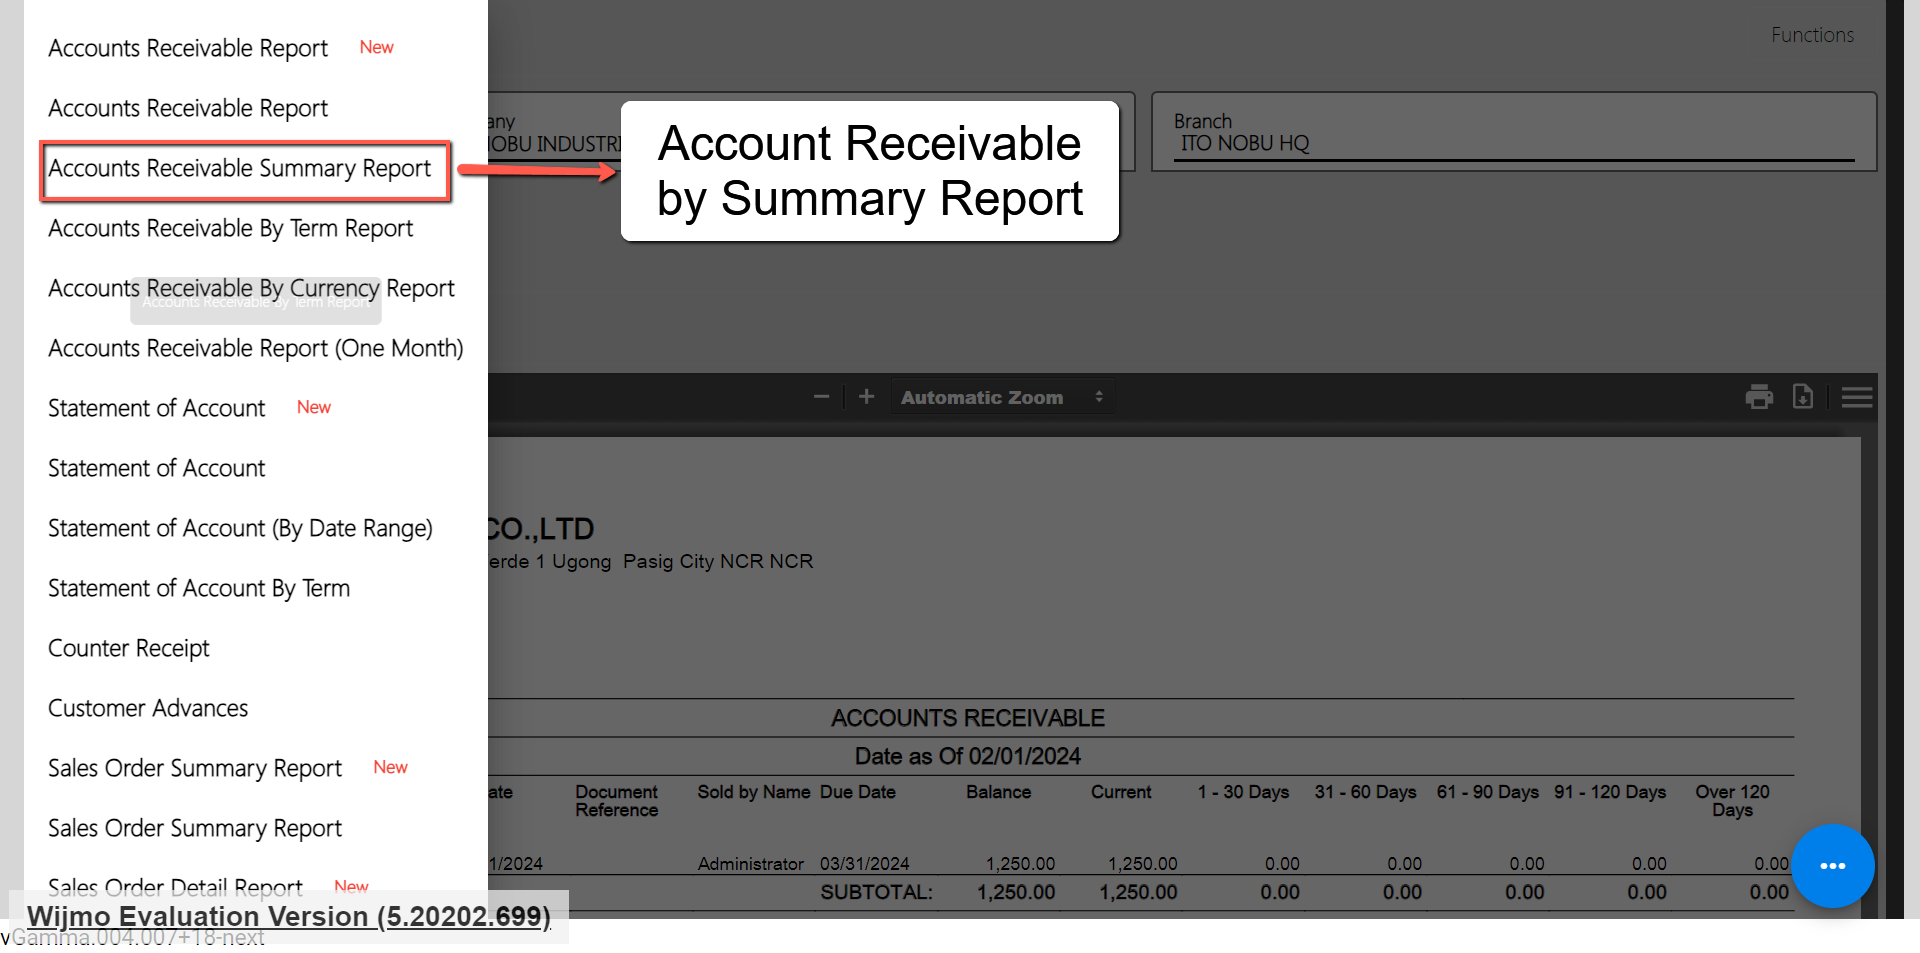
Accounts Receivable is a summary report which generates the total accounts receivable per customer.
To open or generate Accounts Receivable Report here are the steps to follow:
1. Go to Sales
2. Select Accounts Receivable
3. Click Accounts Receivable Summary Report
4. Enter Date as of
5. Select branch you want to generate
6. You can have the option to Print or Download the PDF Report
Accounts Receivable by Term Report is a summary report which generates the total accounts receivable per customer with Aging Days.
To open or generate Accounts Receivable by Term Report here are the steps to follow:
1. Go to Sales
2. Select Accounts Receivable
3. Click Accounts Receivable by Term Report
4. Enter Date as of
5. Select branch you want to generate
6. You can have the option to Print or Download the PDF Report
Accounts Receivable by Currency Report is a summary report which generates the total accounts receivable per customer with Currency.
To open or generate Accounts Receivable by Currency Report here are the steps to follow:
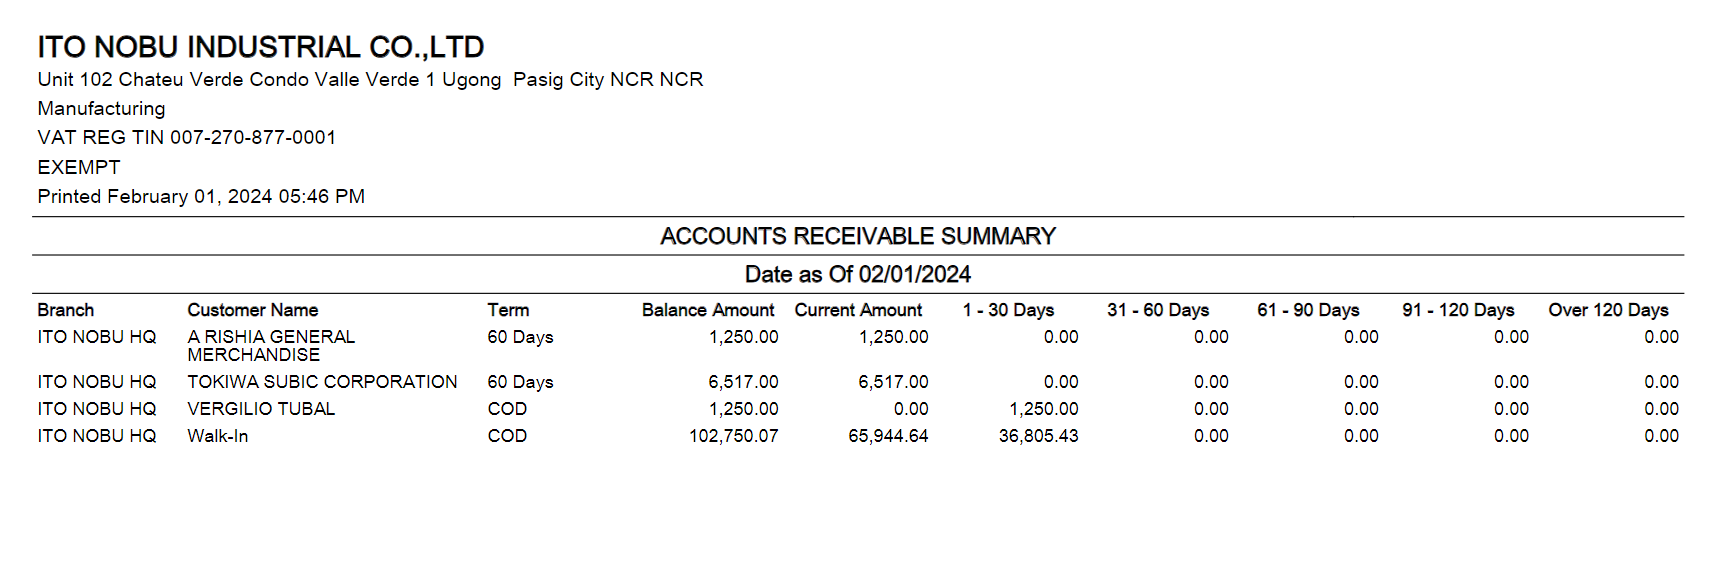
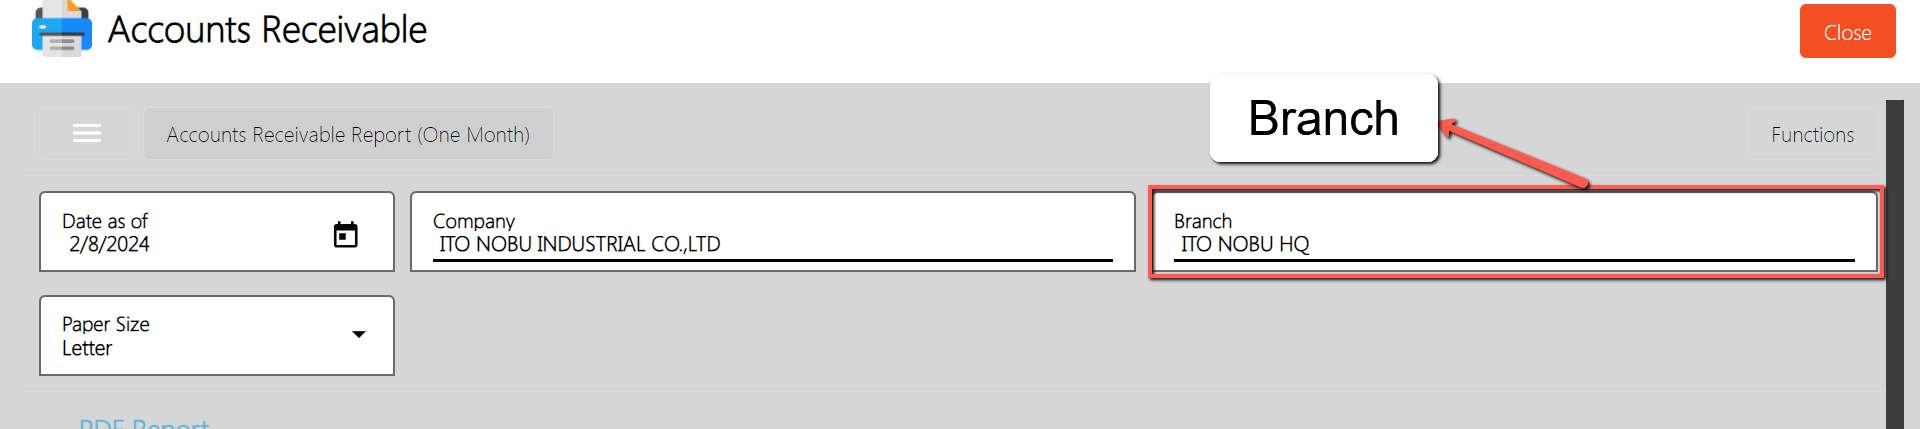
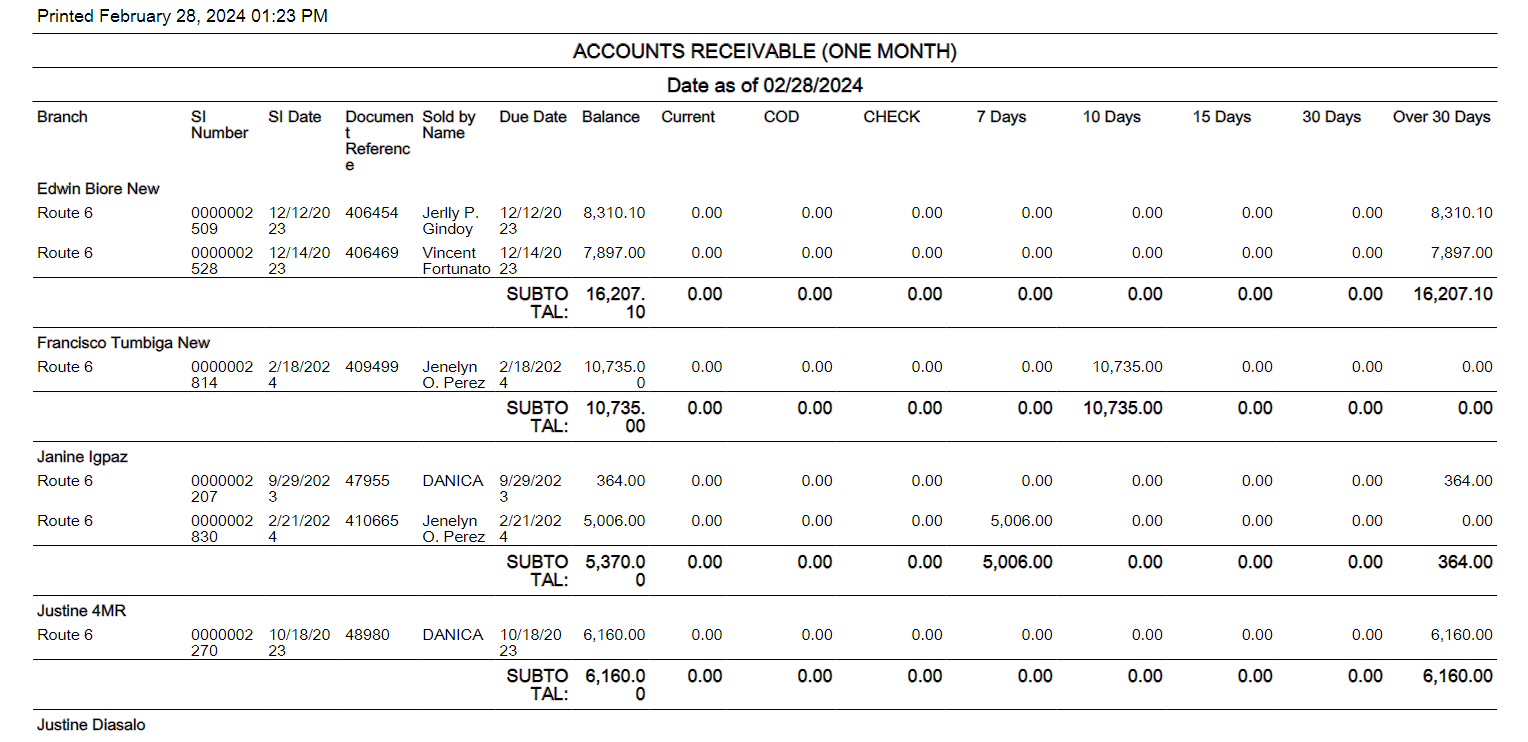
The Accounts Receivable Report (One Month) is a comprehensive summary of outstanding receivables from customers within a specified time frame, typically one month. This report categorizes the receivables based on the age of the invoices, including segments such as 7 days, 10 days, 15 days, 30 days, and over 30 days. By organizing receivables in this manner, businesses can efficiently track and manage their outstanding invoices, aiding in timely collections and financial decision-making.
To generate Account Receivables Report (One Month), here are the steps for you to follow:
Sample Printout
Statement of Account is a financial document that provides a summary of transactions between a business and its customers over a specific period. It typically includes details such as invoice numbers, dates, document references, due dates, total amount owed, payments made, adjustments, and outstanding balances.
This statement helps both parties keep track of their financial obligations and activities, providing a clear record of what has been billed, paid, and is still outstanding. It serves as a crucial tool for reconciling accounts, resolving discrepancies, and ensuring accurate financial records.
To open or generate Statement of Account here are the steps to follow:
1. Go to Sales
2. Select Accounts Receivable
3. Click Statement of Account
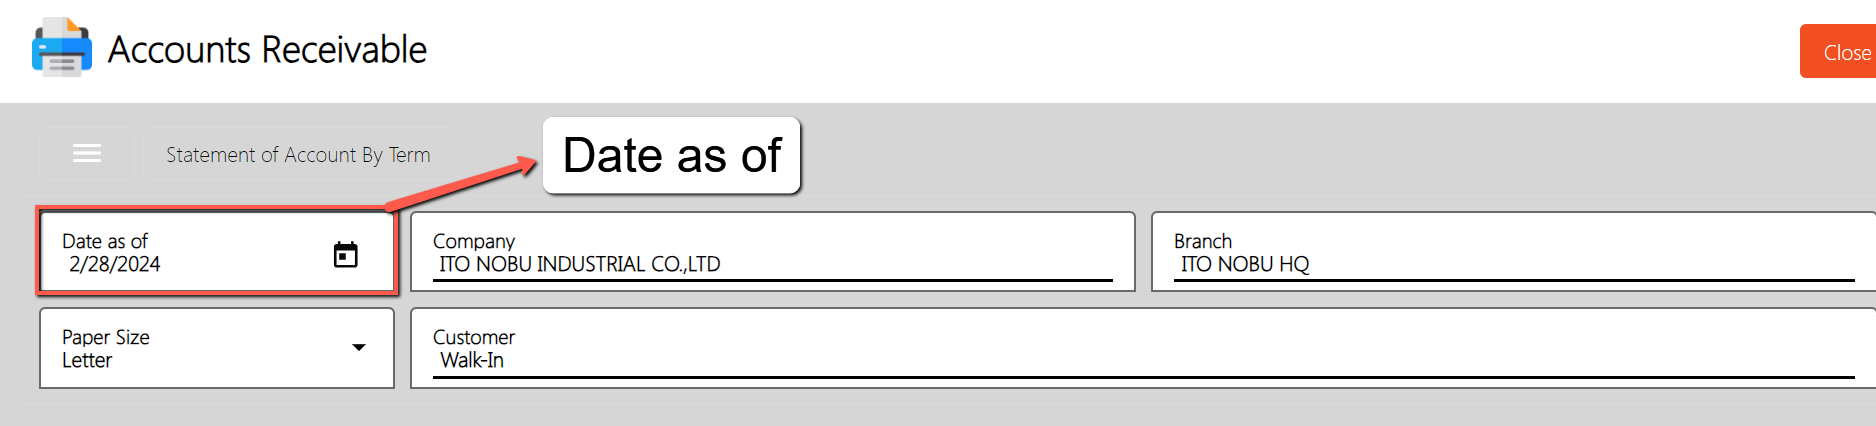
4. Enter Date as of
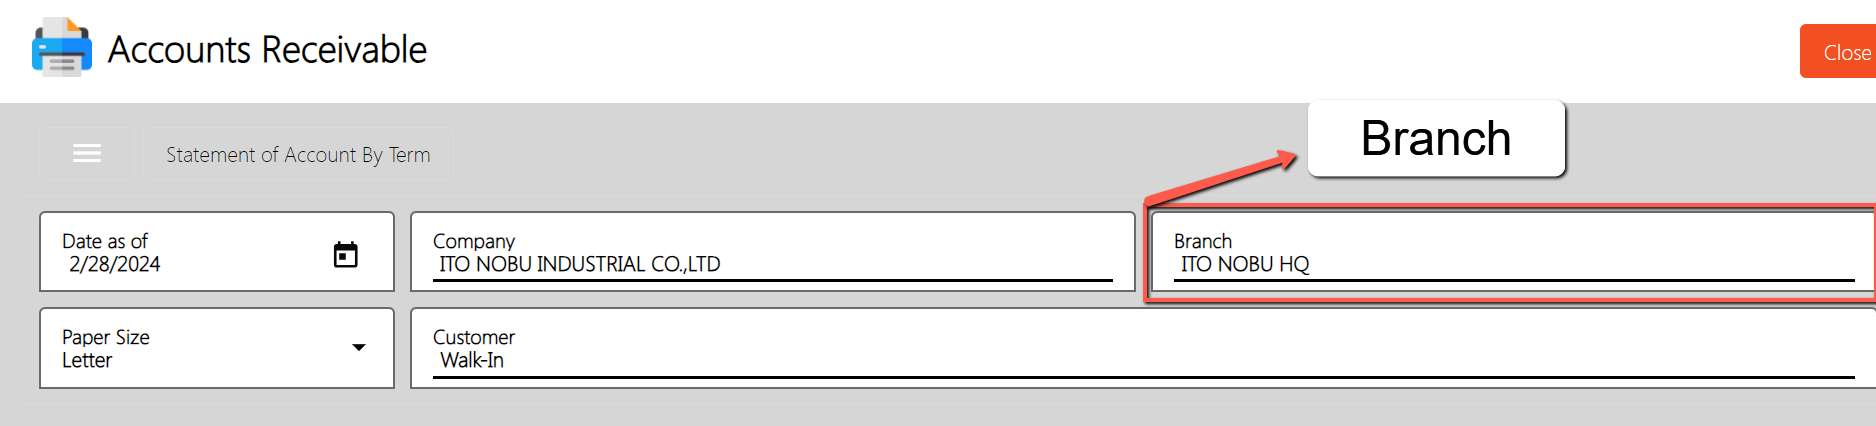
5. Select branch you want to generate
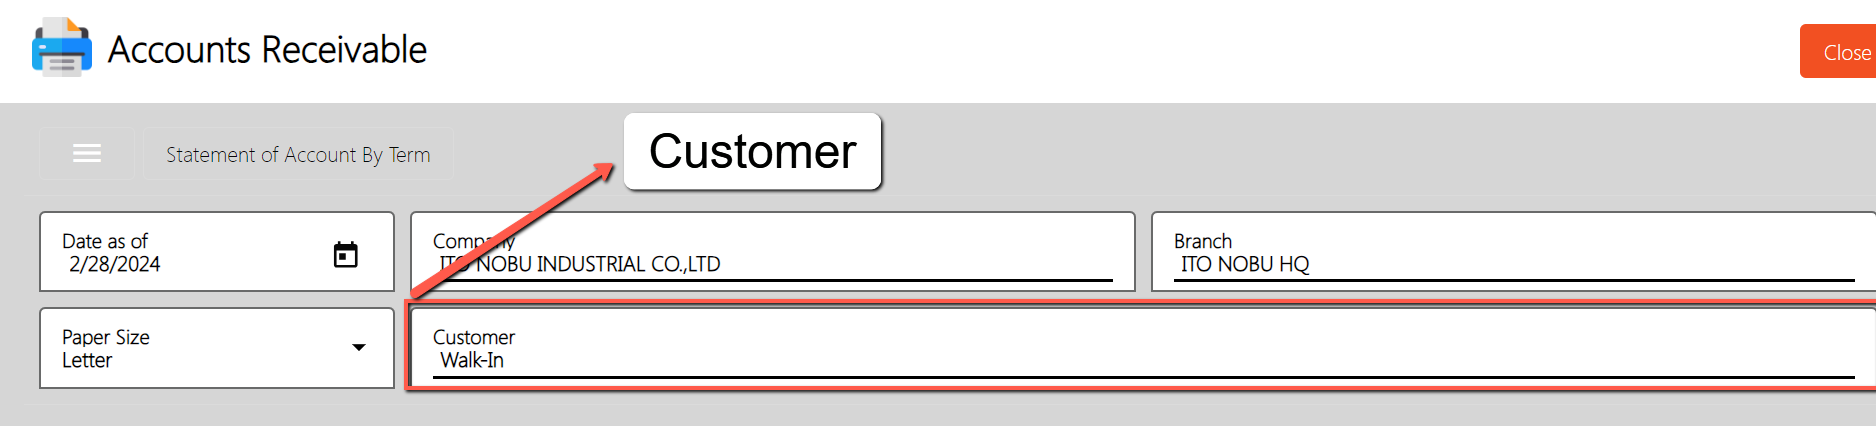
6. Select Specific customer
7. You can have the option to Print or Download the PDF Report
The Statement of Account by Date Range is a report similar to the Statement of Account, allowing you to generate the total Accounts Receivable for a specific customer on a specified date.
To open or generate Statement of Account by Date Range here are the steps to follow:
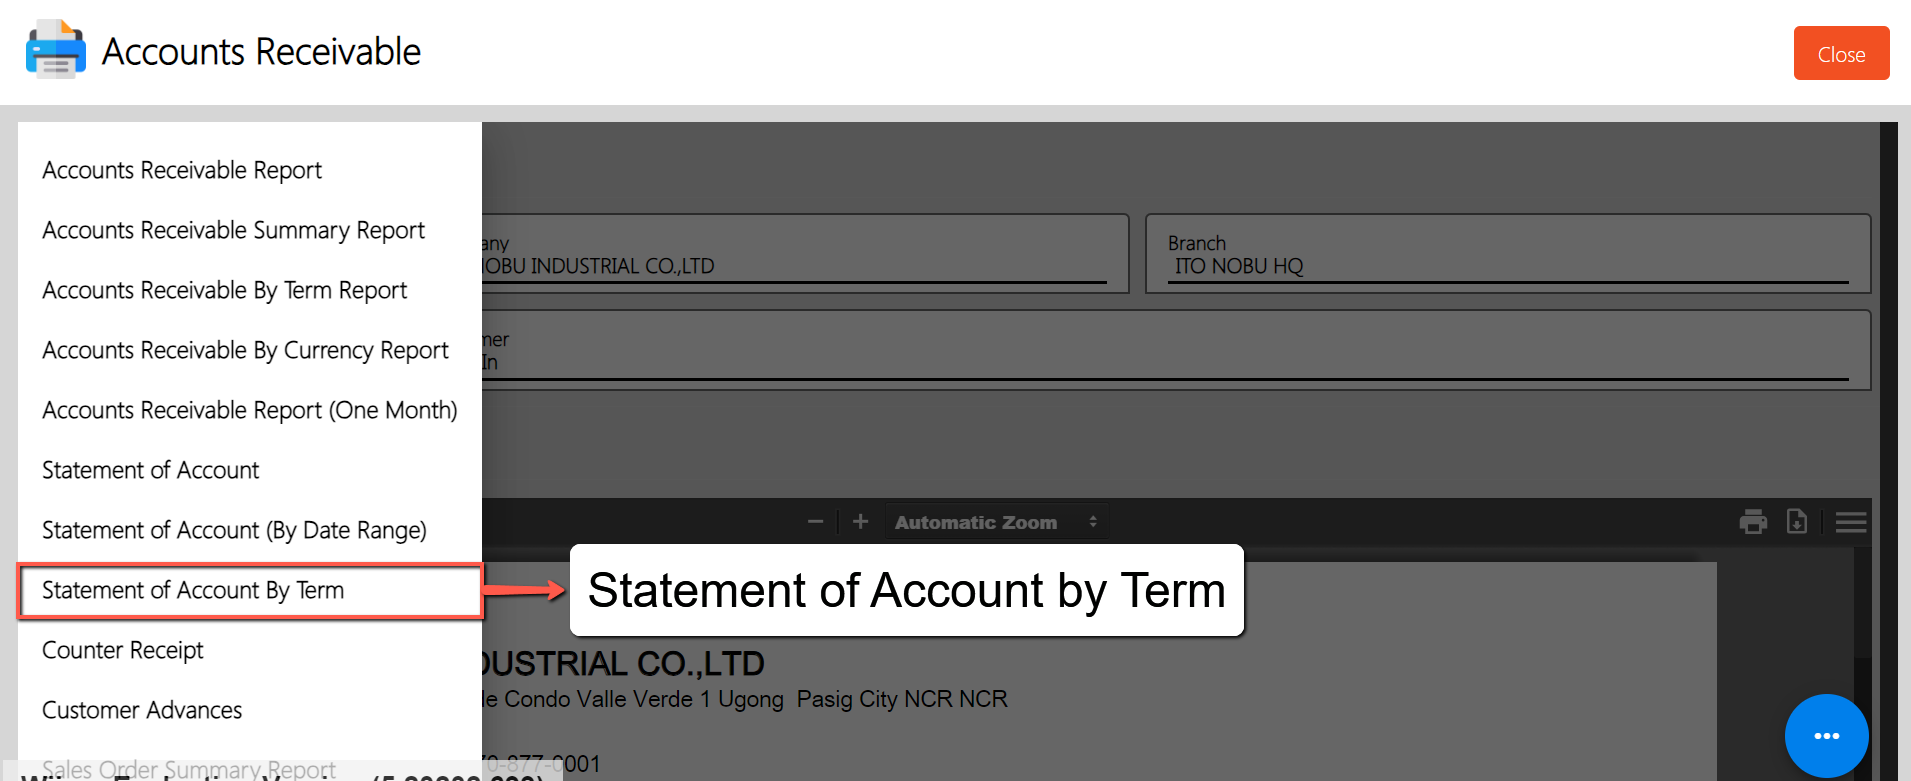
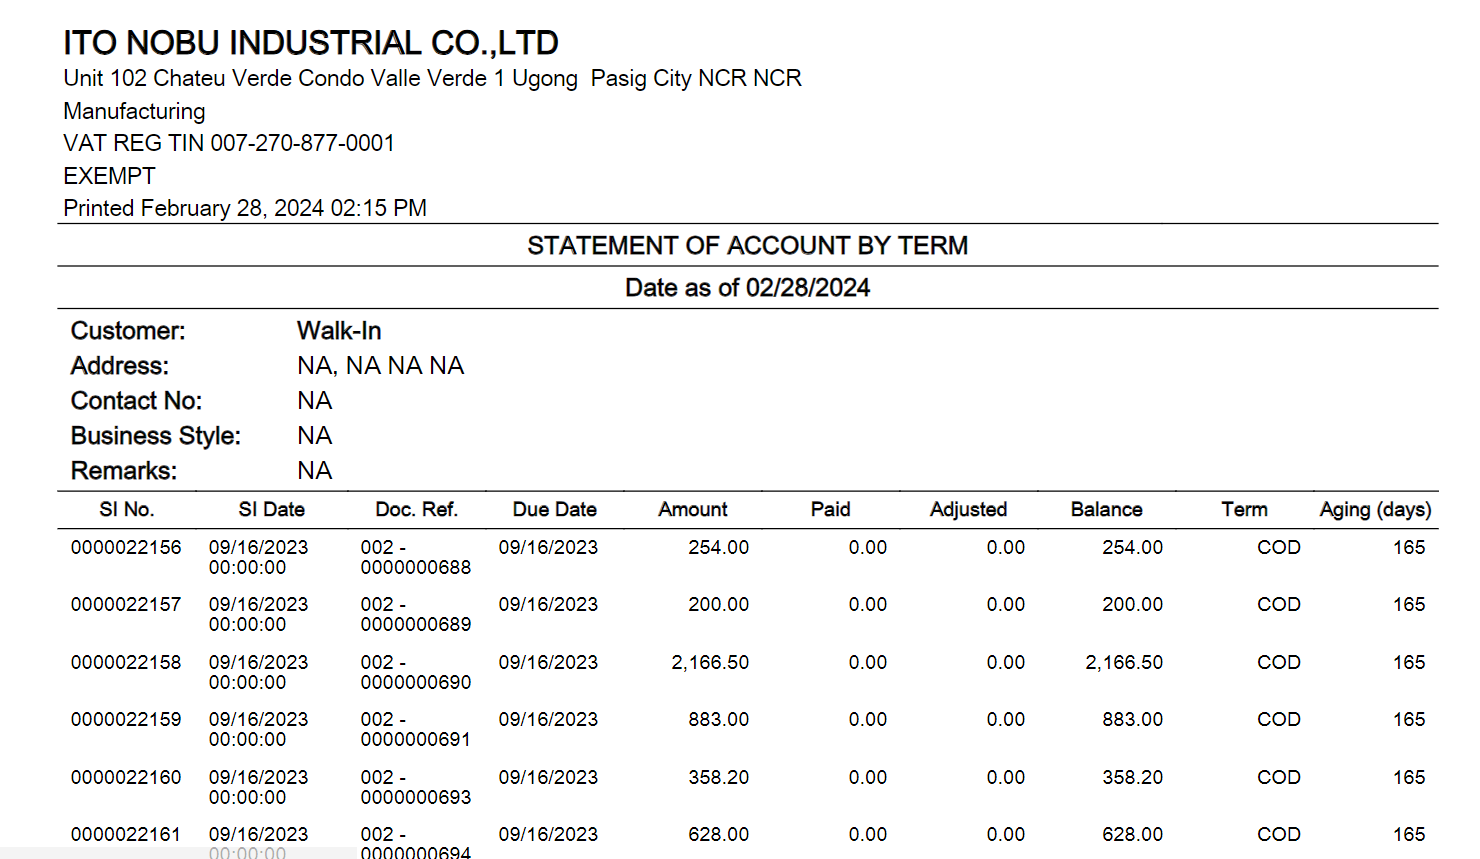
The Statement of Account by Term is a specialized report designed to provide a comprehensive overview of a customer’s accounts receivable based on specific payment terms. Similar to the Statement of Account by Date Range, this report allows you to view the total amount owed by the customer, but it categorizes this information according to the agreed-upon payment terms, such as 7 days, 15 days, 30 days, etc. By specifying a date, you can generate this report for a particular period, enabling you to track and manage receivables efficiently.
To generate Statement of Account by Term report, here are the steps for you to follow:
Sample Printout
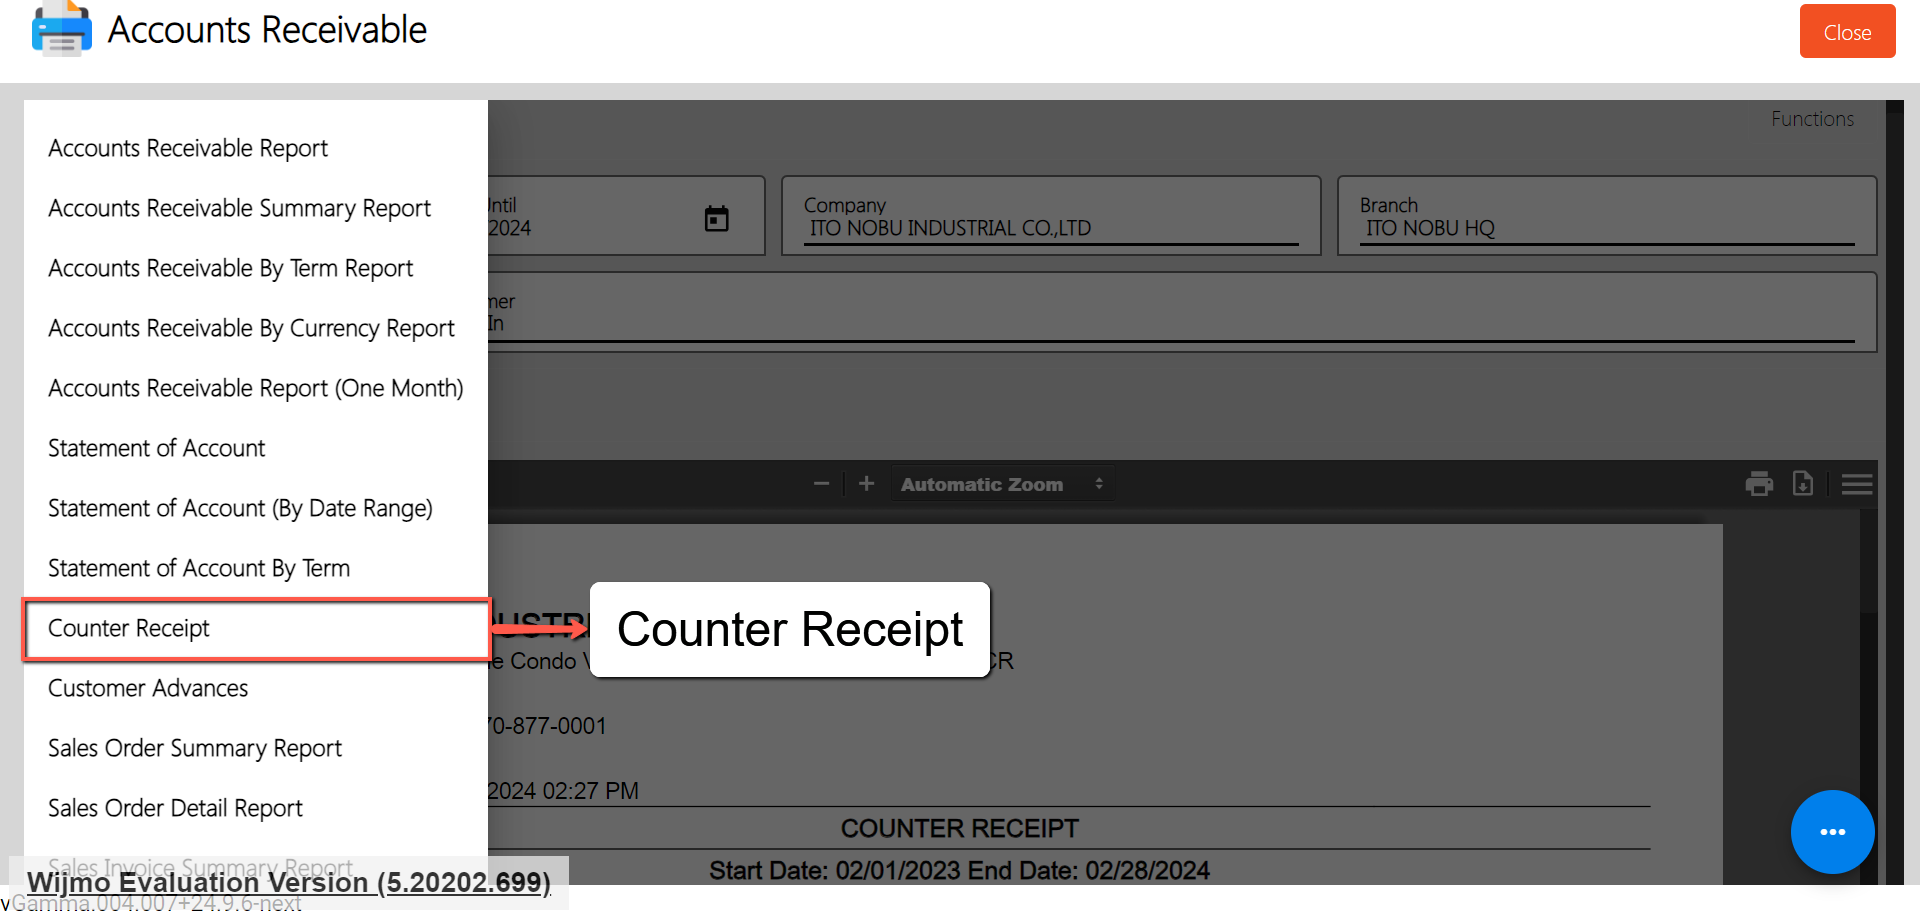
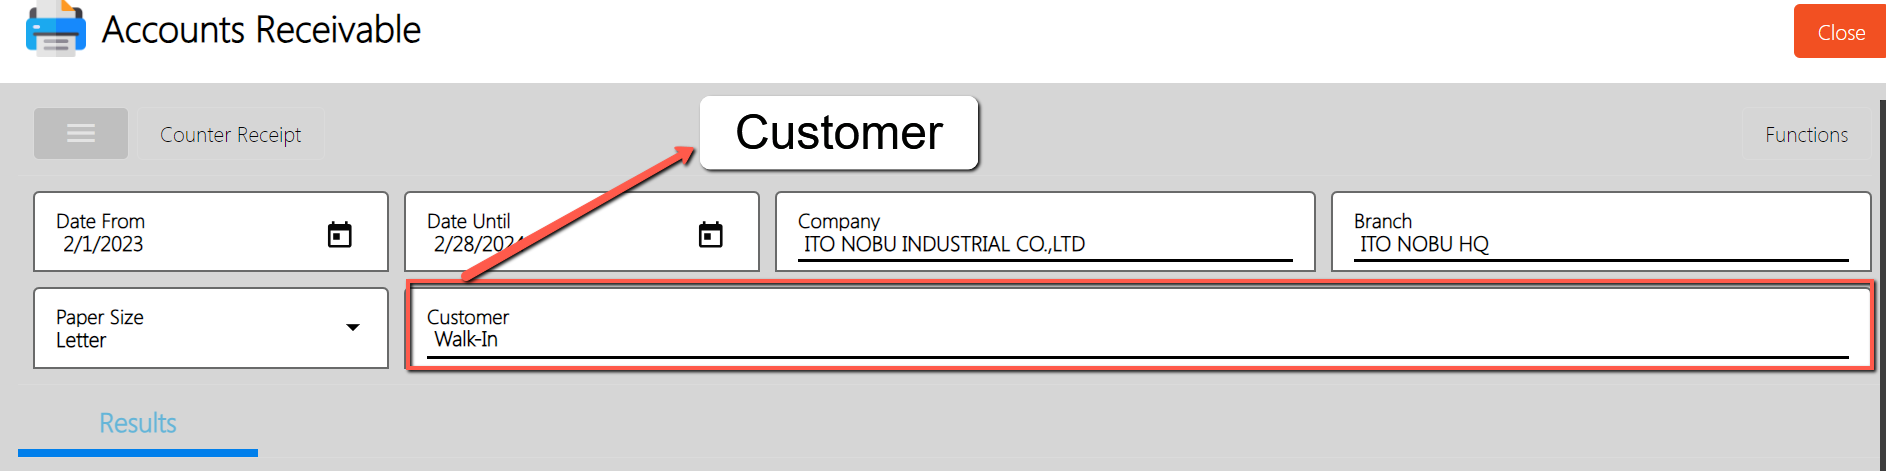
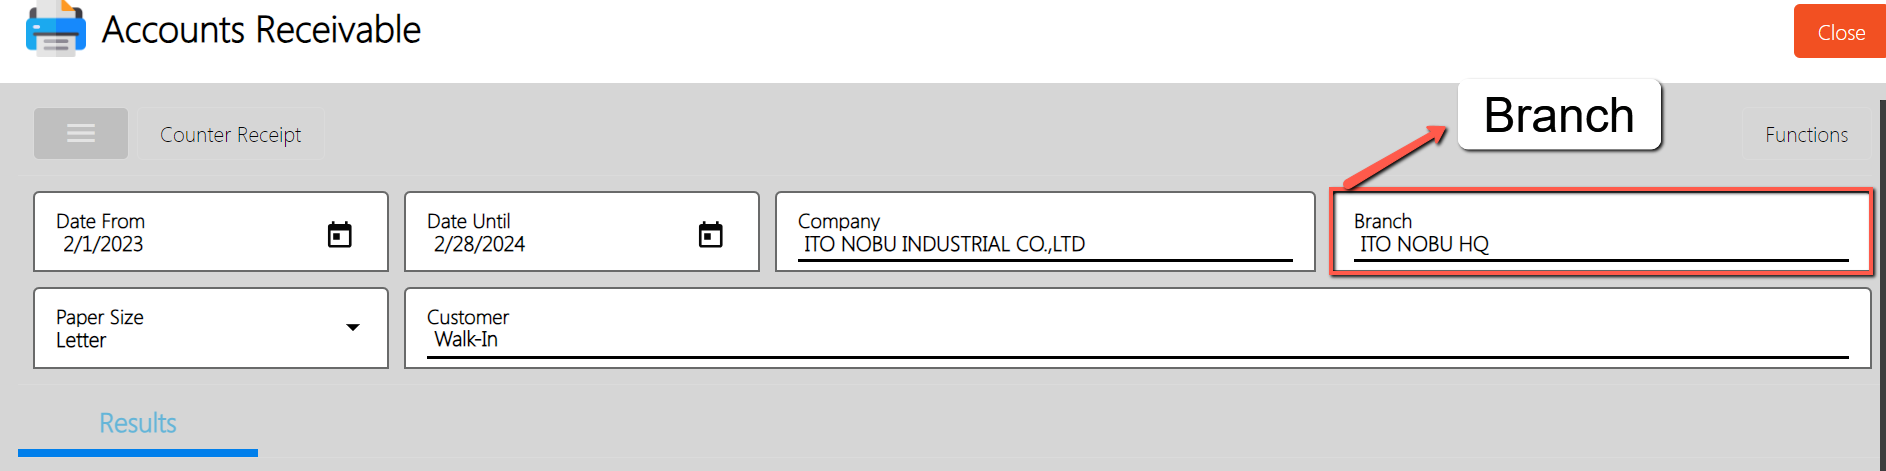
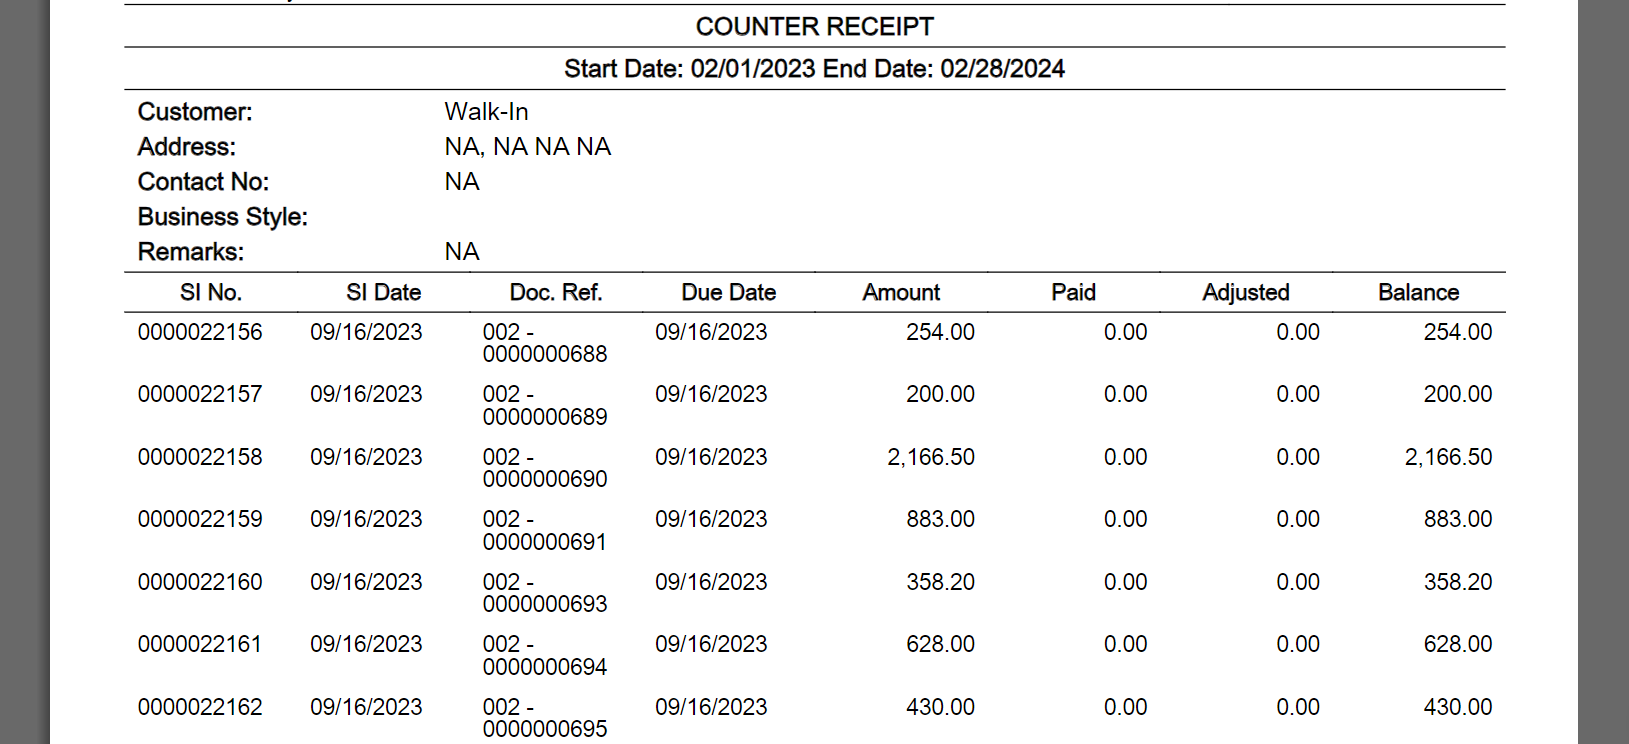
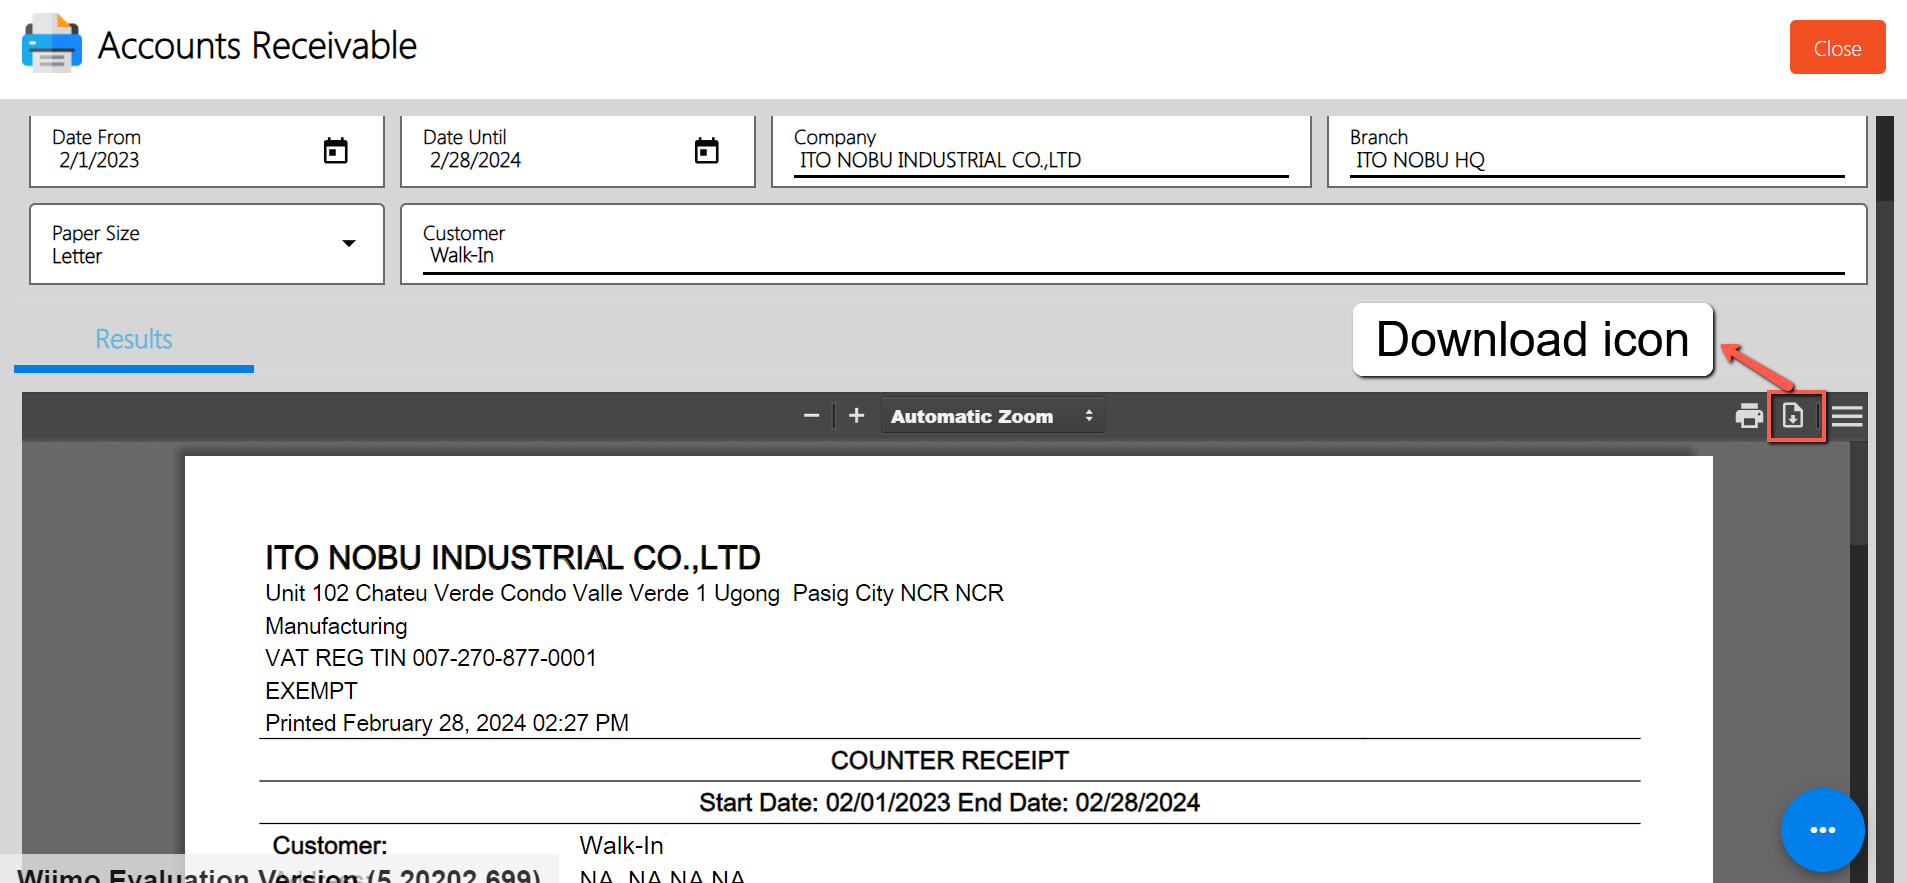
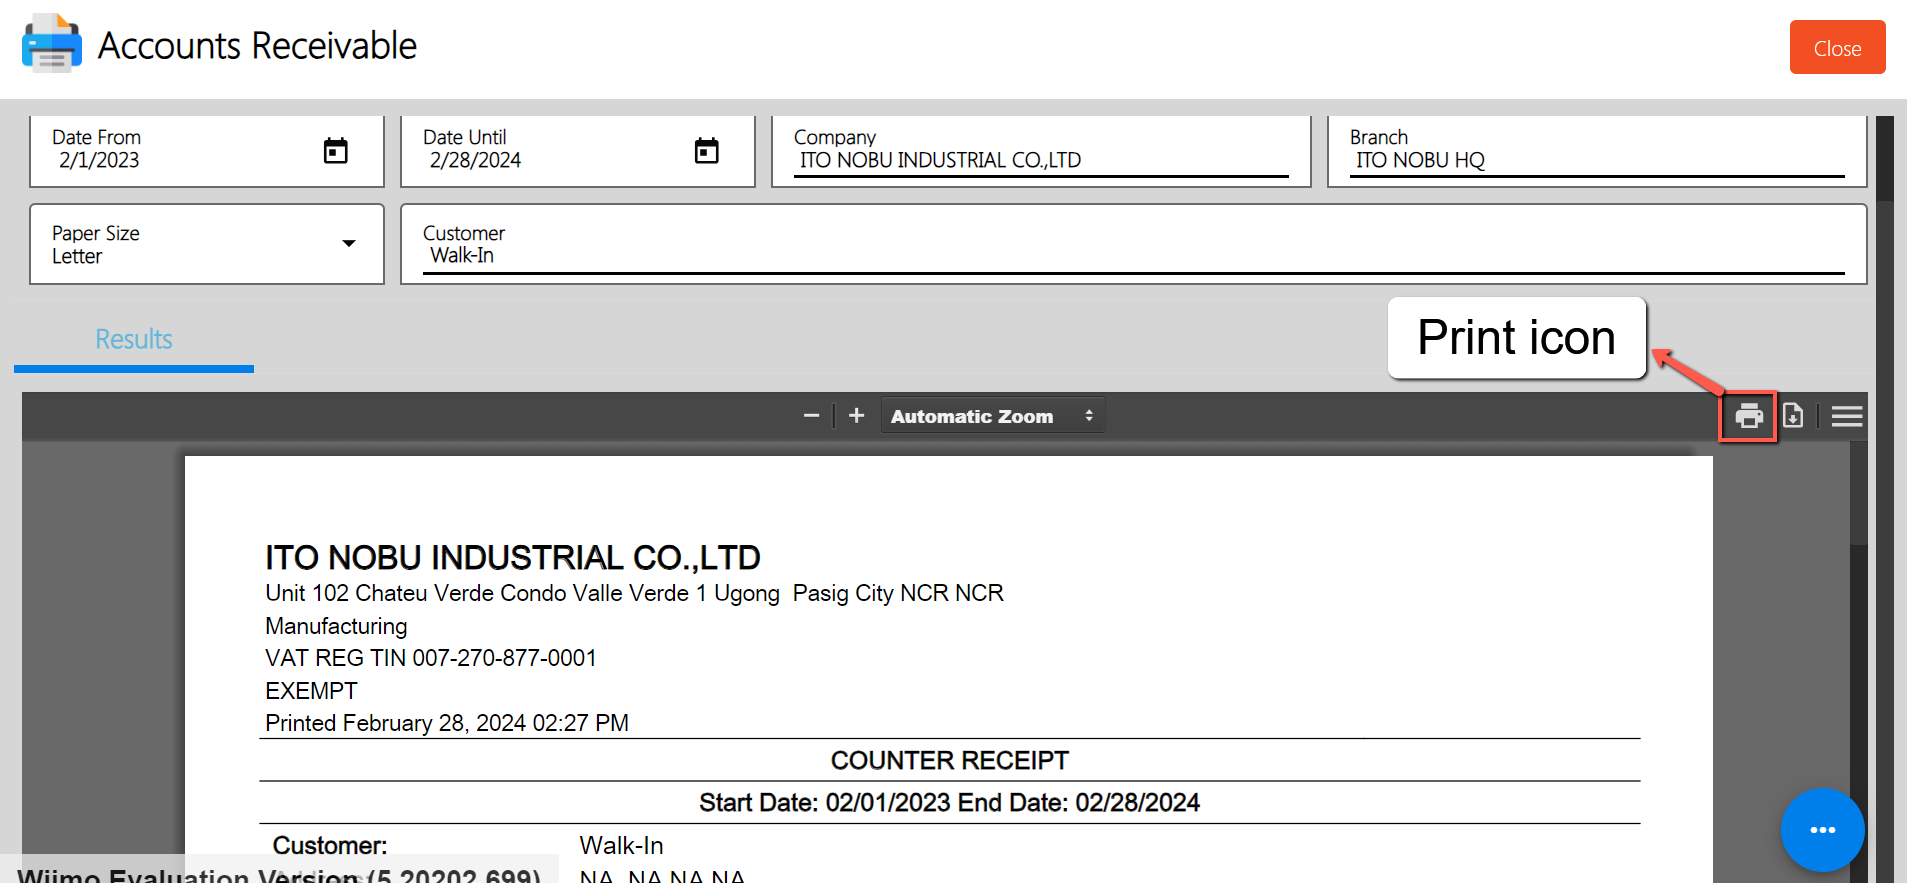
A Counter Receipt is a document issued by a company to acknowledge the payment received from a customer or client at the company’s physical location, such as a storefront or office counter. This receipt serves as proof of payment and typically includes details such as the payment amount, date, customer name, invoice number (if applicable), and any other relevant transaction information. It provides both the company and the customer with a record of the payment made, aiding in accurate accounting and reconciliation of accounts receivable.
To generate Counter Receipt report, here are the steps for you to follow:
Sample Printout
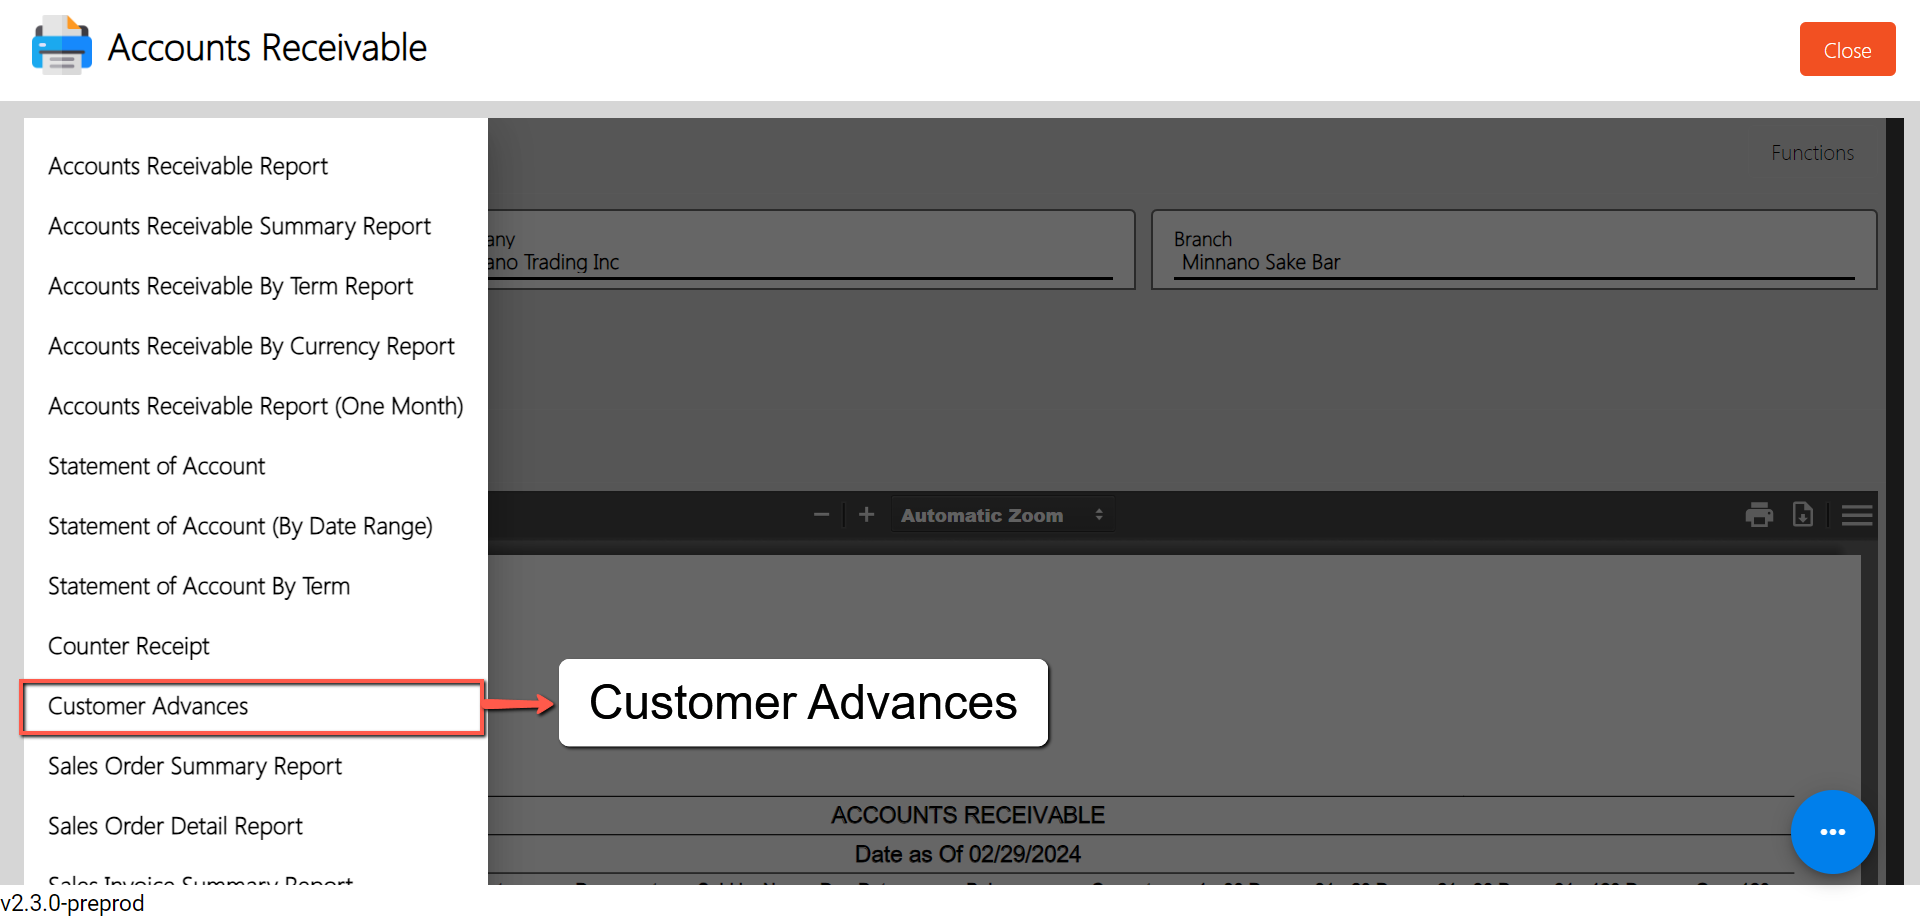
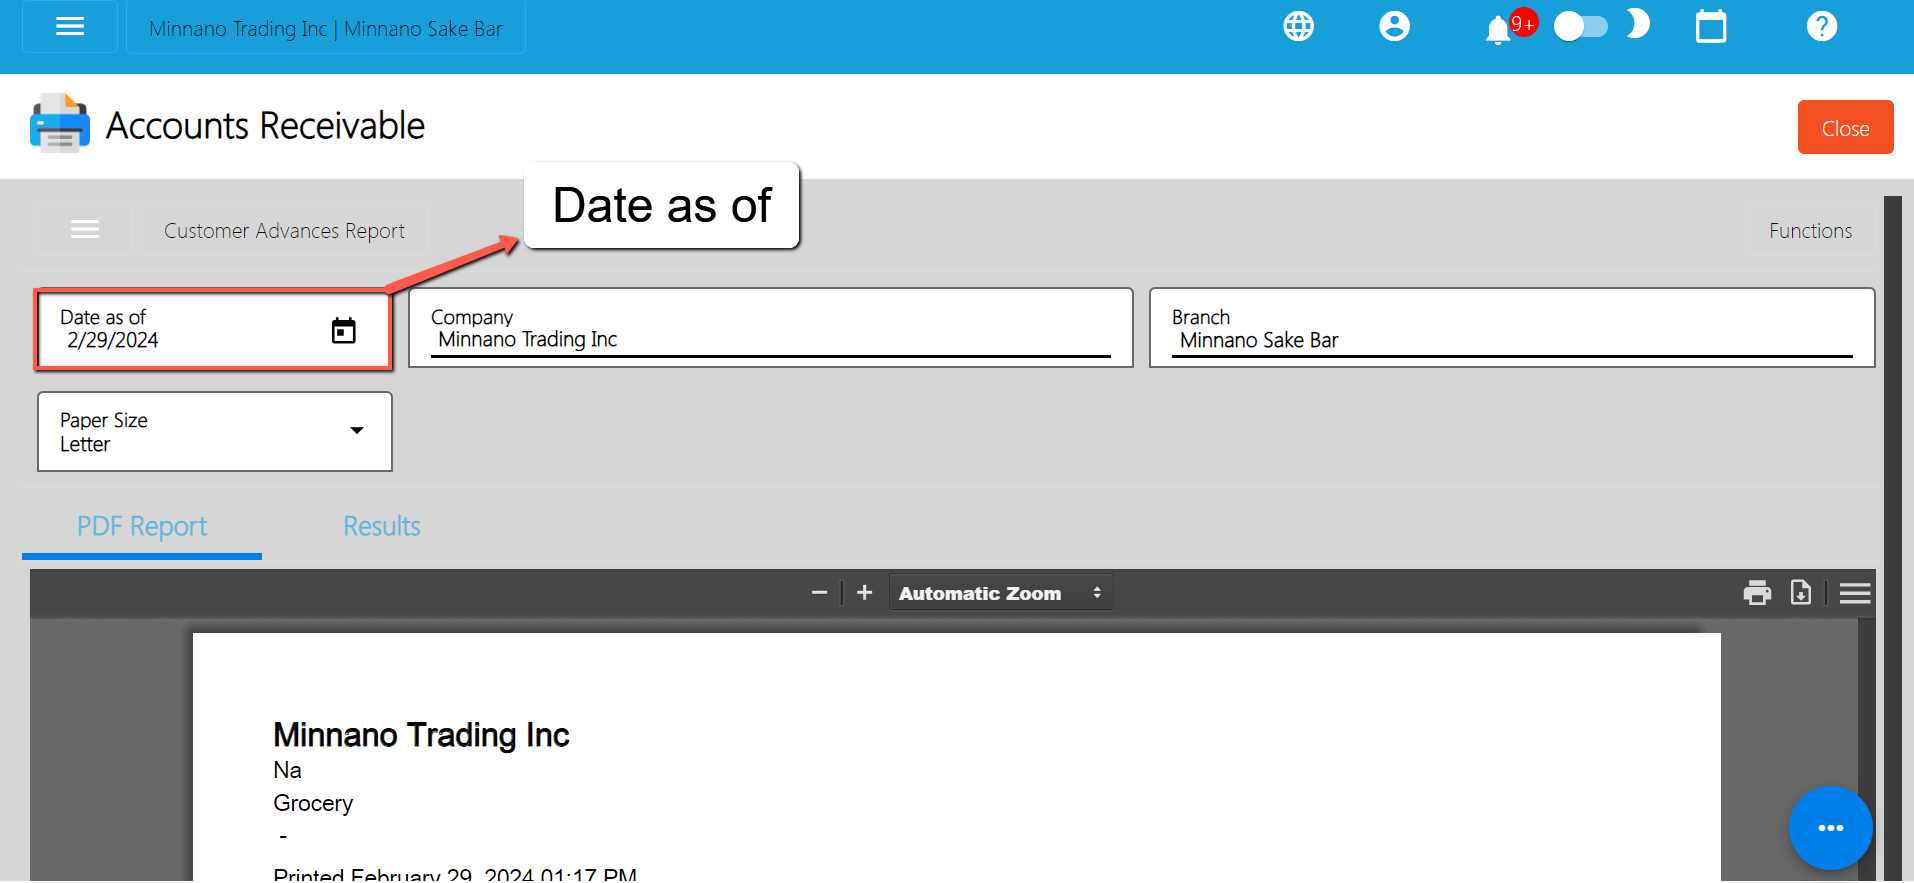
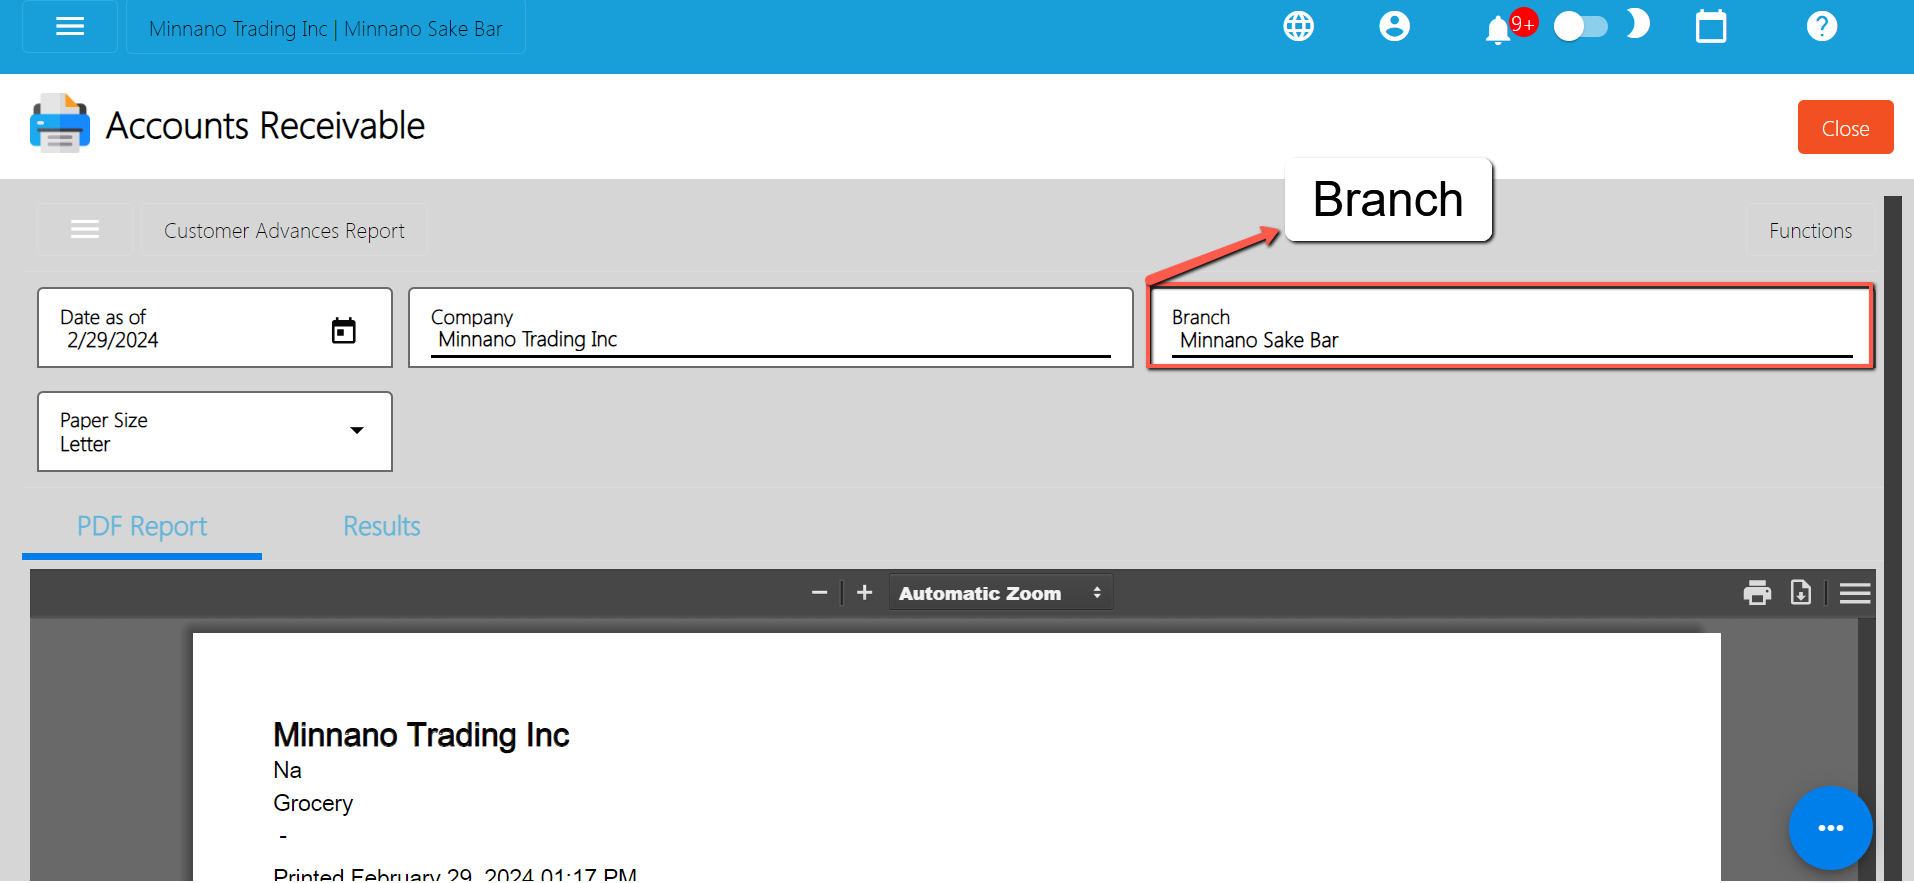
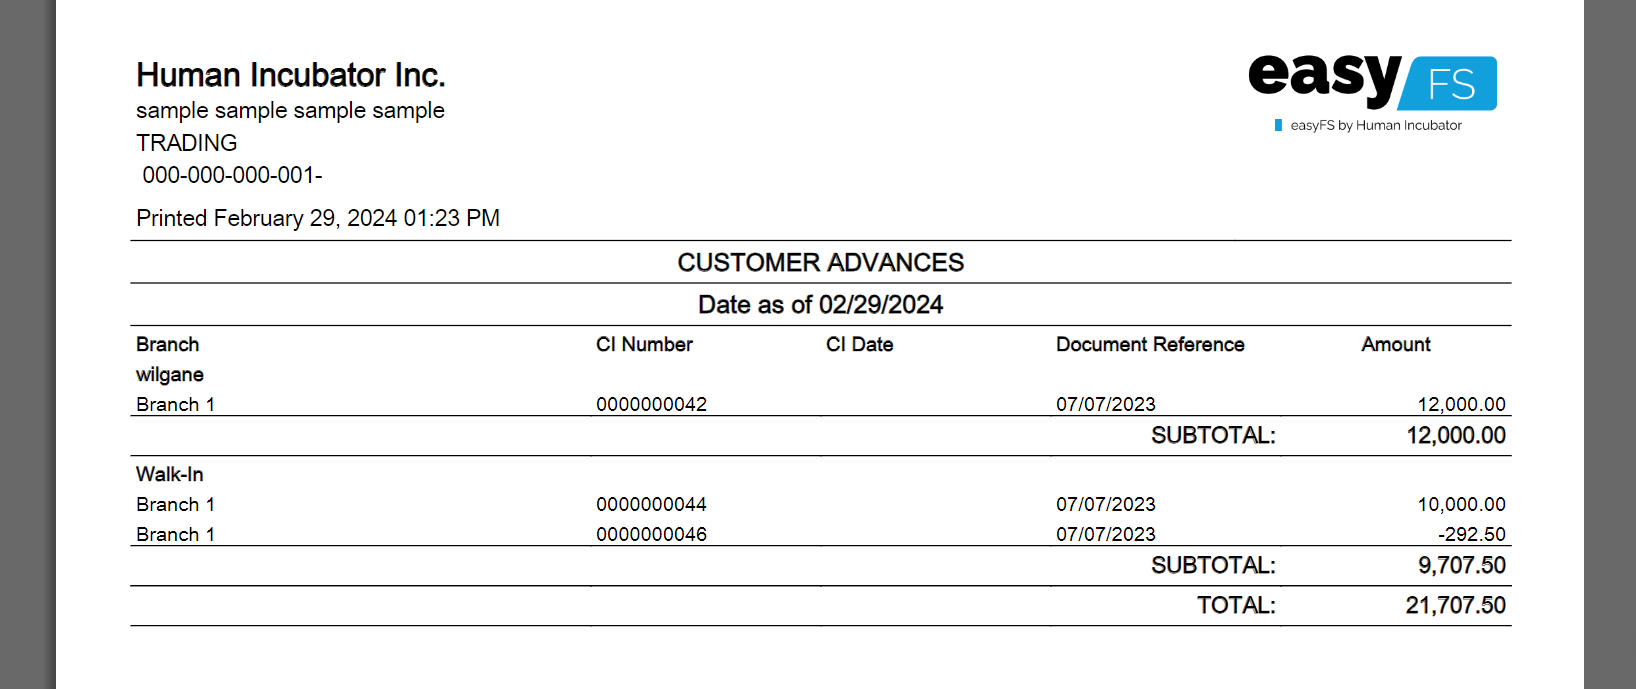
The Customer Advances Report provides a comprehensive overview of all customer advance transactions within a specified period. It allows businesses to track the status of customer advances, identify outstanding balances, and monitor trends over time. Additionally, by leveraging this report, businesses can effectively manage their customer advance transactions and optimize their cash flow management strategies.
To generate Counter Receipt report, here are the steps for you to follow:
Sample Printout

Typically replies within a few hours
 Log in to Messenger