Search User Manual
1.3 Purpose of this User Manual
1.4 Who Should Use This Manual
1.4 Best Practices and System Limitations
1.4.1 Setting up the Master Files
4.1.1.1 How to Add an Item Manually
4.1.1.2 Add Item Via Import Function
4.1.2.2 Add Customer Via Import Function
4.1.3.2 Add Supplier Via Import Function
List of All Users that were added to the System
4.1.6.1 Chart of Accounts Lists
4.1.6.2 Manual Add Chart of Accounts
4.1.6.2 Add Chart of Accounts via Upload Account
4.1.8.2 Manual Add of Currency
4.2.1.1 Manual Update Item Detail
4.2.1.2 Update Item Detail in Bulk
4.2.2.1 Manual Update Supplier Detail
4.2.2.1 Update Supplier Detail in Bulk
4.2.3.1 Manual Update Customer Detail
4.2.3.1 Update Customer Detail in Bulk
5.2 Purchases Transaction Module
Cancel Purchase Request Transaction
Purchase Order Transaction via Upload Template
Cancel Purchase Order Transaction
Cancel Receiving Receipt Transaction
Cancel Disbursement Transaction
Debit Memo Transaction via Upload Template
Sales Order Transaction via Upload Template
Cancel Sales Order Transaction
Sales Invoice Transaction via Upload Template
Cancel Sales Invoice Transaction
Collection Transaction via Upload Template
Scenario 3: Extra-Ordinary Activities
Scenario 4: Multi-Branch with EasyPOS Integration
Accounts Payable Voucher Report
Accounts Payable By Currency Report
Purchase Request Summary Report
Purchase Request Detail Report
Purchase Order Detail With Balance Report
Receiving Receipt Summary Report
Receiving Receipt Detail Report
Print or Download the PDF Report
Available Item Per Batch Report
Cancelled Purchase Request Report
Cancelled Purchase Order Report
Cancelled Receiving Receipt Report
Accounts Receivable Summary Report
Accounts Receivable by Term Report
Accounts Receivable by Currency Report
Accounts Receivable Report (One Month)
Statement of Account (By Date Range)
Collection Summary by PayType Report
Cancelled Sales Invoice Report
Sales Invoice Detail Report with Cost
Stock Transfer Detailed Report
13.1.1 Benefits of Integration
13.2.1 EasyPOS Integration Overview
13.3 How to Set Up Integrations
.toc-wrapper .c27{margin-left: 6pt}.toc-wrapper .c46{margin-left:14pt}.toc-wrapper .c46 .c14 a,.toc-wrapper .c50 a{font-size:13px}.toc-wrapper .c50{margin-left:18pt;} .manual-content table td, .manual-content table th{padding:0;border: 1px #aaa solid;padding: 10px;} .manual-content table td span,.manual-content table td p,.manual-content table td li{font-size:11px!important;}

easyFS Users Manual
Author: John Cedrick Madula
Collaborators: Jerico Canete
Keycee Rafales
easyFS Version: HEAD v2.19.33-production 2025-01-28
Date Created: 10/16/2023
Date Updated: 01/31/2025
Date Released: 02/05/2025
Table of Contents
1.3 Purpose of this User Manual
1.4 Who Should Use This Manual
1.4 Best Practices and System Limitations
1.4.1 Setting up the Master Files
4.1.1.1 How to Add an Item Manually
4.1.1.2 Add Item Via Import Function
4.1.2.2 Add Customer Via Import Function
4.1.3.2 Add Supplier Via Import Function
List of All Users that were added to the System
4.1.6.1 Chart of Accounts Lists
4.1.6.2 Manual Add Chart of Accounts
4.1.6.2 Add Chart of Accounts via Upload Account
4.1.8.2 Manual Add of Currency
4.2.1.1 Manual Update Item Detail
4.2.1.2 Update Item Detail in Bulk
4.2.2.1 Manual Update Supplier Detail
4.2.2.1 Update Supplier Detail in Bulk
4.2.3.1 Manual Update Customer Detail
4.2.3.1 Update Customer Detail in Bulk
5.2 Purchases Transaction Module
Cancel Purchase Request Transaction
Purchase Order Transaction via Upload Template
Cancel Purchase Order Transaction
Cancel Receiving Receipt Transaction
Cancel Disbursement Transaction
Debit Memo Transaction via Upload Template
Sales Order Transaction via Upload Template
Cancel Sales Order Transaction
Sales Invoice Transaction via Upload Template
Cancel Sales Invoice Transaction
Collection Transaction via Upload Template
Scenario 3: Extra-Ordinary Activities
Scenario 4: Multi-Branch with EasyPOS Integration
Accounts Payable Voucher Report
Accounts Payable By Currency Report
Purchase Request Summary Report
Purchase Request Detail Report
Purchase Order Detail With Balance Report
Receiving Receipt Summary Report
Receiving Receipt Detail Report
Disbursement Detail Report
Print or Download the PDF Report
Debit Memo Summary Report
Debit Memo Detail Report
Supplier Journal
Available Item Per Batch Report
Cancelled Purchase Request Report
Cancelled Purchase Order Report
Cancelled Receiving Receipt Report
Accounts Receivable Summary Report
Accounts Receivable by Term Report
Accounts Receivable by Currency Report
Accounts Receivable Report (One Month)
Statement of Account (By Date Range)
Collection Summary by PayType Report
Cancelled Sales Invoice Report
Sales Invoice Detail Report with Cost
Stock Transfer Detailed Report
13.1.1 Benefits of Integration
13.2.1 EasyPOS Integration Overview
13.3 How to Set Up Integrations
13.5 Guidelines for Integrations: Do’s and Don'ts
I: Introduction
1.1 Overview
easyFS is a cloud-based accounting system where users can easily access it anytime and anywhere as long as they have a stable internet connection with the use of their laptops, desktops and tablets. This system offers a range of features to simplify financial tasks, such as invoicing, expense tracking, and financial reporting.
Using cloud-based accounting software like easyFS can provide numerous benefits to small and medium-sized enterprises (SMEs). Here are some of the benefits:
Low cost of deployment
easyFS is a cloud-based software, which means it’s delivered over the internet as a service, so you don’t need to invest in expensive hardware or infrastructure to deploy it. This can result in significant cost savings for SMEs, particularly those that have limited budgets. Savings include not having to employ and deploy and maintain a whole IT infrastructure among others.
You will always get the latest updated version
With easyFS, you don’t need to worry about upgrading to the latest version of the software as it is done automatically. This means that you always have access to the latest features and functionality, without having to go through the hassle of manually upgrading your software.
Improved team efficiency and collaboration
With easyFS, you can streamline your accounting processes and automate routine tasks, which can save your team a lot of time and effort. Different teams in different locations can collaborate seamlessly because they work with the same set of data accessed in real time. This can free up your team to focus on other important areas of your business and improve their overall efficiency.
Anytime, anywhere convenience
easyFS is accessible from anywhere with an internet connection and at any time, in real time giving you the flexibility and convenience you need to manage your finances on the go. This is essential for modern SMEs that need to stay connected and responsive to their customers and stakeholders.
At easyFS, we pride ourselves on offering a range of cutting-edge features that help small and medium-sized enterprises (SMEs) in the Philippines manage their finances with ease. Here’s a closer look at each of our seven features:
BIR CAS-ready
Our platform is fully BIR CAS-ready, making it easier for your company to apply for BIR Computerized Accounting System (CAS) registration. This feature ensures that you are compliant with the latest regulations, while also simplifying your accounting processes.
Sales and Inventory Management
With easyFS, you can easily manage your sales and inventory, helping you to stay on top of your stock levels and make informed decisions about your products and services. This feature also allows you to generate reports on your sales performance, helping you to optimize your sales strategies and drive growth.
Tracking business expenses and purchases
With easyFS, you can easily track your business expenses and purchases, helping you to stay on top of your cash flow and make informed financial decisions. Our platform allows you to quickly enter expenses and purchases, categorize them, and generate reports to help you understand where your money is going.
On-the-spot invoicing
easyFS allows you to create professional invoices on the spot, making it easy to bill your customers and get paid quickly. This feature is perfect for SMEs that need to generate invoices quickly and efficiently, without compromising quality or accuracy.
Generate financial reports
With easyFS, you can generate powerful financial reports like cash flow statements, balance sheets, and income statements with just a few clicks. This feature gives you valuable insights into your financial performance, helping you to make informed decisions for business growth.
Capable of handling multi-branch and multi-company operations
easyFS is designed to handle the unique needs of SMEs with multiple branches or companies. This feature allows you to easily manage your finances across multiple locations or businesses, giving you a complete view of your financial performance.
Cloud-based accounting software
easyFS is a cloud-based accounting software that makes it easy for your teams to collaborate no matter where they are. That’s because your teams have access to the same data that is stored remotely in the cloud.
1.2 easyFS Process
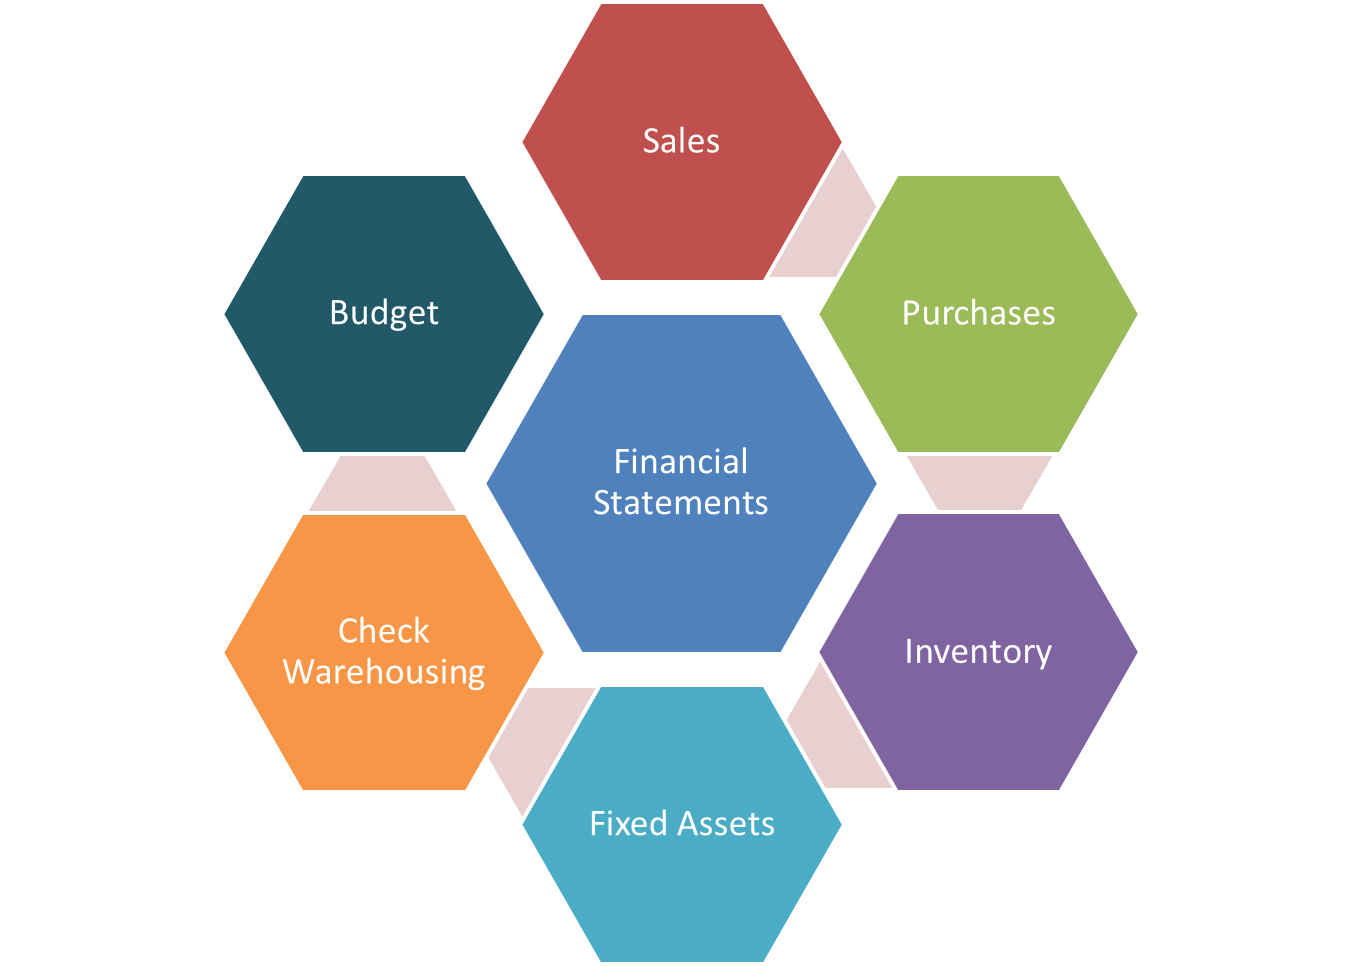
easyFS has the following modules that ultimately generates the Financial Statements that are needed in every business to monitor and control. Whether you are into retail or service business, easyFS can cater to your Accounting Software needs. These are the Modules of easyFS.
Module 1: Sales
The process begins with the Sales module, where transactions related to the sale of goods or services are recorded. Sales representatives generate invoices or sales orders, capturing details such as product/service description, quantity, unit price, and customer information. This module also tracks sales returns and allowances. Once a sale is confirmed and collected, the system updates the accounts receivable and revenue accounts.
Module 2: Purchases
Simultaneously, the Purchases module manages transactions related to the acquisition of goods or services. Purchase orders are created, specifying items, quantities, and agreed-upon prices with vendors. When goods are received, the system updates inventory and accounts payable. Invoices from vendors are processed, recording expenses and adjusting accounts payable accordingly.
Module 3: Inventory
The Inventory module plays a crucial role in tracking the movement of goods. When items are received from purchases, the inventory is updated to reflect the new stock. Similarly, when products are sold, the inventory is adjusted accordingly. This module also facilitates inventory reconciliation, helping to identify discrepancies between physical stock and recorded quantities.
Module 4: Fixed Assets
The Fixed Assets module manages the accounting for long-term assets. When a fixed asset is acquired, the system records the cost, depreciation, and other relevant details. Regular updates are made to reflect changes in the value or status of fixed assets, ensuring accurate financial reporting and compliance with accounting standards.
Module 5: Check Warehousing
The Check Warehousing module monitors the physical storage of inventory items. It ensures that goods received match the recorded quantities and that they are stored appropriately. This module helps in preventing discrepancies between the actual stock in the warehouse and the inventory records.
Module 6: Budgeting
The Budgeting module plays a crucial role in financial planning. Budgets are created based on historical data and future business projections. The module monitors actual financial performance against the budget, providing insights into variances. This information aids management in making informed decisions and adjusting strategies to meet financial goals.
1.3 Purpose of this User Manual
Our primary purpose of this user manual is to provide comprehensive guidance and information to users of the easyFS system. Also, this manual aims to assist you in effectively utilizing the features it offers.
In addition, this manual strives to achieve the following objectives:
- To help users become familiar with the easyFS system, its interface, and the overall layout.
- To empower users to navigate the system confidently and understand the features it offers.
- To enhance awareness of best practices related to data problems.
By referring to this manual, you will gain valuable insights and practical knowledge about the features of our easyFS system.
1.4 Who Should Use This Manual
This manual is designed for all users of the easyFS Accounting System. Whether you're a business owner, financial manager, or a new user eager to explore our system, this guide will provide you with valuable insights on using the system effectively and securely.
Throughout this manual, you will find detailed information, step-by-step instructions, and best practices for making the most of our accounting system. By following the guidance within these pages, you can confidently navigate our system, enhance your financial management skills, and ensure the security of your financial data.
1.4 Best Practices and System Limitations
In this section, we’ll cover a set of best practices to help you prevent future issues and maximize the efficiency and safety of your easyFS.
1.4.1 Setting up the Master Files
easyFS offers two master files setup features: one for manual adding and another for bulk uploads which can upload a total of 500 records/data. Master files on easyFS include: Items, Customers, Suppliers and Chart of Account
Keep the following guidelines in mind to ensure successful entry when setting up the master file(s):
a. Item
- Among the Item detail fields listed below,
- We've set a character limit of 255 and added validation to prevent the use of special characters (comma(,) and tilde(~) are restricted):
- Manual Code
- SKU Code
- Barcode
- Serial Number
- Principal
- Generic Name
- Avoid the issuance of duplicate Manual Code, so please ensure that each item is assigned with a unique Manual Code.
- Avoid the issuance of duplicate SKU Code, so please ensure that each item is assigned with a unique SKU Code.
- Avoid the issuance of duplicate Barcode, so please ensure that each item is assigned with a unique Barcode.
- When using the new feature for uploading new items, we strongly advise a maximum of 500 items per upload.
- When bulk updating the items, we strongly advise a maximum of 500 items per bulk update.
b. Customer
- Among the Customer detail fields listed below, we've set a character limit of 255 and added validation to prevent the use of special characters (comma(,) and tilde(~) are restricted):
- Manual Code
- Contact Person
- Contact Number
- Street Barangay
- City
- Province
- Region
- Zip Code
- Business Style
- Extension
- TIN
- TIN Branch Code
- Senior Citizen Code
- Avoid the issuance of duplicate Manual Code, so please ensure that each Customer is assigned with a unique Manual Code.
- Avoid the issuance of duplicate Customer names, so please ensure that each Customer is assigned with a unique Customer name.
- When using the new feature for uploading new Customers, we strongly advise a maximum of 500 Customers per upload.
- When bulk updating the Customers, we strongly advise a maximum of 500 Customers per bulk update.
c. Supplier
- Among the Supplier detail fields listed below, we've set a character limit of 255 and added validation to prevent the use of special characters (comma(,) and tilde(~) are restricted):
- Manual Code
- Contact Person
- Contact Number
- Street Barangay
- City
- Province
- Region
- Zip Code
- Business Style
- Extension
- Avoid the issuance of duplicate Manual Code, so please ensure that each Supplier is assigned with a unique Manual Code.
- Avoid the issuance of duplicate Supplier names, so please ensure that each Supplier is assigned with a unique Supplier name.
- When using the new feature for uploading new Suppliers, we strongly advise a maximum of 500 Suppliers per upload.
- When bulk updating the Suppliers, we strongly advise a maximum of 500 Suppliers per bulk update.
1.4.2 Internet Connection
To ensure a smooth experience with easyFS and to avoid unexpected issues when uploading new master files or updating existing ones, it’s important to have reliable internet connection. Here are some best practices to consider:
- Use a Secure Network: Connect to a secure and trusted Wi-Fi network or wired connection.
- Minimum Upload Speed: For efficient uploading of new master files and updates, your internet connection should have a minimum speed of at least 25 Mbps.
1.4.3 Device Shutdown
To maintain the condition of your device and ensure consistent access to the easyFS cloud system, it’s essential to follow these best practices for proper device shutdown:
- Regular Device Shutdown: Shut down your computer or mobile devices regularly to prevent overheating and extend hardware lifespan.
- Graceful Closure: Before shutting down your computer, ensure all applications, including easyFS, are closed properly. Saving any unsaved work is essential.
- Close easyFS: Specifically, close easyFS and log out of your easyFS account before shutting down your device. This ensures that any ongoing tasks are saved and that easyFS is in a stable state.
- Update Software: Keep your device's operating system and easyFS software up to date. Updates often include bug fixes and security enhancements that can prevent hardware-related issues.
- Battery Maintenance: If you're using a laptop or mobile device, manage your device's battery health by following the manufacturer's recommendations for charging and discharging cycles.
- Uninterruptible Power Supply (UPS): If possible, use a UPS to provide backup power during brief outages, ensuring that your device has enough time to shut down gracefully.
II. Version History
2.1 Overview
Welcome to easyFS! This section provides an overview of the version history, highlighting key features, improvements, and bug fixes introduced in each release.
2.2 Gamma.003.001
- Release Date: March 18, 2023
- Description of Updates
- Basic master files setup
- The overview and basic creation of different easyFS transactions.
2.3 Gamma.004.003
- Release Date: September 25, 2023
- Description of Updates
- Added section for the master file setup (Item, Customer, Supplier) to avoid using special characters
- Added a section on Stock In Things to Remember.
- Added a section on Stock In on how to bulk upload line items.
- Added a section on the Item setup on how to use the new upload feature.
2.4 Gamma.004.004
- Release Date: November 24, 2023
- Description of Updates
- Updated easyFS User Manual format.
- Added an Introduction section for an easyFS overview, purpose of the manual, persons who should use the manual, and best practices.
- Added a Version History section so users could keep track of the user manual updates.
- Added a Getting Started section consisting of Login and Forgot Password.
- Added Master Files section where it helps the user to easily setup and update the easyFS master files.
- Added an Integration section consisting of overview, types of integrations, how to set up integrations, managing integrations, and the guidelines when having integrations; the do’s and don’ts.
2.5 Gamma.004.004
- Release Date: December 5, 2023
- Description of Updates
- Added Process Flow Chart on Sales, Purchases, Inventory and Financial Transactions
- Added Additional Description on the Flow of Transactions to be understood by Common Users
2.6 Gamma.004.004
- Release Date: December 6, 2023
- Description of Updates
- Updated Item Fields Definition
- Maximizes Margins and Remove Spaces
- Added Use Cases for Each Features
- Added Reports Screenshots
2.7 Gamma.004.005
- Release Date: December 30, 2023
- Description of Updates
- Changed UI for Master Files Menu
- Changed UI for Extraordinary Activities
- Added more explanation on the process flow of easyFS
III: Getting Started
3.1 Introduction
Welcome to the “Getting Started” section of the easyFS User Manual. This section is your gateway to entering the world of secure financial management. By this section, you will be guided through the initial steps to access and navigate our system effectively.
3.2 Accessing easyFS
3.2.1 Logging In
- Open your web browser: Launch your preferred web browser. We recommend using the latest version of popular web browsers like Google Chrome, Mozilla Firefox, Safari, or Microsoft Edge.
- Visit the system’s web address: In the address bar of your web browser, enter the URL for easyFS. The web address may look like ”https://demo.easyfs.ph/”.
- Enter your credentials: You will be redirected to the login page. Here, enter your username and password. Make sure to use the correct credentials associated with your easyFS account. If you have no account yet, better inform the System’s Administrator to create you an account.
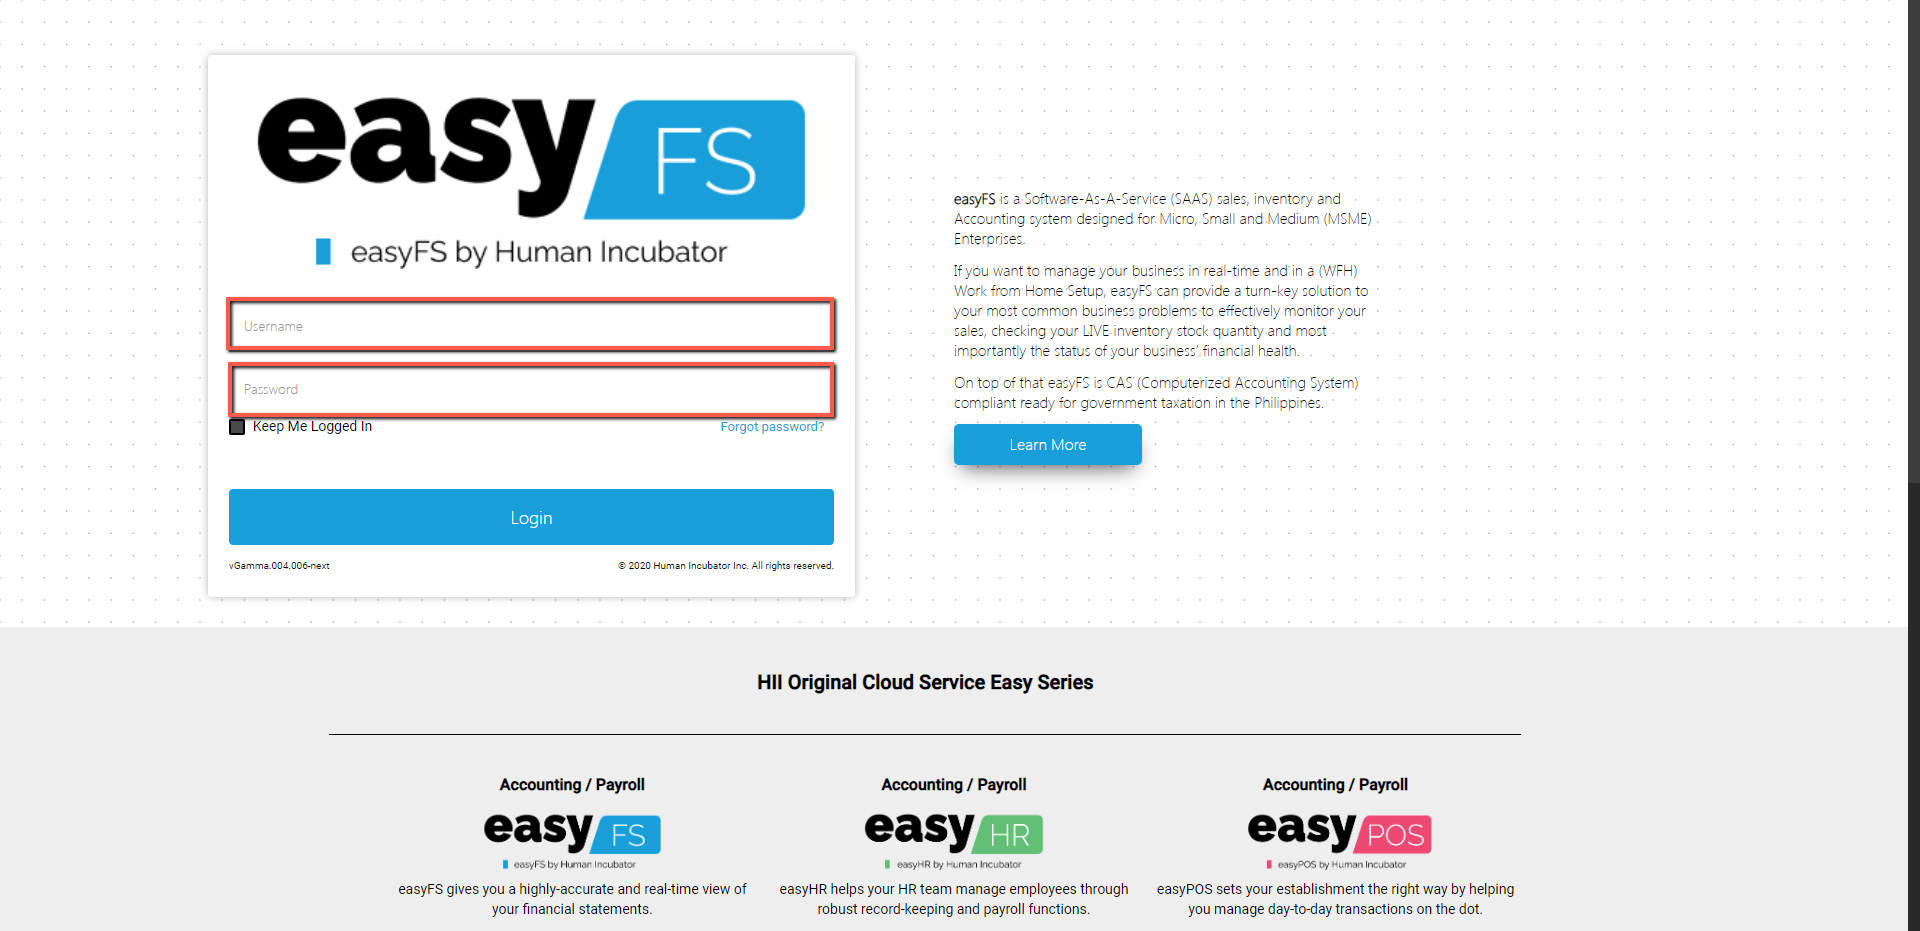
- Click “Login”: Once you’ve done entering your credentials, click the Login button.
3.2.2 Forgot Password
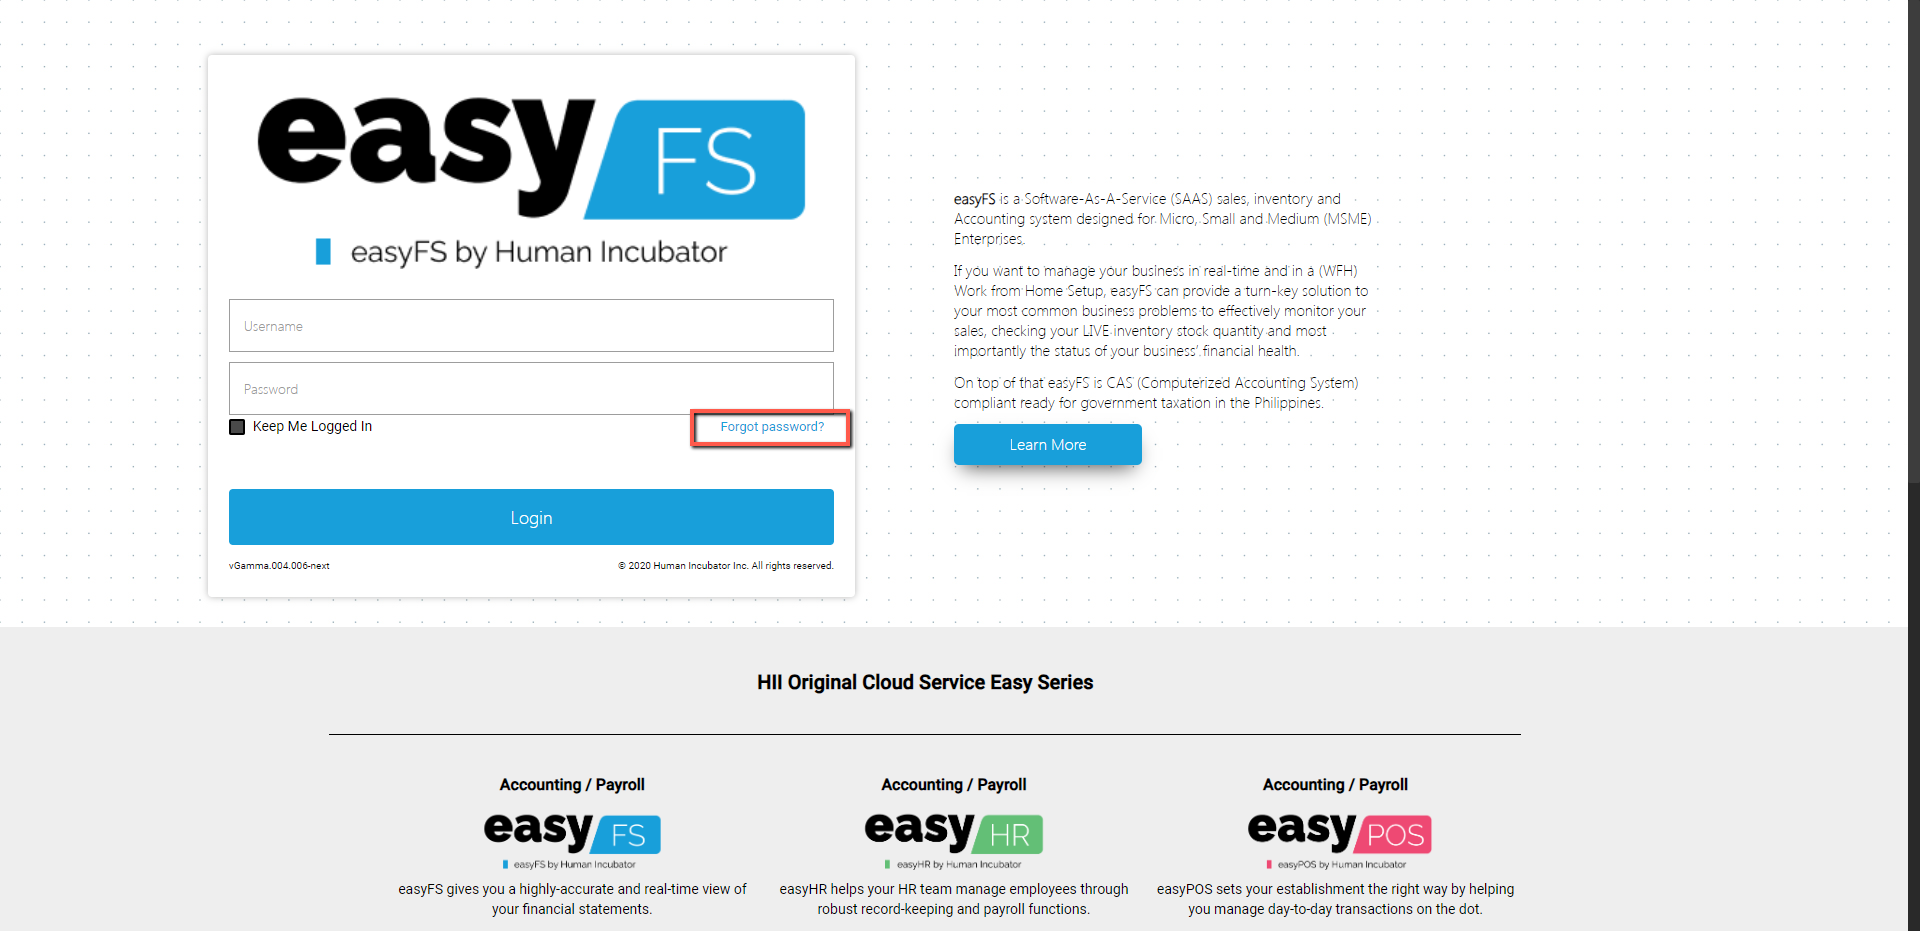
If you've forgotten your password, no need to worry. Simply click the "Forgot Password" link on the login page. You'll receive instructions on how to reset your password via your registered email address.
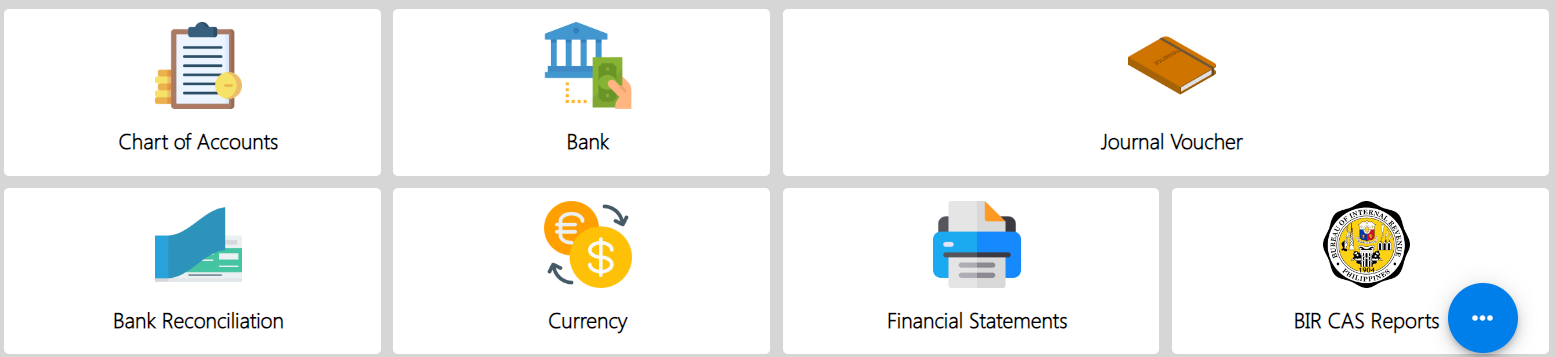
3.2.3 The Dashboard Page
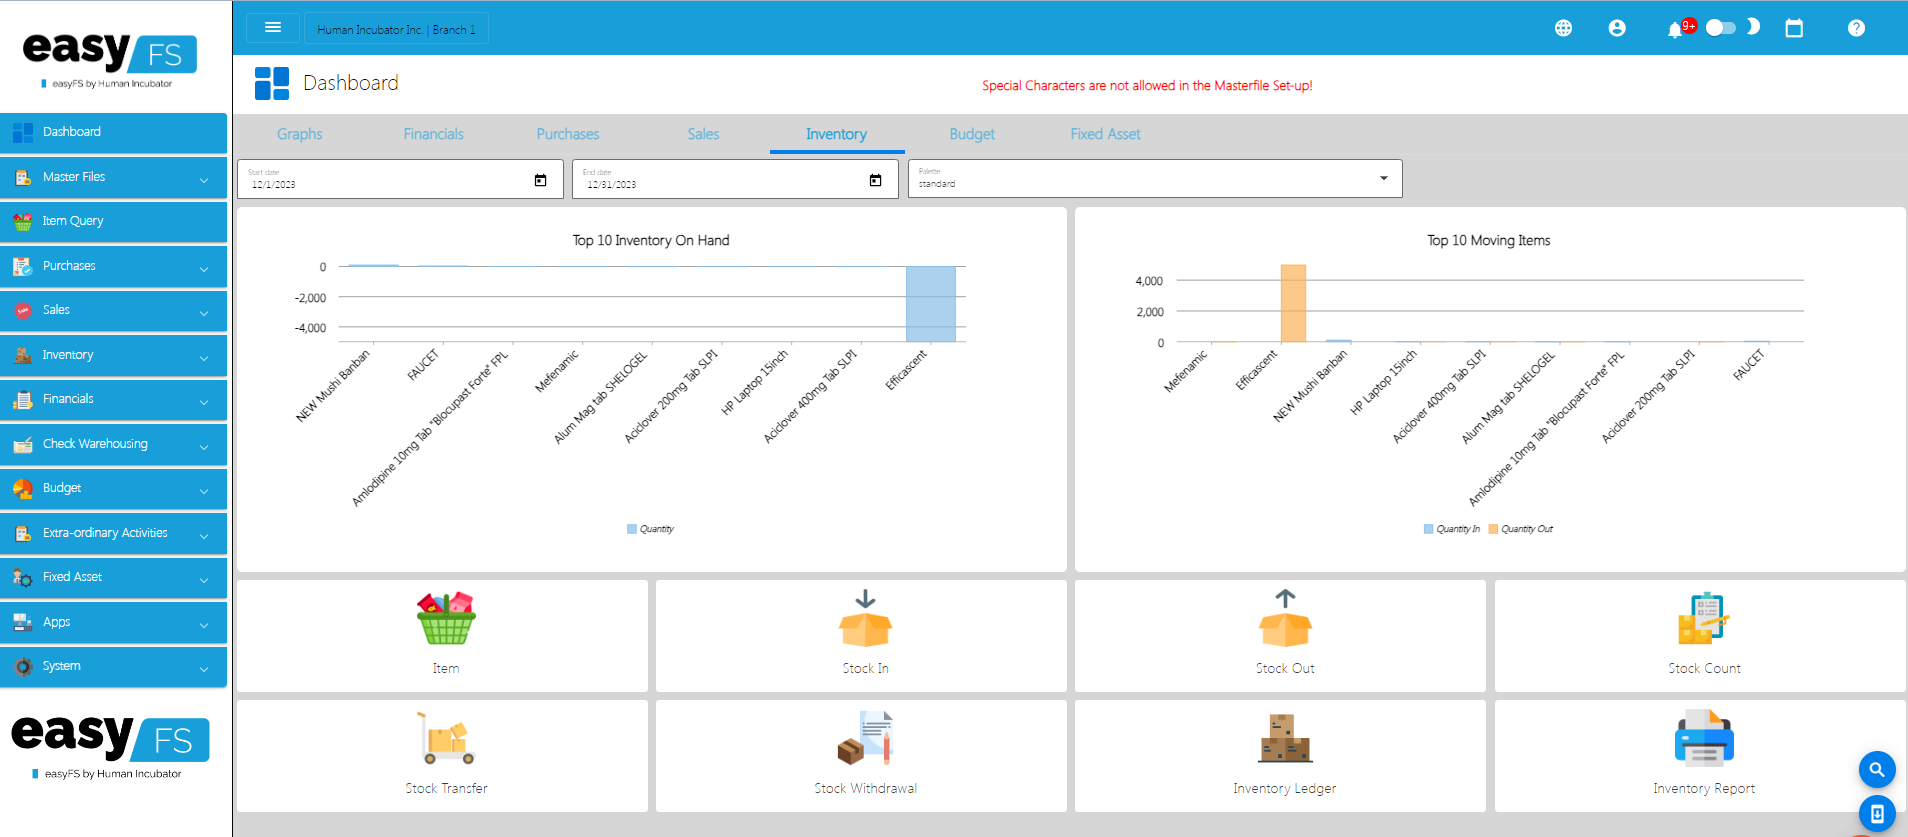
Once login is successful, you will be redirected to this Dashboard page. The easyFS Dashboard is a visual representation of key information, data, or functionalities that provides users with a quick and accessible overview of the application's state or performance. Dashboards are designed to present information in a way that is easy to understand, typically through charts, graphs, widgets, or other visual elements
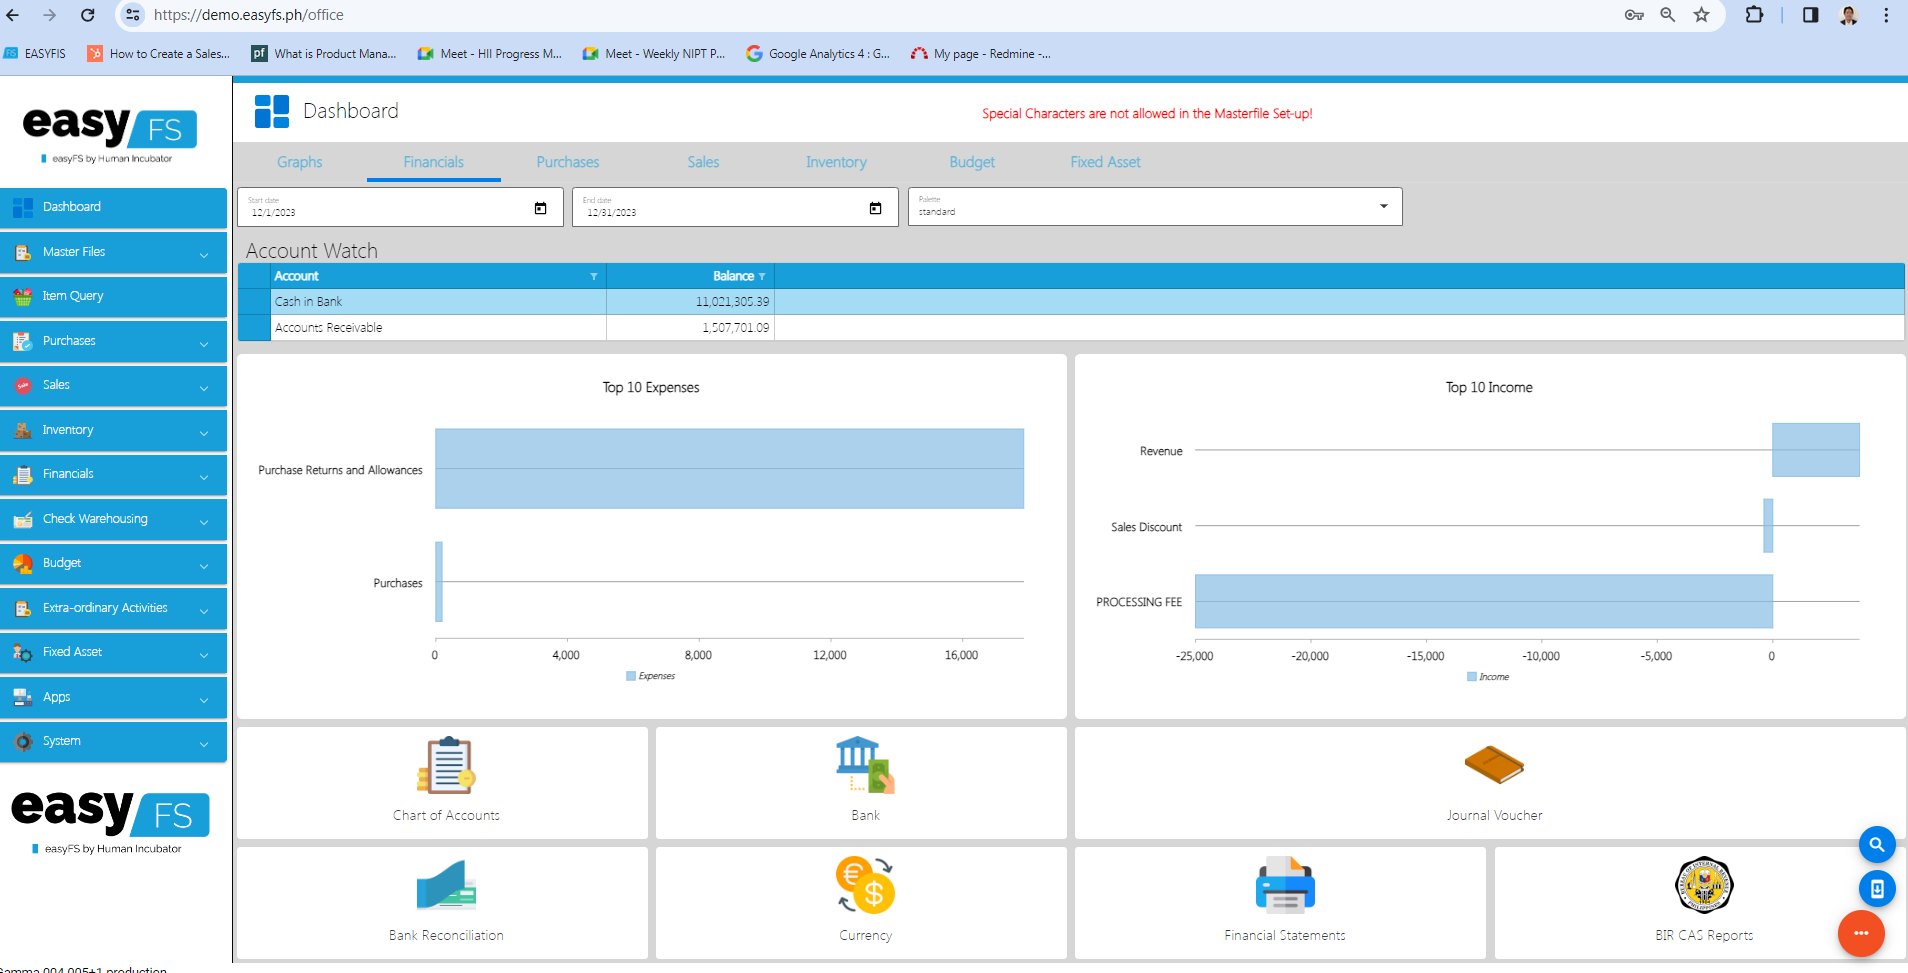
easyFS Dashboard – shows the most important things in the system such as the Graphs, Financials, Purchases Sales, Inventory, Budget, and Fixed Asset.
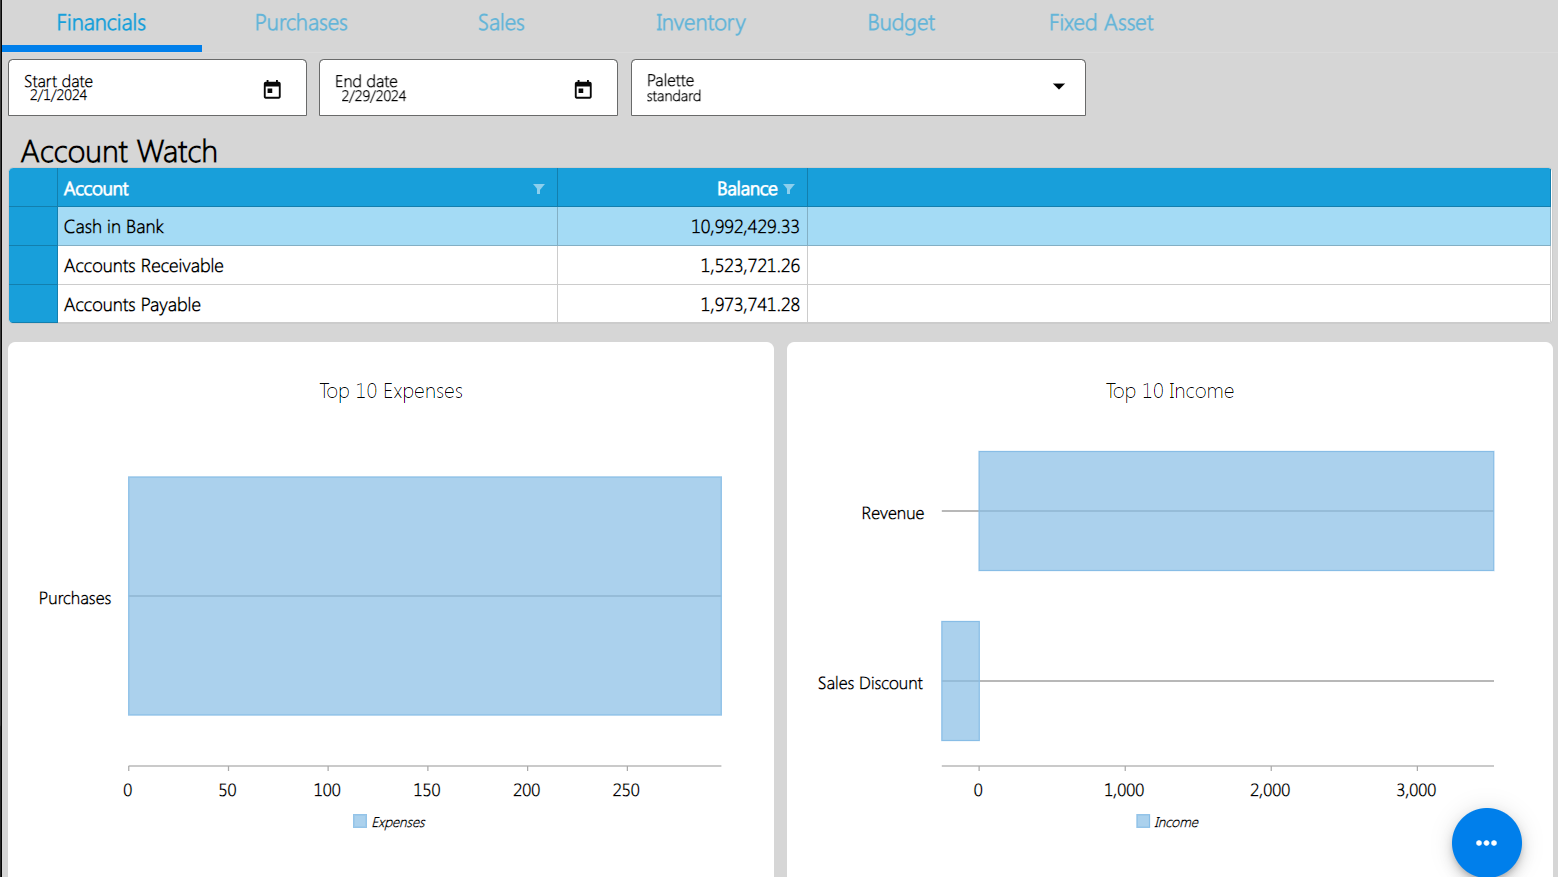
Financials Dashboard – shows the top income and expense items in real time data.
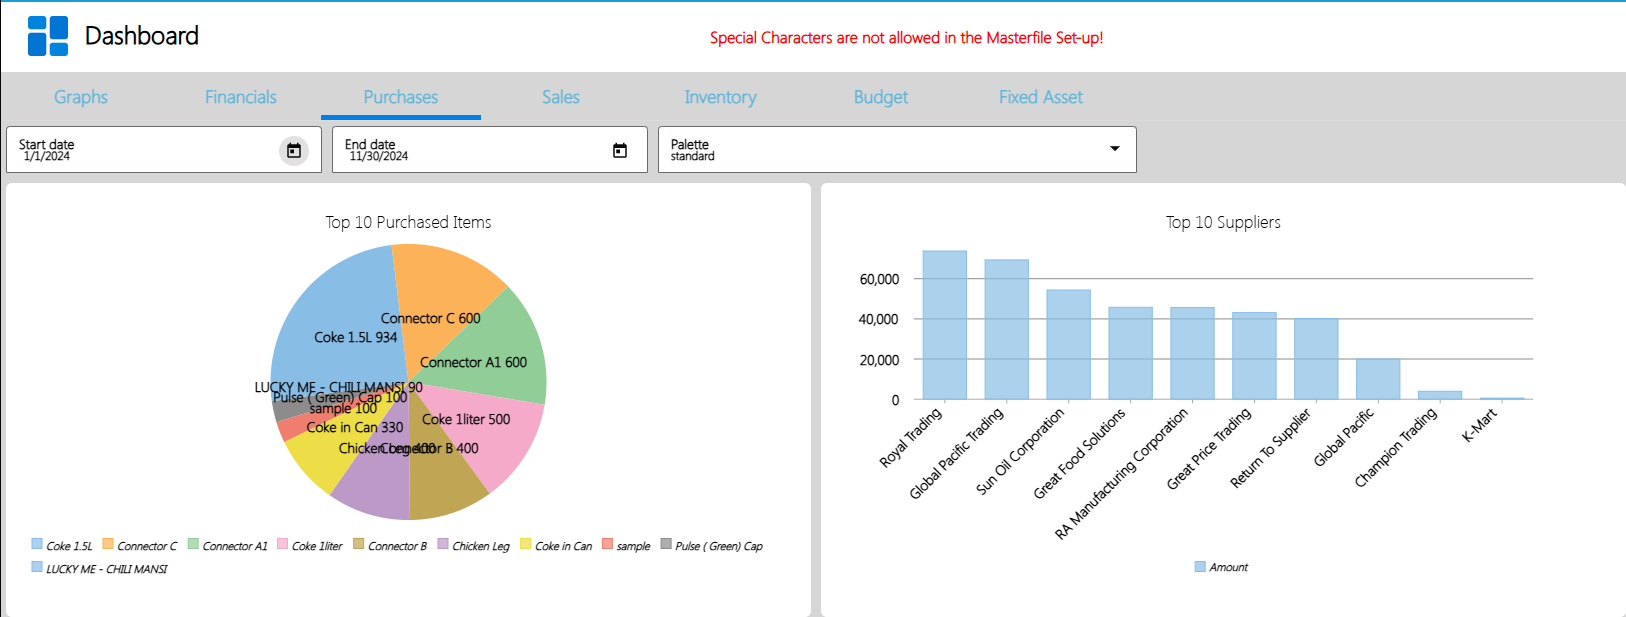
Purchases Dashboard – shows the top 10 Purchased Items and top 10 Suppliers in graphical representation.
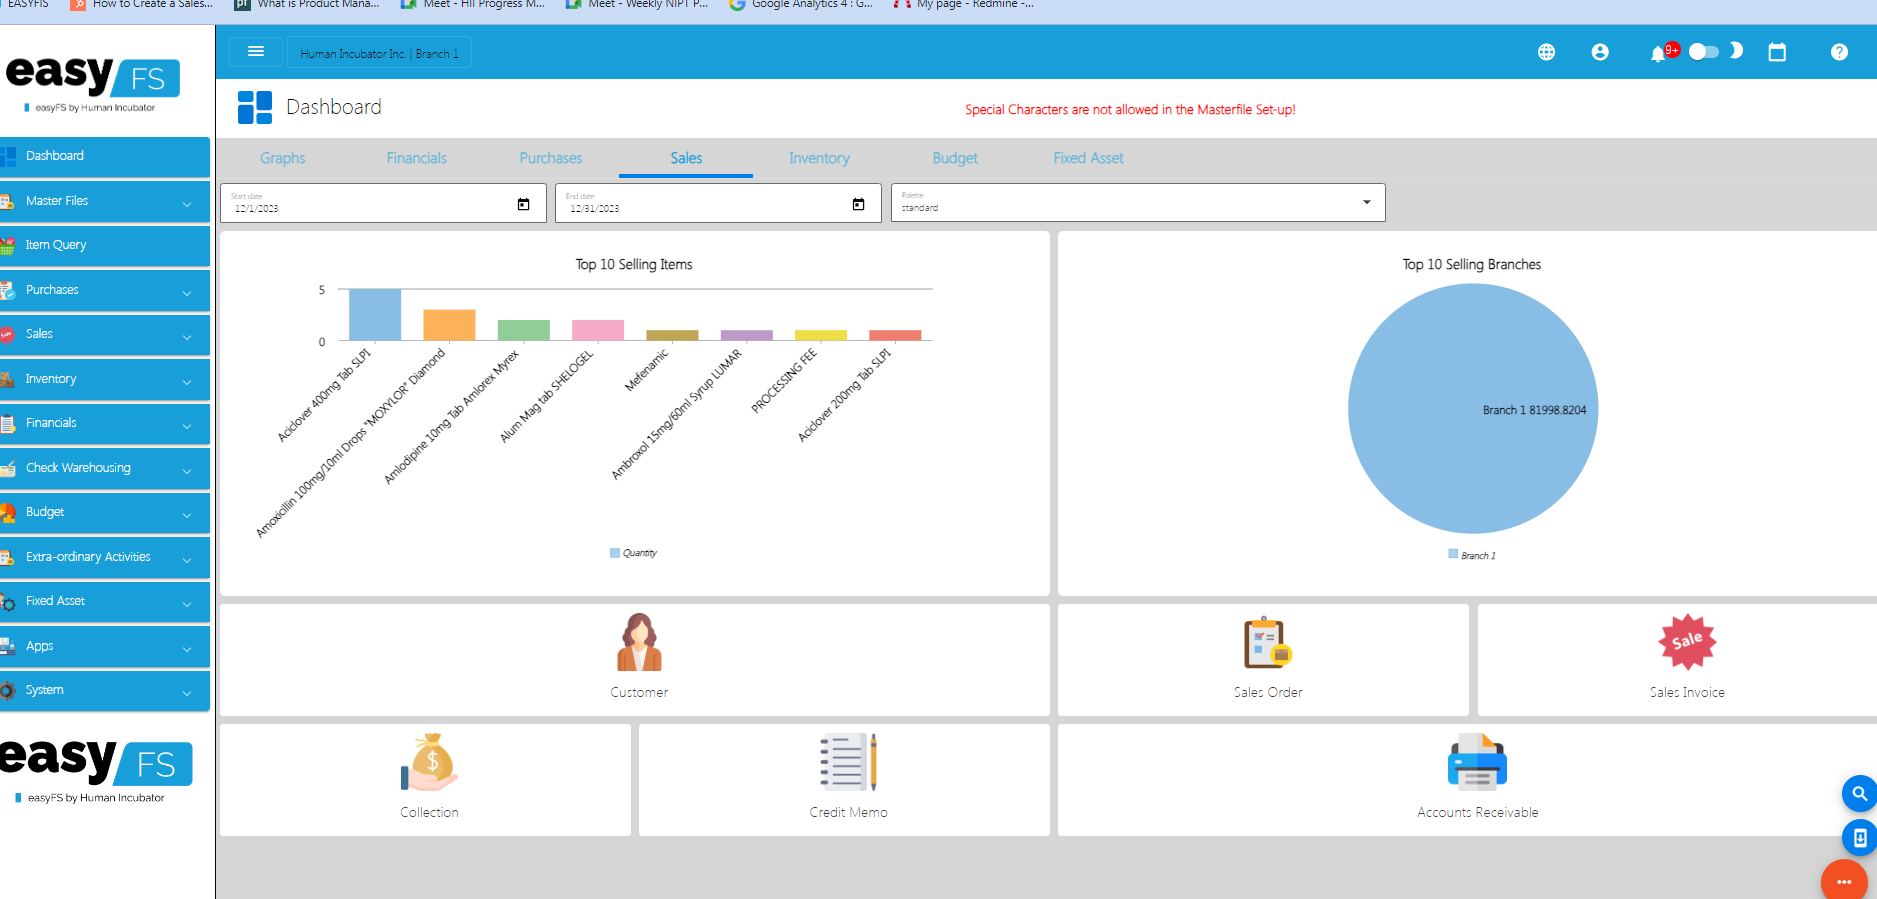
Sales Dashboard – shows the top 10 sellable items and the top
10 branch that has the most sale
Inventory Dashboard – Displays the top 10 Inventory on Hand Quantity and top 10 fast moving items
Budget Dashboard – Displays 2 buttons, budget button: once clicked the user will be redirected to the budget list module and the Budget Variance button: once clicked the user will be redirected to the budget variance list module

Fixed Asset Dashboard – Displays 3 buttons, Fixed Asset button: once clicked the user will be redirected to the Fixed Asset list module, Assets Disposals button: once clicked the user will be redirected to the Asset Disposal list module and last is Report Button: once clicked the user will be redirected to the Fixed Assets Reports Module.

3.2.4 Navigating easyFS
To assist users in navigating through easyFS these are the most common terms used in this manual and in the easyFS system for you to understand easily the User Interface (UI)
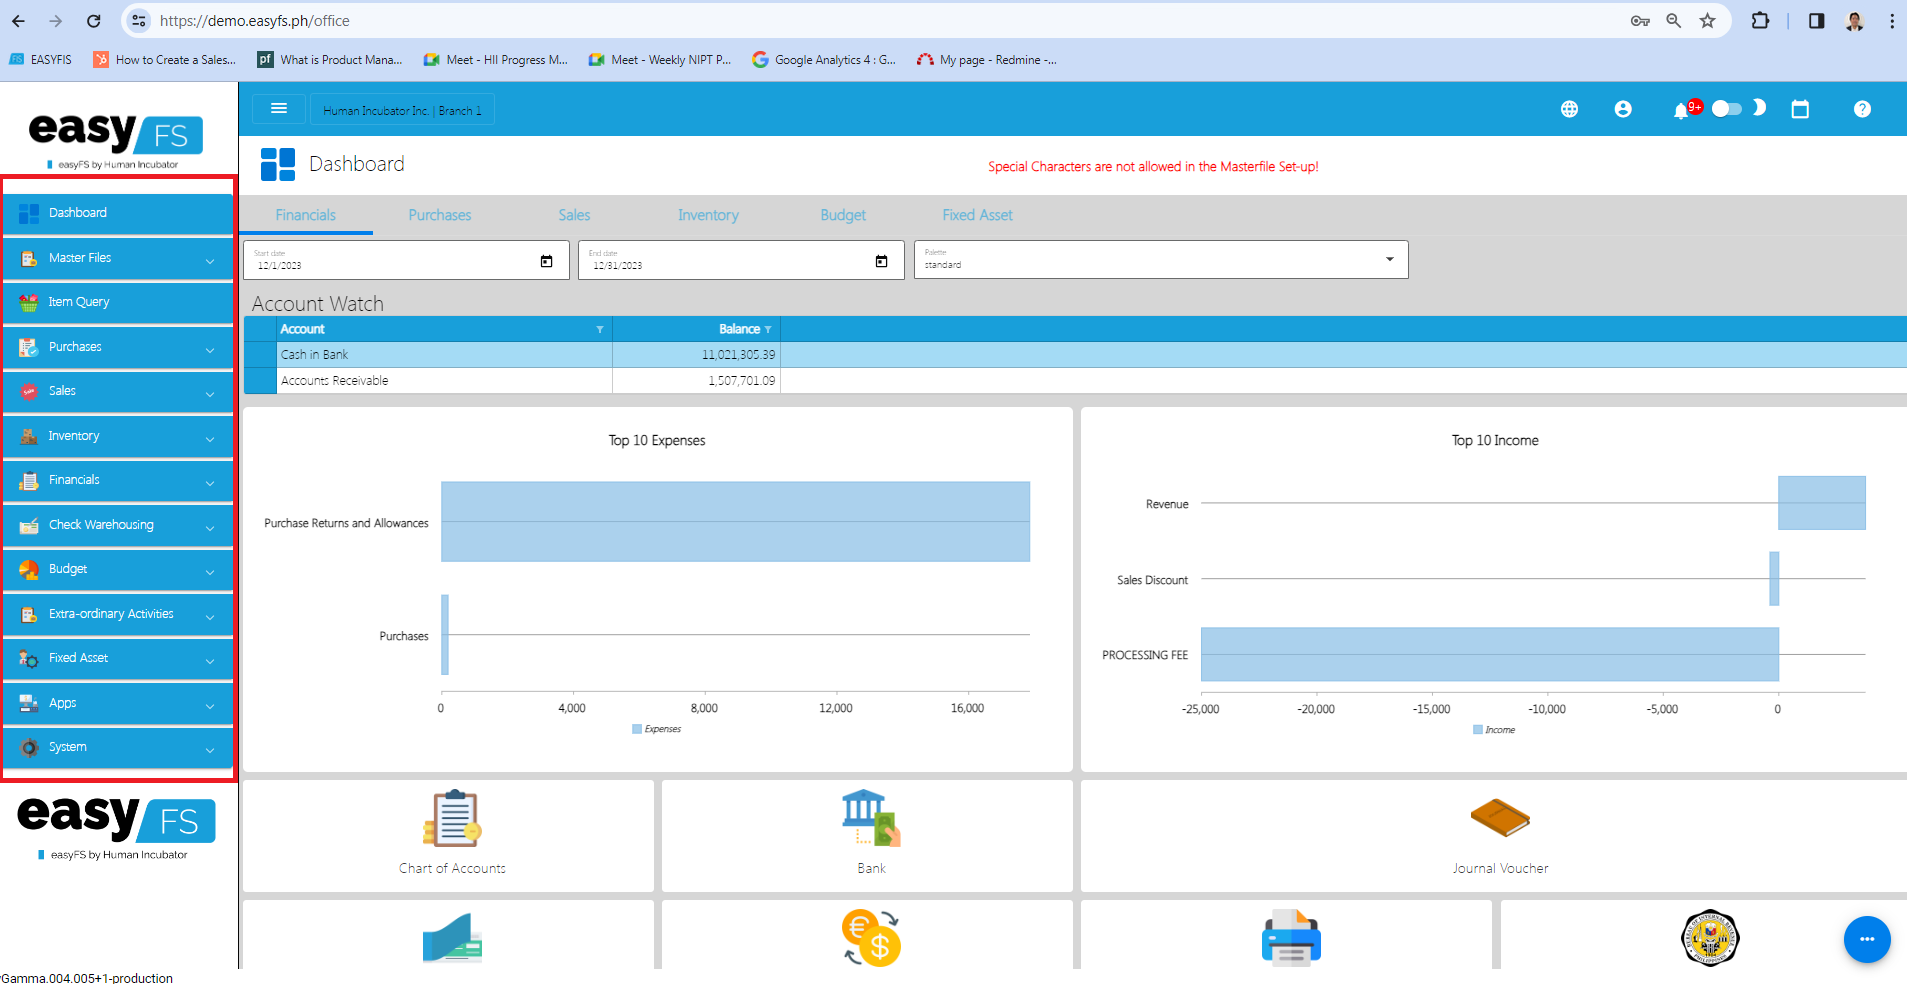
- Menus – Serves as the primary navigation point for users.
Contains high-level options that represent major sections or functionalities of the application.
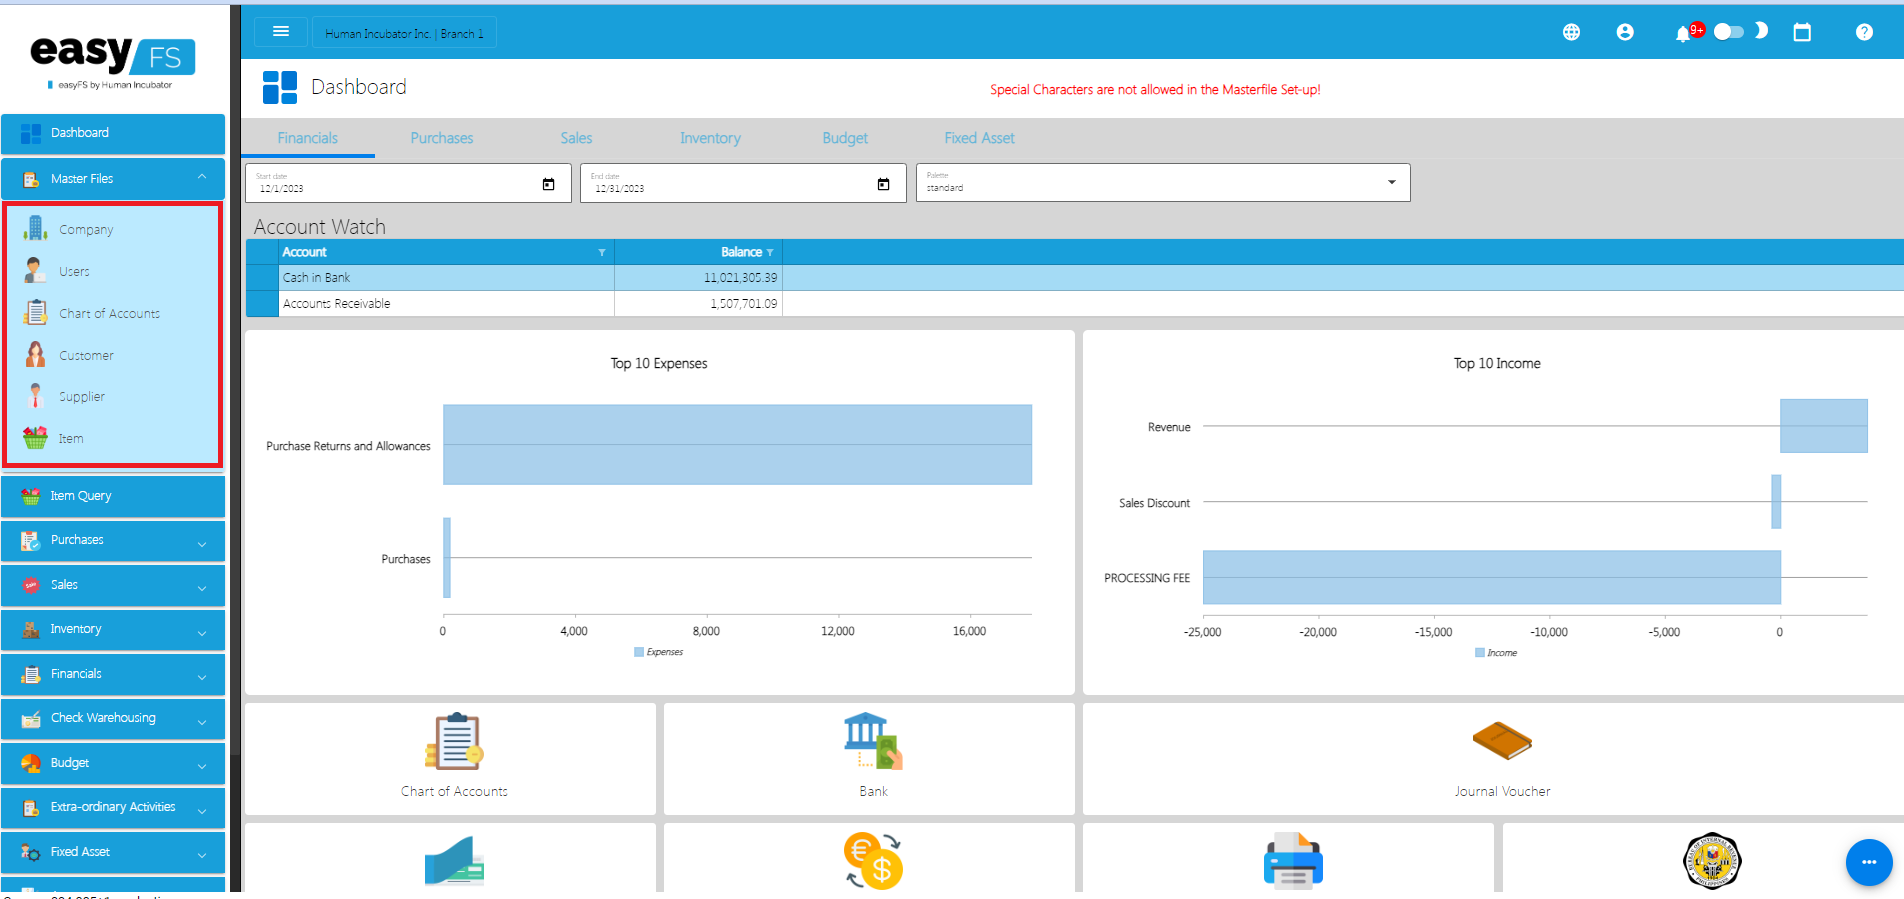
- Sub-Menus – Appears when a user selects an option from the main menu. Contains more specific options related to the selected main menu item
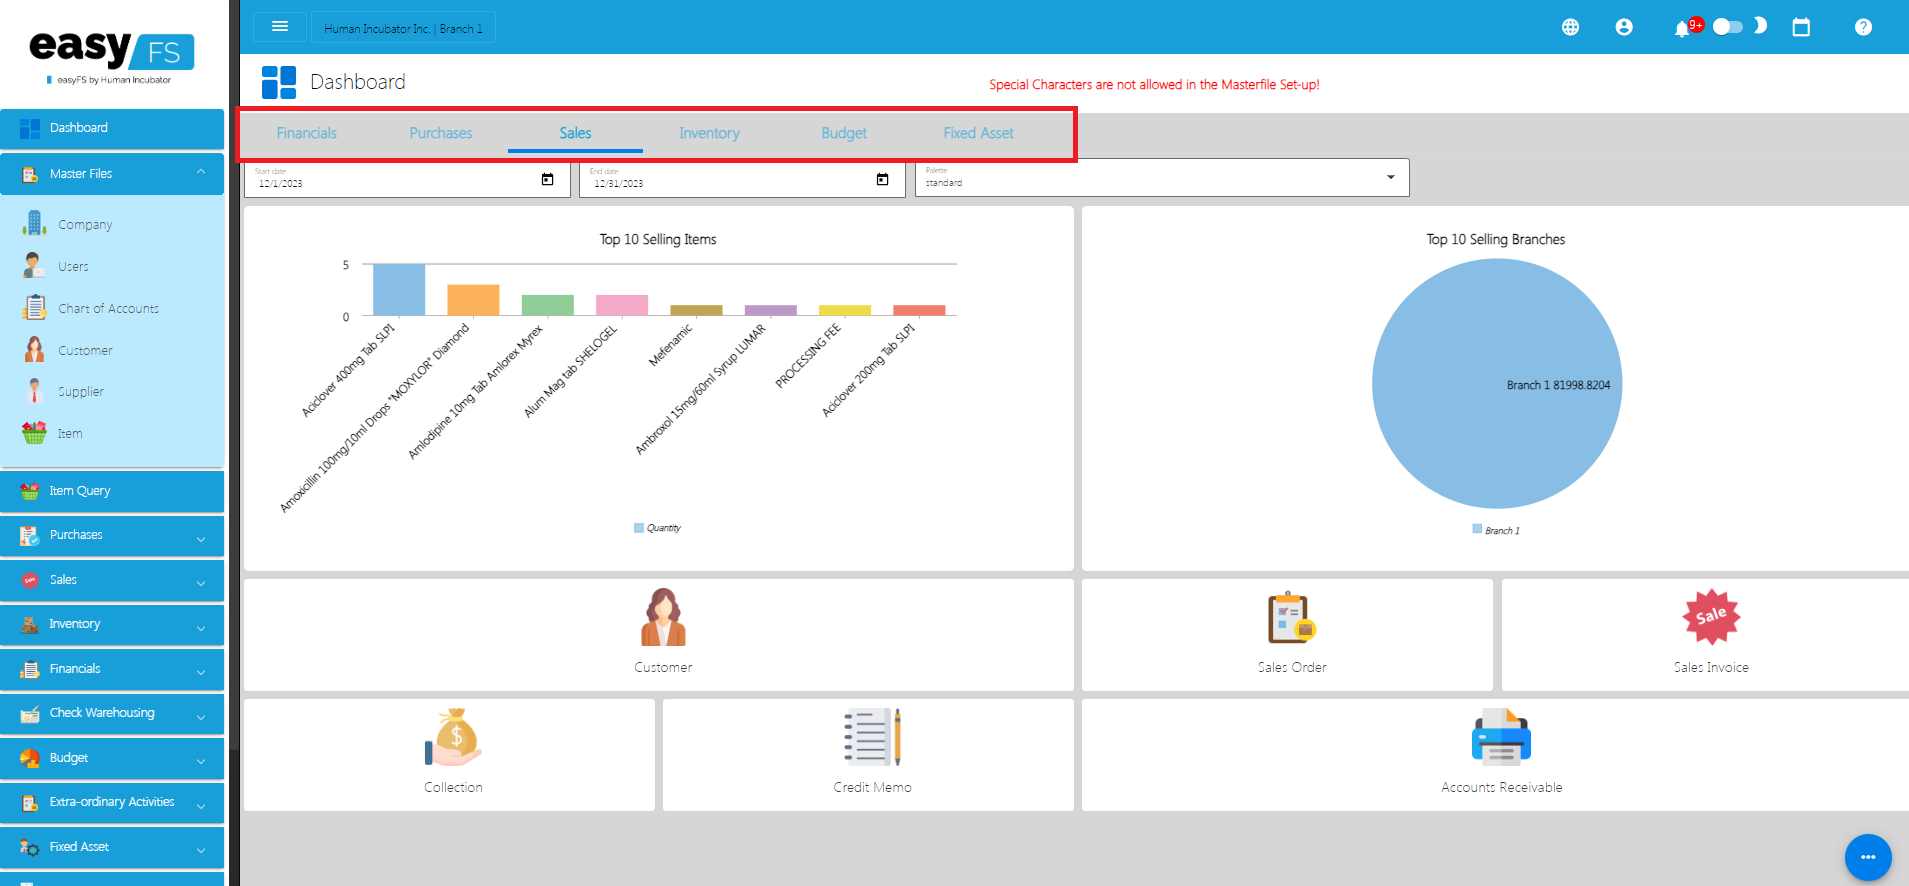
- Tabs – refers to a graphical control element that allows users to navigate between different sections or content within the same window or view . Tabs are often used to organize and present information in a way that is both visually and functionally clear.
- Language Toggle – user interface element that allows users to switch between different languages or language versions of content within an application or website. This easyFS feature is particularly useful for multilingual applications or websites where users may prefer or require content in a language other than the default.
- Notifications – refer to messages or alerts that inform users about specific events, updates, or actions that require their attention. Notifications play a crucial role in keeping users informed, engaged, and aware of relevant information.
Dark and Light Mode Toggle – refers to easyFS feature that allows users to switch between different color schemes or visual themes for an application or website. The two primary modes are typically a "dark mode" with dark backgrounds and light text, and a "light mode" with light backgrounds and dark text. Users can choose their preferred mode based on personal preference, situational needs, or simply for aesthetic reasons.
- Forms – or data entry user interfaces, allowing users to input, submit, and interact with data. These data inputs will then become the source for generating reports and outputs in easyFS. easyFS has a standard Data Entry Form based on the List Detail form User Pattern.
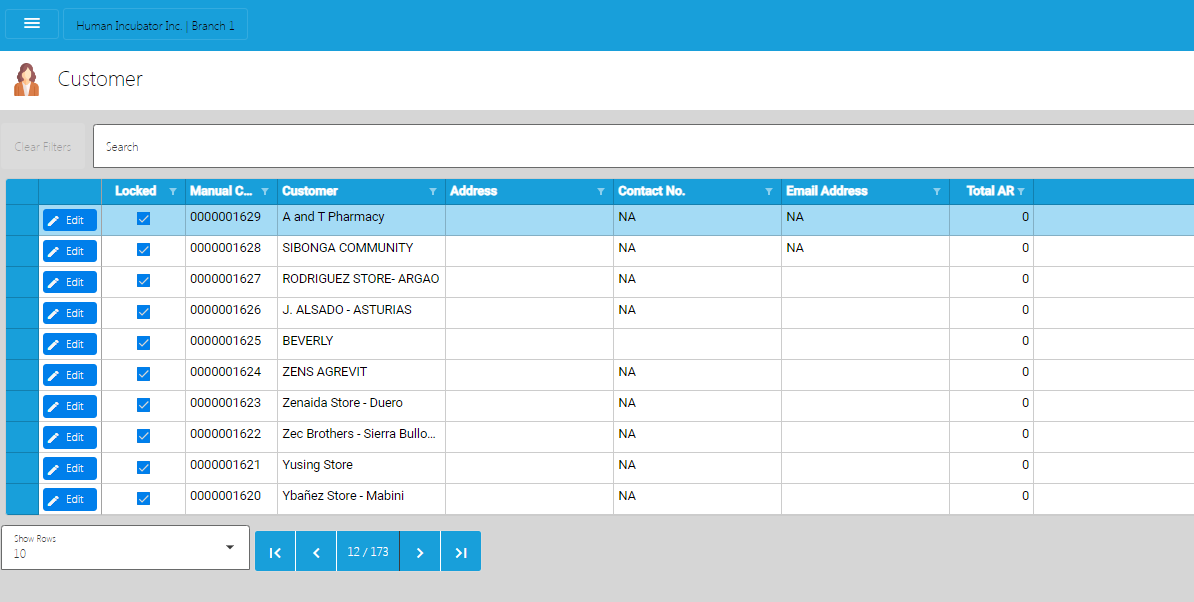
- List – The list view presents a summarized or condensed display of multiple items. Each item typically includes key information or attributes. Users can quickly scan and navigate through the list to find the item they are interested in.
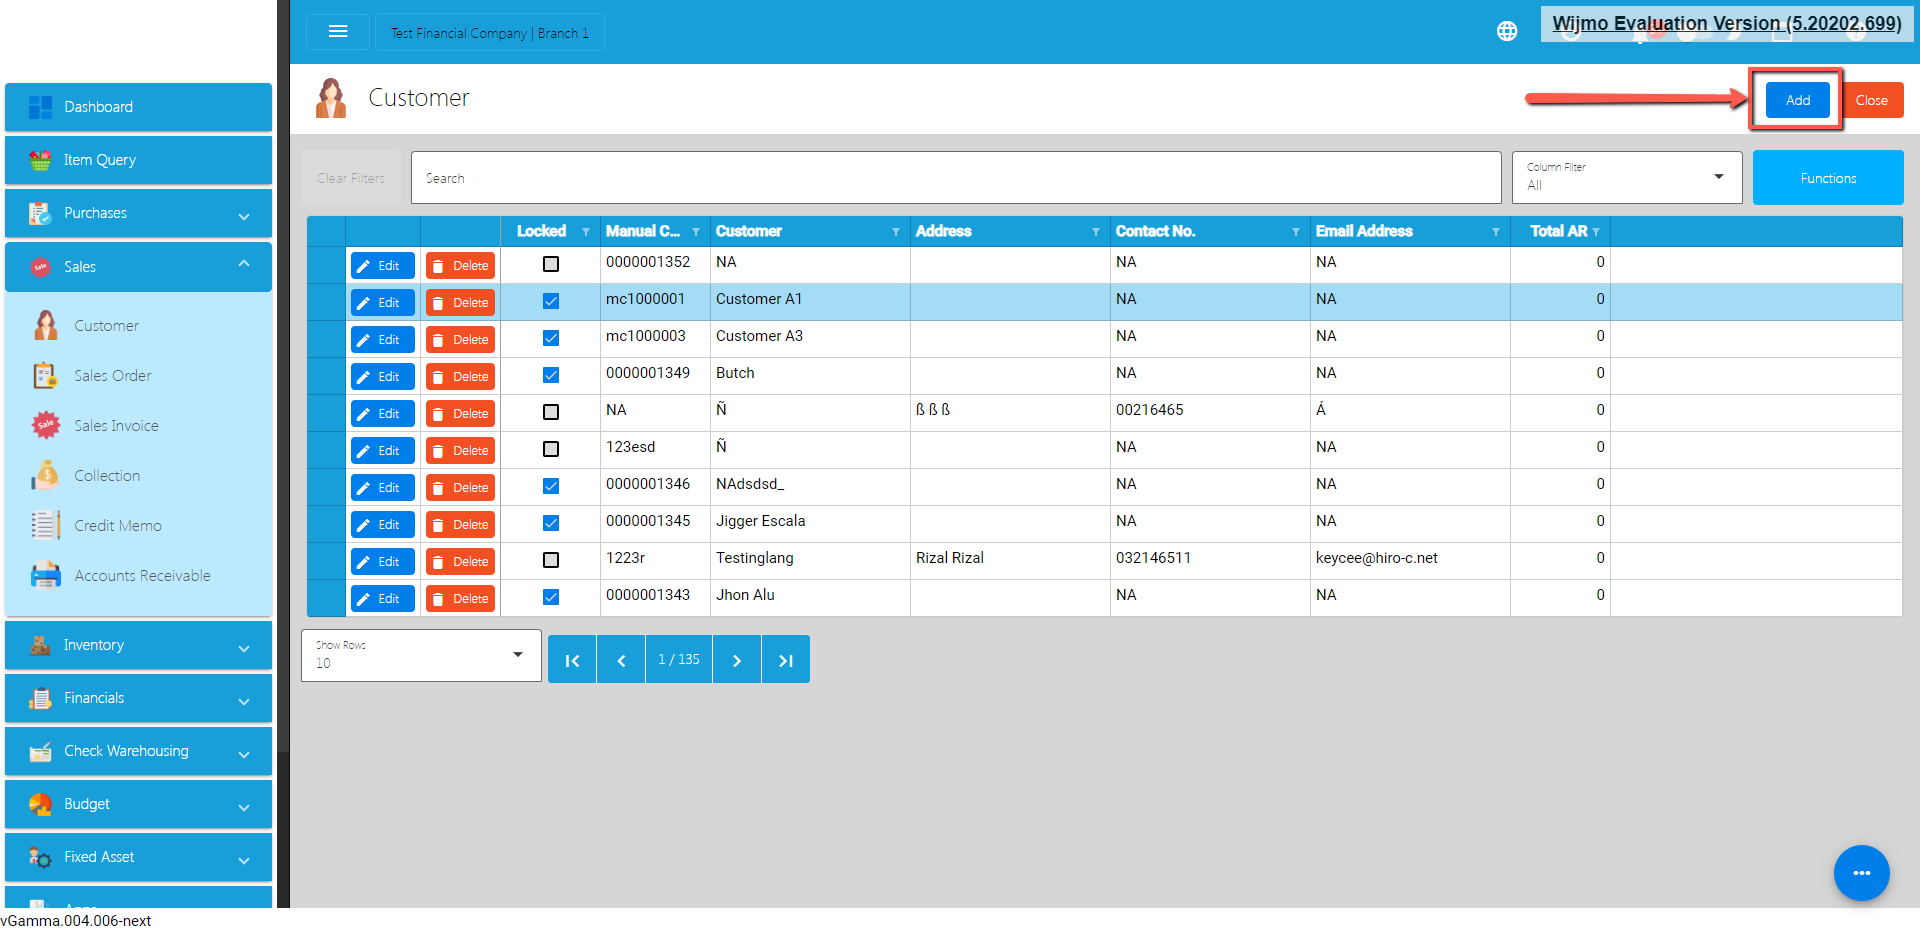
Example is the screenshot below which shows the List of Customers.
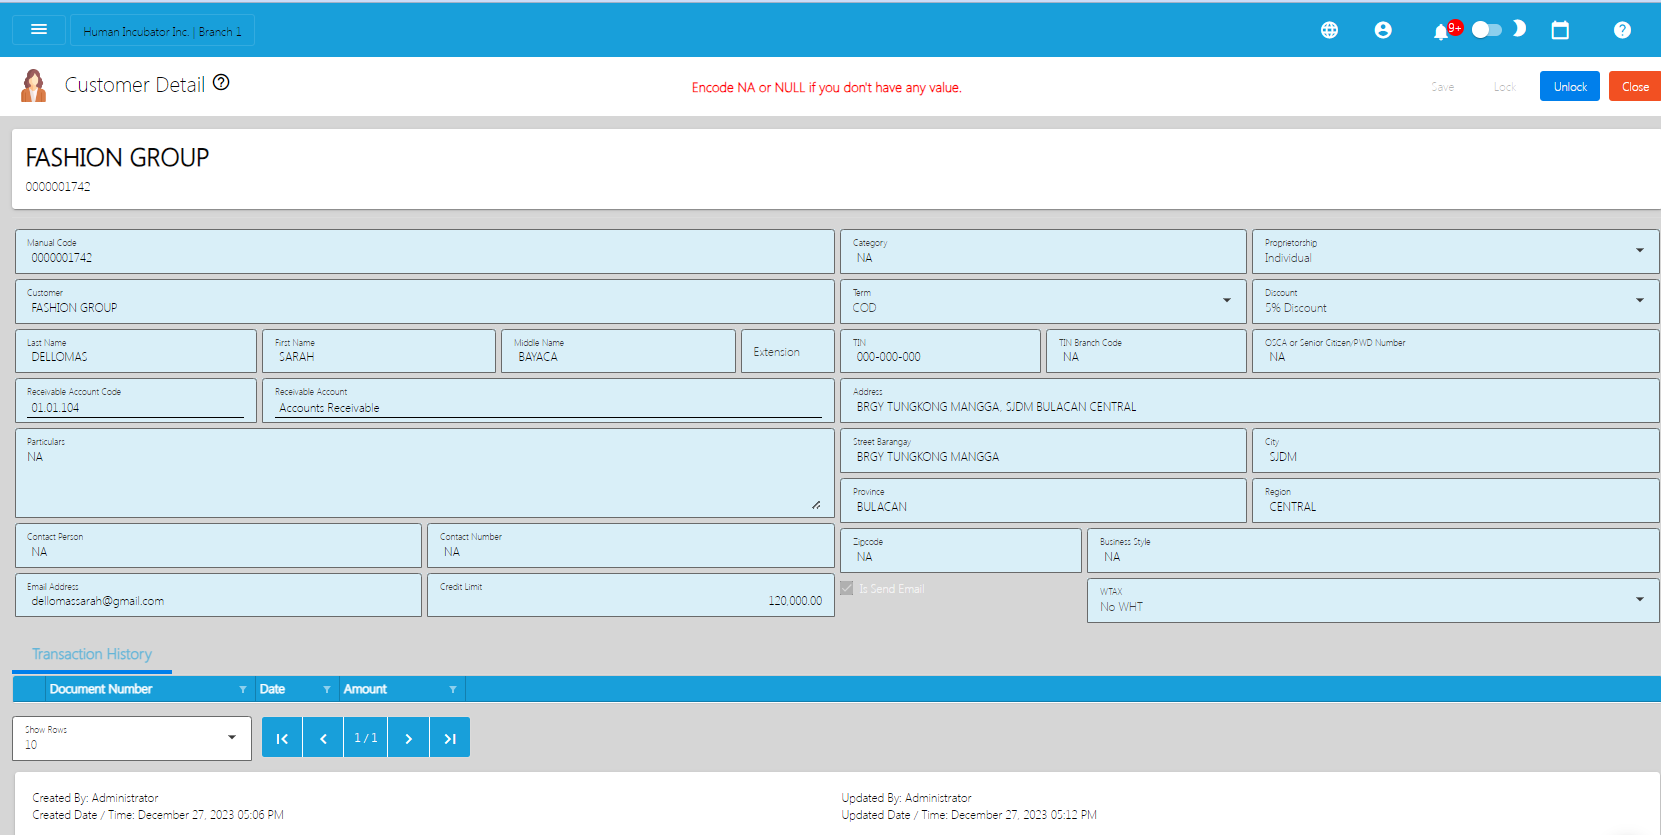
- Details – Clicking on the Edit Button beside the Customer in the list opens a detailed view or form for that specific item.
The detailed view provides a more comprehensive set of information about the selected item and may allow users to edit or update the details.
- After that, click the Save Buttons.
- Reports
IV: Master Files
4.0 Overview
easyFS Master Files serve as centralized repositories for critical data that is fundamental to the business processes managed by the application.
Following are the Major Master Files of easyFS.
|
Master File Type |
Purpose |
Key Data / Information |
|
Item |
Detailed information about products/items |
|
|
Customer |
Manage customer relationships and transactions |
|
|
Supplier |
Information about suppliers or vendors |
|
|
Bank |
Crucial for financial transactions and management |
|
|
Employee |
Details about individuals employed by the organization |
|
|
Chart of Accounts |
Foundation of the organization's accounting system |
|
|
Company |
Includes the Company Details, Branch Details and default settings |
|
|
Users |
List of Users to Access the System |
|
4.1 Setup Master Files
Setting up the Master Files is the first and foremost procedure in updating easyFS data. The system will not work or move into its transactions if the master files are not entered into the system.
4.1.1 Item
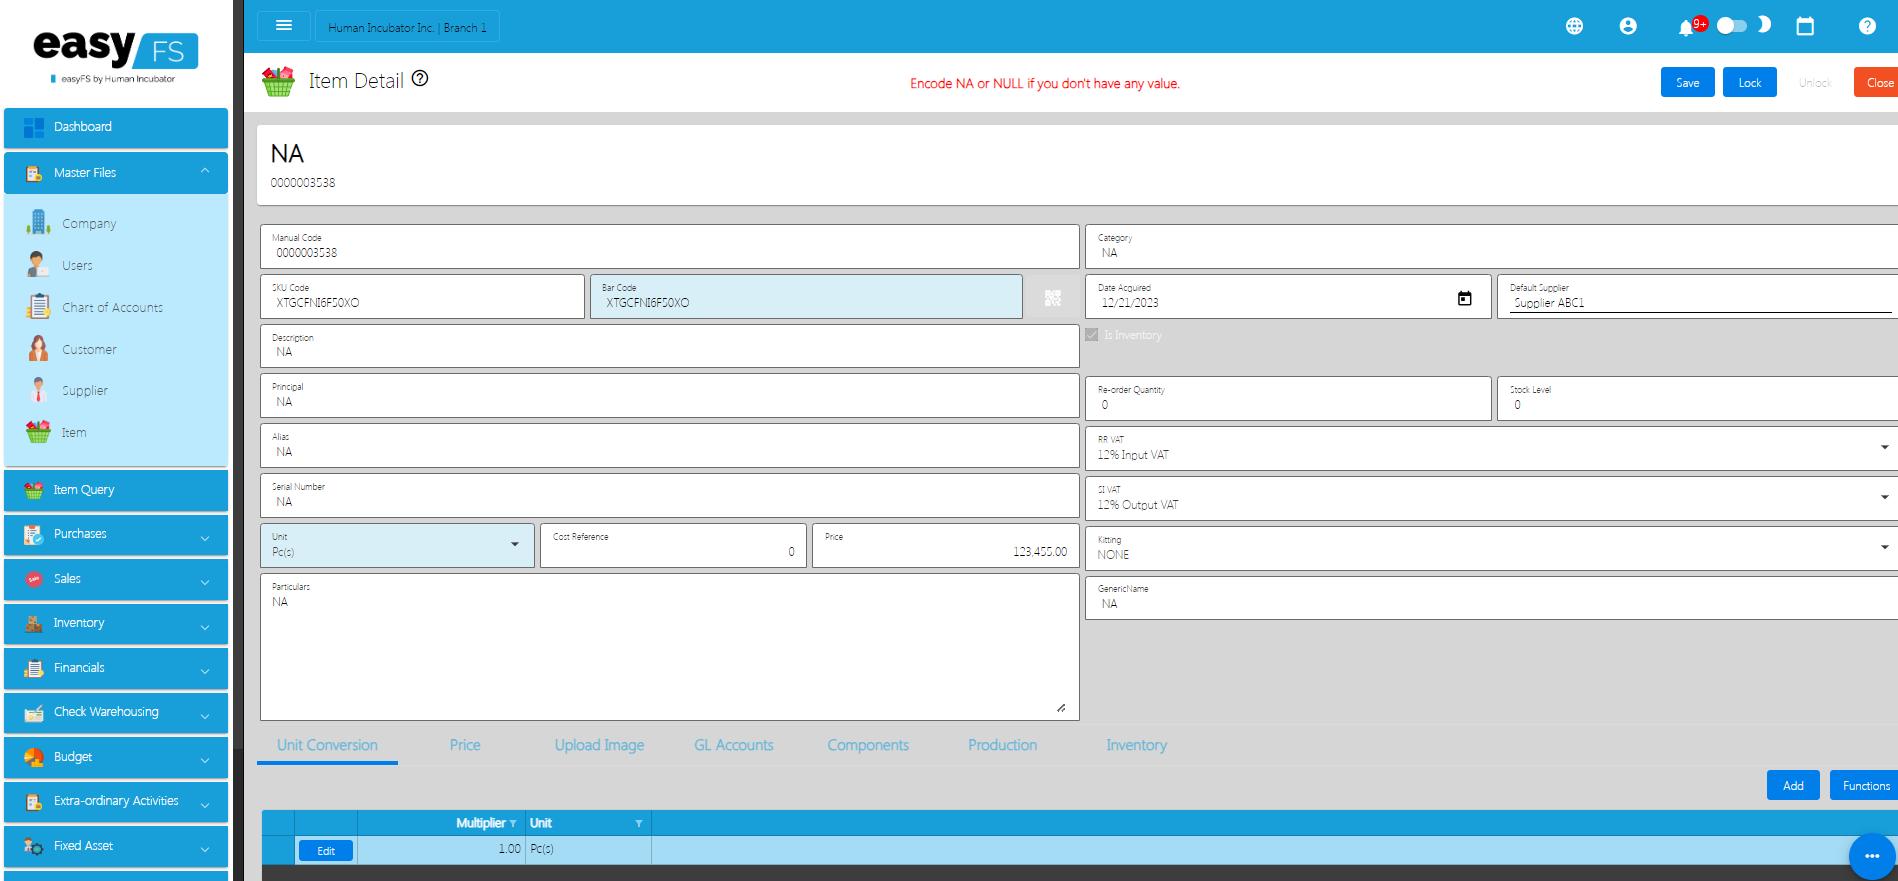
Item refers to a specific product, part, or unit that is tracked within a company’s inventory system. The item's info includes a short description, how it's measured (like pieces or pounds), how much it costs to buy or make, how much it's sold for, how many are currently in stock, when it's time to order more, how long it takes to get more, where it's stored, and who the supplier is. All this info helps a business manage its stock better, making sure they have enough products at the right time and avoiding running out. Moreover, we've improved the way you see item details so that you don't have to wait too long to view them.
4.1.1.1 How to Add an Item Manually
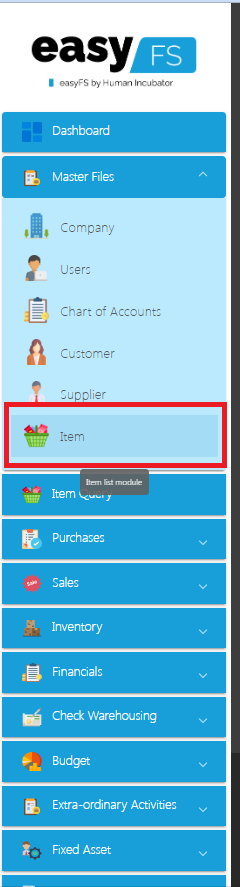
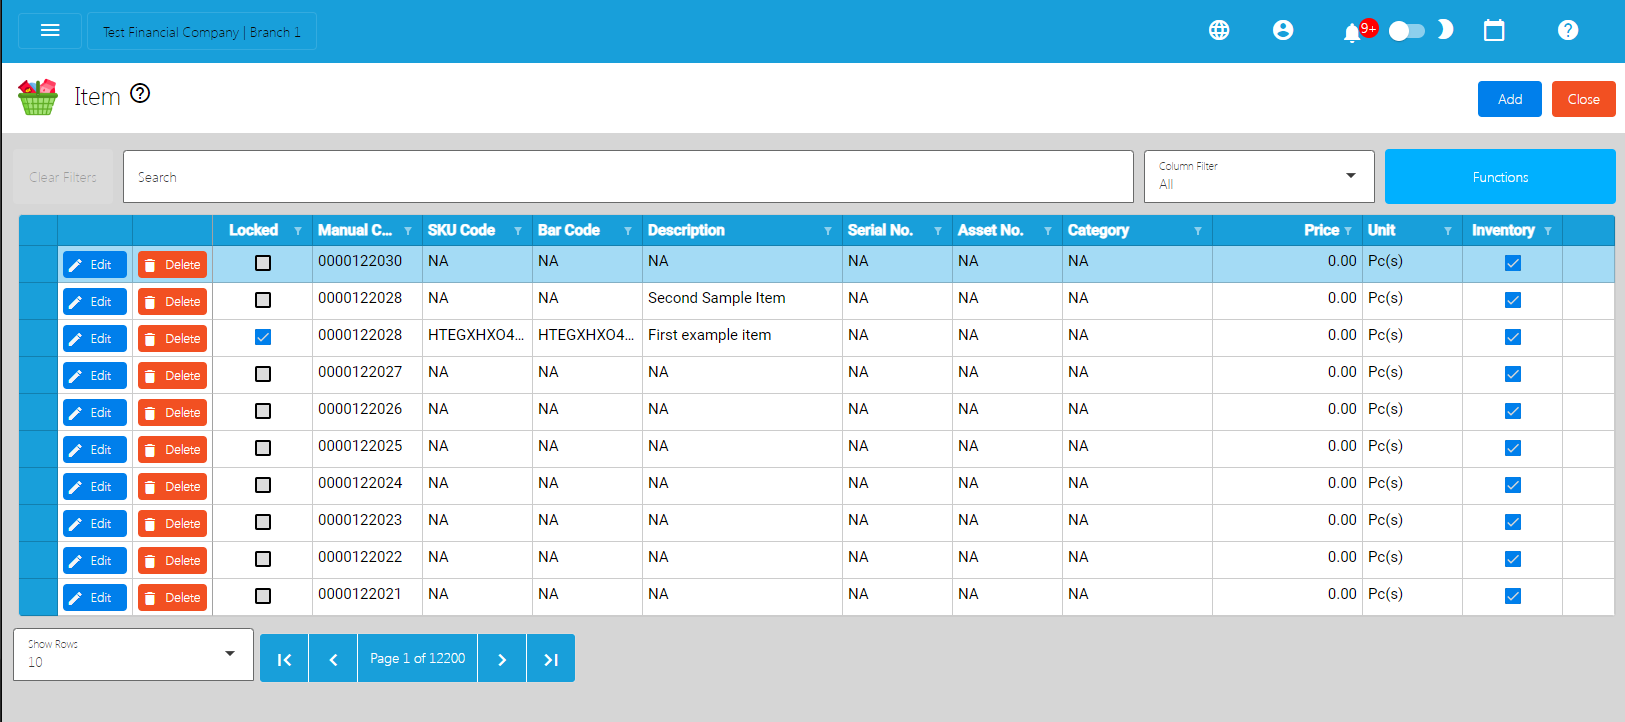
- Goto the Menus → Master Files → Item
- Click the Add button on the upper right corner from the Item List.
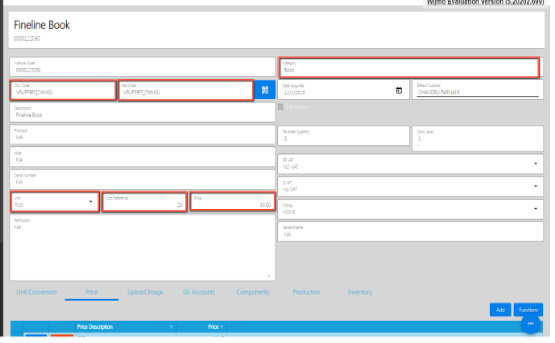
- Fill up all the Required information SKU Code, Barcode, Description, Category, Unit, Cost Reference, Price
|
Name |
Description |
Acceptable Values |
|
SKU Code |
An SKU (Stock Keeping Unit) code is a unique identifier assigned to each distinct product or item in a retailer's inventory or stock. It is used for tracking and managing inventory, facilitating accurate and efficient management of stock levels, sales, and restocking.
The SKU code allows for quick and precise identification of products, making it easier to monitor inventory movements and conduct accurate stock counts
The SKU code often includes information about the product, such as its color, size, style, and other relevant attributes. This helps in quickly identifying and locating the exact variant of a product in the inventory system. Overall, the use of SKU codes is crucial for efficient inventory management in retail and other industries. |
255 Alphanumeric Characters
Restricted: Comma(,) Tilde(~) |
|
Barcode |
A barcode is a machine-readable representation of data in a visual, linear, or two-dimensional format. It consists of a series of parallel lines, dots, or rectangles that can be scanned and interpreted by a barcode scanner or camera-equipped device. Barcodes are used to uniquely identify products, assets, or entities and are commonly employed in various industries for purposes such as inventory management, retail, logistics, and more.
Barcodes are widely used in retail for product identification and inventory management, in logistics for tracking shipments, in healthcare for patient identification, and in various other applications to streamline data capture and reduce errors associated with manual data entry. They provide a quick and efficient way to access information about a particular item or entity in a digital format.
easyFS uses the following types of Barcode UPC (Universal Product Code)
EAN (International Article Number)
Code 39
Code 128
QR Code (Quick Response Code)
WARNING: Changing or editing the barcode will cause a major error on the easyFS and easyPOS integration. It is strongly advised not to change the barcode once it is already encoded, saved and locked the item |
255 Alphanumeric Characters
Restricted: Comma(,) Tilde(~) |
|
Description |
The item description is used to uniquely identify and label each item in the inventory. It distinguishes one product from another based on its characteristics, features, or other relevant details |
255 Alphanumeric Characters
Restricted: Comma(,) Tilde(~) |
|
Category |
An "Item Category" in the context of inventory and product management refers to a classification or grouping assigned to a specific type of product or item based on common characteristics or attributes. Item categories help organize and streamline inventory management by grouping similar items together, simplifying the tracking, analysis, and reporting of products within a system.
Depending on how the organization categorizes its products. The following is a guide on various Criteria for Product Categorization
Product Type Categorizing items based on their general type or nature. For example, grouping products into categories like electronics, clothing, or office supplies.
Function or Use Classifying items based on their intended use or function. This might include categories such as tools, consumables, or accessories.
Industry Standards Adhering to industry standards or regulations that require specific categorization. For instance, in healthcare, items may be categorized according to medical equipment, pharmaceuticals, or surgical supplies.
Lifecycle Stage Organizing items based on their lifecycle stage, such as new arrivals, in-stock, clearance, or discontinued.
Sales or Marketing Strategy Grouping items according to their sales performance or marketing strategy. This could involve categories like best-sellers, seasonal items, or promotional products.
Supplier or Brand Categorizing items by their supplier or brand, especially if there are specific agreements or considerations associated with different suppliers.
Profitability Grouping items based on their contribution to profitability, allowing businesses to prioritize or analyze products accordingly.
Location Categorizing items based on their physical location within a warehouse or facility. This helps in efficient inventory management and retrieval.
|
255 Alphanumeric Characters
Restricted: Comma(,) Tilde(~) |
|
Unit |
Refers to the basic counting or measurement unit assigned to individual items or products within the inventory. The "unit" is the standard quantity in which items are counted, tracked, bought, and sold. It serves several important purposes in inventory management
WARNING: Changing the Unit will cause a major problem in the integration of easyFS and easyPOS. Never change the Unit of Measure if you have already saved and locked the item. |
255 Alphanumeric Characters
Restricted: Comma(,) Tilde(~) |
|
Cost Reference |
Refers to the financial value associated with acquiring or producing goods that are held in inventory. The cost of inventory is a crucial aspect of managing a business's finances and involves various components.
This is the amount paid to acquire products from suppliers. It includes the purchase price of goods, transportation costs, import duties, and any other costs directly attributable to obtaining the items.
Cost Reference will be automatically updated |
Numeric up to (-) 999,999,999.99 up (+) |
|
Price |
"price" refers to the monetary value assigned to a specific item or product in the inventory. The price is a crucial element in financial transactions, sales, and overall financial management.
The unit price represents the selling price of a single unit of the item. It is the amount charged or paid for one individual item.
Prices are integrated into sales transactions and invoices, ensuring accurate financial records and reflecting the revenue generated from sales
|
Numeric up to (-) 999,999,999.99 up (+) |
- For the fields that are optional, default it to “NA” if there’s nothing to provide:
- Principal
- Alias
- Serial Number
- Particulars
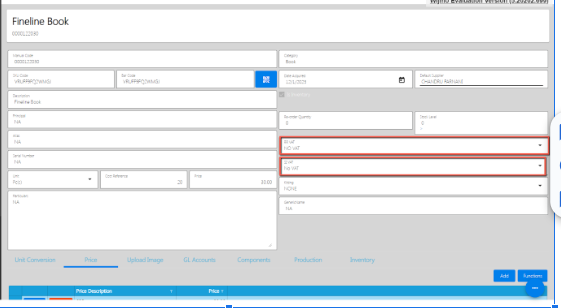
- In the taxes fields, select a correct Tax value:
- RR (Receiving Receipt) VAT (INPUT VAT or NON-VAT)
- SI (Sales Invoice) VAT (OUTPUT VAT or NON-VAT)
Unit Conversion
- Assumption: Item detail is filled with necessary information.
- Unit Conversion allows you to include multiple units for an item, eliminating the need to create a new item record with the same description.
- Click the Add button, select first the unit that you selected on the Item detail and provide a multiplier. This is for you not to be able to hit an error when locking the Item detail.
- Provide a multiplier and after that, click the Save button.
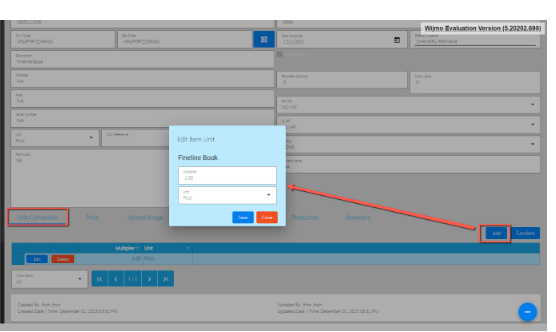
- If you wish to add a new Unit Conversion record, repeat Steps 3 and 4.
Price
- The price tab in inventory is used to add one or more item prices to be used when having future transactions.
- Click the Add button, provide first the Price that you provided on the Item detail and provide a price description. This is for you not to be able to hit an error when locking the Item detail.
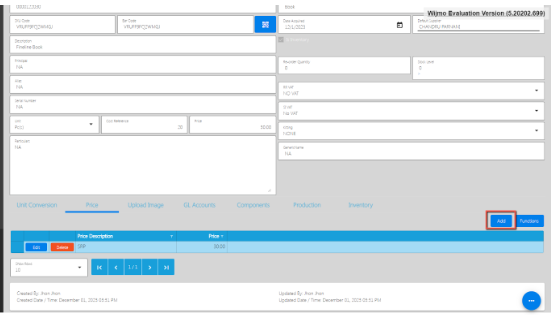
- After that, click the Save button.
- If you wish to add a new Item Price record, repeat Steps 2 and 3.
General Ledger Accounts
- The importance of the General Ledger account is to know where the transaction will be recorded. Make sure all the accounts that you select on the GL account are also in the chart of accounts.
- We have a default set up for this but if you have a specific account you want to use, you can do so.
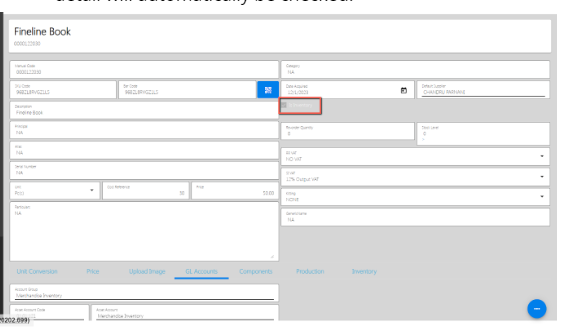
- If your Item is an Inventory, select an Account for Inventory. By this, the isInventory checkbox on the Item detail will automatically be checked.
- If your Item is a Non-Inventory, select an Account for Non Inventory. By this, the isInventory checkbox on the Item detail will automatically be unchecked.
- If your Item is a Fixed Asset, select an Account for Fixed Asset. By this, the isInventory checkbox on the Item detail will automatically be unchecked.
Save and Lock
- Review the Item detail first.
- Once everything is okay, click Save. Save button allows you to save your item detail, however, the item will not be visible when you do future transactions.
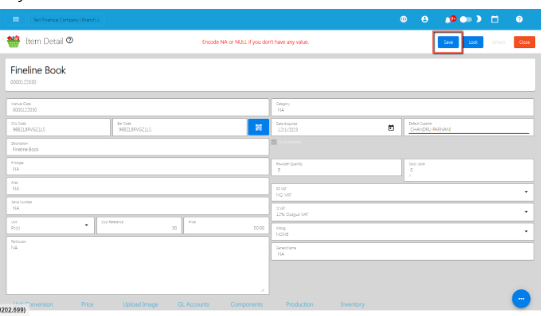
- Inorder for your Item to be visible when doing future transactions, click the Lock button.
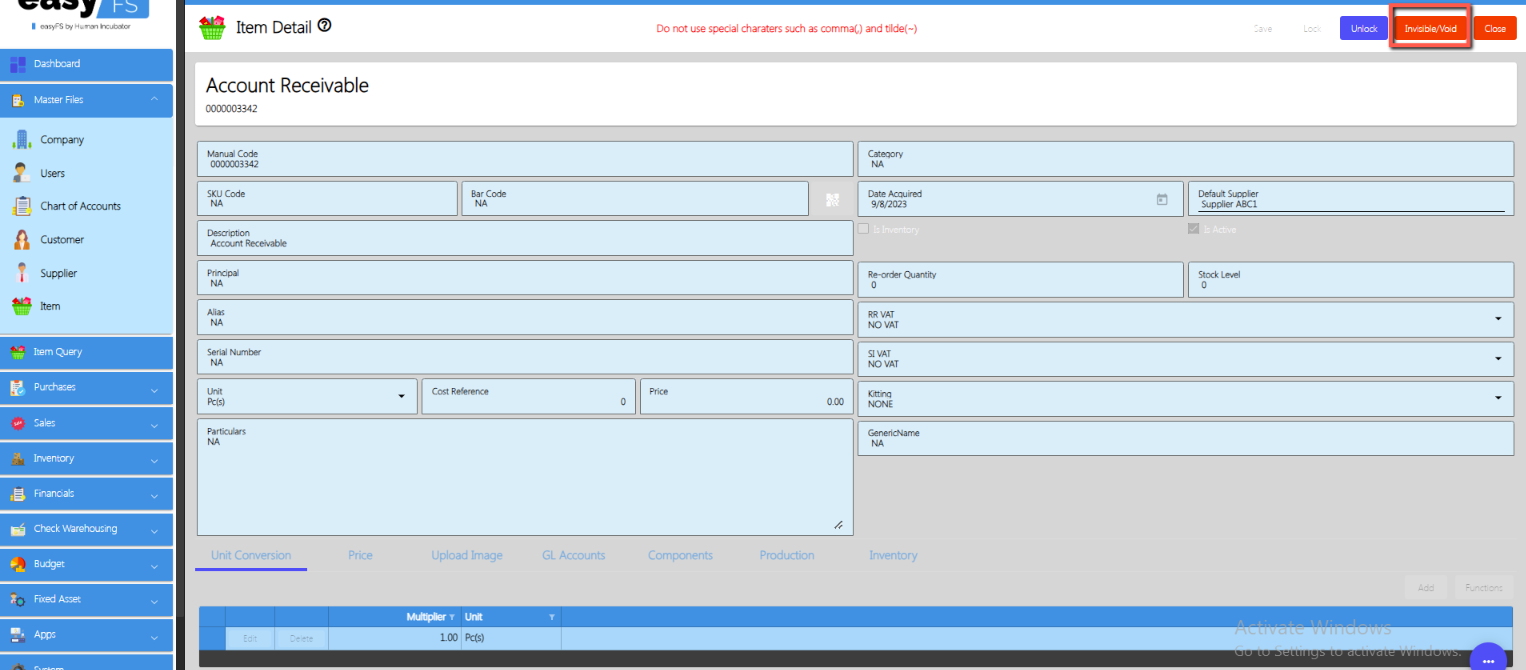
- If you want to delete items , you can’t delete that one even if there's no transaction because we don’t have a delete button but instead you can use Invisible/void for those unused items.
4.1.1.2 Add Item Via Import Function
- Go to Masterfiles, then select Items.
- Click the Functions button, then click Download Item File Format.
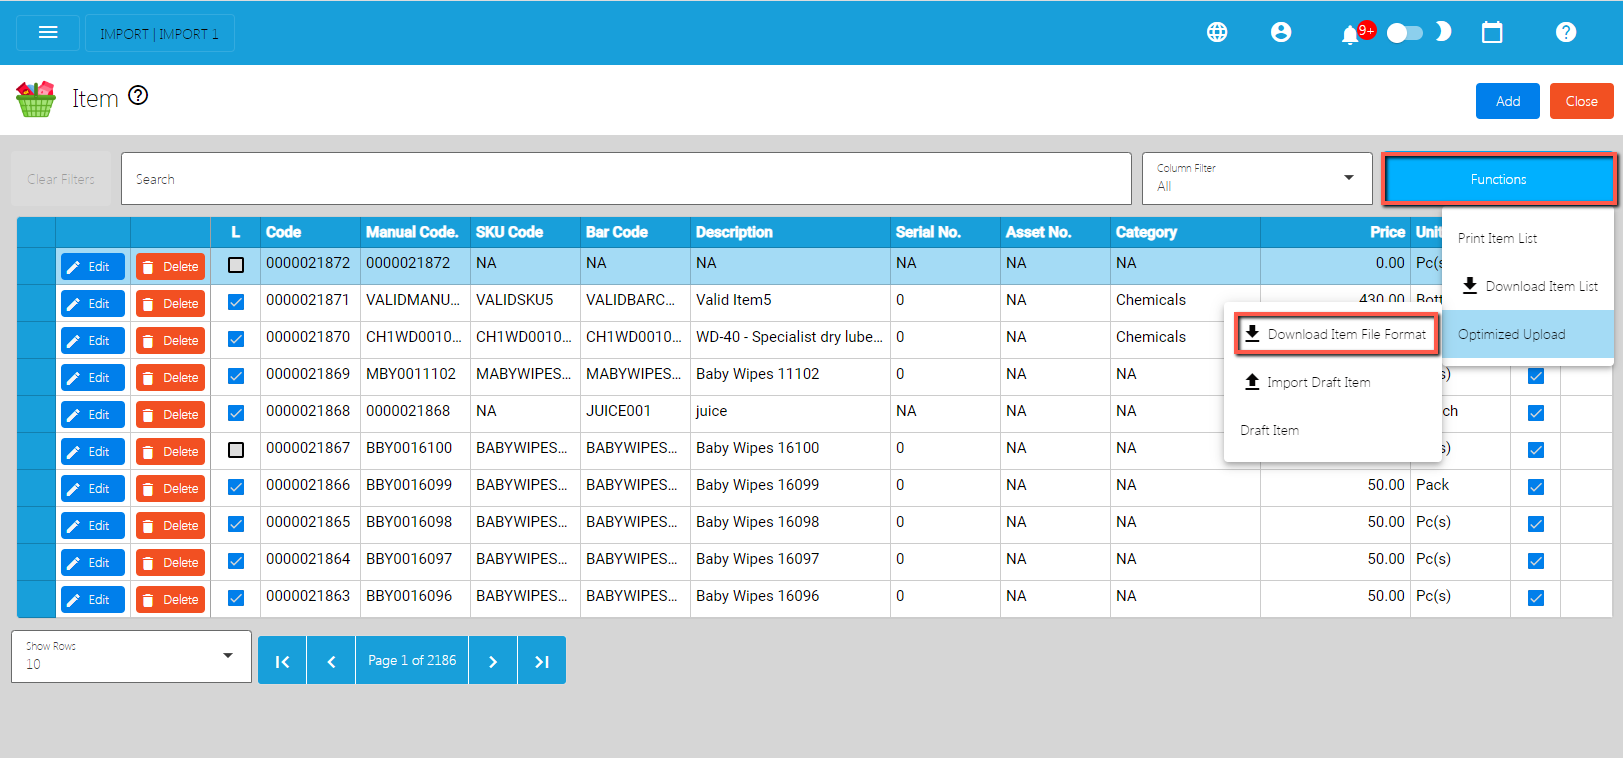
- An excel file is automatically downloaded for the Item File Format.
- Open the file. The file is used if you want to import multiple items in our system. Just keep in mind, we advise with a maximum of 500 items per upload.
- As you can see on the file, it has sample data where you can see the following columns (all in all, there are 44 columns):
- ManualCode
- SKUCode
- Barcode
- ItemDescription
- UnitId
- Unit
- Category
- IsInventory
- CostReference
- Price
- ProductionCost
- ReorderQuantity
- StockLevel
- Kitting
- WarrantyExpiry
- AssetNumber
- PurchasePrice
- SerialNumber
- DepreciationStartDate
- DepreciationMethod
- Custodian
- Particulars
- Alias
- GenericName
- DateAcquired
- SalvageValue
- UsefulLife
- DefaultSupplierId
- DefaultSupplier
- Principal
- ArticleAccountGroupId
- ArticleAccountGroup
- AssetAccountId
- AssetAccount
- SalesAccountId
- SalesAccount
- CostAccountId
- CostAccount
- ExpenseAccountId
- ExpenseAccount
- RRVATId
- RRVAT
- SIVATId
- SIVAT
- If you have multiple items to be uploaded, we suggest copying first the sample data then pasting on the next row until it reaches out on the number of items to be uploaded. Take note, there is a limitation of the number of items to be uploaded. Better read the “Best Practices” section first.
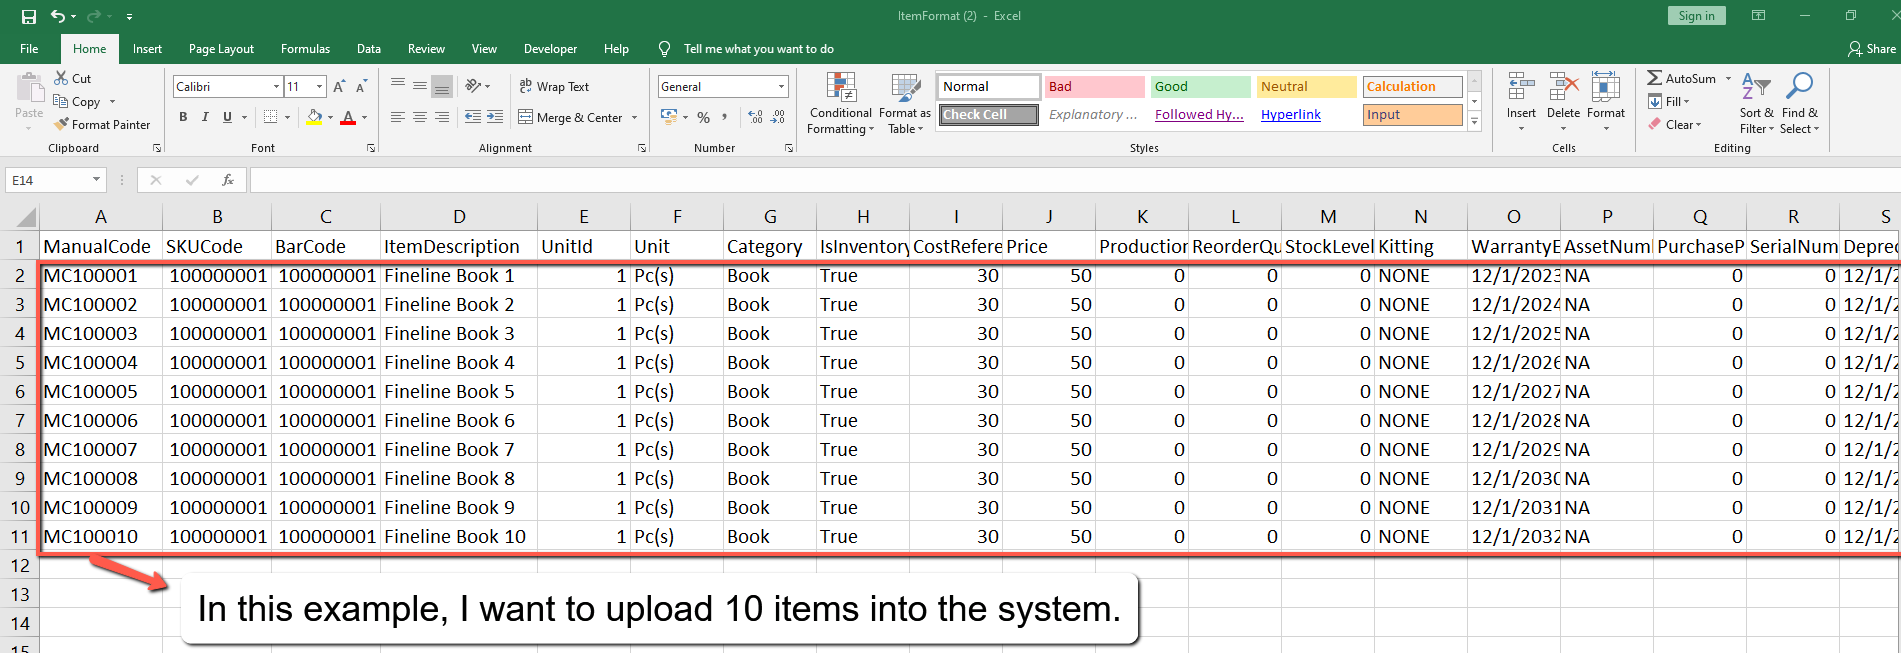
- Next, provide a correct value for each column especially on the following column(s):
- Take note: Highlighted with ORANGE are the required column, otherwise put NA as value:
- Manual Code → should be unique, alphanumeric and should not exceed 255 characters. Example: ABC0000001
– if the Manual Code starts with 000, don’t forget to put an apostrophe (‘) at the beginning of the Manual Code.
Example: ‘00000111231414
– if the Manual Code starts with a number but exceeds more than 10 digits, format the cell to Text to show all the numbers.
Steps on how to change the format to Text:
1. Right Click the Cell
2. Click Format Cell
3. Choose Text
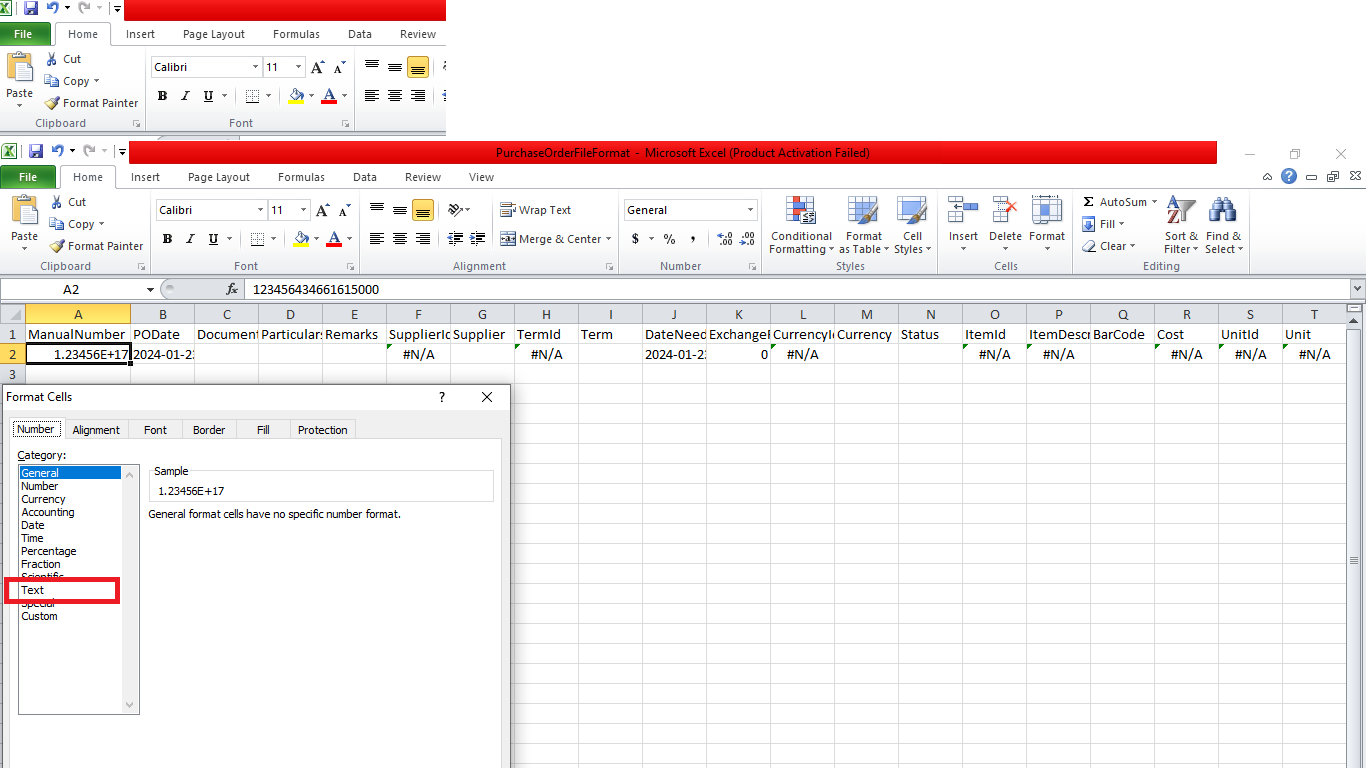
4. Click OK
5. Then reselect the field
- SKUCode → should be unique, alphanumeric and should not exceed 255 characters. Example: XYZ CA1001
– if the SKU Code starts with 000, don’t forget to put an apostrophe (‘) at the beginning of the Manual Code.
Example: ‘00000111231414
– if the SKU Code starts with a number but exceeds more than 10 digits, format the cell to Text to show all the numbers.
Steps on how to change the format to Text:
1. Right Click the Cell
2. Click Format Cell
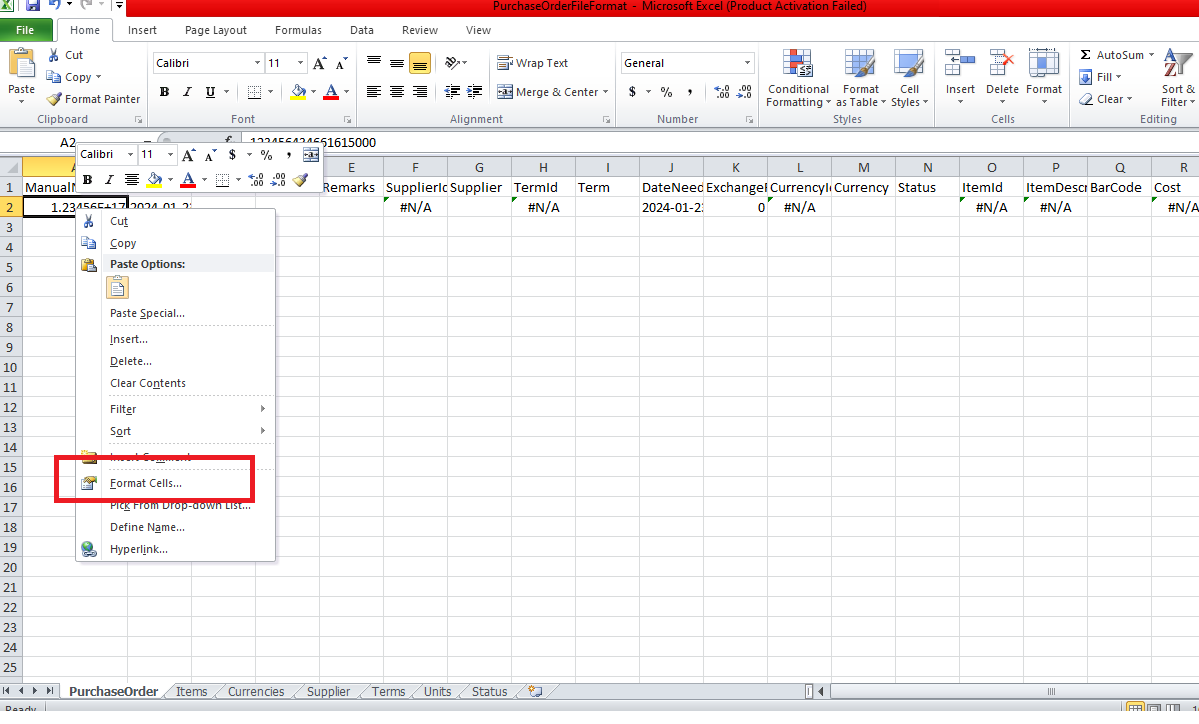
3. Choose Text
4. Click OK
5. Then reselect the field
- Barcode → should be unique, alphanumeric and should not exceed 255 characters. Example: XYZ CA1001
– if the Barcode starts with 000, don’t forget to put an apostrophe (‘) at the beginning of the Manual Code.
Example: ‘00000111231414
– if the Barcode starts with a number but exceeds more than 10 digits, format the cell to Text to show all the numbers.
Steps on how to change the format to Text:
1. Right Click the Cell
2. Click Format Cell
3. Choose Text
4. Click OK
5. Then reselect the field
- ItemDescription → should be unique, has no special characters and should not exceed 255 characters.
- Unit → you can select a unit value from the dropdown. Do not edit the UnitId column.
- Cost → should be numeric
- Price → should be numeric
- Category → should have no special characters, (if none, default to NA)
- IsInventory → true or false
- Asset Number → alphanumeric, should have no special characters (if none, default to O or NA)
- Custodian → alphanumeric, should have no special characters (if none, default to NA)
- Particulars → alphanumeric, should have no special characters (if none, default to NA)
- Alias → alphanumeric, should have no special characters (if none, default to NA)
- Principal → alphanumeric, should have no special characters (if none, default to NA)
- RRVAT → you can select a RRVAT value from the dropdown. Do not edit the RRVATId column.
- SIVAT → you can select a SIVAT value from the dropdown. Do not edit the SIVATId column.
- For the General Ledger Accounts, make sure to select correct accounts. If confused, you may check the GL of Account list on the System>System Tables>Article Account Groups.
- Once okay, save the file.
- Go back to the system, then go to Inventory, then select Items.
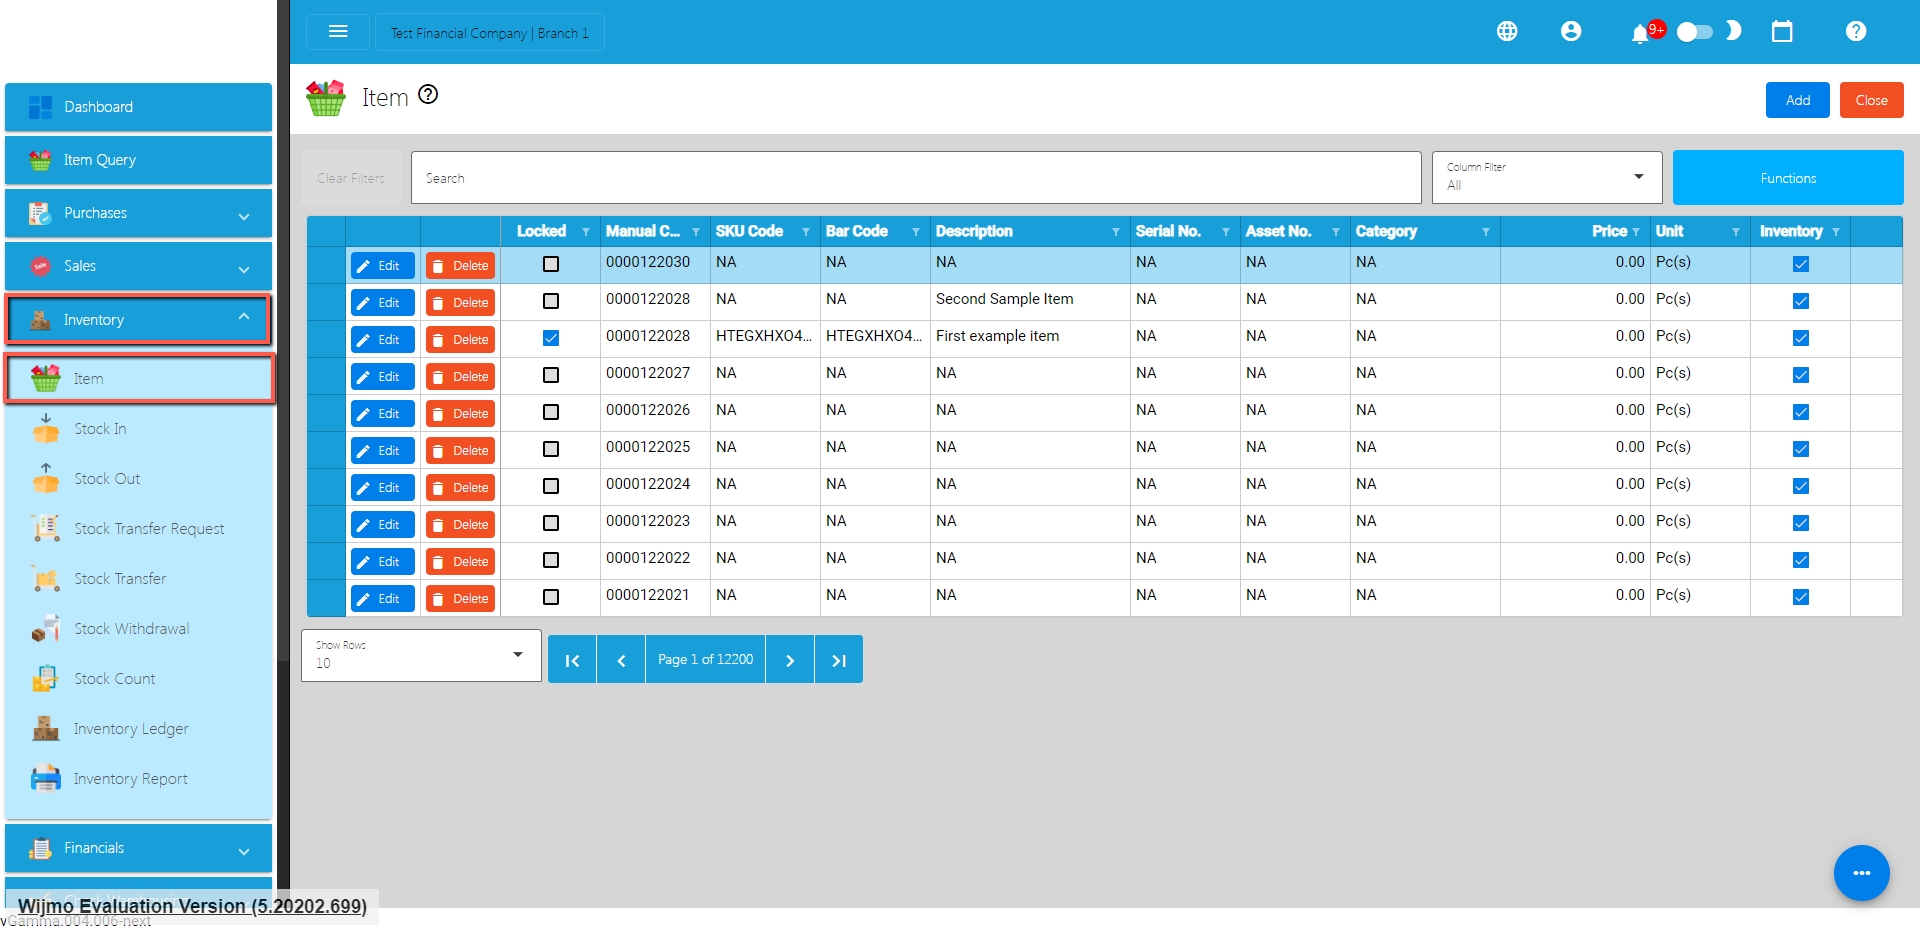
- Click again the Functions button, then click Import Draft Item.
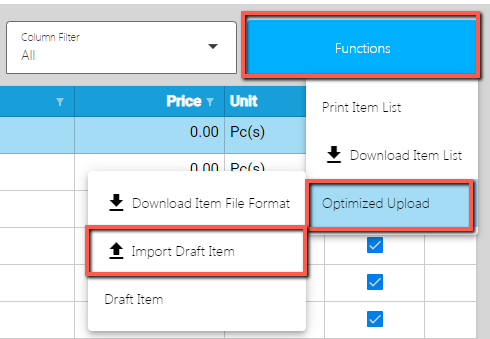
- Look for the item file format, then double click.
- A confirmation popup will display, just select confirm.
- Wait until it will successfully be imported. At this stage, the item(s) is not yet added on the item list. Instead, it will be added on the Draft Item list. Meaning, the items being imported are subject for a review.
- To view the items on the Draft Item, click the Functions button, then click on the Draft Item.
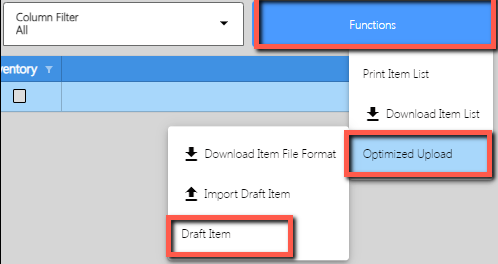
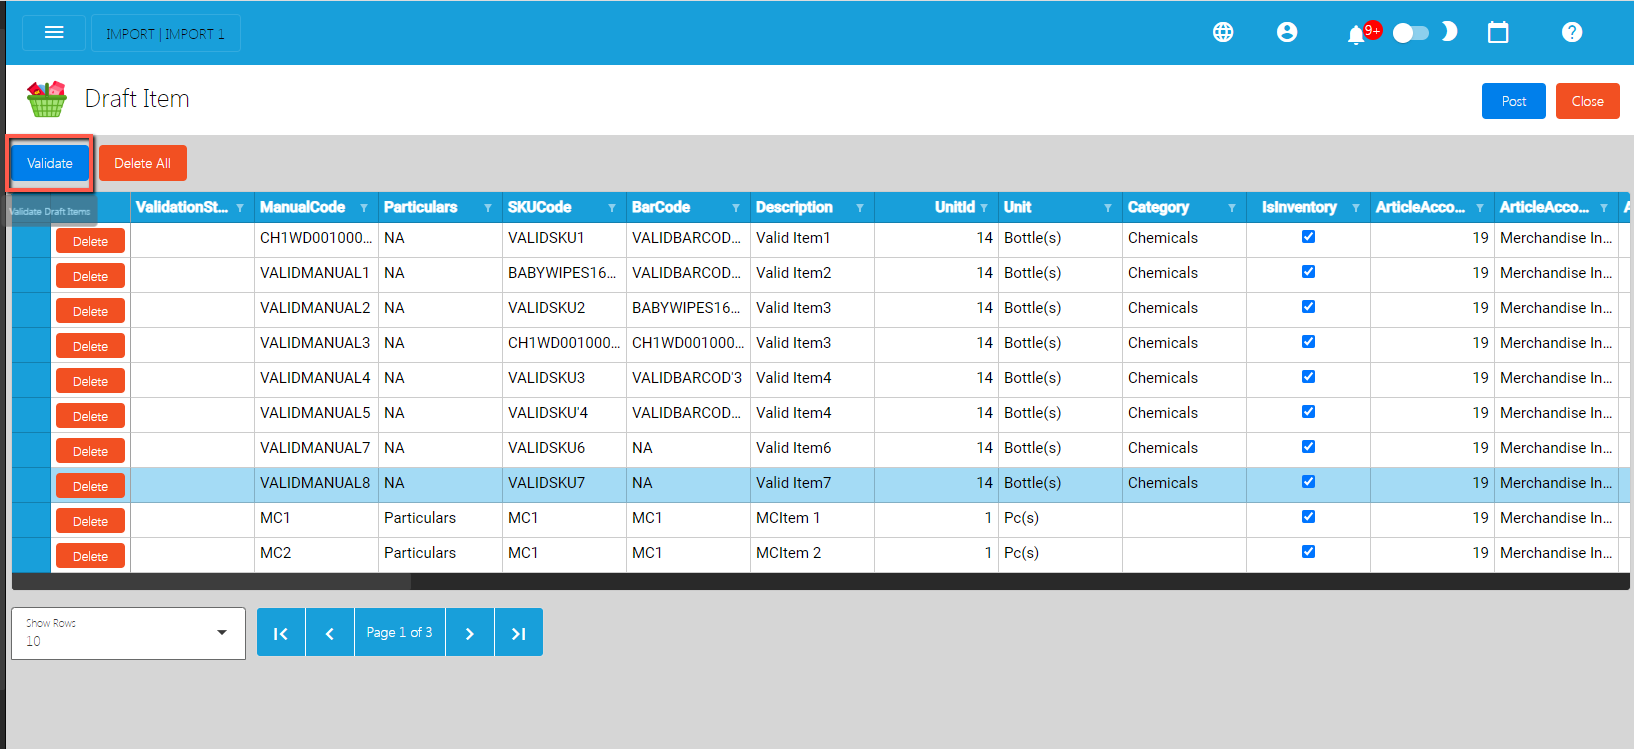
- Review if the item(s) being imported are added on the Draft Item list.
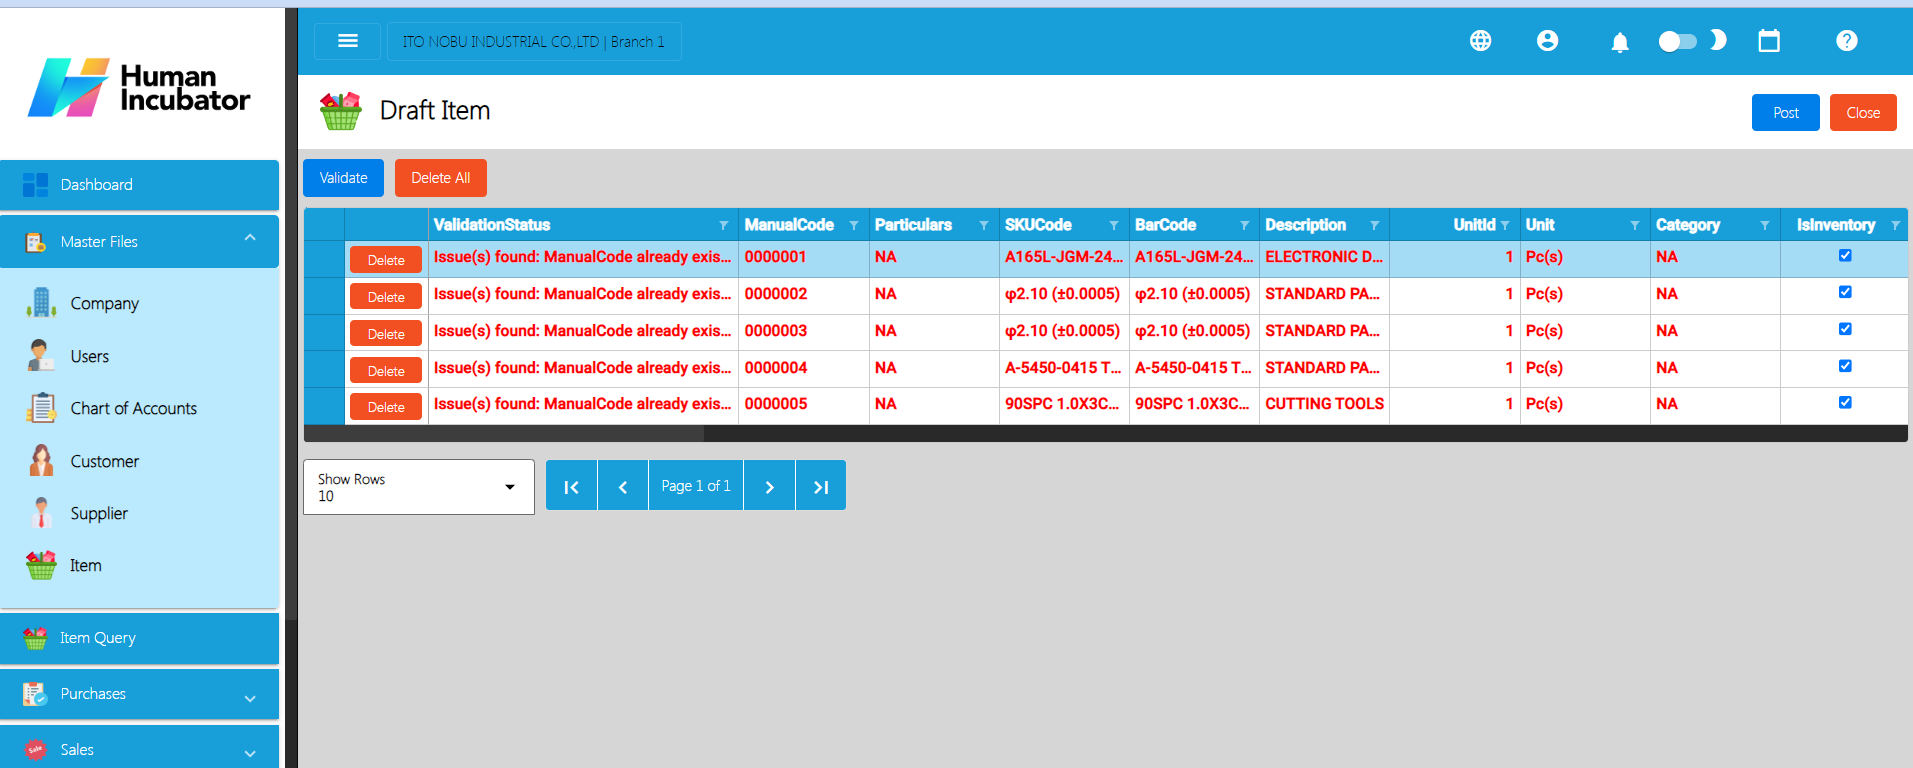
- Once okay, click the Validate button. This is to validate the Item details first if everything is correct before it can be posted. Please refer to the following validation status:
- No ManualCode provided → means that ManualCode column has no value.
- Duplicate ManualCode in list → means that ManualCode column has a duplicate value from the Draft Item list.
- ManualCode already exists → means that ManualCode column value exists on the Item list.
- No Particulars provided → means that Particulars column has no value.
- No Description provided → means that the Description column has no value.
- No SKUCode provided → means that SKUCode column has no value.
- Duplicate SKUCode in list → means that SKUCode column has a duplicate value from the Draft Item list.
- SKUCode already exists → means that SKUCode column value exists on the Item list.
- No Barcode provided → means that the Barcode column has no value.
- Duplicate Barcode in list → means that Barcode column has a duplicate value from the Draft Item list.
- Barcode already exists → means that Barcode column value exists on the Item list.
- UnitId not found → means that the UnitId column value does not exist on the database.
- No Category provided → means that the Category column has no value.
- ArticleGroupId not found → means that the ArticleGroupId column value does not exist on the database.
- AssetAccountId not found → means that the AssetAccountId column value does not exist on the database.
- SalesAccountId not found → means that the SalesAccountId column value does not exist on the database.
- CostAccountId not found → means that the CostAccountId column value does not exist on the database.
- ExpenseAccountId not found → means that the ExpenseAccountId column value does not exist on the database.
- No Price provided → means that the Price column has no value.
- Price should be numeric→ means that the Price should be in number format.
- RRVATId not found → means that the RRVATId column value does not exist on the database.
- SIVATId not found → means that the SIVATId column value does not exist on the database.
- Invalid Kitting value → means that Kitting column is not equal to NONE, COMPONENT, PRODUCED, or PACKAGE.
- No ProductionCost provided → means that the ProductionCost column has no value.
- ProductionCost should be numeric→ means that the ProductionCost should be in number format.
- Invalid DateAcquired value → means that the DateAcquired column is not in valid date format.
- No SalvageValue provided → means that the SalvageValue column has no value.
- SalvageValue should be numeric→ means that the SalvageValue should be in number format.
- No UsefulLife provided → means that the UsefulLife column has no value.
- UsefulLife should be numeric→ means that the UsefulLife should be in number format.
- No CostReference provided → means that the CostReference column has no value.
- CostReference should be numeric→ means that the CostReference should be in number format.
- No ReorderQuantity provided → means that the ReorderQuantity column has no value.
- ReorderQuantity should be numeric→ means that the ReorderQuantity should be in number format.
- No StockLevel provided → means that the StockLevel column has no value.
- StockLevel should be numeric→ means that the StockLevel should be in number format.
- No AssetNumber provided → means that the AssetNumber column has no value.
- No PurchasePrice provided → means that the PurchasePrice column has no value.
- PurchasePrice should be numeric→ means that the PurchasePrice should be in number format.
- Invalid WarrantyExpiry value → means that the WarrantyExpiry column is not in valid date format.
- No SerialNumber provided → means that the SerialNumber column has no value.
- Invalid DepreciationDate value → means that the DepreciationDate column is not in valid date format.
- No DepreciationMethod provided → means that the DepreciationMethod column has no value.
- No Custodian provided → means that the Custodian column has no value.
- No Alias provided → means that the Alias column has no value.
- No GenericName provided → means that the GenericName column has no value.
- No Principal provided → means that the Principal column has no value.
- DefaultSupplierId not found → means that the DefaultSupplierId column value does not exist on the database.
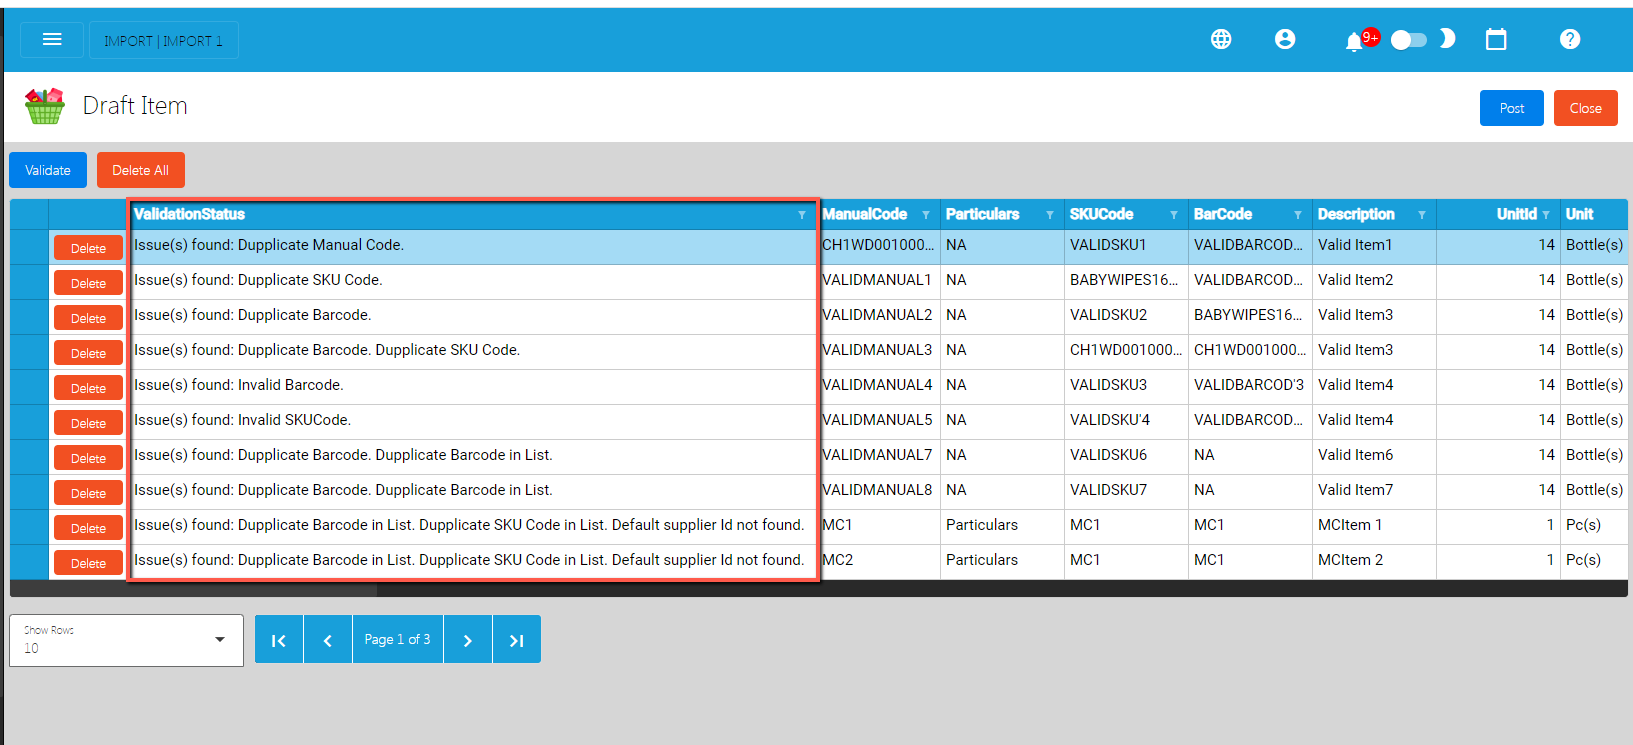
- Once validation is okay, it will update the ValidationStatus. Read the validationStatus on what issues are being found. To correct the item detail, double click on the column where it has an issue then enter a valid value, then press Enter. After that, validate again by clicking the Validate button.
- Once everything is okay (ValidationStatus is equal to Validated), click the Post button. A confirmation message will display, click the Confirm button. This will now add the validated item(s) on the Item list.
- To check if the item(s) are added on the Item list, click the Close button then look for the item on the Item List.
Warning:
You cannot proceed with the posting after validation if there are errors encountered. Among the Errors you might encounter are:
- Duplicate Manual Code
- Duplicate Barcode
- Duplicate SKU Code
- Other Errors
Solution:
Option 1: You need to delete the line that caused the error before posting.
Option 2: You need to use the Delete All Button and re-upload the Excel file that caused the such errors and re-upload the Excel file again using the process mentioned above.
4.1.2 Customer
A "customer" is a person or entity that buys goods or services from a business. The customer is the party making a purchase, and their transactions are recorded in the accounting system. These records help track sales, revenue, and customer-related information. Understanding customer transactions is crucial for businesses to manage sales, provide customer service, and keep accurate financial records. Moreover, we've improved the way you see Supplier details so that you don't have to wait too long to view them.
4.1.2.1 Add Customer Manually
- Go to Sales, then click Customer.
- To add a new Customer, click the Add button that can be seen on the Customer List.
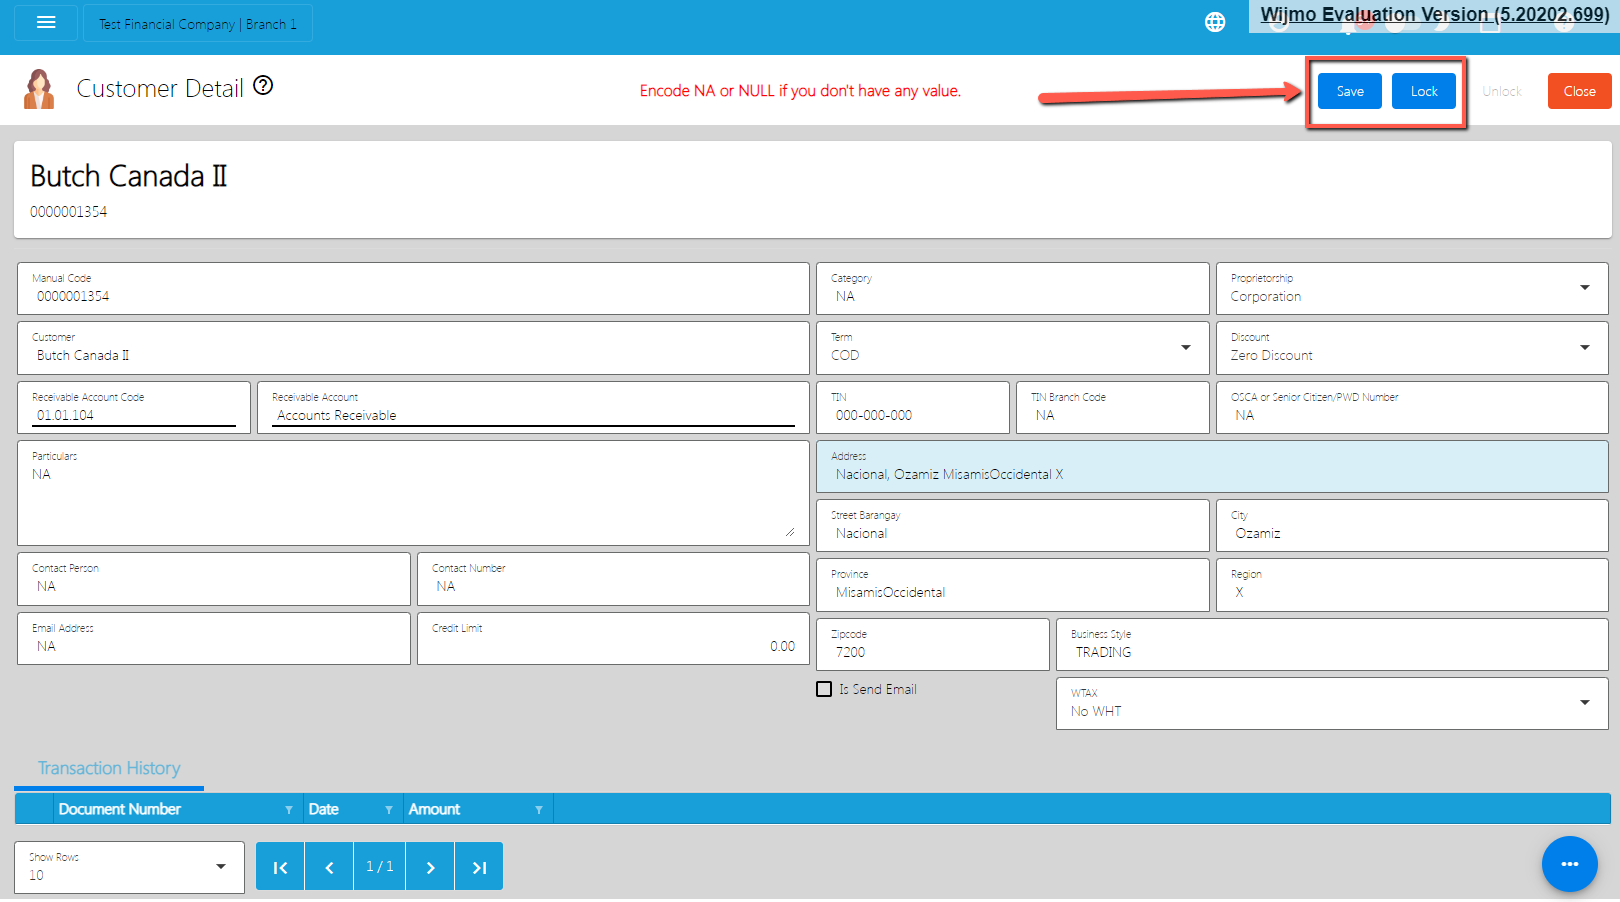
- Fill all the important fields for Customer Detail like:
- Note: Highlighted with Orange are required fields. If there is no value, just put NA. In addition, do not provide special characters like ` ! @ # $ % ^ & * ( ) – _ + = { } [ ] | \ / : ; " ' < > . ? .
- Customer (Name of the Customer)
- Contact Person
- Contact Number
- Email Address
- Proprietorship
- First Name
- Middle Name
- Last Name
- TIN
- TIN Branch Code
- Address lines (Street Barangay, City, Province, Region, Zip Code)
- Category
- Business Style
- WTAX
- After filling up the important fields, click Save then Lock buttons.
4.1.2.2 Add Customer Via Import Function
- Go to Sales, then select Customer.
- Click the Functions button, then click Optimized Upload, and click Download Customer File Format.
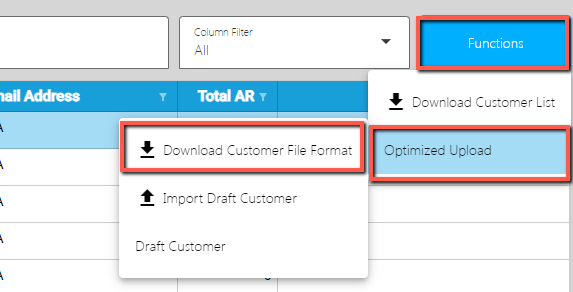
- An excel file is automatically downloaded for the Customer File Format. As your indicator, the file is named CustomerFileFormat.
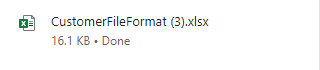
- Open the file. The file is used if you want to import multiple Customers in our system. Just keep in mind, we advise with a maximum of 500 Customers per upload.
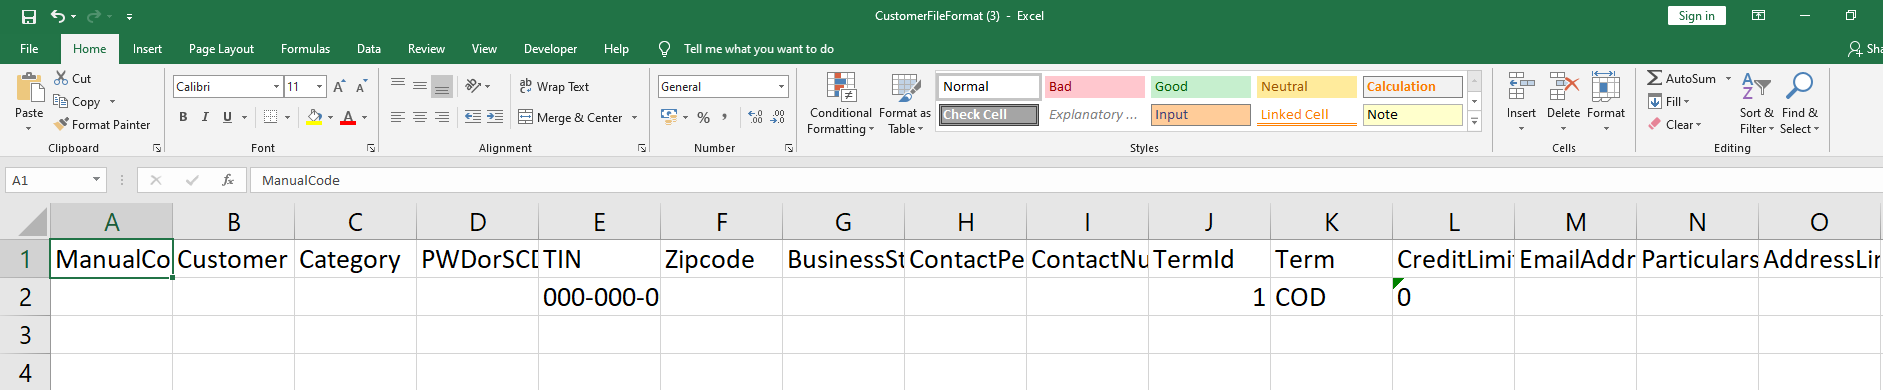
- As you can see on the file, it has sample data where you can see the following columns (all in all, there are 29 columns):
- ManualCode
- Customer
- Category
- PWDorSCDNo
- TIN
- Zipcode
- BusinessStyle
- ContactPerson
- ContactNumber
- TermId
- Term
- CreditLimit
- EmailAddress
- Particulars
- AddressLineStrtBarangay
- AddressLineCity
- AddressLineProvince
- AddressLineRegion
- WTaxId
- WTax
- DiscountId
- Discount
- ReceivableAccountId
- ReceivablePayableAccount
- Proprietorship
- LastName
- FirstName
- MiddleName
- TINBranchCode
- If you have multiple Customers to be uploaded, we suggest copying first the sample data then pasting on the next row until it reaches out on the number of items to be uploaded. Take note, there is a limitation of the number of Customers to be uploaded. Better read the “Best Practices” section first.
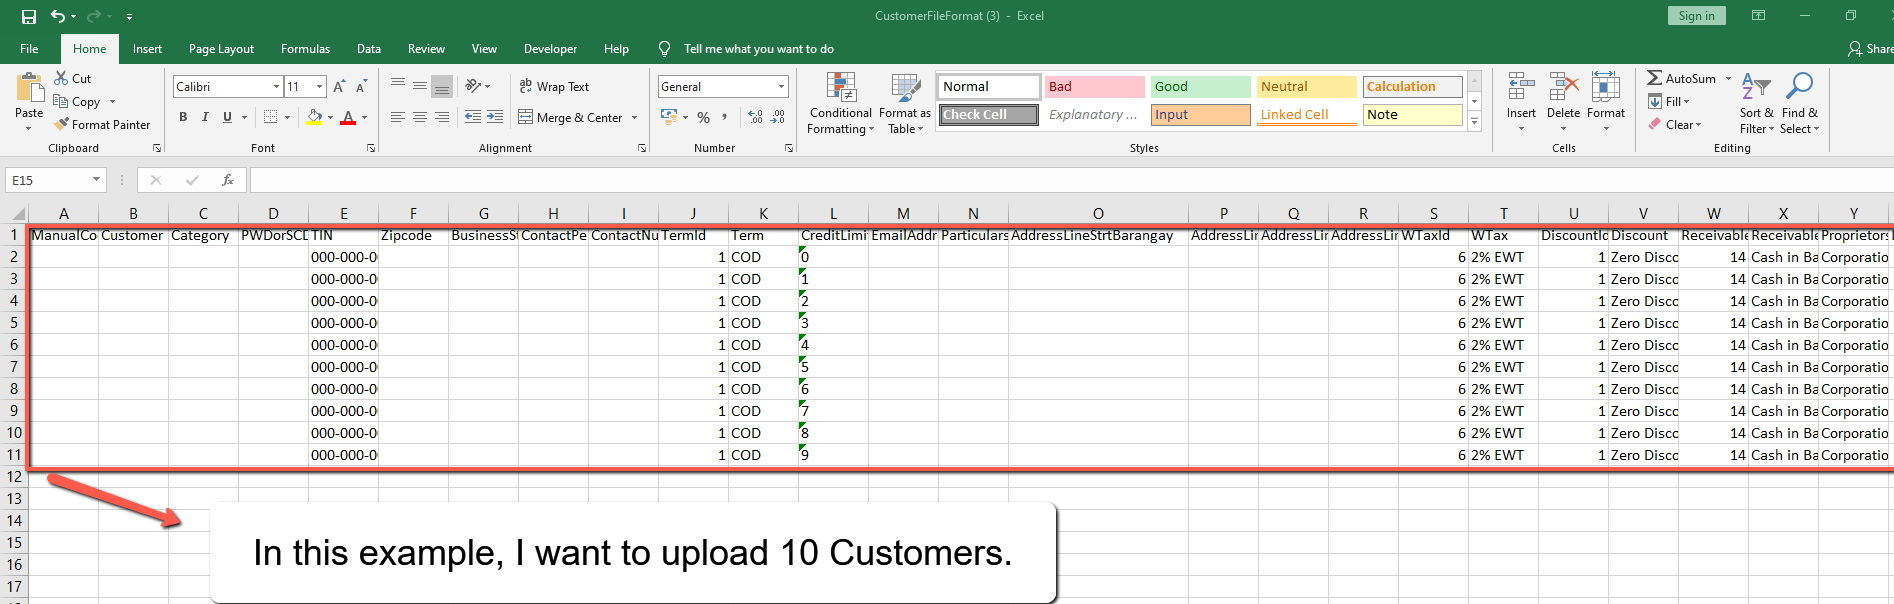
- Next, provide a correct value for each column especially on the following column(s):
- Take note: Highlighted with ORANGE are the required column, otherwise put NA as value:
- Manual Code → should be unique, alphanumeric and should not exceed 255 characters. Example: ABC0000001
- Customer → should be unique, has no special characters and should not exceed 128 characters.
- Category → alphanumeric, should have no special characters (if none, default to NA)
- PWDorSCDNo → should have no special characters (if none, default to NA)
- TIN → format should be 000-000-000
- Zipcode → should be numeric
- BusinessStyle → should have no special characters (if none, default to NA)
- ContactPerson → should have no special characters (if none, default to NA)
- ContactNumber → should have no special characters (if none, default to NA)
- Term → you can select a Term value from the dropdown. Do not edit the TermId.
- CreditLimit → should be numeric, (if none, default to 0)
- EmailAddress → should be valid email address, (if none, default to NA)
- Particulars → if none, default to NA
- AddressLineStrtBarangay → should have no special characters (if none, default to NA)
- AddressLineCity → should have no special characters (if none, default to NA)
- AddressLineProvince → should have no special characters (if none, default to NA)
- AddressLineRegion → should have no special characters (if none, default to NA)
- WTax→ you can select a WTAX value from the dropdown. Do not edit the WTaxId.
- Discount → you can select a Discount value from the dropdown. Do not edit the DiscountId.
- ReceivableAccount → you can select an Account Receivable value from the dropdown. Do not edit the ReceivableAccountId.
- Proprietorship → just select Corporation or Individual
- LastName → should have no special characters (if none, default to NA)
- FirstName → should have no special characters (if none, default to NA)
- MiddleName → should have no special characters (if none, default to NA)
- TINBranchCode → should be numeric
- Once okay, save the file.
- Go back to the system, then go to Sales, then select Customer.
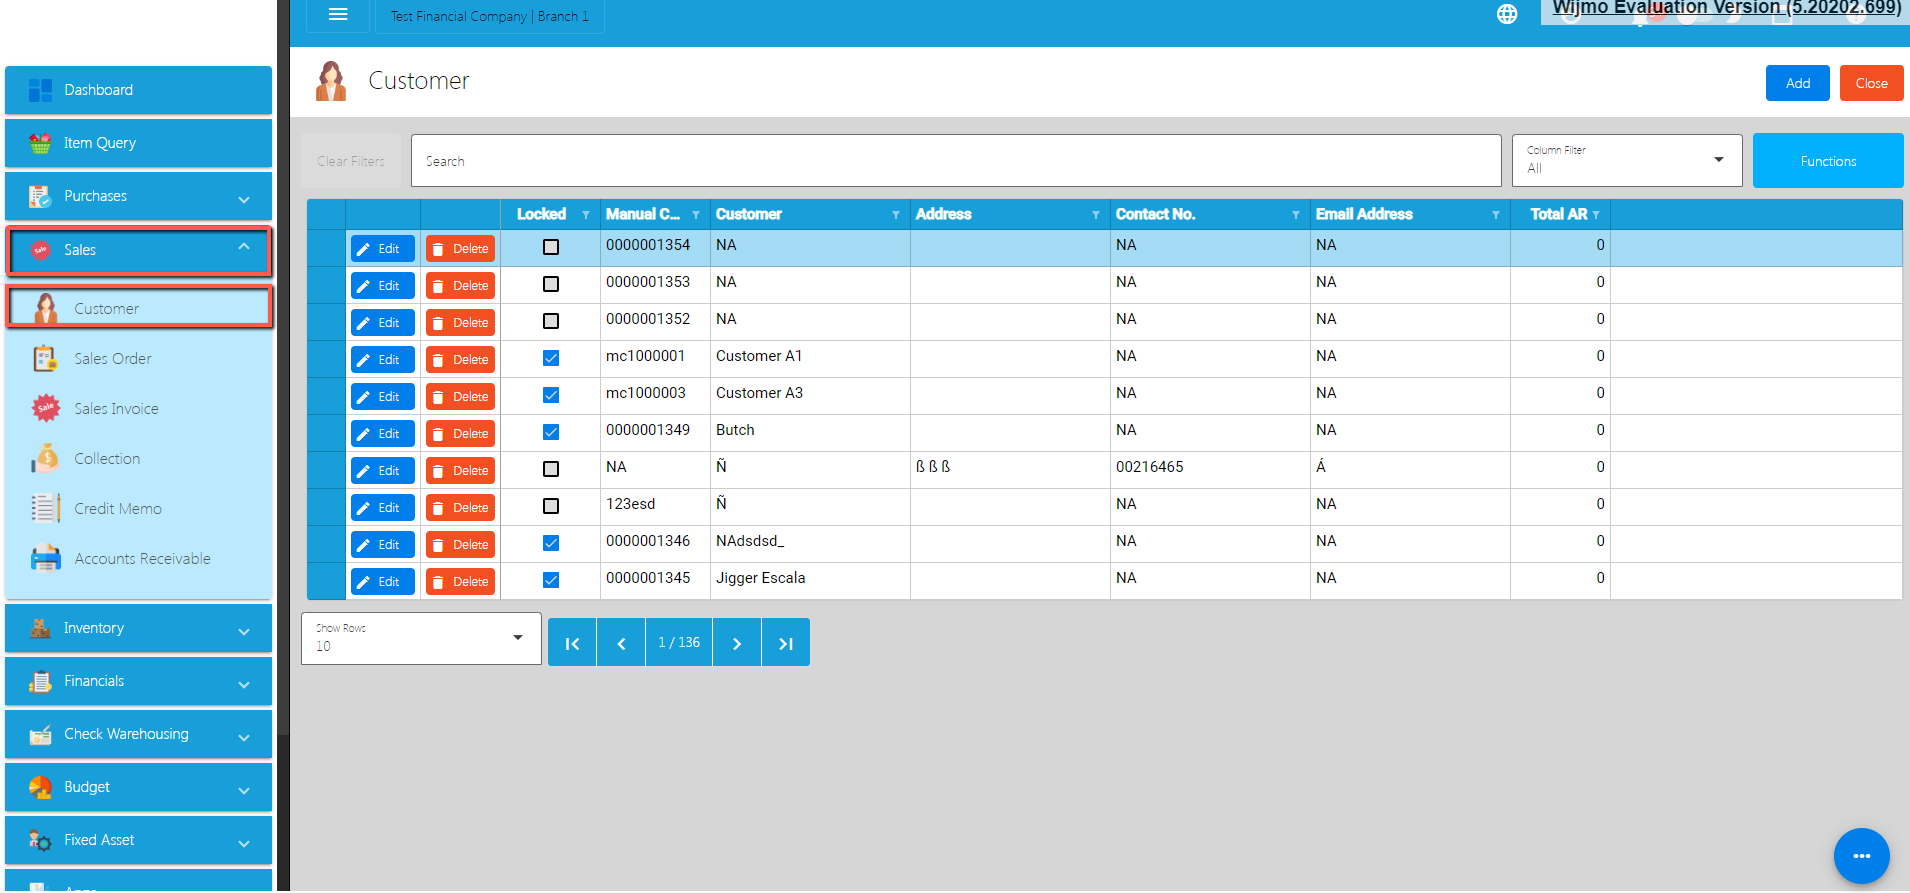
- Click again the Functions button, then hover to Optimized Upload, then click Import Draft Customer.
- Look for the Customer file format, then double click.
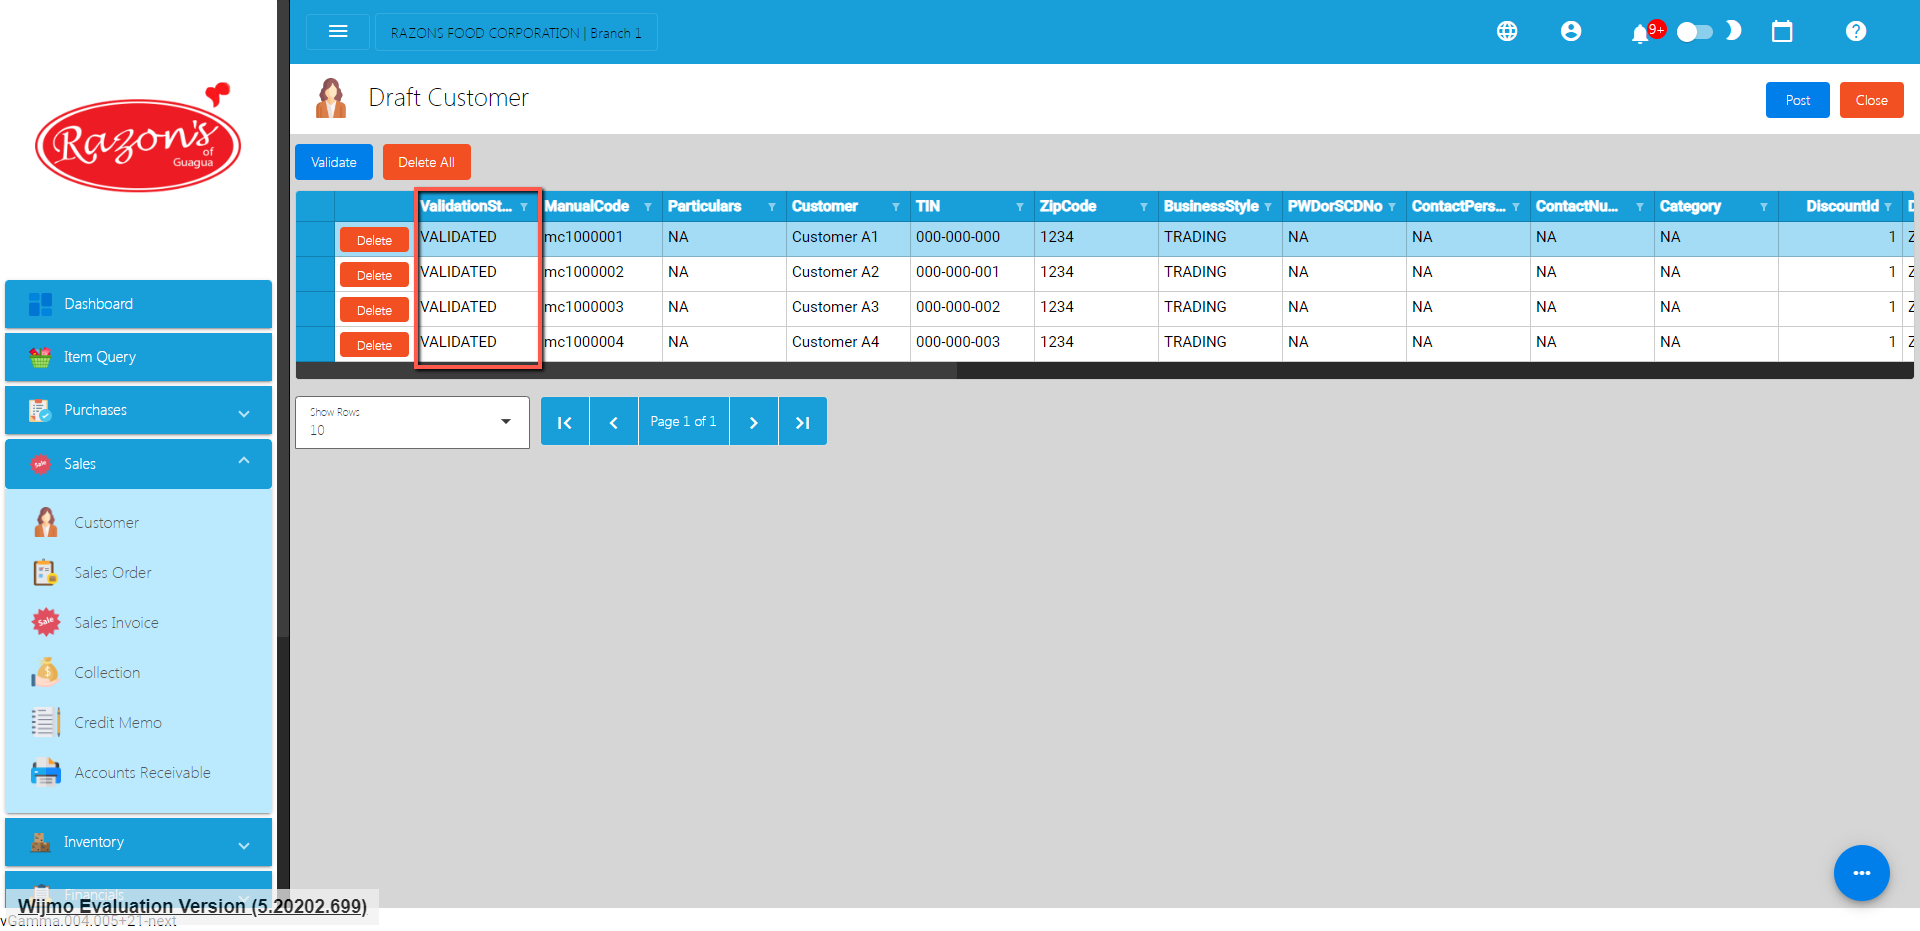
- Wait until it will successfully be imported. At this stage, the Customer(s) is not yet added to the Customer list. Instead, it will be added on the Draft Customer list. Meaning, the Customer(s) being imported are subject for a review.
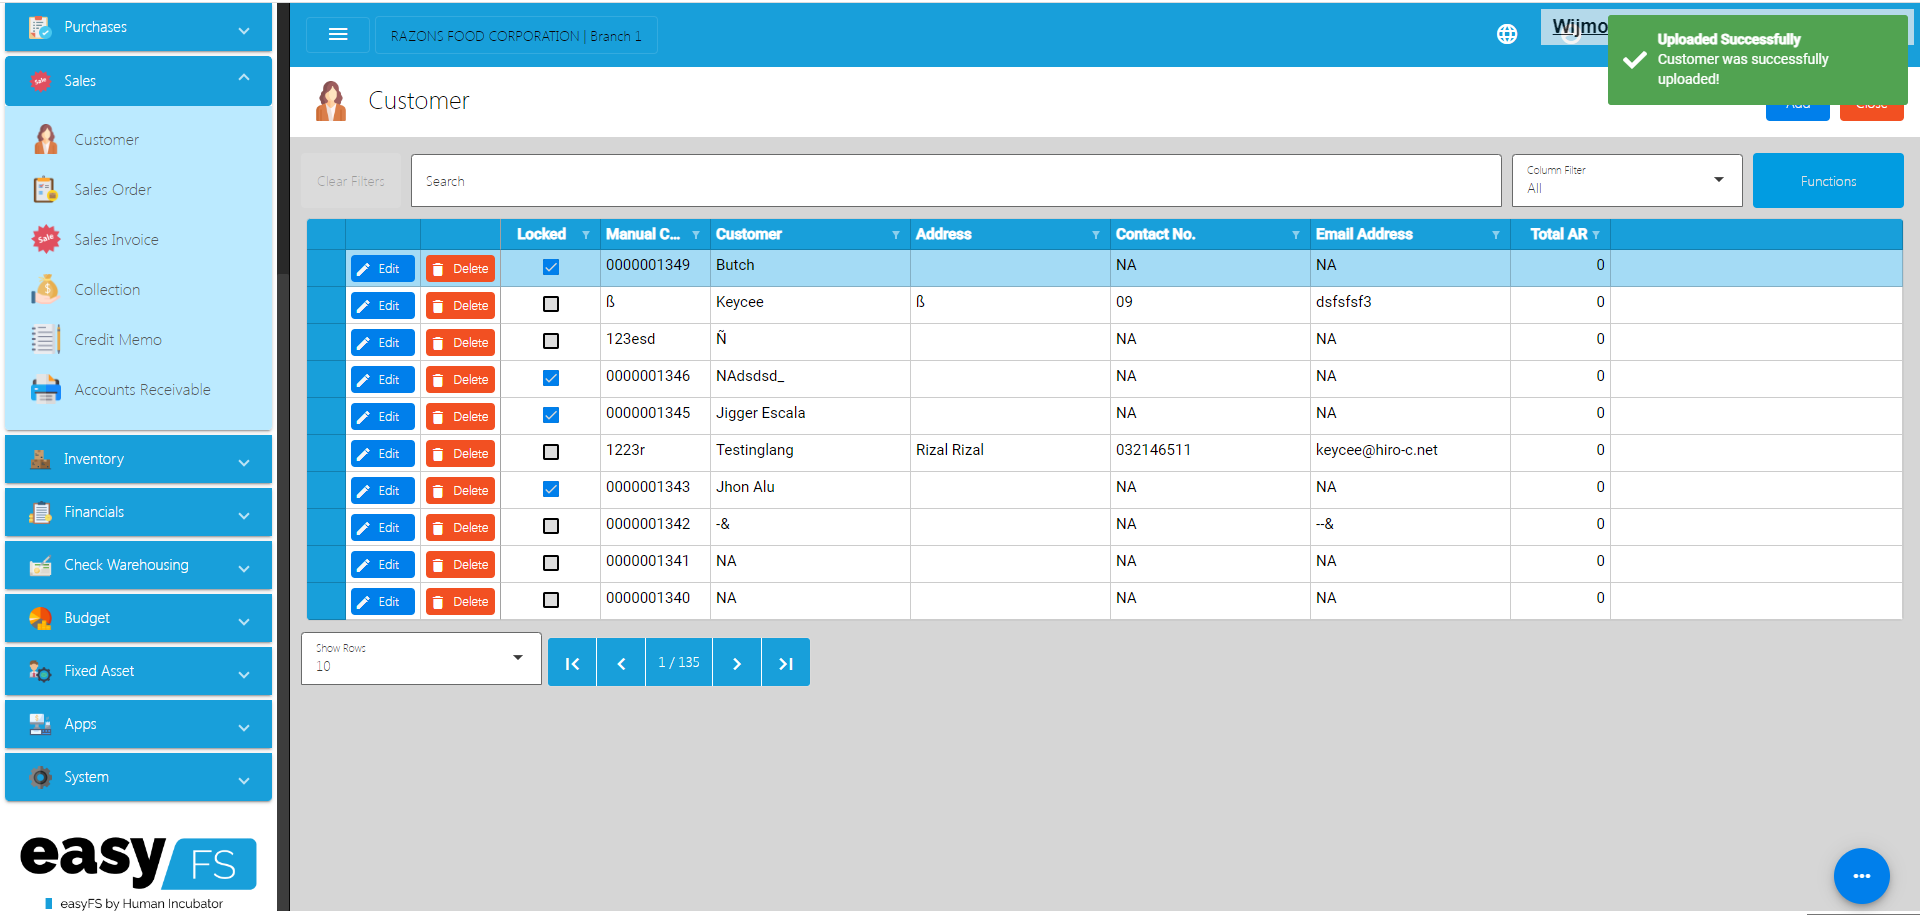
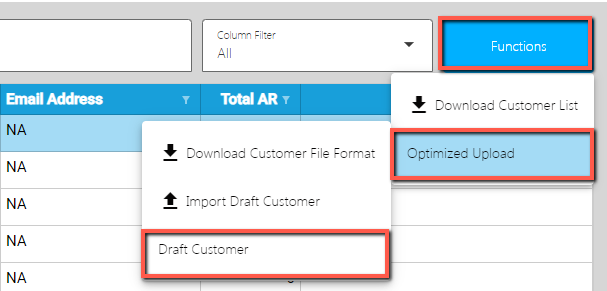
- To view the Customer(s) on the Draft Customer , click the Functions button, then hover to Optimized Upload, then click on the Draft Customer.
- Review if the Customer(s) being imported are added on the Draft Customer list.
- Once okay, click the Validate button. This is to validate first the Customer detail if everything is correct before it can be posted. Please refer to the following validation status:
|
Validation Error |
Description |
Action to Correct |
|
No Manual Code Provided |
Manual Code is one of the important fields of the Customer. This refers to the assigned Code defined by the customer for easy reference and searching |
Provide a unique Value on the Manual Code for Customer |
- No ManualCode provided → means that ManualCode column has no value.
- ManualCode already exists. → means that ManualCode column value exists on the Customer list.
- No Particulars provided → means that Particulars column has no value.
- No Customer provided → means that the Customer column has no value.
- Invalid TIN Format → means that the TIN column has an invalid format. Format should be: 000-000-000.
- No TIN provided → means that the TIN column has no value.
- No ZipCode provided → means that the ZipCode column has no value.
- No BusinessStyle provided → means that the BusinessStyle column has no value.
- No PWDorSCDNo provided → means that the PWDorSCDNo column has no value.
- No ContactPerson provided → means that the ContactPerson column has no value.
- No ContactNumber provided → means that the ContactNumber column has no value.
- No Category provided → means that the Category column has no value.
- No CreditLimit provided → means that the CreditLimit column has no value.
- No EmailAddress provided → means that the EmailAddress column has no value.
- Invalid EmailAddress → means that the provided email address is not in the format of email.
- No AdddressLineStrtBarangay provided → means that the AdddressLineStrtBarangay column has no value.
- No AdddressLineCity provided → means that the AdddressLineCity column has no value.
- No AdddressLineProvince provided → means that the AdddressLineProvince column has no value.
- No AdddressLineRegion provided → means that the AdddressLineRegion column has no value.
- No Proprietorship provided → means that the Proprietorship column has no value.
- InvalidProprietorship → means that the Proprietorship is not equal to Individual OR Corporation.
- No LastName provided → means that the LastName column has no value.
- No FirstName provided → means that the FirstName column has no value.
- No MiddleName provided → means that the MiddleName column has no value.
- No TINBranchCode provided → means that the TINBranchCode column has no value.
- Customer already exists → means that Customer column value exists on the Customer list.
- ReceivableAccountId not found → means that the ReceivableAccountId column value does not exist on the database.
- DiscountId not found → means that the DiscountId column value does not exist on the database.
- TermId not found → means that the TermId column value does not exist on the database.
- WTAXId not found → means that the WTAXId column value does not exist on the database.
- Once validation is okay, it will update the ValidationStatus. Read the validationStatus on what issues are being found. To correct the Customer detail, double click on the column where it has an issue then enter a valid value, then press Enter. After that, validate again by clicking the Validate button.
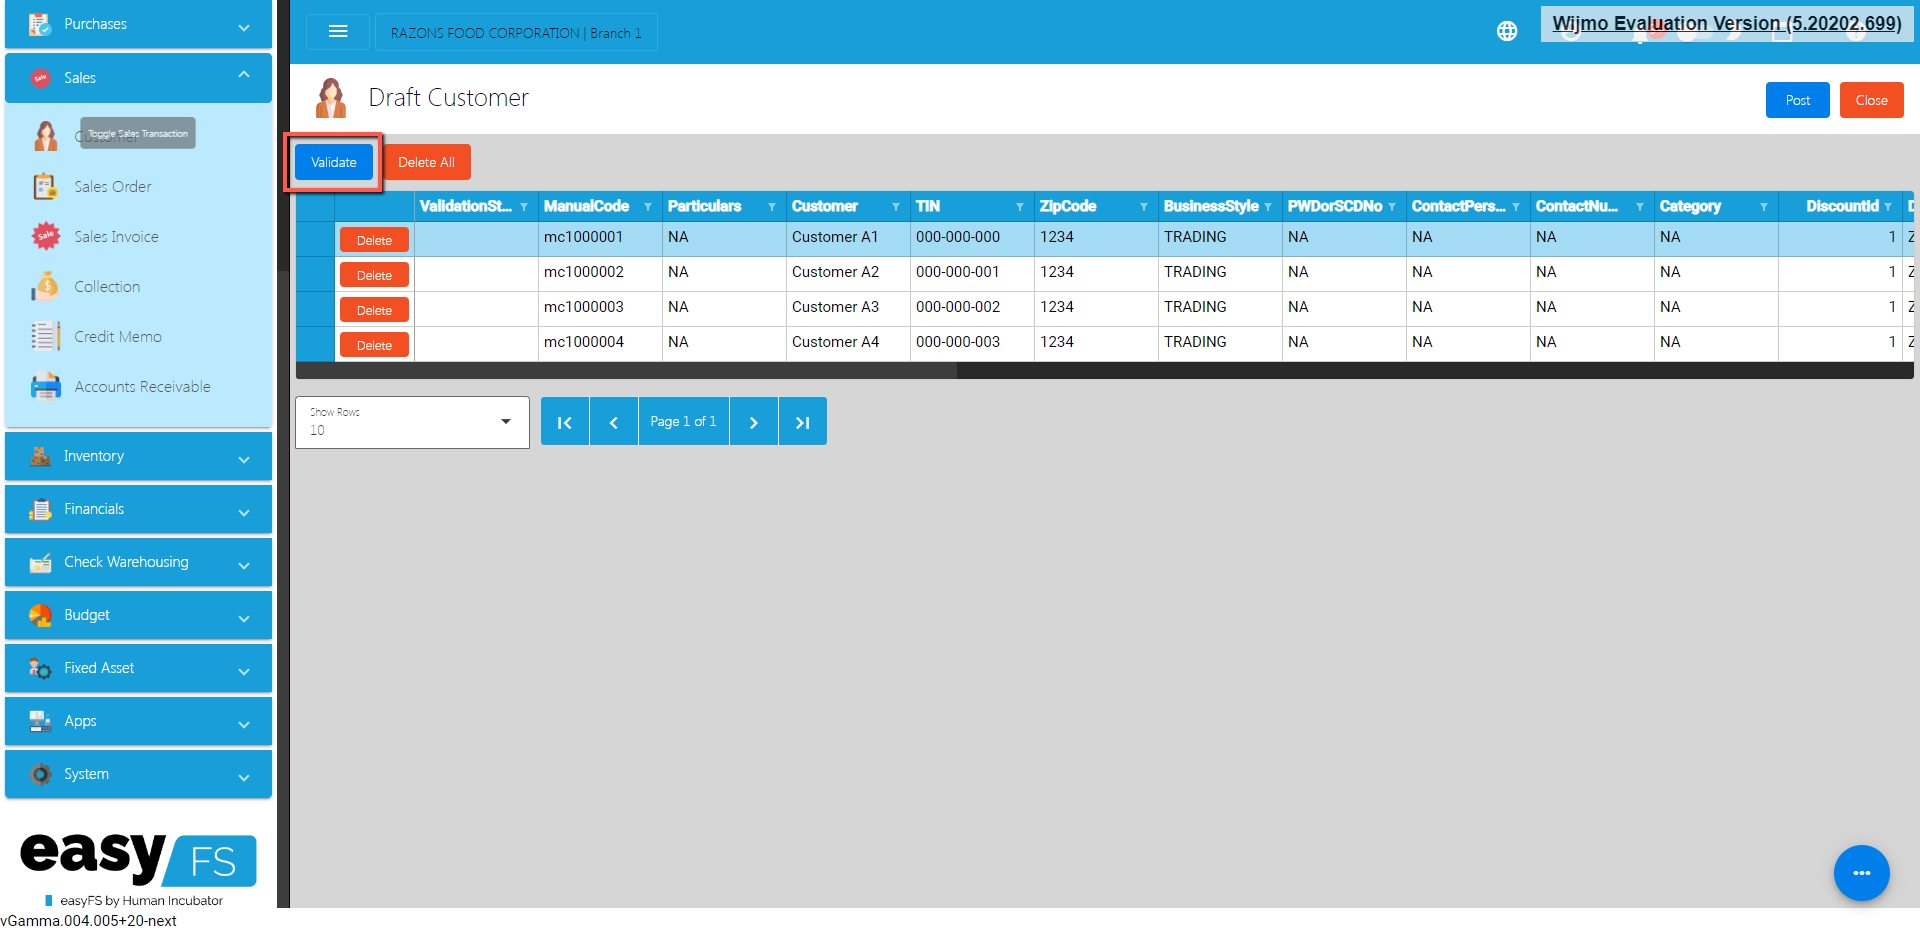
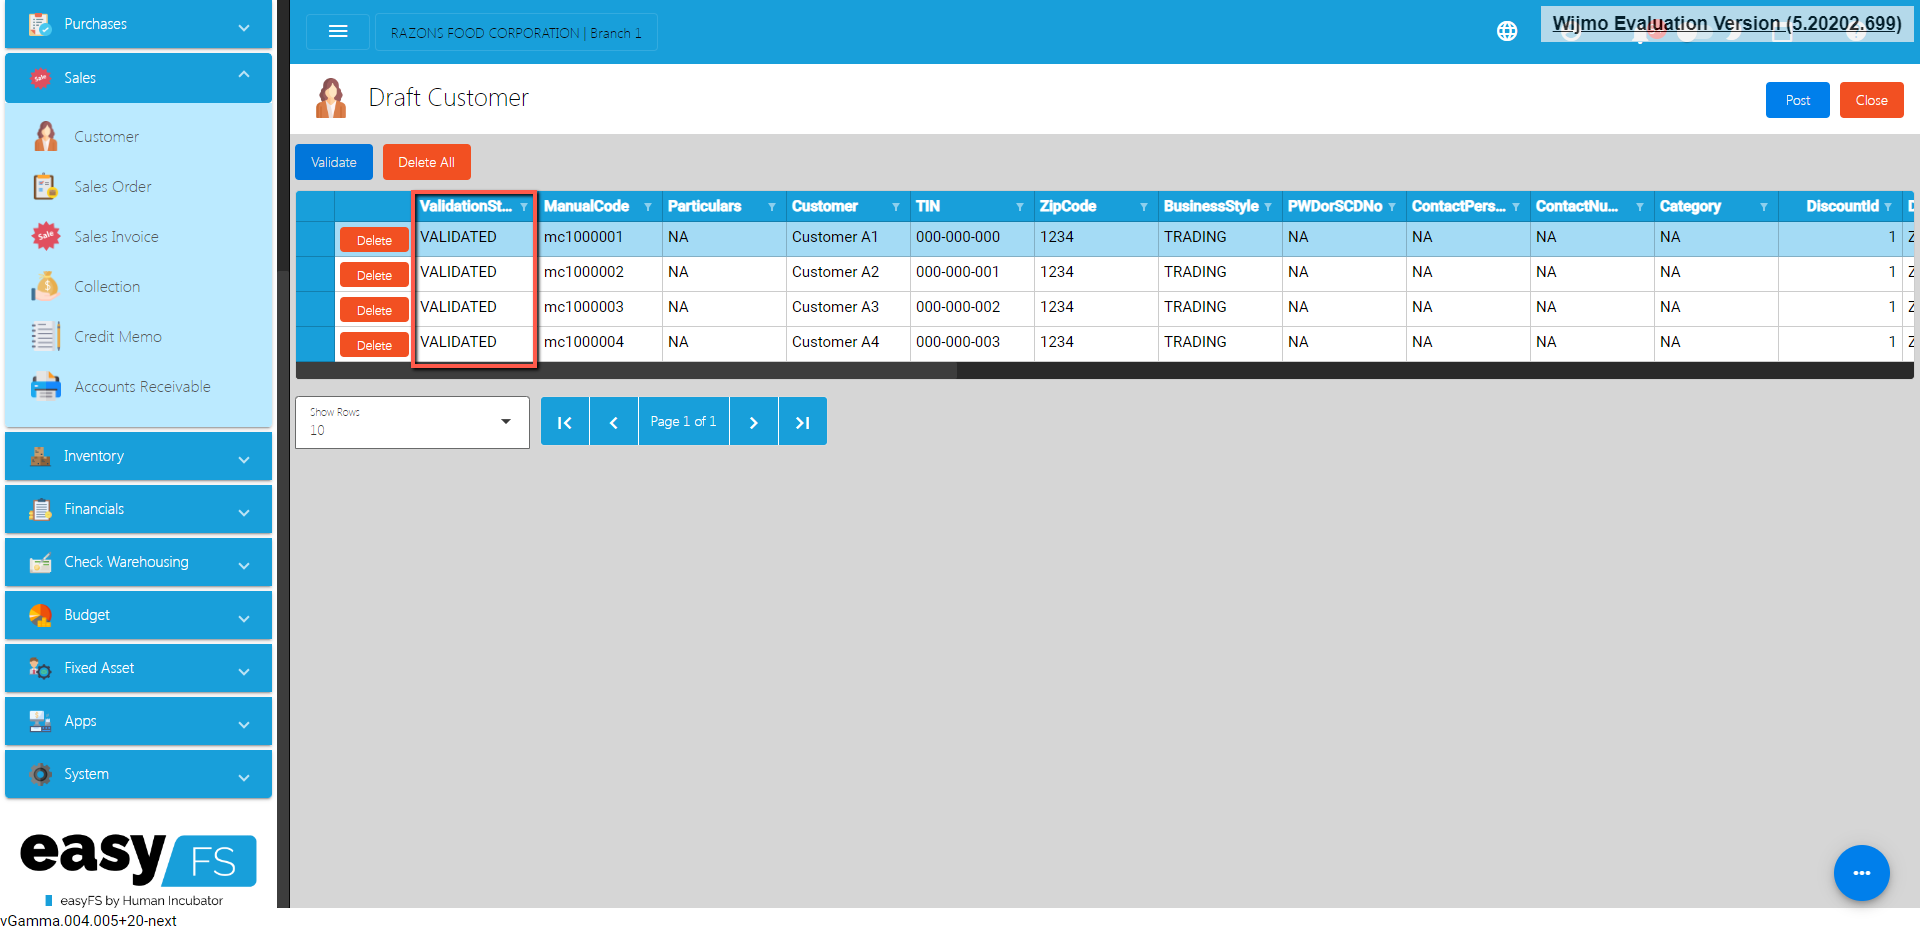
- Once everything is okay (ValidationStatus is equal to Validated), click the Post button. A confirmation message will display, click the Confirm button. This will now add the validated Customer(s) on the Customer list.
- To check if the Customer(s) are added on the Item list, click the Close button then look for the Customer on the Customer List.
4.1.3 Supplier
A "supplier" refers to an entity or individual that provides goods or services to a business. This could include companies from which a business purchases inventory, materials, or services necessary for its operations. The supplier is essentially the counterpart to the customer in the context of buying and selling transactions. In the accounting records, transactions with suppliers are recorded to track expenses, manage inventory, and maintain accurate financial records. Moreover, we've improved the way you see Supplier details so that you don't have to wait too long to view them.
4.1.3.1 Add Supplier Manually
- Go to Purchases then click Supplier.
- To add a new Supplier, click the Add button that can be seen on the Supplier List.
- Fill all the important fields for Supplier Detail like:
- Note: Highlighted with Orange are required fields. If there is no value, just put NA. In addition, do not provide special characters like ~ ` ! @ # $ % ^ & * ( ) – _ + = { } [ ] | \ / : ; " ' < > , . ? .
- Supplier (Name of the Supplier)
- Contact Person
- Contact Number
- Email Address
- Proprietorship
- First Name
- Middle Name
- Last Name
- TIN
- TIN Branch Code
- Address lines (Street Barangay, City, Province, Region, Zip Code)
- Category
- Business Style
- WTAX
- After filling up the important fields, click Save then Lock buttons.
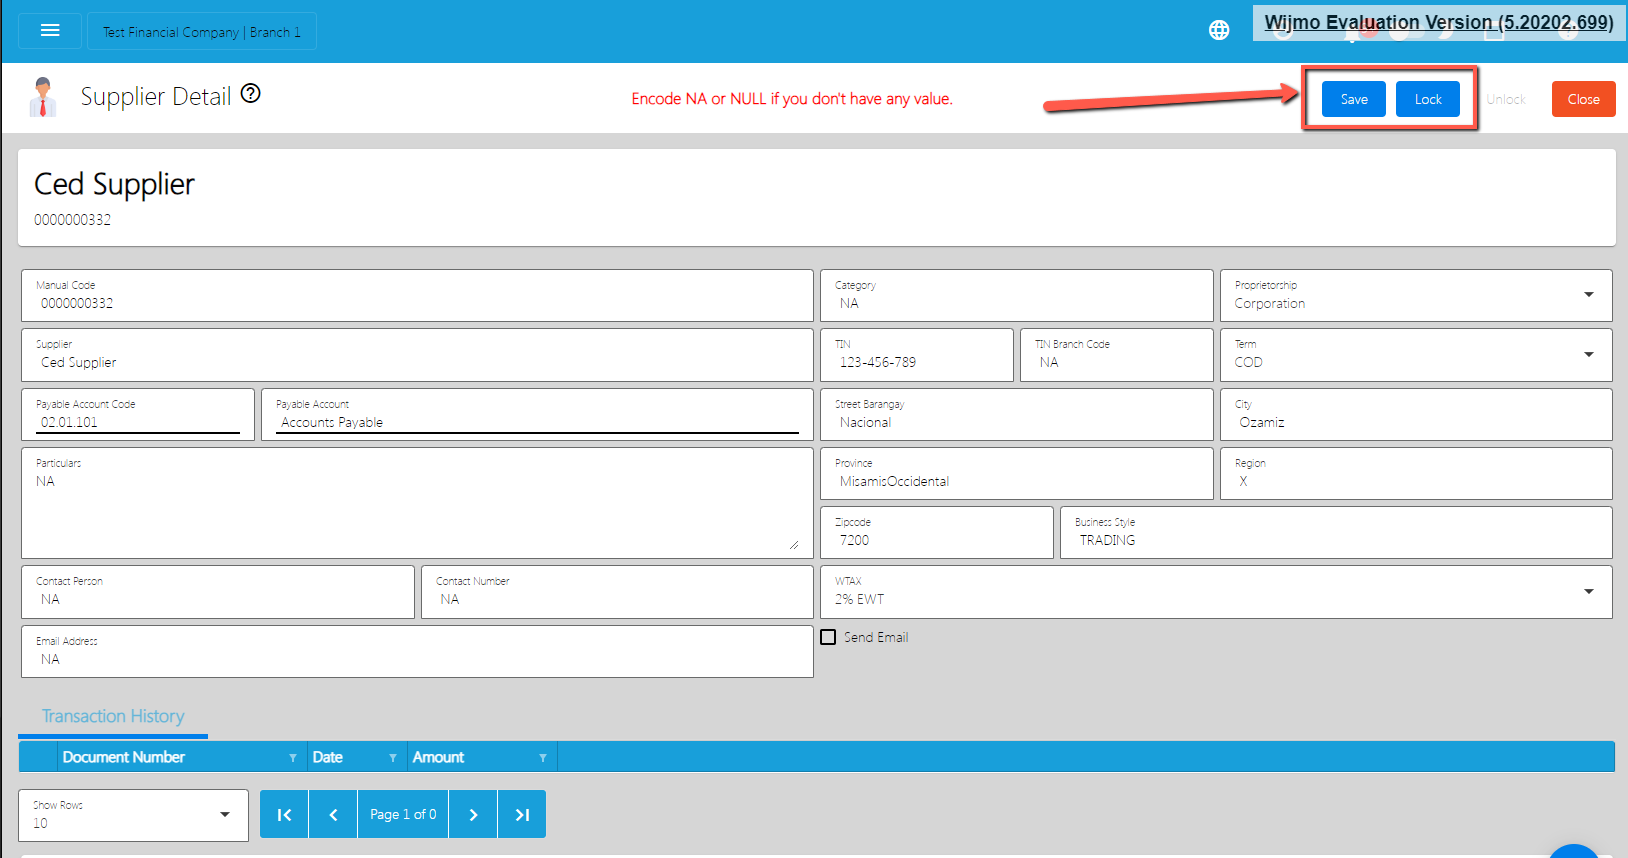
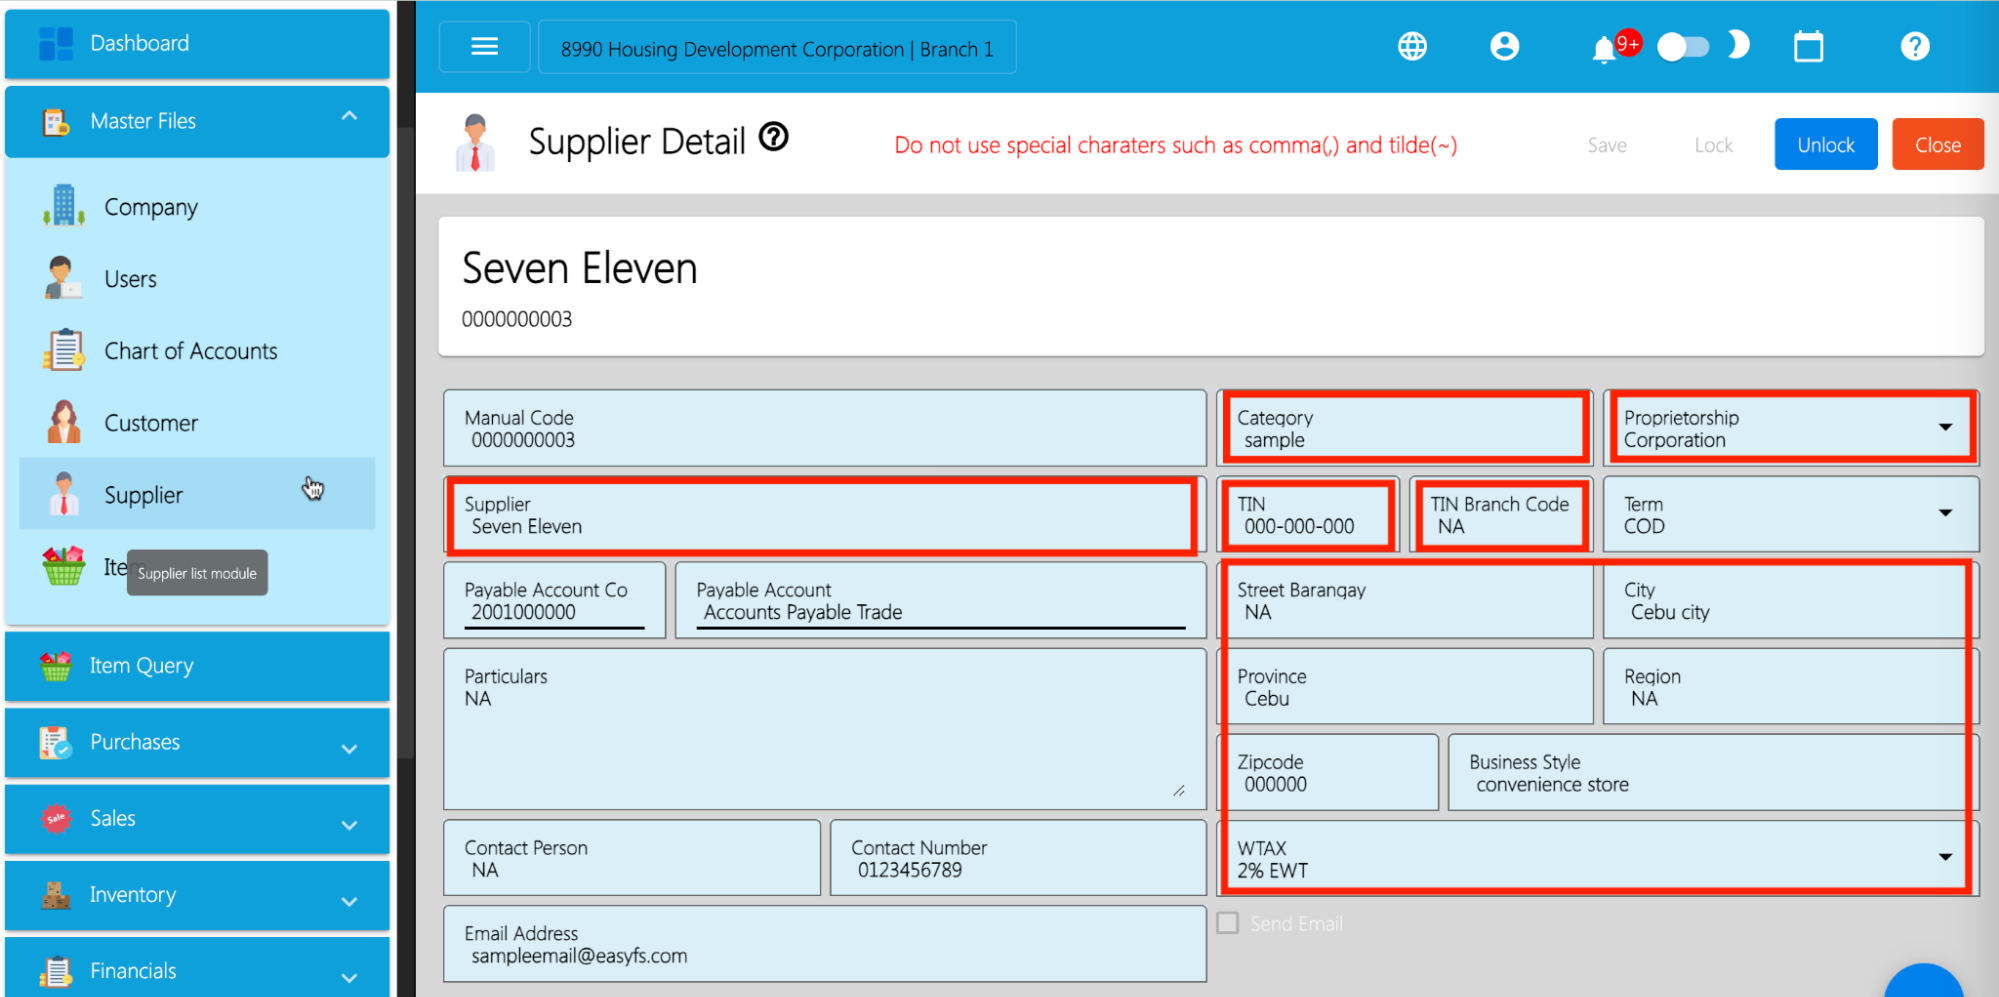
4.1.3.2 Add Supplier Via Import Function
- Go to Master Files, then select Supplier.
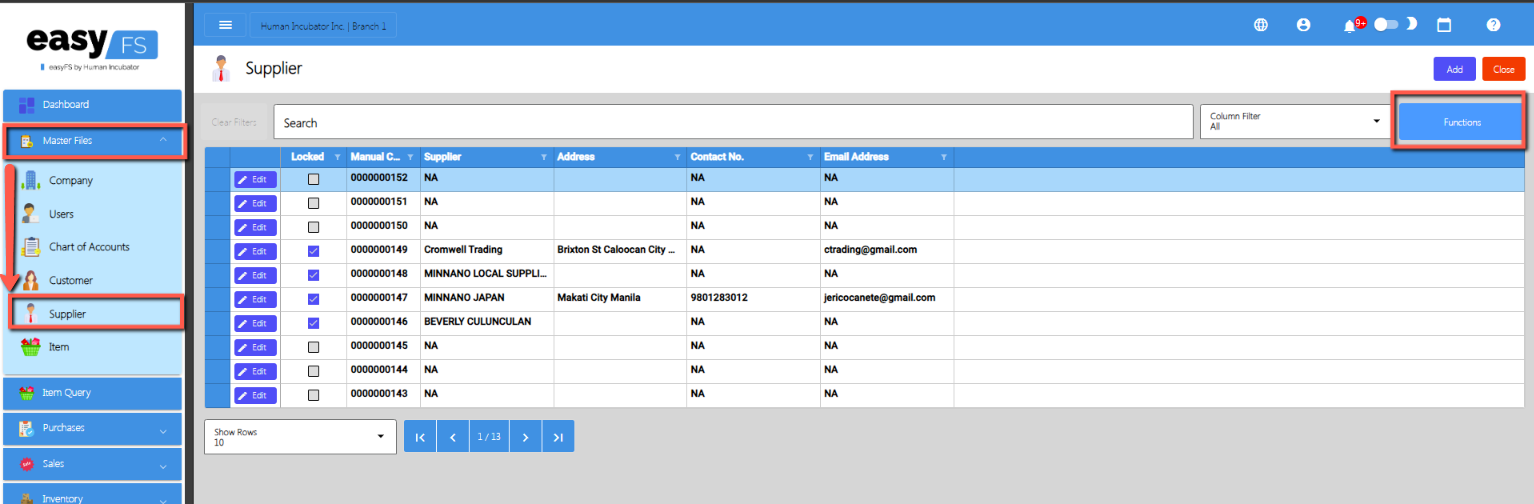
- Click the Functions button, then click Optimized Upload, and click Download Supplier File Format.
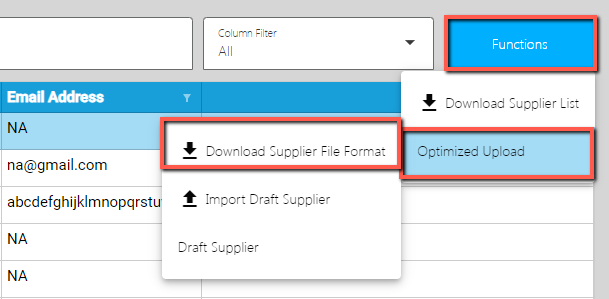
- An excel file is automatically downloaded for the Supplier File Format. As your indicator, the file is named SupplierFileFormat.

- Open the file. The file is used if you want to import multiple Suppliers in our system. Just keep in mind, we advise with a maximum of 500 Suppliers per upload.
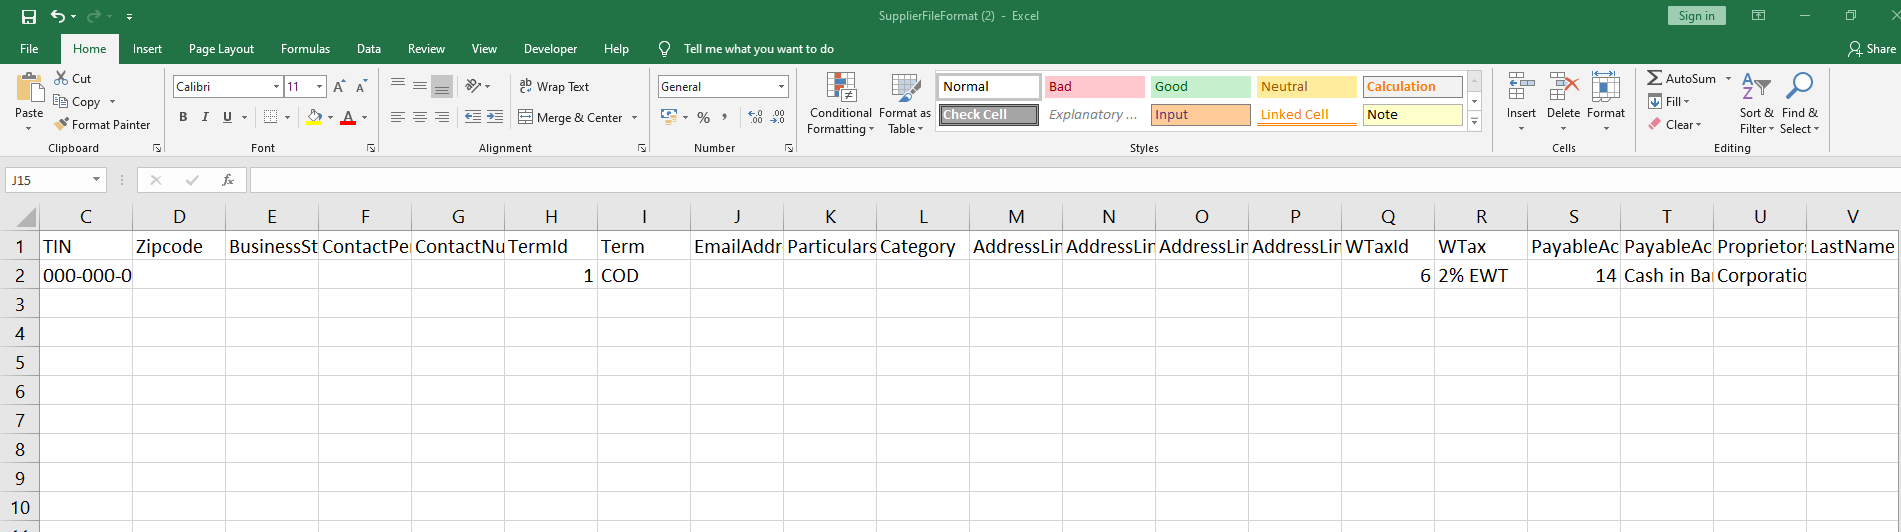
- As you can see on the file, it has sample data where you can see the following columns (all in all, there are 25 columns):
- ManualCode
- Supplier
- TIN
- Zipcode
- BusinessStyle
- ContactPerson
- ContactNumber
- TermId
- Term
- EmailAddress
- Particulars
- Category
- AddressLineStrtBarangay
- AddressLineCity
- AddressLineProvince
- AddressLineRegion
- WTaxId
- WTax
- PayableAccountId
- PayableAccount
- Proprietorship
- LastName
- FirstName
- MiddleName
- TINBranchCode
- If you have multiple Suppliers to be uploaded, we suggest copying first the sample data then pasting on the next row until it reaches out on the number of items to be uploaded. Take note, there is a limitation of the number of Suppliers to be uploaded. Better read the “Best Practices” section first.
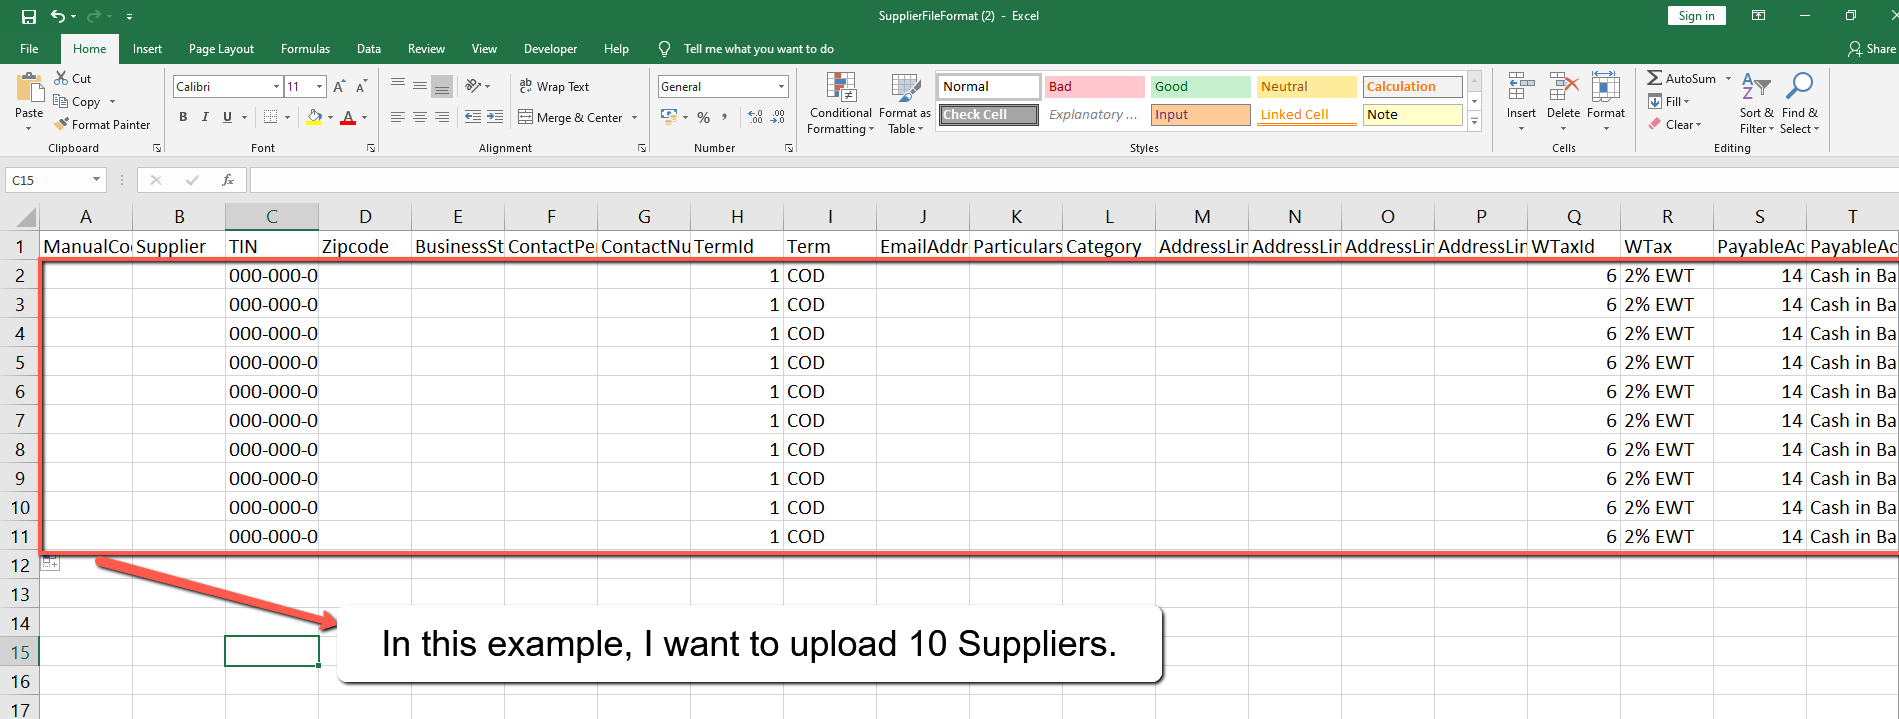
- Next, provide a correct value for each column especially on the following column(s):
- Take note: Highlighted with ORANGE are the required column, otherwise put NA as value:
- Manual Code → should be unique and has no special characters
- Supplier
- Category
- TIN → format should be 000-000-000
- Zipcode → should be numeric
- BusinessStyle → should have no special characters (if none, default to NA)
- ContactPerson → should have no special characters (if none, default to NA)
- ContactNumber → should have no special characters (if none, default to NA)
- Term → you can select a Term value from the dropdown. Do not edit the TermId.
- EmailAddress → should be valid email address, (if none, default to NA)
- Particulars → if none, default to NA
- AddressLineStrtBarangay → should have no special characters (if none, default to NA)
- AddressLineCity → should have no special characters (if none, default to NA)
- AddressLineProvince → should have no special characters (if none, default to NA)
- AddressLineRegion → should have no special characters (if none, default to NA)
- WTax→ you can select a WTAX value from the dropdown. Do not edit the WTaxId.
- PayableAccount→ you can select an Account Receivable value from the dropdown. Do not edit the PayableAccountId.
- Proprietorship → just select Corporation or Individual
- LastName → if none, default to NA
- FirstName → if none, default to NA
- MiddleName → if none, default to NA
- TINBranchCode → should be numeric
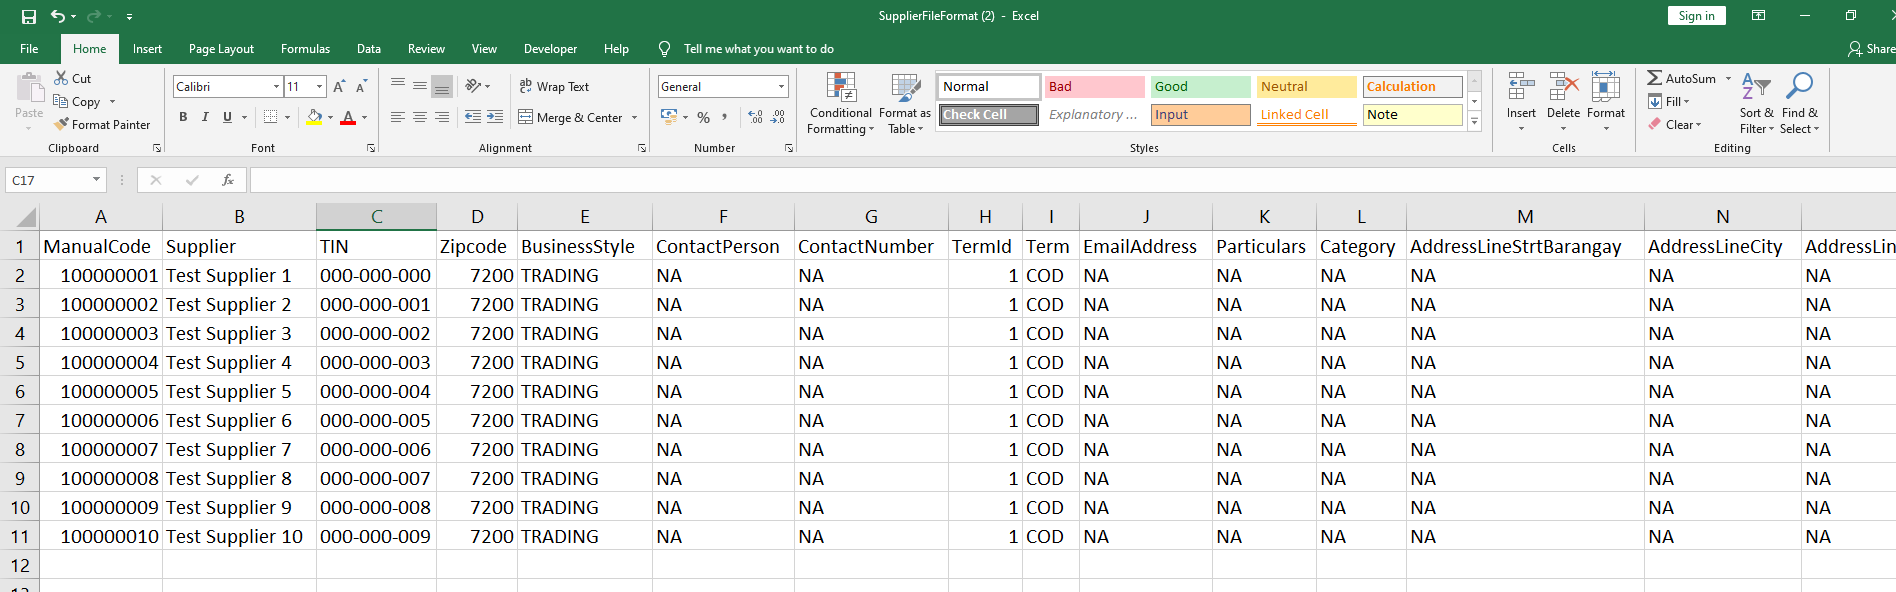
- Once okay, save the file.
- Go back to the Master Files, then select Supplier.
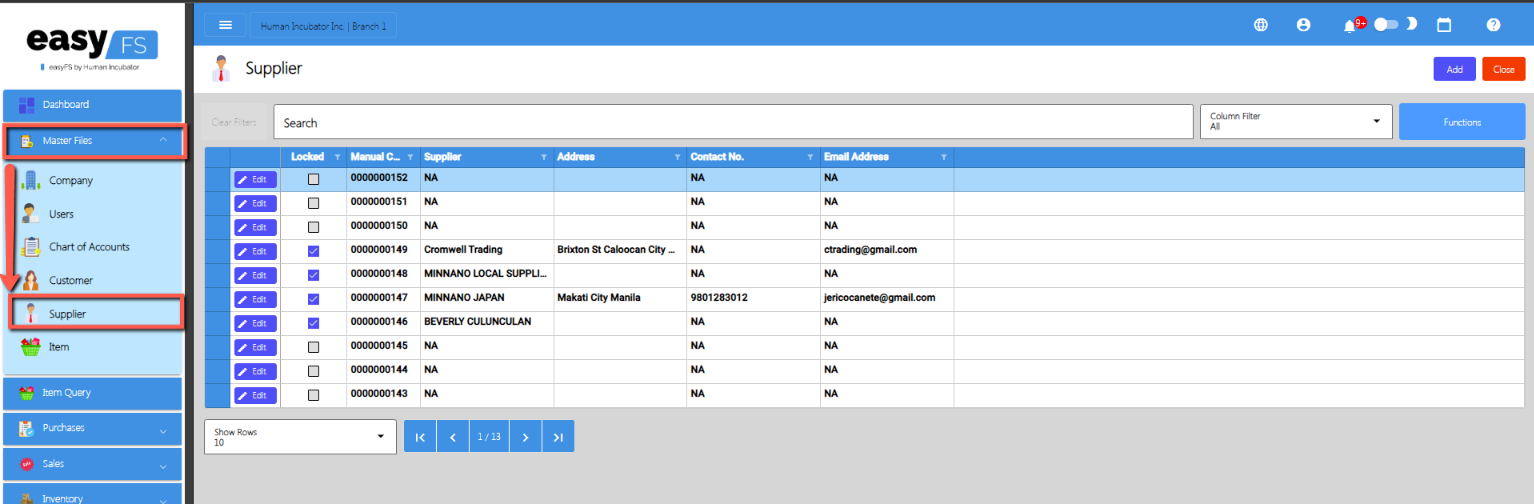
- Click again the Functions button,then click Optimized Upload, and click Import Draft Supplier.
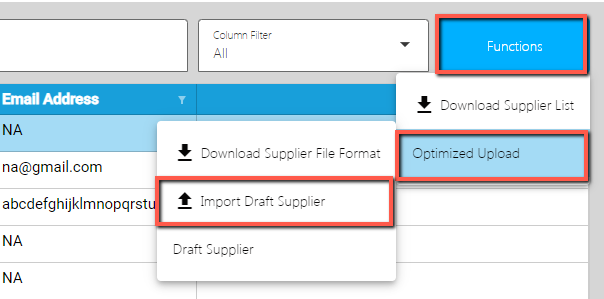
- Look for the Supplier file format, then double click.
- Wait until it will successfully be imported. At this stage, the Supplier(s) is not yet added to the Supplier list. Instead, it will be added on the Draft Supplier List. Meaning, the Supplier(s) being imported are subject for a review.
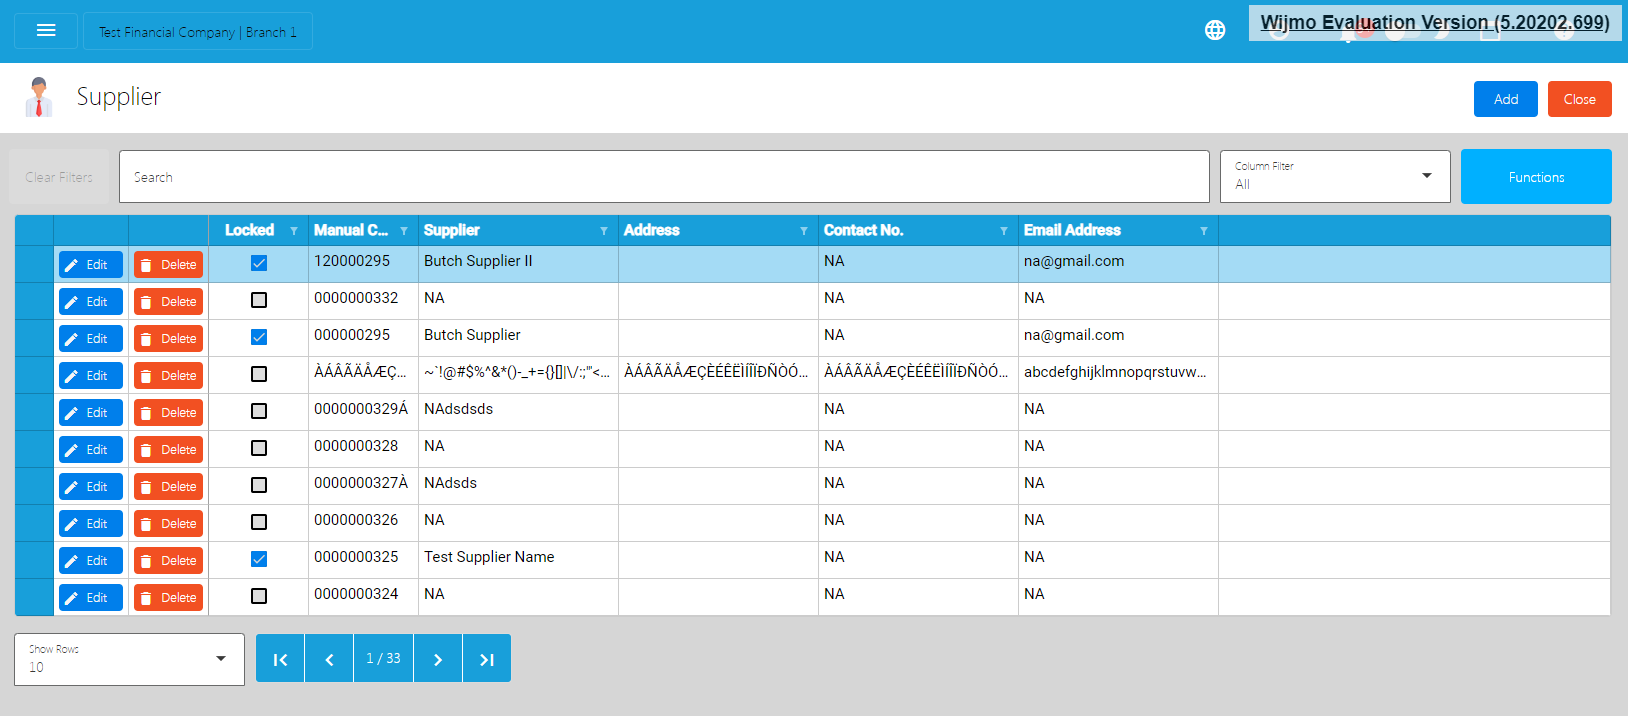
- To view the Supplier(s) on the Draft Supplier, click the Functions button, then click on the Draft Supplier.
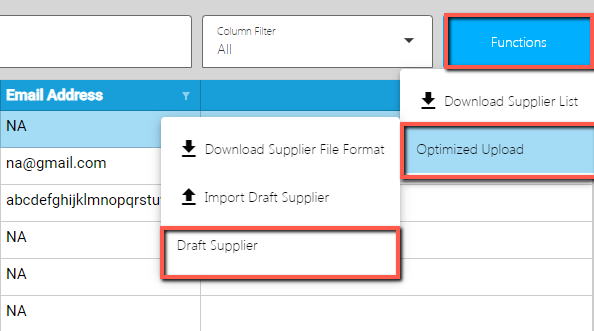
- Review if the Supplier(s) being imported are added on the Draft Supplier list.
- Once okay, click the Validate button. This is to validate first the Supplier detail if everything is correct before it can be posted. Please refer to the following validation status:
- No ManualCode provided → means that ManualCode column has no value.
- ManualCode already exists. → means that ManualCode column value exists on the Supplier list.
- No Particulars provided → means that Particulars column has no value.
- No Supplier provided → means that the Supplier column has no value.
- Invalid TIN Format → means that the TIN column has an invalid format. Format should be: 000-000-000.
- No TIN provided → means that the TIN column has no value.
- No ZipCode provided → means that the ZipCode column has no value.
- No BusinessStyle provided → means that the BusinessStyle column has no value.
- No ContactPerson provided → means that the ContactPerson column has no value.
- No ContactNumber provided → means that the ContactNumber column has no value.
- No Category provided → means that the Category column has no value.
- No CreditLimit provided → means that the CreditLimit column has no value.
- No EmailAddress provided → means that the EmailAddress column has no value.
- Invalid EmailAddress → means that the provided email address is not in the format of email.
- No AdddressLineStrtBarangay provided → means that the AdddressLineStrtBarangay column has no value.
- No AdddressLineCity provided → means that the AdddressLineCity column has no value.
- No AdddressLineProvince provided → means that the AdddressLineProvince column has no value.
- No AdddressLineRegion provided → means that the AdddressLineRegion column has no value.
- No Proprietorship provided → means that the Proprietorship column has no value.
- InvalidProprietorship → means that the Proprietorship is not equal to Individual OR Corporation.
- No LastName provided → means that the LastName column has no value.
- No FirstName provided → means that the FirstName column has no value.
- No MiddleName provided → means that the MiddleName column has no value.
- No TINBranchCode provided → means that the TINBranchCode column has no value.
- Supplier already exists → means that Supplier column value exists on the Supplier list.
- PayableAccountId not found → means that the PayableAccountId column value does not exist on the database.
- TermId not found → means that the TermId column value does not exist on the database.
- WTAXId not found → means that the WTAXId column value does not exist on the database.
- Once validation is okay, it will update the ValidationStatus. Read the validationStatus on what issues are being found. To correct the Supplier detail, double click on the column where it has an issue then enter a valid value, then press Enter. After that, validate again by clicking the Validate button.
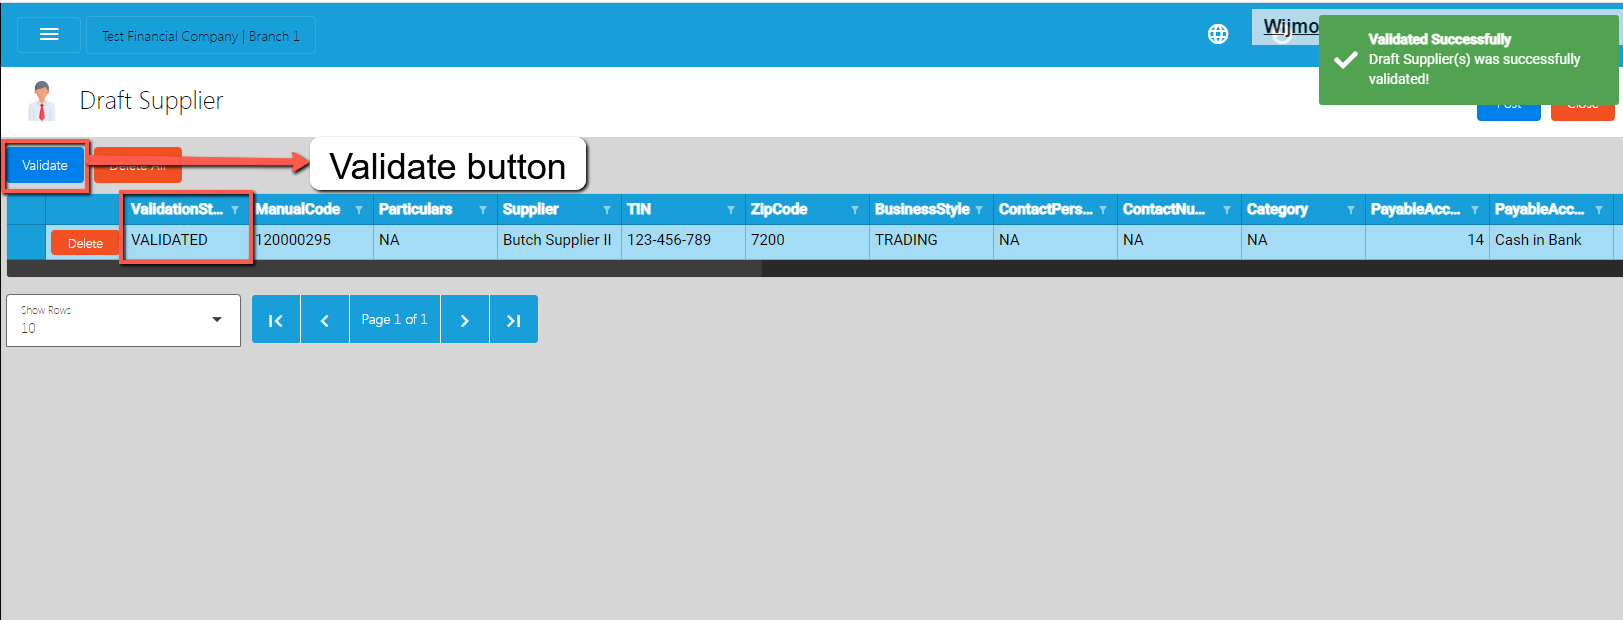
- Once everything is okay (ValidationStatus is equal to Validated), click the Post button. A confirmation message will display, click the Confirm button. This will now add the validated Supplier(s) on the Supplier list.
- To check if the Supplier(s) are added on the Item list, click the Close button then look for the Supplier on the Supplier List.
4.1.4 Company
Company refers to the name of the organization using easyFS. Each company can have multiple branches. Depending on how the organization will configure their branches, they could use it as a profit center, a cost center or a warehouse. Each Company has its own consolidated Financial Reports.
Company List
- List of All Companies that were added to the system.
Company Detail
- To add a new Company detail, click on the Add button that can be seen on the Company list page.
- In the company Detail there are some few settings for having the proper settings. Here are some few settings in easyFS
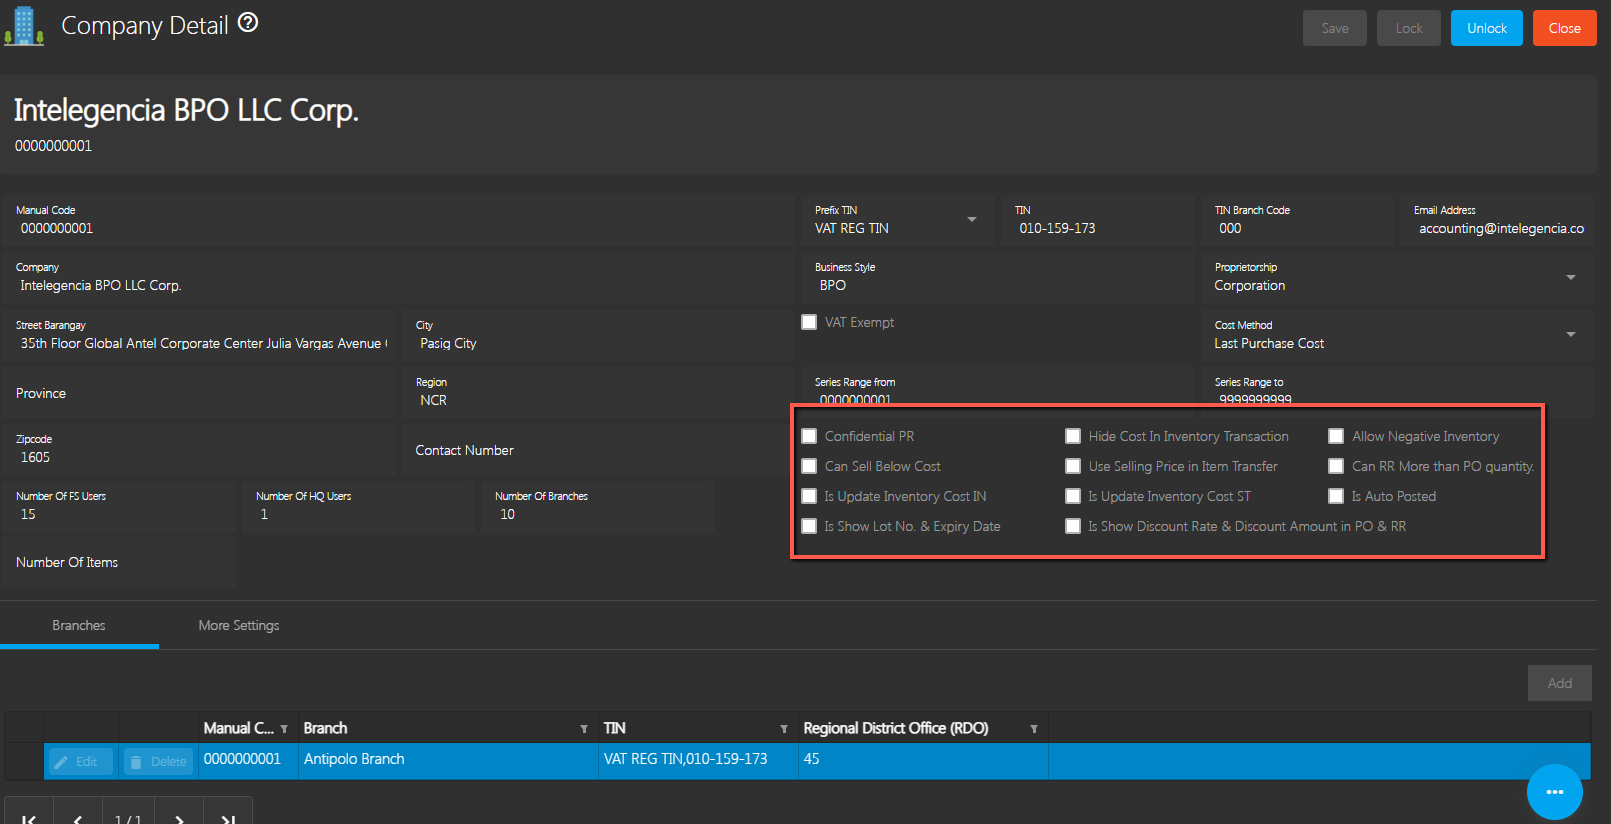
- Confidential PR – This setting will allow the user to hide the Supplier in the Purchase Request(PR) and Purchase Order(PO) transaction.
- Can Sell Below Cost – This will allow the user to sell the item or product lower than the purchase cost.
- Is Update Inventory Cost IN – this will allow the user to update the cost in the inventory report by creating a Stock in
- Is show Lot No. & Expiry Date – This will allow the user to hide or show the Lot No. & Expiry Date in the Receiving Receipt(RR) printout.
- Is Show Discount Rate & Discount Amount in PO & RR – This will allow the user to hide or show the Discount Rate and the Discount Amount in PO & RR
- Hide Cost In Inventory Transaction – Will allow the user to hide the cost of the item while doing an inventory transaction.
- Use Selling Price in Items Transfer – This will allow the user to use the Selling price instead of the cost in doing a stock transfer transaction.
- Is Update Inventory Cost ST – this will allow the user to update the cost in the inventory report by creating a Stock Transfer
- Allow Negative Inventory – This will allow the user to still do a transaction even if there is no stocks or quantity in the inventory
- Can RR More than PO Quantity – This will allow the user to create more Receiving Receipts(RR) even if the Purchase Order(PO) are all received.
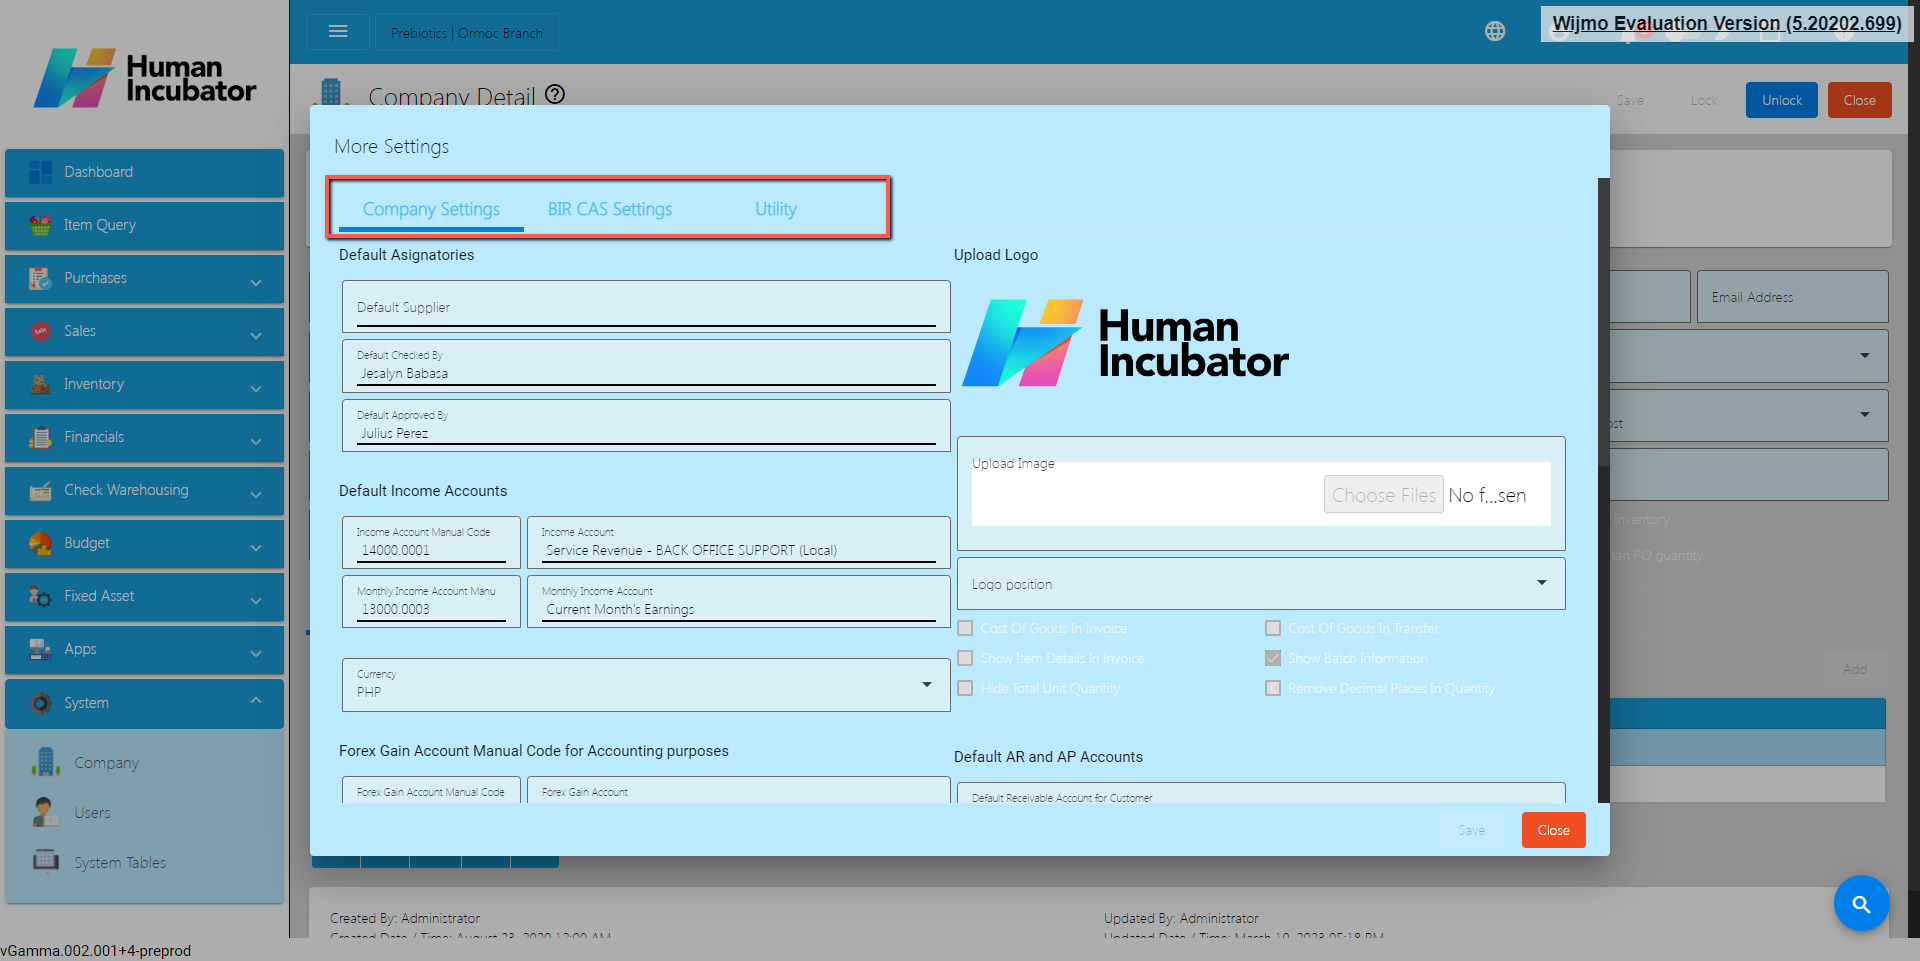
Provide all the necessary information for the More Settings for the company the tabs shown here are:
- Company Settings – more settings for company tweaking.
- If easyFS has easyPOS integration, make sure to turn on the With Integration checkbox. Turning on the With Integration will prevent the user to Unlock/Edit the following transactions:
- Stock In
- Stock Out
- Stock Transfer
- Receiving Receipt
- BIR CAS Settings – more settings to tweak BIR Forms format
- Utility – use for several functions, like uploading items in bulk, truncating all transactions, etc.
4.1.5 Users
User refers to an individual who has access to easyFS. Each user will be given rights and permissions to the Modules, Forms and Reports of easyFS. This will depend on how the organization will configure or implement their access rights.
Note: A user license is part of the contract of easyFS and it should be coordinated with HII Sales for proper accounting and to avoid unnecessary disruption in the organization’s operations. For more additional inquiry on the User License you can contact Hiisales@human-incubator.com
Users List
List of All Users that were added to the System.
Users Detail
- Fill up the required fields for the User to use:
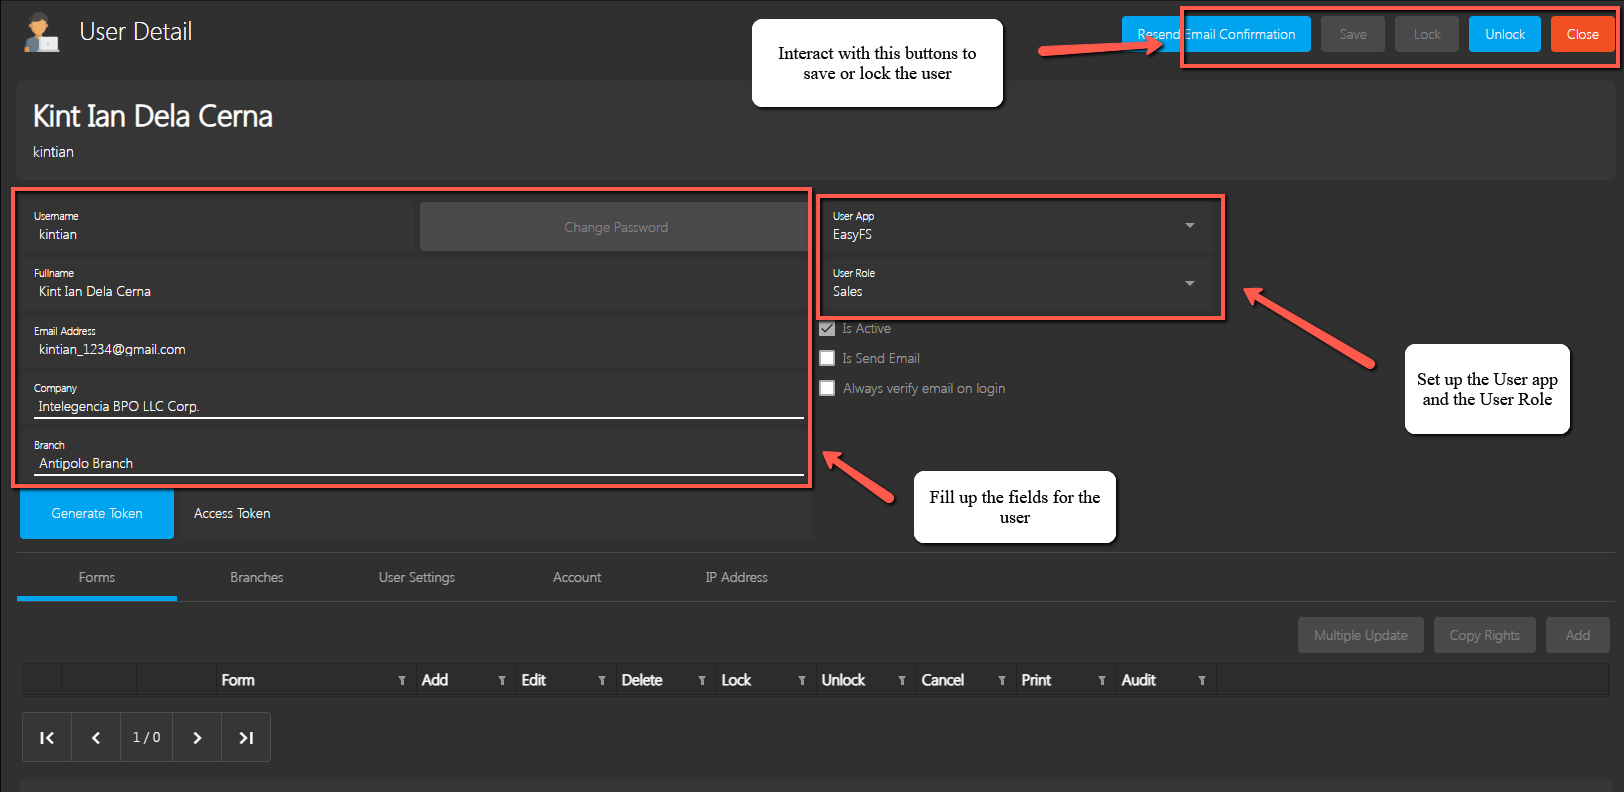
- Username – username that will be used in logging into the system
Fullname – Full Name of the user, it will be reflected in the reports and in the transactions.
- Email Address – Please provide an active email address. This will be used to send your password and receive notifications for all transactions
- Company – a company which the user can only access
- Branch – a branch which the user can only access
- User Role – This will determine if the user will be included to the Number of User, User will choose either admin or sales
- Admin Role – The admin role will be included in the Number of User that will have an access to easyFS
- Sales Role – The sales Role will not be included in the Number of users and it will not have an access to the easyFS, They will be used only for tagging of sales/transaction.
- Is Active – it should be checked so that the user can access the system
- Is Send Email – If this button is checked, you will receive notifications for all transactions you have created
- Always Verify Email on Login – If this button is checked, you will receive an OTP every time you log-in to the system. * Note: The password will be set up once the username setup is completed. An email will be sent to the registered email address provided in the user details. Please ensure that you click the link within 5 minutes.
- Set-up also the Apps for the user to access, either All (Both easyFS and EasyHQ), easyFS, EasyHQ.
- Forms – set the forms that a USER can only access. Select or Check the Necessary fields like ADD, EDIT, DELETE, LOCK, UNLOCK, CANCEL, PRINT, AUDIT.
- Branches – set the branch this user can use, there should be a button there that says Copy Branch that will copy another user's set of branches.
- User Settings – set the users preferences on what charts to be seen on the Dashboard. Upload electronic signature on this tab also.
- Account – set the Account for you to watch the balance of, this can be found in the Dashboard, which is called Account Watch
- IP Address – add an IP Address to limit access for this user based on the added IP Address example of IP Address is (255.255.255.0)
4.1.6 Chart of Accounts
- Establish a chart of accounts, which is a structured list of all accounts used by the organization.
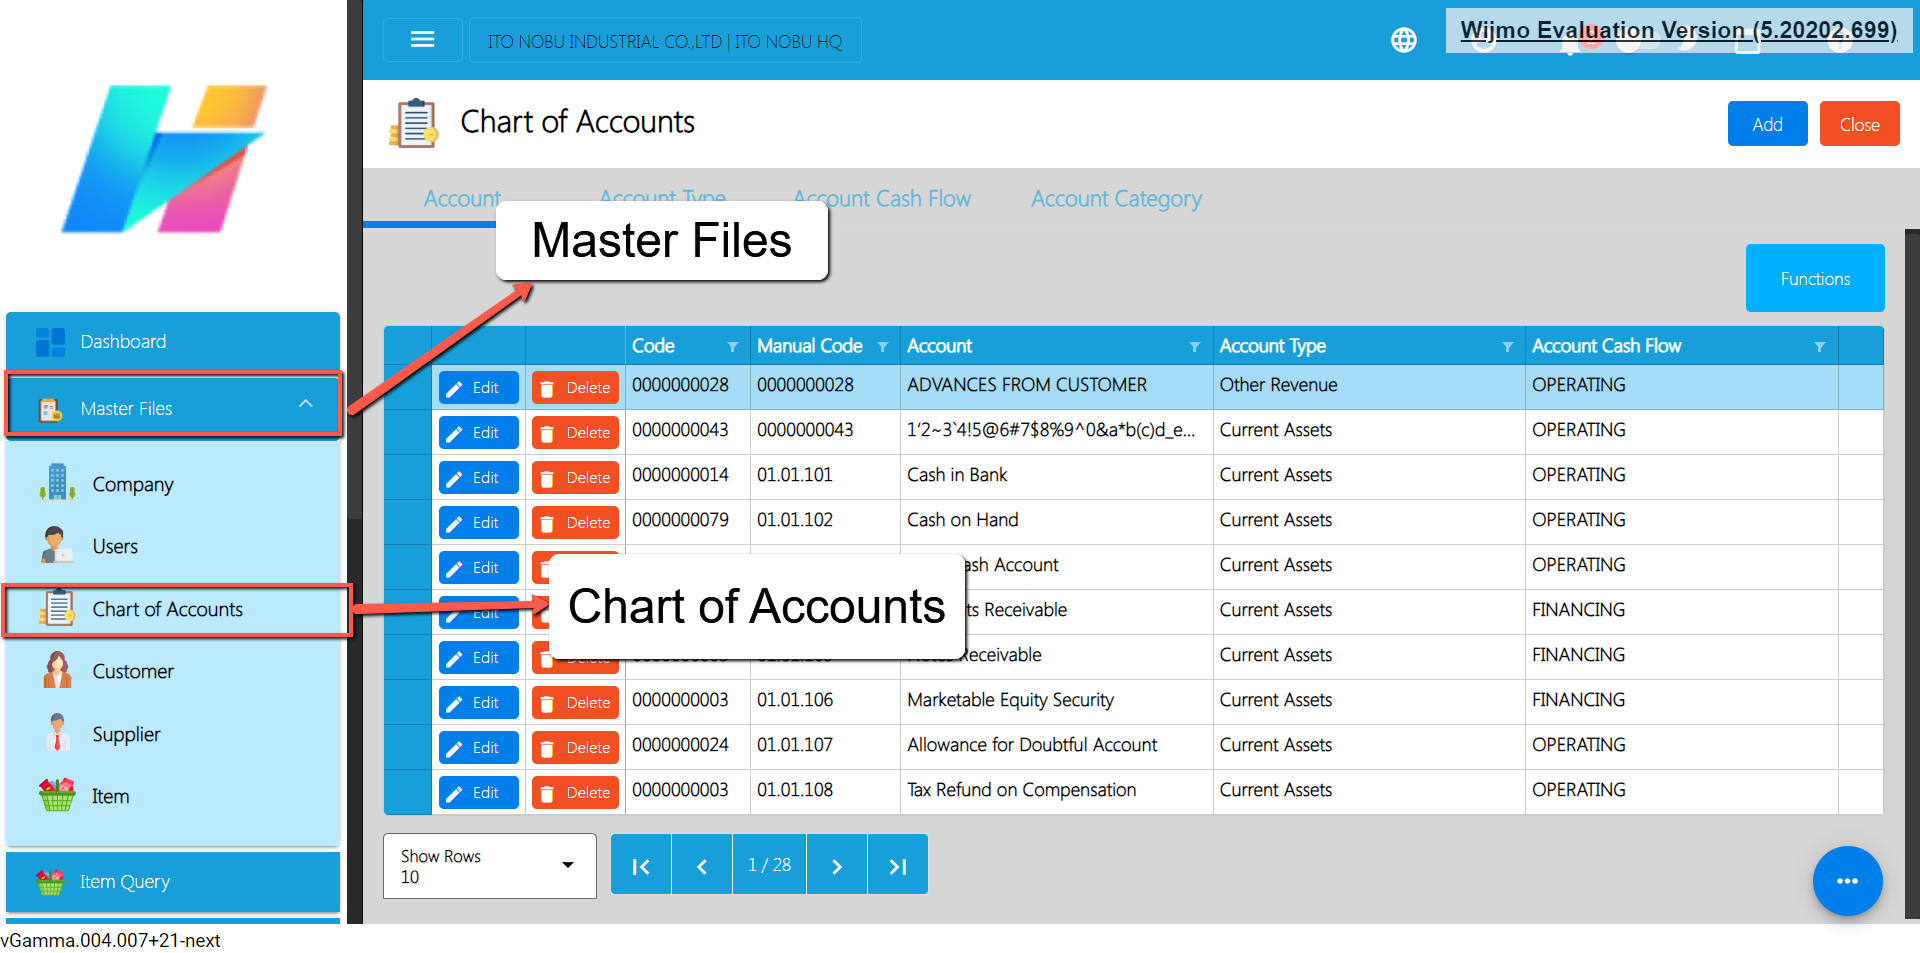
- Categorize accounts based on assets, liabilities, equity, income, and expenses.
Note: An Accountant can advise what will be the best suited Chart of Accounts for your type of business.
4.1.6.1 Chart of Accounts Lists
- List of All Accounts that were added to the System
- Here the user can choose what Account they want to set up for them to use in their transactions, there are the tabs:
- Account – This is the name of the account used to record financial transactions.
- Account Type – This refers to the type of account based on the nature of the financial transactions. Common account types include assets, liabilities, equity, revenues, and expenses.
- Account Cash Flow – This refers to the direction of cash flow associated with the account. Accounts can be classified as cash inflows or cash outflows.
- Account Category – This refers to the grouping of accounts based on their function within the business. Common account categories include current assets, fixed assets, current liabilities, long-term liabilities, income, and expenses.
4.1.6.2 Manual Add Chart of Accounts
- Go to Master Files, then select Chart of Accounts.
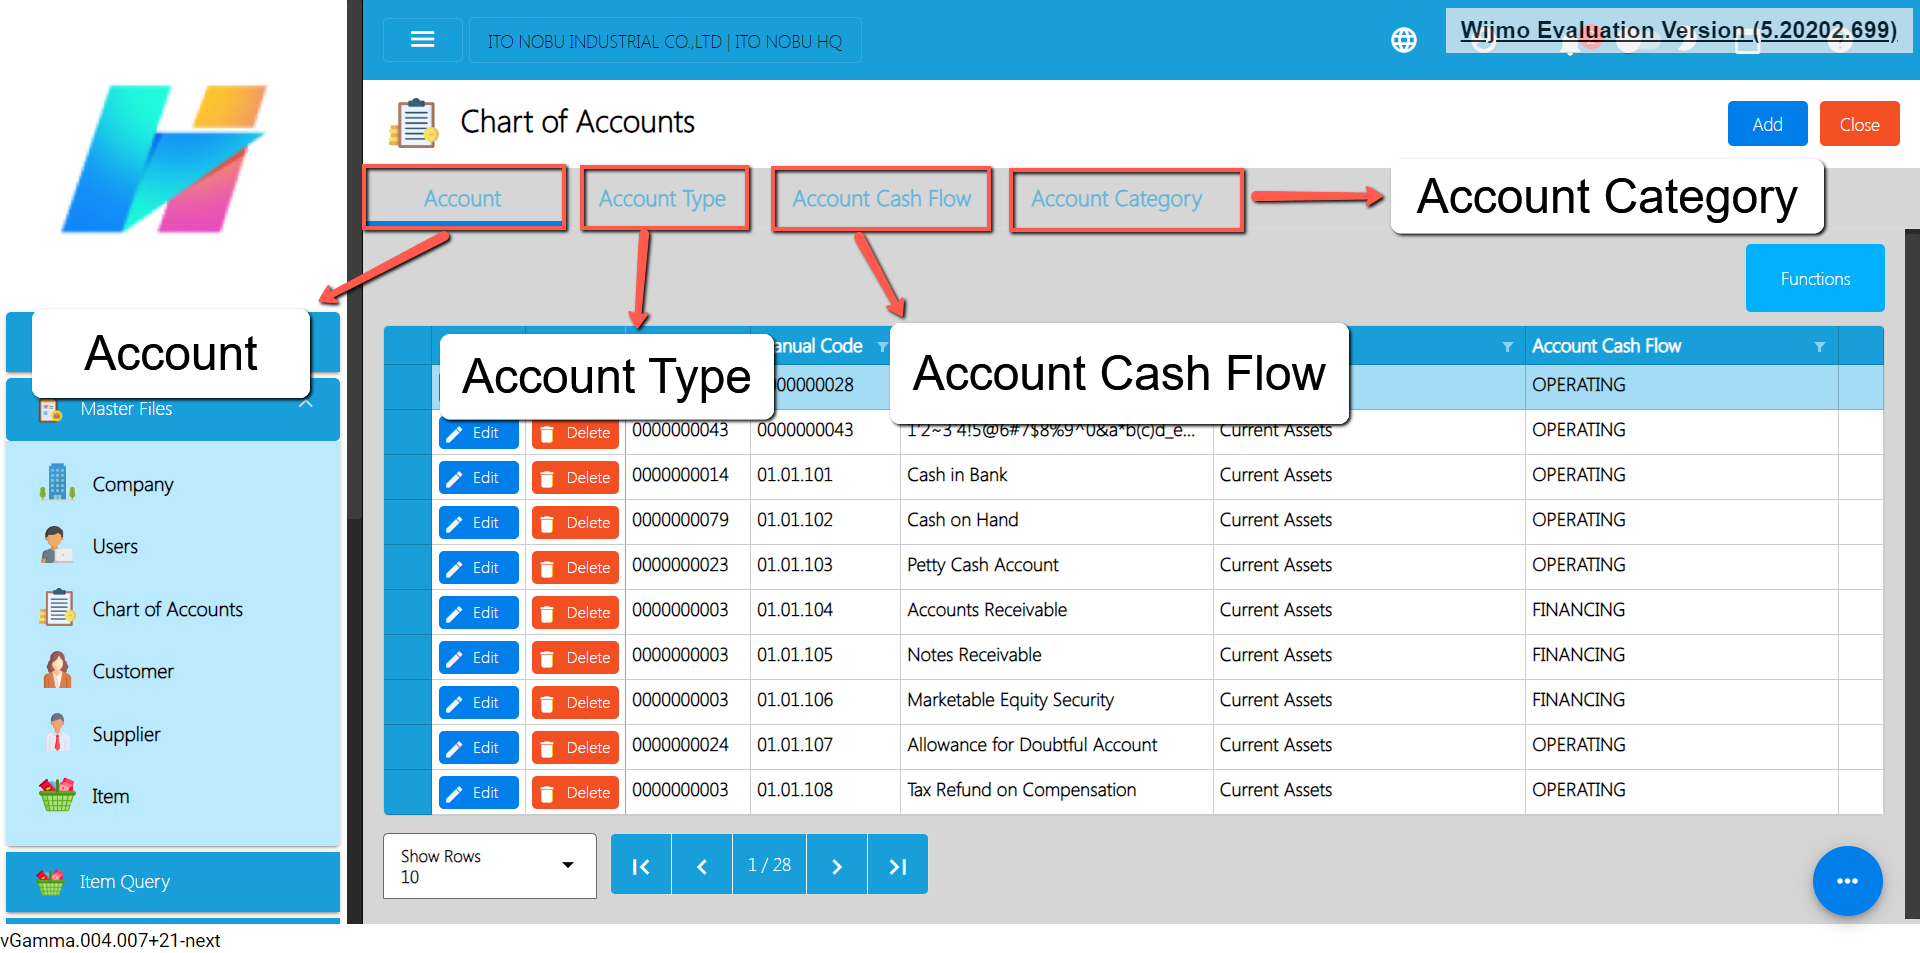
- You will be redirected to the Chart of Accounts list where you can see the following tabs:
- Account → list of accounts.
- Account Type → list of account types.
- Account Cash Flow → list of account flows.
- Account Category → list of account categories
- To add a new account, click the Add button.
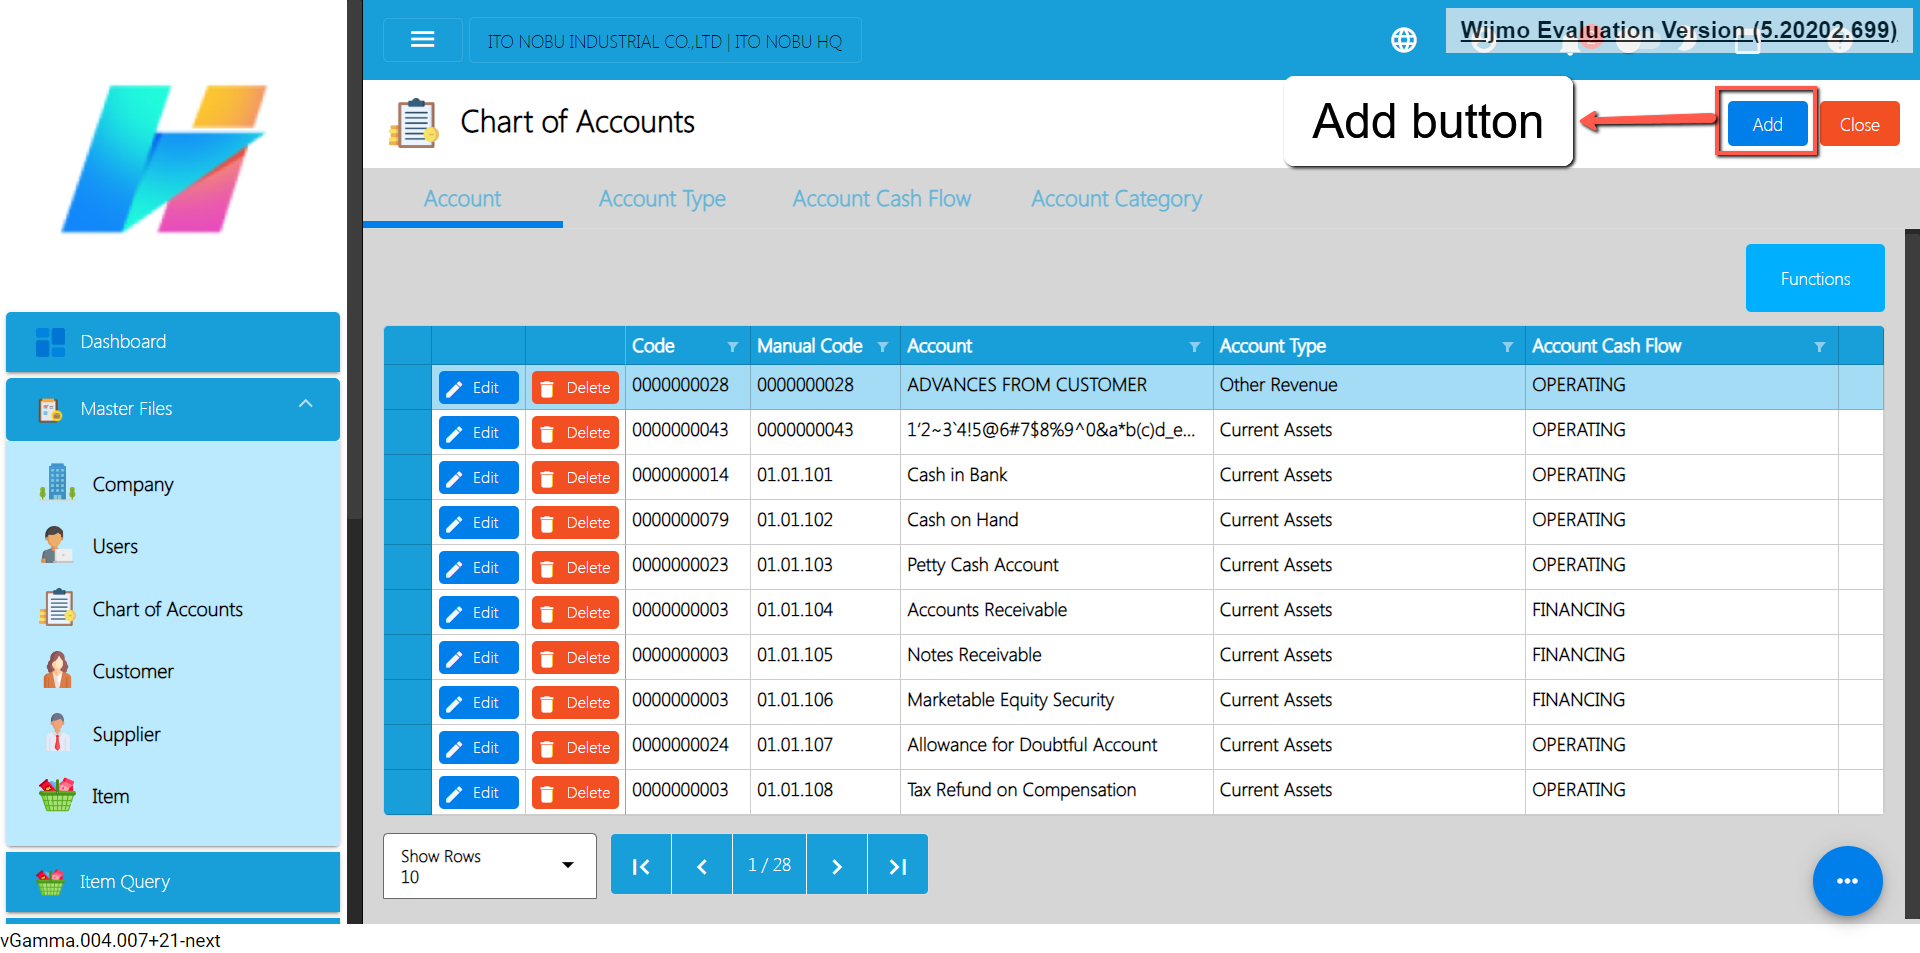
- An Add Account window will popup where you need to input the Account details.
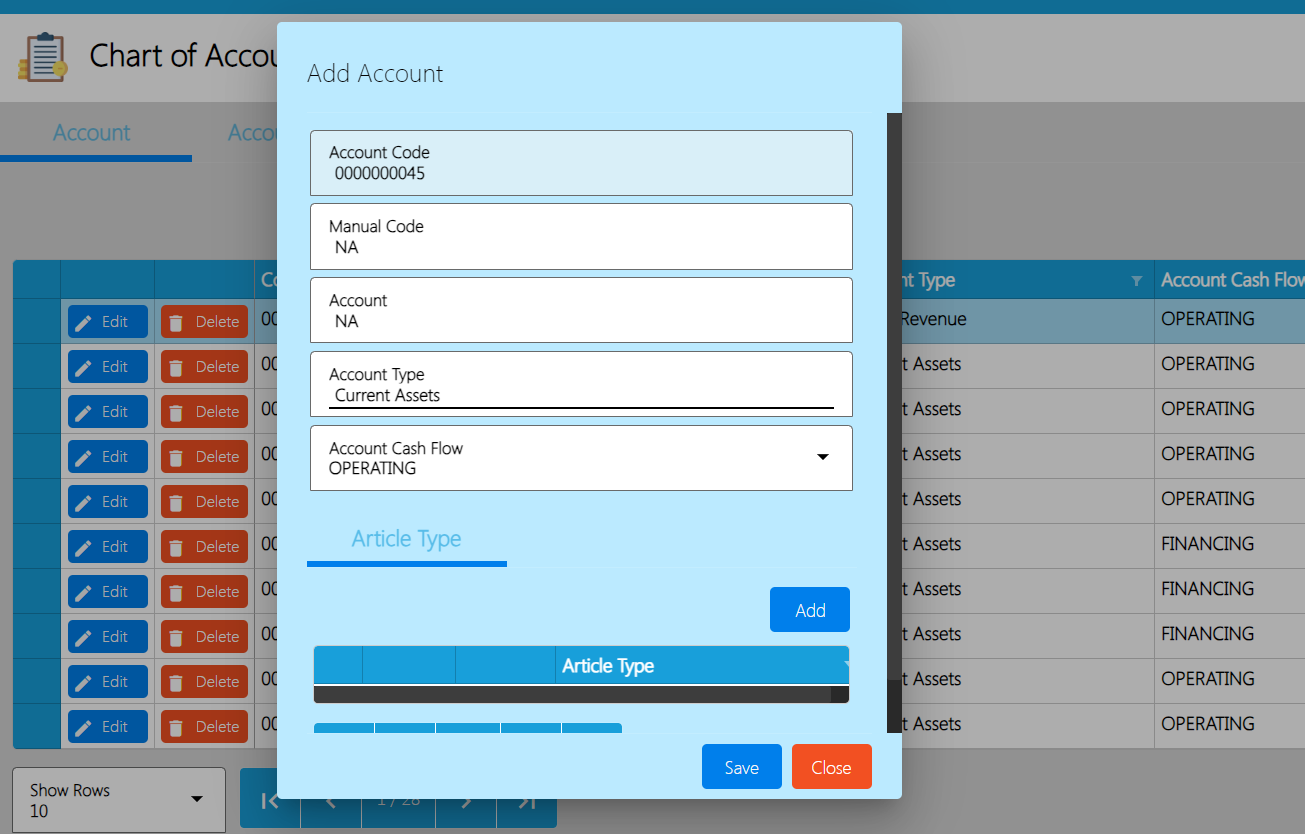
- Fill in the important fields with correct information like:
- Manual Code
- Account
- Account Type
- Account Cash Flow
- Article Type
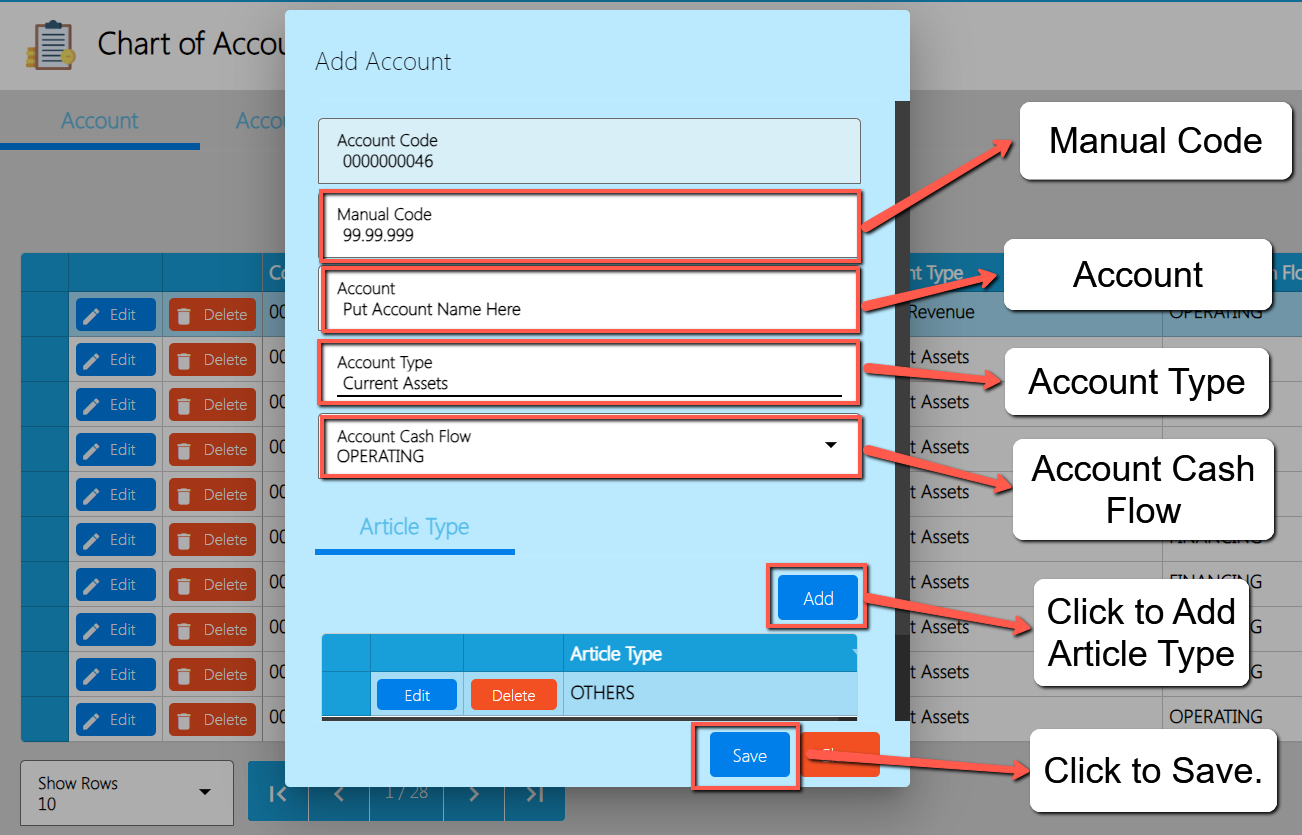
- Once everything is okay, click the Save button.
4.1.6.2 Add Chart of Accounts via Upload Account
- Go to Master Files, then select Chart of Accounts.
- You will be redirected to the Chart of Accounts list where you can see the following tabs:
- Account → list of accounts.
- Account Type → list of account types.
- Account Cash Flow → list of account flows.
- Account Category → list of account categories.
- To add new accounts via Upload Account, click the Functions button, then click the Download File Format for the Account template.
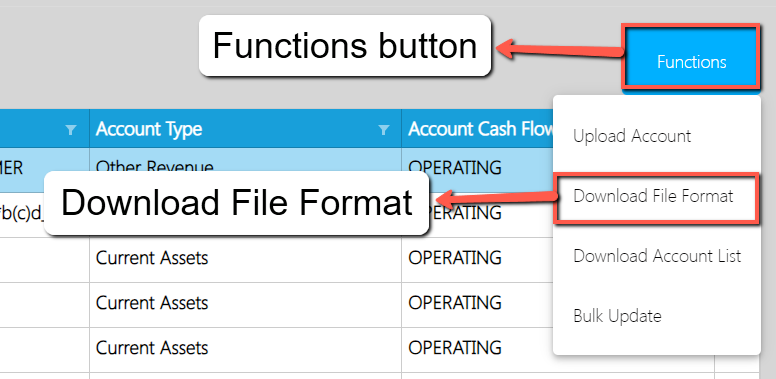
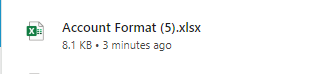
- An excel file will be downloaded with a file name of Account Format.
- Open the excel file and you will see the following columns:
- ManualCode
- Account
- AccountTypeManualCode
- AccountCashFlowManualCode
- If you wish to add bulk accounts, we highly recommend you to copy first the first data (cell 2) as it has dropdown values for the AccountTypeManualCode and AccountCashFlowManualCode.
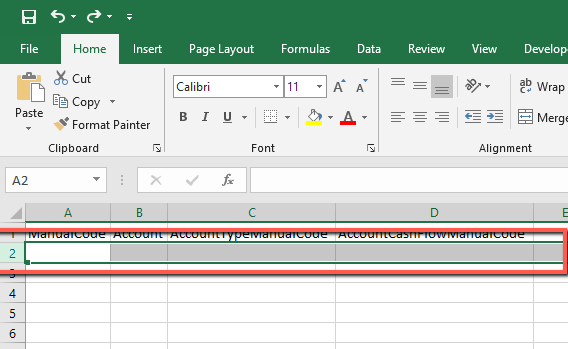
- Click Row number 2. This is what is looks like upon clicking:
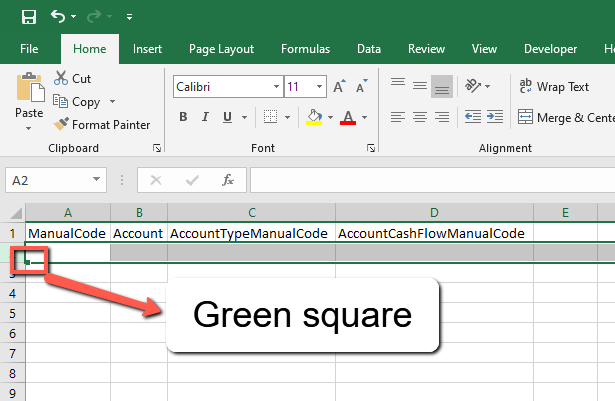
- Look for the square colored with green then drag lower until you reach the number of accounts you wanted to add.
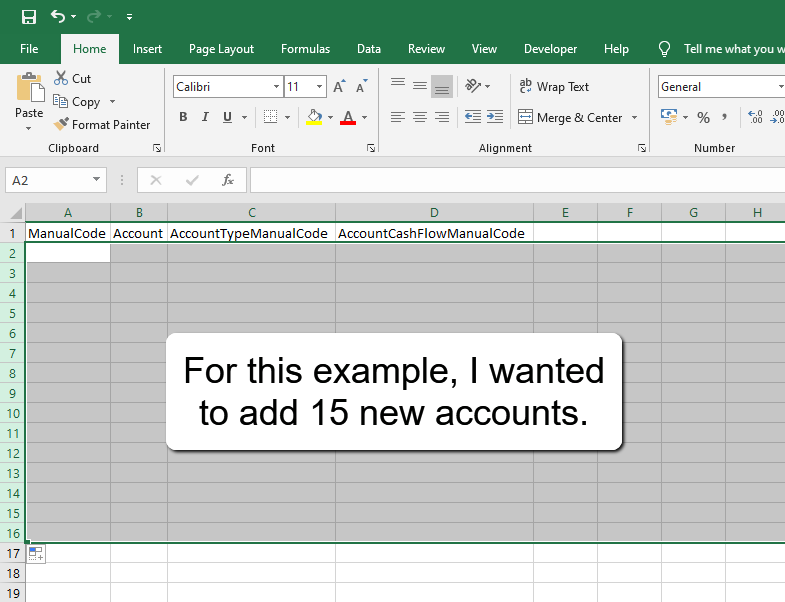
- After that, provide a ManualCode and Account value with correct details.
- For the AccountTypeManualCode and
- AccountCashFlowManualCode, click the cell. You will see a dropdown icon, click the dropdown icon, and select the correct value.
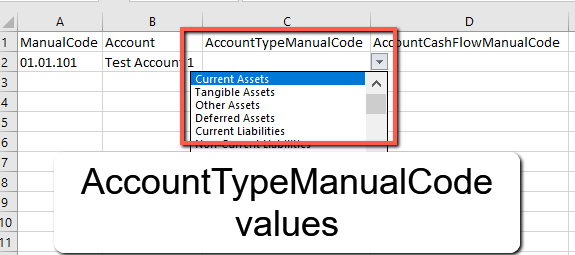
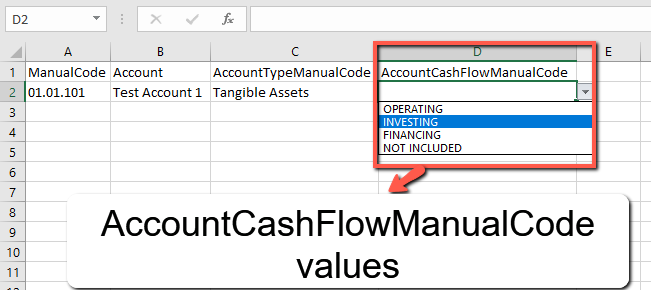
Above screenshot is a sample data to be up
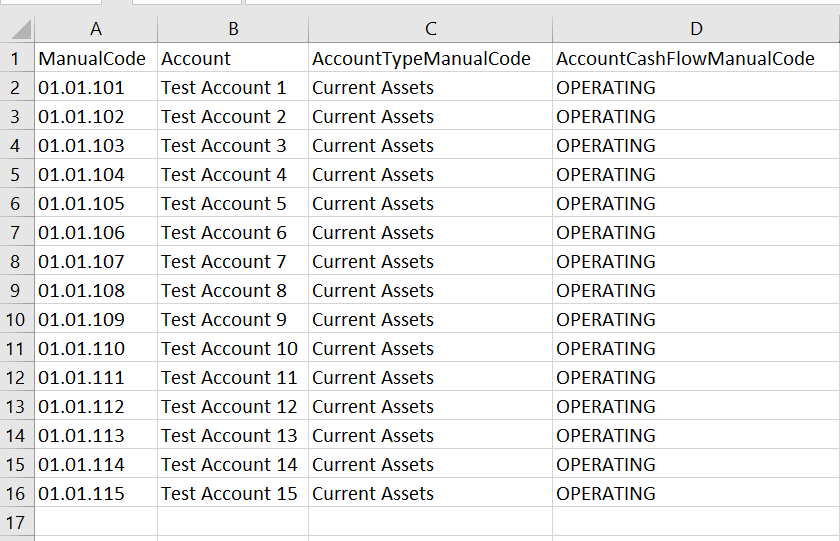
- If you are done with providing correct values, save the file.
- On the easyFS, go to Master Files again, then click the Chart of Accounts.
- After that, click the Functions button then, Upload Account to upload the file being downloaded earlier.
- A file dialogue will open and look for the Account Format file. Once found, double click the file to upload.
- Wait until the upload is complete, once complete, a success toast message will appear.
4.1.7 Bank
- Establish a Bank, which is a structured list of all Bank accounts used by the organization.
4.1.7.1 Bank List
- List of All Bank Accounts that were added to the System
- Here the user can choose what Bank account they want to set up for them to use in their transactions, bank details are:
- Code – This is auto incremented by the system
- Manual Code – this is used to assign specific code for a specific bank
- Bank – It is where you put the name identifier of the bank
- Address – It is where you put the address of the bank
- Contact No. – It is where you enter the contact number of the bank
4.1.7.2 Manual Add of Bank
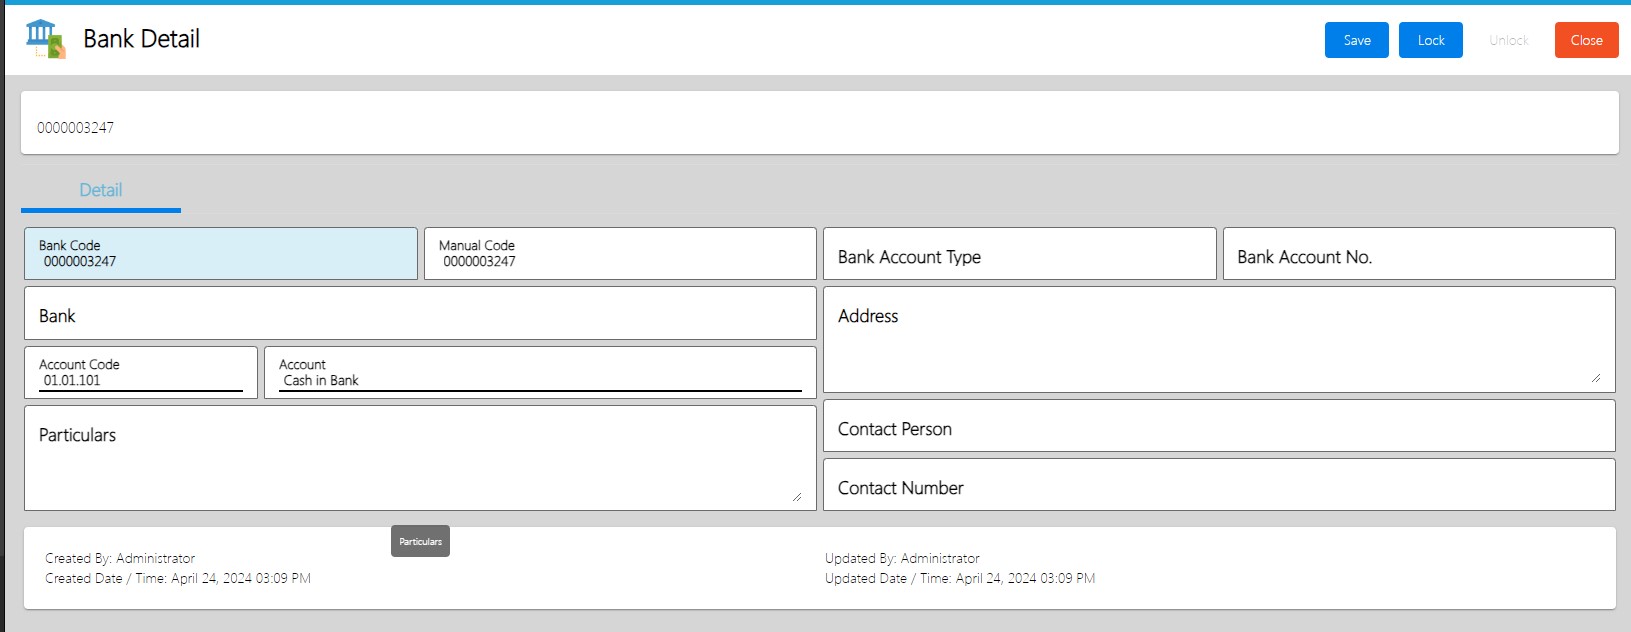
- Go to Master Files, Select Bank
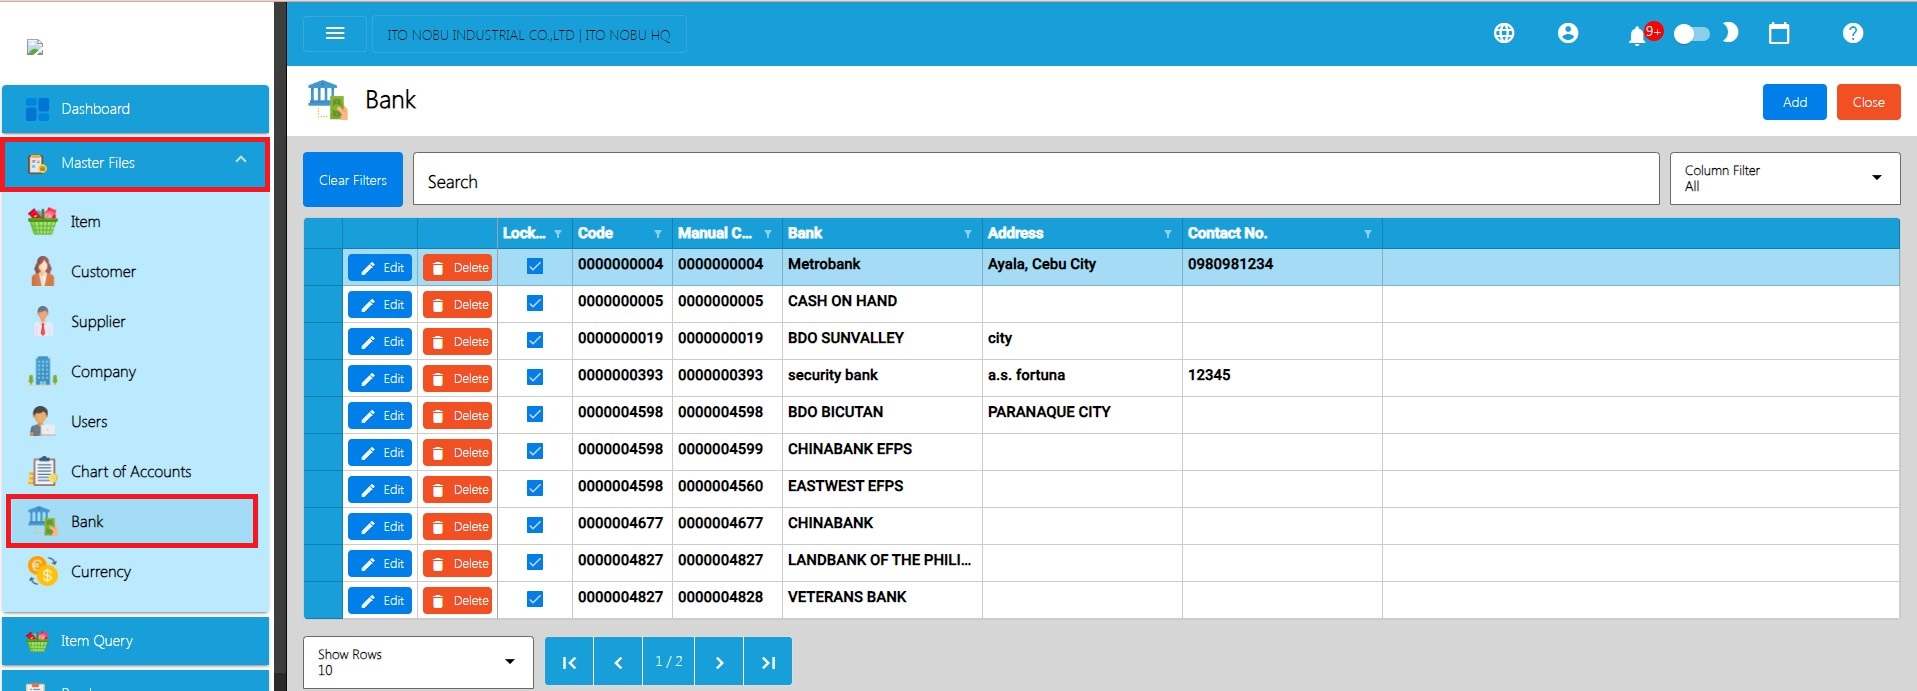
- To add a new Bank, click the Add button.
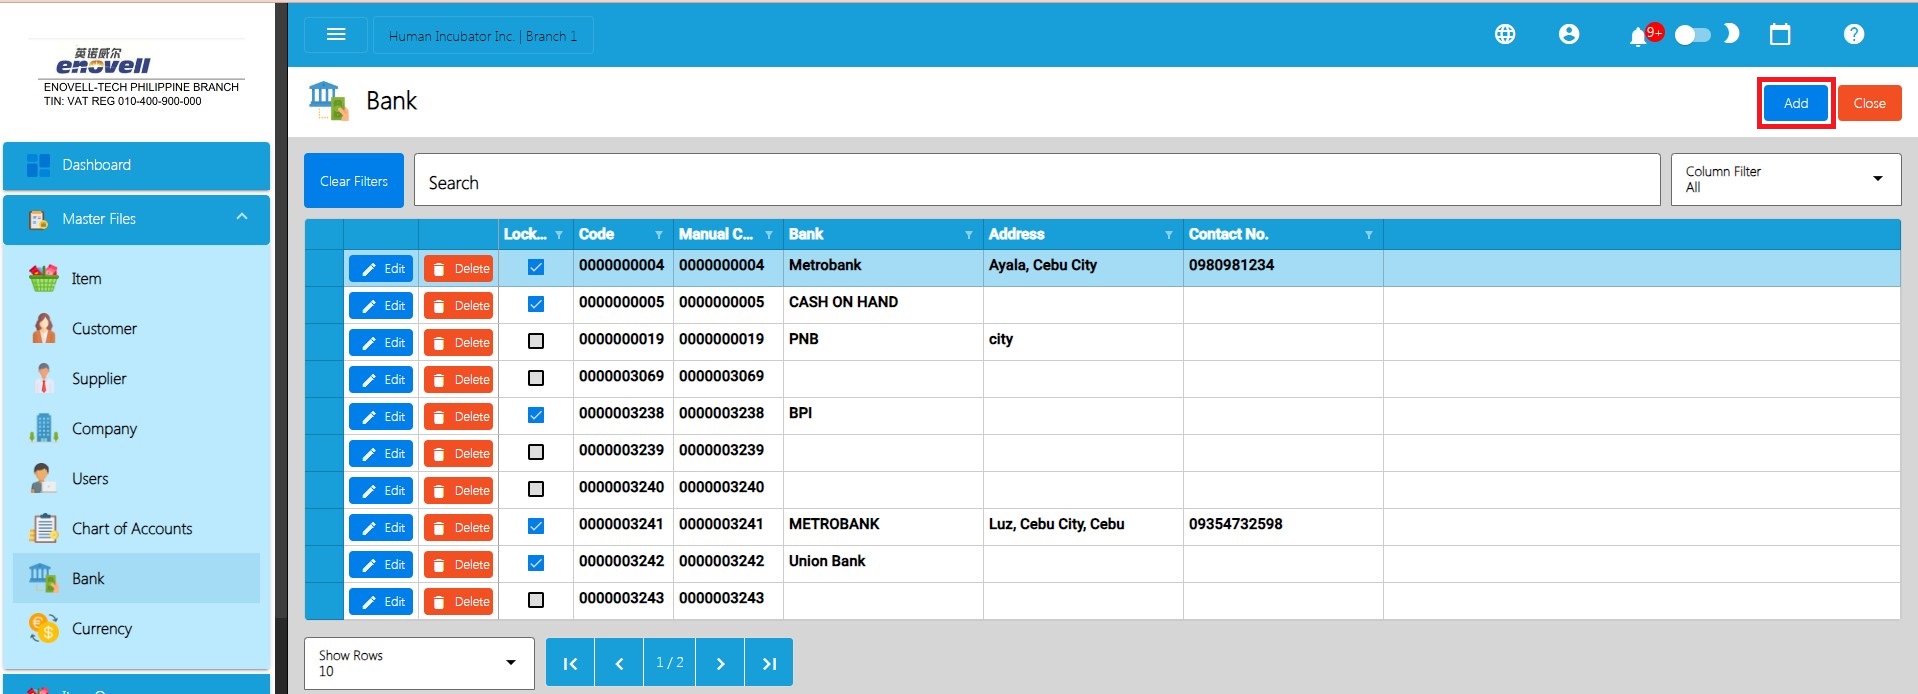
- Fill in the important fields with correct information like:
- Manual Code
- Bank Account Type
- Bank Account No.
- Bank (Name)
- Address. etc.
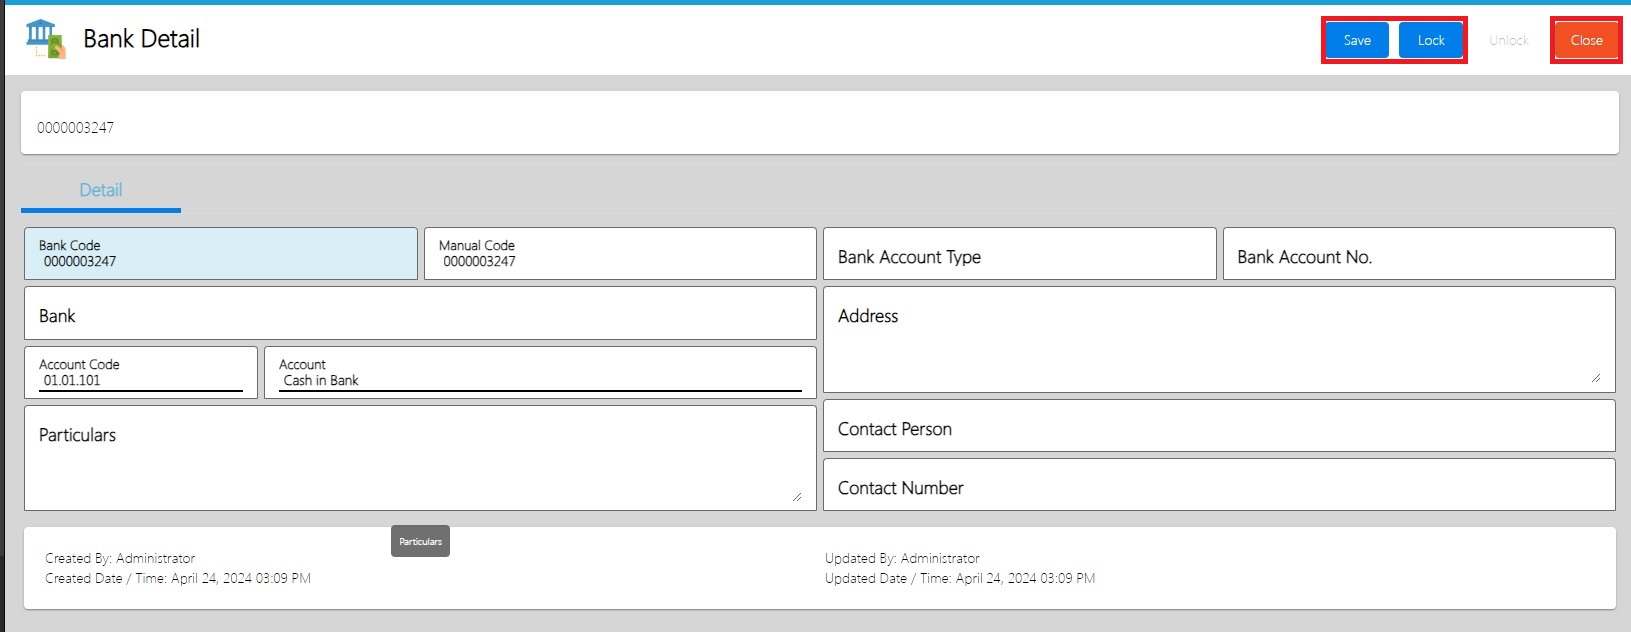
- Click Save and Lock and Close to go back to the Bank List
4.1.8 Currency
- Establish a Currency, which is a structured list of all Currency used by the organization.
4.1.8.1 Currency List
- List of All Currency that were added to the System
- Here the user can choose what currency they want to set up for them to use in their transactions. Currency details are:
- Code
- Manual Code
- Currency Name
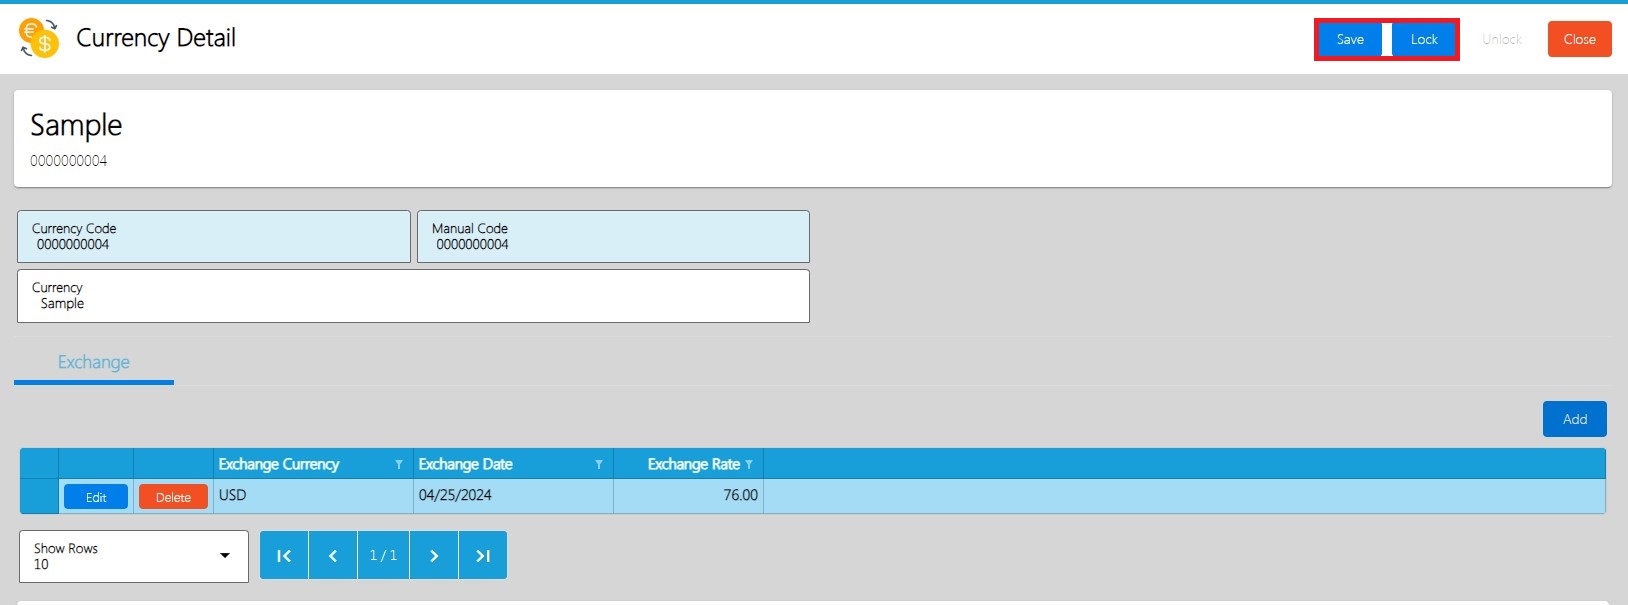
4.1.8.2 Manual Add of Currency
- Go to Masterfile, Select Currency.
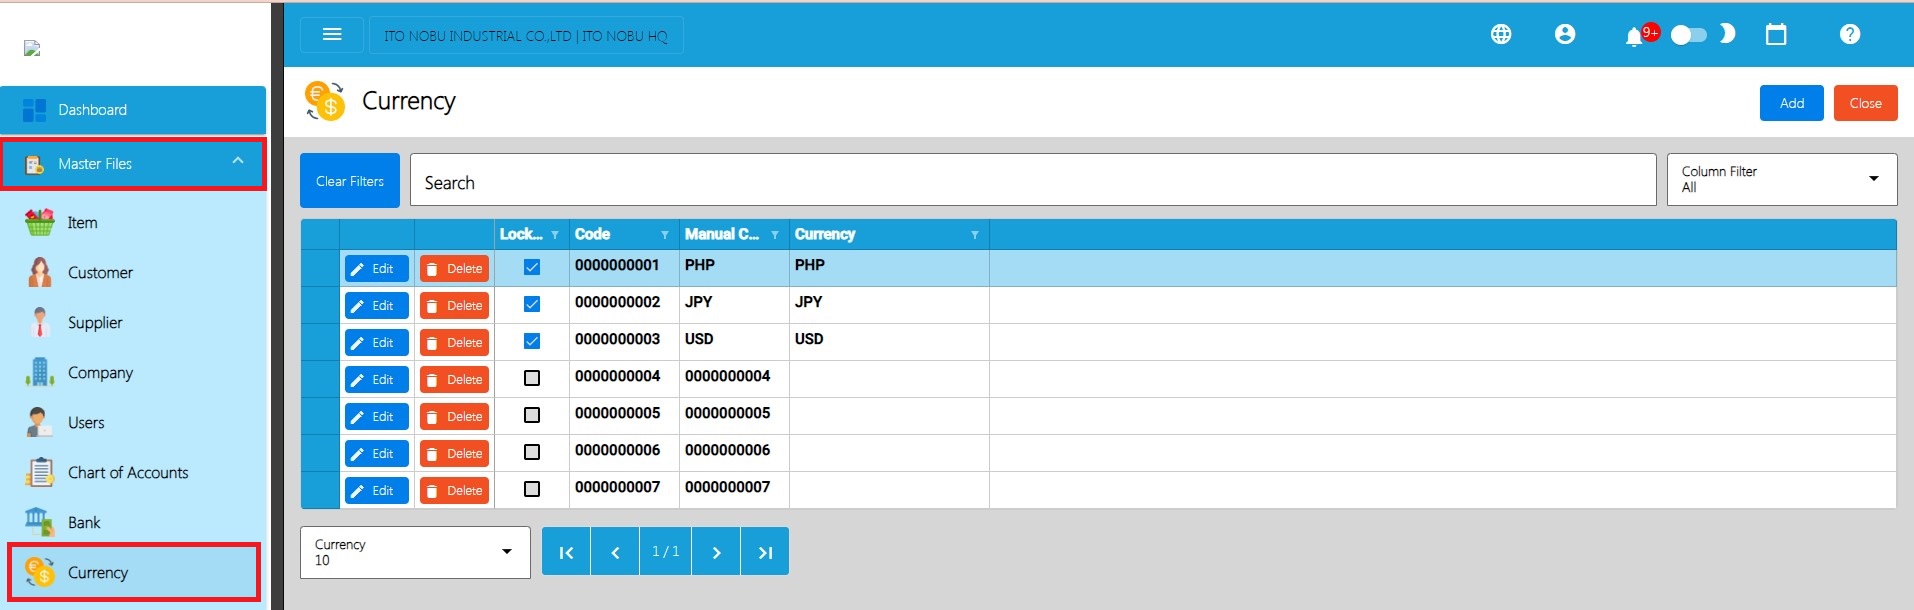
- To add a new Currency, click the Add button.
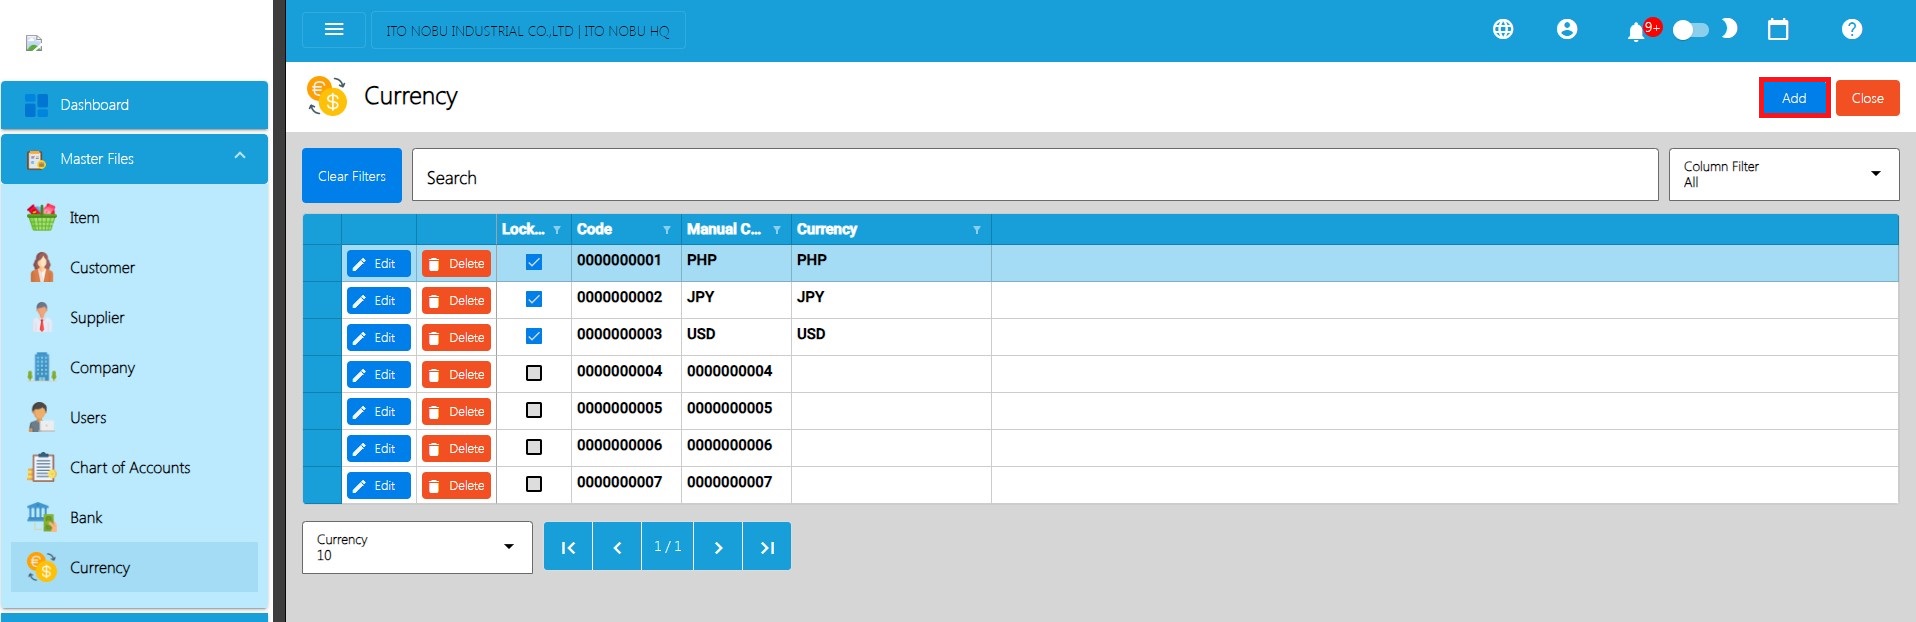
- Fill in the important fields with correct information like:
- Currency Name
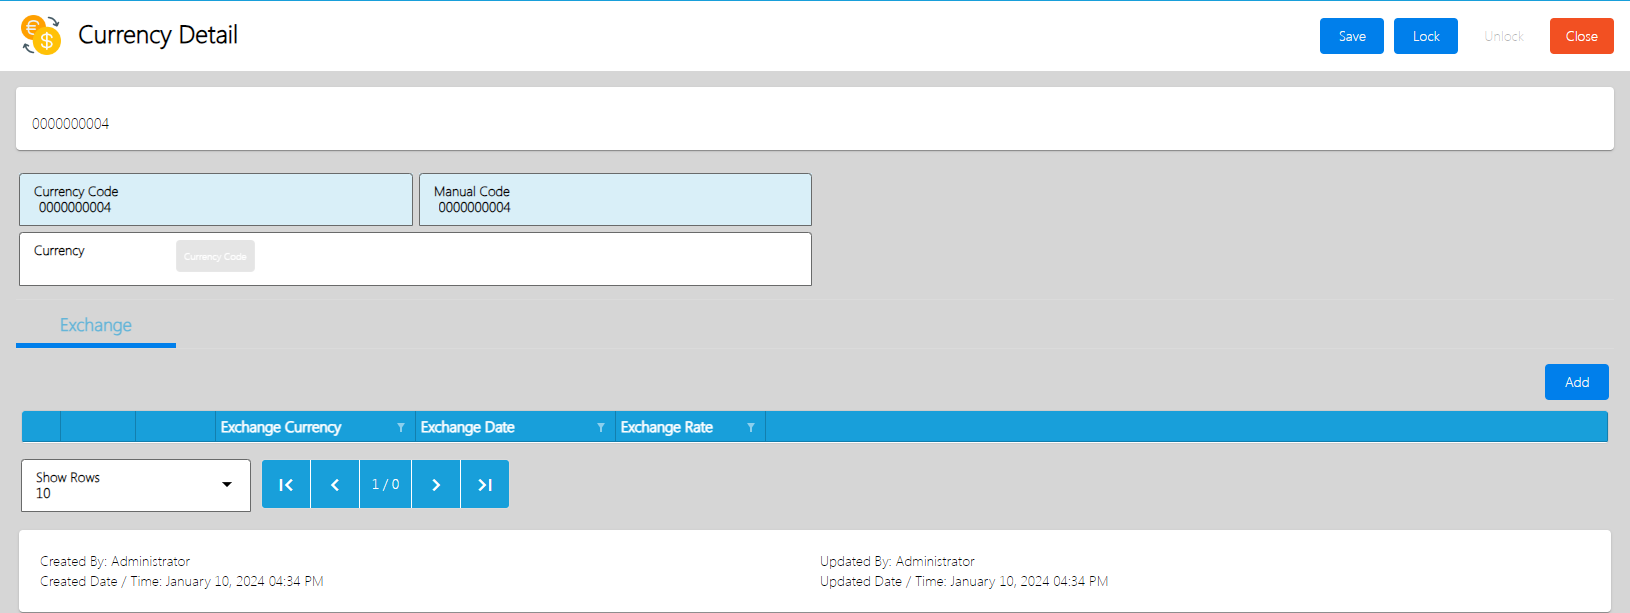
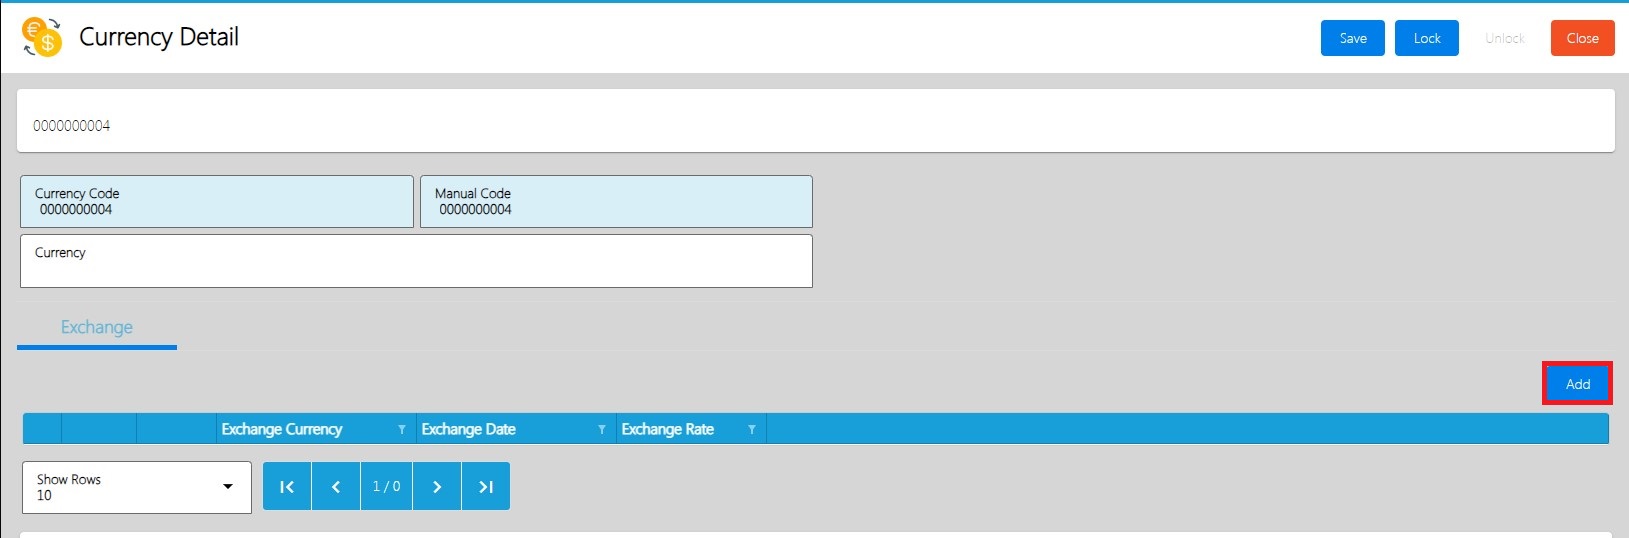
- Click Add, Under exchange tab.
- An Add Currency Exchange window will appear
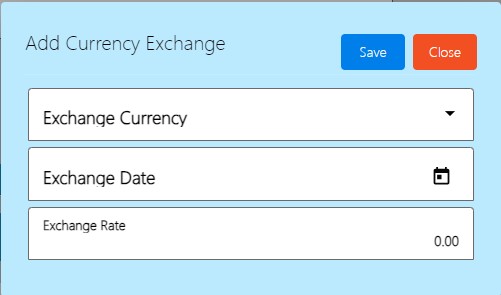
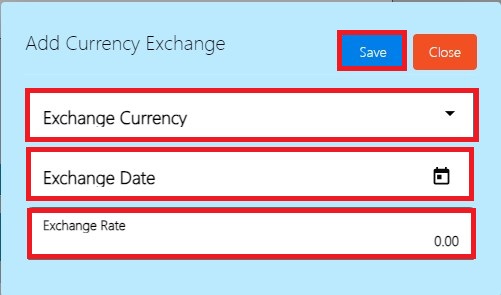
- Fill in the important fields with correct information like and click Save:
- Exchange Currency
- Exchange Date
- Exchange Rate
- Click Save and Lock and Close to go back to the Currency List
4.2 Update Master Files
I'll walk you through the process of bulk updating master files, including Items, Suppliers, and Customers. There are two methods for bulk updates: performing updates in bulk or opting for manual updates.
4.2.1 Item
4.2.1.1 Manual Update Item Detail
- Go to Master Files , then click Item.
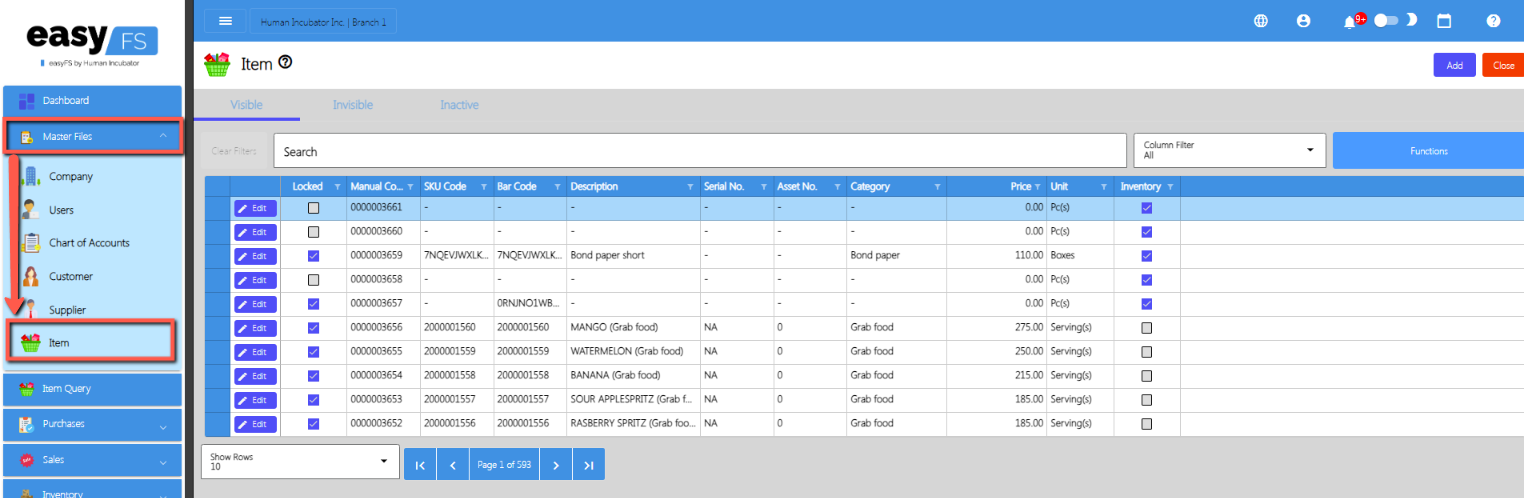
- On the Item list page, click the Edit button.
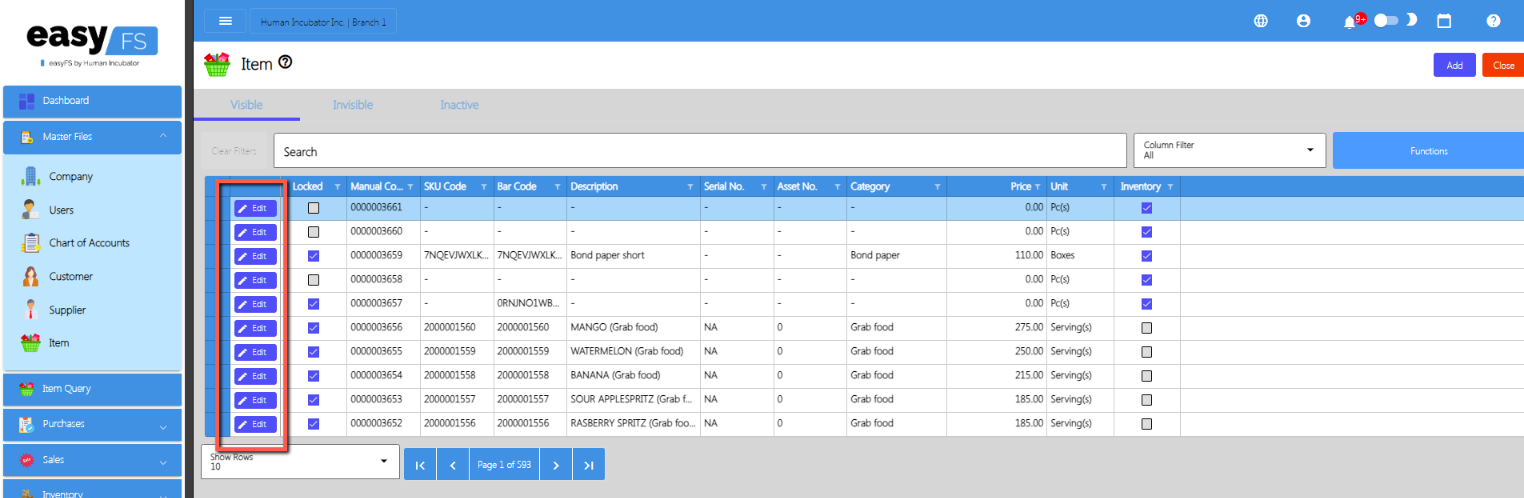
- You will be routed to the Item Detail page.
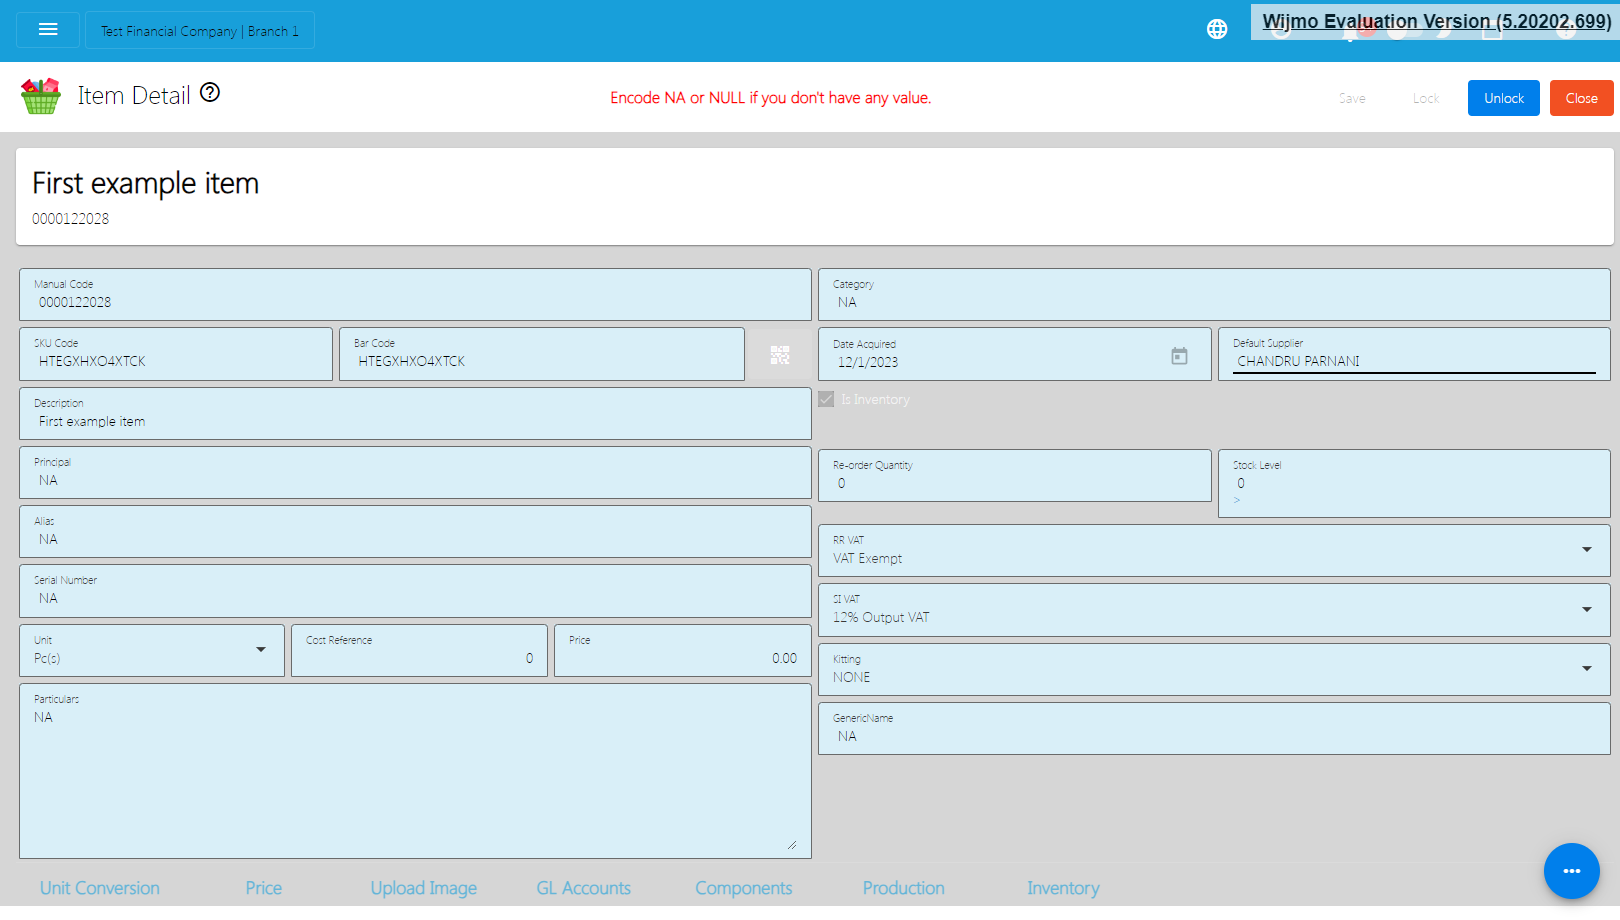
- If your item is locked, click the Unlock button found on the top right part of the Item Detail page.
- Once unlocked, you can now change the Item field values that you want to except for the BARCODE and UNIT. Just make sure not to provide special characters like: ~ ` ! @ # $ % ^ & * ( ) – _ + = { } [ ] | \ / : ; " ' < > , . ? and should not exceed the character limit of 255 to prevent errors.
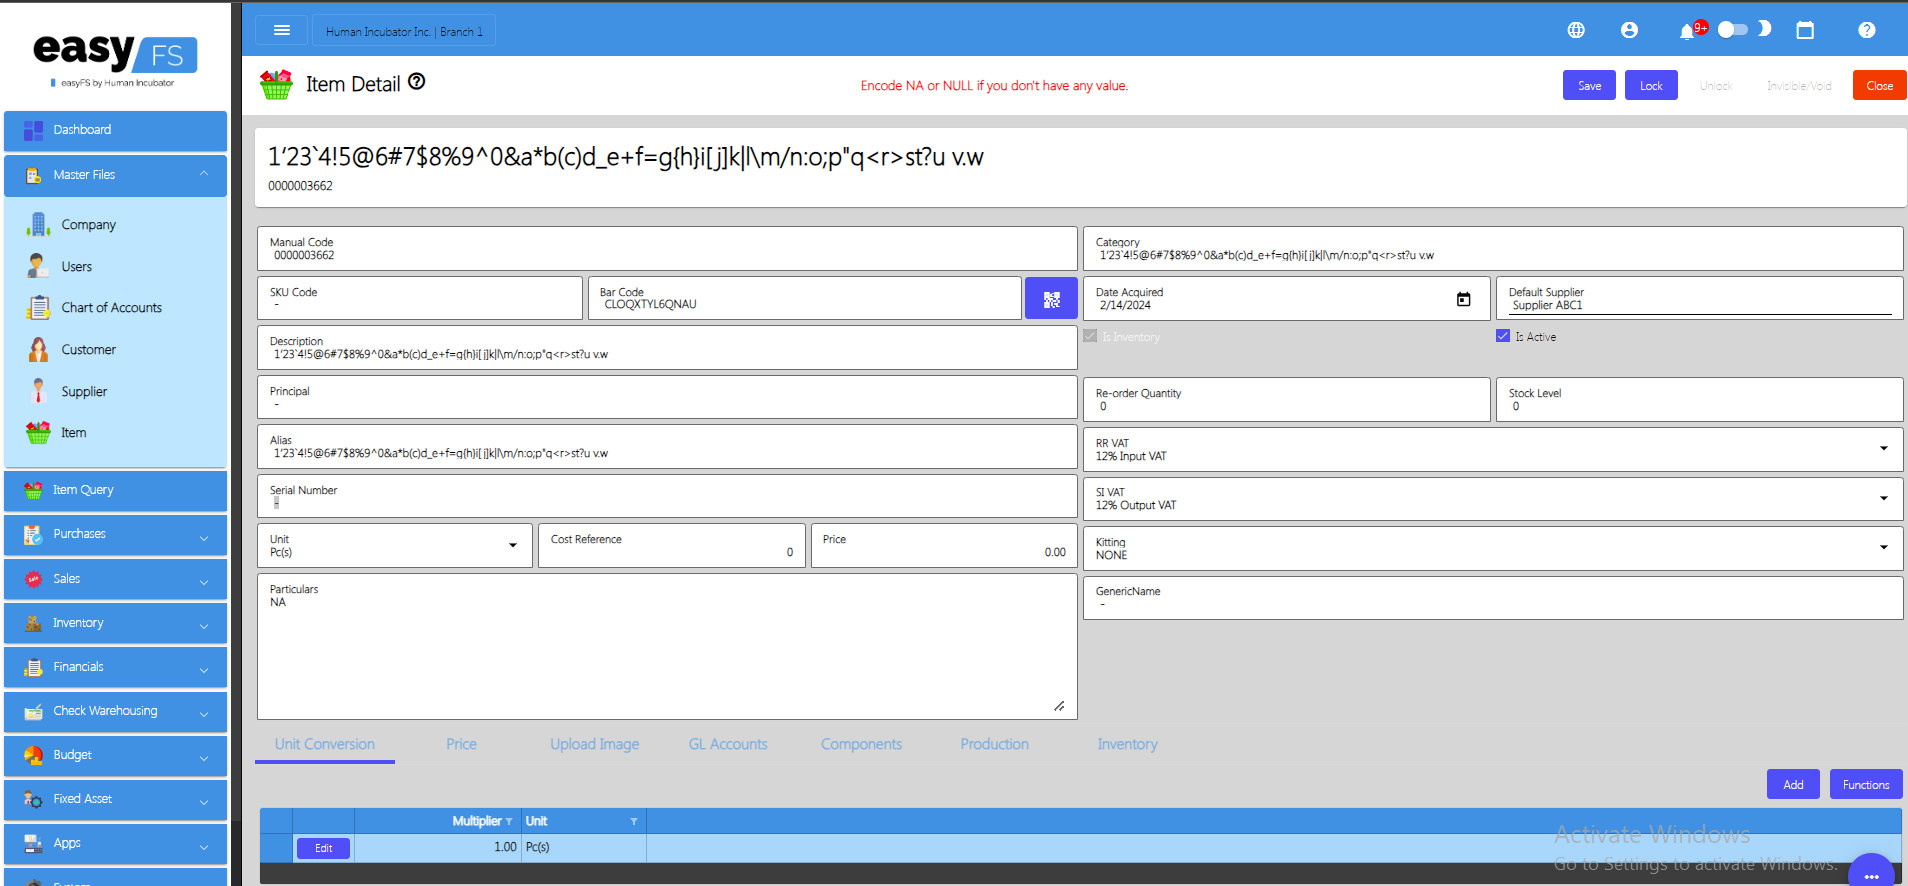
- If everything is okay, just click Save then Lock.
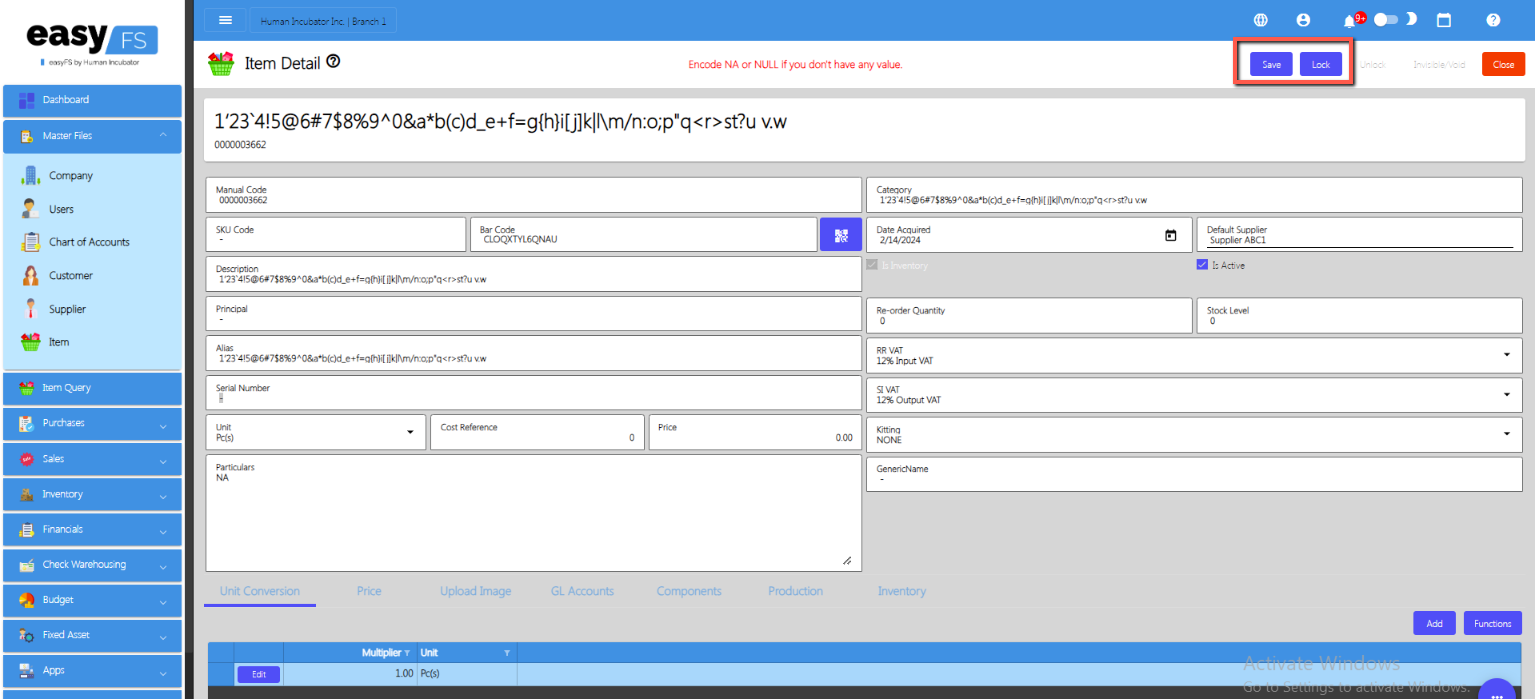
4.2.1.2 Update Item Detail in Bulk
- Go to Master Files, then click Item.
- On the Item list page, click the Functions button, then click Optimized Upload and Download Item List. Item List will be used as a template for bulk updating Item detail.
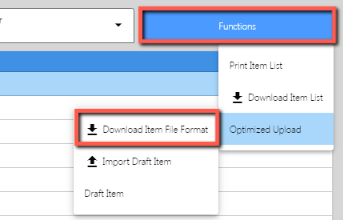
- Once the download is complete, open the file. File name of the downloaded file is File List.
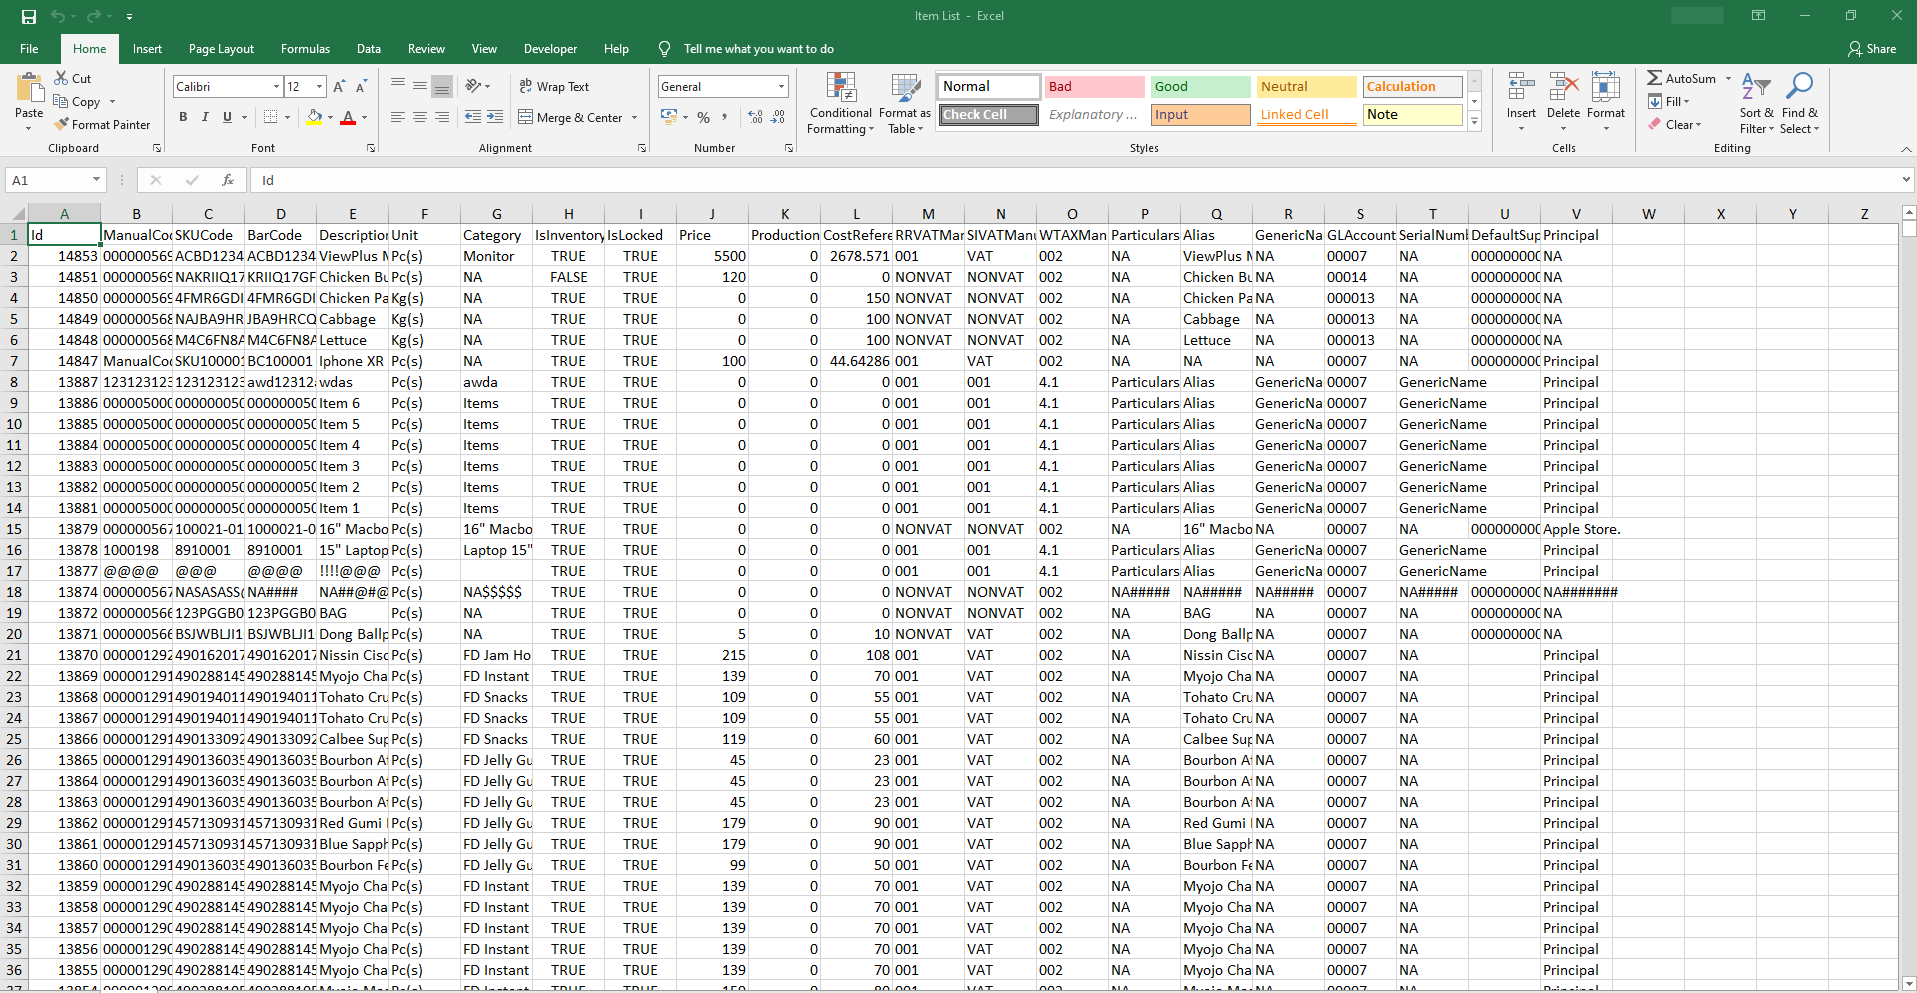
- Update the column value that you want to change. Take note, do not touch the Id column as it is needed for the update functionality.
- If you want to update the TAX values, just make sure you provide the correct Manual Code for the taxes. There’s no need to worry about the Manual Code, since you can find it on System>System Tables>Tax Types on our easyFS system.
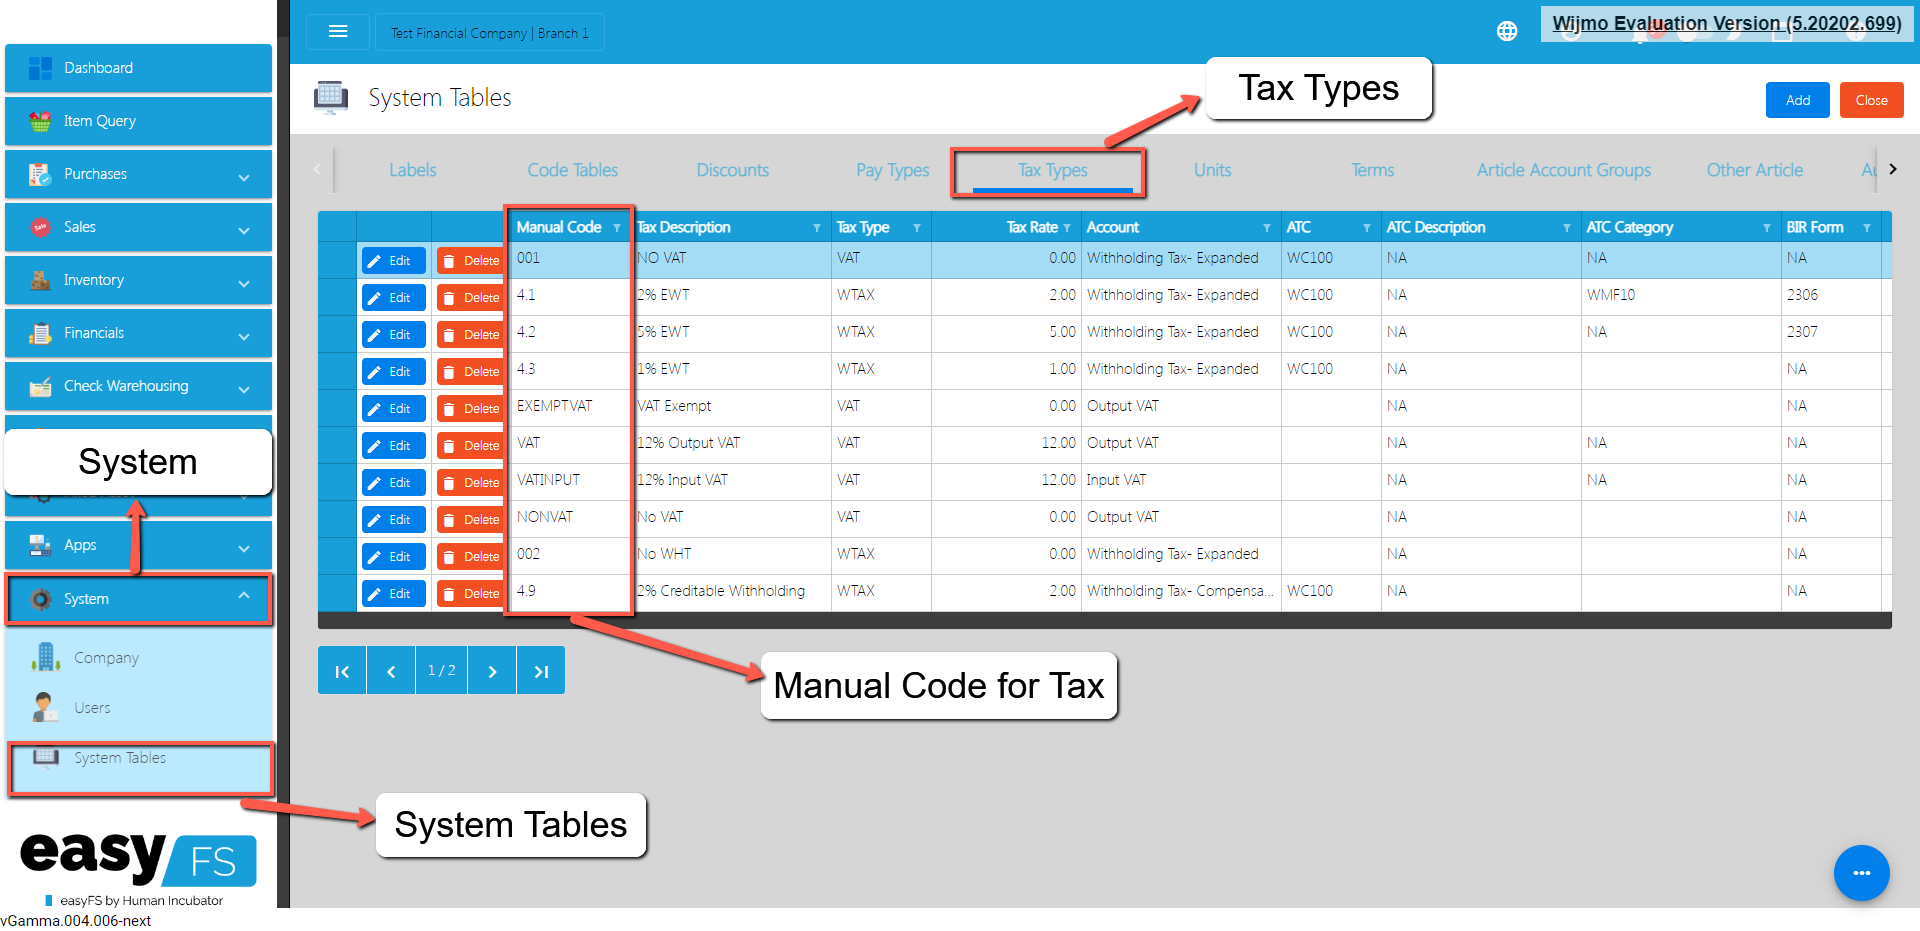
- Once everything is okay, just Save the file.
- Go back to the easyFS system.
- Go to Master Files, then click Company.
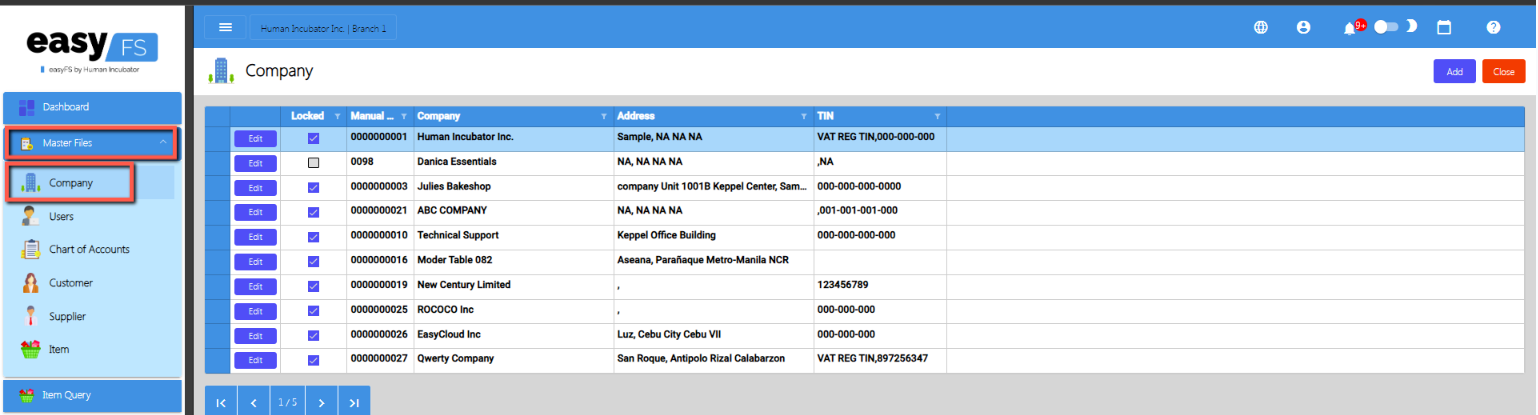
- Click the Edit button, beside your Company name.
- You will be routed to the Company Detail page. If it is locked, click the Unlock button to unlock.
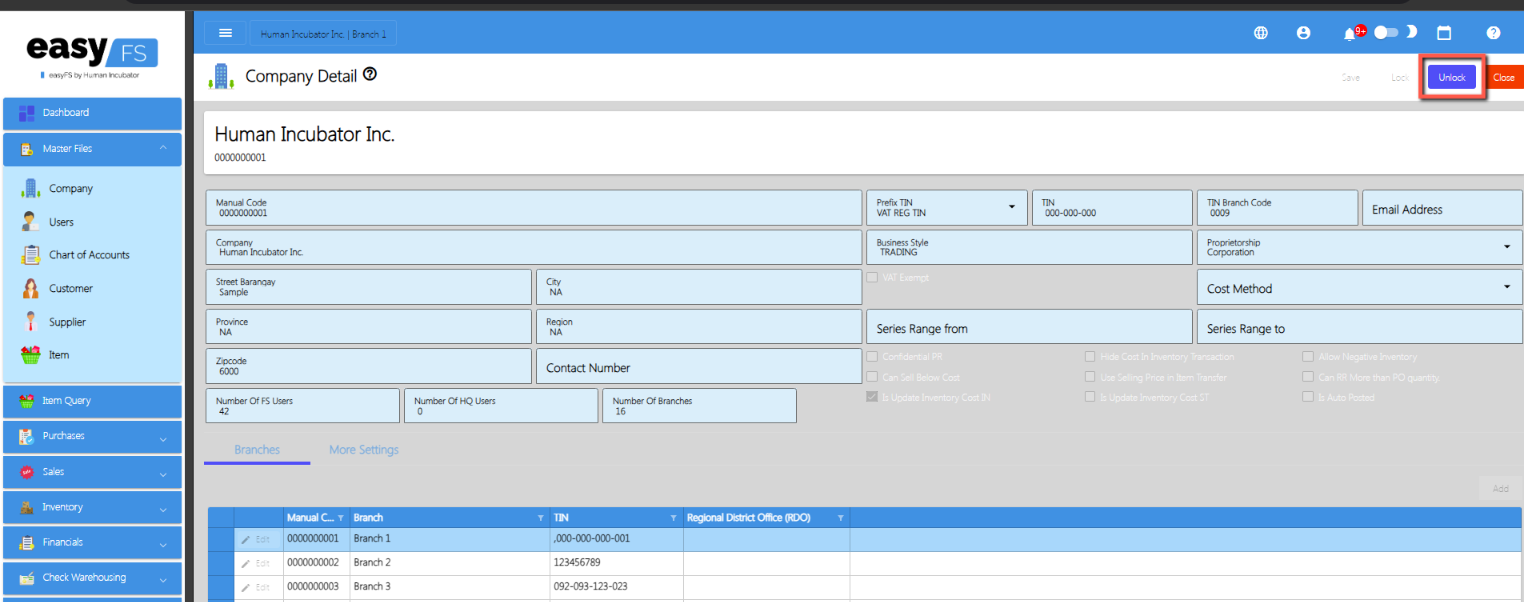
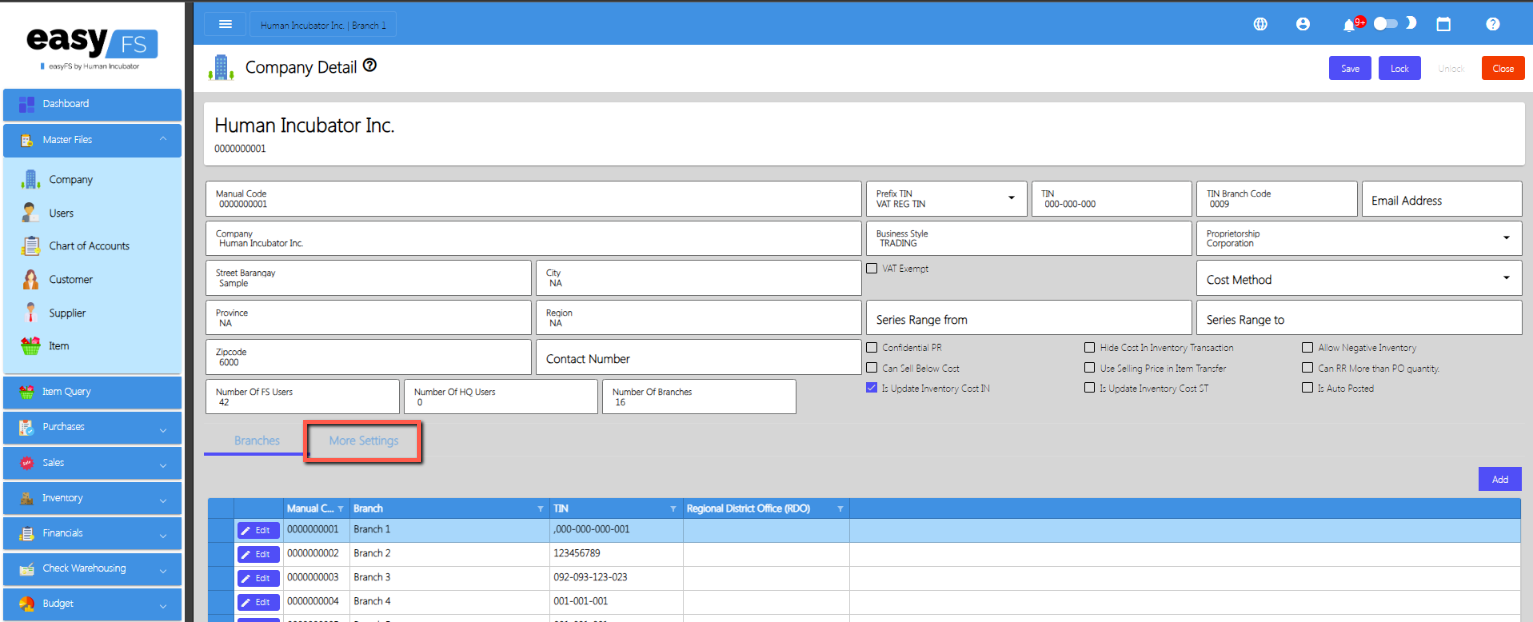
- Click the More Settings tab found below the page, then click Utility then Uploads.
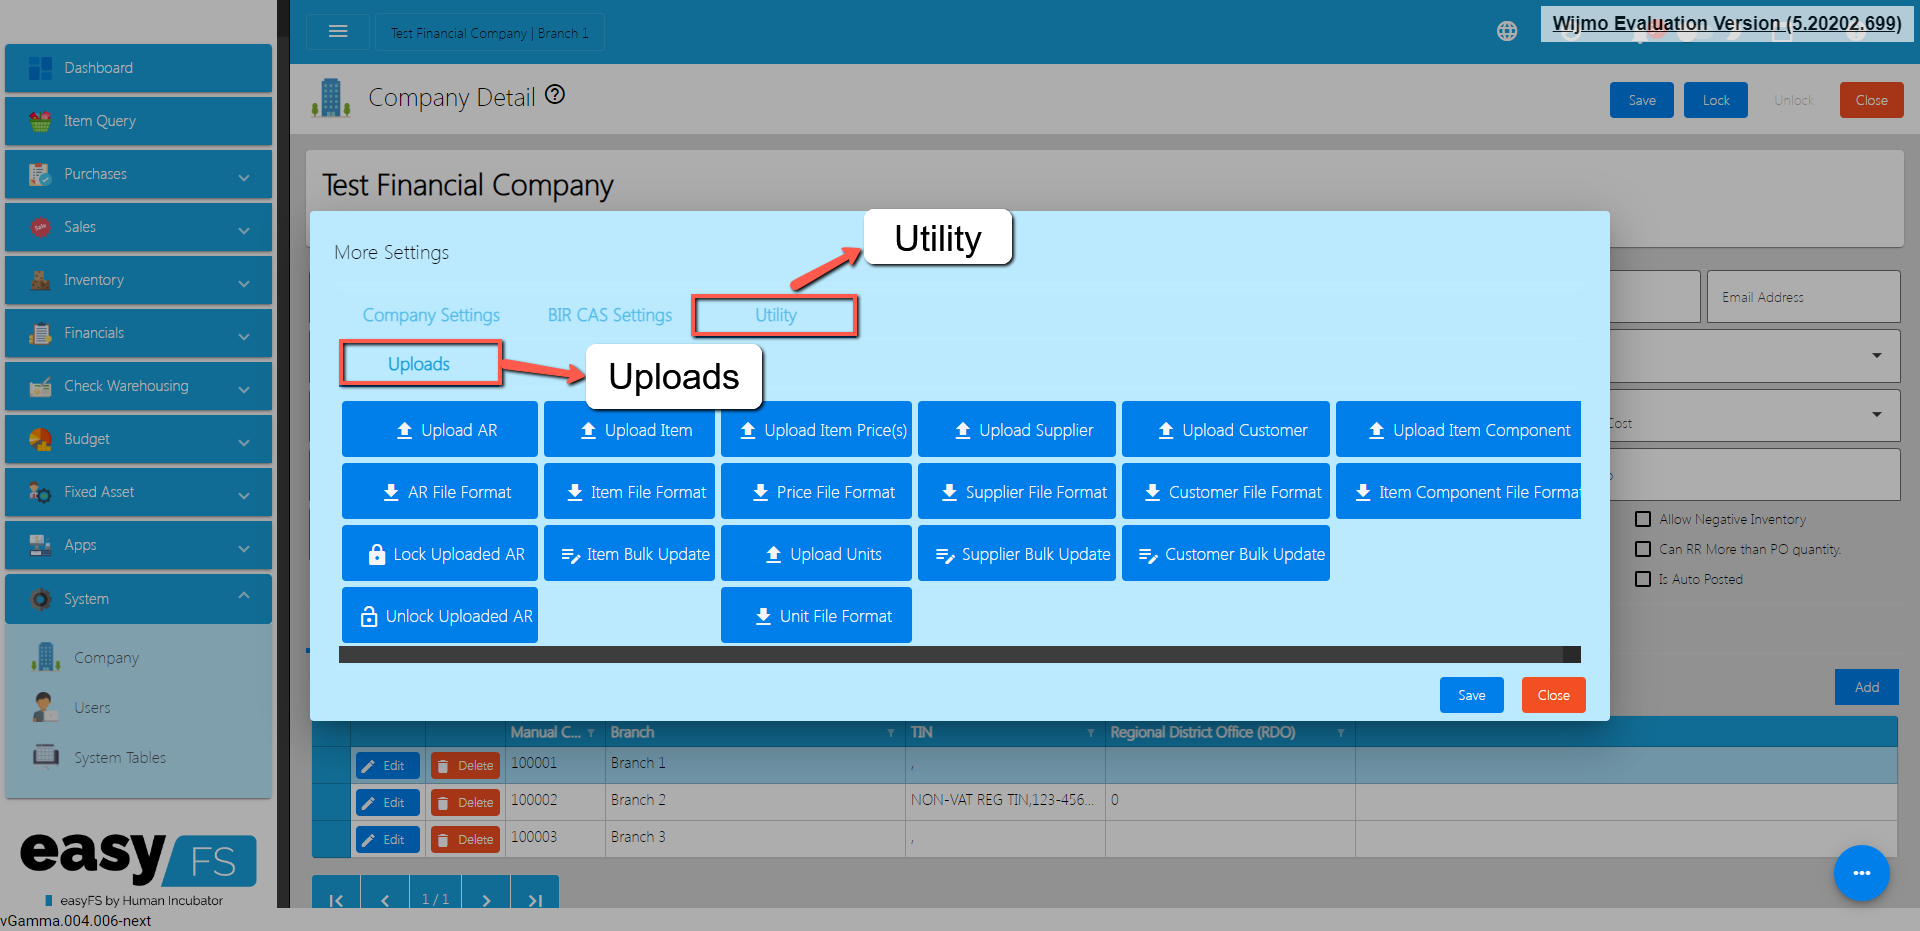
- To bulk update the item detail, click the Item Bulk Update button.
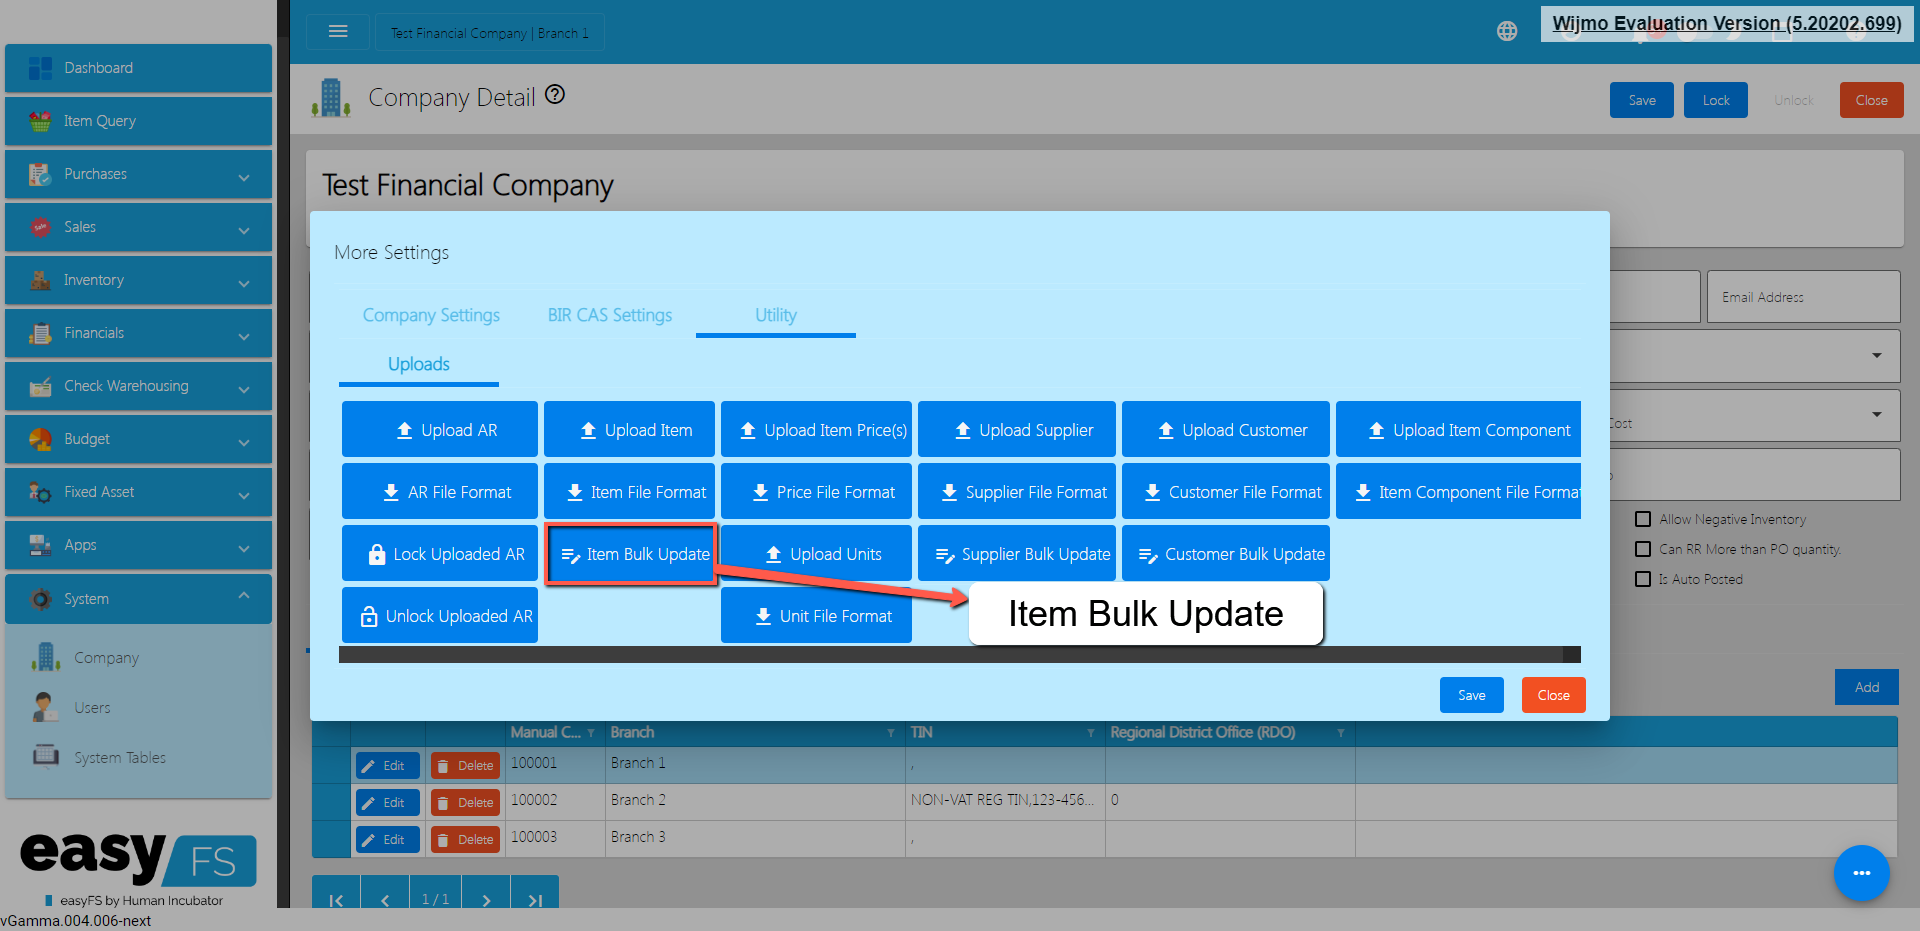
- Look for the Item List file, then double click to upload.
- Wait until it will successfully update the Item detail.
- Once okay, you may now review the item you updated by clicking again the MasterFiles, then Item.
- You may use the Search bar to search the item you
- updated, then click the Edit button to see the changes.
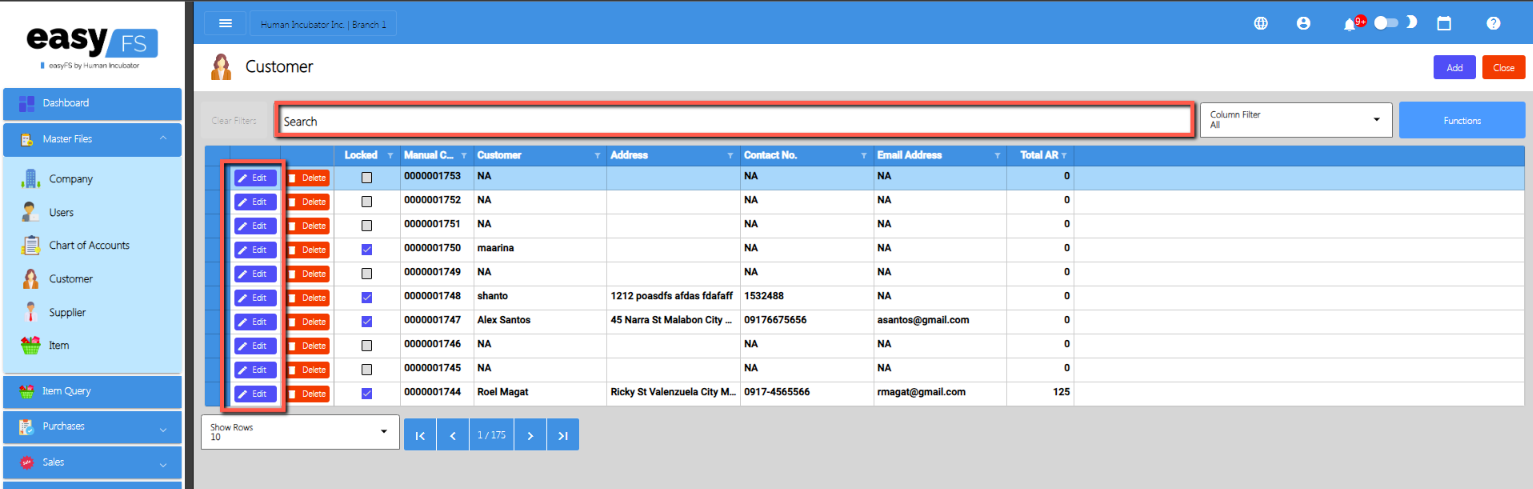
4.2.2 Supplier
4.2.2.1 Manual Update Supplier Detail
- Go to Purchases, then click Supplier.
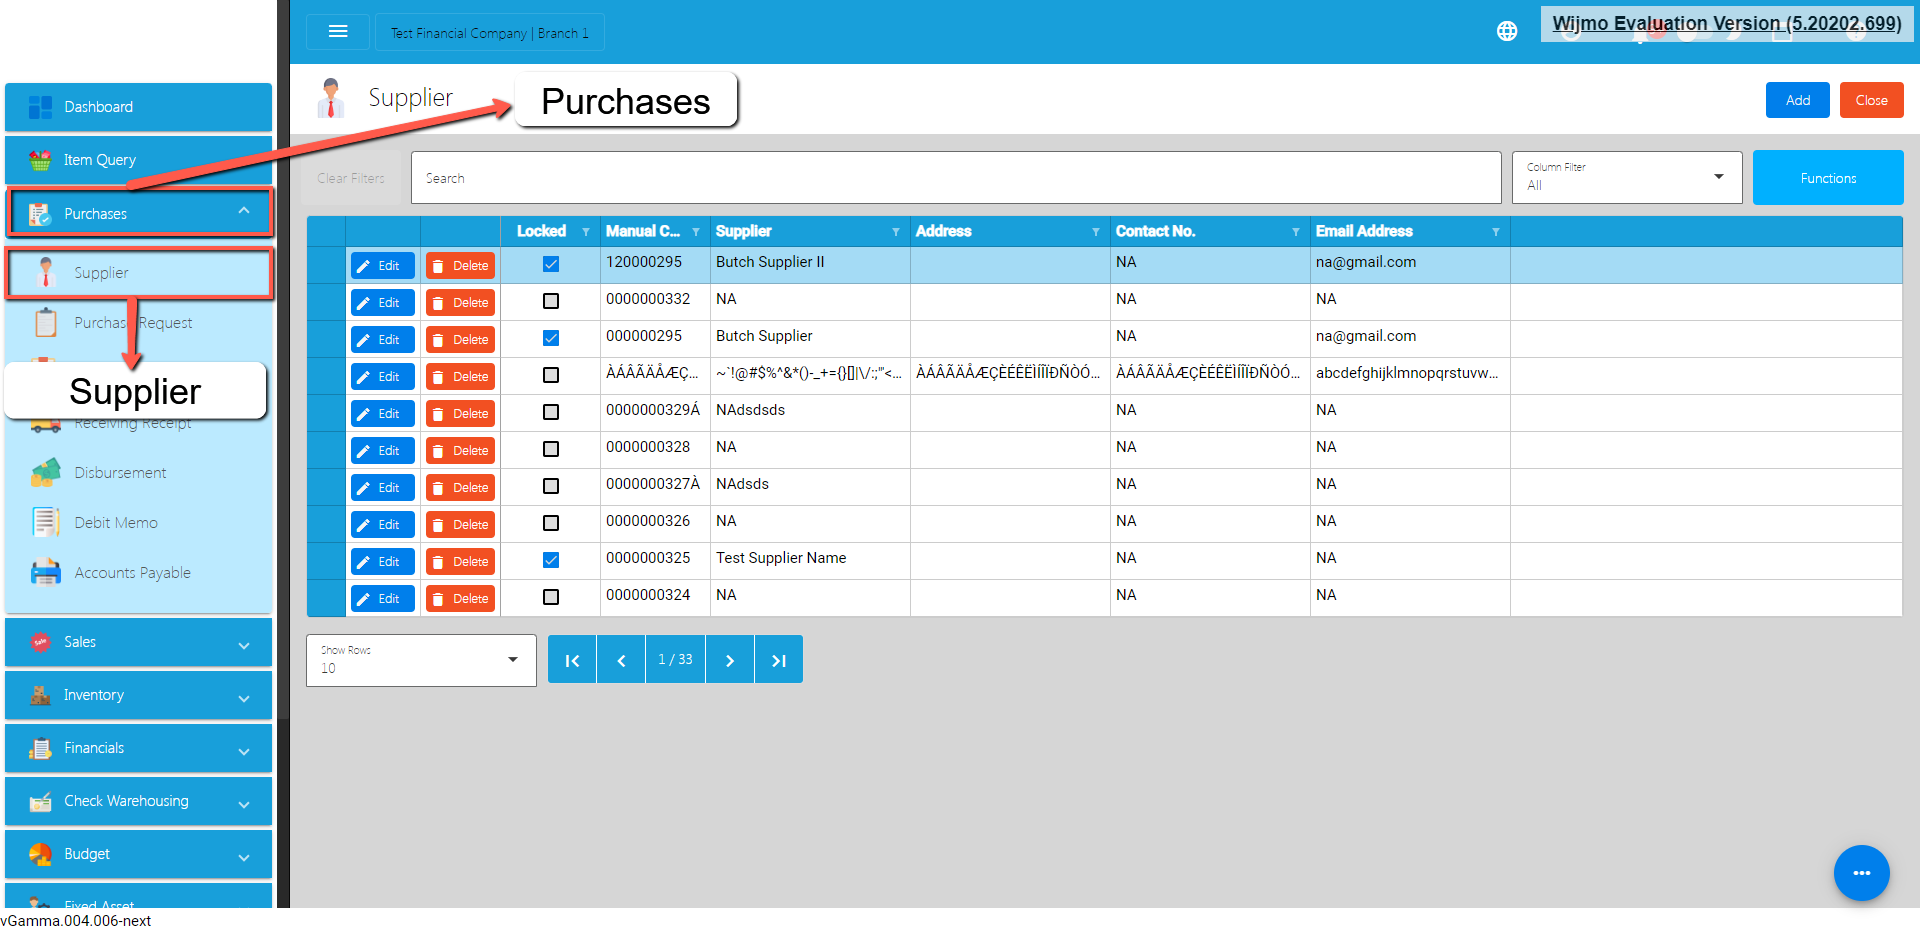
- On the Supplier list page, click the Edit button.
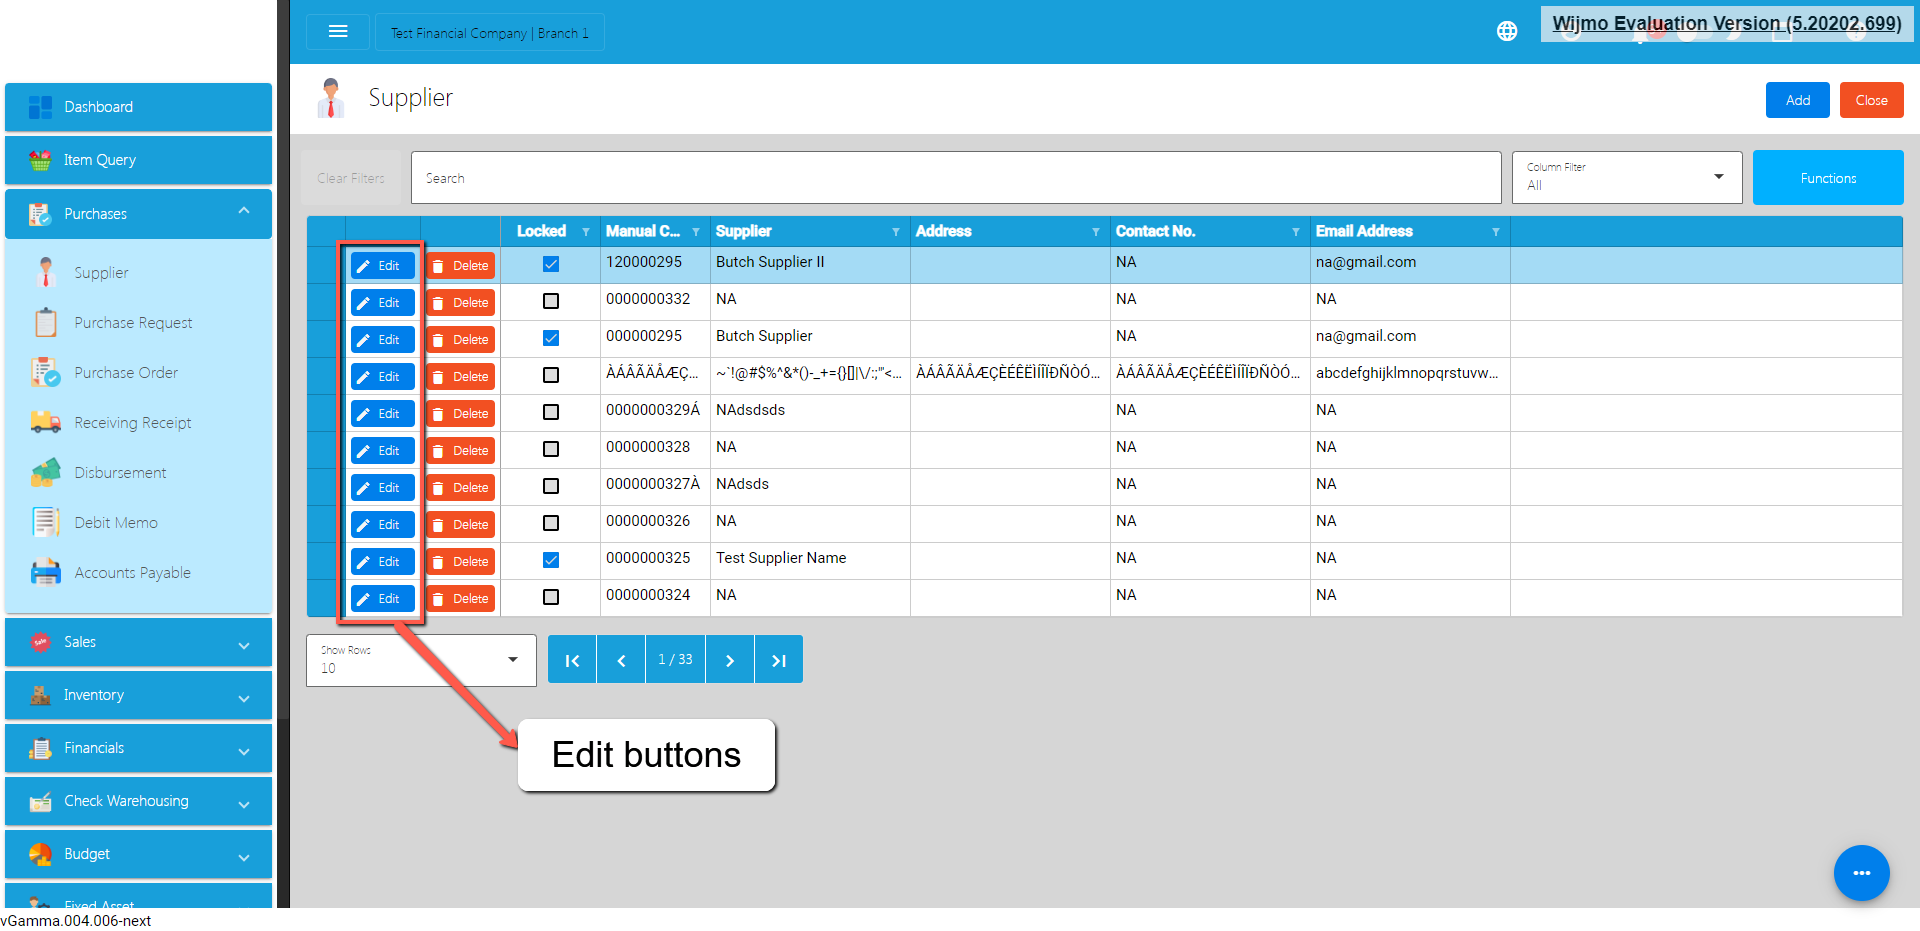
- You will be routed to the Supplier Detail page.
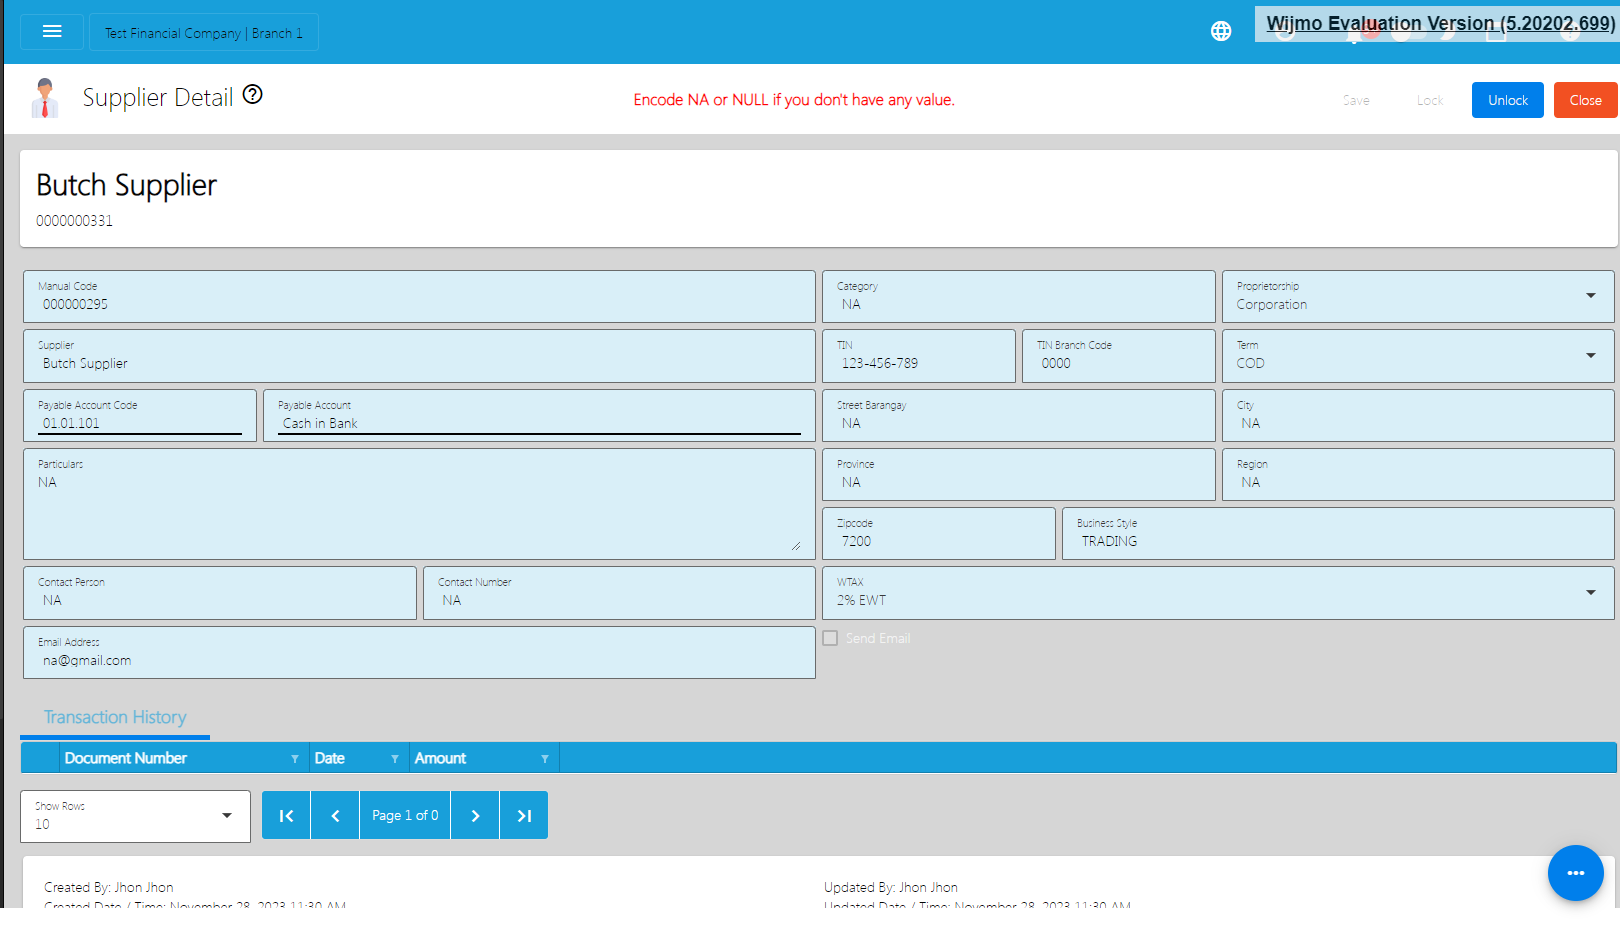
- If your Supplier is locked, click the Unlock button found on the top right part of the Supplier Detail page.
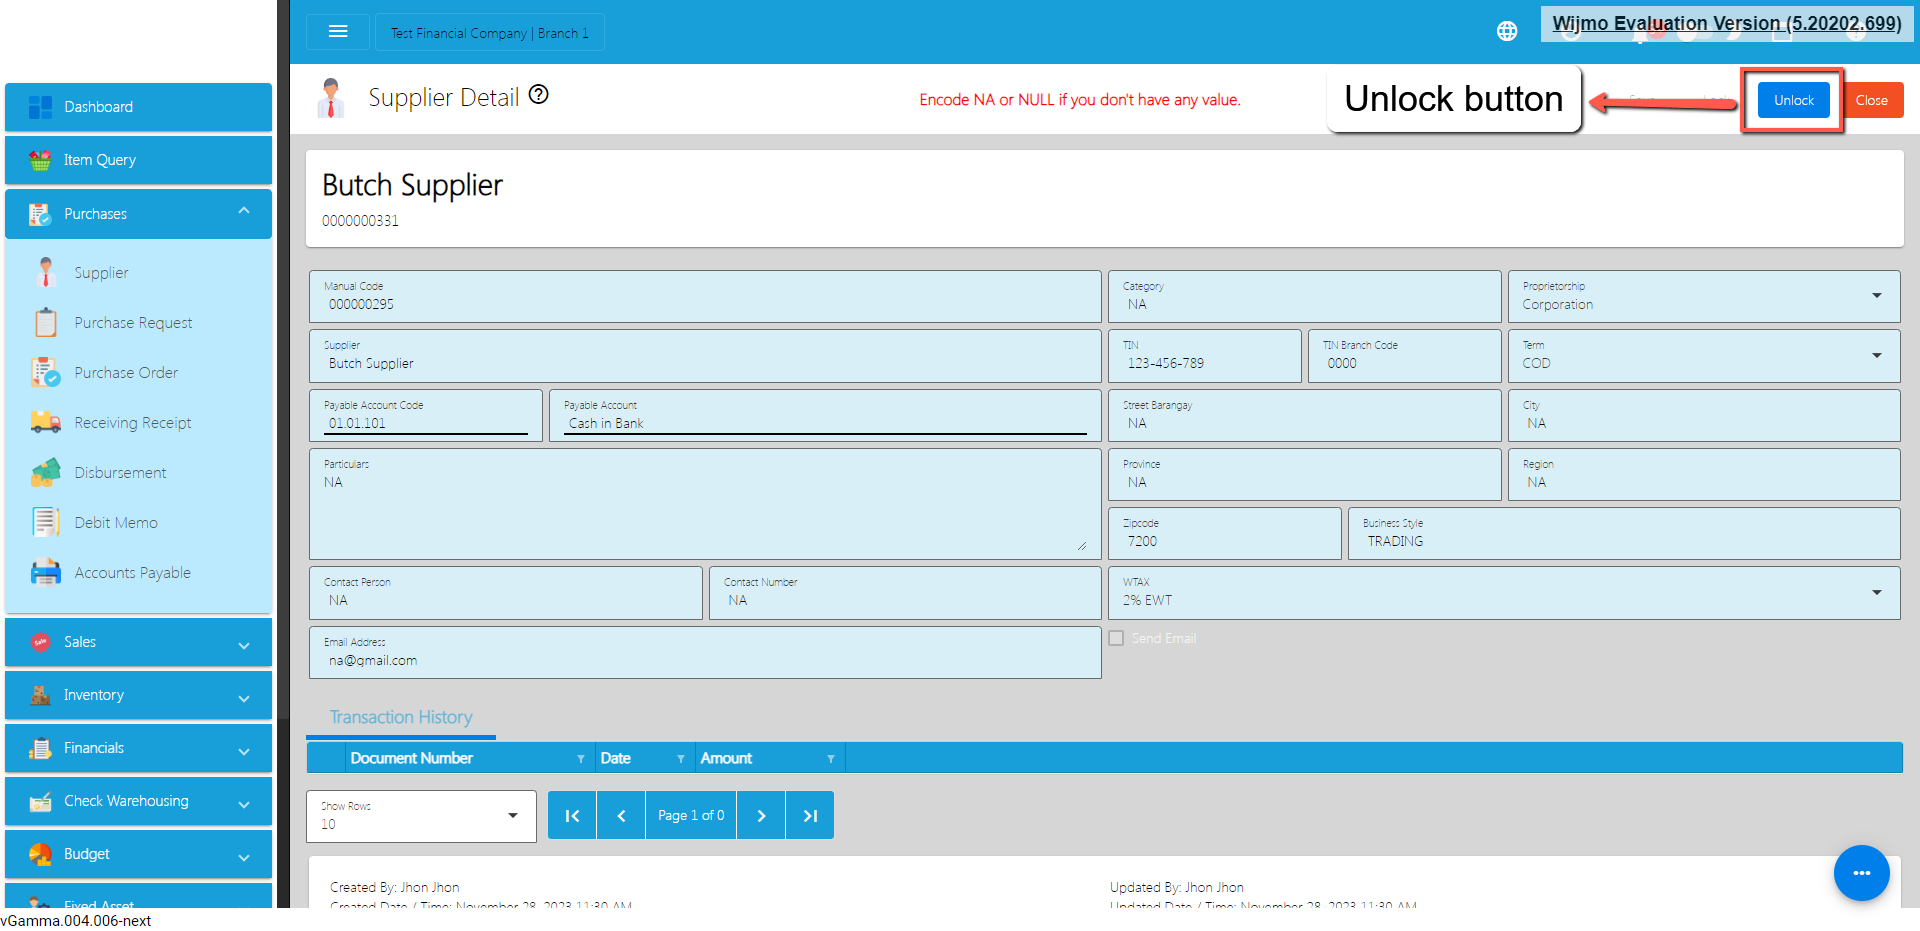
- Once unlocked, you can now change the Item field values that you want to change.
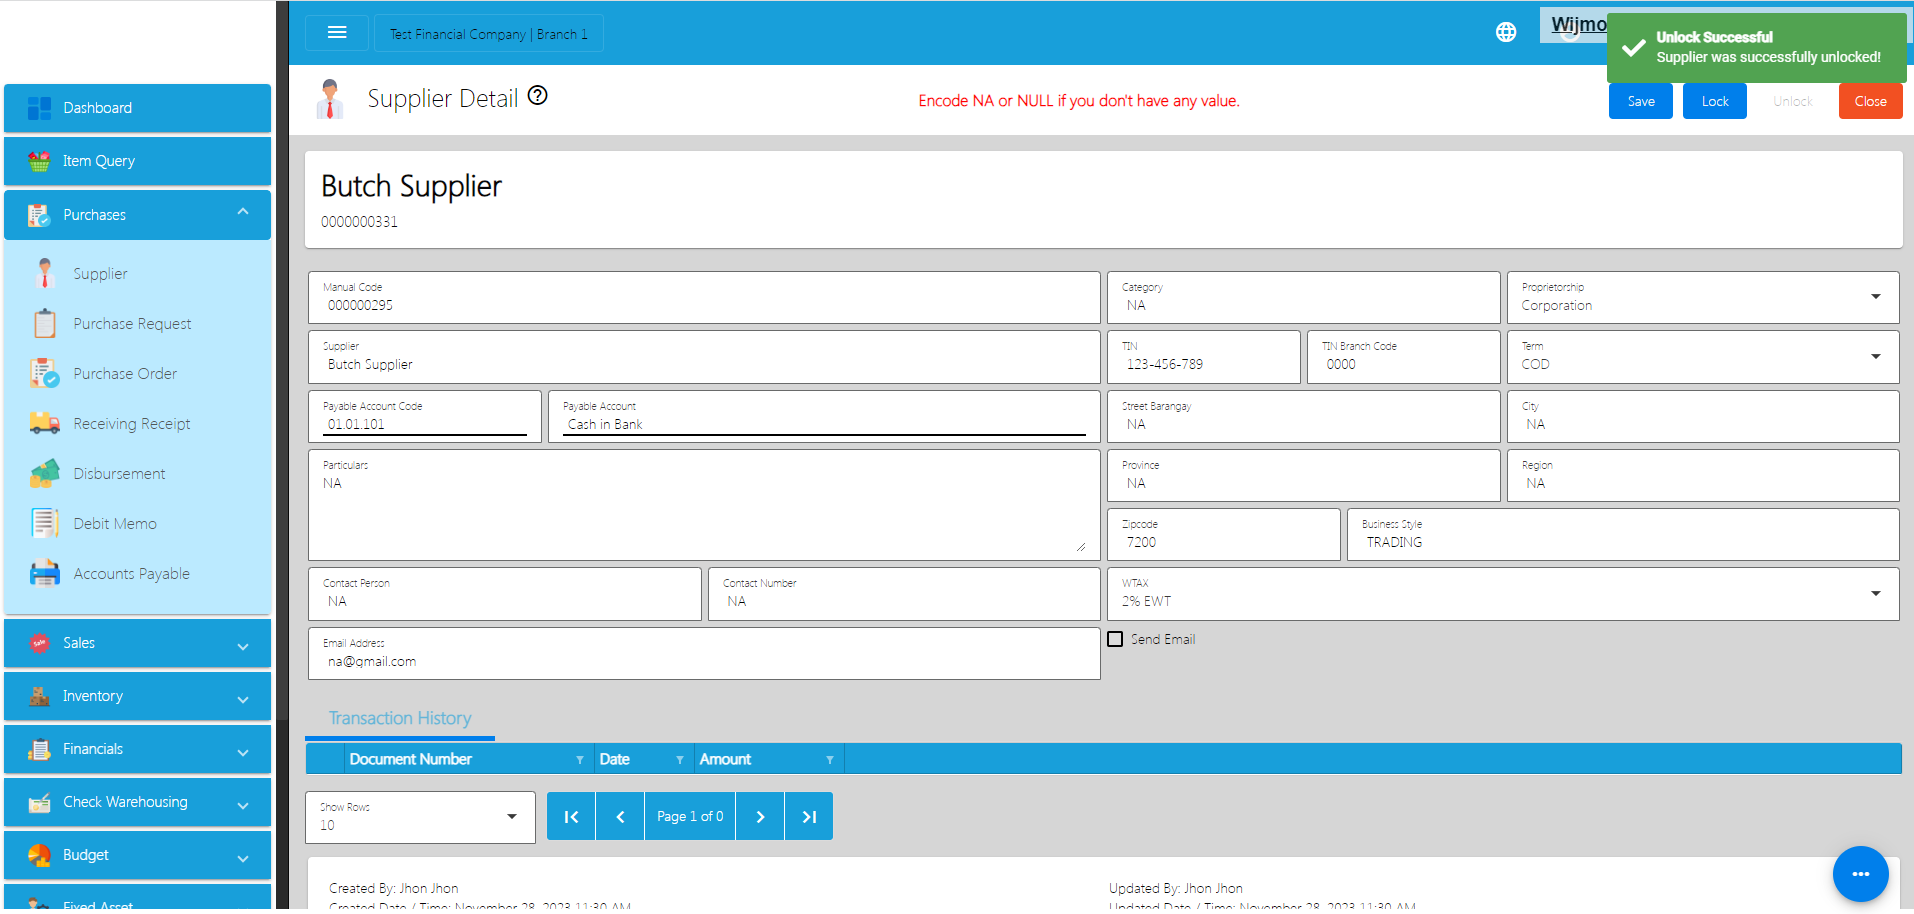
- If everything is okay, just click Save then Lock.
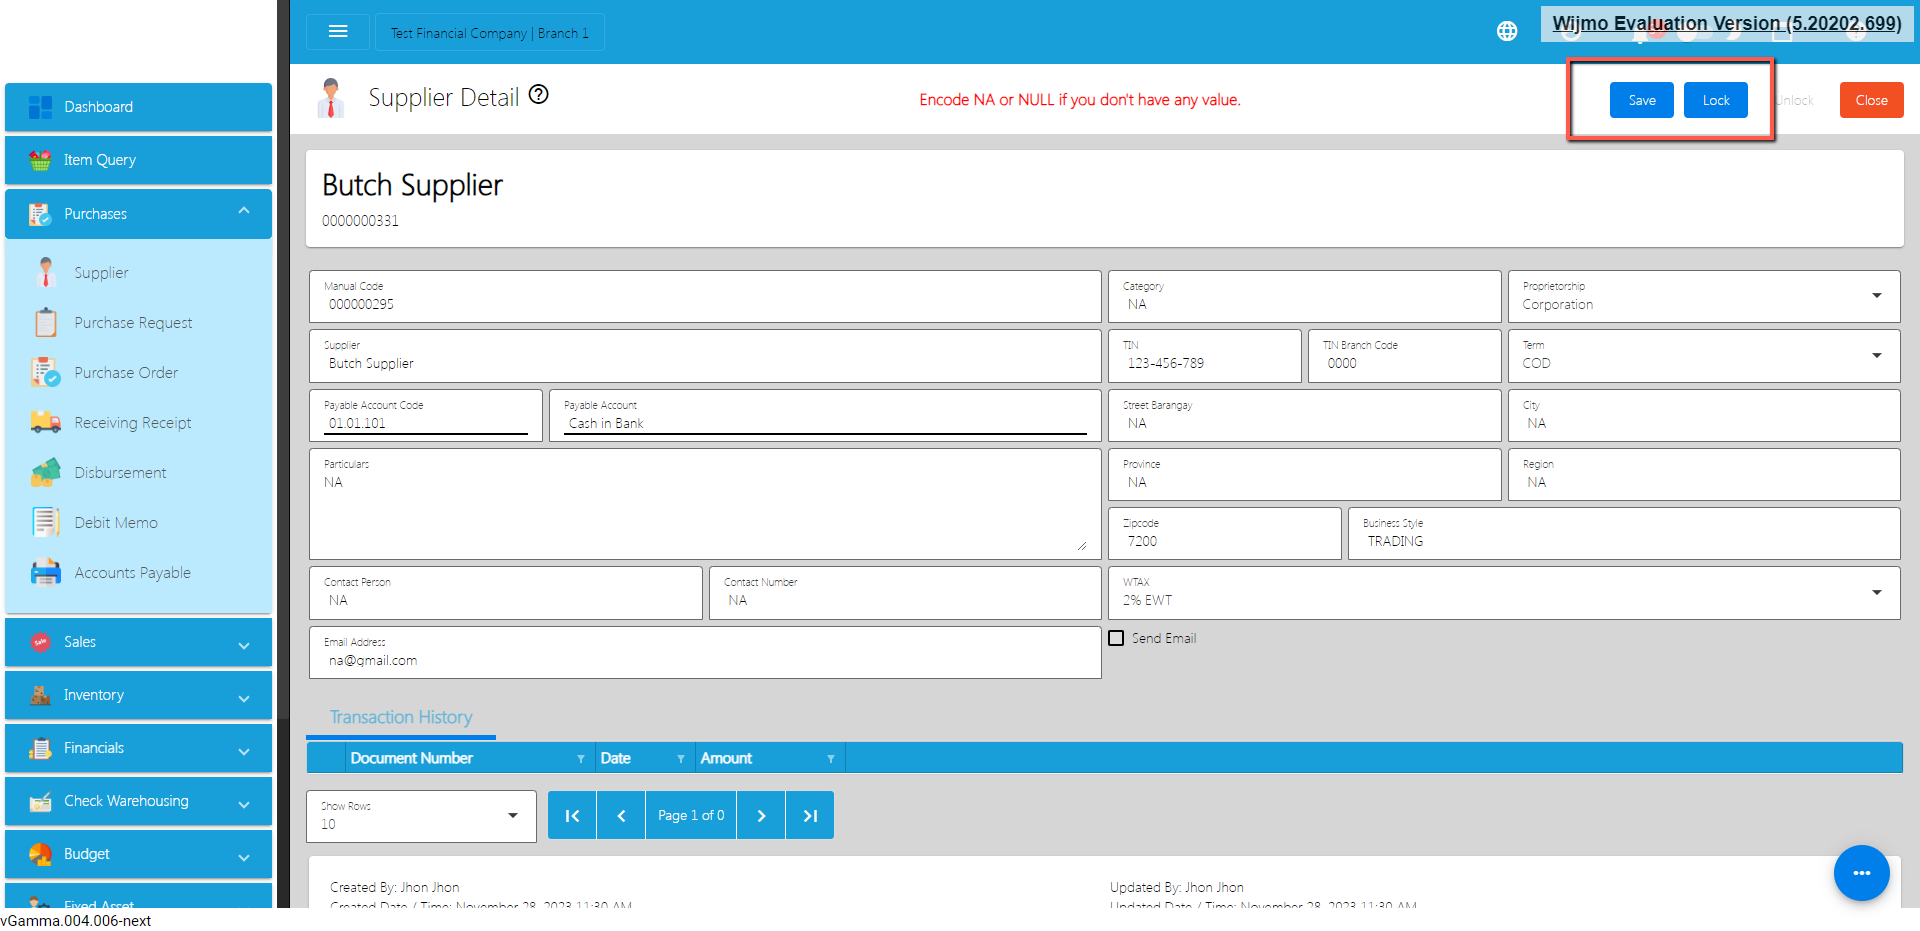
4.2.2.1 Update Supplier Detail in Bulk
- Go to Purchases, then click Supplier.
- On the Supplier list page, click the Functions button, then click Download Supplier List. Supplier List will be used as a template for bulk updating Supplier detail.
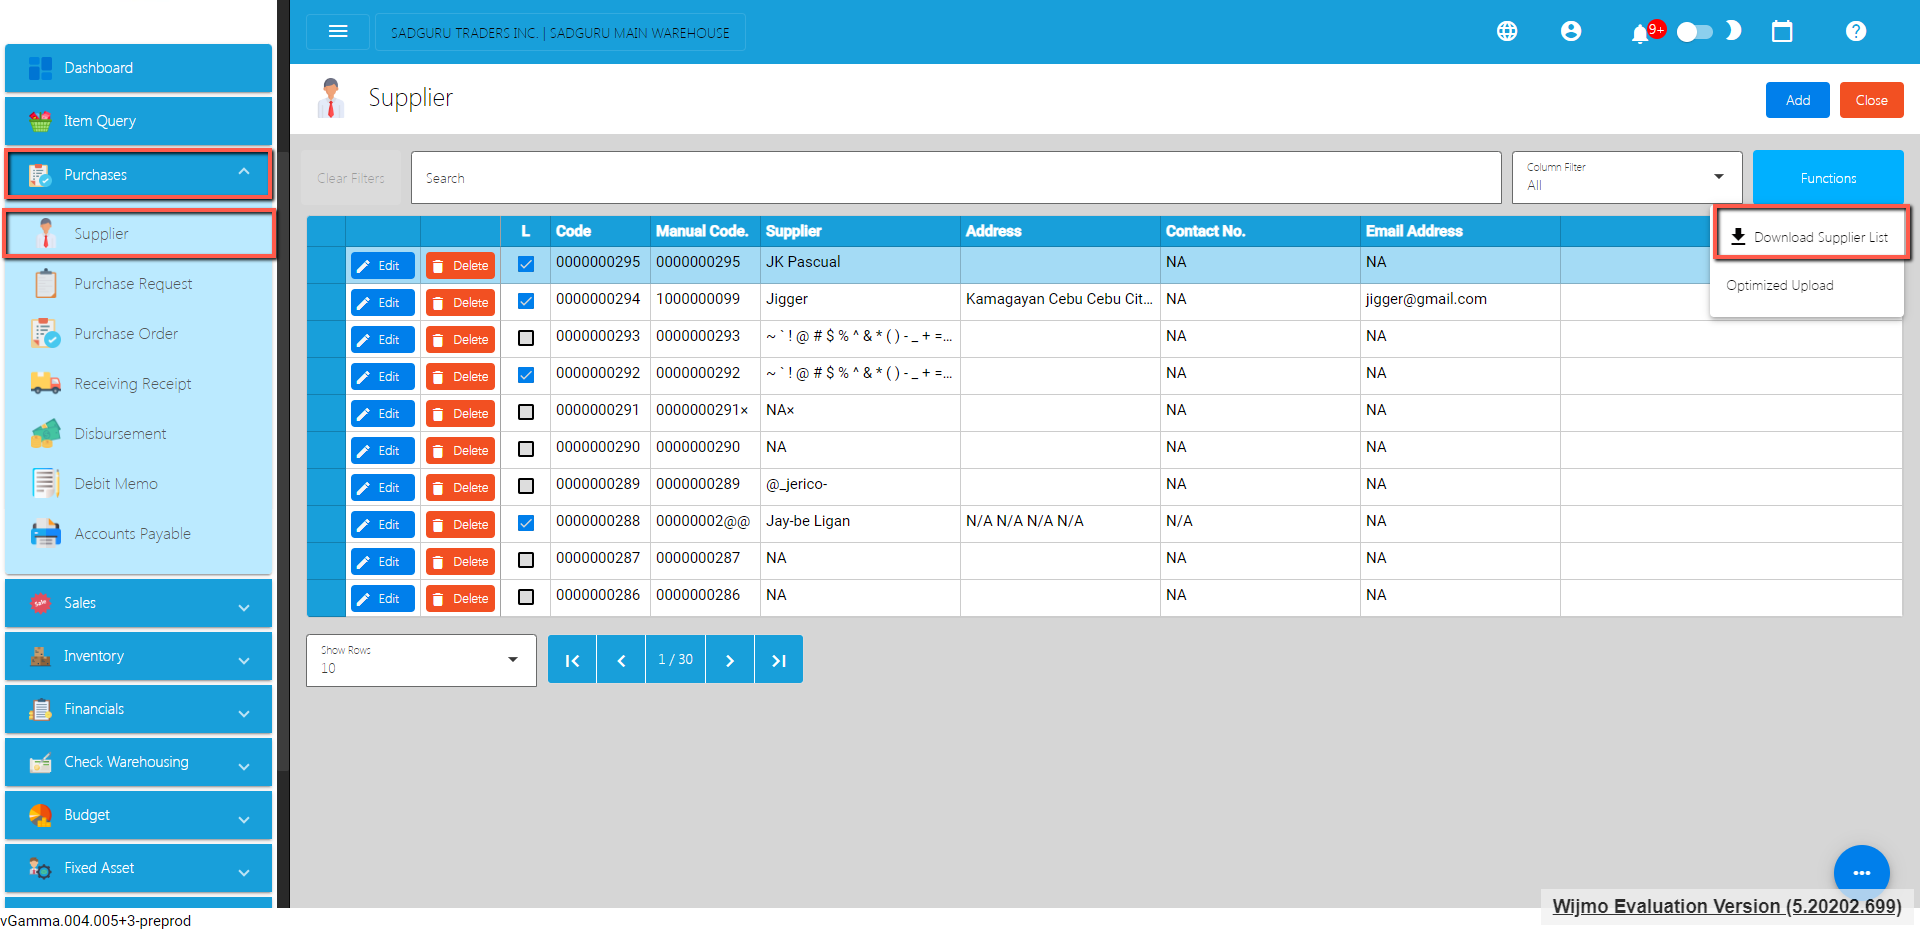
- Once the download is complete, open the file. File name of the downloaded file is Supplier List.
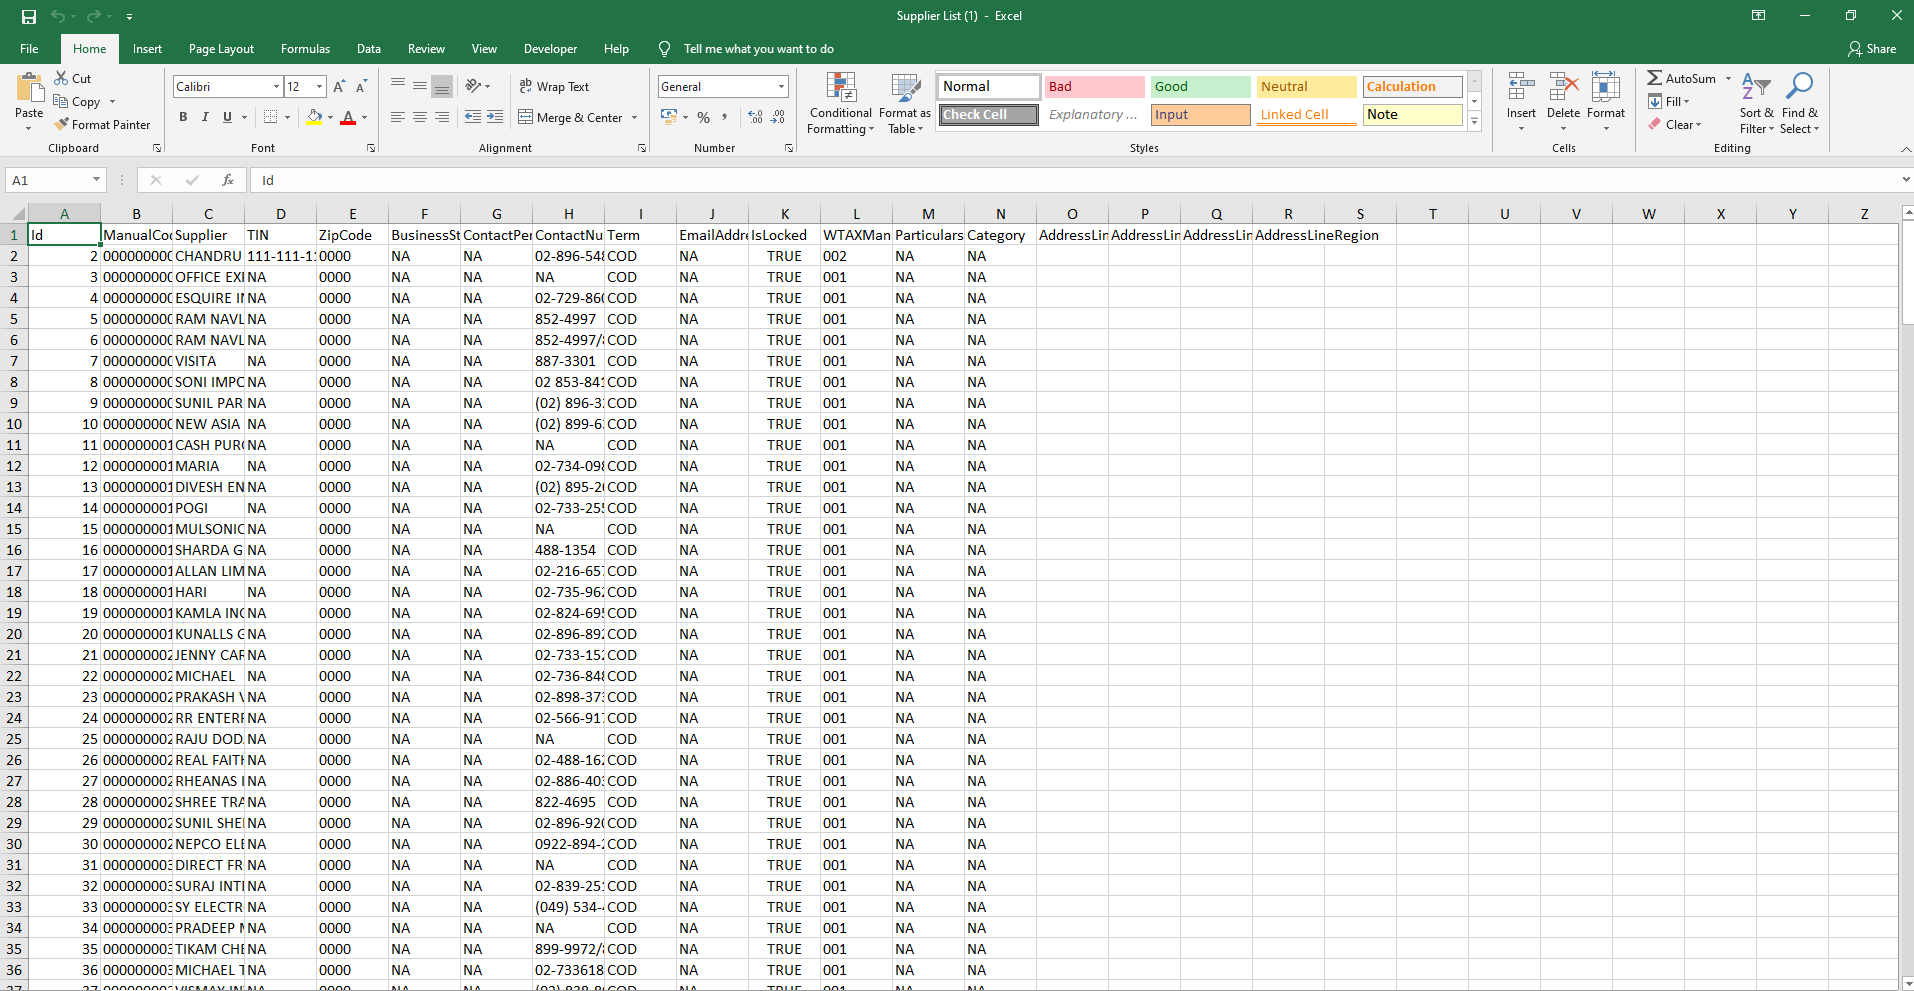
- Update the column value that you want to change. Take note, do not touch the Id column as it is needed for the update functionality.
- If you want to update the WTAXManualCode column, just make sure you provide the correct Manual Code for the WTAX. There’s no need to worry about the Manual Code, since you can find it on System>System Tables>Tax Types on our easyFS system.
- Once everything is okay, just Save the file.
- Go back to the easyFS system.
- Go to System, then click Company.
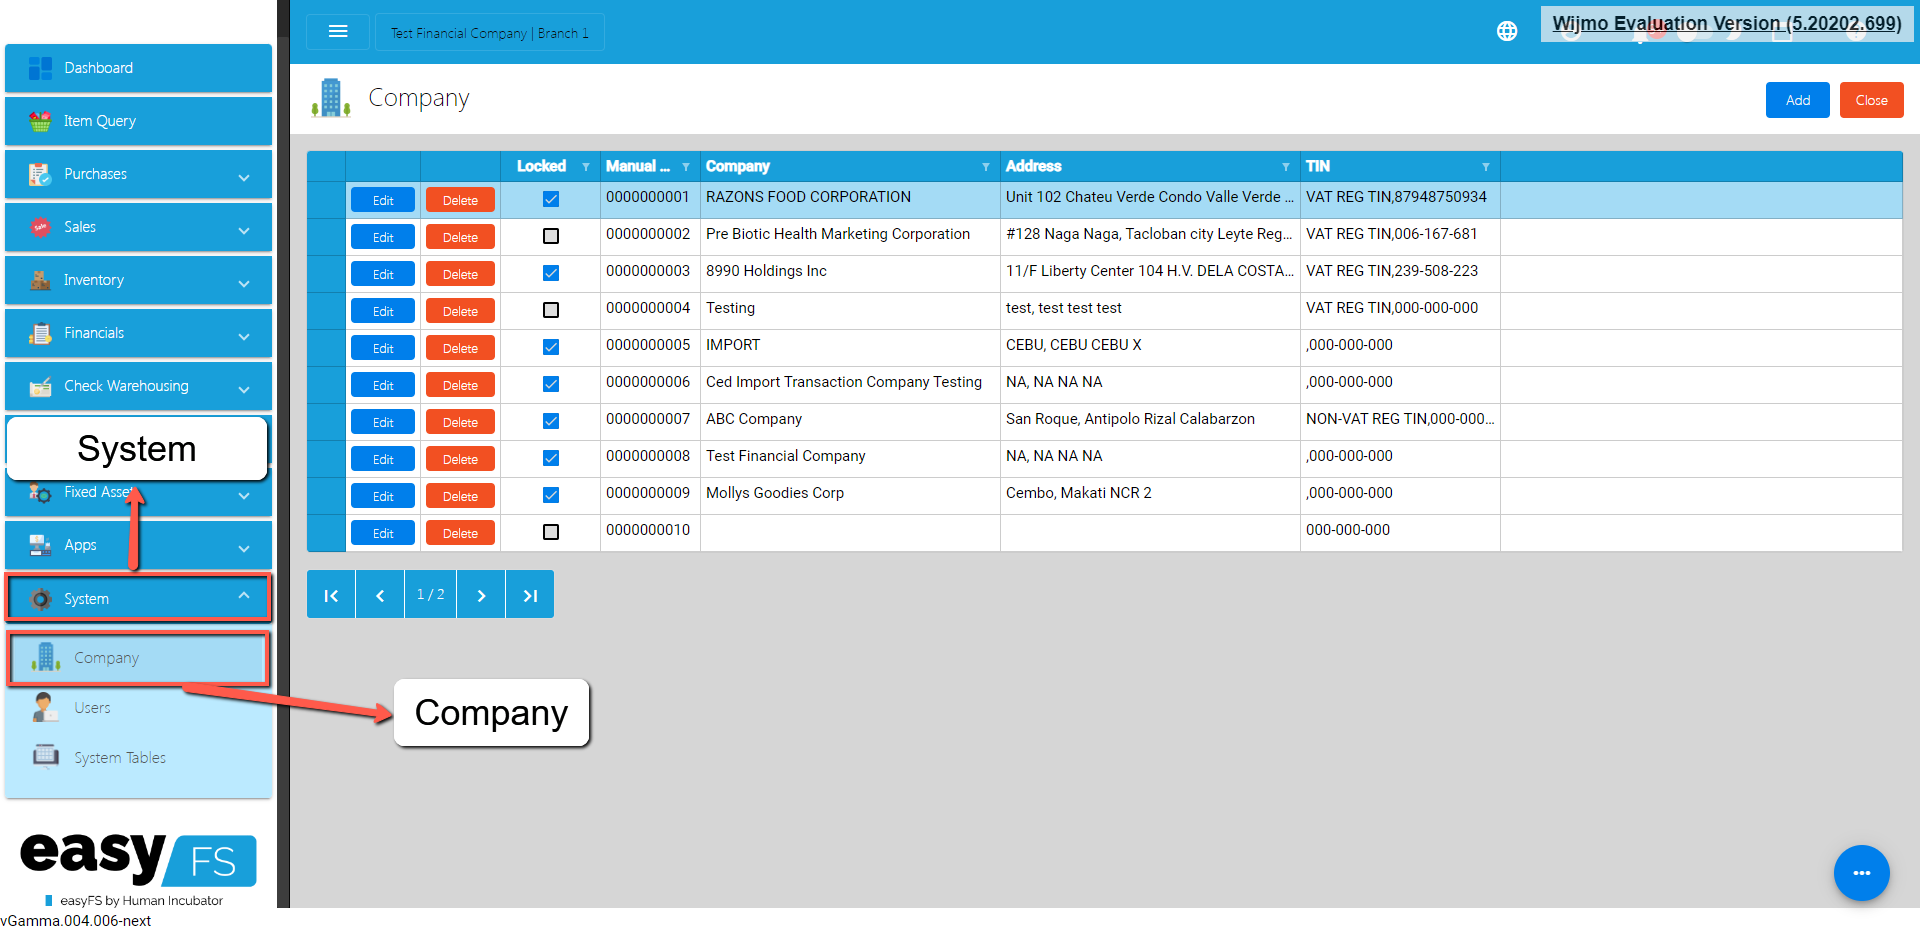
- Click the Edit button, beside your Company name.
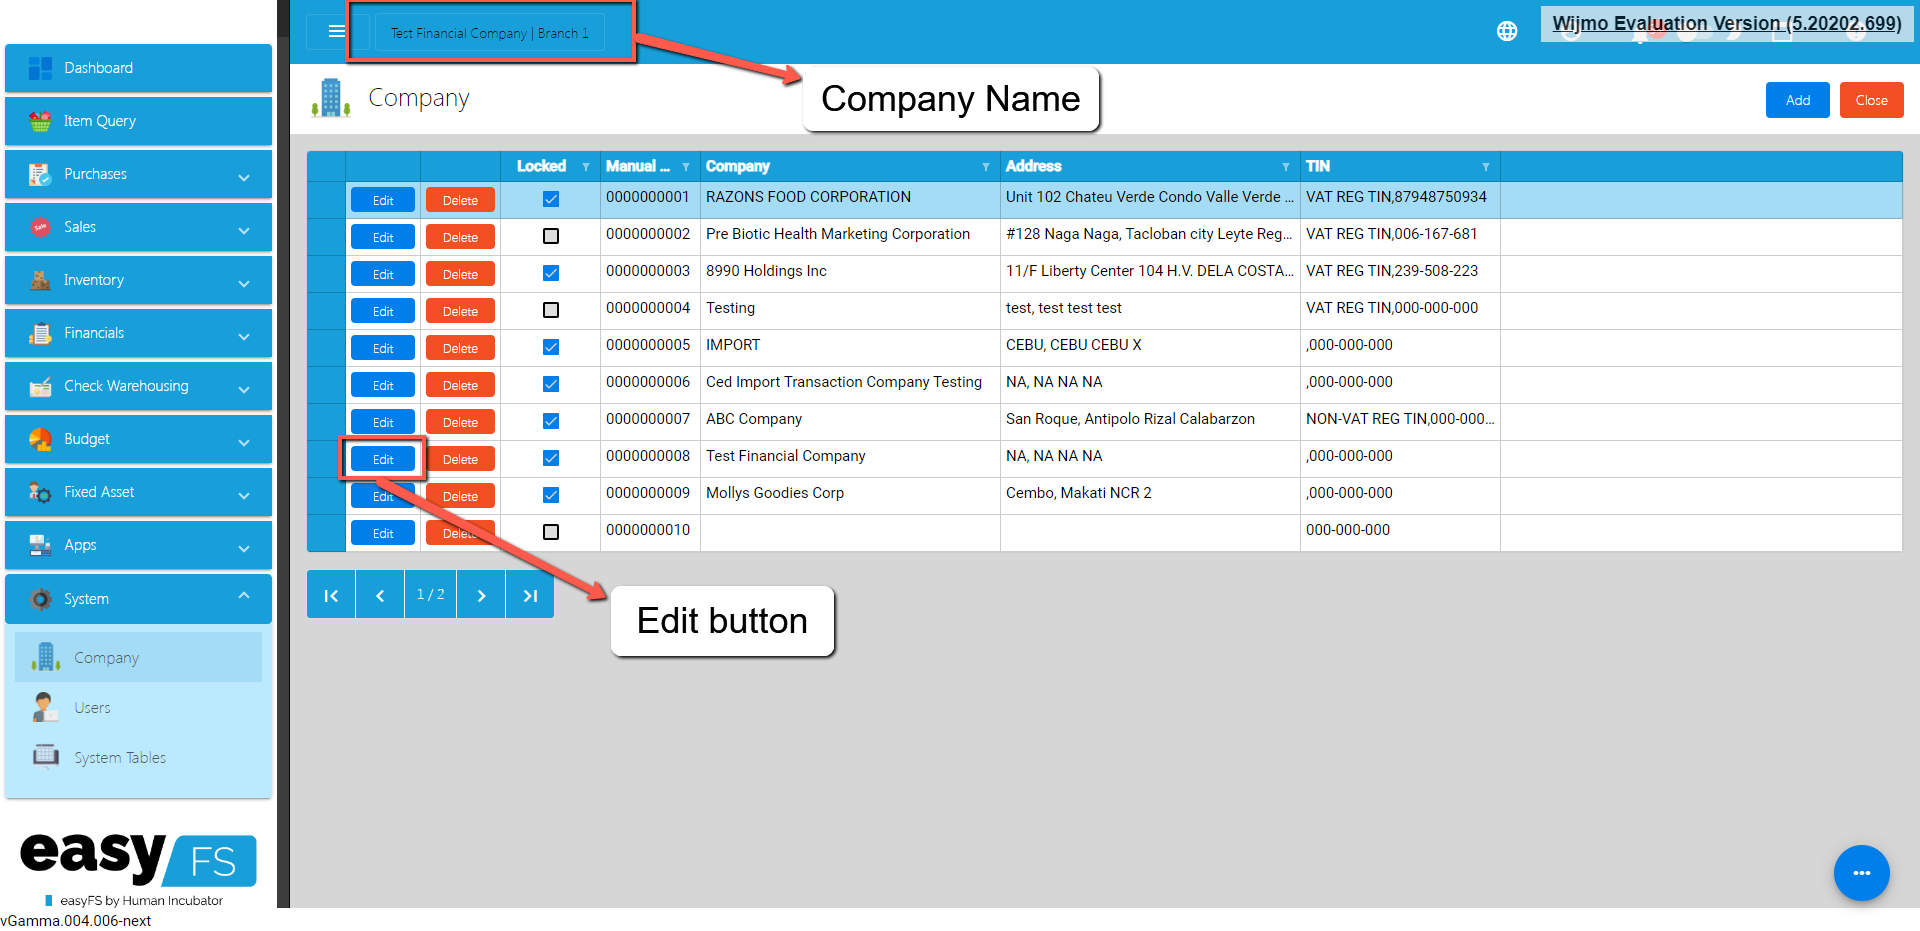
- You will be routed to the Company Detail page.
- Click the More Settings tab found below the page, then click Utility then Uploads.
- To bulk update the Supplier detail, click the Supplier Bulk Update button.
- Look for the Supplier List file, then double click to upload.
- Wait until it will successfully update the Supplier detail.
- Once okay, you may now review the item you updated by clicking again the Purchases, then Supplier.
- You may use the Search bar to search the Supplier you updated, then click the Edit button to see the changes.
4.2.3 Customer
4.2.3.1 Manual Update Customer Detail
- Go to Sales, then click Customer.
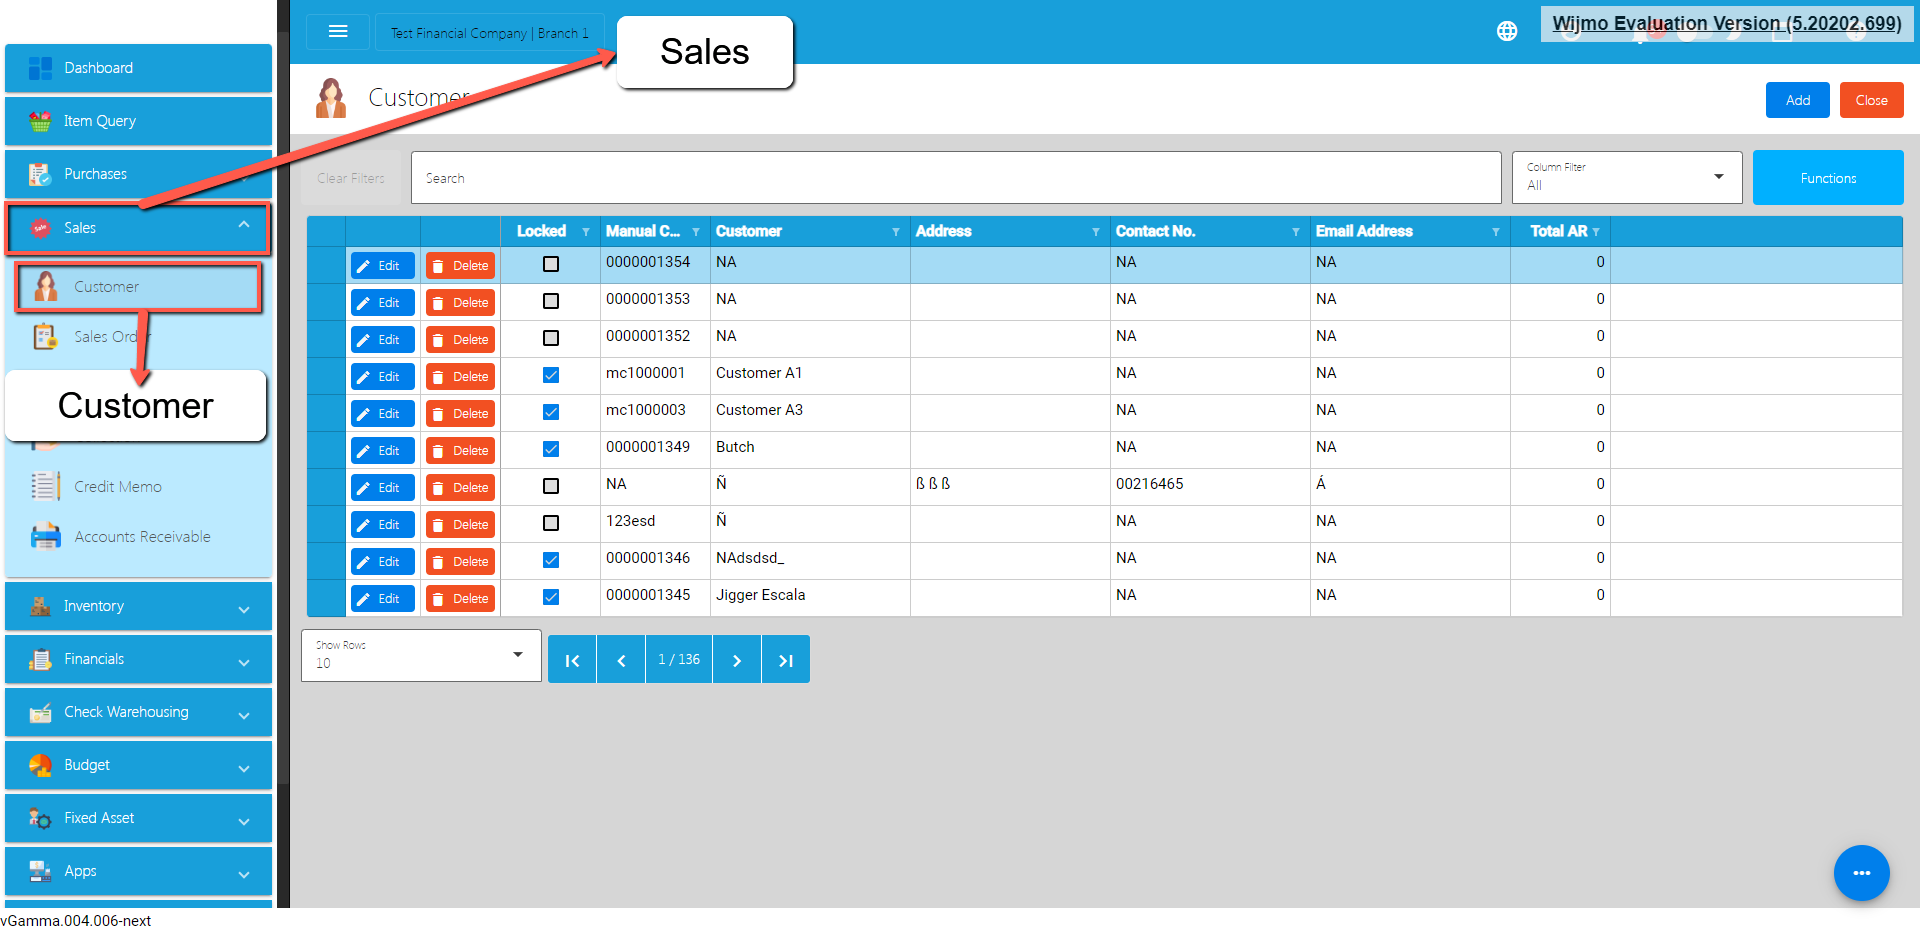
- On the Customer list page, click the Edit button.
- You will be routed to the Customer Detail page.
- If your Customer is locked, click the Unlock button found on the top right part of the Customer Detail page.
- Once unlocked, you can now change the Item field values that you want to change.
- If everything is okay, just click Save then Lock.
4.2.3.1 Update Customer Detail in Bulk
- Go to Sales, then click Customer.
- On the Customer list page, click the Functions button, then click Download Customer List. Customer List will be used as a template for bulk updating Customer detail.
- Once the download is complete, open the file. File name of the downloaded file is Customer List.
- Update the column value that you want to change. Take note, do not touch the Id column as it is needed for the update functionality.
- If you want to update the WTAXManualCode column, just make sure you provide the correct Manual Code for the WTAX. There’s no need to worry about the Manual Code, since you can find it on System>System Tables>Tax Types on our easyFS system.
- Once everything is okay, just Save the file.
- Go back to the easyFS system.
- Go to System, then click Company.
- Click the Edit button, beside your Company name.
- You will be routed to the Company Detail page.
- Click the More Settings tab found below the page, then click Utility then Uploads.
- To bulk update the Customer detail, click the Customer Bulk Update button.
- Look for the Customer List file, then double click to upload.
- Wait until it will successfully update the Customer detail.
- Once okay, you may now review the List of customers that you updated by clicking again the MasterFiles, then Customer.
- You may use the Search bar to search the Customer you updated, then click the Edit button to see the changes.
V: Transactions
5.1 Overview
Accounting transactions is a financial activity or event that involves the exchange of money or something of value between two parties. These events are recorded to keep track of how much money a business makes, spends, and owns. Every transaction affects the financial health of the business, and accountants use these records to create reports and make sure everything adds up correctly. For example, when a business sells a product, it's an accounting transaction because money is exchanged for a product, and both the sale and the money received are recorded.
Our easyFS system has the following transactions:
- Purchases
- Purchases in accounting refer to the buying of goods or services by a business. It's when a company acquires items it needs to operate, such as raw materials for manufacturing or products for resale. When you spend money to get something for your business, it's a purchase.
- Sales
- Sales are transactions where a business exchanges goods or services for money. It's the process of transferring ownership of a product or providing a service in exchange for payment.
- Inventory
- Inventory in accounting refers to the goods a business holds for the purpose of resale. It includes items a company has purchased or produced but has not yet sold.
- Financials
- Generates the Balance Sheet, Income Statement, Cash Flows Statement, Trial Balance, General Ledger and General Journal.
5.2 Purchases Transaction Module
The purchasing process in accounting involves a series of steps that outline the flow of a procurement transaction, from the identification of a need to the payment of suppliers.
Supplier Creation/Management
- Create and manage supplier records within the system, including contact information, Email, TIN (Tax Identification Number), and payment terms.
- Assign unique Supplier Code for easy tracking.
Purchase Request
- When a department identifies a need for goods or services, a purchase request is generated.
- The purchase request includes details such as the items or services required, quantities, and any specific requirements.
Purchase Order
- Based on the approved purchase request, a purchase order is created and sent to the supplier.
- The purchase order includes details like the quantity, price, and description of the items or services.
Receiving Receipt
- Upon receiving the goods or services, a receiving receipt is generated to confirm that the items have been received in the quantity and condition specified in the purchase order.
- Inventory Code is generated upon making the Receiving Receipt. This will monitor the Inventory of the Item being encoded
- Update inventory levels if applicable.
Accounts Payable
- Record the purchase in the accounts payable ledger.
- Accounts payable represents the amount the business owes to suppliers for the received goods or services.
- Accounts Payable Formula is computed as Receiving Receipt less Disbursement less Debit Memo
Disbursement (Payment)
- Issue payment to the supplier based on the terms specified in the purchase order and agreed-upon payment terms.
- Payment methods may include checks, electronic transfers, or other agreed-upon methods.
Debit Memo (if necessary)
- If there are issues with the received goods or services, such as damaged items or discrepancies, a debit memo may be issued to adjust the accounts payable balance.
- Update records to reflect the debit memo.
Purchasing Module Reporting and Analytics
- Monitor and analyze purchasing performance, accounts payable aging, and other relevant metrics.
- Generate reports to gain insights into the financial aspects of the procurement process.
- Integration with General Ledger, Income Statement and Balance
5.2.1 Purchase Request
Overview
This is where you input the entire purchase request needed.
Purchase Request List
- List of all the PR (Purchase Request) and will also show the overview of the transaction. In addition, it also has filter functionality where you can select the Start and End Date of the transaction.
Purchase Request Detail
- To add a new Purchase Request, go to Purchases then click Purchase Request. After that, click the Add that can be seen in the Purchase Request list.
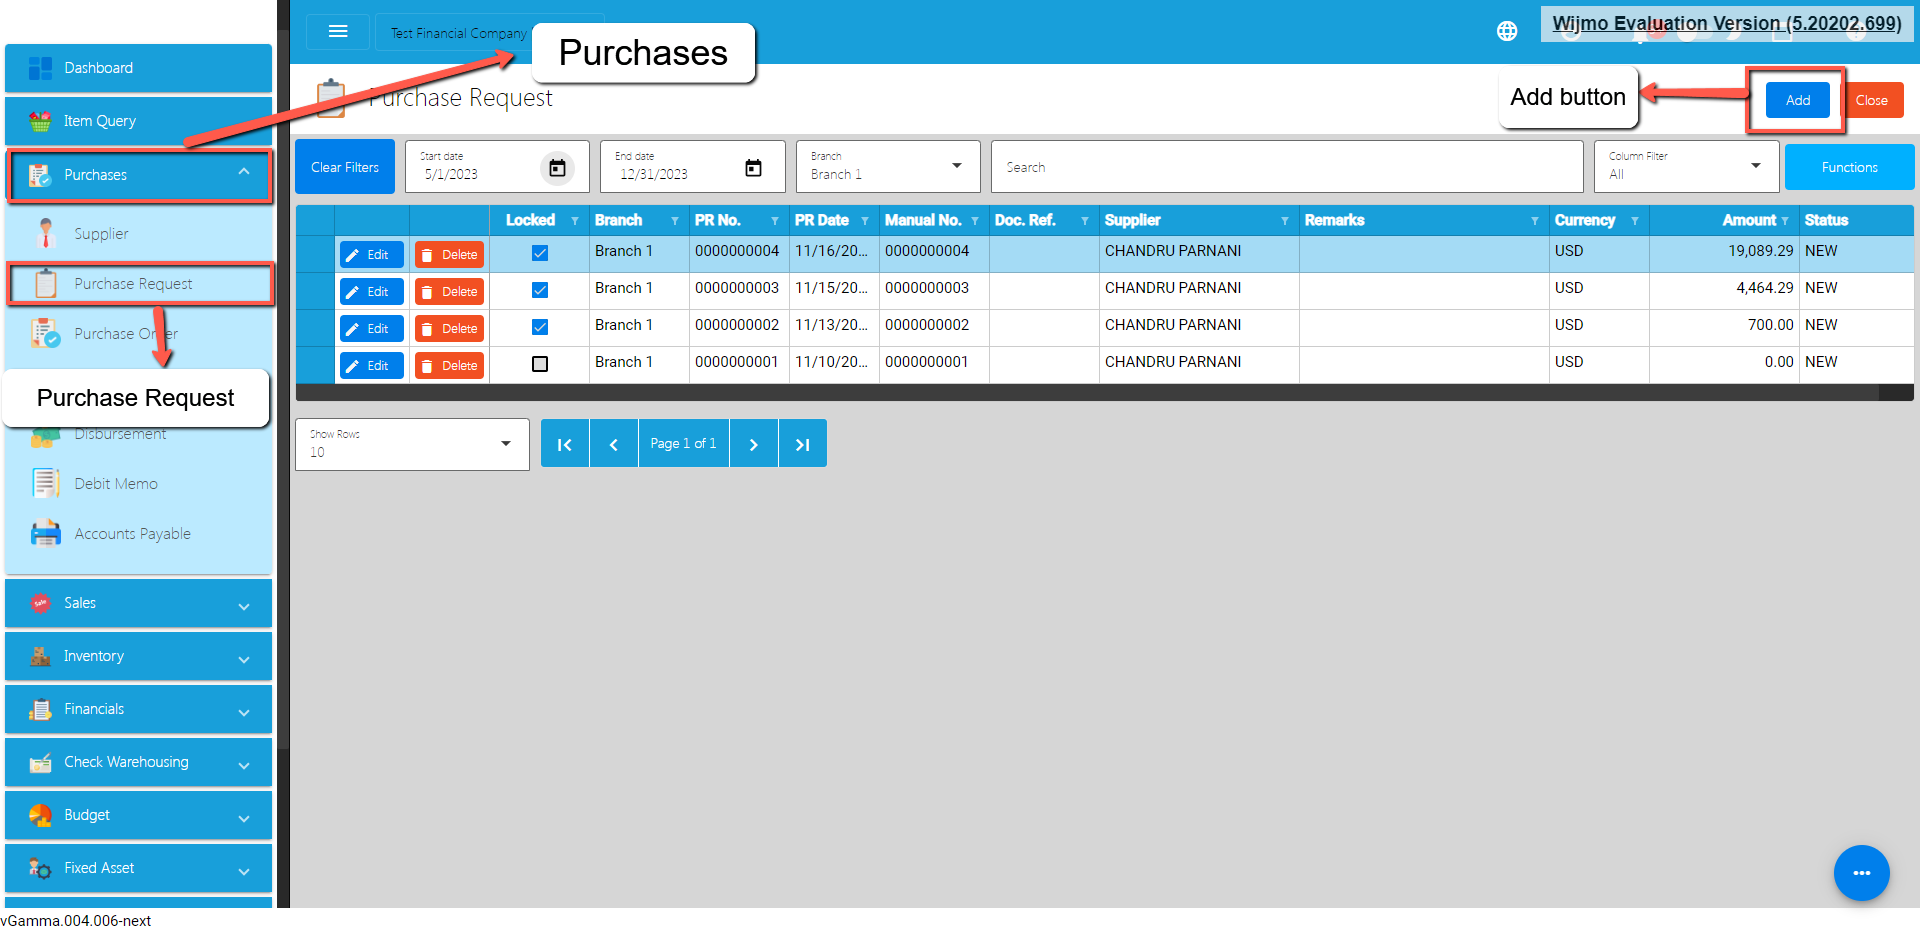
- Fill out all the needed information for the Purchase Request Detail like,
- Currency
- Supplier Name
- PR Date
- Term
- Document Reference
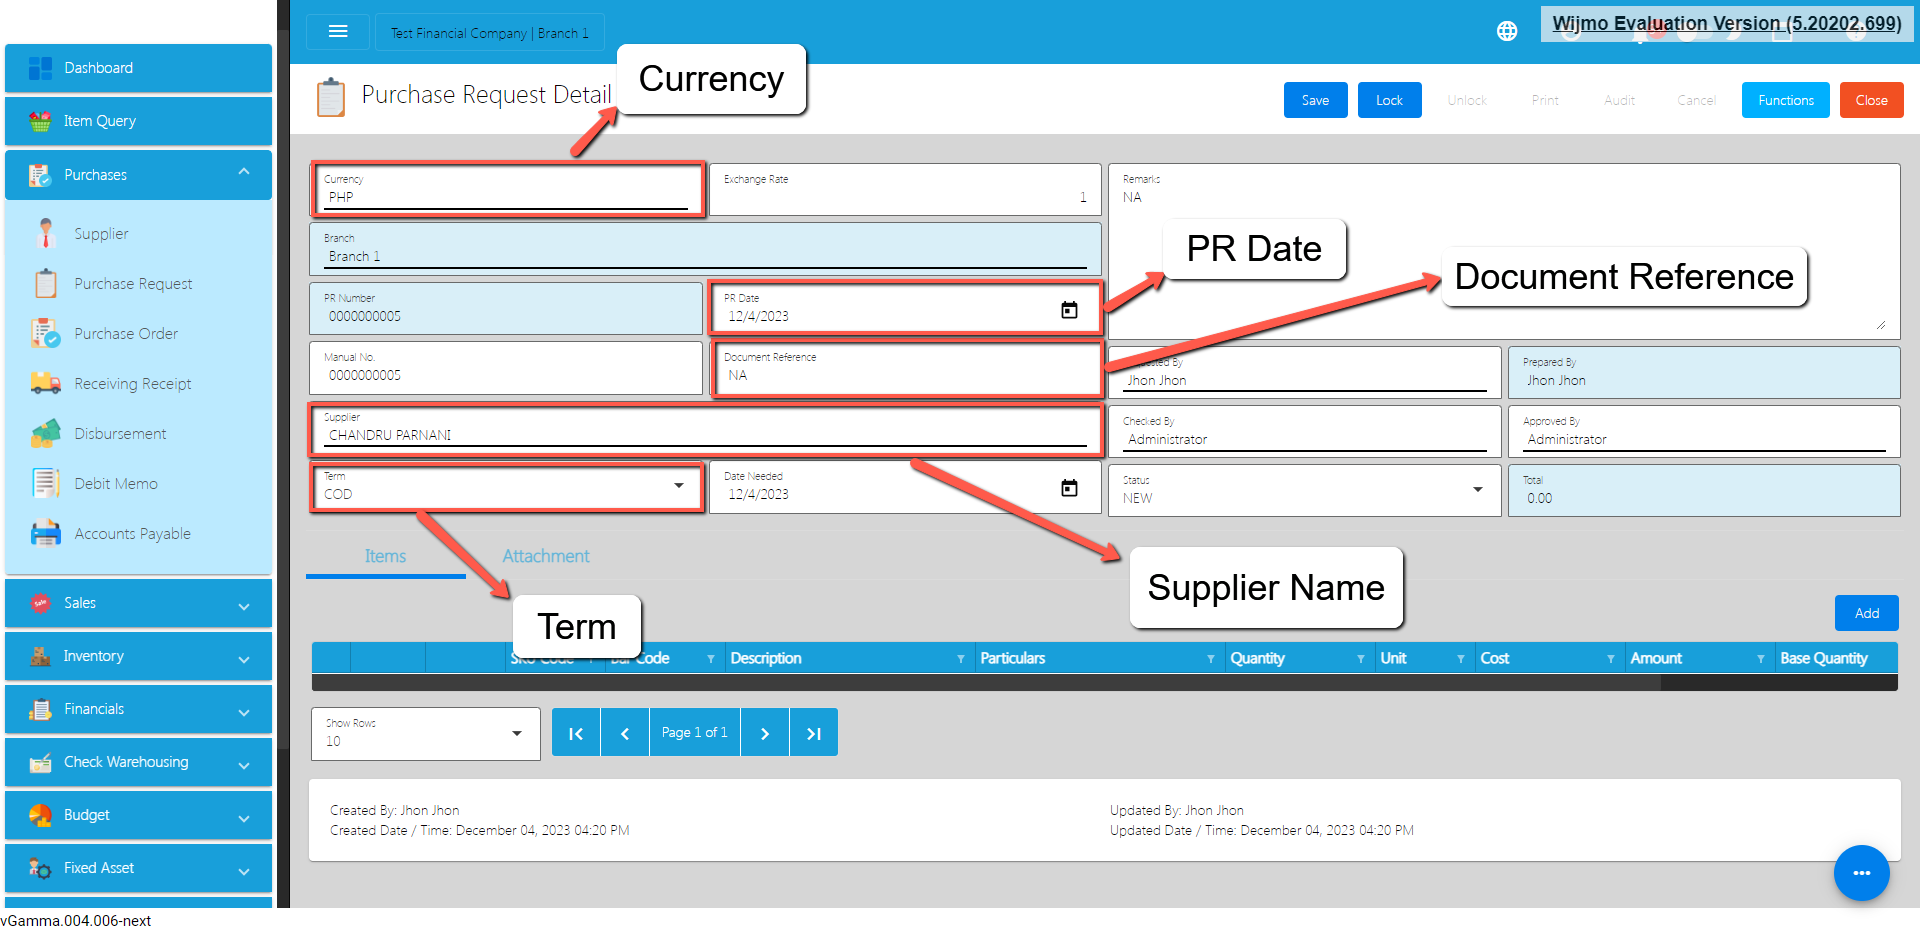
- To add line Item(s), click the Add button on the right part of the page under the Items tab.
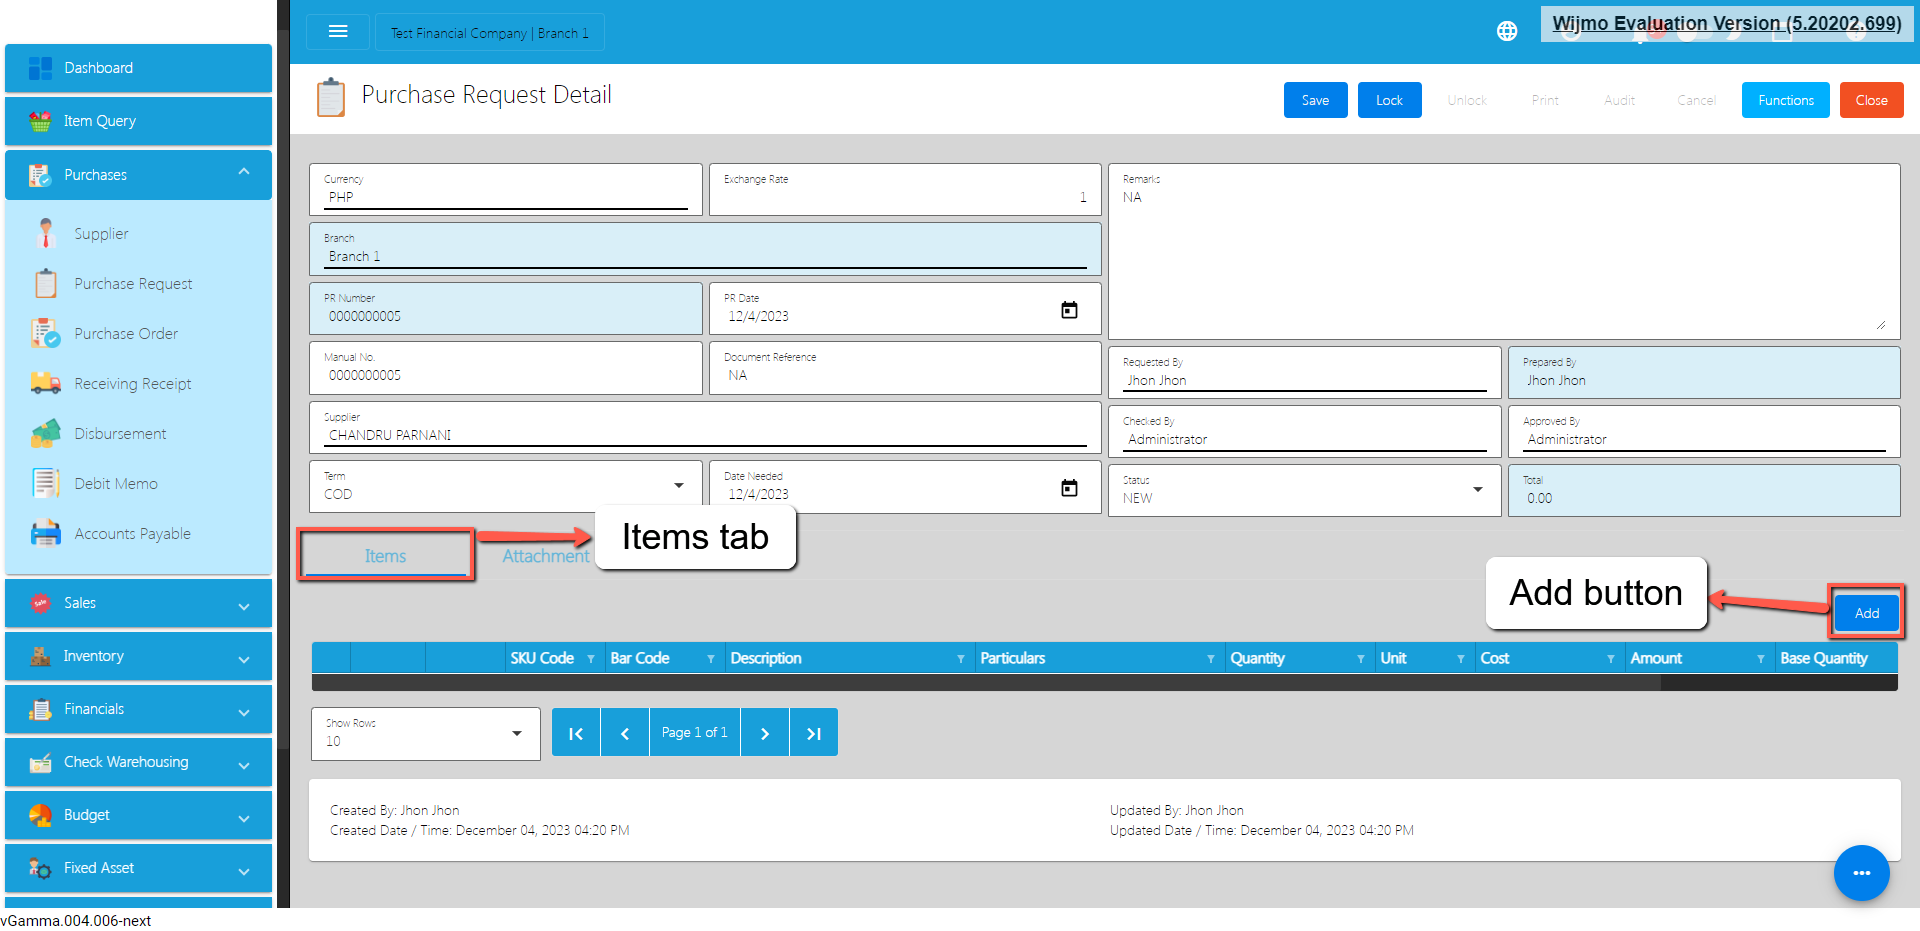
- Select the items, by clicking the Pick button.
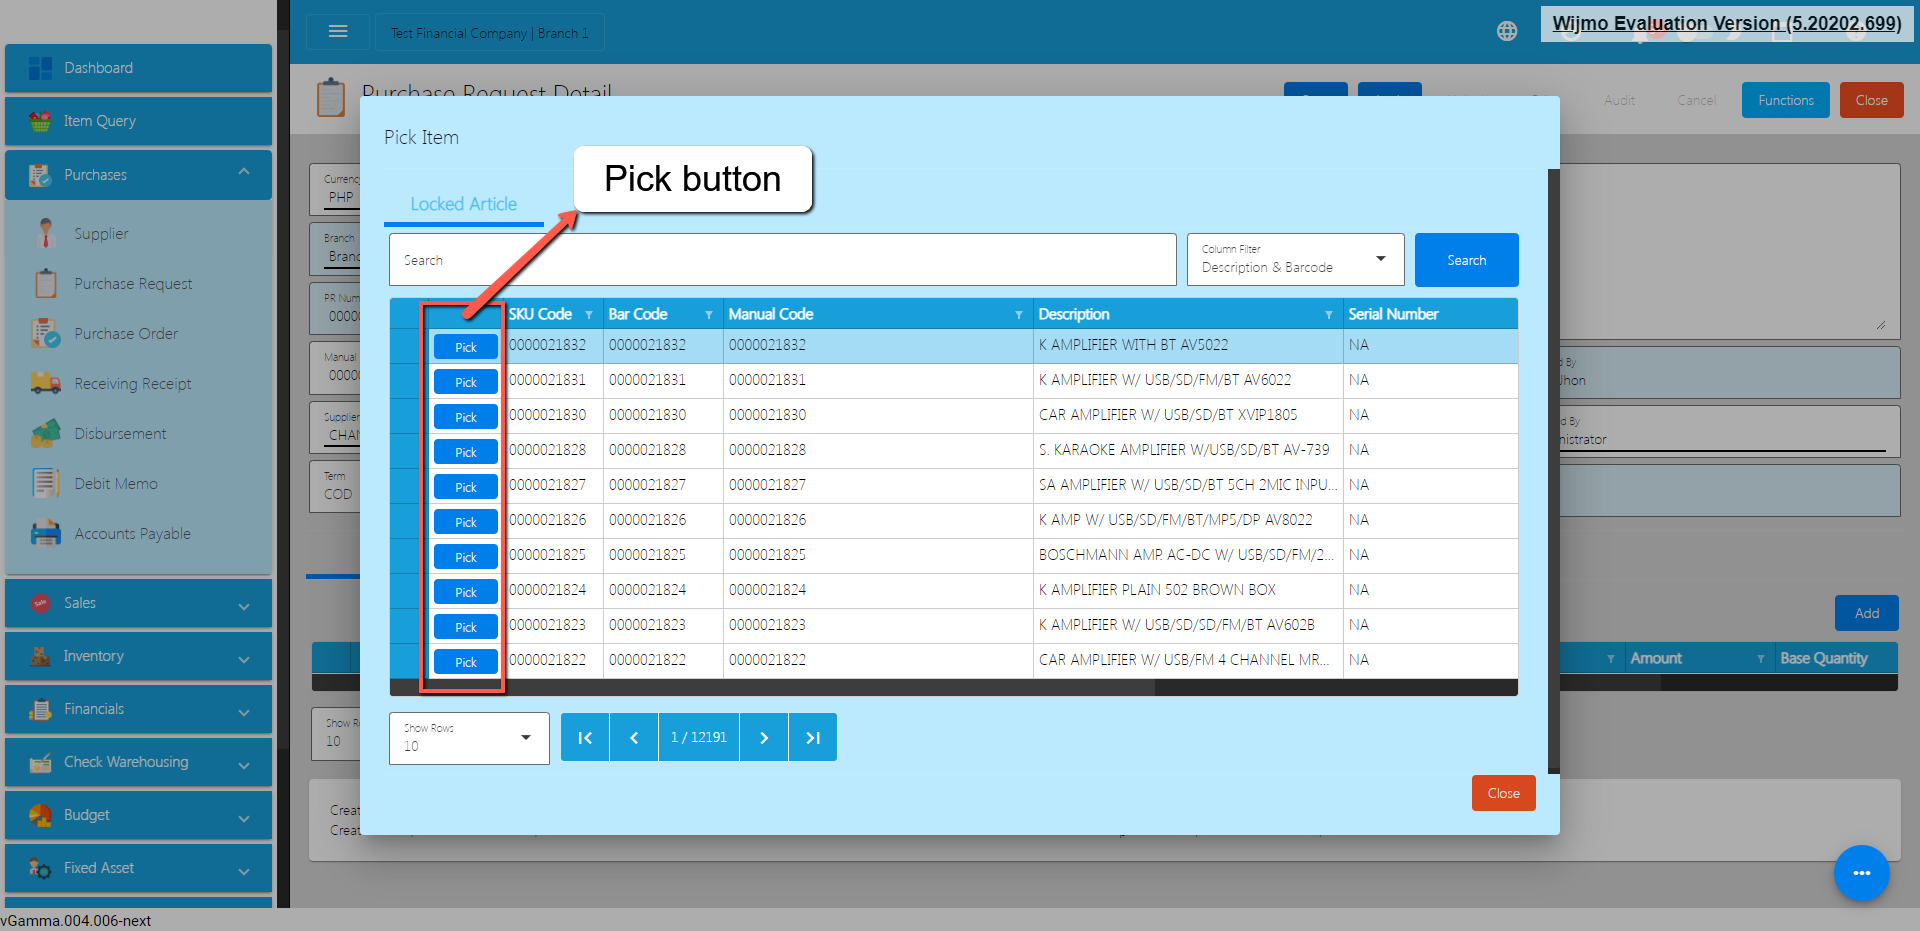
5. Once the Pick button is clicked, fill out the quantity and the cost. For Particulars, put NA if nothing to provide.
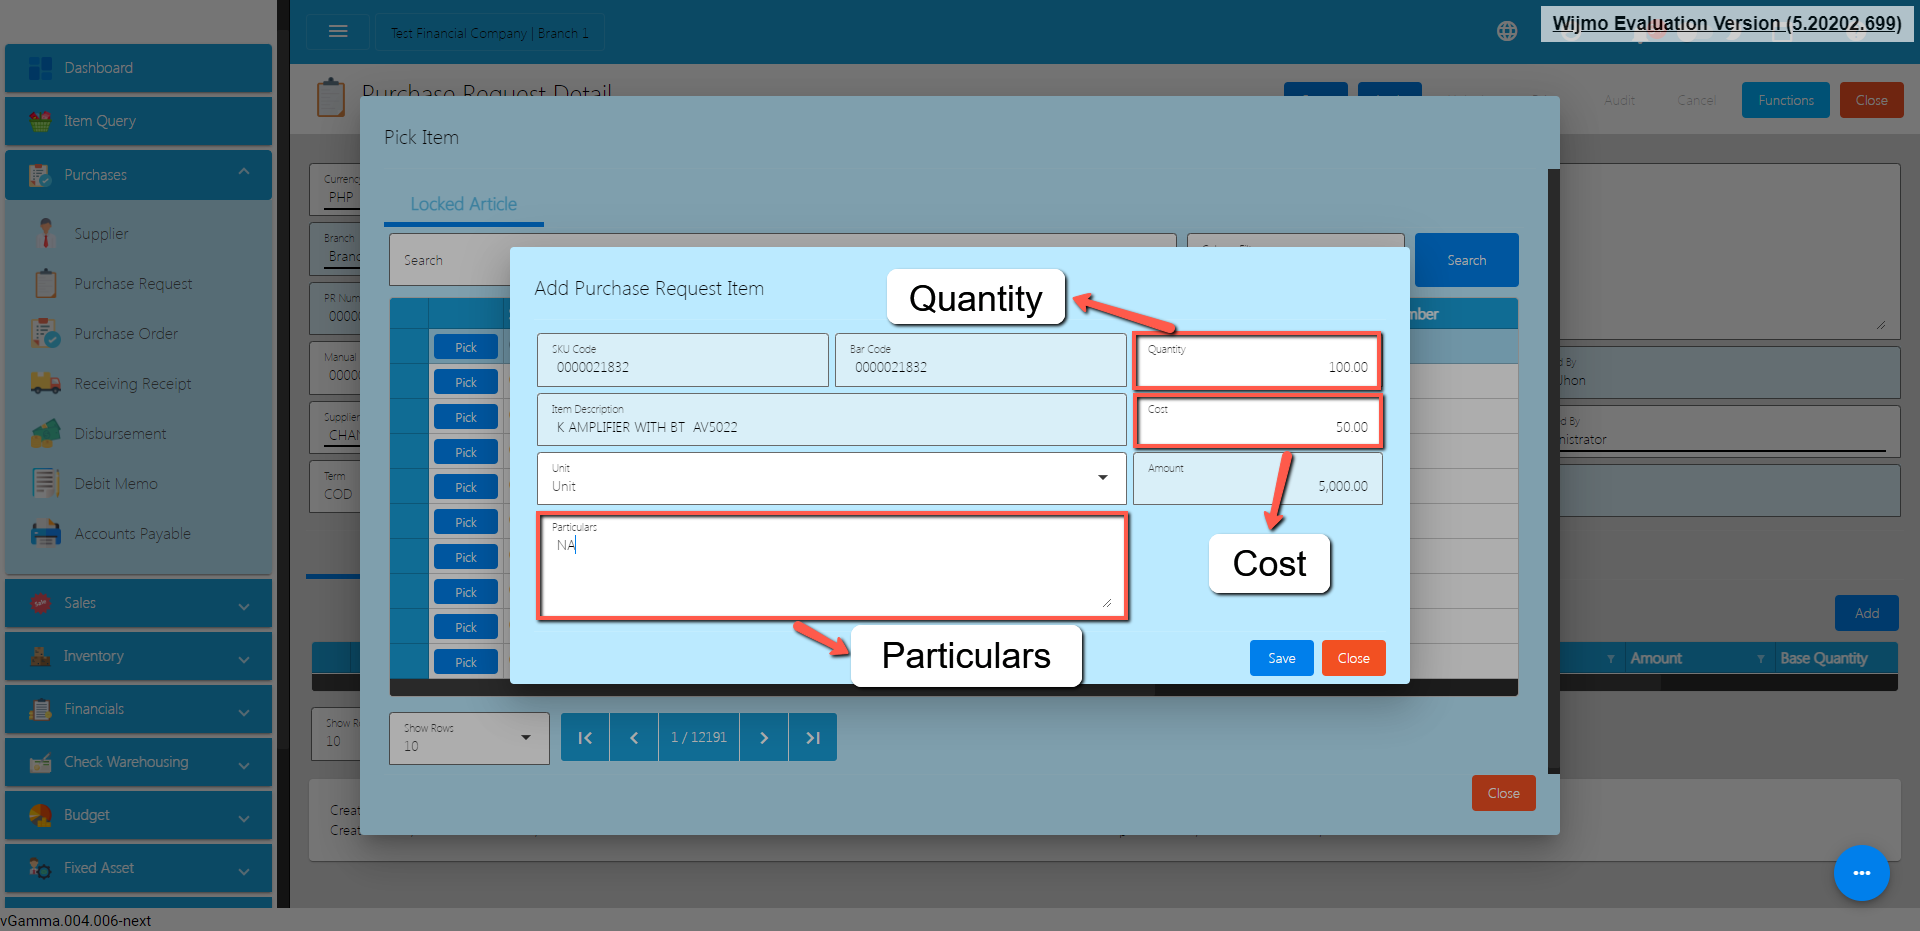
- After providing the Quantity, Cost and Particulars, click the Save button.
- If you wish to add additional items, repeat Steps 4 up to 6.
- If you’re done adding line items, just click the Close button to hide the popup.
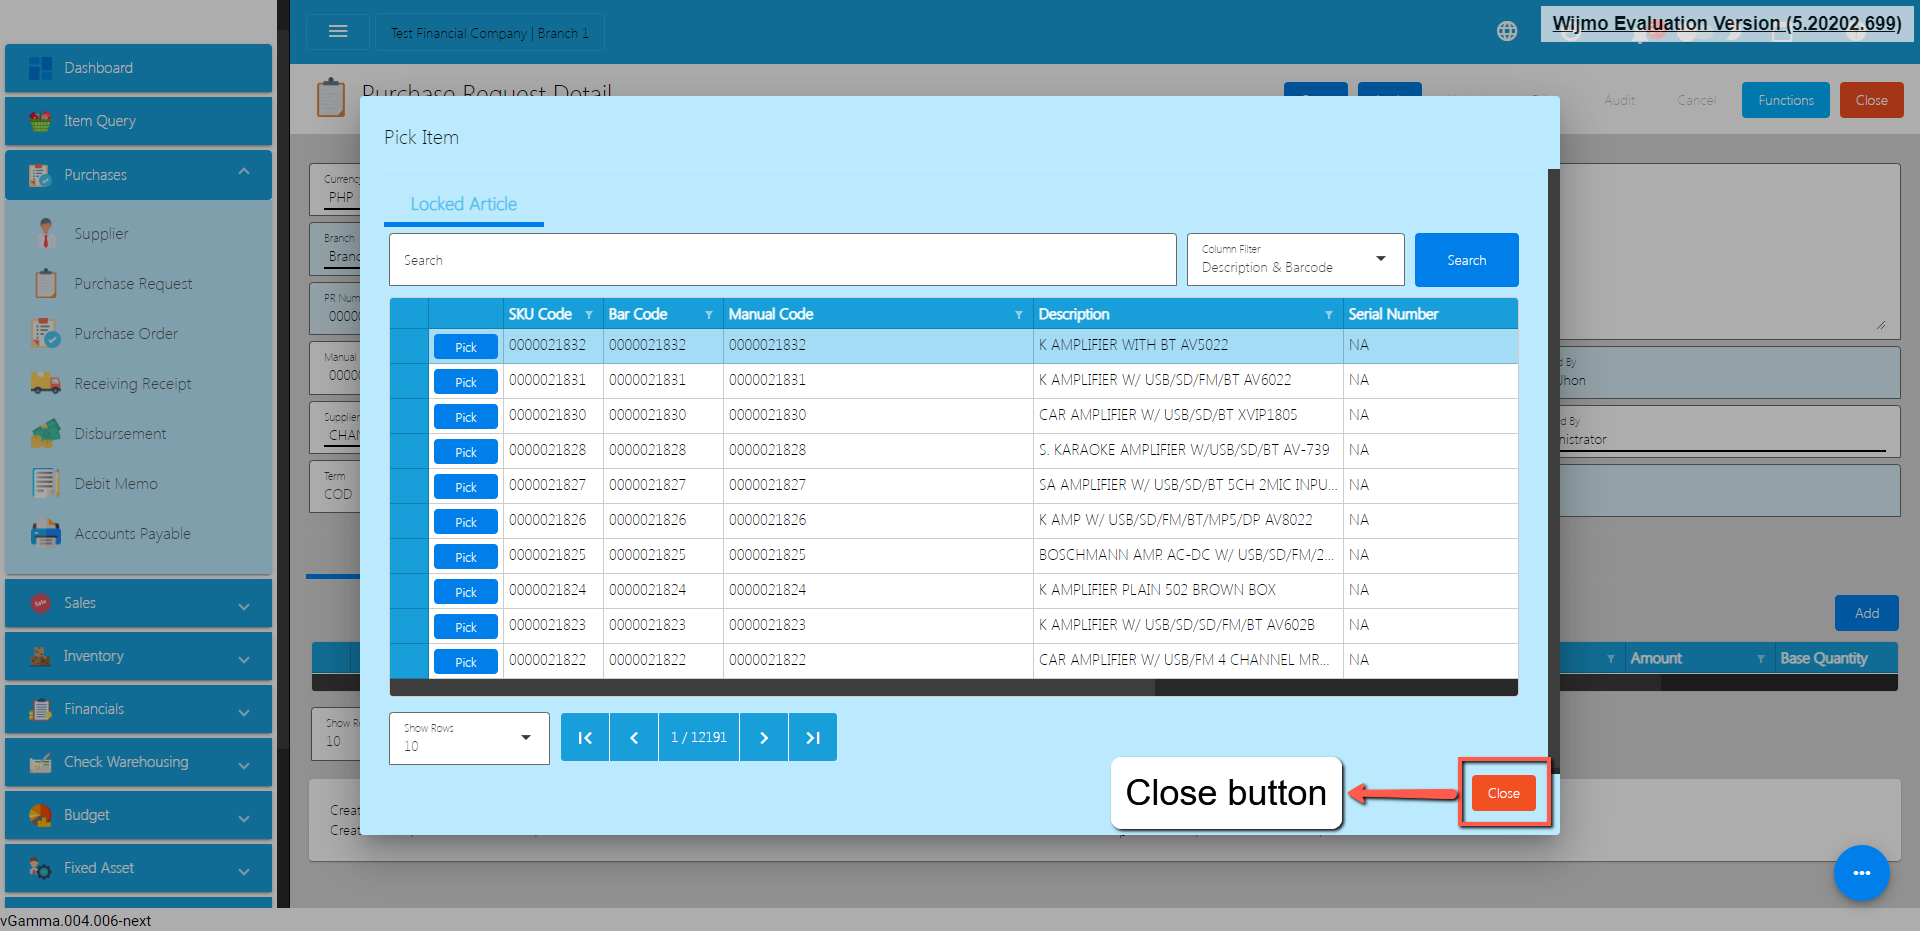
- Review the Purchase Request you created. If it is all good, click the Save button, then Lock button.
Cancel Purchase Request Transaction
When you need to cancel a purchase request, it’s important to follow these simple steps:
- Log In: Visit your easyFS domain and login with your username and password.
- Find your Purchase Request: Navigate to the Purchases, then Purchase Request. You will be redirected to the Purchase Request lists.
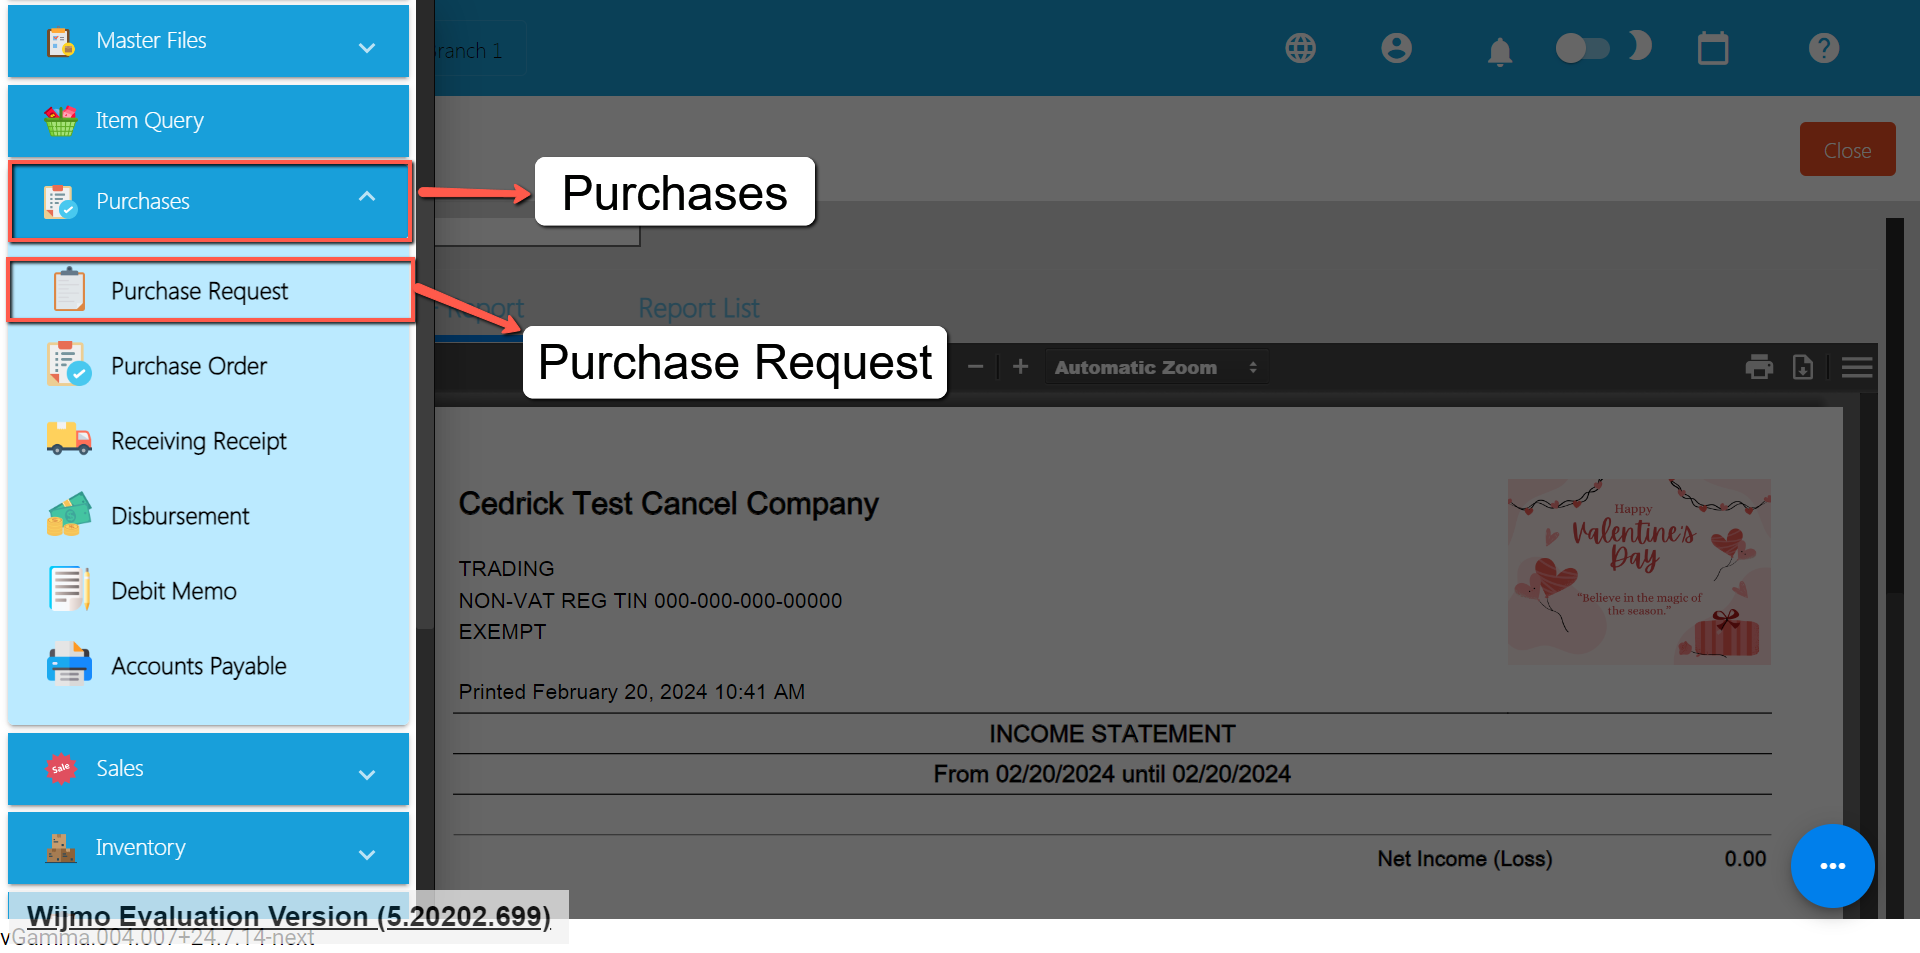
- Locate the Right One: From the Purchase Request list, you may use the search bar to look for the right Purchase Request you want to cancel. You can search using the Purchase Request’s RR Number, Manual Number, Document Reference, etc.
Take note: Don’t forget to change the Start Date and End Date to your Purchase Request’s transaction date to display the correct result.
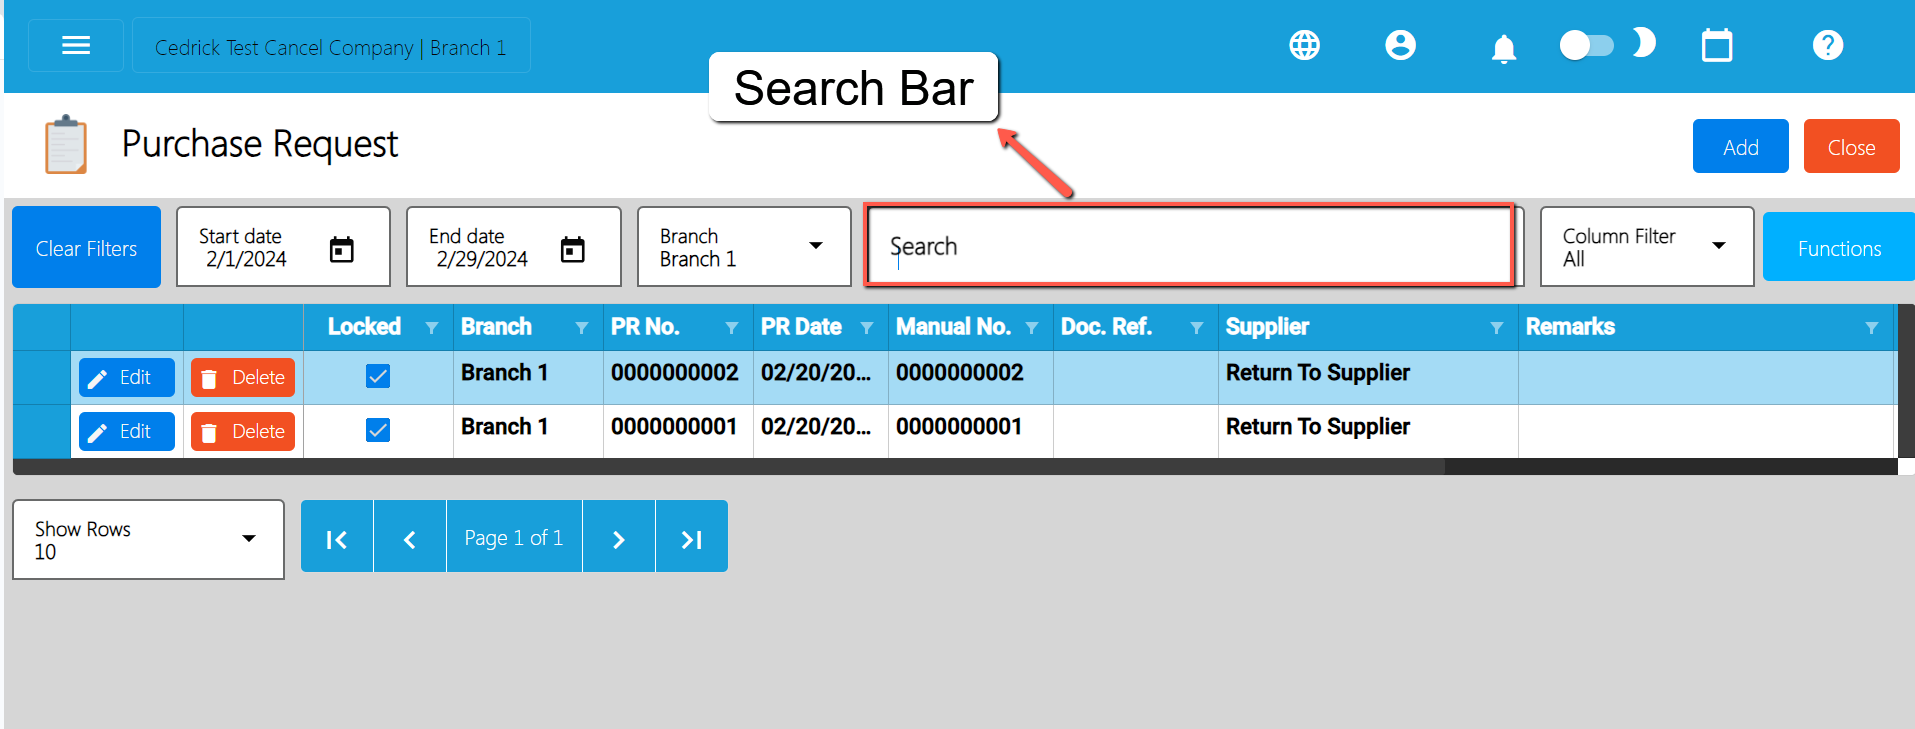
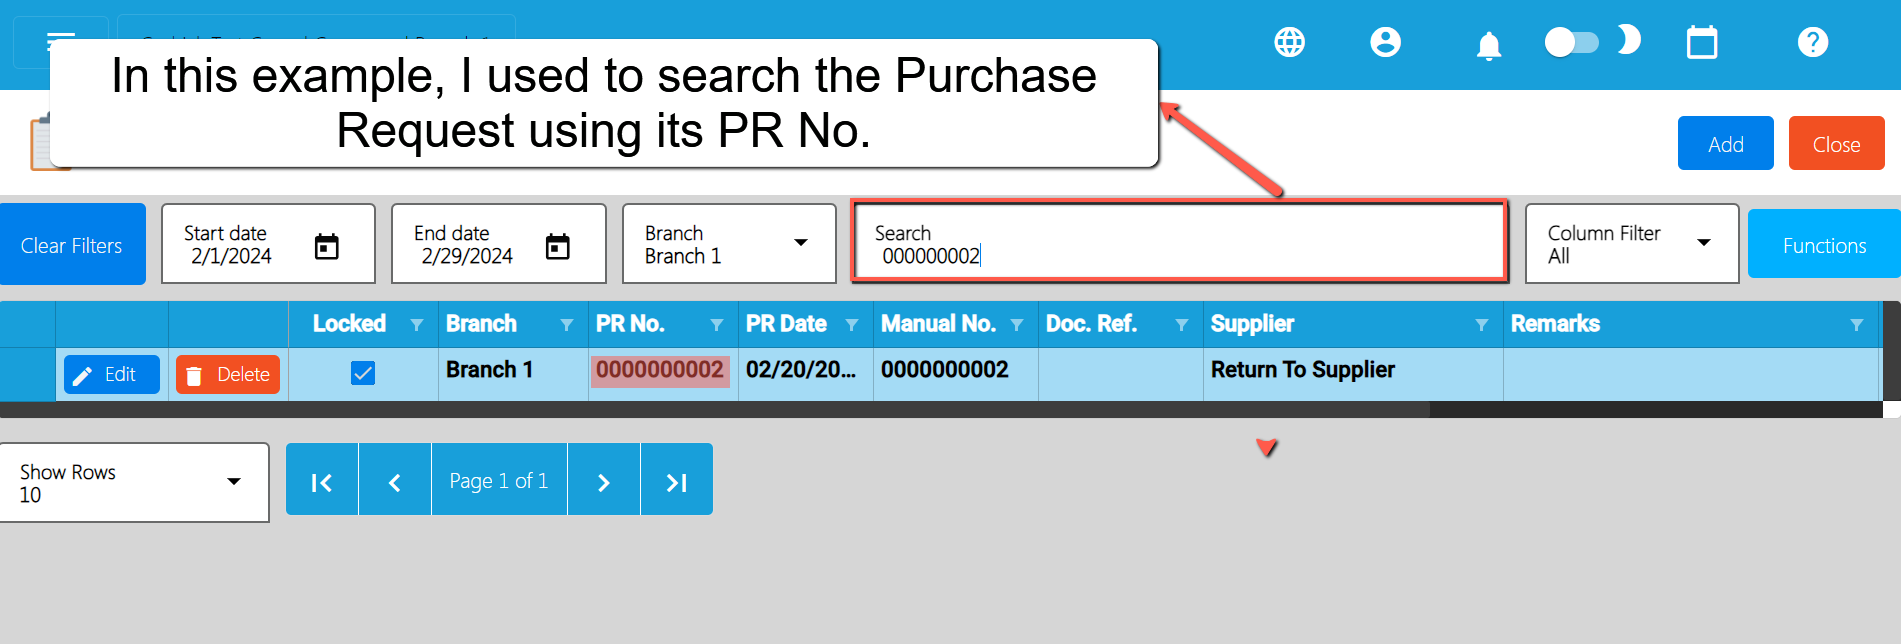
- Open the Purchase Request Detail: Click the Edit button to open the Purchase Request detail page.
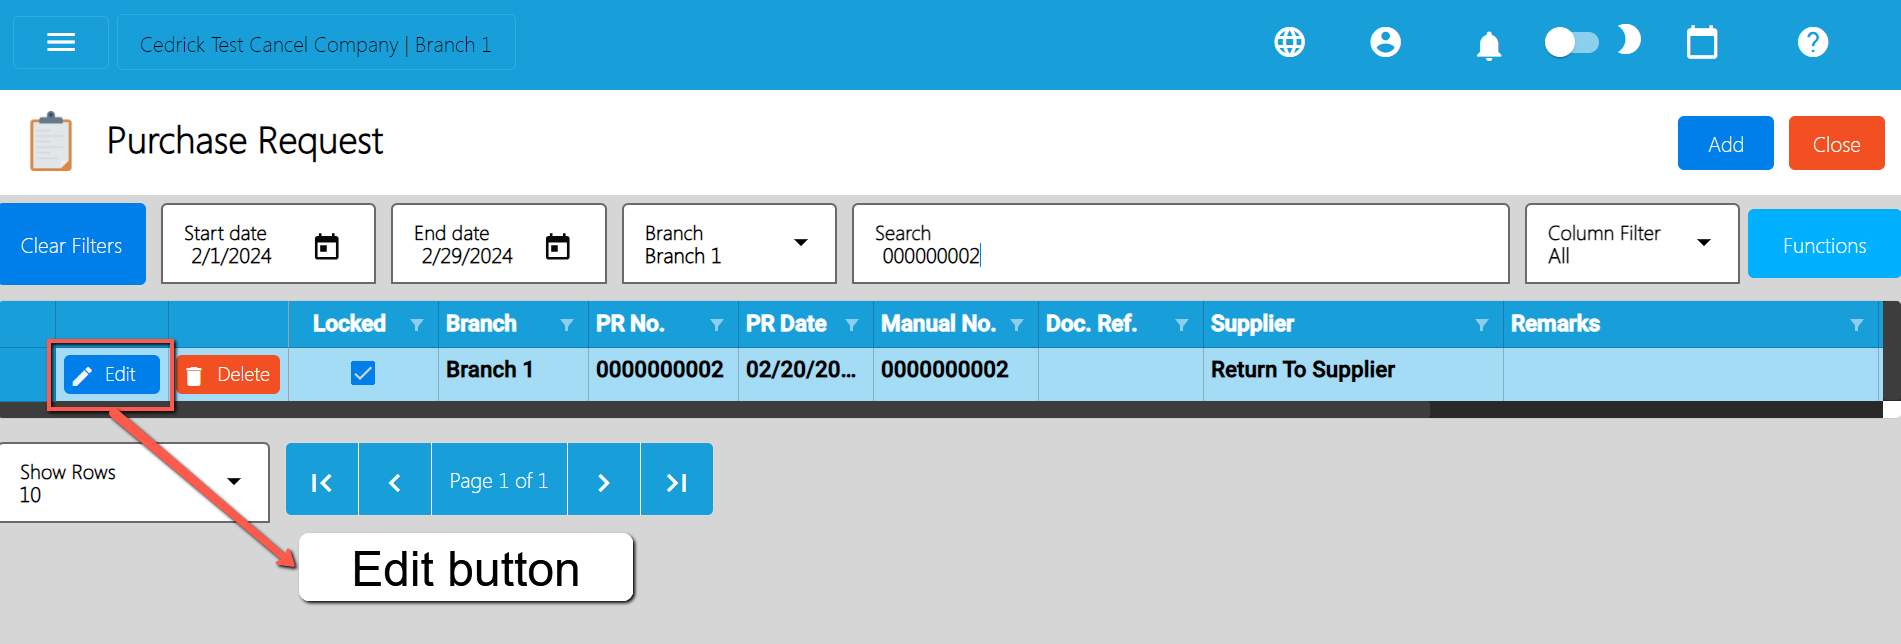
- Cancel the Purchase Request: To cancel your Purchase Request transaction, look for the Cancel found on the upper-right part of the page, then click.
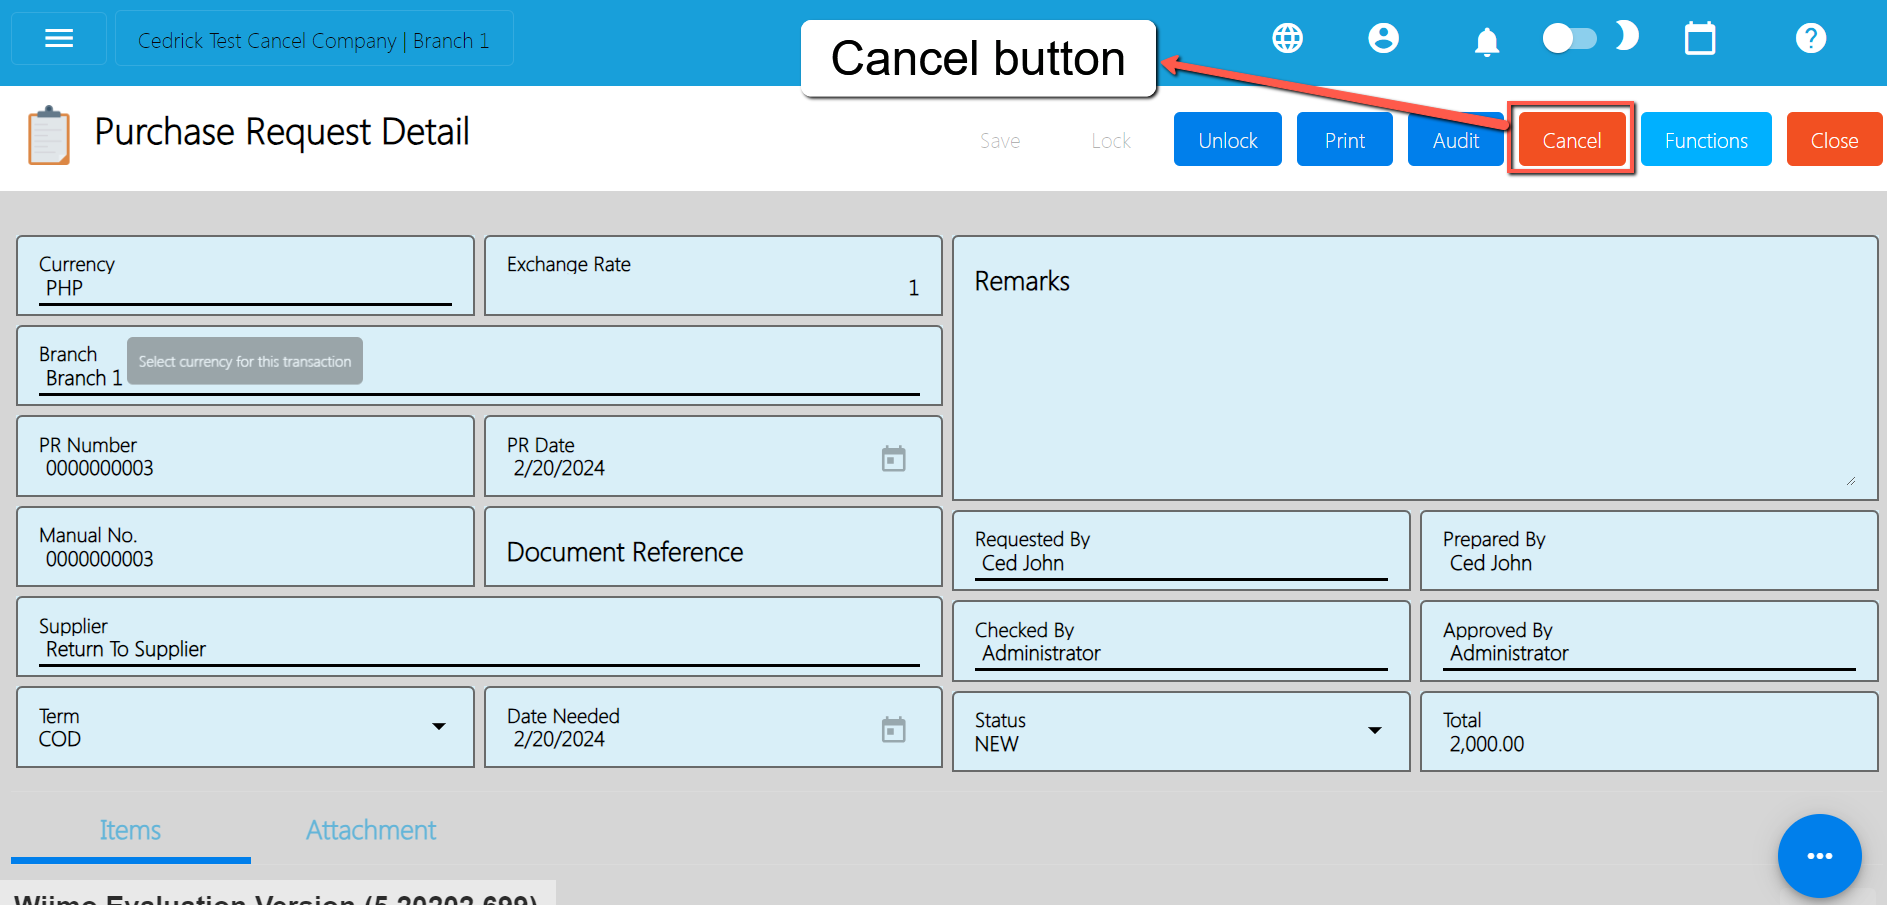
- Confirm Canceling: After you click the Cancel button, there’s a Cancel Purchase Request window. If you’re sure you want to cancel your Purchase Request transaction, click the Cancel button.
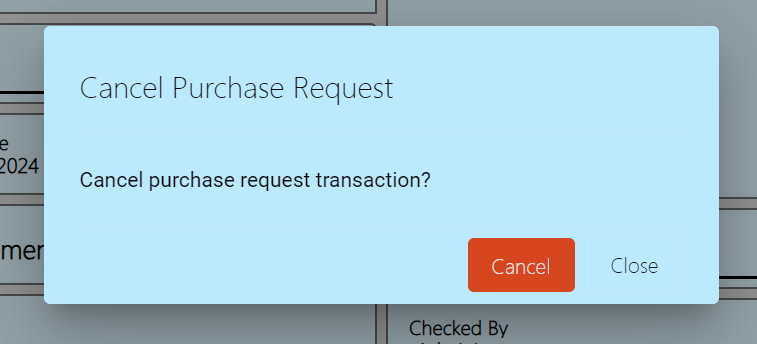
- Check It’s Done: After canceling, make sure you get a success toast message confirming it’s canceled successfully. It is found on the bottom right of the page.
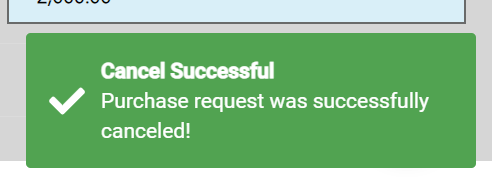
- Let Others Know(if needed): If you believe canceling affects other people, it's a good idea to inform them.
- Keep Track: Remember to make a note somewhere that you canceled the Purchase Request, just in case it is needed later.
5.2.2 Purchase Order
Overview
This is to finalize the purchases for the company.
Purchase Order List
- List of all the PO (Purchase Order) and will also show the overview of the transaction.
- Here, you can also filter the Start and End Date of the transaction and the button to add a new PO.
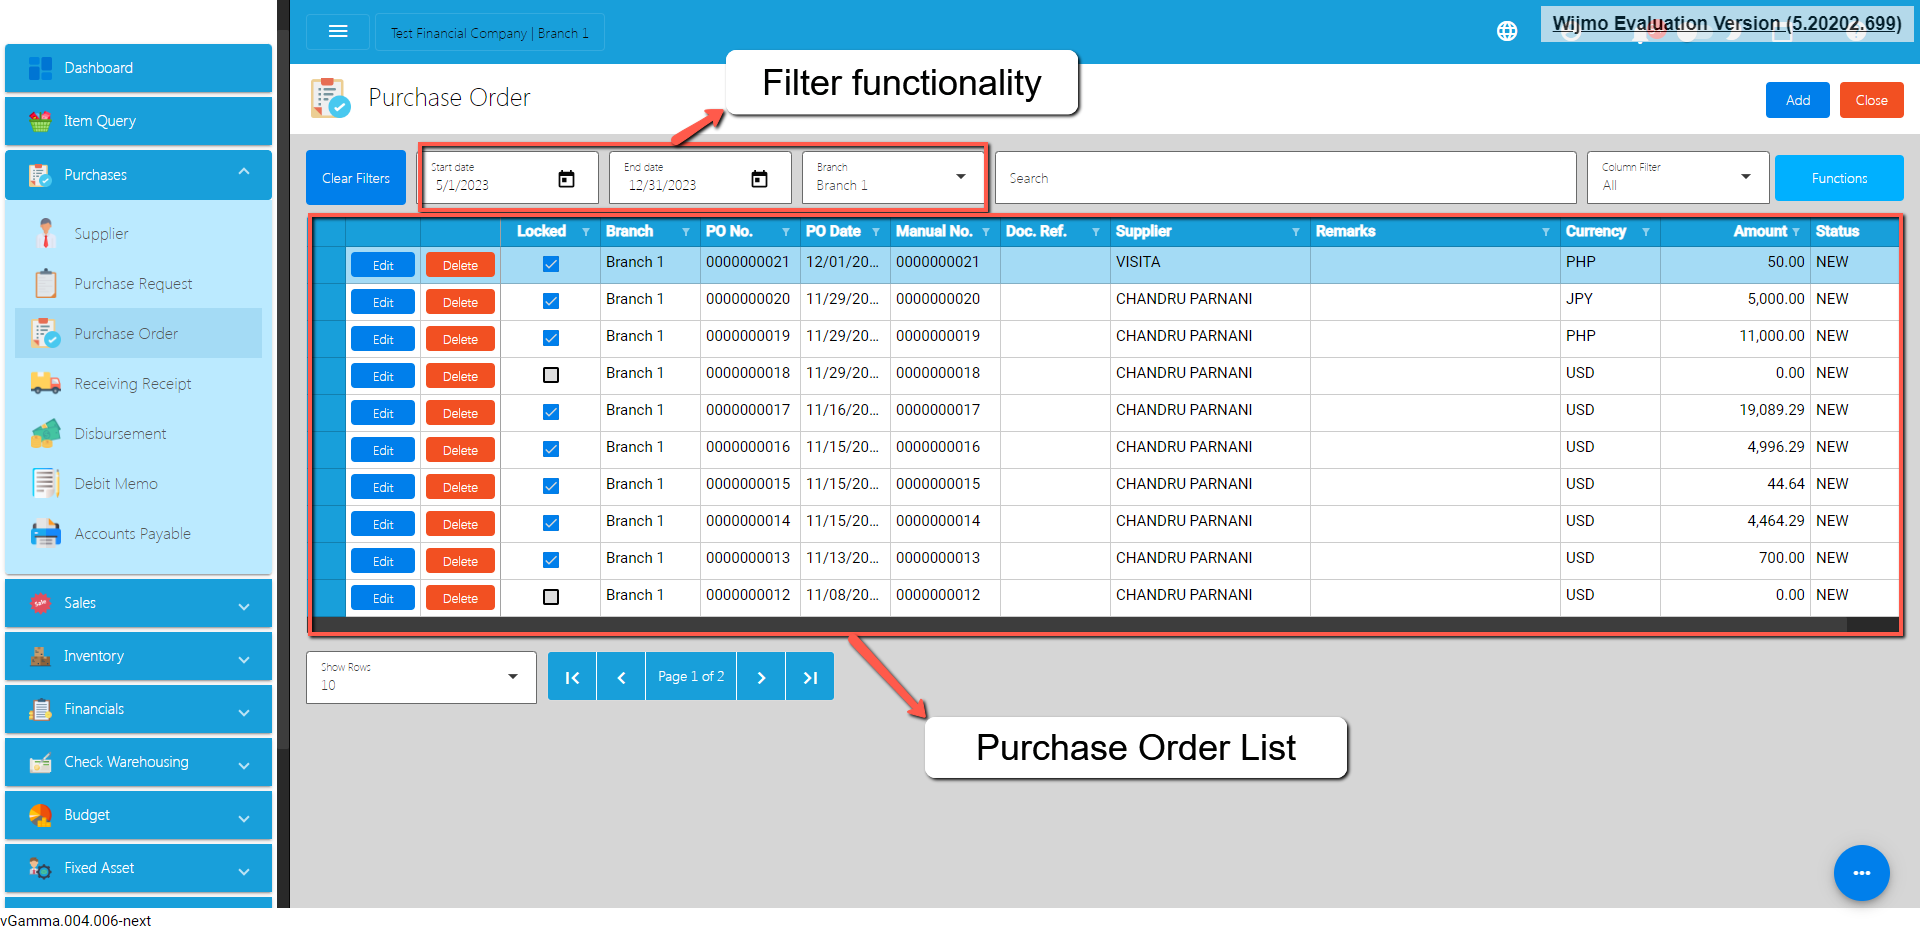
Purchase Order Detail
- To add a new Purchase Order, go to Purchases then click Purchase Request. After that, click the Add that can be seen in the Purchase Order list.
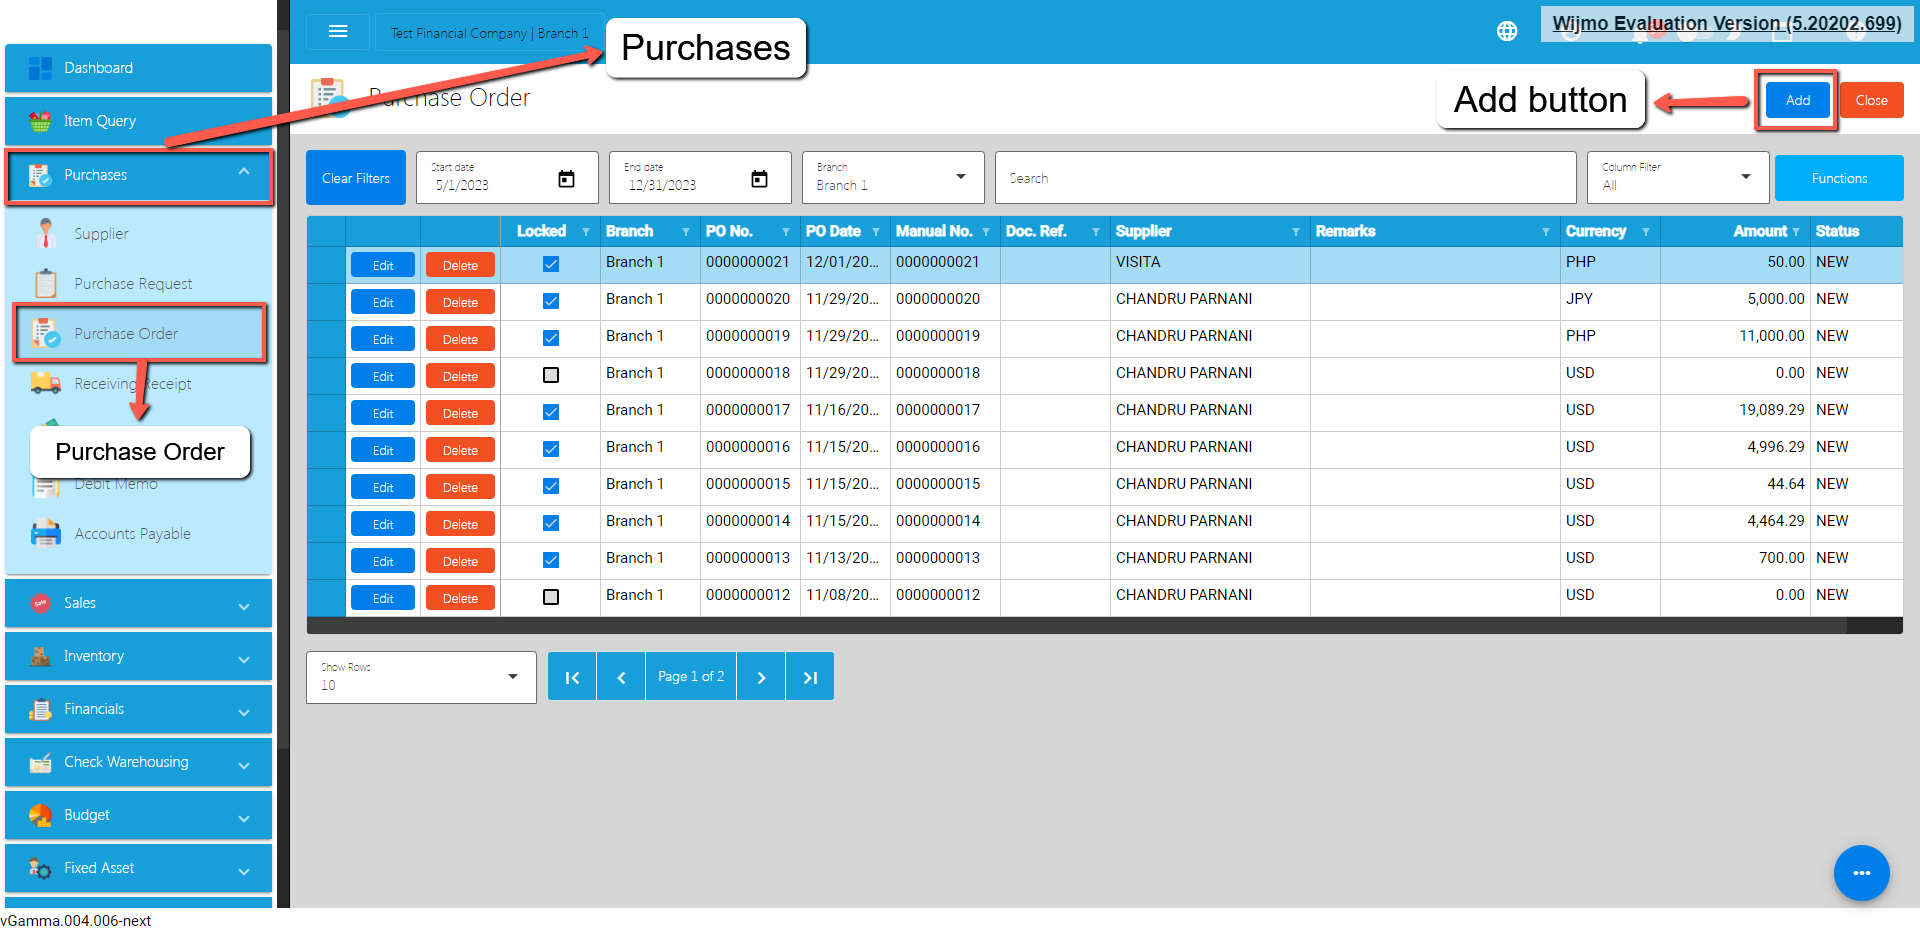
- Fill out all the needed information for the Purchase Order Detail like,
- Currency
- Supplier Name
- PO Date
- Term
- Document Reference
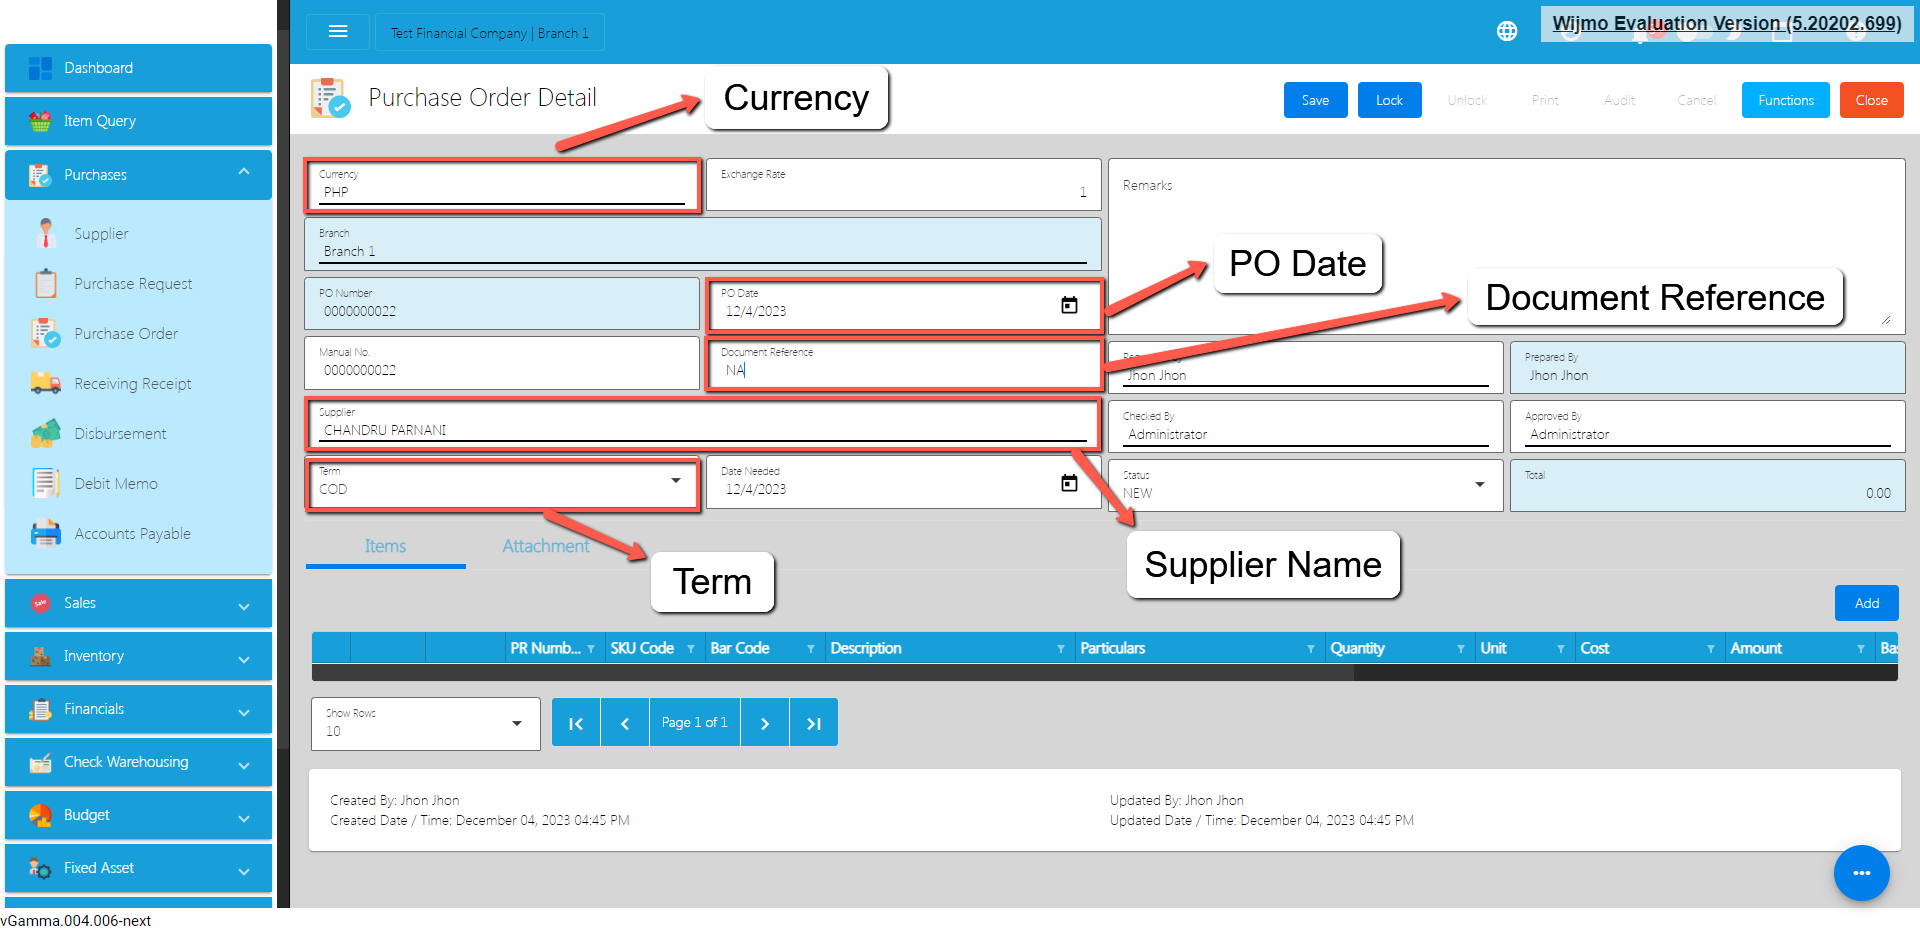
- To add line Item(s), click the Add button on the right part of the page under the Items tab.
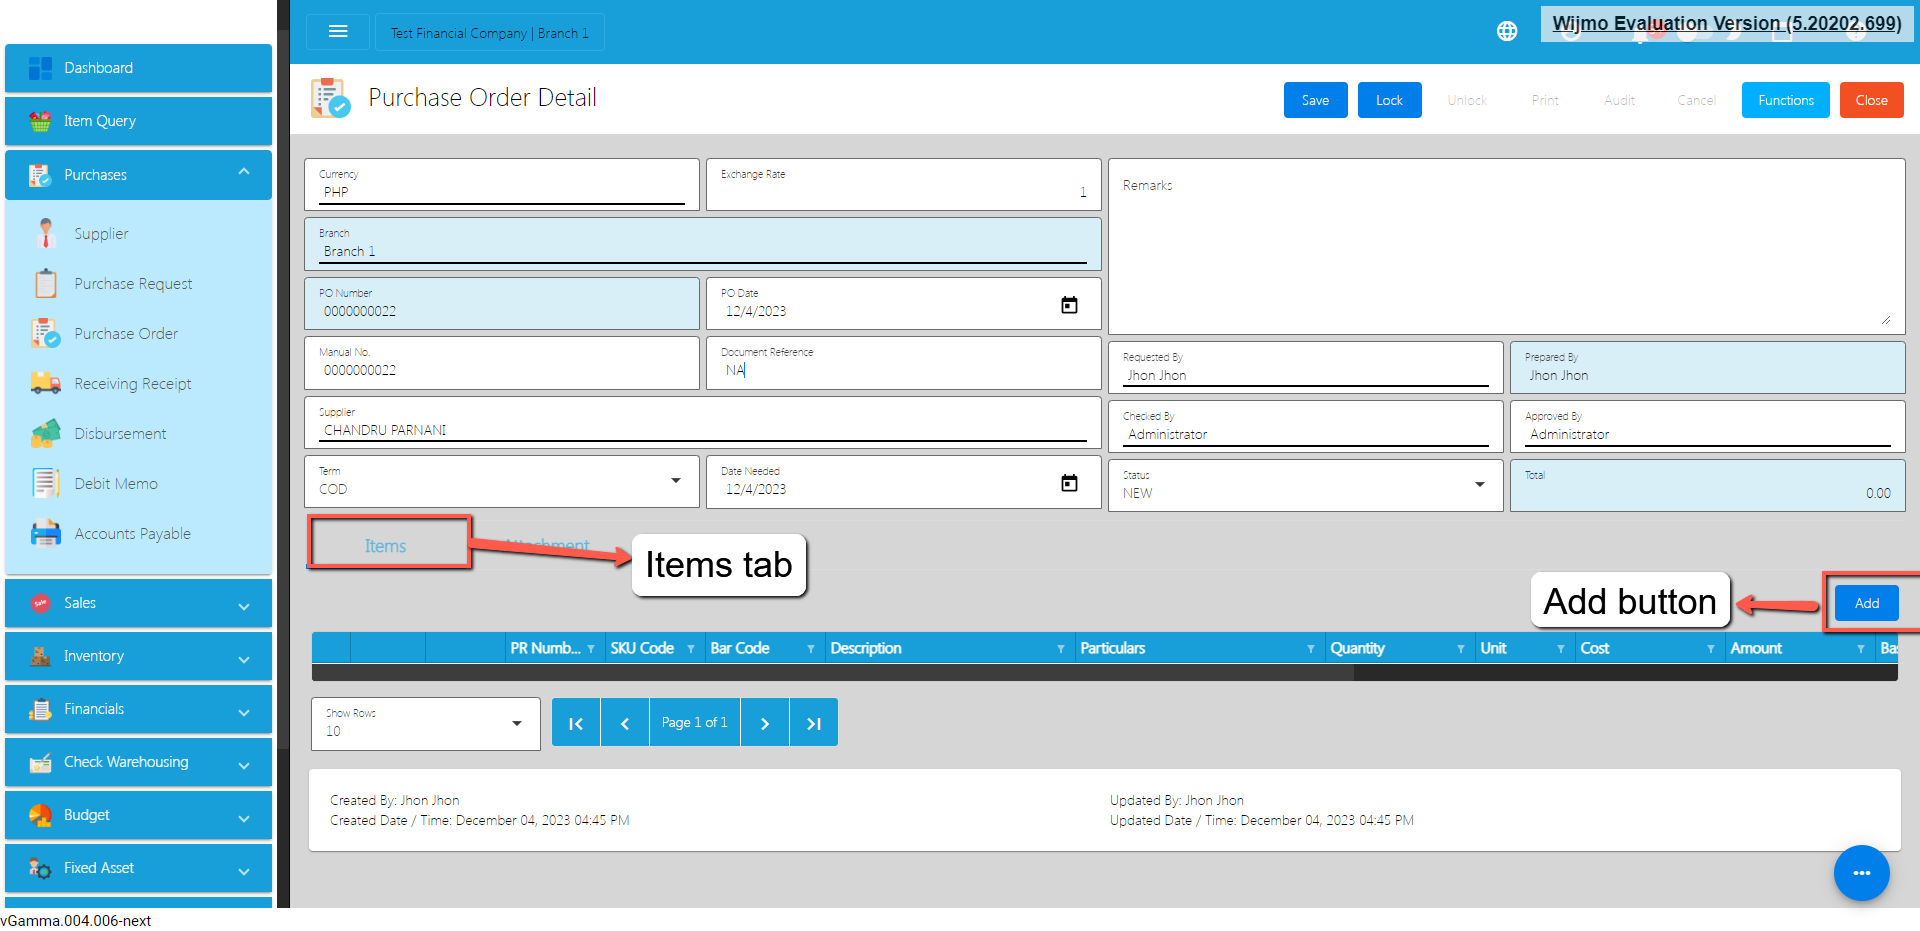
- Choose either Locked Article (Items) or Purchase Request tab.
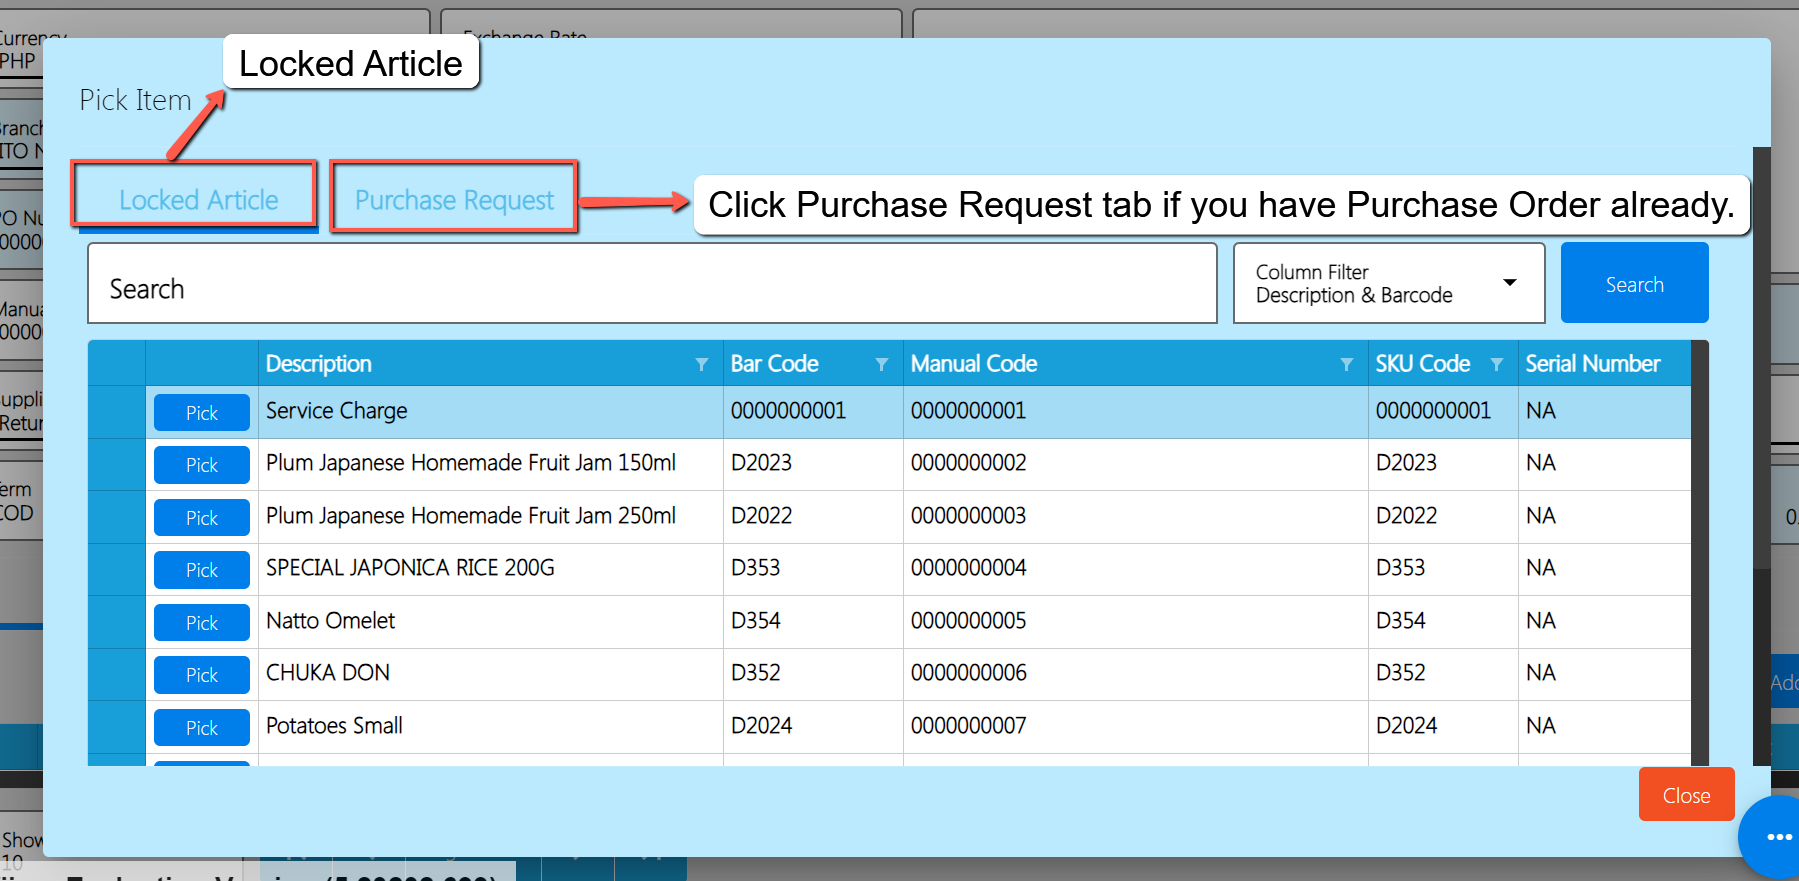
- If you already have a Purchase Request, you can select that PR by clicking on the PR Number. Once clicked it will pop up all the PR that was not yet created as PO.
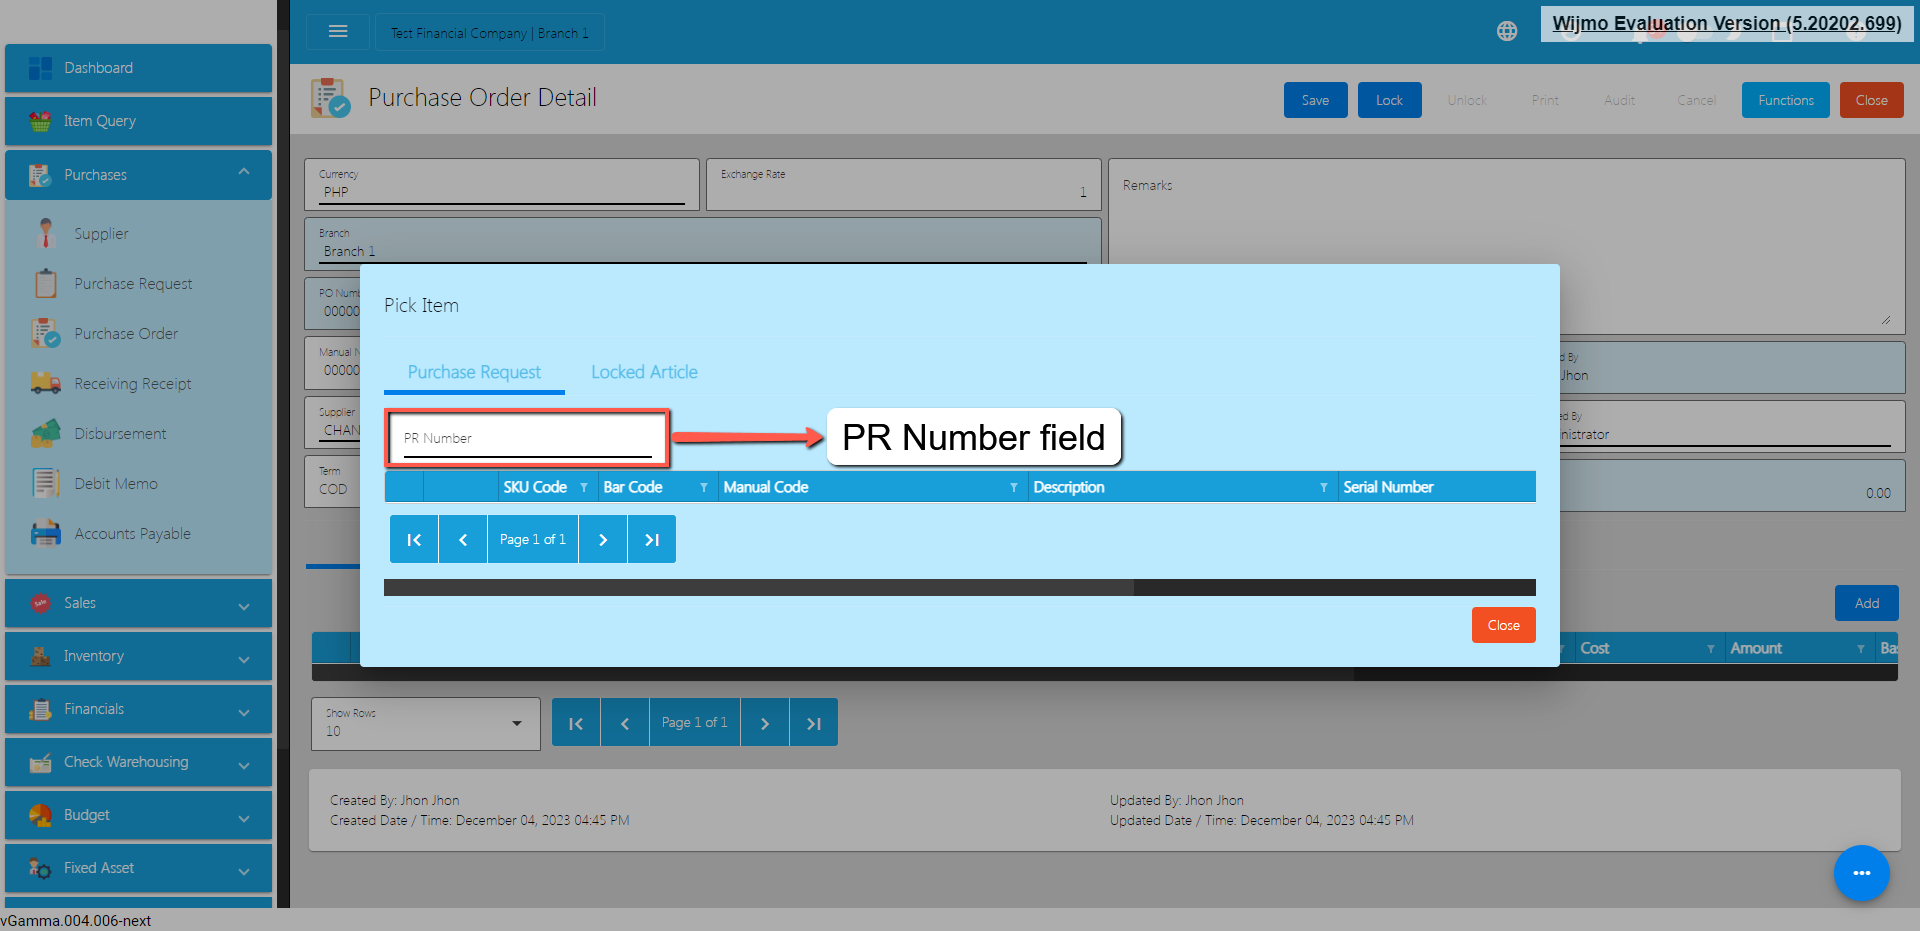
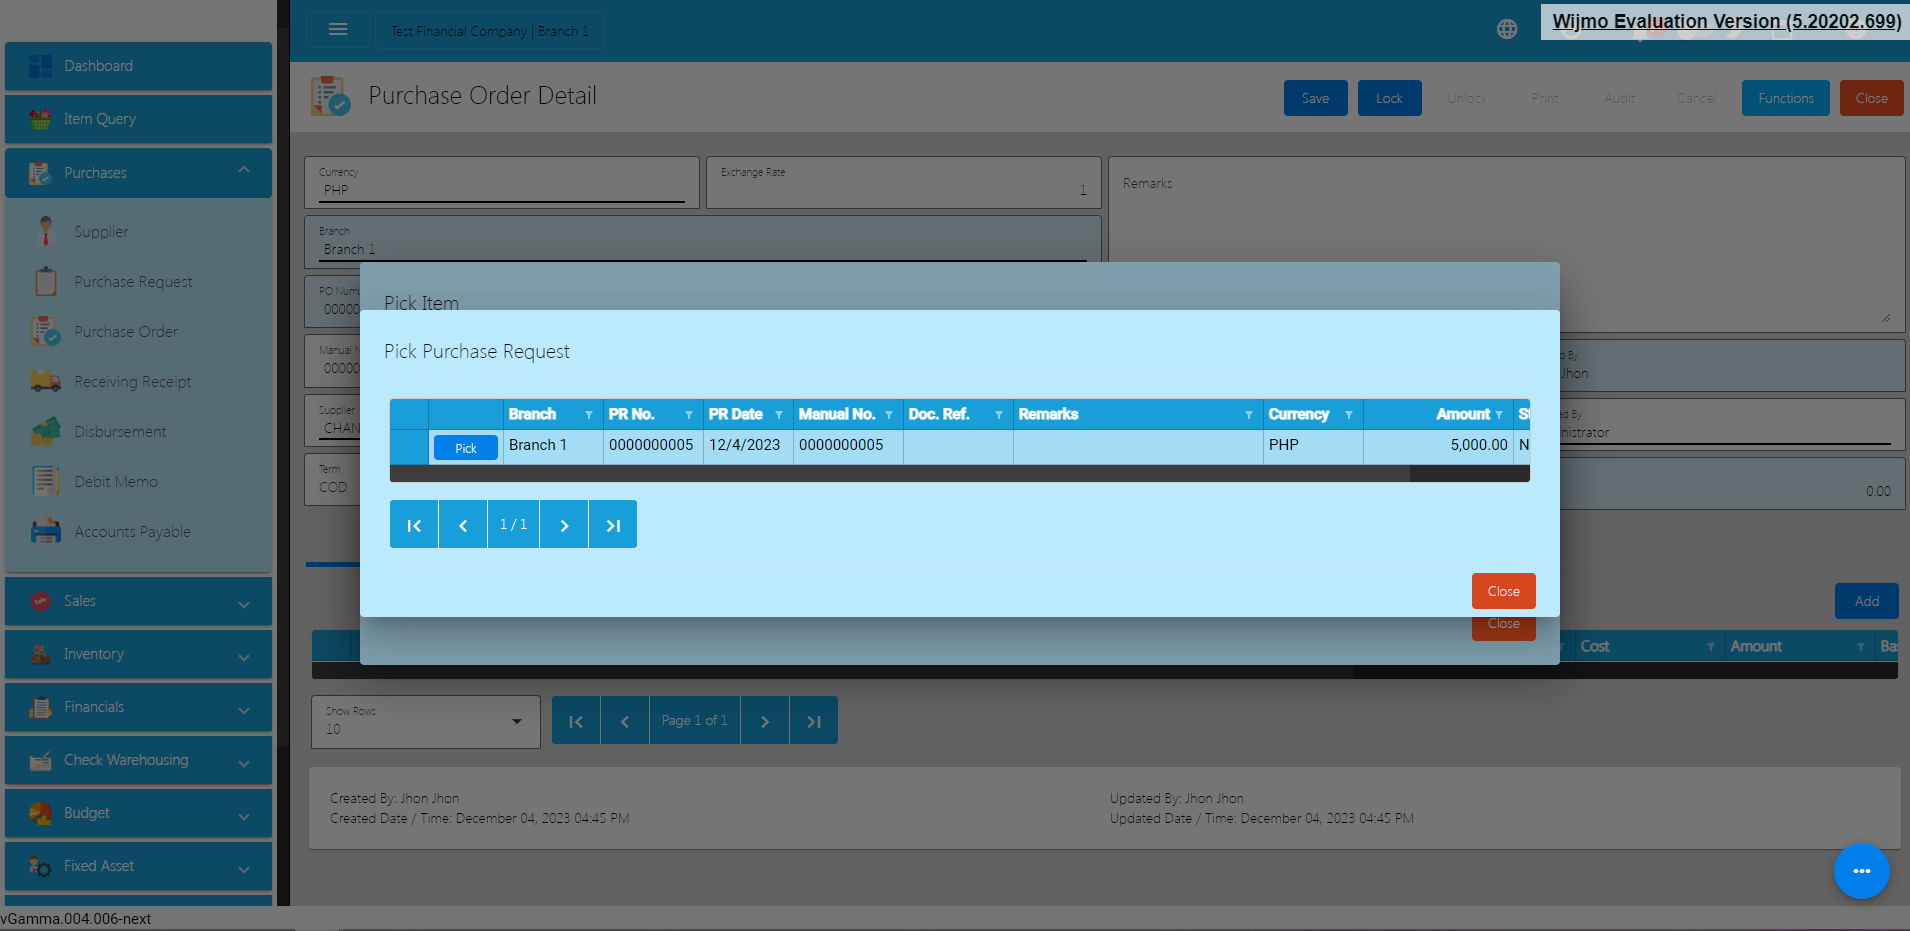
- Then to add that Purchase to the Purchase Request, click the Pick button beside the Branch column.
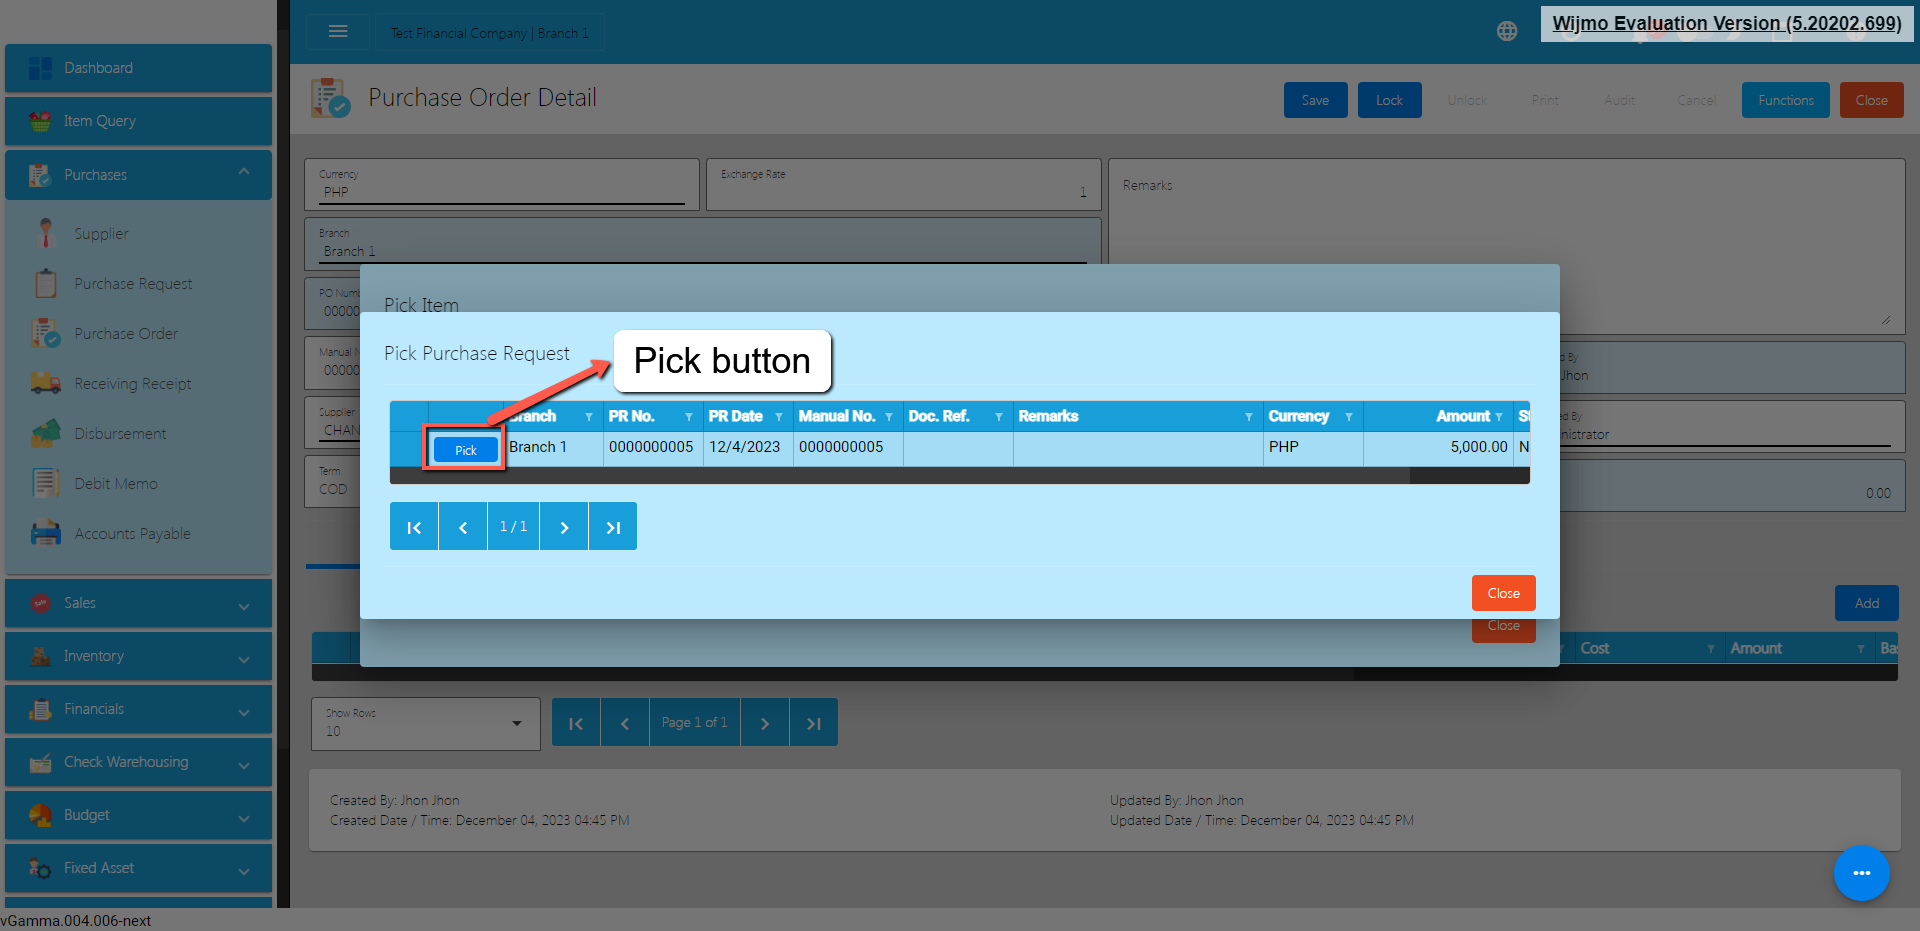
- After clicking the Pick button, it will automatically display the list of items based on your chosen Purchase Order.
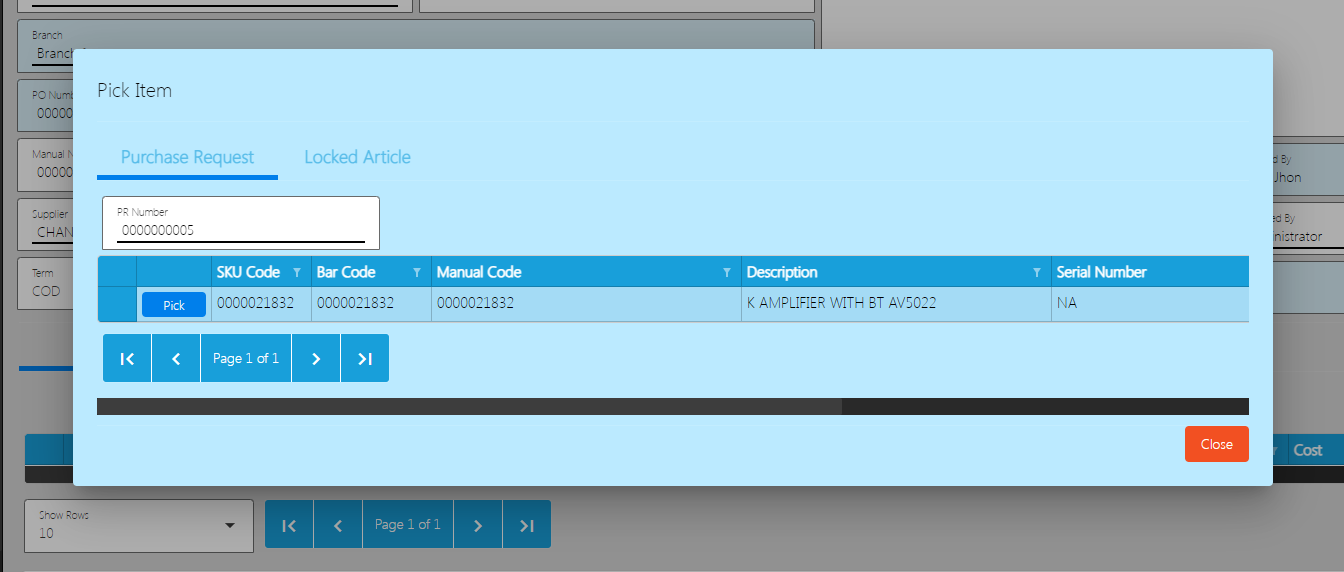
- Select the items, by clicking the Pick button.
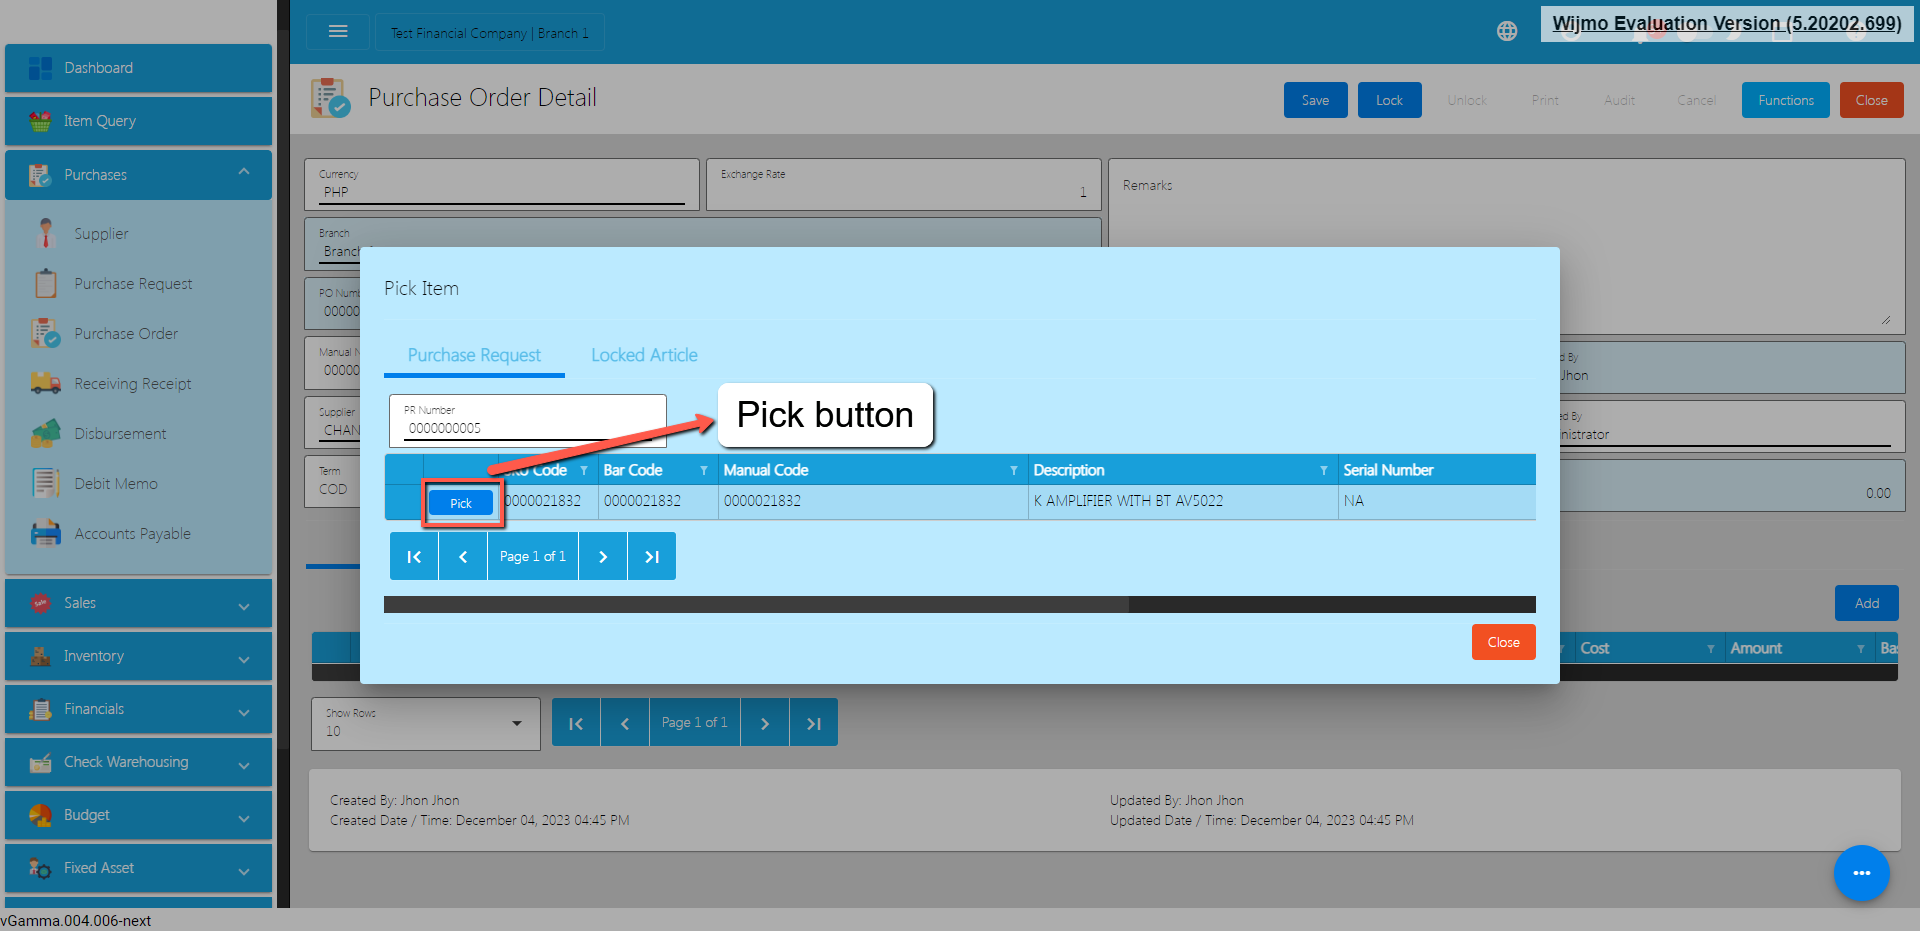
- Once the Pick button is clicked, fill out the quantity and the cost. For Particulars, put NA if nothing to provide.
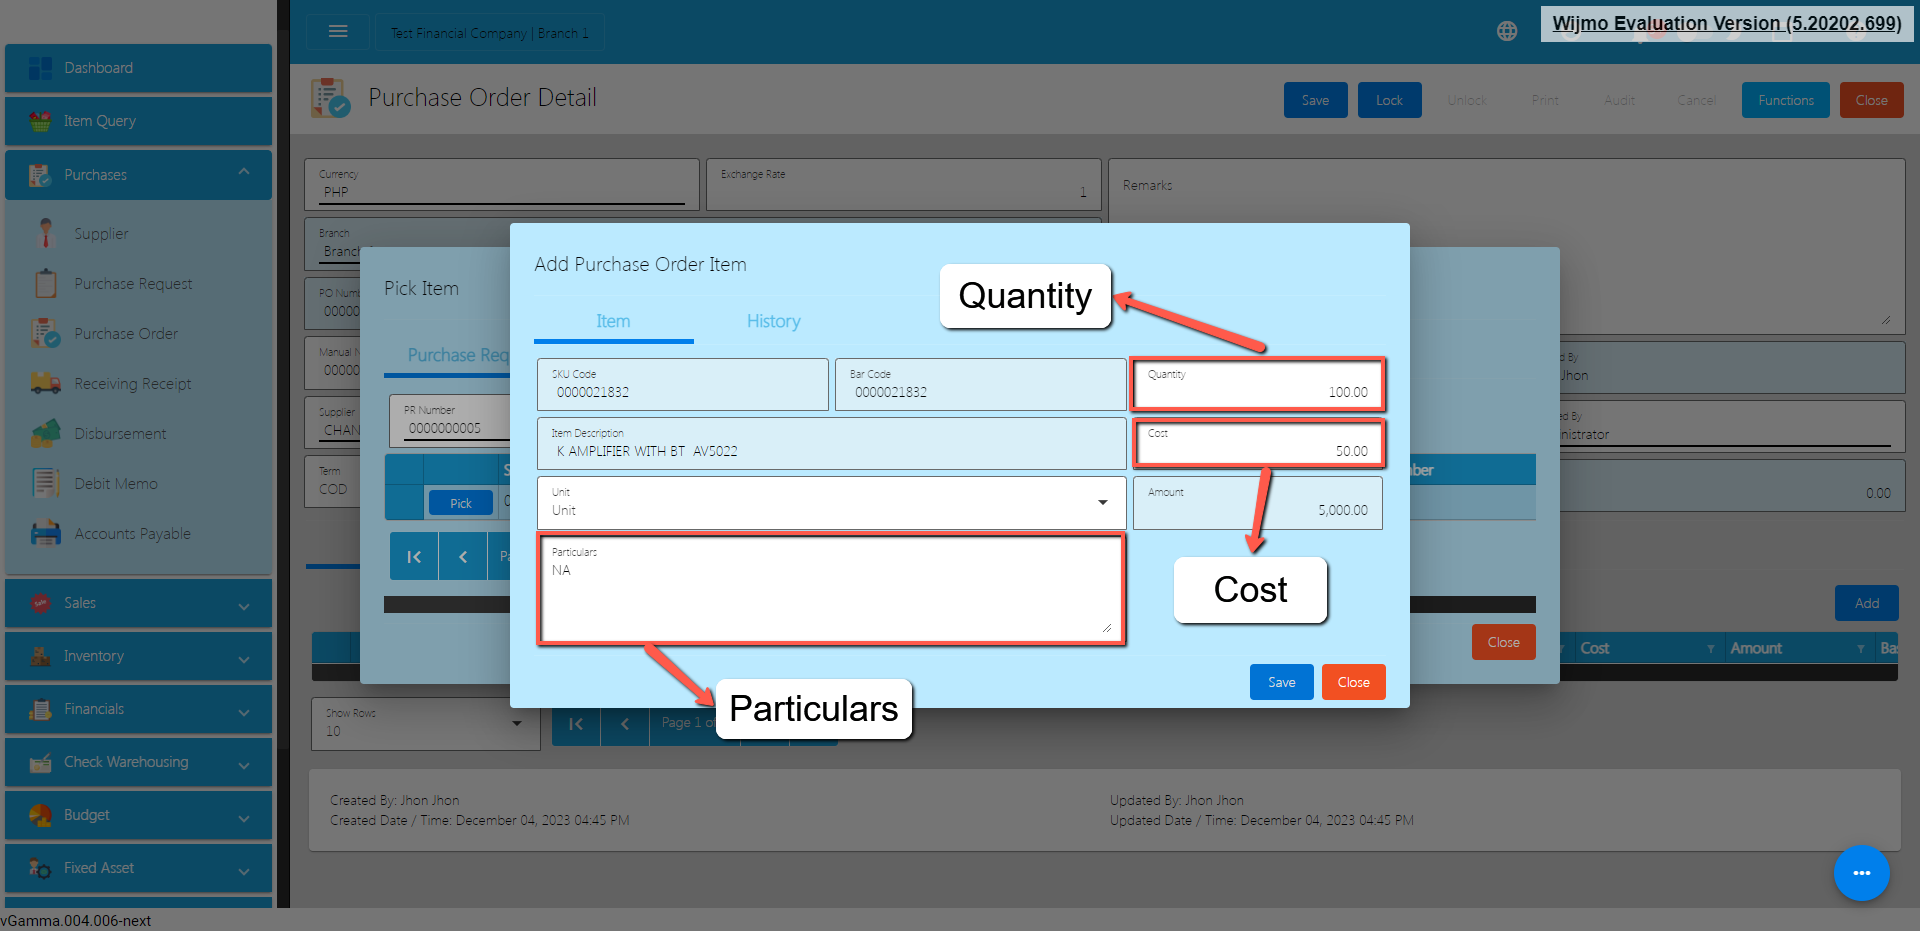
- After providing the Quantity, Cost and Particulars, click the Save button.
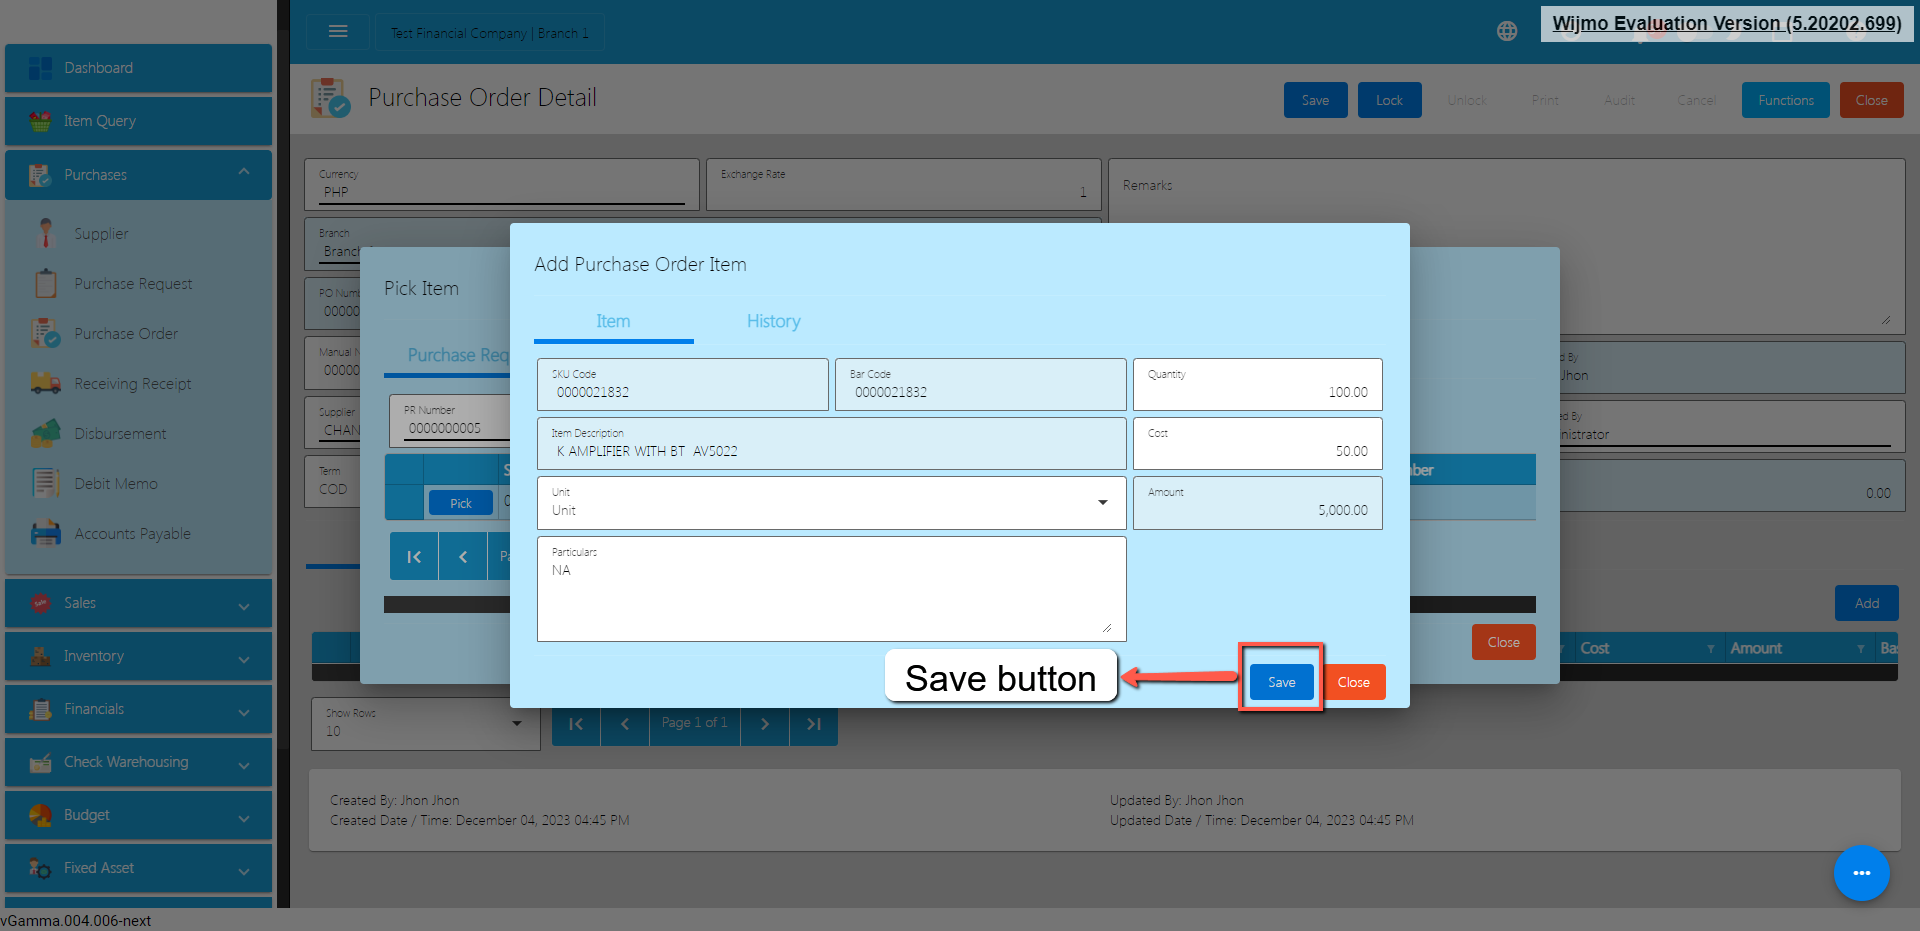
- If you wish to add additional items, repeat Steps 8 to 10.
- There’s no need to worry if you don’t have a Purchase Order since you can automatically select the items. Just go directly from steps 8 to 10 after clicking the Locked Article tab that is mentioned on Step 4.
- If you’re done adding line items, just click the Close button to hide the popup.
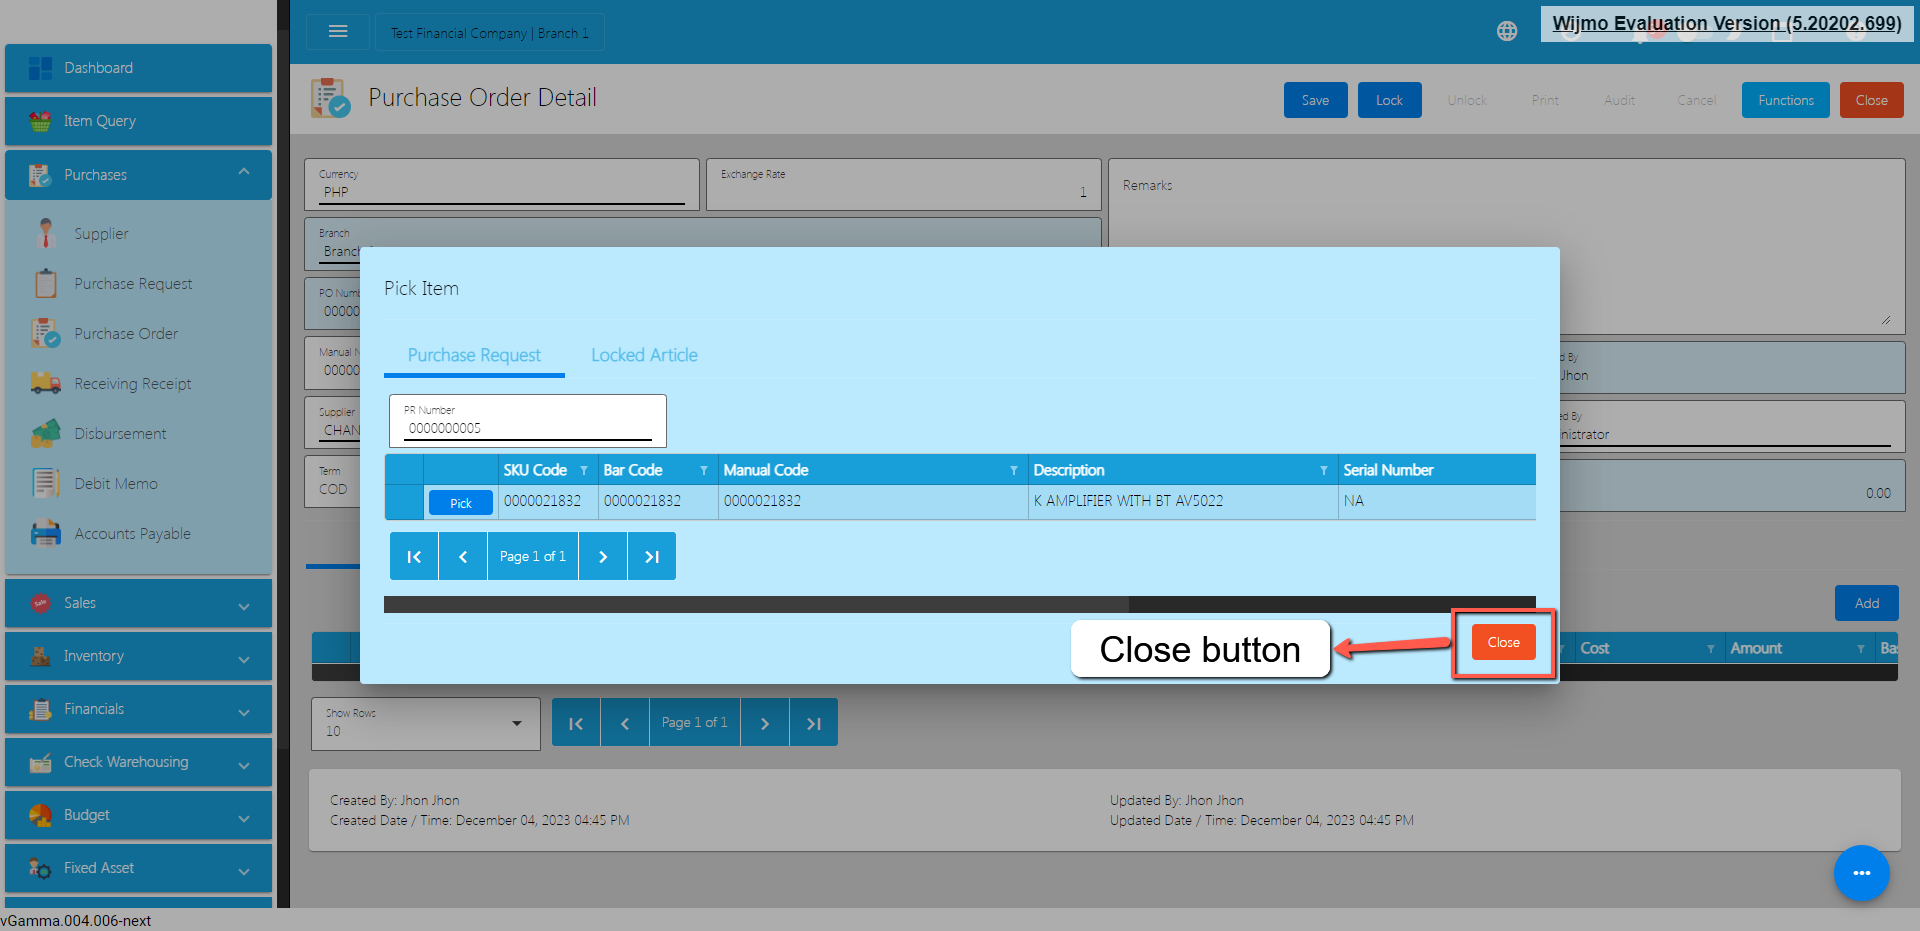
- Review the Purchase Order you created. If it is all good, click the Save button, then Lock button.
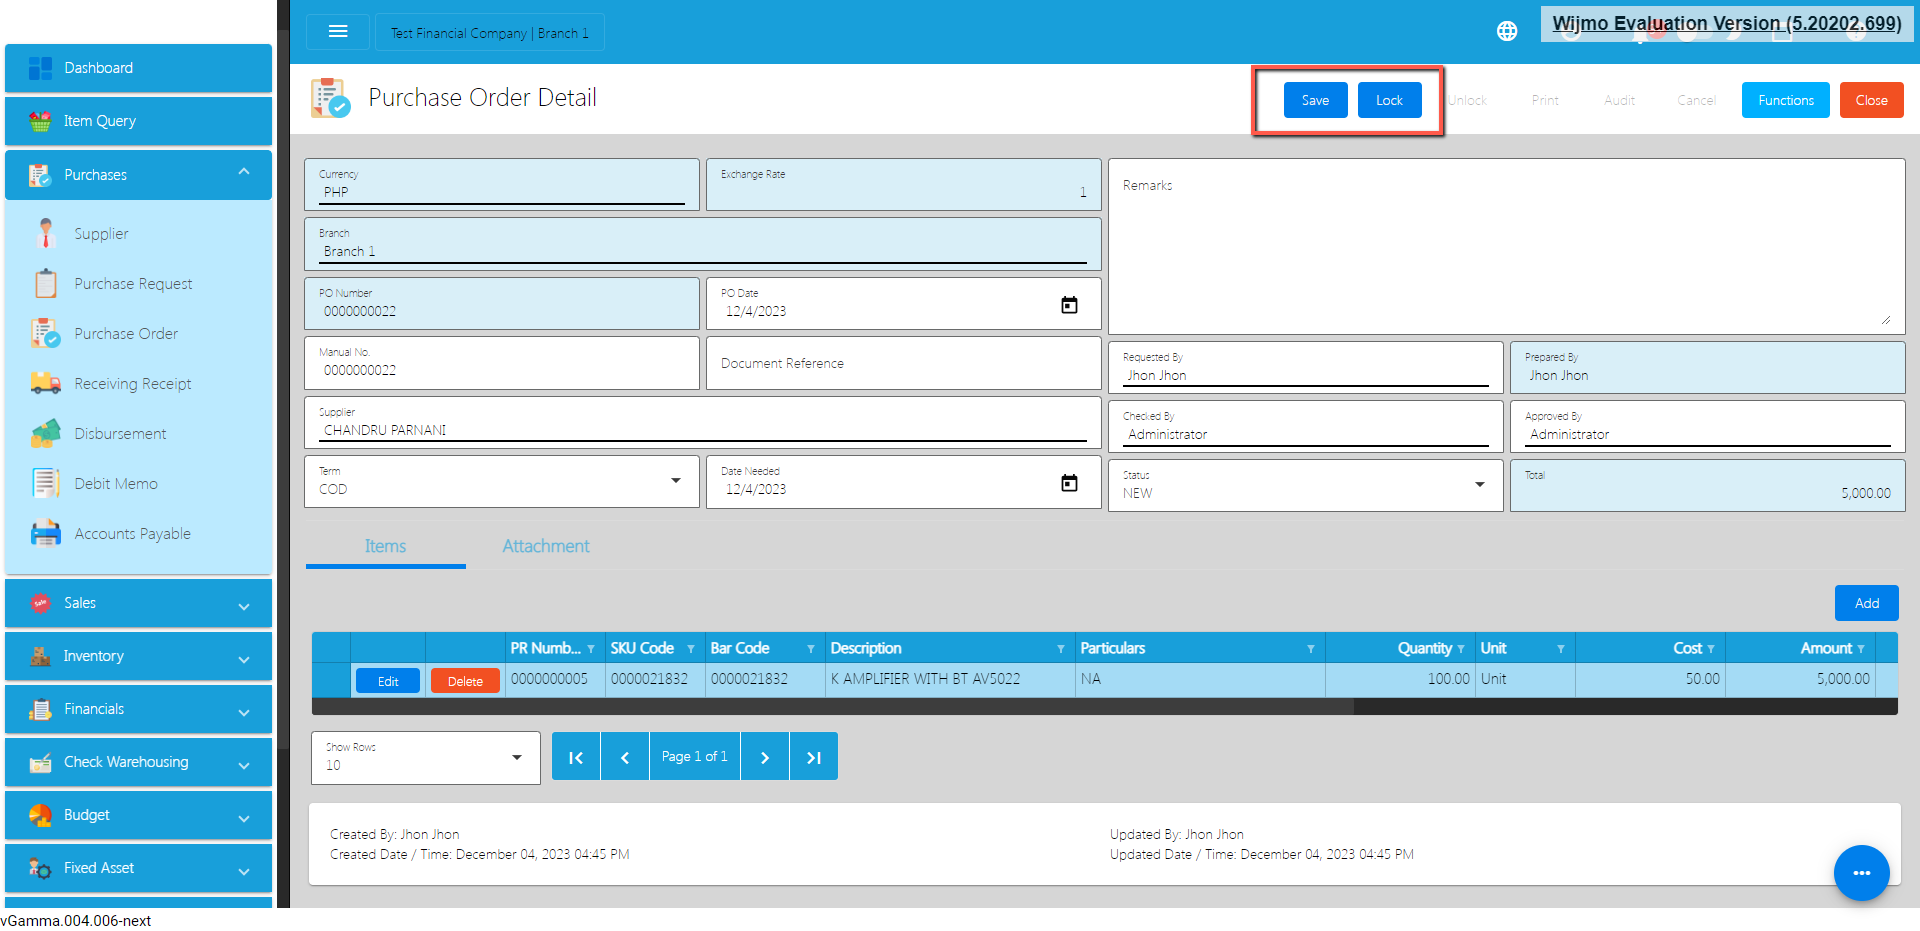
Purchase Order Transaction via Upload Template
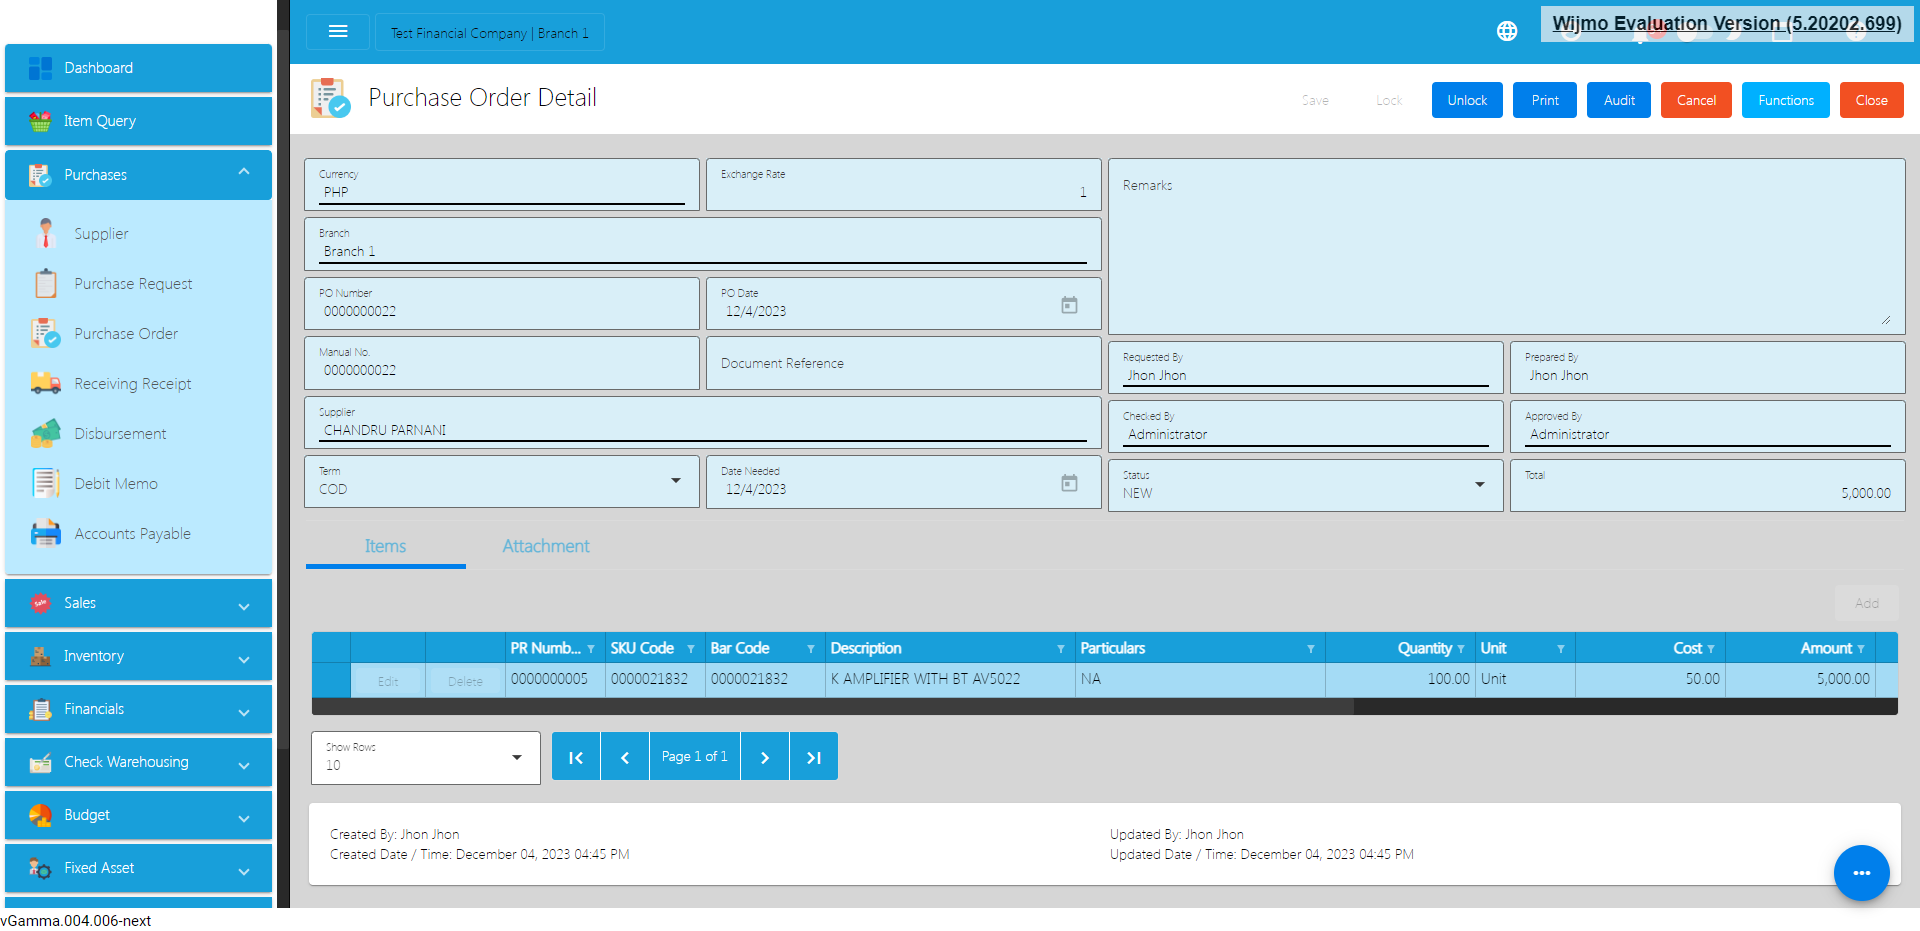
- To add a Purchase Order Transaction via Upload Template, go to Purchase Order List then Click Functions
- Click Optimized Upload
- Select Download PO File Format – an excel file will be downloaded. This is the file format where you will edit or encode the Items that you need to PO.
3.1 In the Excel file:
A. Manual Code should be unique per transaction, alphanumeric and Special transaction, should not exceed 255 characters.
Example: 1‘23`4!5@6#7$8%9^0&a*b(c)d_e+f=g{h}i[j]k|l\m/n:o;p"q<r>st?u v.w
– if the Manual Code starts with 000, don’t forget to put an apostrophe (‘) at the beginning of the Manual Code.
Example: ‘00000111231414
– if the Manual Code starts with a number but exceeds more than 10 digits, format the cell to Text to show all the numbers.
Steps on how to change the format to Text:
1. Right Click the Cell
2. Click Format Cell
3. Choose Text
4. Click OK
5. Then reselect the field
B. Document Reference should be unique per transaction,alphanumeric and special characters should not exceed 255 characters.
Example: 1‘23`4!5@6#7$8%9^0&a*b(c)d_e+f=g{h}i[j]k|l\m/n:o;p"q<r>st?u v.w
– if the Document Reference starts with 000, don’t forget to put an apostrophe (‘) at the beginning of the Manual Code.
Example: ‘00000111231414
– if the Document Reference starts with a number but exceeds more than 10 digits, format the cell to Text to show all the numbers.
Steps on how to change the format to Text:
1. Right Click the Cell
2. Click Format Cell
3. Choose Text
4. Click OK
5. Then reselect the field
C. Particulars – in this column this is basically the remarks for each item line, it should be alphanumeric and Special characters should not exceed 255 characters.
D. Remarks – in this column are basically the remarks for the whole transaction, it should be alphanumeric and Special characters should not exceed 255 characters.
E. Date Needed and PO Date – PO Date is the date of PO or when it was created. Date Needed it can be after or on the date of the PO date, the format of the PO Date and Date Needed should be
( yyyy-mm-dd )
F. Supplier and SupplierID – Select supplier from the dropdown and choose the supplier, SupplierID will correspond to the selected supplier. Never edit the supplierID since it will automatically change after selecting the supplier.
G. Term and TermID – Select term from the dropdown and choose the term, TermID will correspond to the selected Term. Never edit the termID since it will automatically change after selecting the Term.
H. Currency and CurrencyID – Select the Currency from the dropdown and choose the supplier, CurrencyID will correspond to the selected currency. Never edit the CurrencyID since it will automatically change after selecting the currency.
I. Exchange Rate and Status – exchange rate is the rate that is used to convert the currency, Status is the status of the transaction, just select the status from the dropdown.
J. ItemID, Item Description, Cost, UnitID and Unit – all these fields are related to the Item. Once the barcode is selected all these fields will also change depending on the barcode that was selected.
K. Quantity – Input the quantity that needed to be ordered from the supplier.
- Go Back to the Purchase Order List Transaction
- Click Function
- Click Optimize Upload
- Click Import Purchase Order
- After Importing, Go to Draft Purchase Order
- Click Validate
- Click Post
- Lock the Transaction
Cancel Purchase Order Transaction
When you need to cancel a purchase order, it’s important to follow these simple steps:
- Log In: Visit your easyFS domain and login with your username and password.
- Find your Purchase Order: Navigate to the Purchases, then Purchase Order. You will be redirected to the Purchase Order lists.
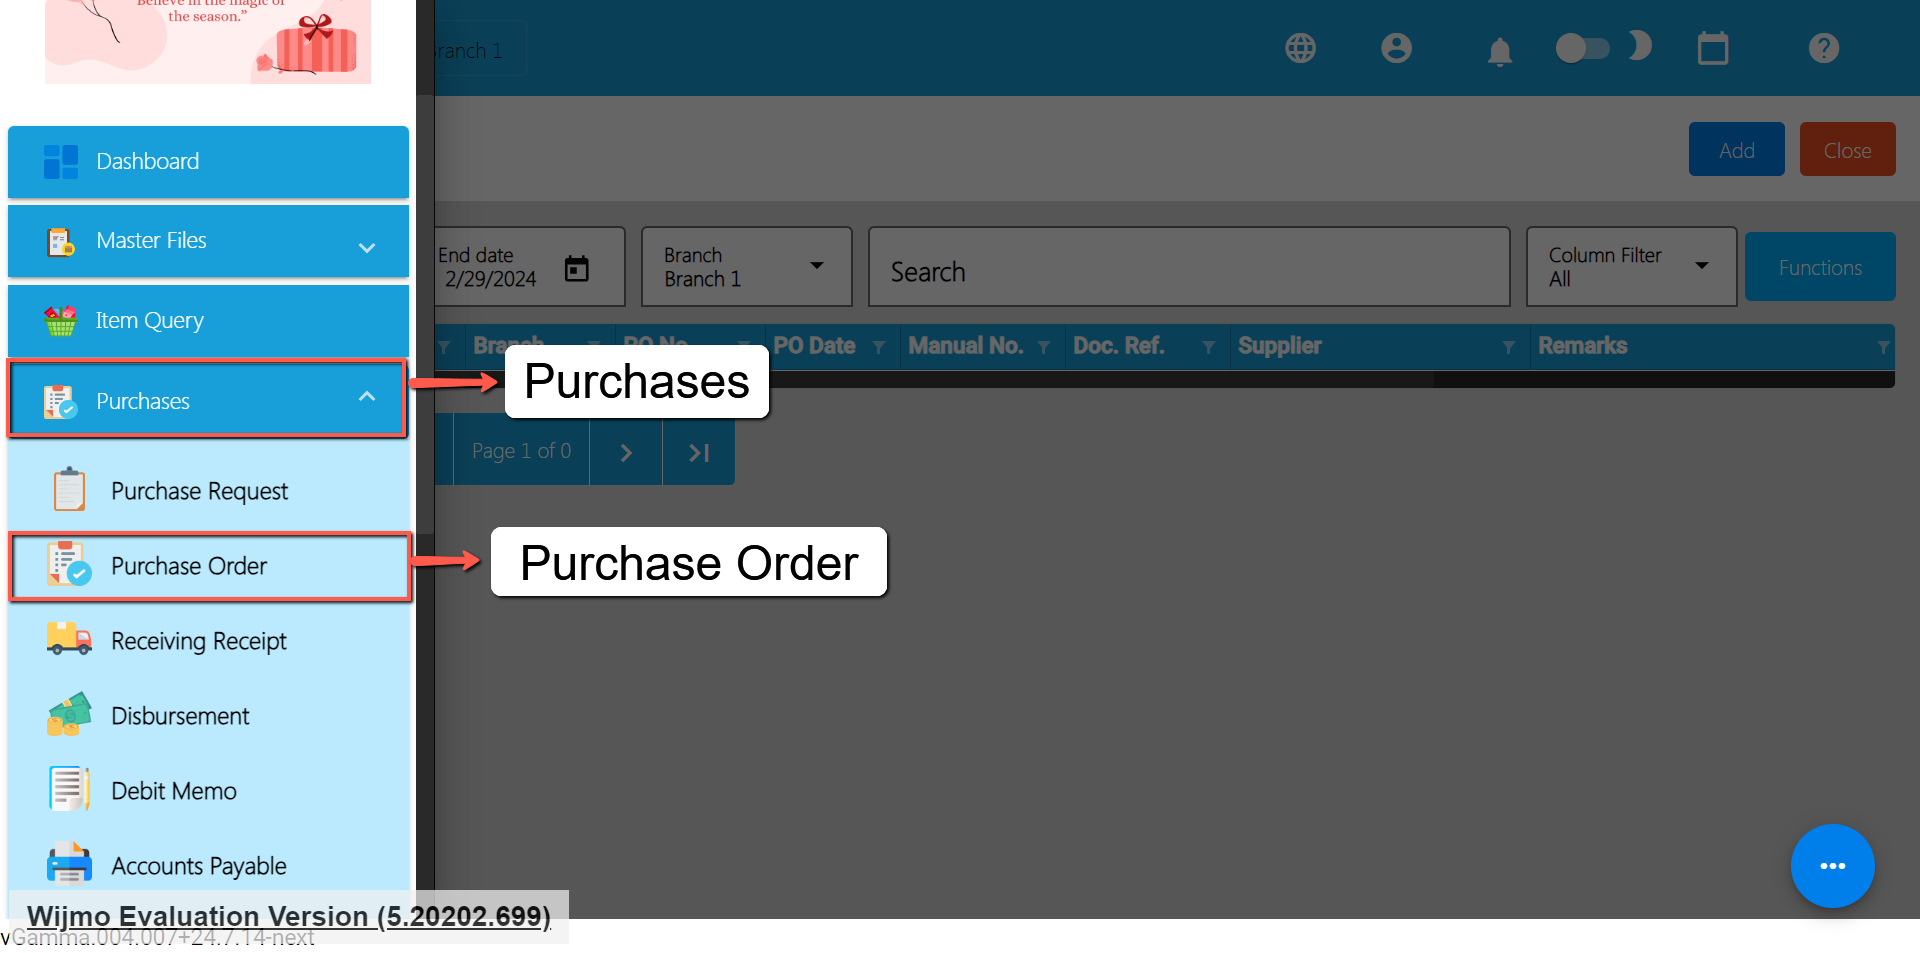
- Locate the Right One: From the Purchase Order list, you may use the search bar to look for the right Purchase Order you want to cancel. You can search using the Purchase Order PO NUmber, Manual Number, Document Reference, etc.
Take note: Don’t forget to change the Start Date and End Date to your Purchase Order’s transaction date to display the correct result.
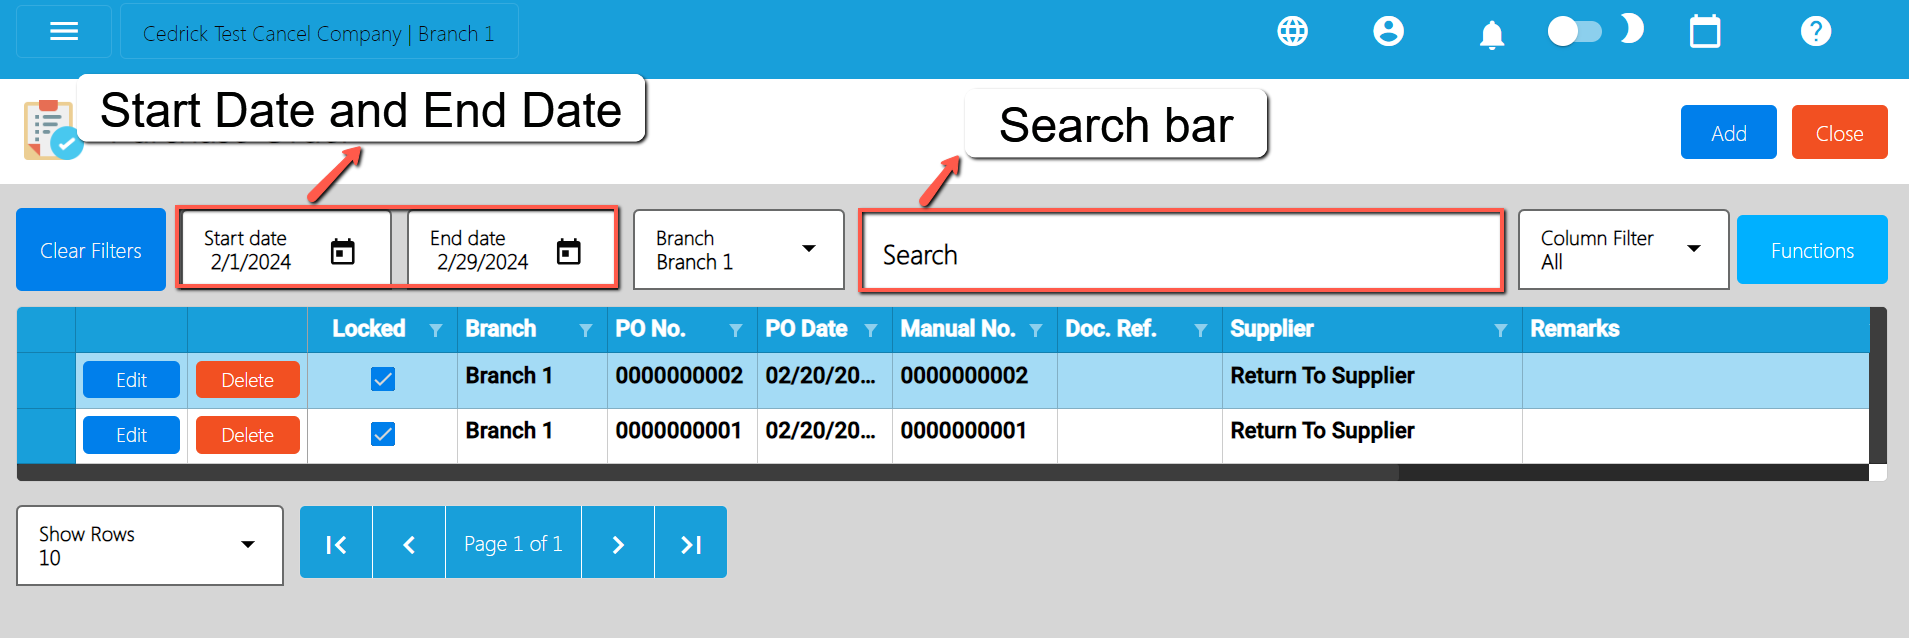
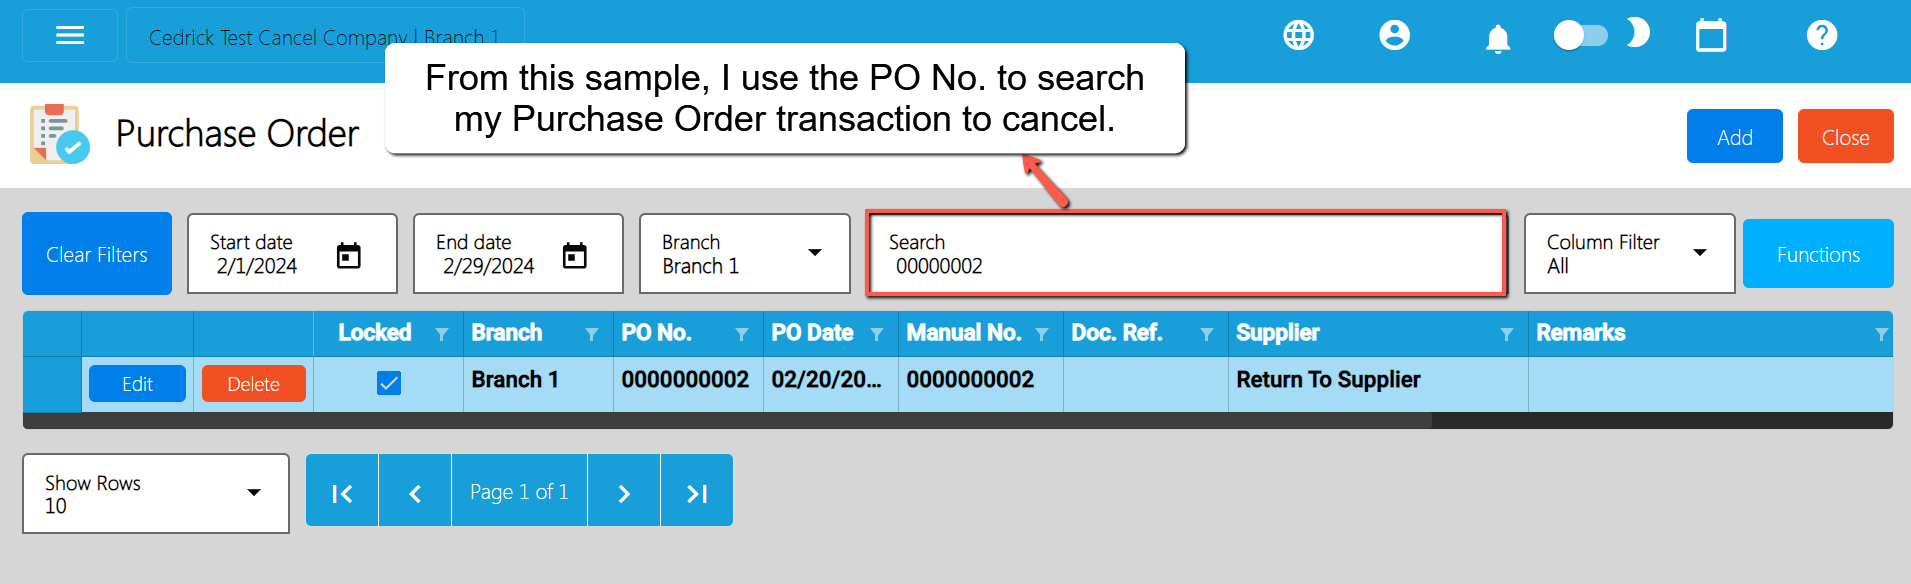
- Open the Purchase Order Detail: Click the Edit button to open the Purchase Order detail page.
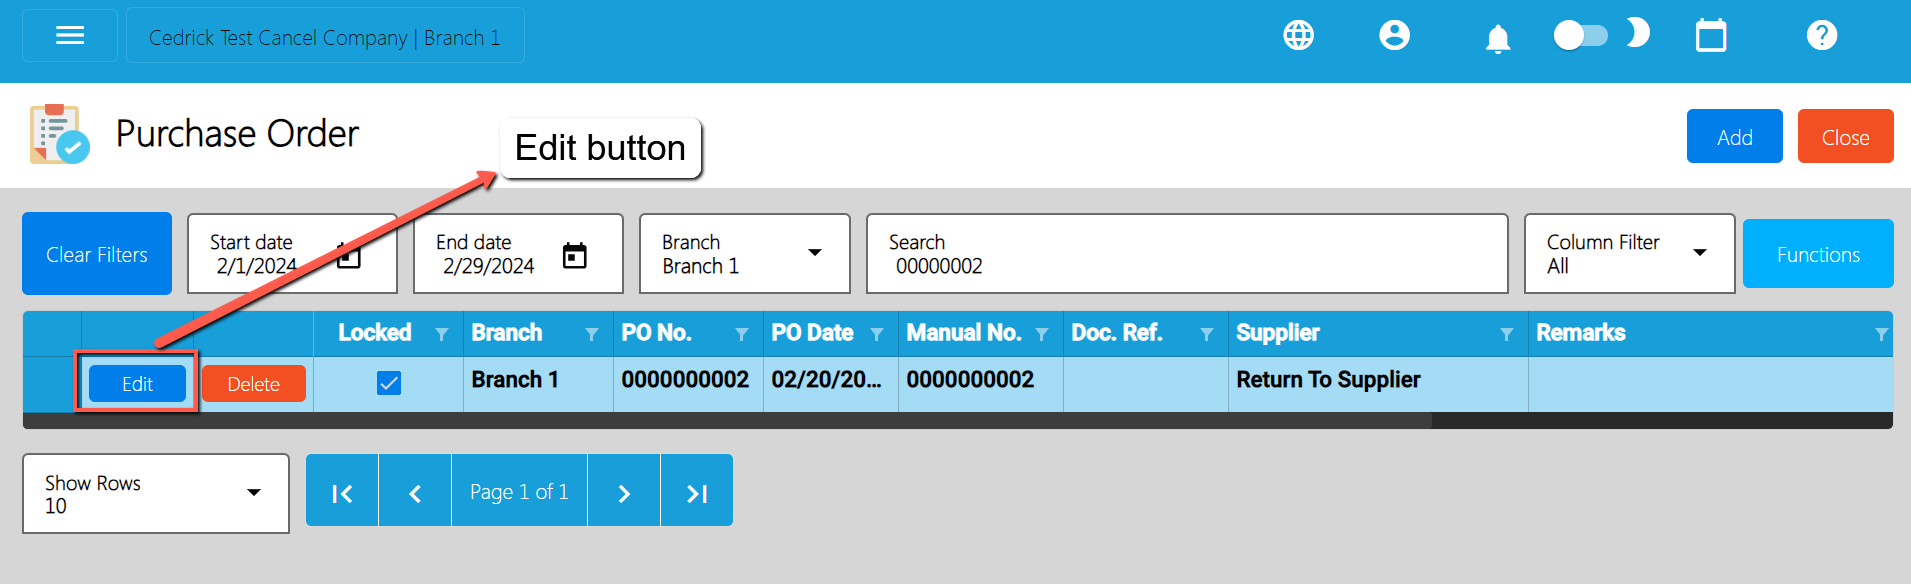
- Cancel the Request: To cancel your Purchase Order transaction, look for the Cancel found on the upper-right part of the page, then click.
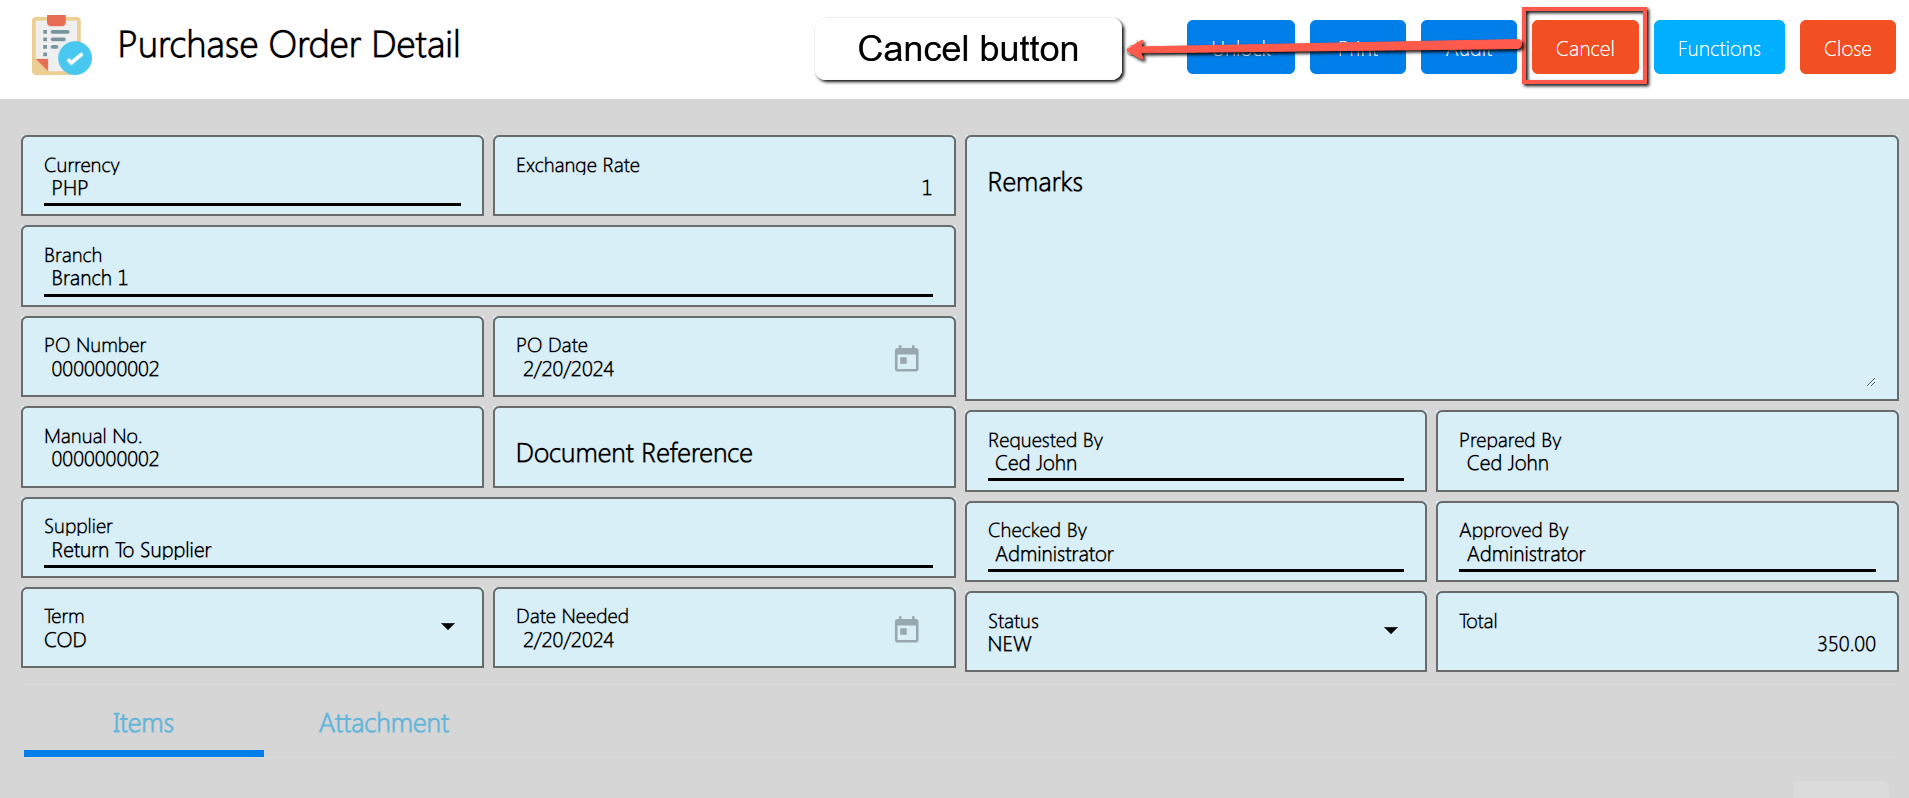
- Confirm Canceling: After you click the Cancel button, there’s a Cancel Purchase Order window. If you’re sure you want to cancel your Purchase Order transaction, click the Cancel button.
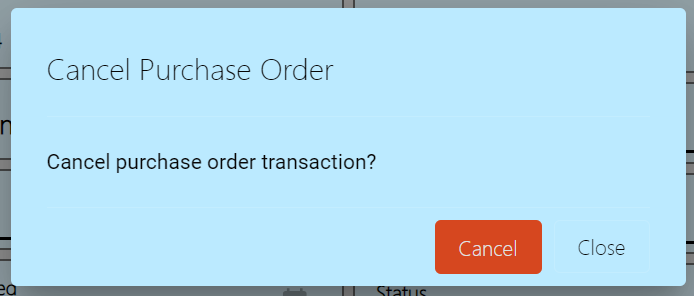
- Check It’s Done: After canceling, make sure you get a success toast message confirming it’s canceled successfully. It is found on the bottom right of the page.
- Let Others Know(if needed): If you believe canceling affects other people, it's a good idea to inform them.
- Keep Track: Remember to make a note somewhere that you canceled the Purchase Order , just in case it is needed later.
5.2.3 Receiving Receipt
Overview
When the supplier already sent or provided the product/item from the PO that the user sent. The user can use this to check if the items are all correct using the RR.
Receiving Receipt Detail
- List of all the RR (Receiving Receipt) and will also show the overview of the transaction. In addition, it also has filter functionality where you can select the Start and End Date of the transaction.
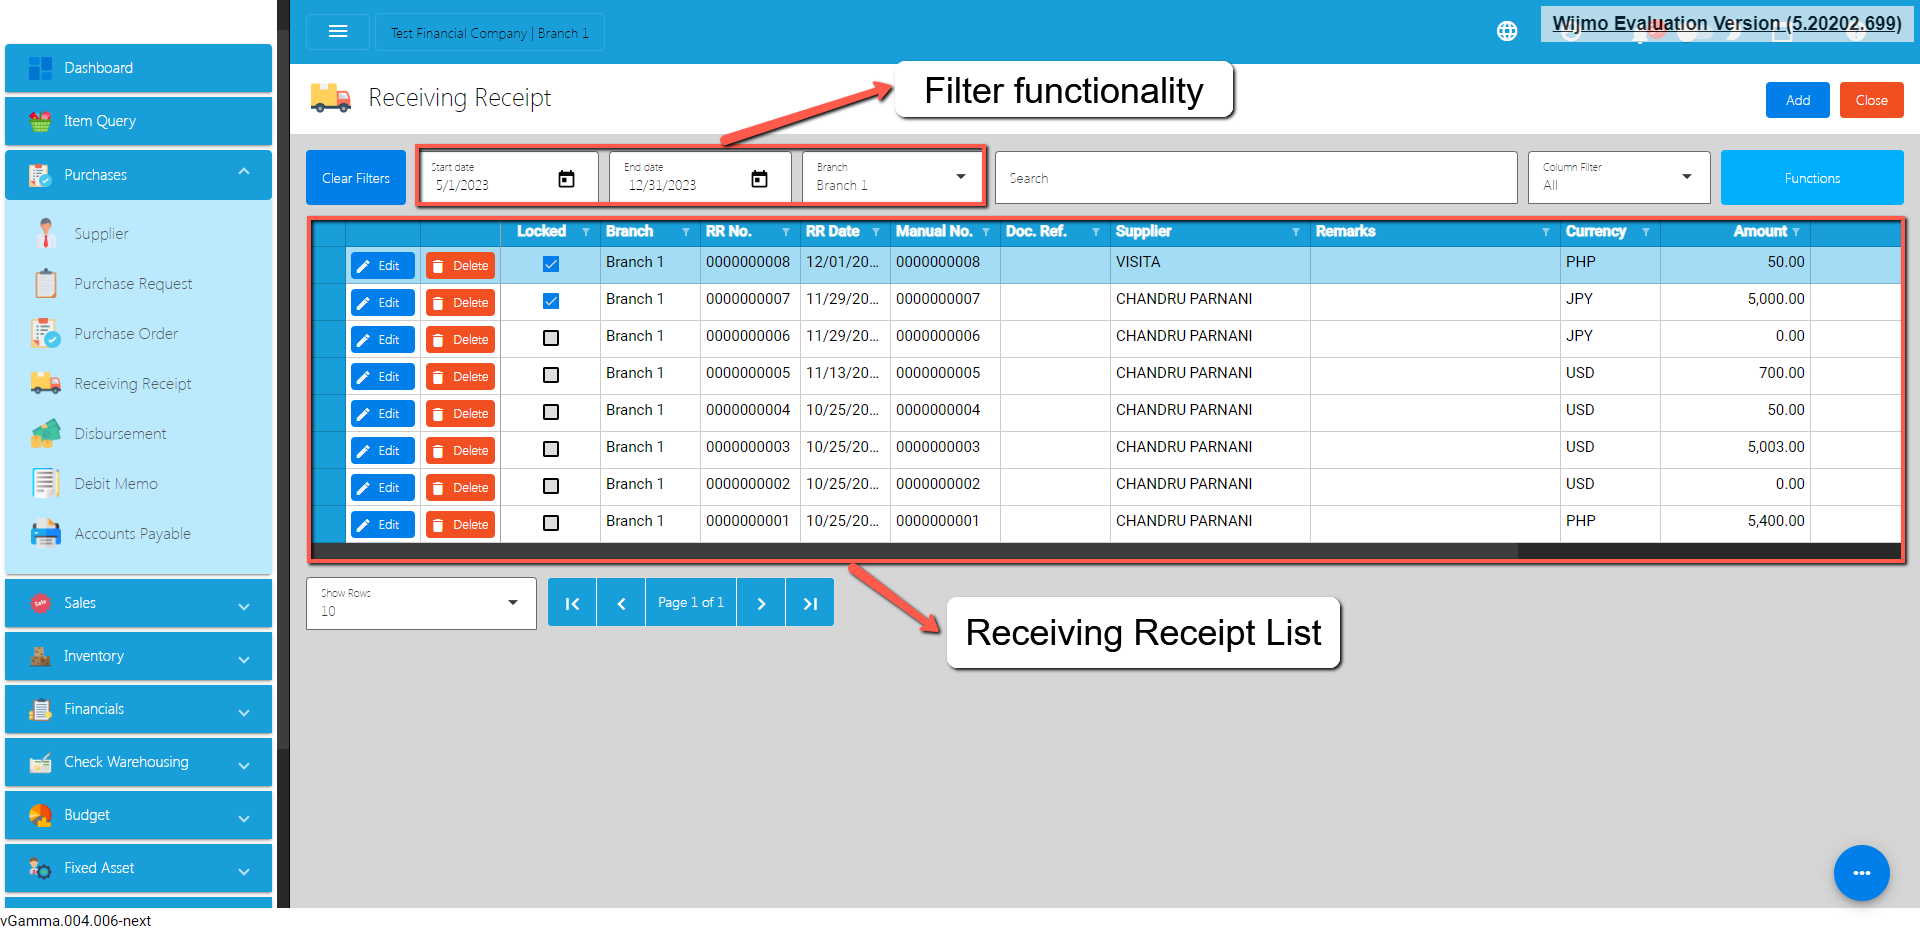
Receiving Receipt List
- To add a new Receiving Receipt, go to Purchases then click Receiving Receipt. After that, click the Add button that can be seen in the Receiving Receipt list.
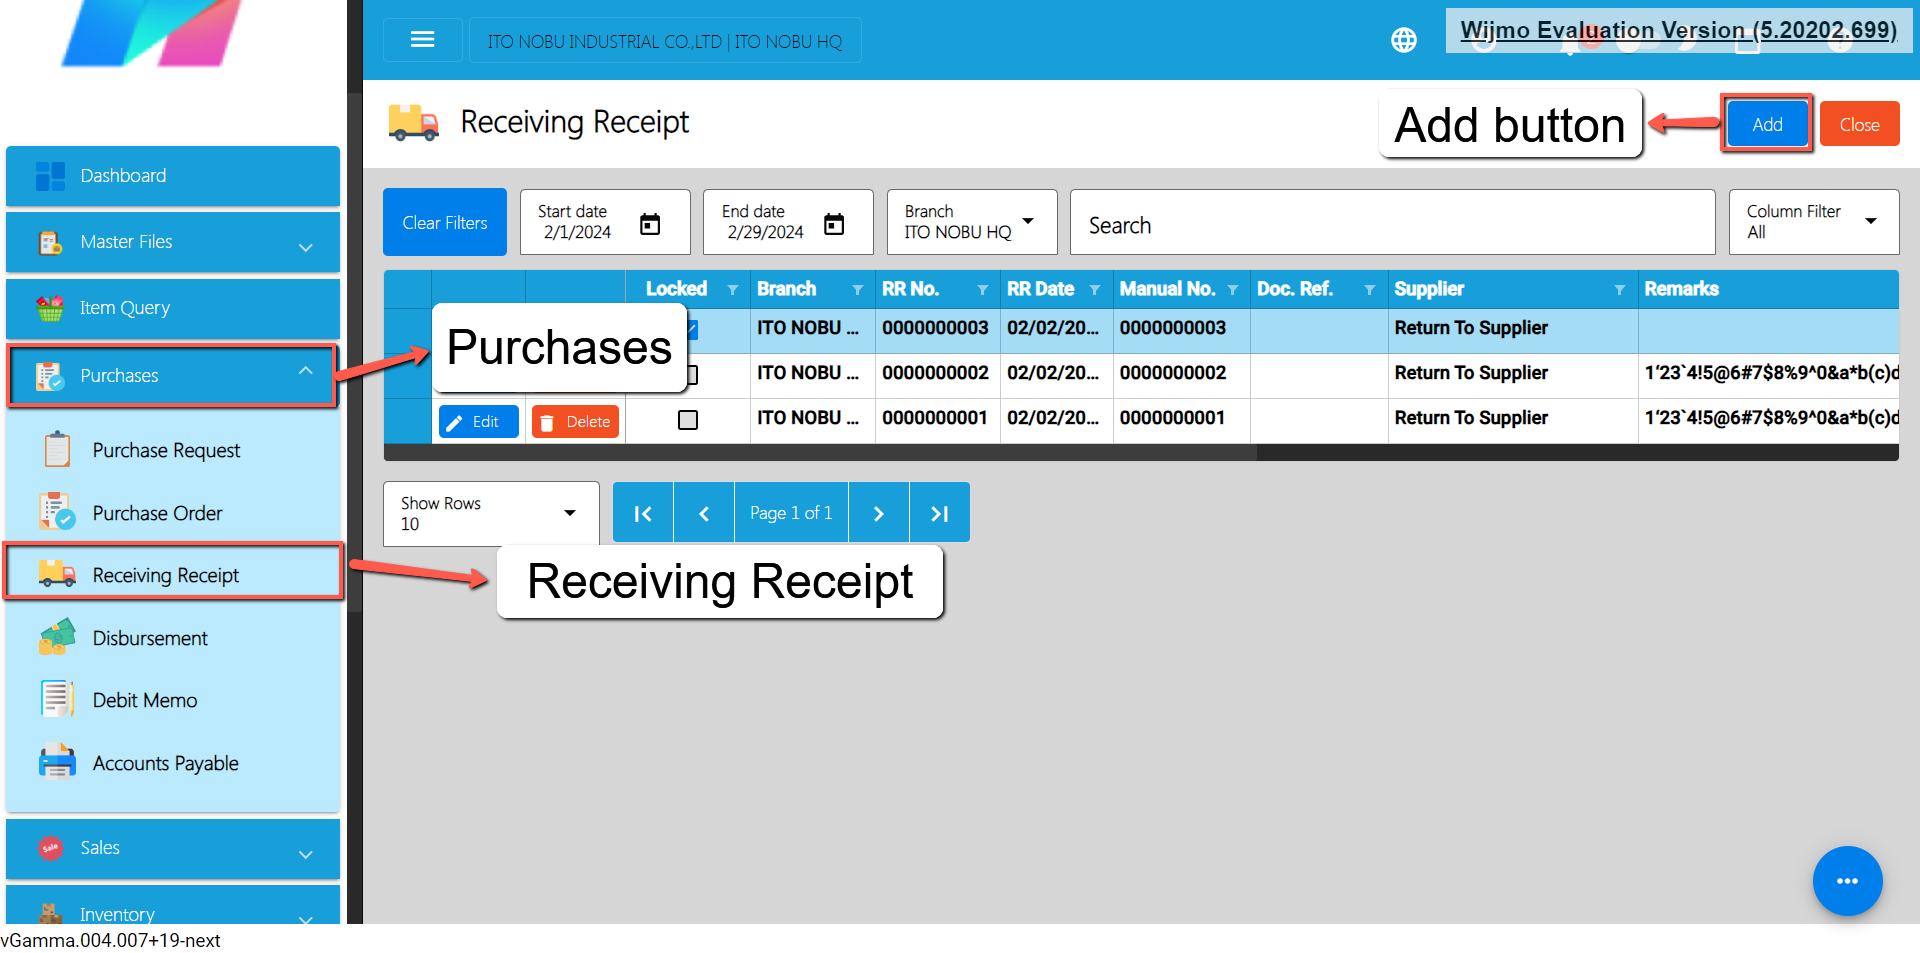
- Fill out all the needed information for the Receiving Receipt Detail like,
- Currency
- Supplier Name
- RR Date
- Term
- Document Reference
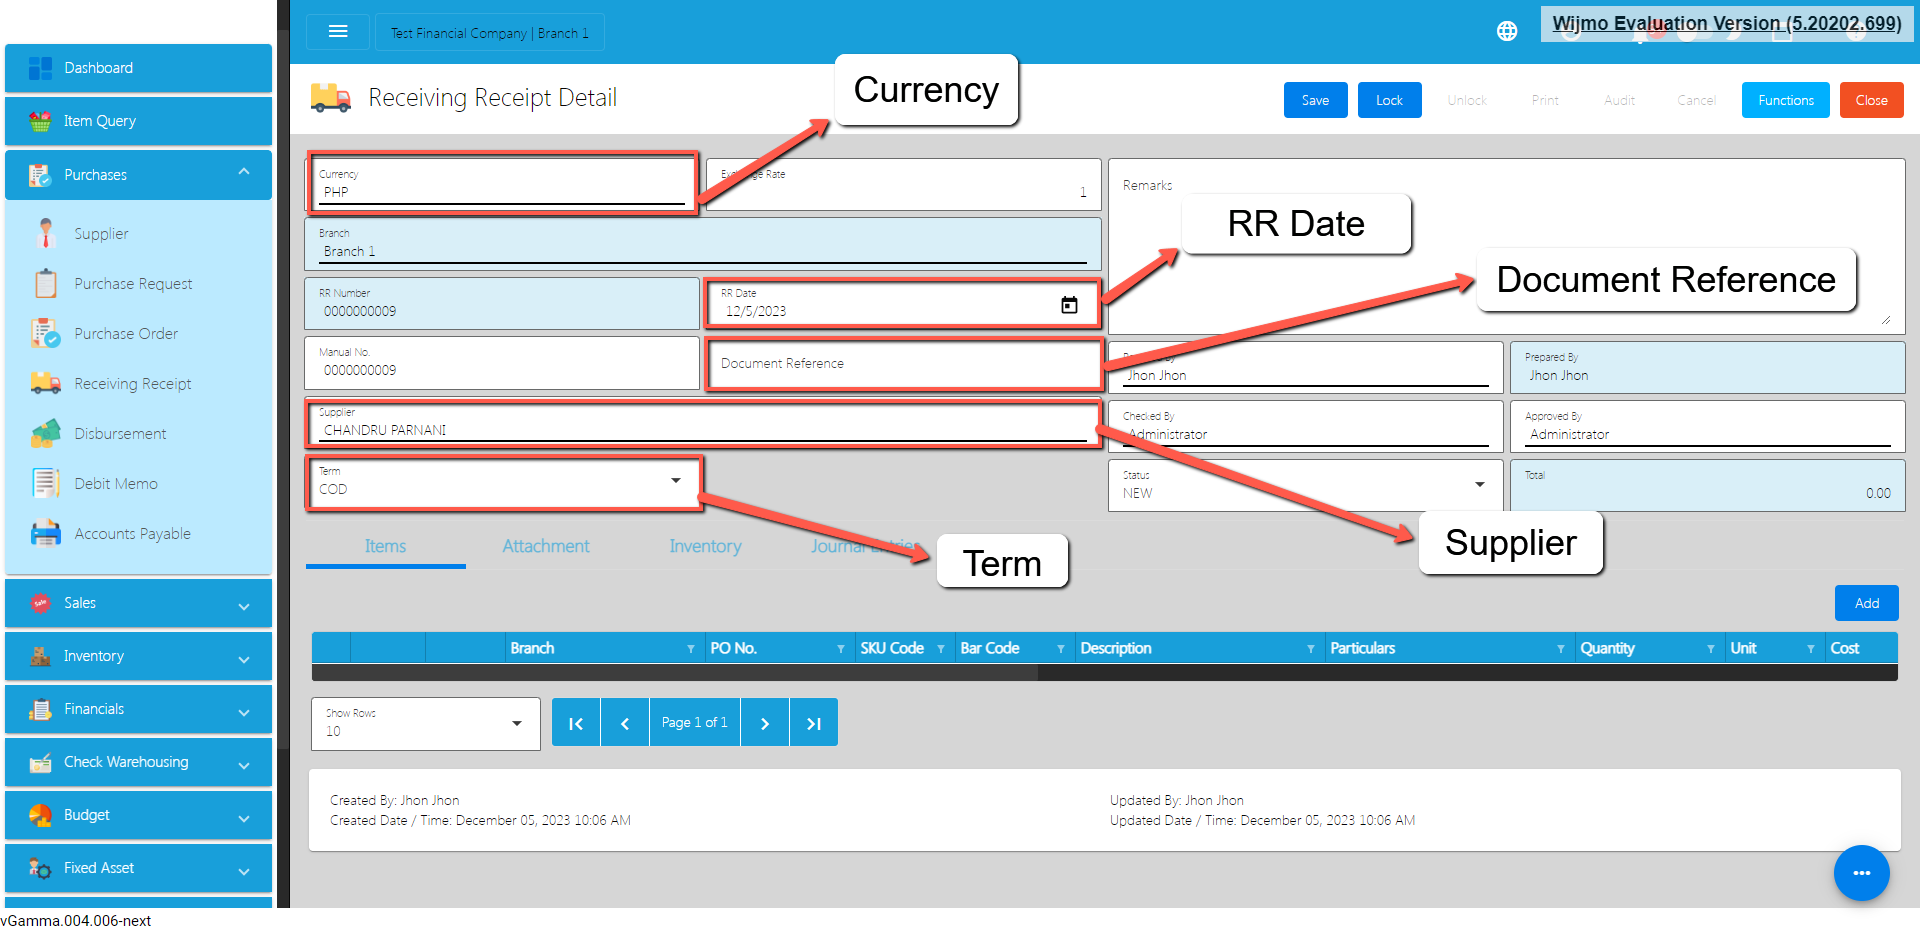
- To add line Item, click the Add button on the right part of the page under the Items tab.
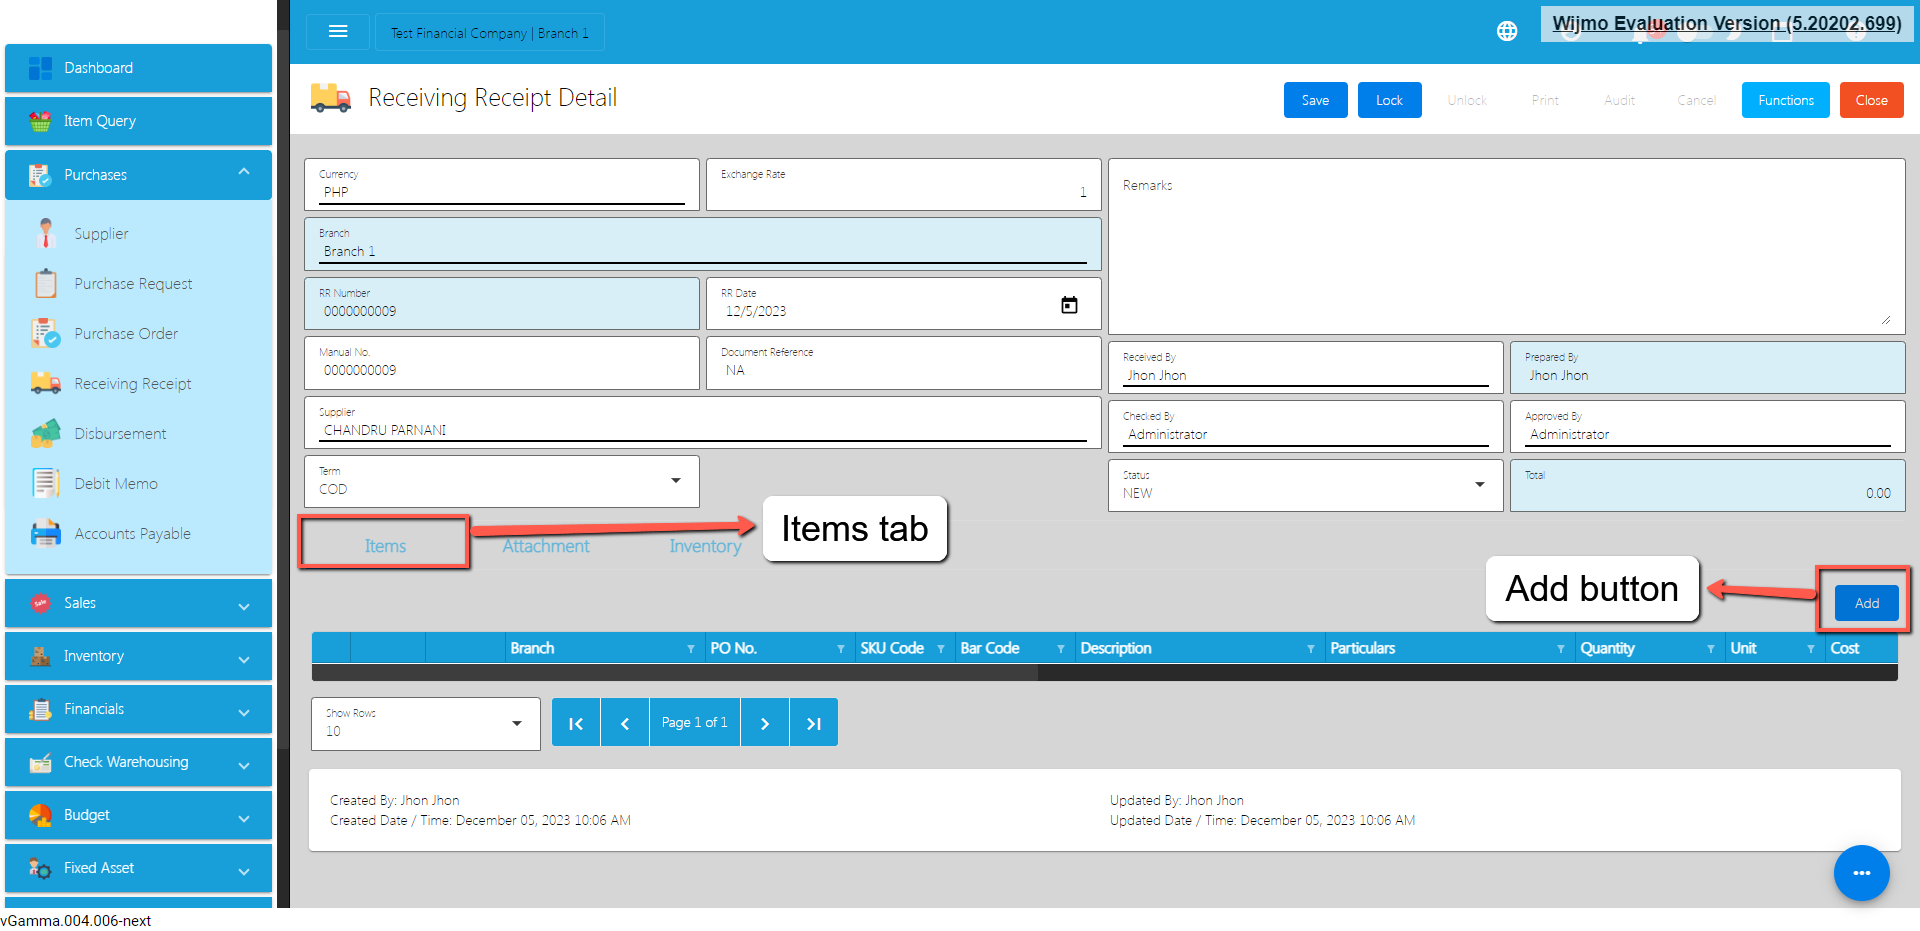
- You need a Purchase Order before you can proceed on adding line items. From the popup, click the PO Number field.
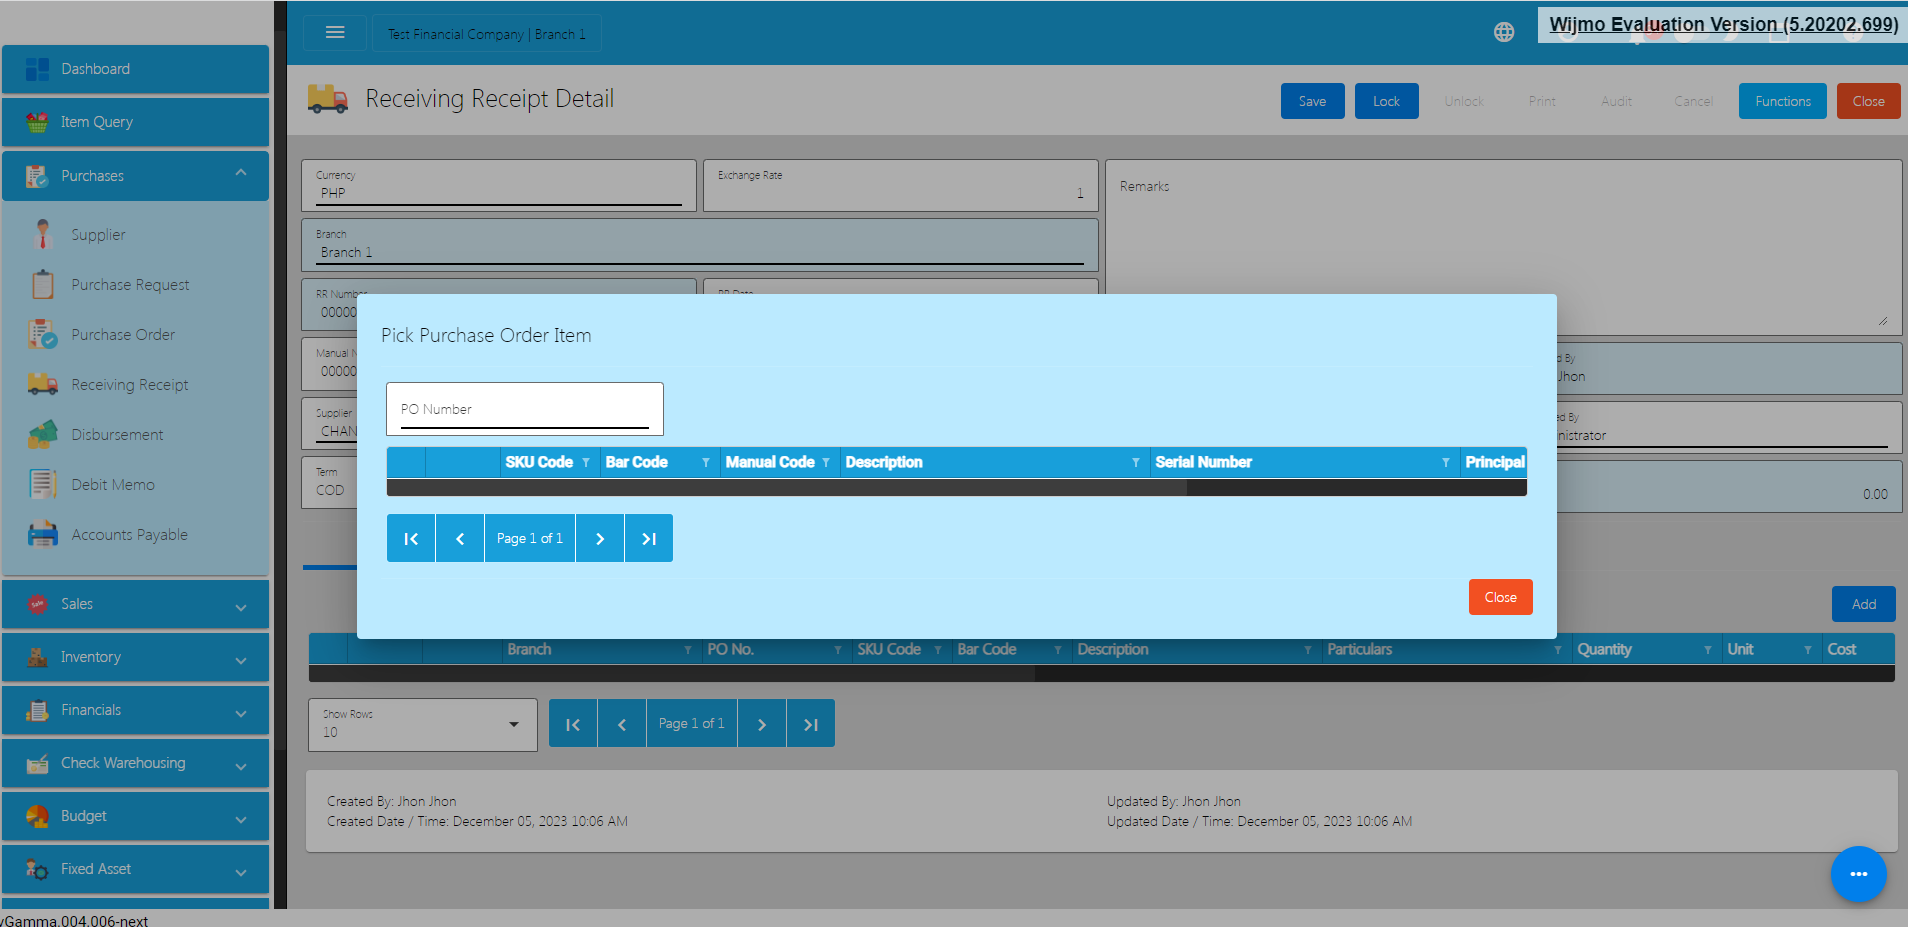
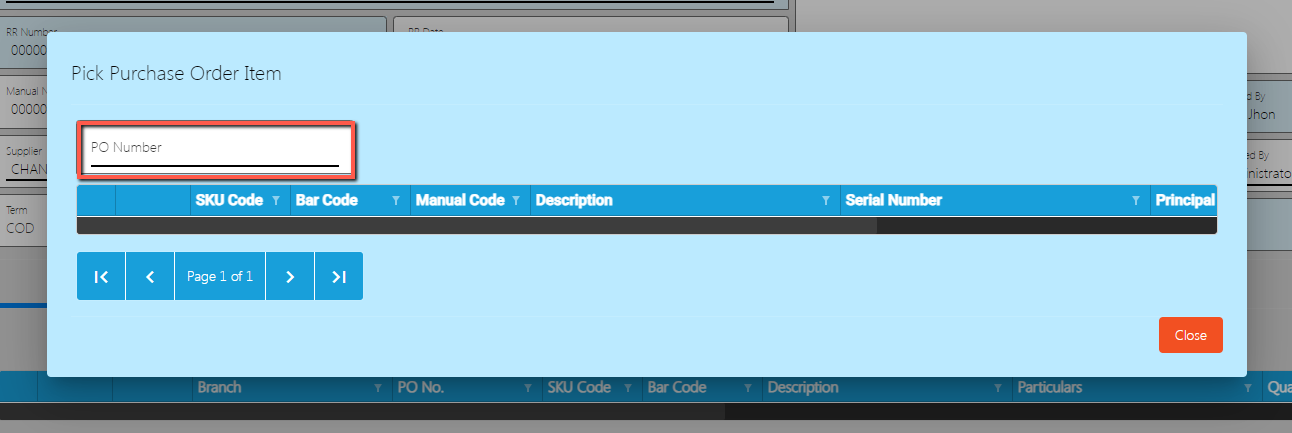
- Once clicked it will pop up all the PO that has not yet created an RR.
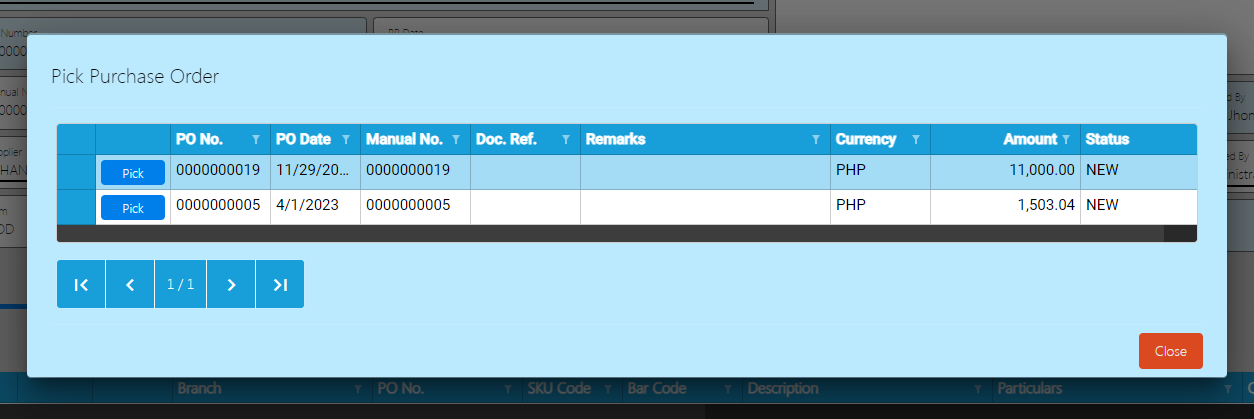
- To add that PO , click the Pick button.
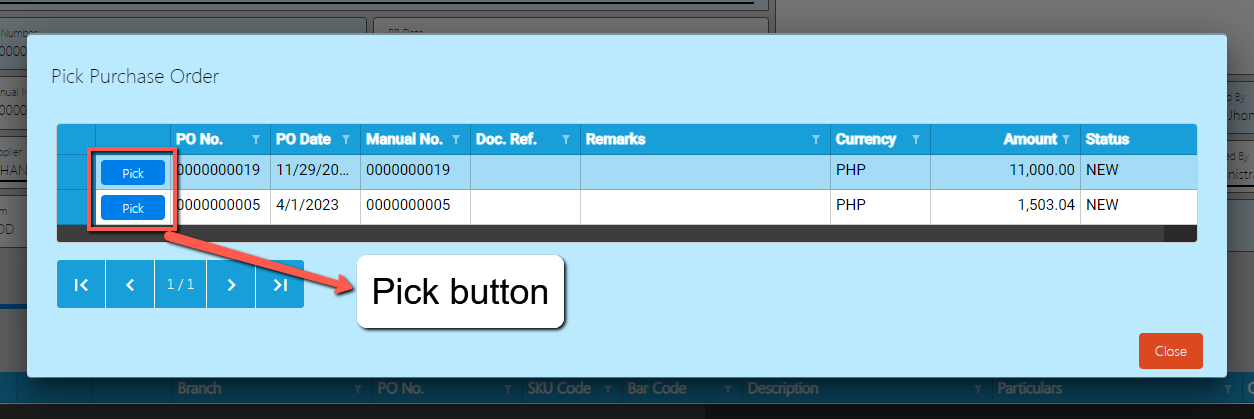
- After clicking the PICK Button, it will automatically display the list of items based on your chosen Purchase Order.
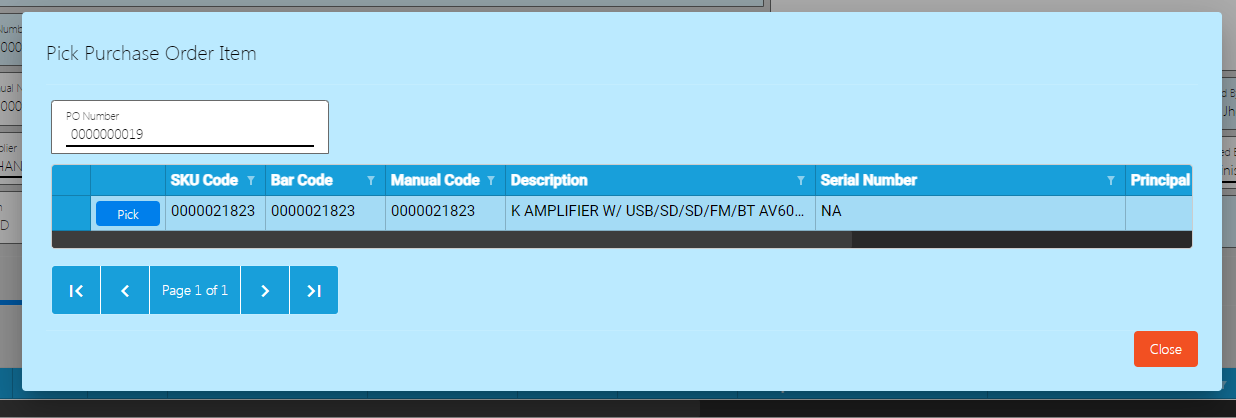
- Select the items, by clicking the Pick button.
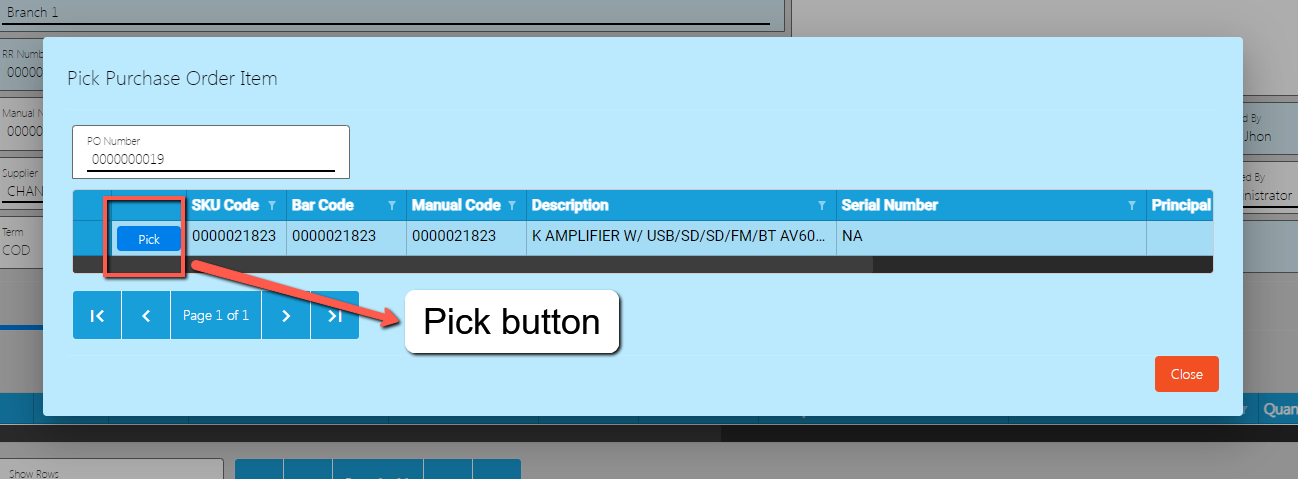
- Once the Pick button is clicked, fill out the quantity you receive for that item.
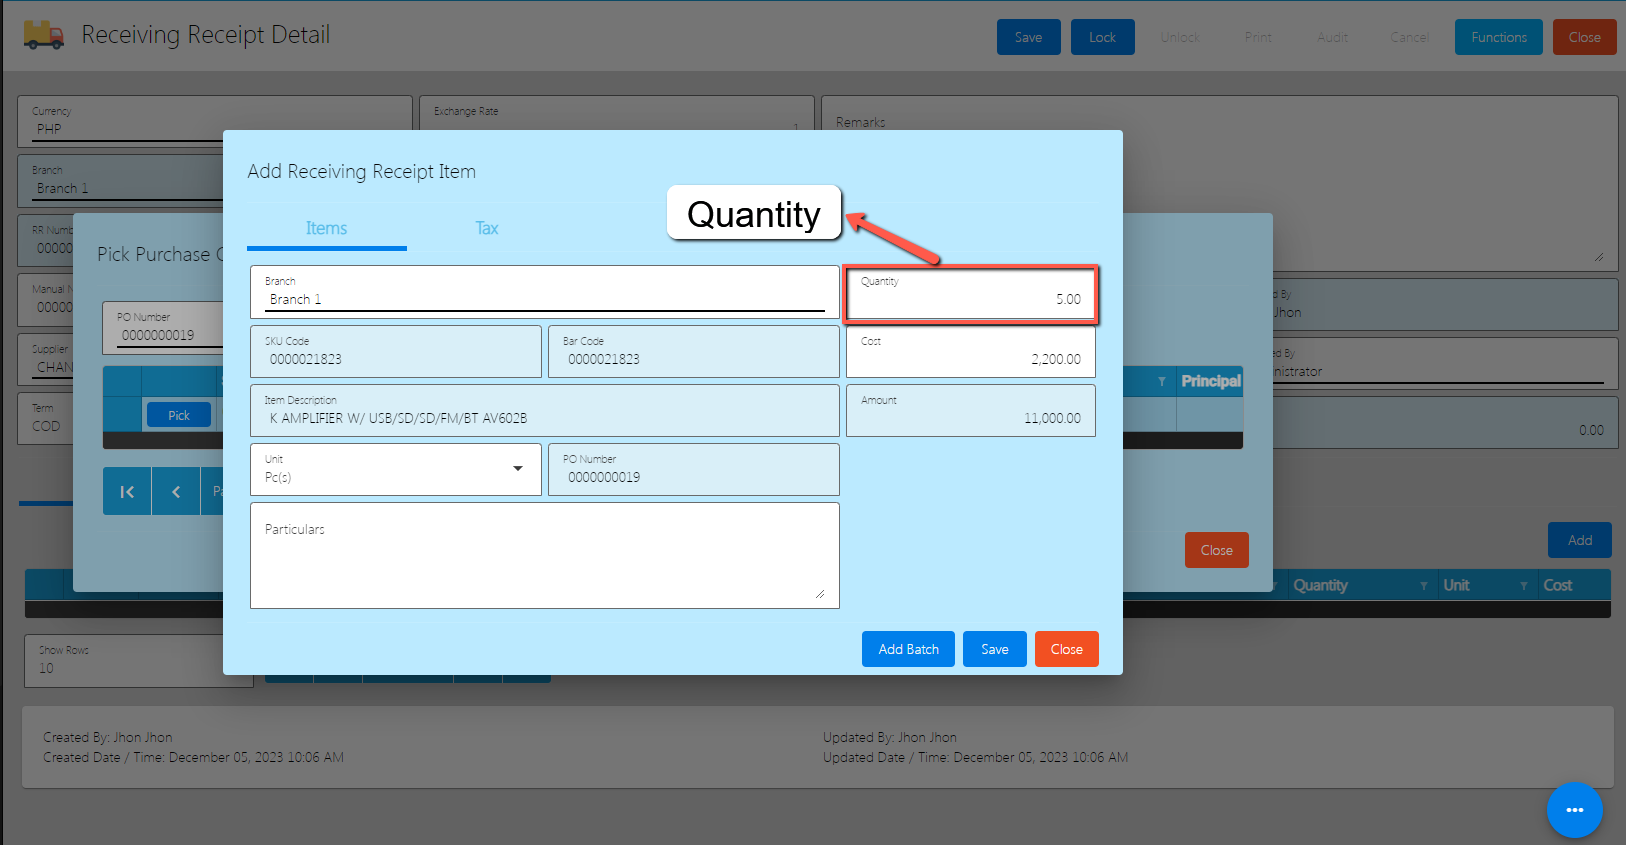
- After providing the Quantity, Cost and Particulars, click the Save button.
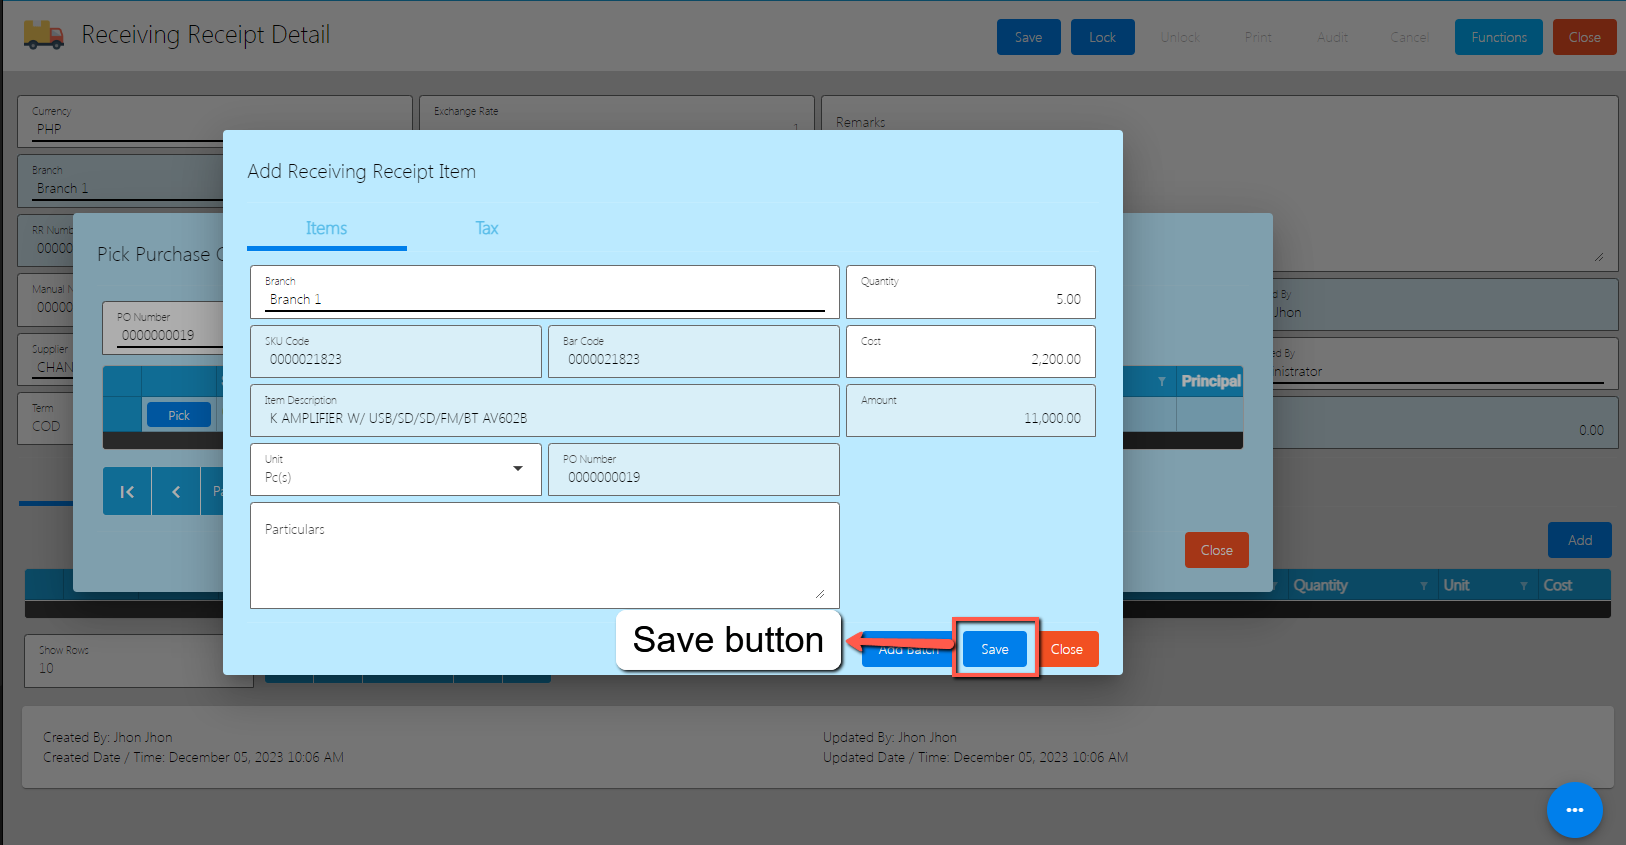
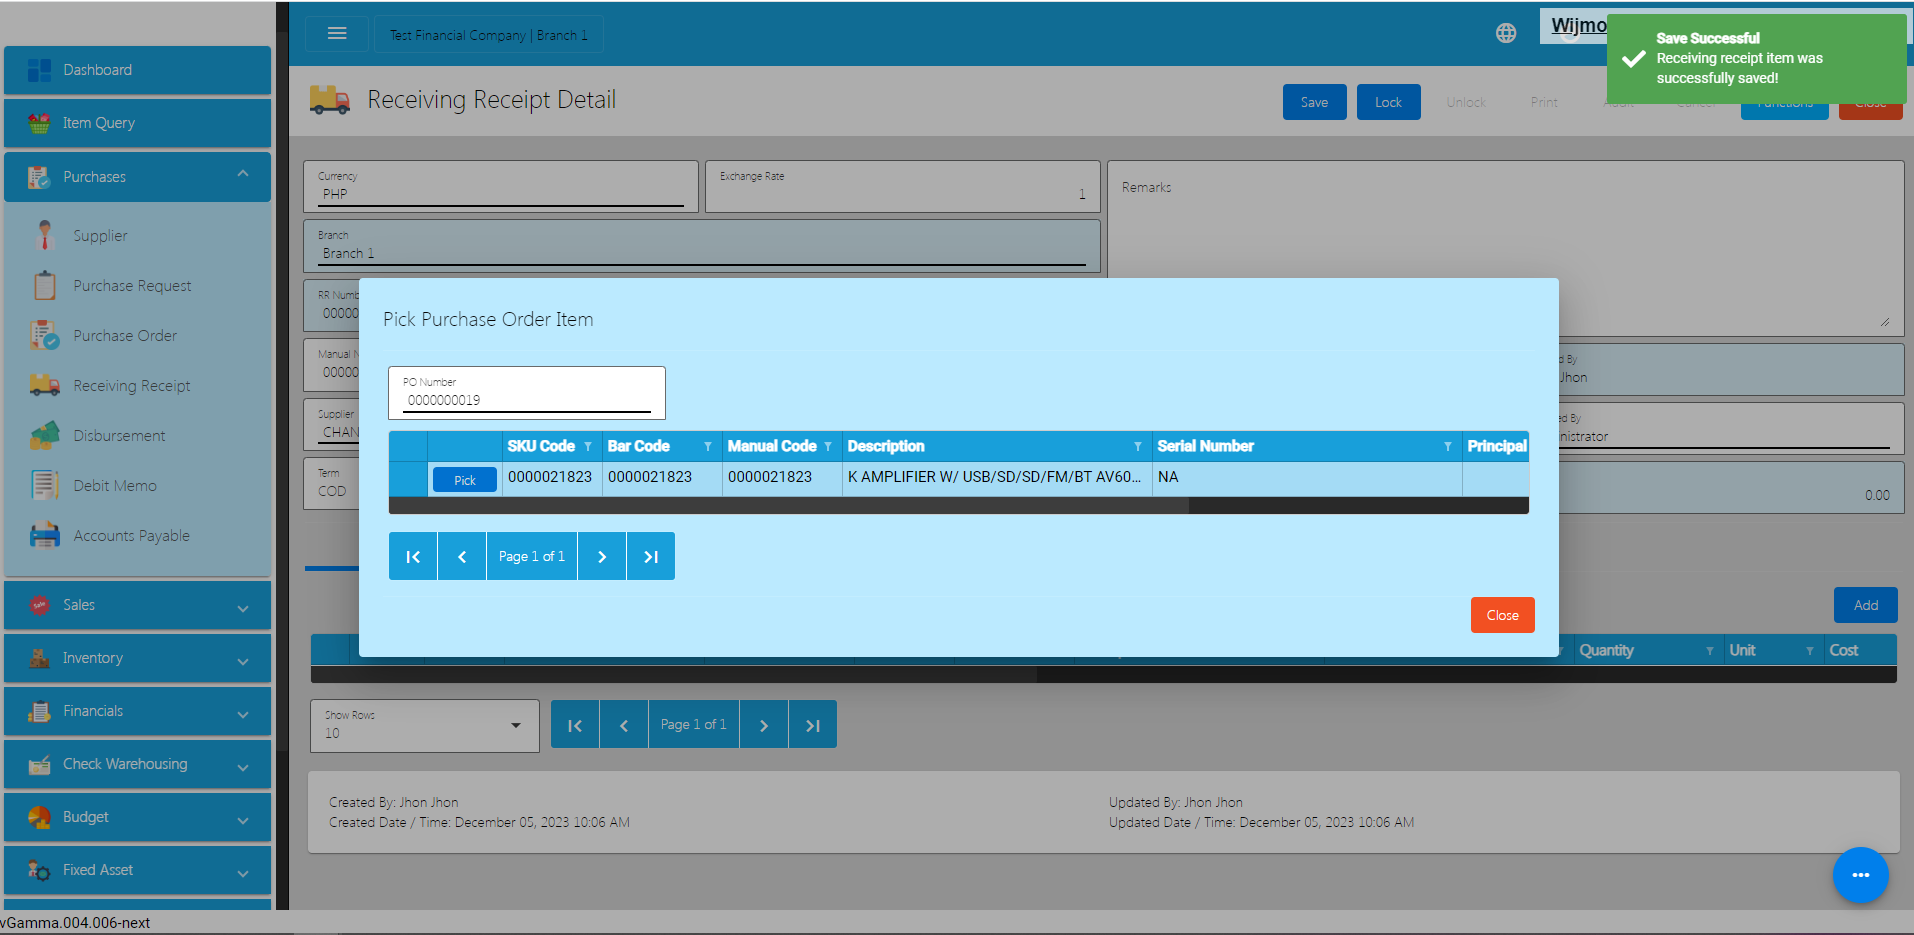
- If you wish to add additional items, repeat Steps 8 to 10.
- If you’re done adding line items, just click the Close button to hide the popup.
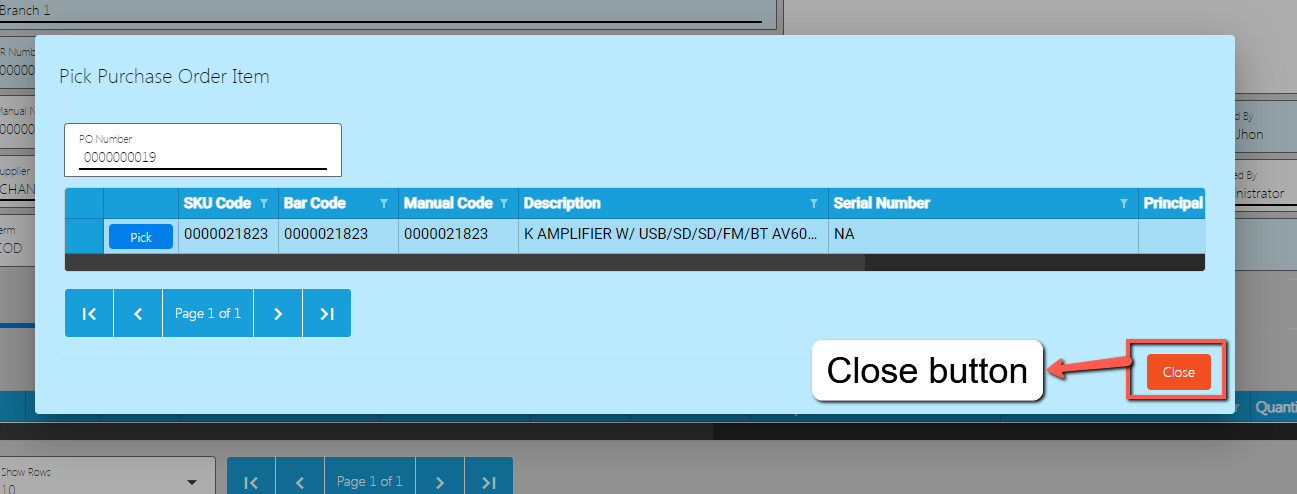
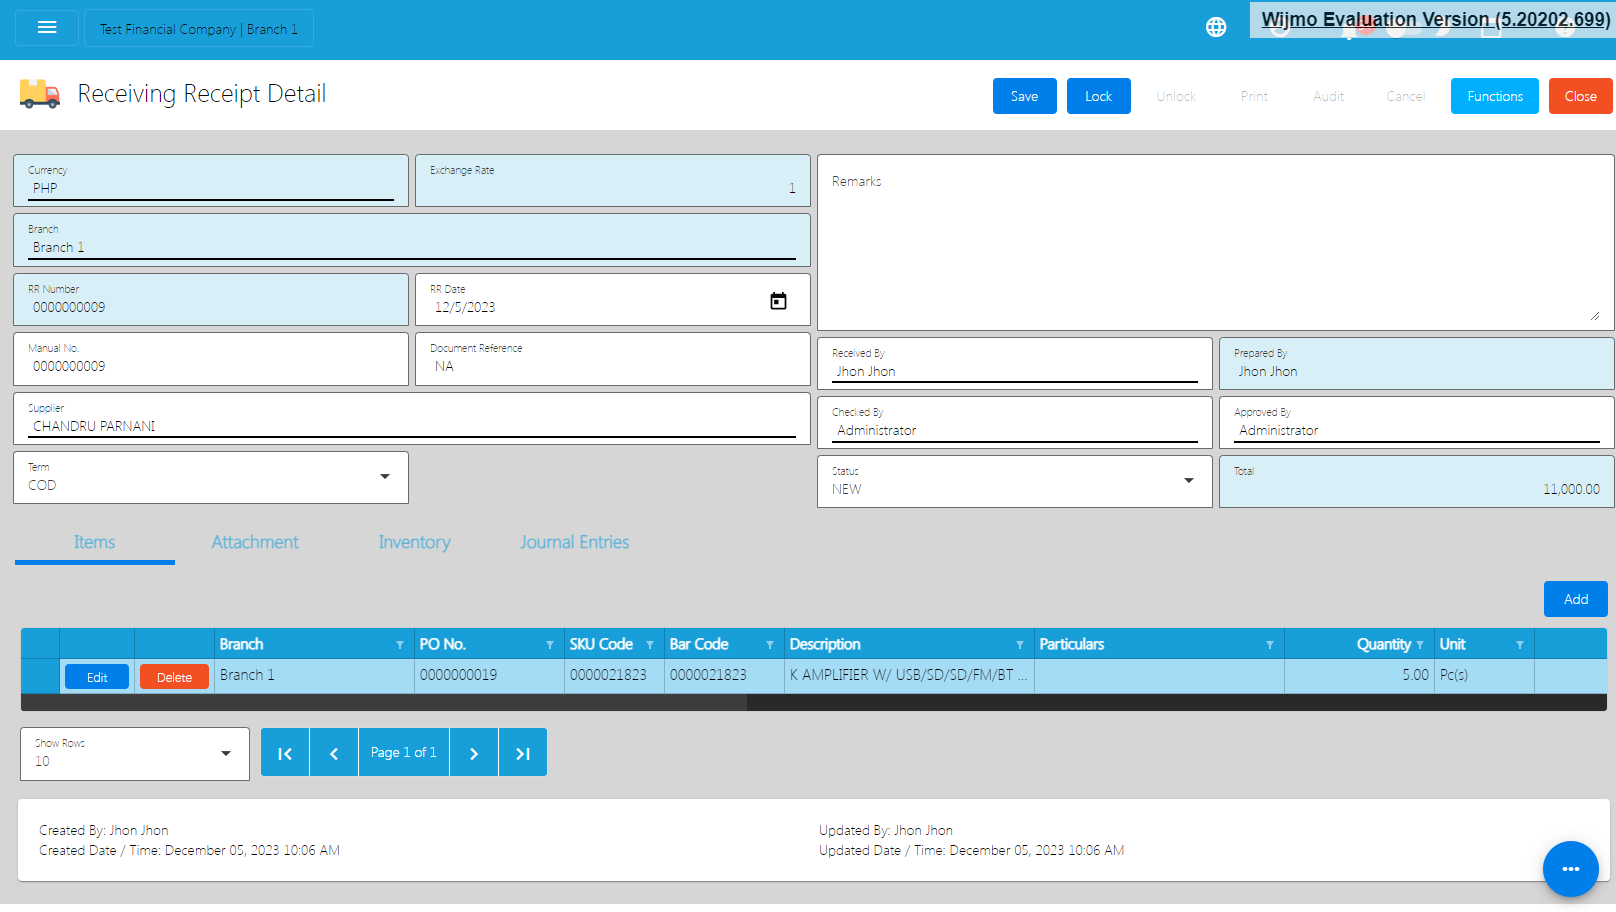
- Review the Receiving Receipt you created. If it is all good, click the Save button, then Lock button. Then if everything is all good, click SAVE and LOCK.
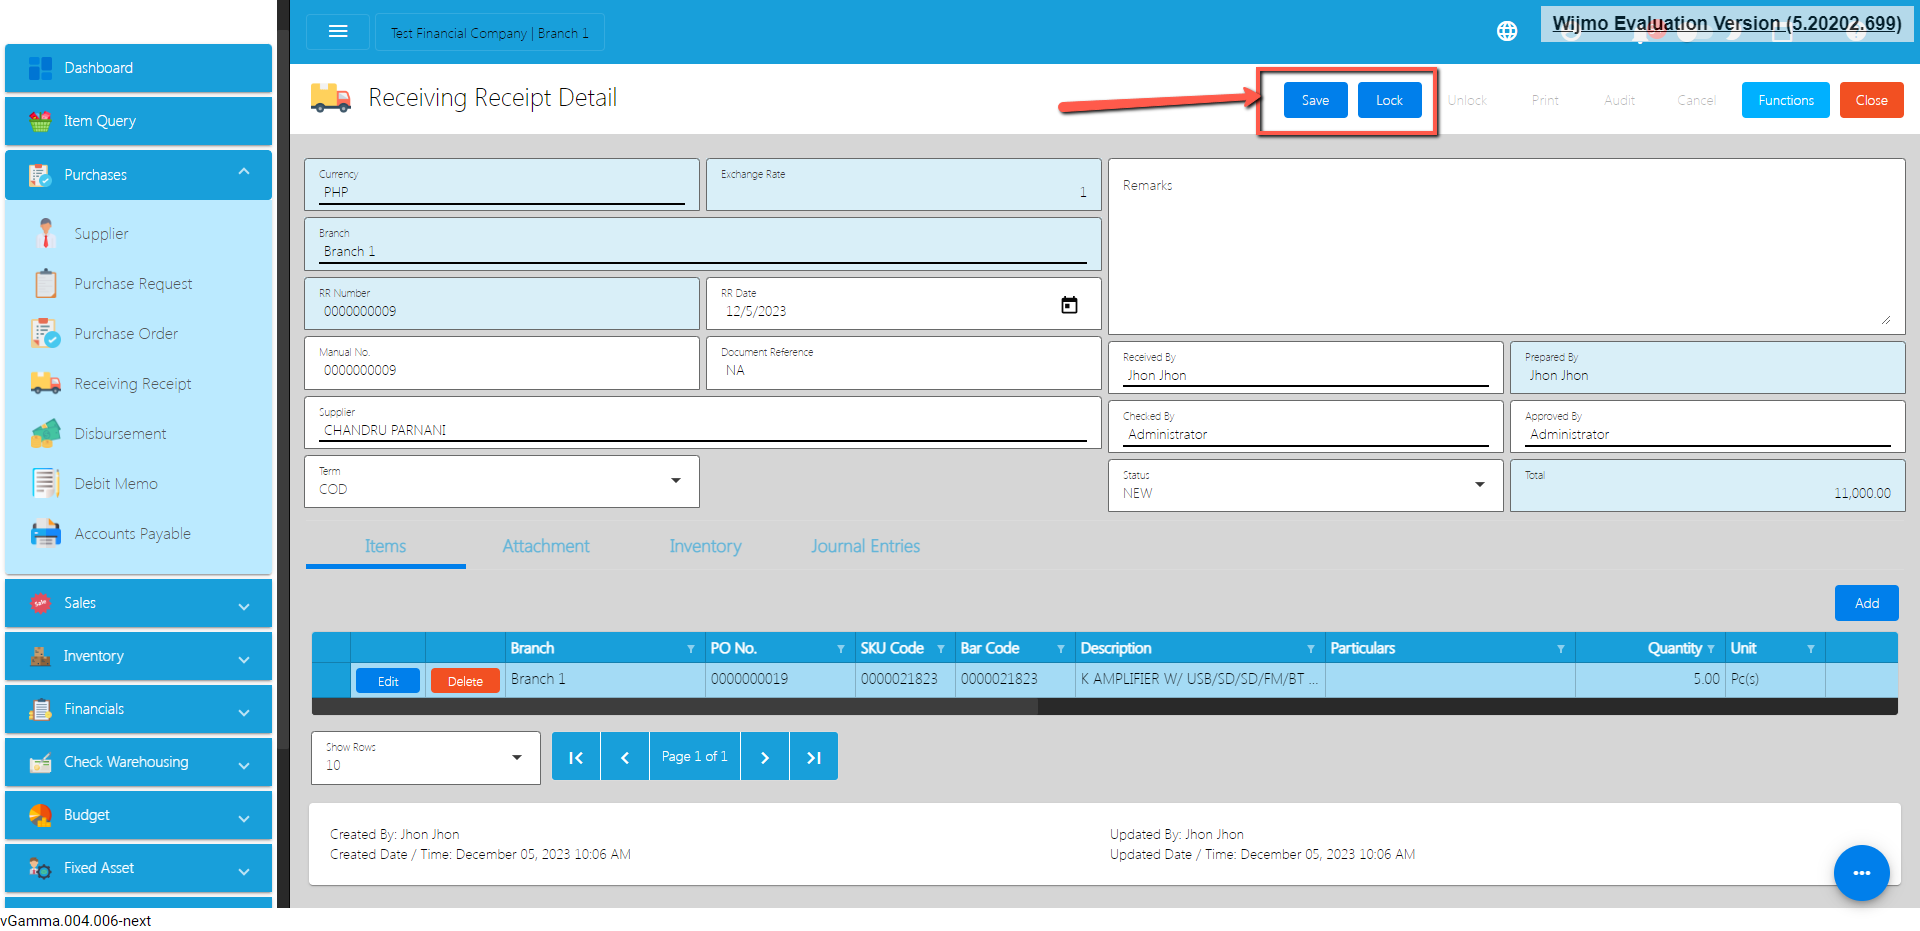
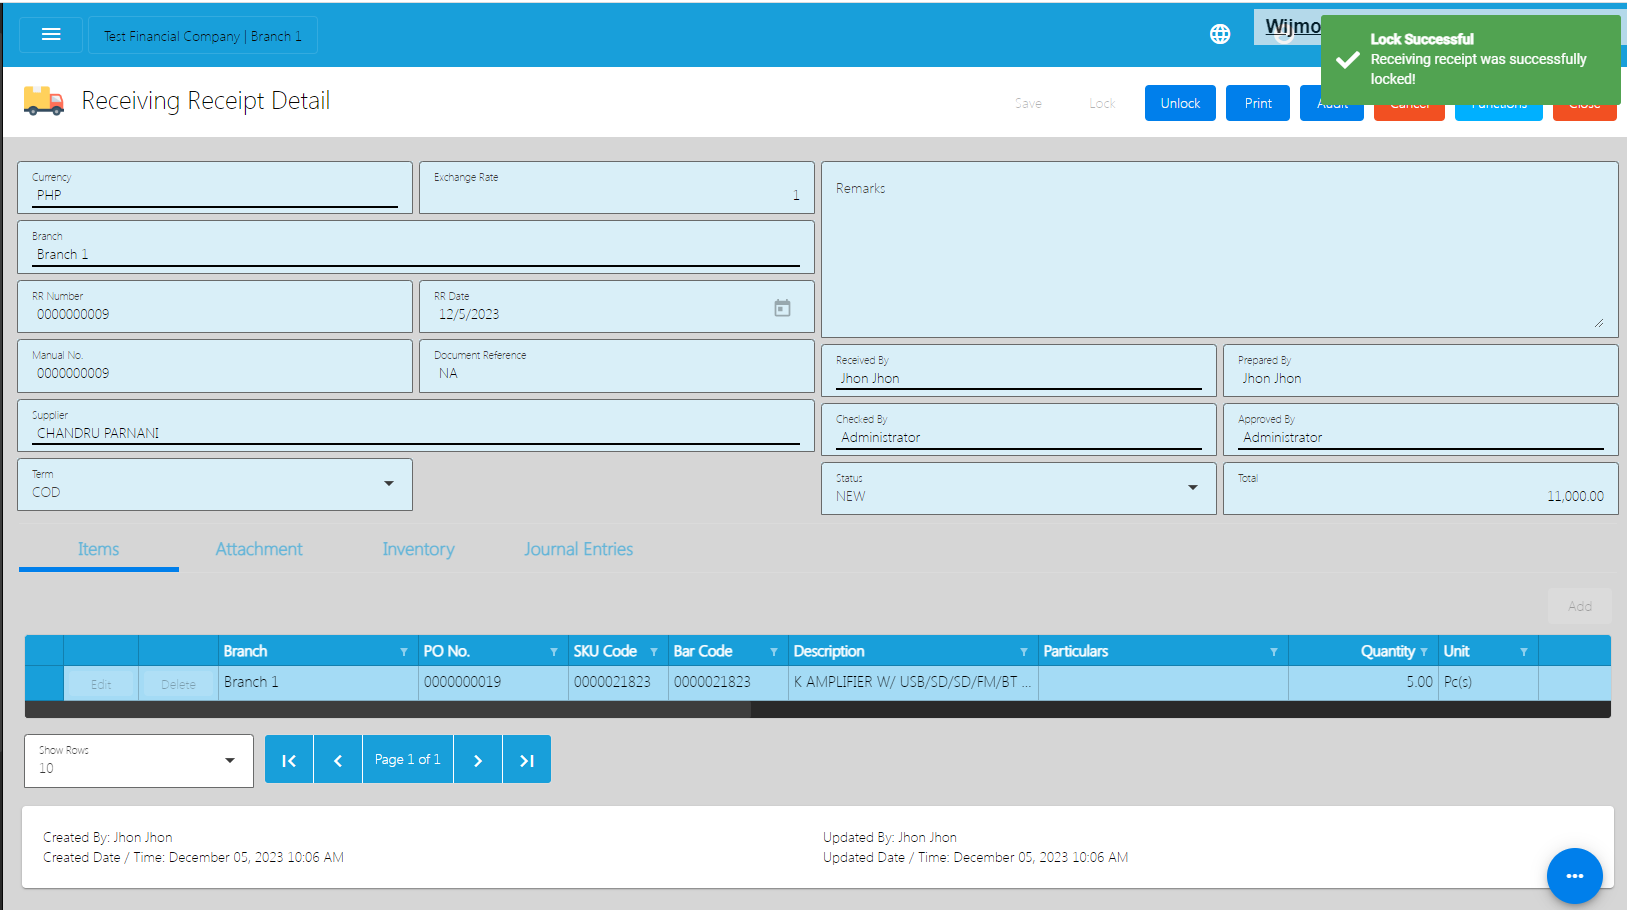
Cancel Receiving Receipt Transaction
When you need to cancel a Receiving Receipt, it’s important to follow these simple steps:
- Log In: Visit your easyFS domain and login with your username and password.
- Find your Receiving Receipt: Navigate to the Purchases, then Receiving Receipt. You will be redirected to the Receiving Receipt lists.
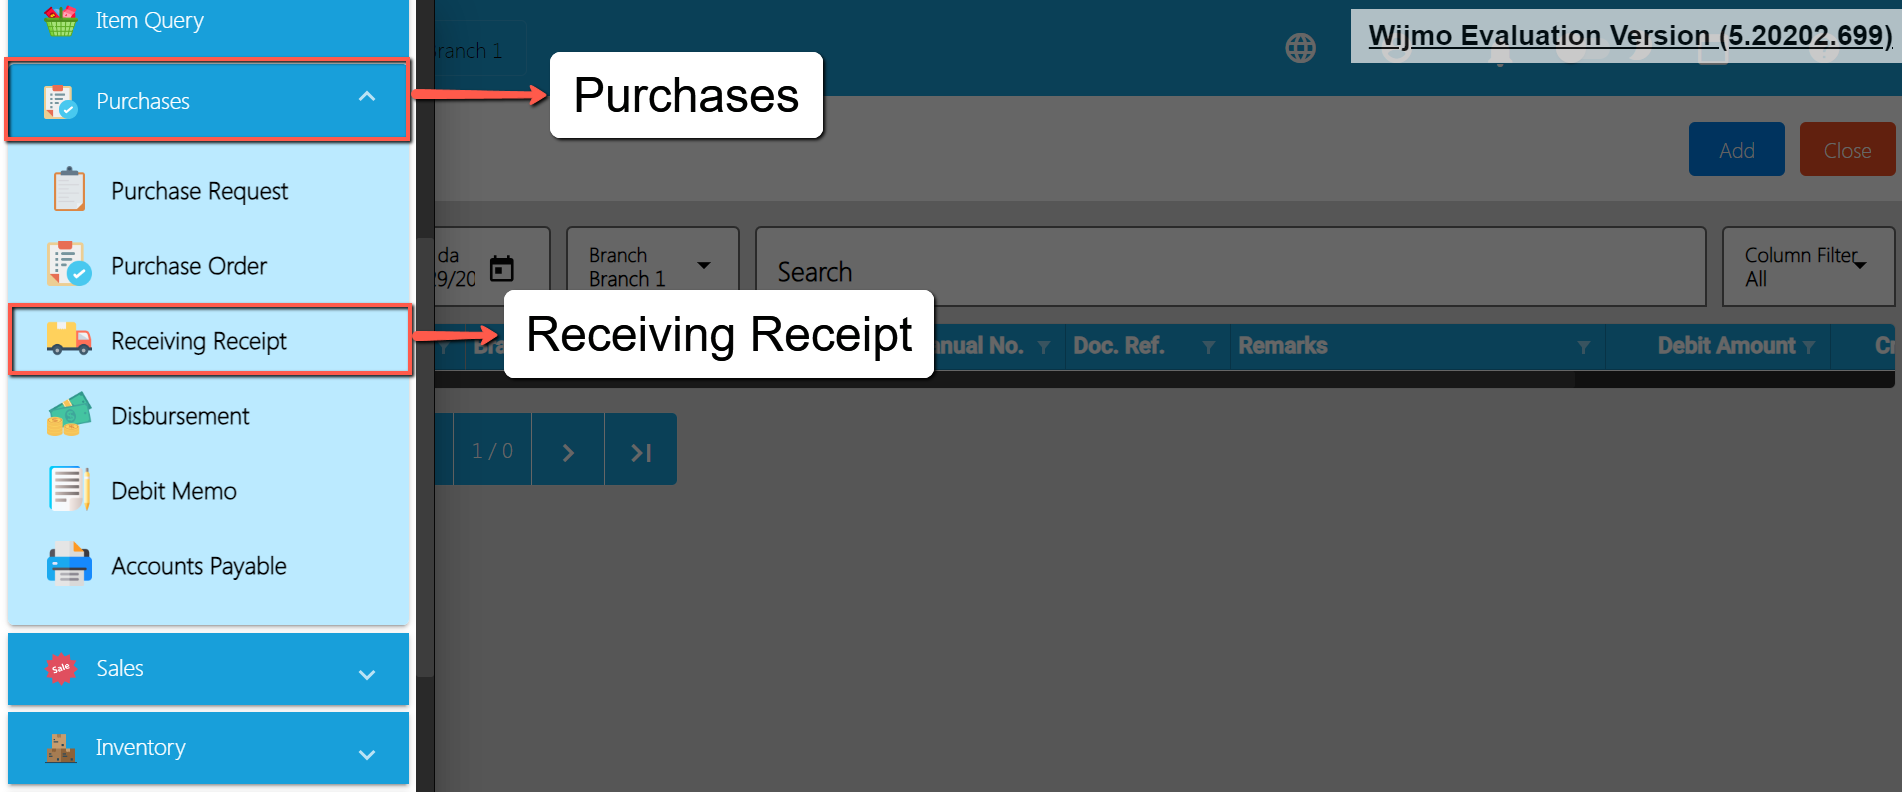
- Locate the Right One: From the Receiving Receipt list, you may use the search bar to look for the right Receiving Receipt you want to cancel. You can search using the Receiving Receipt’s RR NUmber, Manual Number, Document Reference, etc.
Take note: Don’t forget to change the Start Date and End Date to your Receiving Receipt’s transaction date to display the correct result.
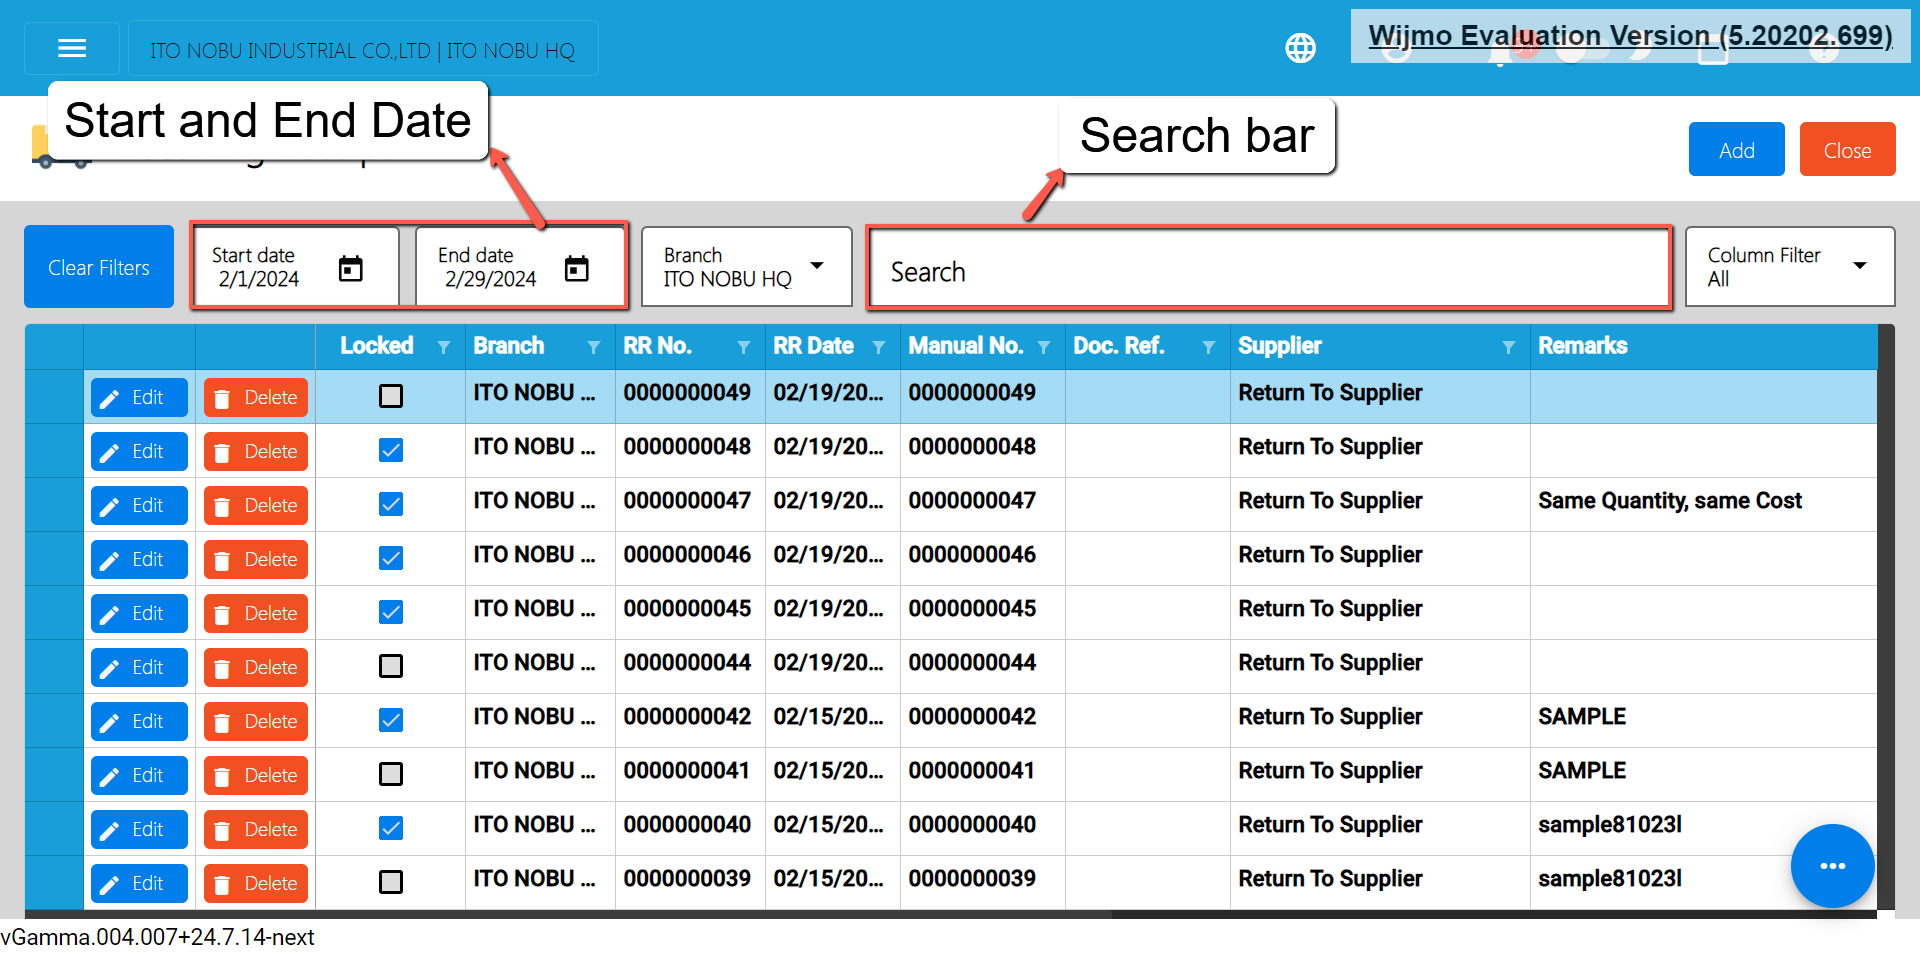
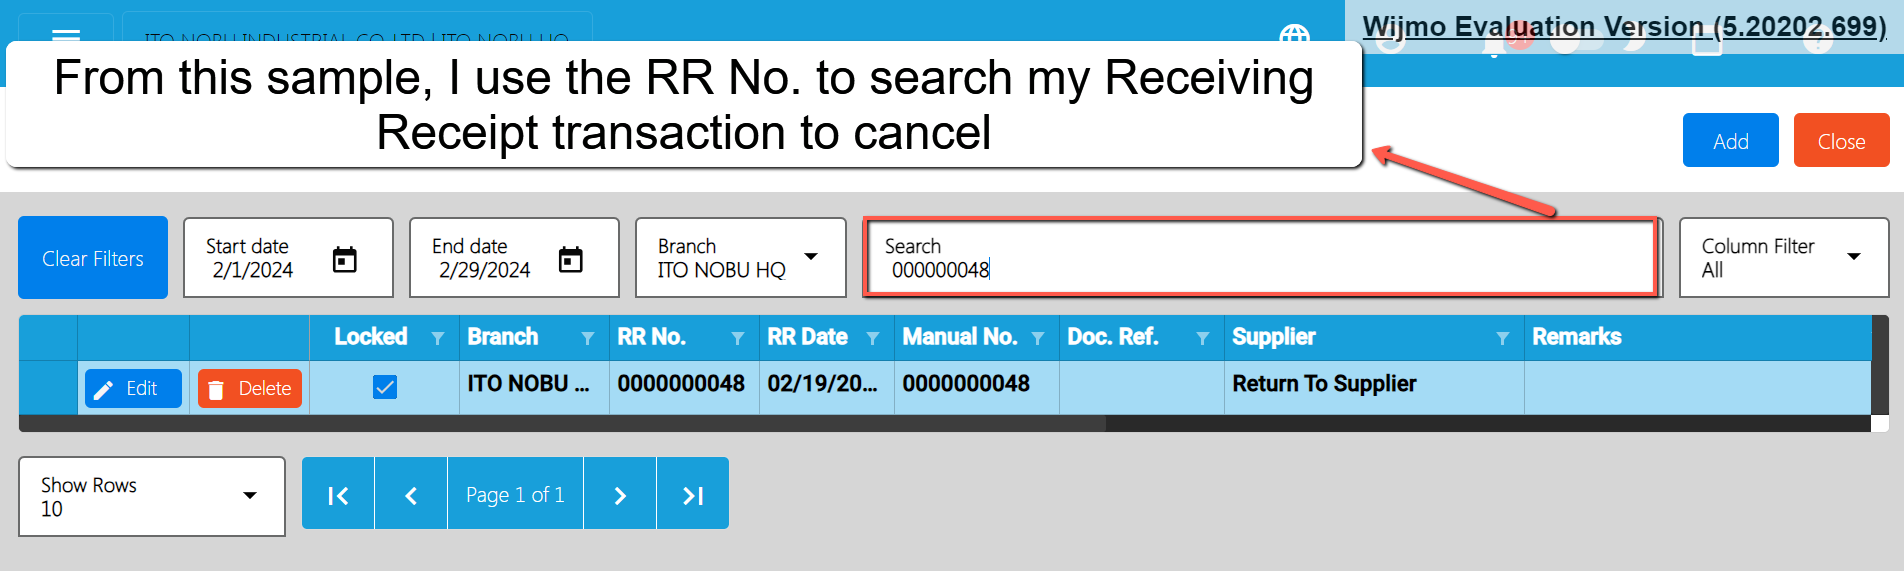
- Open the Receiving Receipt Detail: Click the Edit button to open the Receiving Receipt detail page.
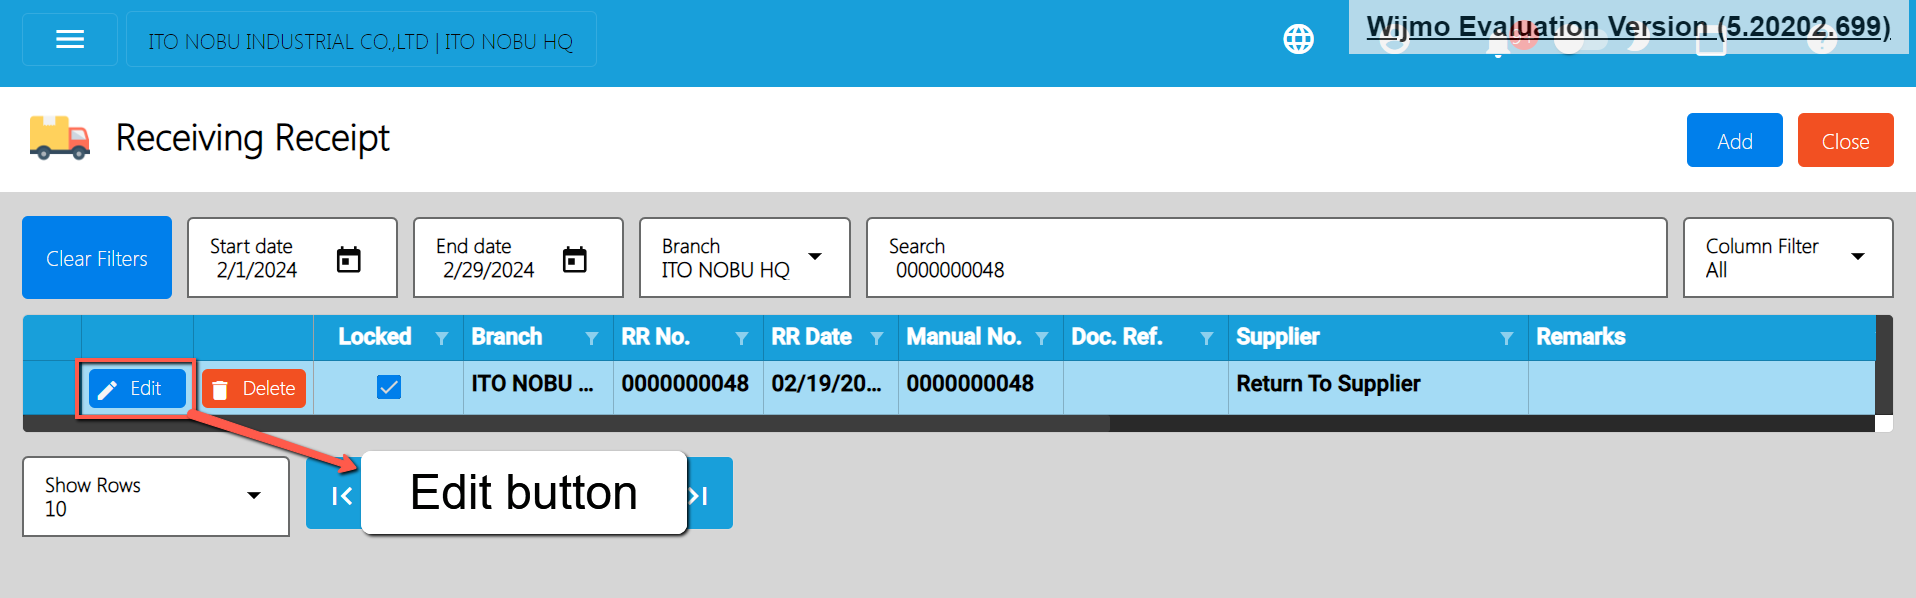
- Cancel the Receiving Receipt: To cancel your Receiving Receipt transaction, look for the Cancel found on the upper-right part of the page, then click.
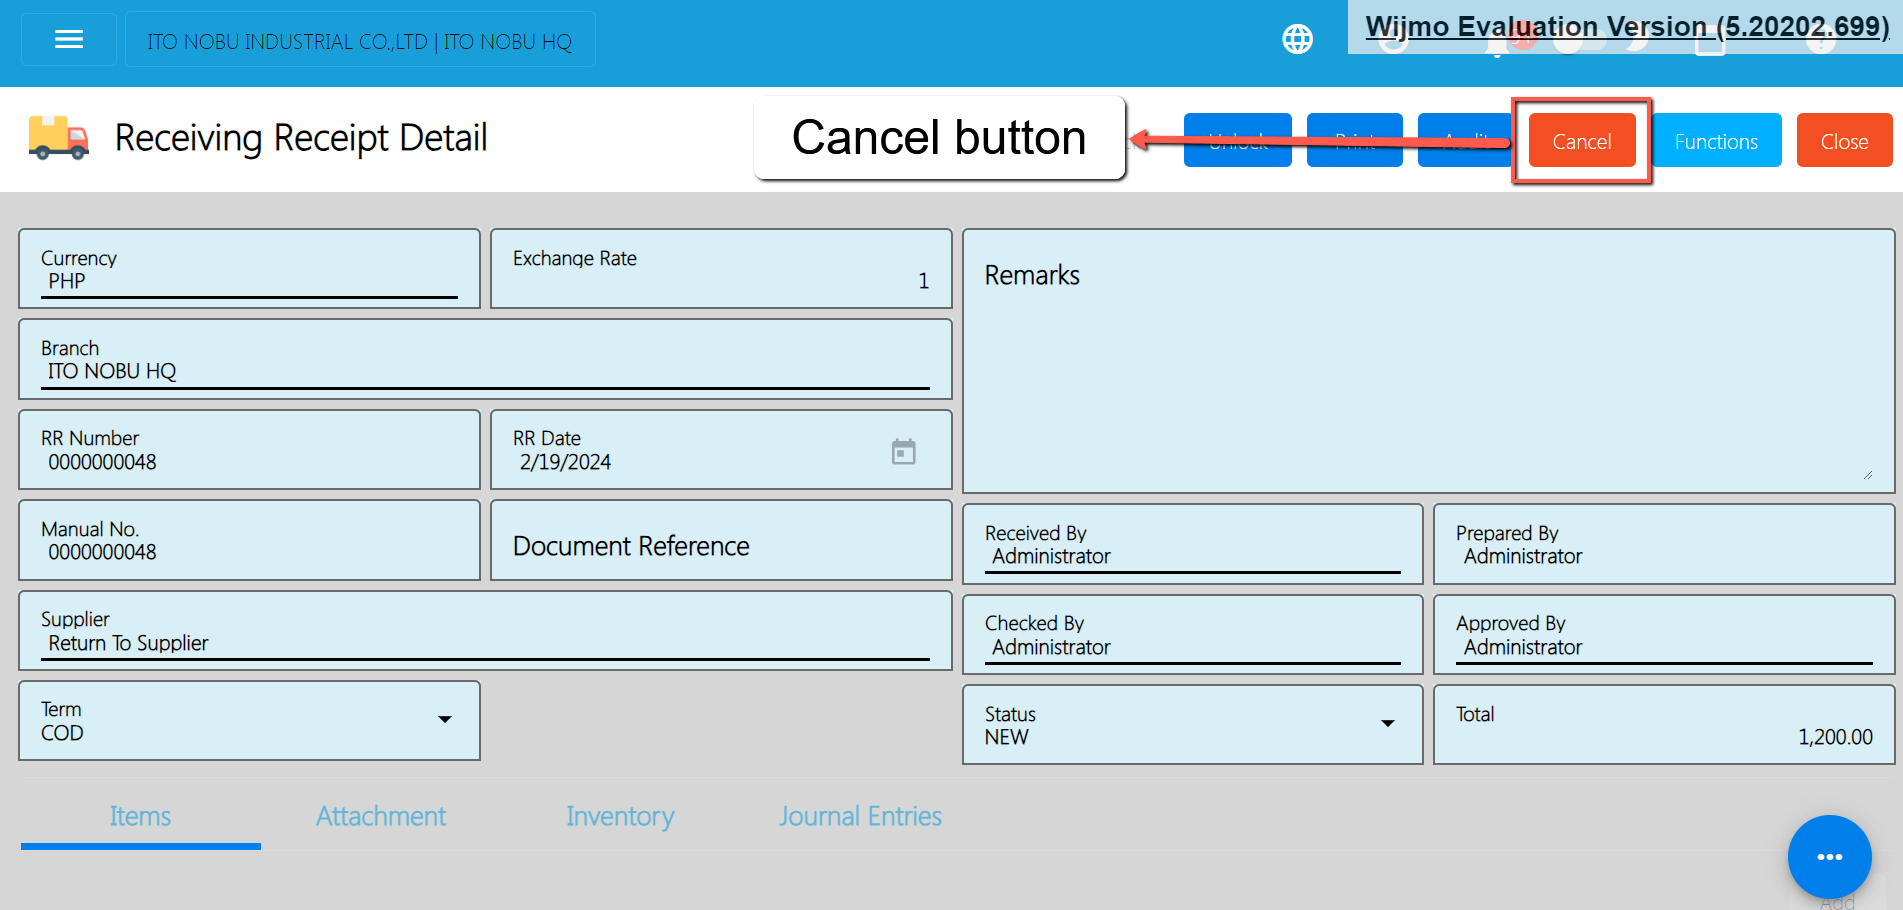
- Confirm Canceling: After you click the Cancel button, there’s a Cancel Receiving Receipt window. If you’re sure you want to cancel your Receiving Receipt transaction, click the Cancel button.
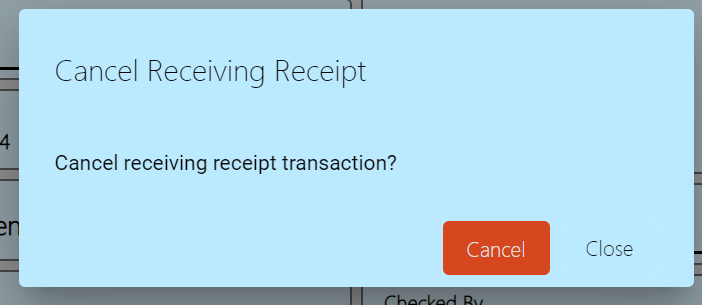
- Check It’s Done: After canceling, make sure you get a success toast message confirming it’s canceled successfully. It is found on the bottom right of the page.
- Let Others Know(if needed): If you believe canceling affects other people, it's a good idea to inform them.
- Keep Track: Remember to make a note somewhere that you canceled the Receiving Receipt , just in case it is needed later.
5.2.4 Disbursement
Overview
The Disbursement is created for expenses of the company and also payment for all the purchase orders.
Disbursement List
- List of all the Disbursements and will also show the overview of the transaction.
- Here, you can also filter the Start and End Date of the transaction and the button to add new Disbursement.
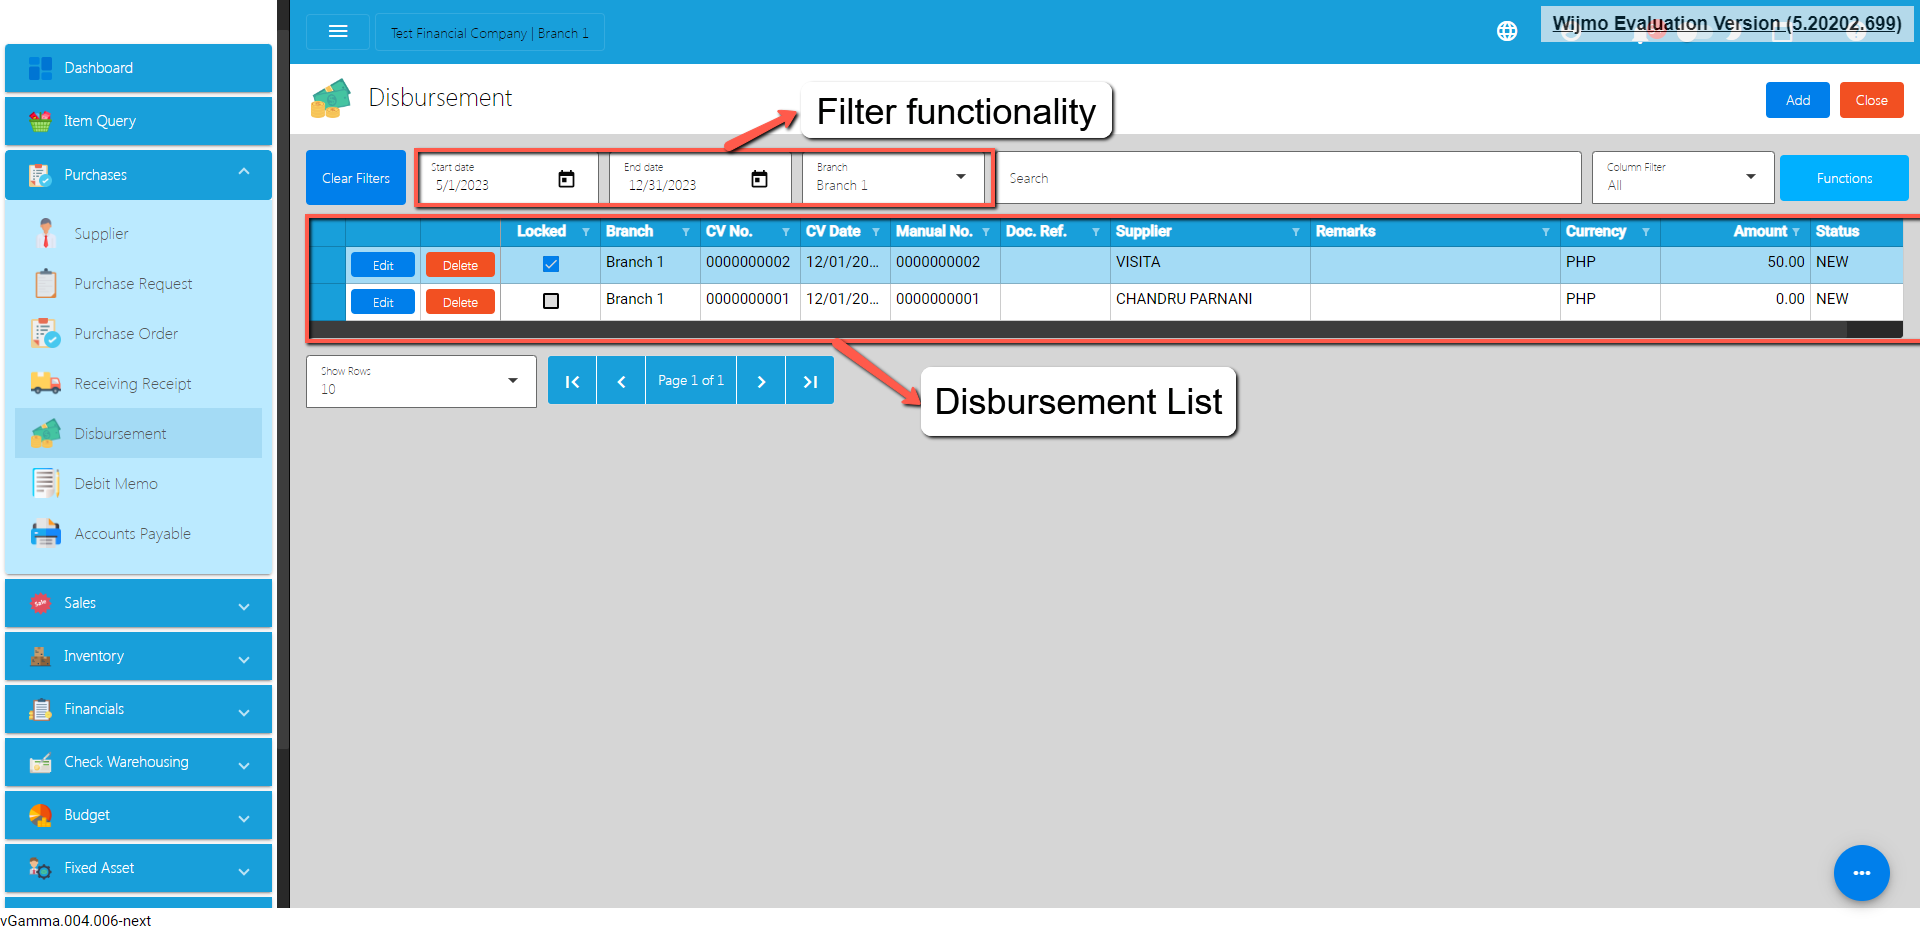
Disbursement Detail
- To add a new Disbursement, go to Purchases then click Disbursement. After that, click the Add that can be seen in the Disbursement list.
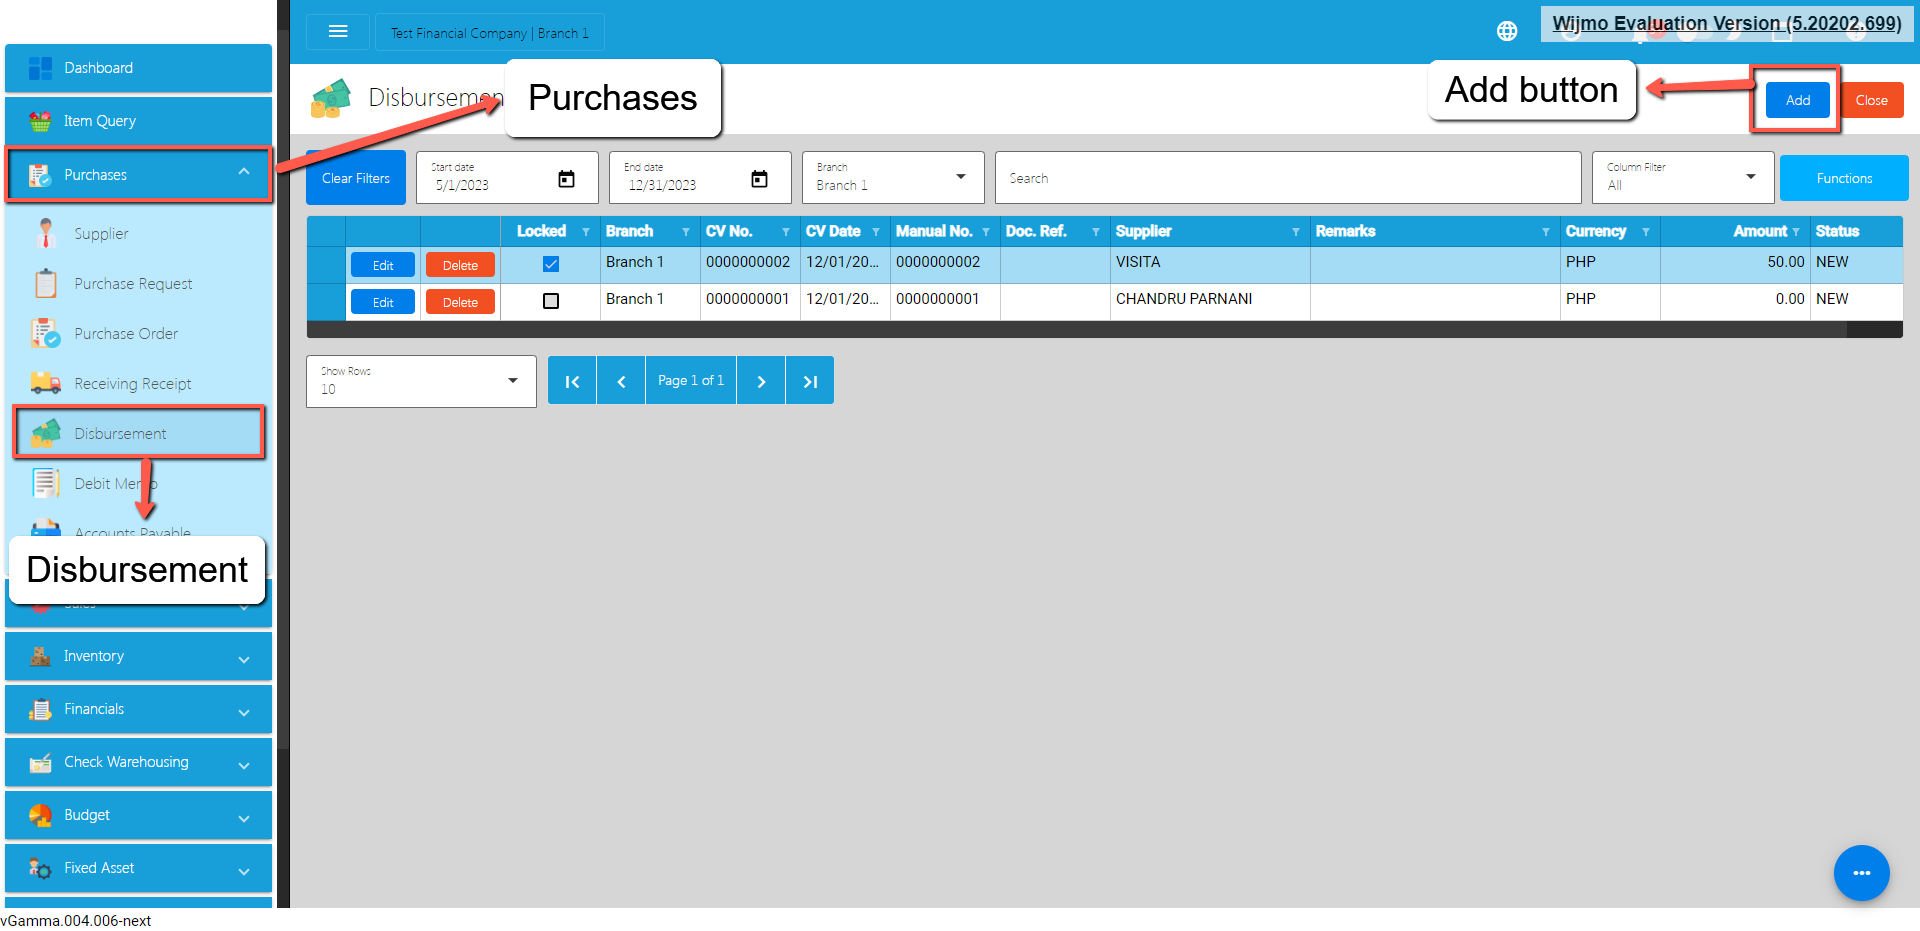
- Fill out all the needed information for the Disbursement Detail like,
- Currency
- Supplier Name
- CV Date
- Document Reference
- Pay Type
- Bank
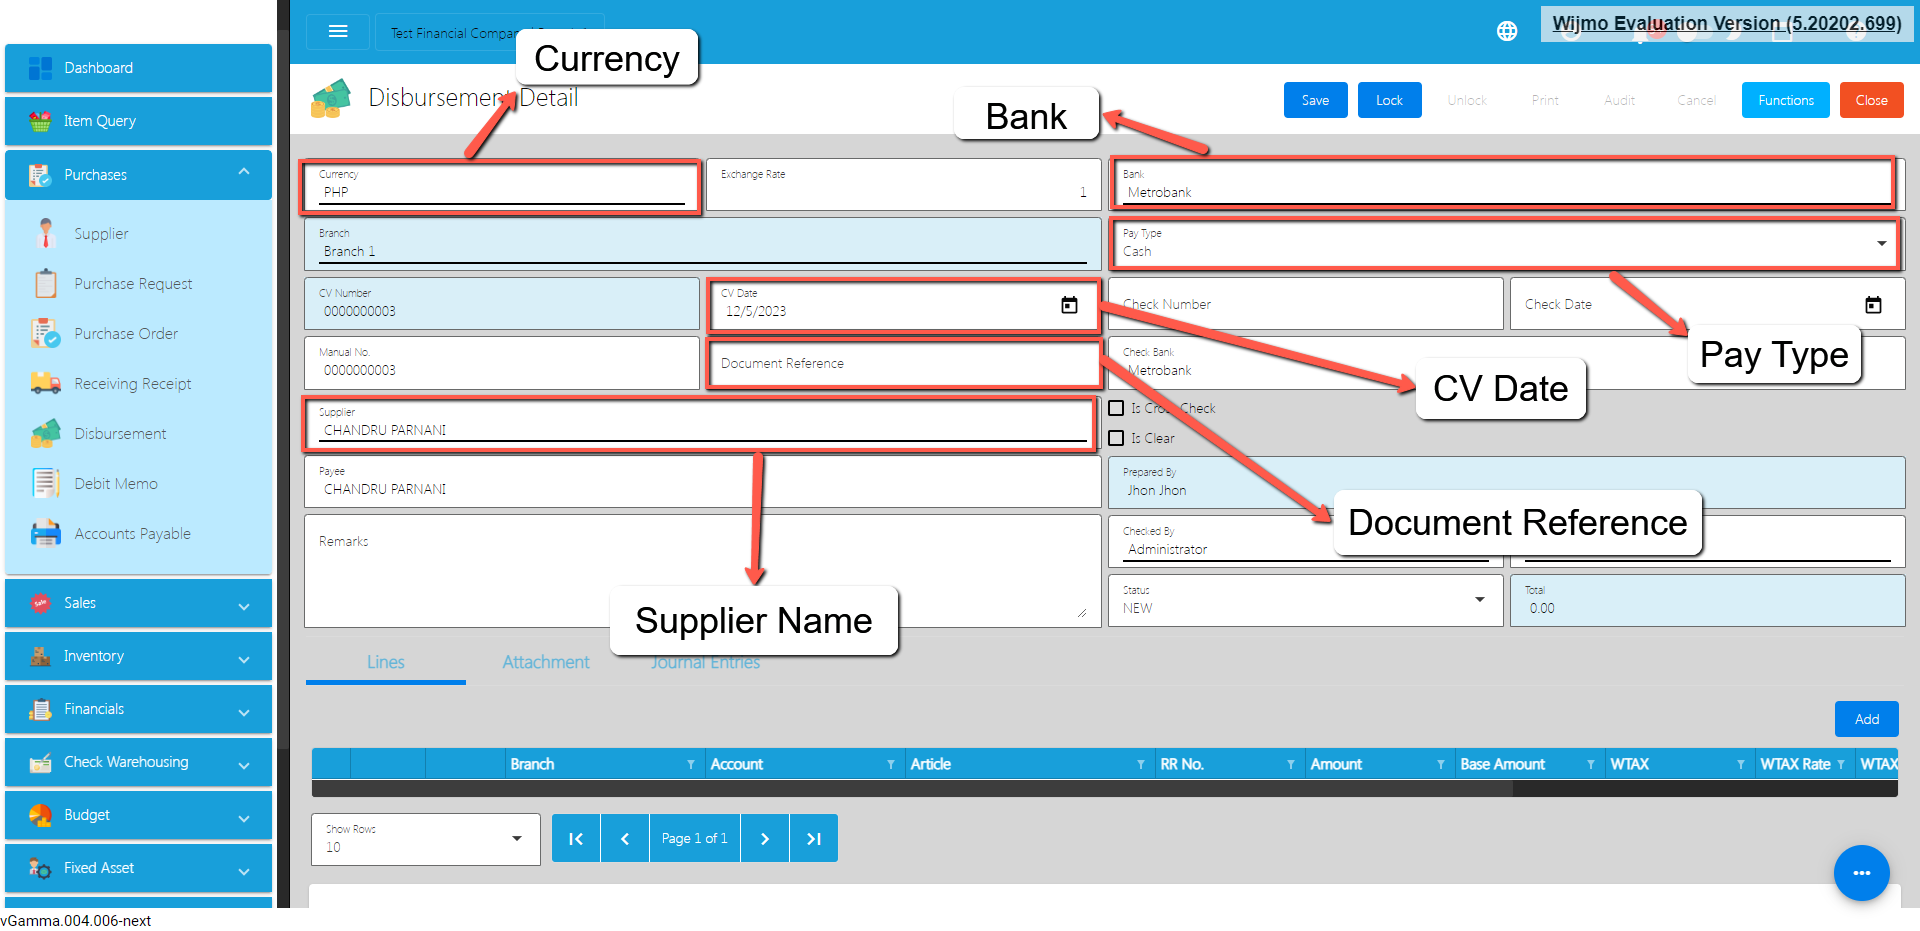
- To add the Disbursement line, click the Add button on the right part of the page under the Lines tab. Choose either RR number or a Disbursement for other expenses.
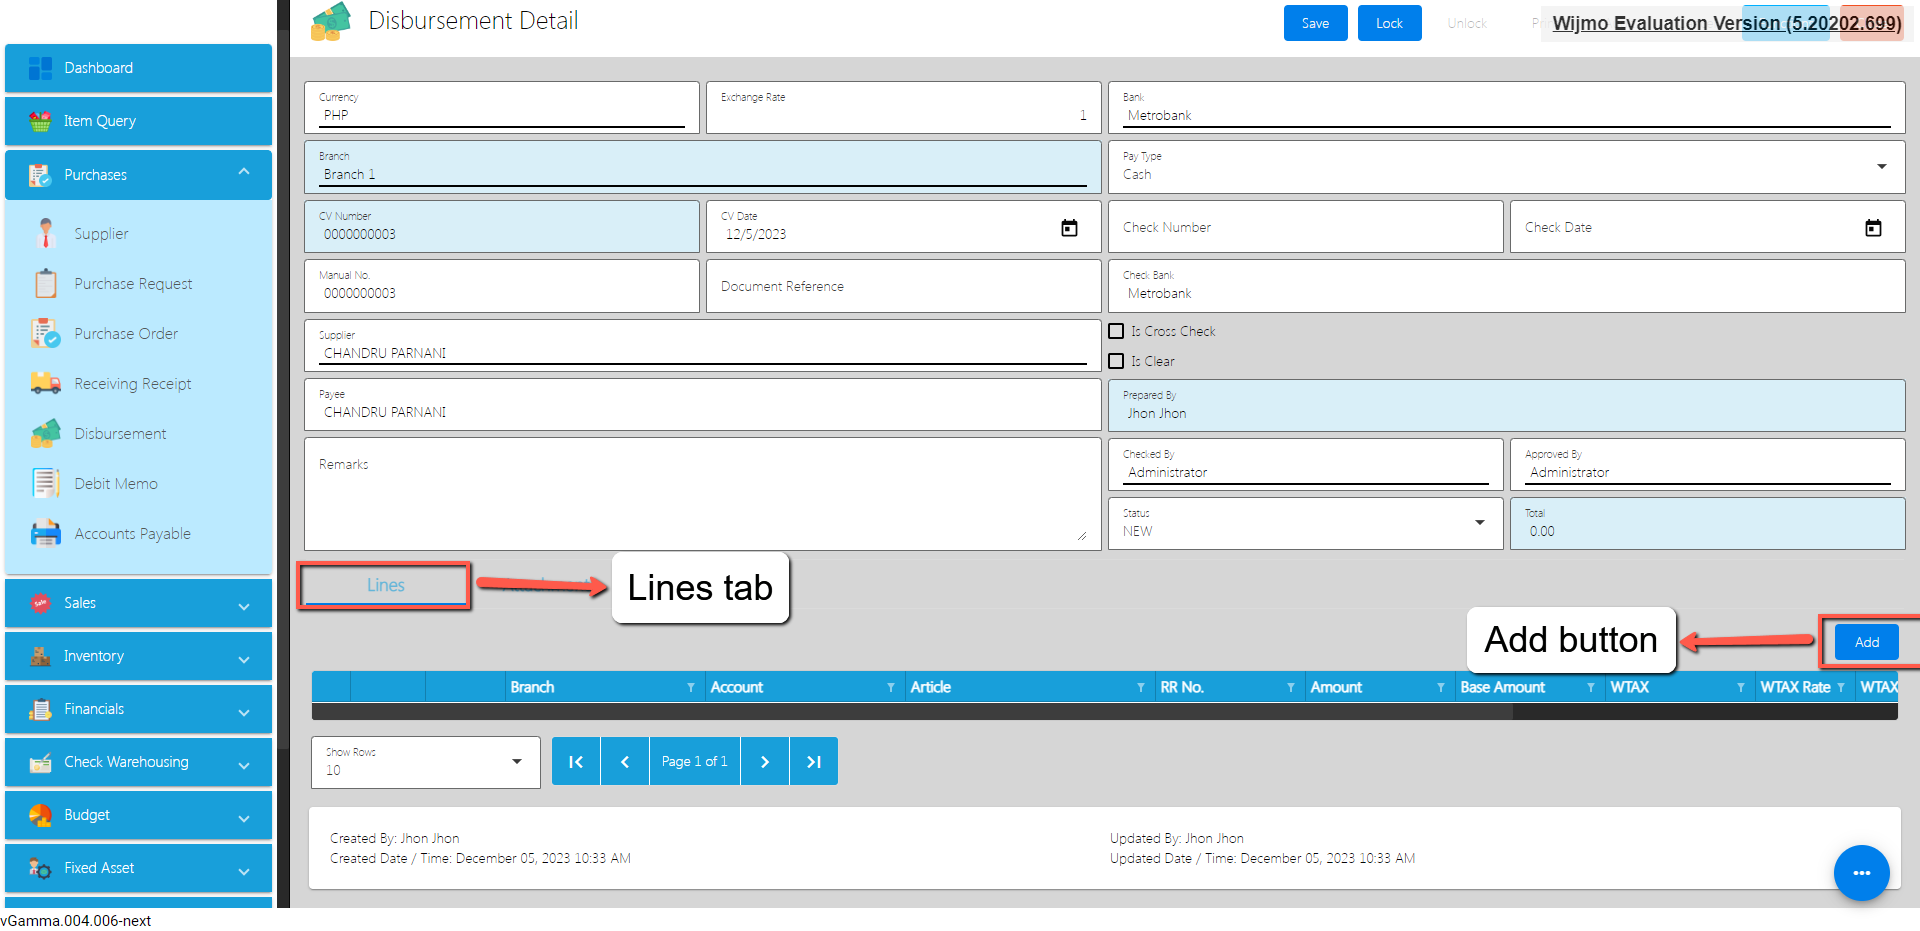
- If the user will Disburse the RR, the user can select that RR by clicking on the RR Number.
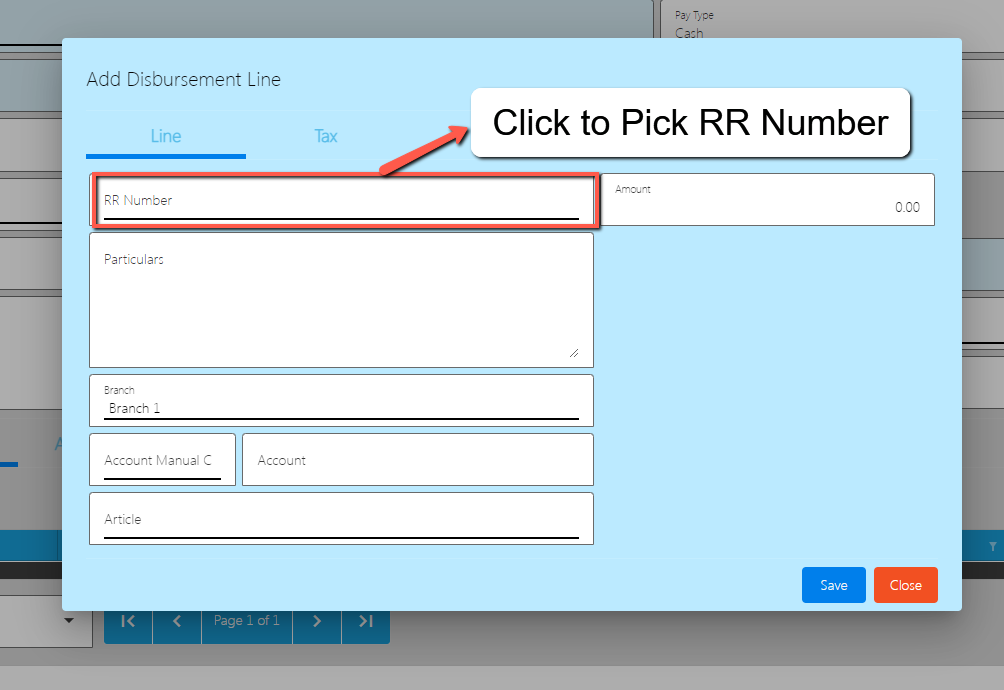
- Once clicked it will pop up all the RR that has not yet Disburse.
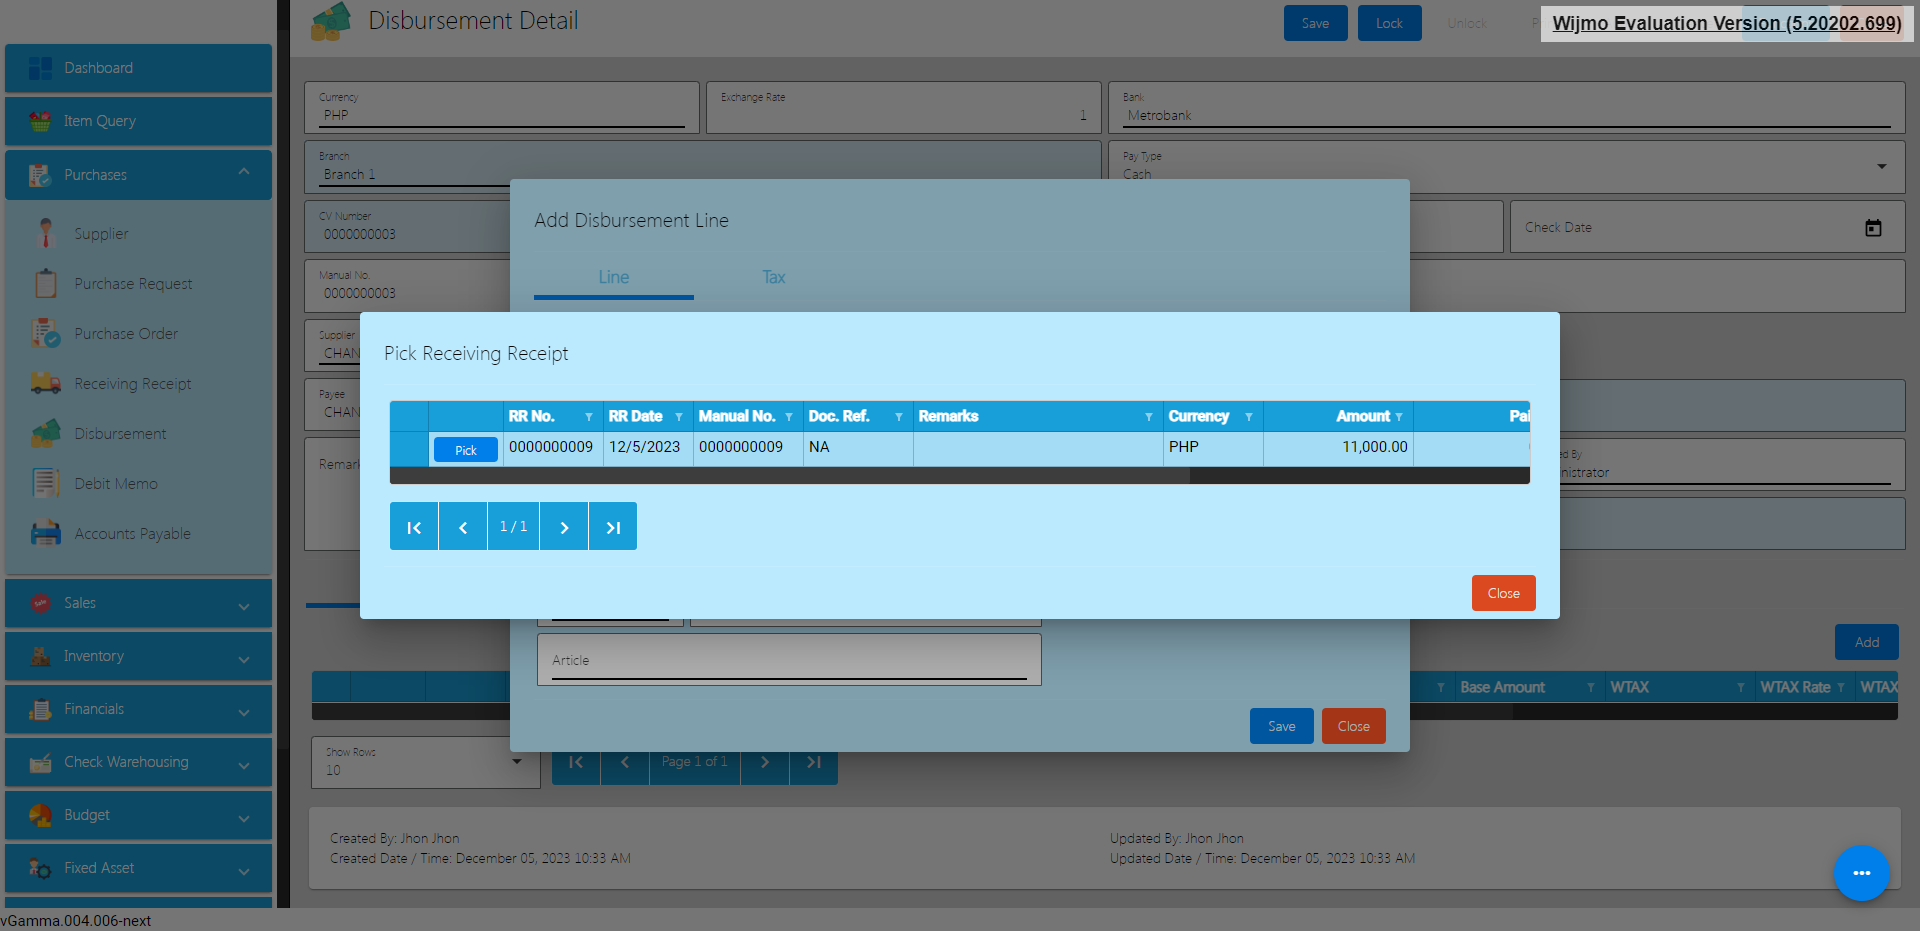
- To add that RR, click the pick button. Once picked, the following fields will automatically populated :
- Account
- Article
- Amount
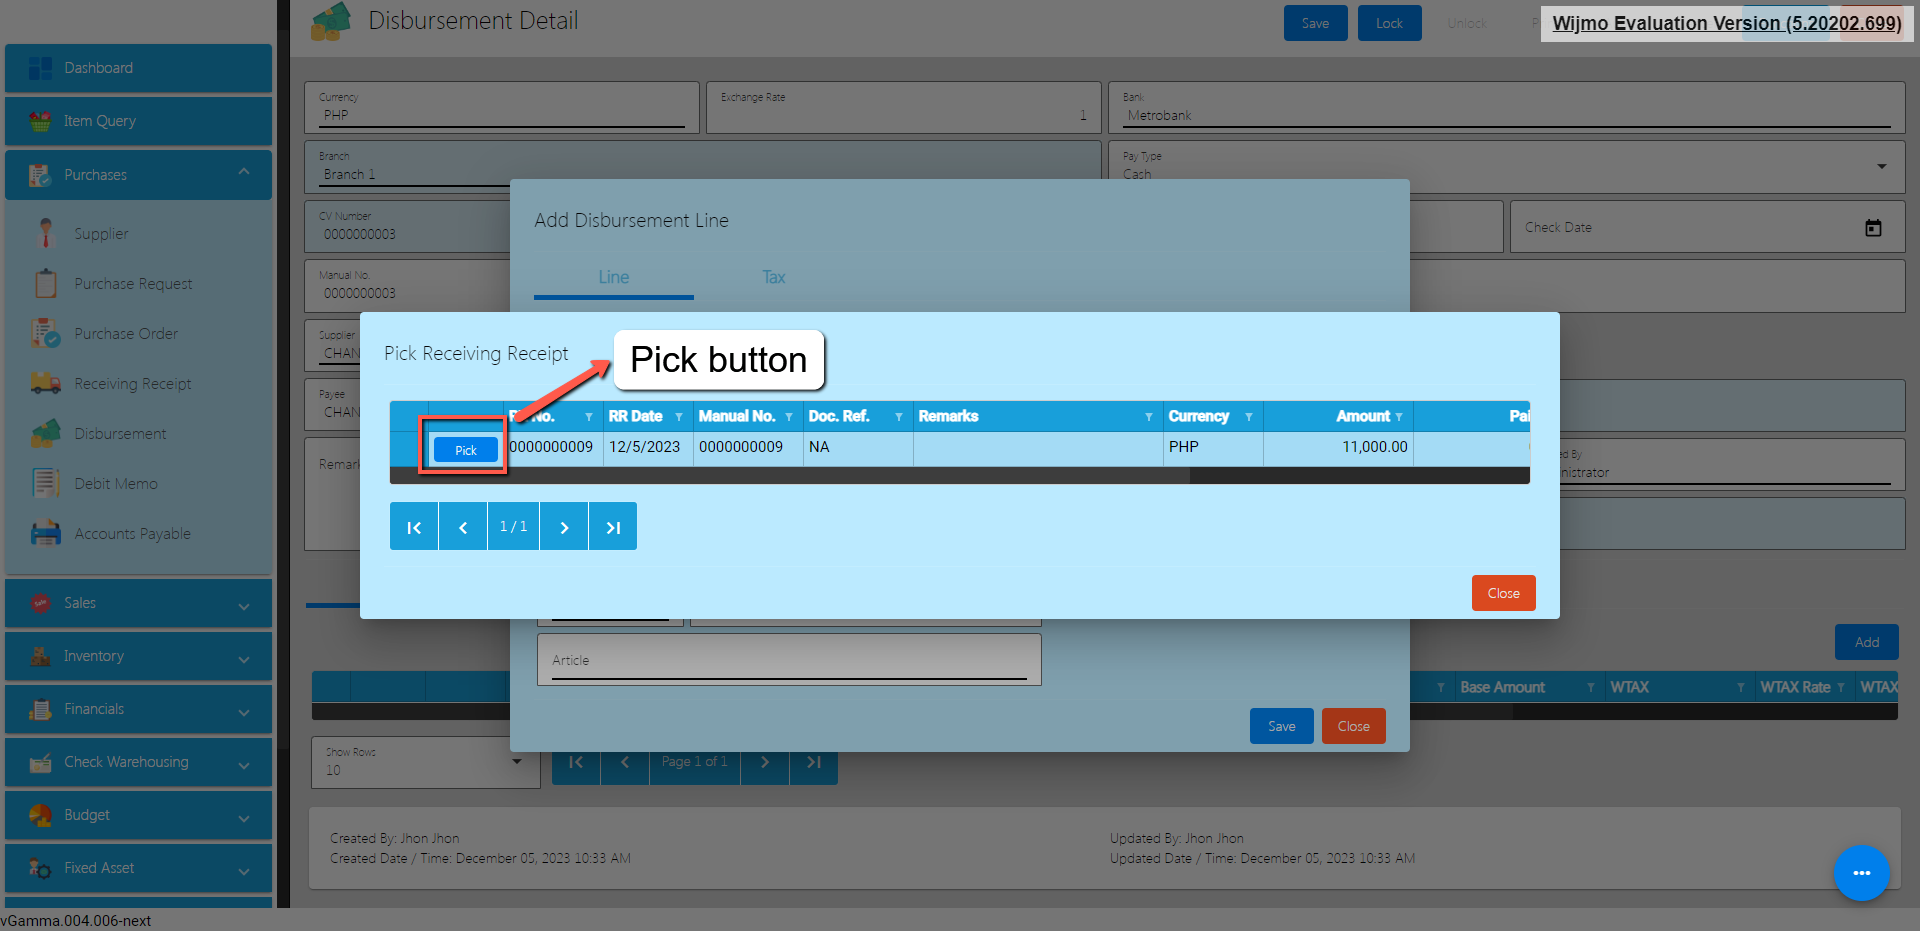
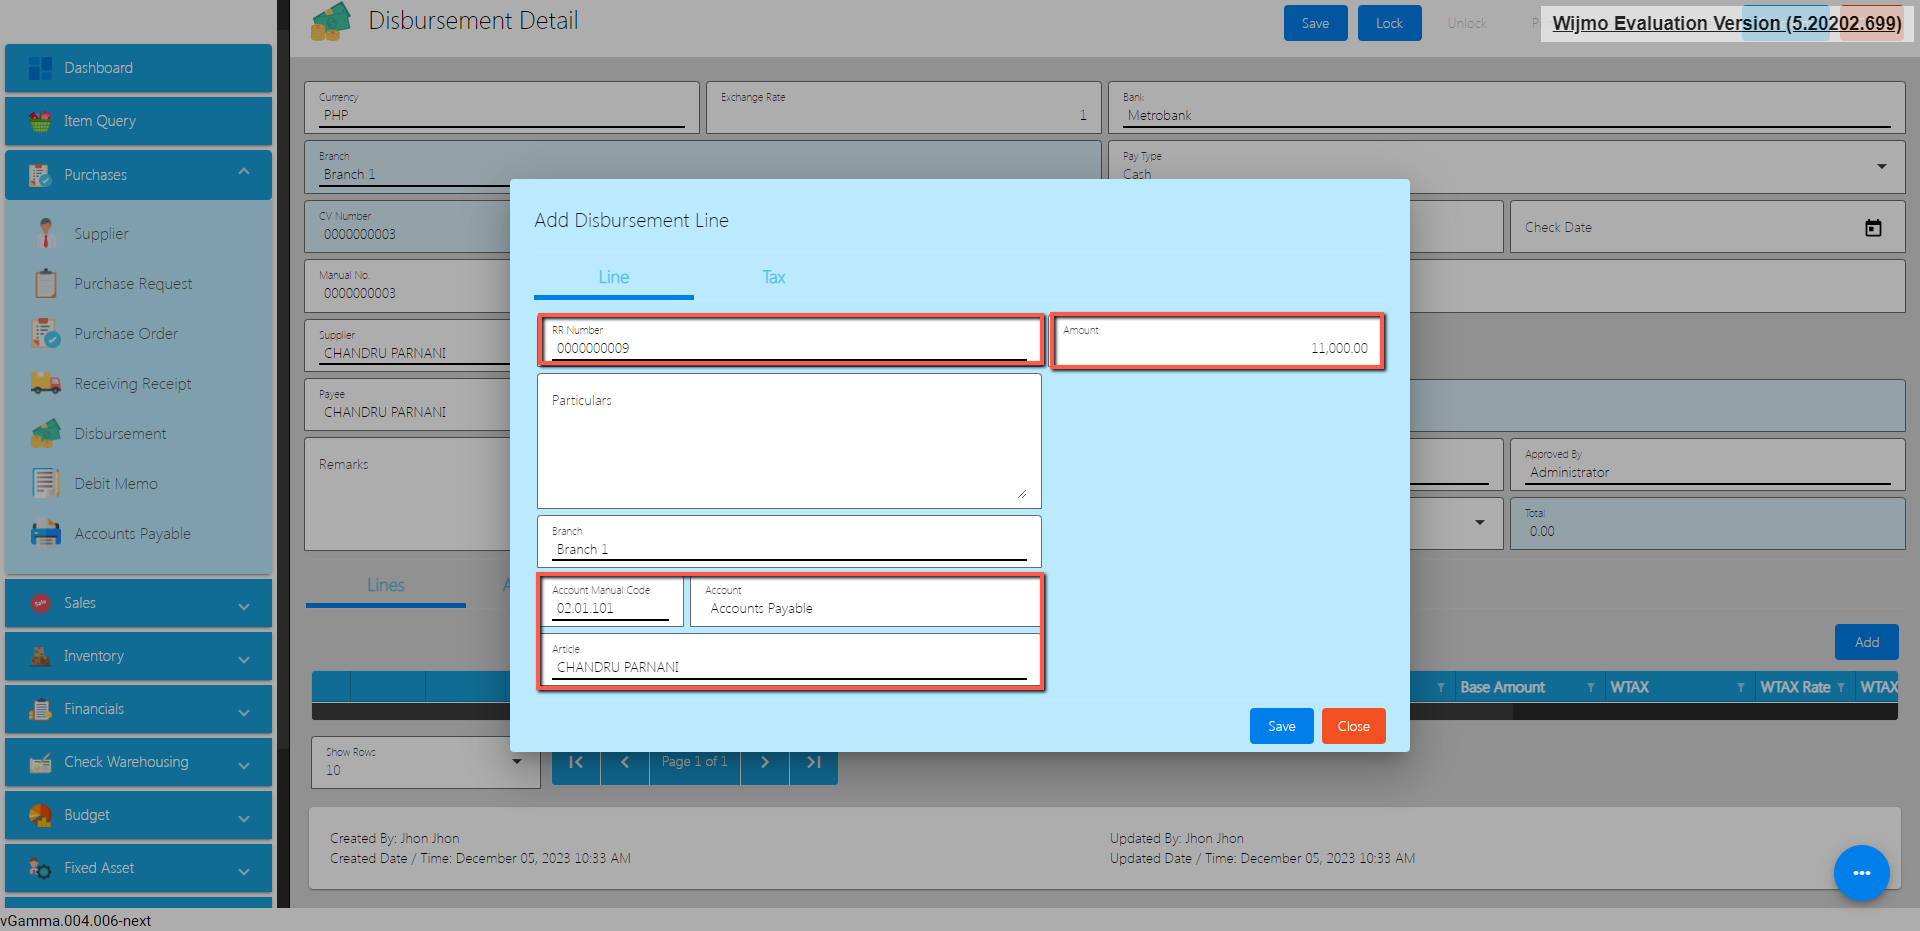
- If you will Disburse for other expenses, just directly click the Account Manual Code then input an amount.
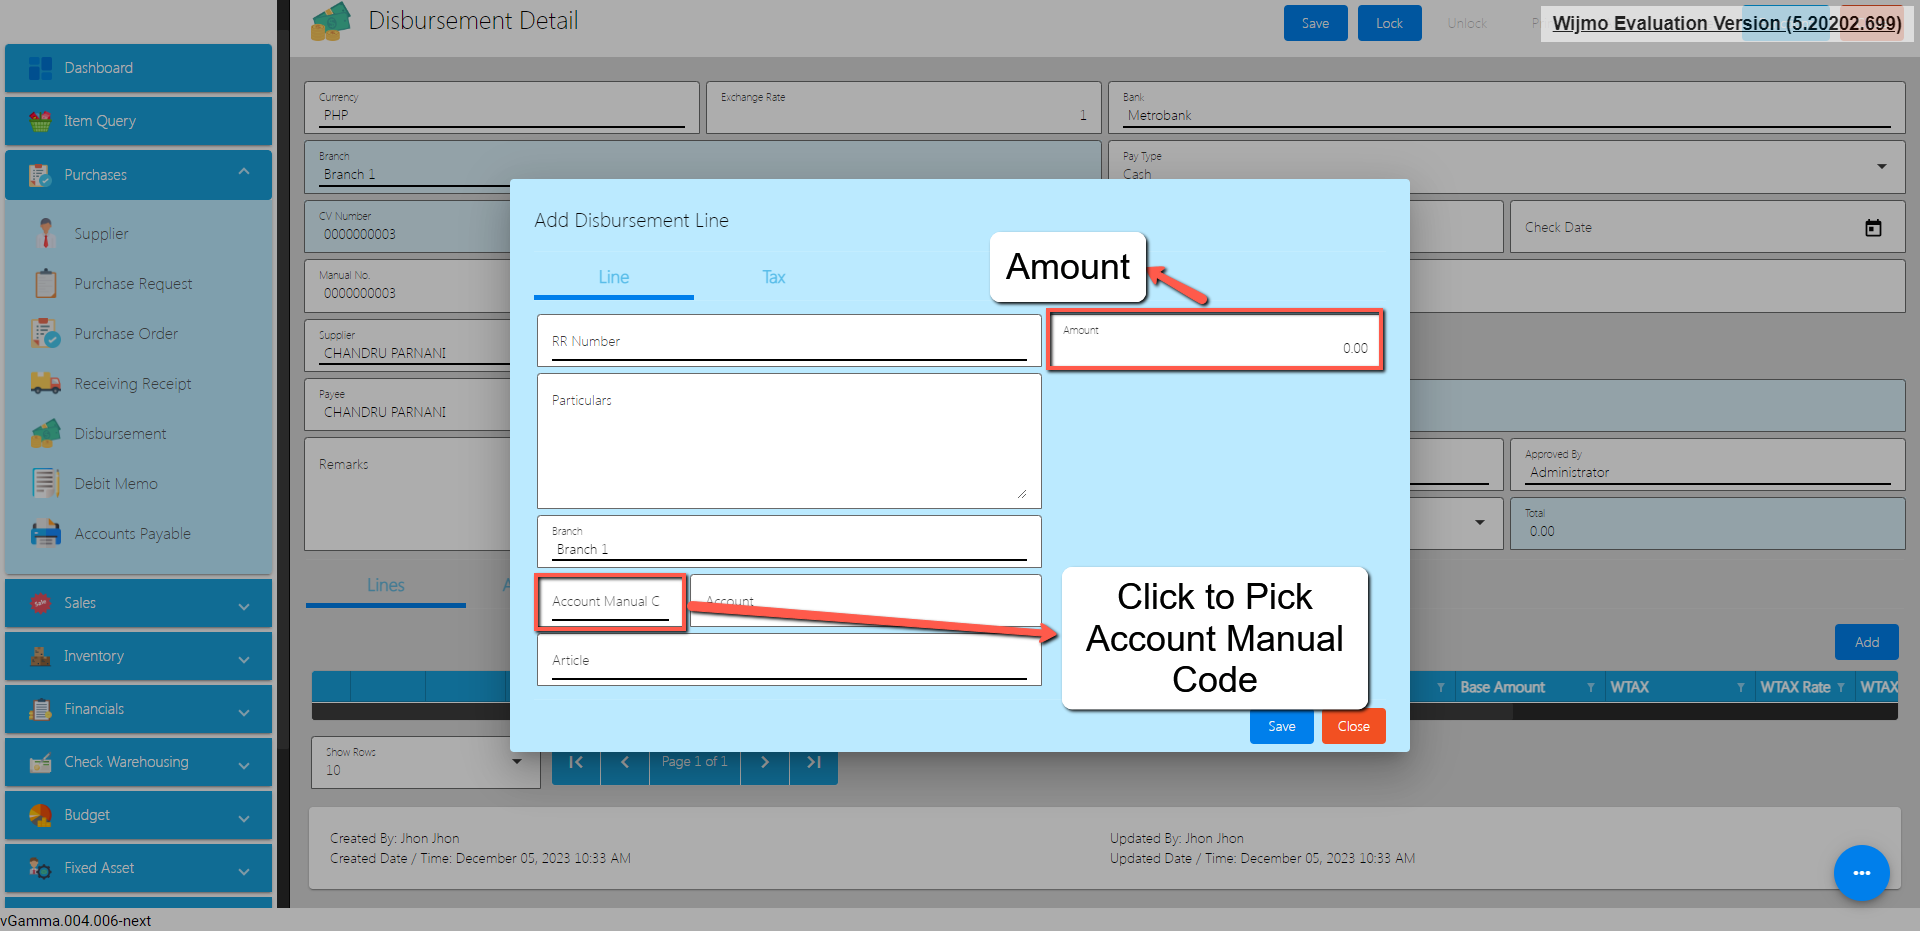
- Click the Save button.
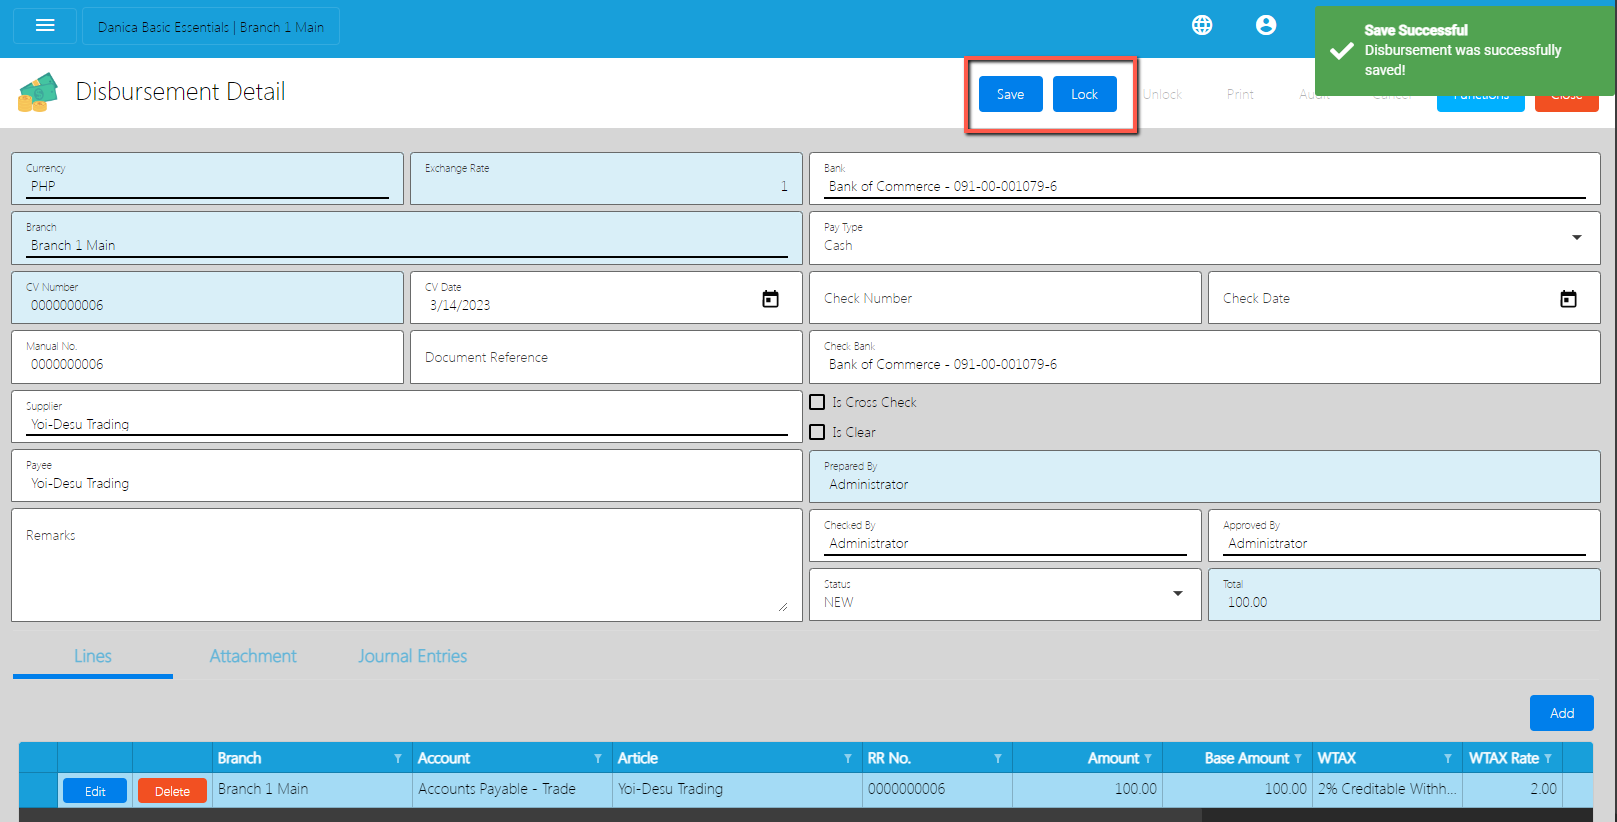
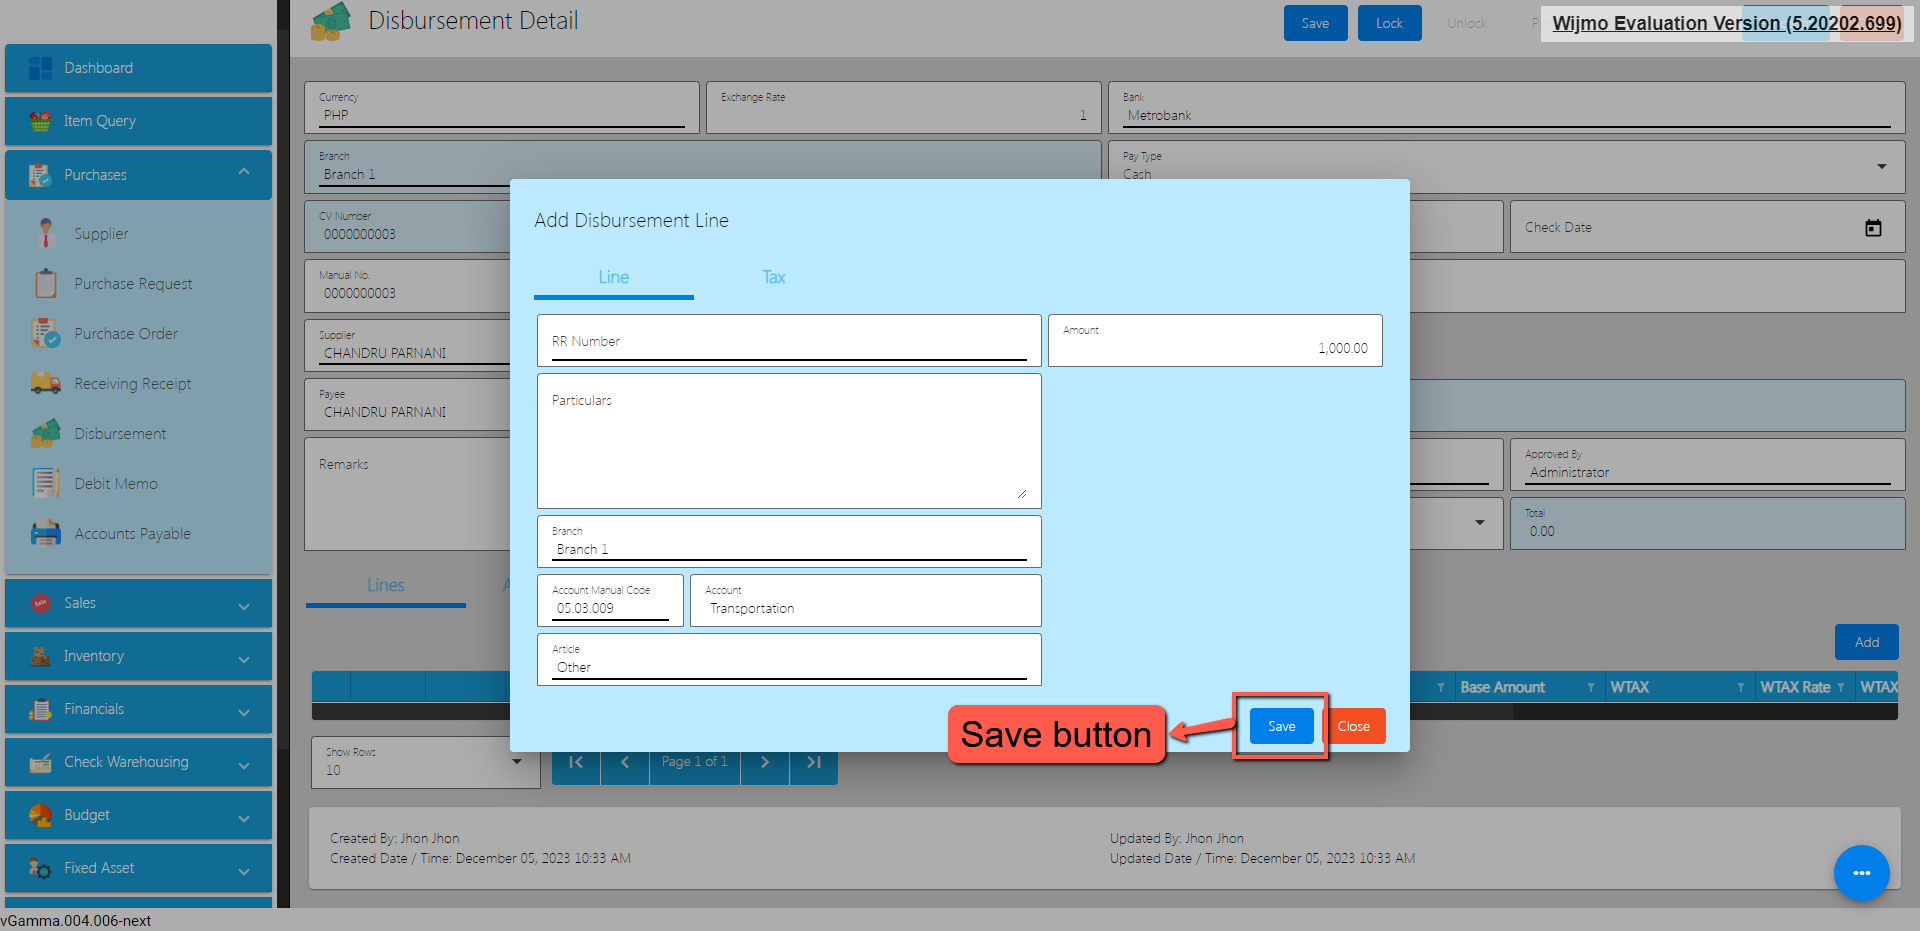
- If the disbursement is all good, make sure to click Save and Lock.
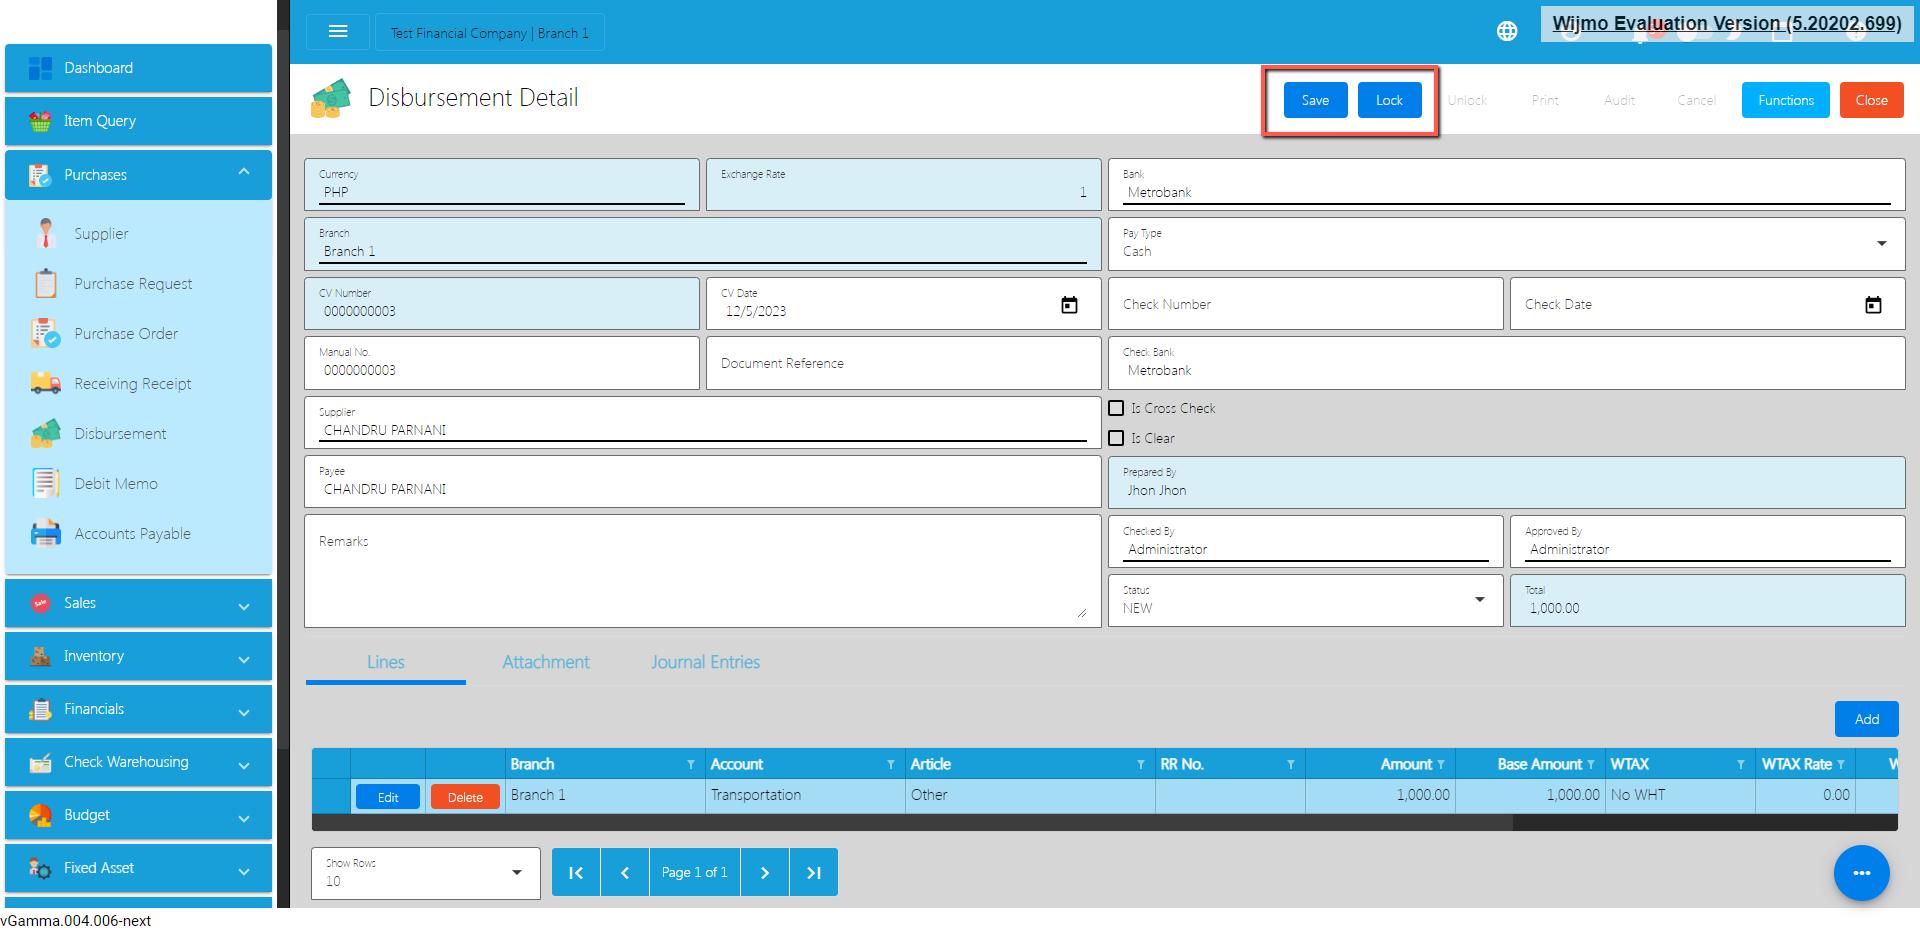
Cancel Disbursement Transaction
When you need to cancel a Disbursement, it’s important to follow these simple steps:
- Log In: Visit your easyFS domain and login with your username and password.
- Find your Disbursement: Navigate to the Purchases, then Disbursement. You will be redirected to the Disbursement lists.
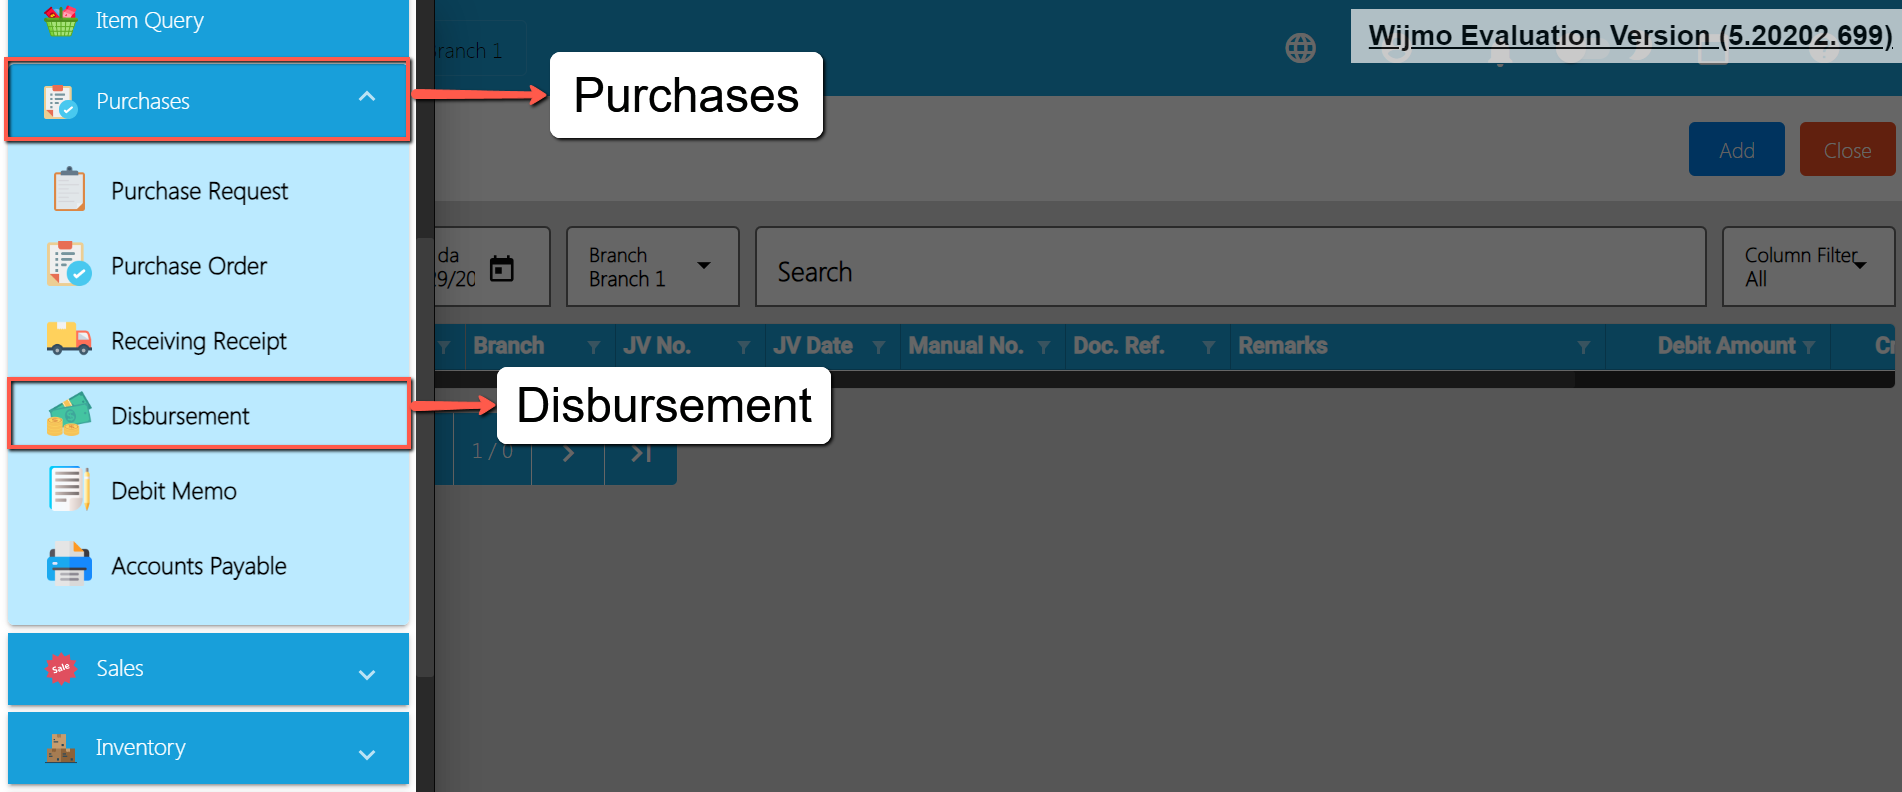
- Locate the Right One: From the Disbursement list, you may use the search bar to look for the right Disbursement you want to cancel. You can search using the Disbursement’s CV NUmber, Manual Number, Document Reference, etc.
Take note: Don’t forget to change the Start Date and End Date to your Disbursement’s transaction date to display the correct result.
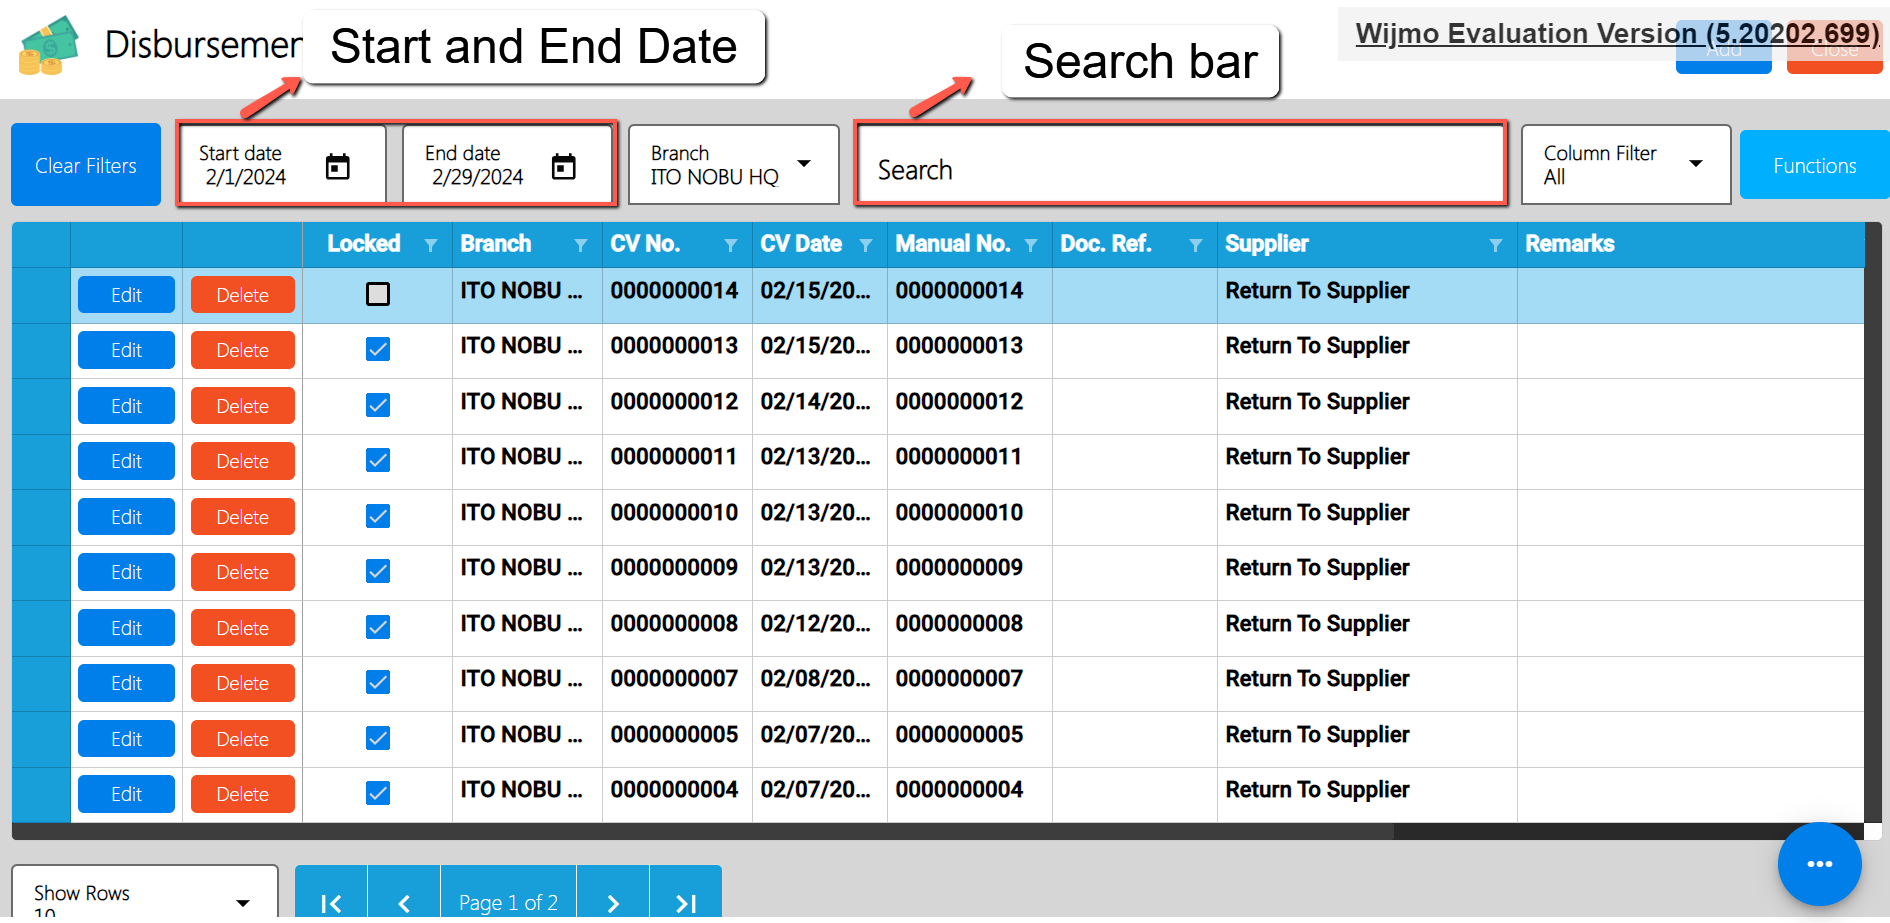
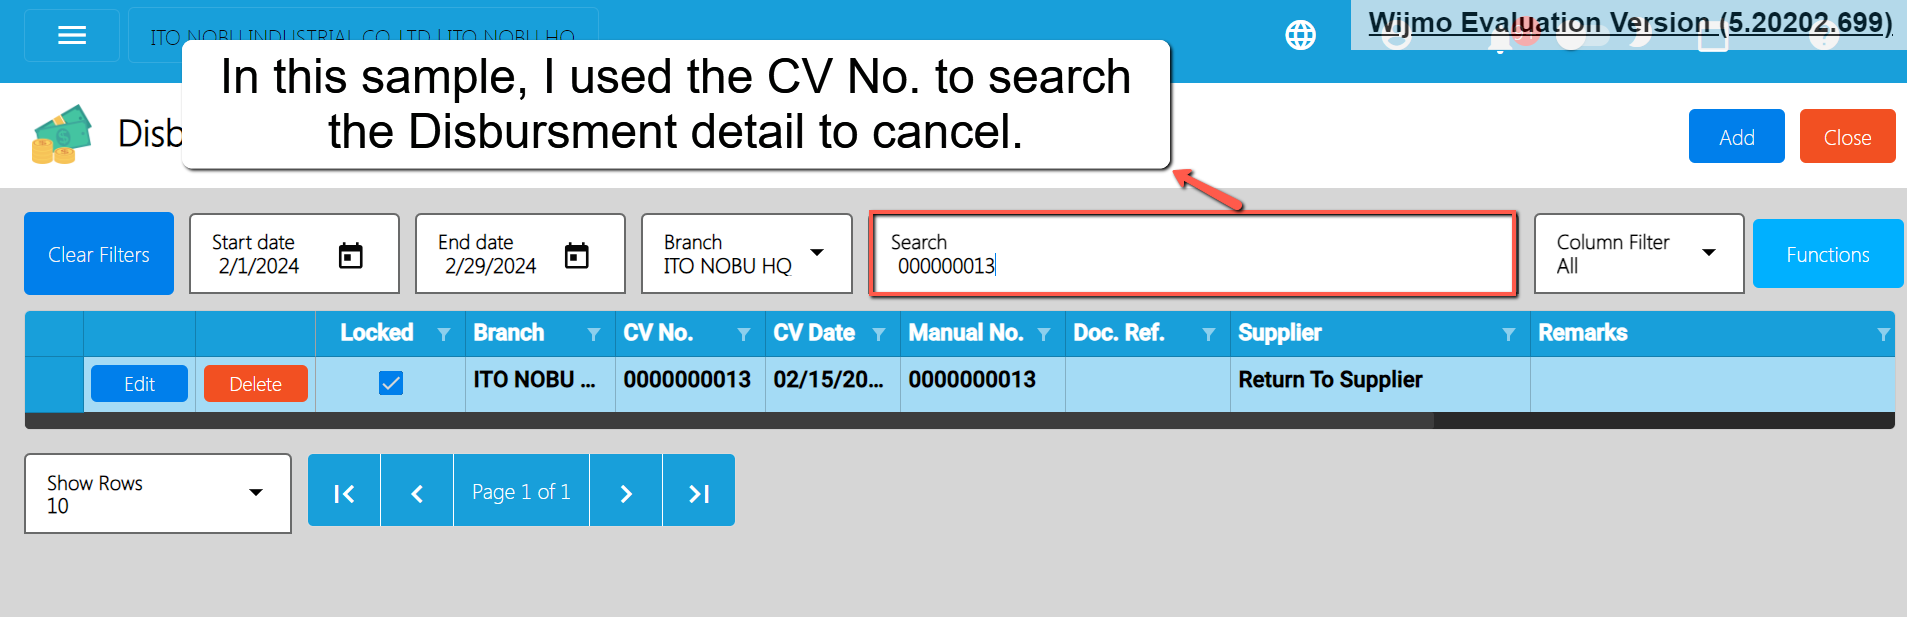
- Open the Disbursement Detail: Click the Edit button to open the Disbursement detail page.
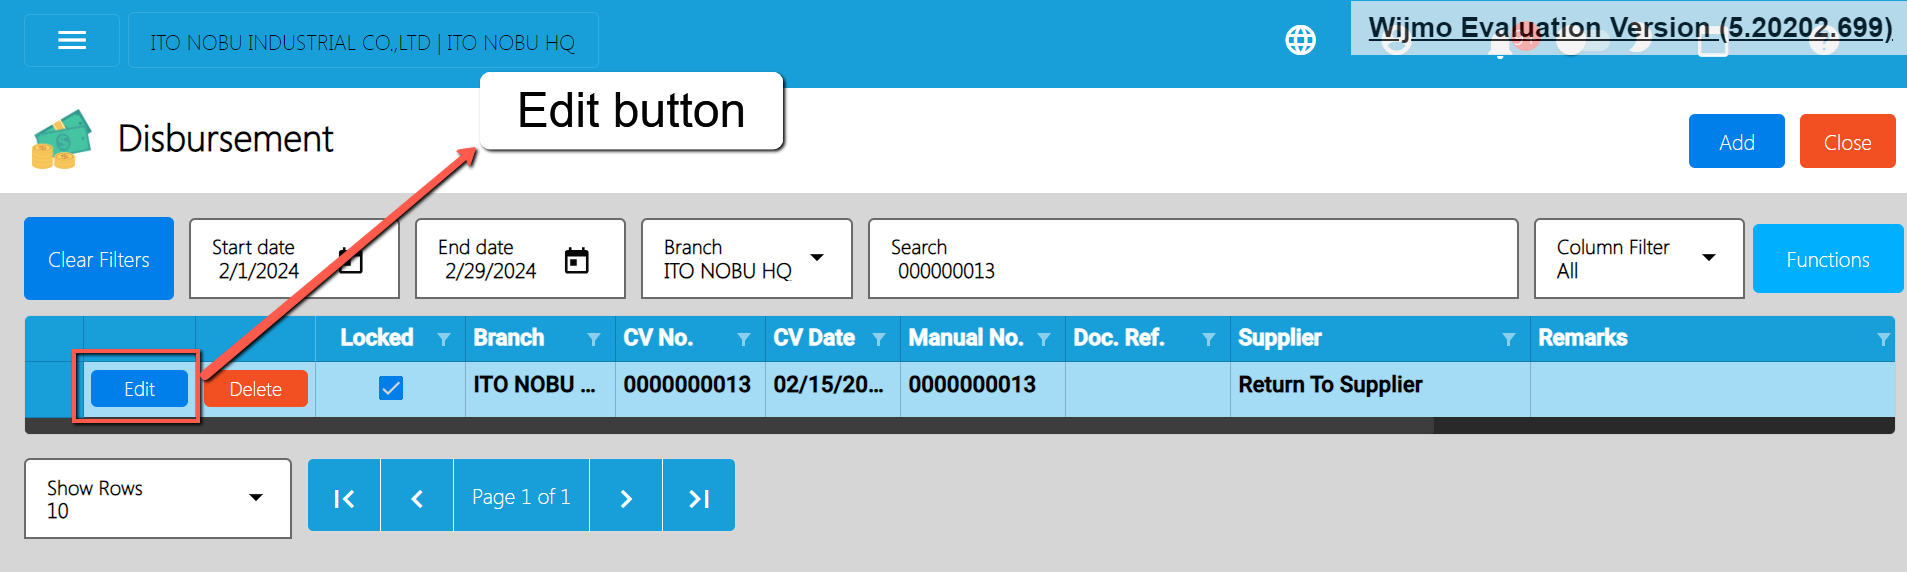
- Cancel the Disbursement: To cancel your Disbursement transaction, look for the Cancel found on the upper-right part of the page, then click.
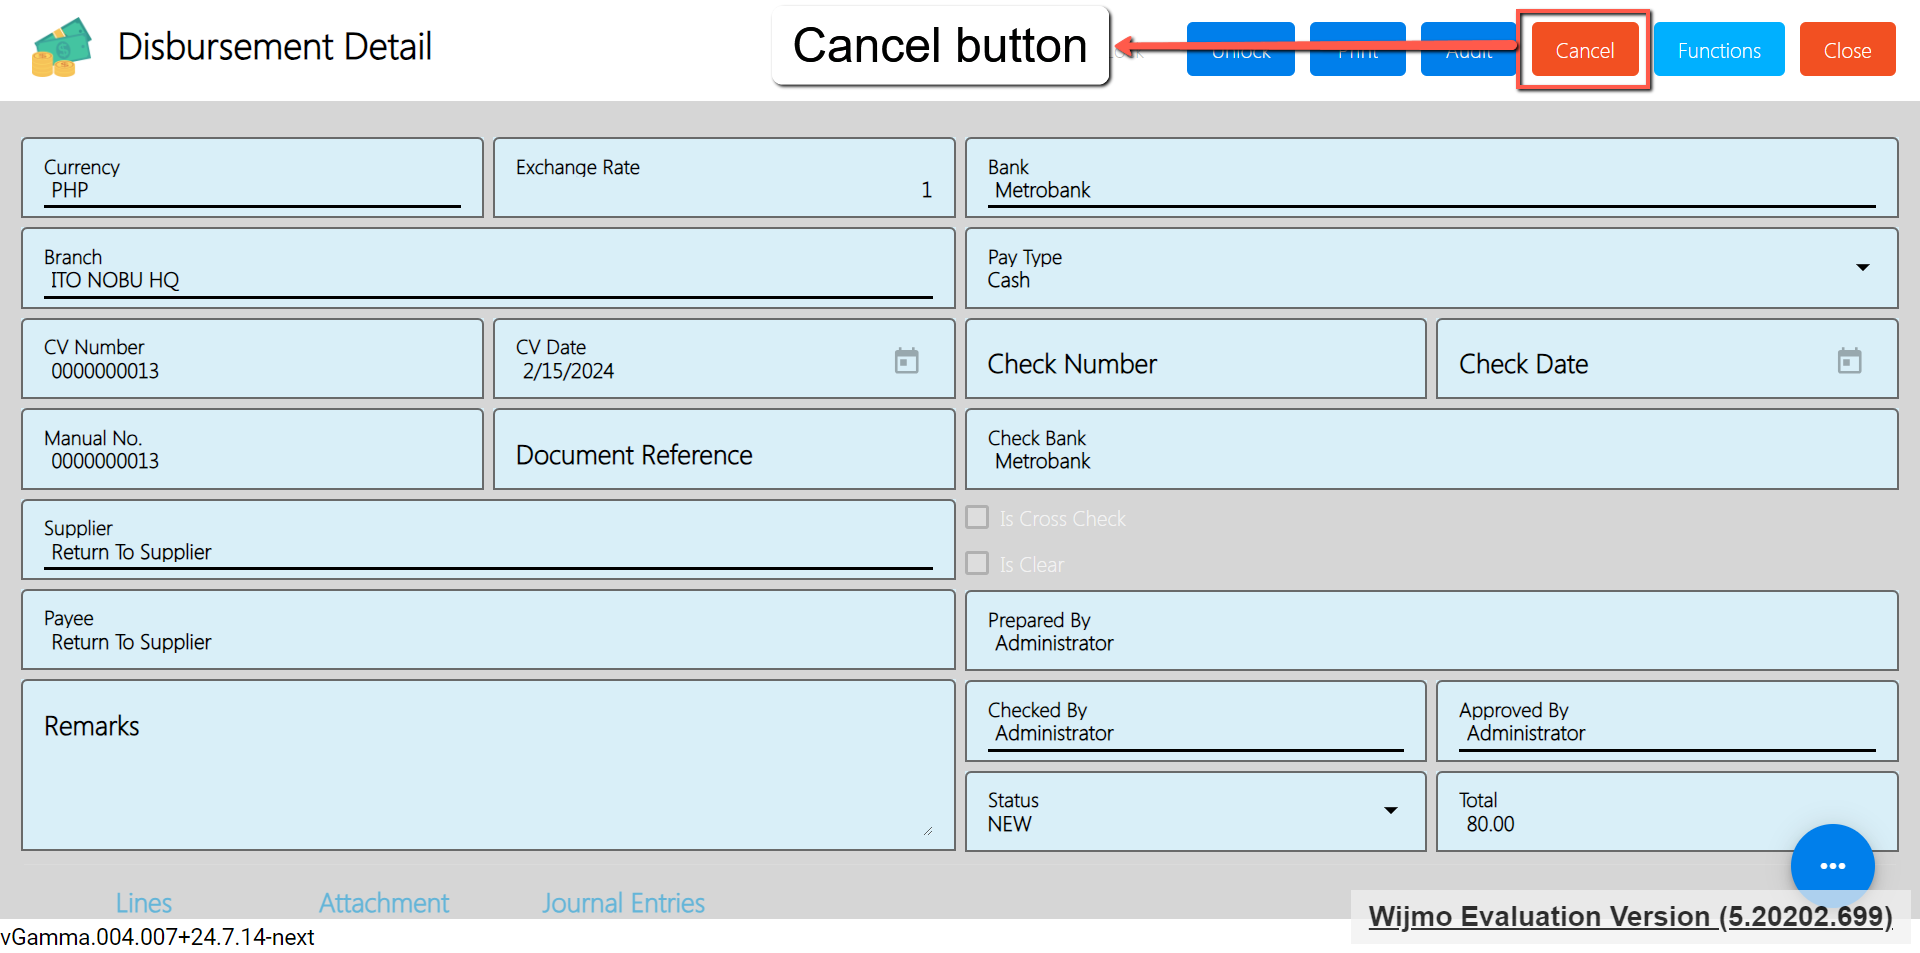
- Confirm Canceling: After you click the Cancel button, there’s a Cancel Disbursement window. If you’re sure you want to cancel your Disbursement transaction, click the Cancel button.
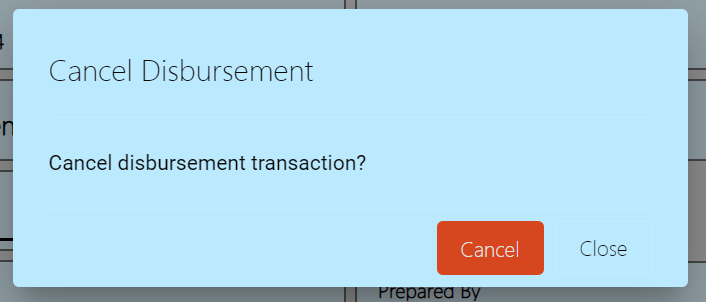
- Check It’s Done: After canceling, make sure you get a success toast message confirming it’s canceled successfully. It is found on the bottom right of the page.
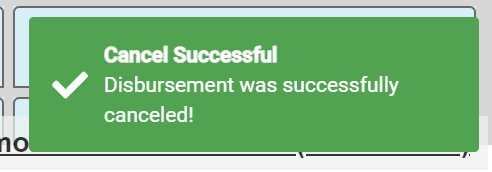
- Let Others Know(if needed): If you believe canceling affects other people, it's a good idea to inform them.
- Keep Track: Remember to make a note somewhere that you canceled the Disbursement, just in case it is needed later.
5.2.5 Debit Memo
Overview
Debit memos are commonly used in various business transactions, such as in accounts payable processes or when correcting billing errors.
Debit Memo List
- List of all the debit memo and will also show the overview of the transactions
- Here, you can also filter the Start and End Date of the transaction and the button to add a new Debit Memo.
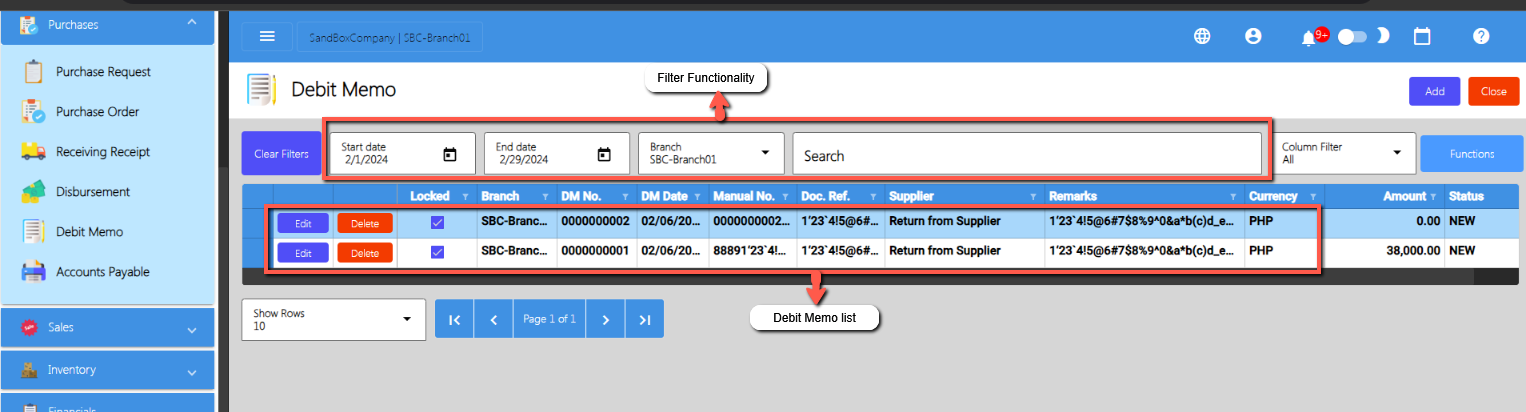
Debit Memo Detail
- To add a new Debit Memo, Go to Purchases then click Debit Memo. After that, click Add that can be seen in the Debit Memo List.
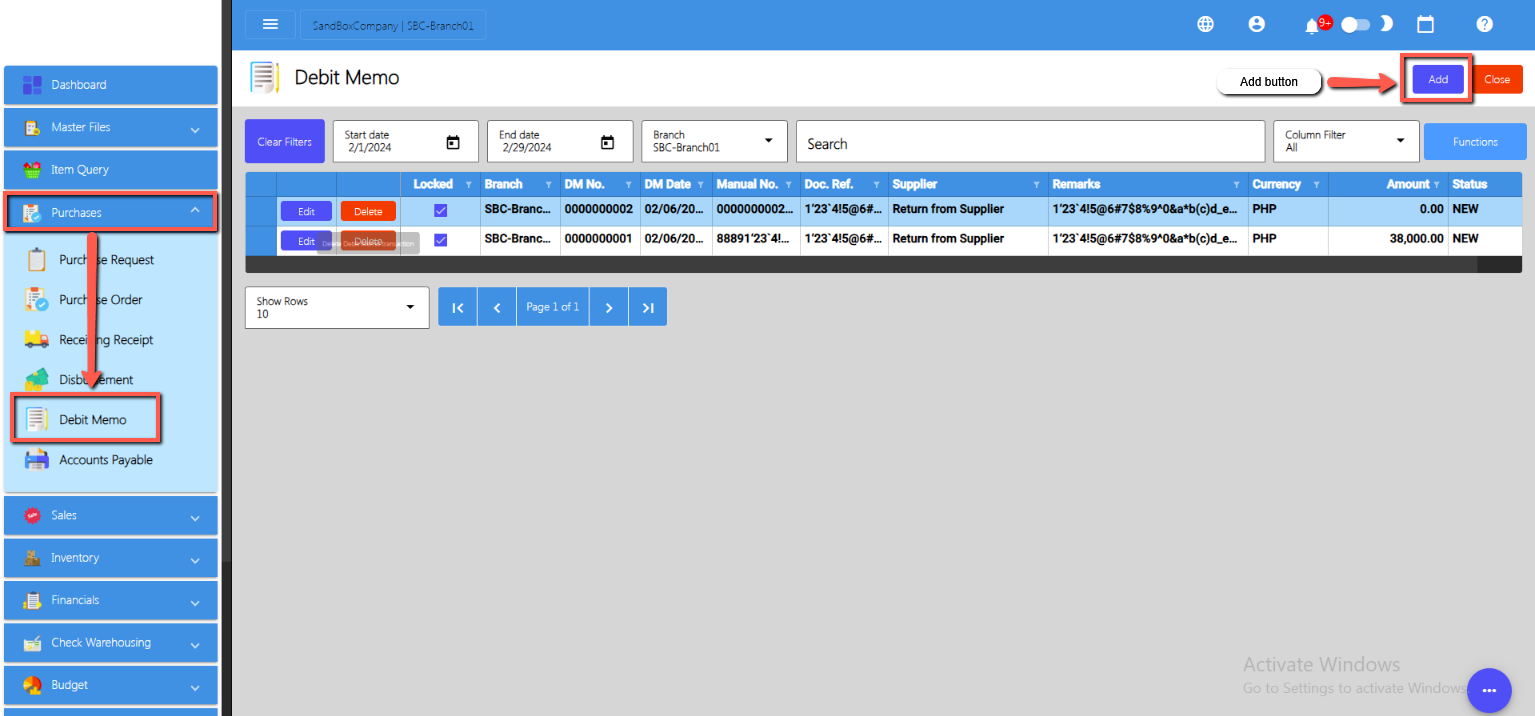
- Fill out all the needed information for the Debit Memo Detail like,
- Currency
- Exchange Rate
- Manual No.
- Document reference
- Remarks
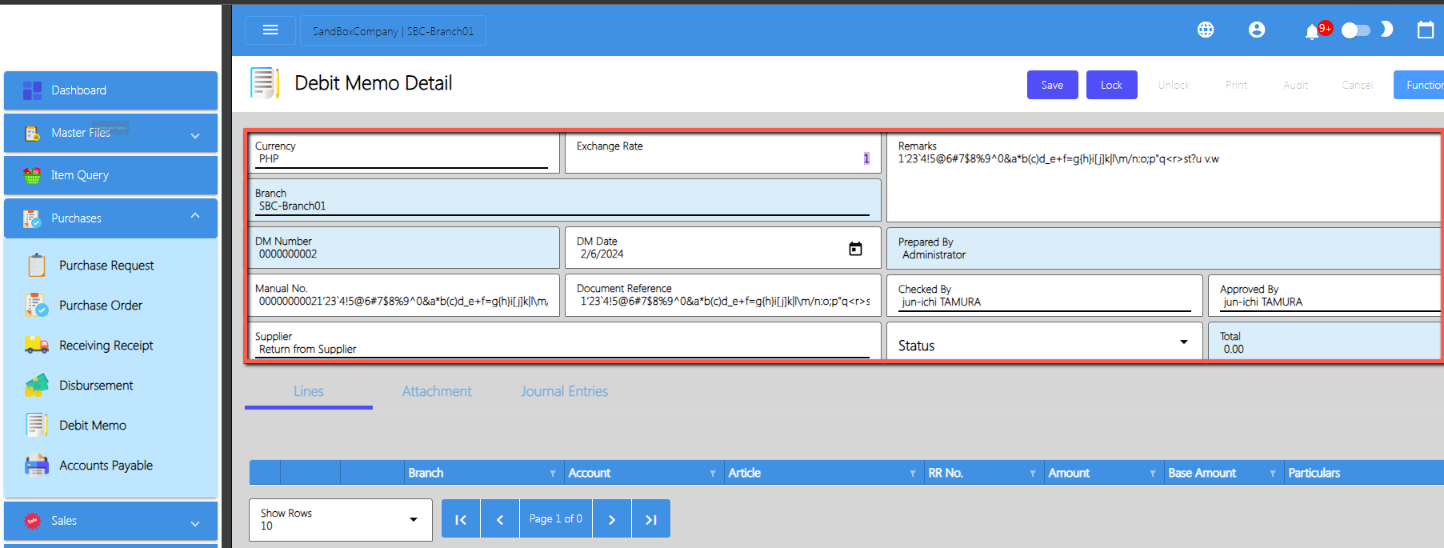
- To add the Debit Memo Line , Click Add button on the right part of the page under the lines tab. Choose RRNumber for accounts payable processes or correcting billing errors.
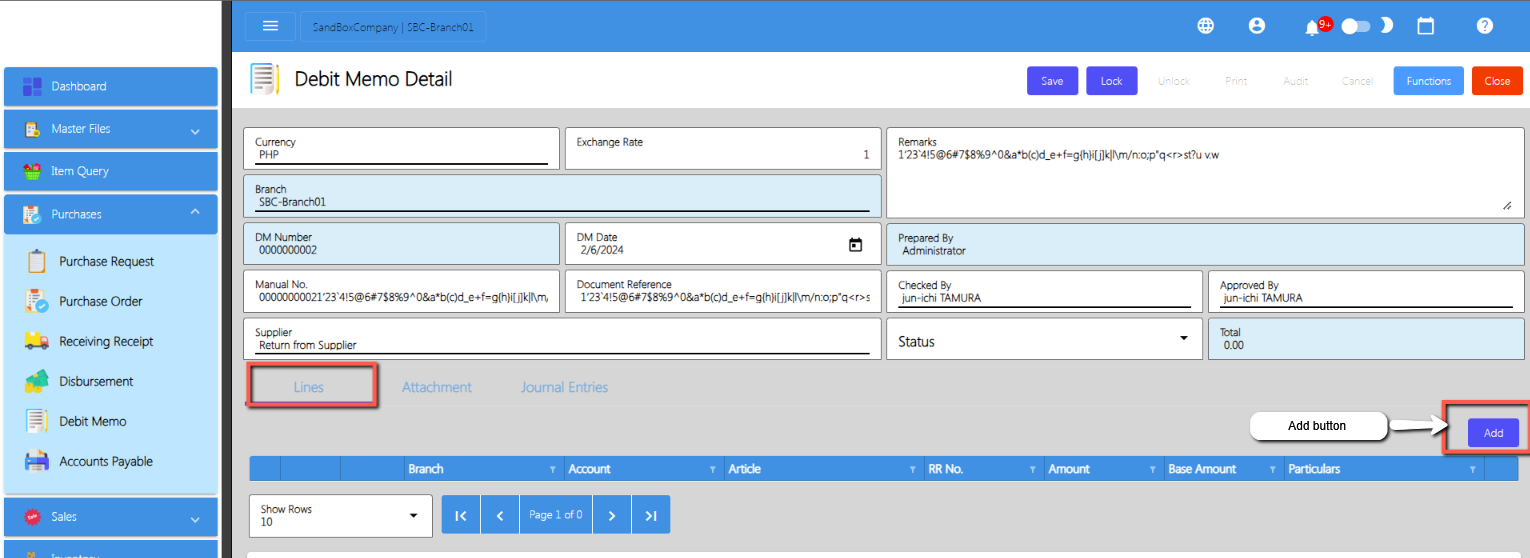
- If the user will Adjust the RR, the user can select that RR by clicking on the RR Number.
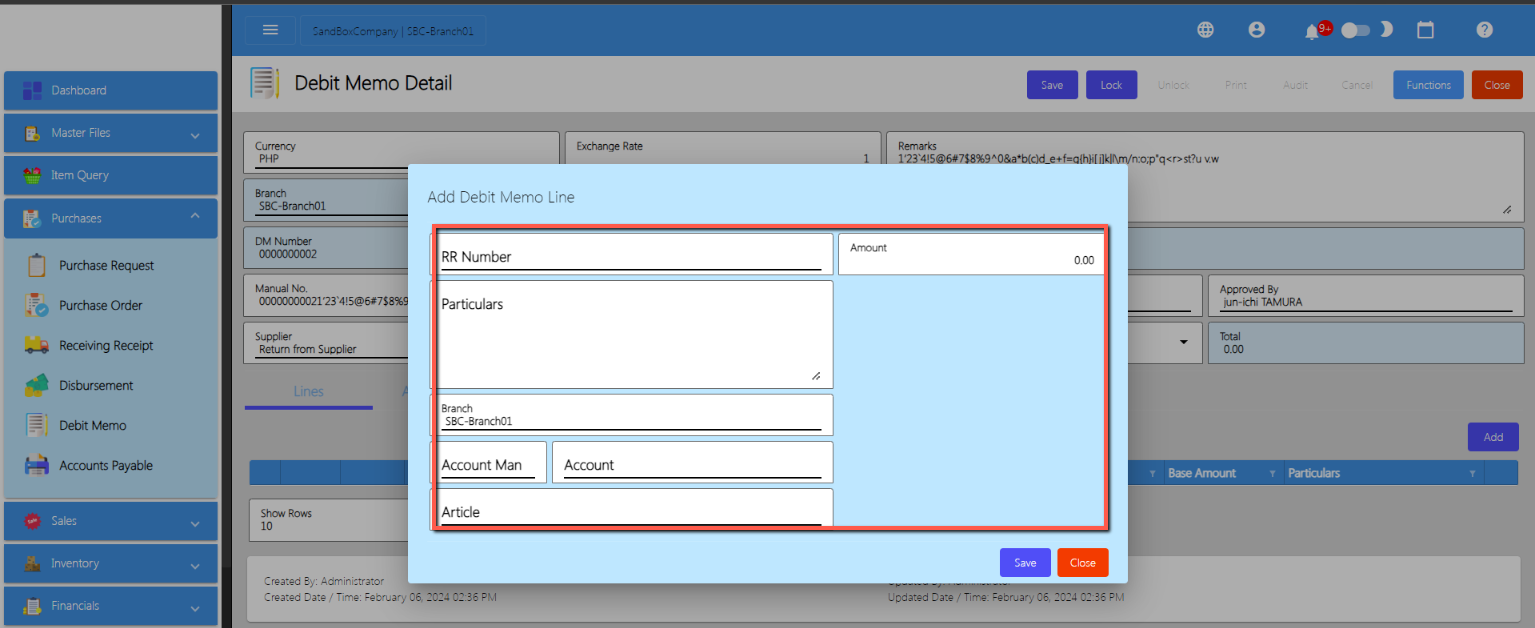
- Once clicked it will pop up all the RR that has not yet Disburse.
- To add that RR, click the pick button. Once picked, the following fields will automatically populated :
- Account
- Article
- Amount → you can change the amount based on the adjustment of the Receiving Receipt.
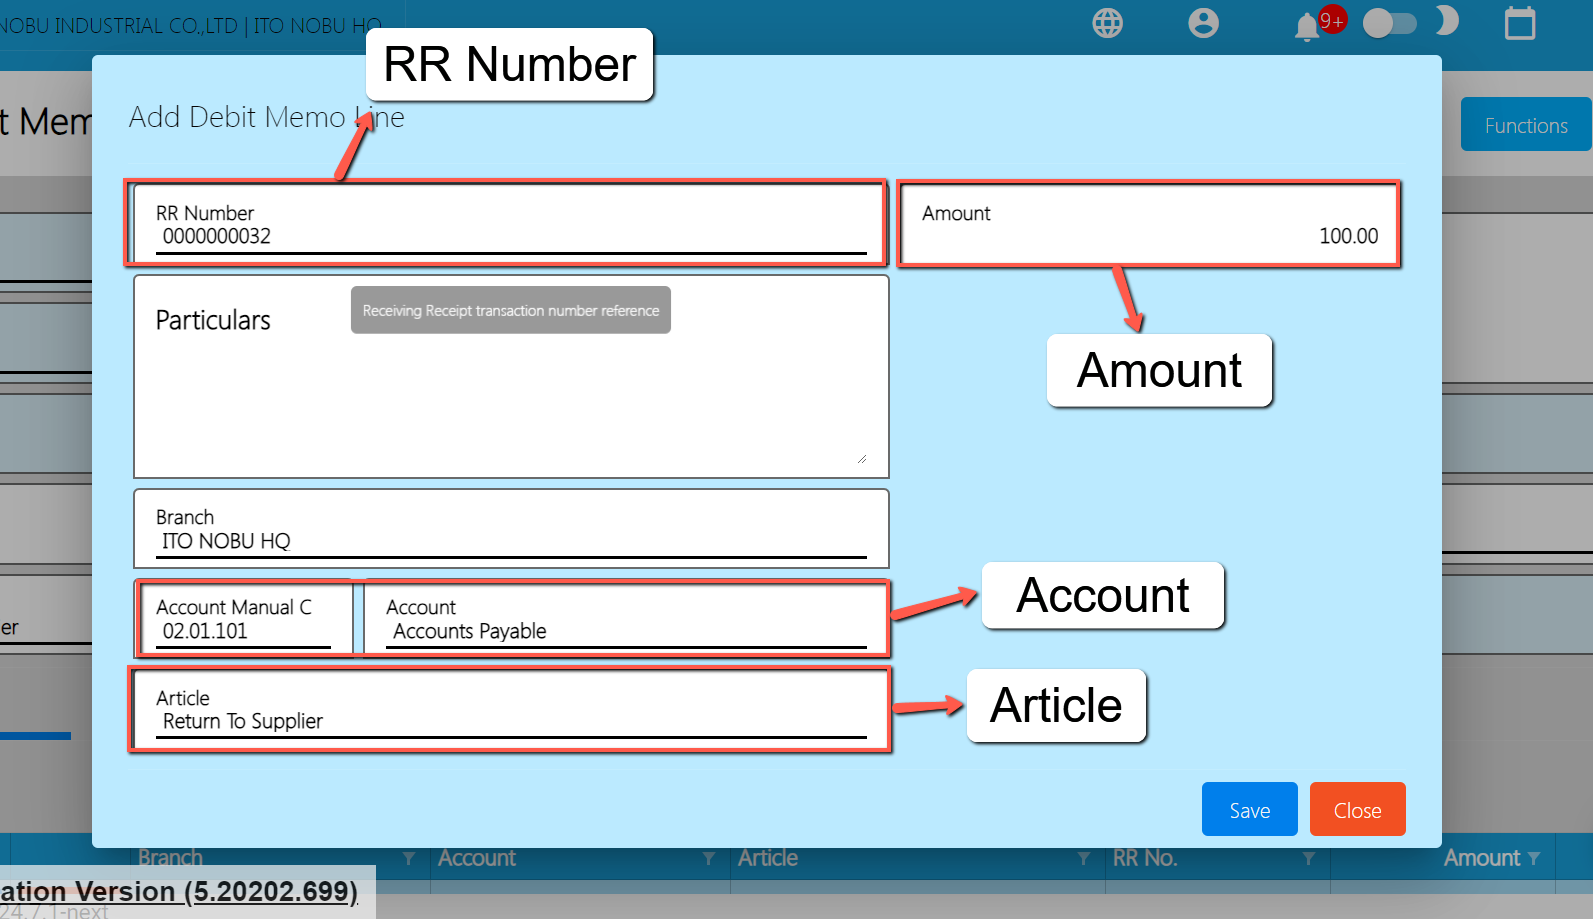
- Once the Debit Memo line item is okay, click the Save button and close the Add Debit Memo line window.
- Review everything in the Debit Memo detail and once okay, click the Save button to save the details. To have an effect with the Accounts Payable, click the Lock button.
Important: If you forget to lock the Debit Memo transaction and quickly click the Close button, you’ll see a popup asking for a confirmation:
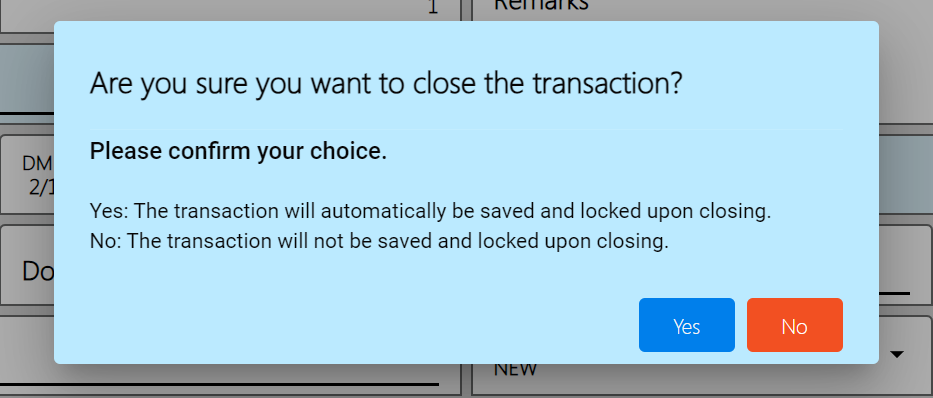
- Press Yes button if you want to automatically save and lock the Debit Memo transaction upon closing.
- Press No button if you prefer not to save and lock the Debit Memo transaction upon closing.
Debit Memo Transaction via Upload Template
- To add a Debit Memo Transaction via Upload Template, go to Debit Memo List then Click Functions
- Click Download DM File Format
- The excel file will be downloaded. This is the file format where you will edit, or encode the details that you need to Debit Memo.
3.1 In the Excel file:
- Manual Number should be unique per transaction, alphanumeric and Special transaction, should not exceed 255 characters.
Example: 1‘23`4!5@6#7$8%9^0&a*b(c)d_e+f=g{h}i[j]k|l\m/n:o;p"q<r>st?u v.w
– if the Manual Code starts with 000, don’t forget to put an apostrophe (‘) at the beginning of the Manual Code.
Example: ‘00000111231414
– if the Manual Code starts with a number but exceeds more than 10 digits, format the cell to Text to show all the numbers.
Steps on how to change the format to Text:
1. Right Click the Cell
2. Click Format Cell
3. Choose Text
4. Click OK
5. Then reselect the field
B. Supplier Code Add supplier code
C. Document Reference should be unique per transaction,alphanumeric and special characters should not exceed 255 characters.
Example: 1‘23`4!5@6#7$8%9^0&a*b(c)d_e+f=g{h}i[j]k|l\m/n:o;p"q<r>st?u v.w
– if the Document Reference starts with 000, don’t forget to put an apostrophe (‘) at the beginning of the Manual Code.
Example: ‘00000111231414
– if the Document Reference starts with a number but exceeds more than 10 digits, format the cell to Text to show all the numbers.
Steps on how to change the format to Text:
1. Right Click the Cell
2. Click Format Cell
3. Choose Text
4. Click OK
5. Then reselect the field
D. Remarks – in this column are basically the remarks for the whole transaction, it should be alphanumeric and Special characters should not exceed 255 characters.
E. Particulars – in this column this is basically the remarks for each item line, it should be alphanumeric and Special characters should not exceed 255 characters.
F. Line Amount – Input amount to correct/adjust customer bill
G. Account – Input Account Code in column
H. Currency – Input specific Currency in column
I. RR Number – Add RRNumber
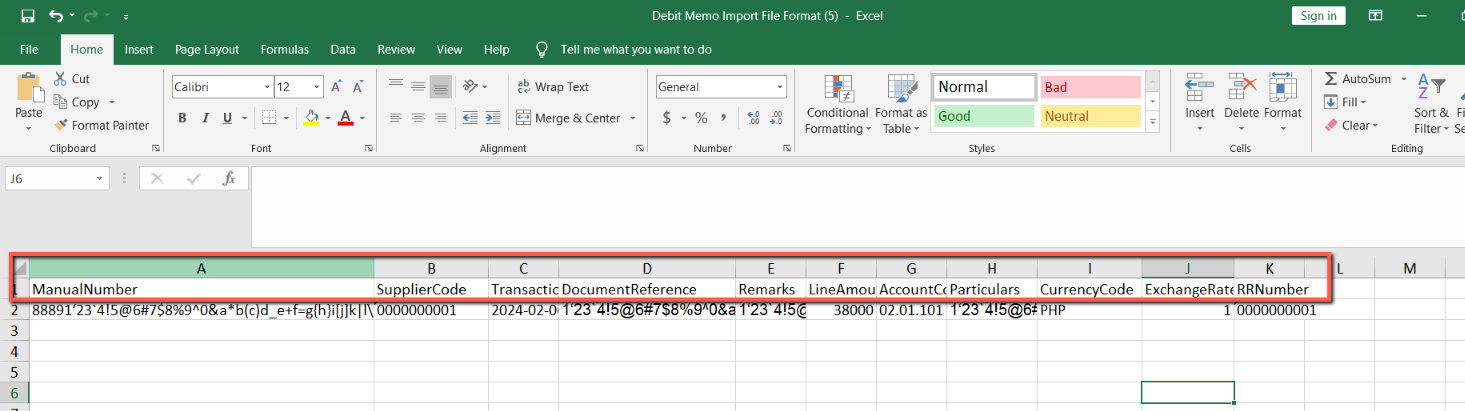
4.Go back to Debit Memo list
- Click Functions
- Click Import Debit Memo
- After Importing, Check Debit Memo list
- Lock Transactions
Cancel Debit Memo Transaction
When you need to cancel a Debit Memo, it’s important to follow these simple steps:
- Log In: Visit your easyFS domain and login with your username and password.
- Find your Debit Memo: Navigate to the Purchases, then Debit Memo. You will be redirected to the Debit Memo lists.
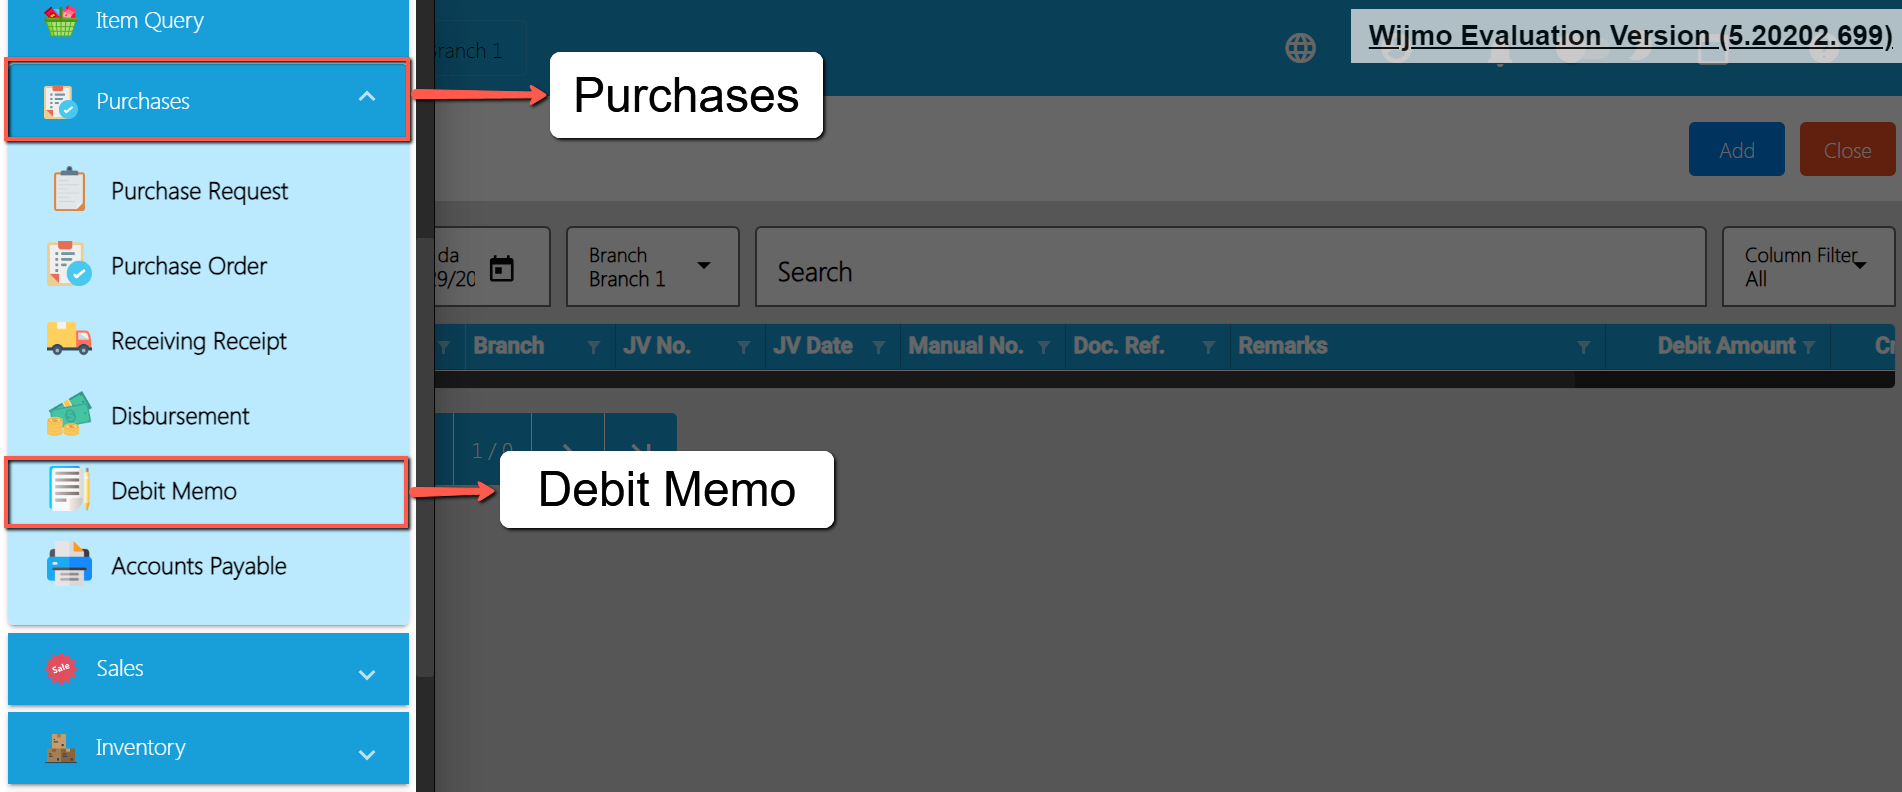
- Locate the Right One: From the Debit Memo list, you may use the search bar to look for the right Debit Memo you want to cancel. You can search using the Debit Memos DM NUmber, Manual Number, Document Reference, etc.
Take note: Don’t forget to change the Start Date and End Date to your Debit Memo’s transaction date to display the correct result.
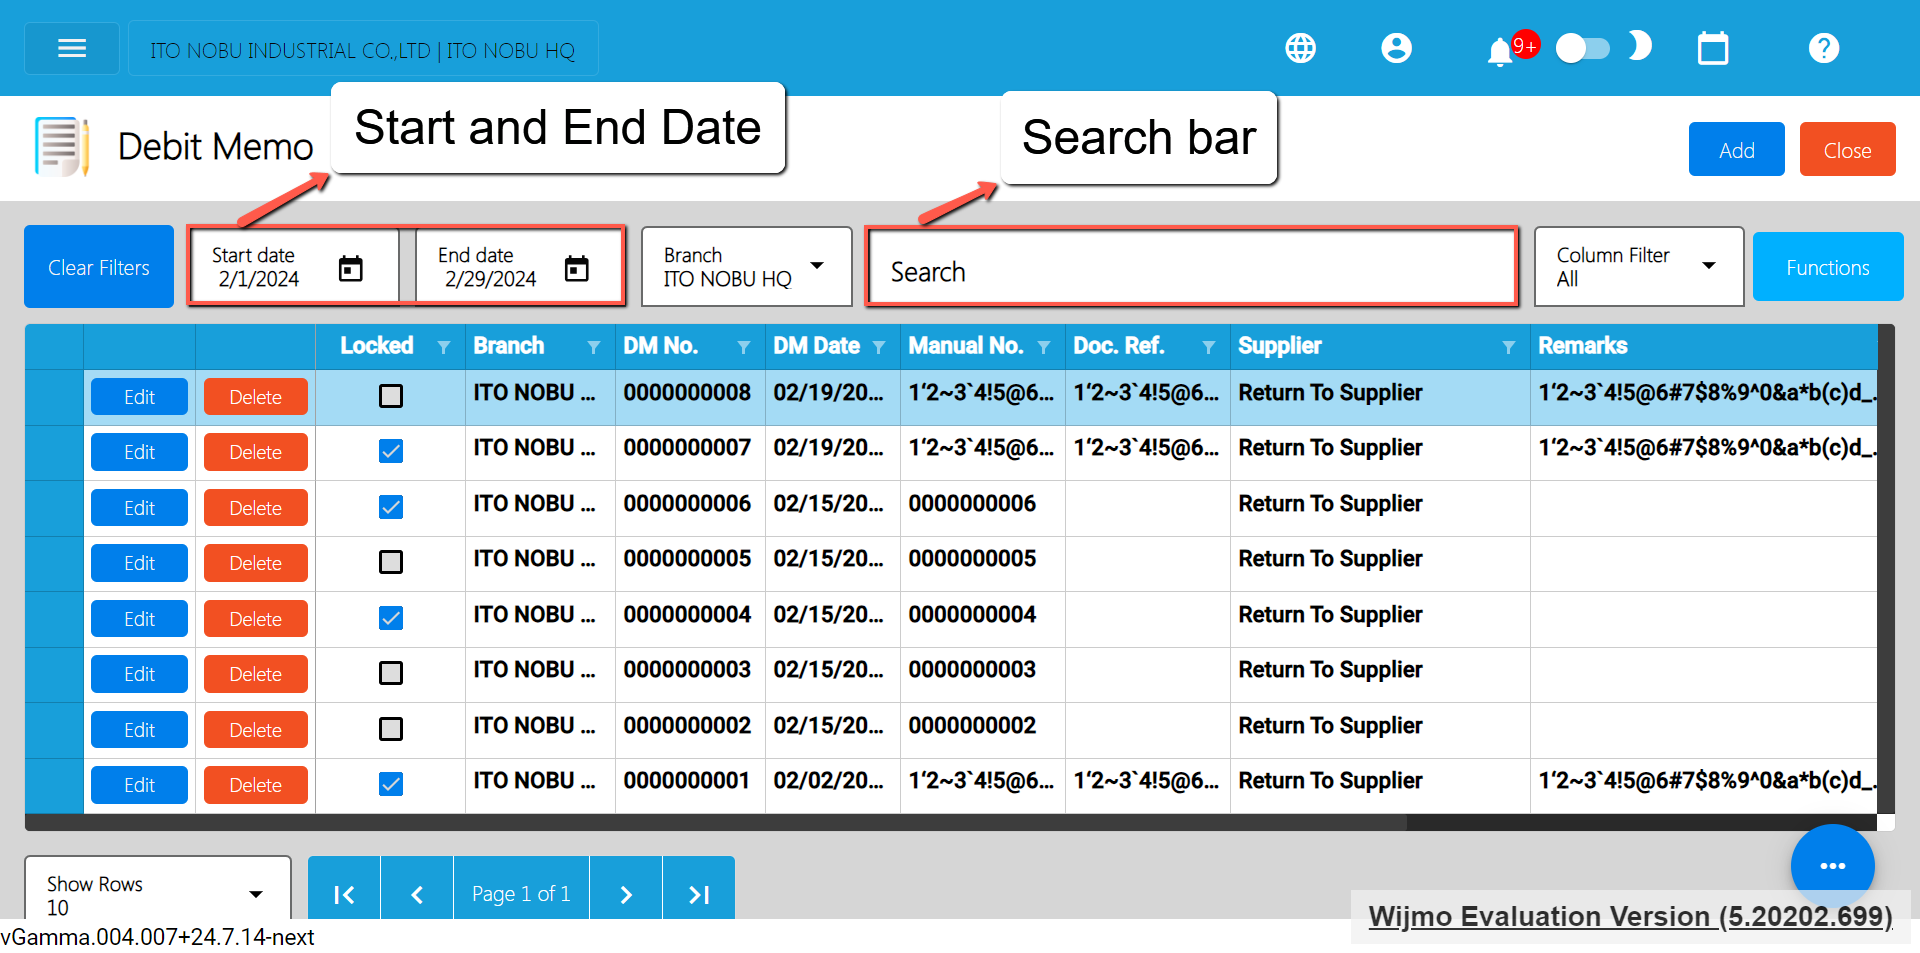
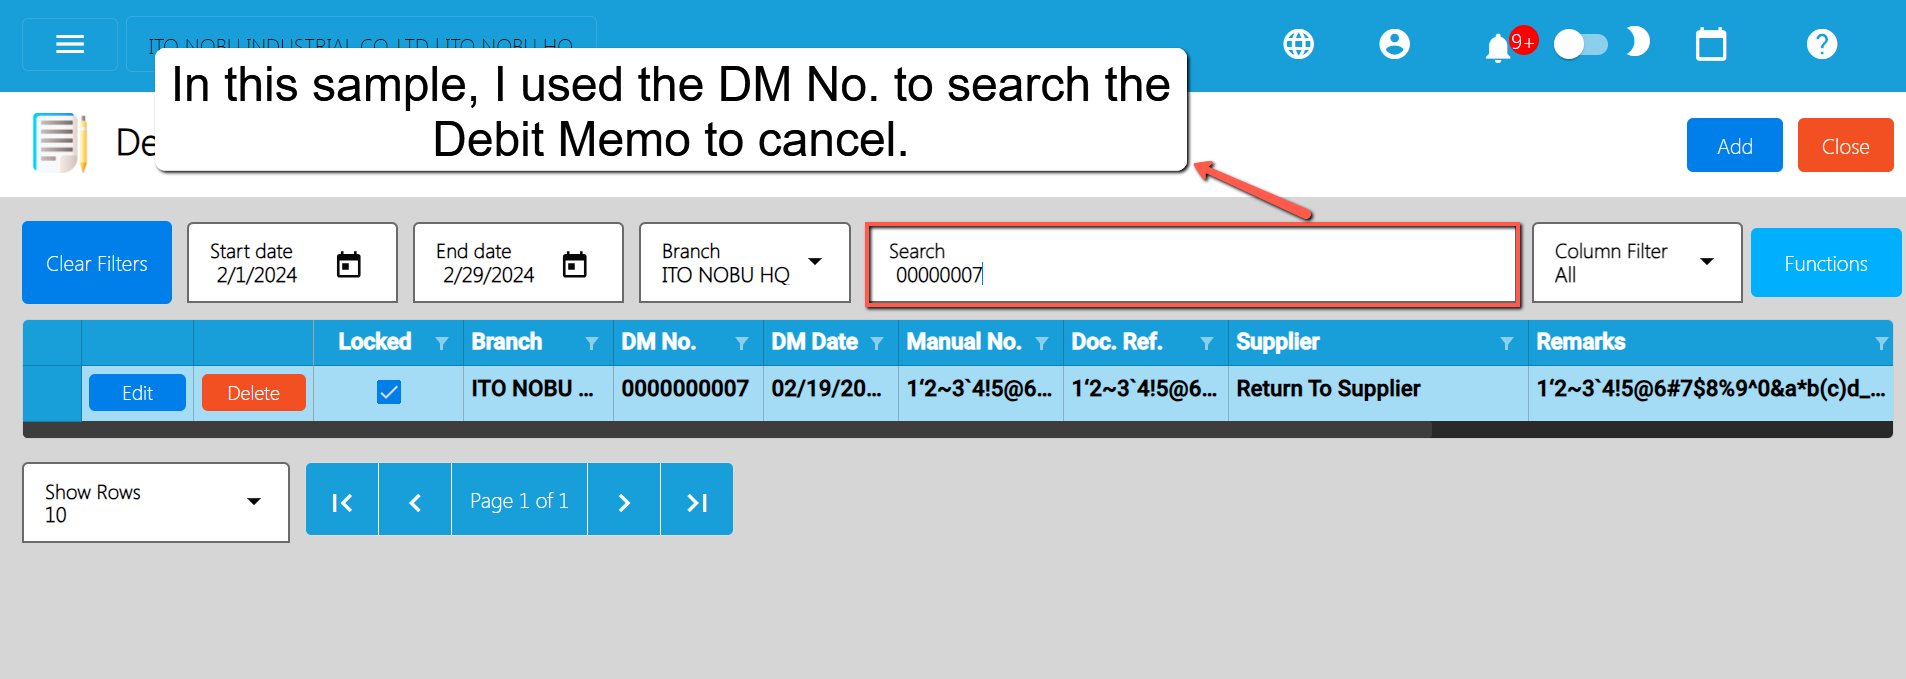
- Open the Debit Memo Detail: Click the Edit button to open the Debit Memo detail page.
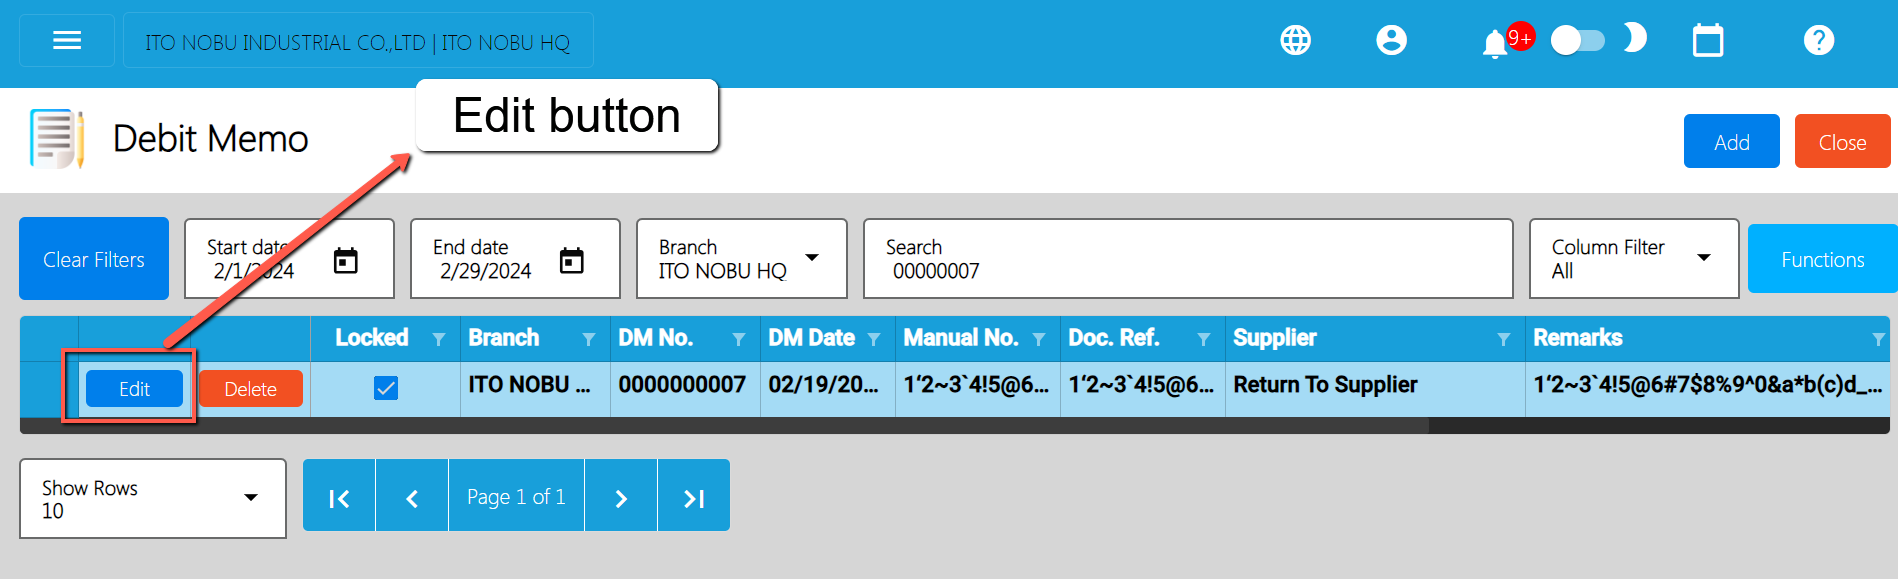
- Cancel the Debit Memo: To cancel your Debit Memo transaction, look for the Cancel found on the upper-right part of the page, then click.
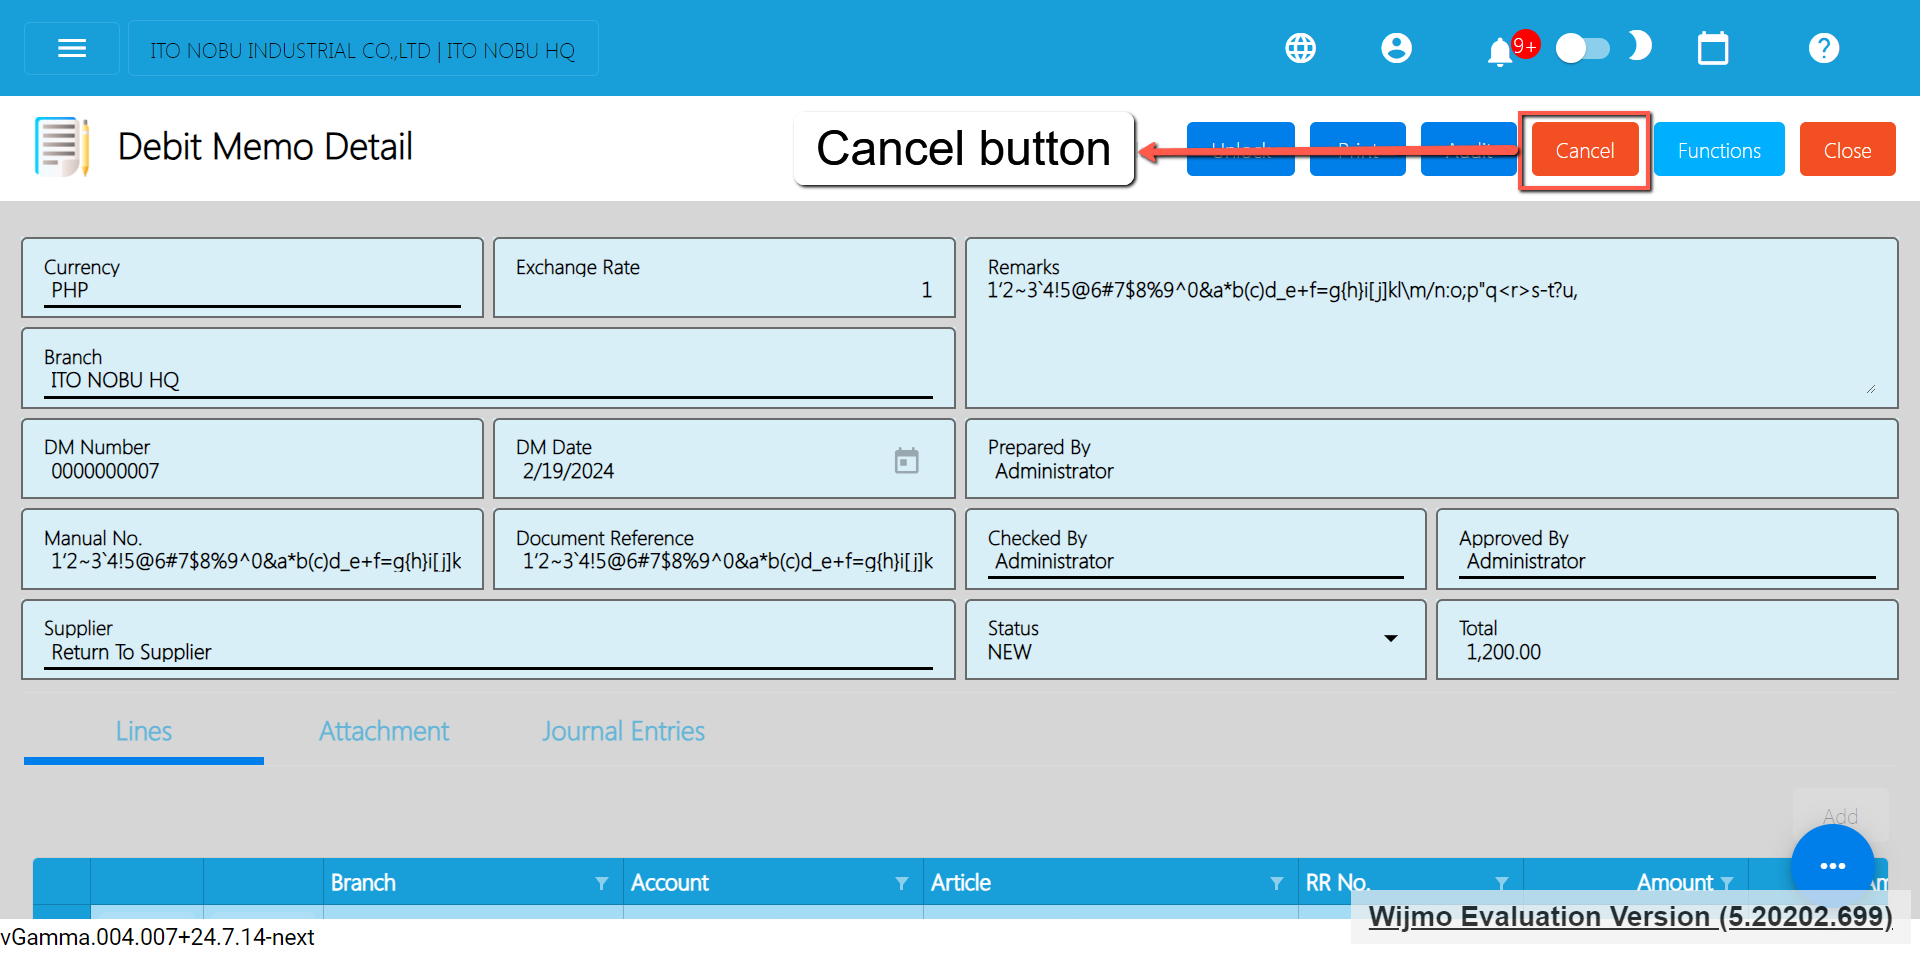
- Confirm Canceling: After you click the Cancel button, there’s a Cancel Debit Memo window. If you’re sure you want to cancel your Debit Memo transaction, click the Cancel button.
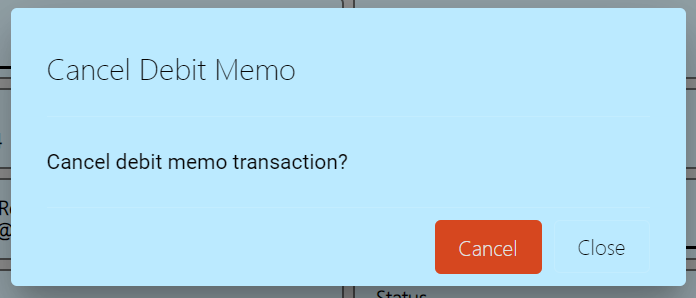
- Check It’s Done: After canceling, make sure you get a success toast message confirming it’s canceled successfully. It is found on the bottom right of the page.
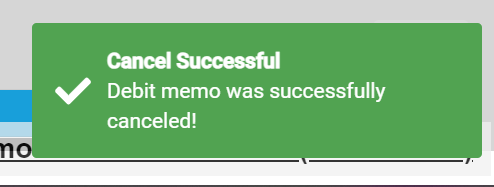
- Let Others Know(if needed): If you believe canceling affects other people, it's a good idea to inform them.
- Keep Track: Remember to make a note somewhere that you canceled the Debit Memo, just in case it is needed later.
5.3 Sales Transaction Module
The Sales Module includes the whole Sales Cycle from adding a Customer up to generating Invoices and Sales Reports. Here’s the flow of the Sales Module
Customer Creation/Management
- Create and manage customer records within the system, including contact information, credit limit, credit terms, TIN (Tax Identification Number), Type of Business
- Assigning of Manual Code unique to customer for easy tracking.
Sales Order
- Generate sales quotes or orders for potential customers, detailing the products or services offered along with prices.
- Share the quote or orders with the customer for approval.
- Once the customer approves the quote, convert it into a sales invoice.
- The sales order includes details like the quantity, price, and description of the products or services.
Order Fulfillment
Sales Invoice
- Generate a sales invoice based on the delivered products or services.
- The invoice includes the total amount due, payment terms, and other relevant details.
- Prepare and deliver the products or services based on the details specified in the sales order.
- Update inventory levels if applicable.
Accounts Receivable
- Record the sale in the accounts receivable ledger with the Aging of Days
- Accounts receivable represents the amount the customer owes for the delivered goods or services
- Formula for Accounts Receivable Report is Sales Invoice less Collection less Credit Memo
Collection/ Payment
- Receive payments from the customer against the issued invoice.
- Apply payments to the corresponding accounts receivable entries.
Credit Memo (if necessary)
- If there are adjustments, returns, or discounts, issue a credit memo to adjust the accounts receivable balance.
- Update records to reflect the credit memo.
Sales Module Reporting and Analytics
- Monitor and analyze sales performance, accounts receivable aging, and other relevant metrics.
- Generate reports to gain insights into the financial health of the sales function.
- Integration with General Ledger, Income Statement and Balance Sheet.
Following this flow, businesses can effectively manage their sales transactions, monitor cash flow, and maintain accurate records of customer interactions. The integration of these steps within the accounting system streamlines the financial processes associated with sales and contributes to a more efficient and accurate overall accounting process.
5.3.1 Sales Order
Overview
This is where to input the entire Sales Order needed. This is optional so you can go directly to the Sales Invoice.
Sales Order List
- List of all the SO (Sales Order) and will also show the overview of the transaction.
- You can filter the data to be displayed by providing the following:
- Start Date
- End Date
- Branch
- Also, you can search data by providing a value on the Search Bar and select the Column Filter on where to search the data.
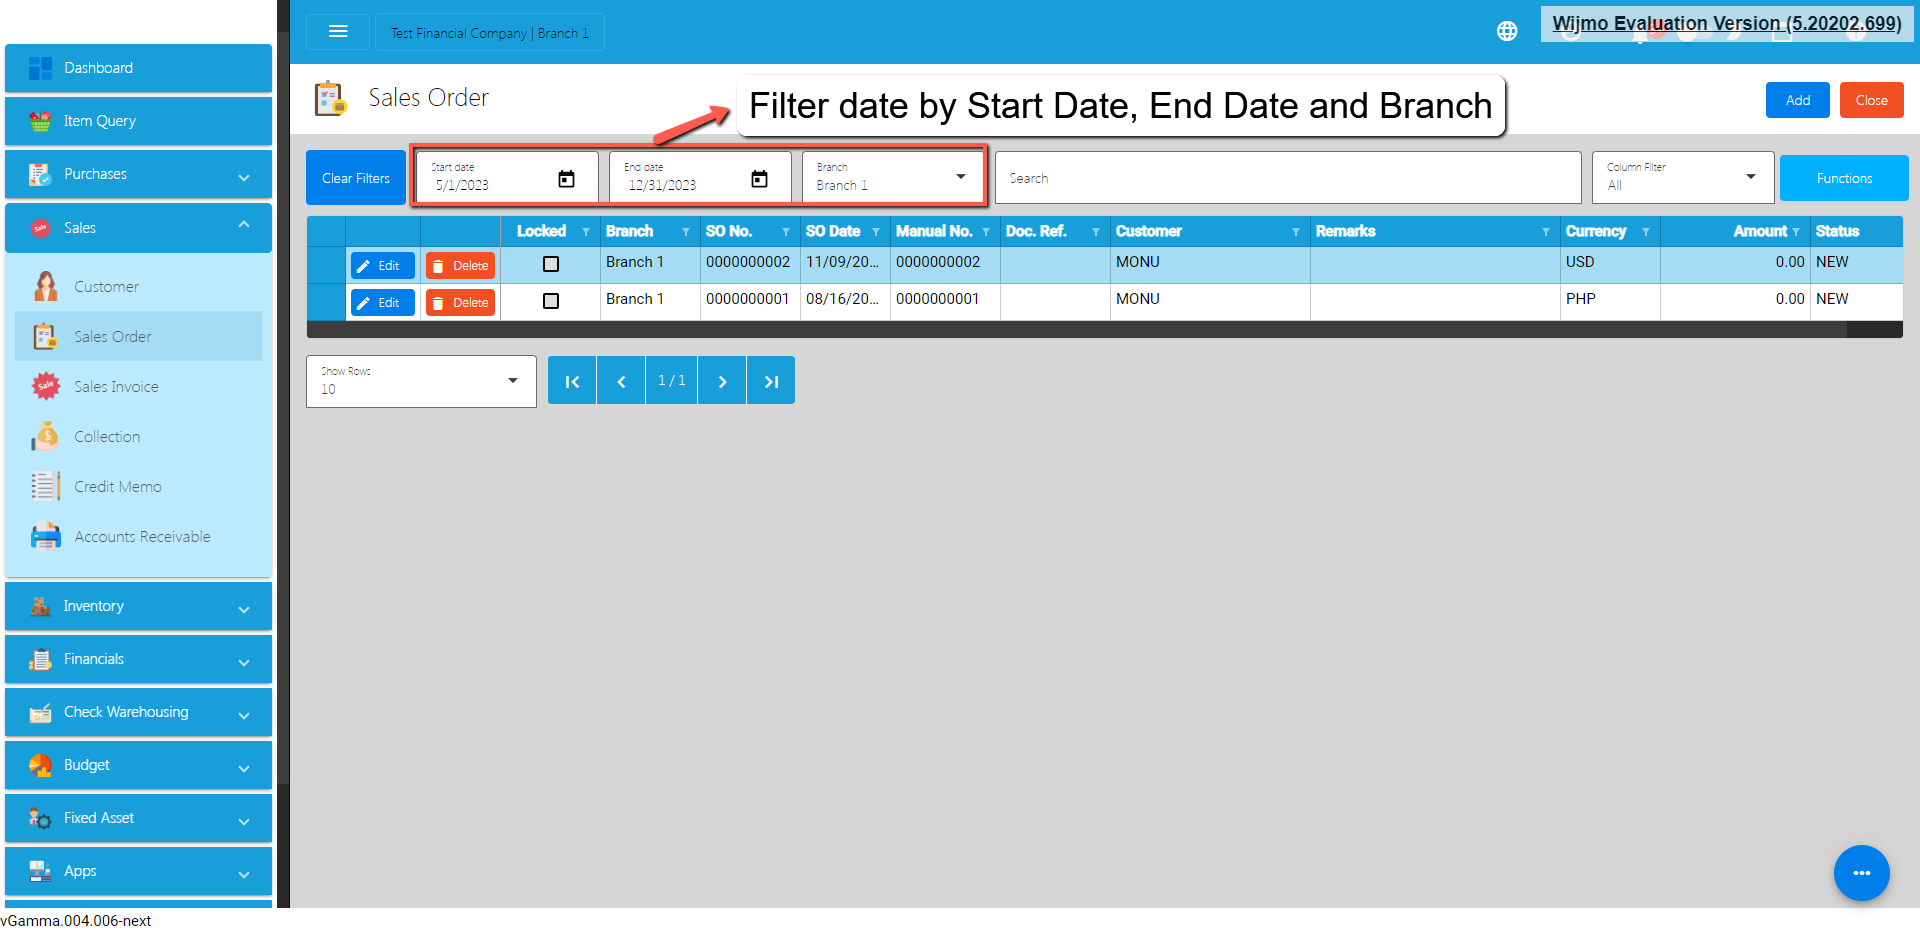
Sales Order Detail
- To add a new Sales Order, go to Sales then click Sales Order. After that, click the Add button that can be seen in the Sales Order list.
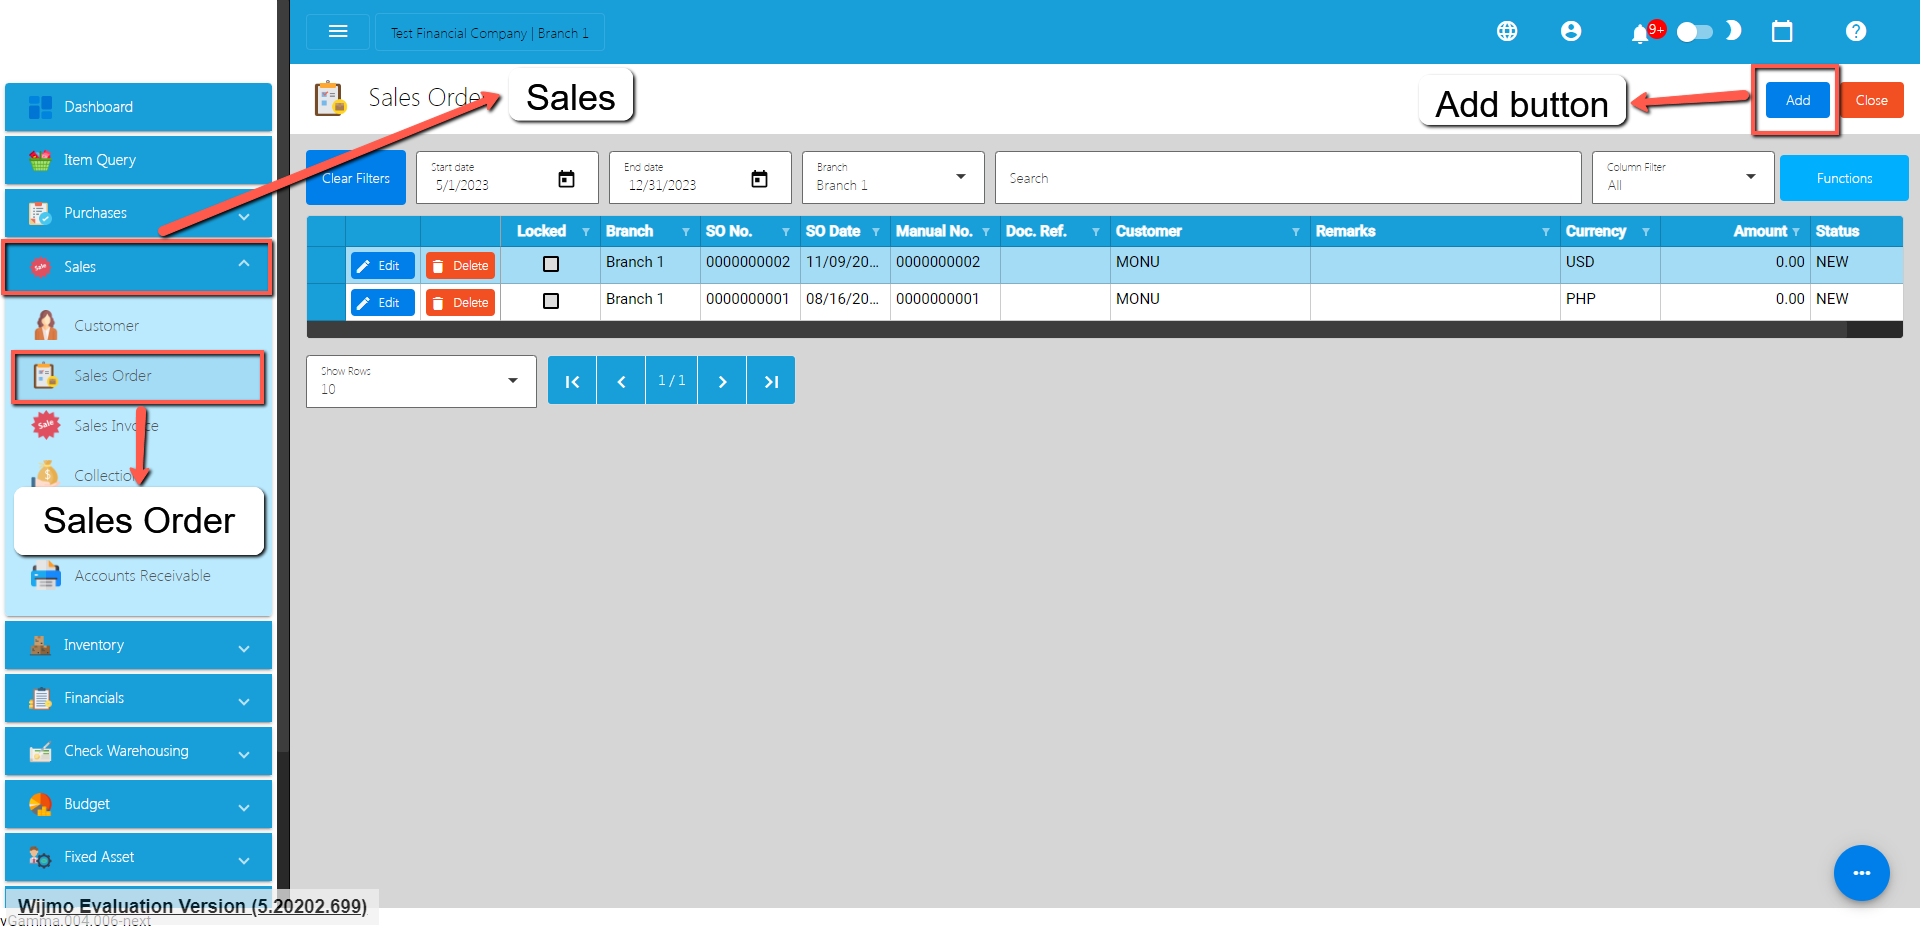
- Fill out all the needed information for the Sales Order Detail like,
- Currency
- Customer Name
- SO Date
- Term
- Document Reference
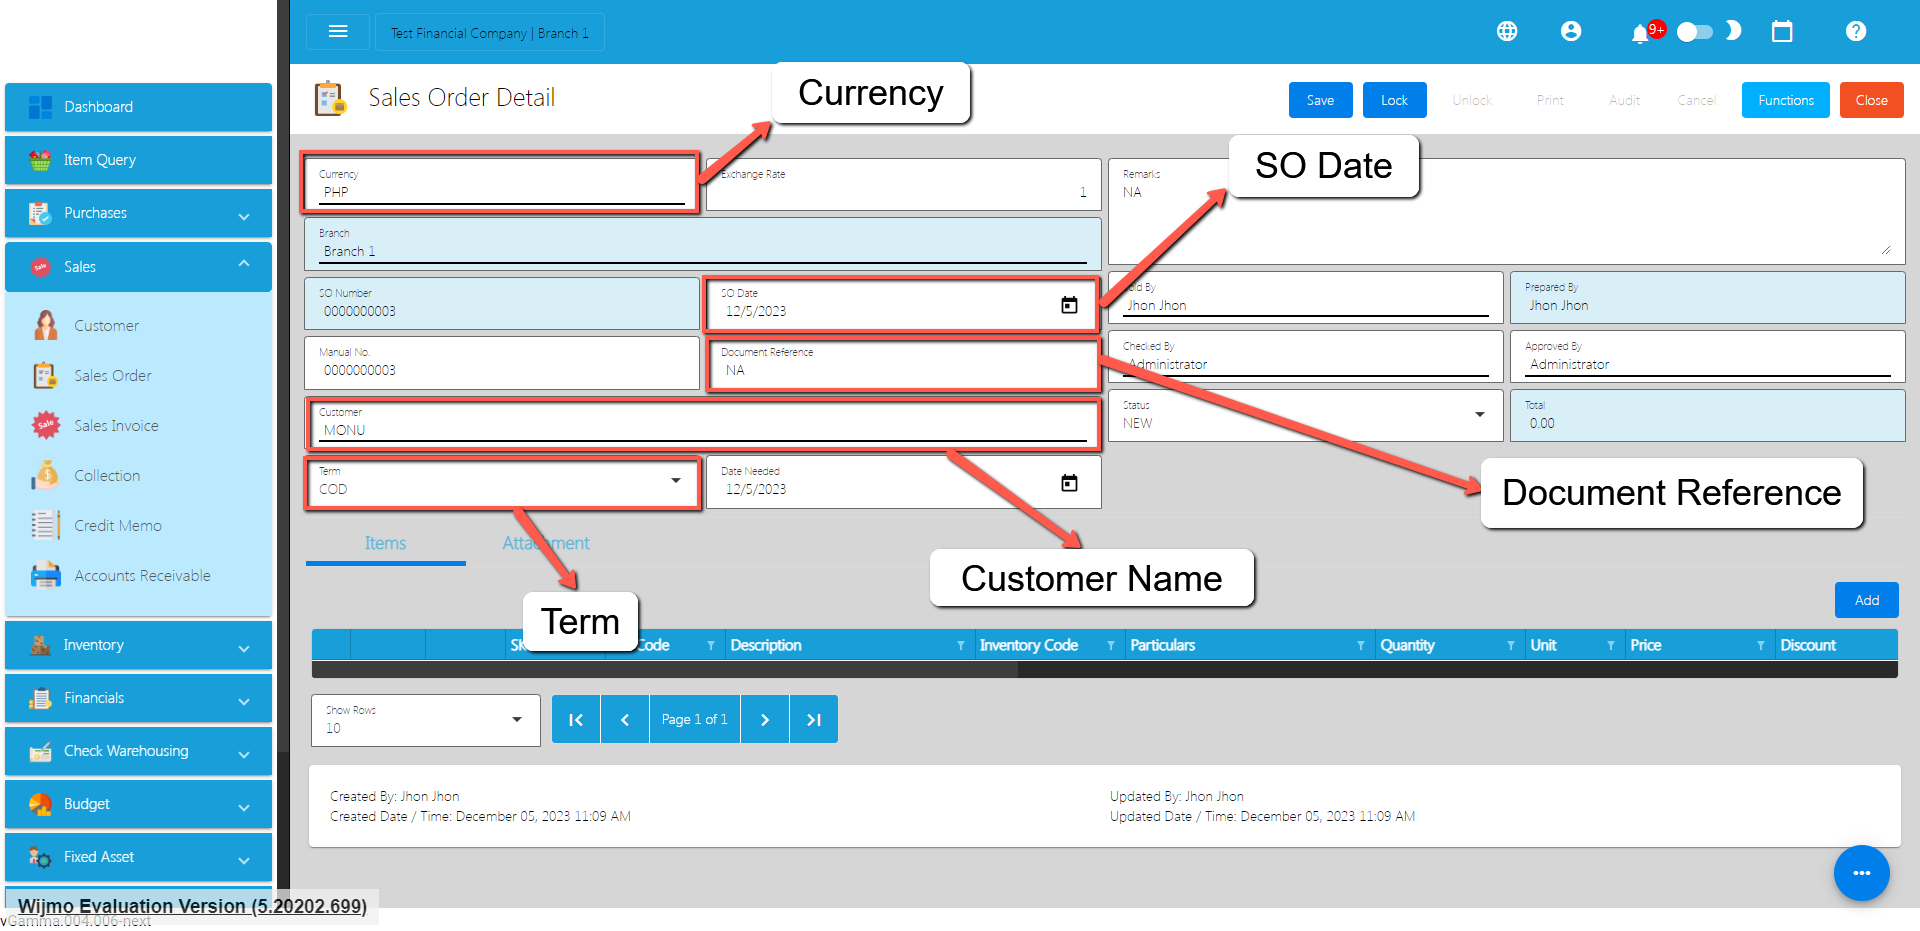
- To add a Sales Order Line Item, click the Add button on the right part of the page under the Items tab.
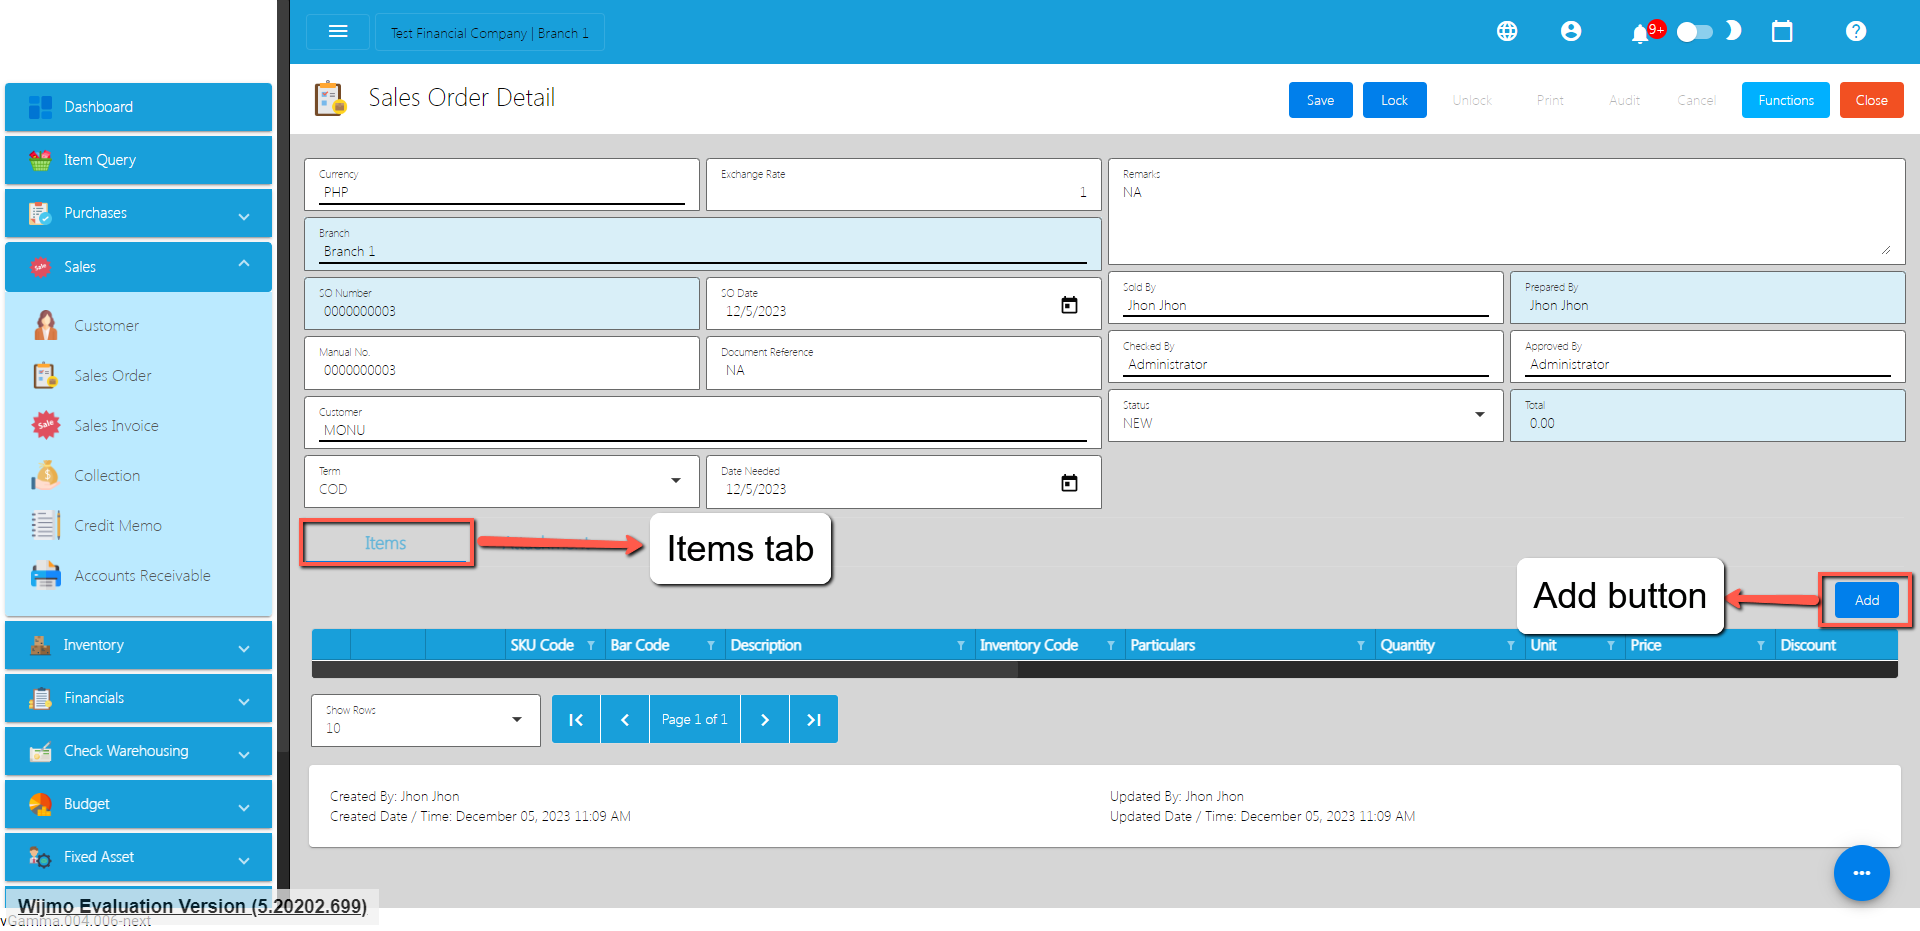
- Select the items, by clicking the Pick button.
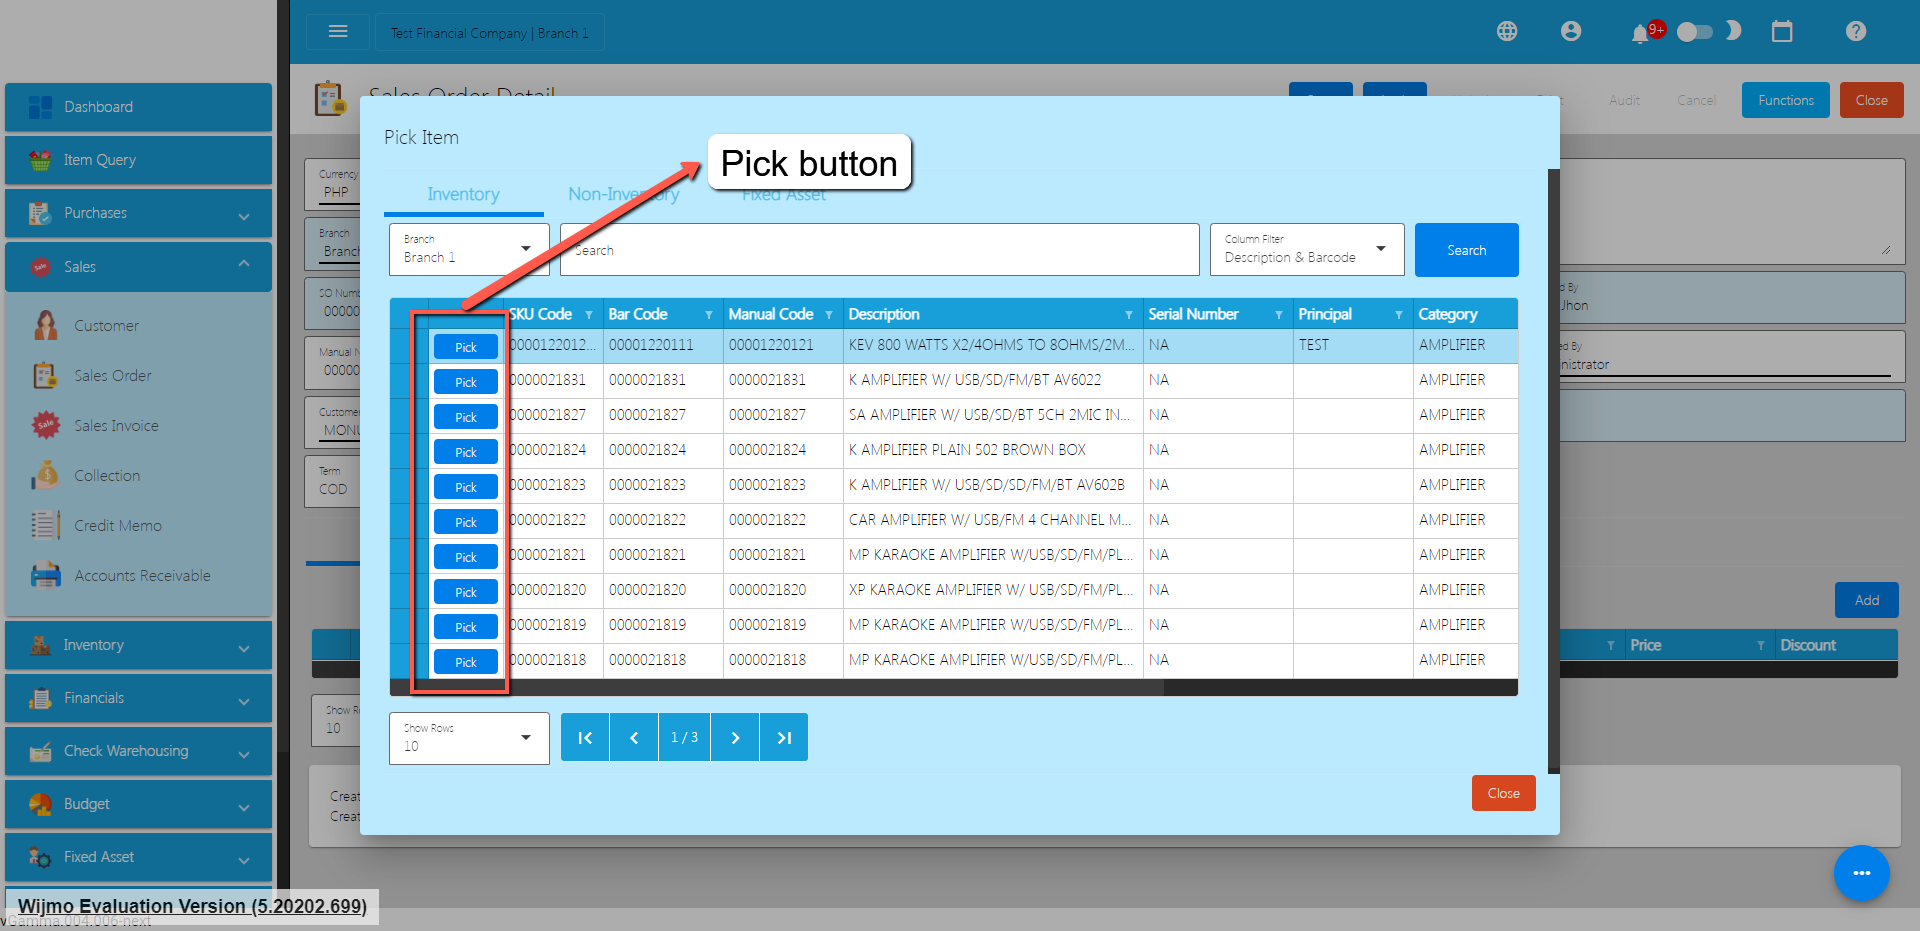
- Once the Pick button is clicked, fill out the Quantity, Price and Discount.
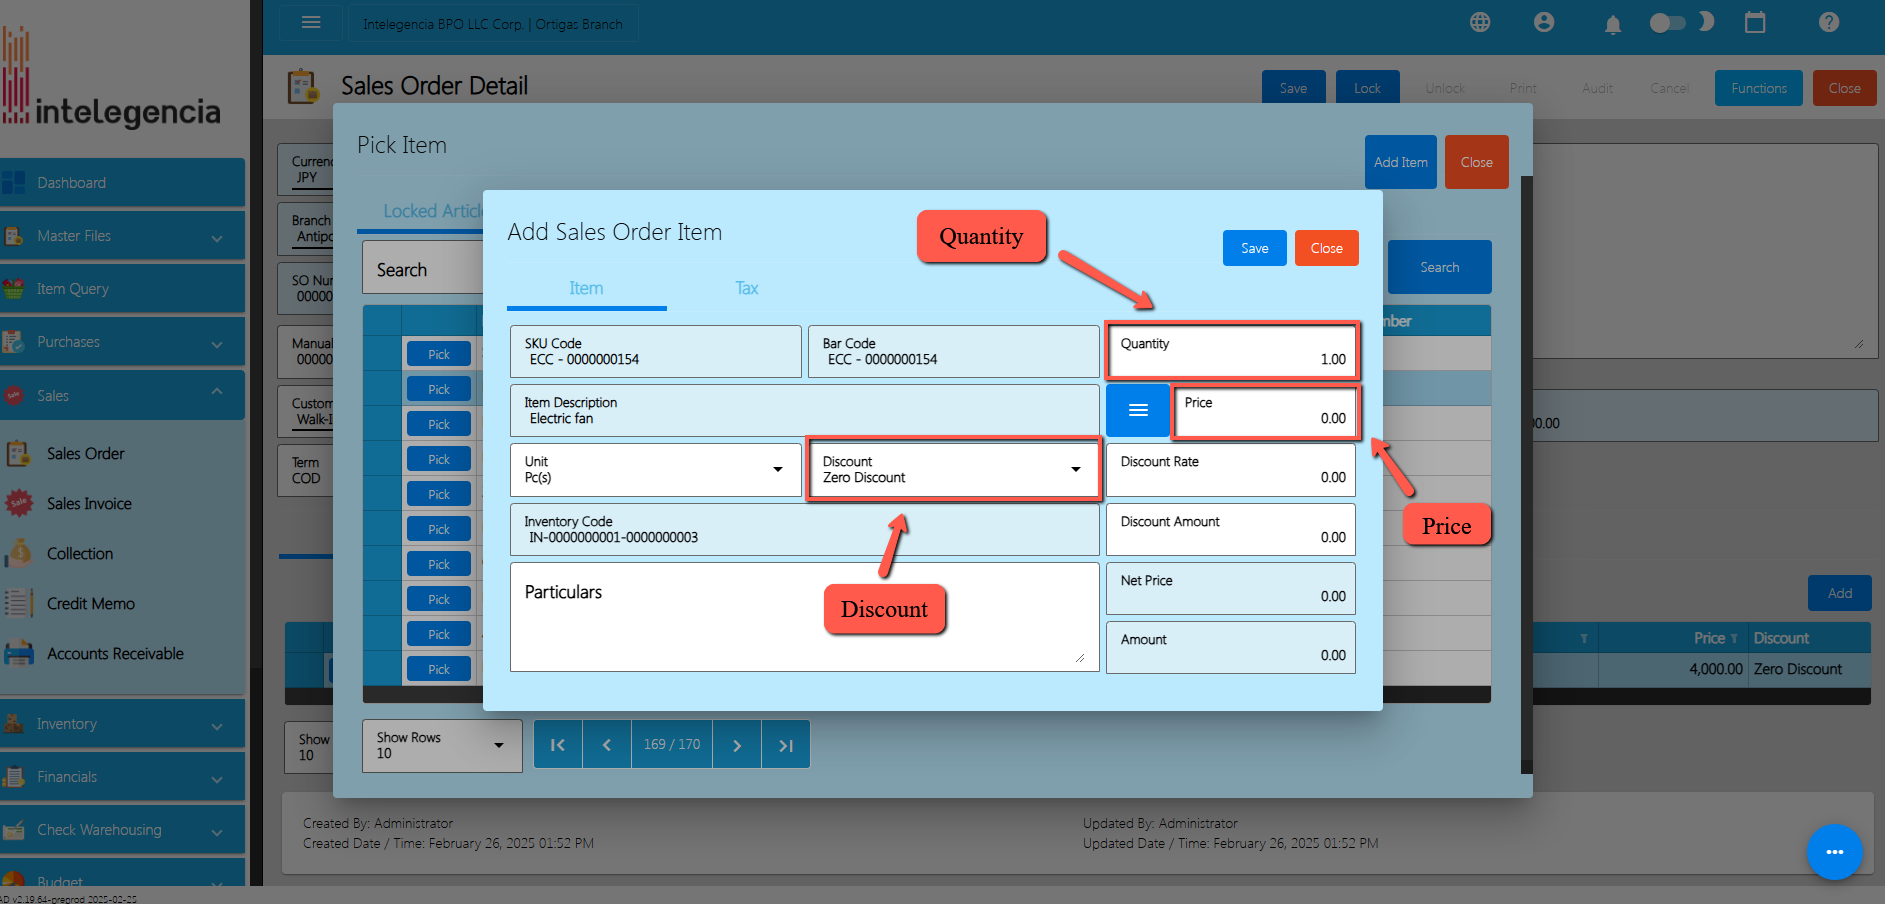
- After that, click the Save button.
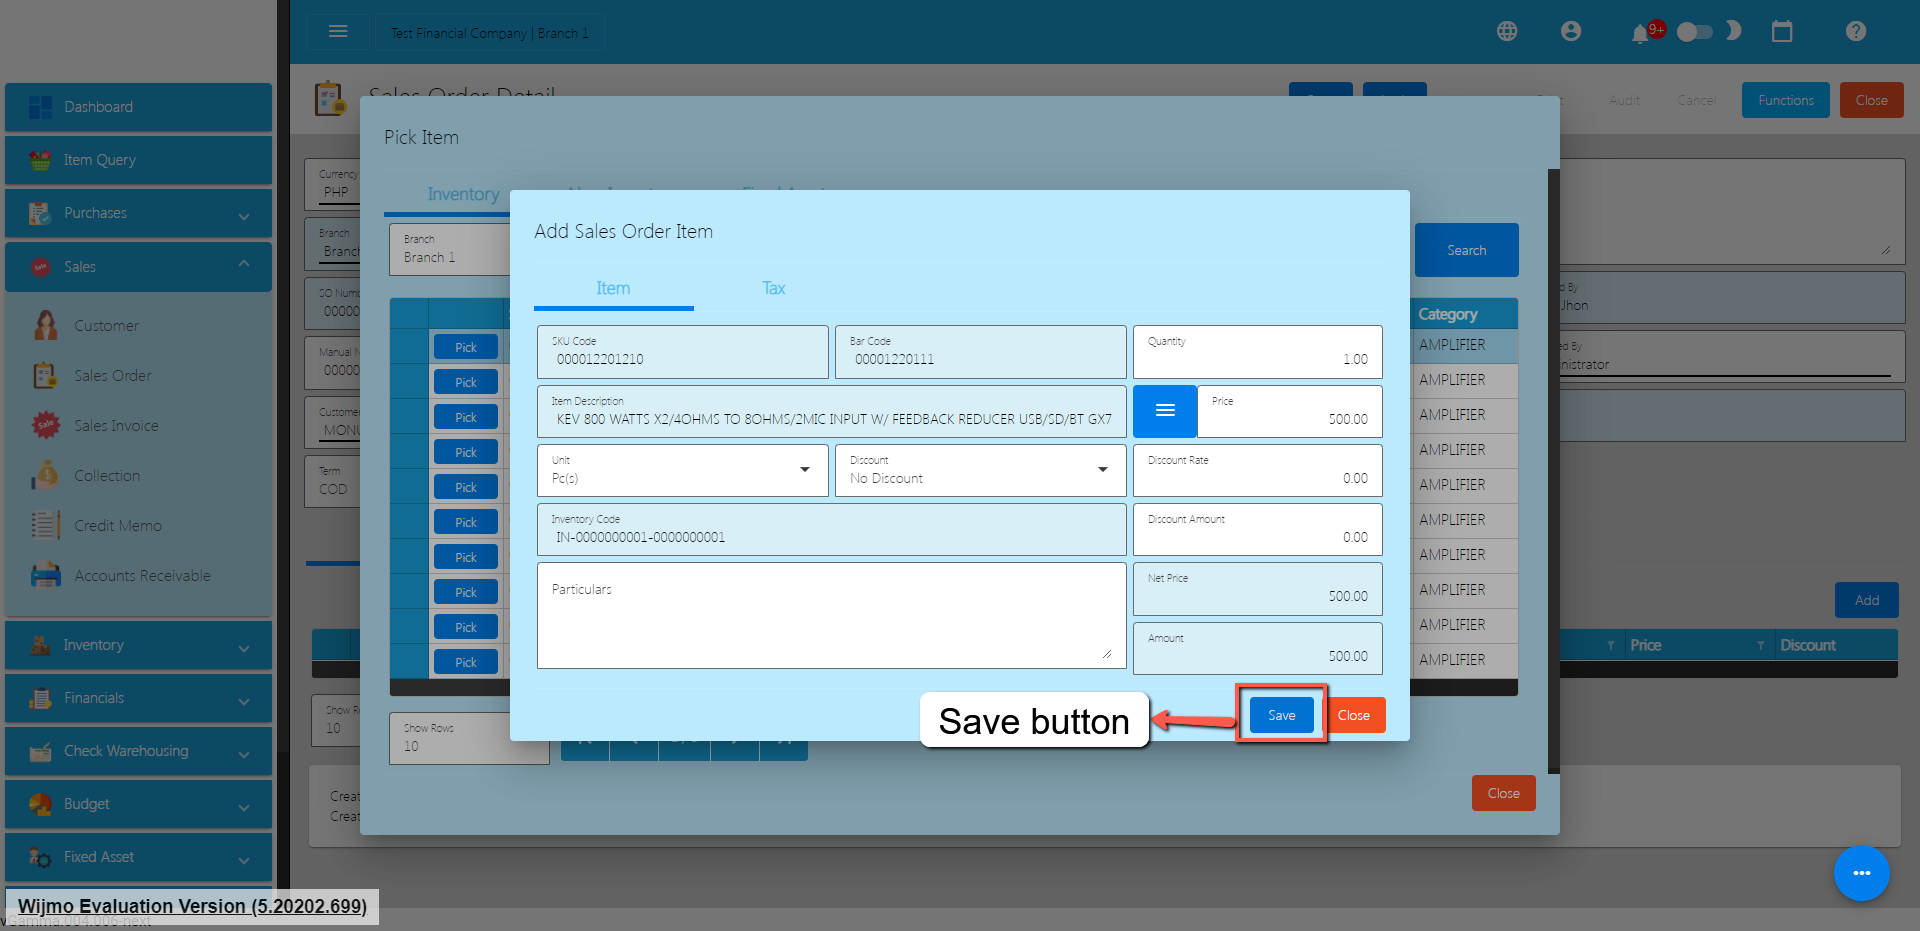
- If you wish to add additional items, repeat Steps 4 to 6.
- If you’re done adding line items, just click the Close button to hide the popup.
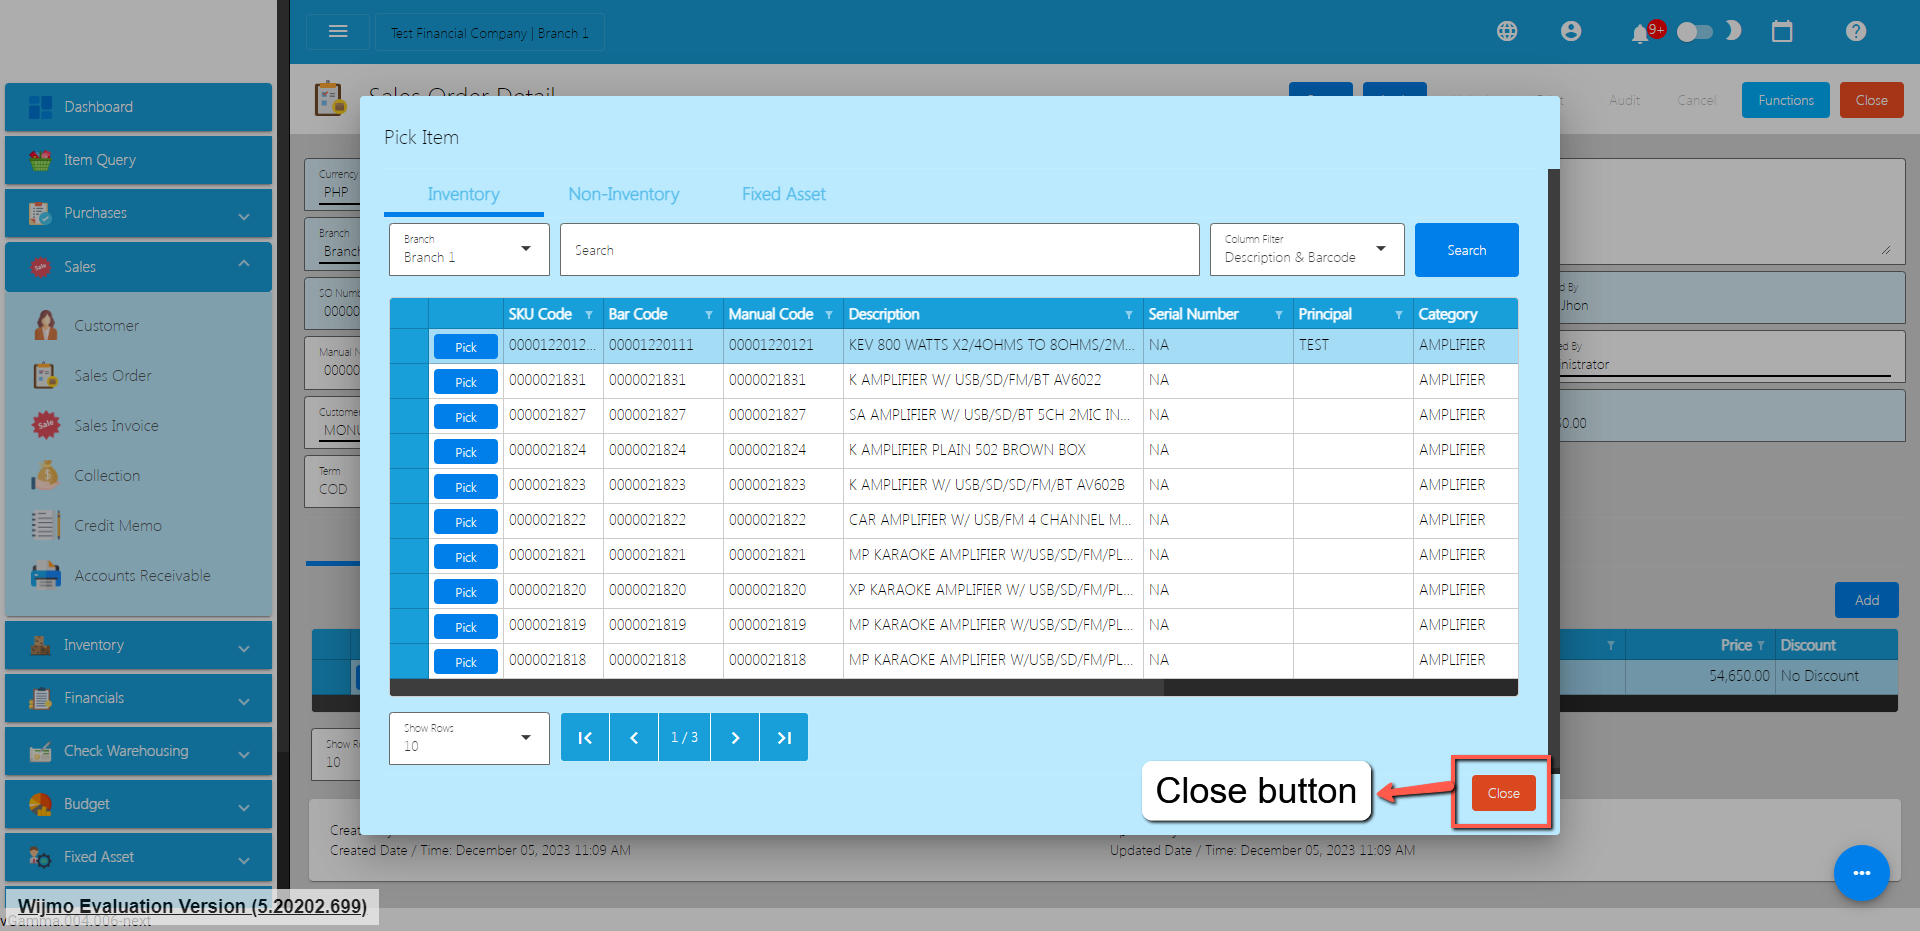
- After adding Sales Order line items, simply click the Save and Lock button.
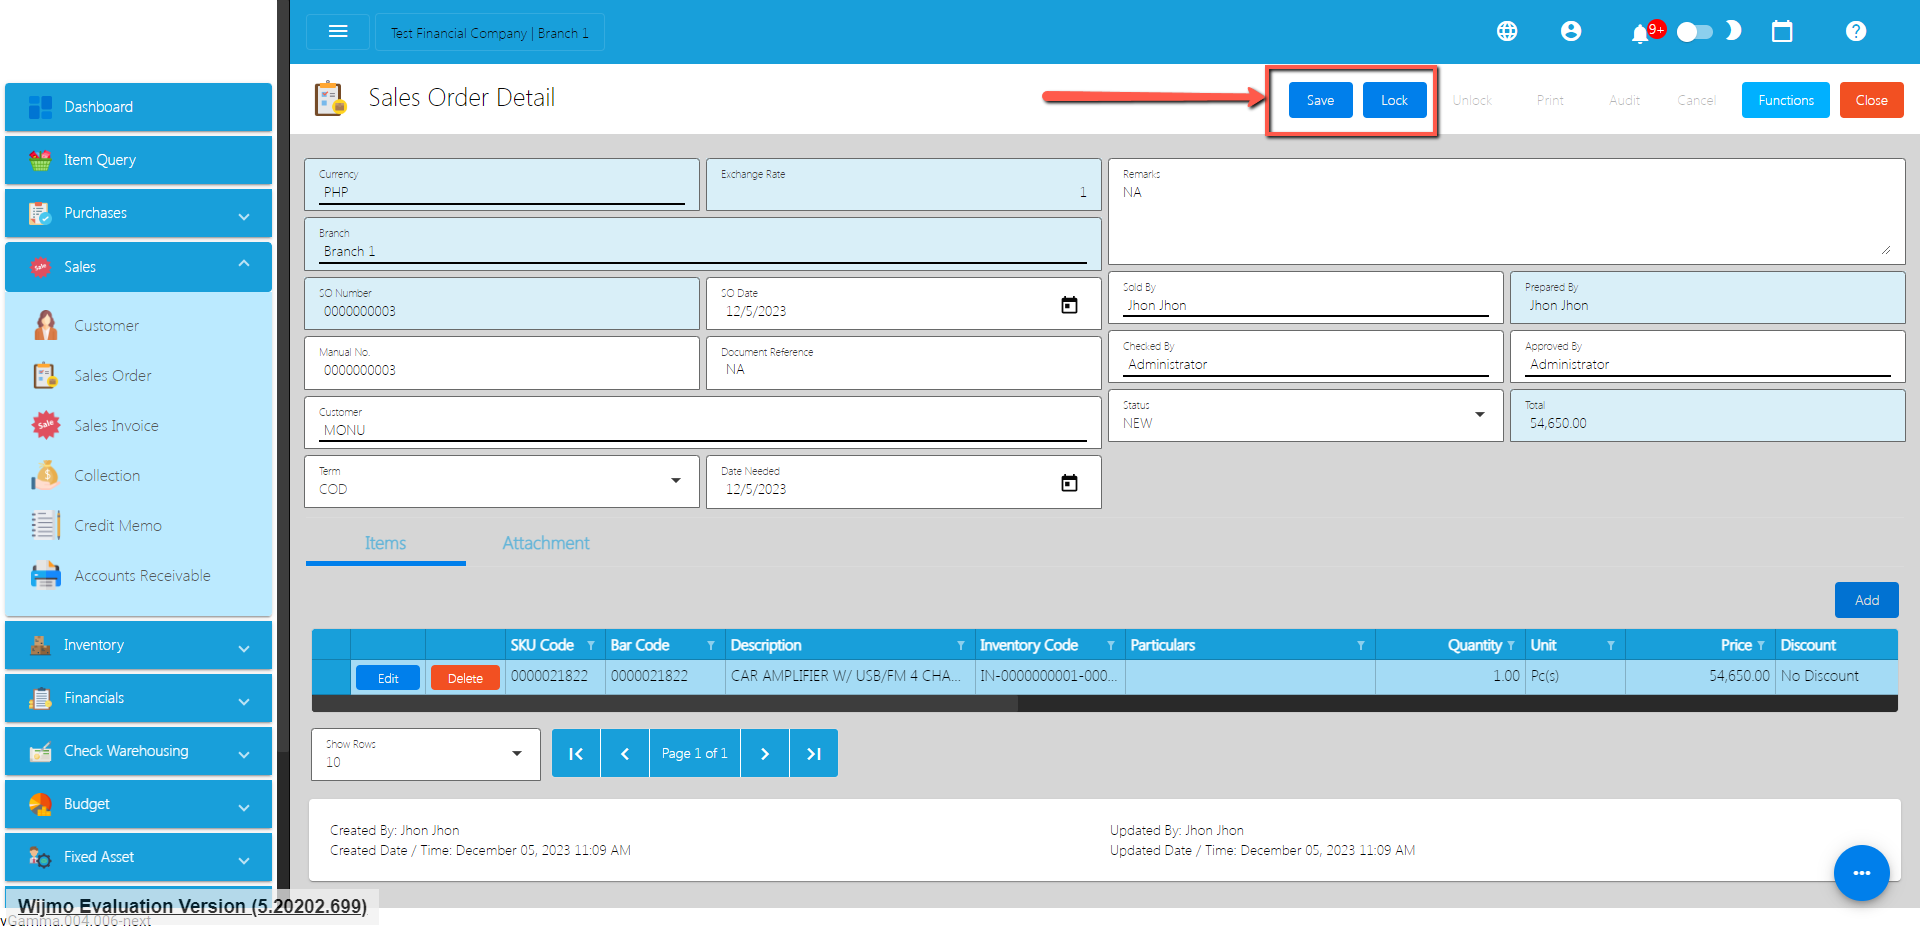
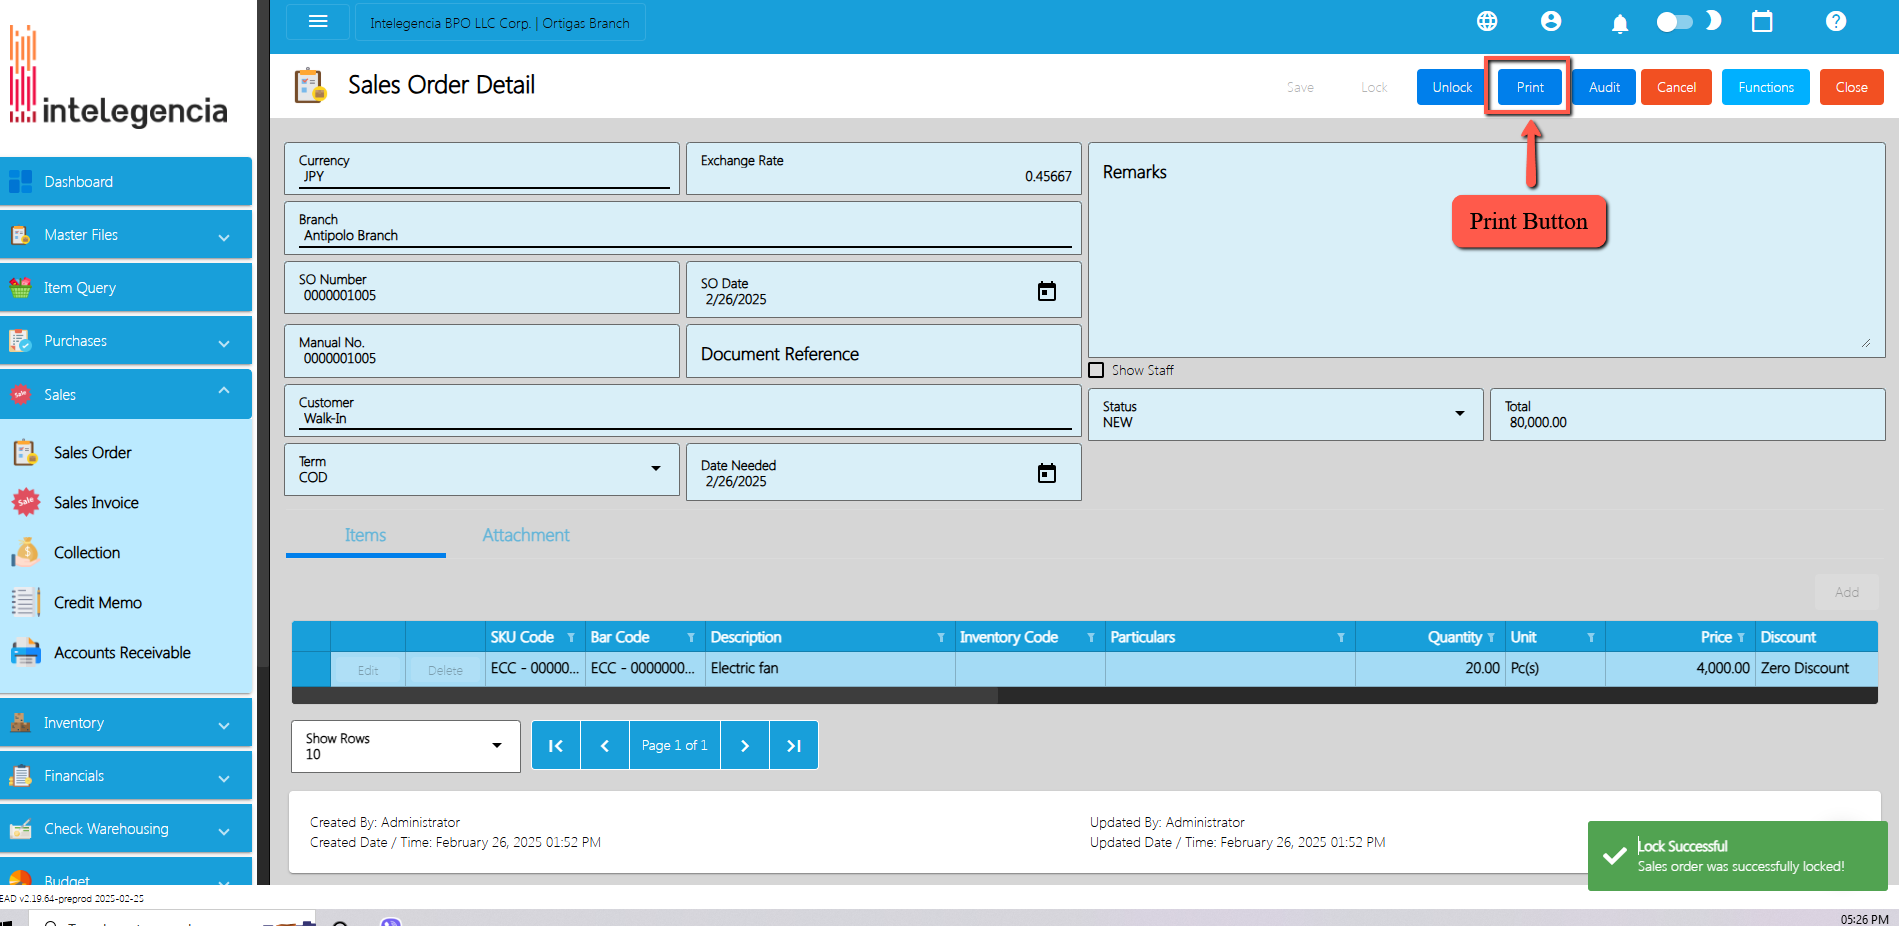
Note : To view the printout of the transaction make sure it is SAVE and LOCK. Then click the Print button.
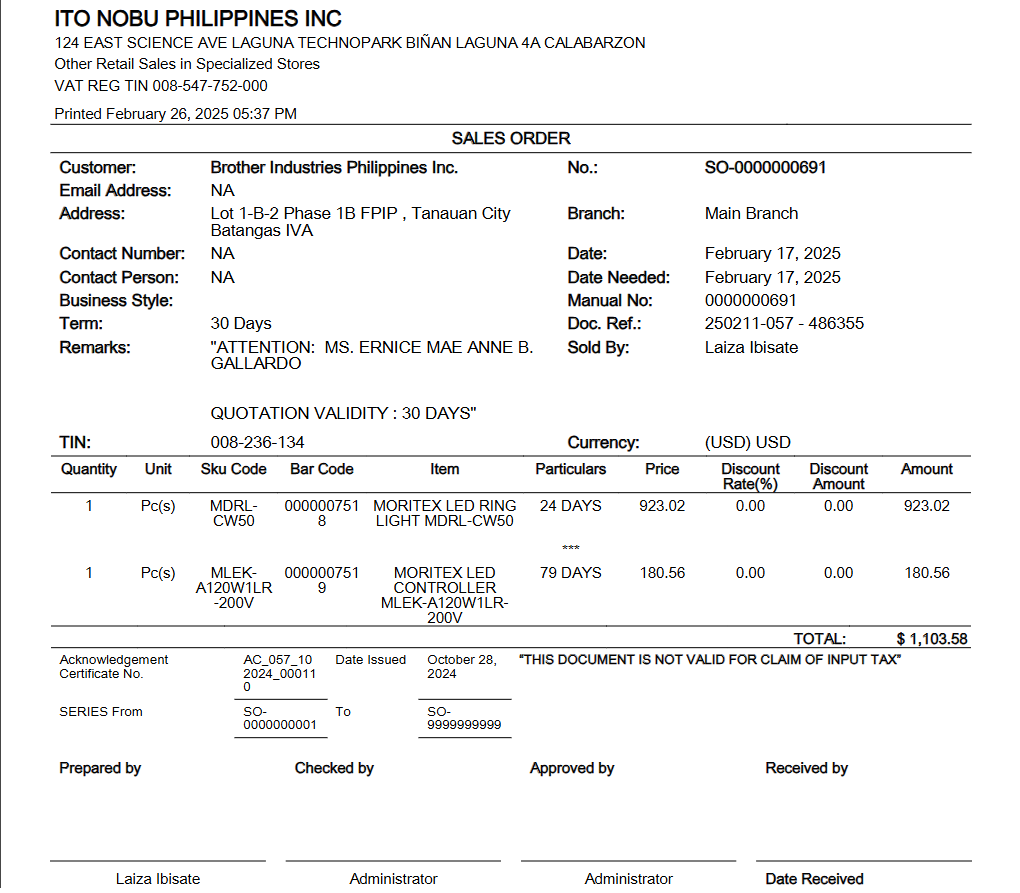
Sales Order Transaction via Upload Template
- To add a Sales Order Transaction via Upload Template, go to the Sales Order List then Click Functions.
- Click Optimized Upload.
- Select Download Sales Order File Format – an excel file will be downloaded. This is the file format where you will edit or encode the Items that you need to Sales Order.
3.1 In the Excel file:
- Manual Code should be unique per transaction, alphanumeric and should not exceed 255 characters. Example: ABC0000001
– if the Manual Code starts with 000, don’t forget to put an apostrophe (‘) at the beginning of the Manual Code.
Example: ‘00000111231414
– if the Manual Code starts with a number but exceeds more than 10 digits, format the cell to Text to show all the numbers.
Steps on how to change the format to Text:
- Right Click the Cell
- Click Format Cell
3. Choose Text
4. Click OK
5. Then reselect the field
- SO Date and Date Needed – SO Date is the date of SO or when it was created. Date Needed it can be after or on the date of the SO date, the format of the SO Date and Date Needed should be (yyyyy-mm-dd)
- Document Reference should be unique per transaction, alphanumeric and should not exceed 255 characters. Example: ABC0000001
– if the Document Reference starts with 000, don’t forget to put an apostrophe (‘) at the beginning of the Manual Code.
Example: ‘00000111231414
– if the Document Reference starts with a number but exceeds more than 10 digits, format the cell to Text to show all the numbers.
Steps on how to change the format to Text:
1. Right Click the Cell
2. Click Format Cell
3. Choose Text
4. Click OK
5. Then reselect the field
- Particulars – in this column this is basically the remarks for each item line, it should be alphanumeric and should not exceed 255 characters.
- Remarks – in this column is basically the remarks for the whole transaction, it should be alphanumeric and should not exceed 255 characters.
- Customer and CustomerID – Select Customer from the dropdown and choose the Customer, CustomerID will correspond to the selected Customer. Never edit the CustomerID since it will automatically change after selecting the Customer.
- Term and TermID – Select term from the dropdown and choose the term, TermID will correspond to the selected Term. Never edit the termID since it will automatically change after selecting the Term.
- Currency and CurrencyID – Select the Currency from the dropdown and choose the correct Currency, CurrencyID will correspond to the selected currency. Never edit the CurrencyID since it will automatically change after selecting the currency.
- Exchange Rate – exchange rate is the rate that is used to convert the currency.
- Status – Status is the status of the transaction, just select the status from the dropdown.
- ItemID, Item Description, Price, UnitID and Unit – all these fields are related to the Item. Once the barcode is selected all these fields will also change depending on the barcode that was selected.
- Quantity – Input the quantity that is needed for the Sales Order
- Discount and DiscountID – Select the Discount from the dropdown and choose the correct Discount, DiscountID will correspond to the selected Discount. Never edit the DiscountID since it will automatically change after selecting the Discount.
- Amount – the amount will automatically calculate based on the selected Discount, Price and Quantity.
- VAT and VATId – Select the VAT from the dropdown and choose the correct VAT, VATId will correspond to the selected WTAX. Never edit the VATId since it will automatically change after selecting the VAT.
- WTAX and WTAXId – Select the WTAX from the dropdown and choose the correct WTAX, WTAXId will correspond to the selected WTAX. Never edit the WTAXId since it will automatically change after selecting the WTAX.
Cancel Sales Order Transaction
When you need to cancel a Sales Order, it’s important to follow these simple steps:
- Log In: Visit your easyFS domain and login with your username and password.
- Find your Sales Order: Navigate to the Sales, then Sales Order. You will be redirected to the Sales Order lists.
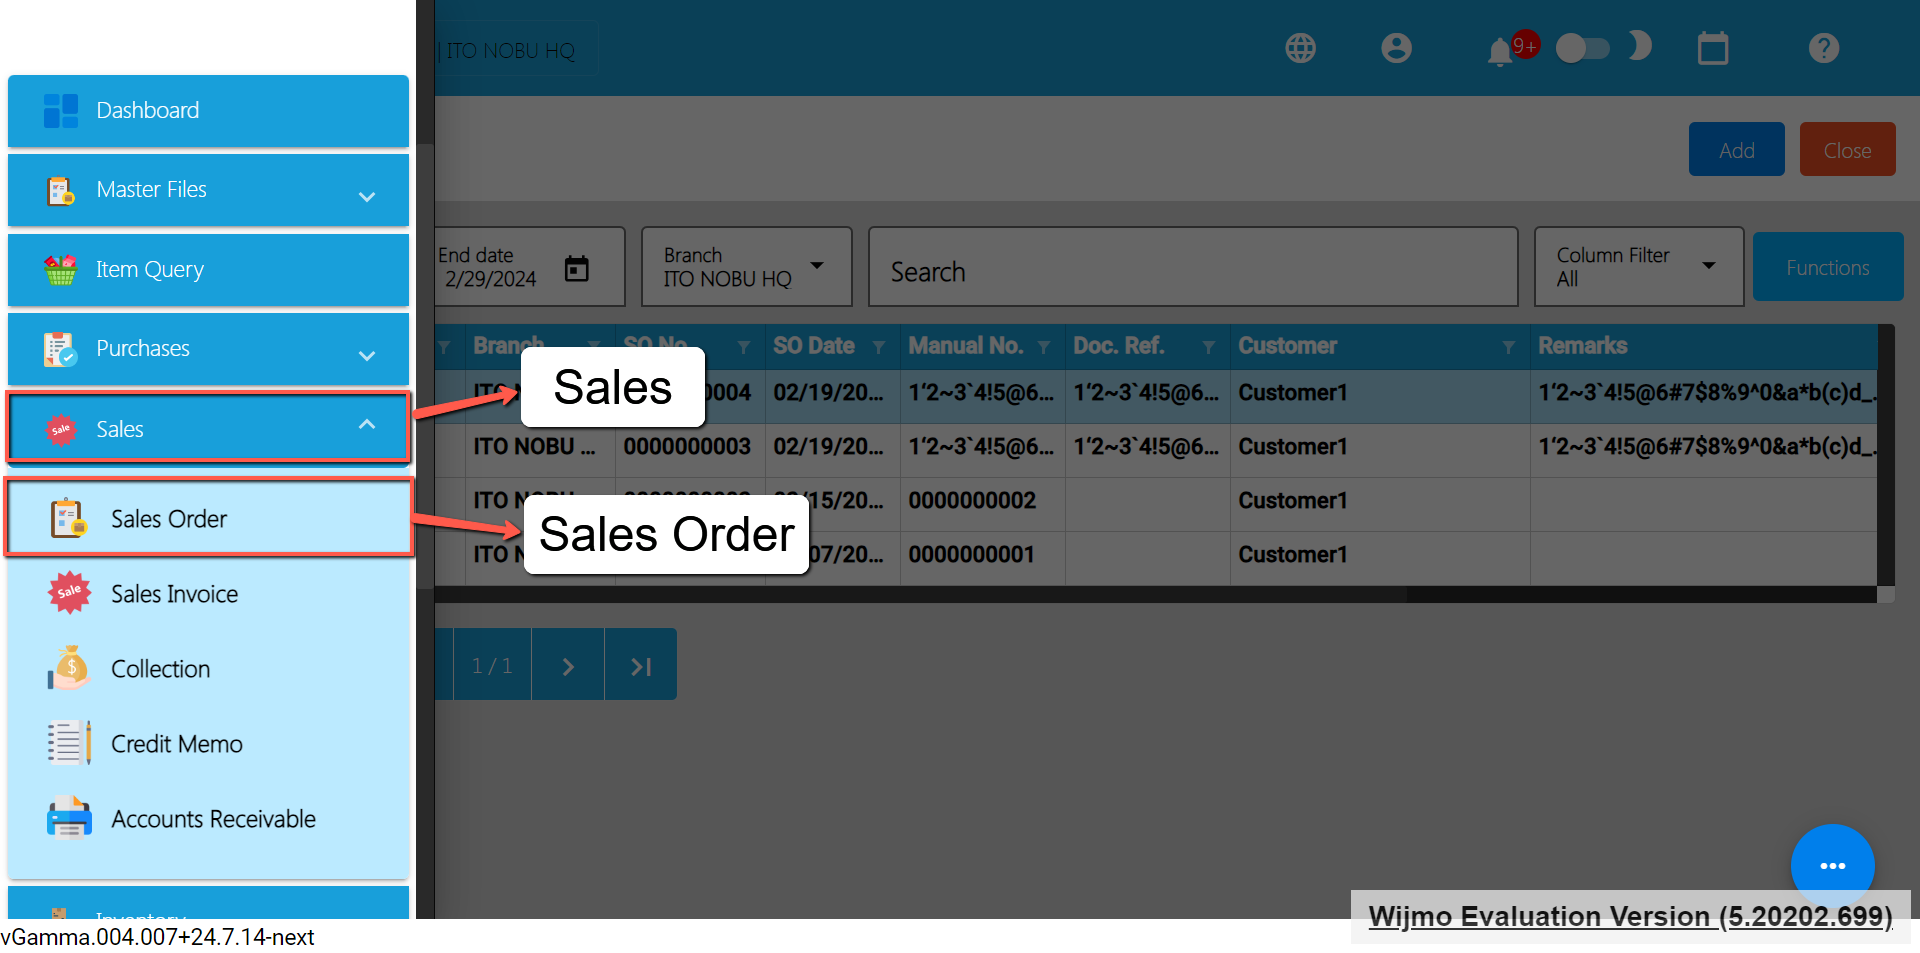
- Locate the Right One: From the Sales Order list, you may use the search bar to look for the right Sales Order you want to cancel. You can search using the Sales Order’s SONUmber, Manual Number, Document Reference, etc.
Take note: Don’t forget to change the Start Date and End Date to your Sales Order’s transaction date to display the correct result.
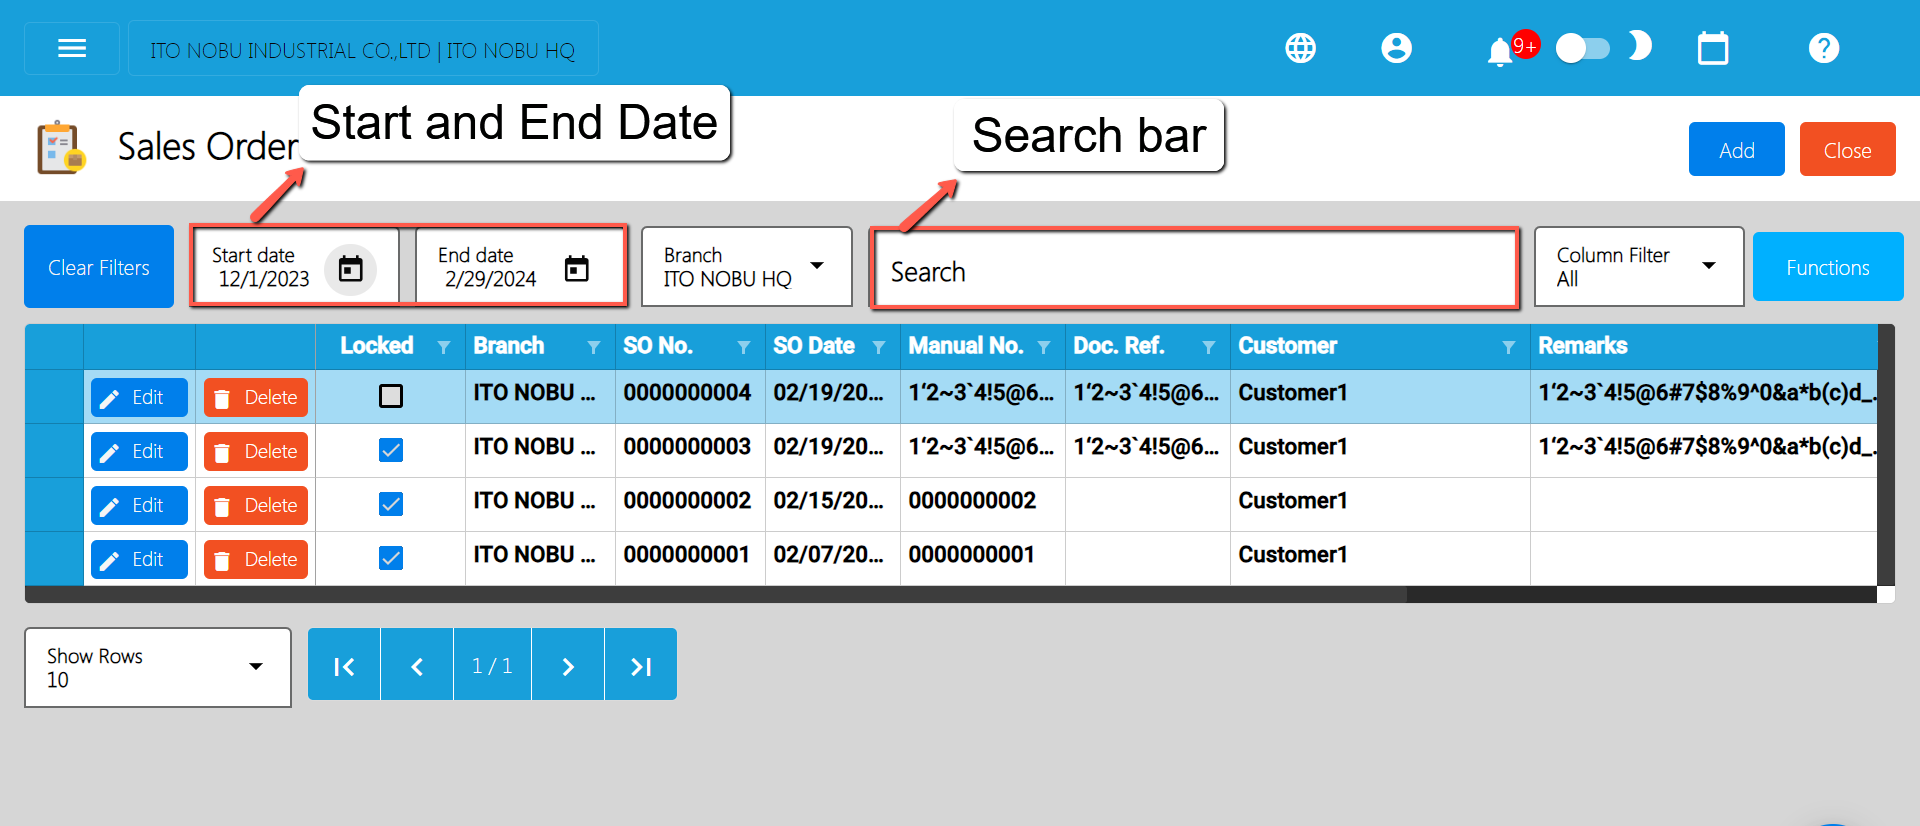
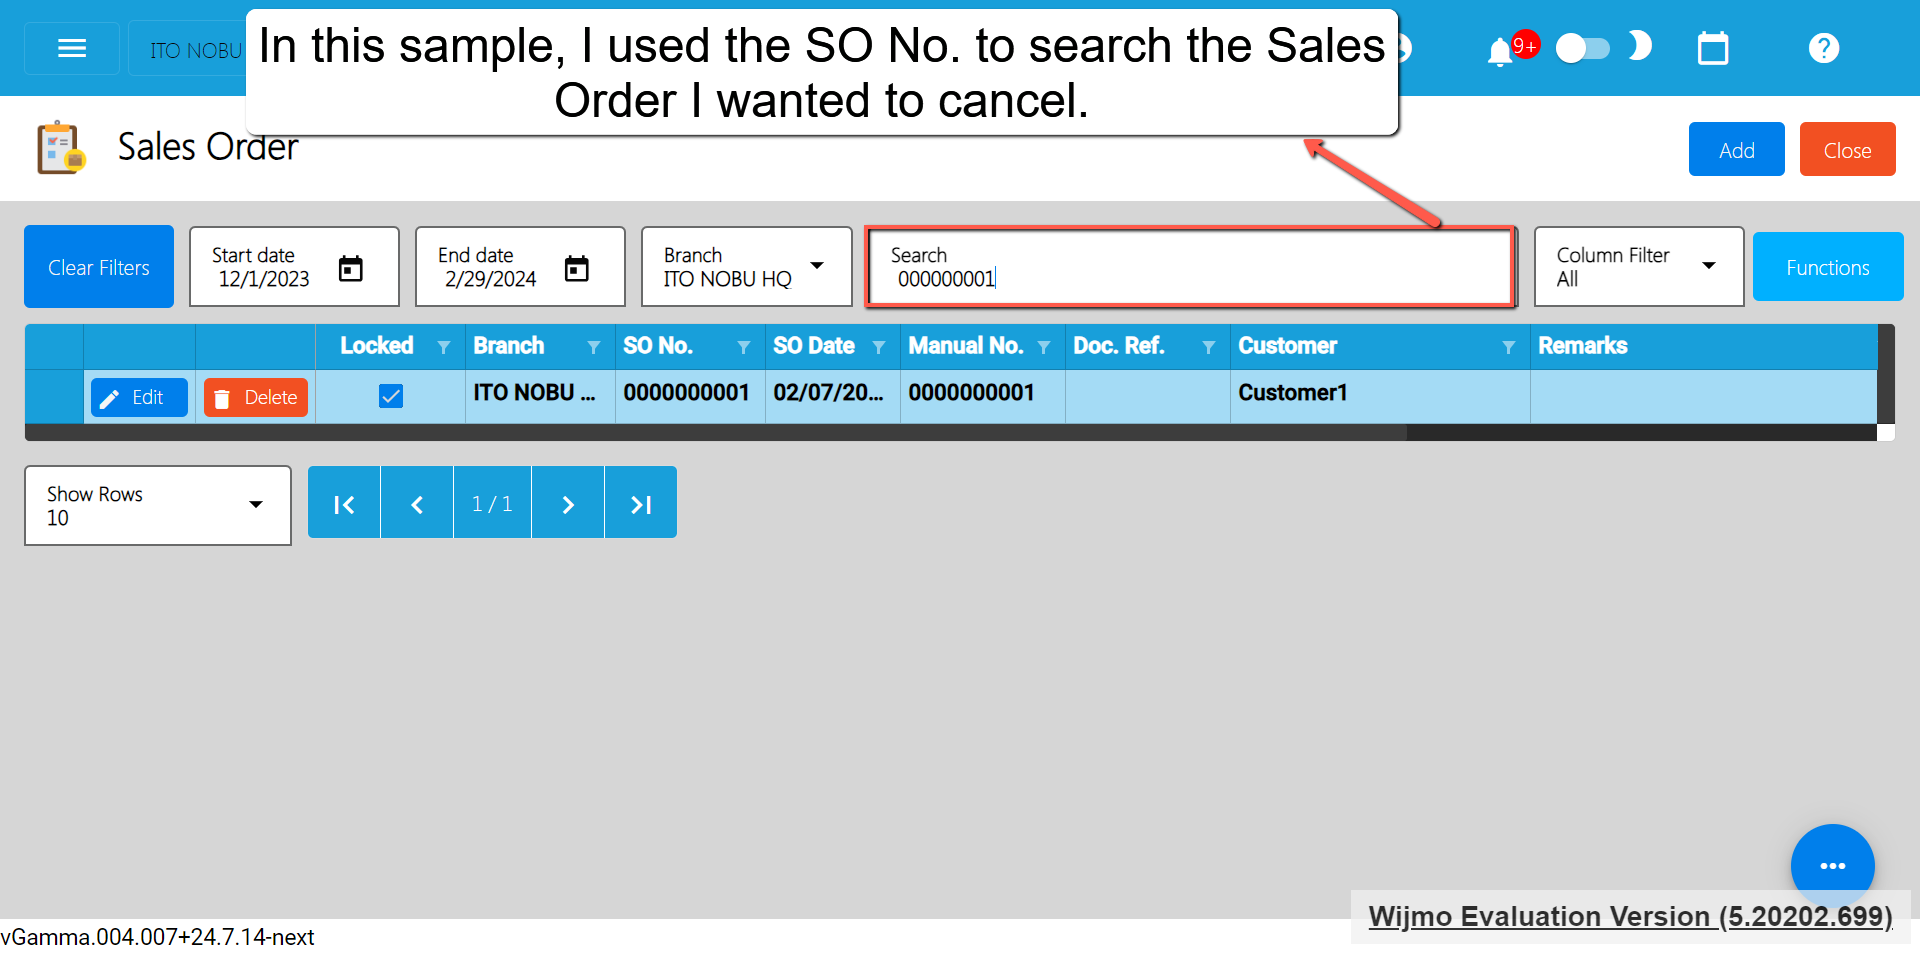
- Open the Sales Order Detail: Click the Edit button to open the Sales Order detail page.
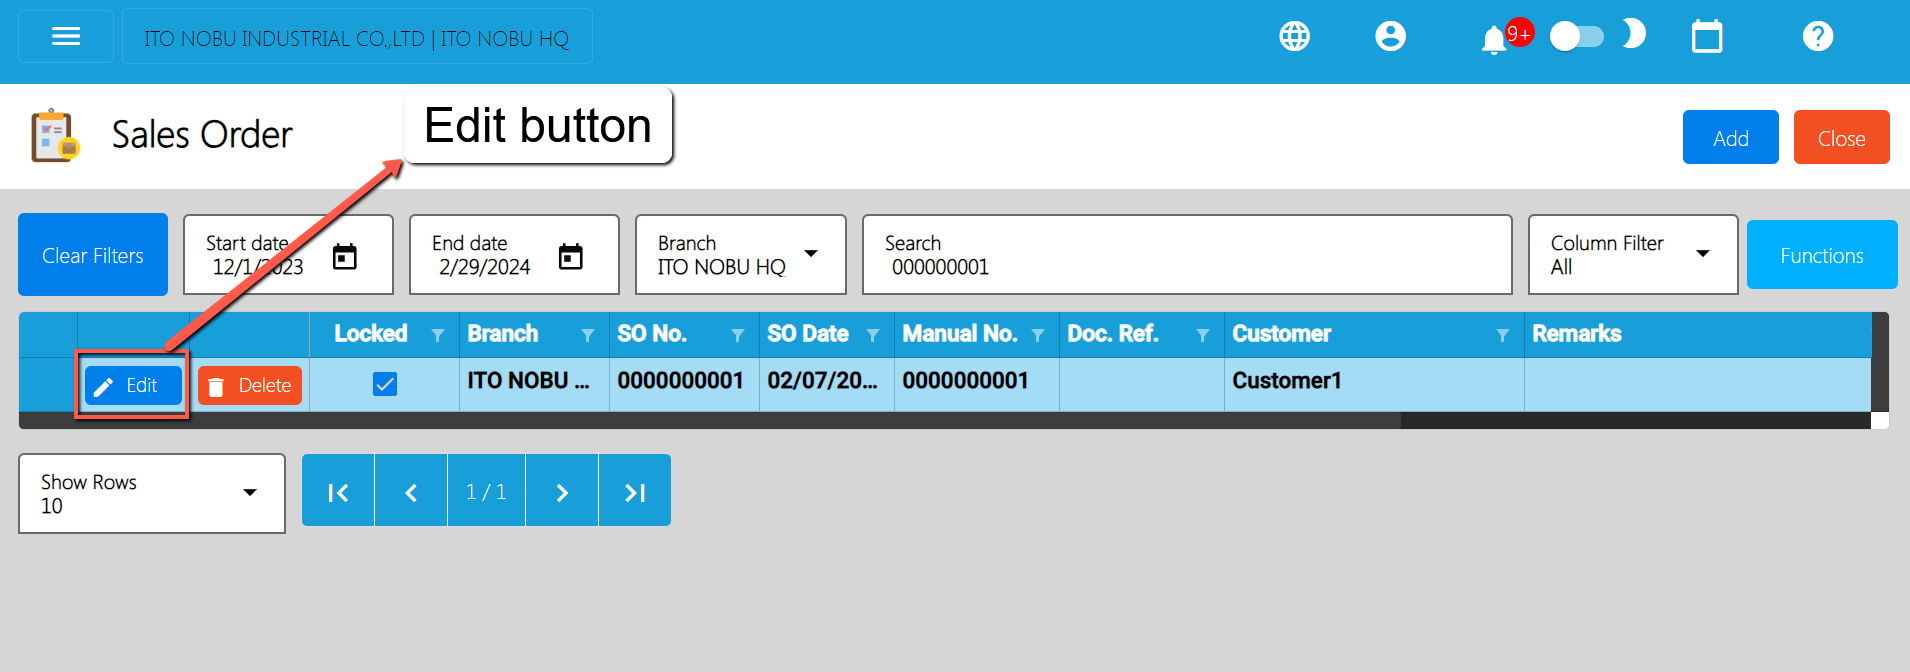
- Cancel the Sales Order: To cancel your Sales Order transaction, look for the Cancel button found on the upper-right part of the page, then click.
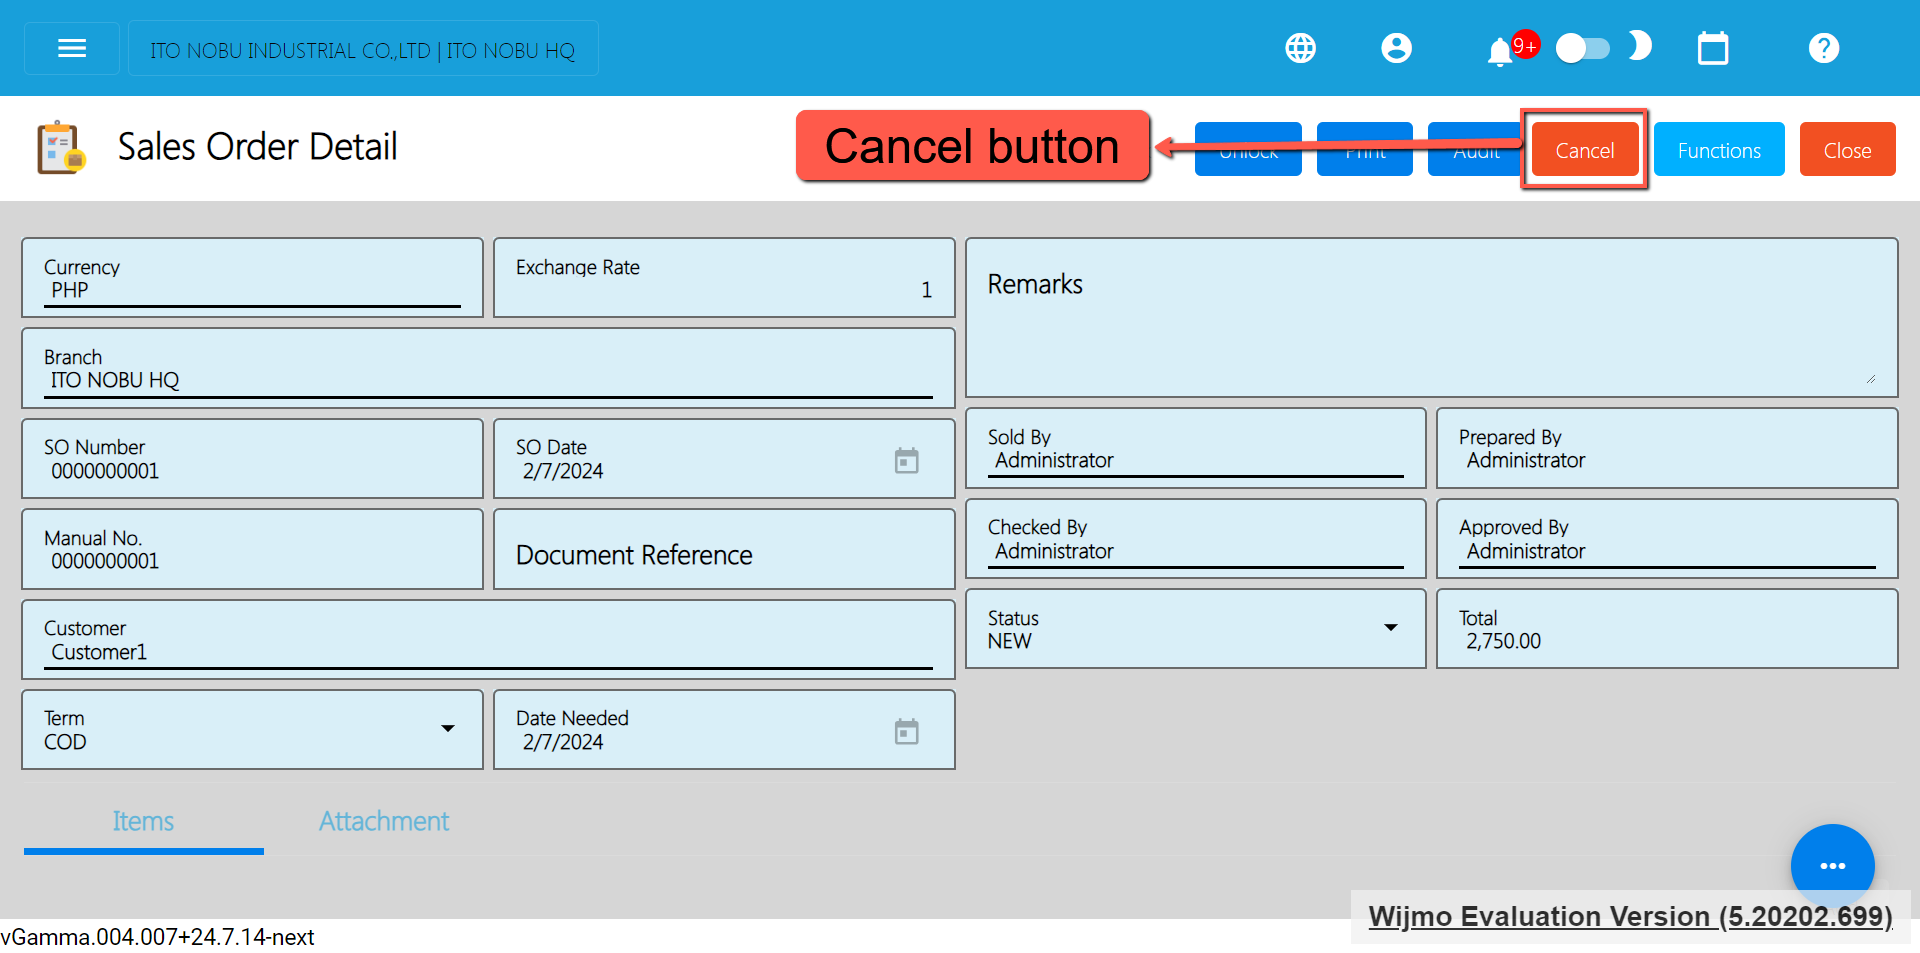
- Confirm Canceling: After you click the Cancel button, there’s a Cancel Sales Order window. If you’re sure you want to cancel your Sales Order transaction, click the Cancel button.
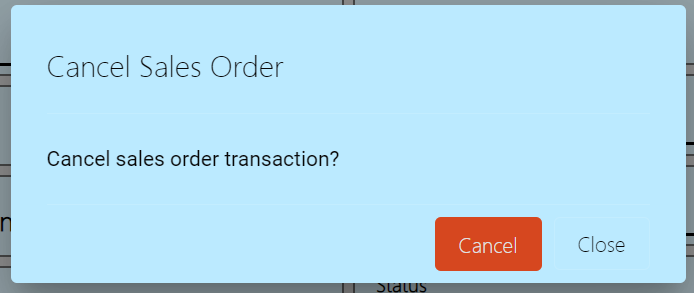
- Check It’s Done: After canceling, make sure you get a success toast message confirming it’s canceled successfully. It is found on the bottom right of the page.
- Let Others Know(if needed): If you believe canceling affects other people, it's a good idea to inform them.
- Keep Track: Remember to make a note somewhere that you canceled the Sales Order, just in case it is needed later.
5.3.2 Sales Invoice
Overview
Once the Customer responds/says that the Sales Order is all good, we can now proceed to creating a Sales Invoice.
Sales Invoice List
- List of all the SI(Sales Invoice) and will also show the overview of the transaction.
- You can filter the data to be displayed by providing the following:
- Start Date
- End Date
- Branch
- Also, you can search data by providing a value on the Search Bar and select the Column Filter on where to search the data.
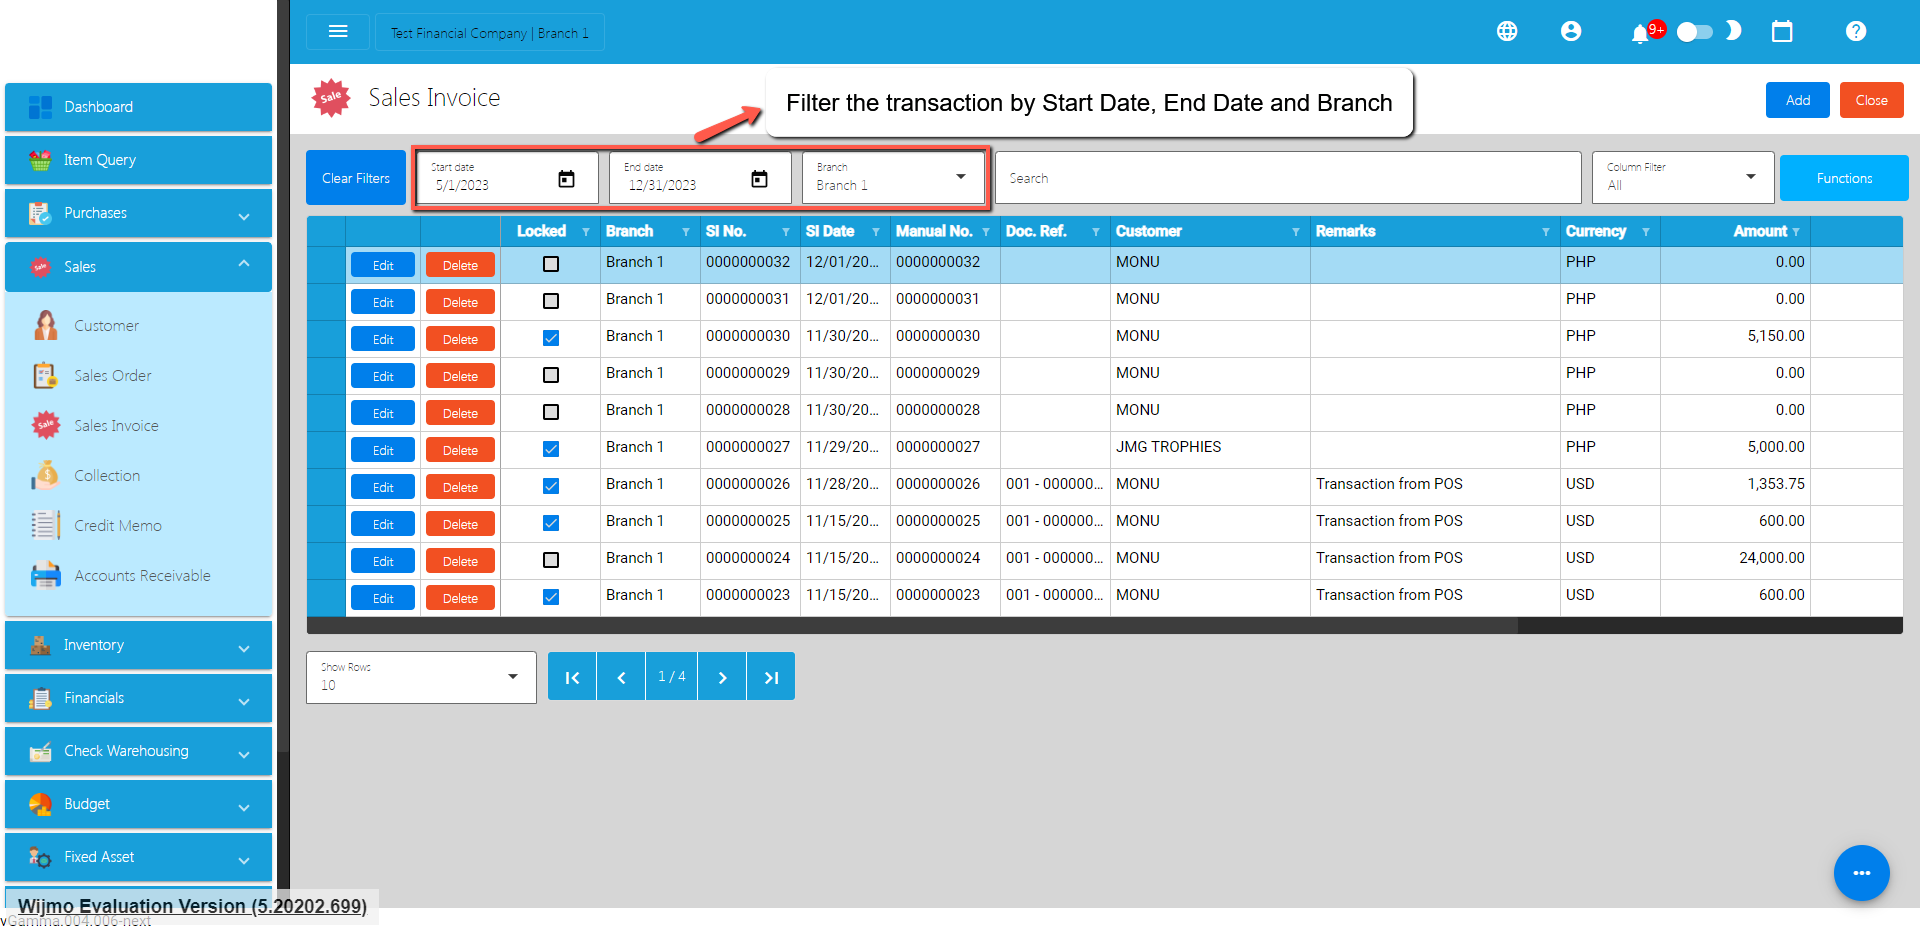
Sales Invoice Detail
- To add a new Sales Invoice, go to Sales then click Sales Invoice. After that, click the Add button that can be seen in the Sales Invoice list.
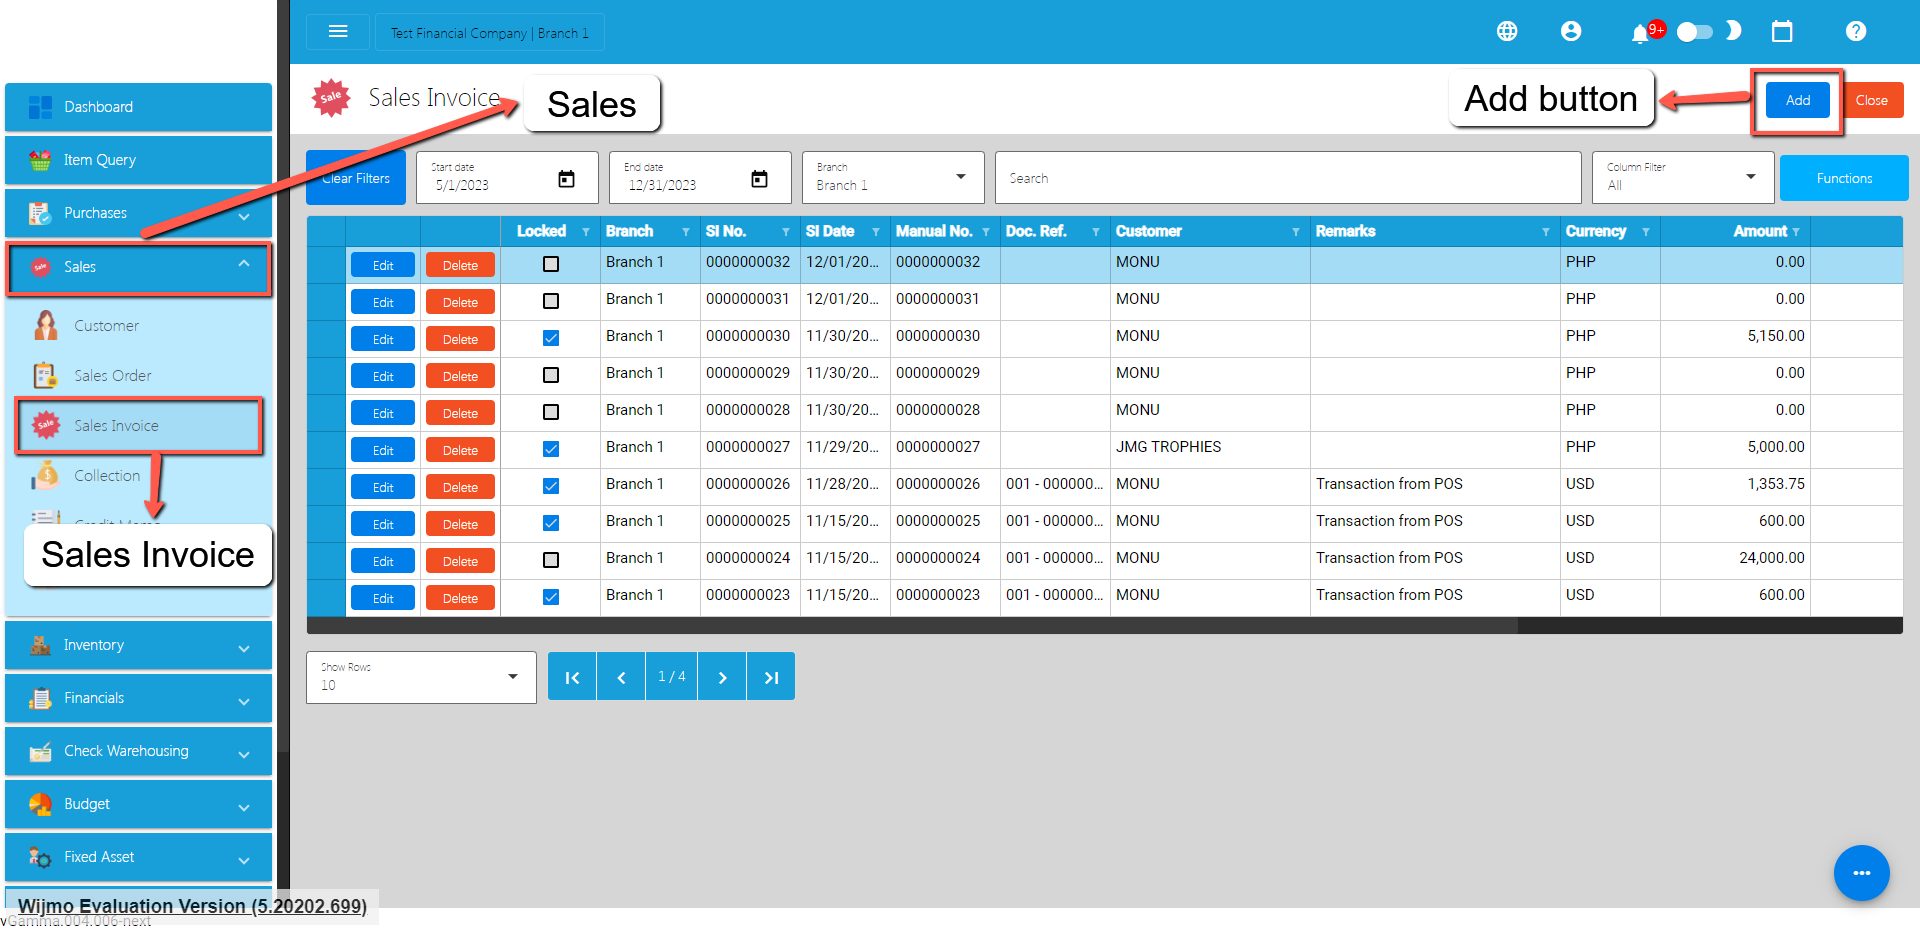
- Fill out all the needed information for the Sales Invoice Detail like,
- Currency
- Customer Name
- SI Date
- Term
- Document Reference
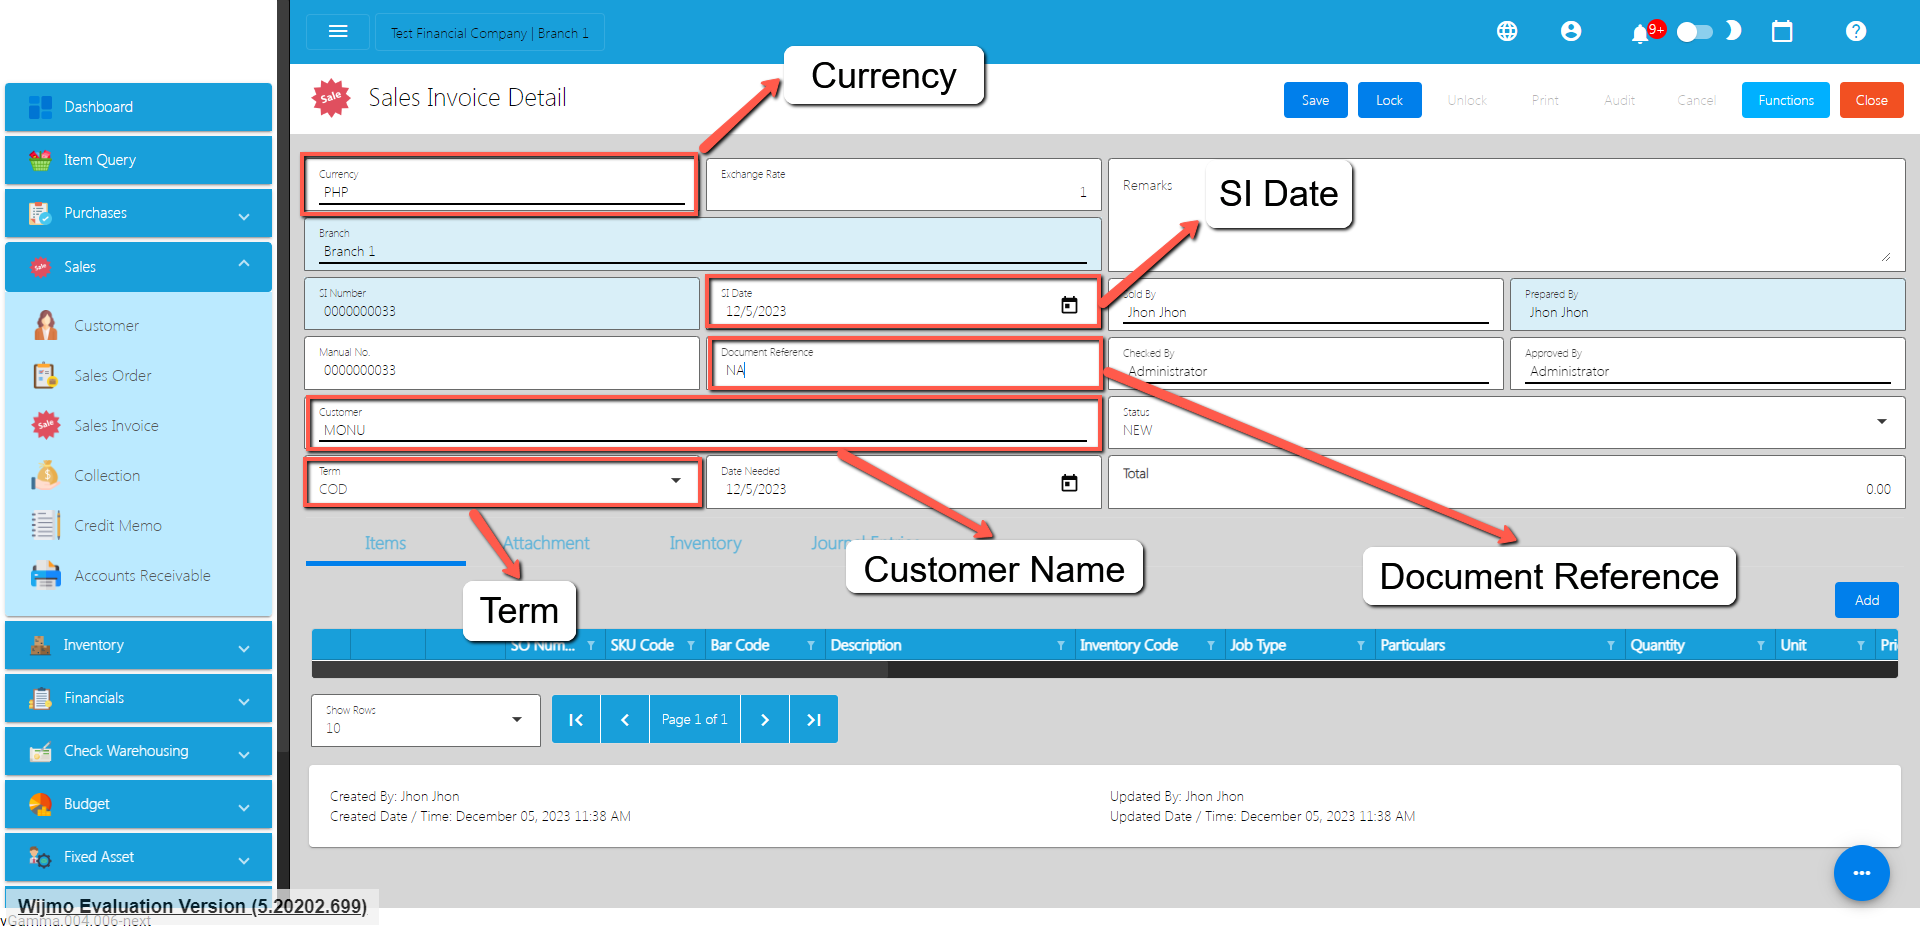
- To add a Sales Invoice Line Item, click the Add button on the right part of the page under Items tab.
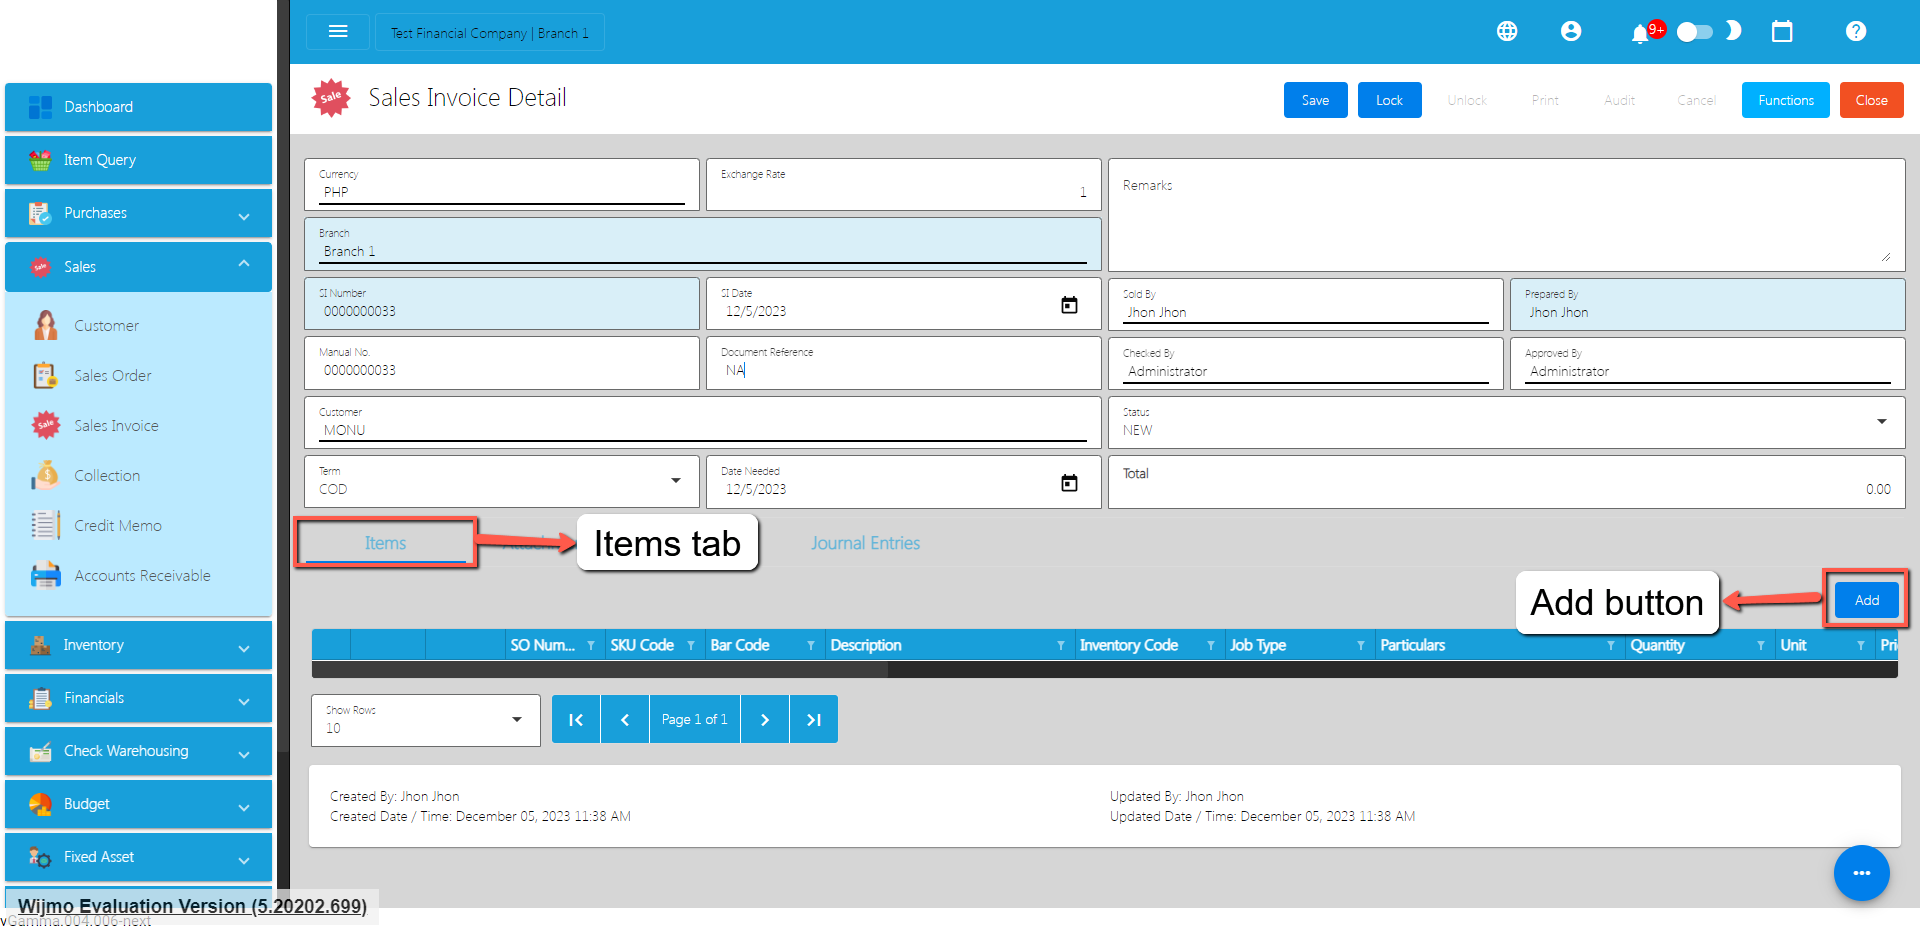
- If you already have a Sales Order for the Sales Invoice, select the Sales Order by clicking on the SO Number.
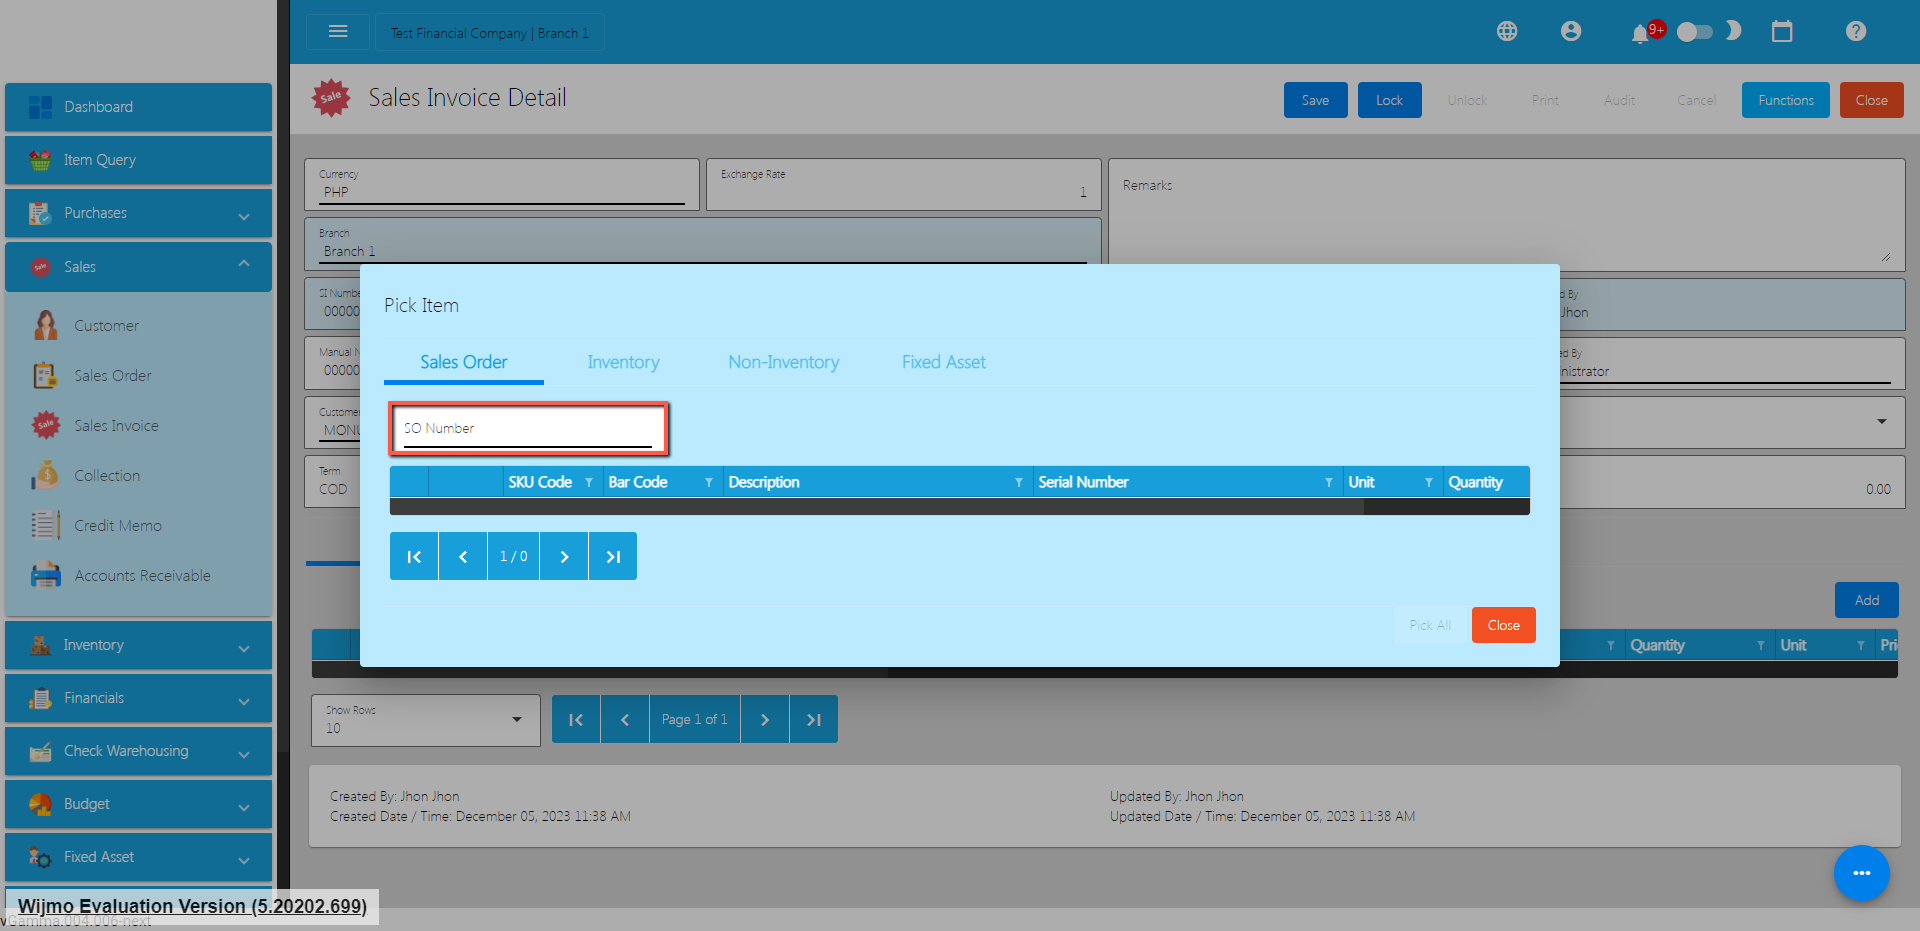
- Once clicked, it will pop up all the Sales Order line items. Click the Pick button.
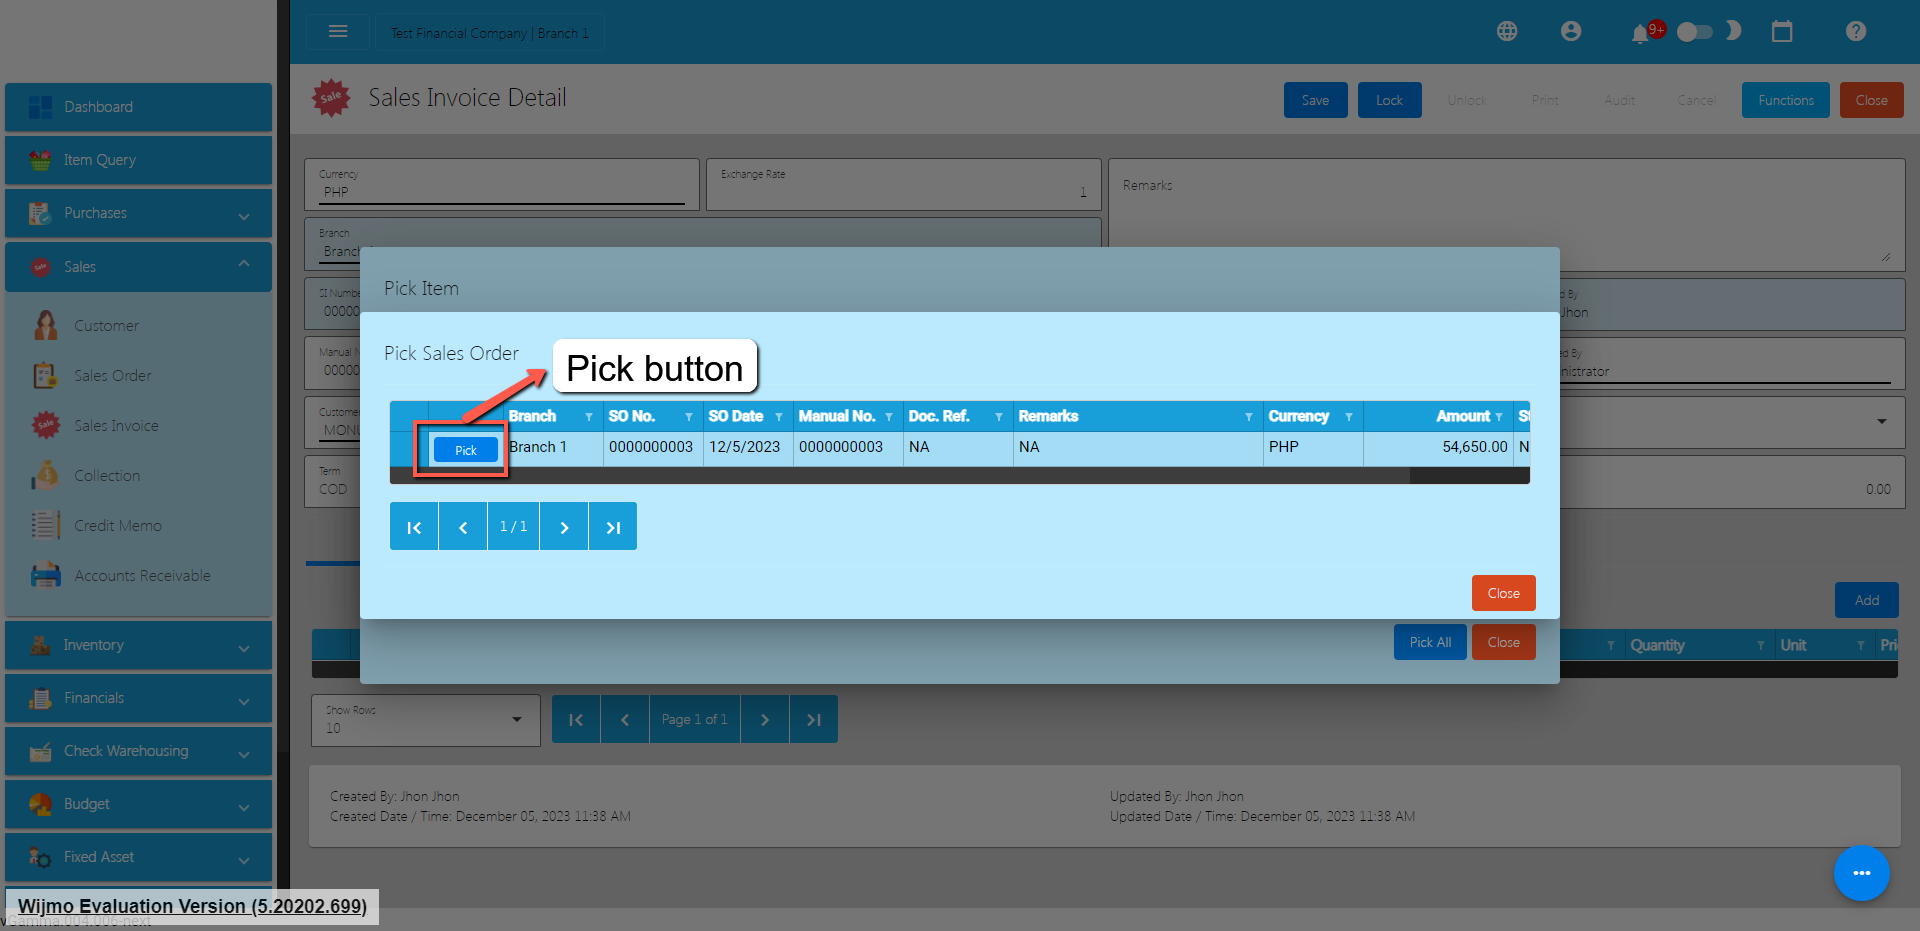
- There are two ways to add the Sales Order’s line items to the Sales Invoice line items: (1) Click the Pick All button to automatically add the SO line items to the Sales Invoice line items; (2) You need to click the Pick button.
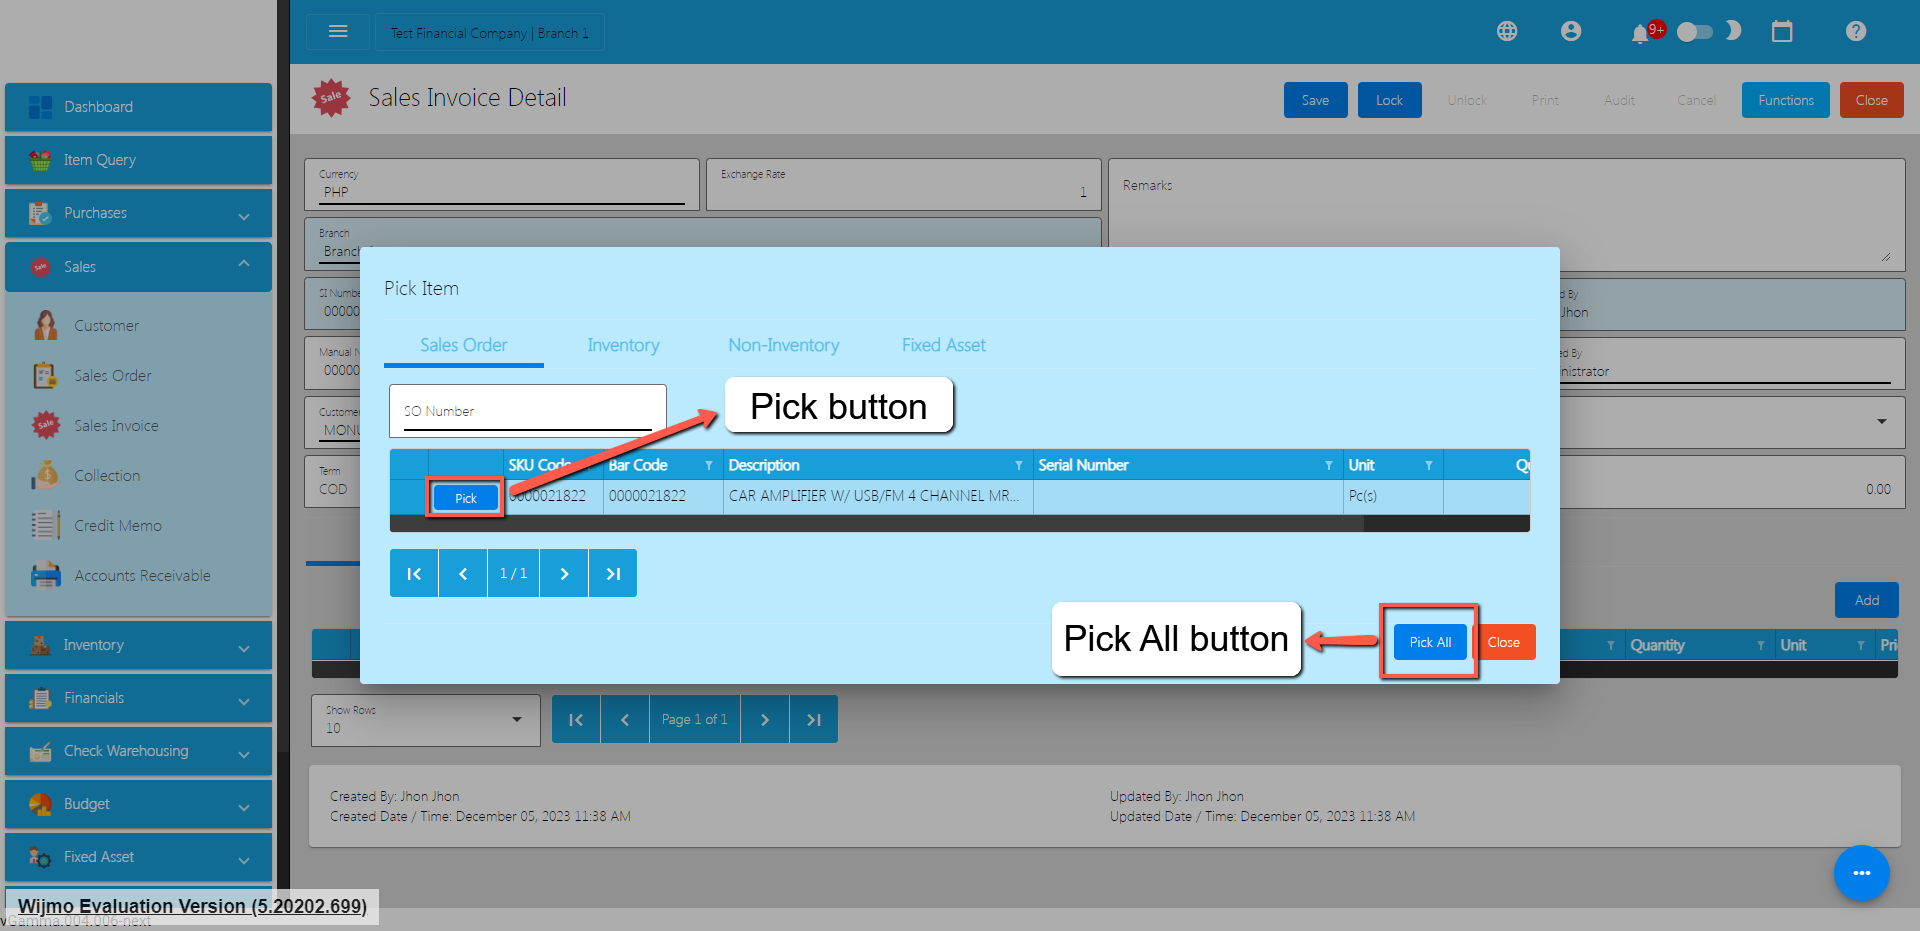
- Once the Pick button is clicked, fill out the Quantity and Price.
- If your sales transaction has a discount, you may select the correct discount by clicking on the Discount dropdown. If discount does not exist on the dropdown, you may add a new discount detail by navigating to the System>System Tables>Discounts>Add button.
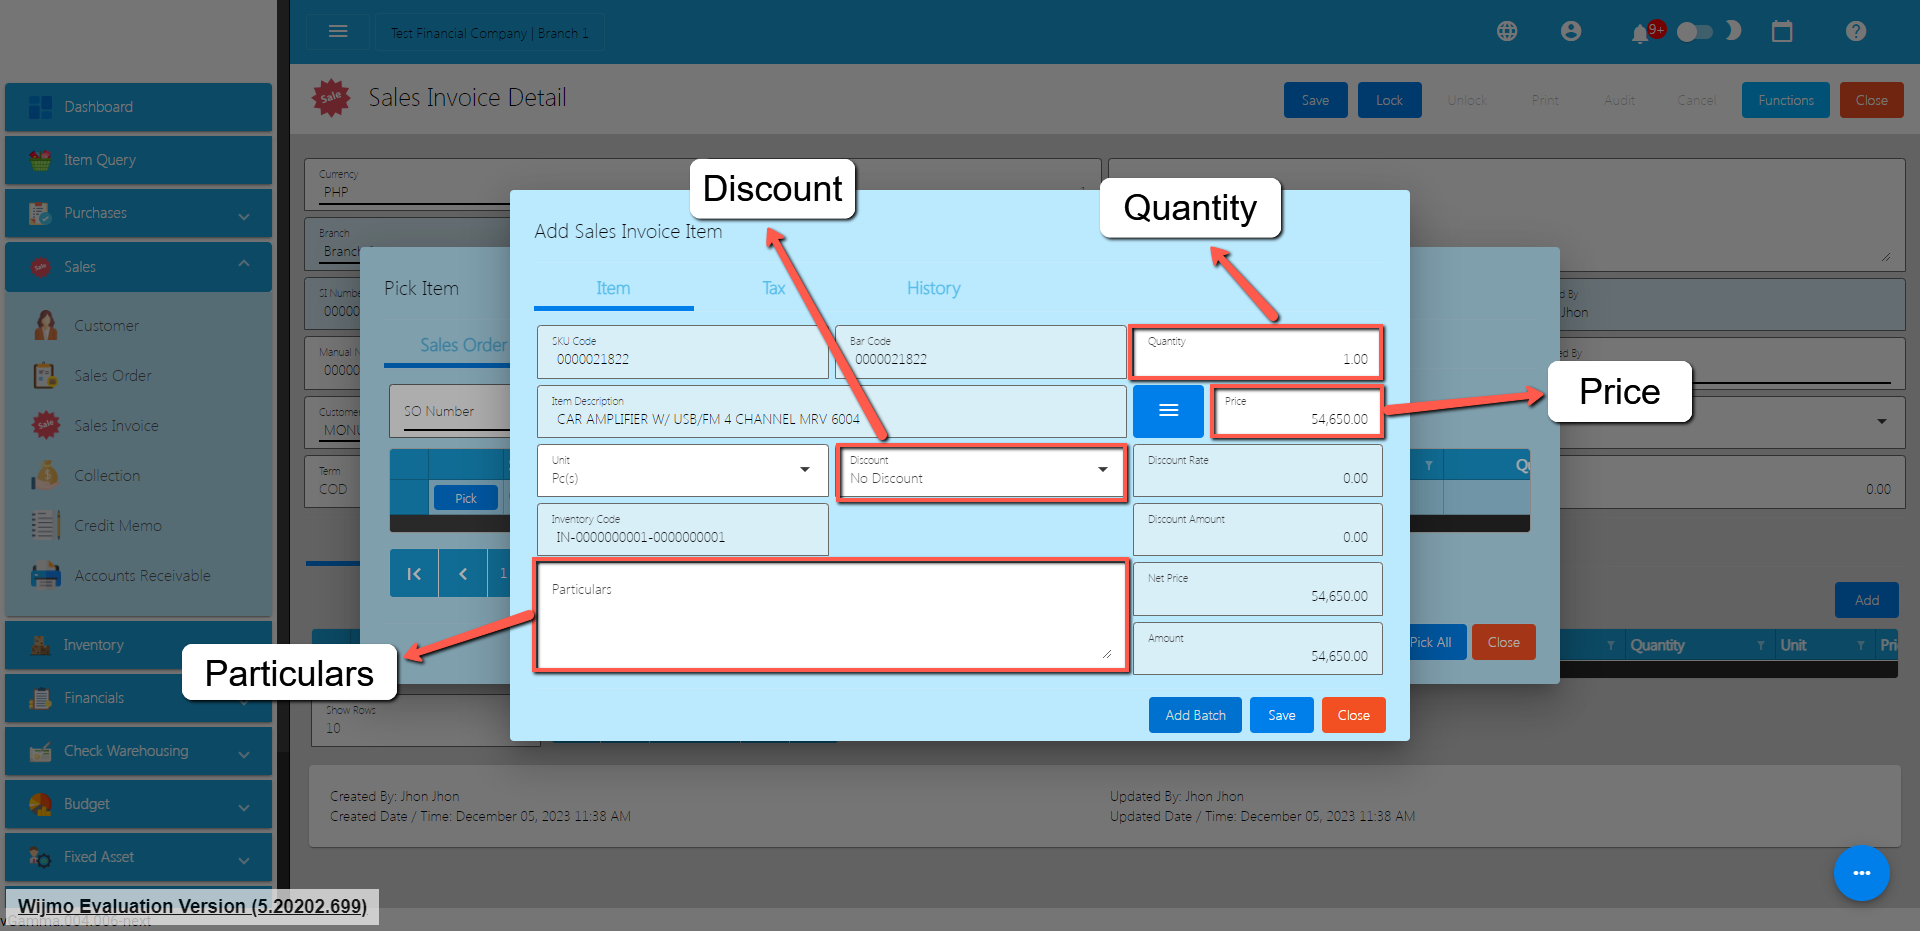
- If your Customer for the sales transaction has a withholding tax, you may set that up by clicking the Tax tab first and look for the Withholding Tax dropdown. By its default value, it is based on the Customer’s WTAX field which you can update by navigating to Master Files>Customer.
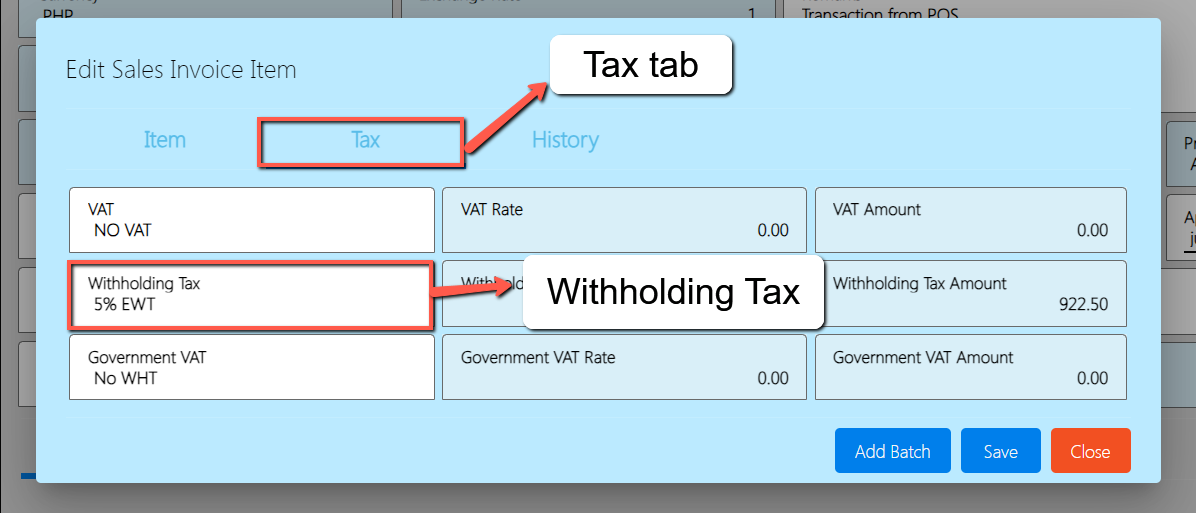
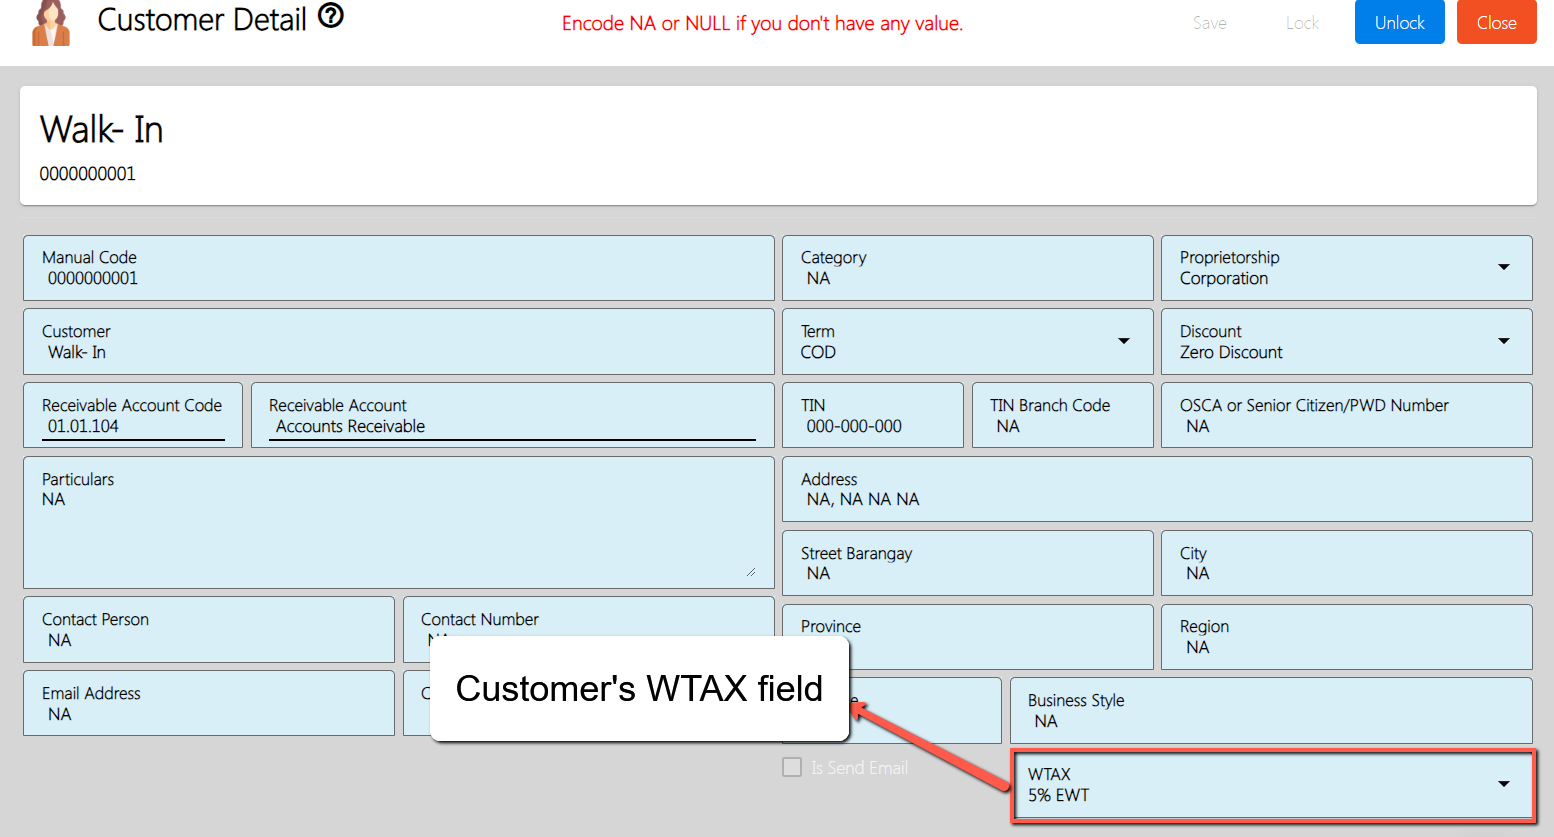
- After that, click the Save button.
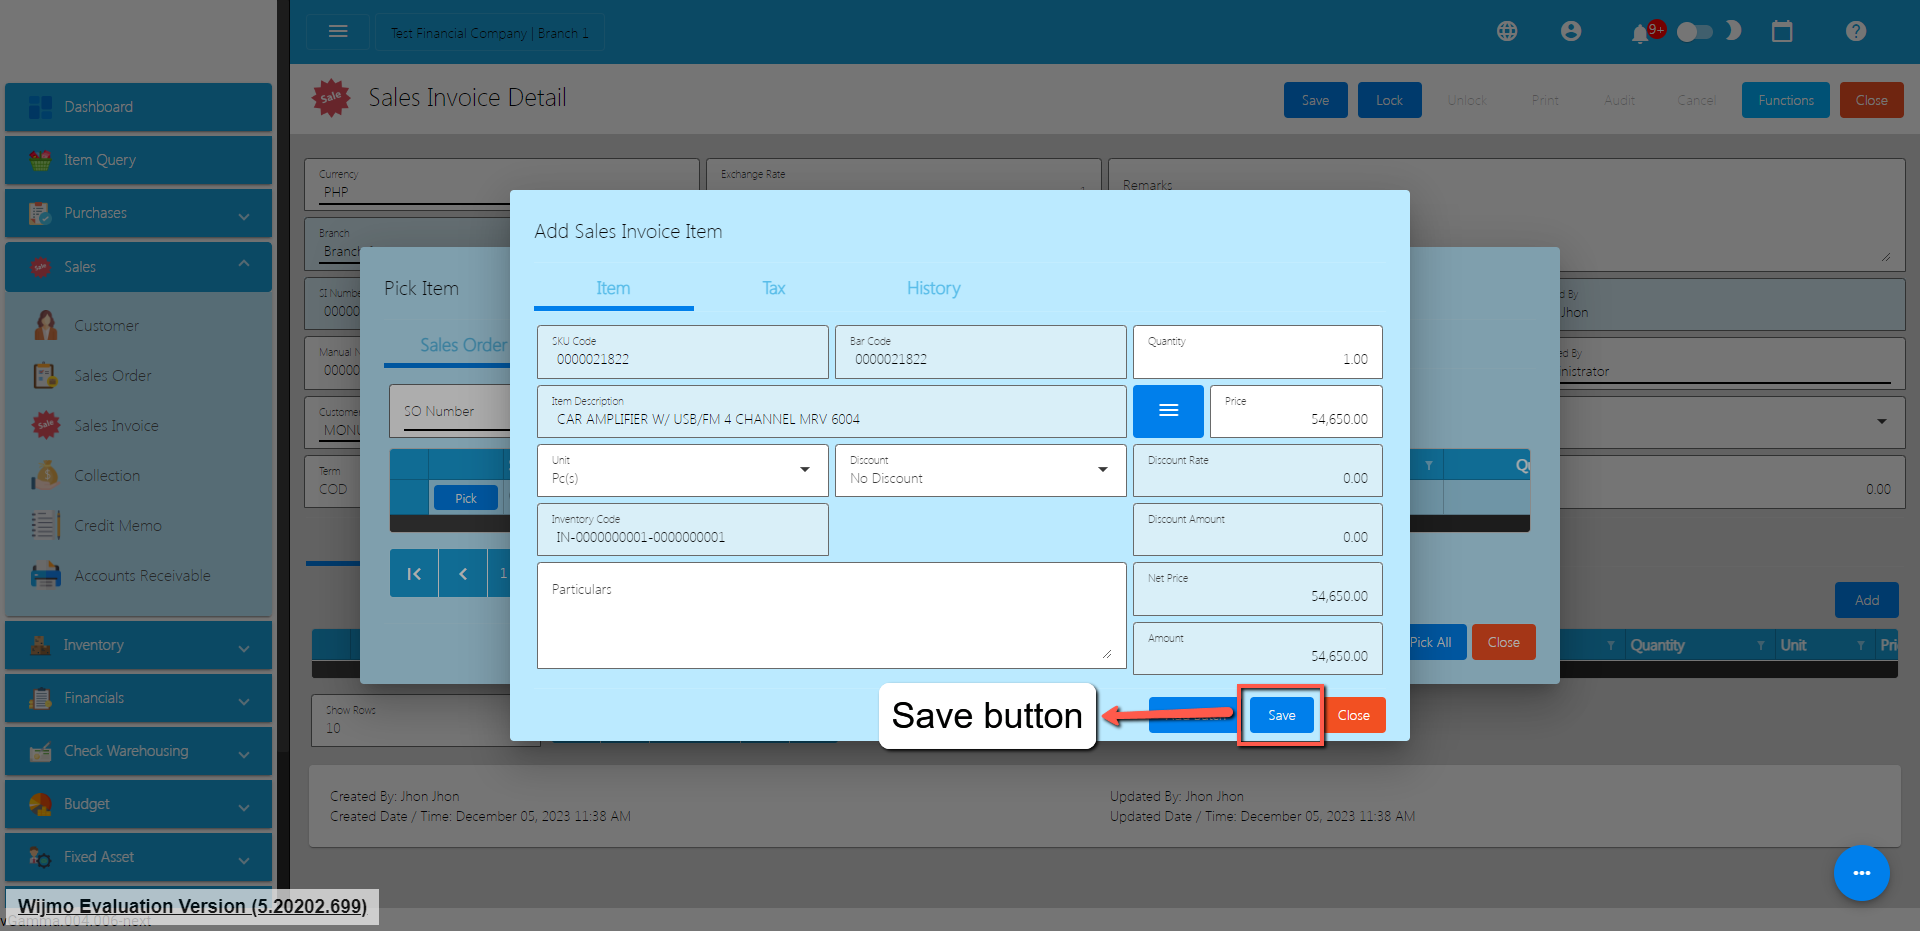
- If you wish to add more items, repeat Steps 6 to 8.
- There’s no need to worry if you don’t have a Sales Order since you can go directly to the Inventory or Non-inventory tab and follow the steps from 6 to 8.
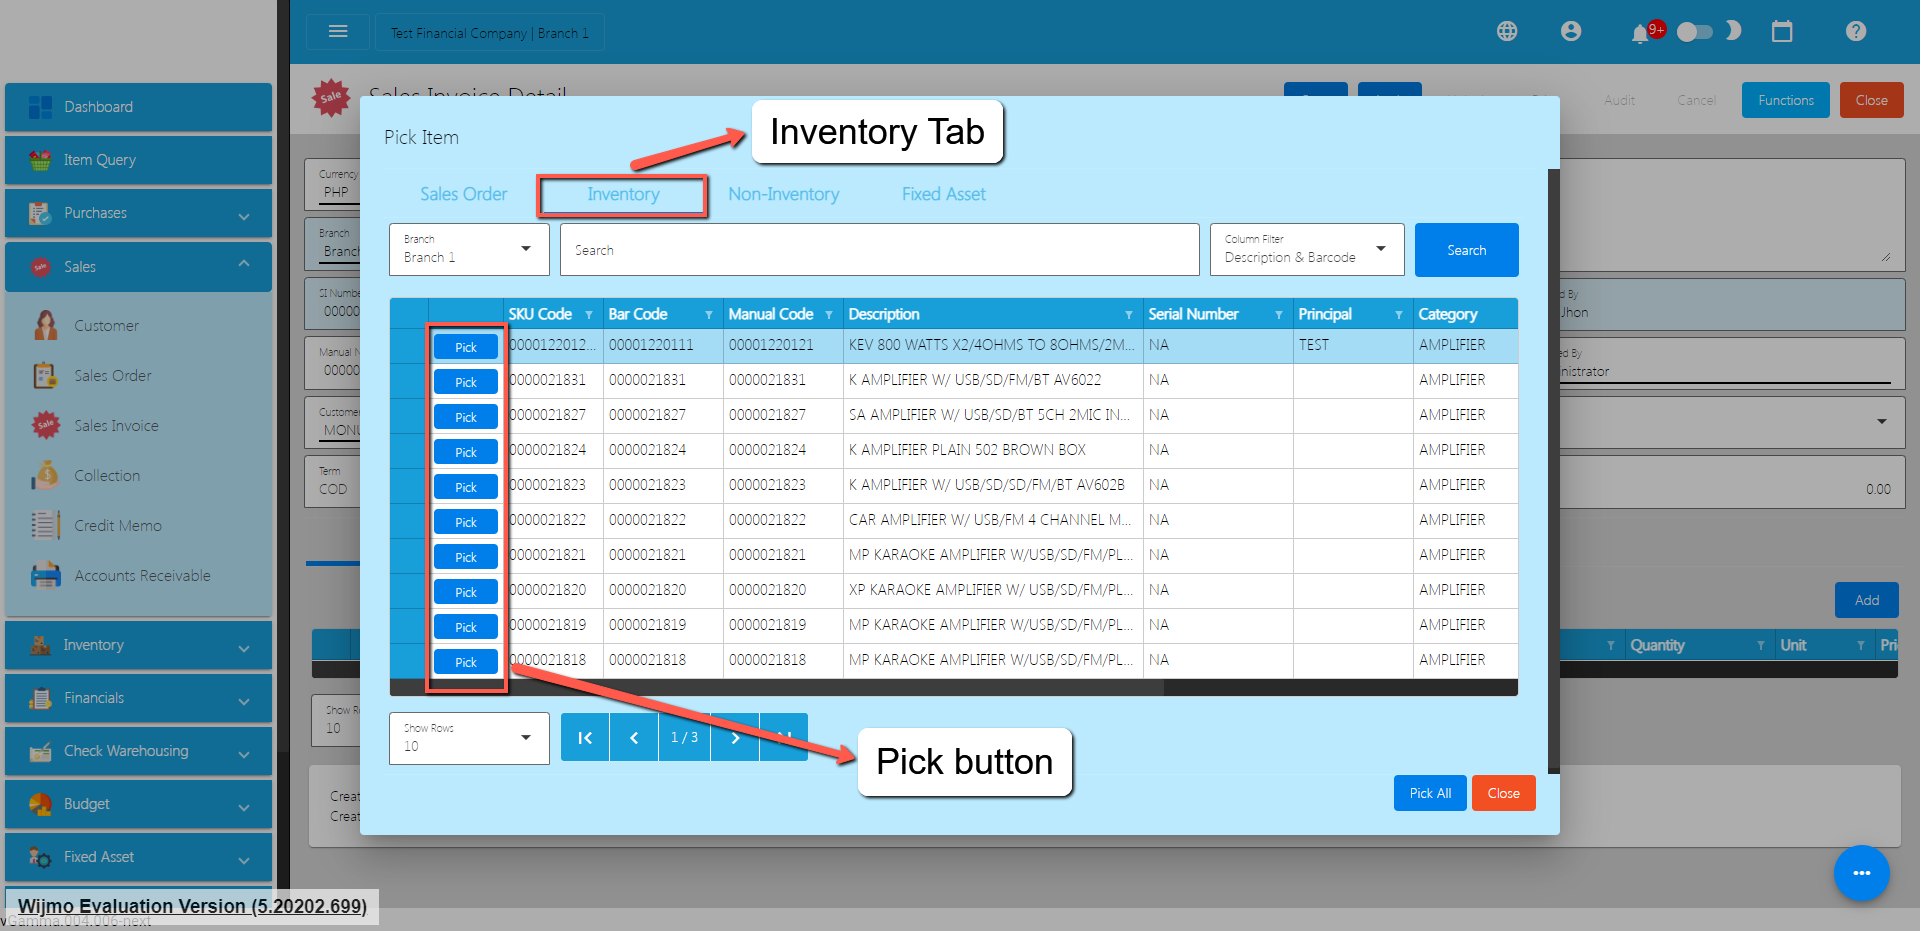
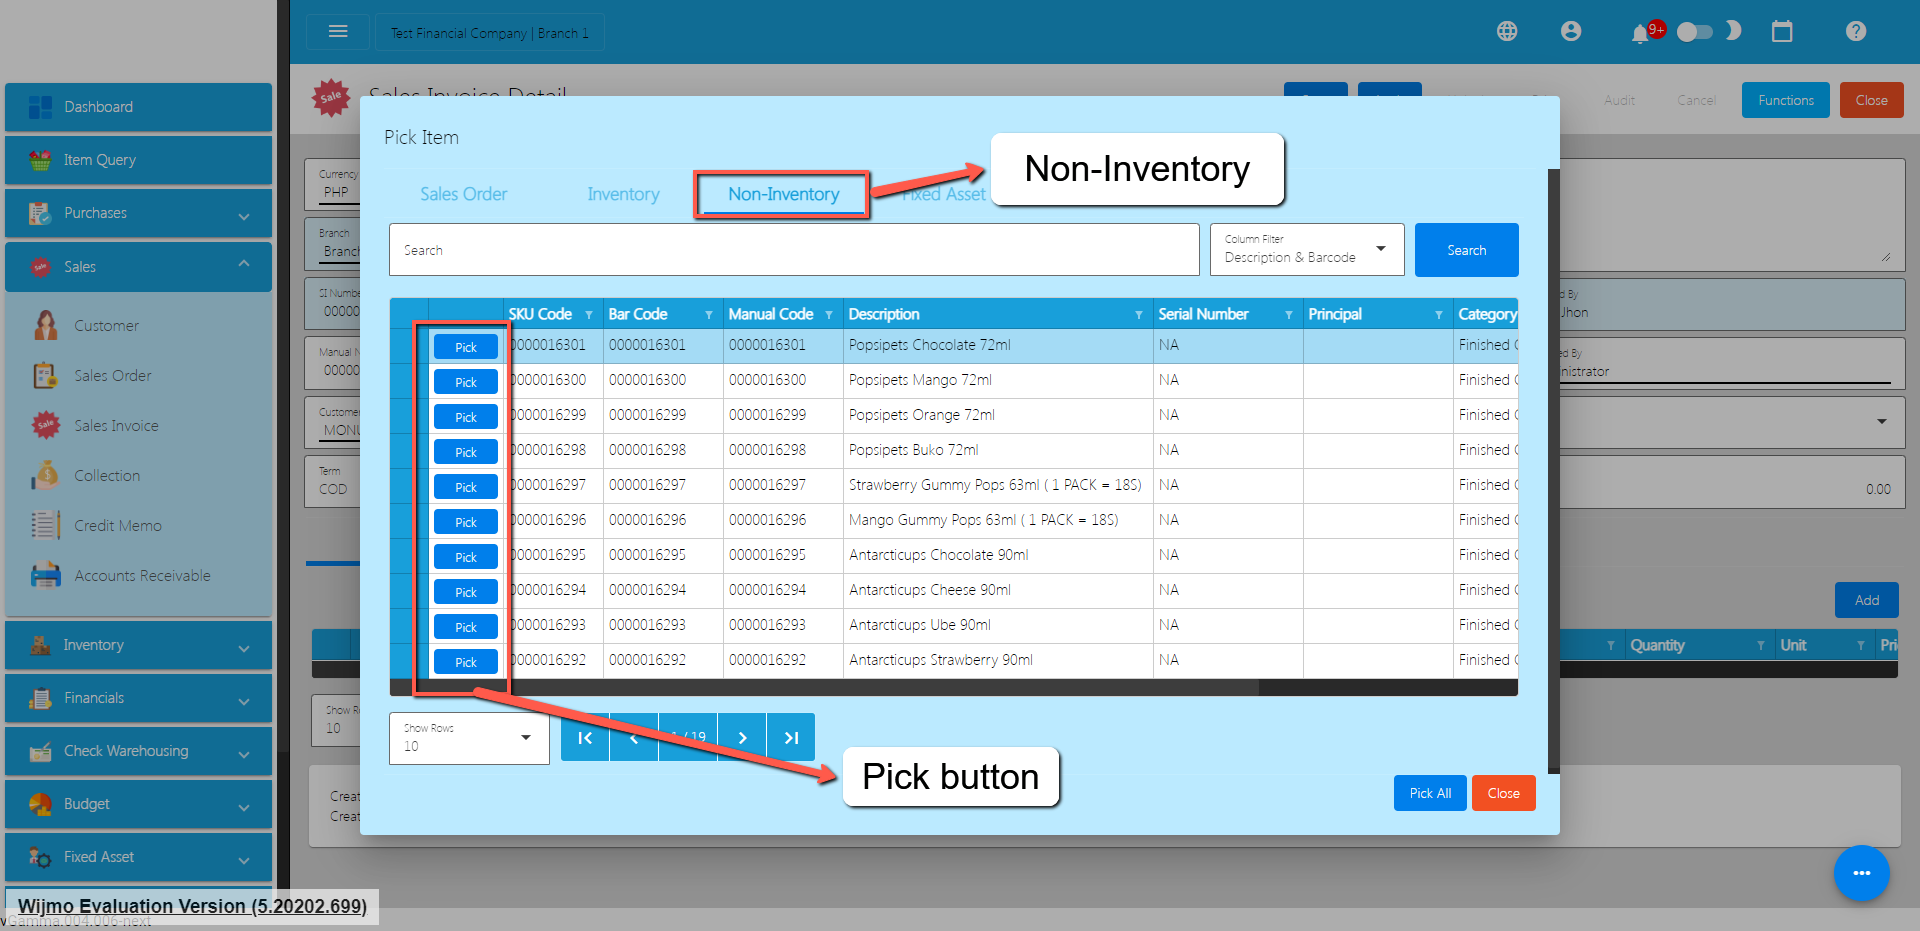
- Review the Sales Invoice you created, once everything is okay, just click the Save and Lock button.
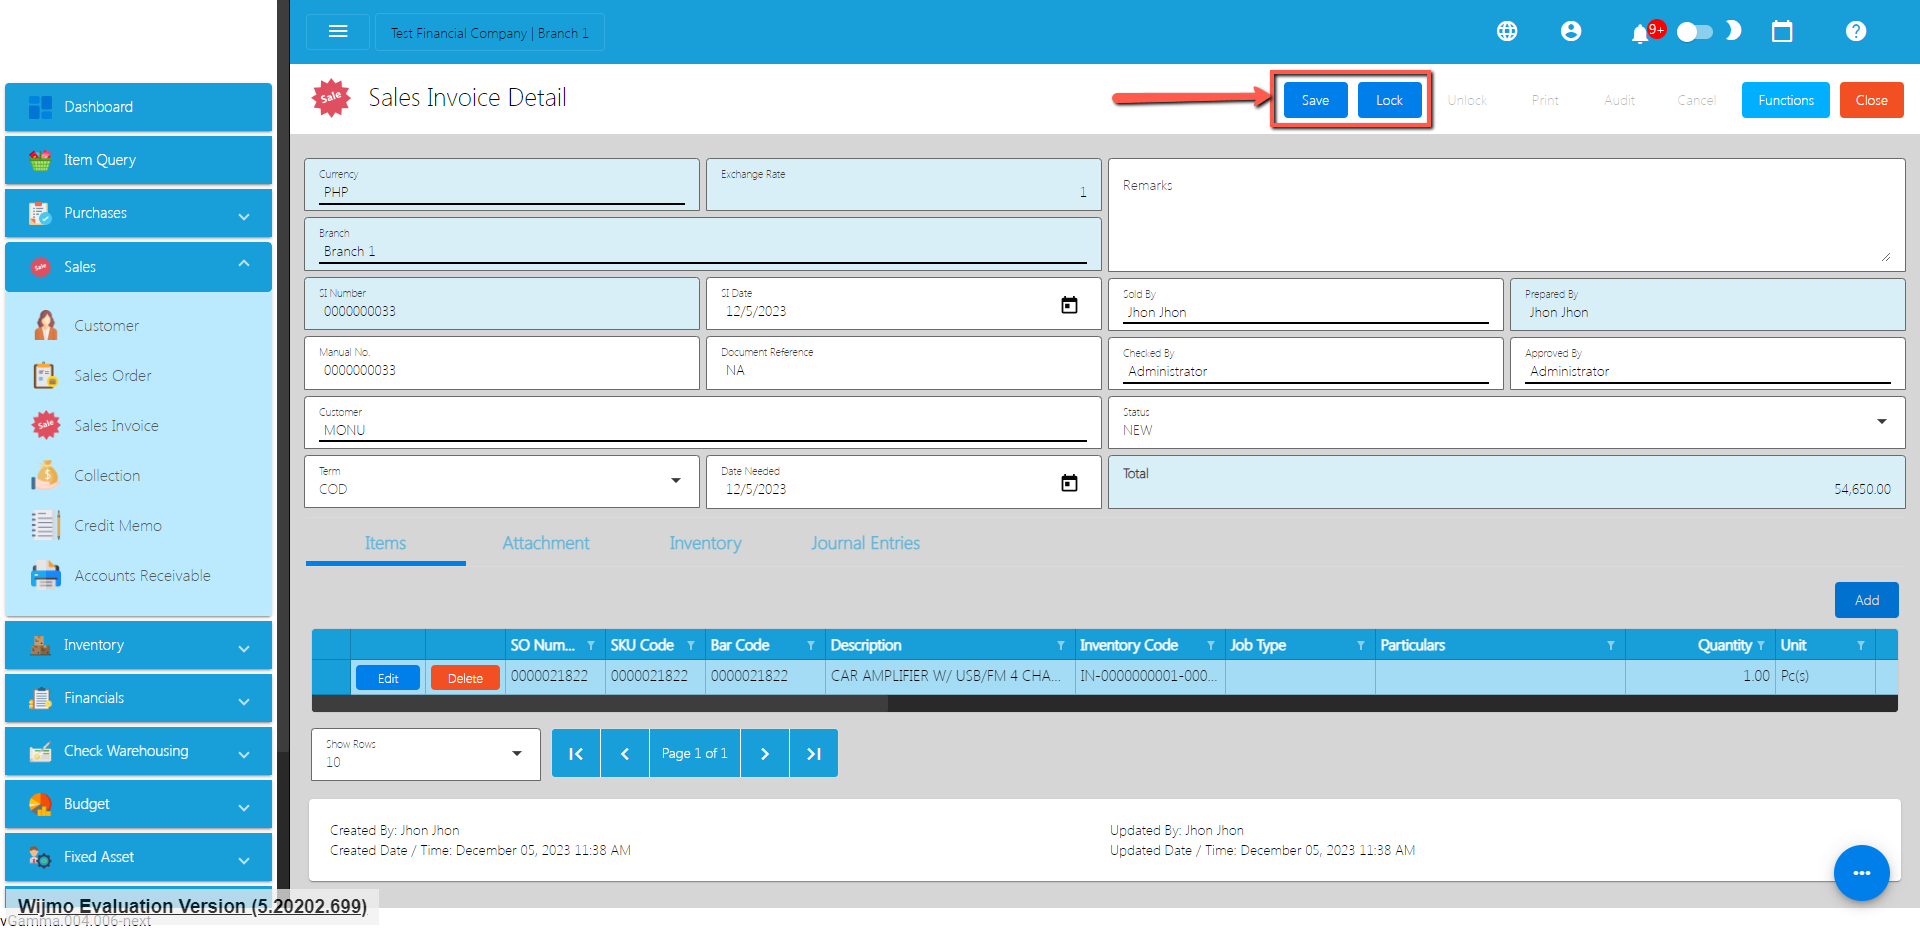
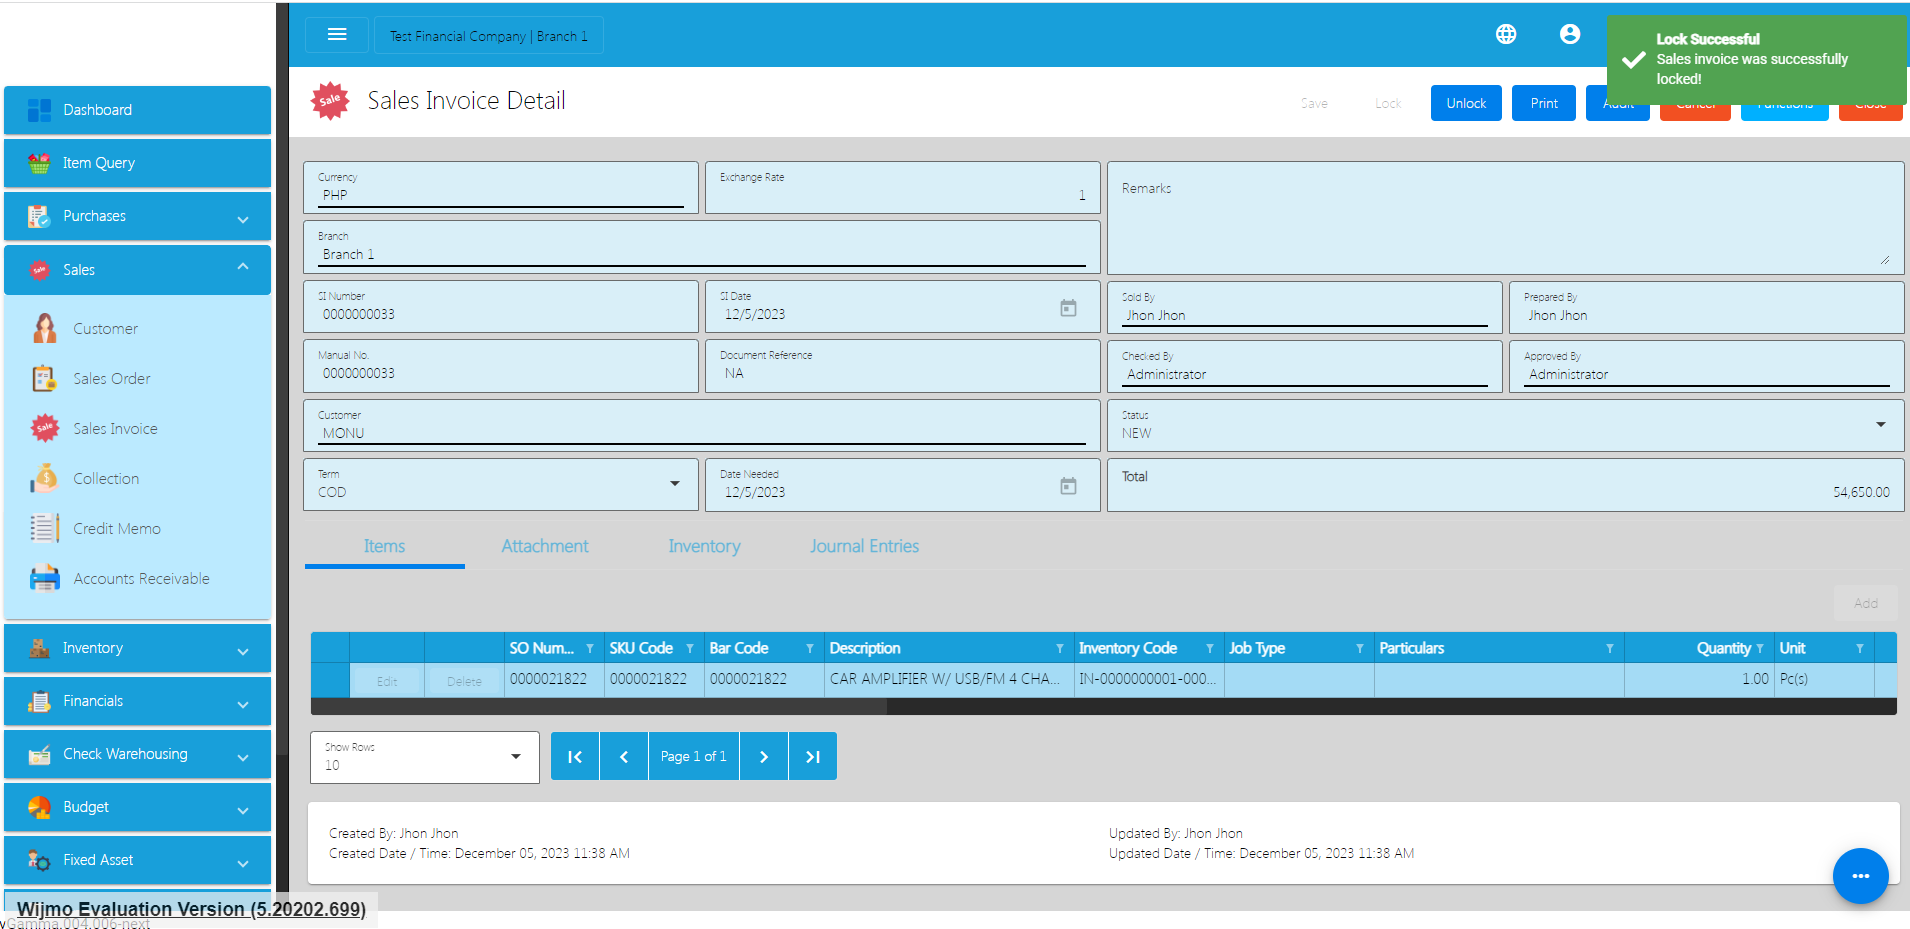
Sales Invoice Transaction via Upload Template
- To add a Sales Invoice Transaction via Upload Template, go to the Sales Invoice List then Click Functions
- Click Optimized Upload.
- Select Download Sales Invoice File Format – an excel file will be downloaded. This is the file format where you will edit or encode the Items that you need to Sales Invoice.
3.1 In the Excel file:
- Manual Code should be unique per transaction, alphanumeric and should not exceed 255 characters. Example: ABC0000001
– if the Manual Code starts with 000, don’t forget to put an apostrophe (‘) at the beginning of the Manual Code.
Example: ‘00000111231414
– if the Manual Code starts with a number but exceeds more than 10 digits, format the cell to Text to show all the numbers.
Steps on how to change the format to Text:
- Right Click the Cell
- Click Format Cell
3. Choose Text
4. Click OK
5. Then reselect the field
- SI Date and Date Needed – SI Date is the date of SI or when it was created. Date Needed it can be after or on the date of the SI date, the format of the SI Date and Date Needed should be (yyyyy-mm-dd)
- Document Reference should be unique per transaction, alphanumeric and should not exceed 255 characters. Example: ABC0000001
– if the Document Reference starts with 000, don’t forget to put an apostrophe (‘) at the beginning of the Manual Code.
Example: ‘00000111231414
– if the Document Reference starts with a number but exceeds more than 10 digits, format the cell to Text to show all the numbers.
Steps on how to change the format to Text:
1. Right Click the Cell
2. Click Format Cell
3. Choose Text
4. Click OK
5. Then reselect the field
- Particulars – in this column this is basically the remarks for each item line, it should be alphanumeric and should not exceed 255 characters.
- Remarks – in this column is basically the remarks for the whole transaction, it should be alphanumeric and should not exceed 255 characters.
- Customer and CustomerID – Select Customer from the dropdown and choose the Customer, CustomerID will correspond to the selected Customer. Never edit the CustomerID since it will automatically change after selecting the Customer.
- Term and TermID – Select term from the dropdown and choose the term, TermID will correspond to the selected Term. Never edit the termID since it will automatically change after selecting the Term.
- Currency and CurrencyID – Select the Currency from the dropdown and choose the correct Currency, CurrencyID will correspond to the selected currency. Never edit the CurrencyID since it will automatically change after selecting the currency.
- Exchange Rate – exchange rate is the rate that is used to convert the currency.
- Status – Status is the status of the transaction, just select the status from the dropdown.
- ItemID, Item Description, Price, UnitID and Unit – all these fields are related to the Item. Once the barcode is selected all these fields will also change depending on the barcode that was selected.
- Quantity – Input the quantity that is needed for the Sales Invoice.
- Discount and DiscountID – Select the Discount from the dropdown and choose the correct Discount, DiscountID will correspond to the selected Discount. Never edit the DiscountID since it will automatically change after selecting the Discount.
- VAT and VATId – Select the VAT from the dropdown and choose the correct VAT, VATId will correspond to the selected WTAX. Never edit the VATId since it will automatically change after selecting the VAT.
- WTAX and WTAXId – Select the WTAX from the dropdown and choose the correct WTAX, WTAXId will correspond to the selected WTAX. Never edit the WTAXId since it will automatically change after selecting the WTAX.
- GVATand GVATId – Select the GVAT from the dropdown and choose the correct GVAT, GVATId will correspond to the selected GVAT. Never edit the GVATId since it will automatically change after selecting the GVAT.
- PaidAmount – input the amount paid by the Customer.
Cancel Sales Invoice Transaction
When you need to cancel a Sales Invoice, it’s important to follow these simple steps:
- Log In: Visit your easyFS domain and login with your username and password.
- Find your Sales Invoice: Navigate to the Sales, then Sales Invoice. You will be redirected to the Sales Invoice lists.
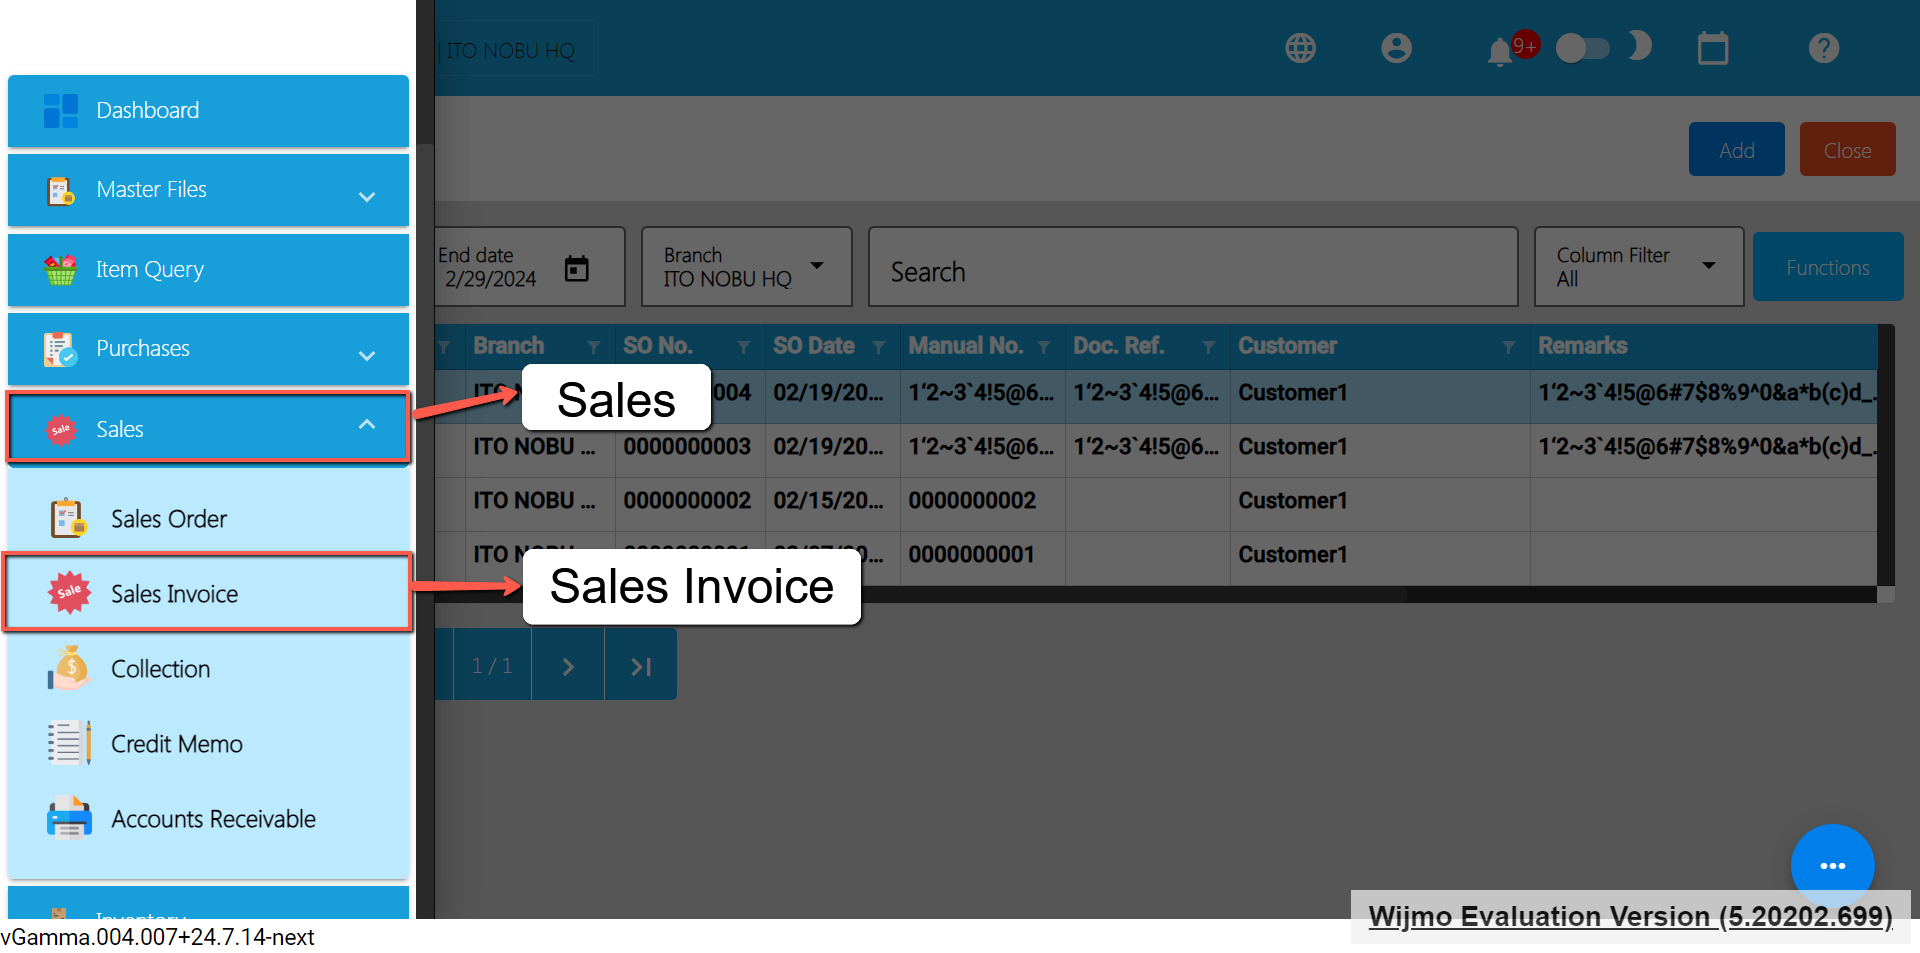
- Locate the Right One: From the Sales Invoice list, you may use the search bar to look for the right Sales Invoice you want to cancel. You can search using the Sales Invoice’s SI NUmber, Manual Number, Document Reference, etc.
Take note: Don’t forget to change the Start Date and End Date to your Sales Invoice’s transaction date to display the correct result.
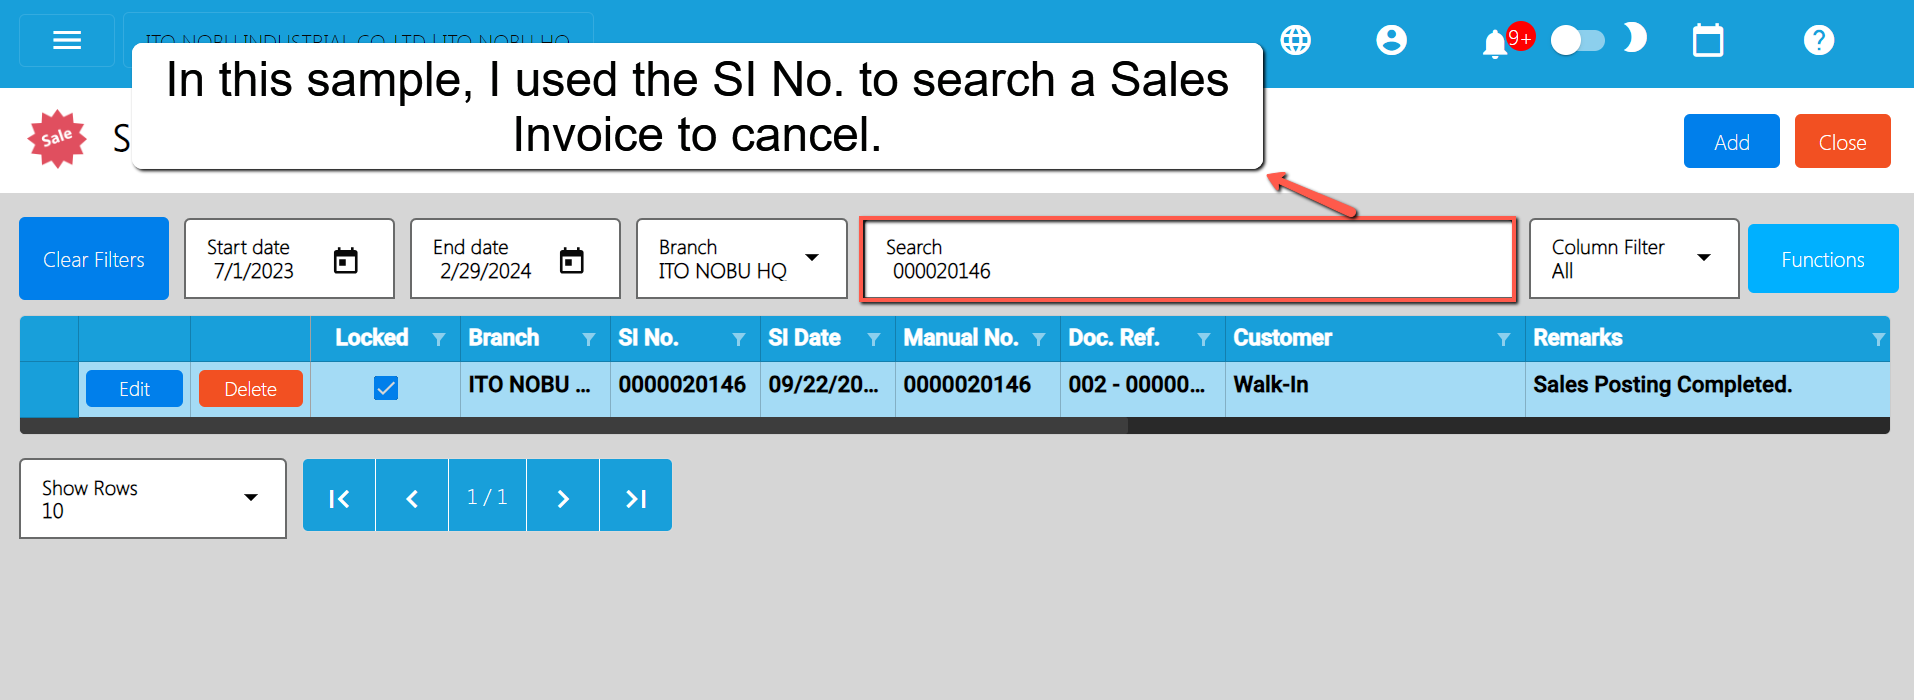
- Open the Sales Invoice Detail: Click the Edit button to open the Sales Invoice detail page.
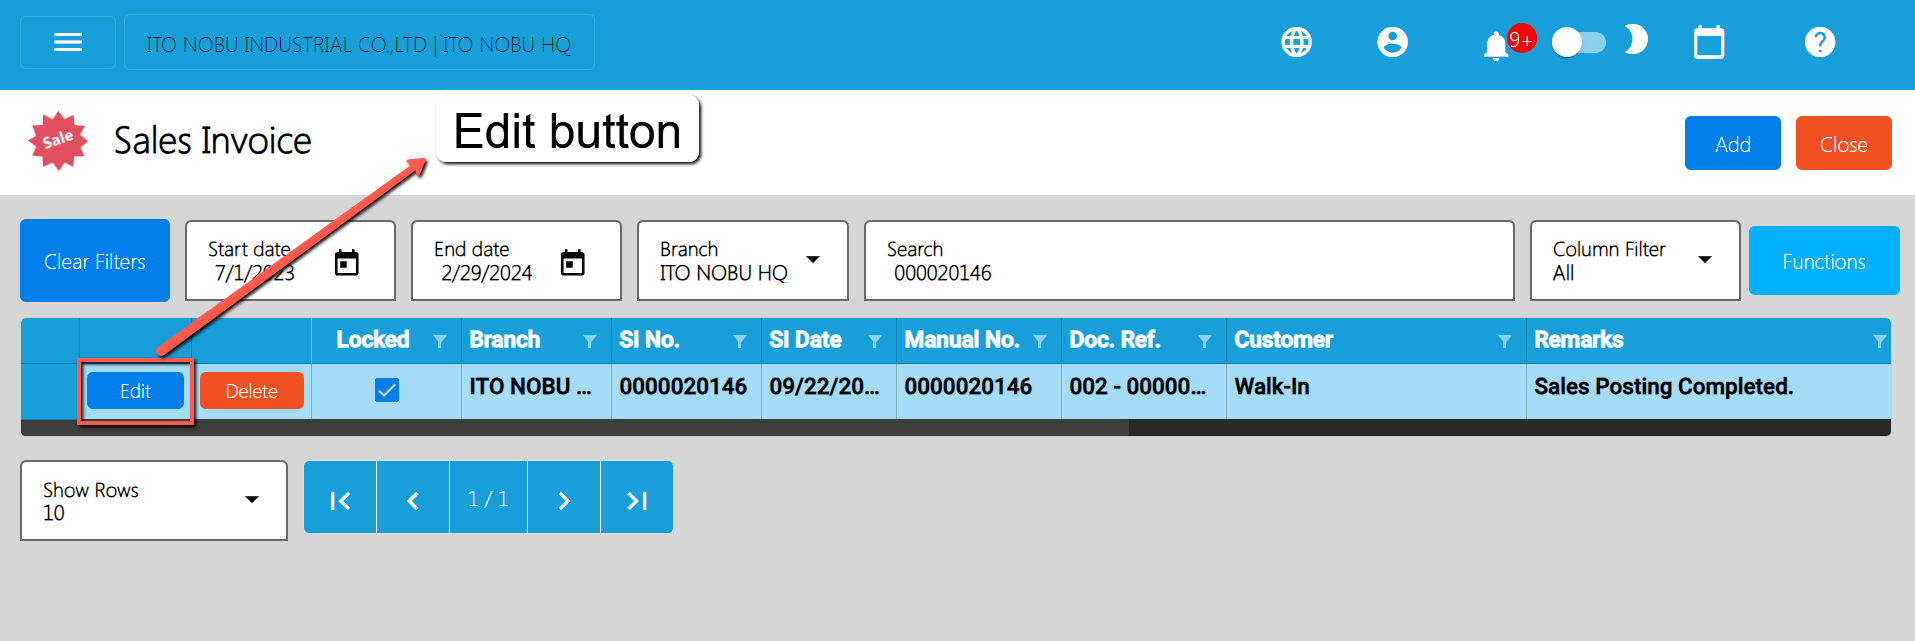
- Cancel the Sales Invoice: To cancel your Sales Invoice transaction, look for the Cancel button found on the upper-right part of the page, then click.
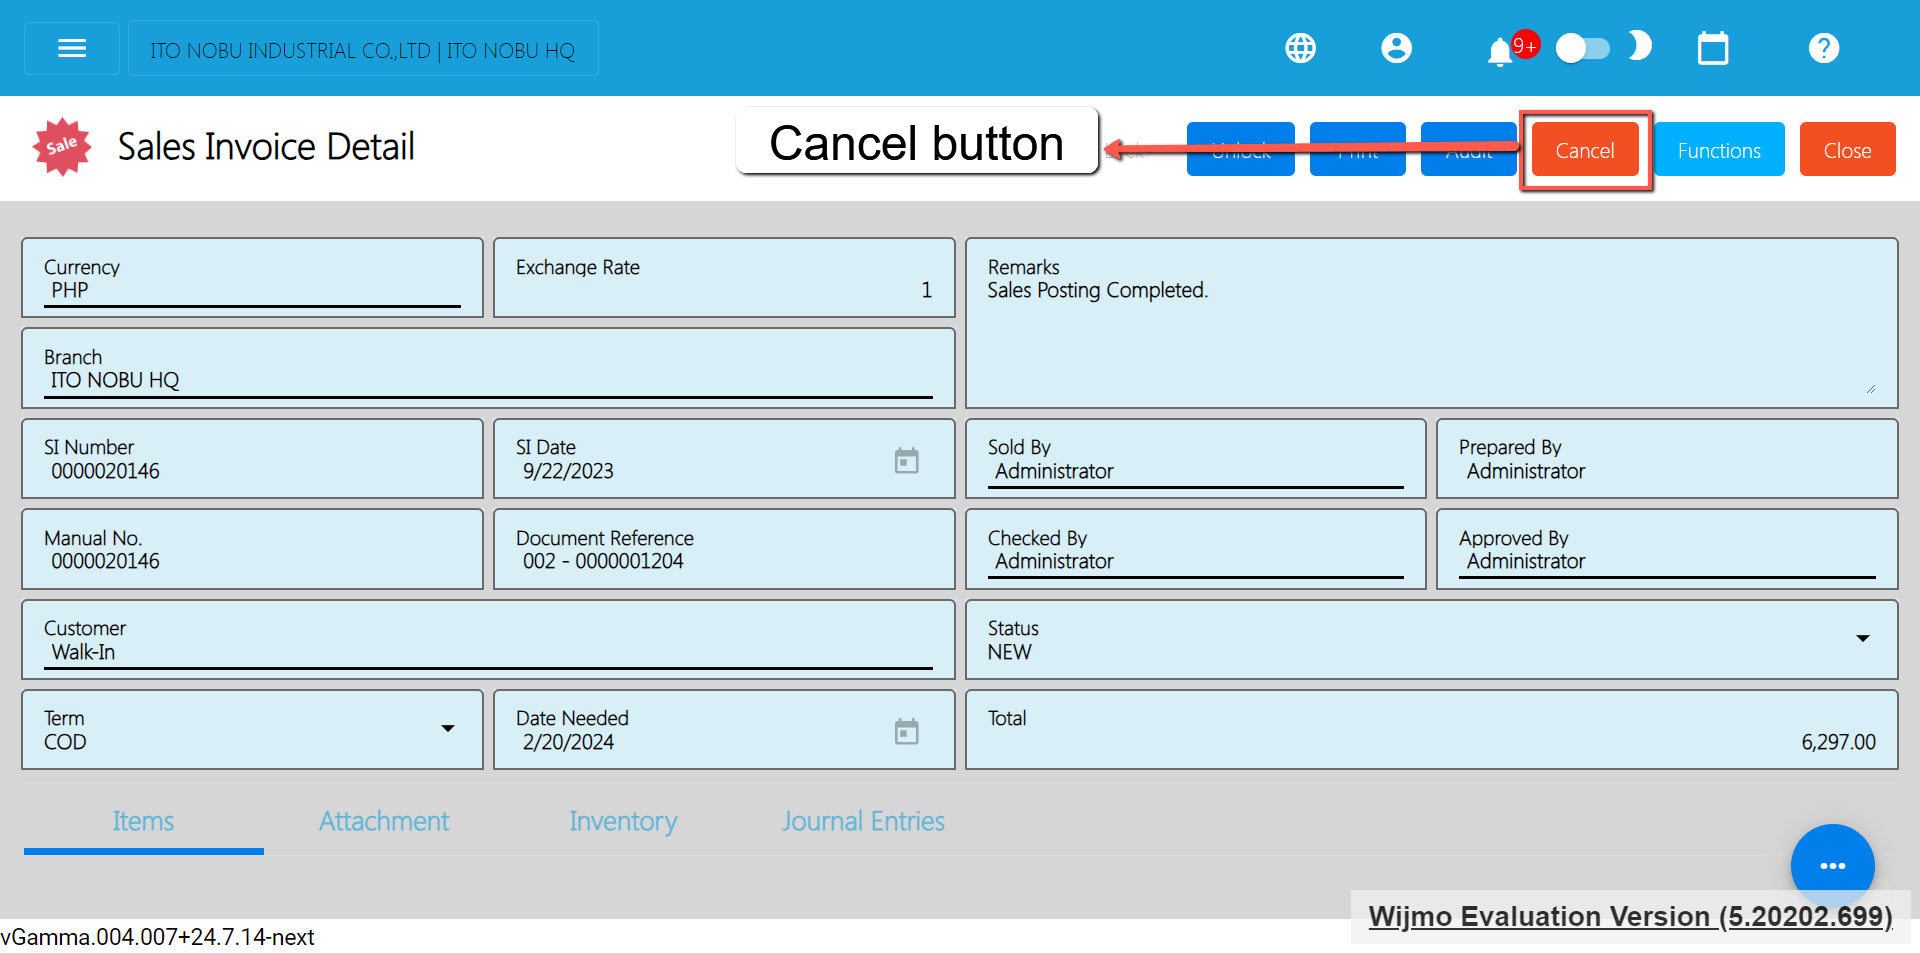
- Confirm Canceling: After you click the Cancel button, there’s a Cancel Sales Invoice window. If you’re sure you want to cancel your Sales Invoice transaction, click the Cancel button.
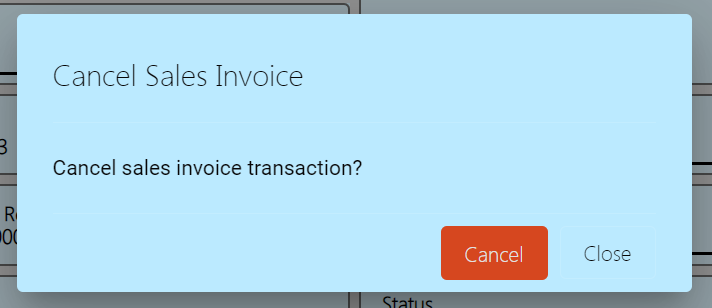
- Check It’s Done: After canceling, make sure you get a success toast message confirming it’s canceled successfully. It is found on the bottom right of the page.
- Let Others Know(if needed): If you believe canceling affects other people, it's a good idea to inform them.
- Keep Track: Remember to make a note somewhere that you canceled the Sales Invoice, just in case it is needed later.
5.3.3 Collection
Overview
Collection is created when Sales Invoice payment is already collected.
Collection List
- List of all the Collection and will also show the overview of the transaction.
- You can filter the data to be displayed by providing the following:
- Start Date
- End Date
- Branch
- Also, you can search data by providing a value on the Search Bar and select the Column Filter on where to search the data.
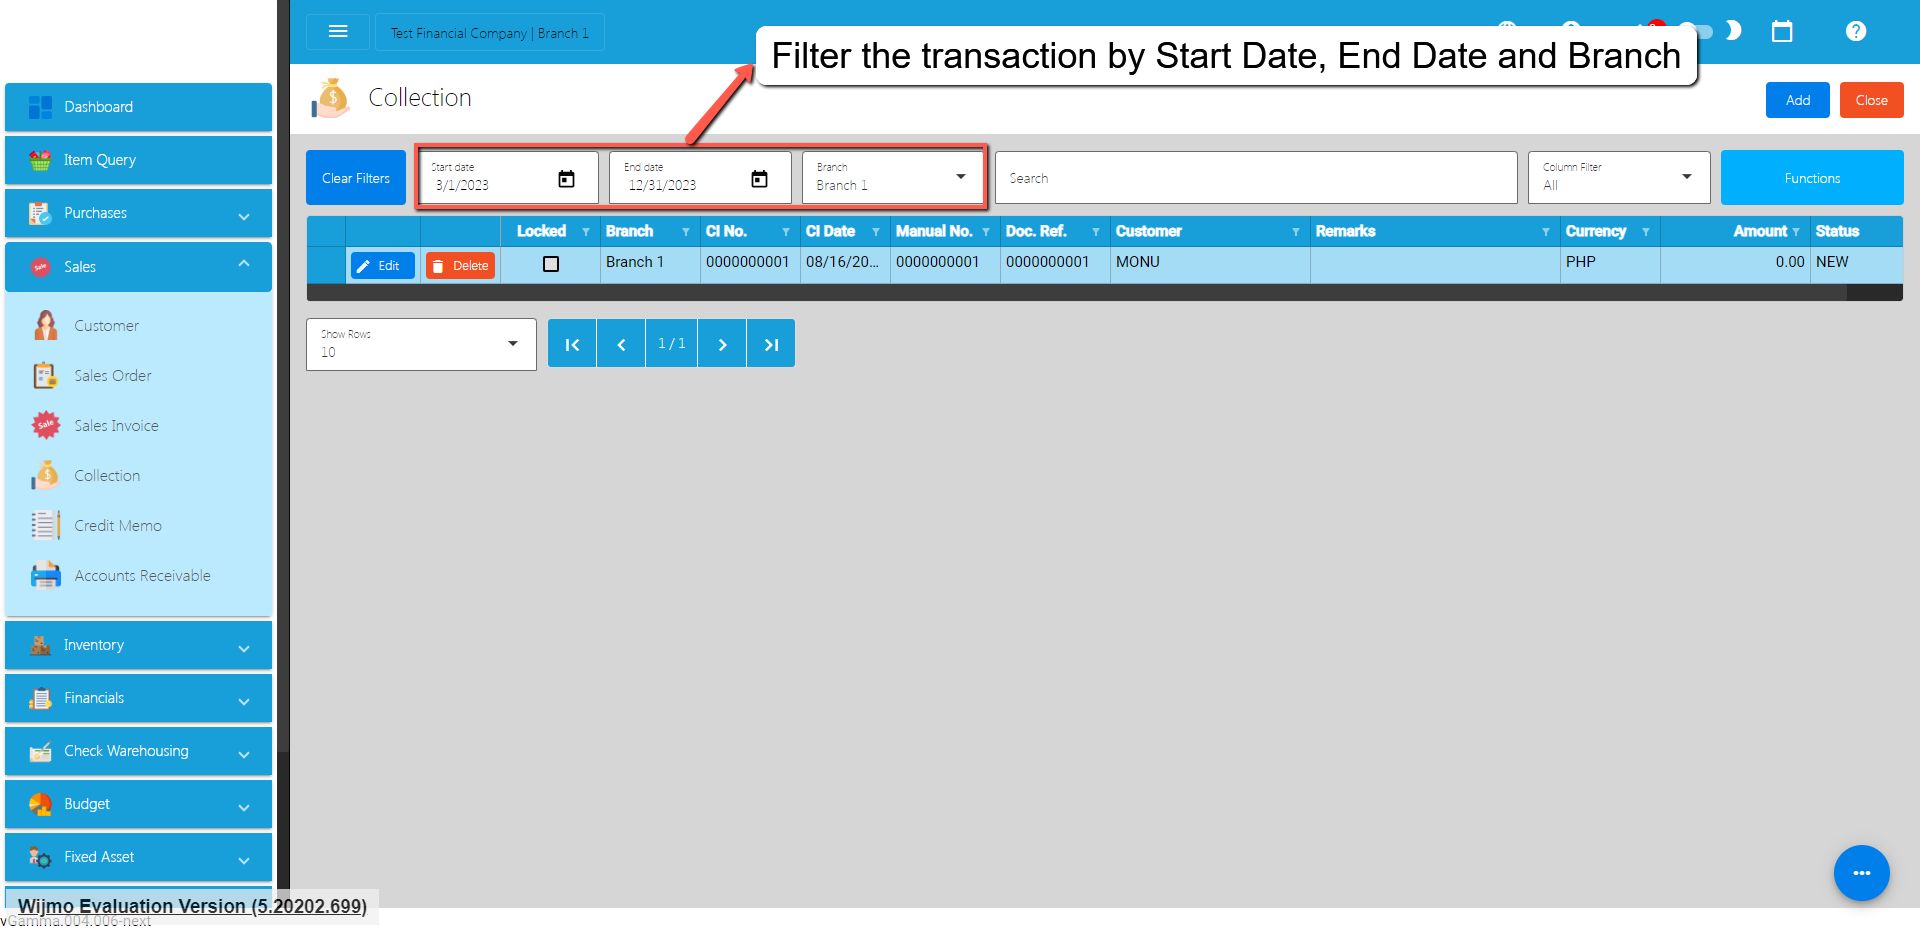
Collection Detail
- To add a new Collection, go to Sales then click Collection. After that, click the Add button that can be seen in the Collection list.
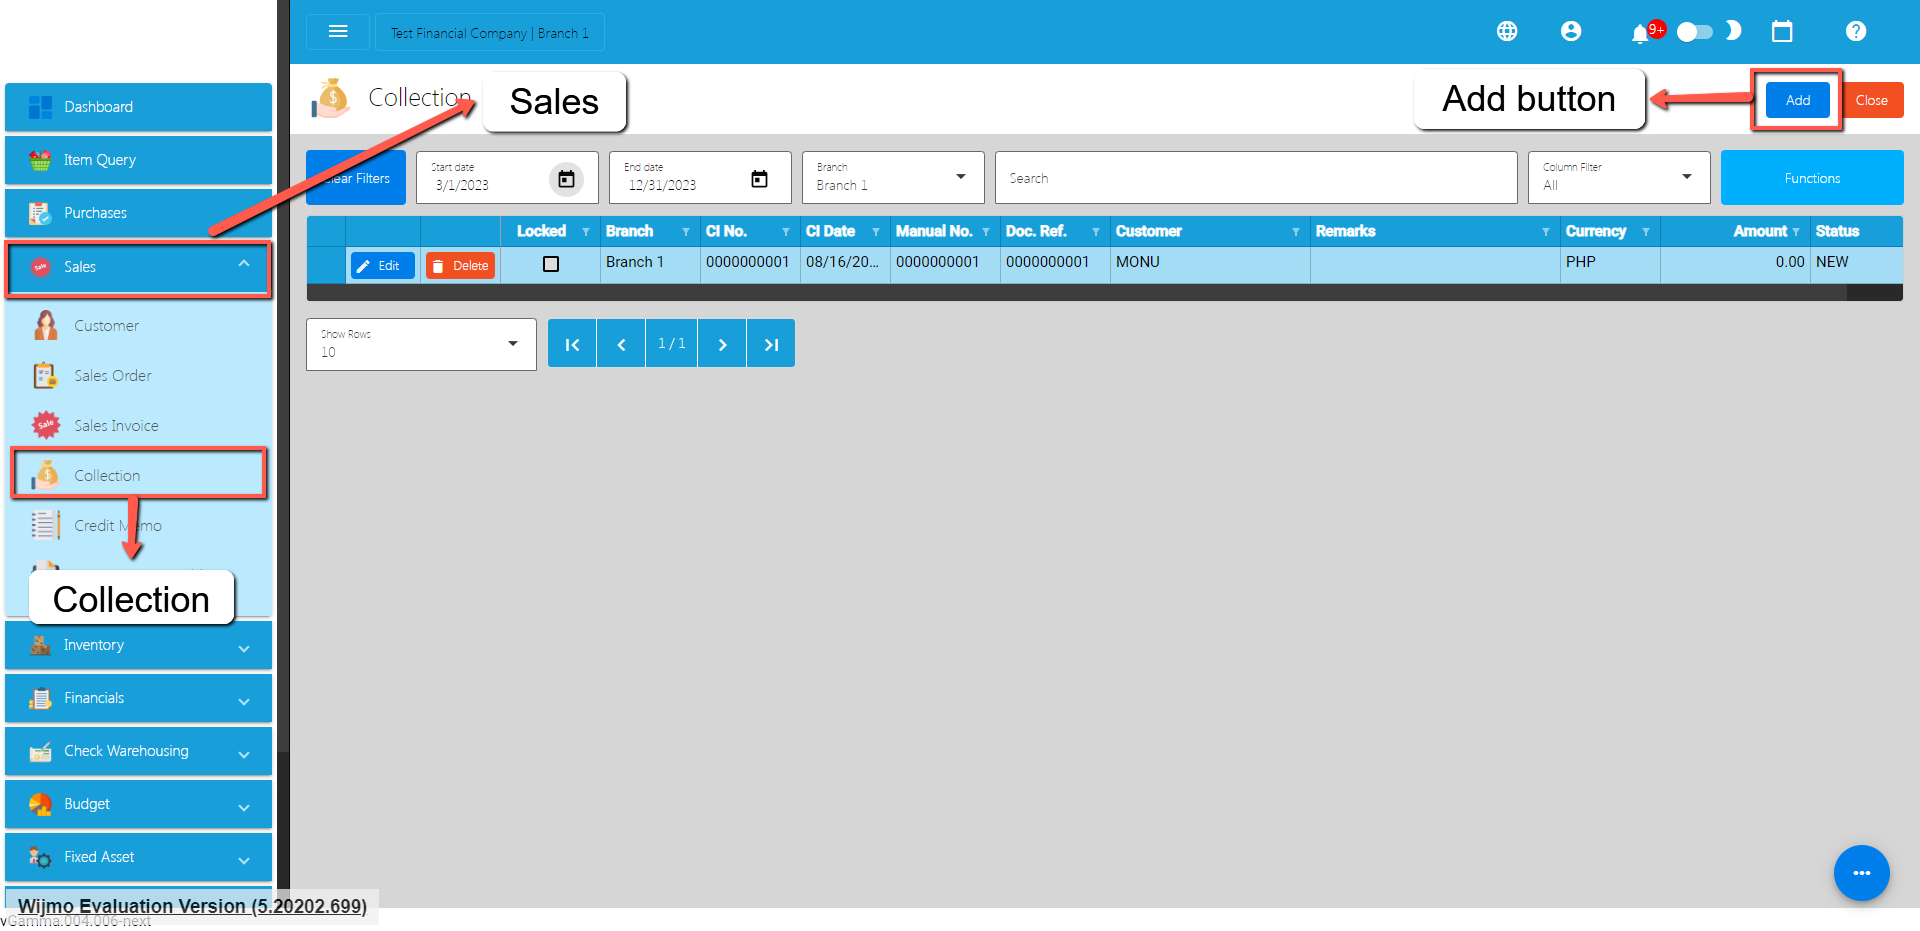
- Fill out all the needed information for the Collection Detail like,
- Currency
- Customer Name
- CI Date
- Document Reference
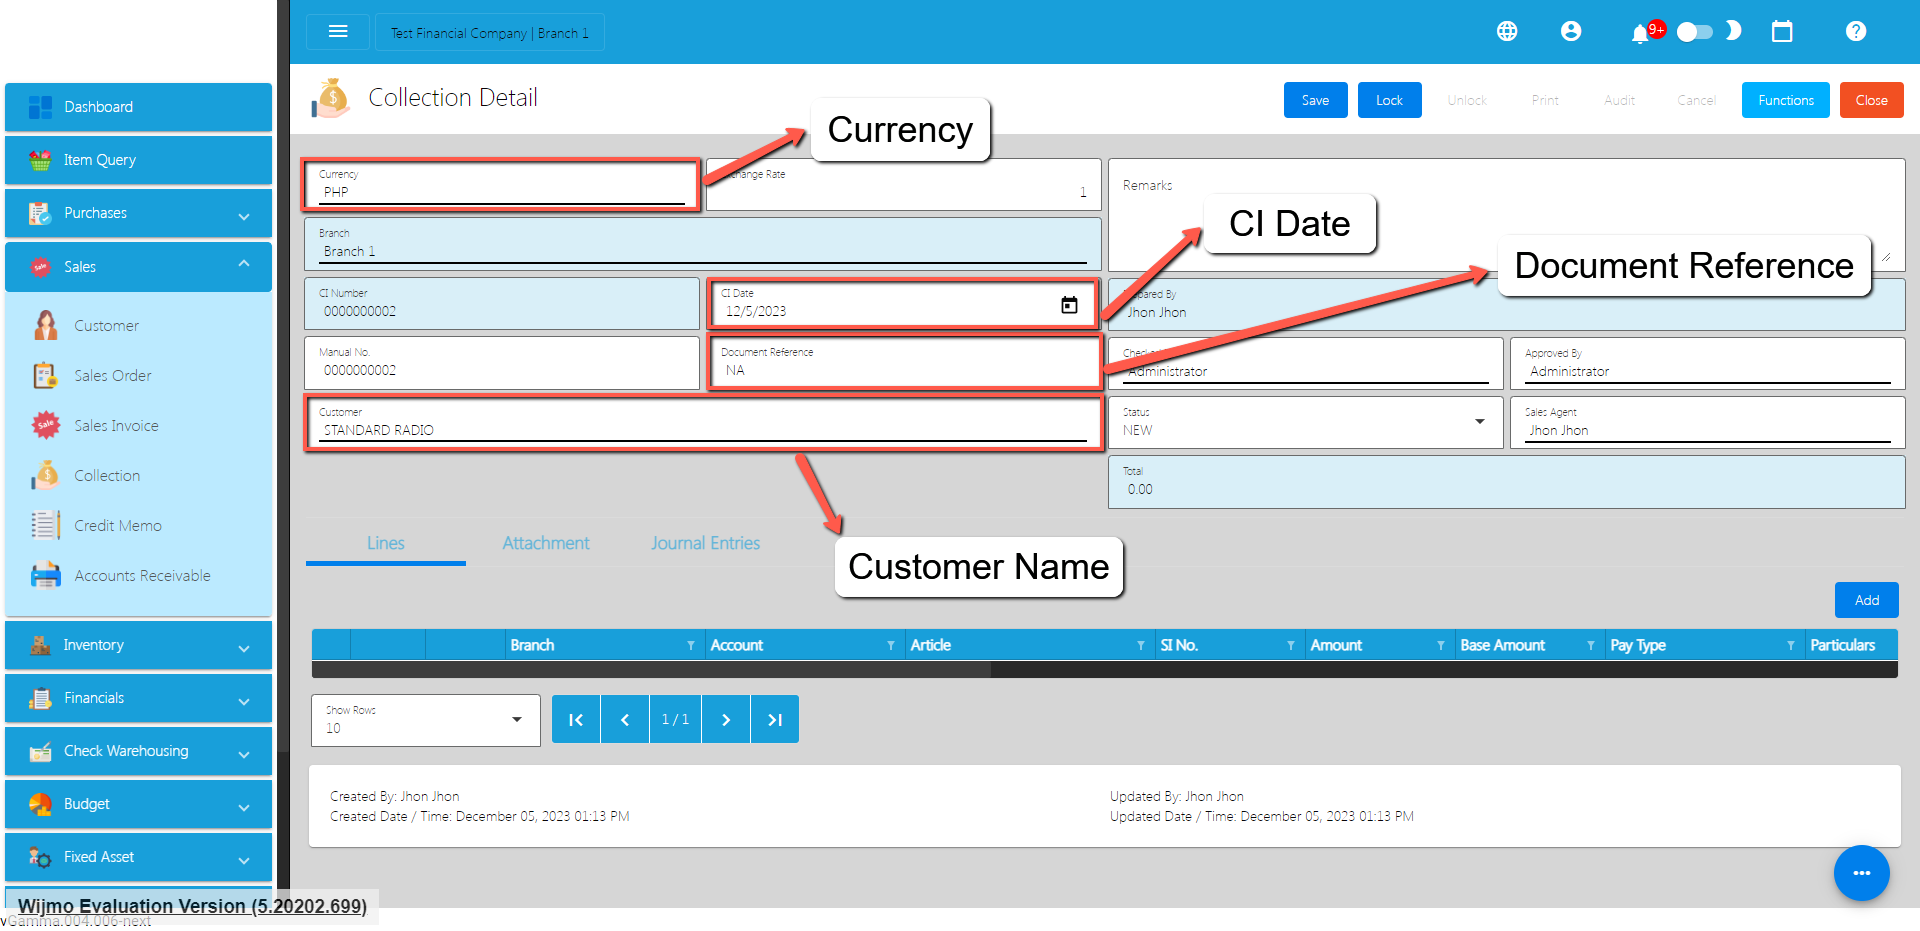
- To add a Collection Line Item, click the Add button on the right part of the page under the Lines tab.
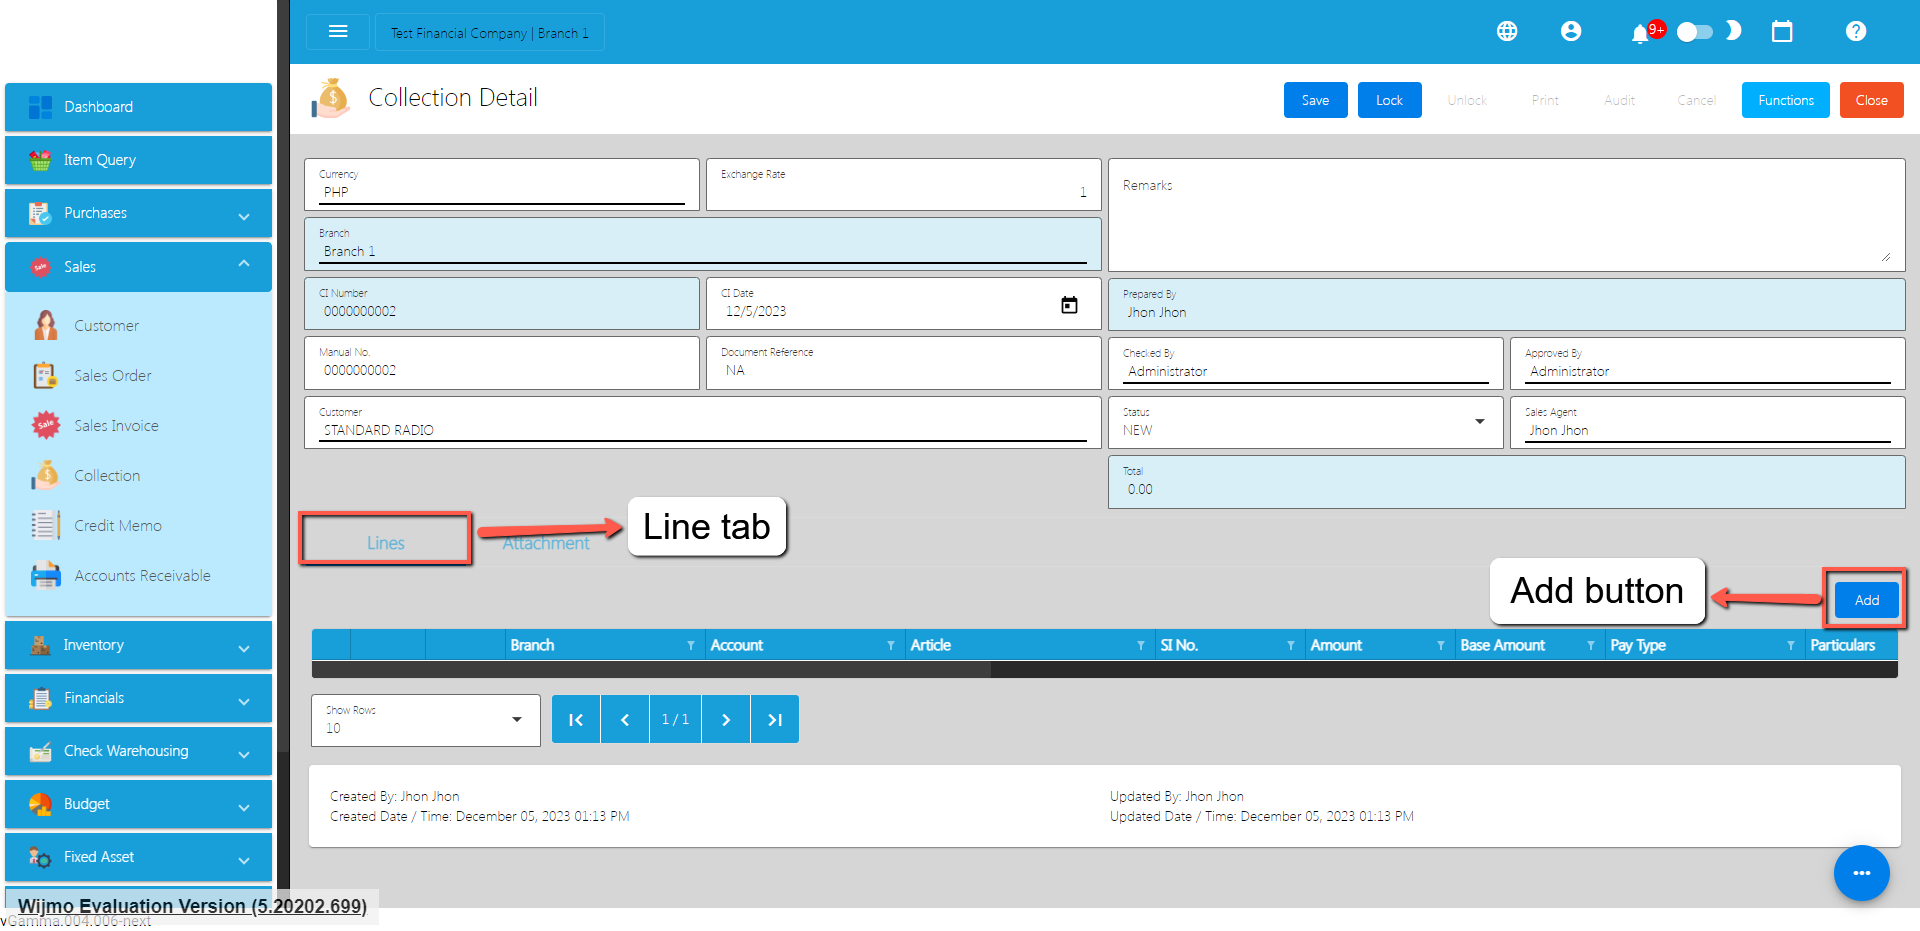
- If you already have a Sales Invoice for the Collection, the user can select the Sales Invoice by clicking on the SI Number.
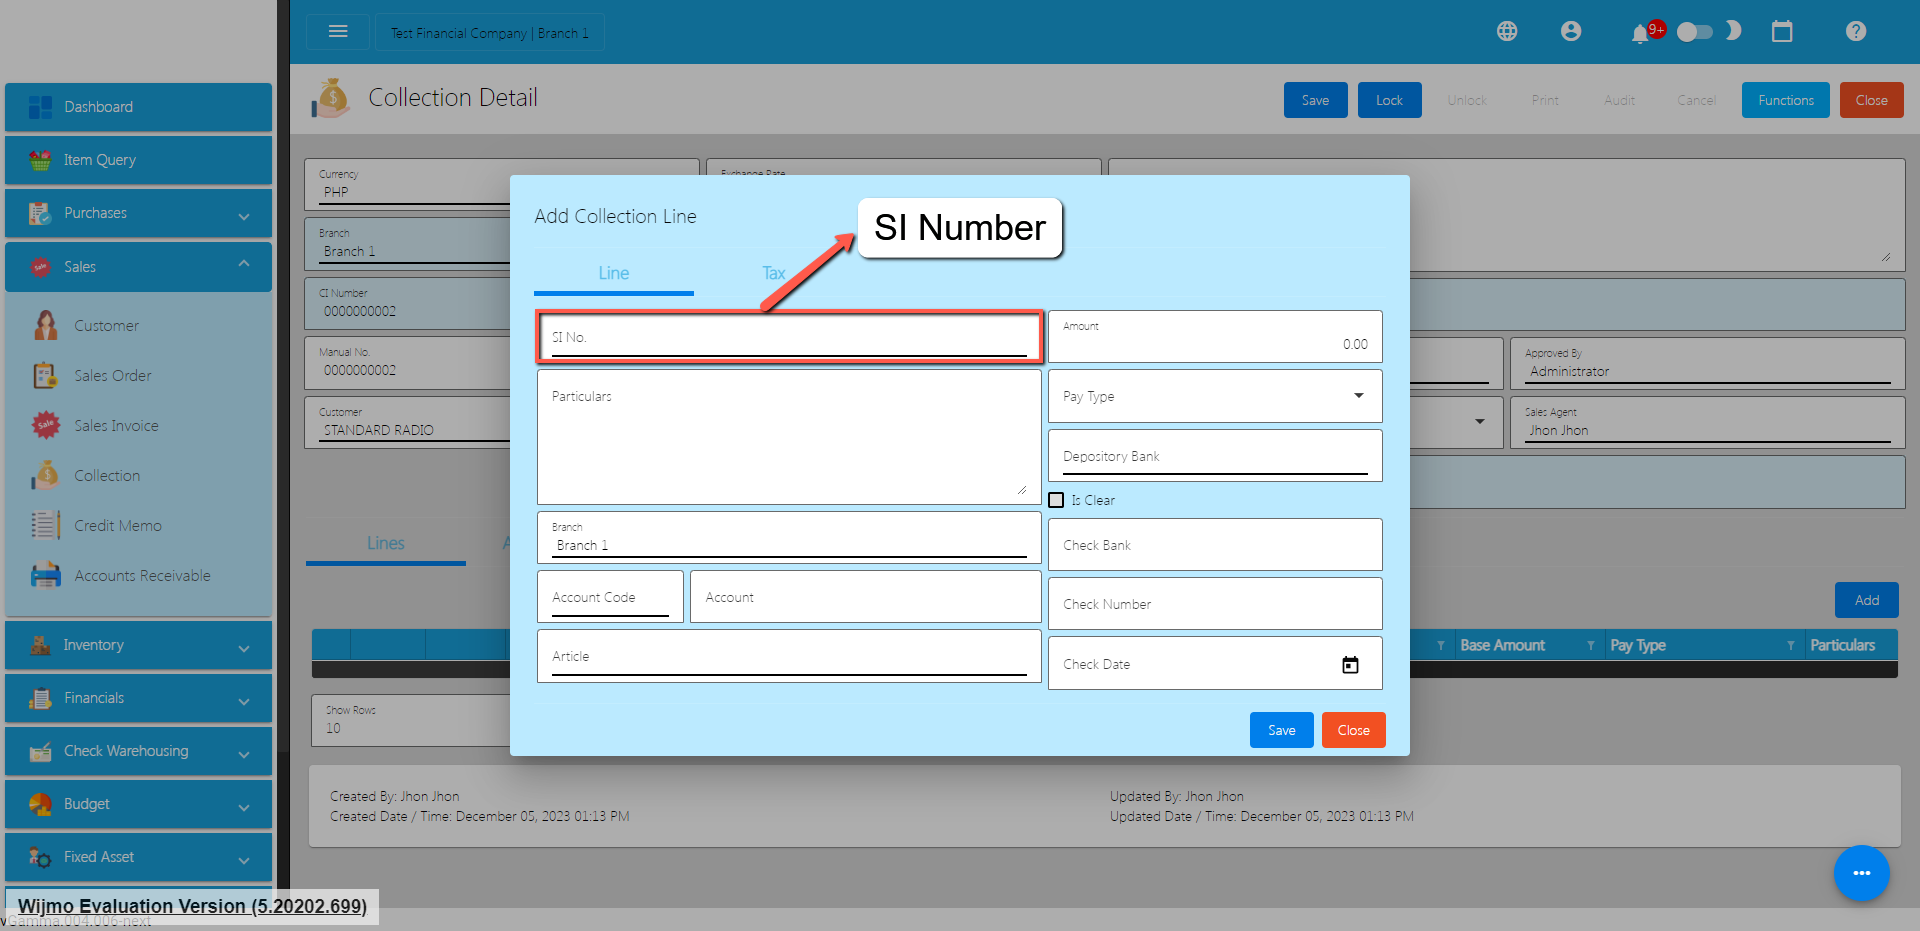
- To select a Sales Invoice Number, click the Pick button.
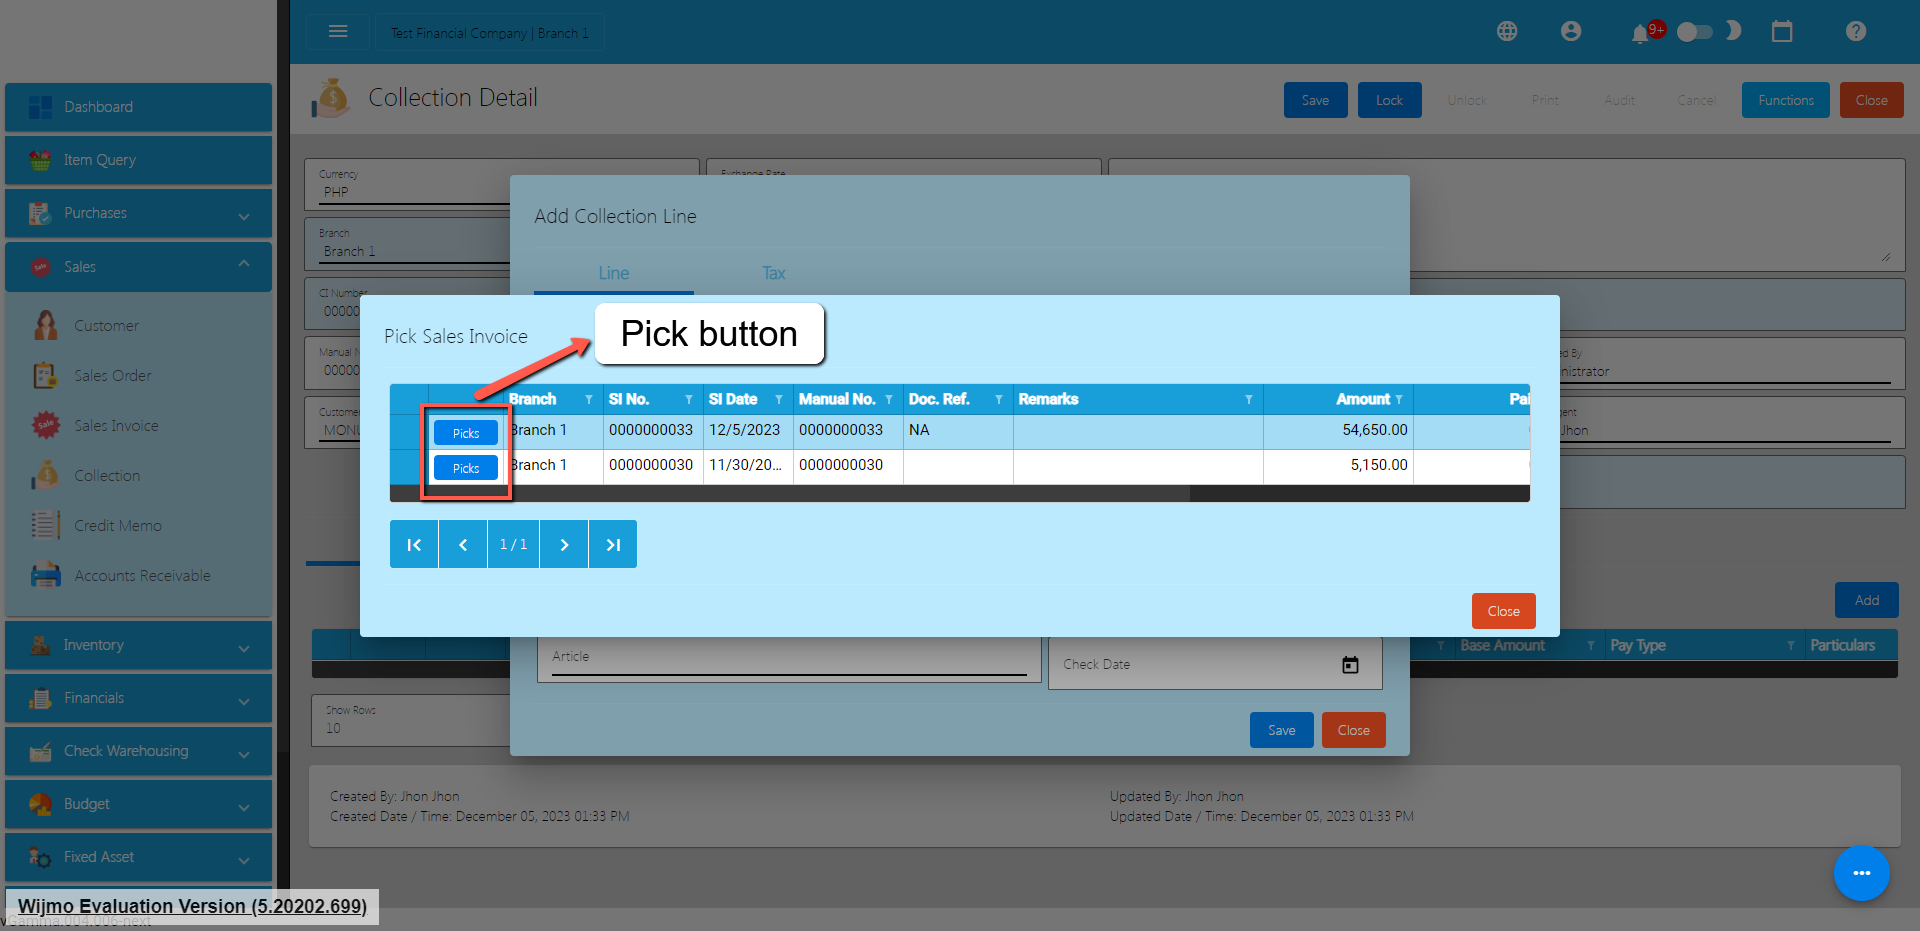
- Once selected, provide all the necessary information such as:
- Amount
- Pay Type
- Depository Bank
- Account
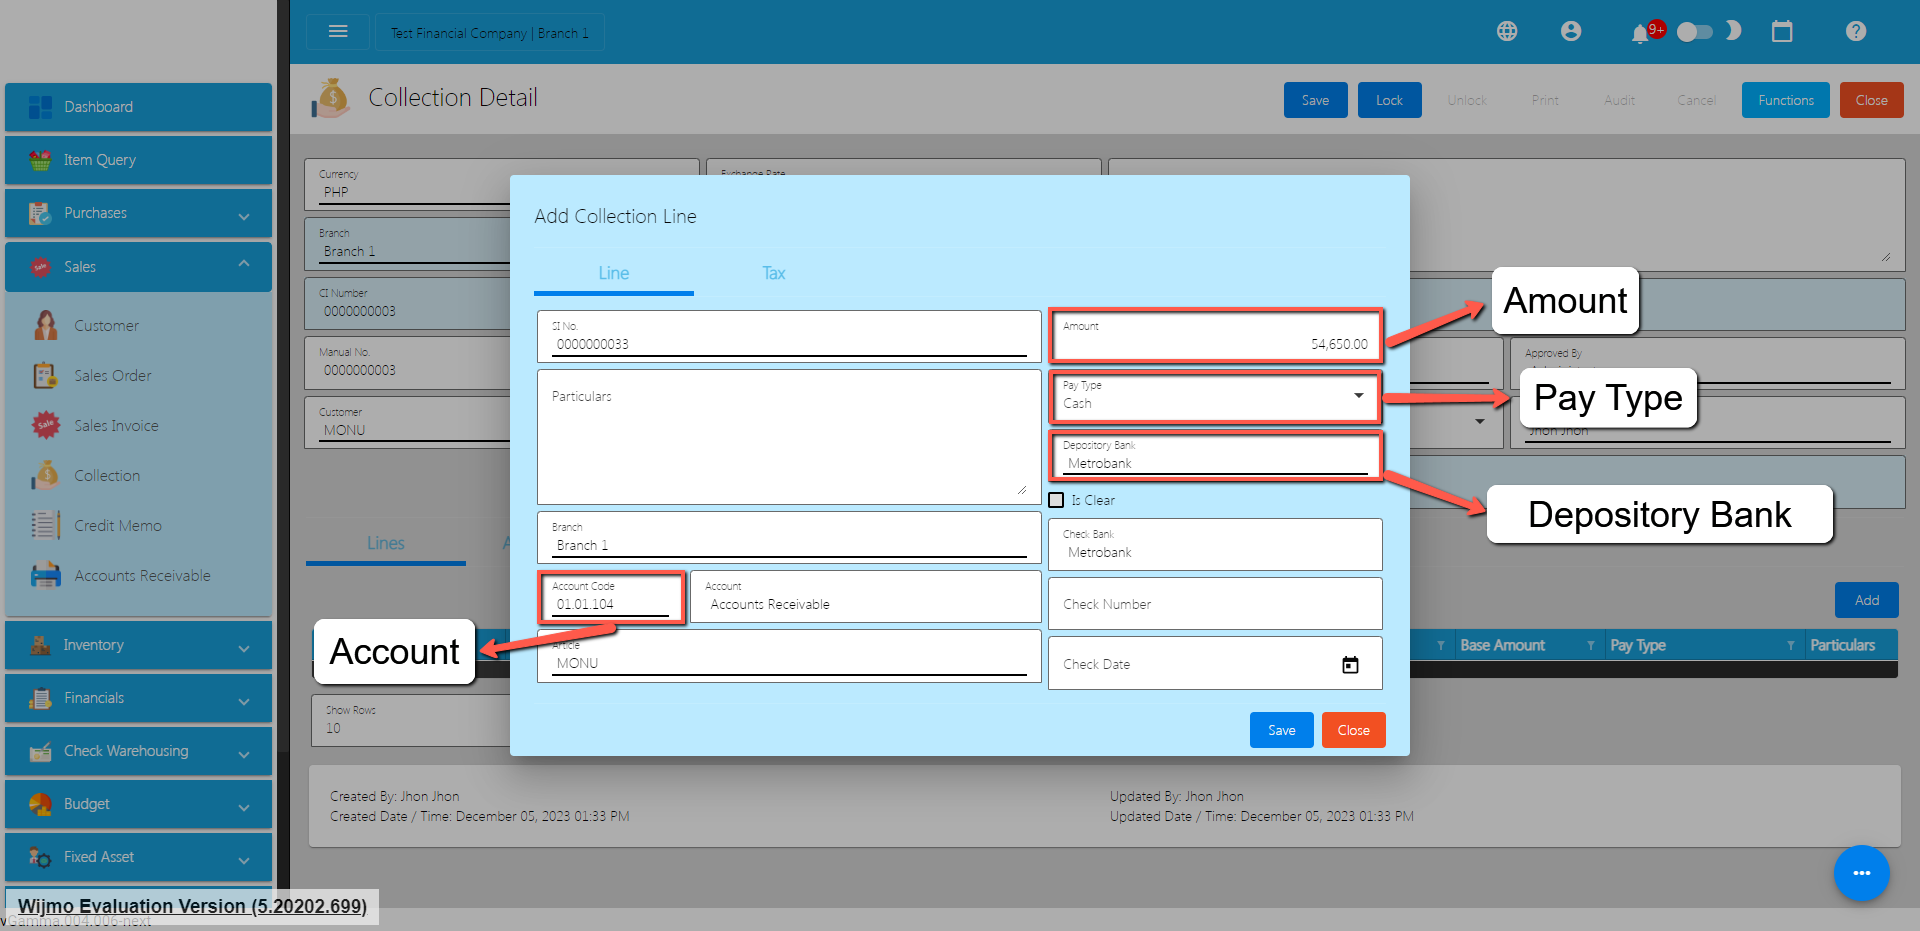
- Once done, save the Collection line item by clicking on the Save button.
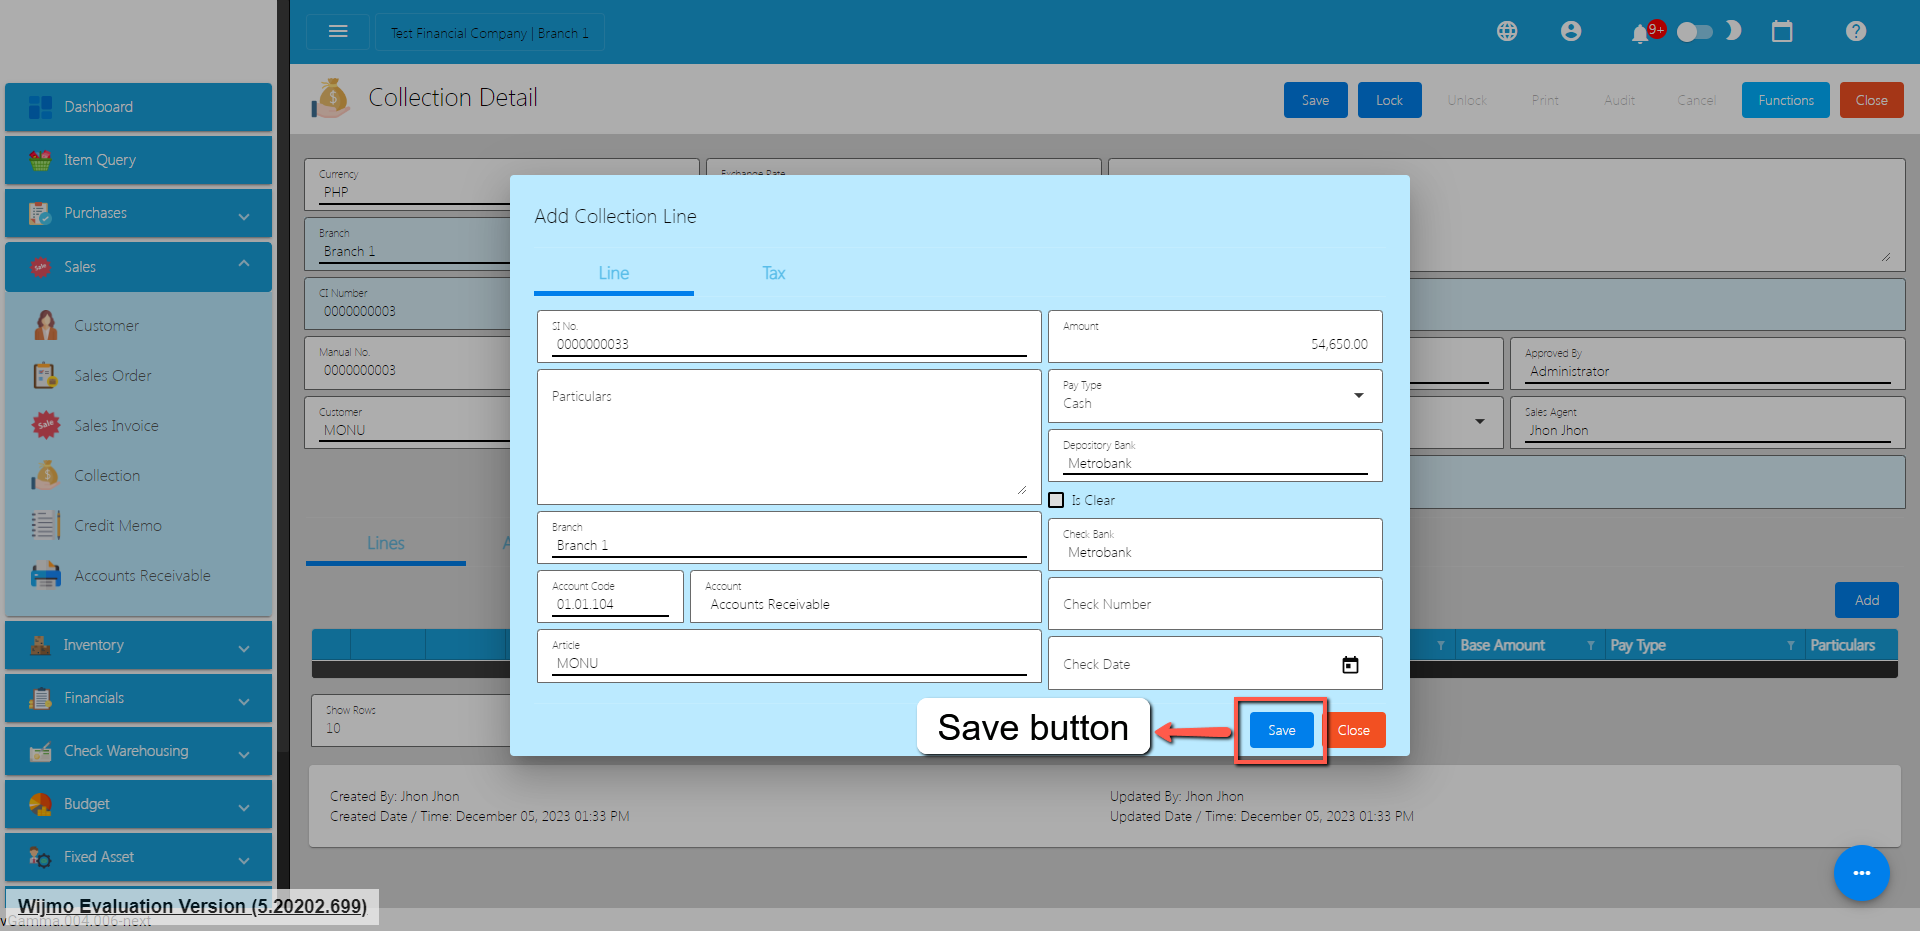
- To totally save the Collection detail, Save and Lock the record.
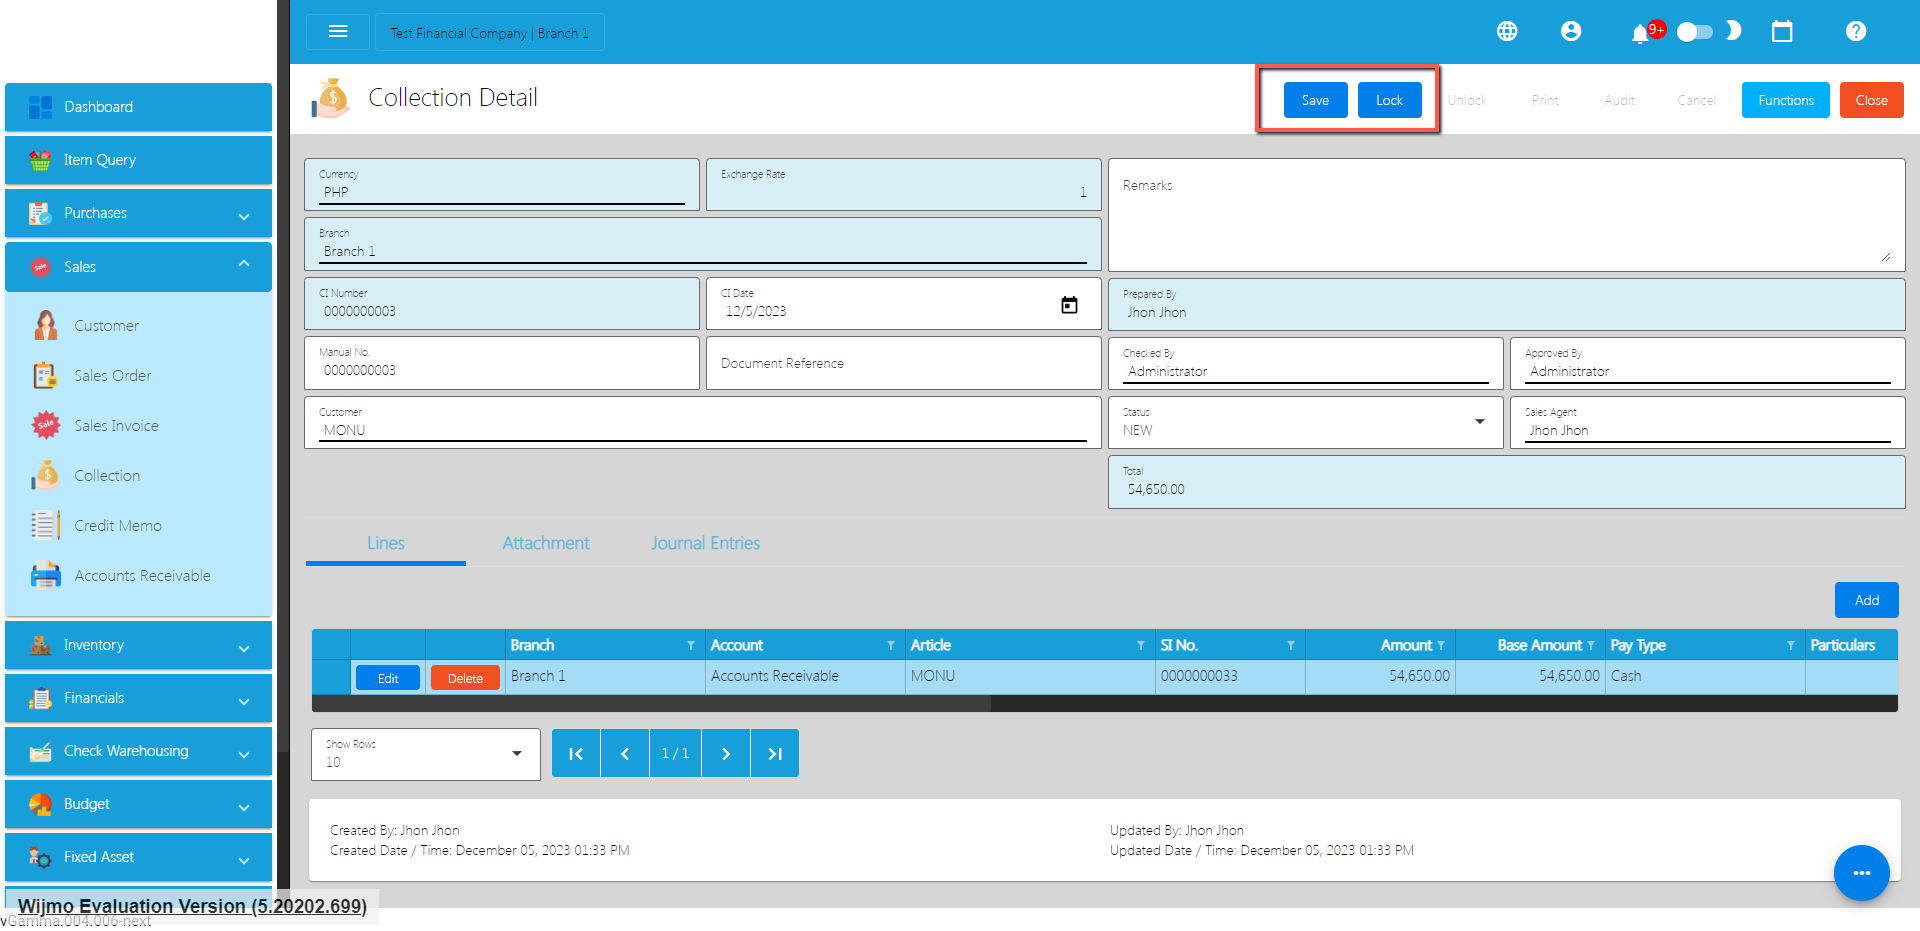
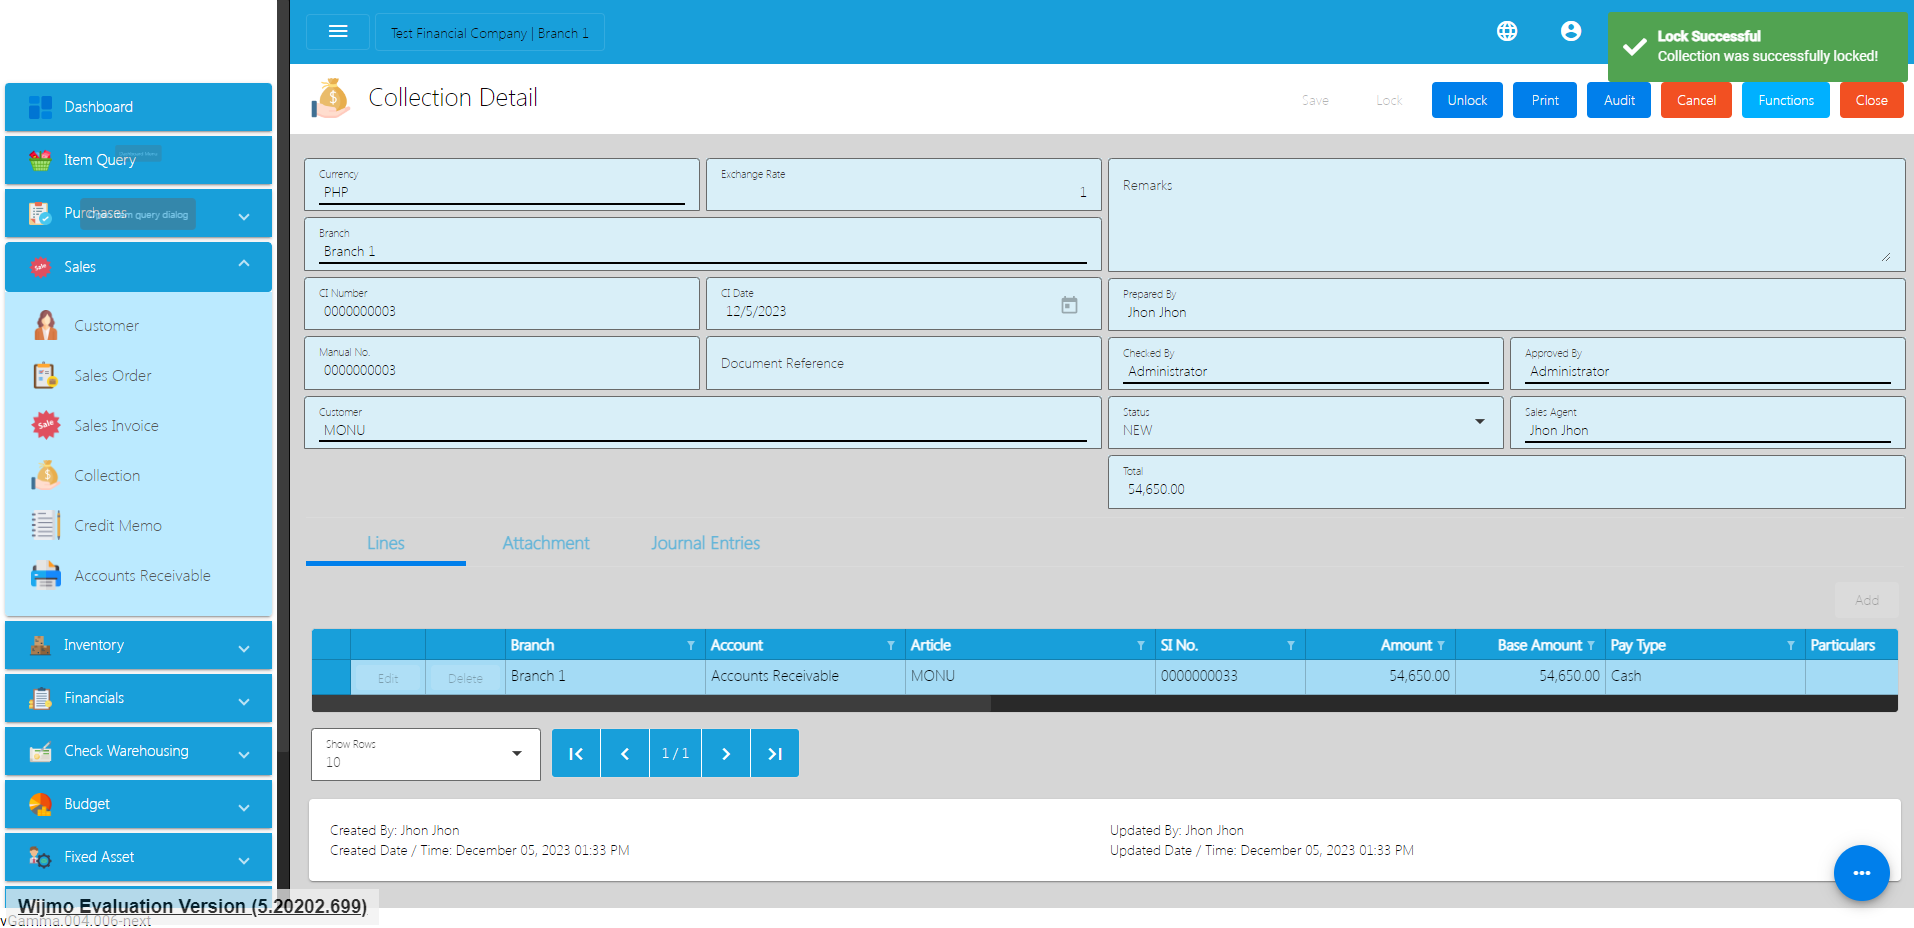
If you want to cancel / void the transaction
Collection Transaction via Upload Template
- To add a Collection Transaction via Upload Template, go to Collection List then Click Functions
- Click Optimized Upload
- Select Download Collection File Format – an excel file will be downloaded. This is the file format where you will edit, select or encode the details that you need to Collection.
3.1 In the Excel File
- Manual Number should be unique per transaction, alphanumeric and Special transaction, should not exceed 255 characters.
Example: 1‘23`4!5@6#7$8%9^0&a*b(c)d_e+f=g{h}i[j]k|l\m/n:o;p"q<r>st?u v.w
– if the Manual Number starts with 000, don’t forget to put an apostrophe (‘) at the beginning of the Manual Number.
Example: ‘00000111231414
– if the Manual Number starts with a number but exceeds more than 10 digits, format the cell to Text to show all the numbers.
Steps on how to change the format to Text:
1. Right Click the Cell
2. Click Format Cell
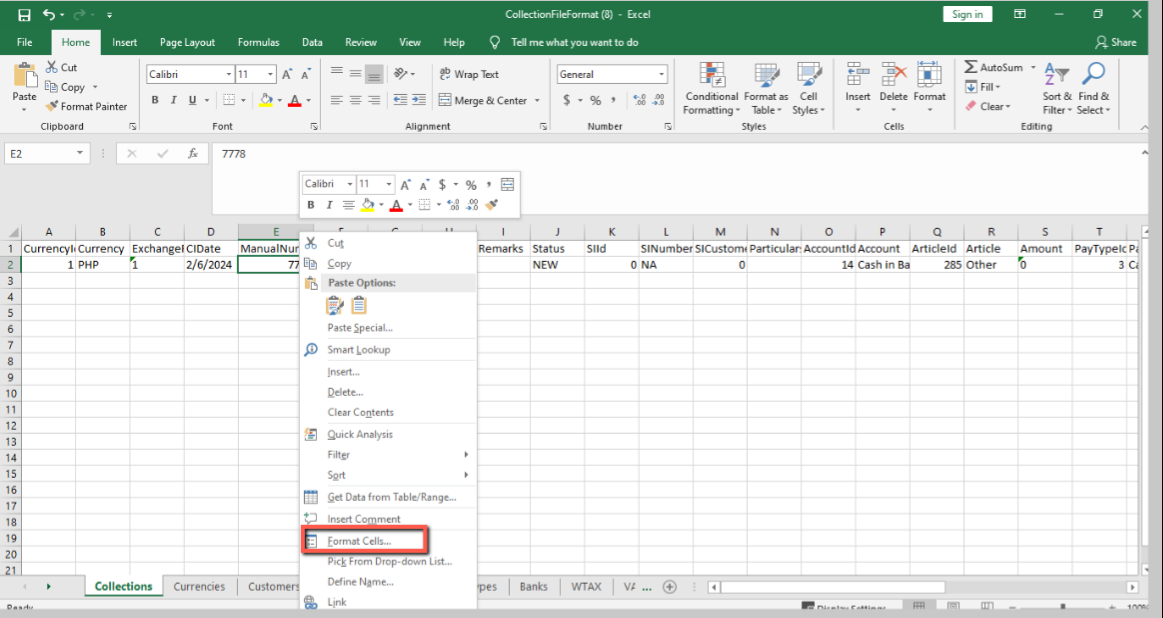
3. Choose Text
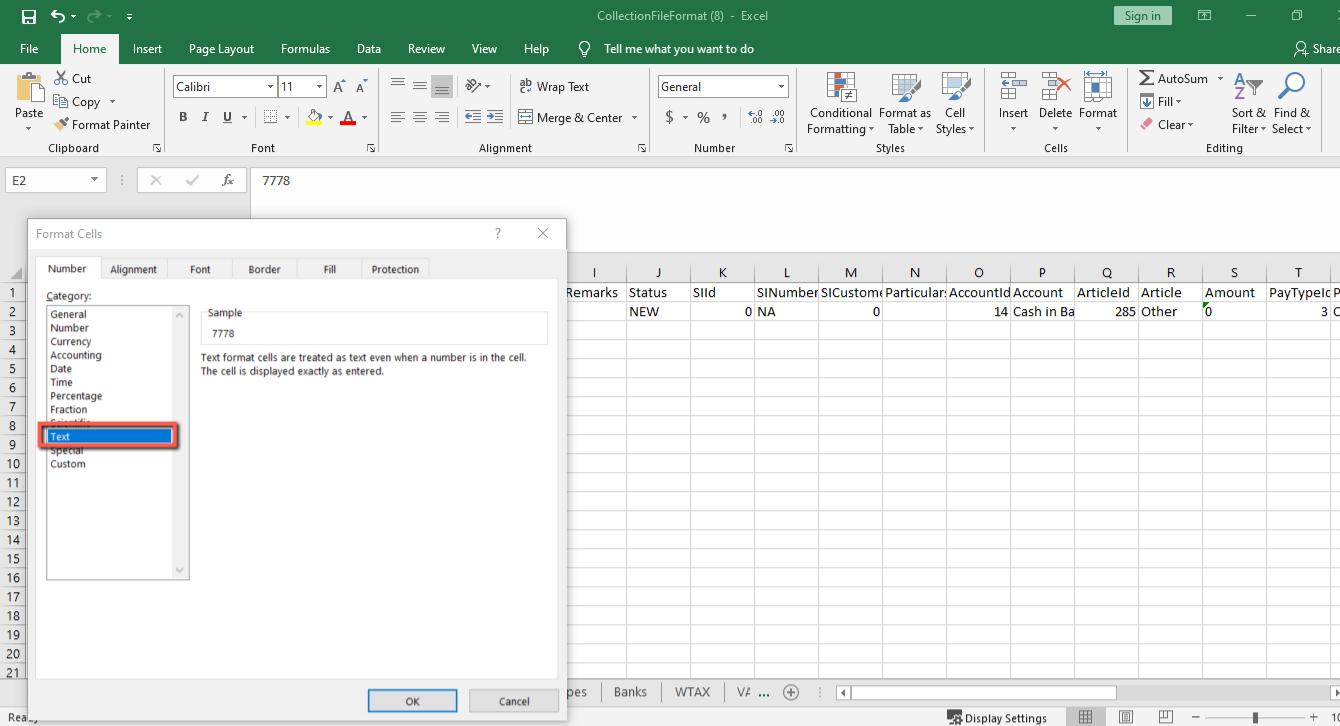
4. Click OK
5. Then reselect the field
- Document Reference should be unique per transaction, alphanumeric and Special transaction, should not exceed 255 characters.
Example: 1‘23`4!5@6#7$8%9^0&a*b(c)d_e+f=g{h}i[j]k|l\m/n:o;p"q<r>st?u v.w
– if the Document Reference starts with 000, don’t forget
to put an apostrophe (‘) at the beginning of the Manual Code.
Example: ‘00000111231414
– if the Document Reference starts with a number but exceeds more than 10 digits, format the cell to Text to show all the numbers.
Steps on how to change the format to Text:
1. Right Click the Cell
2. Click Format Cell
3. Choose Text
4. Click OK
5. Then reselect the field
- Customer and CustomerID – Select Customer from the dropdown and choose the Customer, CustomerID will correspond to the selected Customer. Never edit the CustomerID since it will automatically change after selecting the Customer.
- Remarks – in this column is basically the remarks for the whole transaction, it should be alphanumeric and Special characters should not exceed 255 characters.
- Particulars – in this column this is basically the remarks for each item line, it should be alphanumeric and Special characters should not exceed 255 characters.
- Currency and CurrencyID – Select the Currency from the dropdown and choose the correct Currency, CurrencyID will correspond to the selected currency. Never edit the CurrencyID since it will automatically change after selecting the currency.
- Exchange Rate – is the rate that is used to convert the currency.
- Status – is the status of the transaction, just select the status from the dropdown.
- SINumber and SIId – Select the SINumber from the dropdown and choose the correct SINumber, SIId and SICustomerId will correspond to the selected SINumber. Never edit the SIId and SICustomerId since it will automatically change after selecting the SINumber.
- Account and AccountId – Select the account from the dropdown and choose the correct account , Account Id will correspond to the account.
Never edit the AccountId since it will automatically change after selecting the account.
- Paytype and PaytypeId – Select the Paytype from the dropdown and choose the correct Paytype , PaytypeId will correspond to the Paytype.
Never edit the PaytypeId since it will automatically change after selecting the paytype.
- CheckNumber – used to add check number
- CheckBank – Add check bank
- Bank – Select Bank from the dropdown and choose the correct bank, BankId will correspond to the Bank.
Never edit the BankId since it will automatically change after selecting the Bank.
- VAT and VATId – Select the VAT from the dropdown and choose the correct VAT, VATId will correspond to the selected WTAX. Never edit the VATId since it will automatically change after selecting the VAT.
- WTAX and WTAXId – Select the WTAX from the dropdown and choose the correct WTAX, WTAXId will correspond to the selected WTAX. Never edit the WTAXId since it will automatically change after selecting the WTAX.
- GVATand GVATId – Select the GVAT from the dropdown and choose the correct GVAT, GVATId will correspond to the selected GVAT. Never edit the GVATId since it will automatically change after selecting the GVAT.
- Amount – input the amount paid by the Customer.
4. Go Back to the Collection List Transaction
- Click Function
- Click Optimize Upload
- Click Import Collection
- After Importing, Go to Draft of Optimize Upload
In Collection
- Click Validate
- Click Post
e. Lock the Transaction
Cancel Collection Transaction
When you need to cancel a Collection, it’s important to follow these simple steps:
- Log In: Visit your easyFS domain and login with your username and password.
- Find your Collection: Navigate to the Sales, then Collection. You will be redirected to the Collection lists.
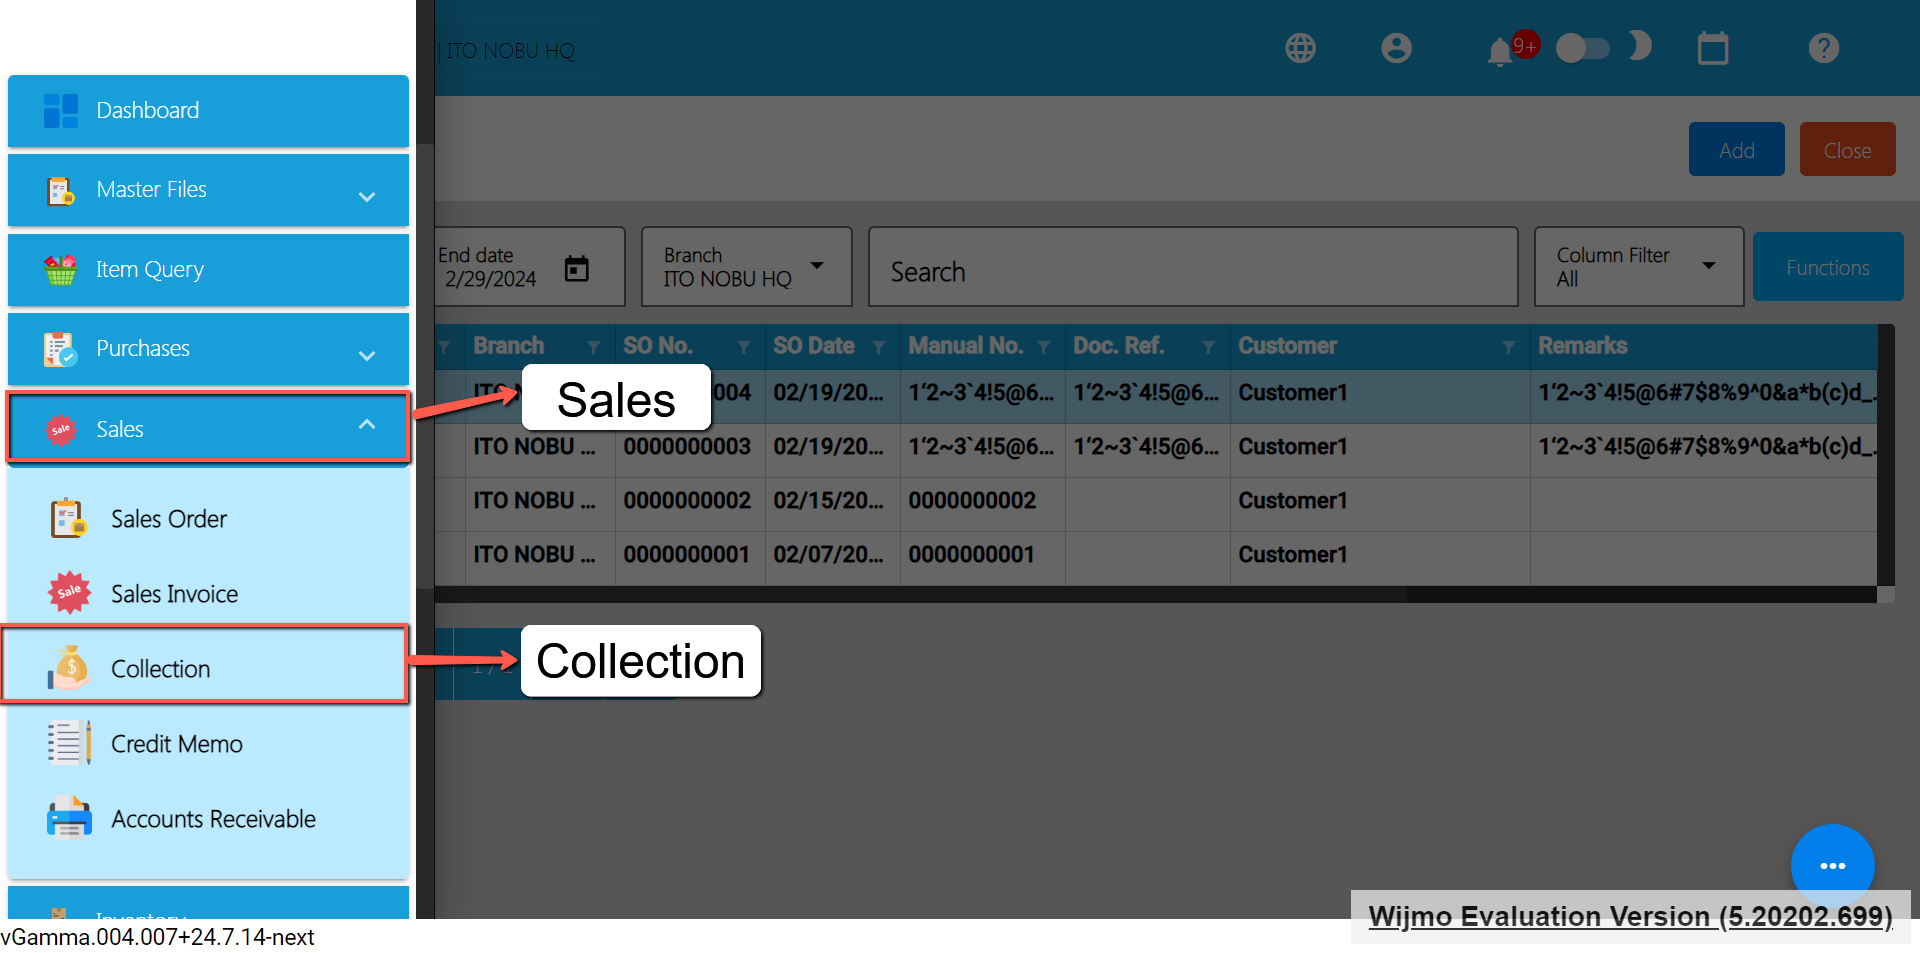
- Locate the Right One: From the Collection list, you may use the search bar to look for the right Collection you want to cancel. You can search using the Collection’s CI NUmber, Manual Number, Document Reference, etc.
Take note: Don’t forget to change the Start Date and End Date to your Collection’s transaction date to display the correct result.
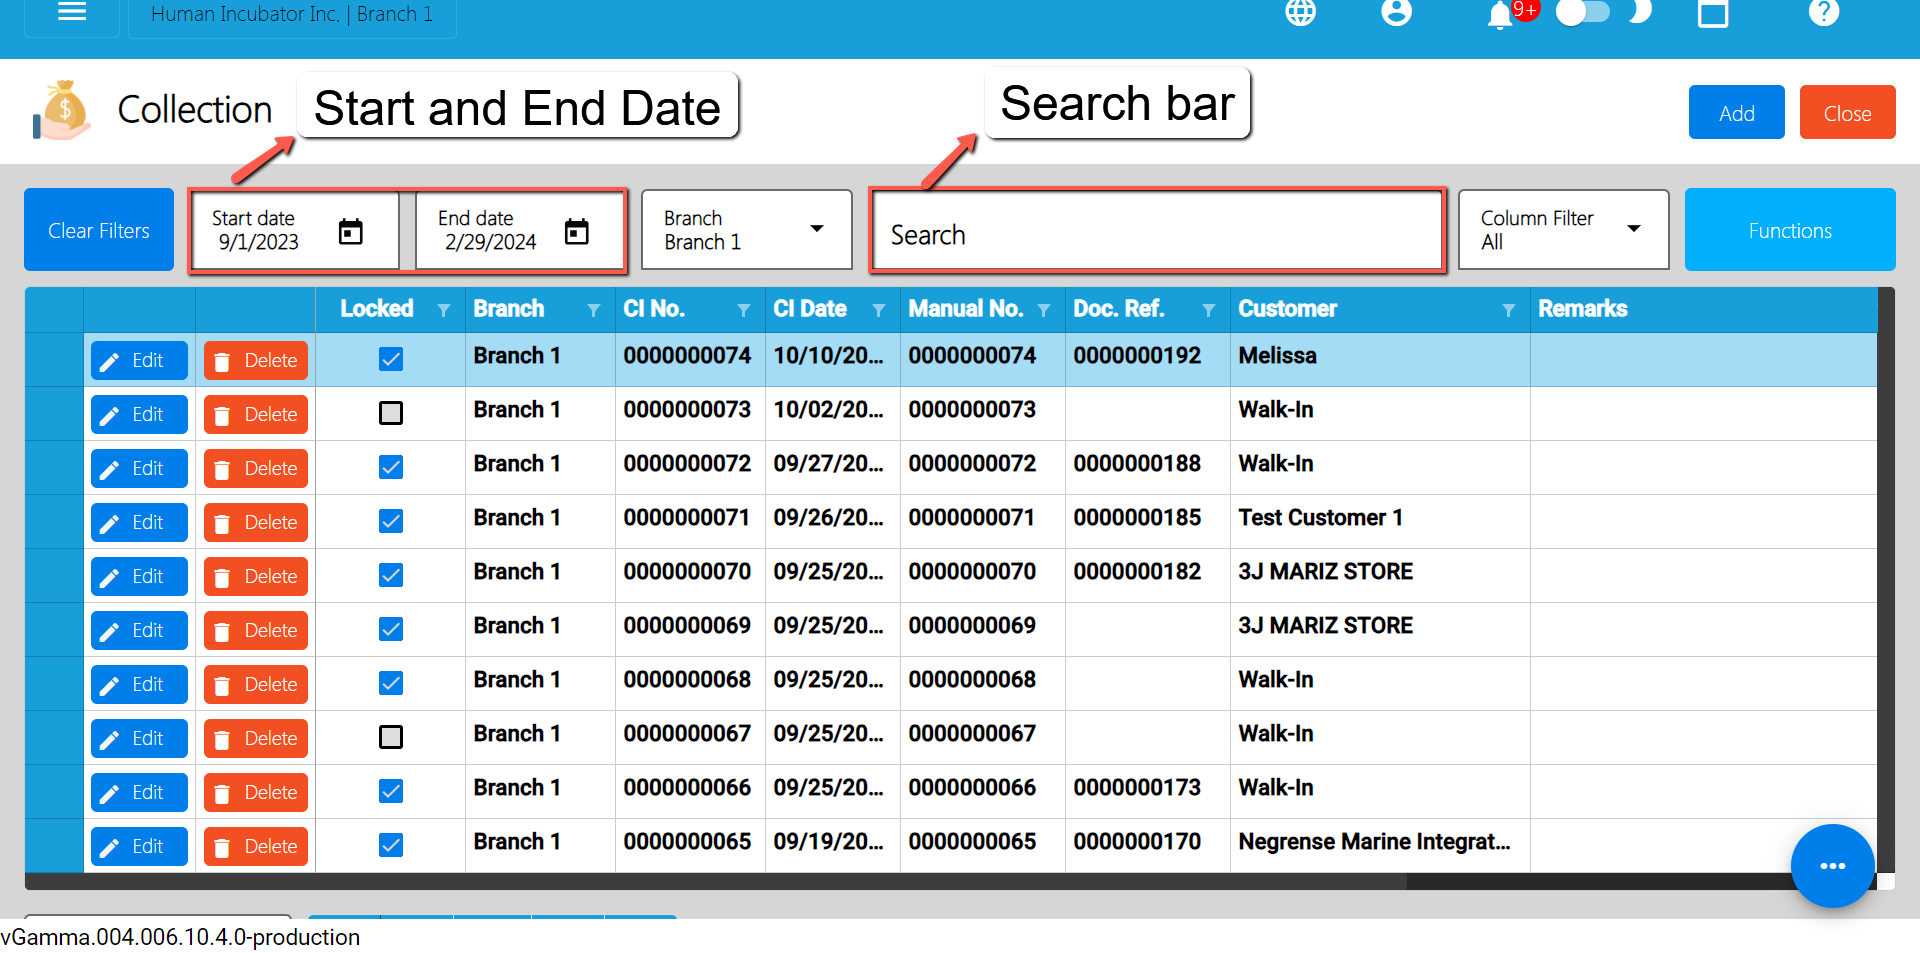
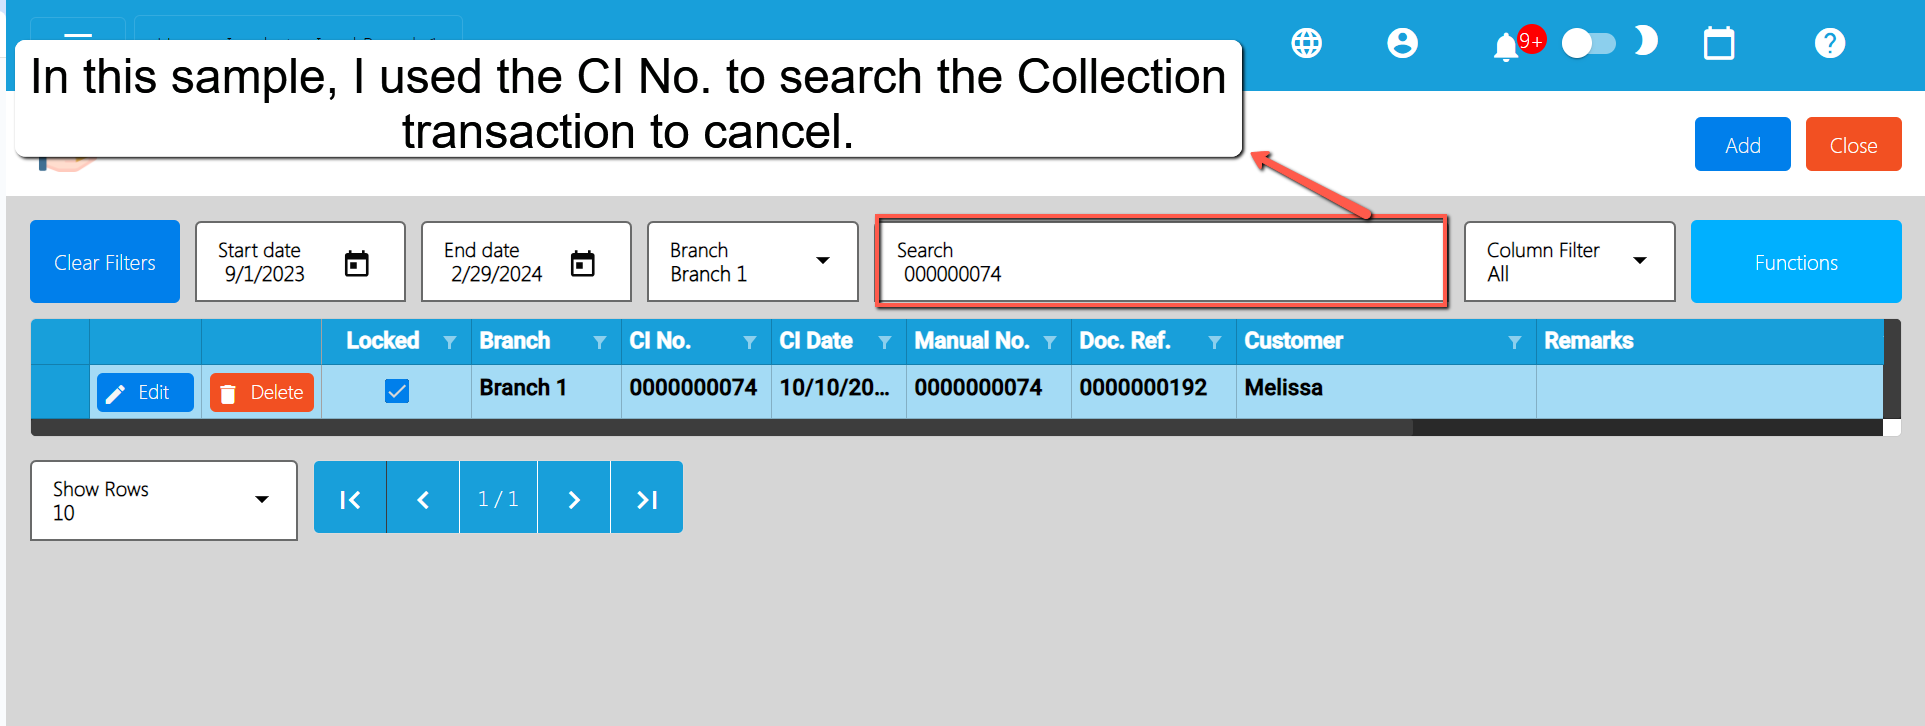
- Open the Collection Detail: Click the Edit button to open the Collection detail page.
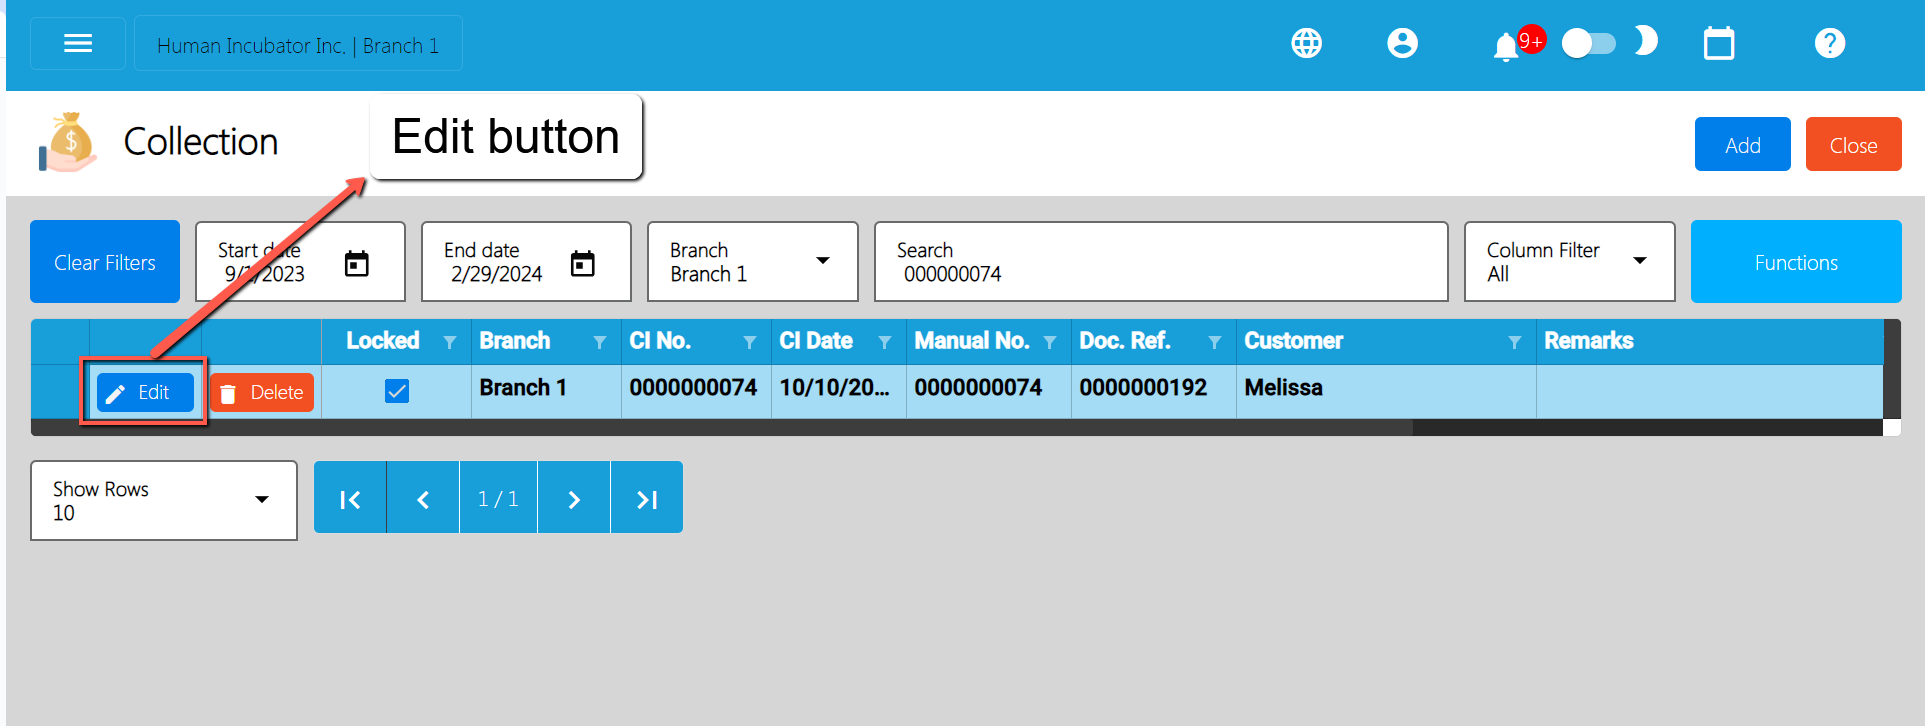
- Cancel the Collection: To cancel your Collection transaction, look for the Cancel found on the upper-right part of the page, then click.
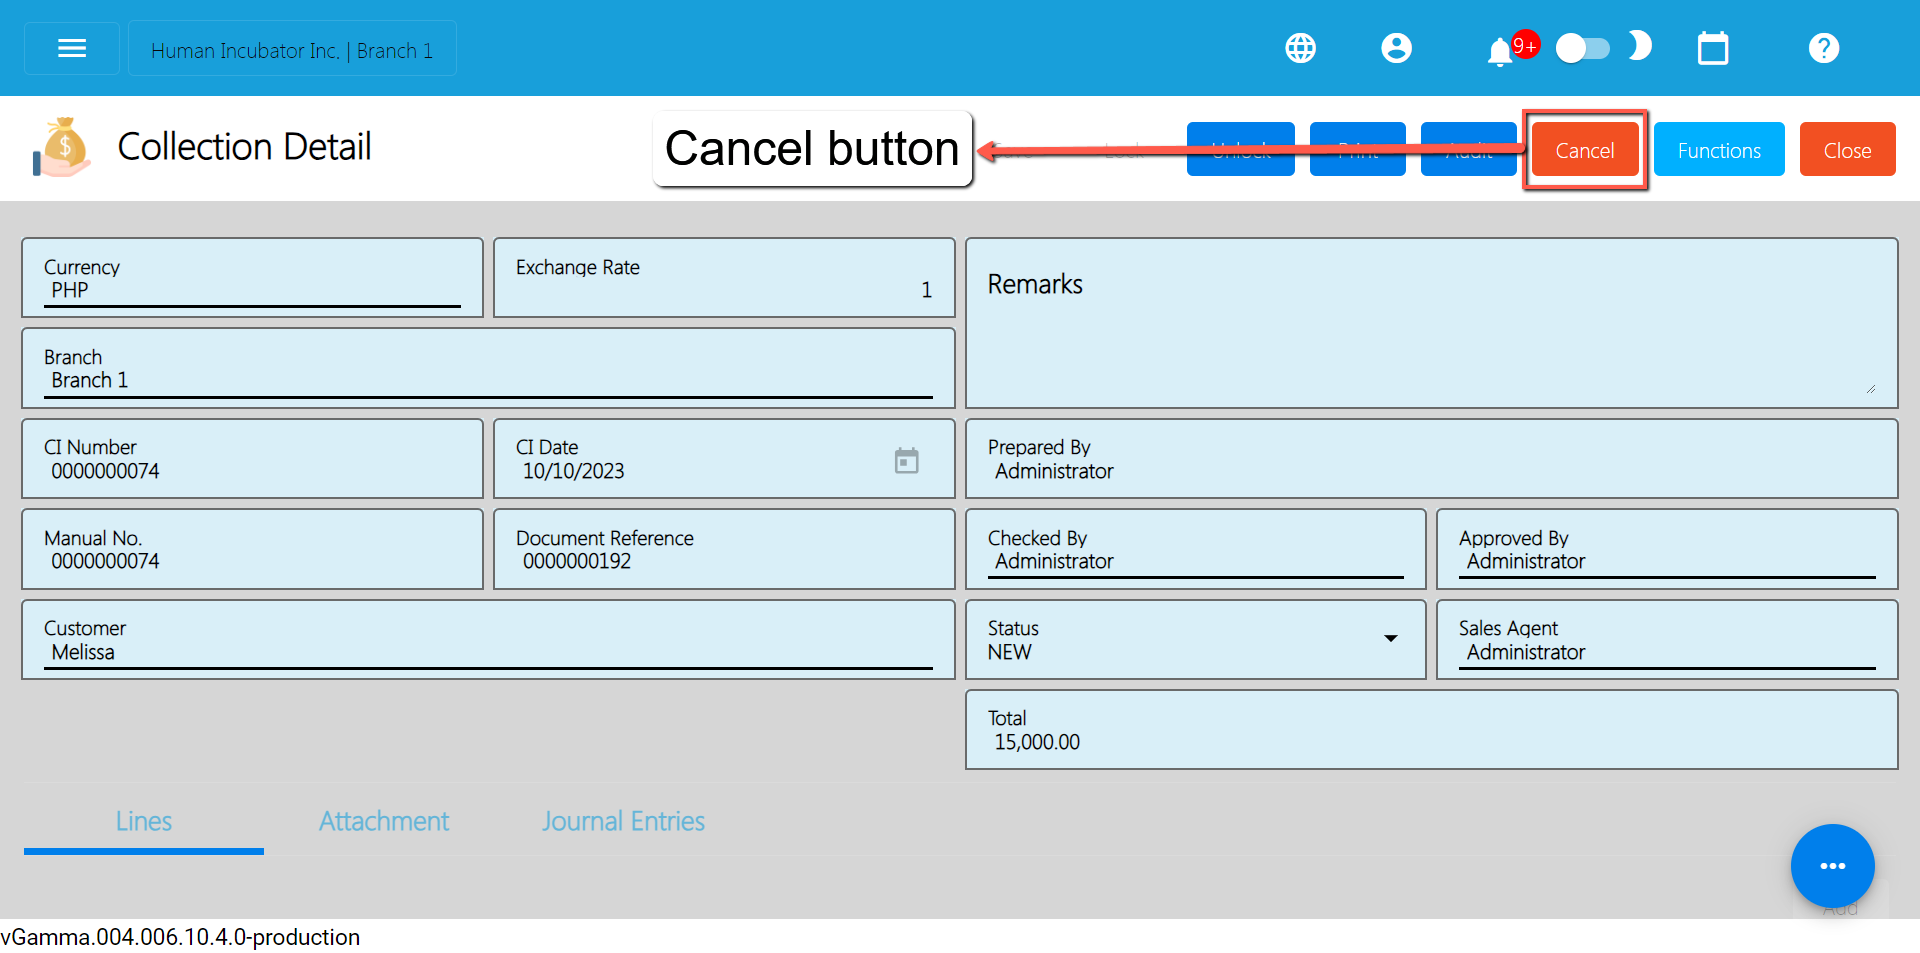
- Confirm Canceling: After you click the Cancel button, there’s a Cancel Collection window. If you’re sure you want to cancel your Collection transaction, click the Cancel button.
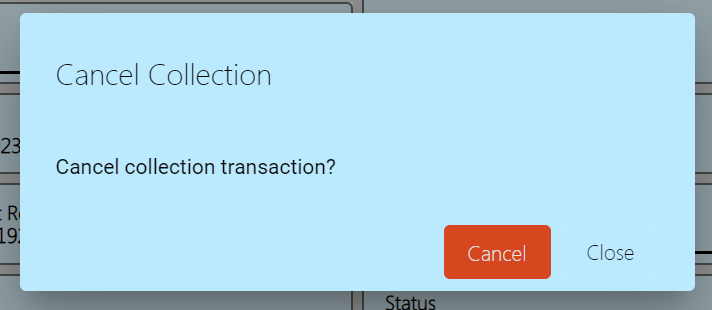
- Check It’s Done: After canceling, make sure you get a success toast message confirming it’s canceled successfully. It is found on the bottom right of the page.
- Let Others Know(if needed): If you believe canceling affects other people, it's a good idea to inform them.
- Keep Track: Remember to make a note somewhere that you canceled the Collection, just in case it is needed later.
5.4: Inventory Transactions
Overview
The Inventory module is a powerful tool designed to help you manage your item inventory efficiently. Whether you're running a retail business, a warehouse, or any operation that involves tracking and handling physical goods, this module provides essential features to streamline your inventory management processes.
Waiver: Please be advised that our support does not extend to the management of raw material inventory. Additionally, while we strive for efficient service, we cannot guarantee perfect inventory management for finished products.
Here are the most common scenarios in easyFS Inventory Flow
Scenario 1: Single Branch
Applies to the use of the Inventory system for a single Branch Monitoring
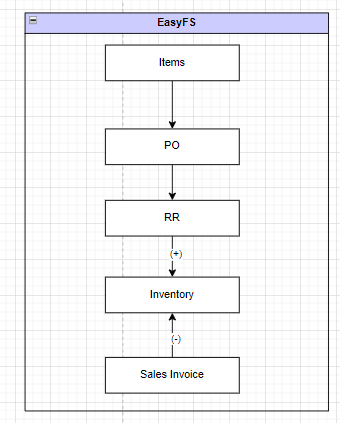
Item Creation/Management
- Create and manage item records within the inventory system.
- Include essential details such as item code, description, unit of measure, and other relevant information.
Purchase Order
- Based on the approved purchase request, a purchase order is created and sent to the supplier.
- The purchase order includes details like the quantity, price, and description of the items or services.
Receiving Receipt
- Upon receiving the goods or services, a receiving receipt is generated to confirm that the items have been received in the quantity and condition specified in the purchase order.
- Inventory Code is generated upon making the Receiving Receipt. This will monitor the Inventory of the Item being encoded
- Update inventory levels if applicable.
Sales Invoice
- When items are sold, generate a sales invoice to record the sale.
- The sales invoice includes details such as the items sold, quantities, prices, and customer information.
- Update Inventory levels if applicable
Inventory Report
- Generate regular inventory reports to monitor stock levels, identify any discrepancies, and track overall inventory performance.
- Reports may include current stock levels, stock valuation, and other relevant metrics.
Scenario 2: Multi-Branch
Applies to the process flow where there are Multiple Branches or Warehouses that the company is utilizing. An additional sub-module is needed such as Stock Transfer Request and Stock Transfer form in order to efficiently transfer stocks from one branch to another.
Item Creation/Management
- Create and manage item records within the inventory system.
- Include essential details such as item code, description, unit of measure, and other relevant information.
Stock Transfer Request
- When there is a need to move inventory from one branch or warehouse to another, initiate a stock transfer request.
- Specify the items, quantities, and the destination branch or warehouse.
- Stock Transfer Requests can be made by users who have the corresponding rights based on the company’s organization.
Stock Transfer
- Process the stock transfer based on the approved request.
- Stock Transfer will pick up the data from the Stock Transfer Request.
- Record the movement of items from one branch or warehouse to another in the system.
Sales Invoice
- When items are sold, generate a sales invoice to record the sale.
- The sales invoice includes details such as the items sold, quantities, prices, and customer information.
- Update Inventory levels if applicable
Inventory Report
- Generate regular inventory reports to monitor stock levels, identify any discrepancies, and track overall inventory performance.
- Reports may include current stock levels, stock valuation, and other relevant metrics.
Scenario 3: Extra-Ordinary Activities
These are non-regular and used only in certain situations as
- Setting up beginning balances
- Supplier and Customer Returns
- Adjustments in Physical Inventory
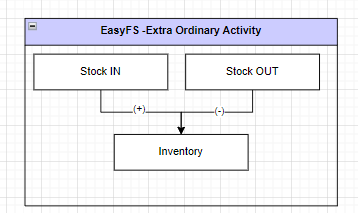
Extraordinary Stock In
- Record the addition of new inventory into the system.
- Used for Stocking In Items as a Beginning Balance
- Also used for Stock Adjustments
- Also used for Stock Returns from Customers
- Update the inventory levels for the corresponding items.
Extraordinary Stock Out
- Record the removal of items due to return to the Supplier.
- Also used for spoilages and internal company use
- Adjust the inventory levels to reflect the reduction in stock.
Scenario 4: Multi-Branch with EasyPOS Integration
This process utilizes easyFS and EasyPOS software Integration. Wherein easyFS is the backend application and EasyPOS is the front end application. This applies to organizations with Multiple Retail Stores that the BIR requires an accredited (Point-Of-Sale) System.
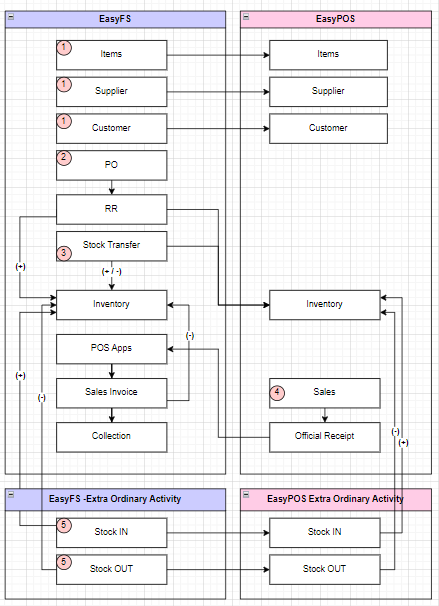
Item Creation/Management
- Create and manage item records within the inventory system.
- Include essential details such as item code, description, unit of measure, and other relevant information.
- Upon Creation of the Item in easyFS it will integrate to EasyPOS
Supplier Creation/Management
- Create and manage supplier records within the system, including contact information, Email, TIN (Tax Identification Number), and payment terms.
- Assign unique Supplier Code for easy tracking.
- Upon Creation of the Supplier in easyFS it will integrate to EasyPOS
Customer Creation/Management
- Create and manage customer records within the system, including contact information, credit limit, credit terms, TIN (Tax Identification Number), Type of Business
- Assigning of Manual Code unique to customer for easy tracking.
- Upon Creation of the Customer in easyFS it will integrate to EasyPOS
Purchase Order
- Based on the approved purchase request, a purchase order is created and sent to the supplier.
- The purchase order includes details like the quantity, price, and description of the items or services.
Receiving Receipt
- Upon receiving the goods or services, a receiving receipt is generated to confirm that the items have been received in the quantity and condition specified in the purchase order.
- Inventory Code is generated upon making the Receiving Receipt. This will monitor the Inventory of the Item being encoded
- Update inventory levels if applicable.
Sales (easyPOS)
- Items are sold, generate a sales invoice to record the sale in EasyPOS
- The sales invoice includes details such as the items sold, quantities, prices, and customer information.
- This is posted in the easyPOS
Official Receipt (easyPOS)
- Recording of the Payment being done in the POS Sales module
- Issuance of a BIR Accredited Receipt
POS Apps (easyFS)
- Validation of Items Sold in the EasyPOS to easyFS
- Tax Type, Terms, Discount and Unit should be consistent between EasyPOS and easyFS
- Usernames between EasyPOS and easyFS should also be consistent to be able to be validated correctly
Sales Invoice
- This is the validated Sales transactions from easyPOS that is transferred in easyFS
- Update inventory levels if applicable
Collection/ Payment
- Receive payments from the customer against the issued invoice.
- Apply payments to the corresponding accounts receivable entries.
Inventory Report
- Generate regular inventory reports to monitor stock levels across all branches or warehouses.
- Reports may include current stock levels, stock valuation, and other relevant metrics for each location.
5.4.1 Stock In
Overview
This module is used if you want to set up
- Beginning balances of your item(s).
- if a Customer wants to return an item he/she purchased e.g., an item is damaged, this module helps manage those Customer Returns as well.
- Make Adjustments in the Inventory
Stock In List
- List of all the SI(Stock In) and will also show the overview of the transaction.
- Here, the user also has the filter functionality and the button to add new Stock In.
Stock In Detail
- To add new Stock In detail,go to Extra-ordinary Activities then click Stock In. After that, click the Add that can be seen in the Stock In list.
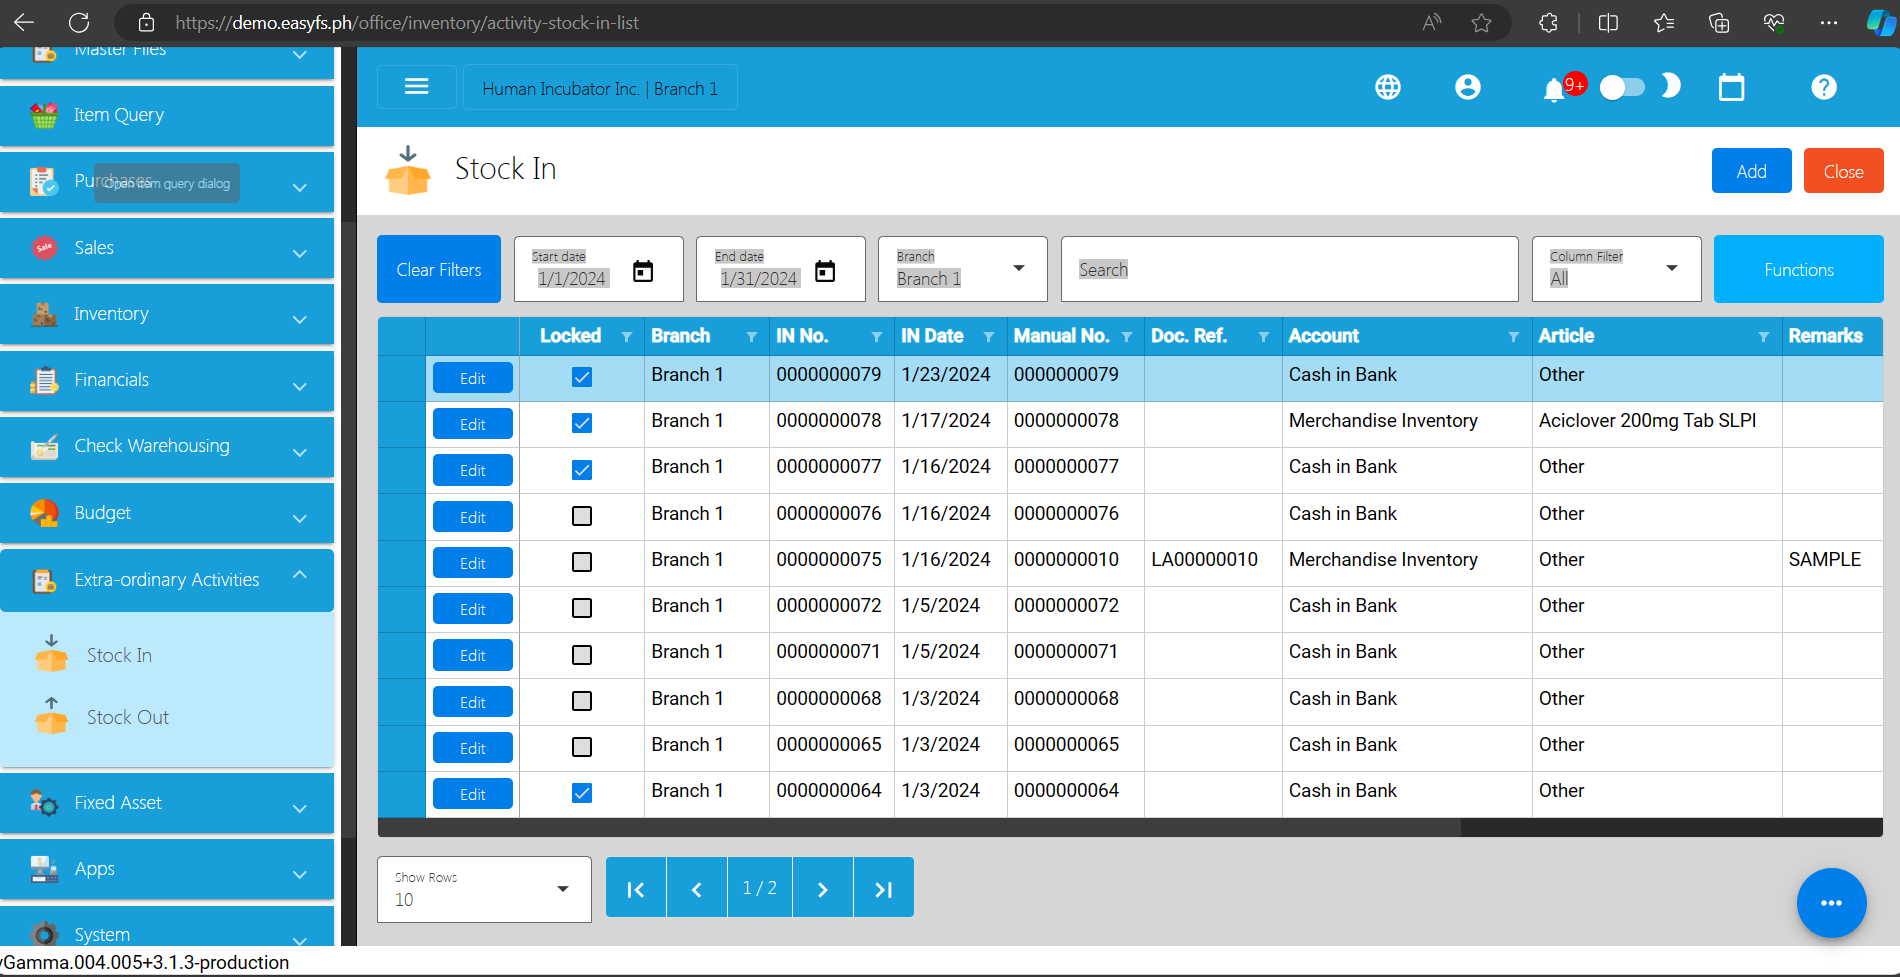
- Fill out all the needed information for the Stock In Detail like,
- IN Date
- Document Reference
- Account
- Article
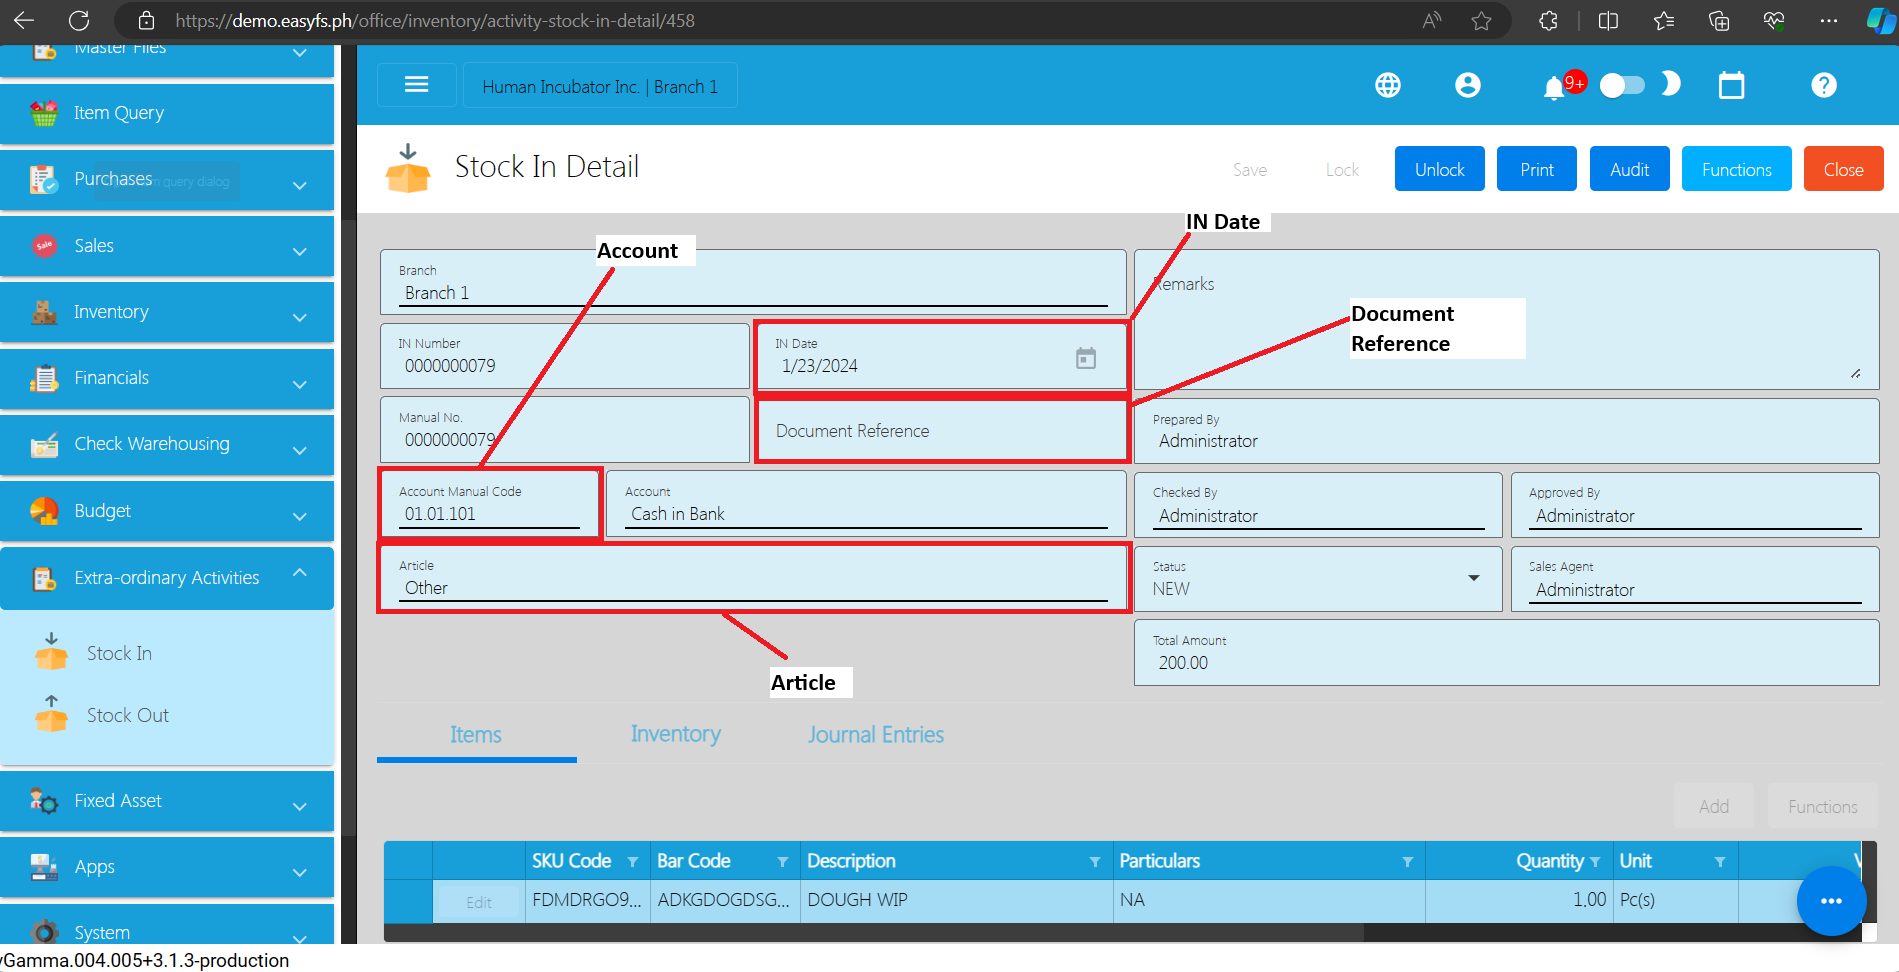
- To add Stock In line item(s), you can:
- Manual add a line item
- Click the Add button under the Items tab.
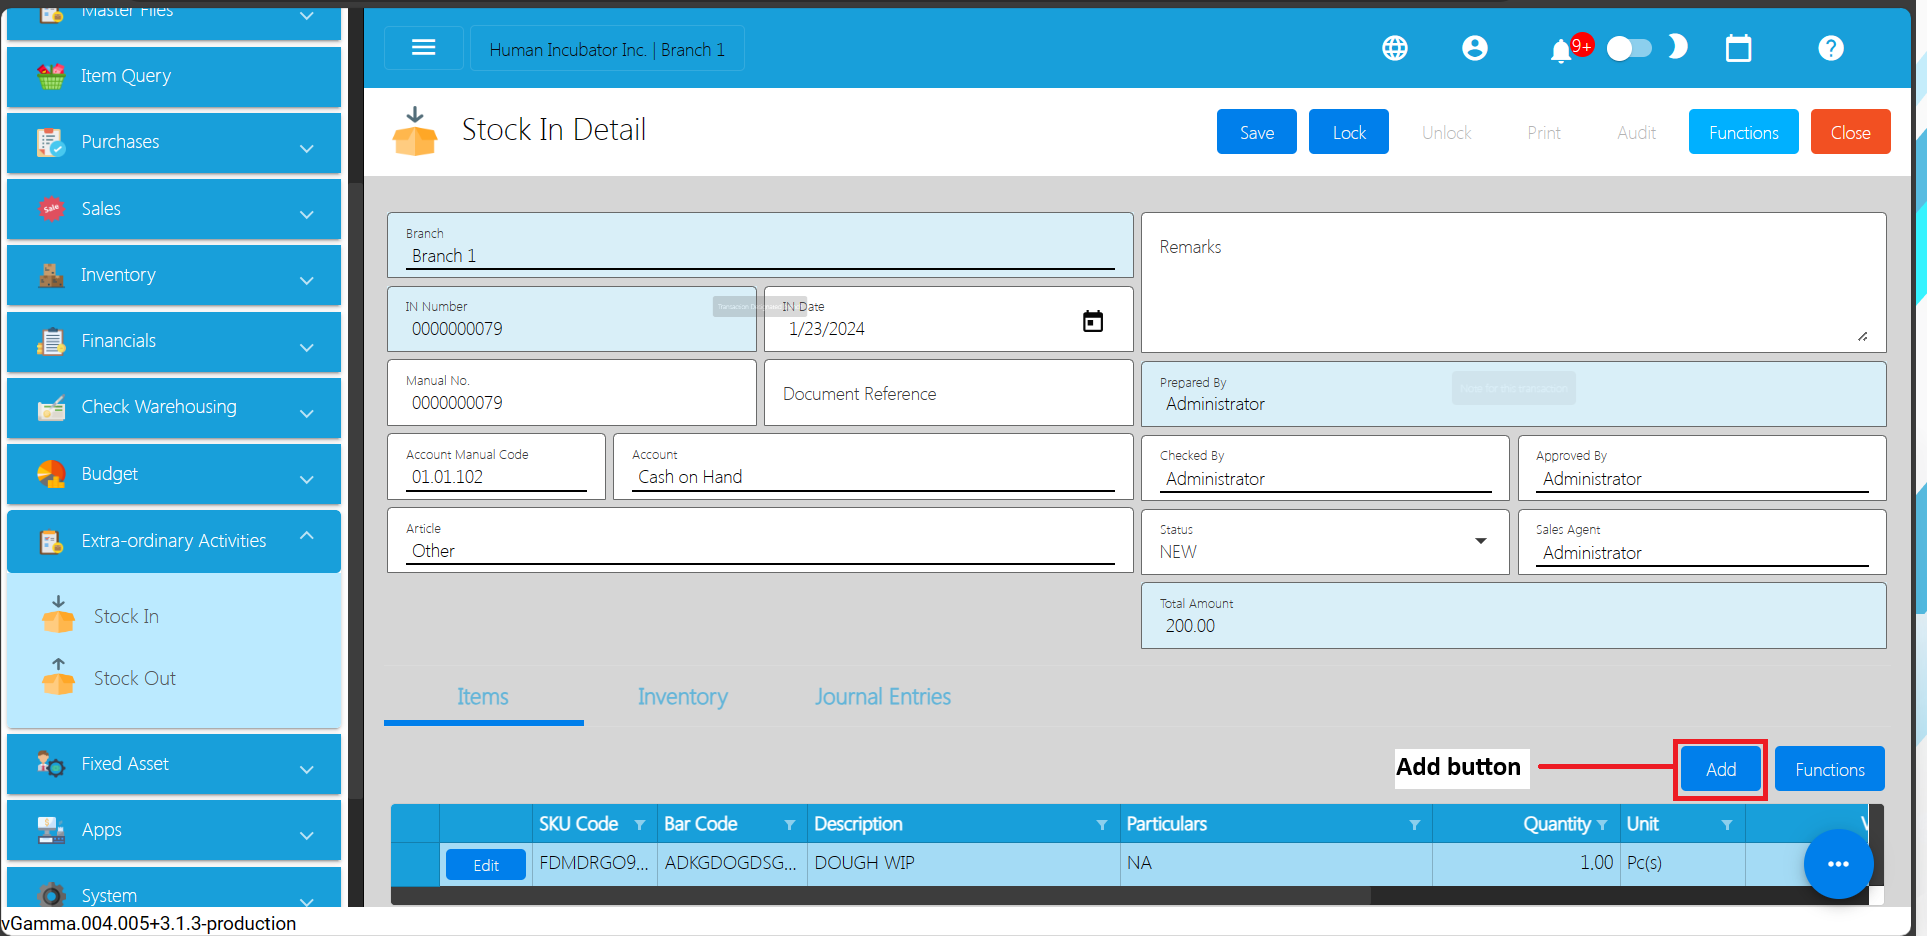
- Click the Pick button that you want to add.
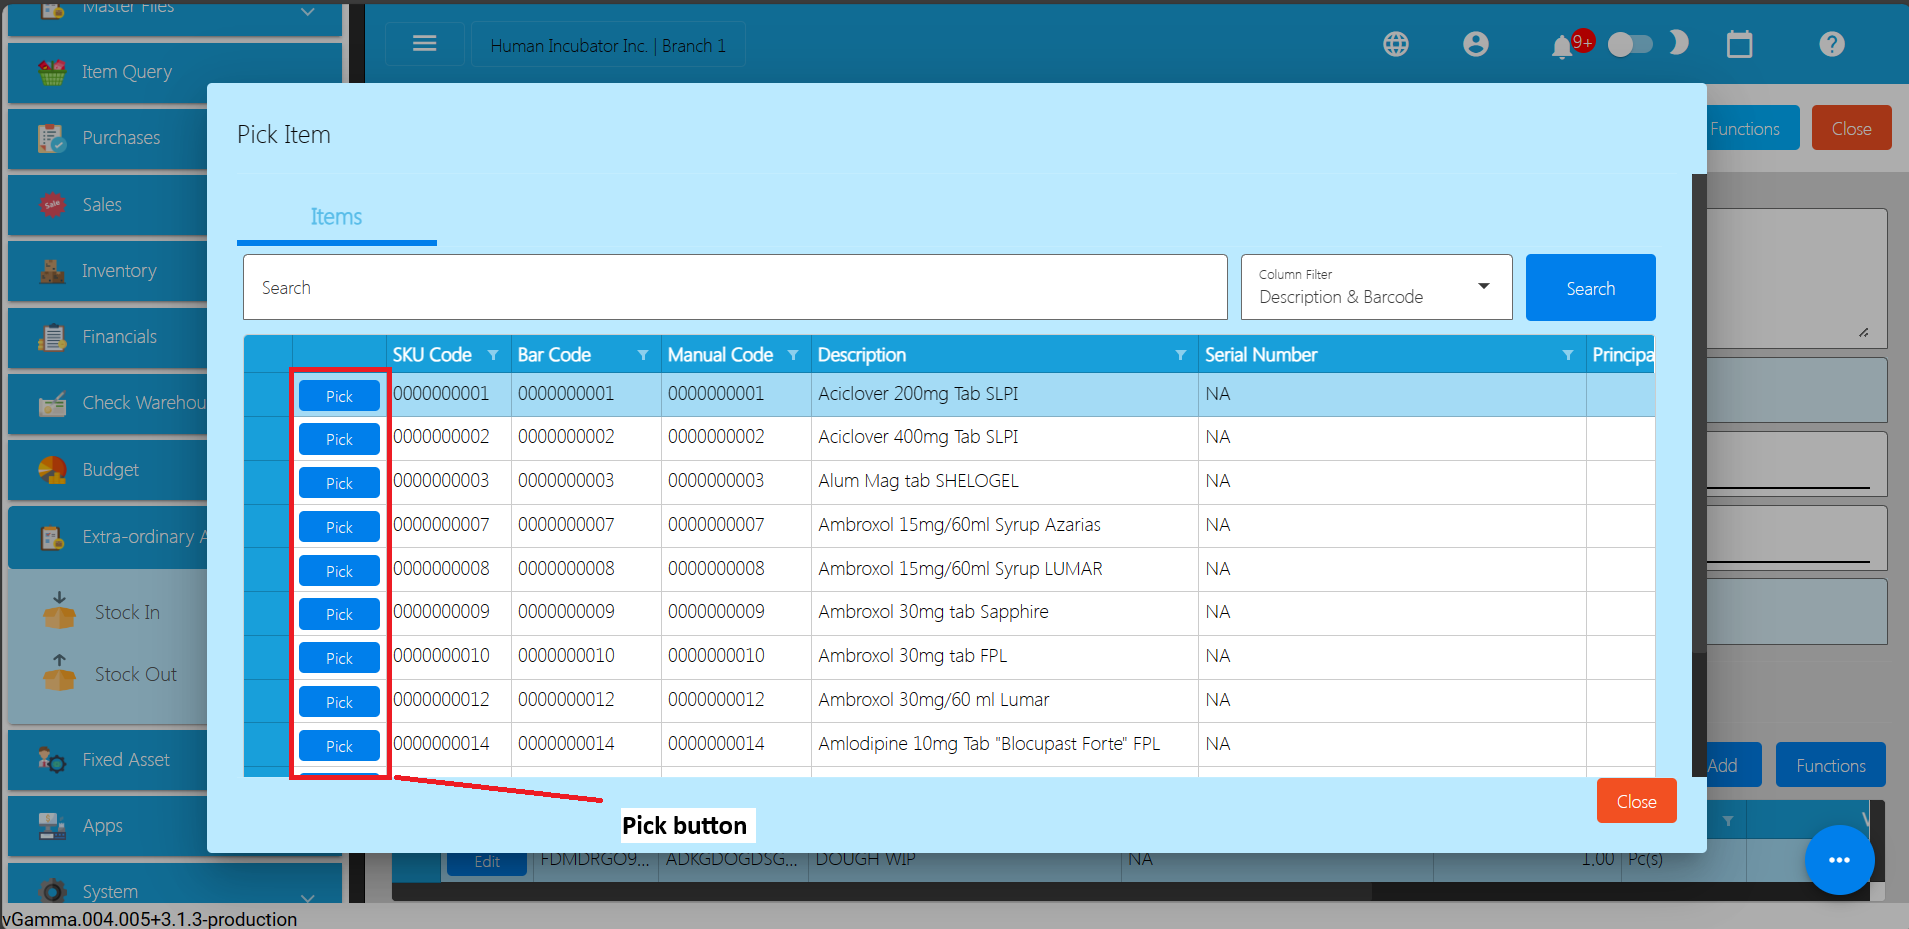
- Fill up the necessary field for adding the item for Stock In such as Quantity and its Cost.
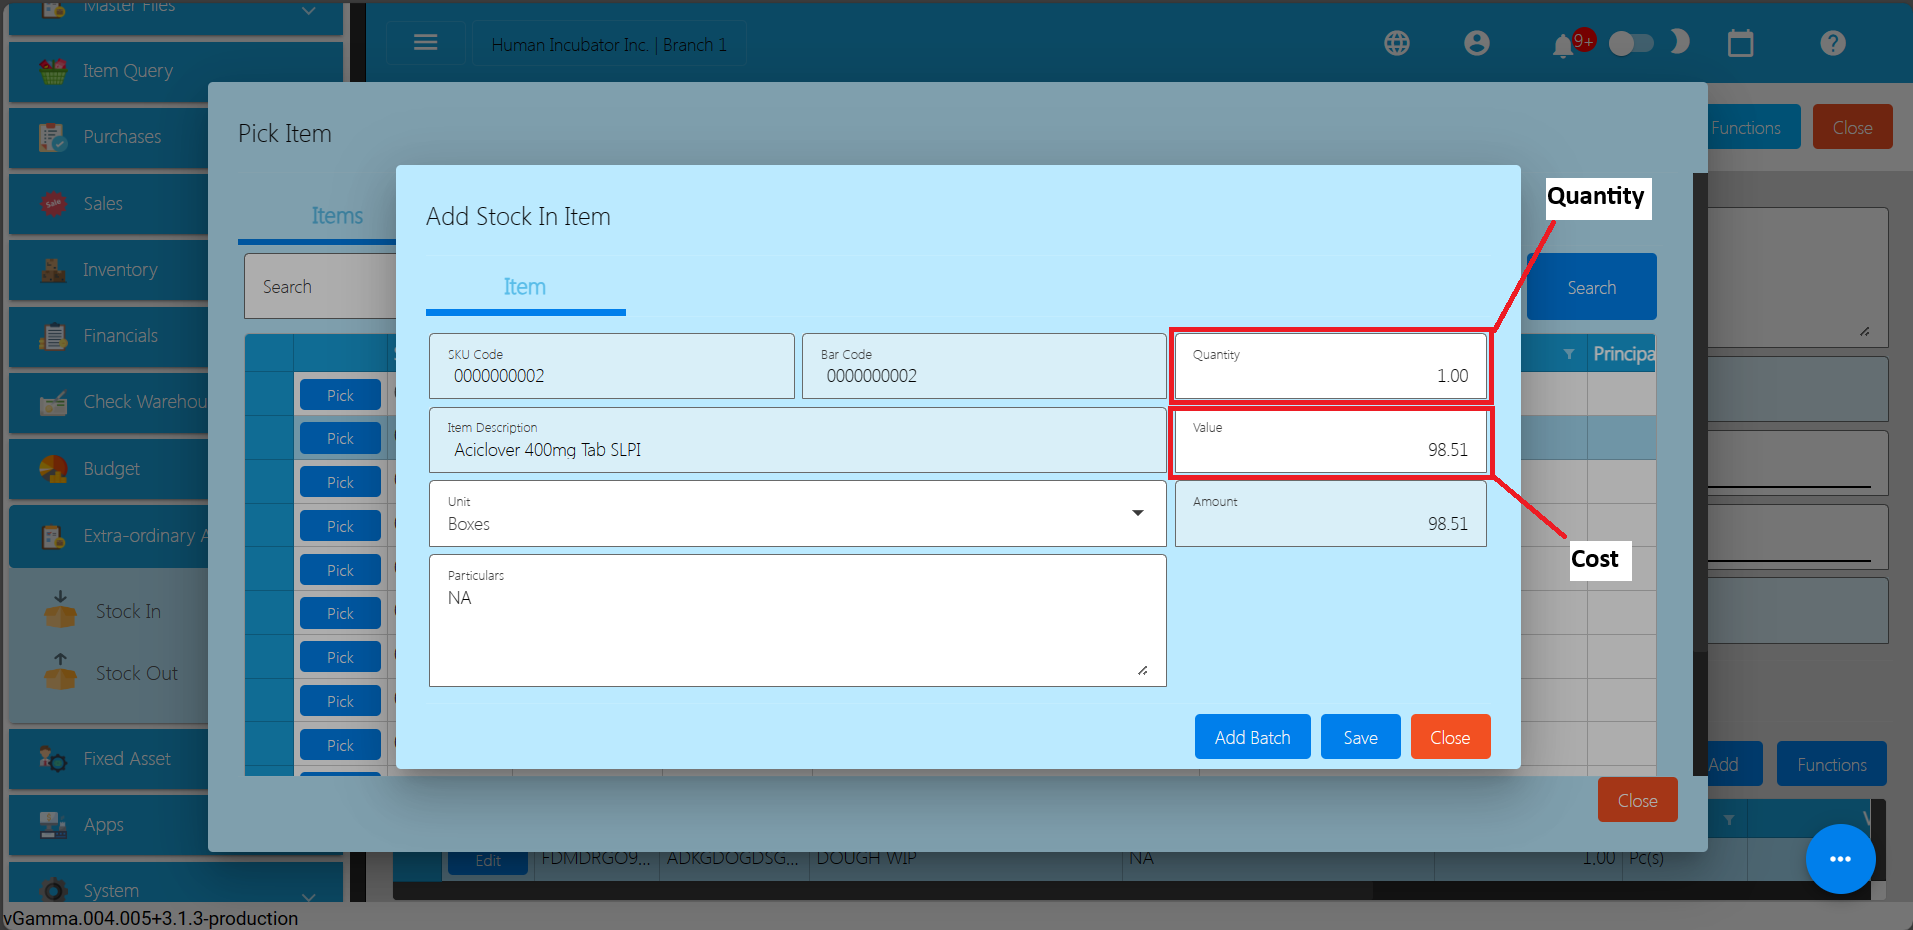
- Click Save button to Save the item as a Stock In line item.
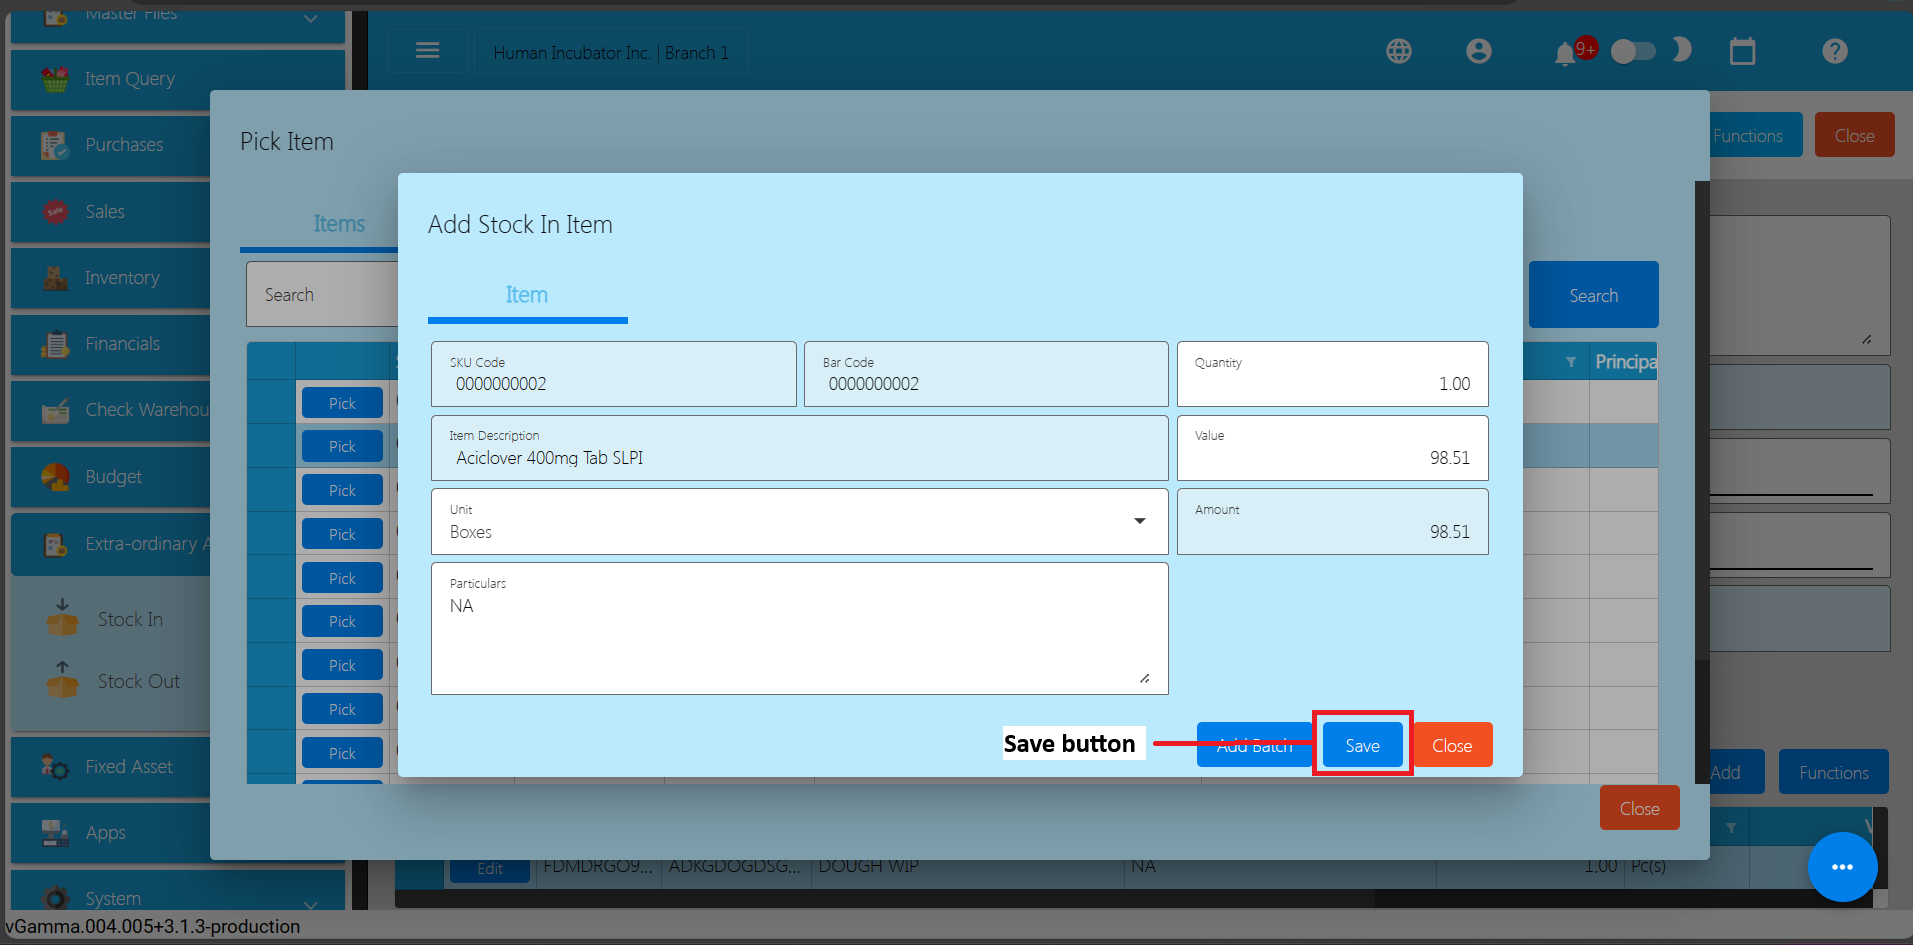
- If you wish to add another item, just repeat Steps 2 to 4.
- Click the Close button to close the popup and review your Stock In detail.
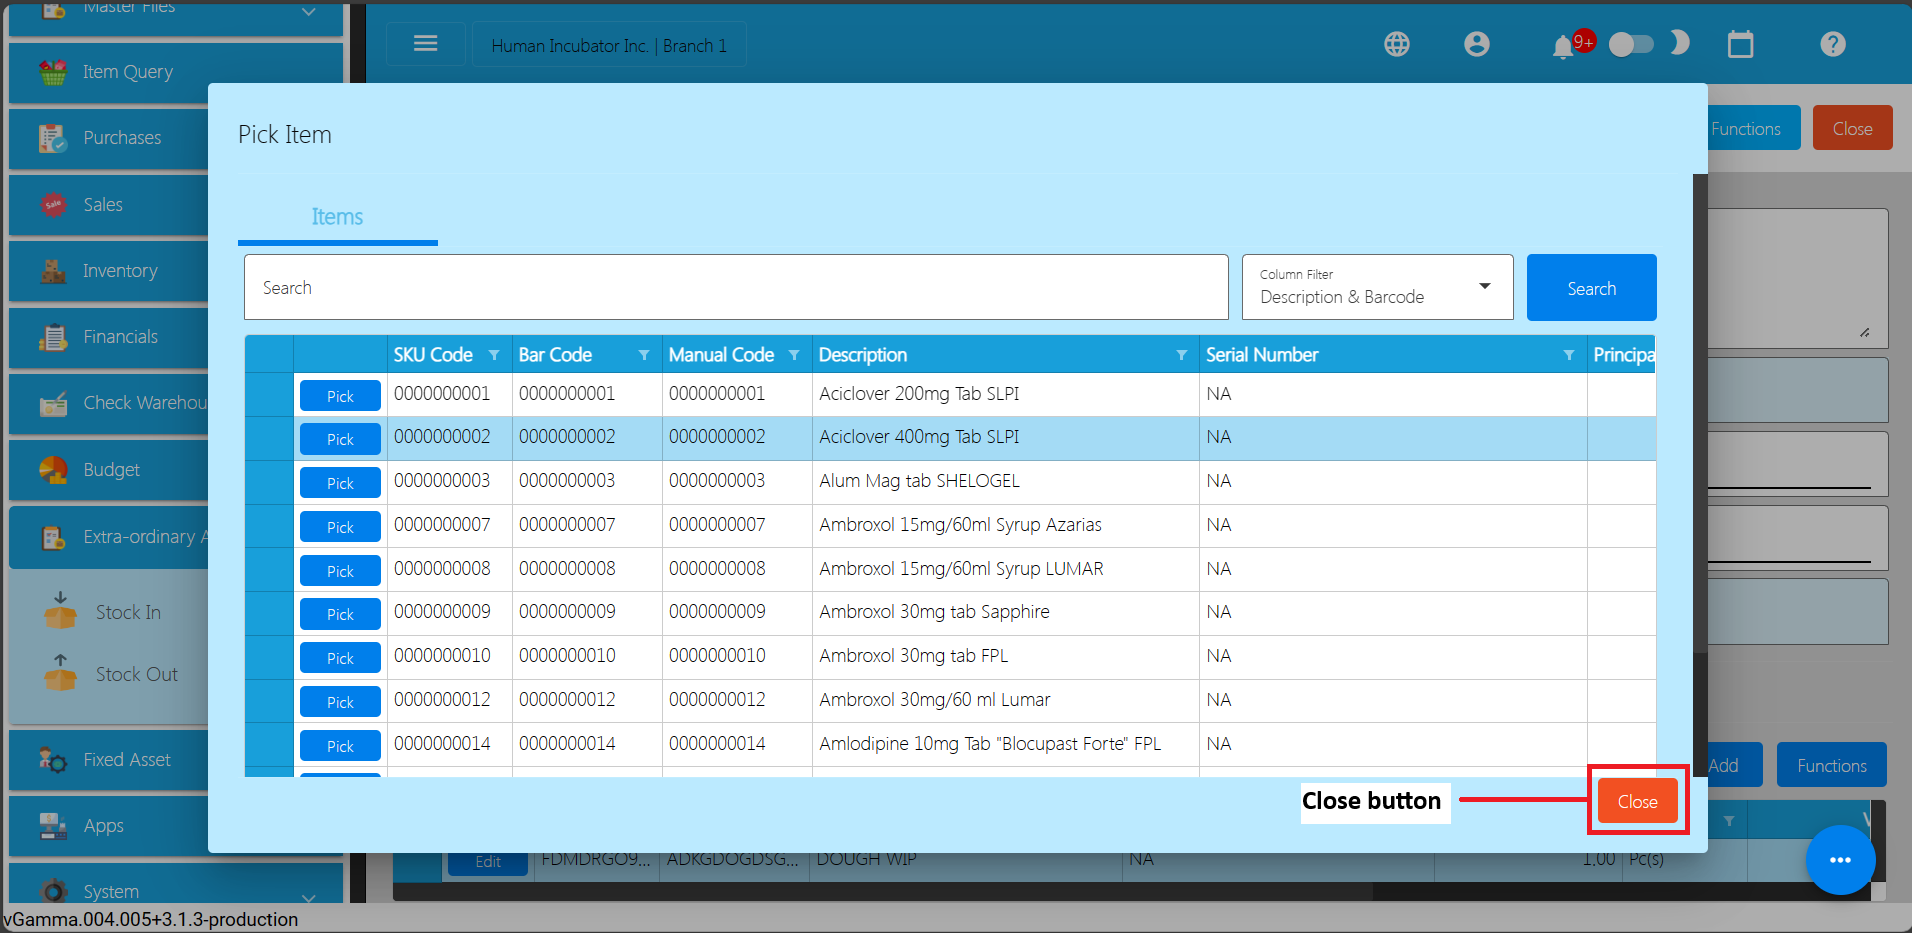
- After filling up the important fields, Save and lock the record. The Save button allows you to save the Stock In detail you created and it does not affect the inventory yet. If you want to have an effect in your inventory (increase the item’s quantity), click the Lock button.
- Bulk Upload Line item(s)
- Click on the Functions button then click on the Download File Format to download the template for bulk uploading Stock In line item(s).
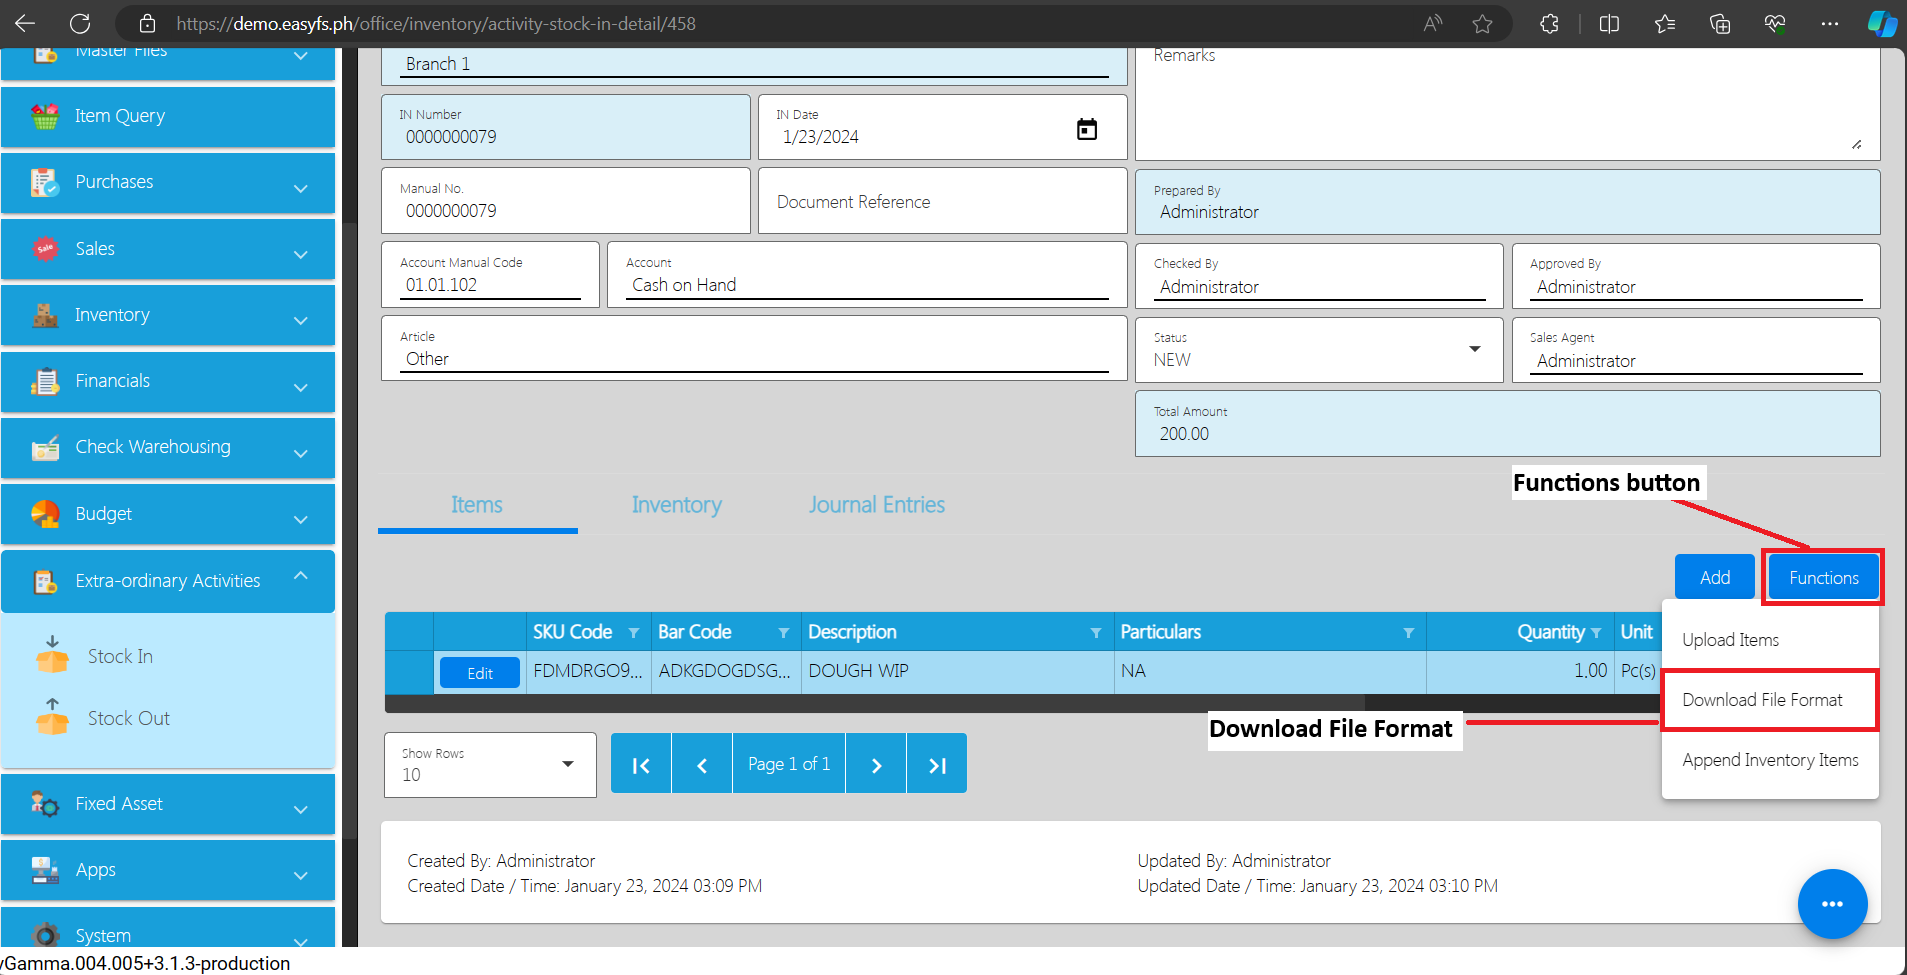
- Open the downloaded file then provide correct data. File name of the downloaded file is Stock in Item Format. Please see sample:
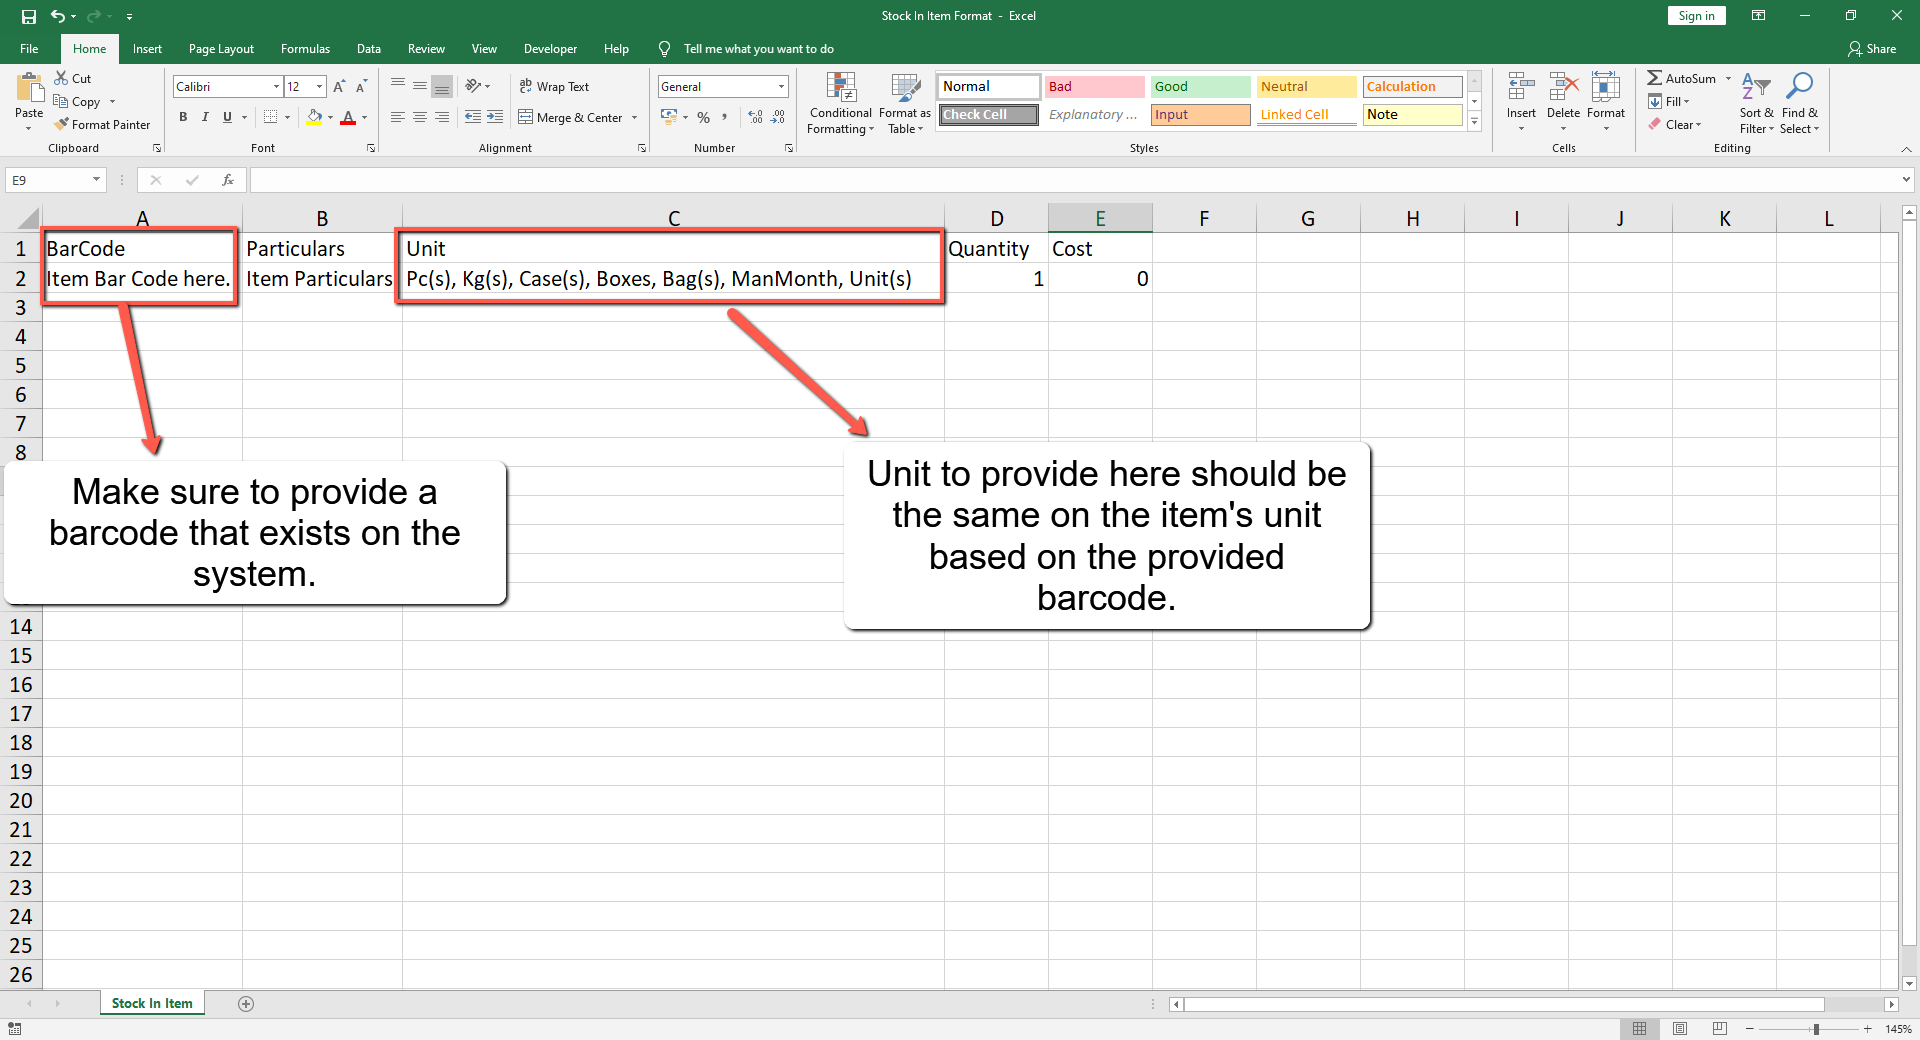
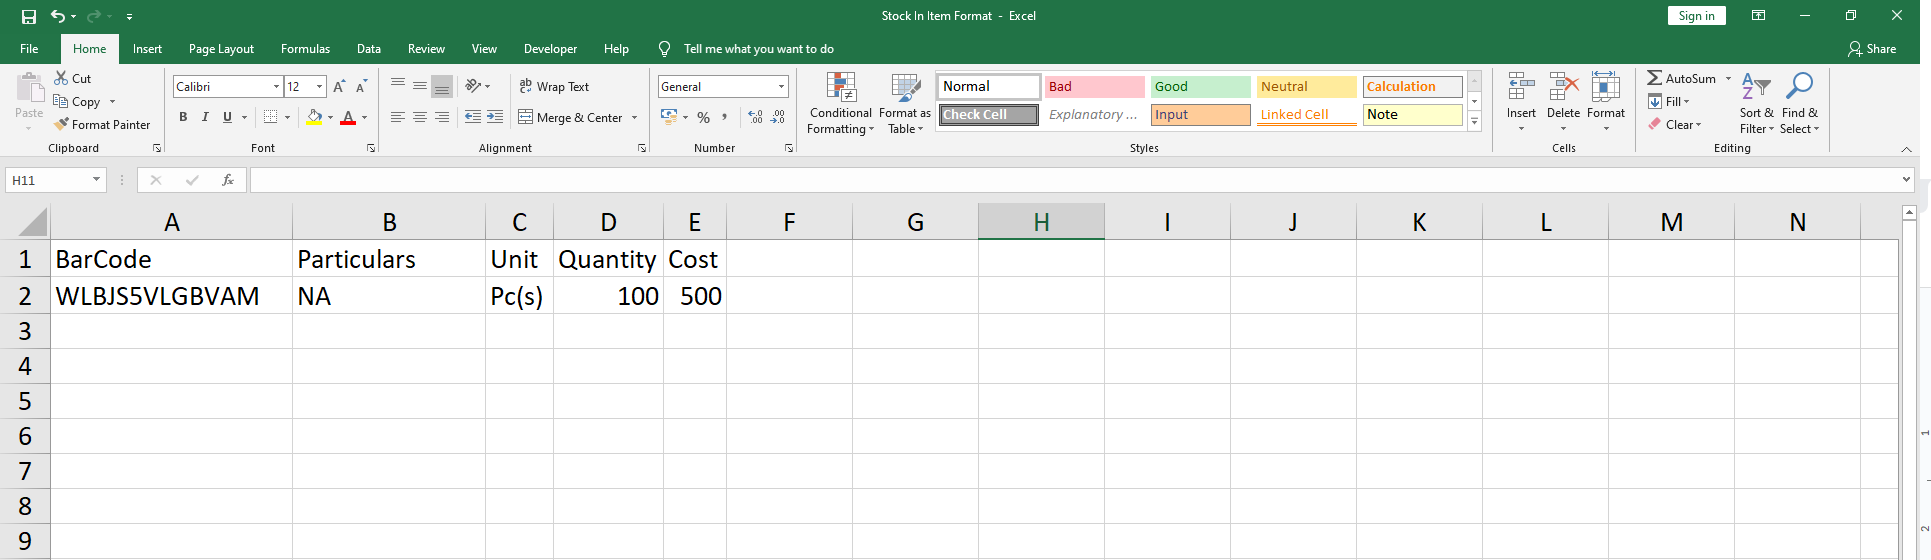
- Save the file.
- Go back to the system, then click again the Functions button then click the Upload Items.
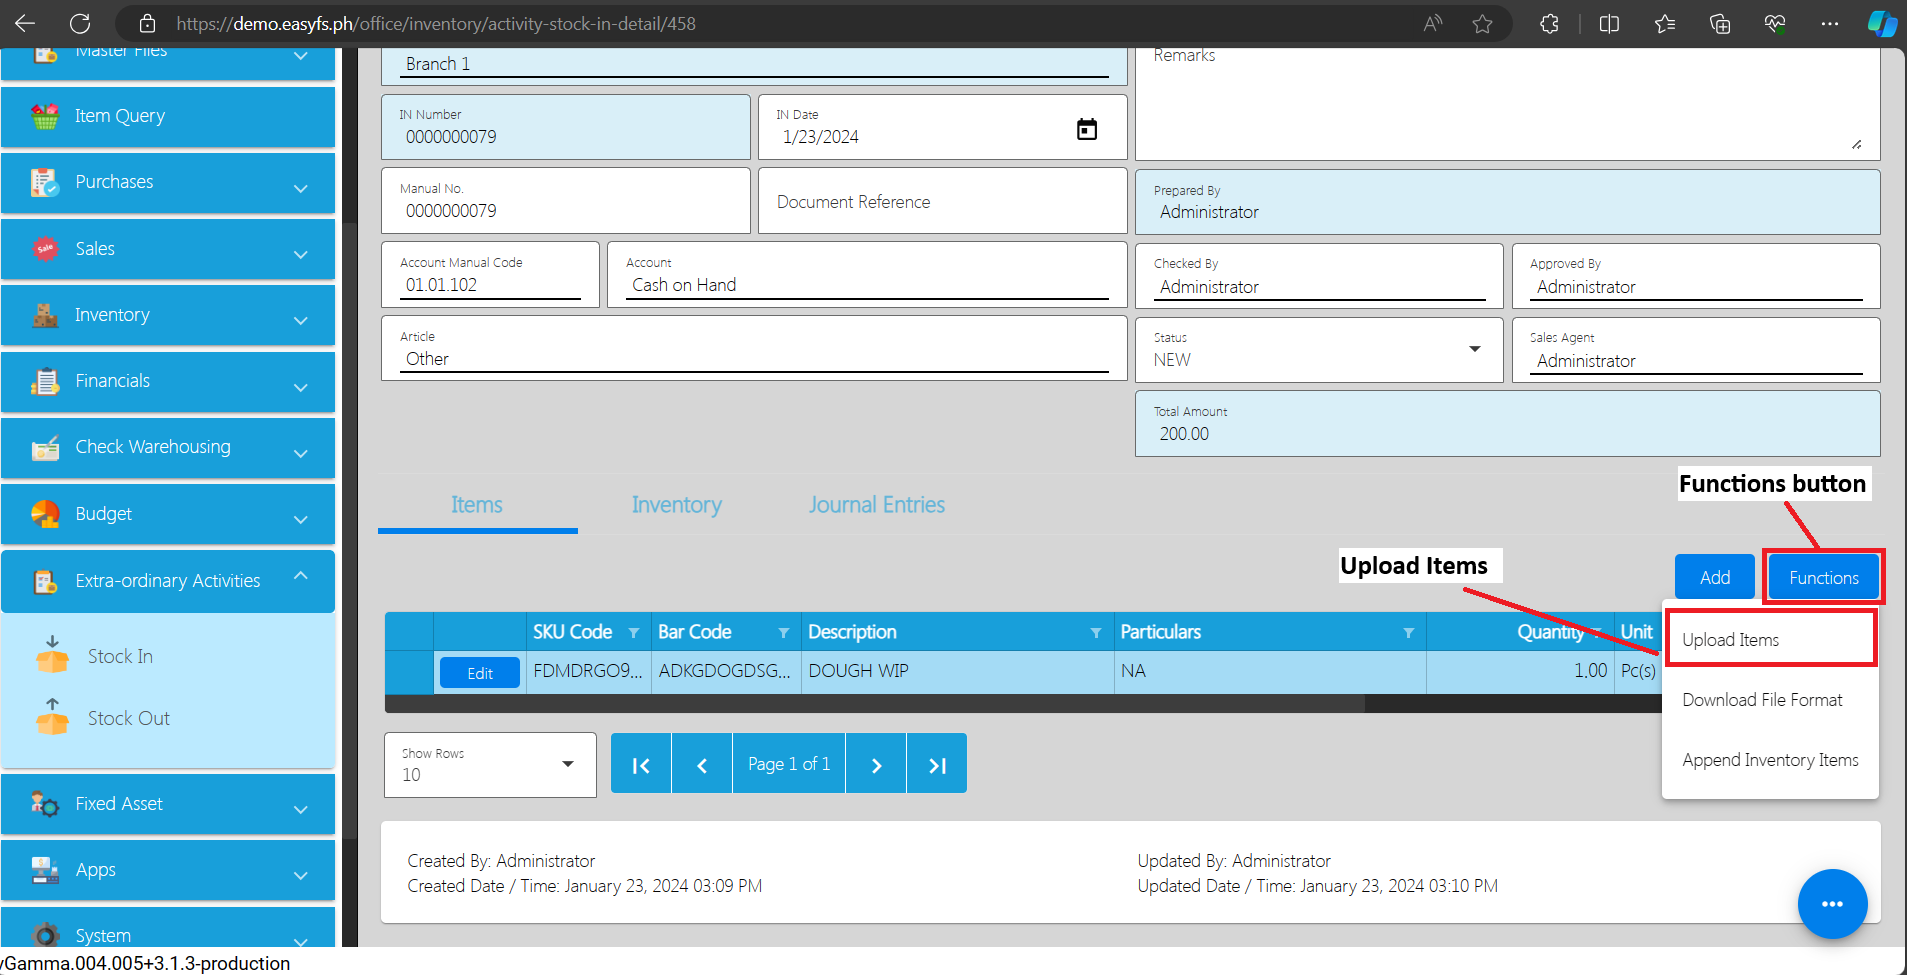
- Locate the file then you can double click the file to upload.
- Once bulk uploading is successful, you will see a success toast message and the Stock In line item will automatically be supplied with data from the template.
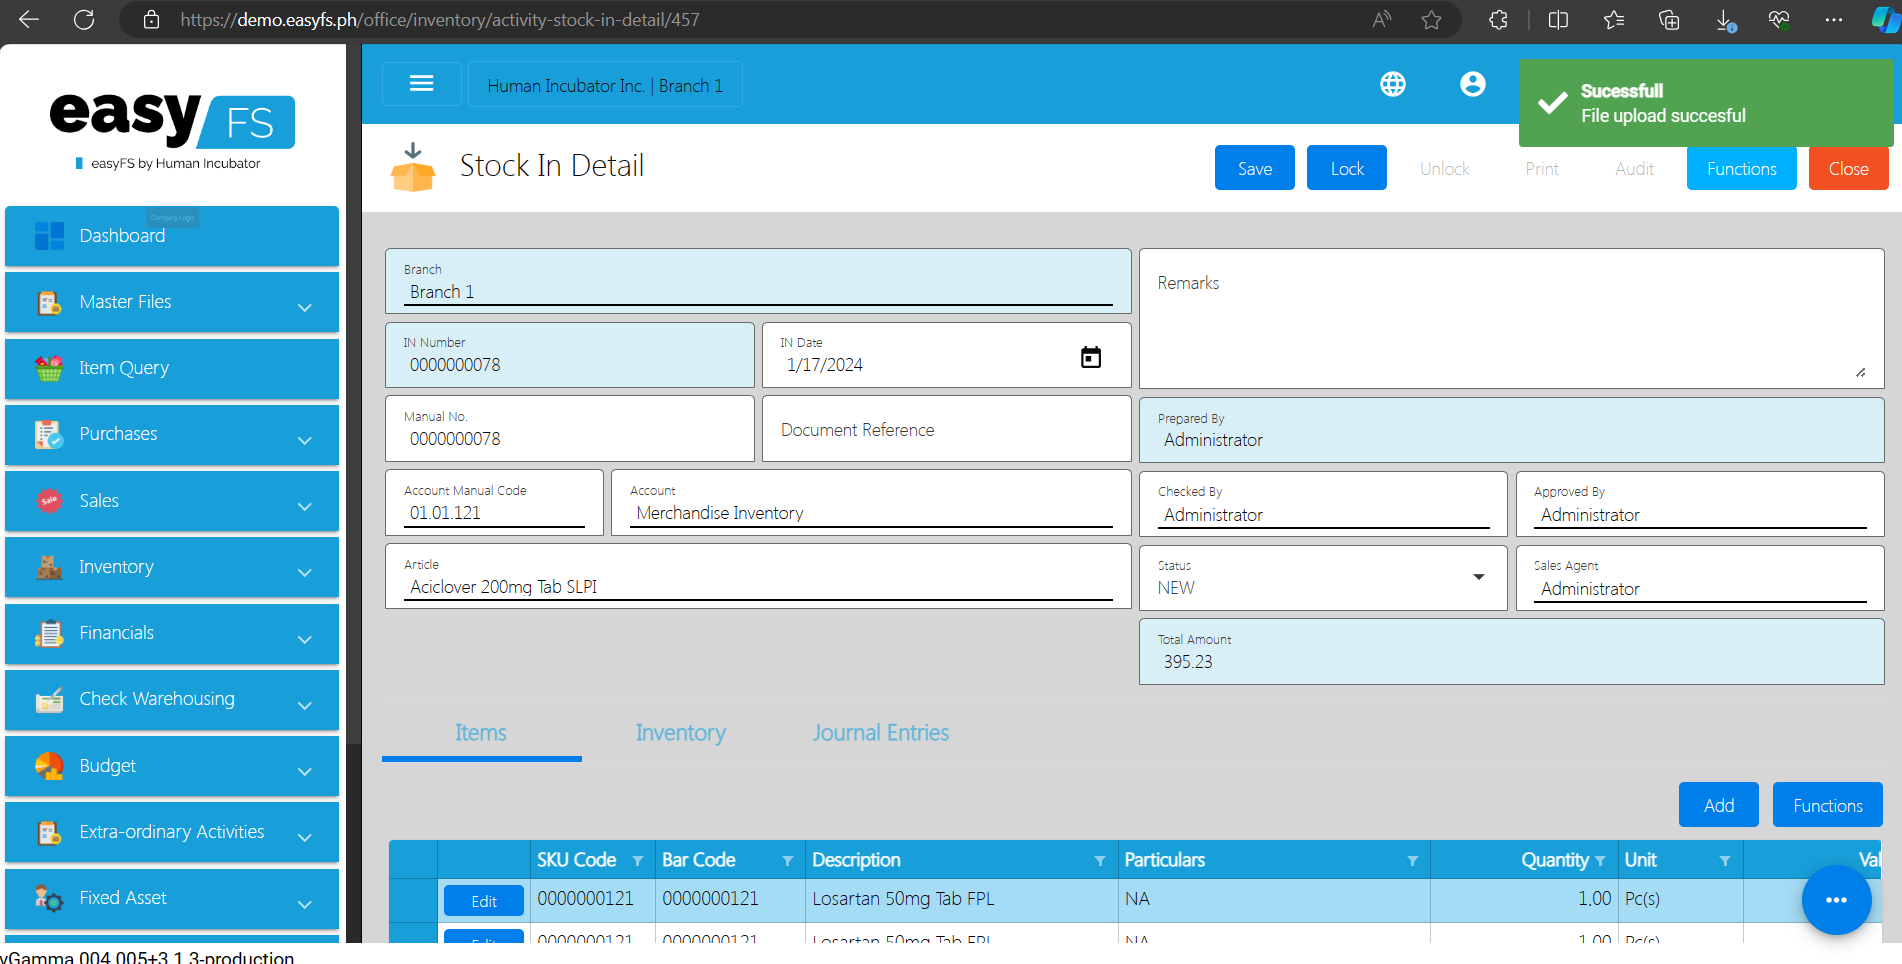
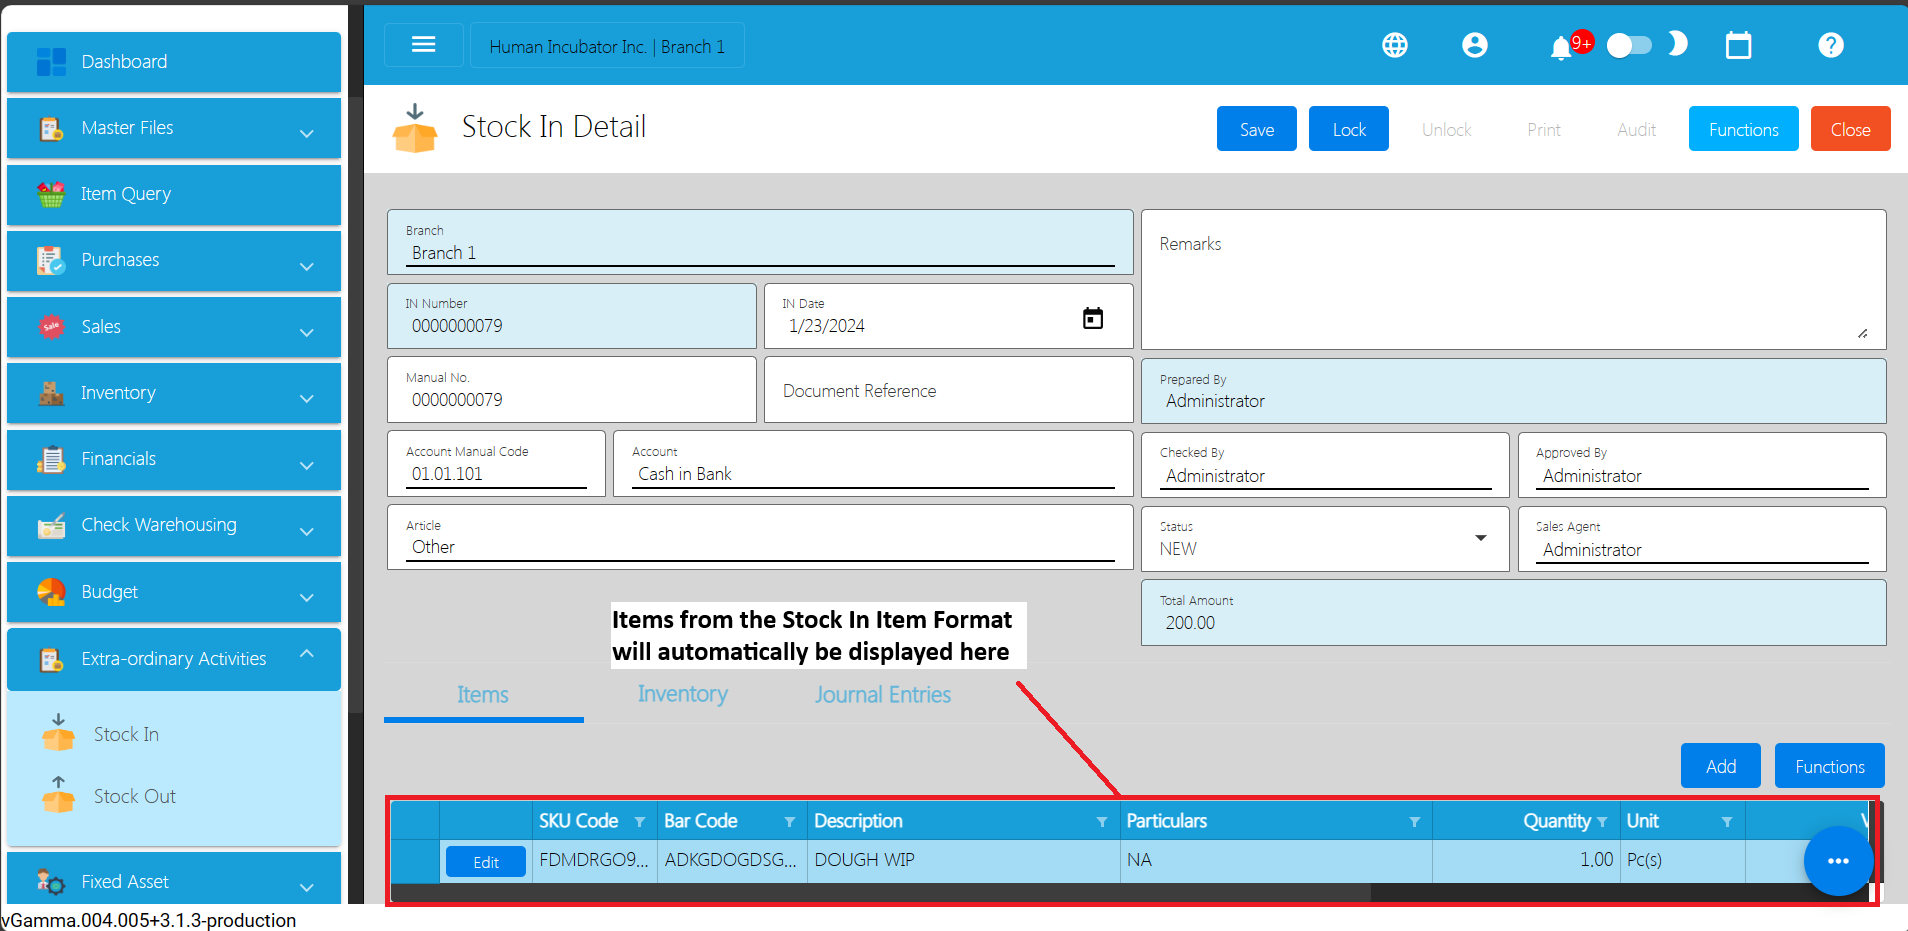
- Review the details and if everything is okay, Save and lock the record. The Save button allows you to save the Stock In detail you created and it does not affect the inventory yet. If you want to have an effect in your inventory (increase the item’s quantity), click the Lock button.
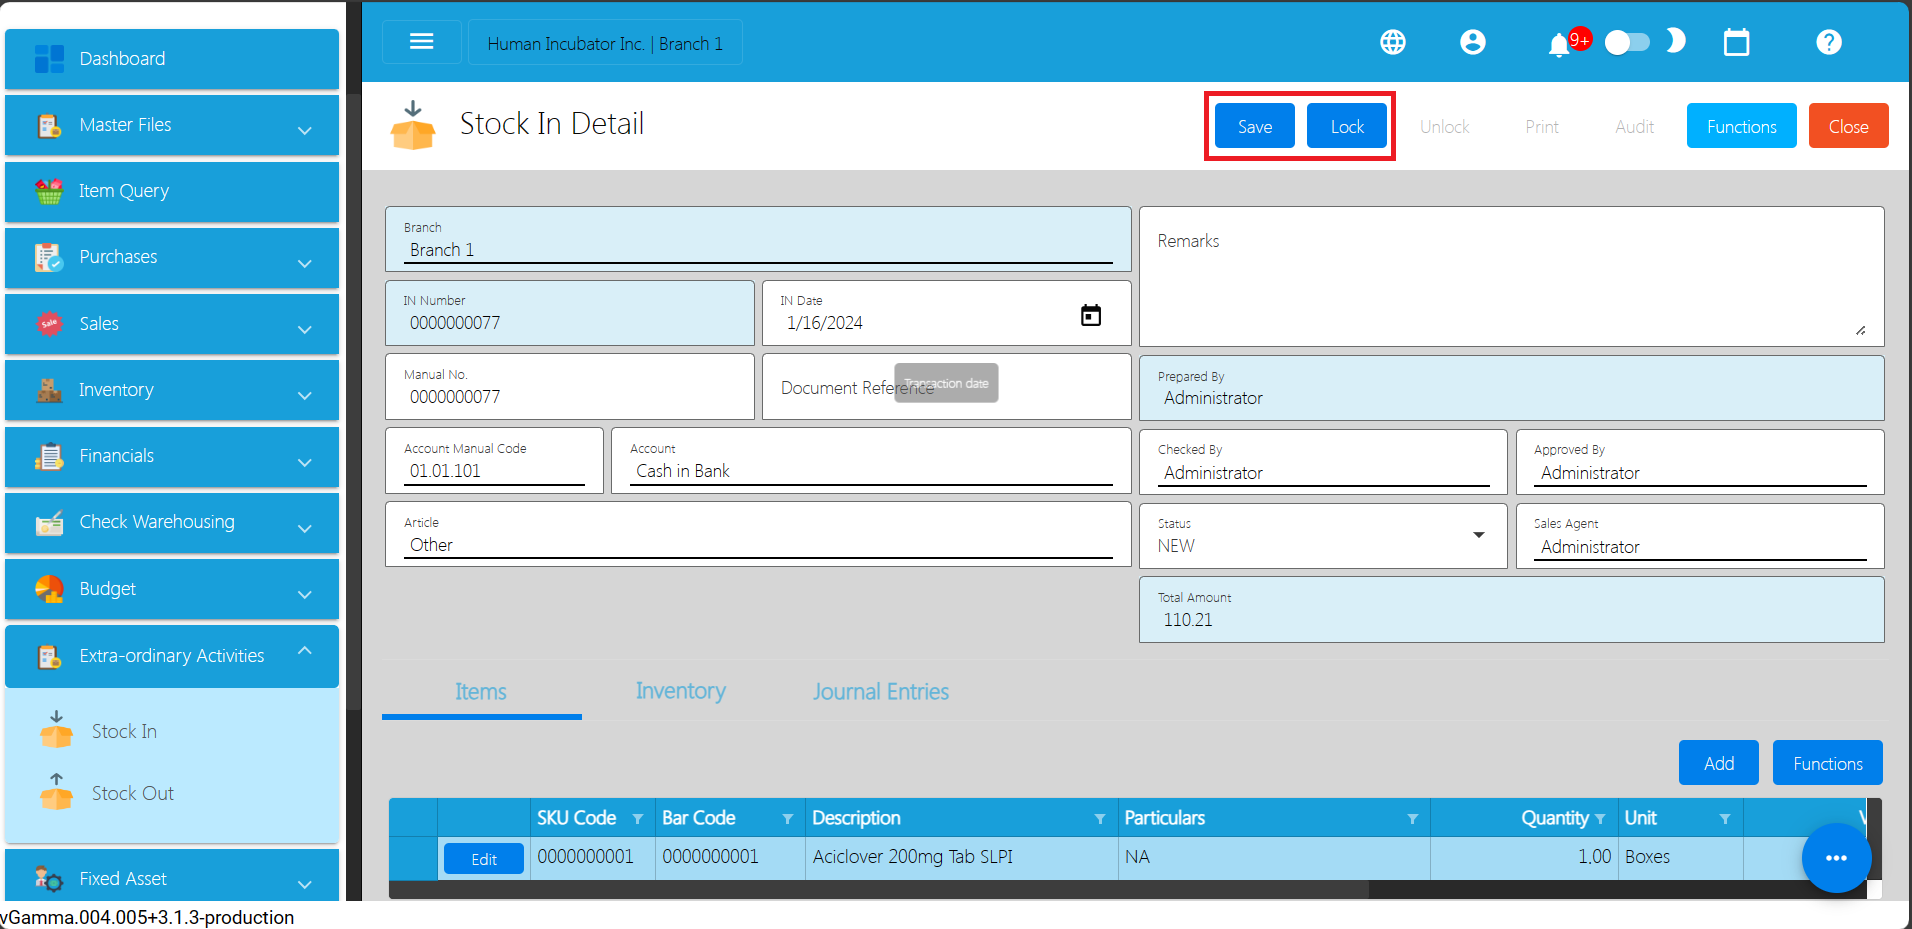
Customer Return via Stock In
Diagram:
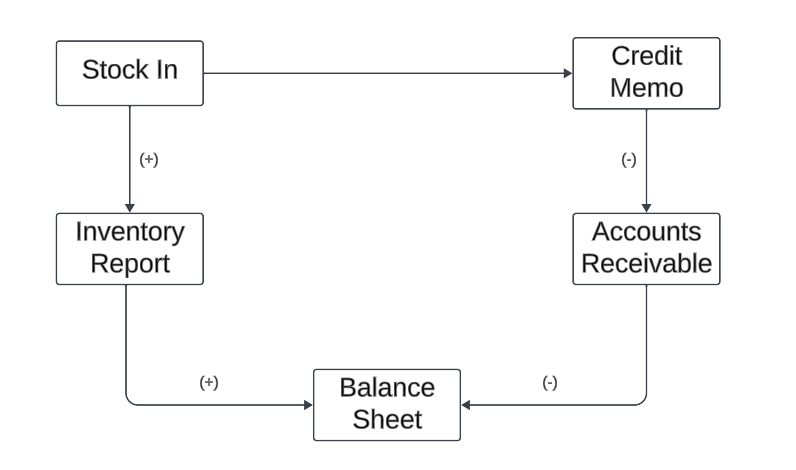
Steps on how to do Customer Return via Stock In:
- Go to Dashboard, then select the Inventory tab.
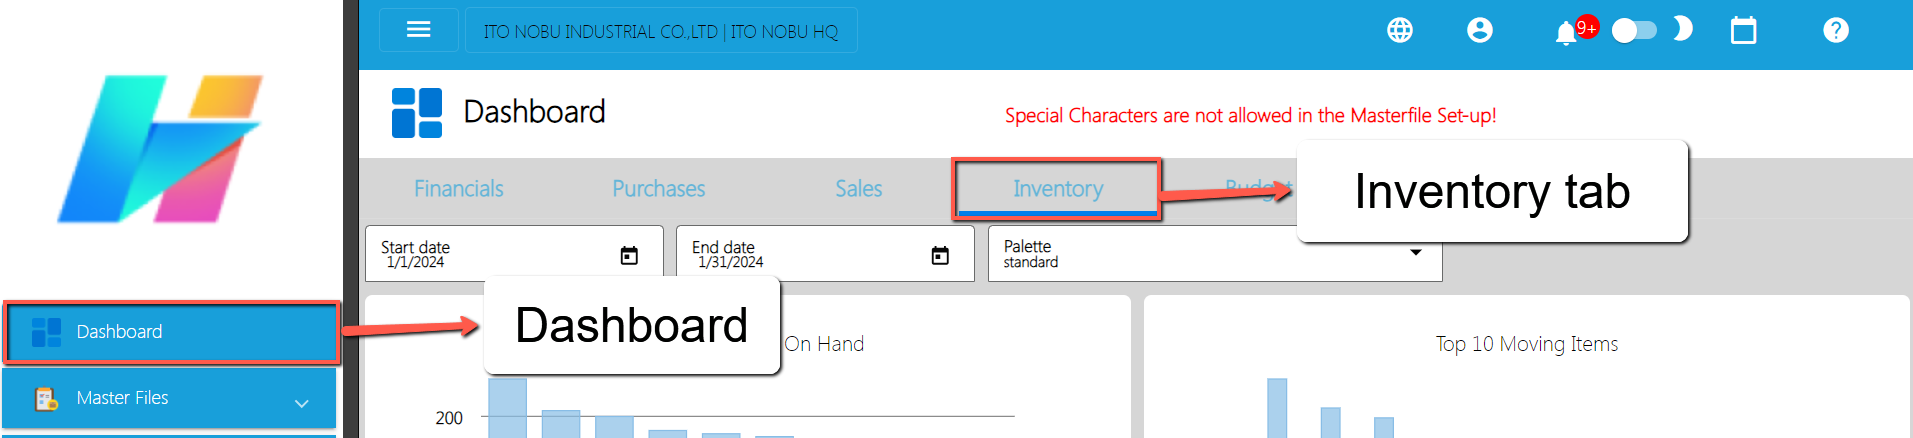
- Scroll down and look for the Stock In menu.
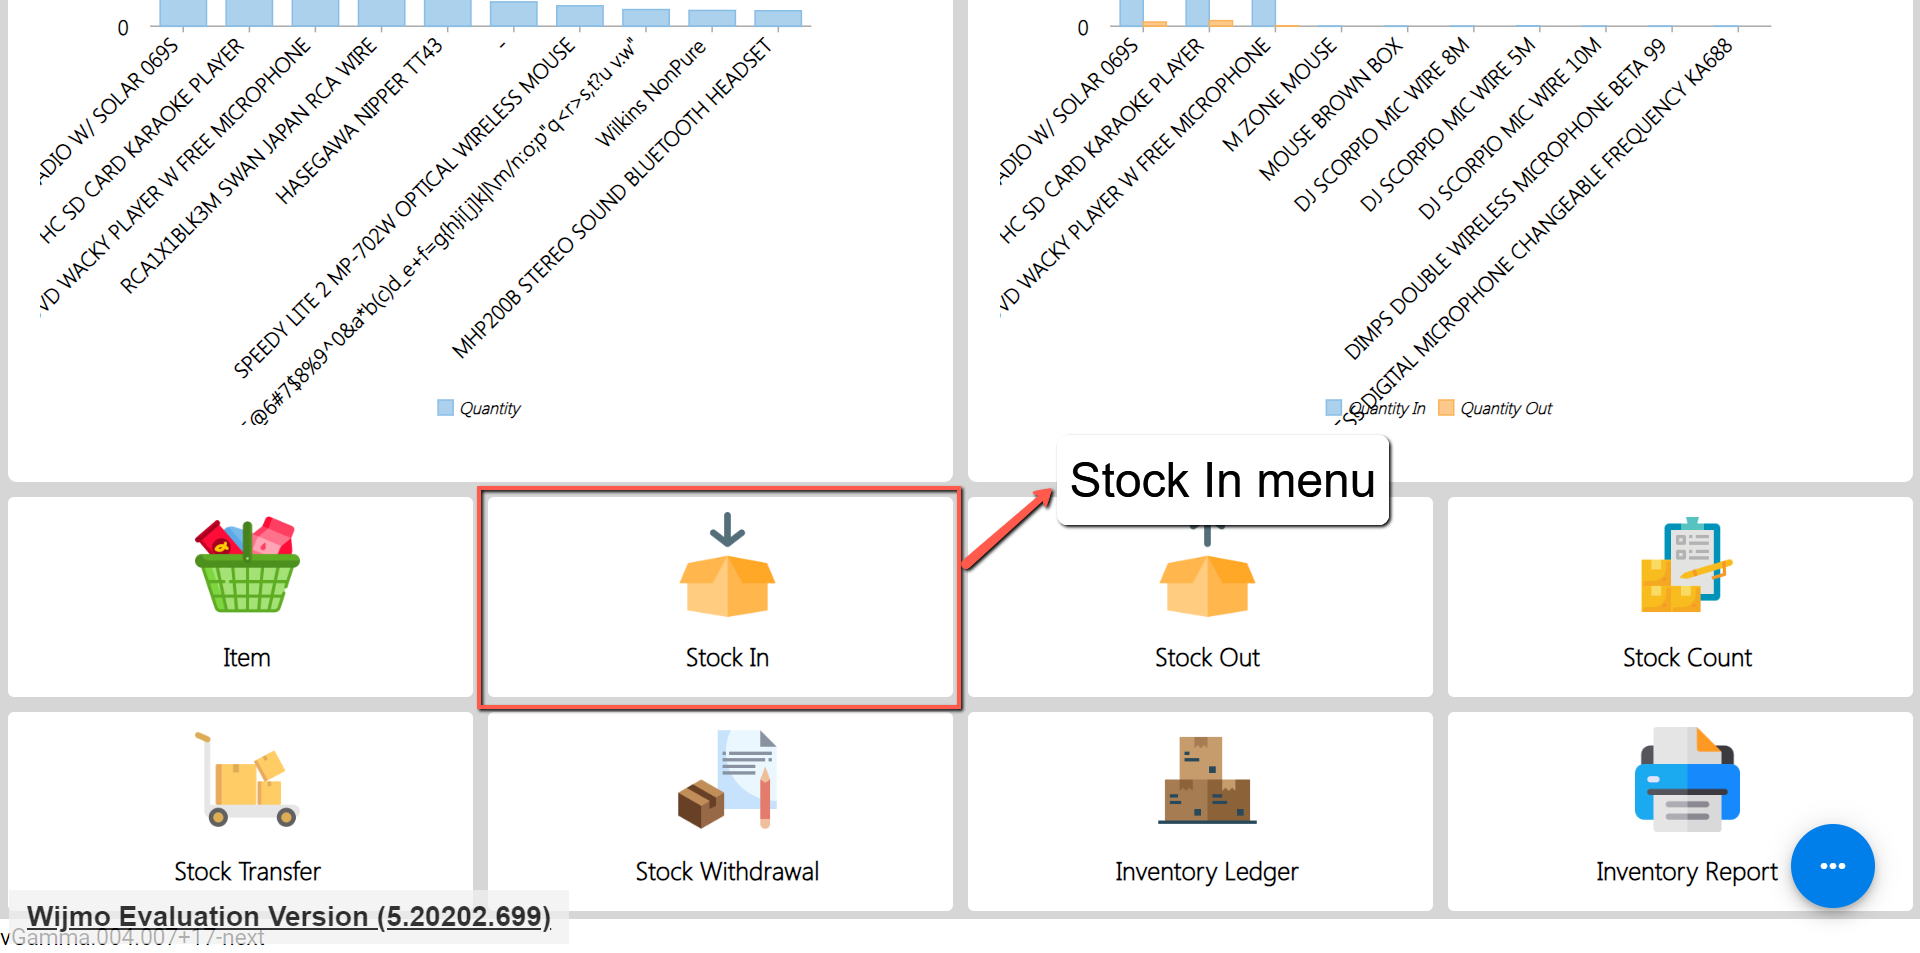
- Click the menu, you will be redirected to the Stock In list.
- From the Stock In list, click the Add button to add new Stock In detail to be used for Customer Return.
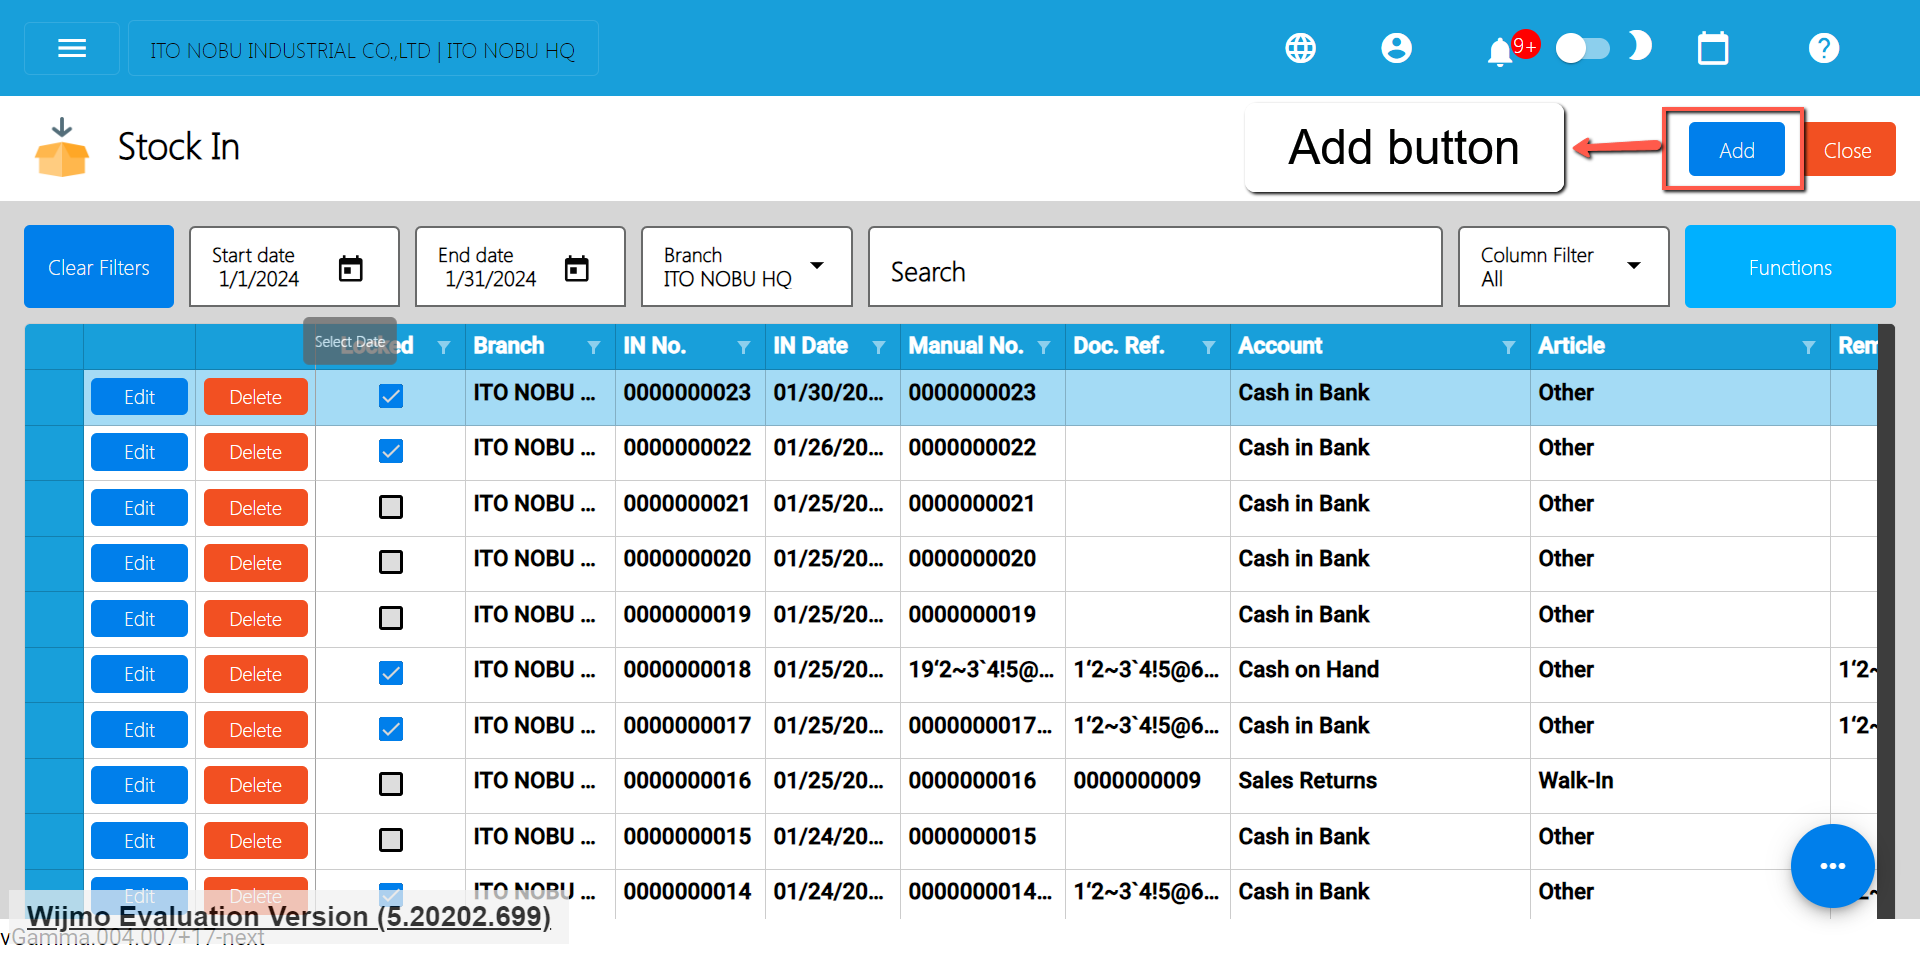
- After clicking the Add button, you will be redirected to the Stock In detail page. There’s no need to input for the Stock In headers, just simply click the Functions button, then select the Customer Return menu.
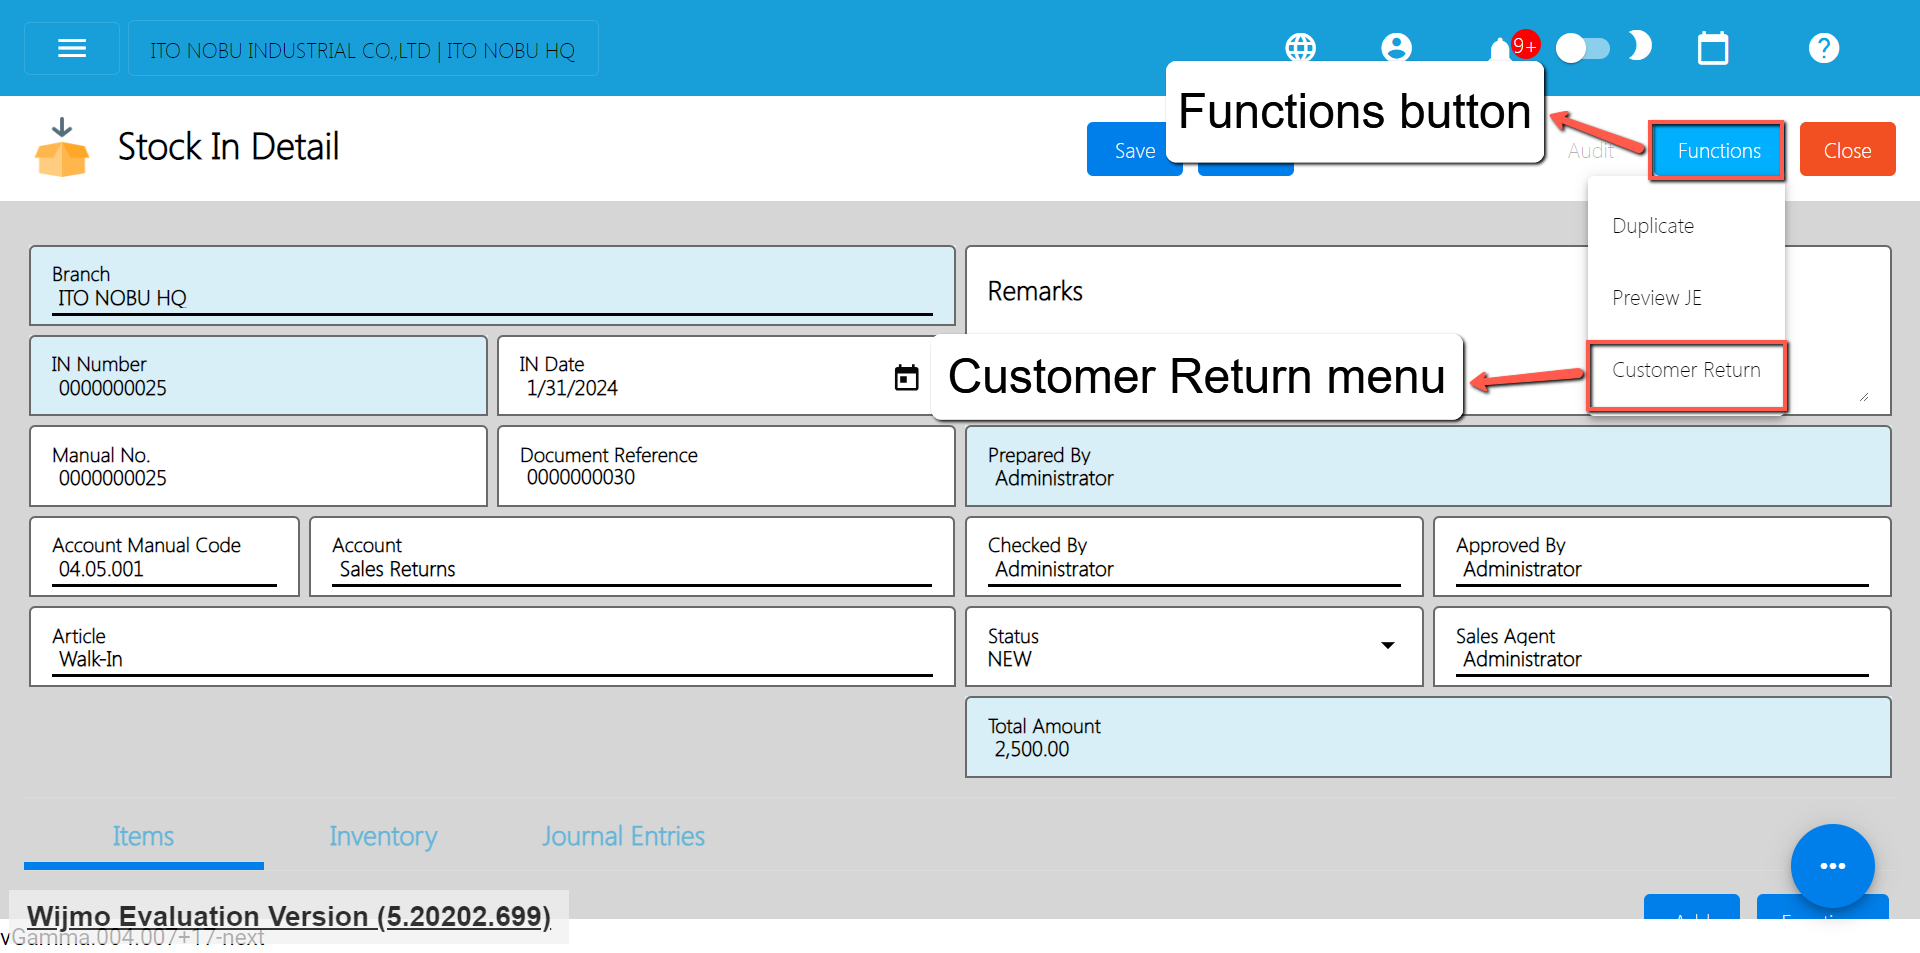
- After clicking the Customer Return, a Pick Sales Invoice popup will display.
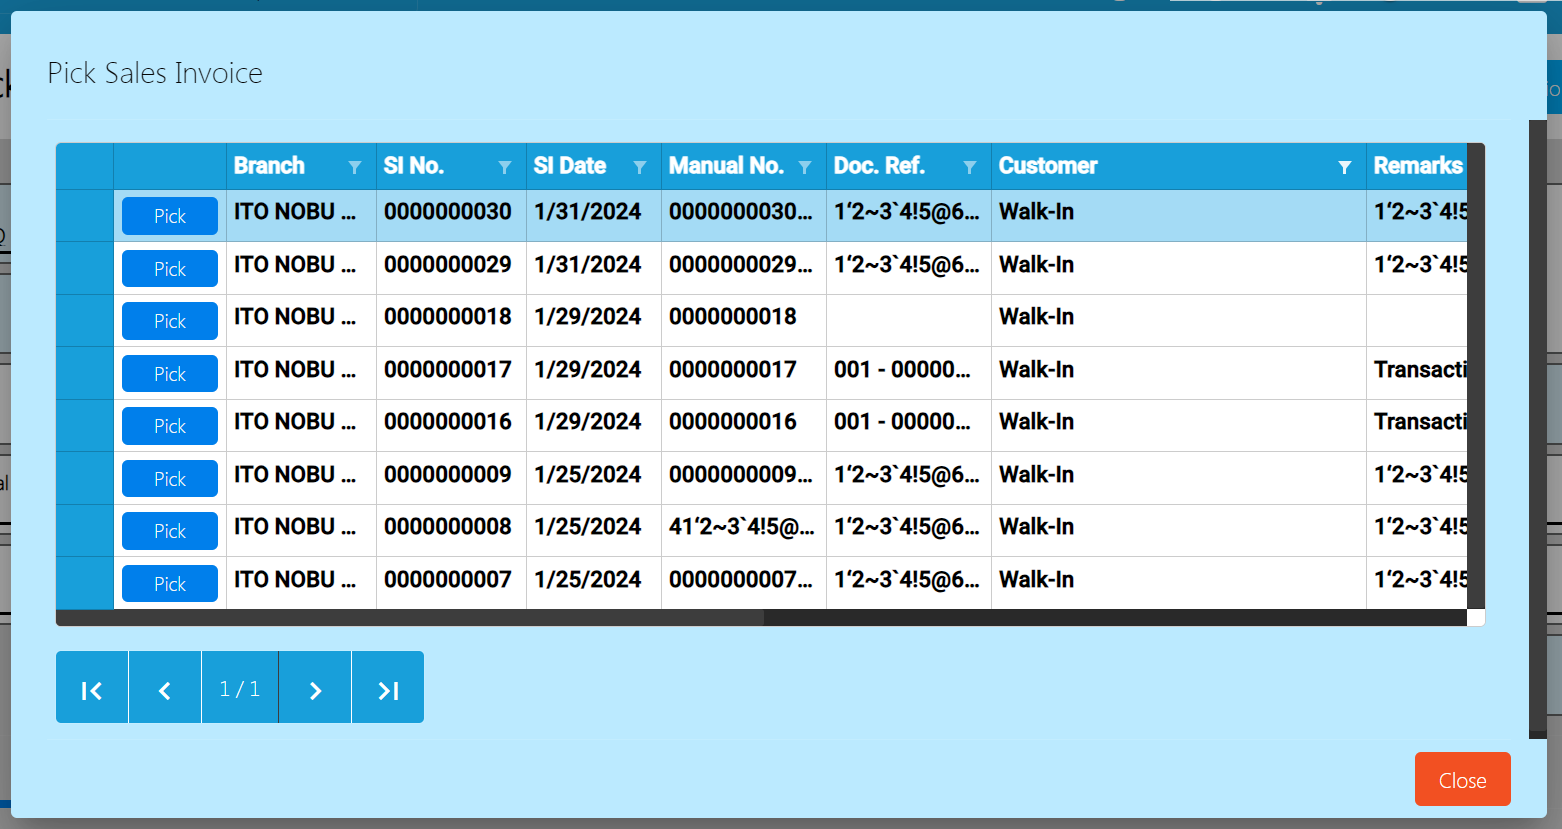
- To quickly find the Sales Invoice number based on the Customer, look for the Customer column.
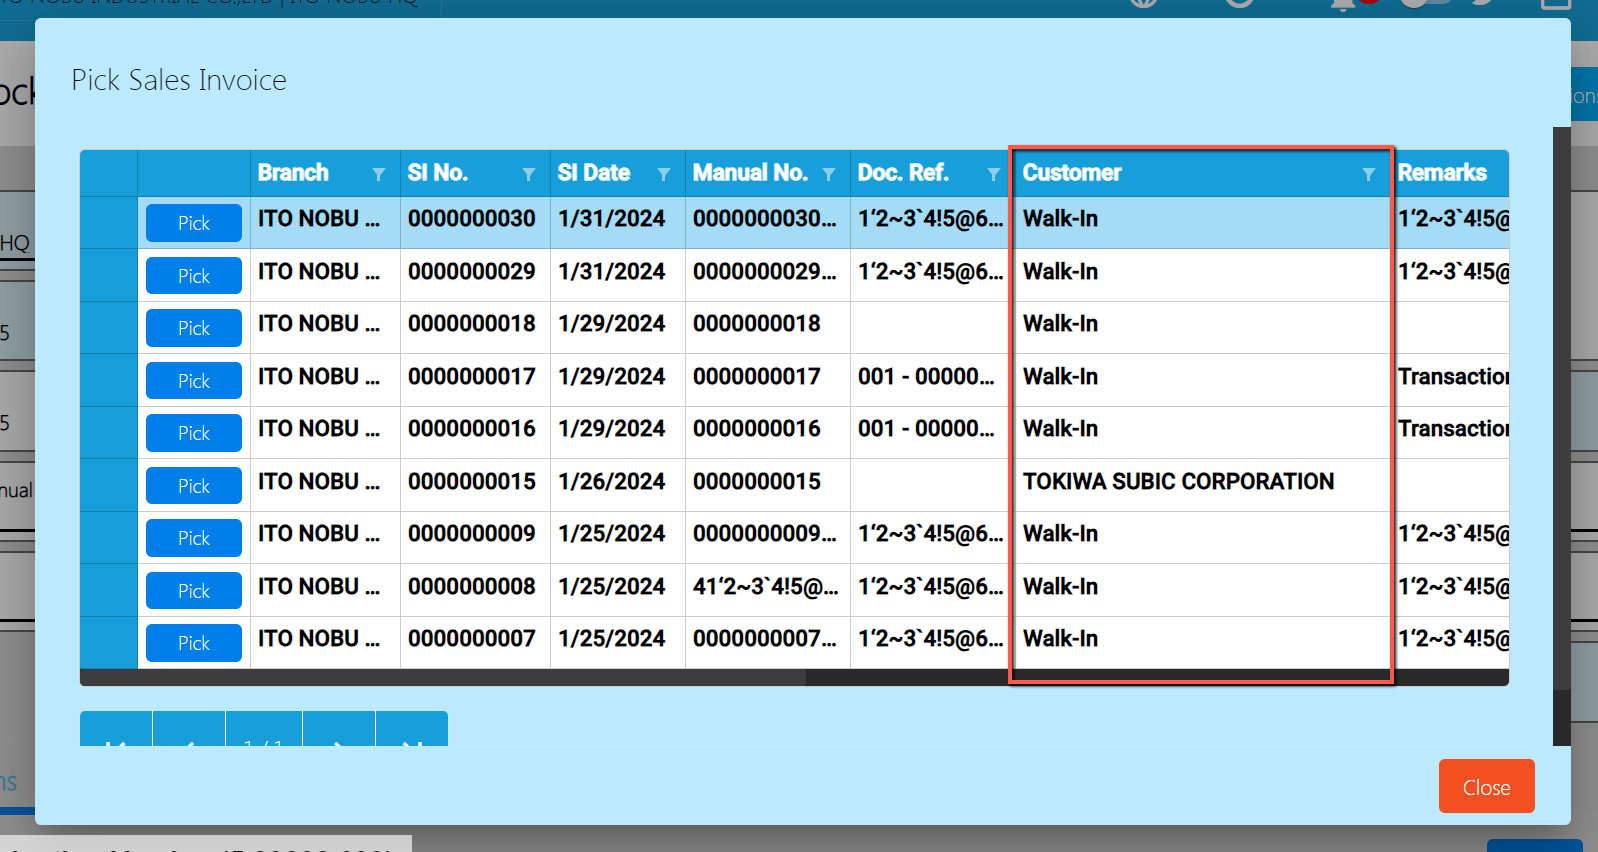
- Select the filter icon, and input the Customer name.
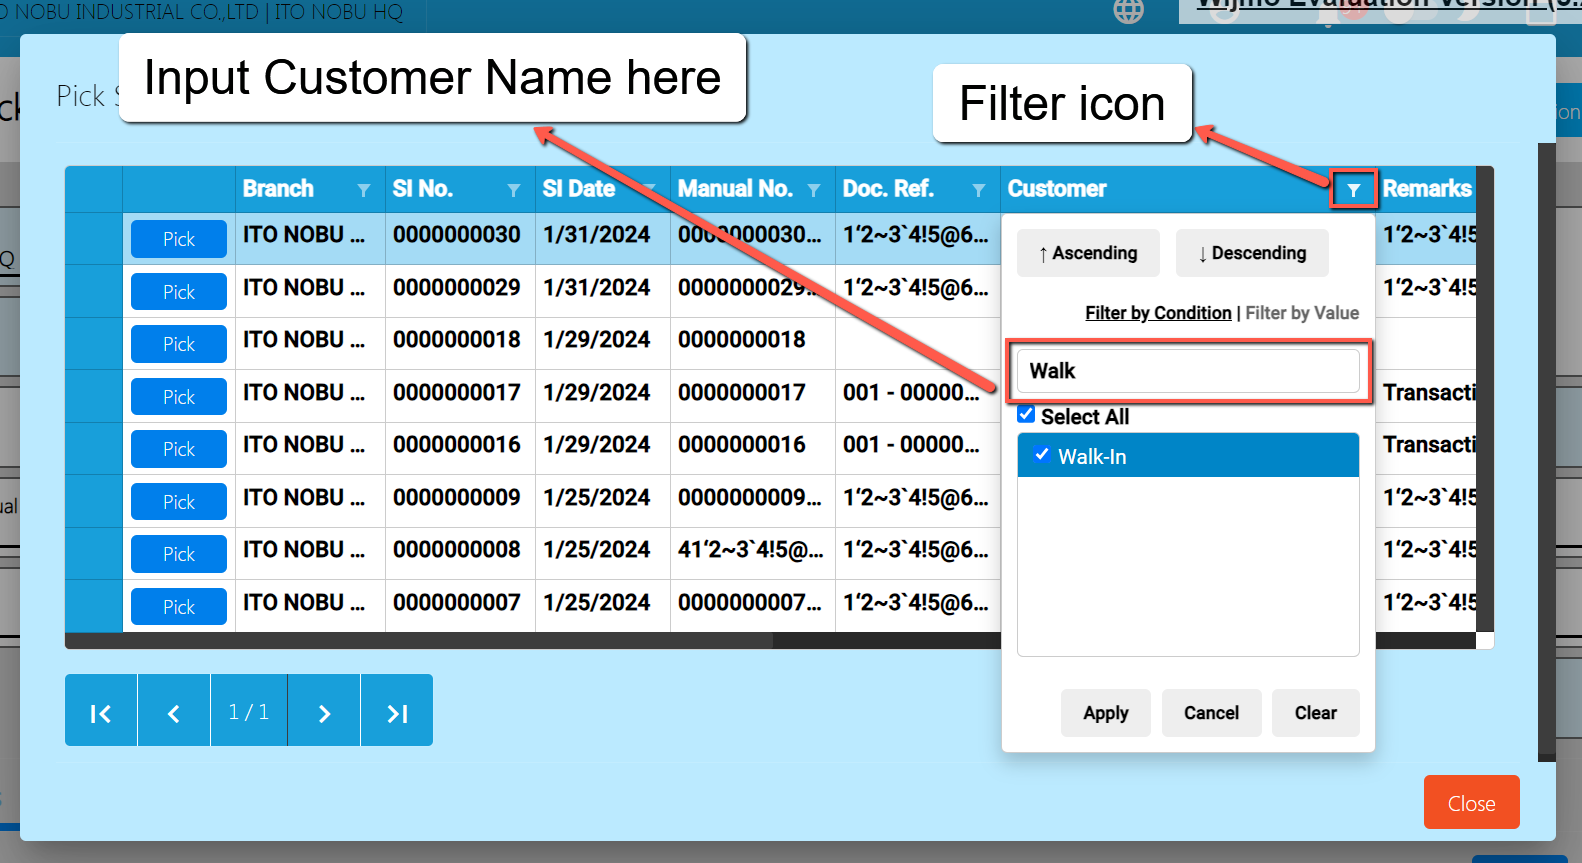
- Once the Customer name is found, click the Apply button.
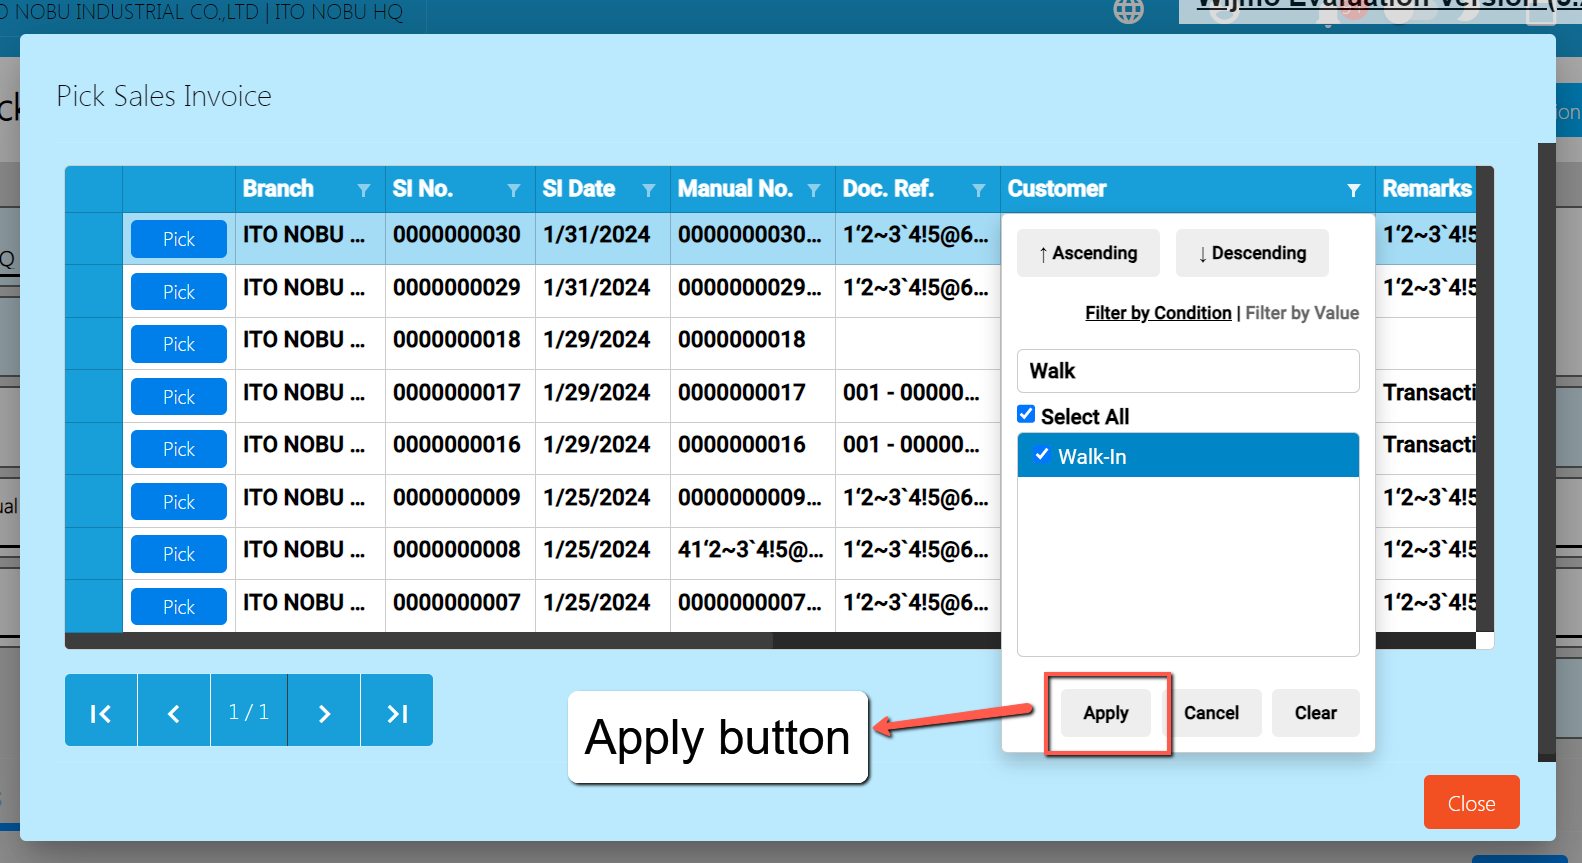
- It will now display the list of Sales Invoice based on the selected Customer.
- Now, look for the Sales Invoice number then click the Pick button. Take note: Once you’ve already picked a Sales Invoice, you can’t do another Customer Return for that same Stock In. If you need to do another Customer Return, you’ll have to create a new Stock In detail instead.
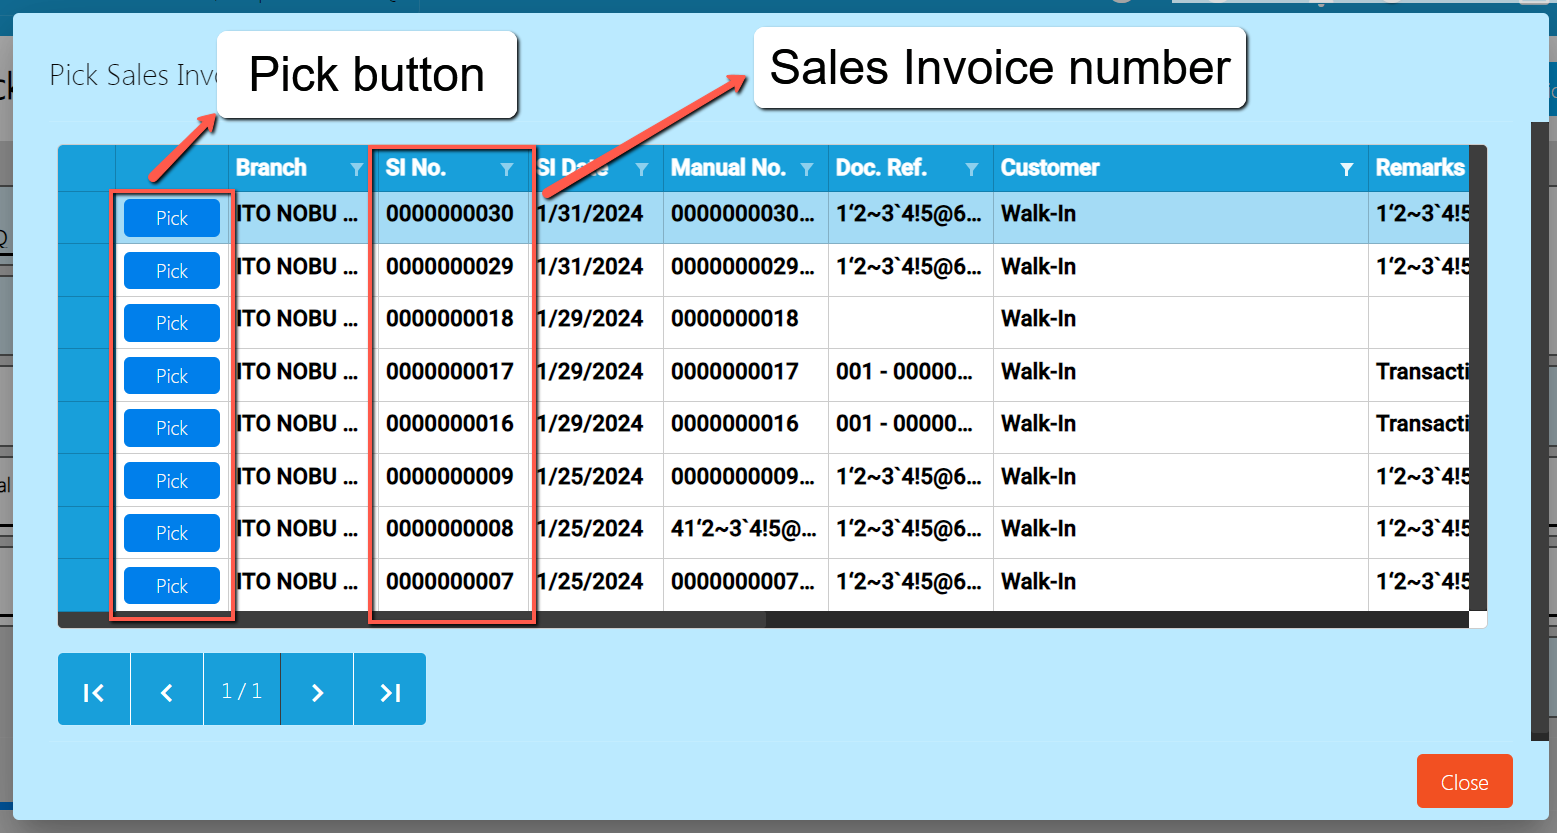
- Once picked, the Stock In header is automatically populated like:
- Document Reference → Sales Invoice’s Number
- Account → default Account for Customer Return (Sales Returns)
- Article → Customer Name
- Under the Stock In line items, delete the item that is not included on the return.
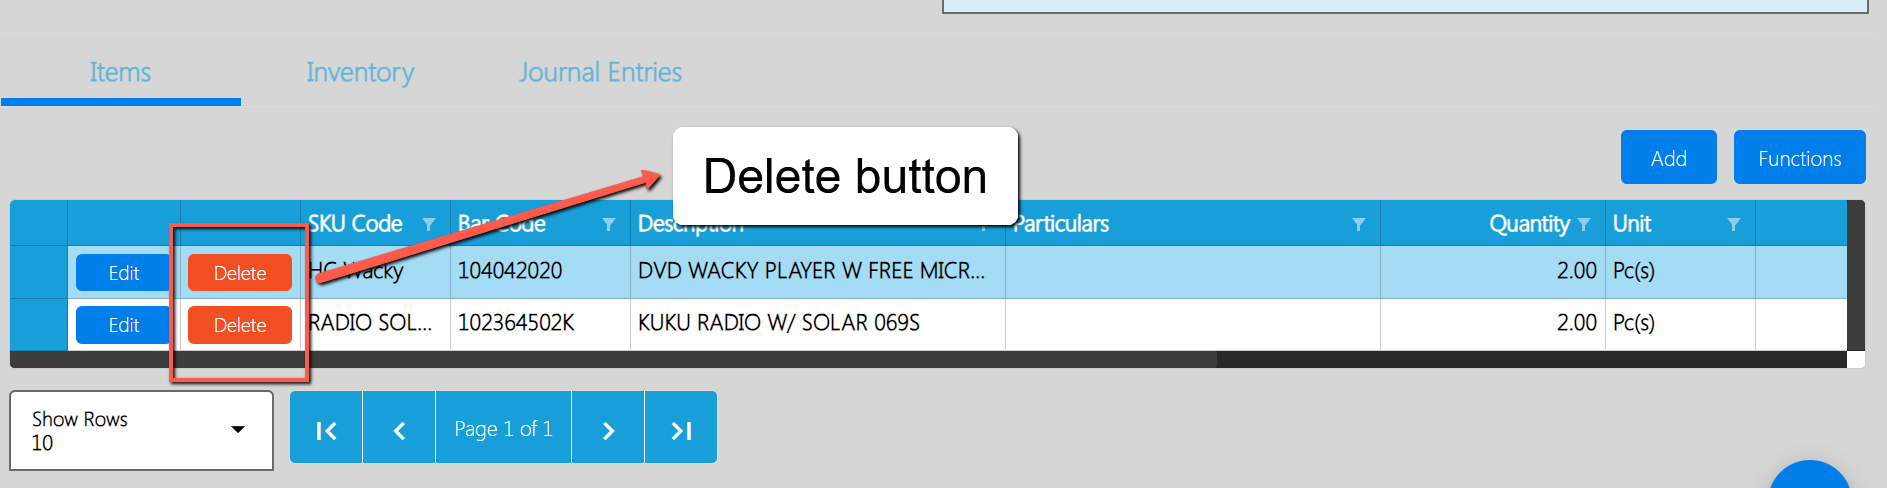
- For the remaining item (item that is returned by the Customer), click the Edit button to edit the quantity being returned. Make sure, it will not exceed the quantity being purchased by the Customer.
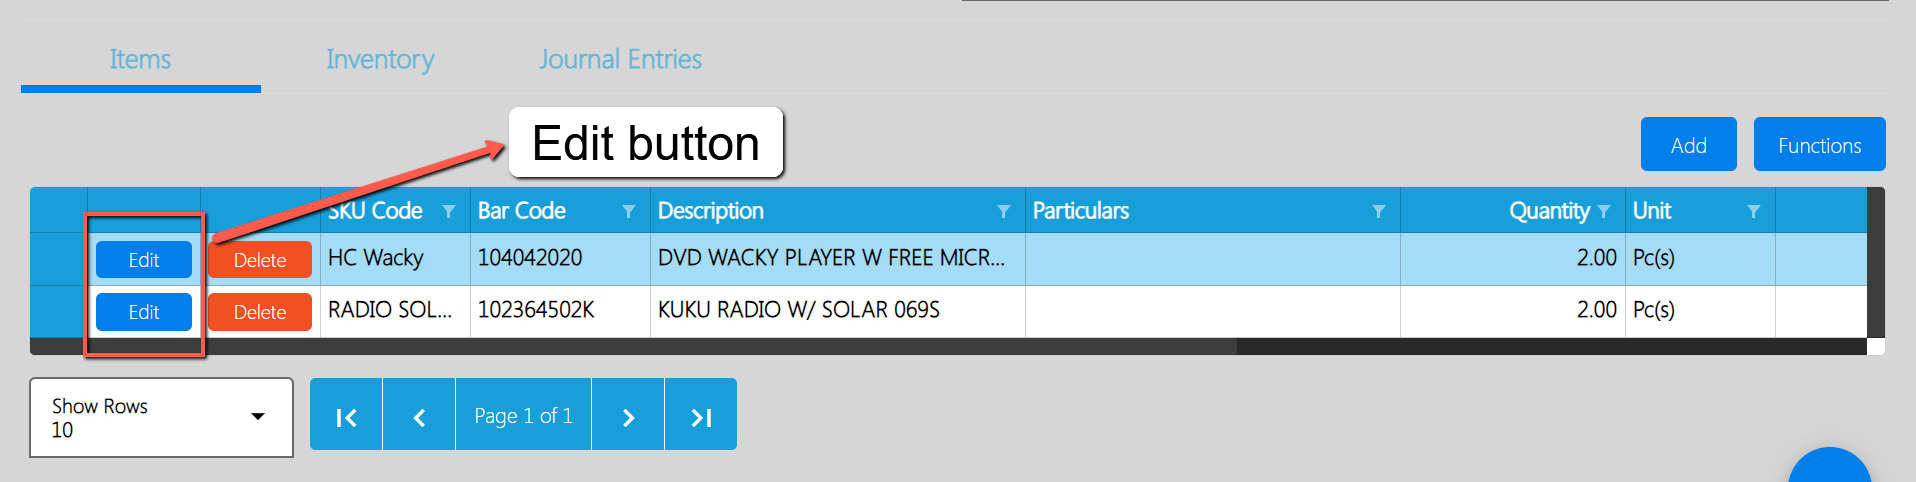
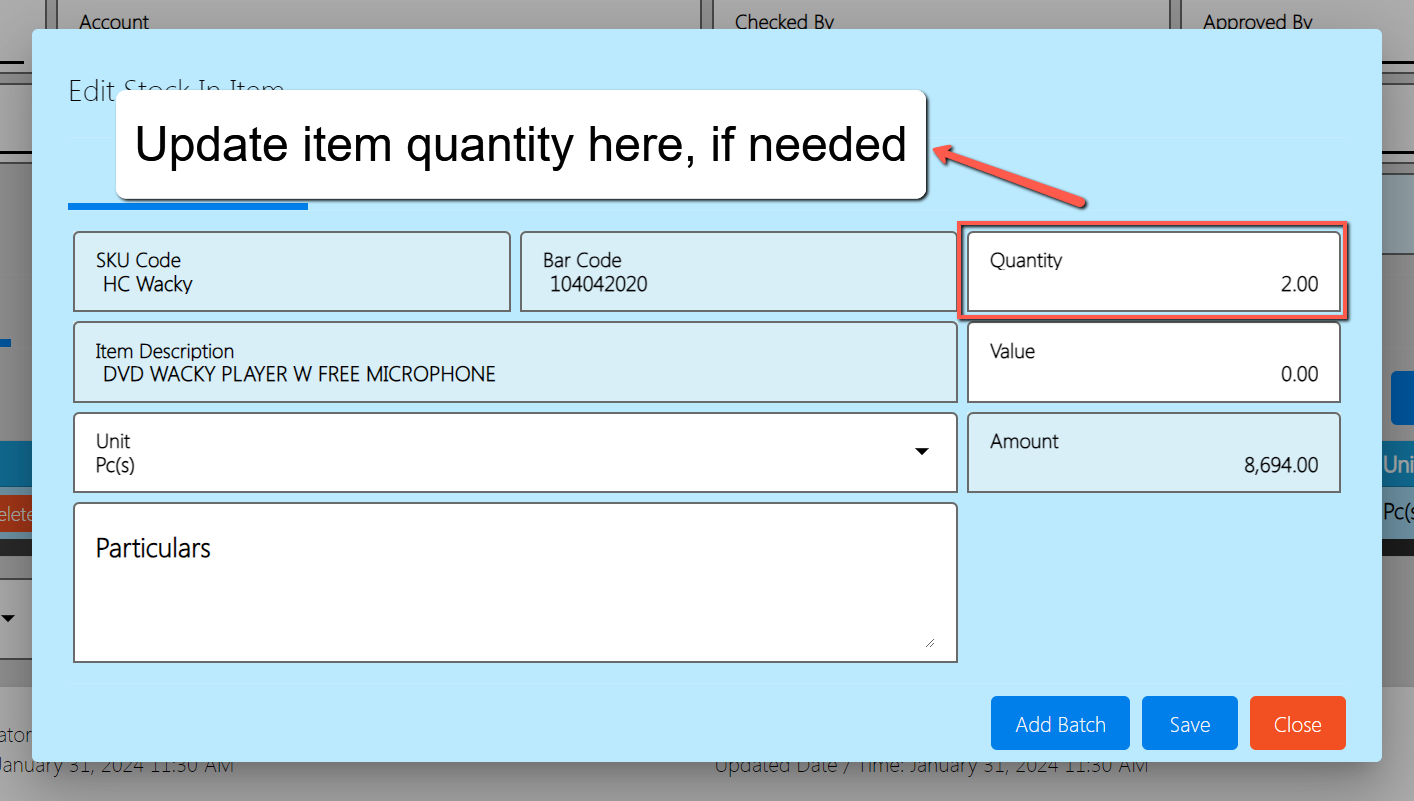
- Once okay, click the Save button to save the changes for the quantity.
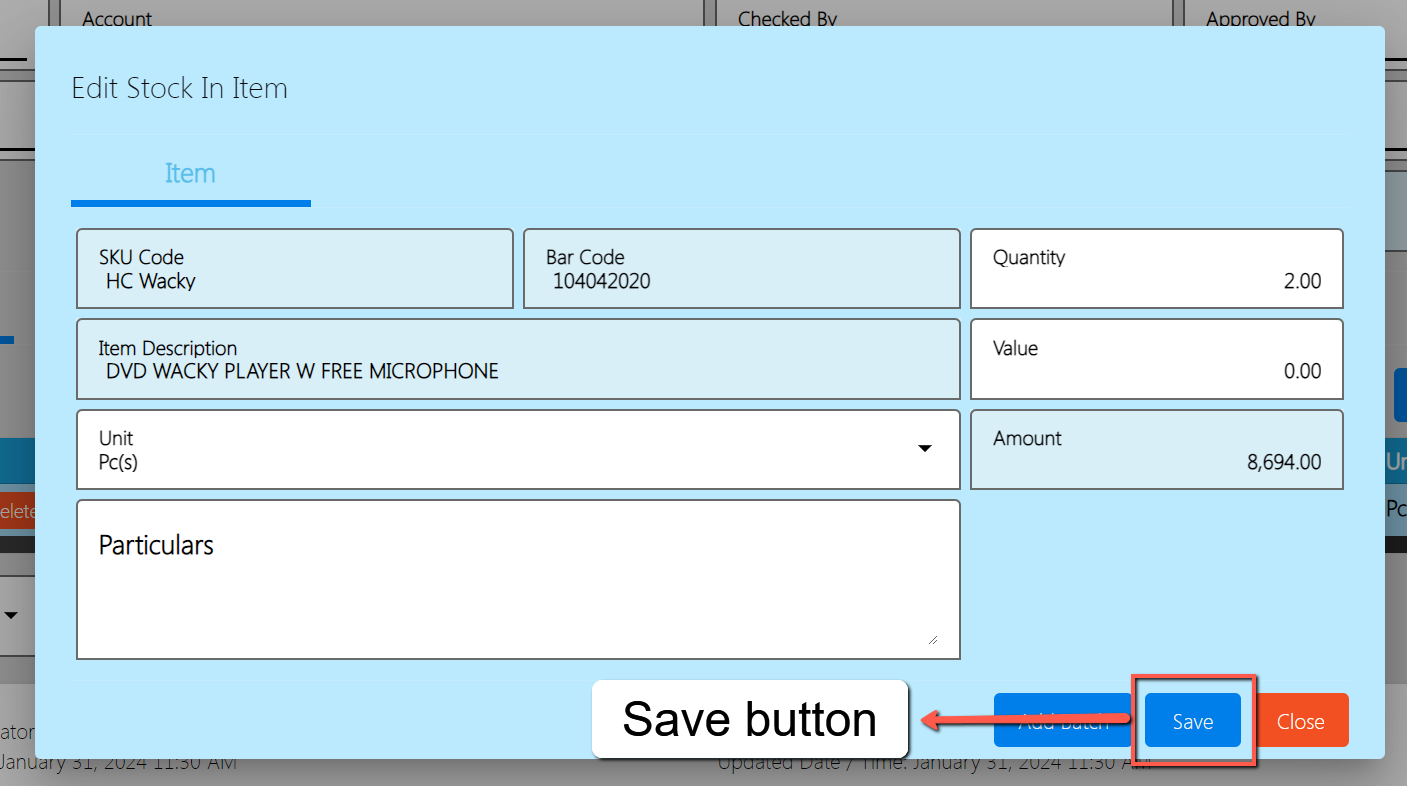
- Once everything is okay, click the Save and Lock button to save and lock the Stock In detail.
- After that, click again the Functions button, then select the Create Credit Memo.
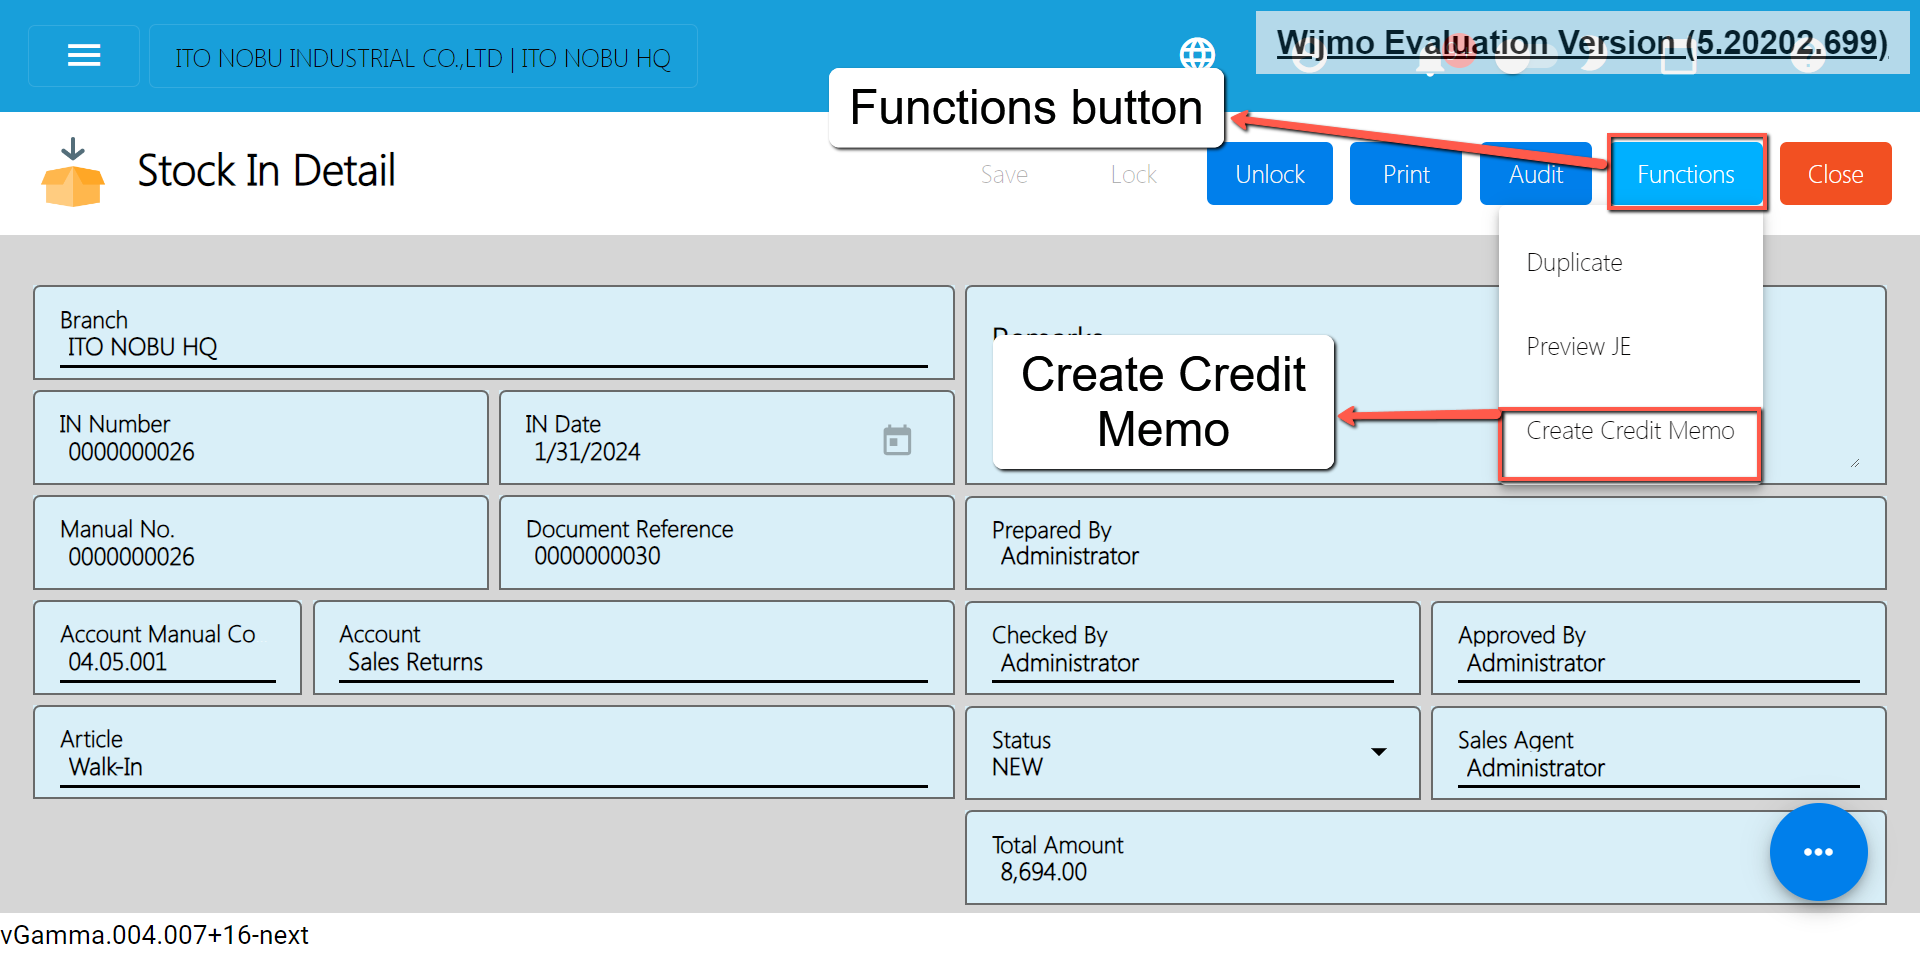
- You will be redirected to the Credit Memo Detail page.
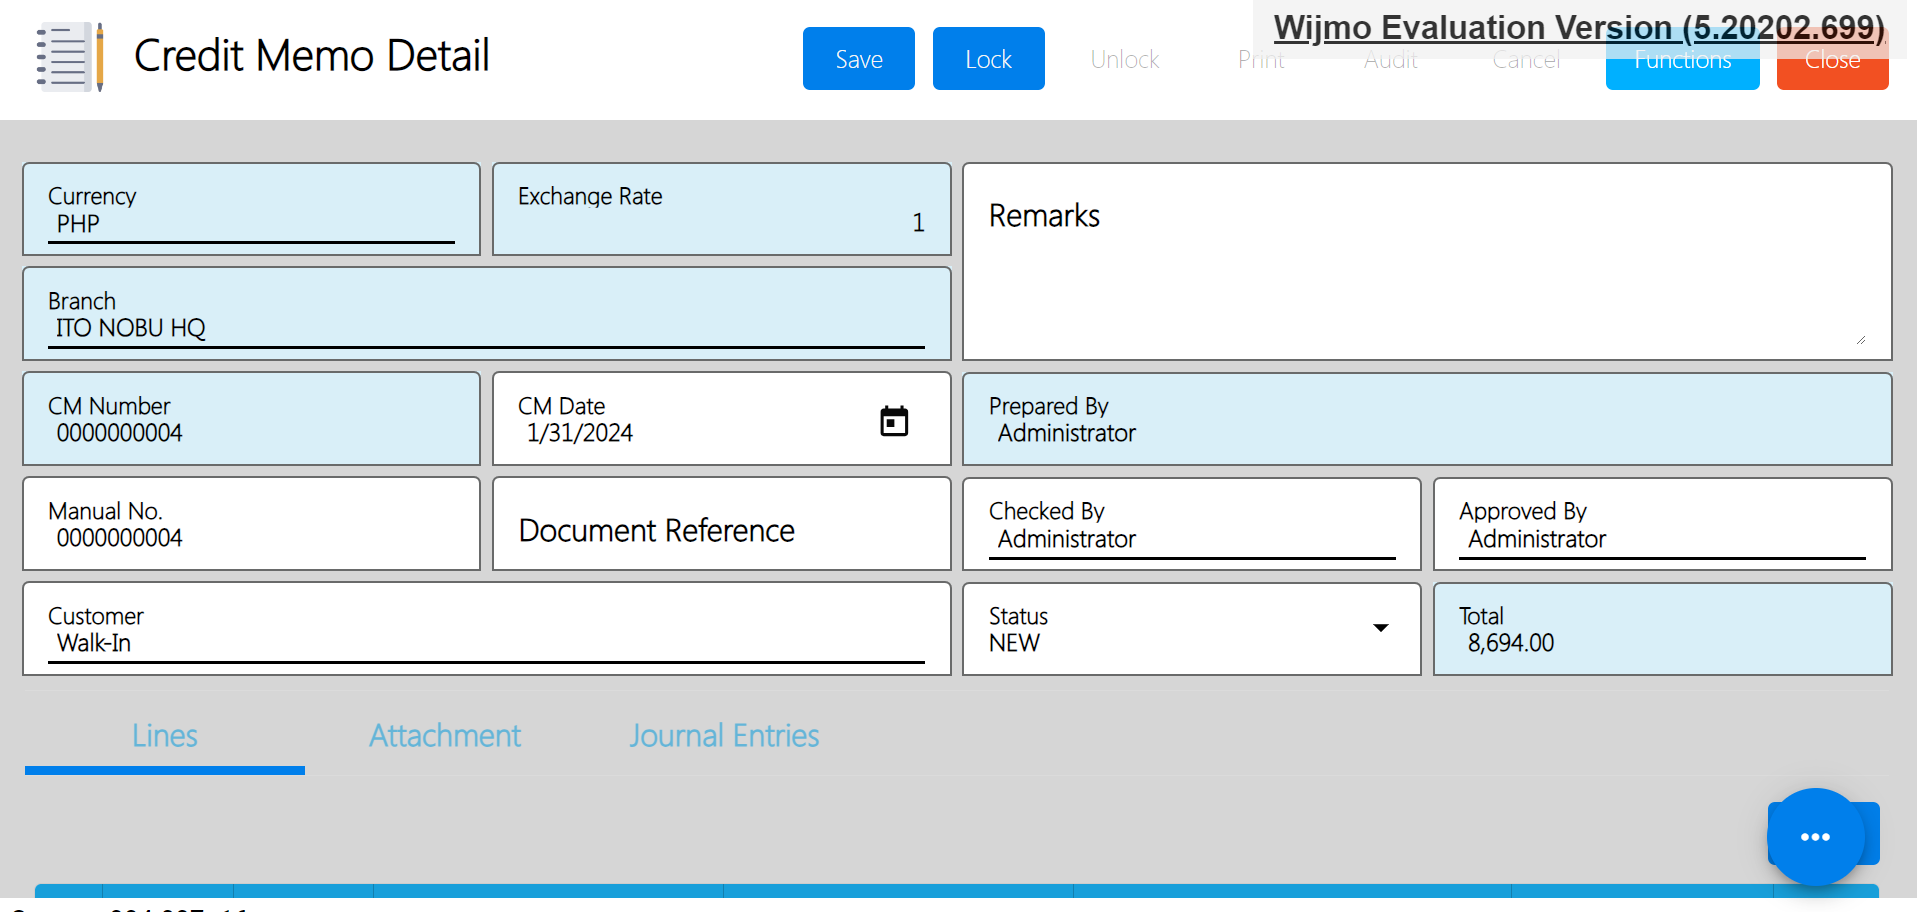
- Review everything especially the Customer tagged and the Total Amount.
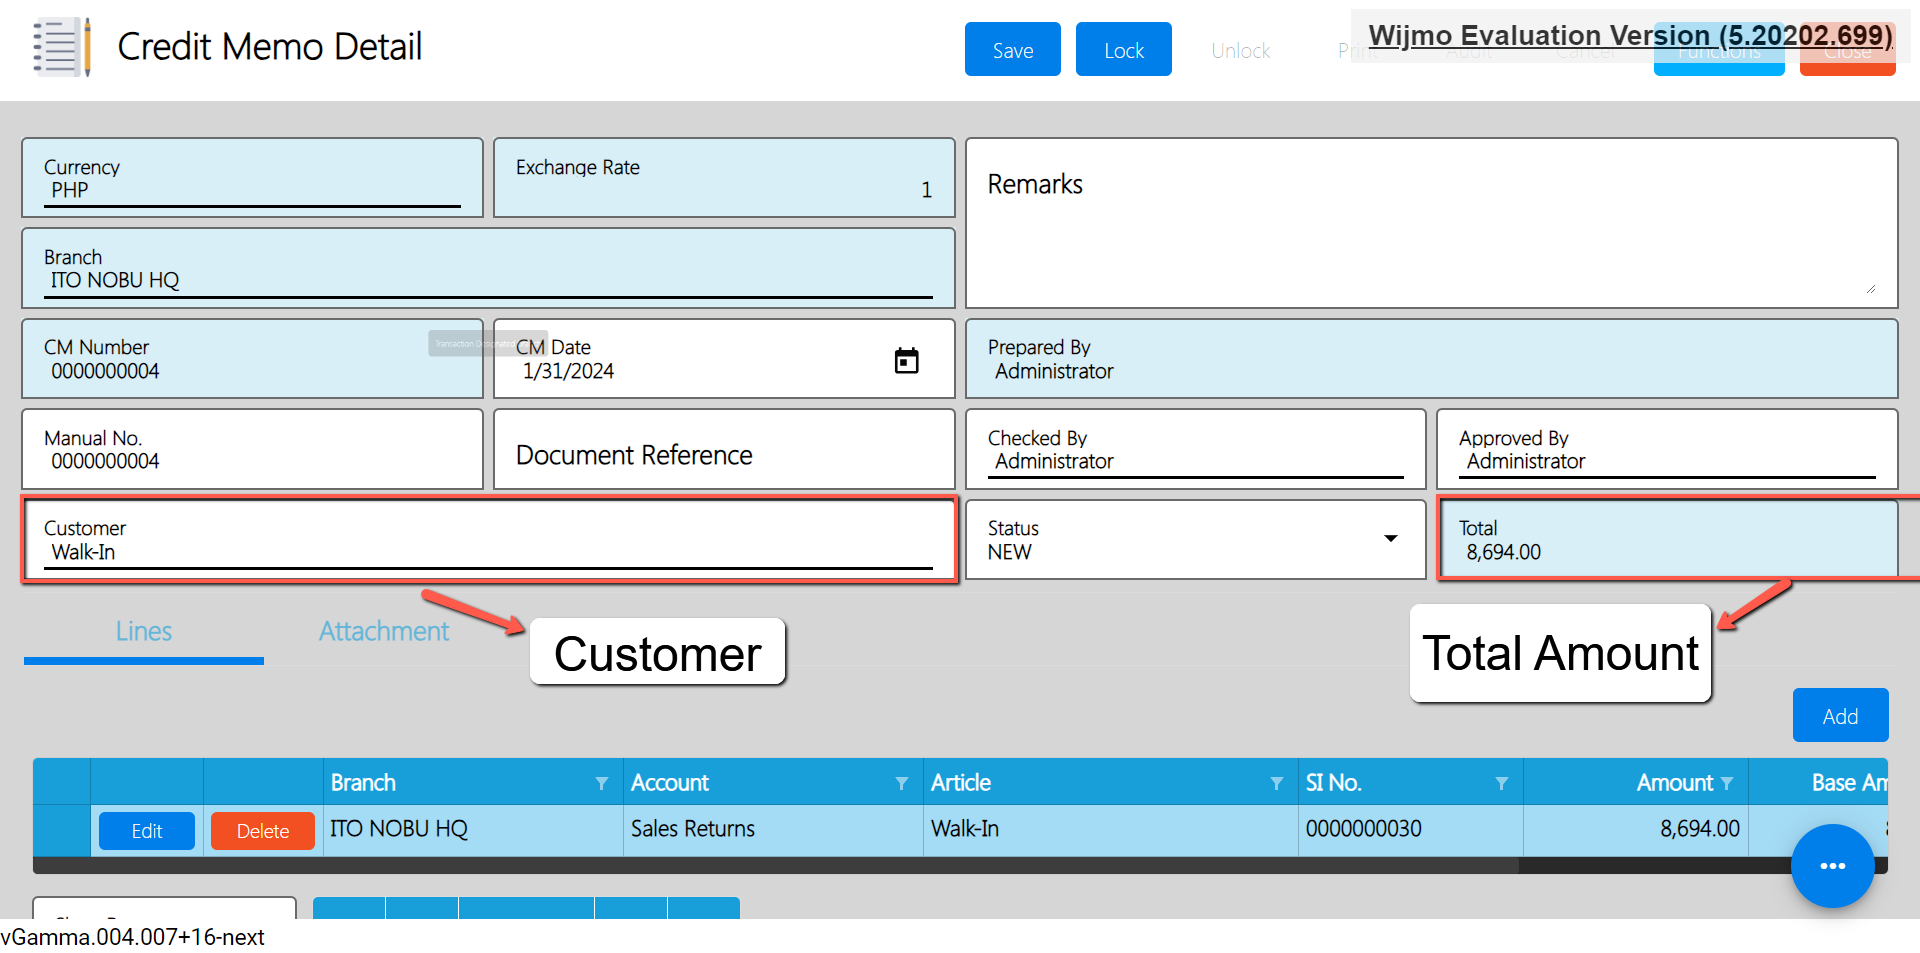
- Once everything is okay, click the Save button.
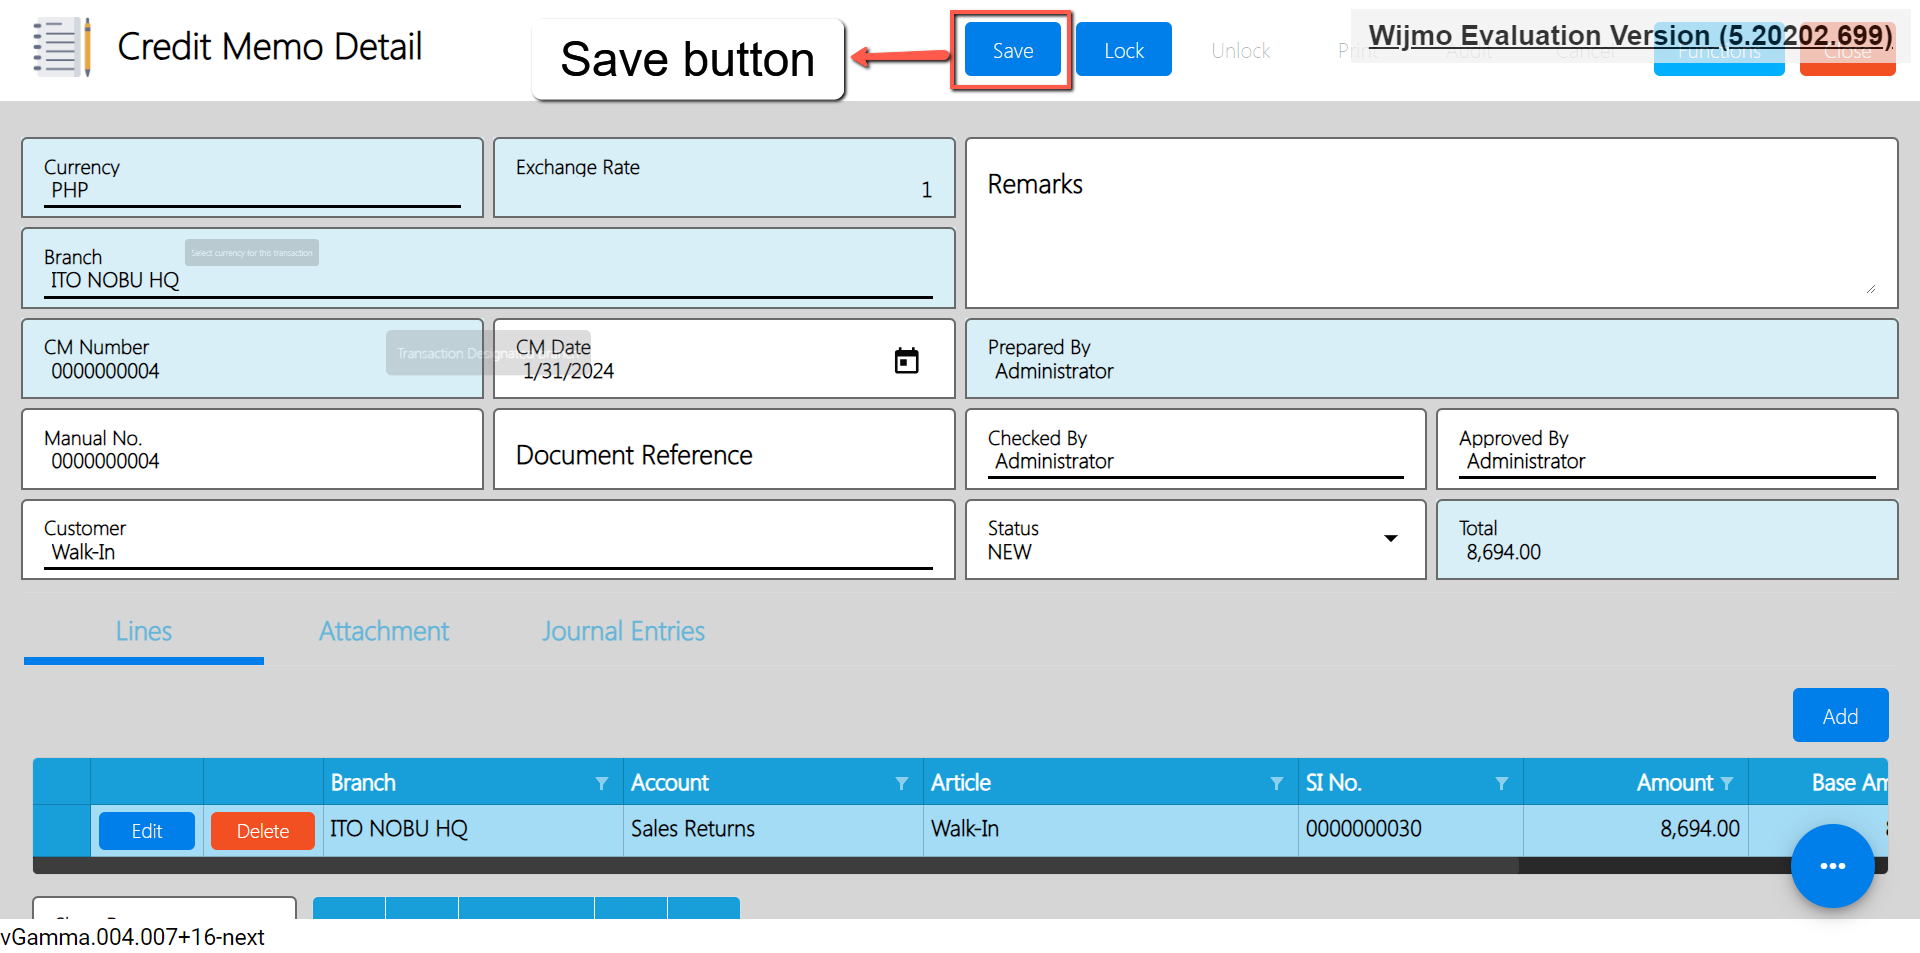
- After clicking the Save button, click the Lock button to make some changes on the system.
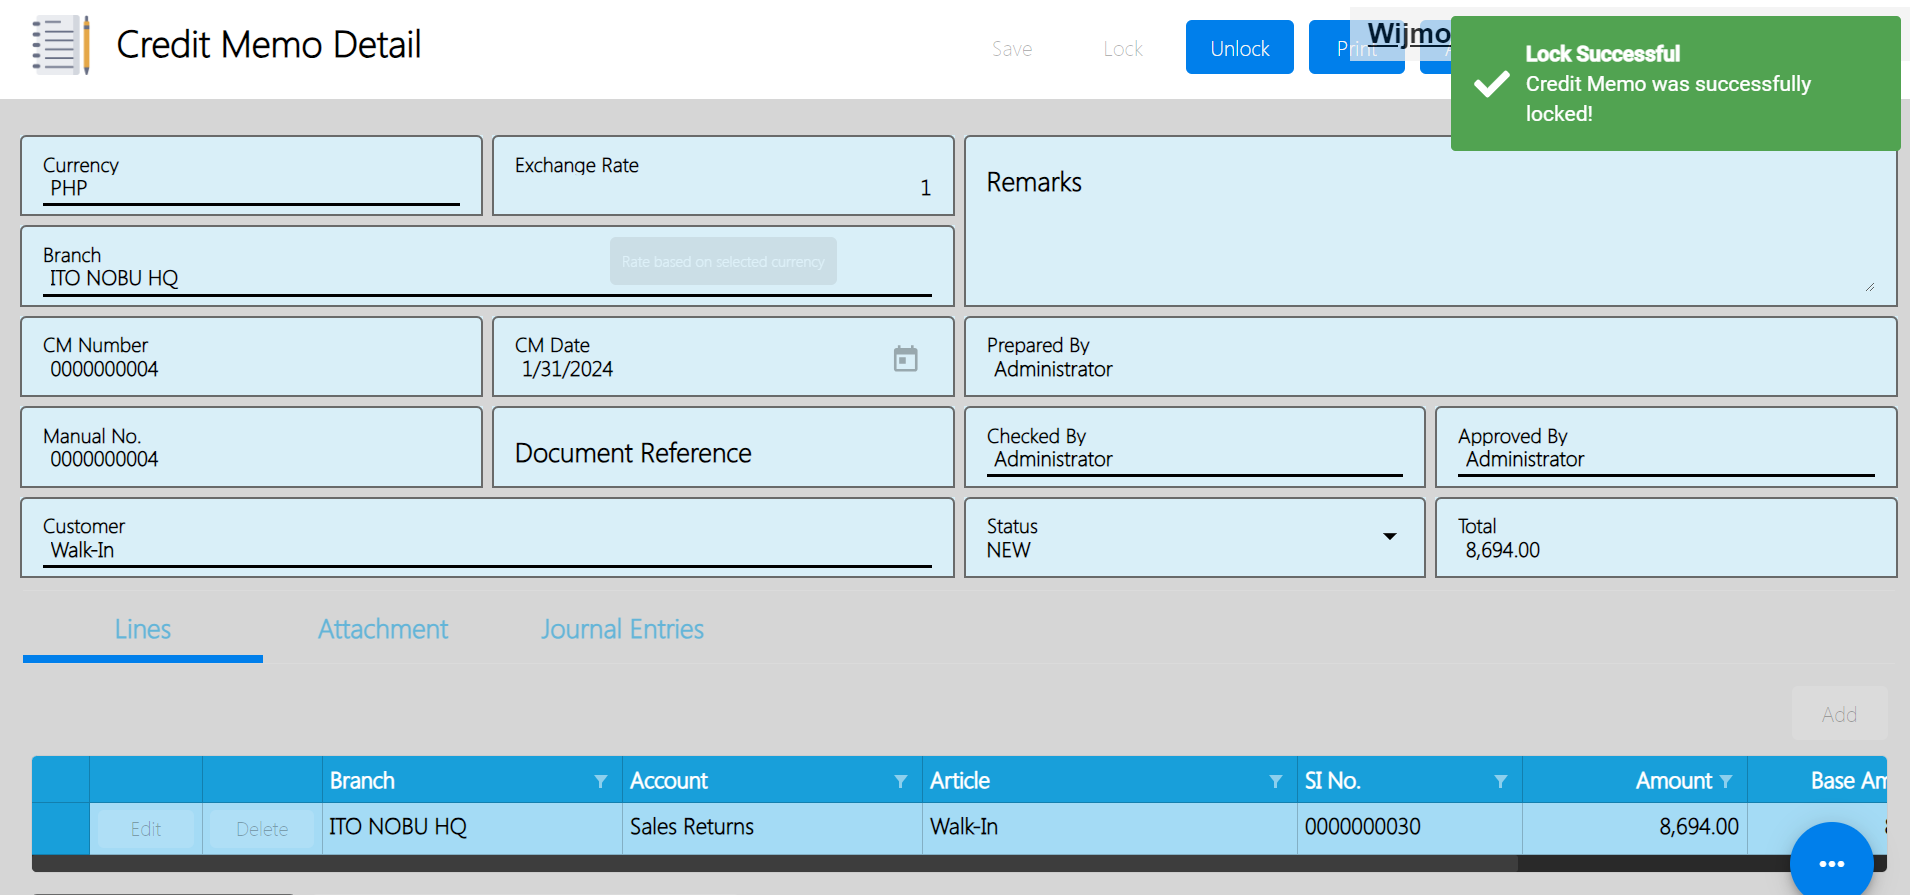
5.4 Stock Out
Overview
This module is used if you want to remove a quantity of an item e.g., damaged or expired item(s). In addition, if you want to return an item purchased to your Supplier e.g., an item is damaged, this module also helps manage those Supplier Returns as well. Moreover, we've improved the way you see Stock Out details so that you don't have to wait too long to view them.
Stock Out List
- List of all the OT(Stock Out) and will also show the overview of the transaction.
- Here, the user also has the filter functionality and the button to add a new OT.
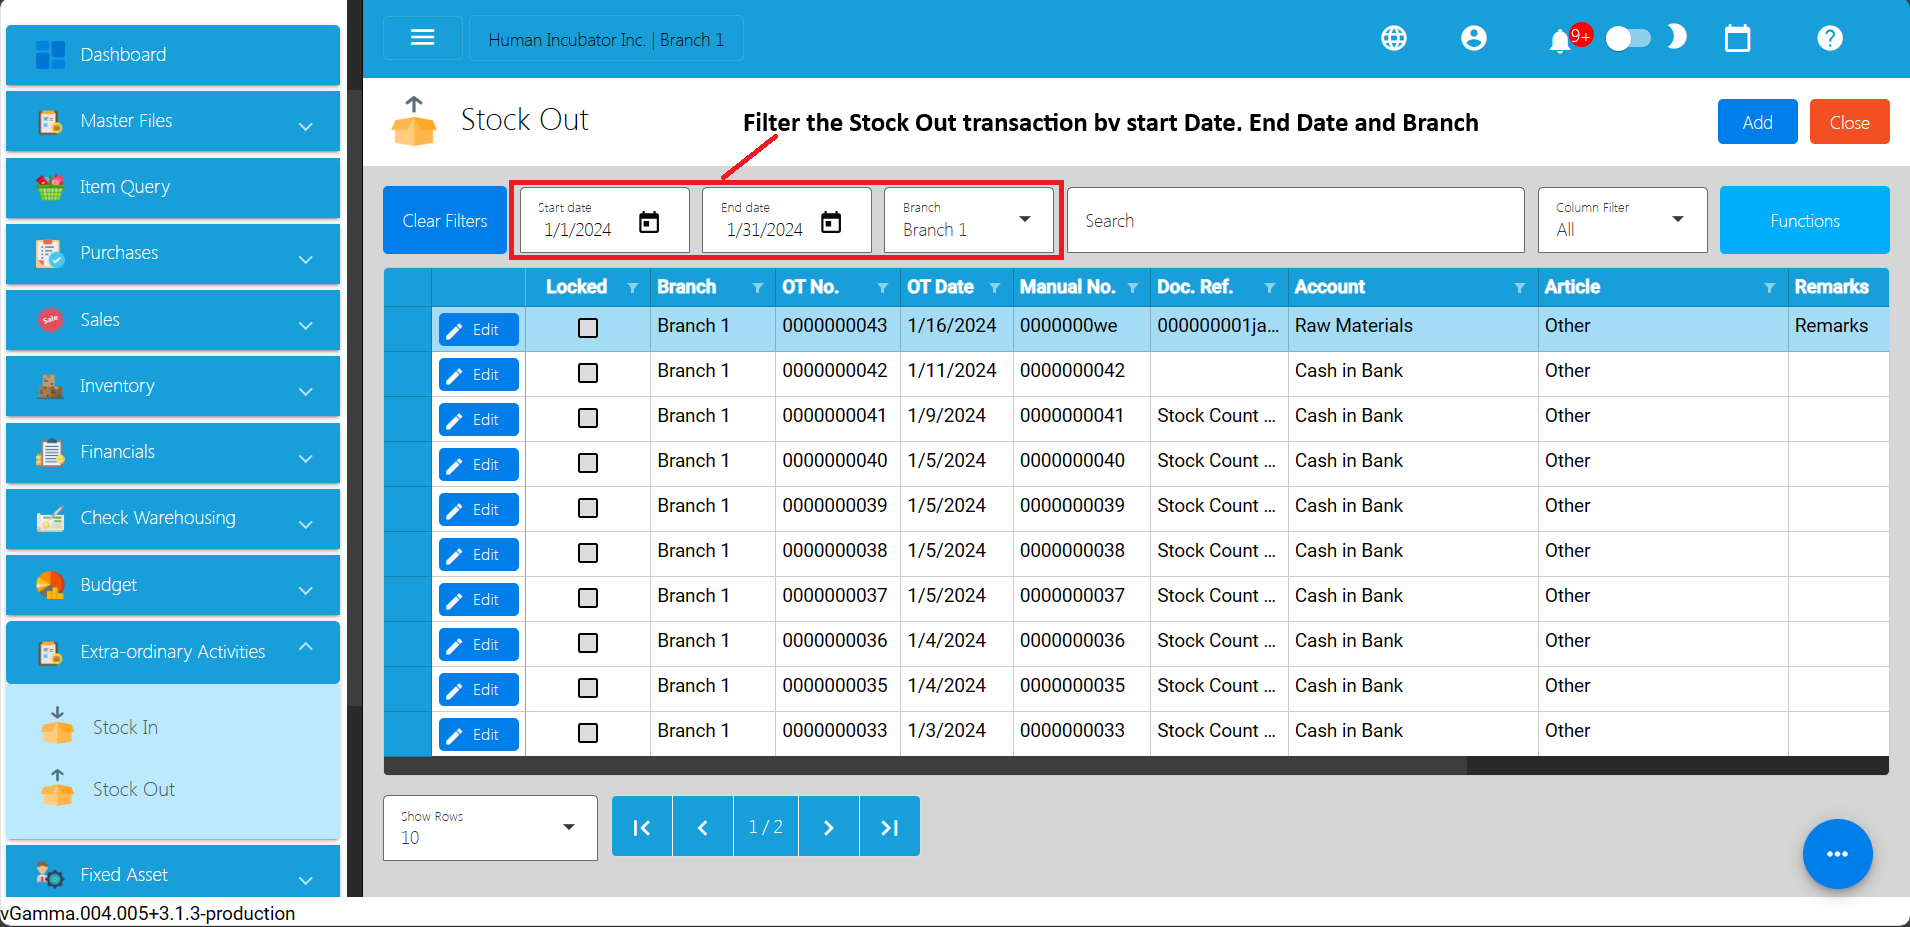
Stock Out Detail
- To add a new Stock Out detail,go to Extra-ordinary Activities then click Stock Out. After that, click the Add that can be seen in the Stock Out list.
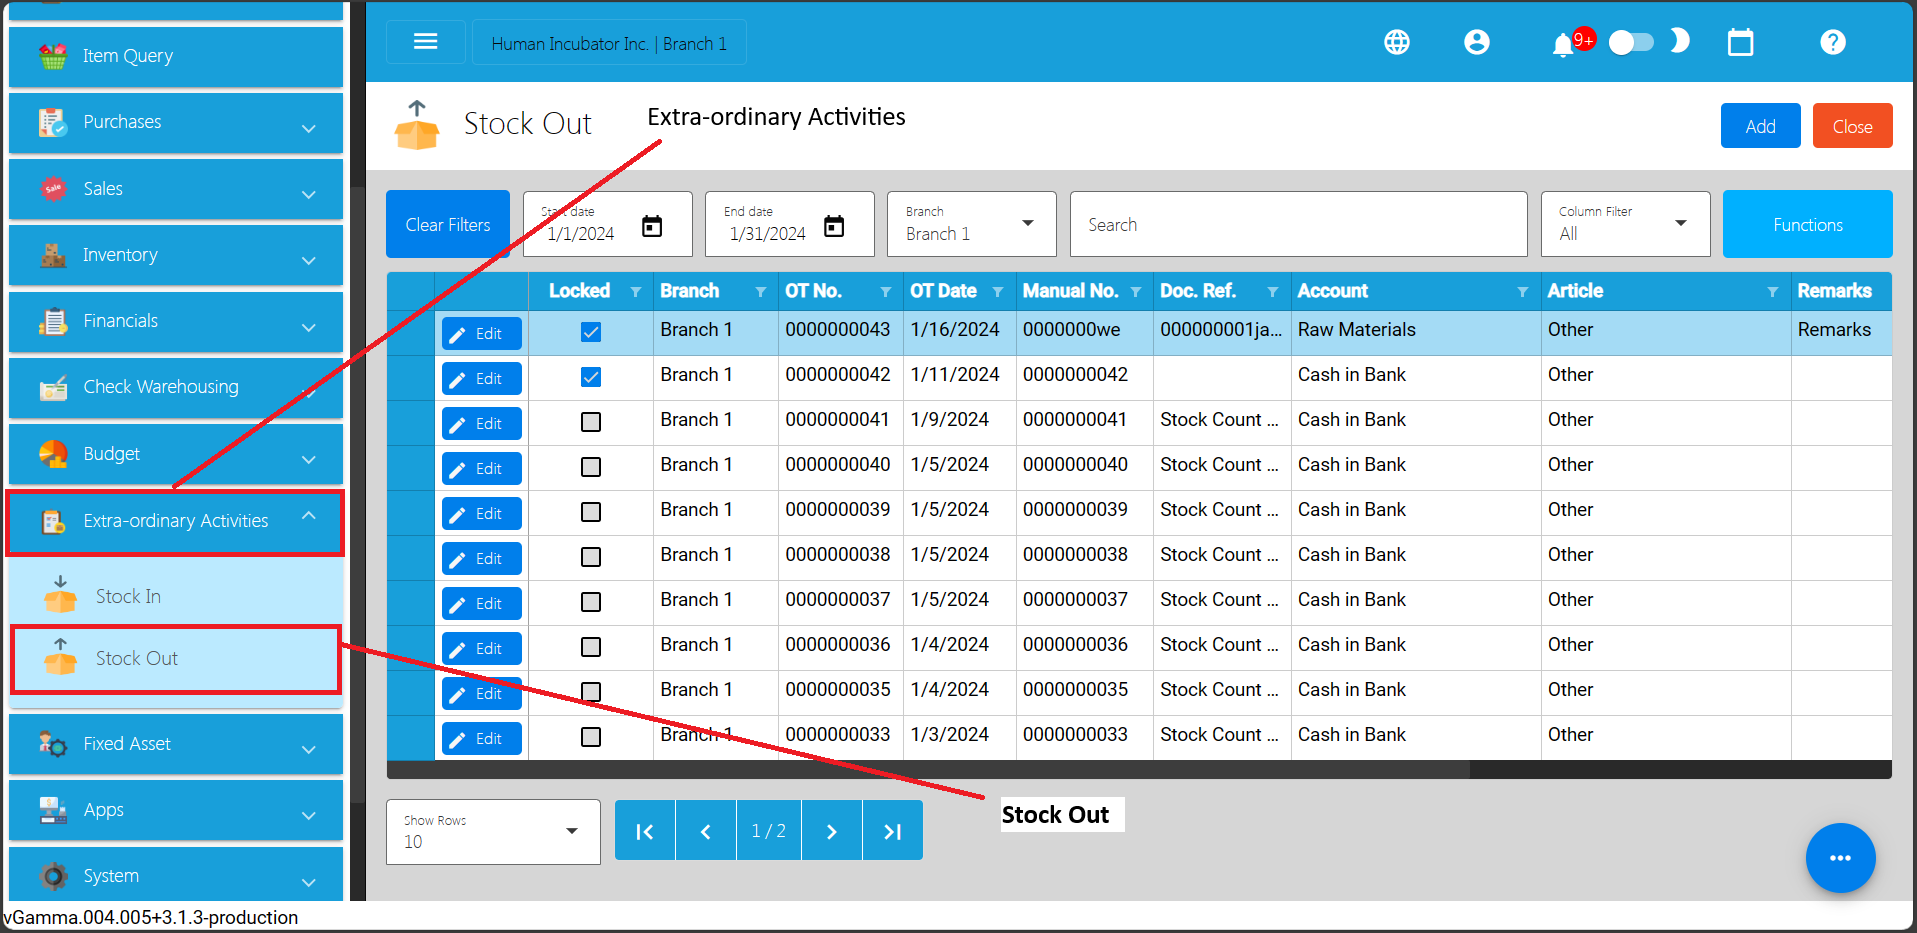
- Fill out all the needed information for the Stock Out Detail like,
- OT Date
- Document Reference
- Account
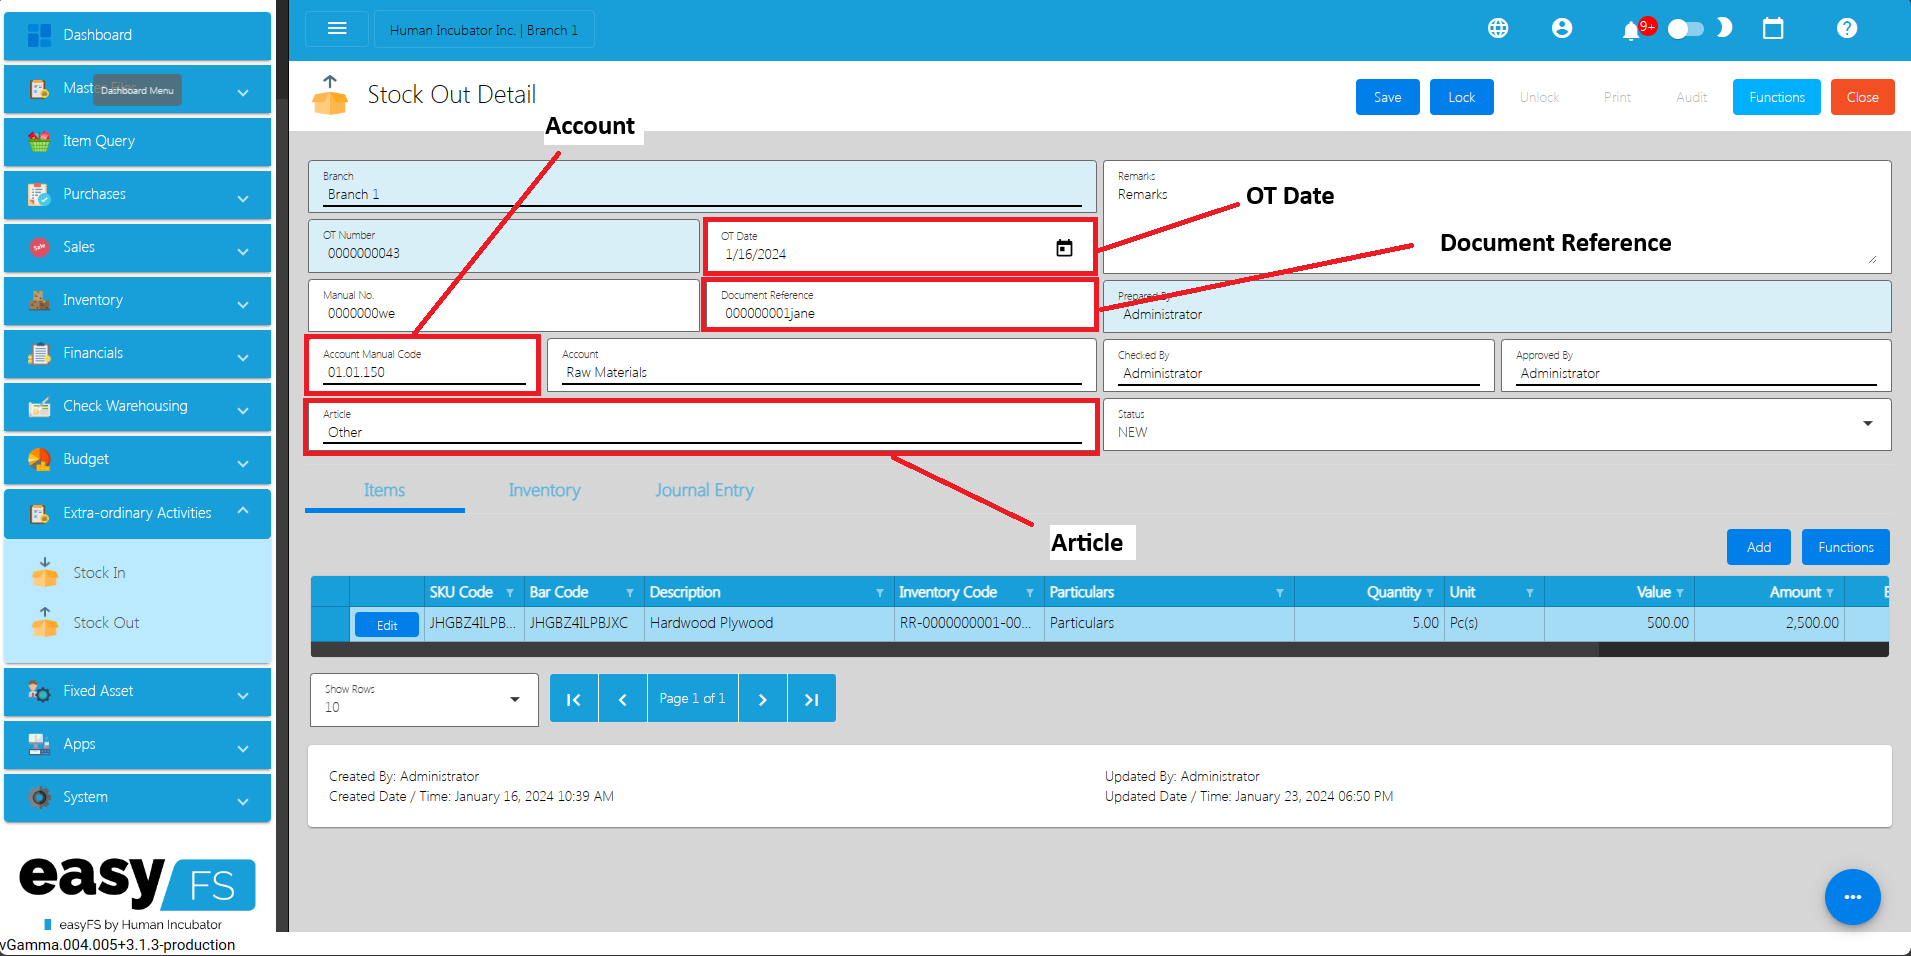
- To add Stock Out line item(s), you can:
- Manual add a line item
- Click the Add button under the Items tab.
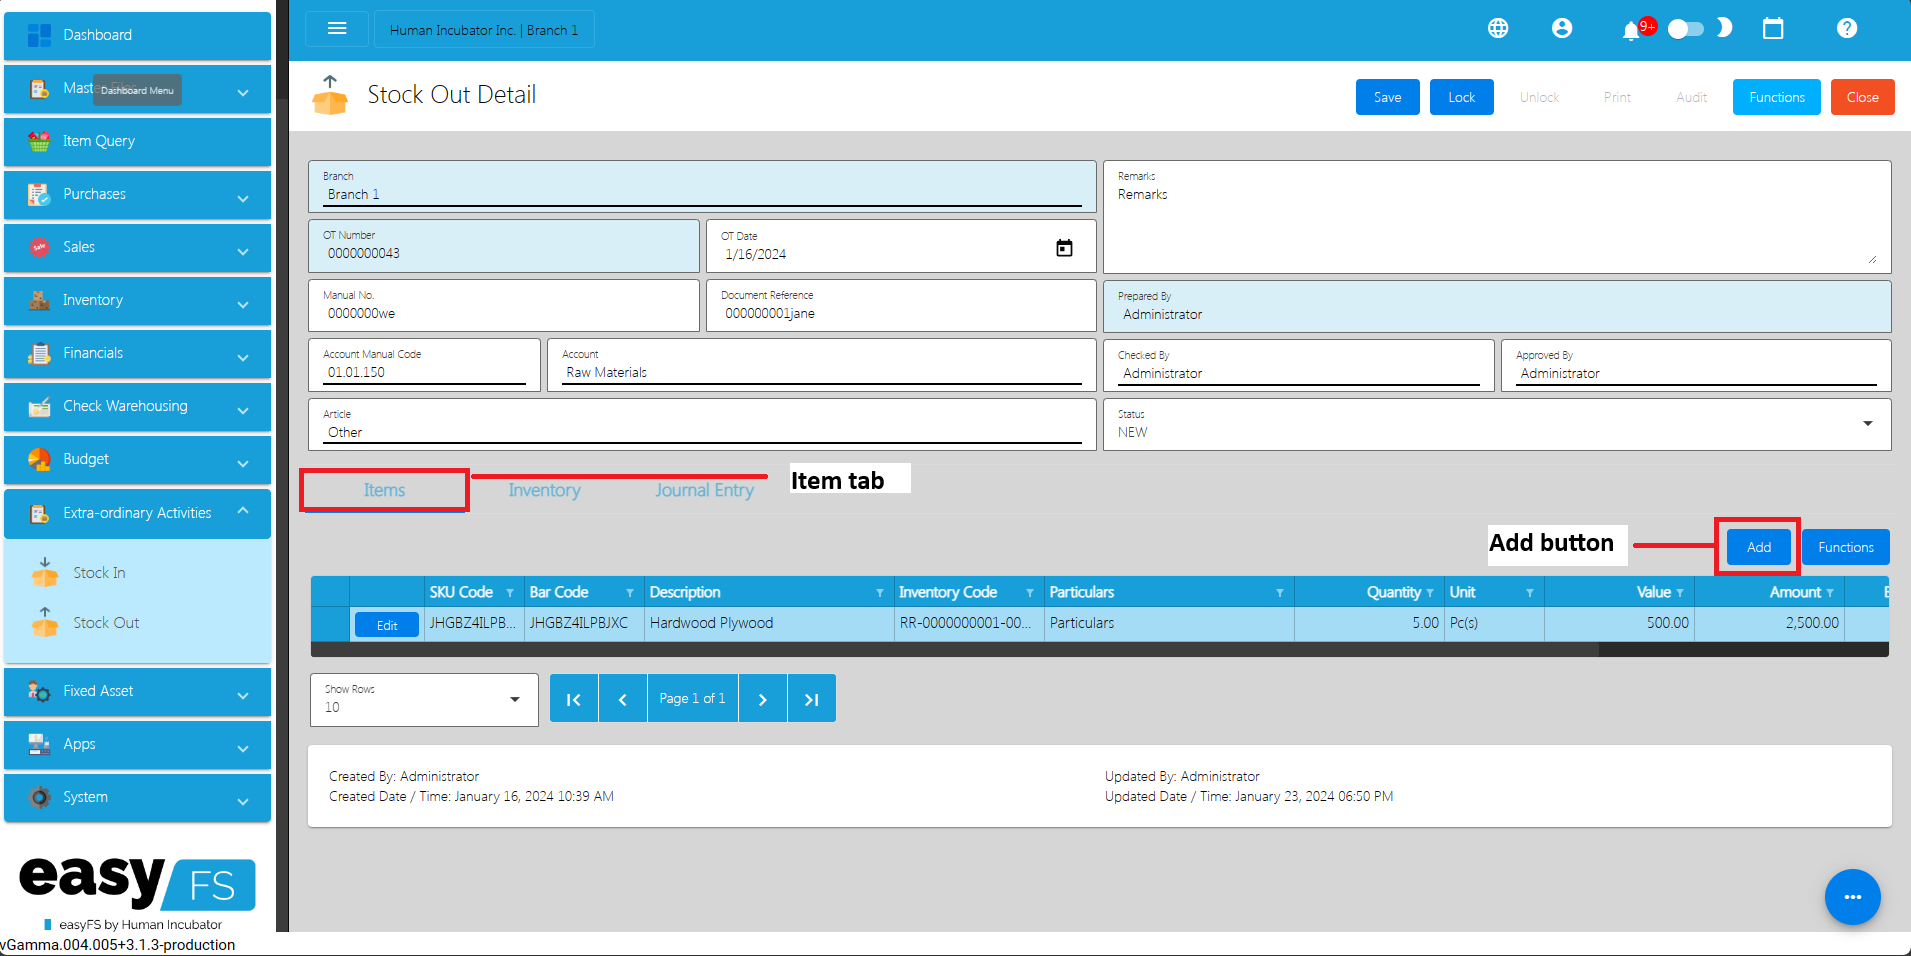
- Click the Pick button that you want to add an Item for Stock Out.
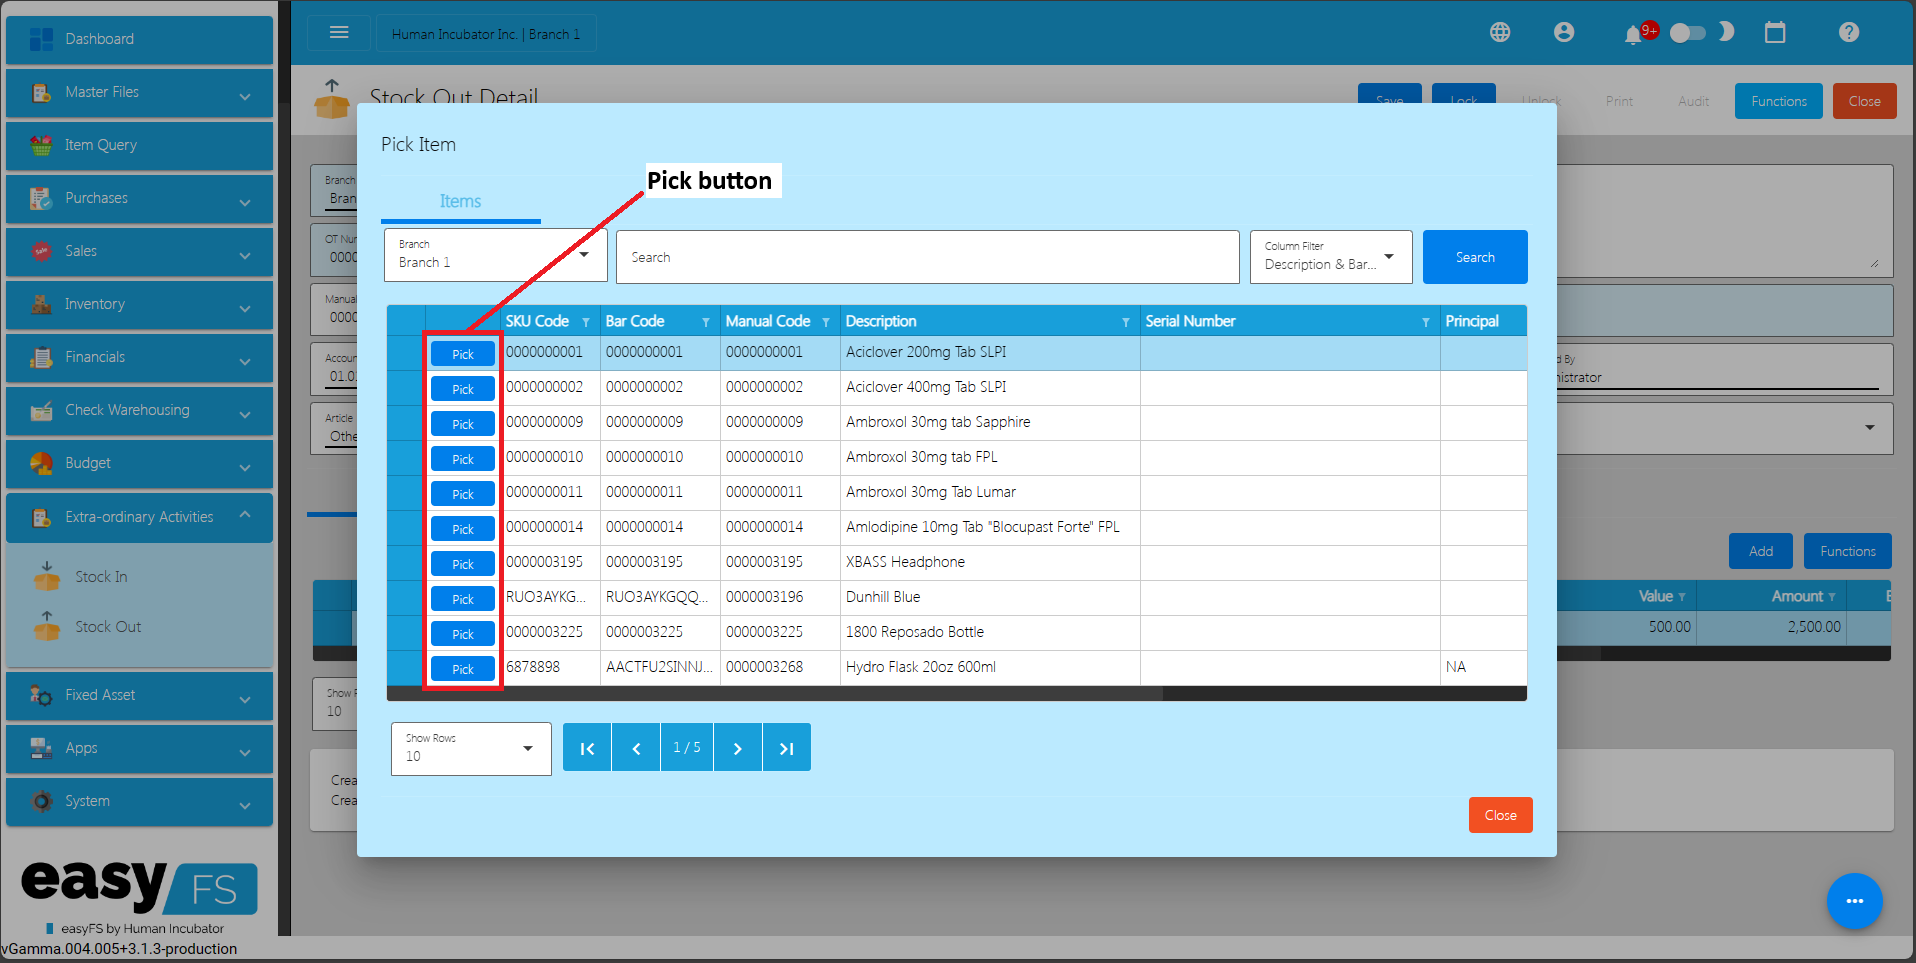
- Fill up the necessary field for adding the item for Stock Out Item such as Quantity and its Cost.
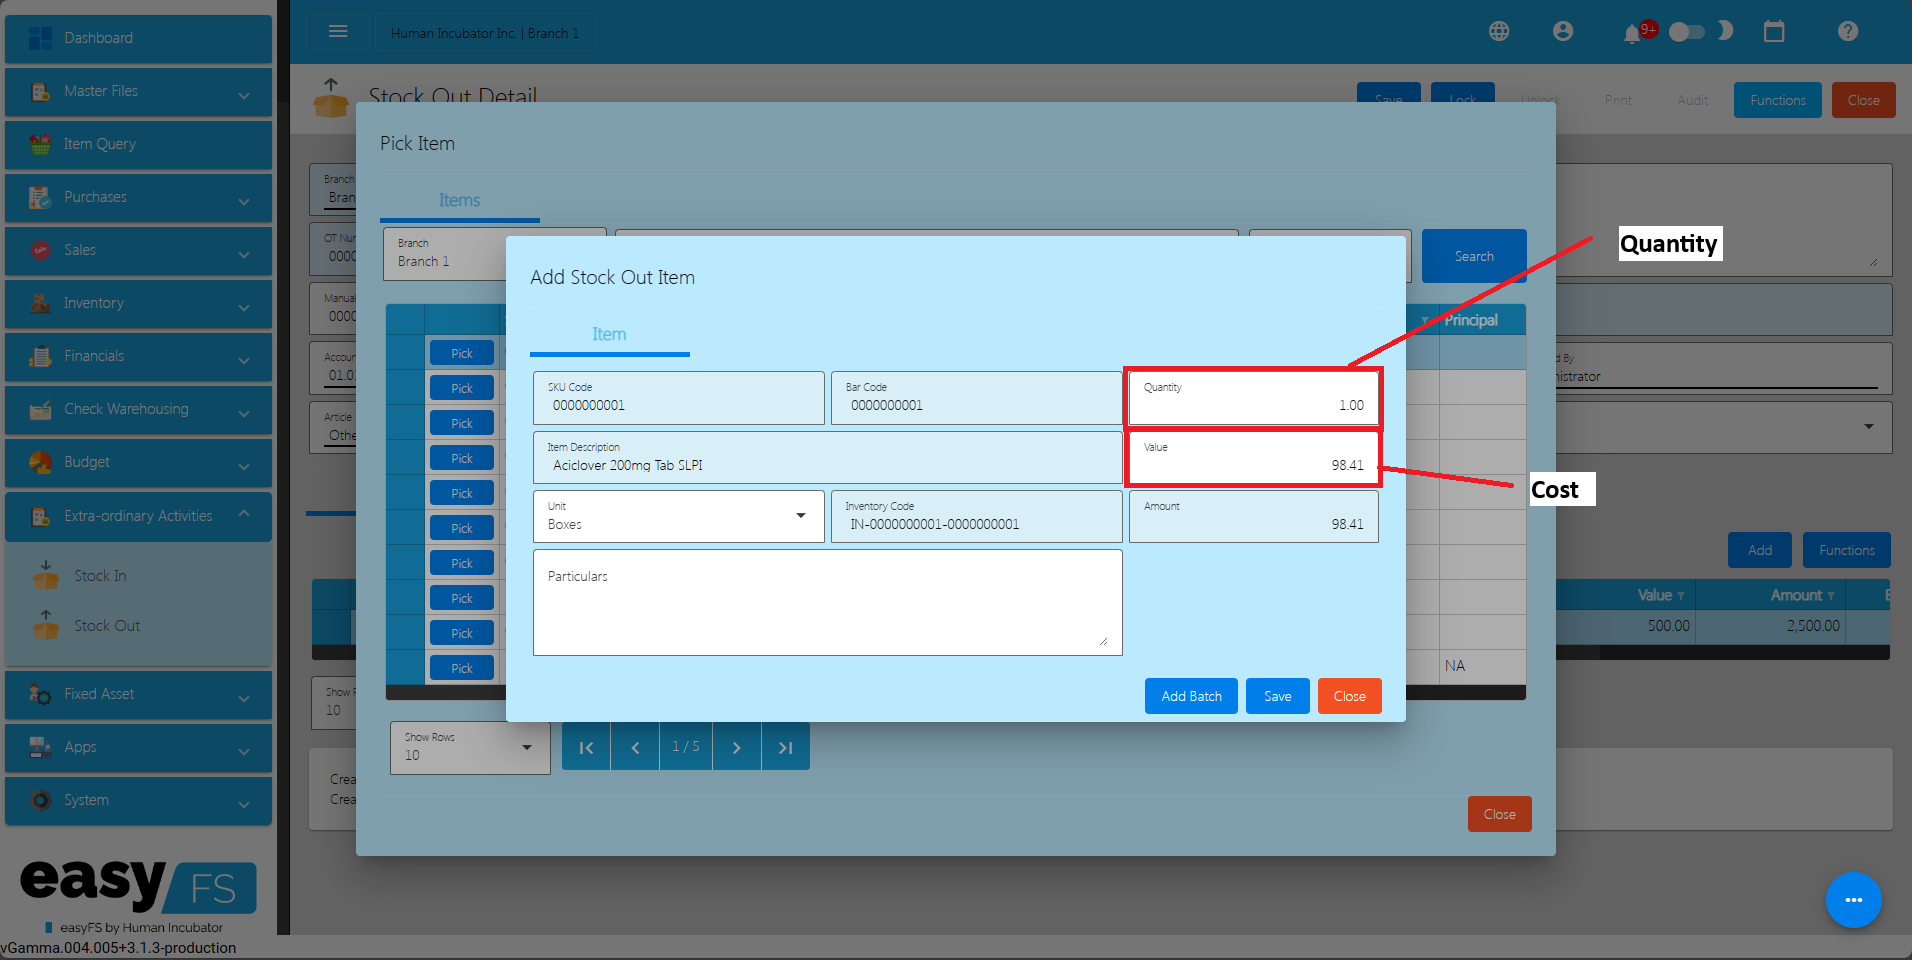
- Click Save button to Save the item as a Stock Out line item.
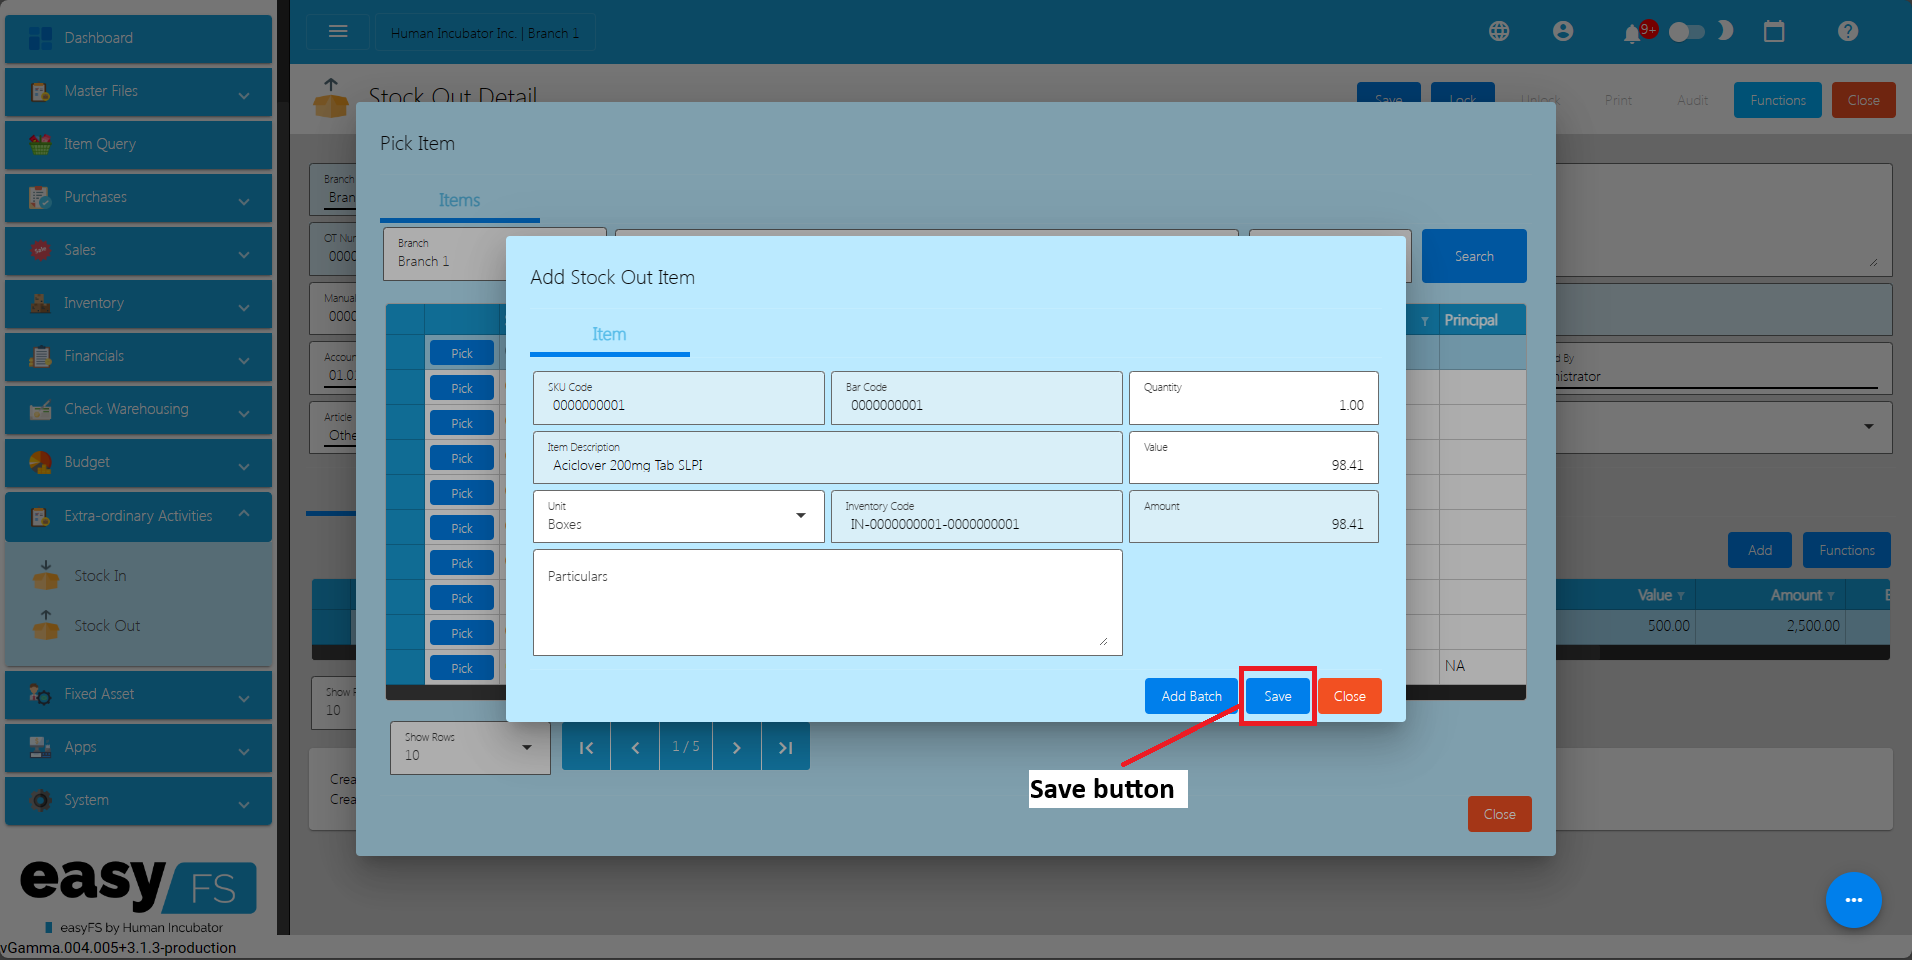
- If you wish to add another item, just repeat Steps 2 to 4.
- Click the Close button to close the popup and review your Stock Out detail.
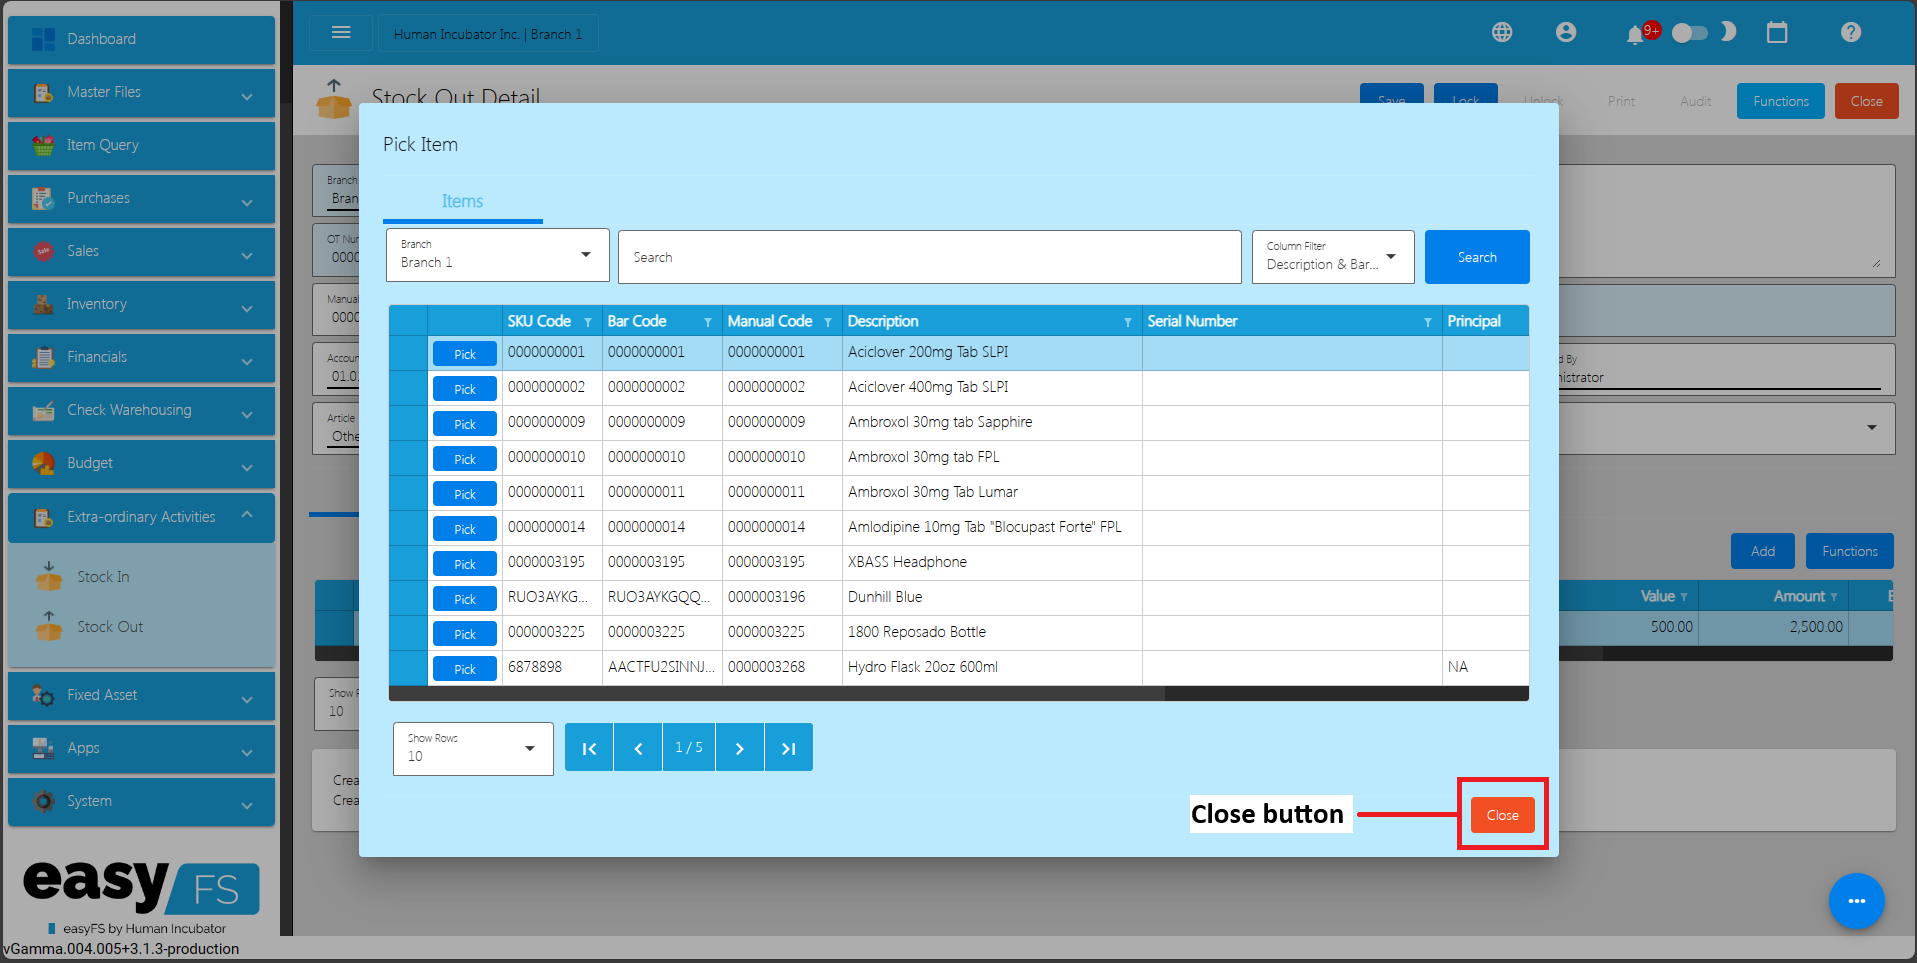
Bulk Upload Line item(s)
- Click on the Functions button then click on the Download File Format to download the template for bulk uploading Stock Out line item(s).
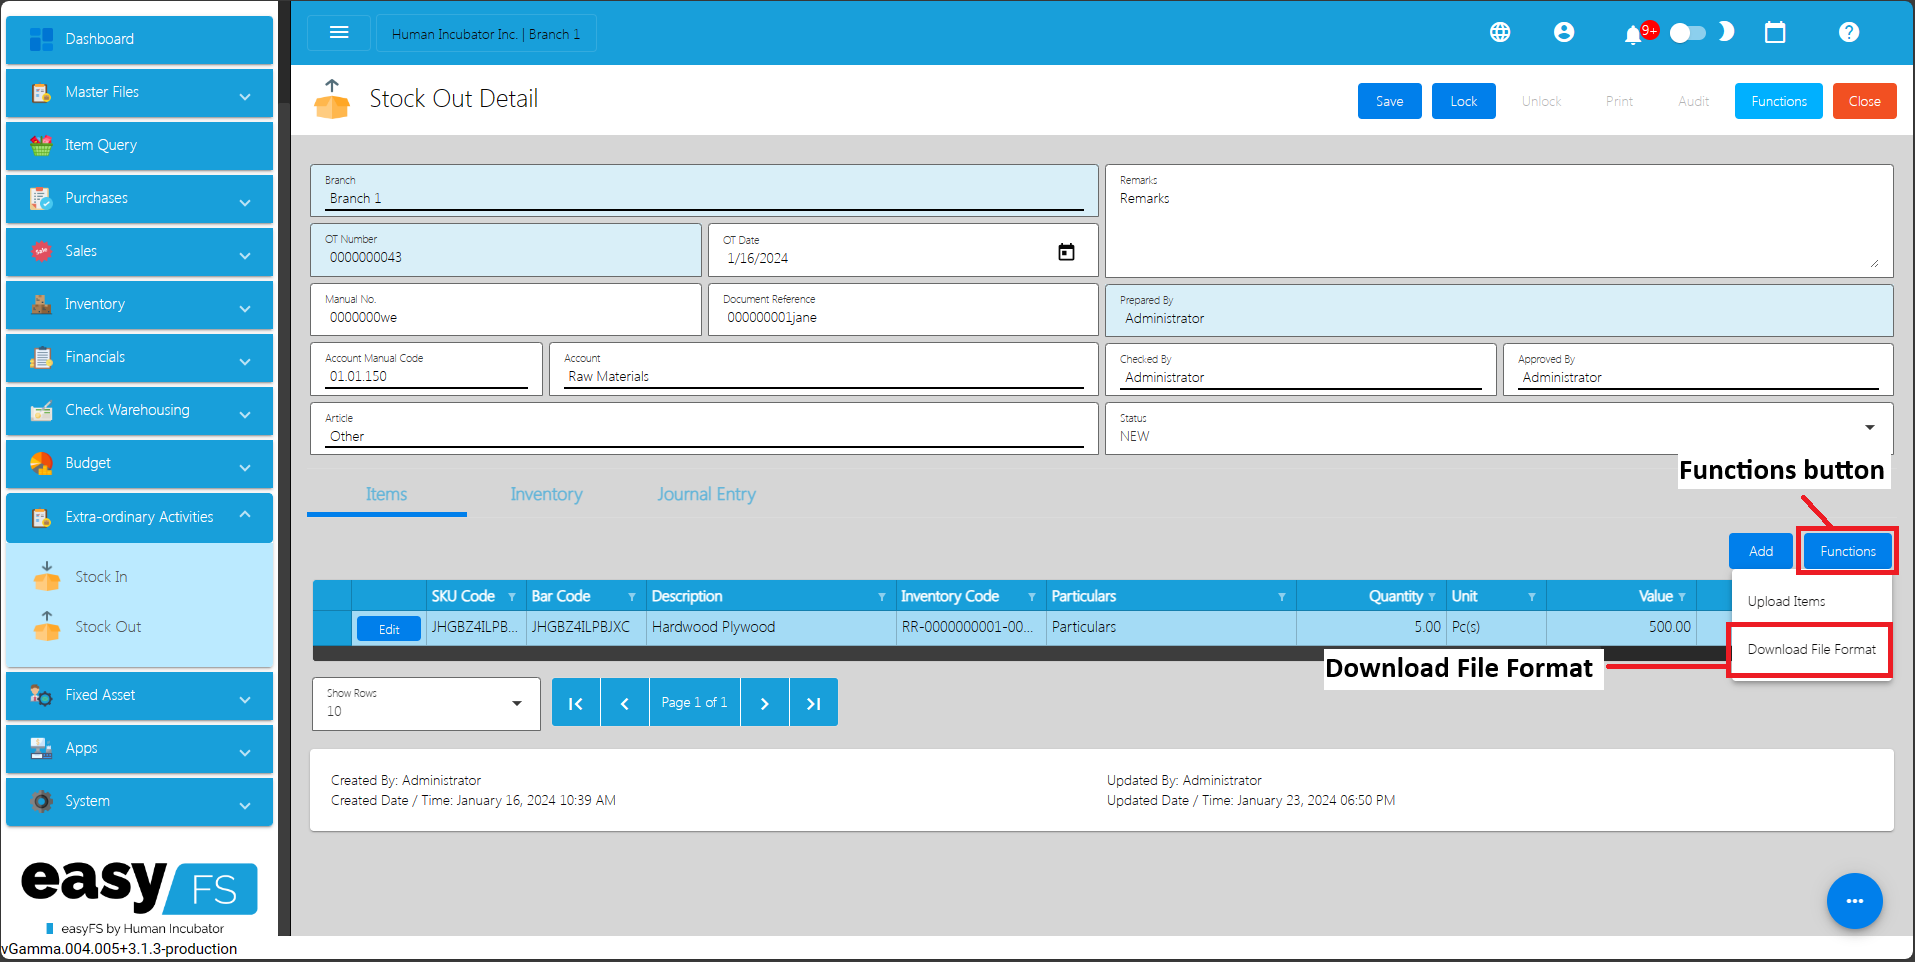
- Open the downloaded file then provide correct data. File name of the downloaded file is Stock Out Item Format. Please see sample:
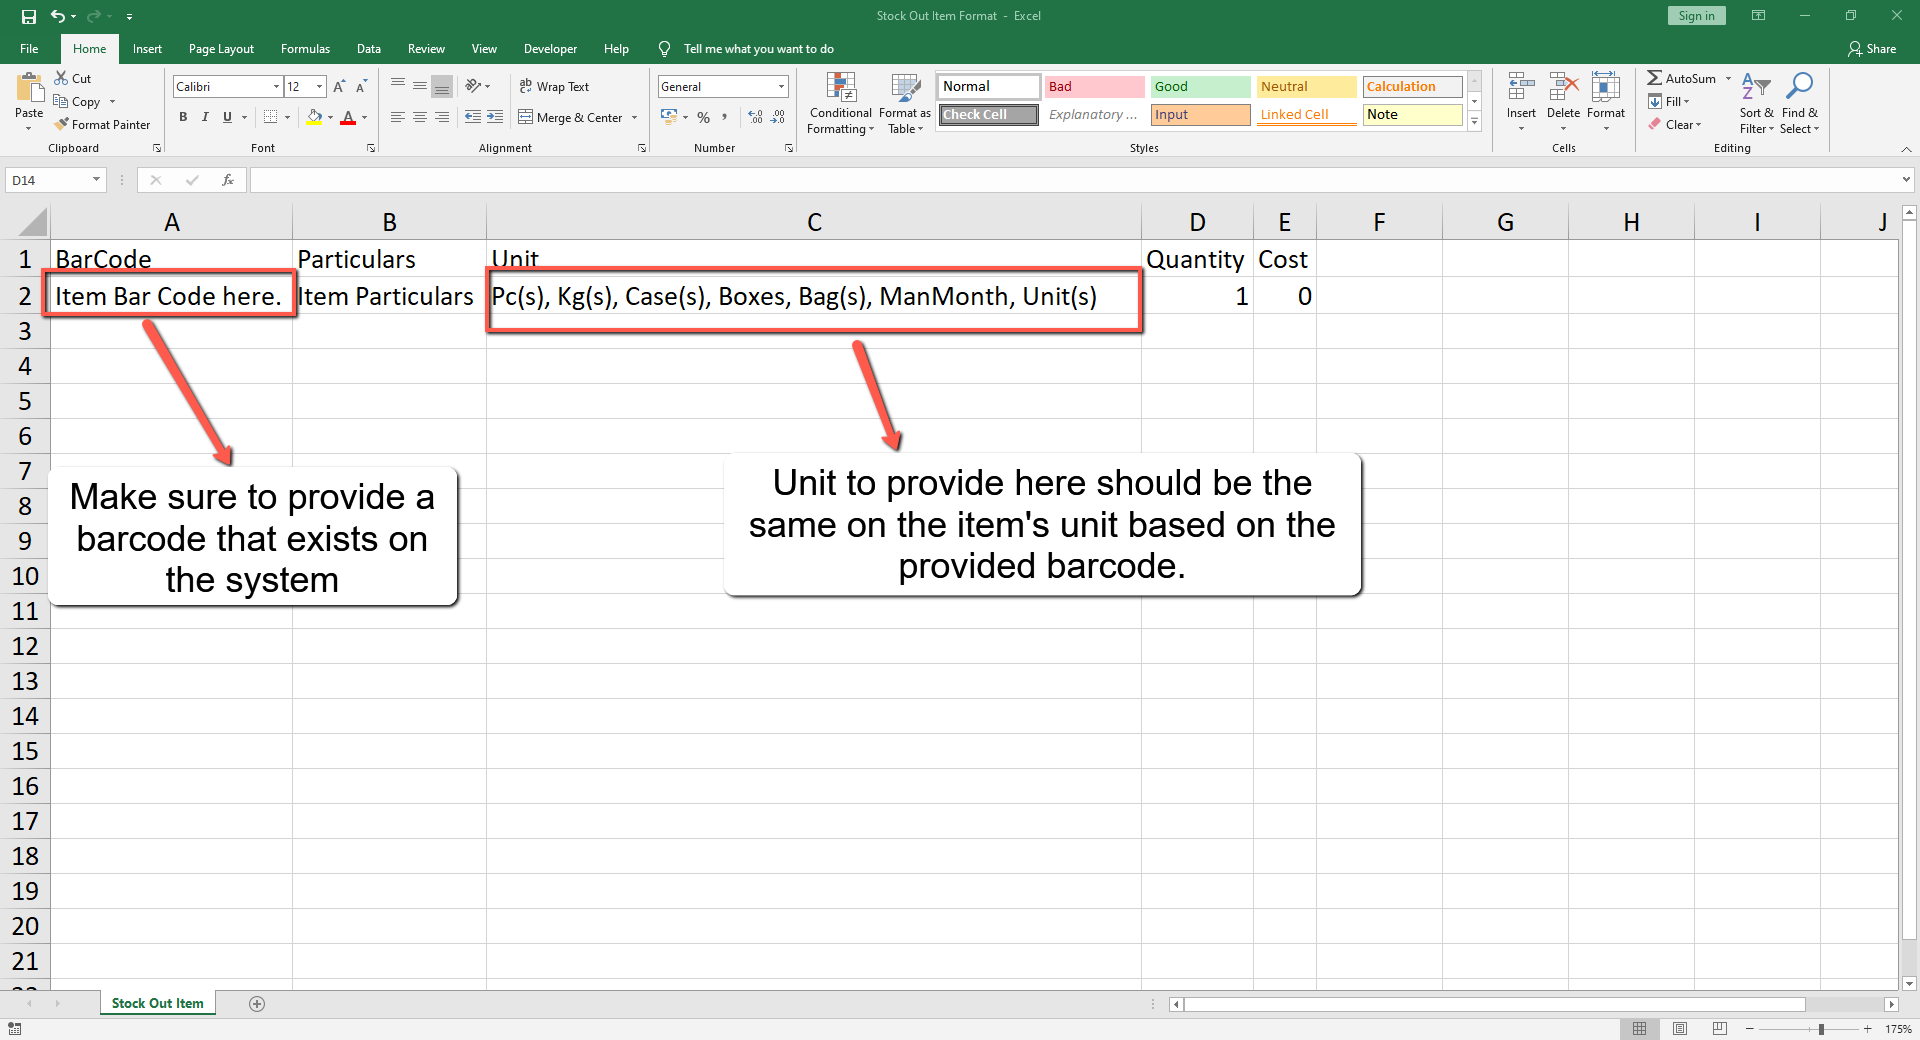
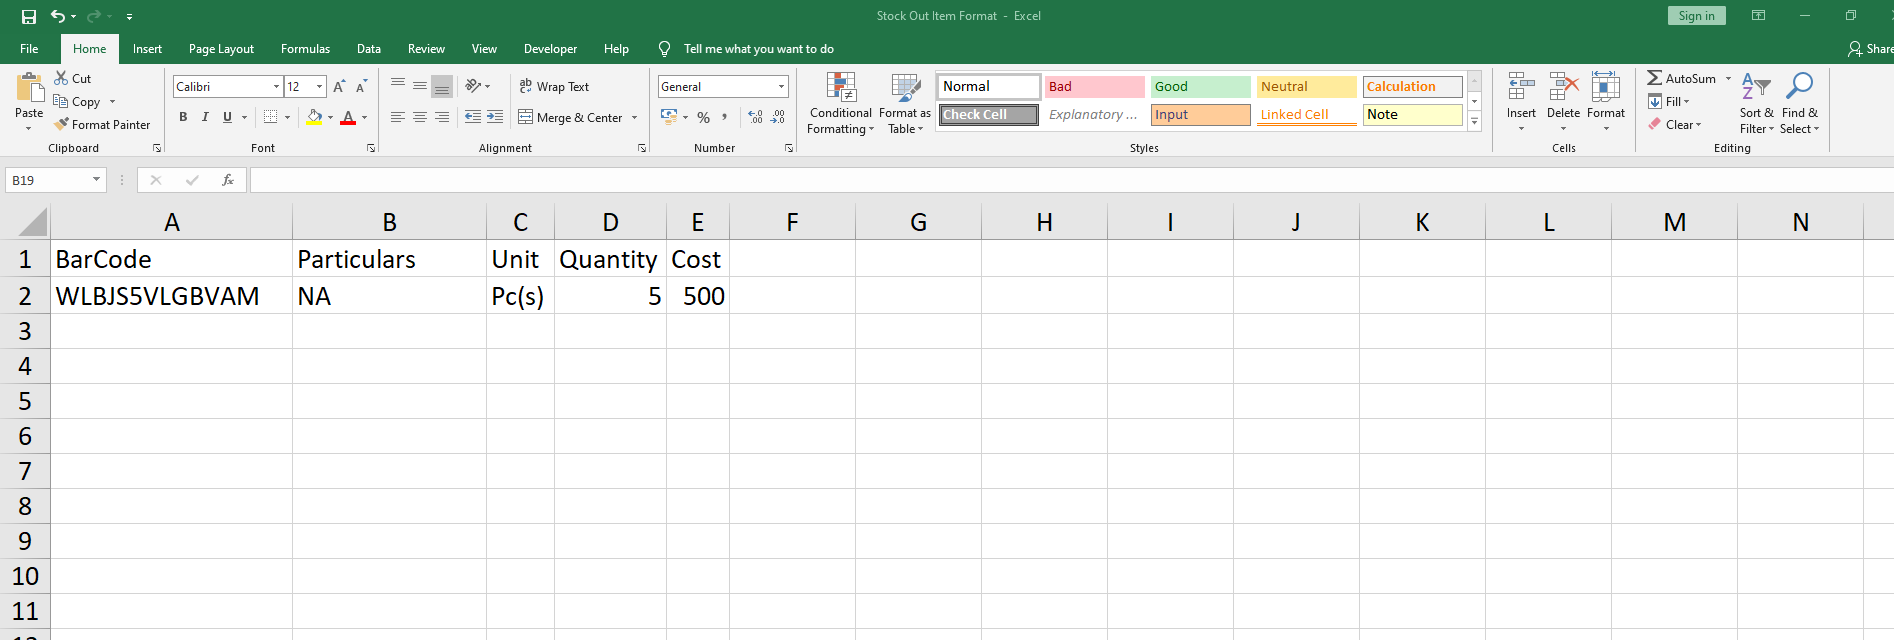
- Save the file.
- Go back to the system, then click again the Functions button then click the Upload Items.
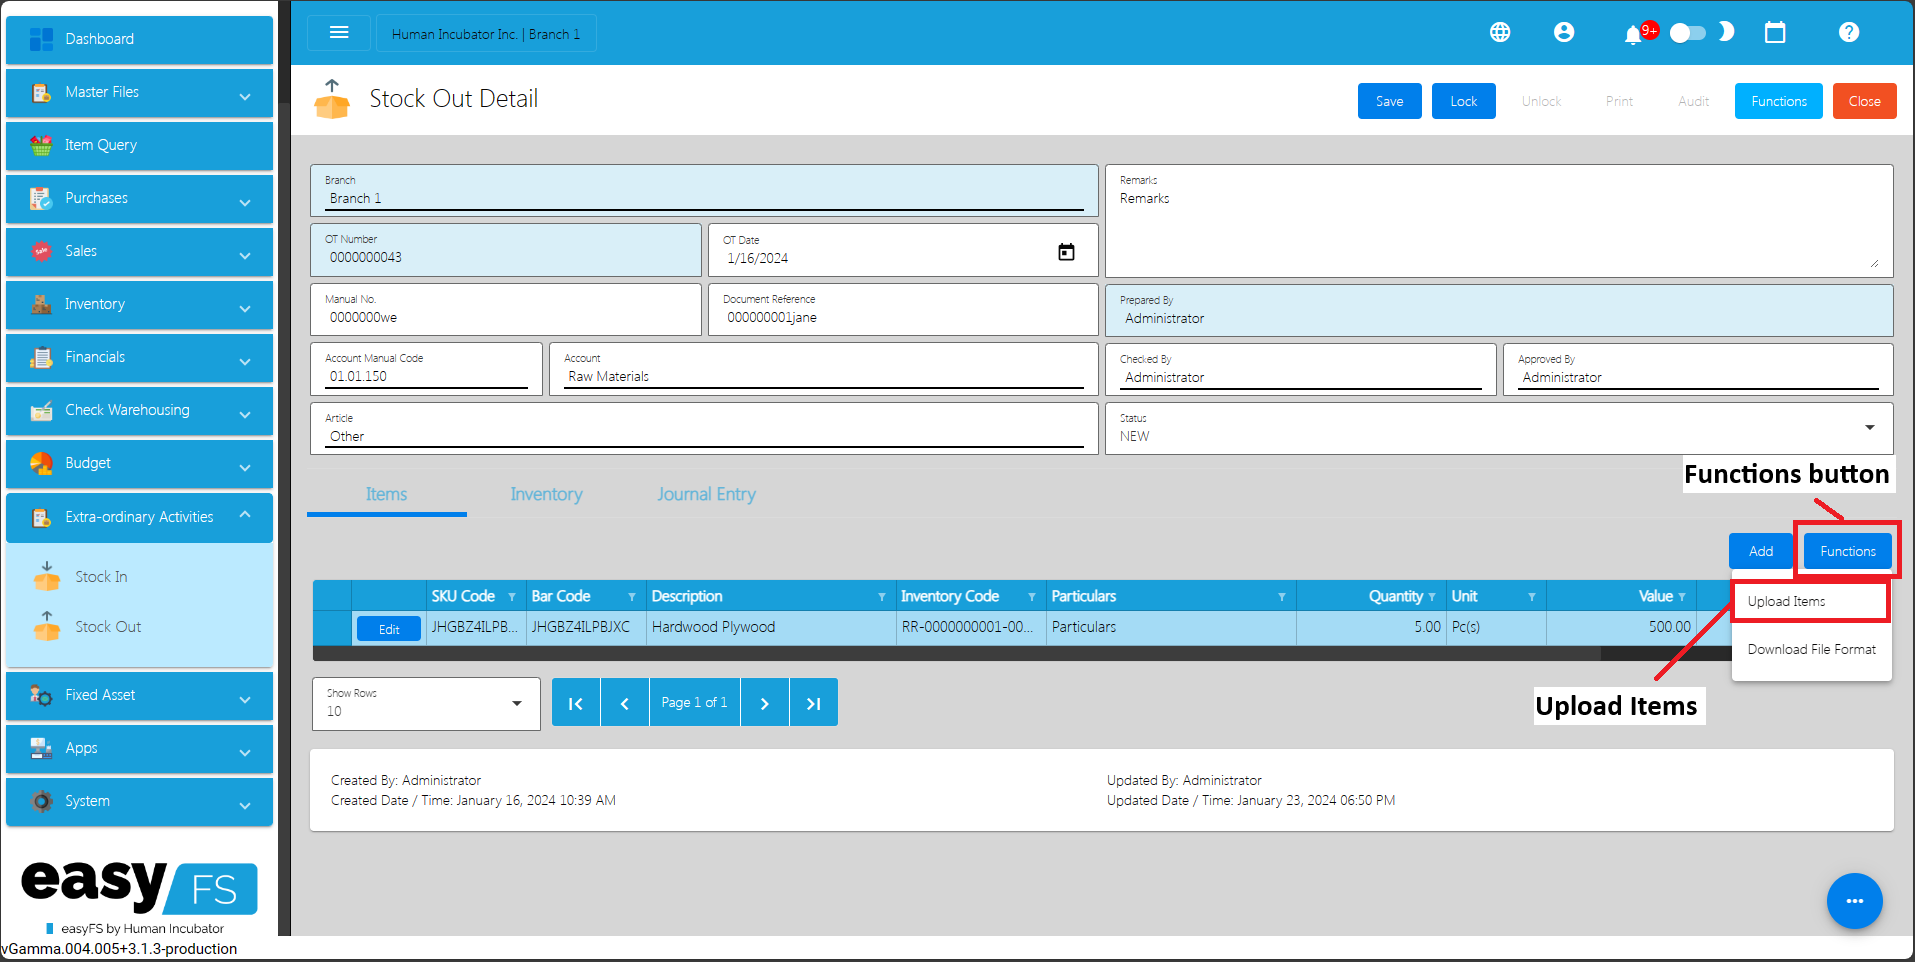
- Locate the file then you can double click the file to upload.
- Once bulk uploading is successful, you will see a success toast message and the Stock Out line item will automatically be supplied with data from the template.
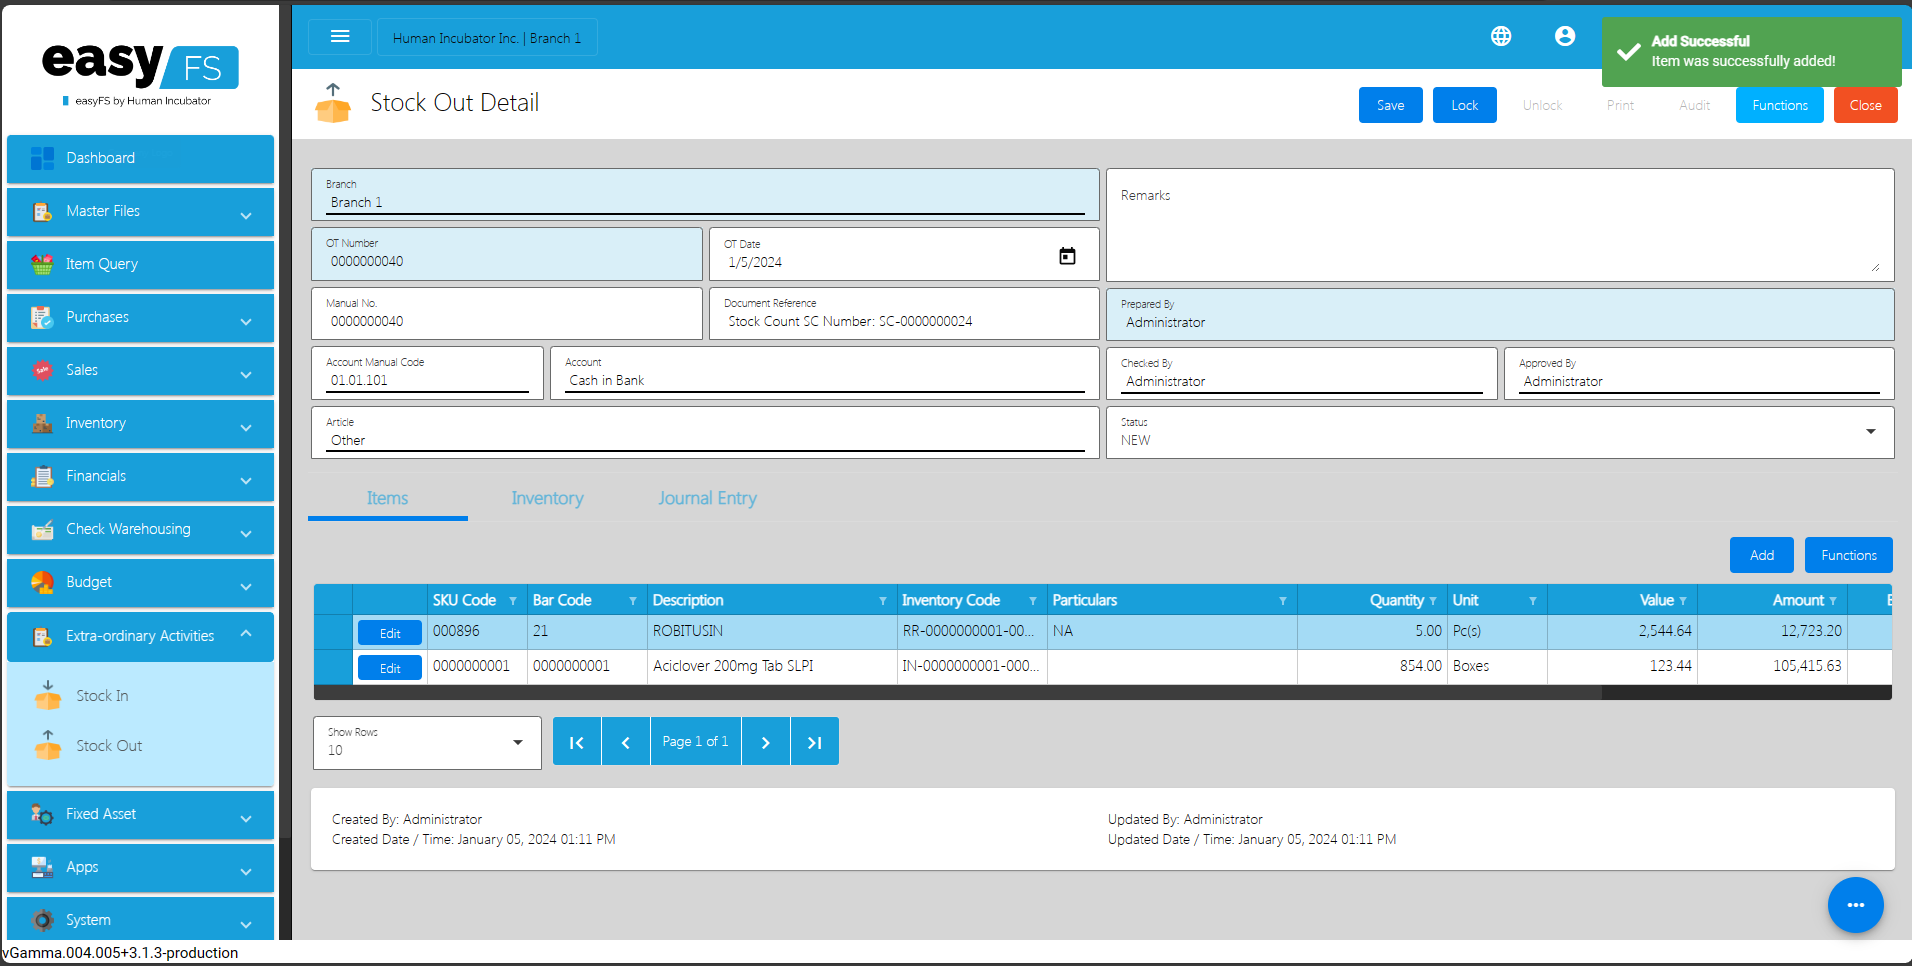
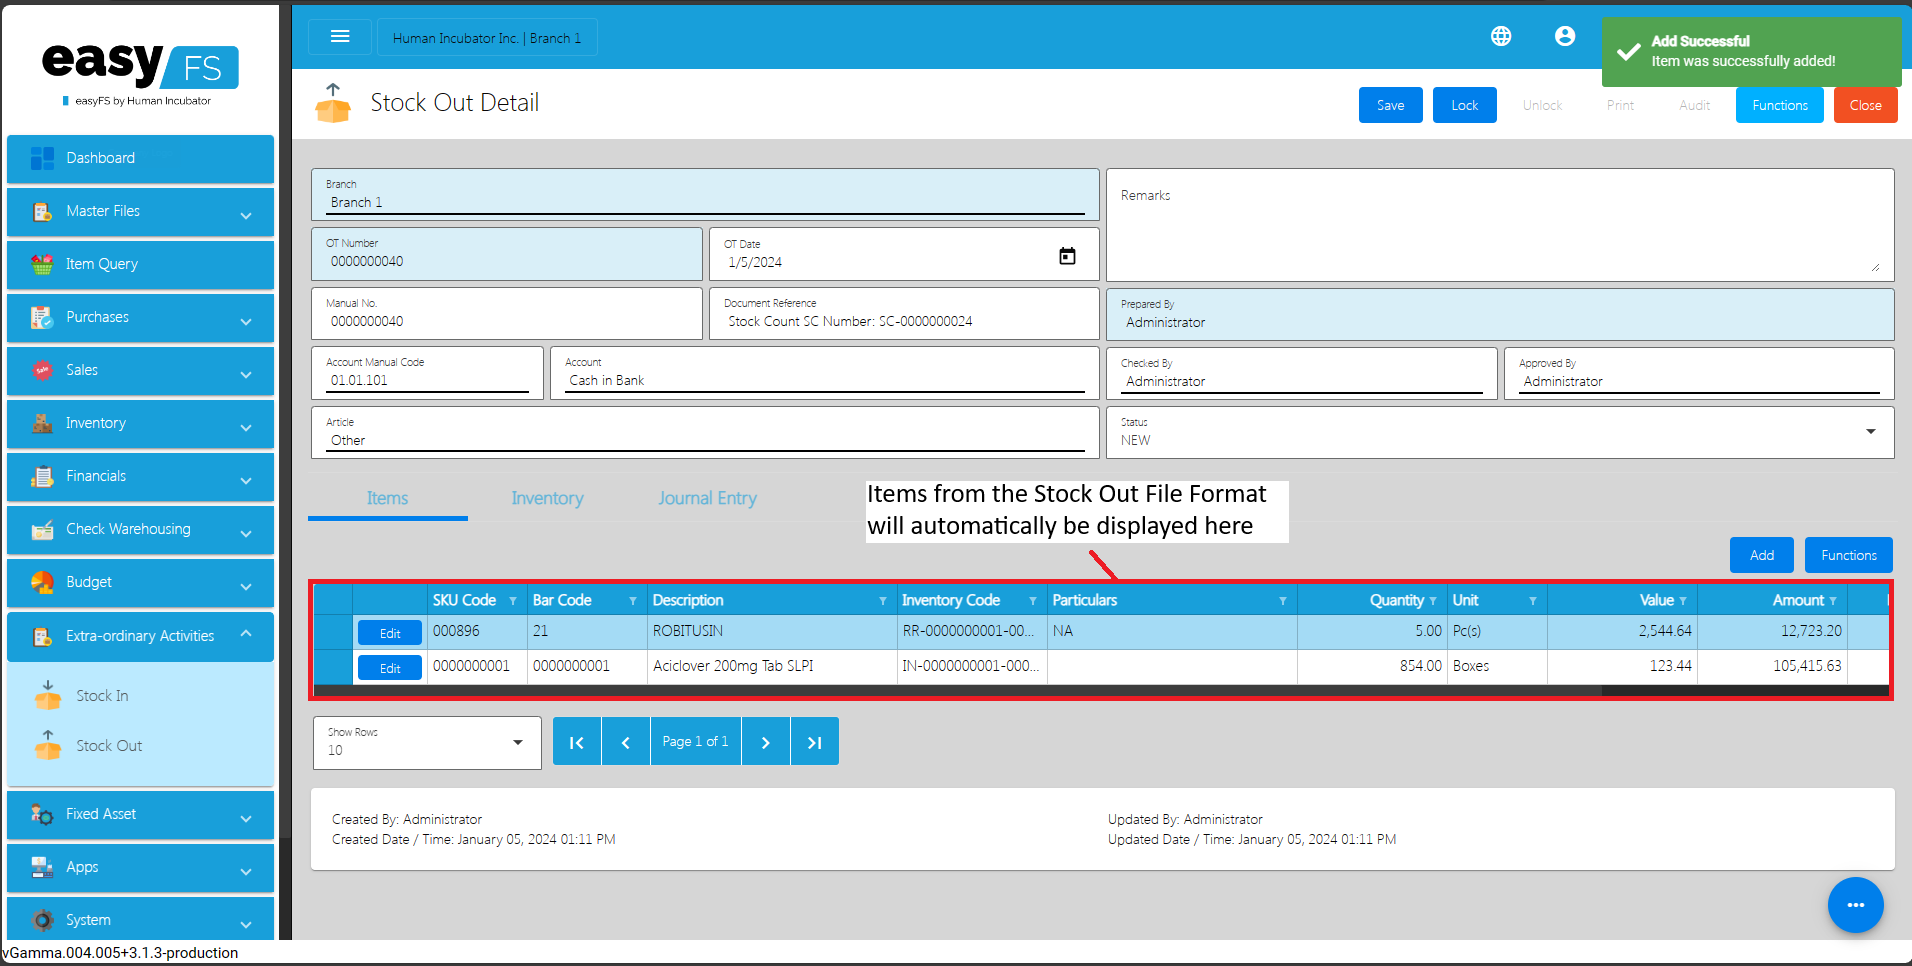
- Review the details and if everything is okay, Save and lock the record. The Save button allows you to save the Stock In detail you created and it does not affect the inventory yet. If you want to have an effect in your inventory (increase the item’s quantity), click the Lock button.
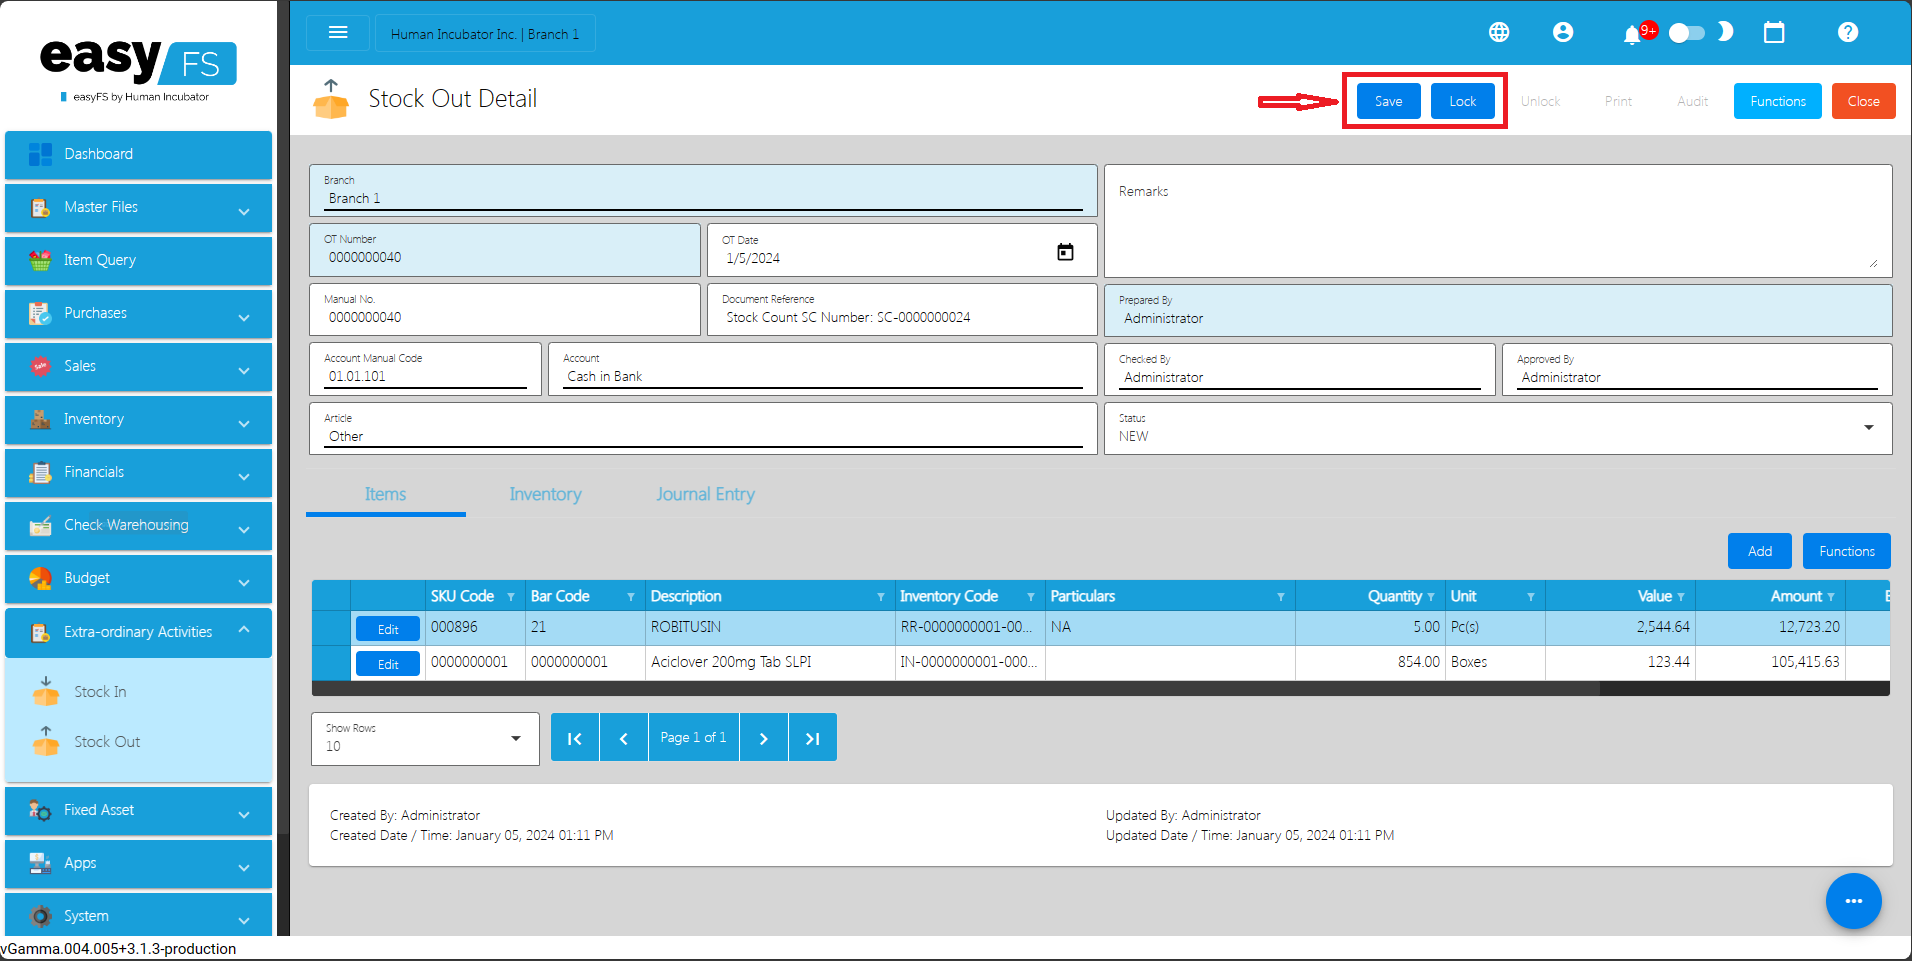
Supplier Return via Stock Out
Diagram:
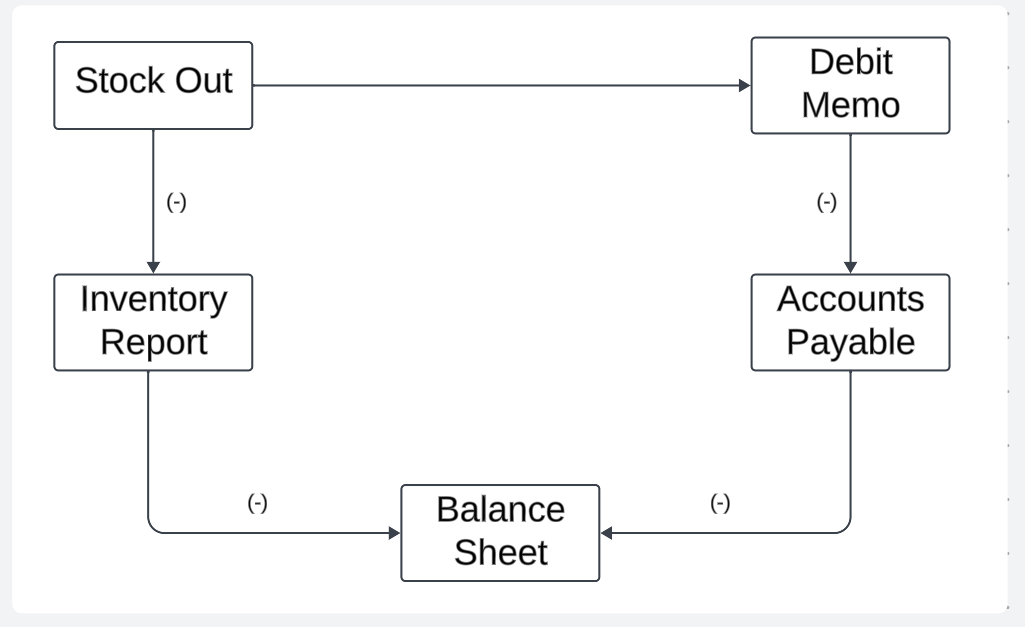
Diagram:
Steps on how to do Supplier Return via Stock Out:
- Go to Dashboard, then select the Inventory tab.
- Scroll down and look for the Stock Out menu.
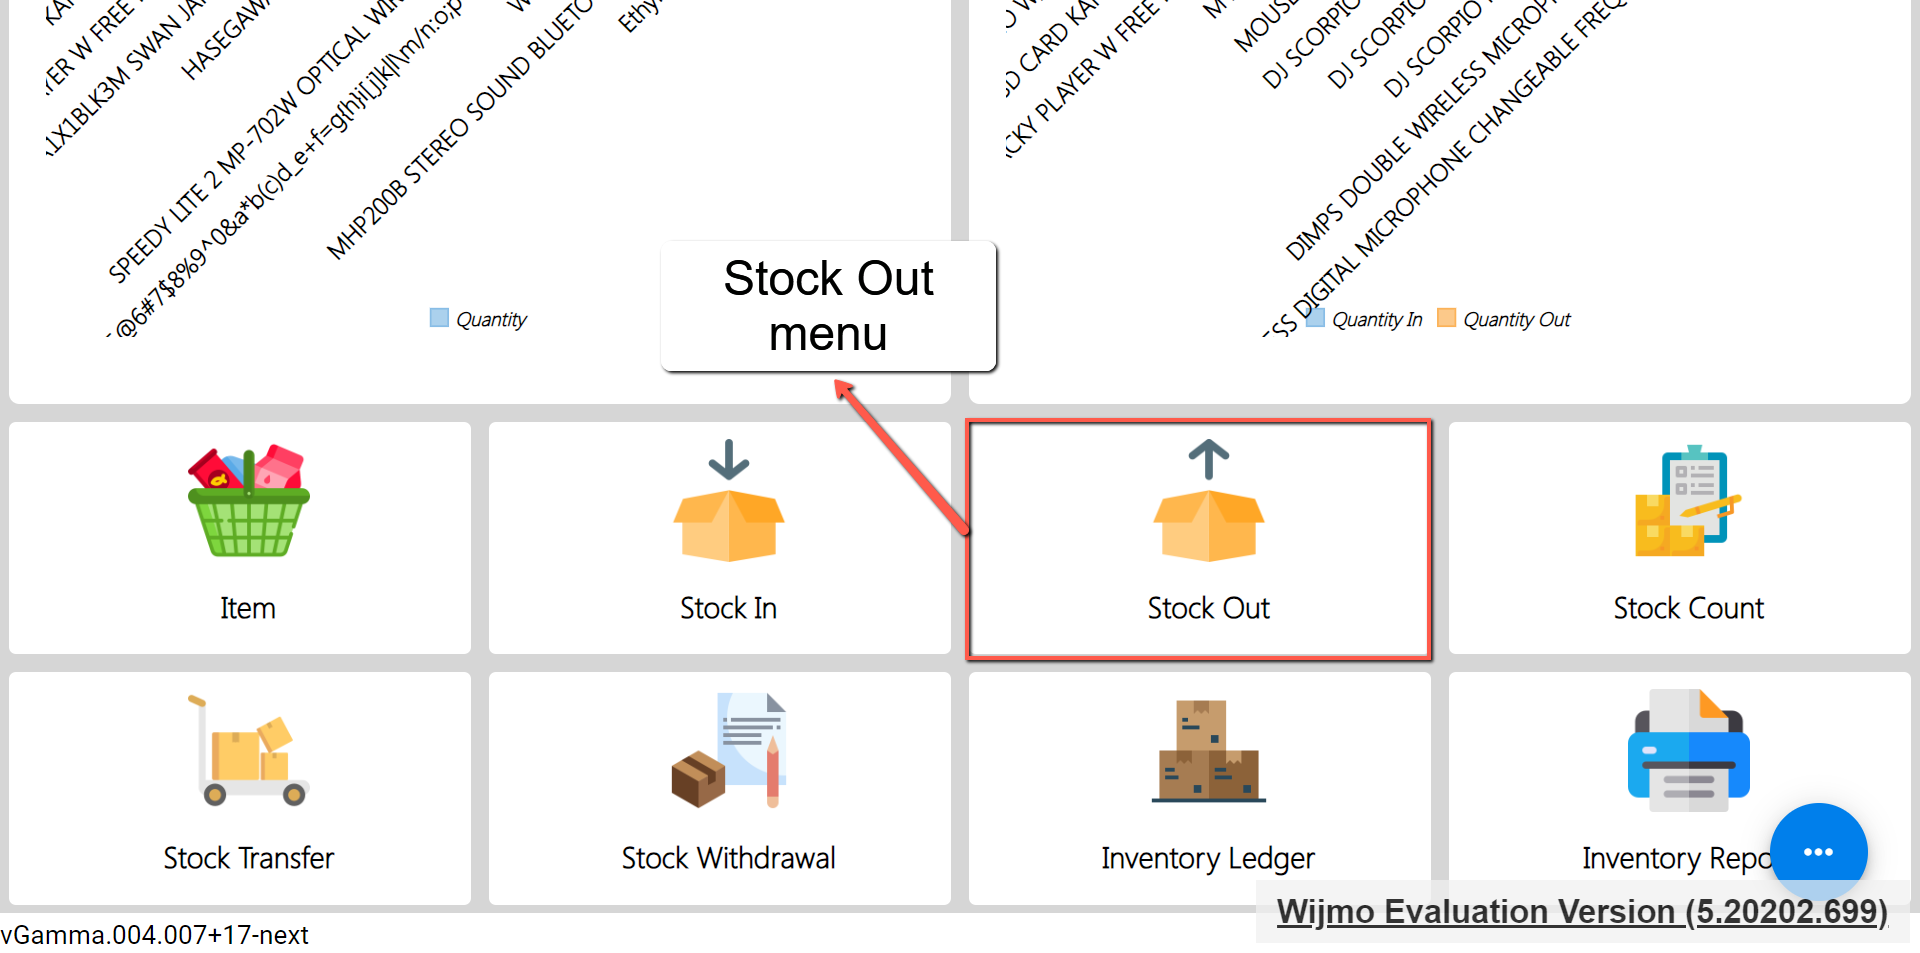
- Click the menu, you will be redirected to the Stock Out list.
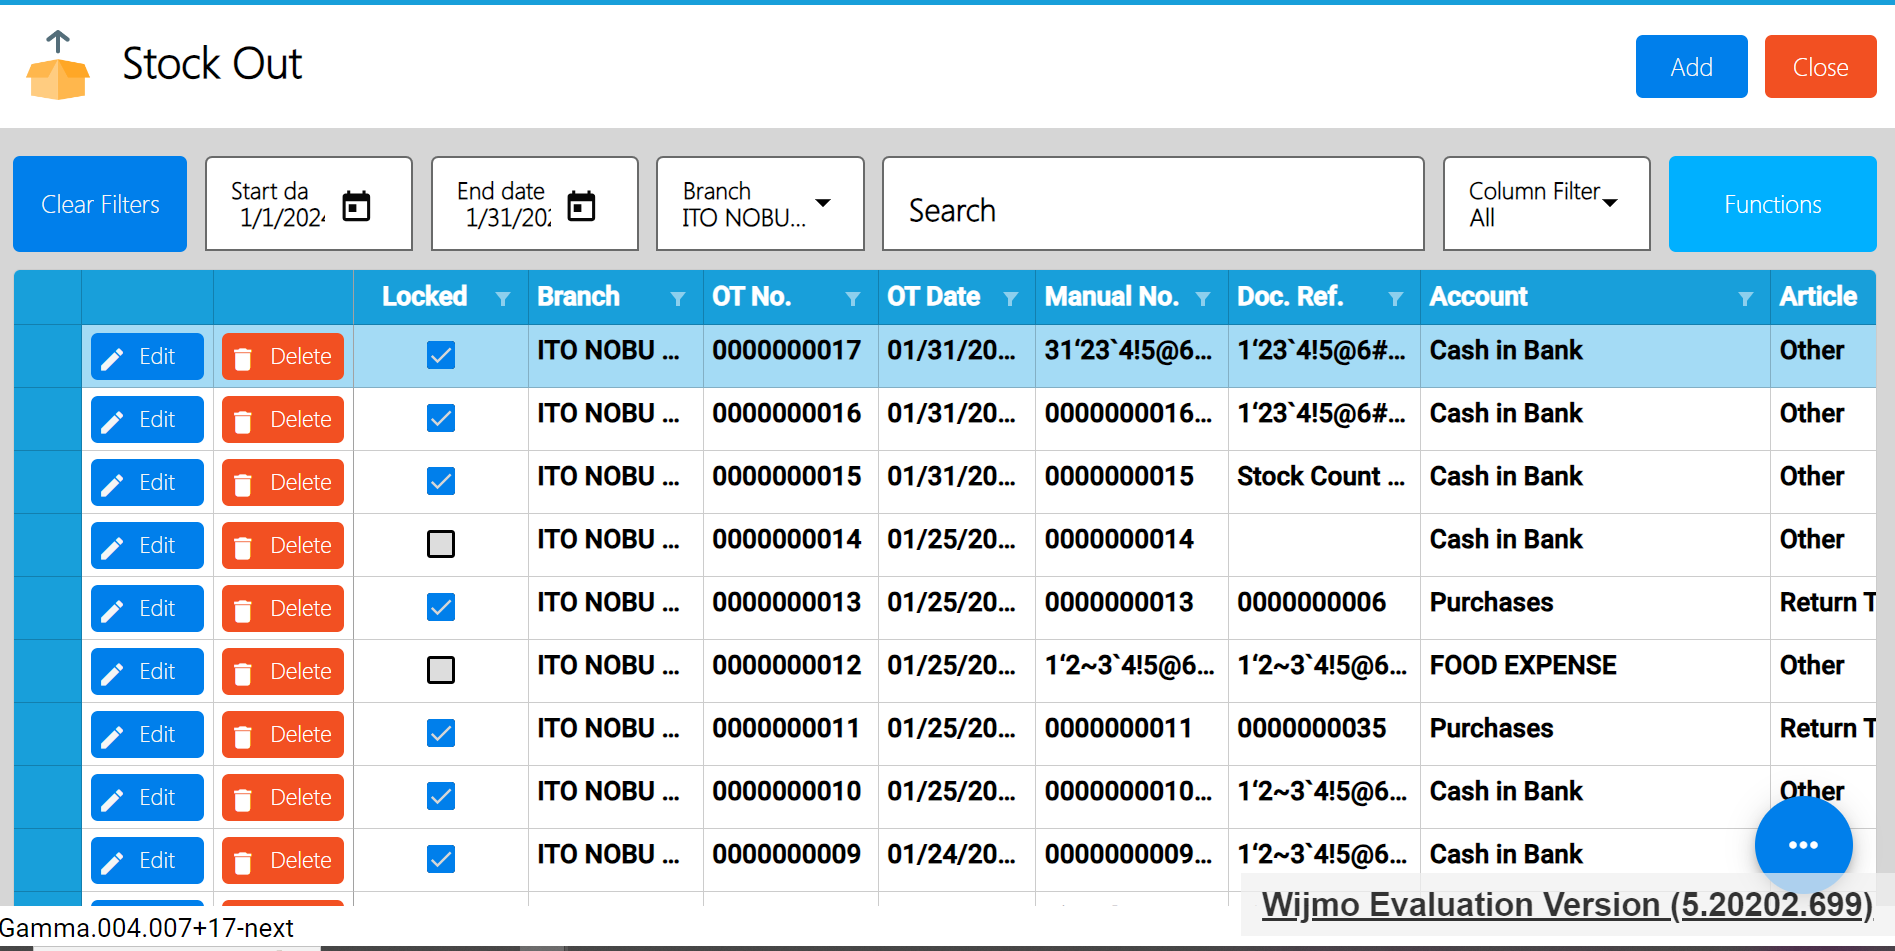
- From the Stock Out list, click the Add button to add new Stock Out details to be used for Supplier Return.
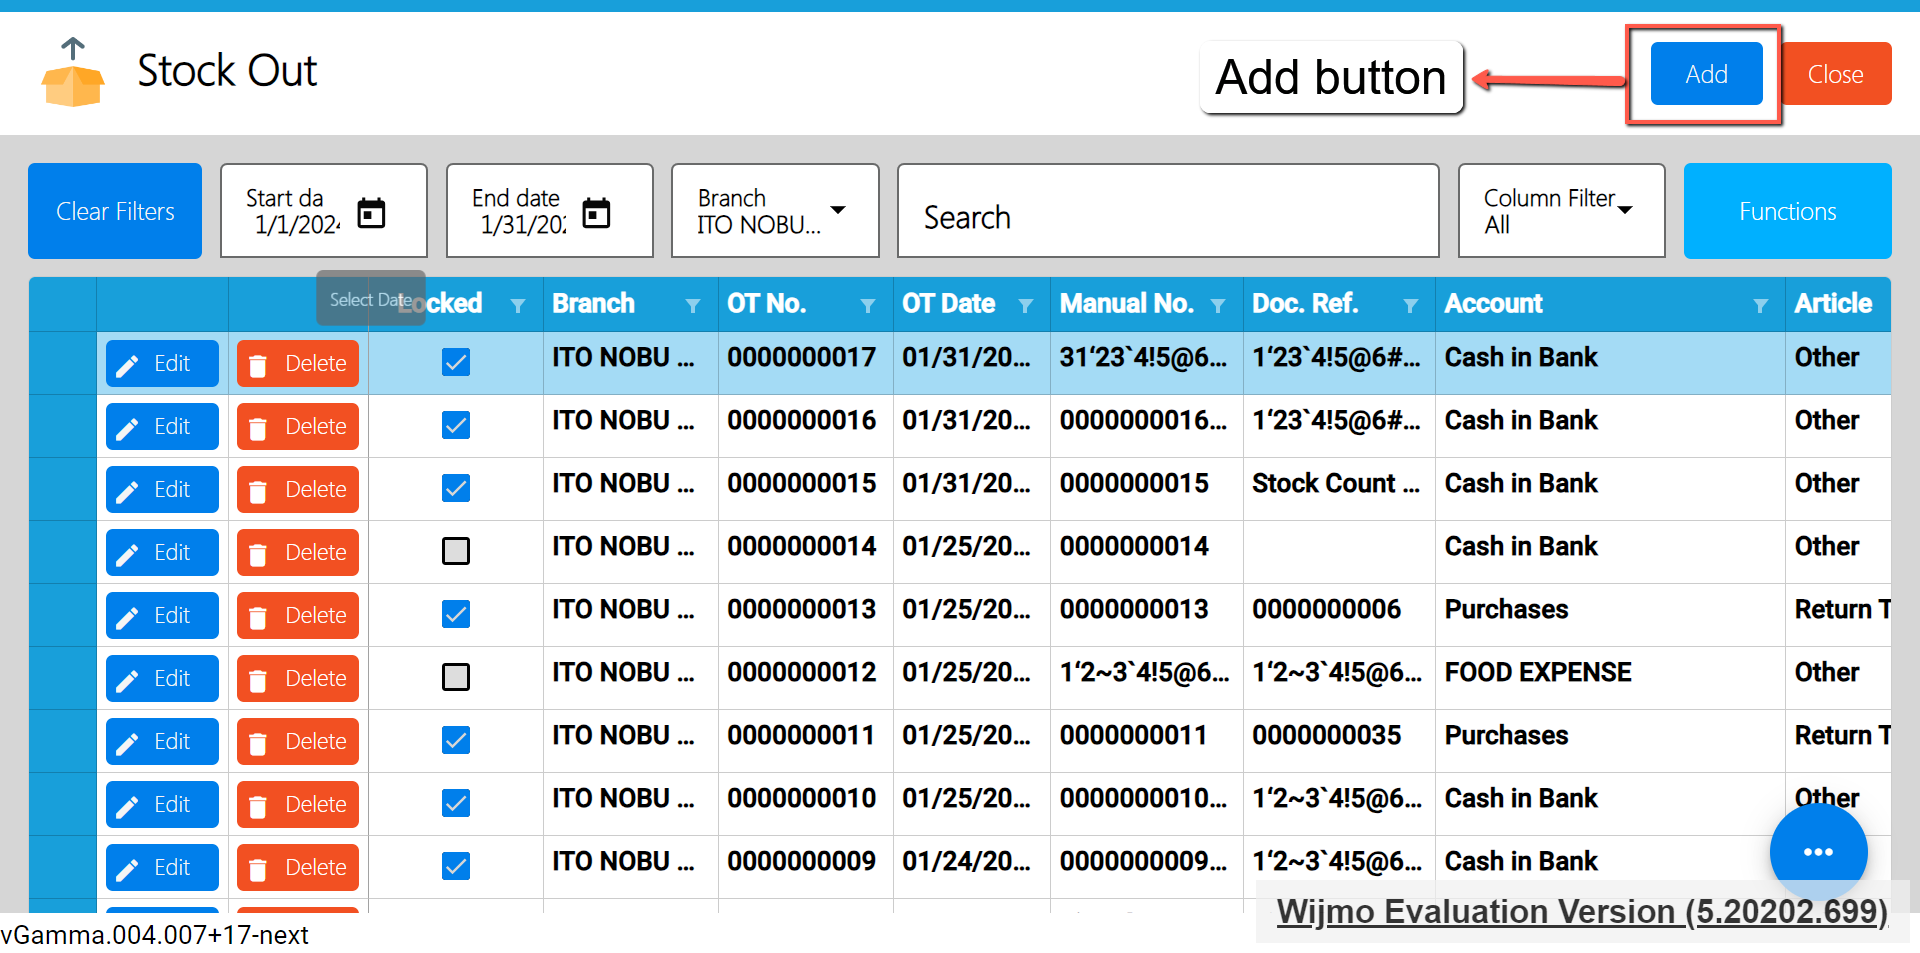
- After clicking the Add button, you will be redirected to the Stock Out detail page. There’s no need to input for the Stock Out headers, just simply click the Functions button, then select the Supplier Return menu.
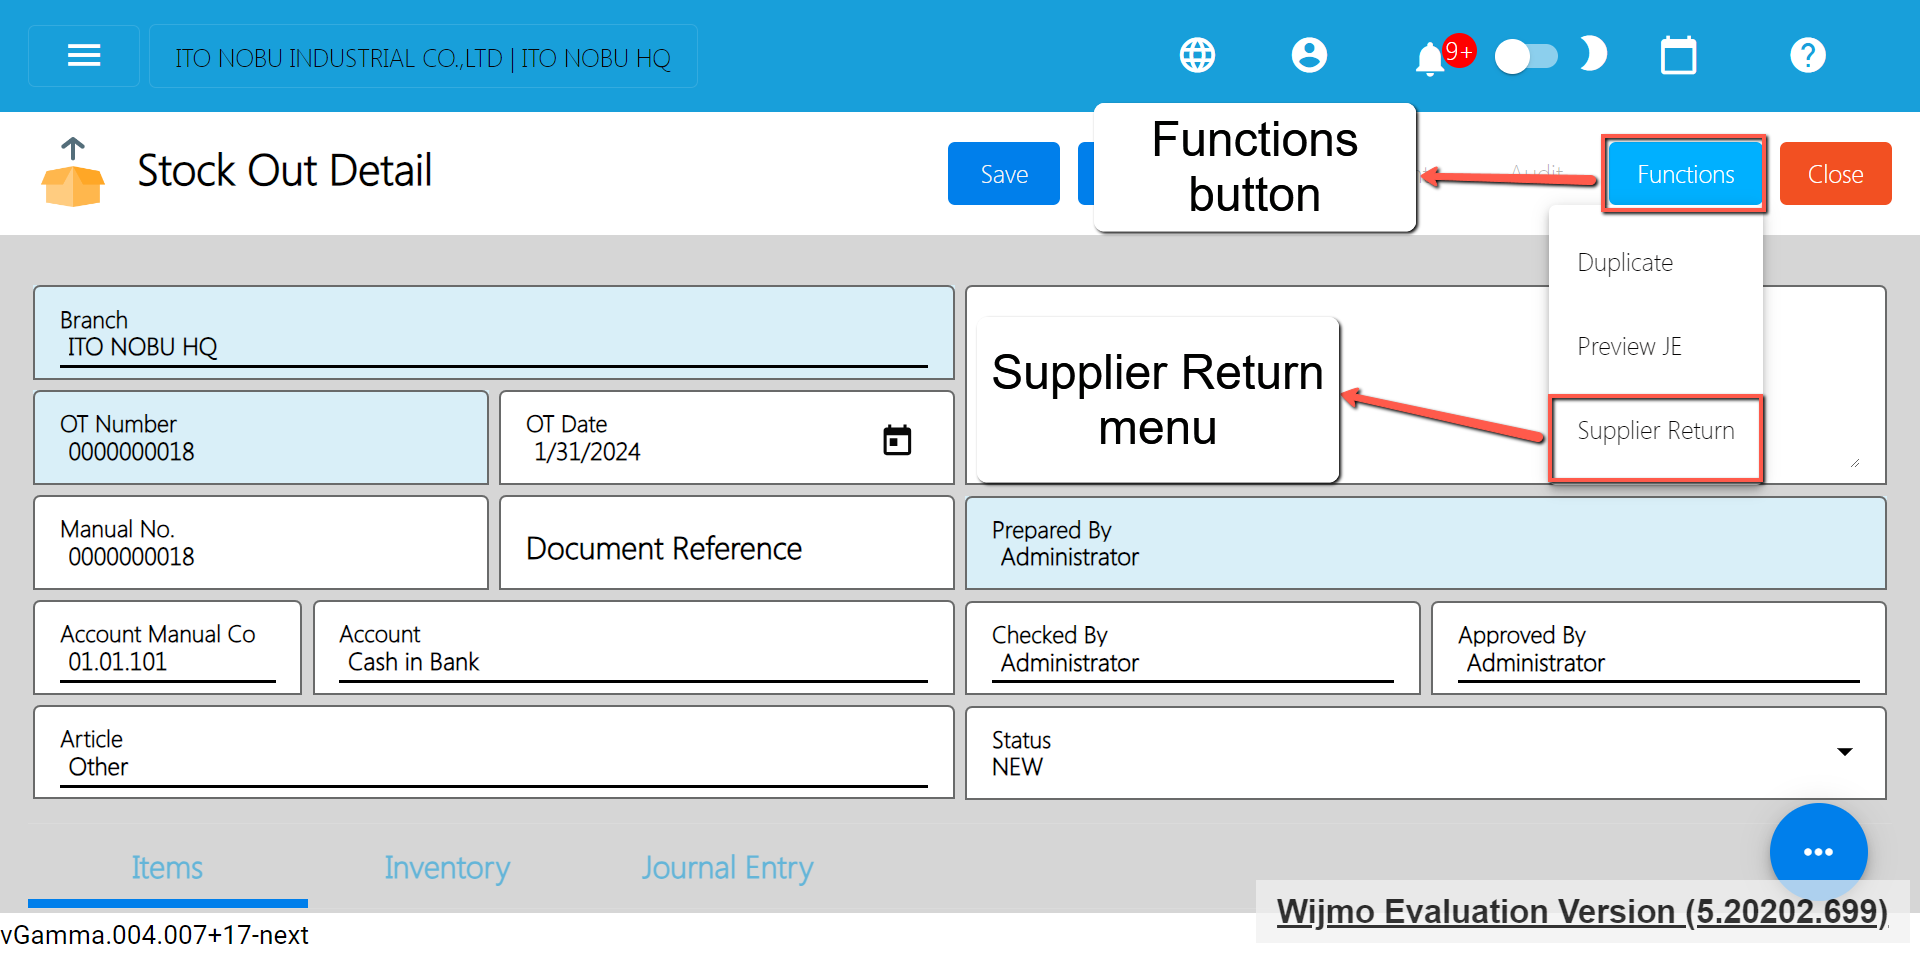
- After clicking the Supplier Return, a Pick Receiving Receipt popup will display.
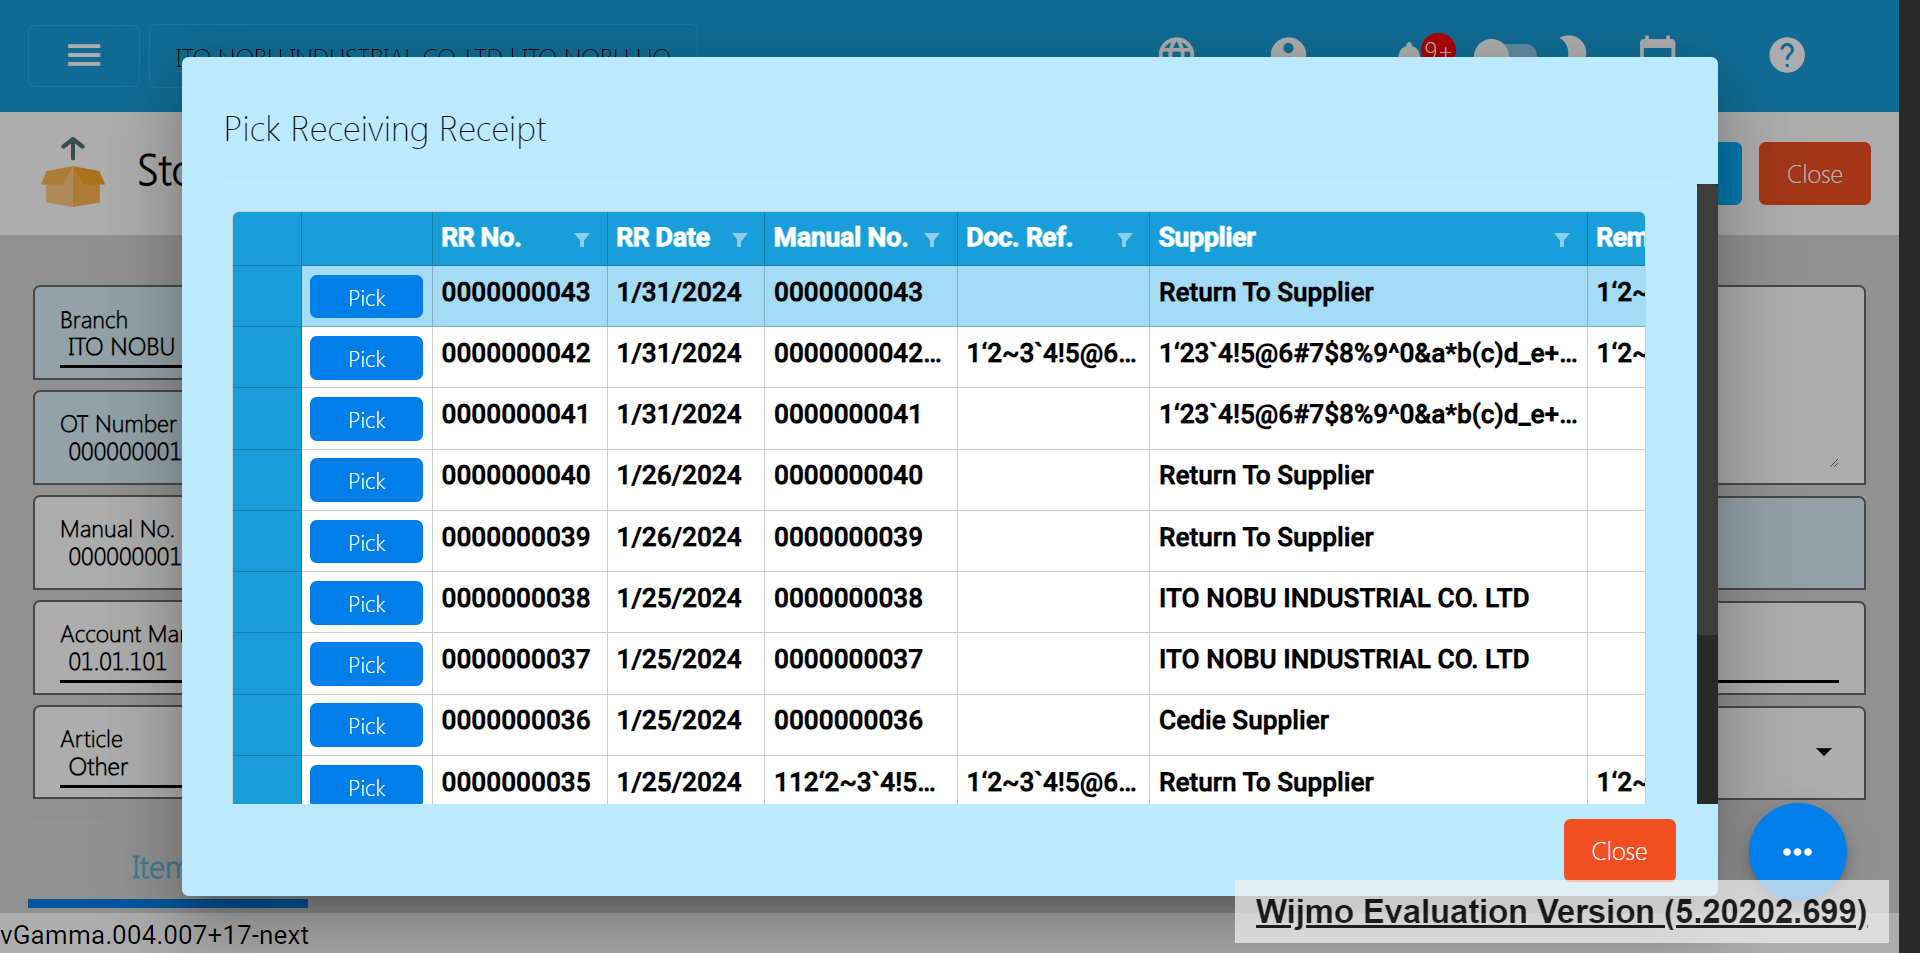
- To quickly find the Receiving Receipt number based on the Supplier, look for the Supplier column.
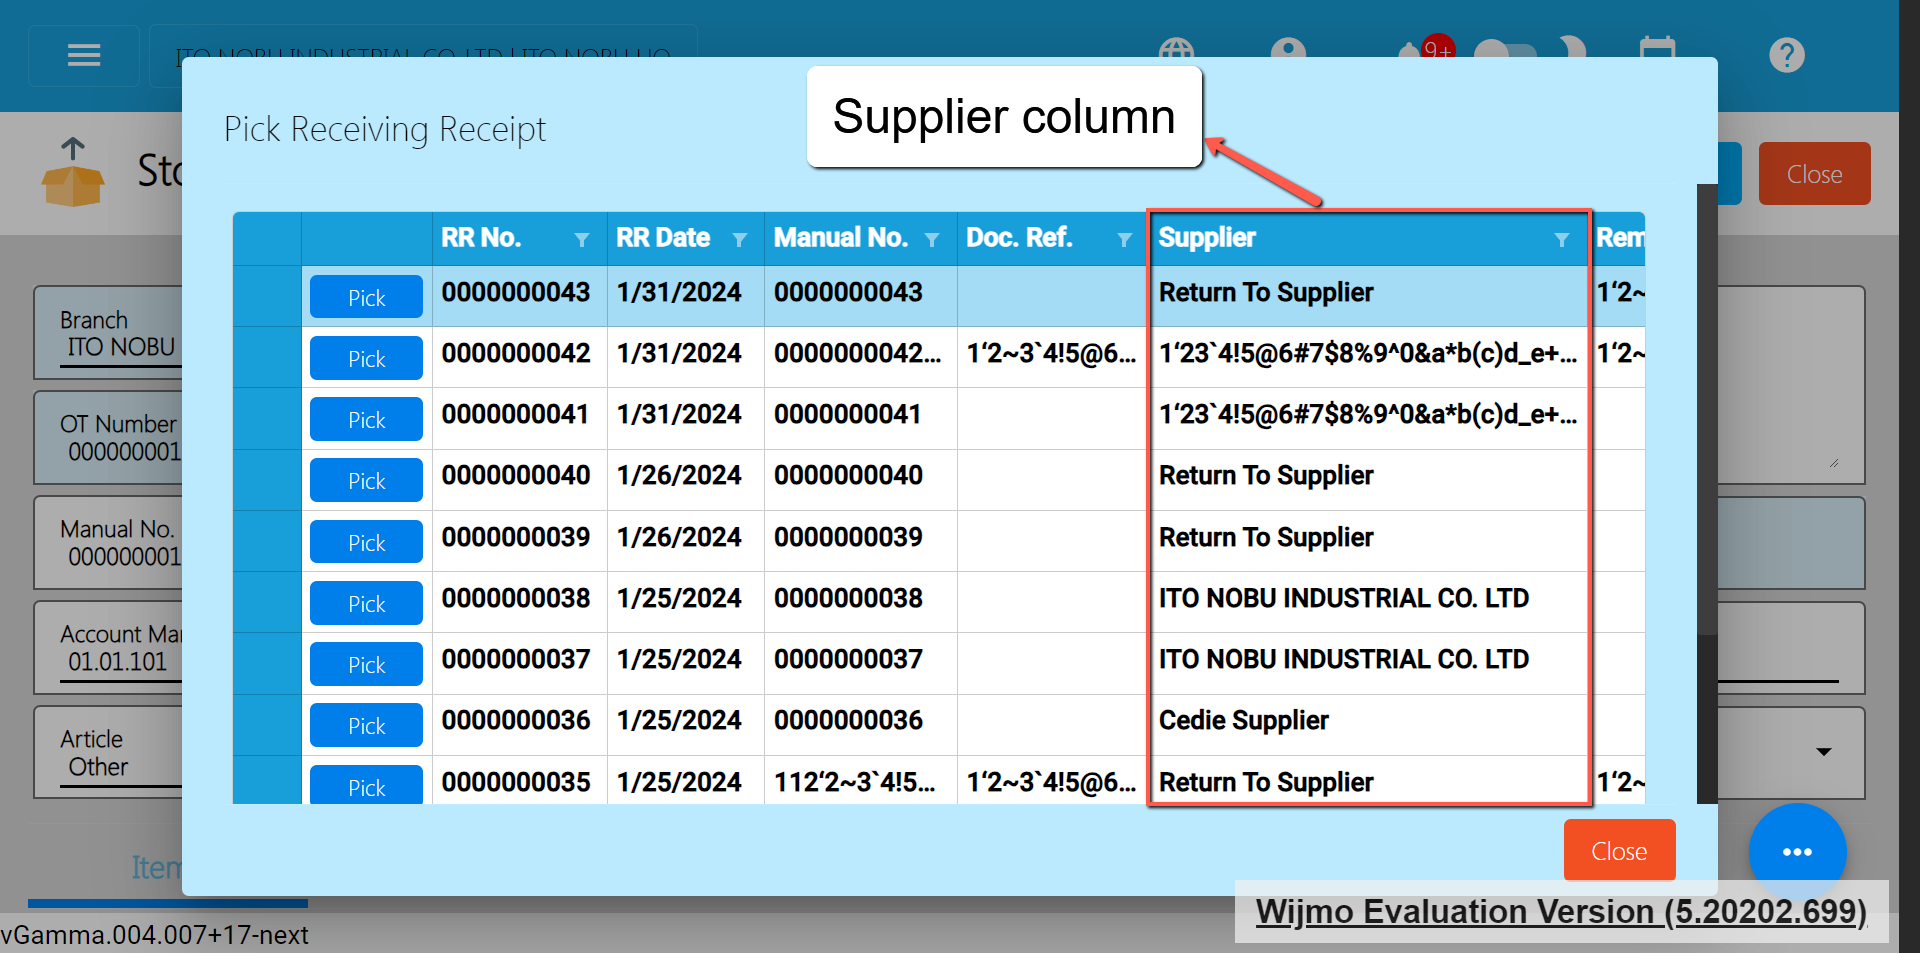
- Select the filter icon, and input the Supplier name.
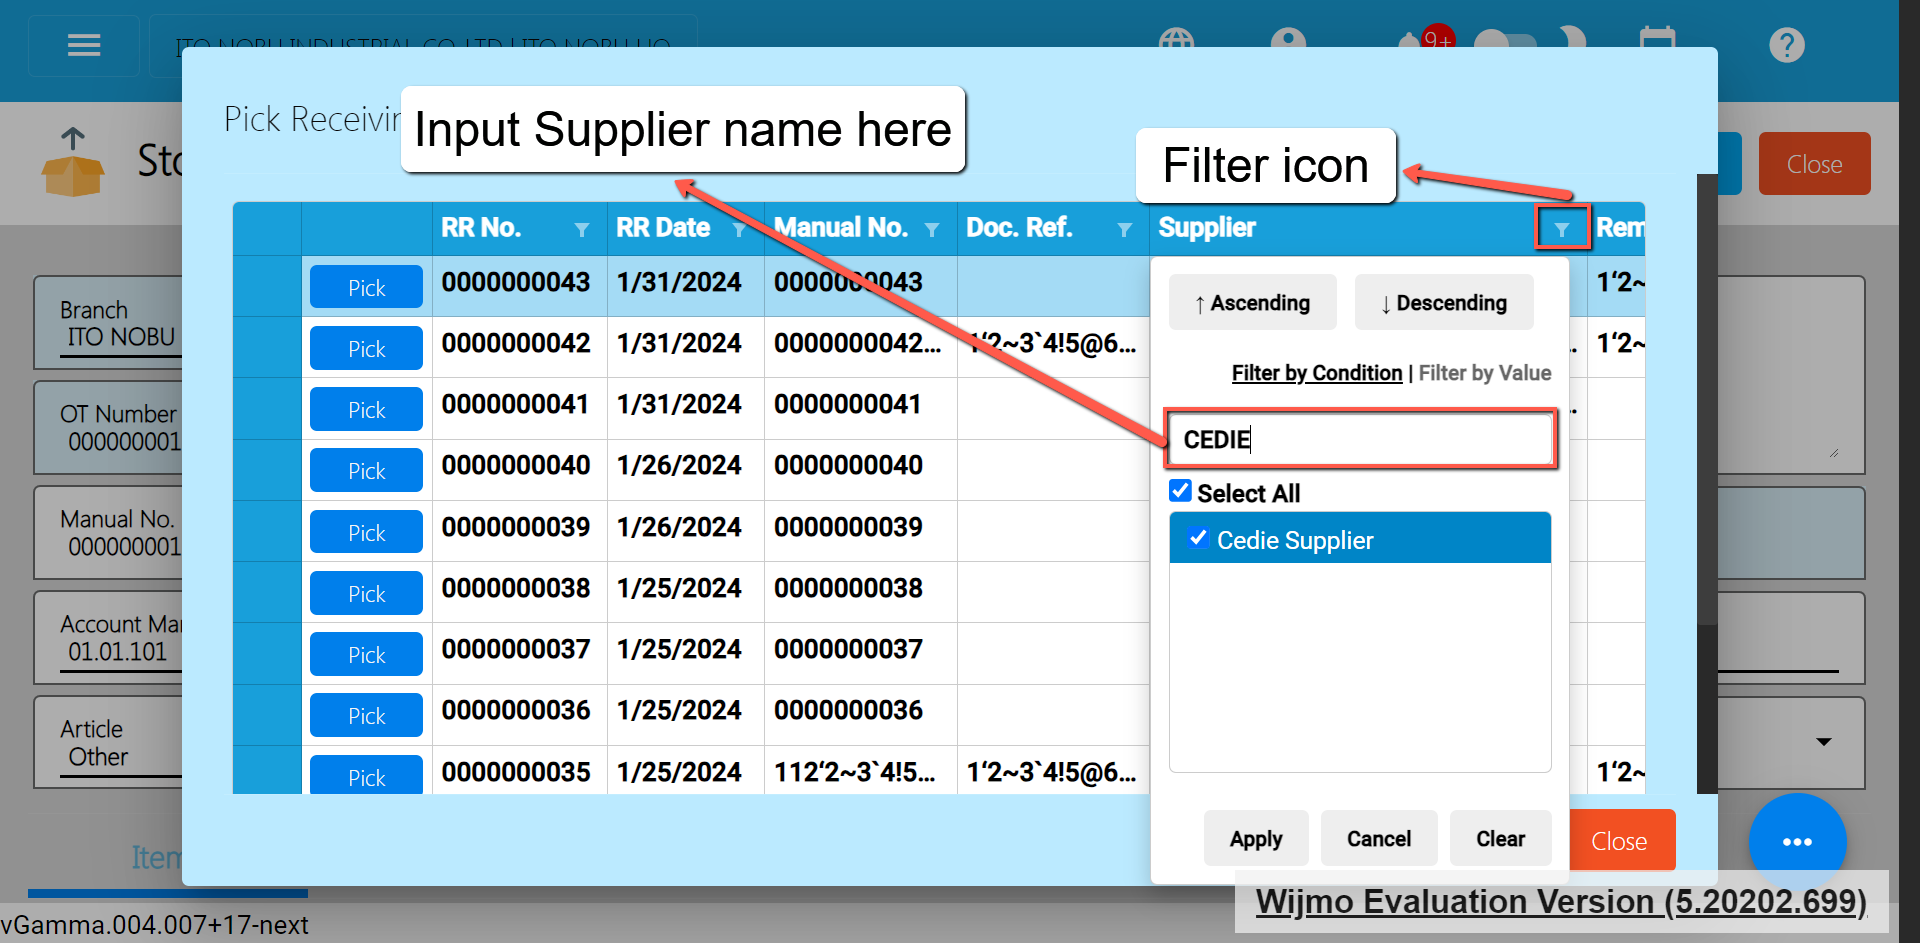
- Once the Supplier name is found, click the Apply button.
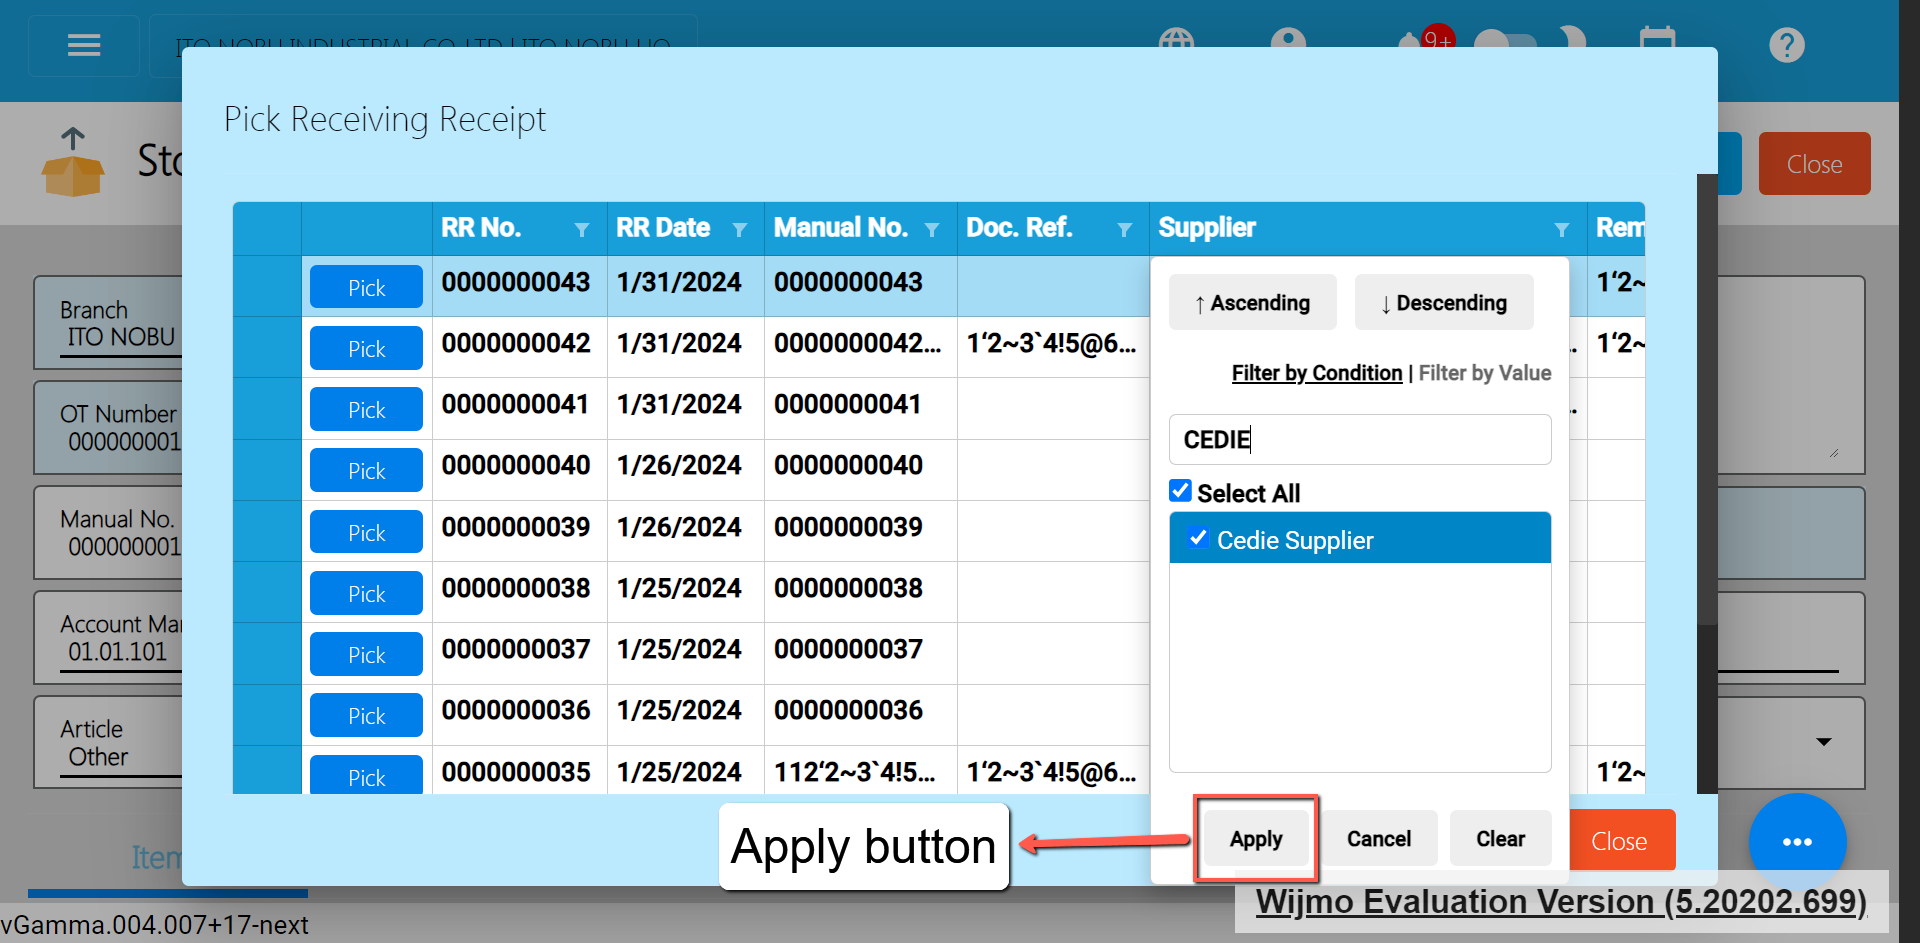
- It will now display the list of Receiving Receipts based on the selected Supplier.
- Now, look for the Receiving Receipt number then click the Pick button. Take note: Once Receiving Receipt is already picked, you already executed the Supplier Return. Meaning, you cannot do another Supplier return. If you wish to add another Supplier Return, add new Stock Out detail.
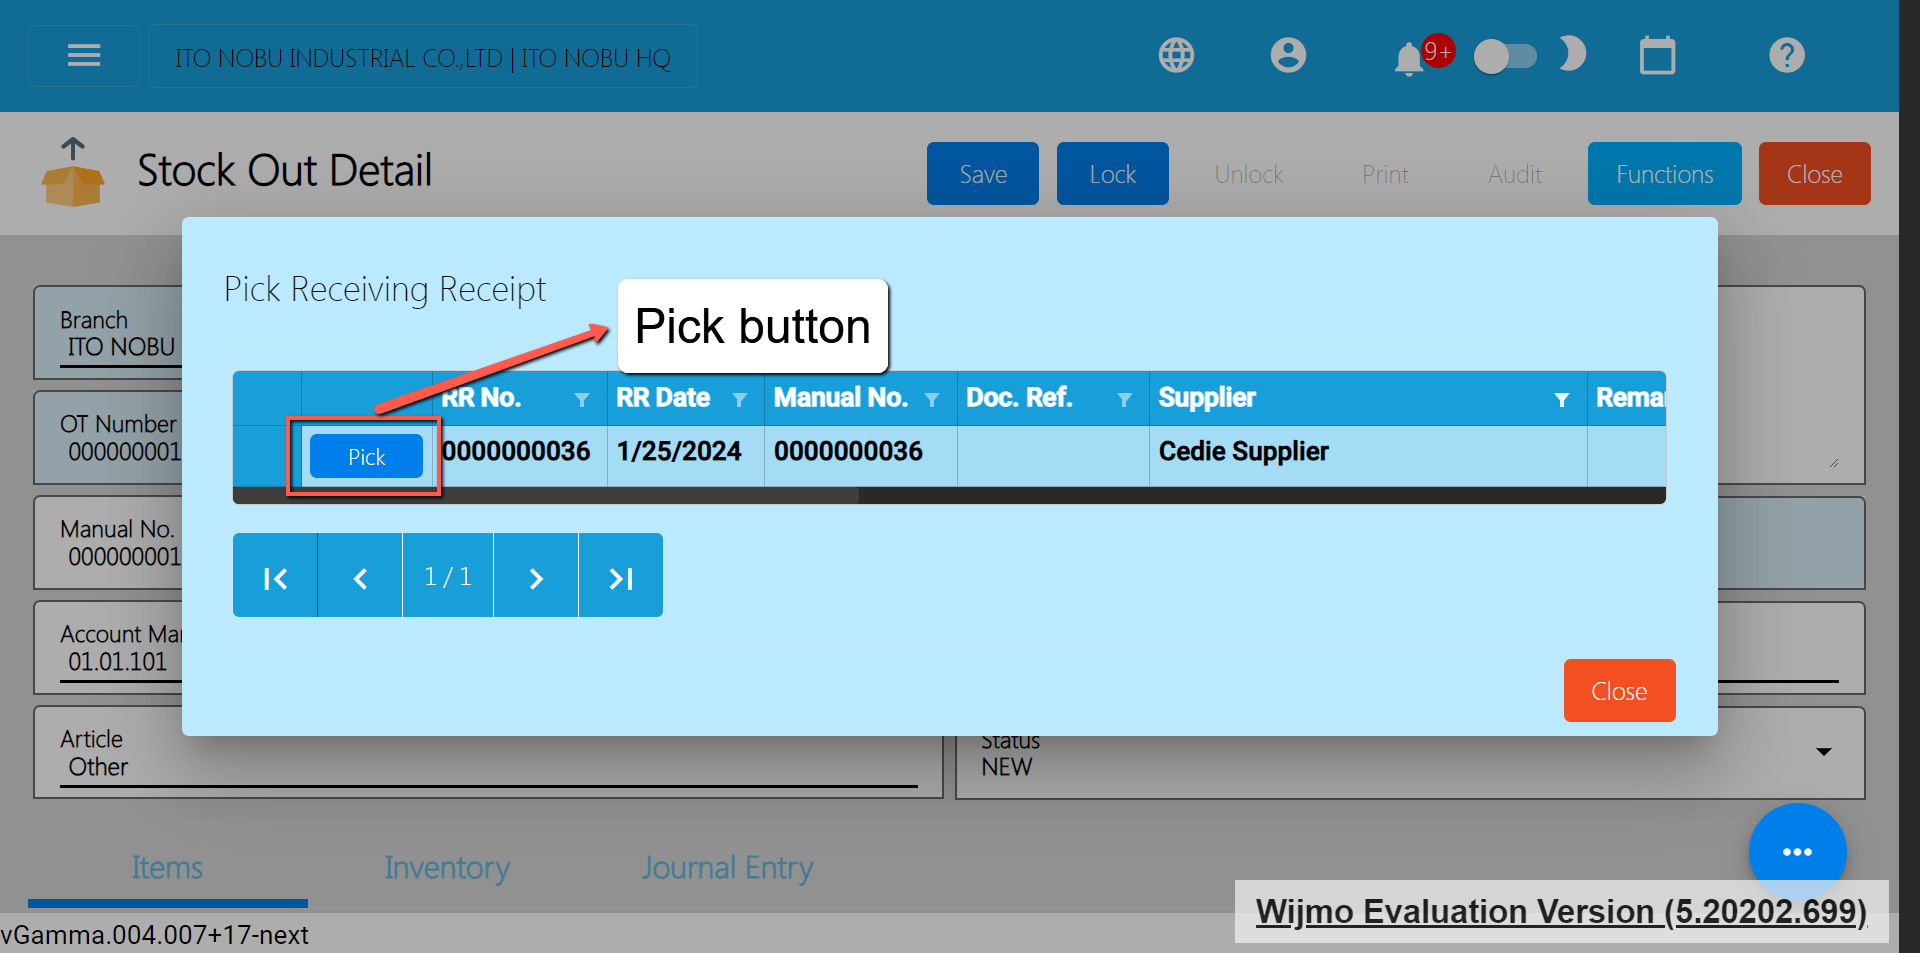
- Once picked, the Stock Out header is automatically populated like:
- Document Reference → Receiving Receipt’s Number
- Account → default Account for Supplier Return (Example: Purchase Return)
- Article → Supplier Name
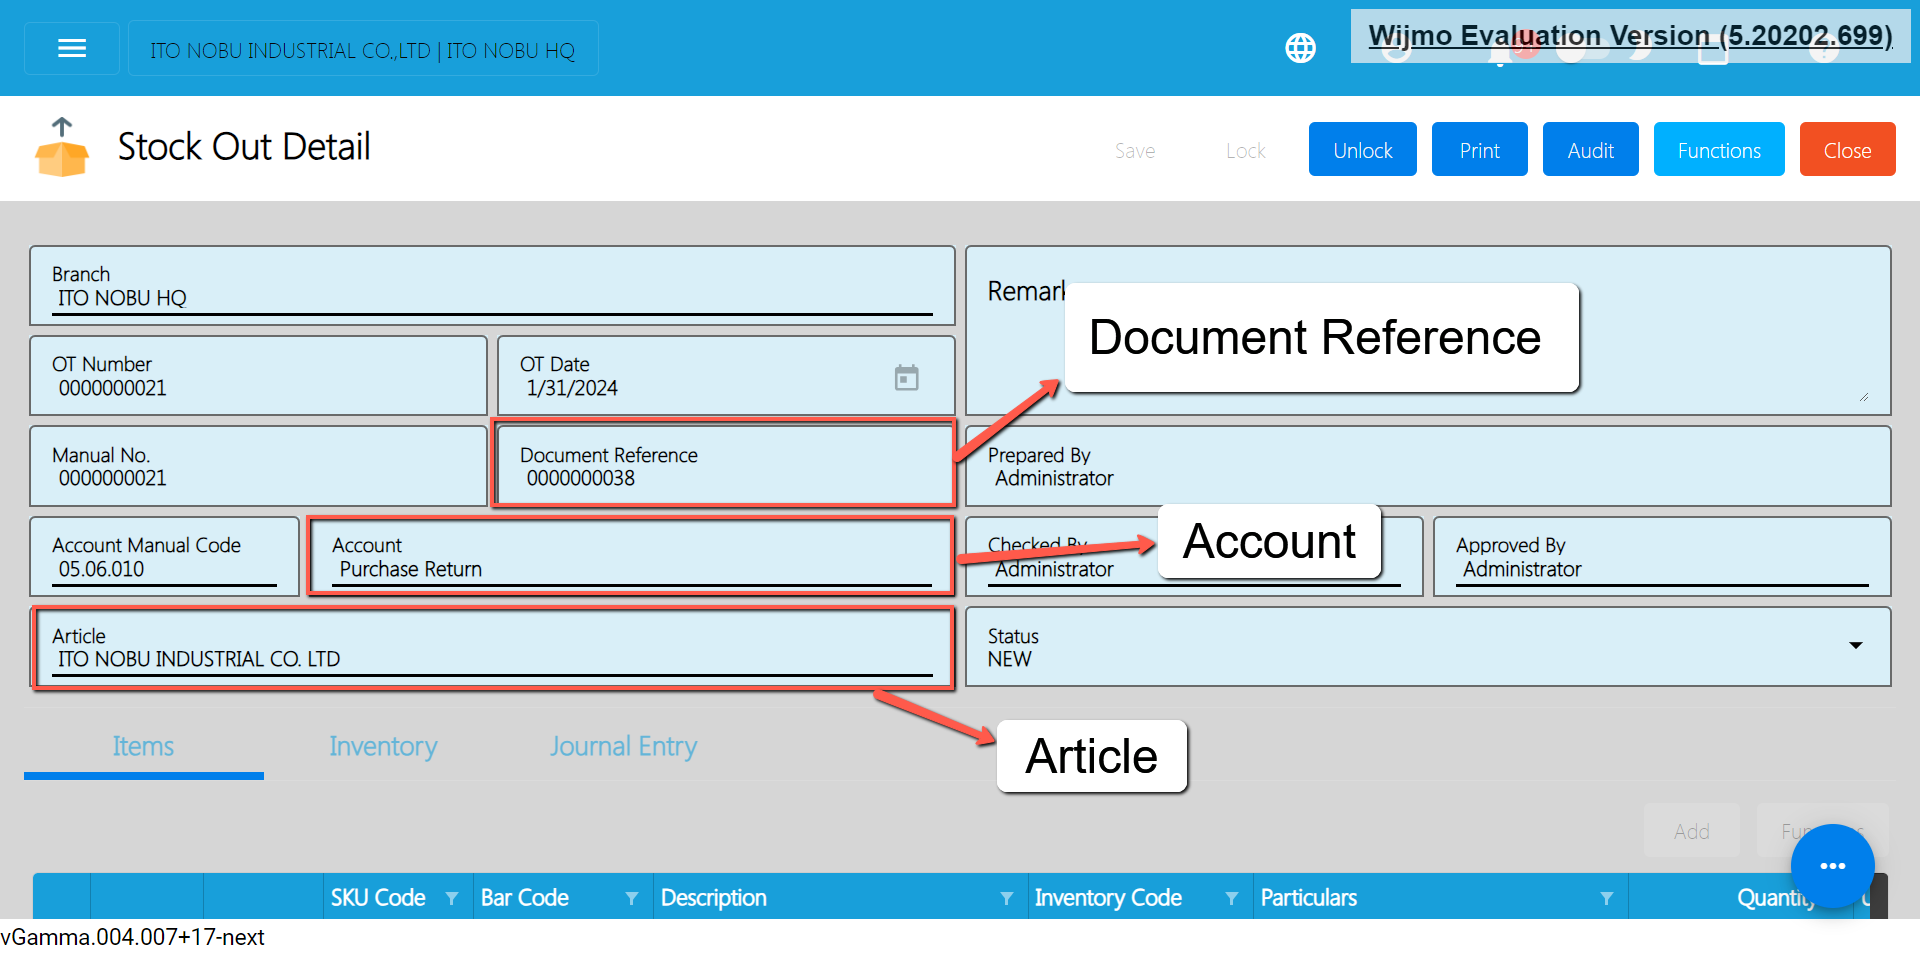
- Under the Stock Out line items, delete the item that is not included on the return.
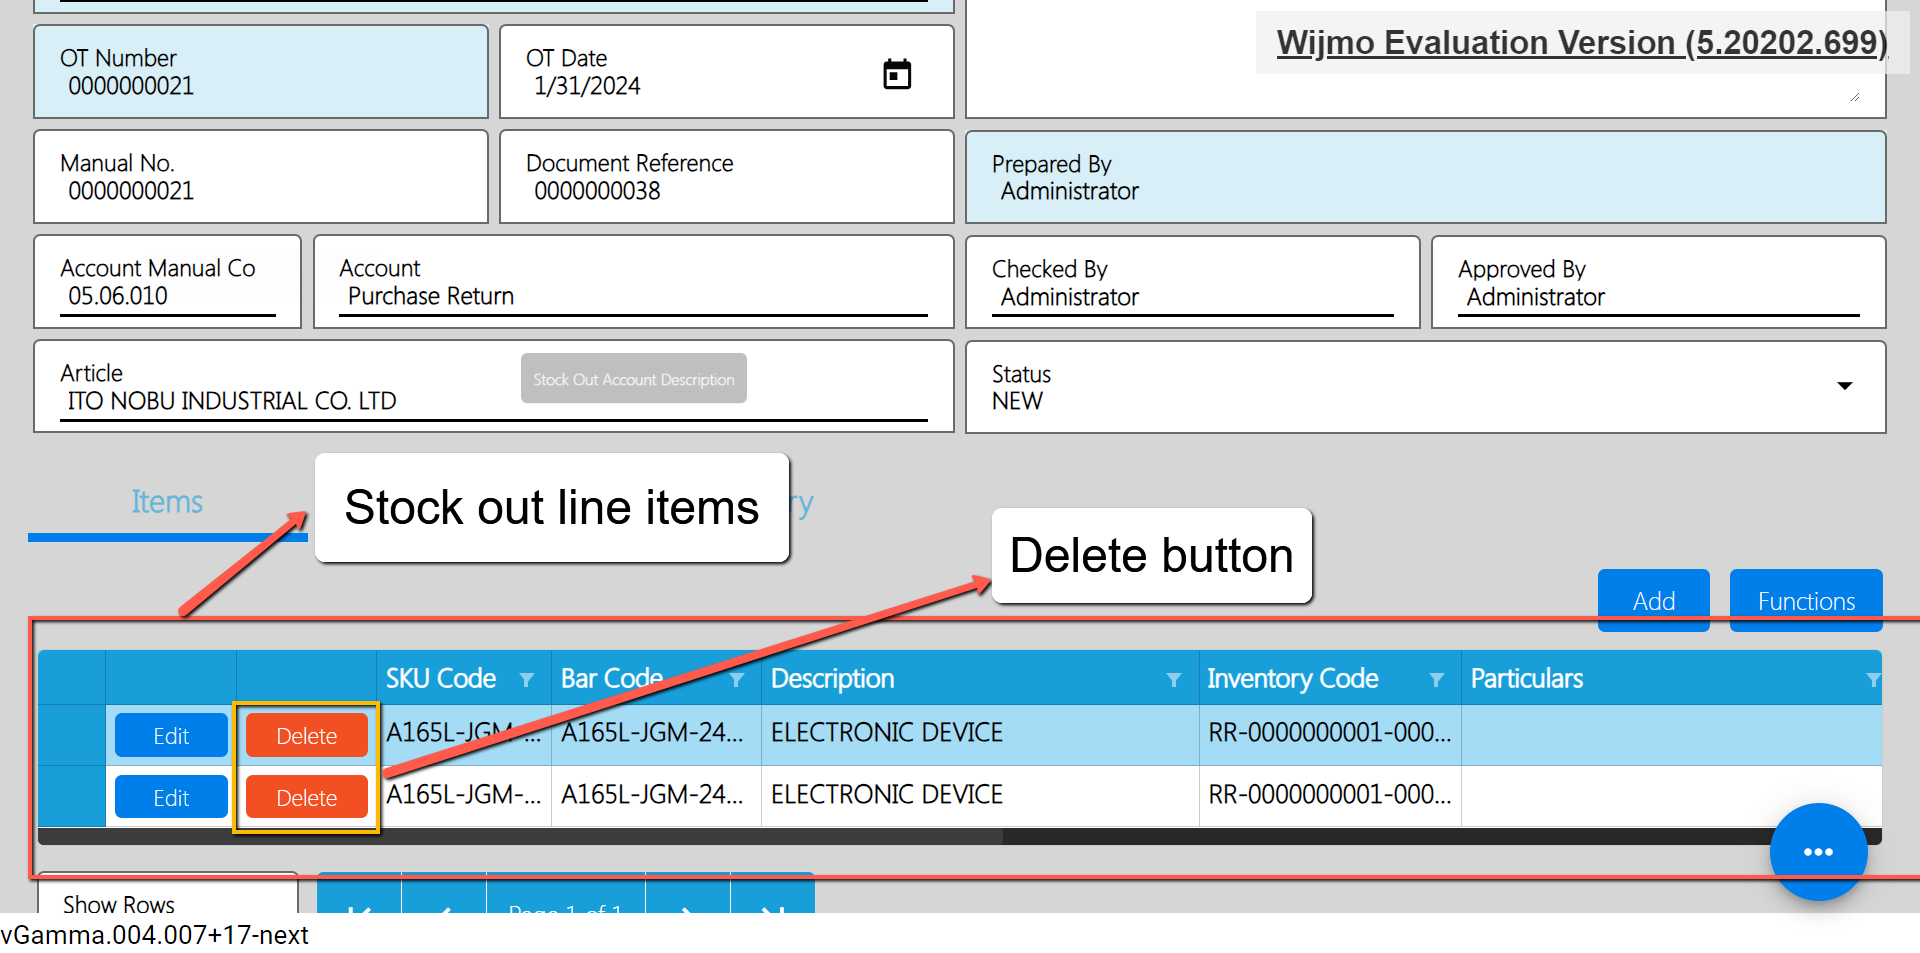
- For the remaining item (item that is returned to the Supplier), click the Edit button to edit the quantity being returned. Make sure, it will not exceed the quantity being purchased from the Supplier.
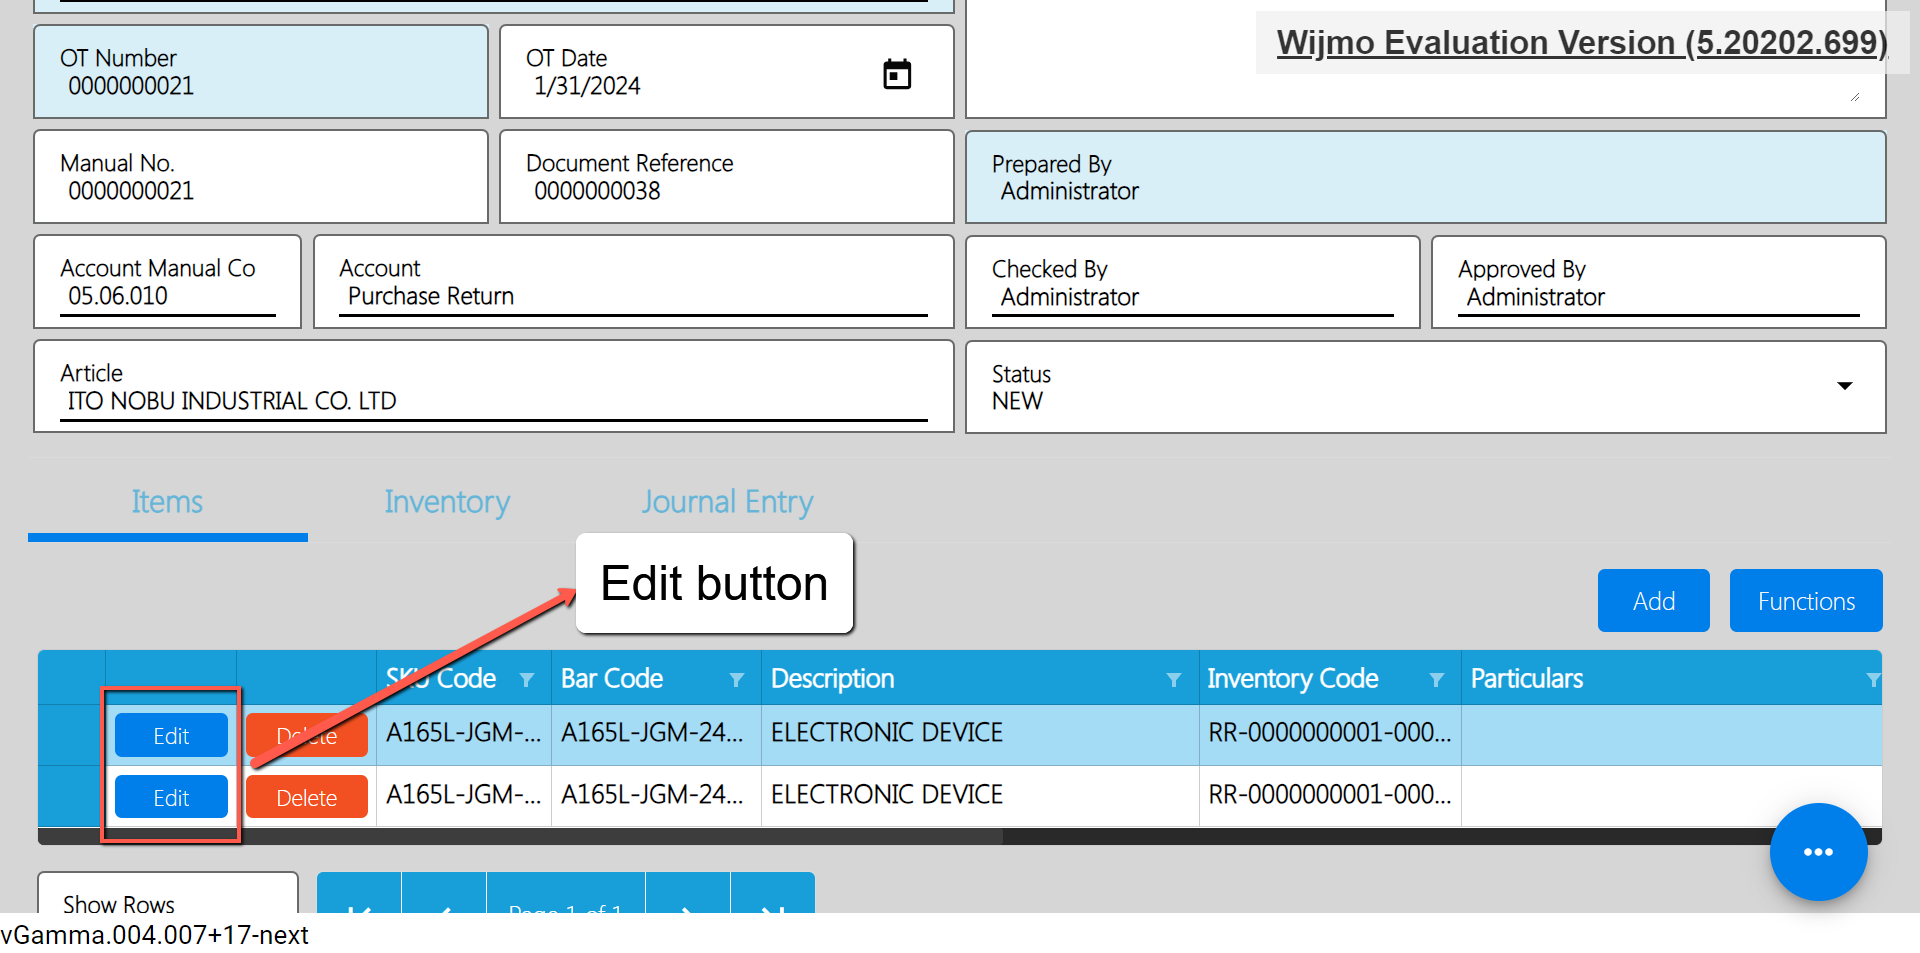
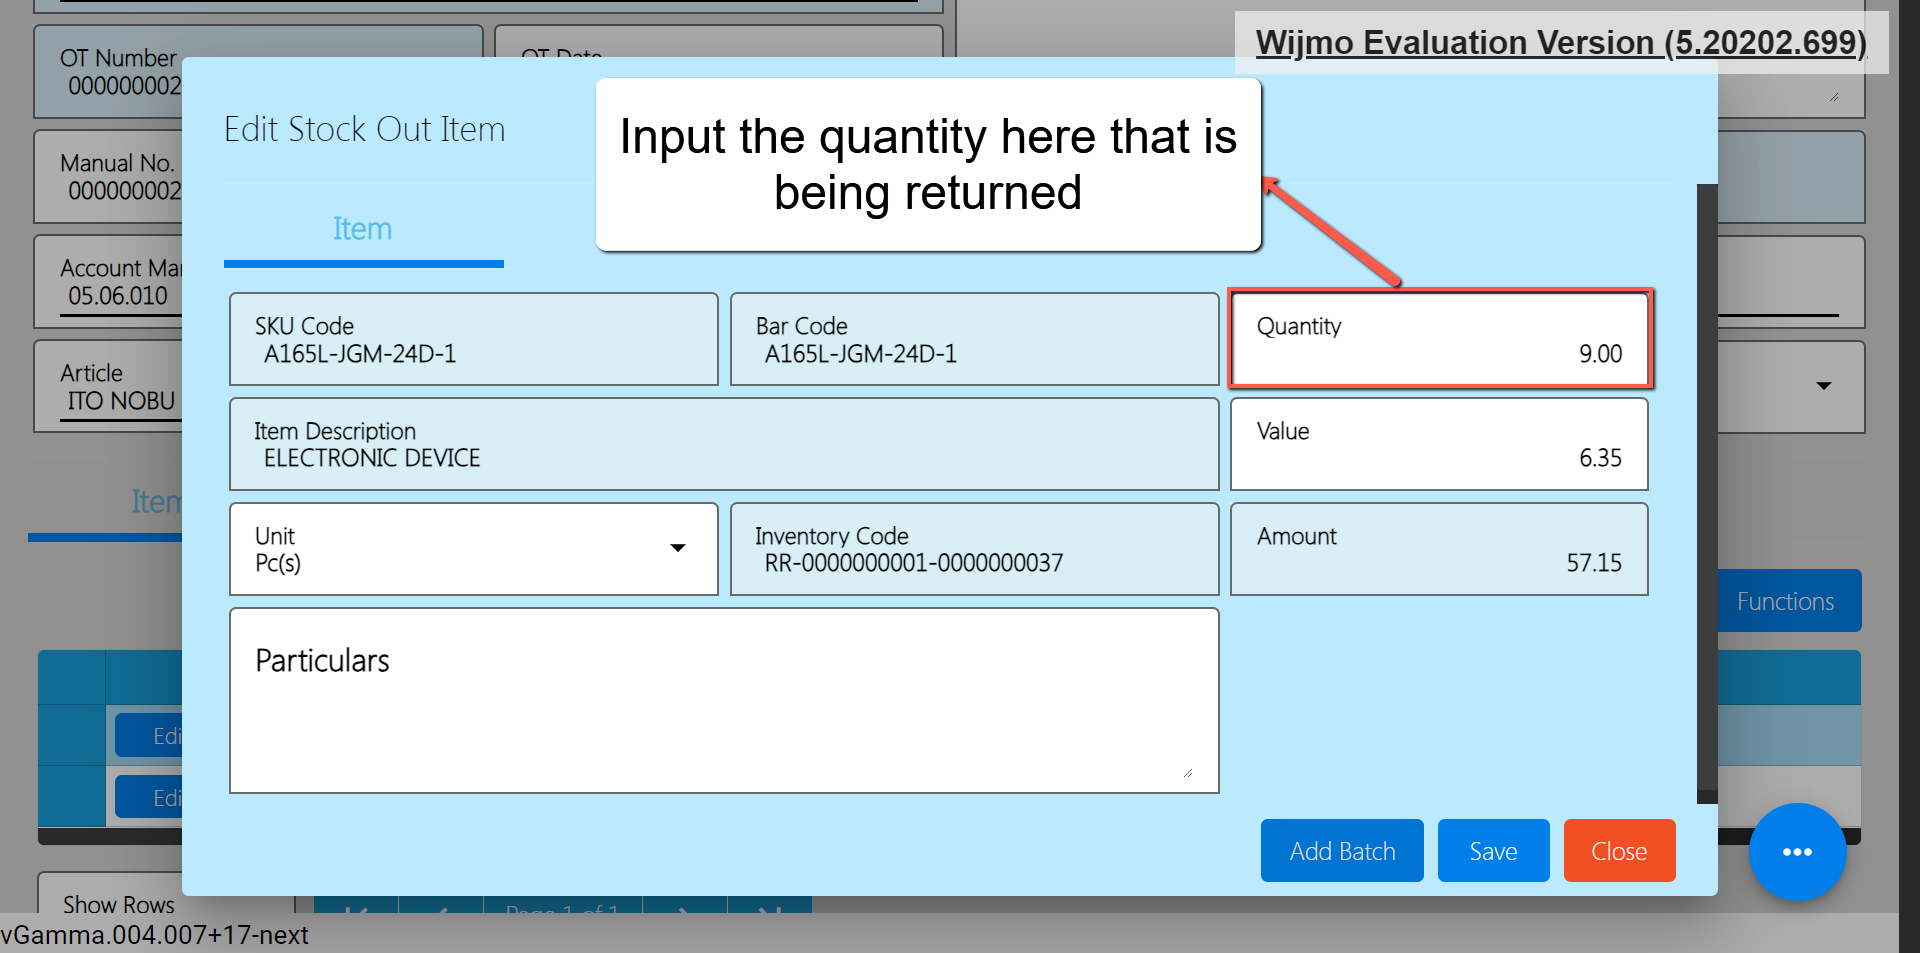
- Once okay, click the Save button to save the changes for the quantity.
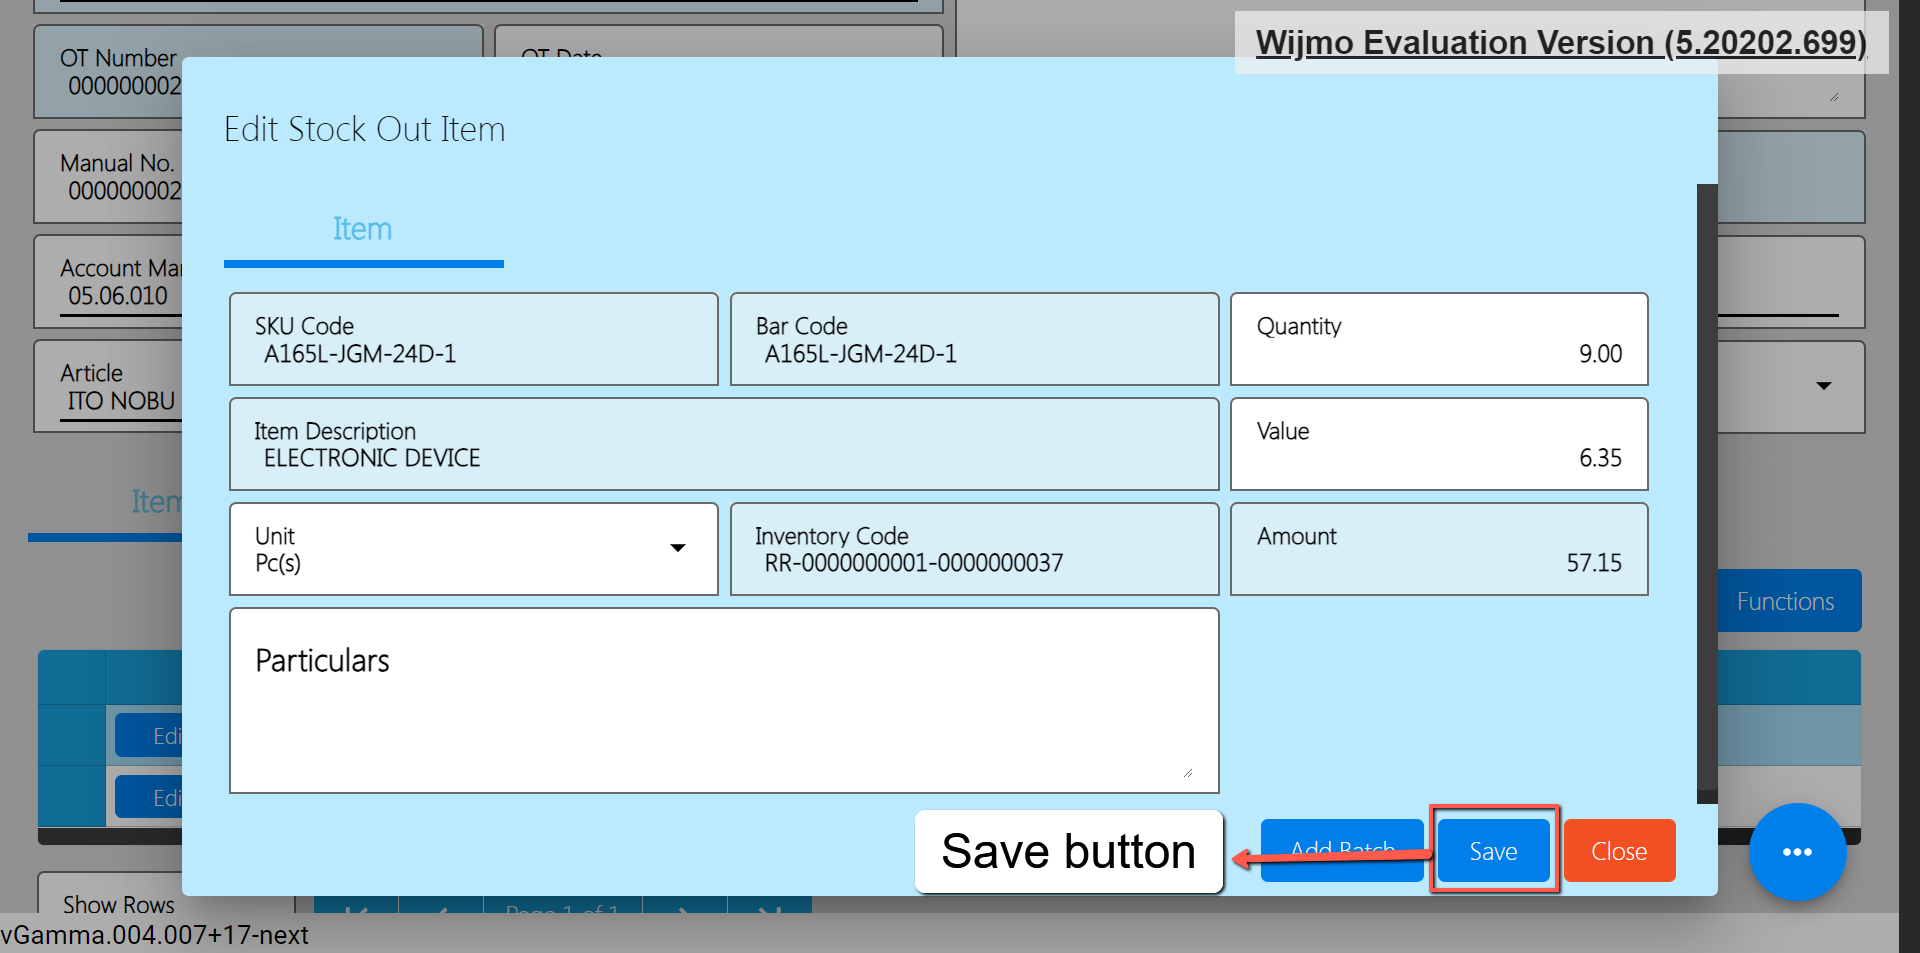
- Once everything is okay, click the Save and Lock button to save and lock the Stock Out detail.
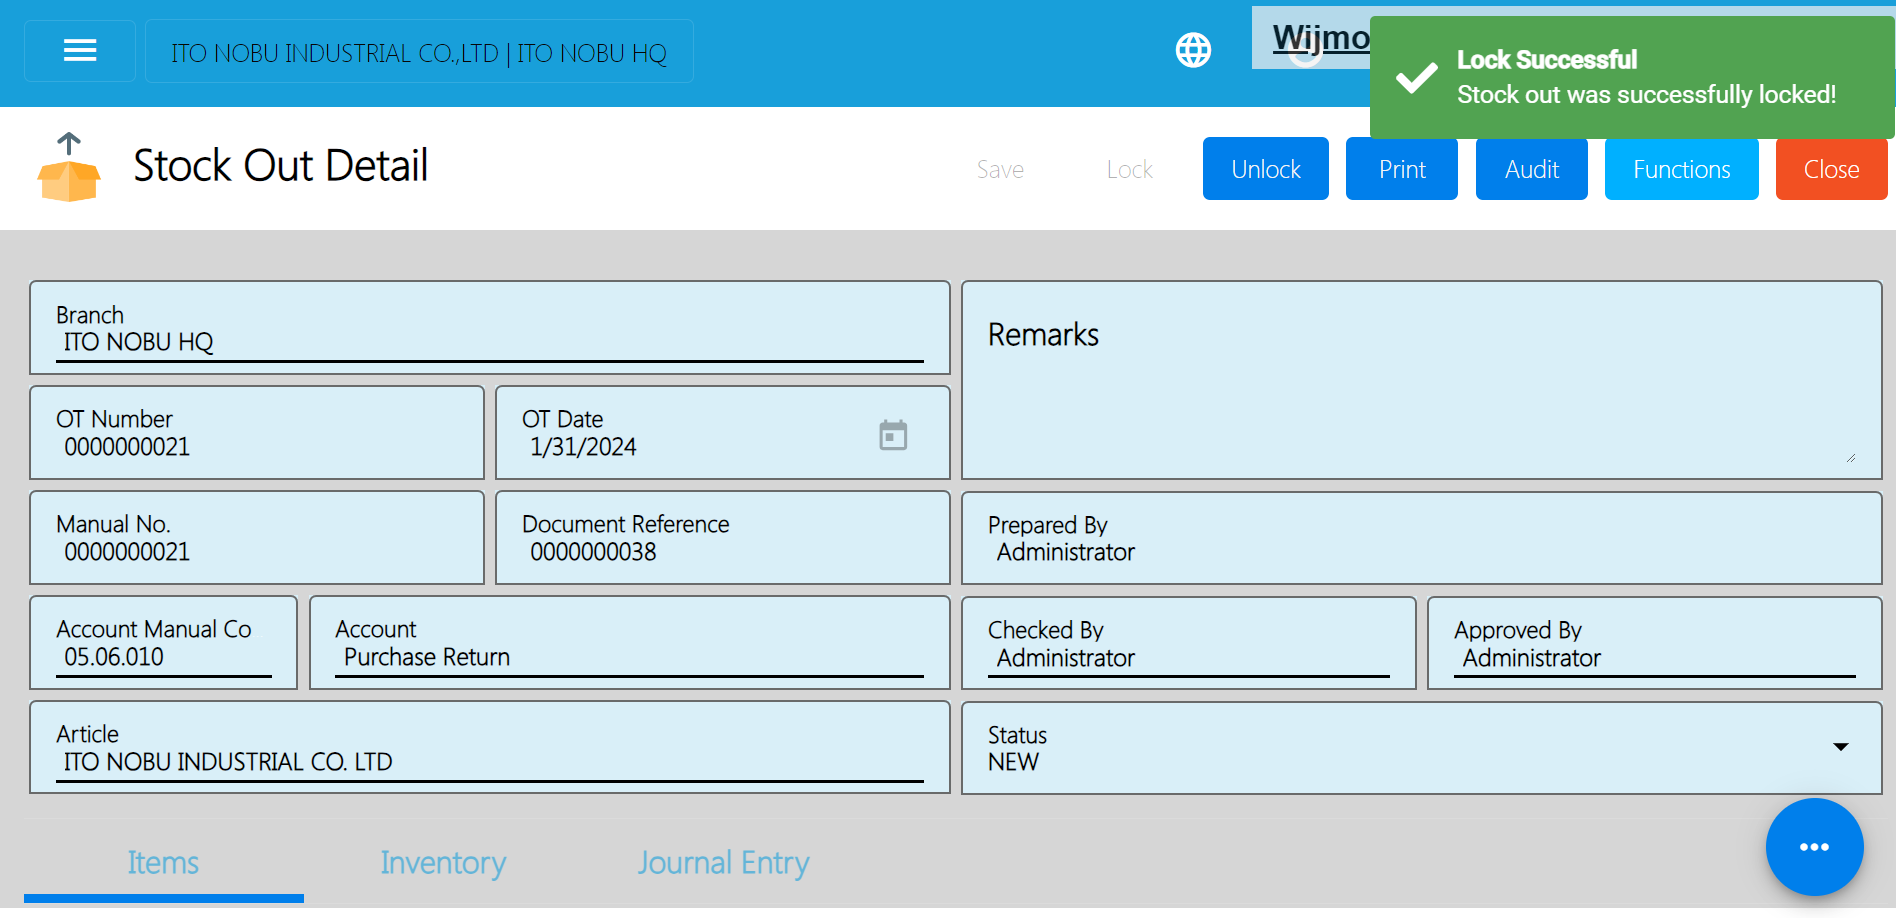
- After that, click again the Functions button, then select the Create Debit Memo.
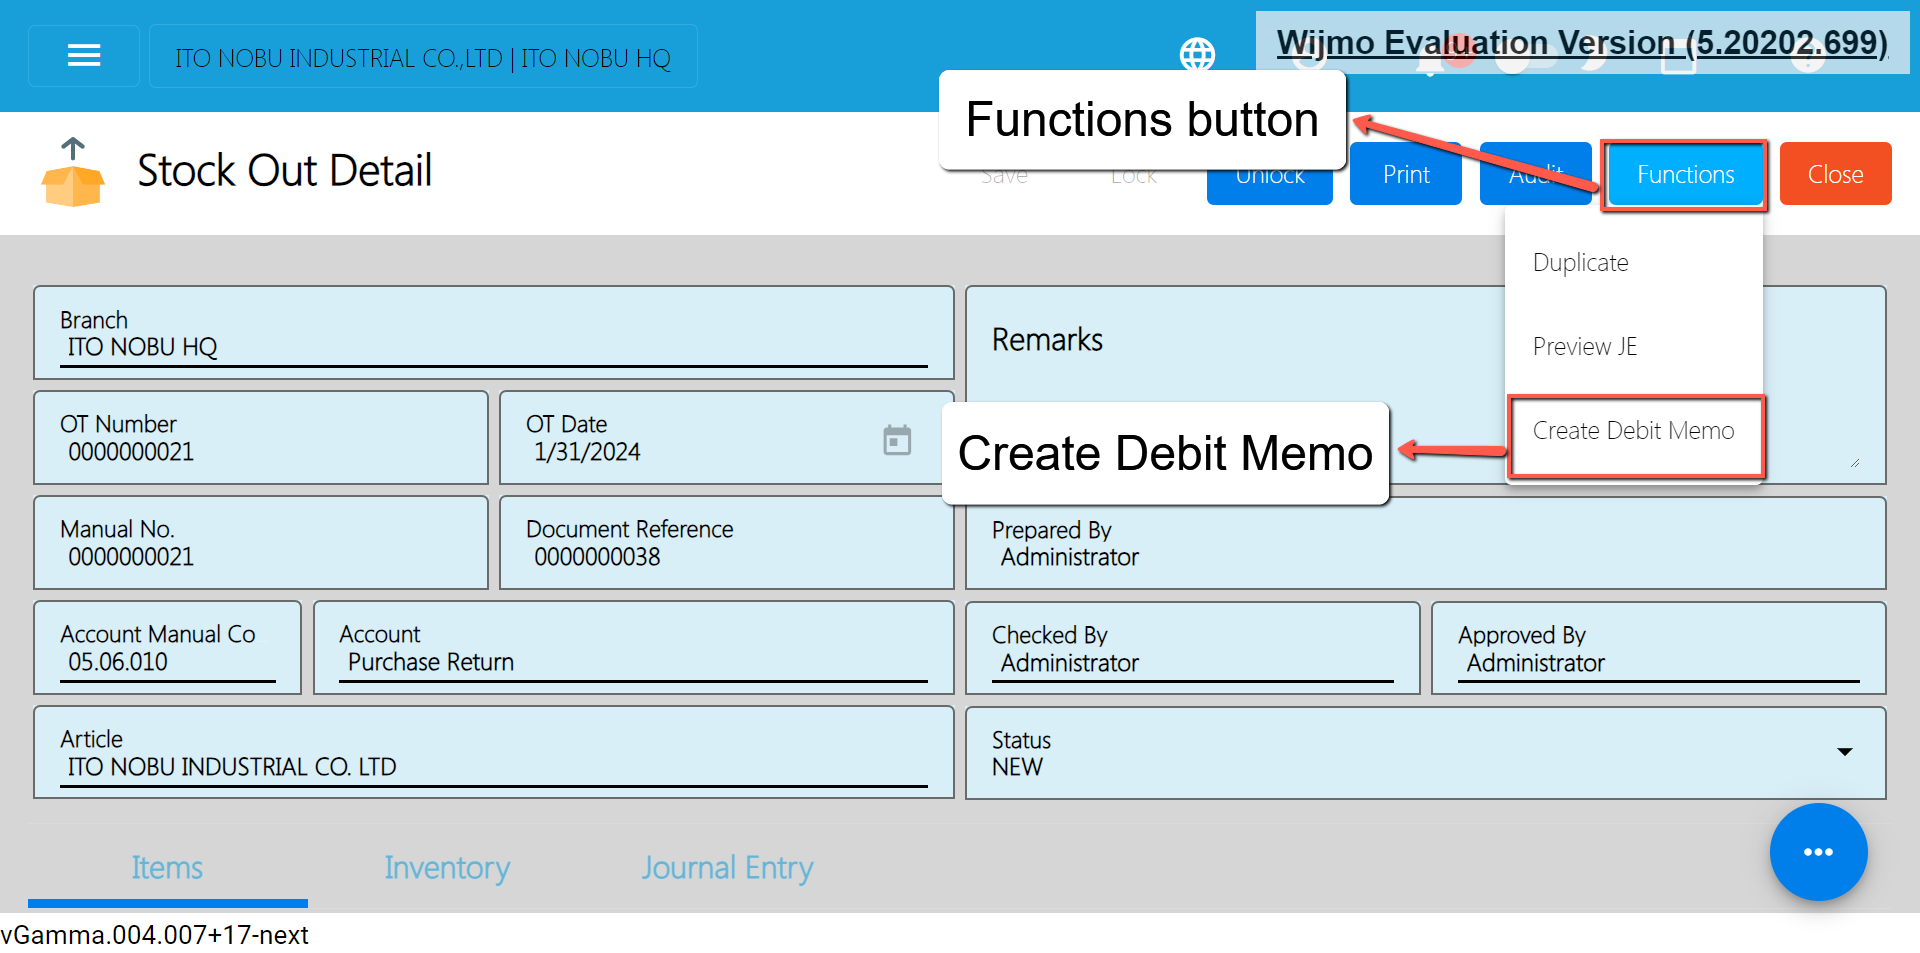
- You will be redirected to the Debit Memo Detail page. This will make adjustments to the Accounts Payable.
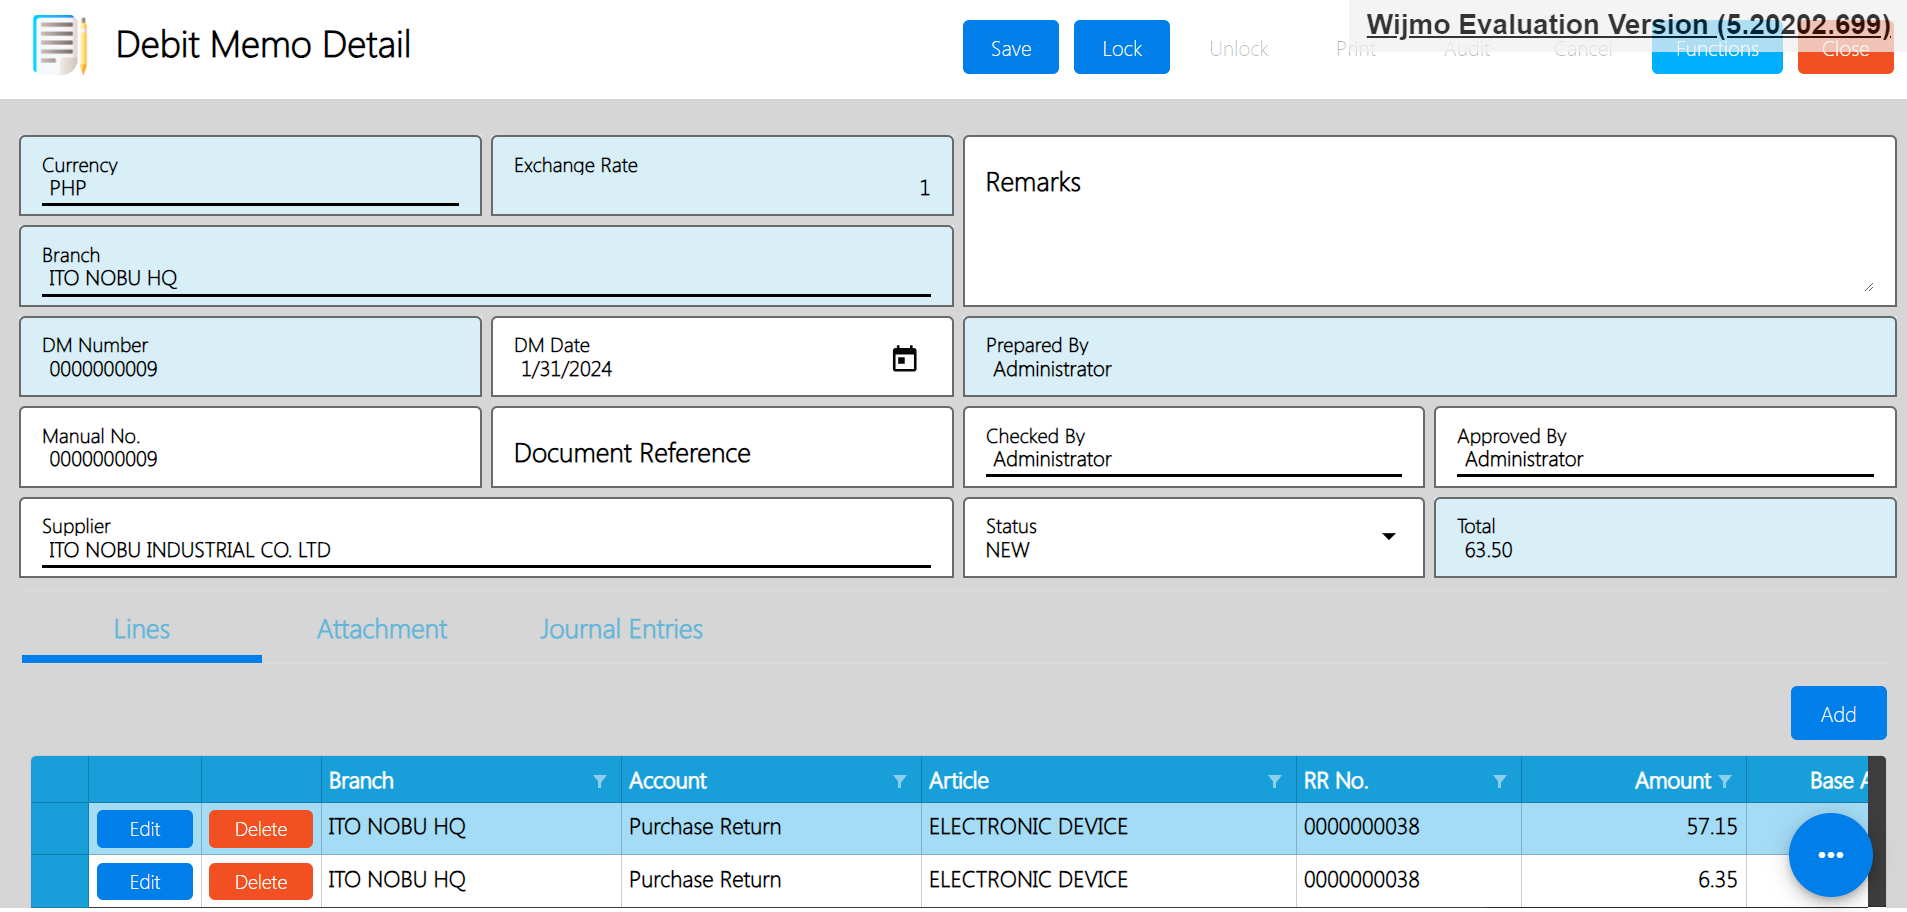
- Review everything especially the Supplier tagged and the Total Amount.
Take note: If you have a currency that is not equal to Php, please double check the Base Amount if the conversion is correct.
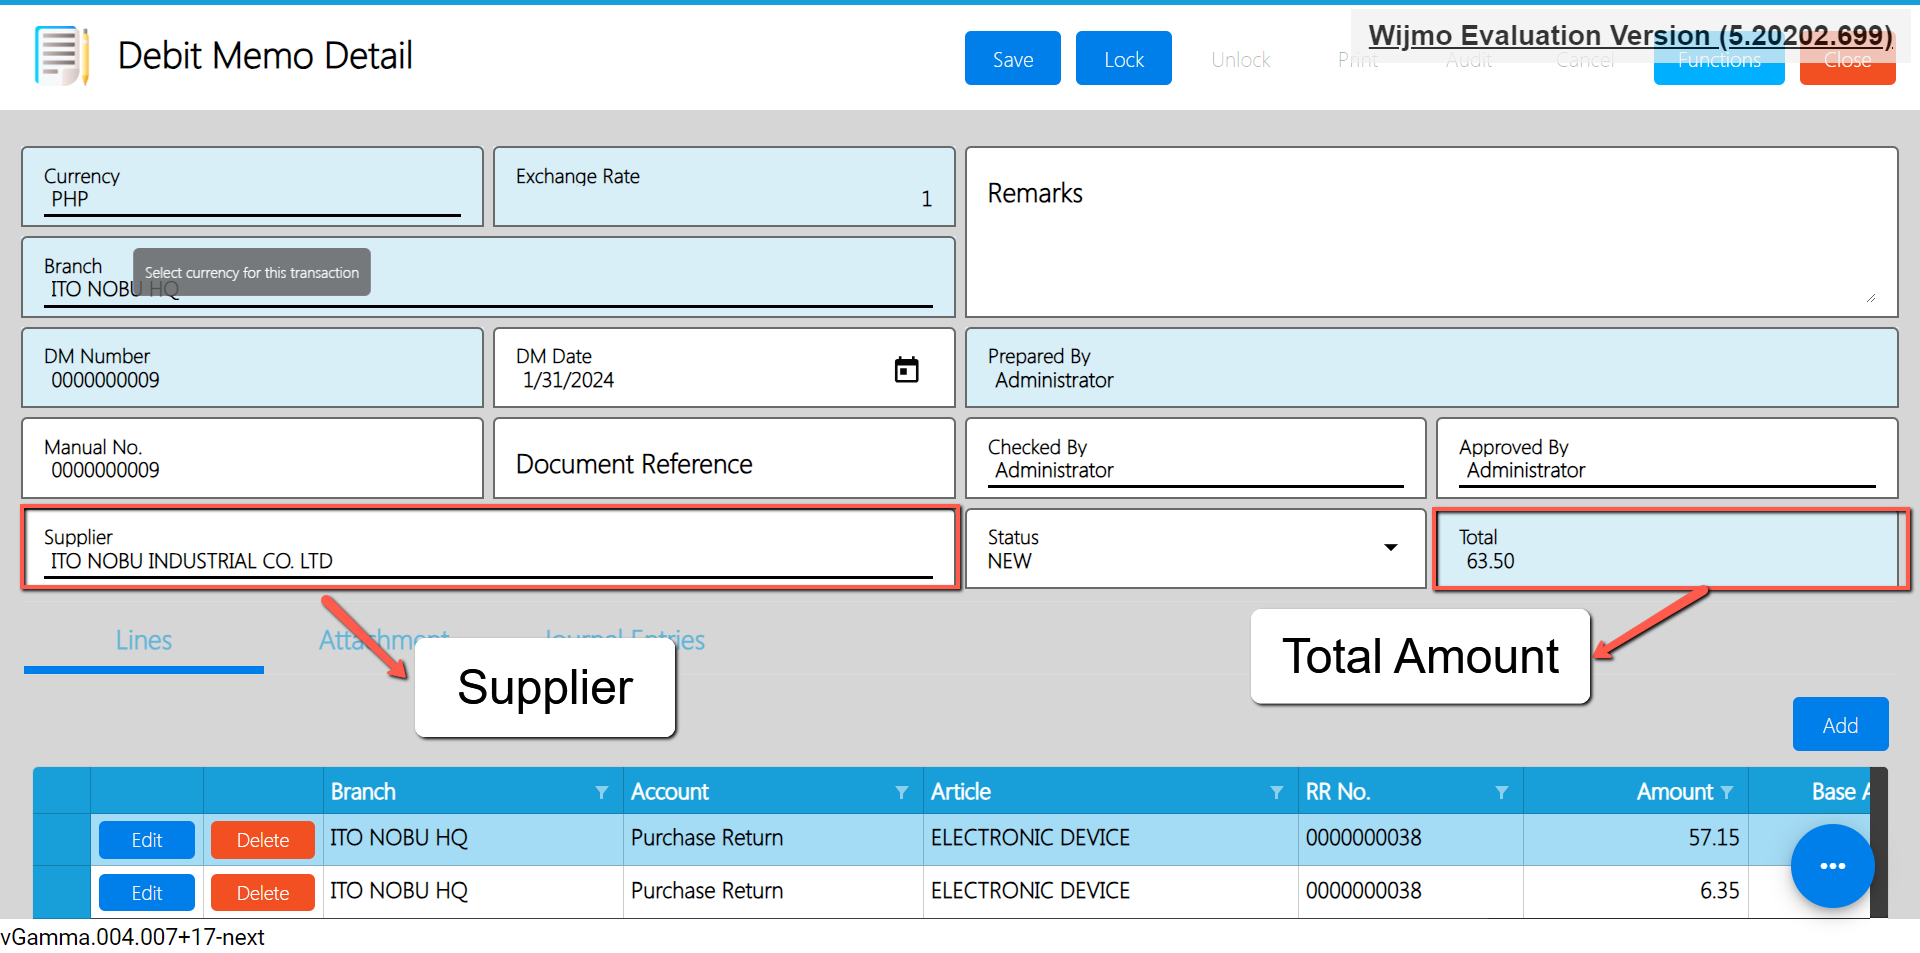
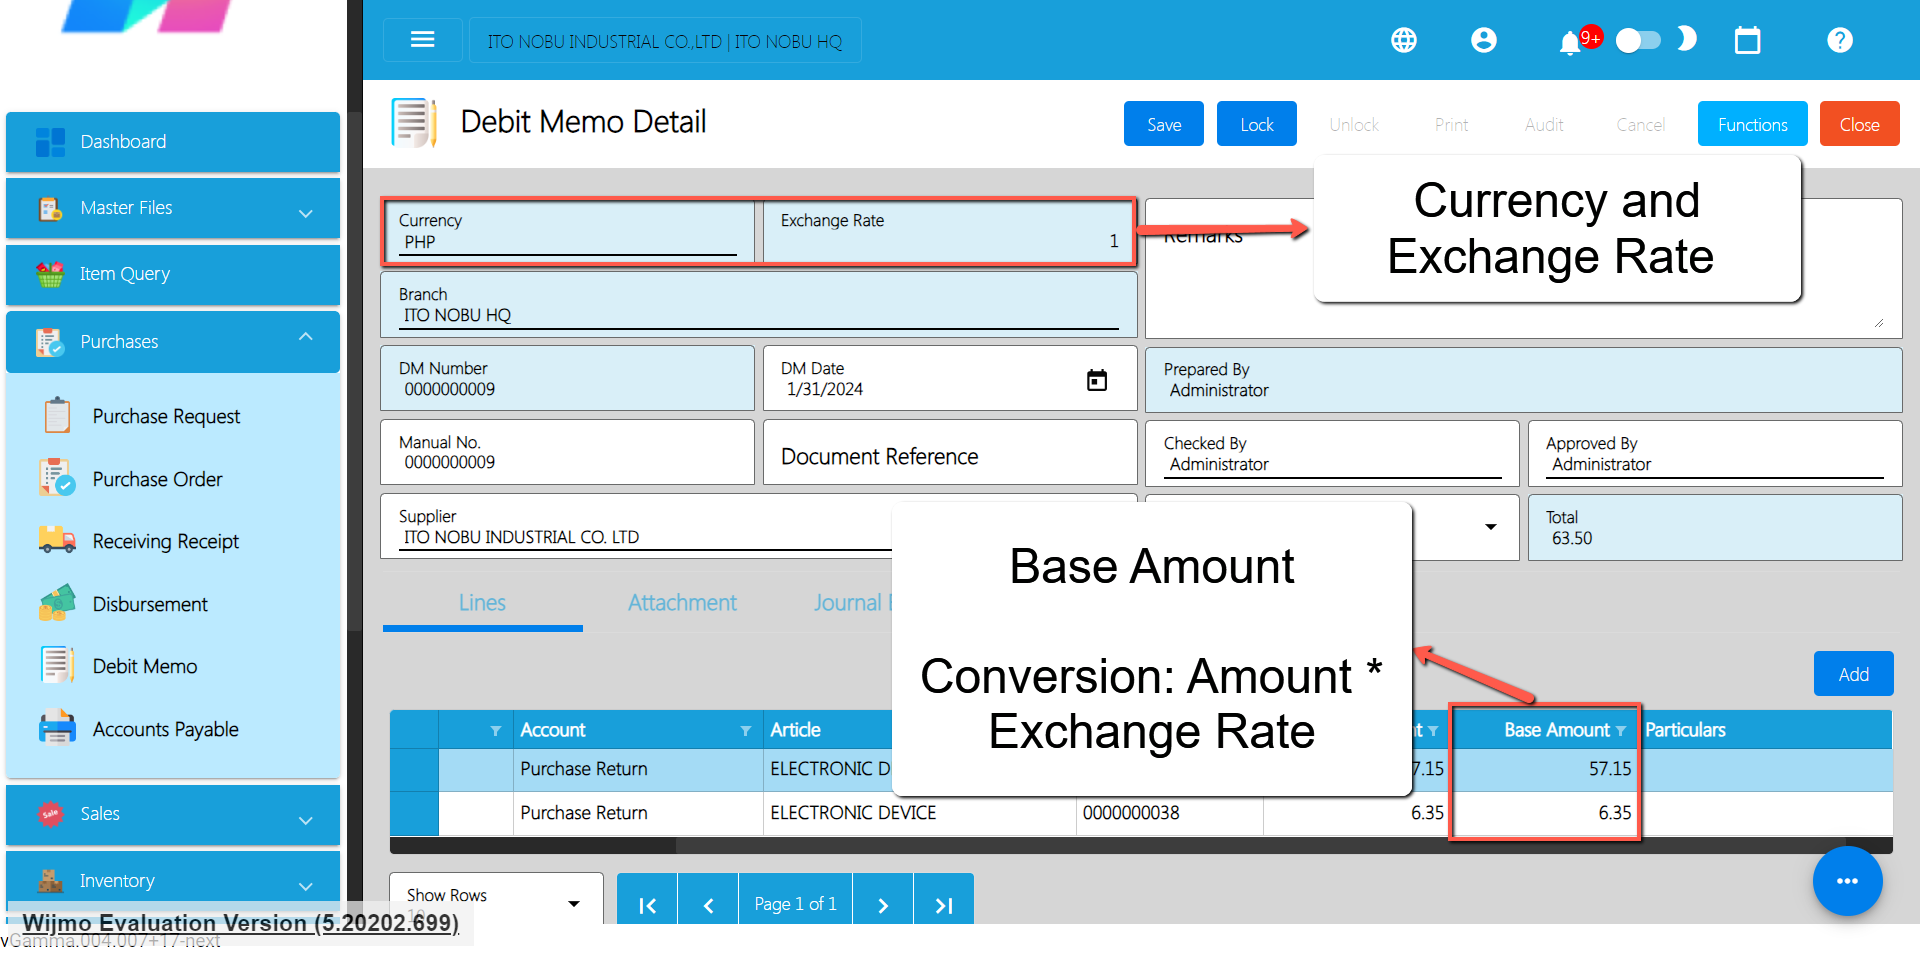
- Once everything is okay, click the Save button.
- After clicking the Save button, click the Lock button to make some changes on the system.
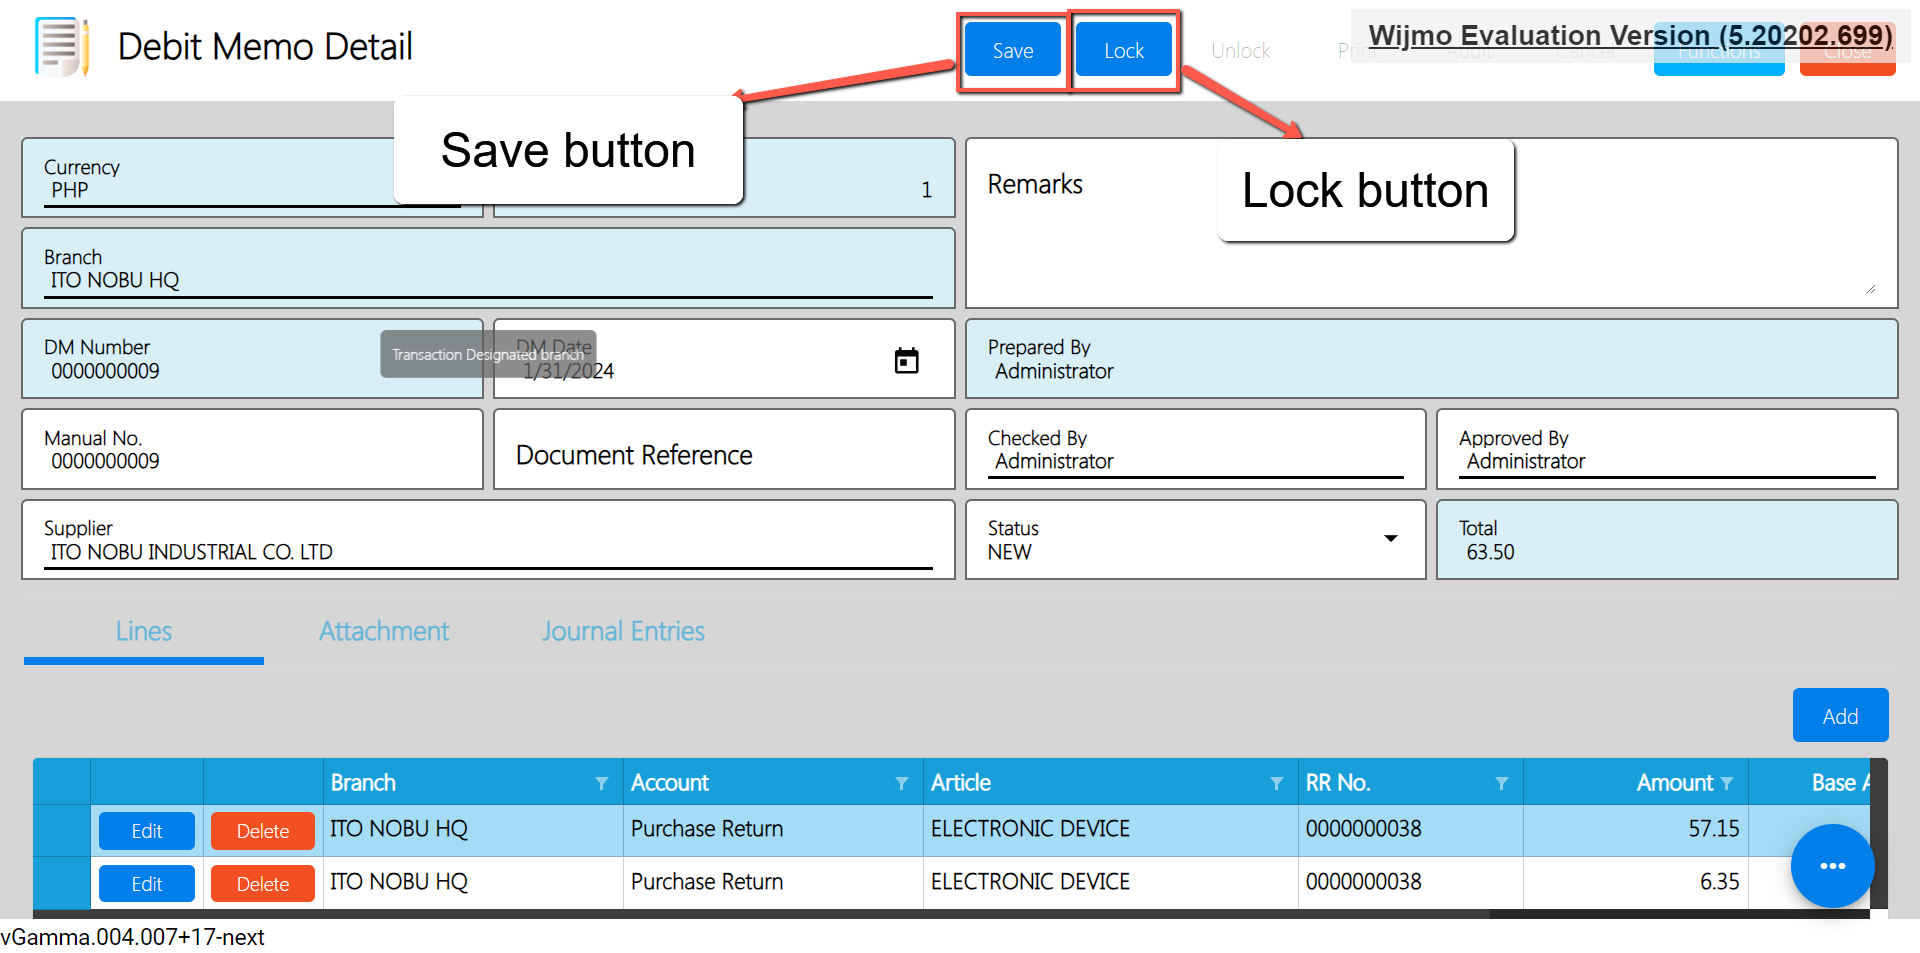
5.5 Stock Transfer Request
Overview
The Stock Transfer Request feature provides a streamlined process for requesting to move an inventory from one branch to another.
Stock Transfer Request List
- List of all the STR(Stock Transfer Request) and will also show the overview of the transaction.
- Here, the user also has the filter functionality and the button to add a new Stock Transfer Request).
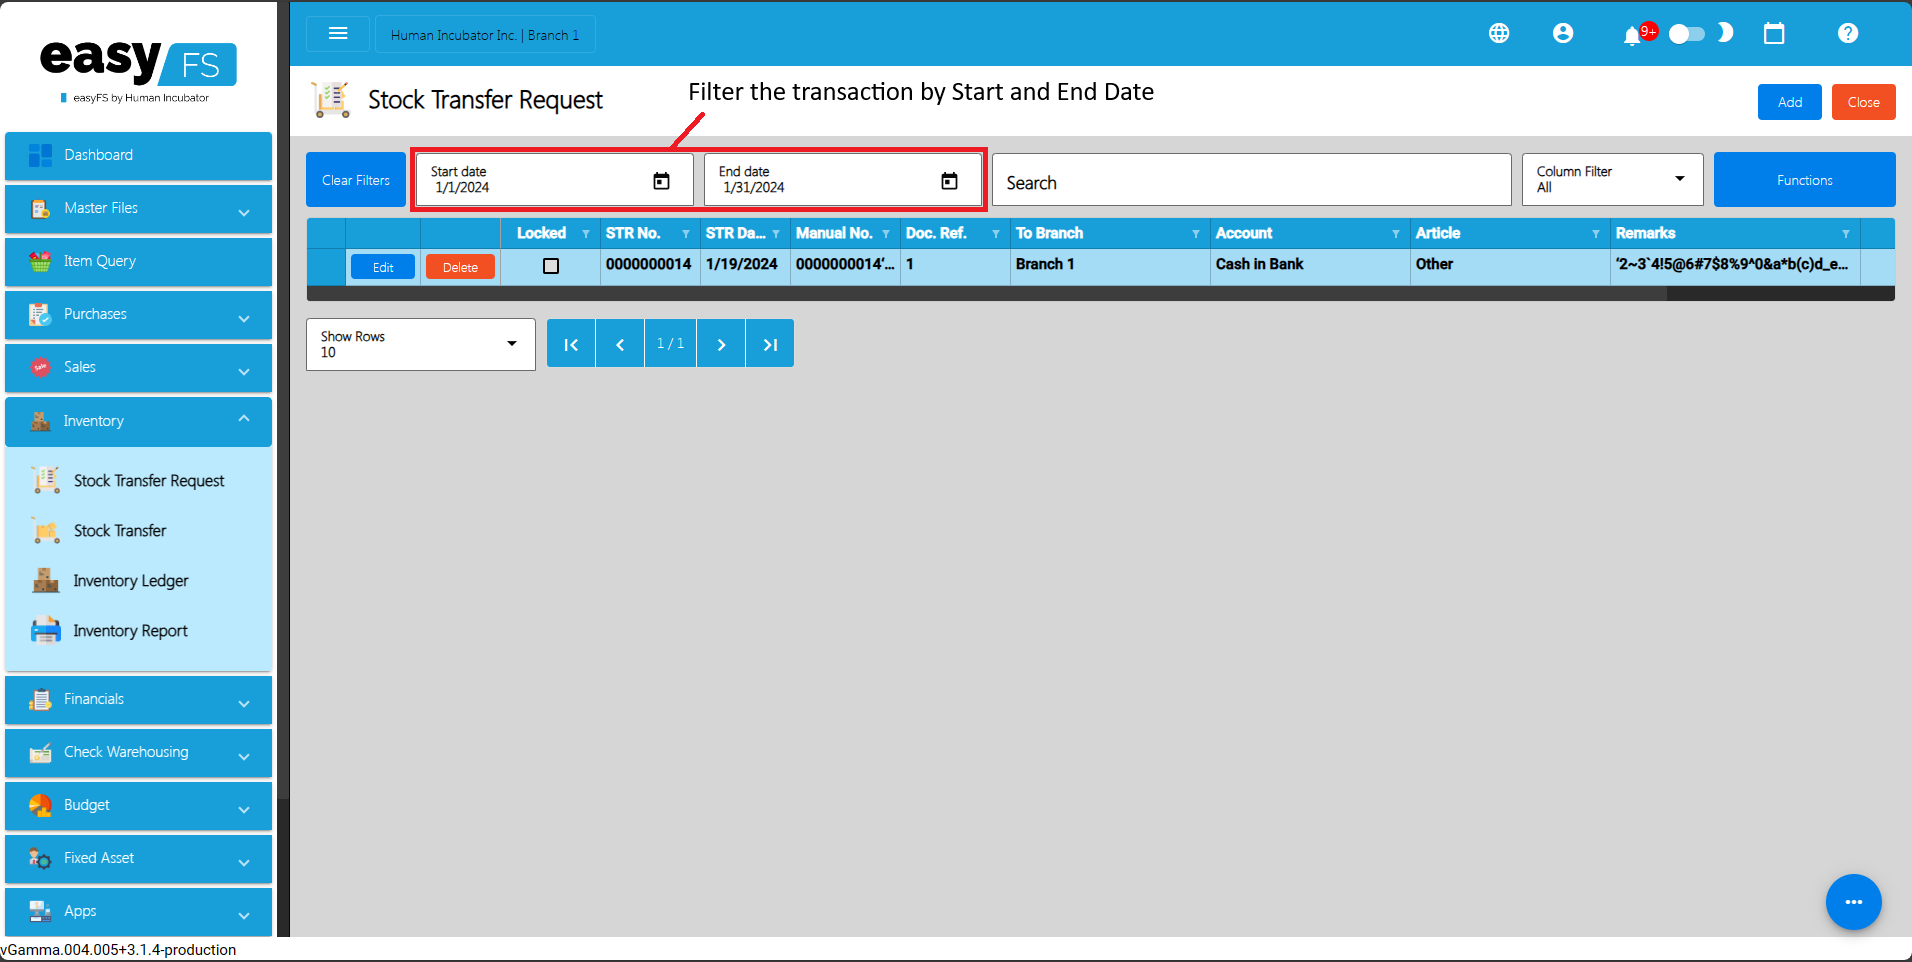
Stock Transfer Request Detail
- To add a new Stock Transfer Request, go to Inventory then click Stock In. After that, click the Add that can be seen in the Stock Transfer Request list.
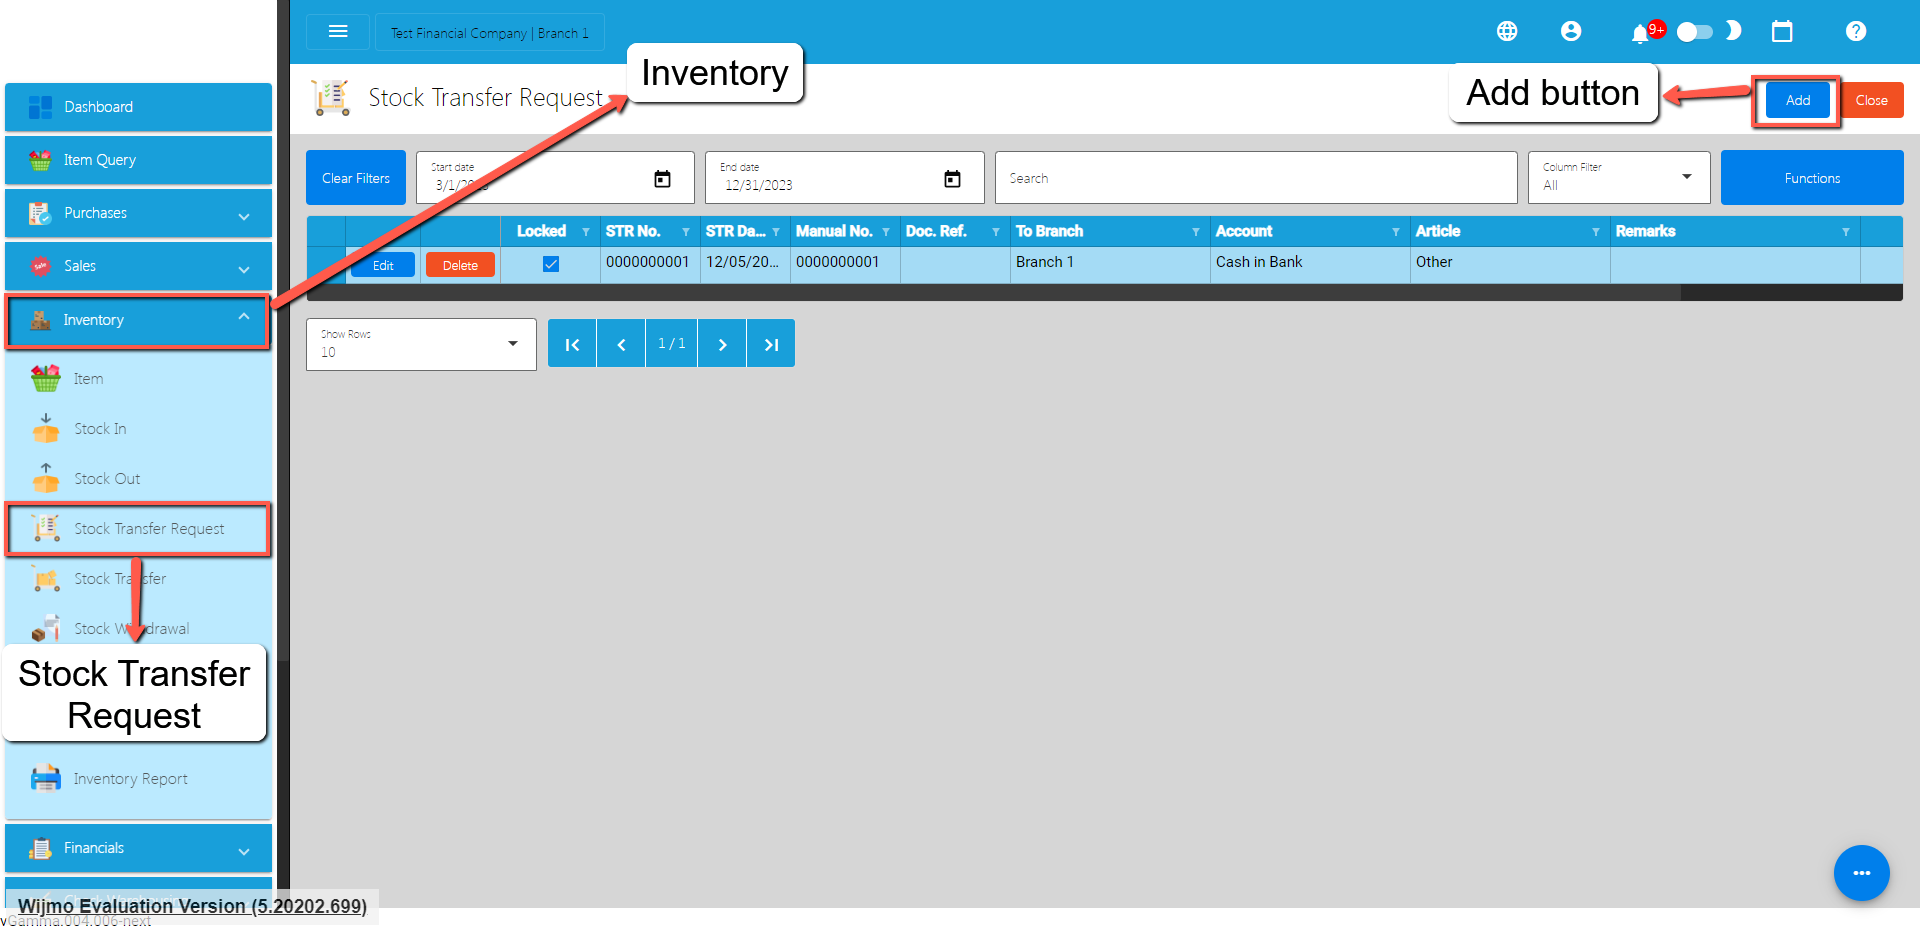
- Fill out all the needed information for the Stock Transfer Request Detail like,
- STR Date
- To Branch (where you want to request an Item)
- Document Reference
- Account
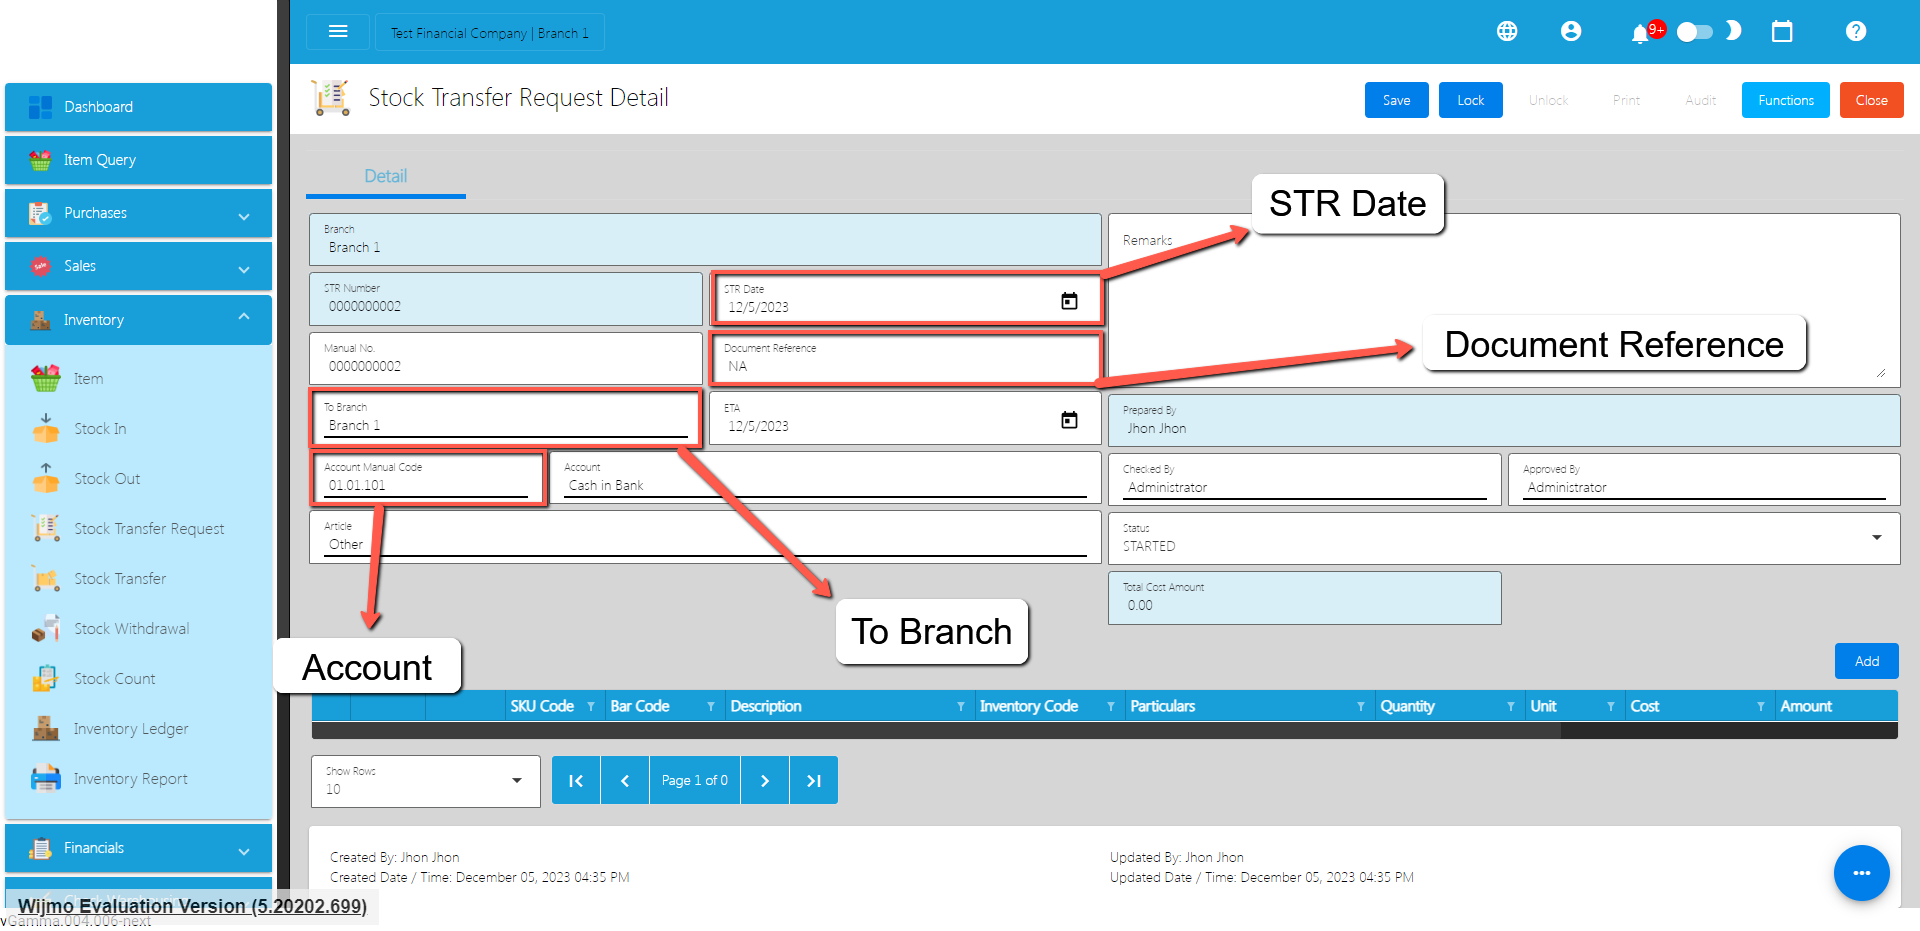
- To add Stock Transfer Request line item(s), click the Add button.
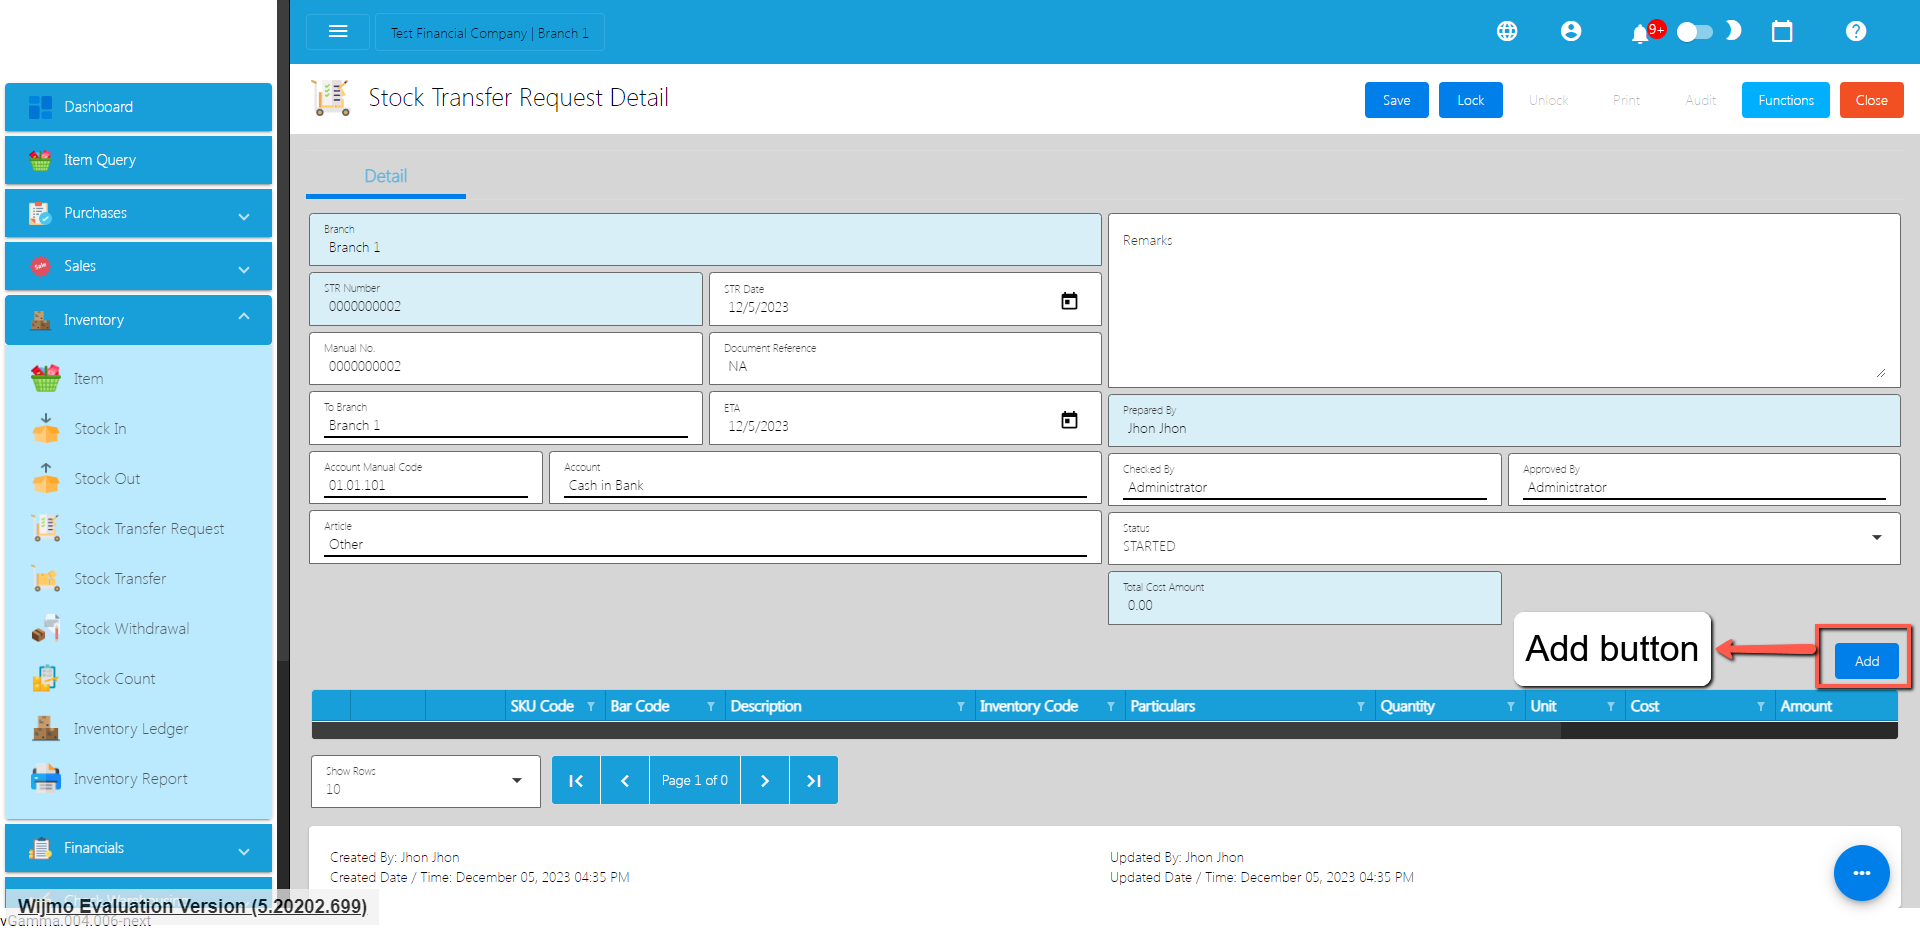
- Click the Pick button that you want to add.
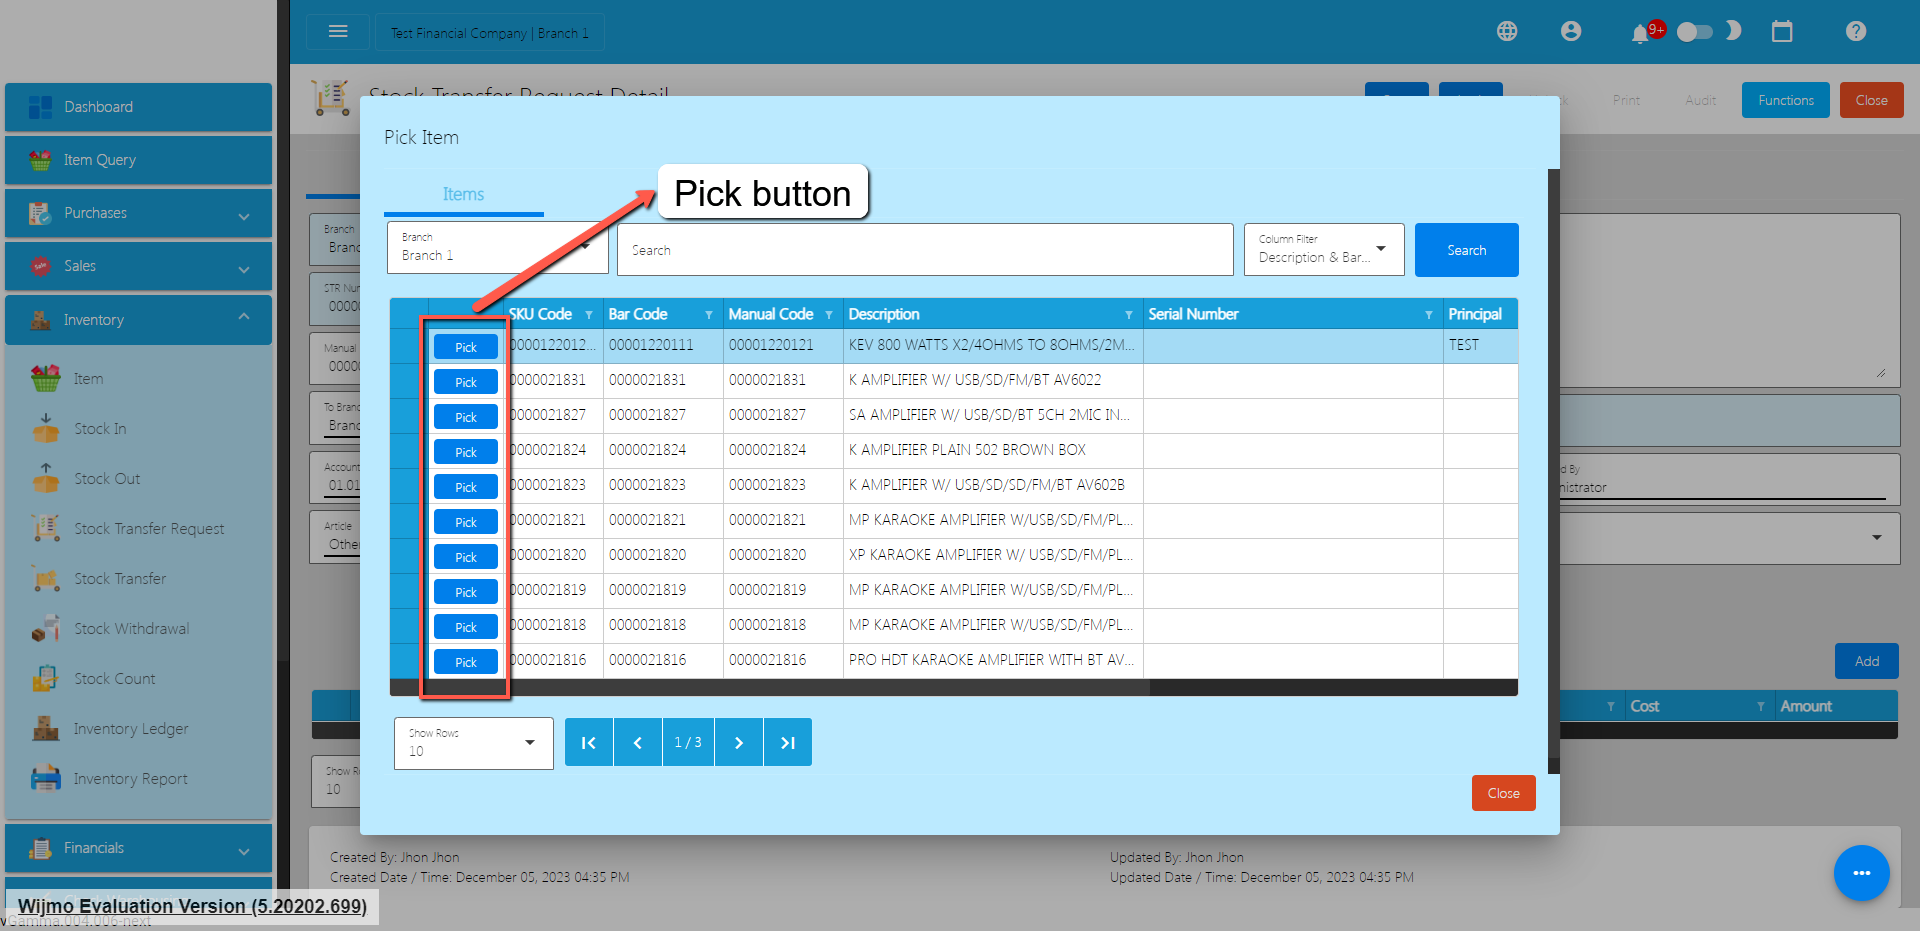
- Fill up the necessary field for adding the item for Stock Transfer Request such as the Cost and the Quantity.
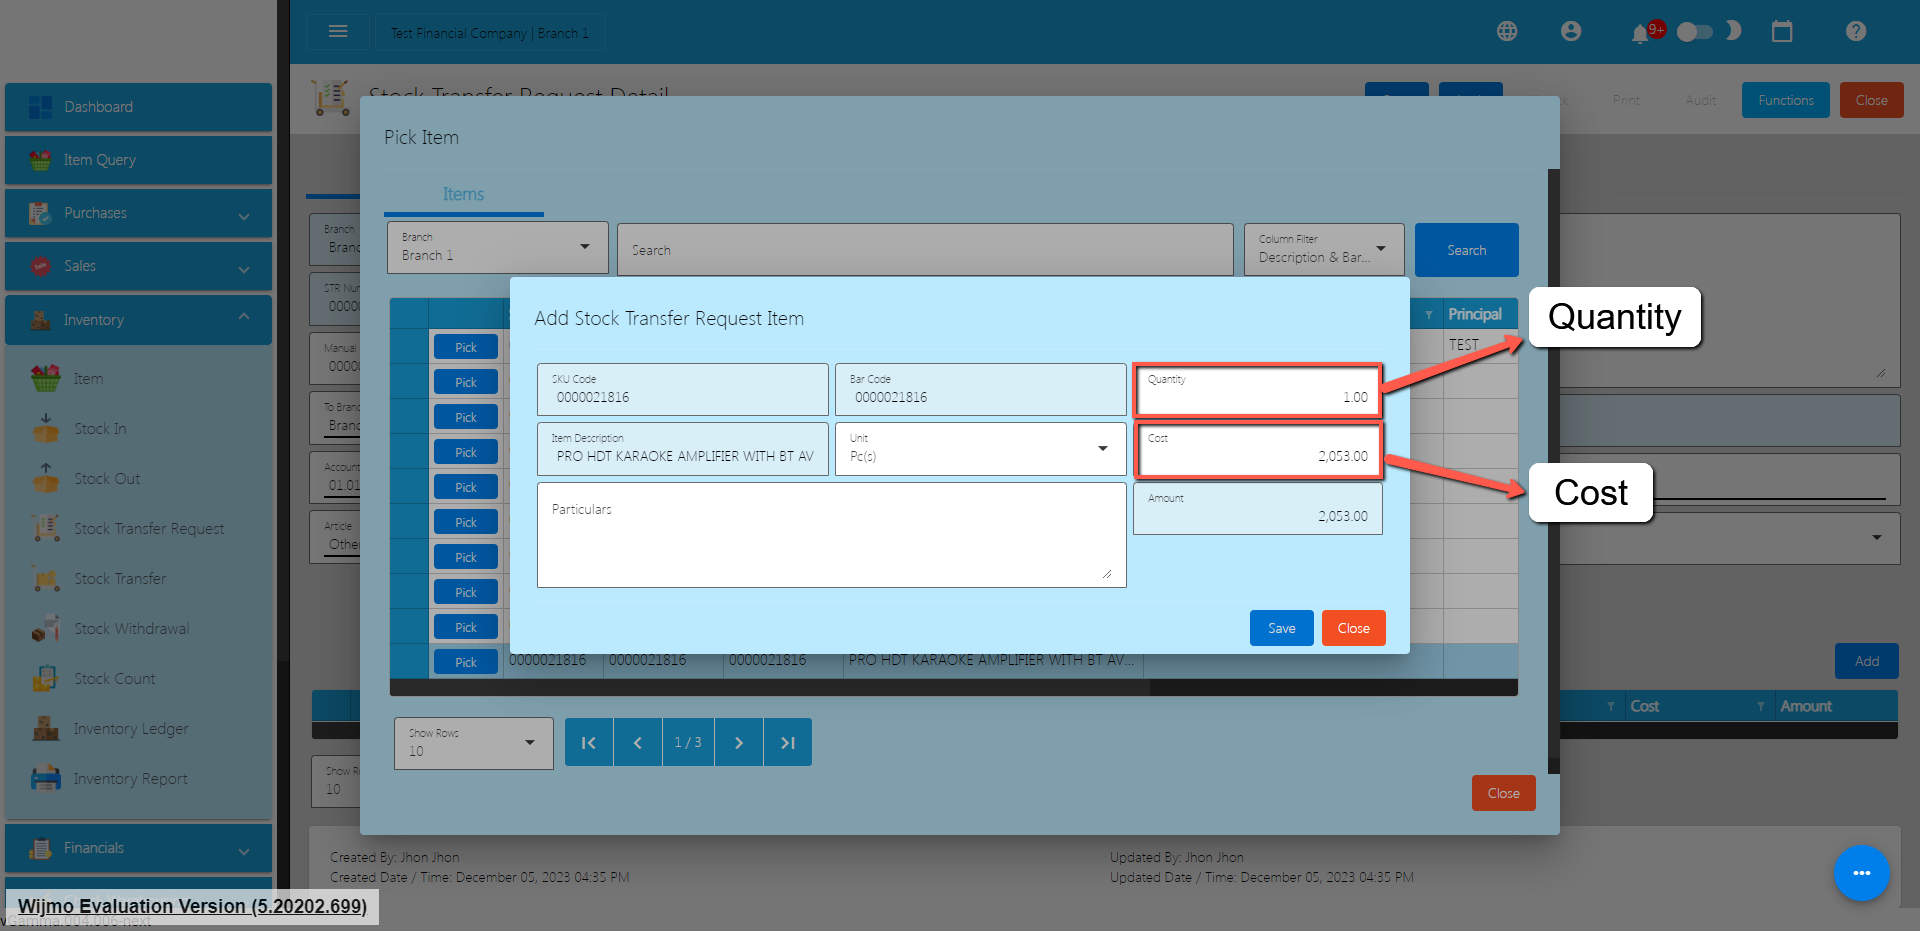
- Click Save button to Save the item as a Stock In line item.
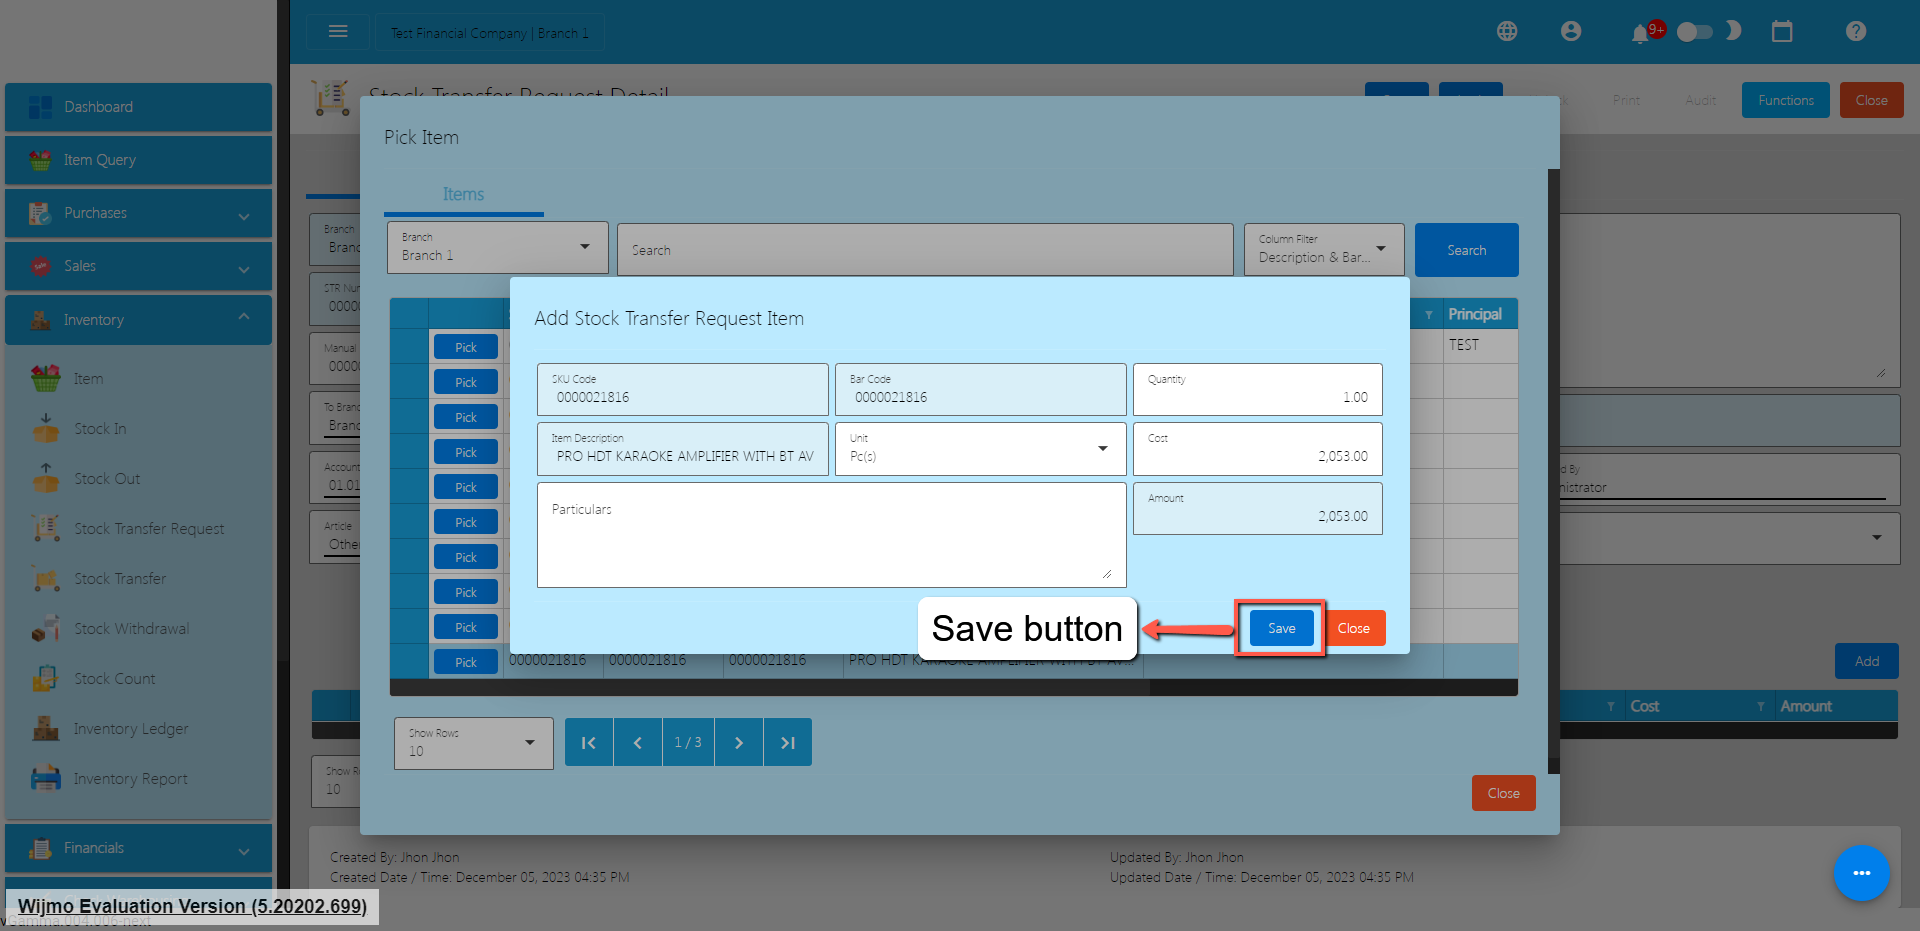
- If you wish to add another item, just repeat Steps 4 to 6.
- Click the Close button to close the popup and review your Stock Transfer Request detail.
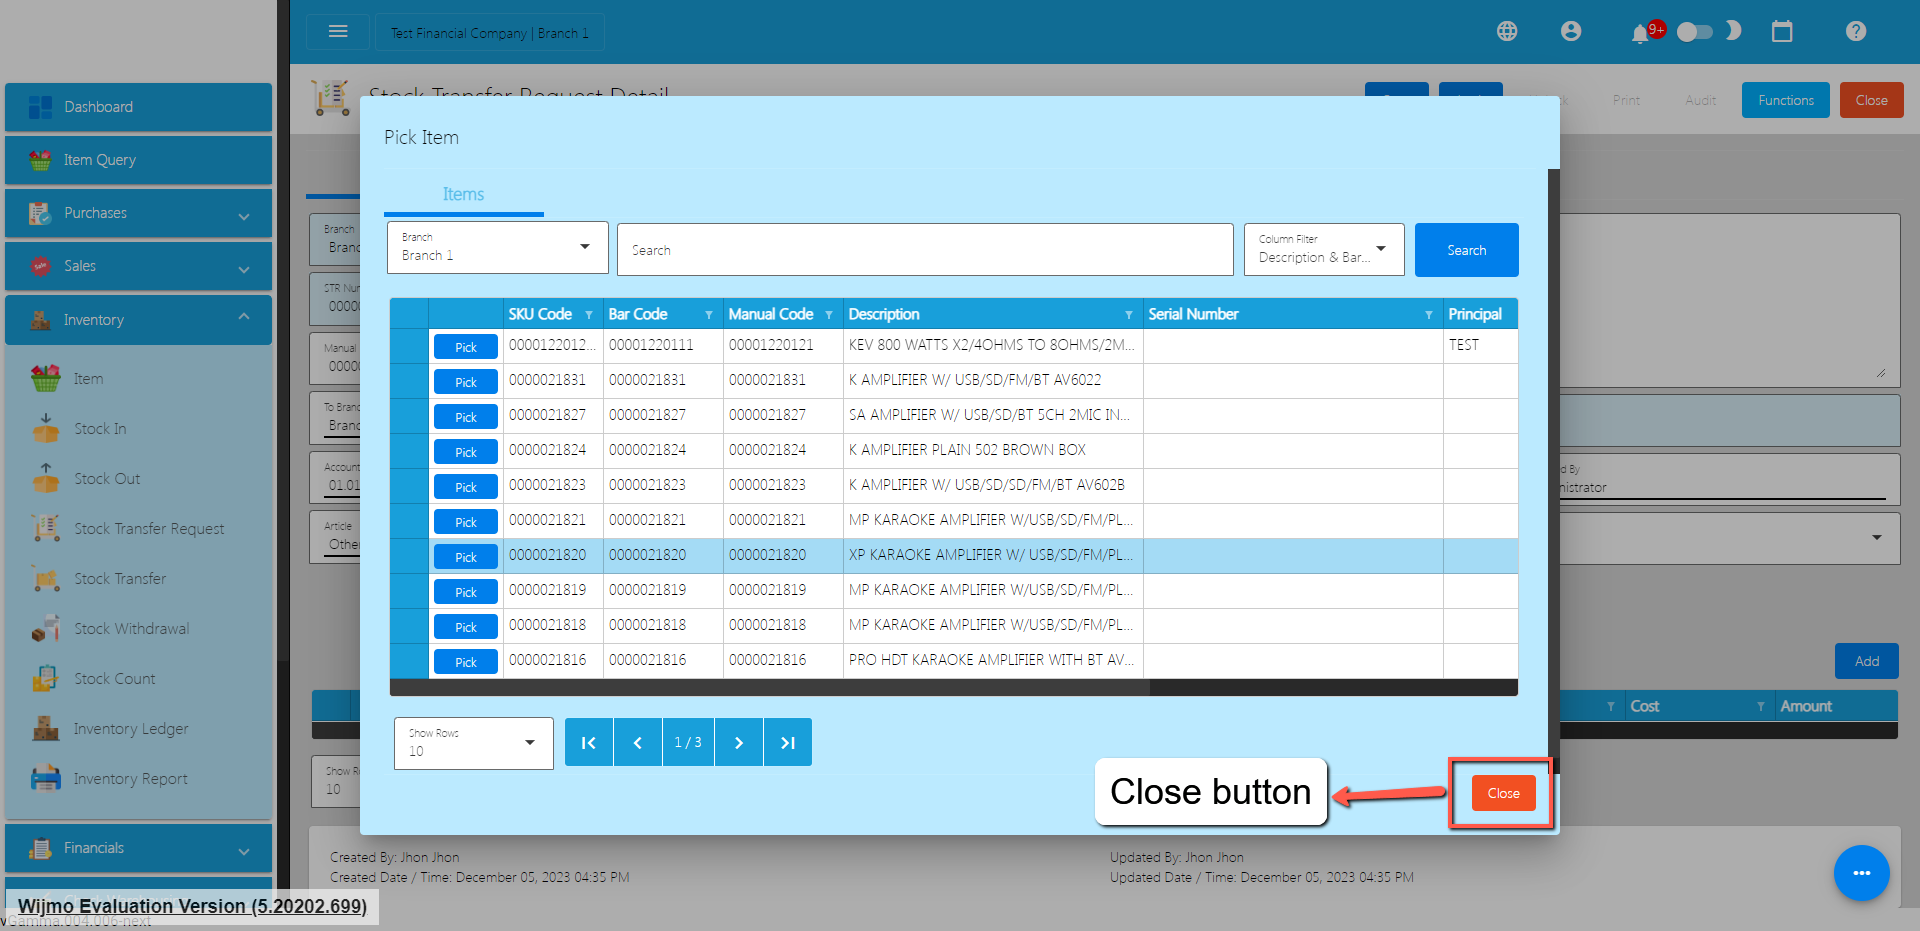
- Review the details and if everything is okay, Save and lock the record. The Save button allows you to save the Stock Transfer Request detail you created. If you want this to be seen on the branch you requested, click the Lock button.
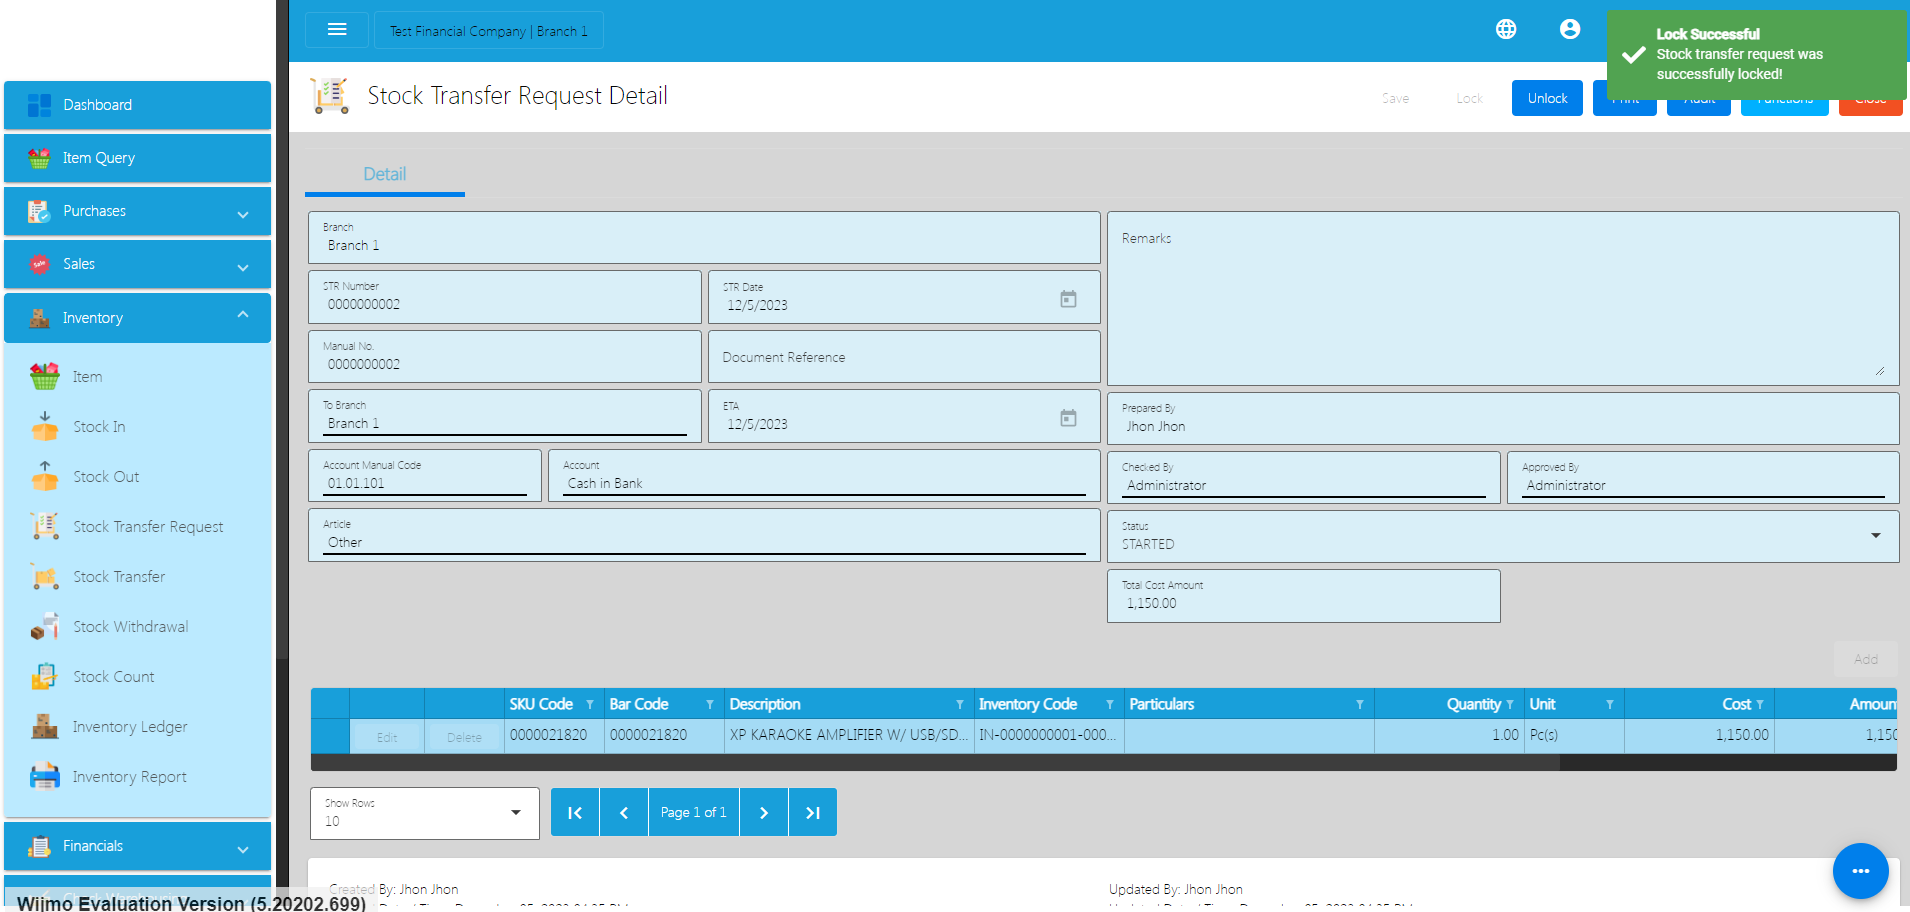
5.6 Stock Transfer
Overview
The Stock Transfer Request feature provides a streamlined process for moving an inventory from one branch to another. Whether you're transferring items between warehouses, stores, or different sections of your business, this tool ensures a smooth and organized method for managing stock movements
Stock Transfer List
- List of all the ST(Stock Transfer) and will also show the overview of the transaction.
- Here, it has the filter functionality and the button to add a new Stock Transfer.
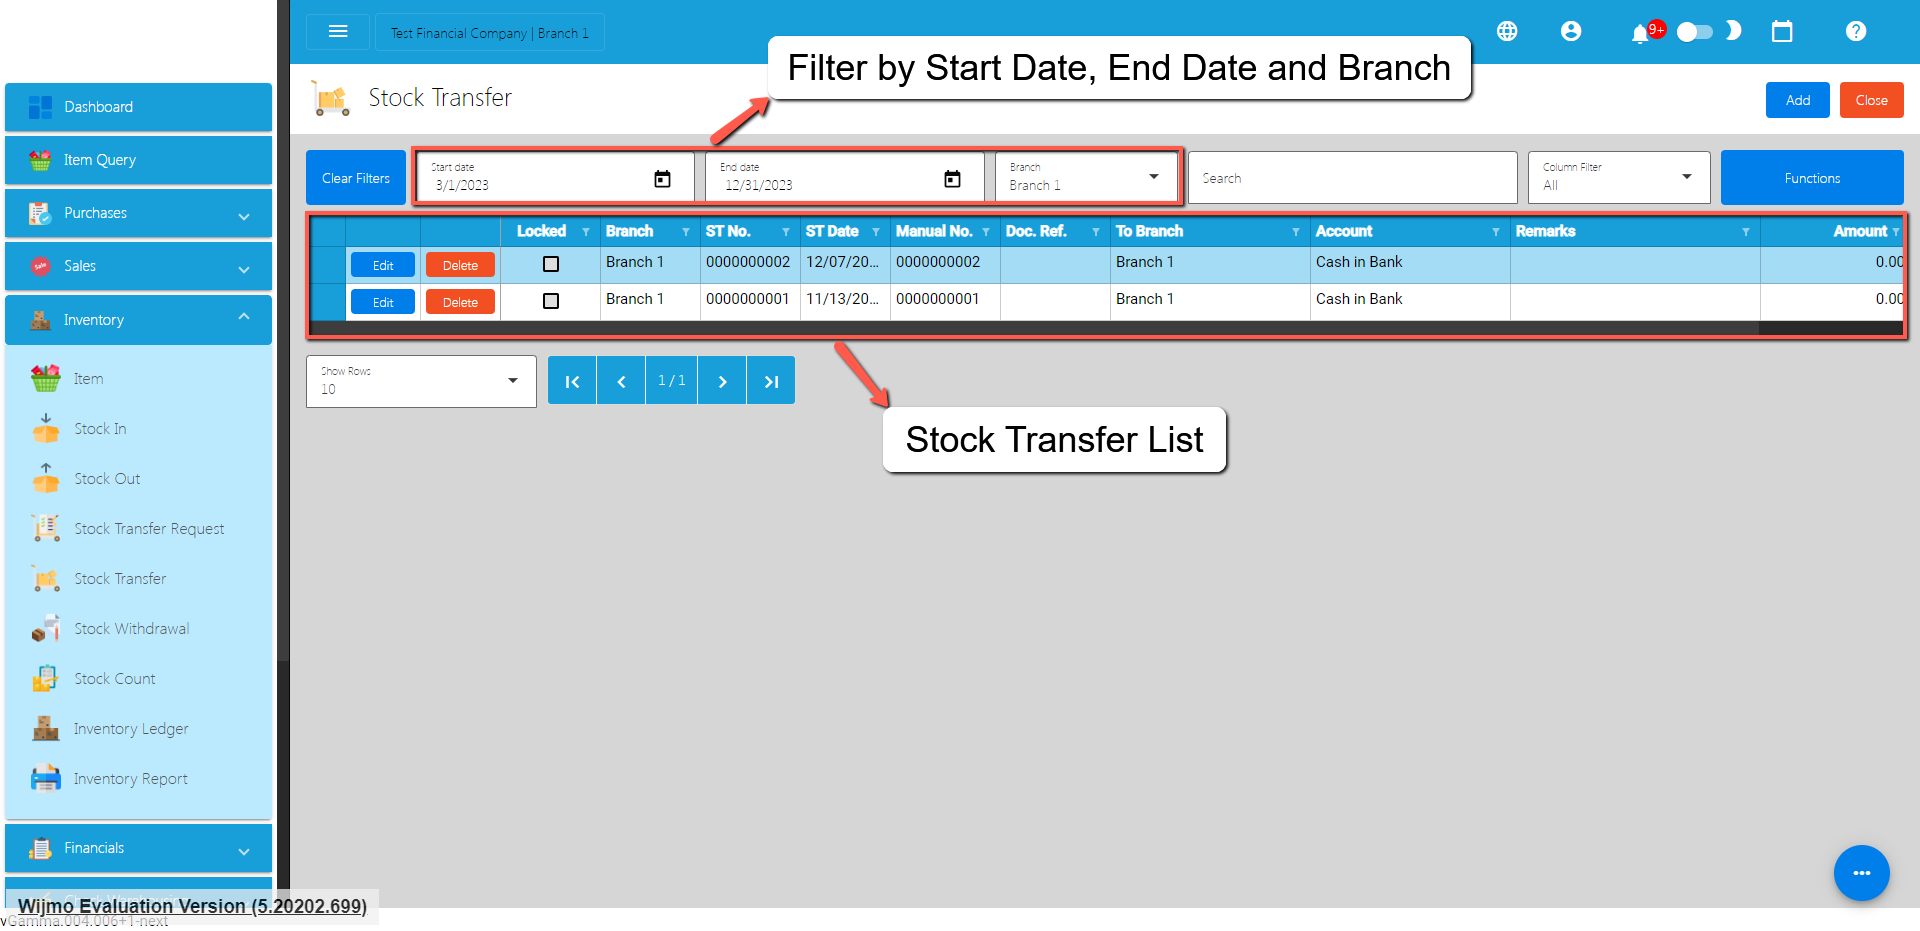
Stock Transfer Detail
- To add a new Stock Transfer, go to Inventory then click Stock Transfer. After that, click the Add that can be seen in the Stock Transfer list.
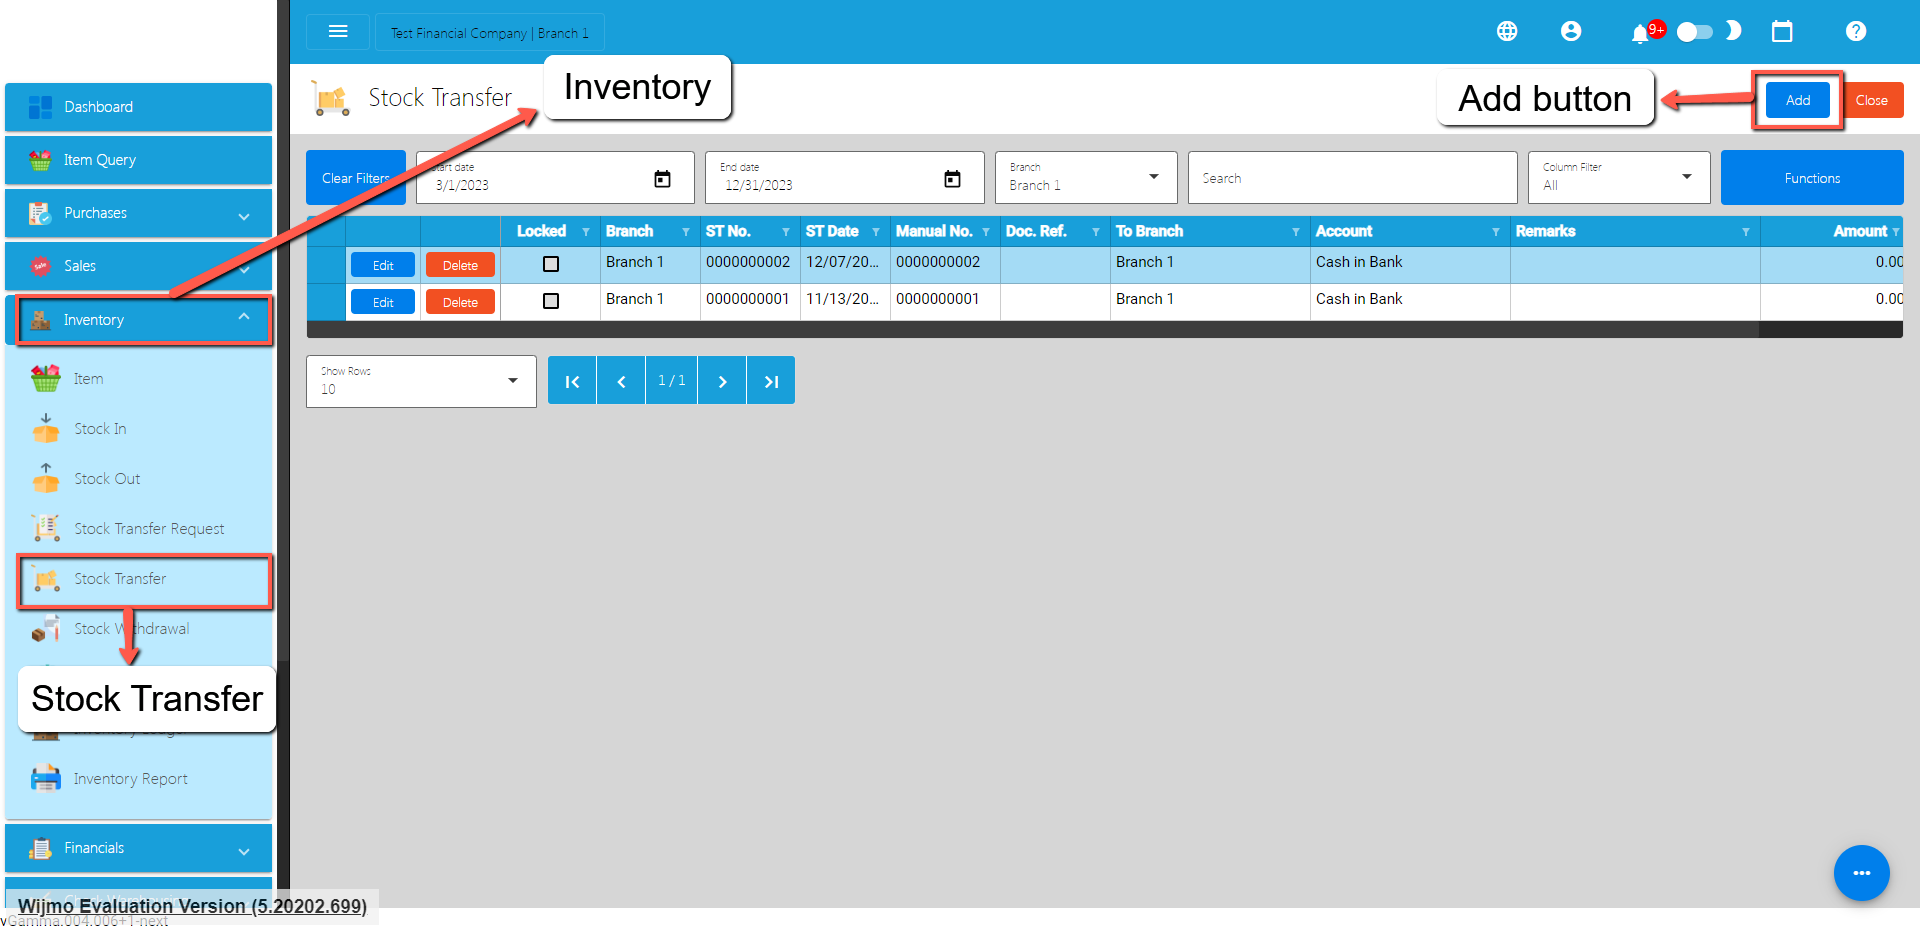
- Fill out all the needed information for the Stock Transfer Detail like,
- ST Date
- Document Reference
- To Branch (where you want to transfer the items)
- Account
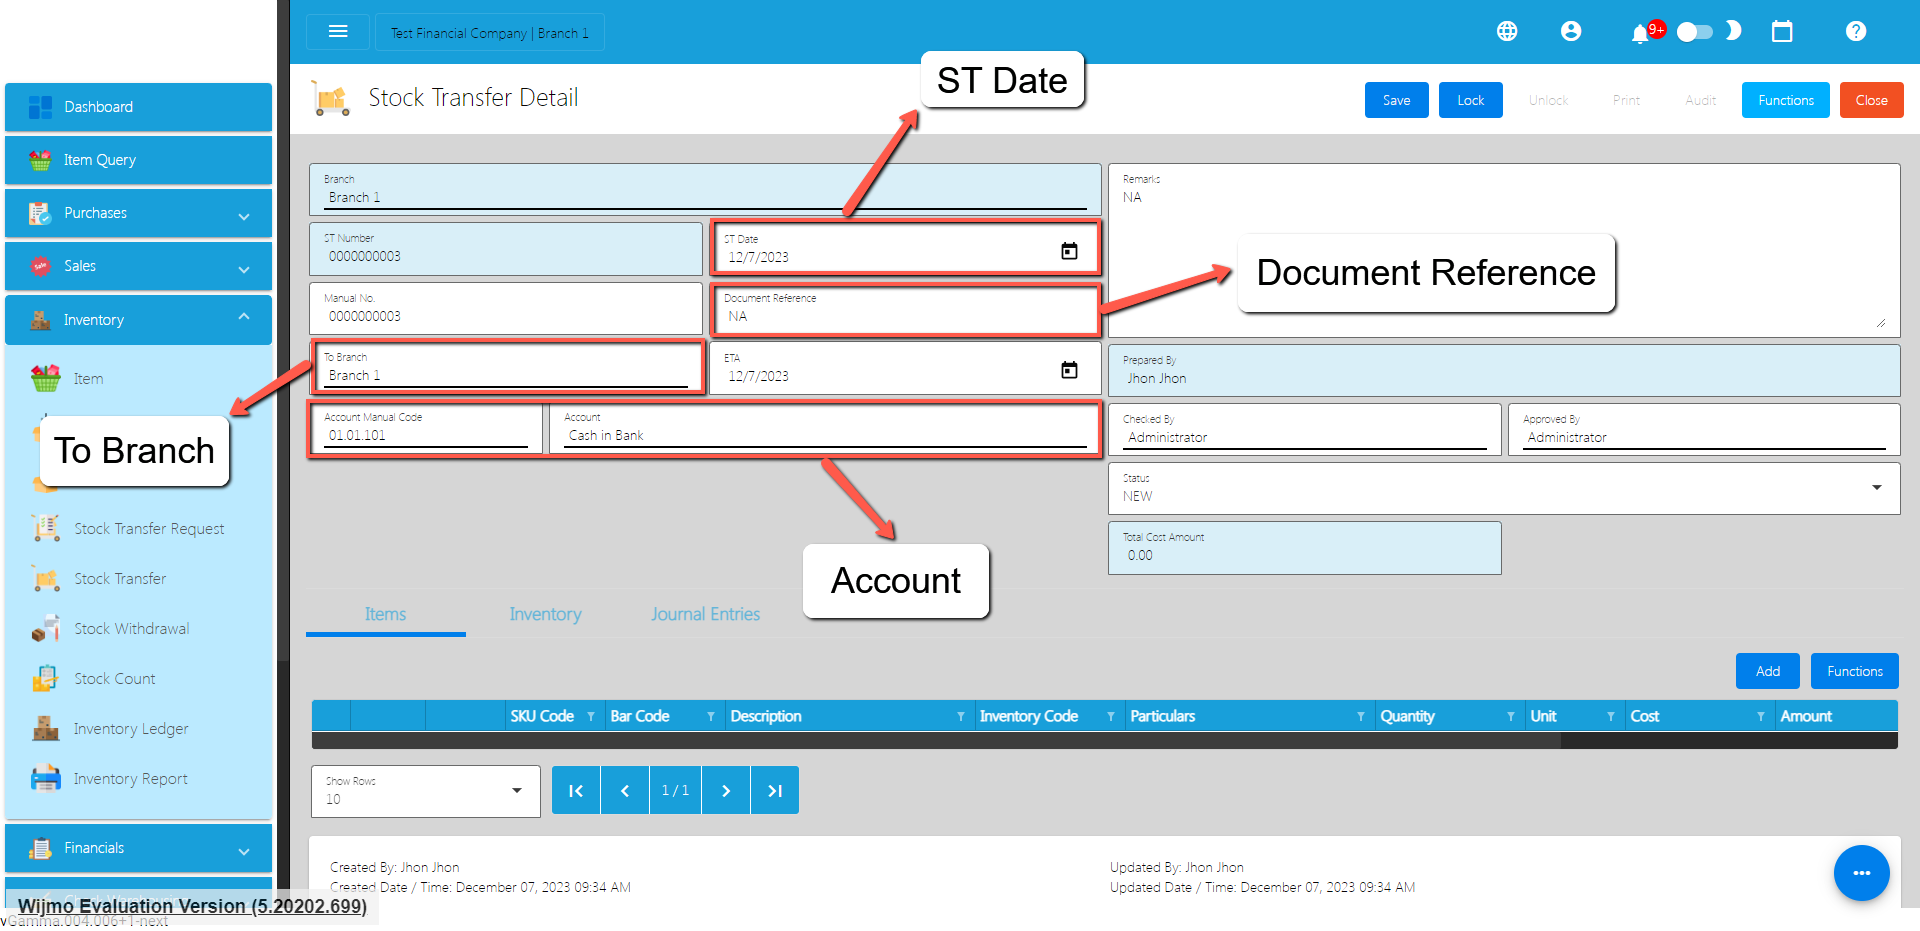
- To add Stock Transfer line item(s), click the Add button under Items tab.
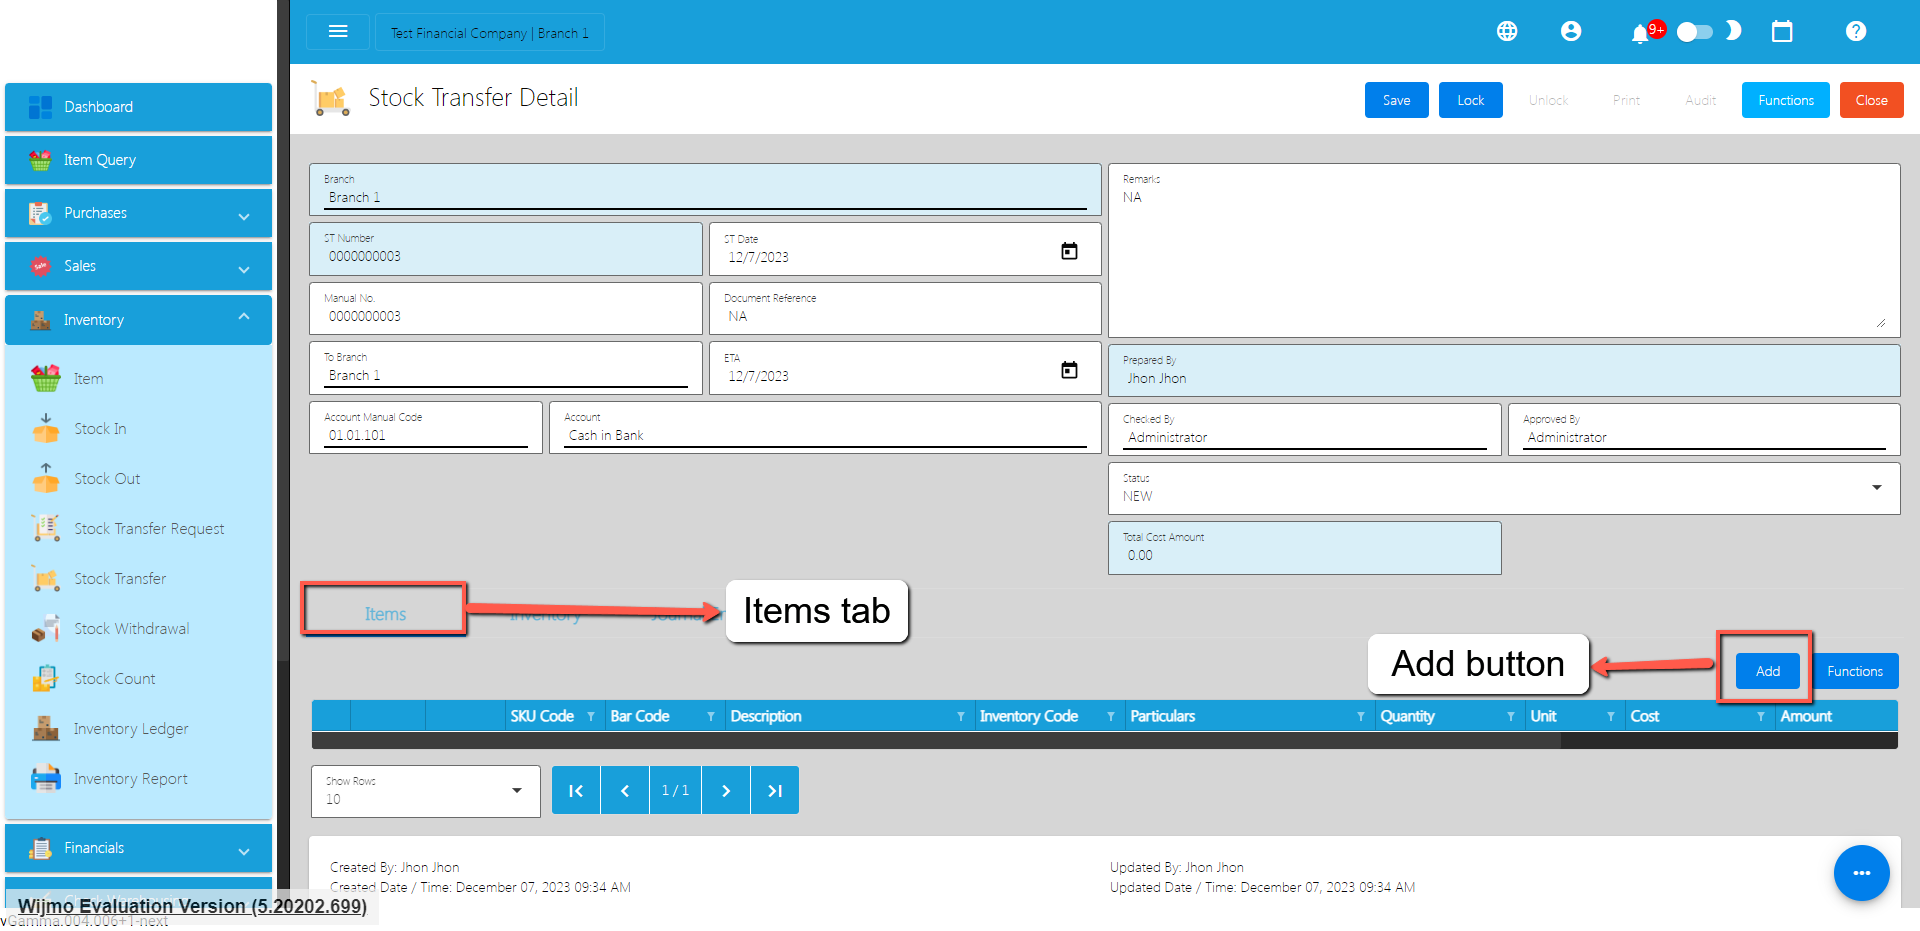
- If there’s a Stock Transfer Request, you can go with the Stock Transfer Request List.
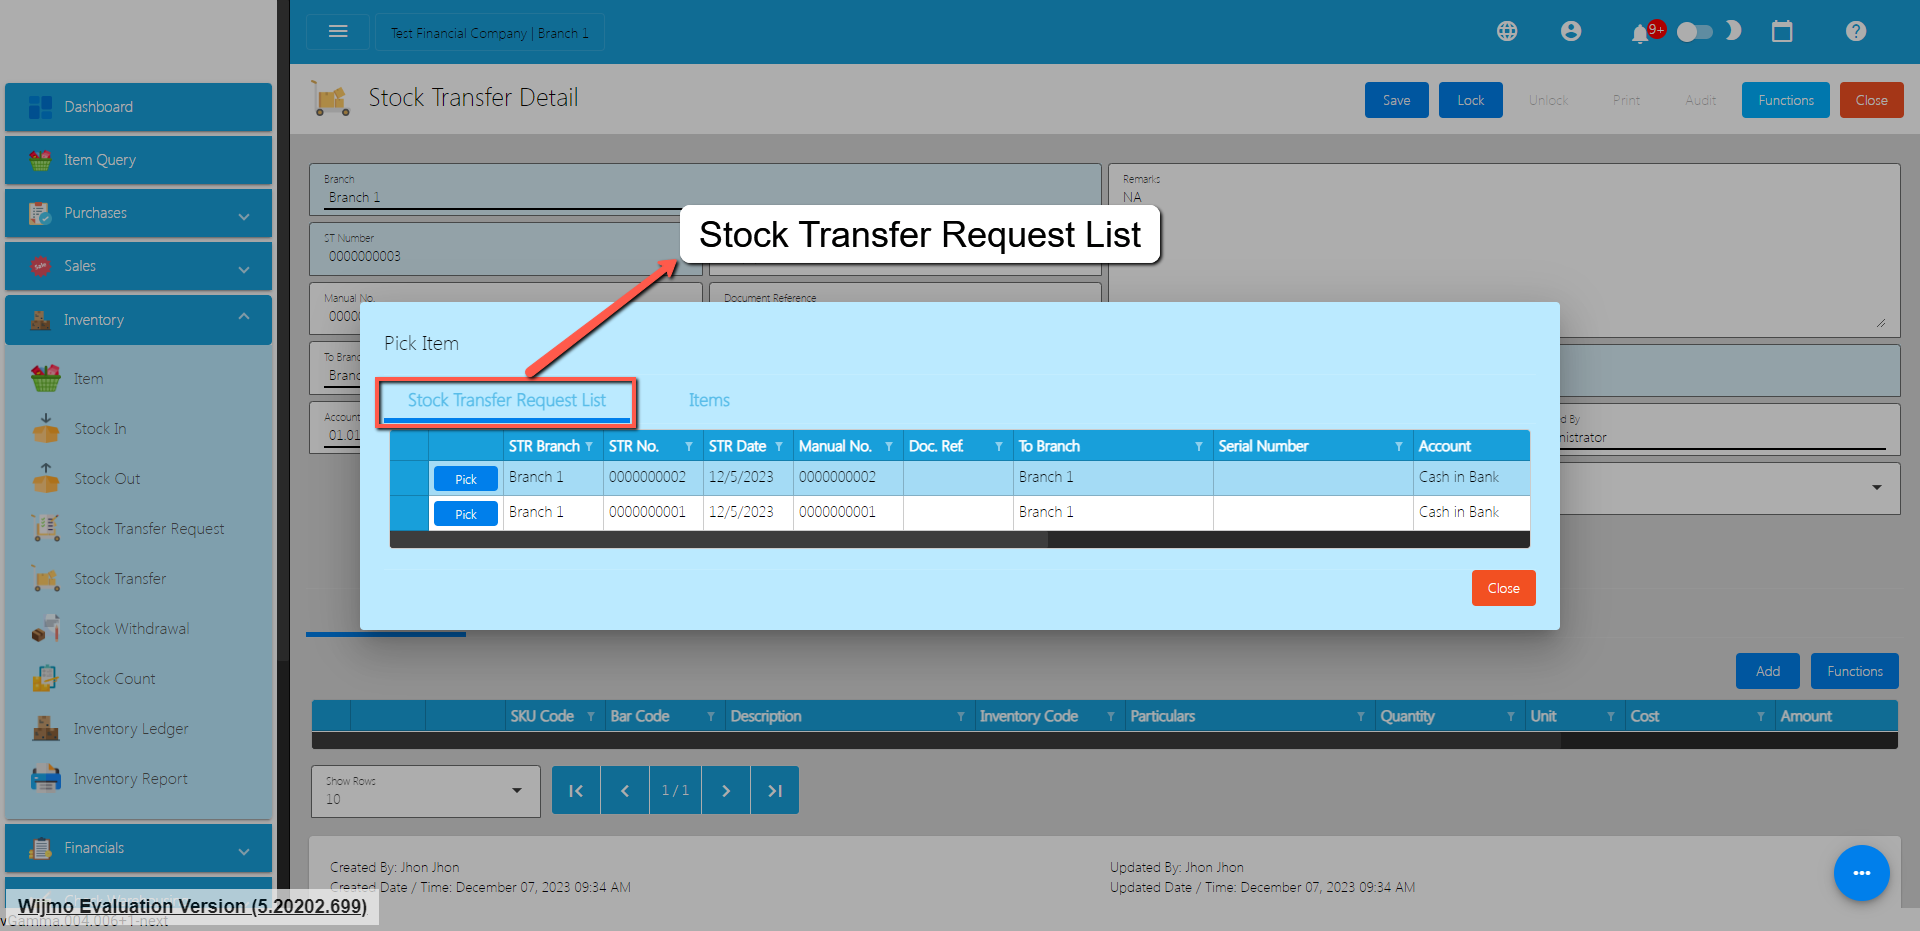
- Click the Pick button to select a Stock Transfer Request to be added on the Stock Transfer.
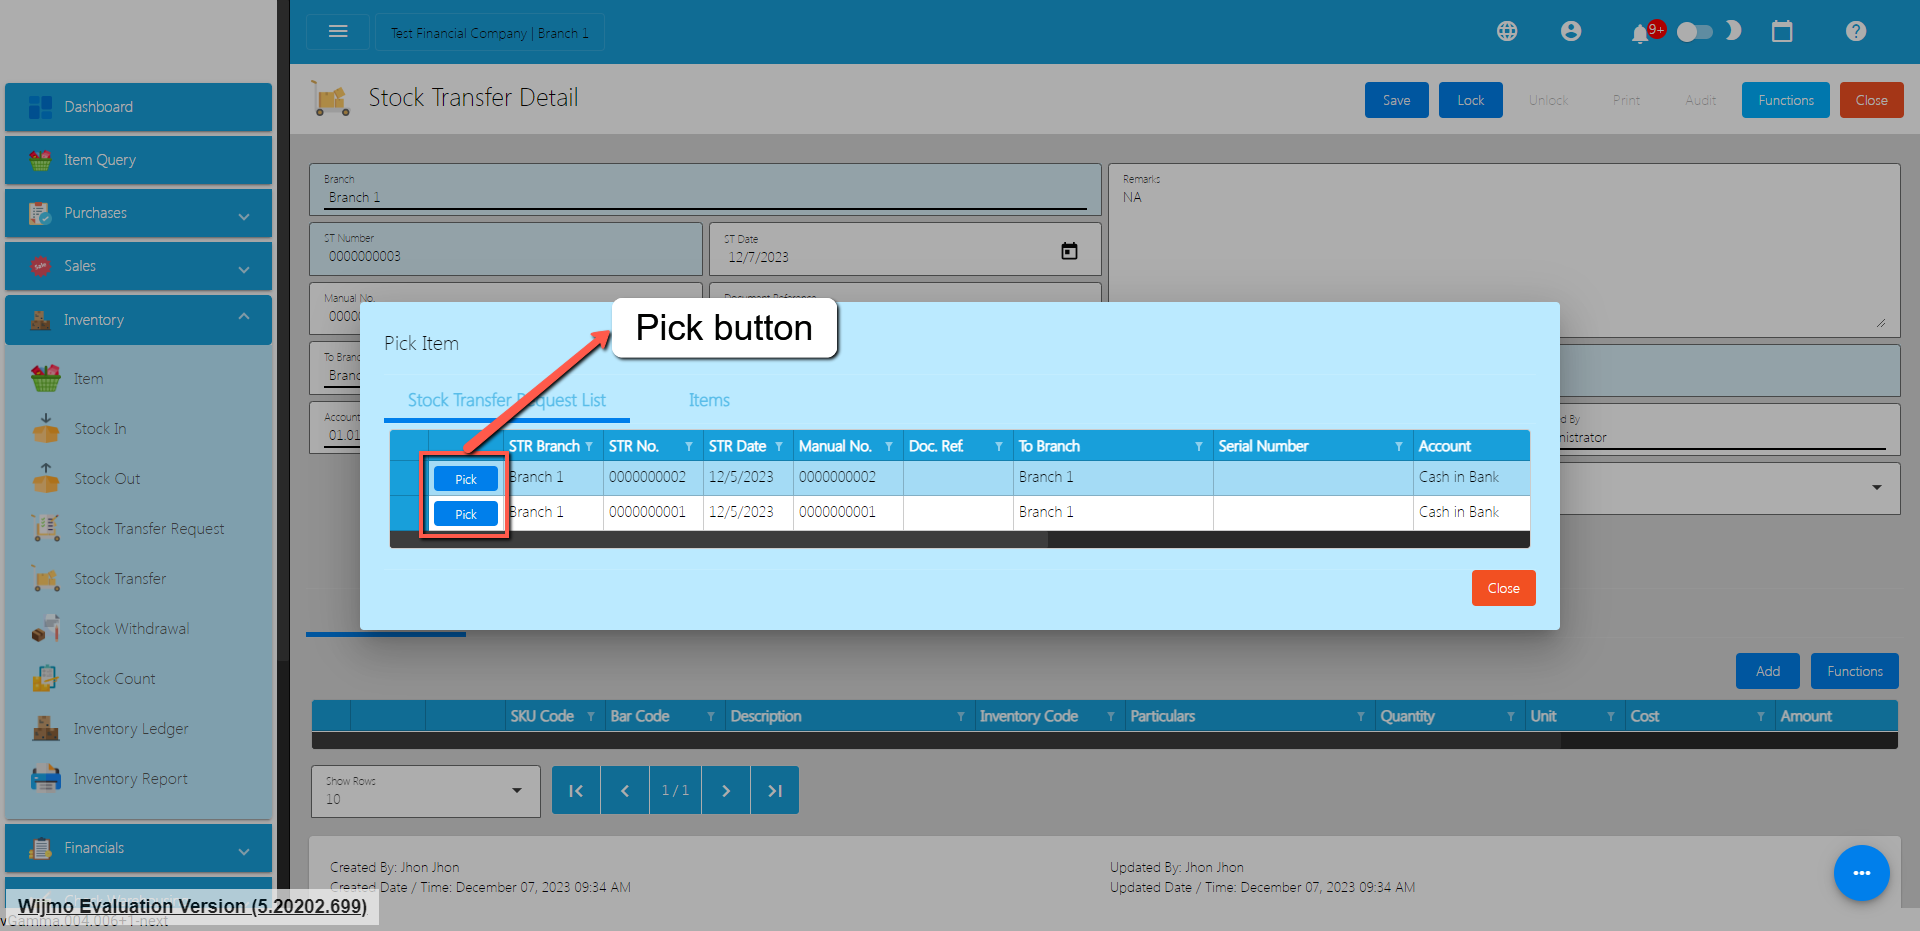
- To confirm adding, click on the Confirm button.
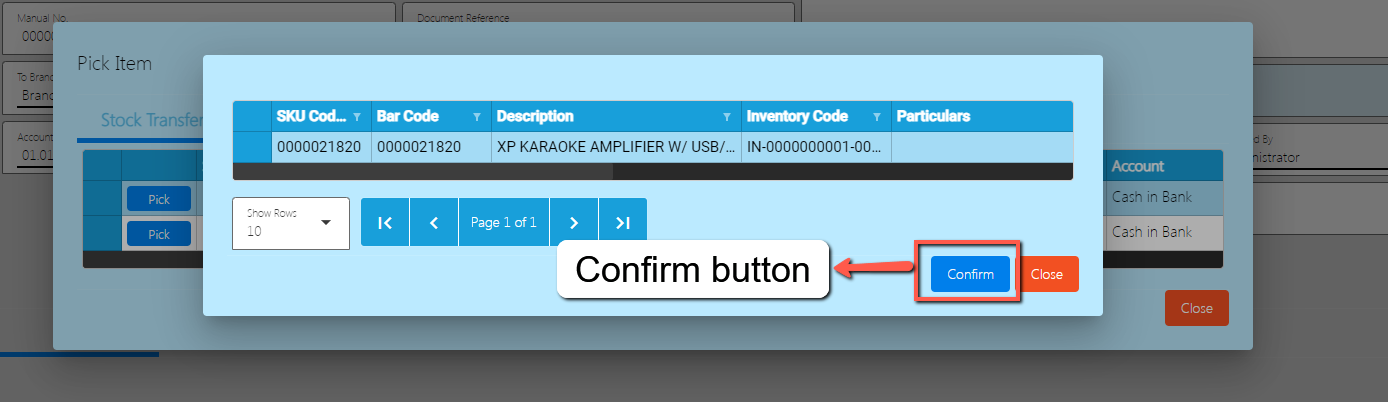
- If you wish to add Stock Transfer line items based on the Stock Transfer Request, repeat steps 5 and 6.
- There’s no need to worry if you don’t have a Stock Transfer Request, since that you can also transfer an item from your current branch to the other branch. Just go directly to the Items tab.
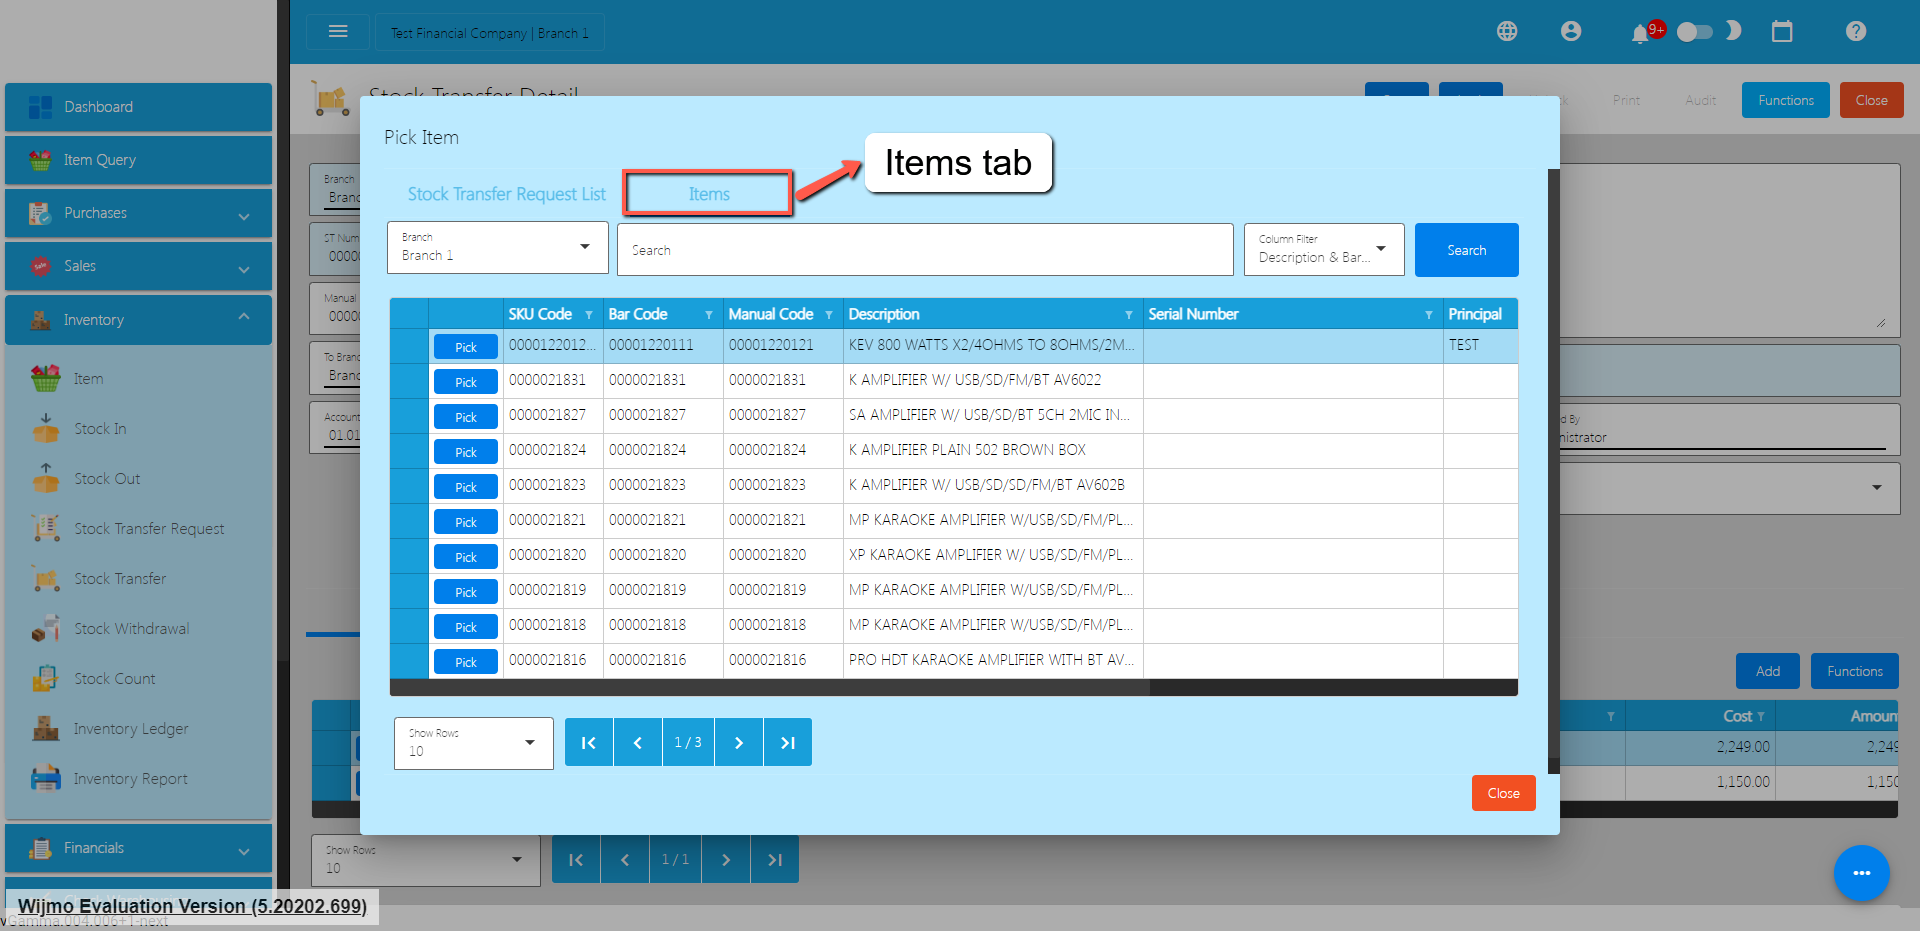
- To pick an item that you want to transfer, click the Pick button.
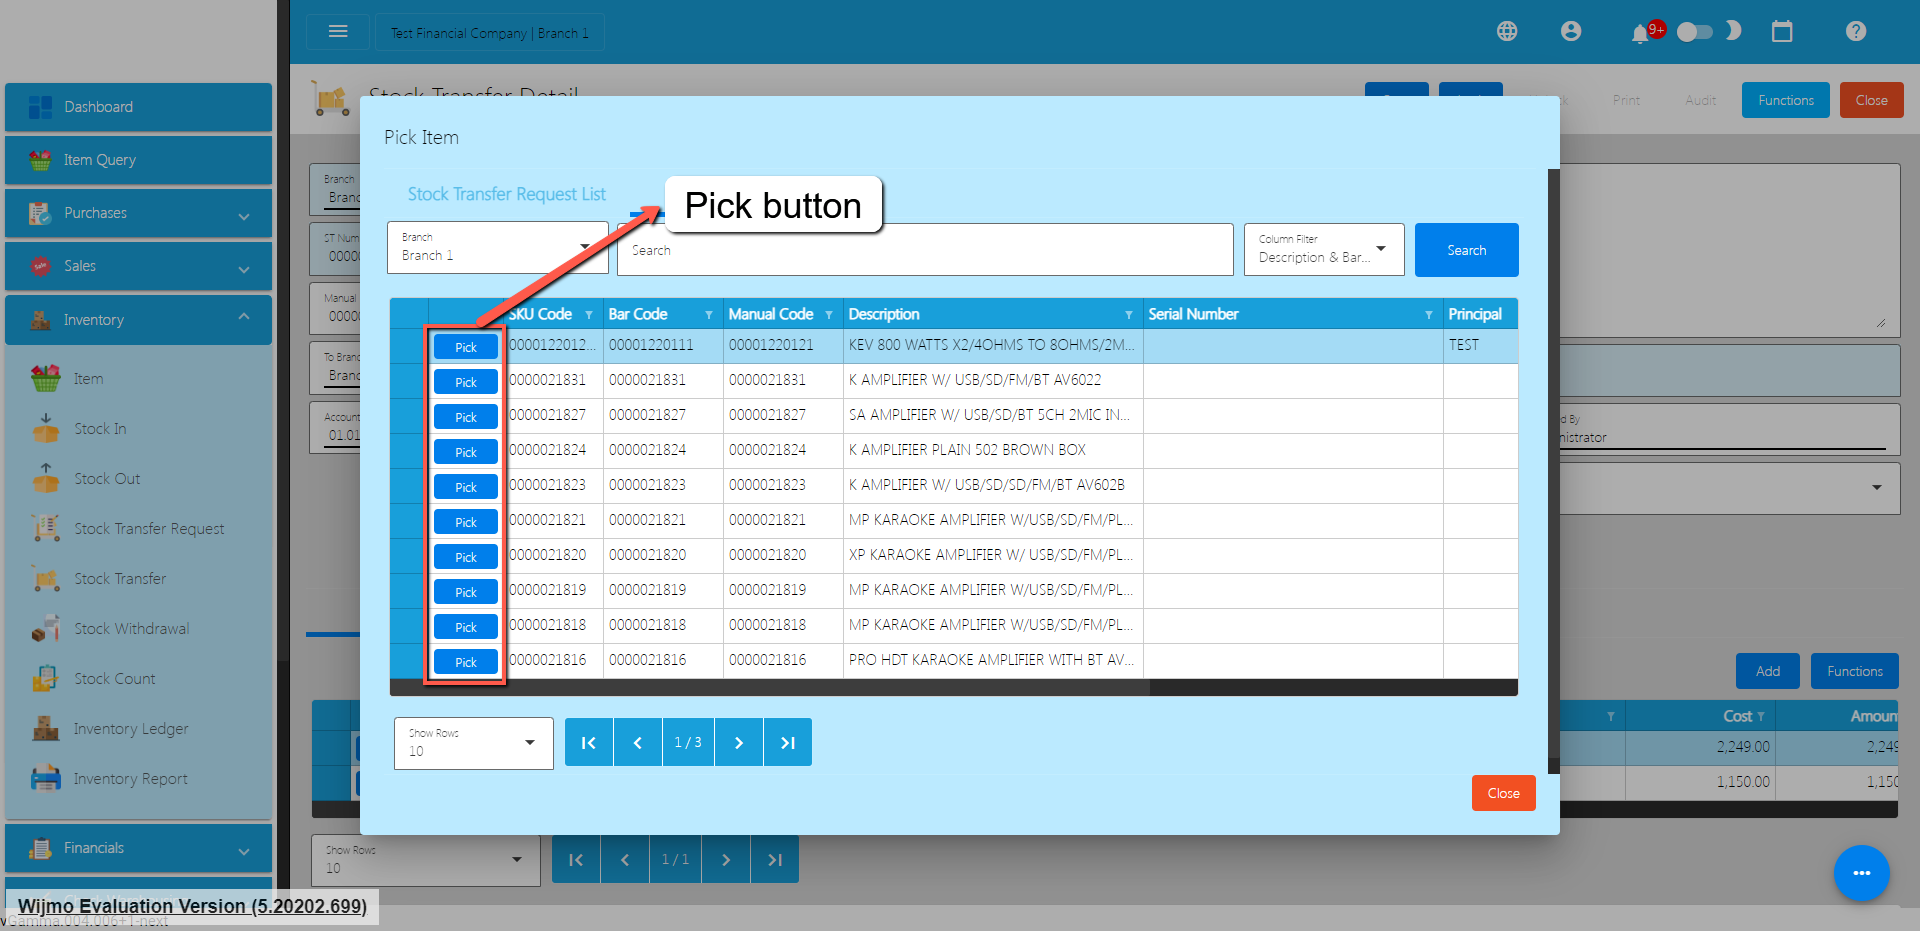
- Fill up the necessary field for adding the item for Stock Transfer, changing the Quantity and the Cost of the item.
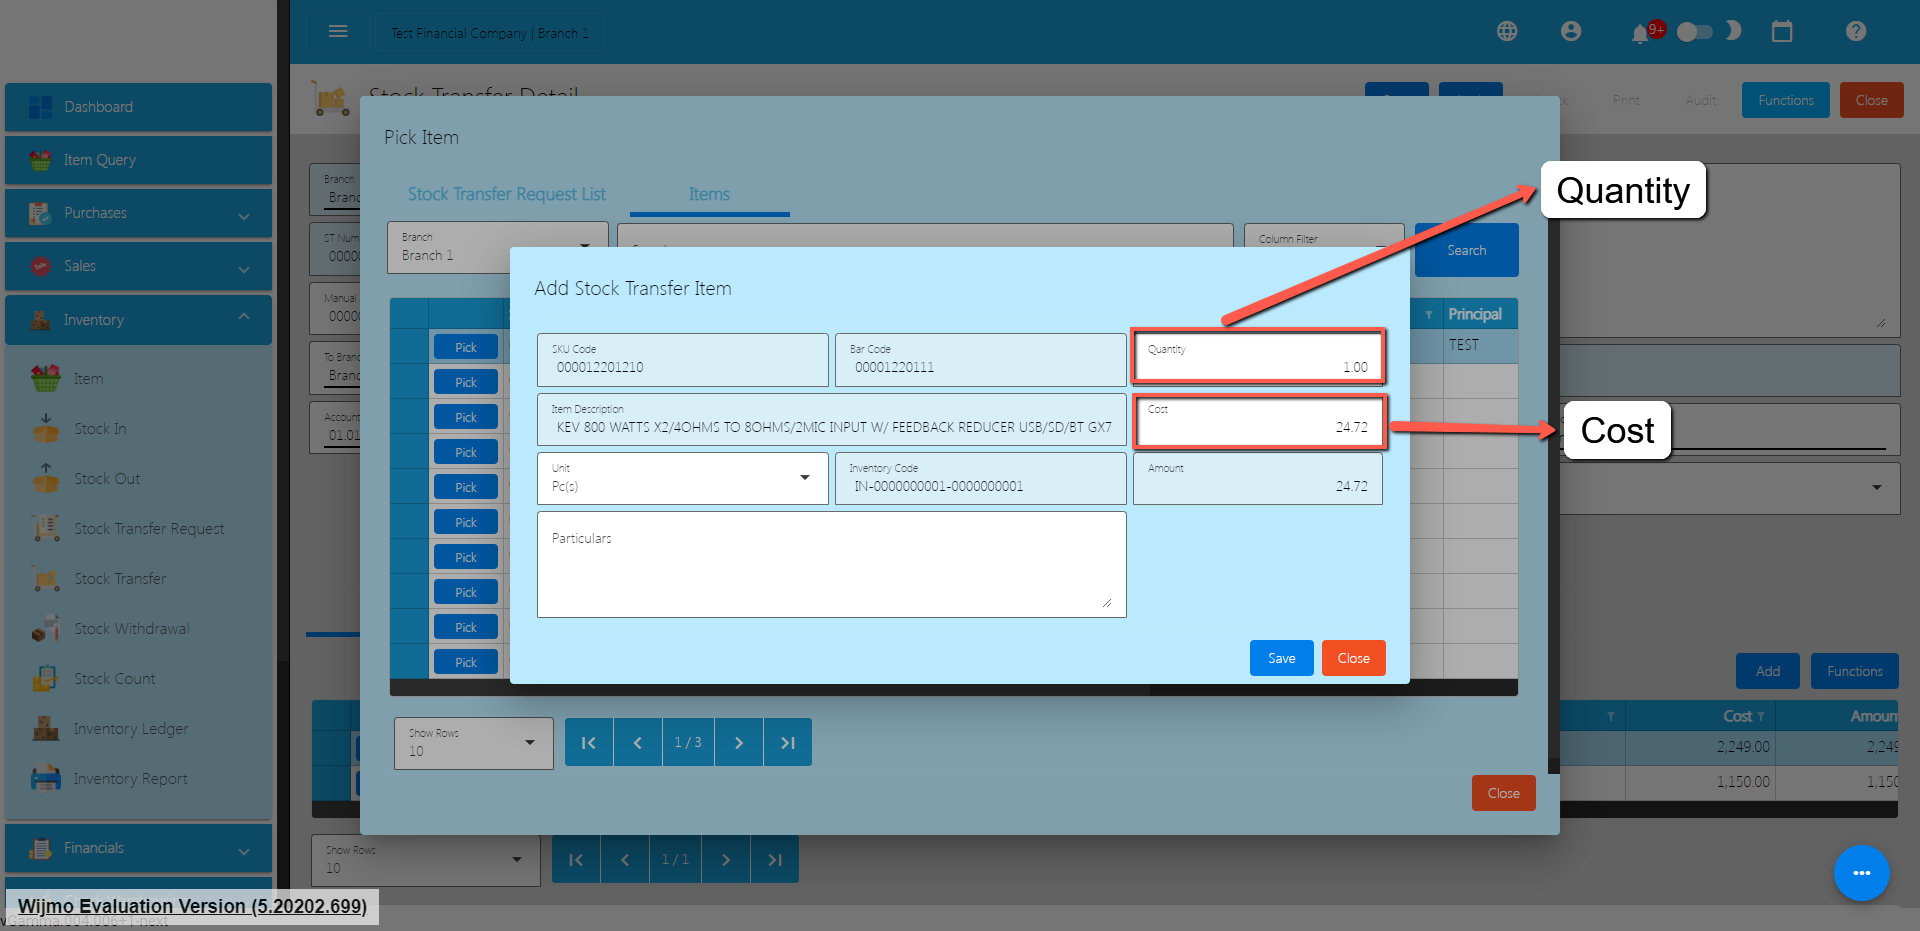
- Click Save button to Save the item as a Stock Transfer line item.
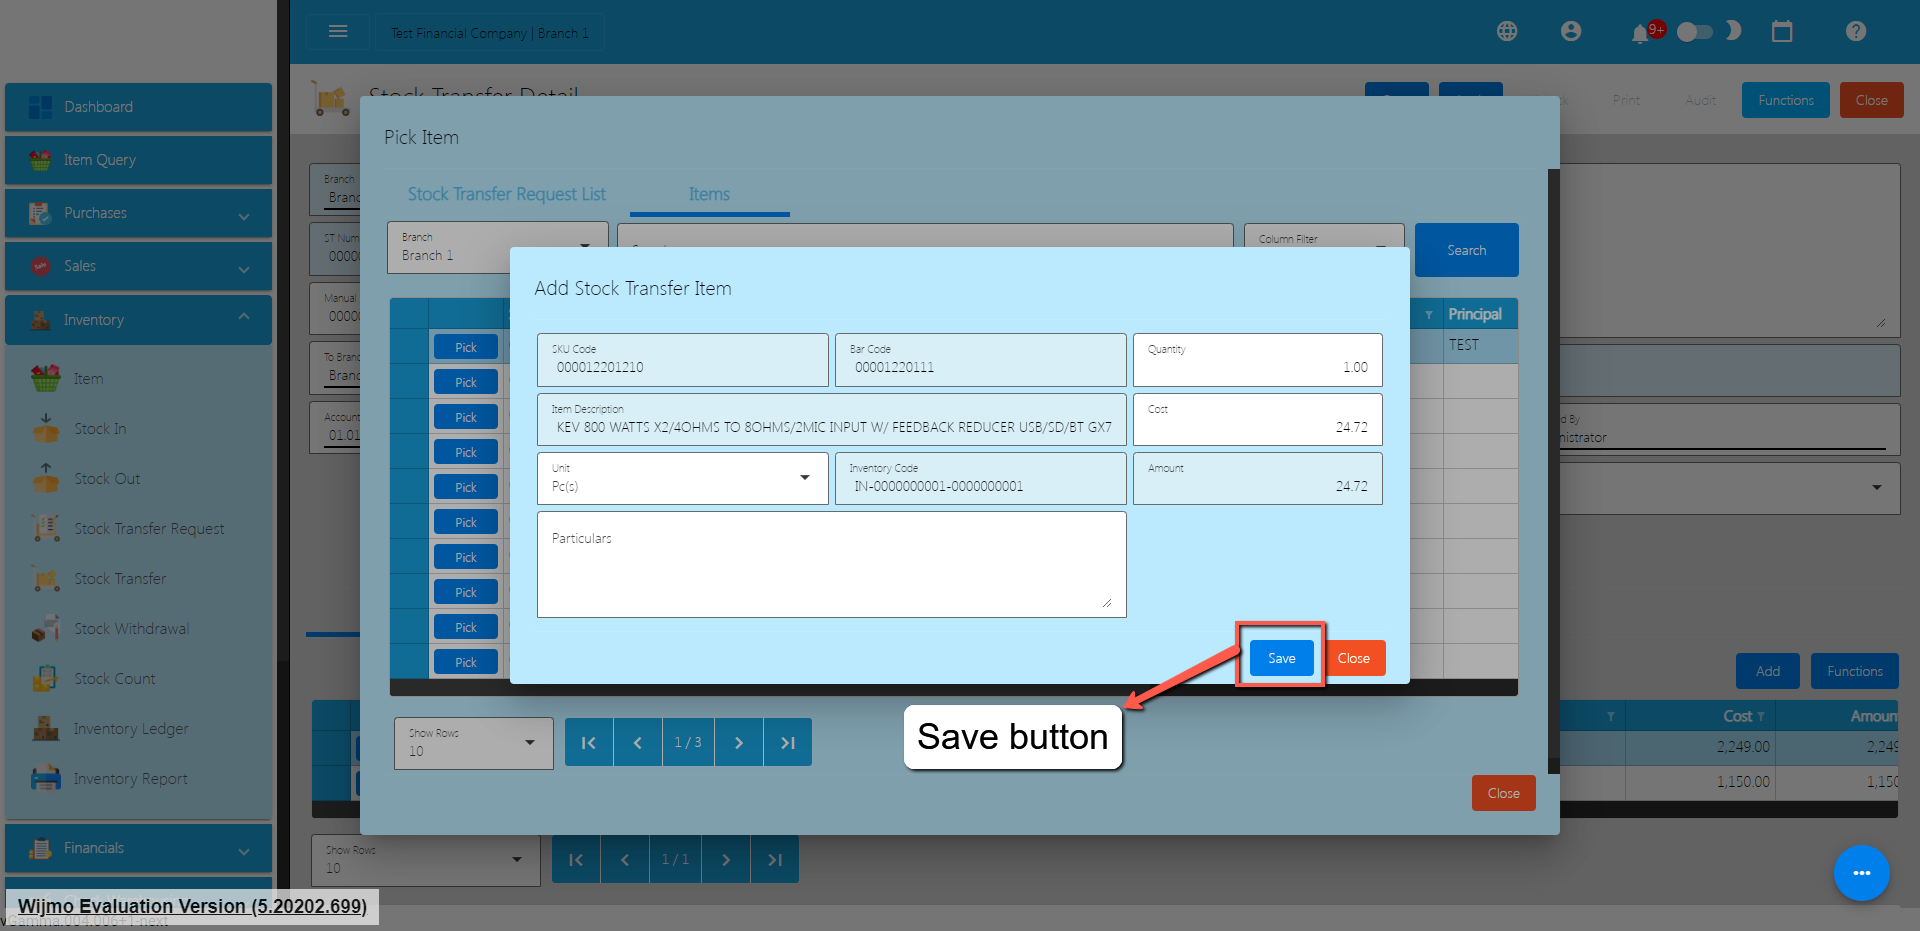
- If you wish to add another item, just repeat Steps 9 to 11.
- Click the Close button to close the popup and review your Stock Transfer detail.
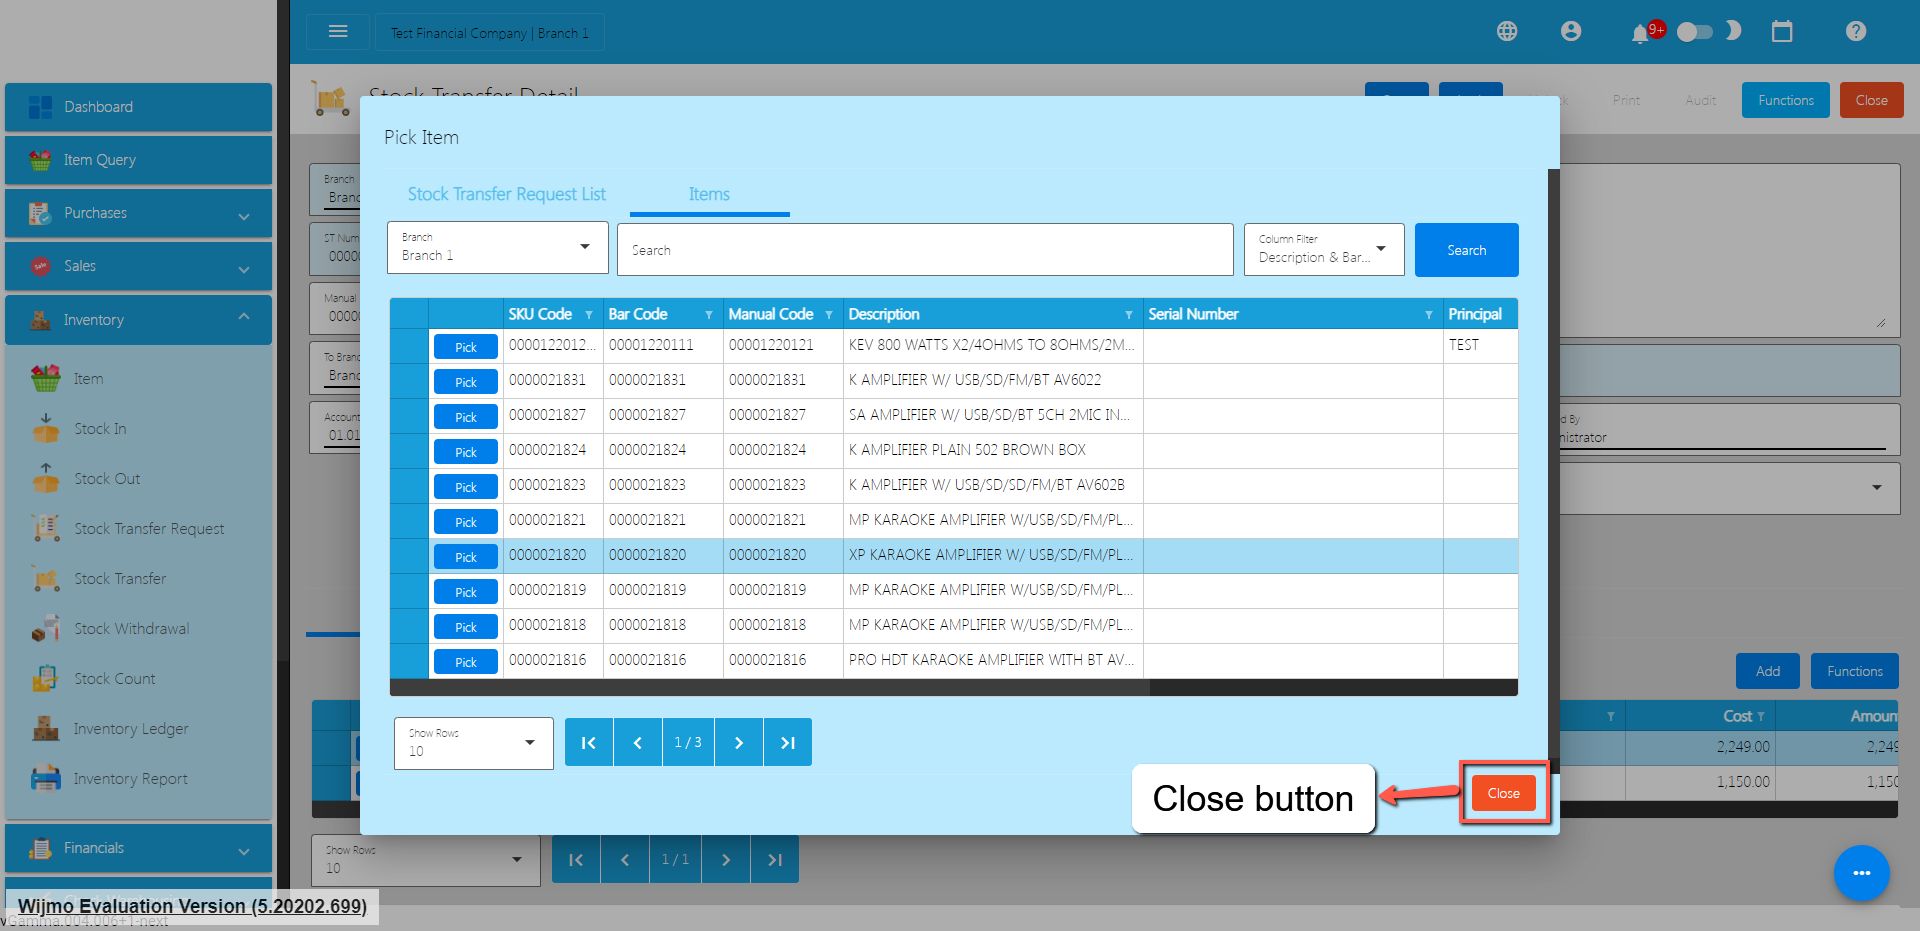
- Review the details and if everything is okay, Save and lock the record. The Save button allows you to save the Stock Transfer detail you created. If you want this to have an effect on your inventory (current branch’s inventory will be deducted based on your Stock Transfer and the other branch’s inventory you transfer stocks will be increased), click the Lock button.
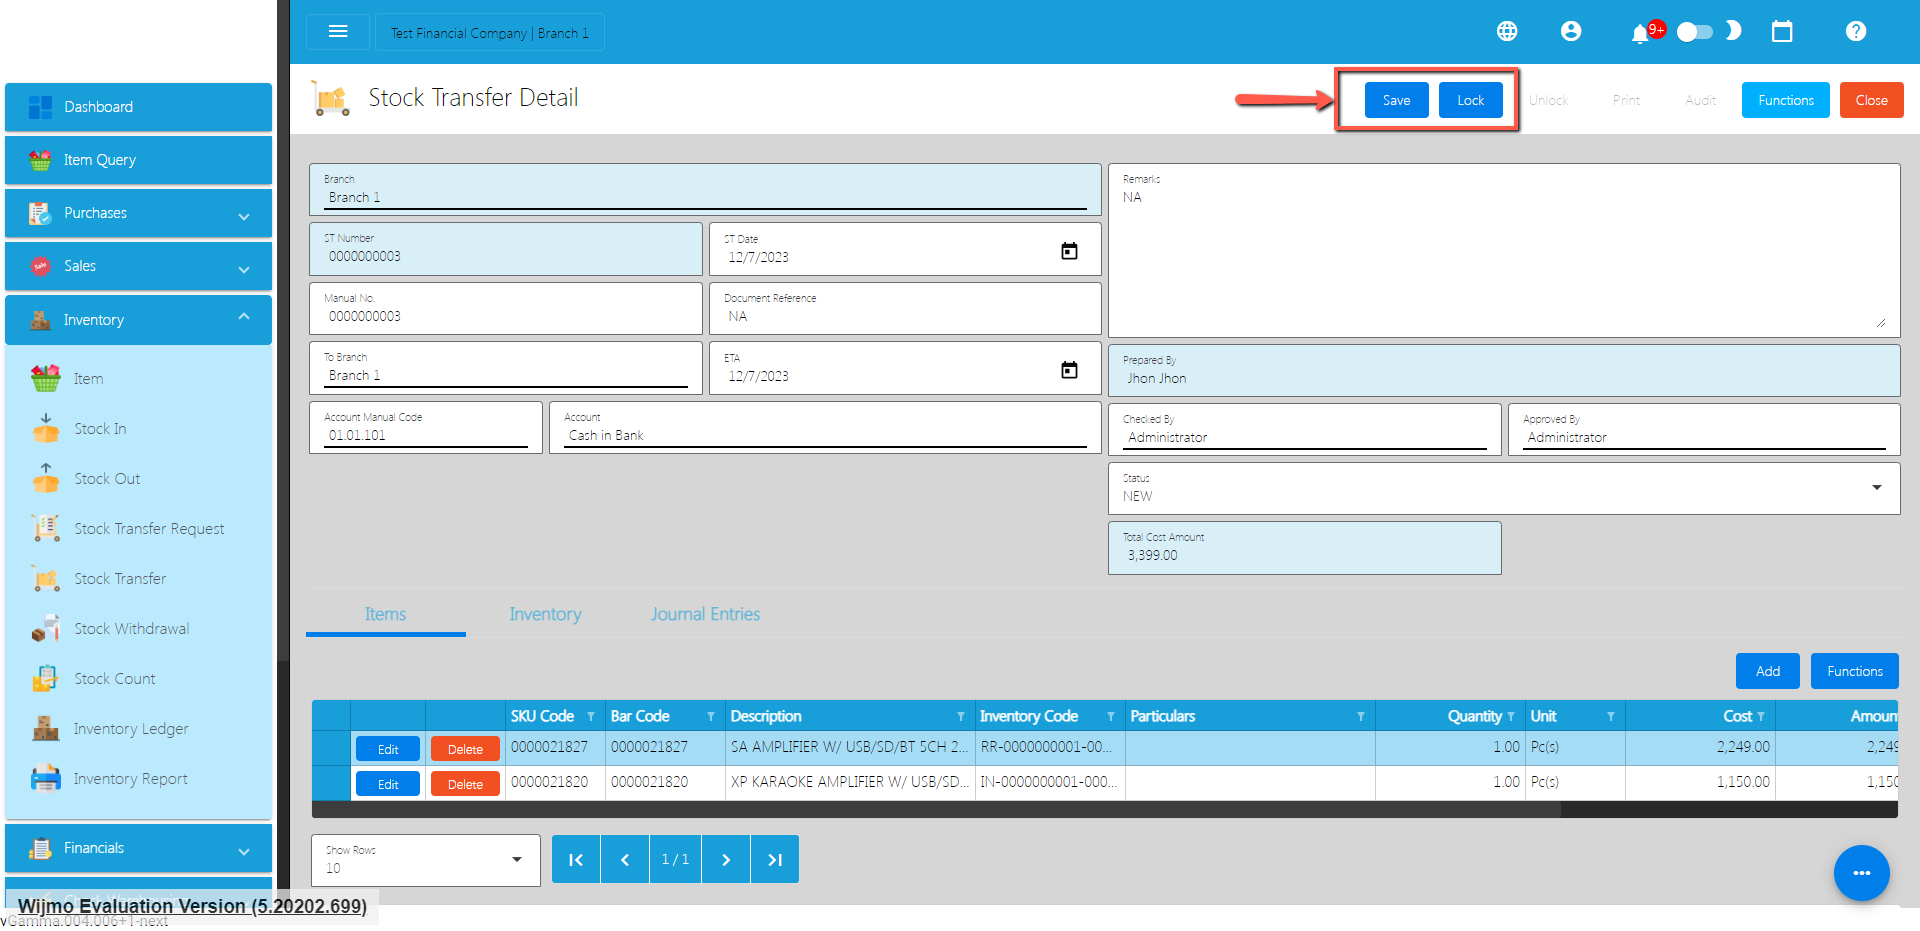
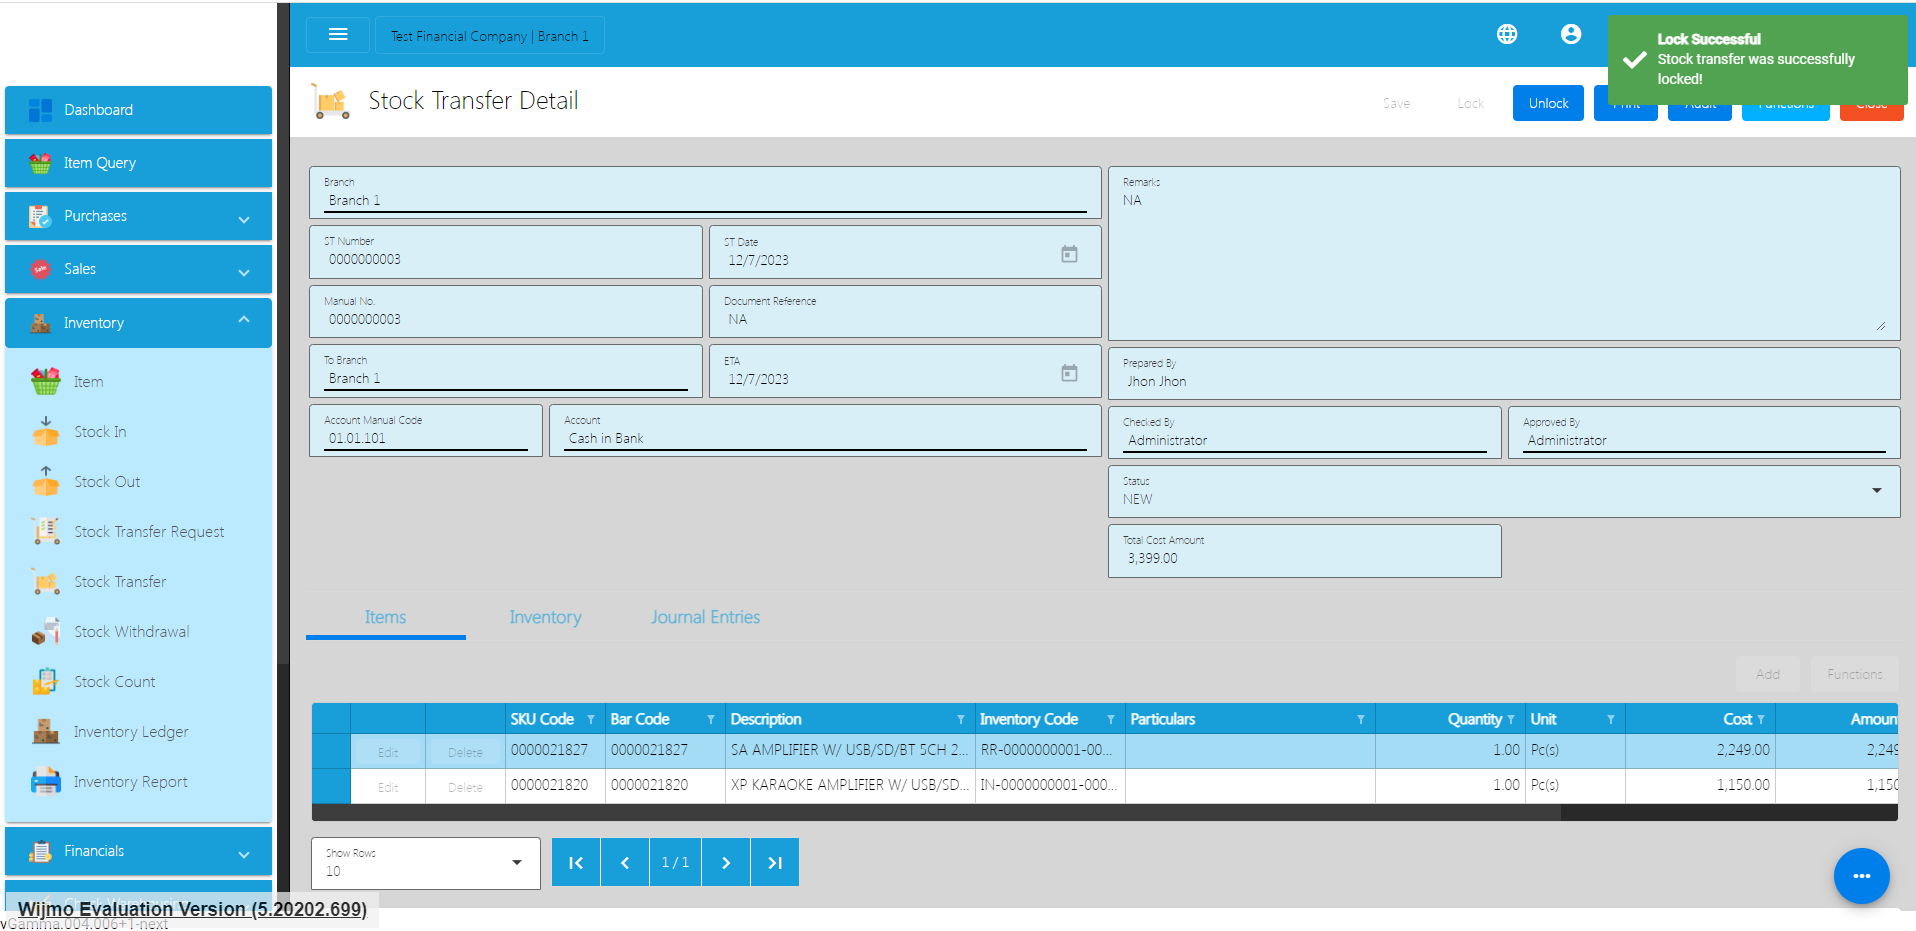
5.7 Stock Withdrawal
Overview
Stock Withdrawal List
- List of all the SW(Stock Withdrawal) and will also show the overview of the transaction.
- Here, it has the filter functionality and the button to add a new Stock Withdrawal.
Stock Withdrawal Detail
- To add a new SW, click the Add that can be seen in the SW list.
- Fill out all the needed information for the Stock Withdrawal Detail like,
- Branch
- SW Date
- SW Number
- Document Reference
- Account
- Pick the item you would like to add in your Stock Withdrawal
- Fill up the necessary field for adding the item for Stock Withdrawal, Changing the Unit for the Item, Particulars,Value, and the Quantity of the item.
5.8 Stock Count
Stock Count List
- List of all the SC(Stock Count) and will also show the overview of the transaction.
- Here, the user also has the filter functionality and the button to add a new SC.
Stock Count Detail
- To add a new SC, click the Add that can be seen in the SC list.
- Fill out all the needed information for the Stock Count Detail like,
- Branch
- SC Date
- SC Number
- Document Reference
- Account
- Pick the item you would like to add in your Stock Count
- Fill up the necessary field for adding the item for Stock Count, Changing the Unit for the Item, Particulars,Value, and the Quantity of the item.
- Once everything is okay, Save and Lock the details.
- To correct the inventory, click the Functions button then click Post Inventory. It will automatically create a Stock In or Stock Out.
5.9 Inventory Ledger
Inventory Ledger List
- List of all the IL(Inventory Ledger) and will also show the overview of the transaction.
- Here, the user also has the filter functionality and the button to add a new IL.
Inventory Ledger Detail
- To add a new SC, click the Add that can be seen in the IL list.
- Fill out all the needed information for the Inventory Ledger Detail like,
- Branch
- IL Date
- IL Number
- Document Reference
- Account
- When Generate IL is clicked the items will generate the cost.
6.0: Financials Transactions
7.2 Bank Reconciliation
Bank Reconciliation Detail
- Here the user can choose what Account they want to set up for them to use in their transactions, there are the tabs:
- Deposits (Collection) – This refers to any money that the company has received and deposited into its bank account. Deposits can include sales revenue, customer payments, and other types of income.
- Withdrawals (Disbursement) – This refers to any money that the company has paid out of its bank account. Withdrawals can include payments to vendors, employee salaries, and other expenses.
- Adjustments (Journal Voucher) – These are entries made to the company's records to account for any differences between the bank statement and the company's records. Adjustments can include bank fees, interest earned on the account, and any errors or omissions made in recording transactions.
- Bank Book Journal – This is a record of all transactions that have taken place in the company's bank account. The bank book journal should include all deposits, withdrawals, and any other transactions that affect the balance of the account.
7.3 Journal Voucher
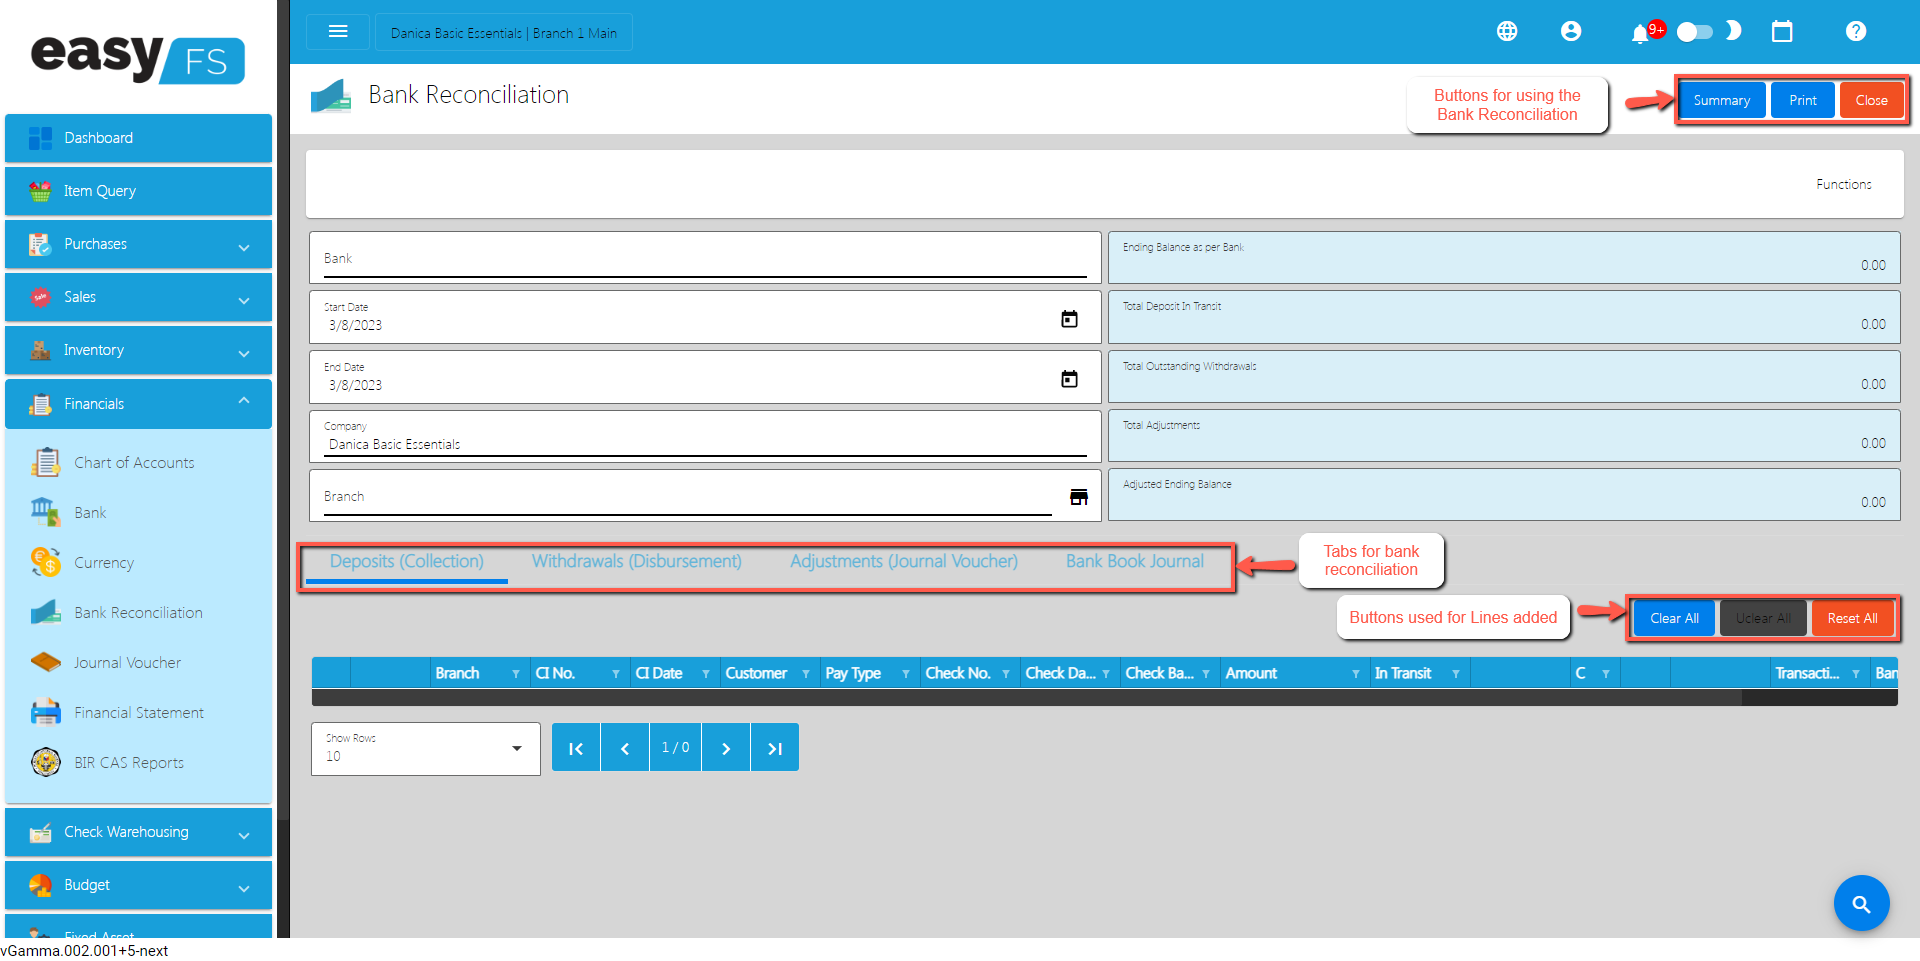
Overview
- A journal voucher is a document on which the essential information about an accounting transaction. This voucher contains a unique identifying number, the transaction date, transaction description, and transaction amount.
- When a financial transaction occurs, create a journal voucher to record the details of the transaction.
- The journal voucher includes information such as the accounts affected, amounts, and a brief description of the transaction.
- easyFS has an automatic Journal Entry recording in its Sales, Purchasing and Inventory Management Module.
- The Journal Voucher form will only be for posting of Adjusting Entries such as accruals, depreciation and amortization. These can be explained further by your Accountant.
Journal Voucher List
- List of All Journal Voucher that were added to the System
- Here the user can add Journal Voucher to set up for them to use in their transactions.
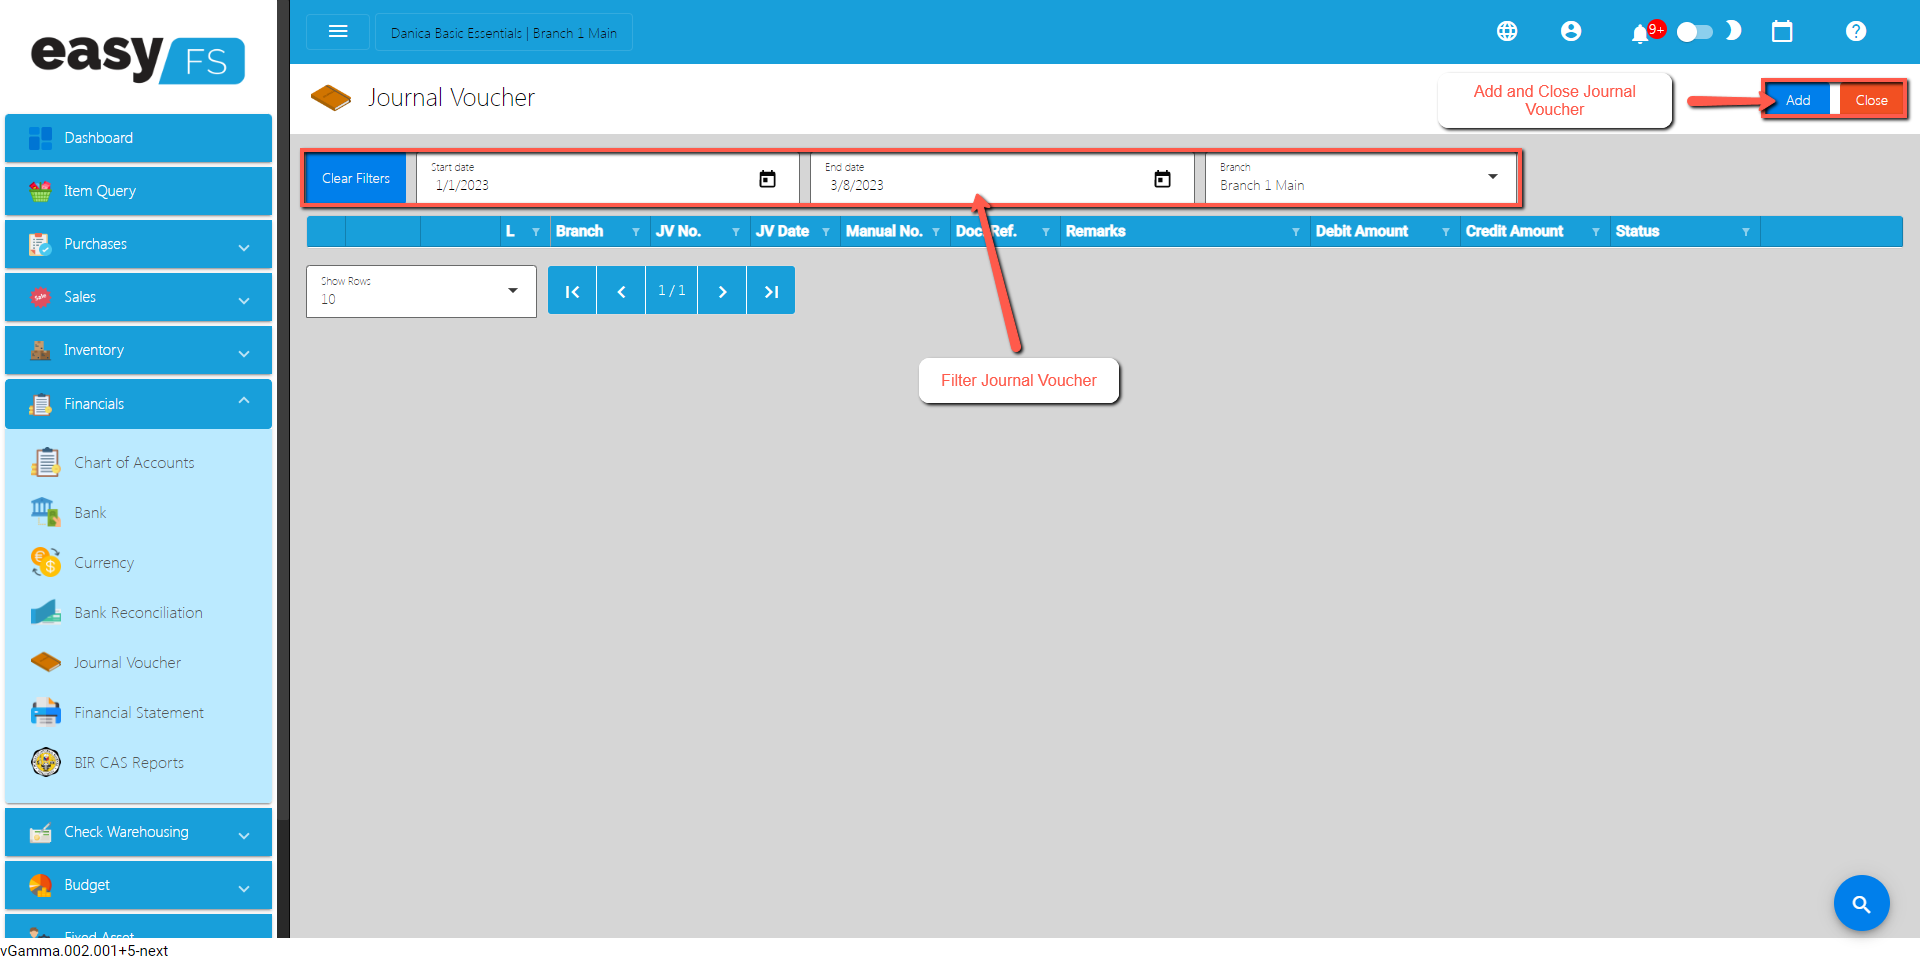
Journal Voucher Detail
- To add a new JV (Journal Voucher), click the Add that can be seen in the Journal Voucher list.
- Users need to fill up required fields, and can also add new Line items for the Journal Voucher.
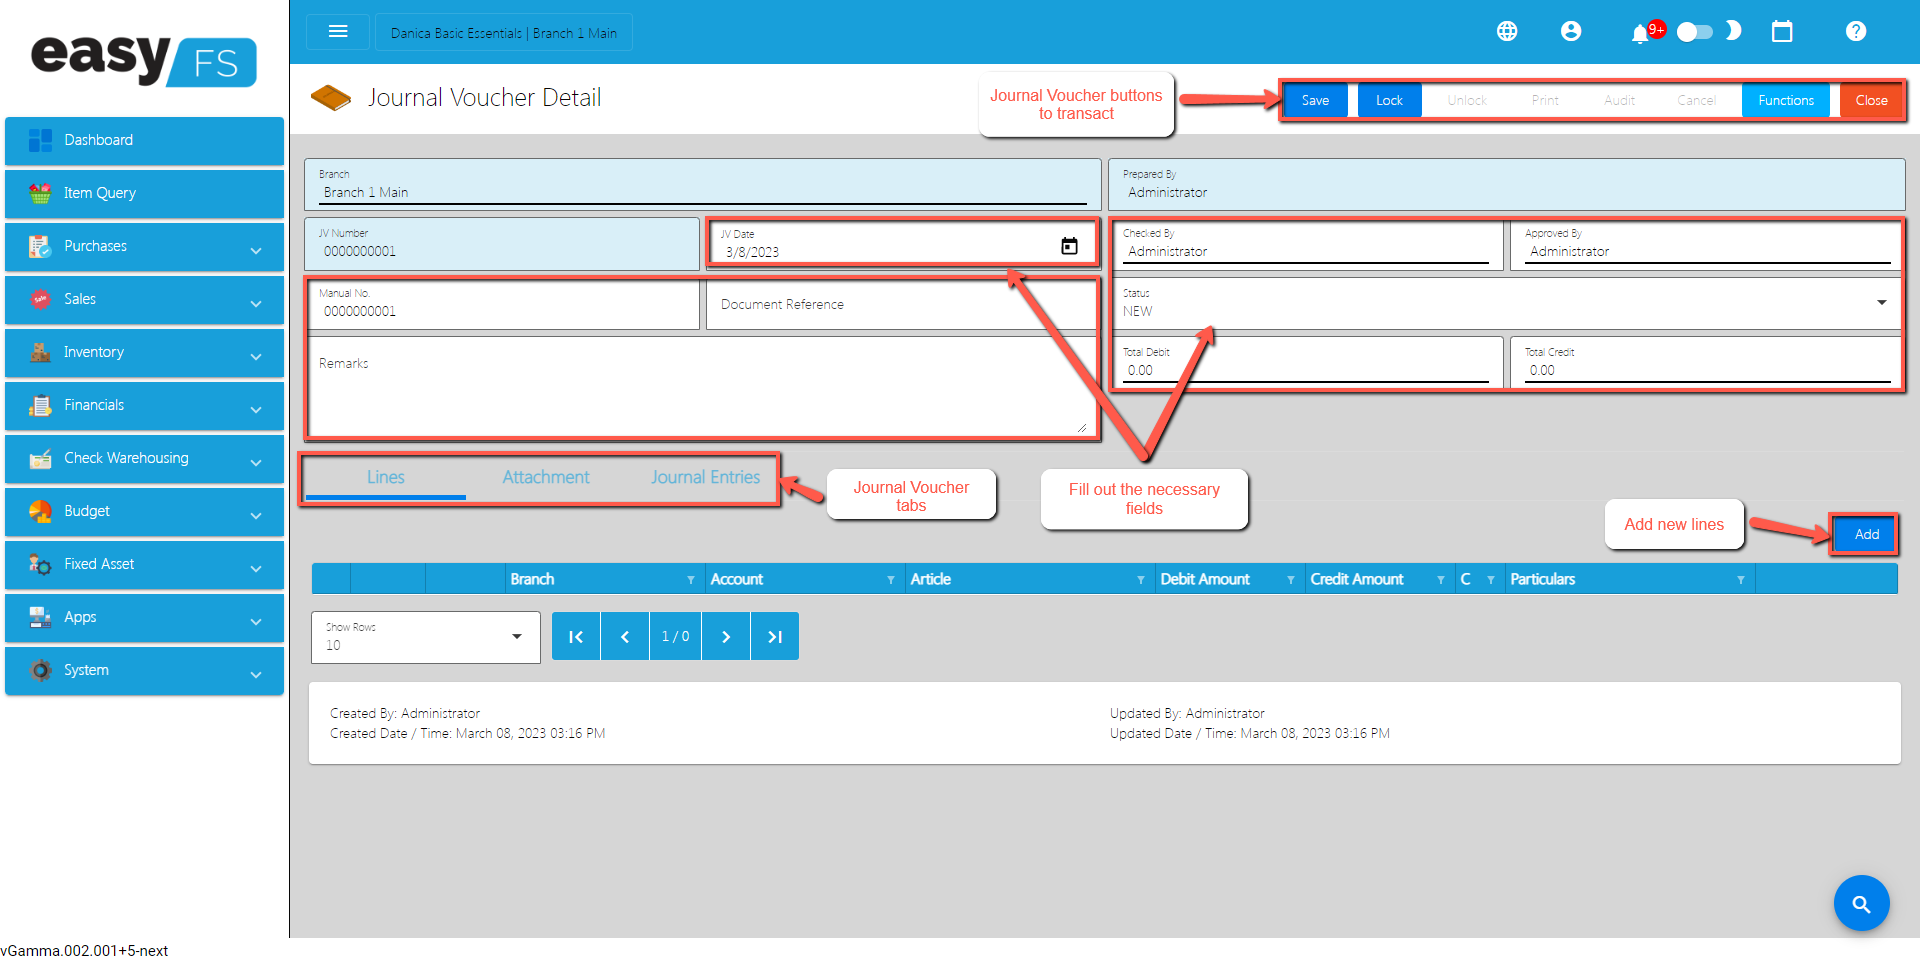
Reports
Accounts Payable Reports
The Accounts Payable Reports Module generates the different Reports such as
- Accounts Payable
- Accounts Payable Voucher Report
- Accounts Payable by Currency Report
- Purchase Request Detail Report
- Purchase Order Summary and Detail Reports
- Receiving Receipt Summary and Detail Reports
- Disbursement Summary and Detail Reports
- Debit Memo Detail and Summary Report
- Top Purchased Item Report
- Top Supplier Report
- Cancelled Reports
- Cancelled Purchase Request
- Cancelled Purchase Order
- Cancelled Receiving Receipt
- Cancelled Disbursement Report
Accounts Payable Report
Accounts Payable Report is an aging report wherein the total amount per receiving receipt transaction will be reflected. It reflects outstanding balances that a company must pay within specified terms such as 30 days, 60 days, 90 days, and over 120 days.
Accounts Payable Report is recorded as liabilities on the Balance Sheet. These liabilities are usually settled through the disbursement of money or debit memos (adjustments) to the suppliers according to the agreed terms.
What is this Report for?
Accounts Payable Report is a report where the users, Accounts Payable incharge or the management can check the total Receiving Receipts that are not yet paid. The report has the following columns:
- Branch – this is the indicator where the RR Transaction was made
- Supplier Name – Name of the Supplier where you purchase your goods or services
- RR Number – refers to the transaction number
- RR Date – date of transaction was made
- Document Reference – document reference or manual reference or delivery receipt reference
- Due Date – Date when the payments should be made
- Balance – Running Balance or Outstanding Balance
- Current – All Balances that are not yet due for payment
- 1-30 Days – All Balances that are overdue for 1 day to 30 days
- 31-60 Days – All Balances that are overdue for 31 day to 60 days
- 61-90 Days – All Balances that are overdue for 61 day to 90 days
- 91-120 Days – All Balances that are overdue for 91 day to 120 days
- Over 120 Days- All Balances that are overdue for over 120 Days
To open or generate Accounts Payable Report here are the steps to follow:
1. Go to Purchases
2. Select Accounts Payable
3. Click Accounts Payable Report
4. Enter Date as of
5. Select Branch you want to generate
6. You can have the option to Print or Download the PDF Report
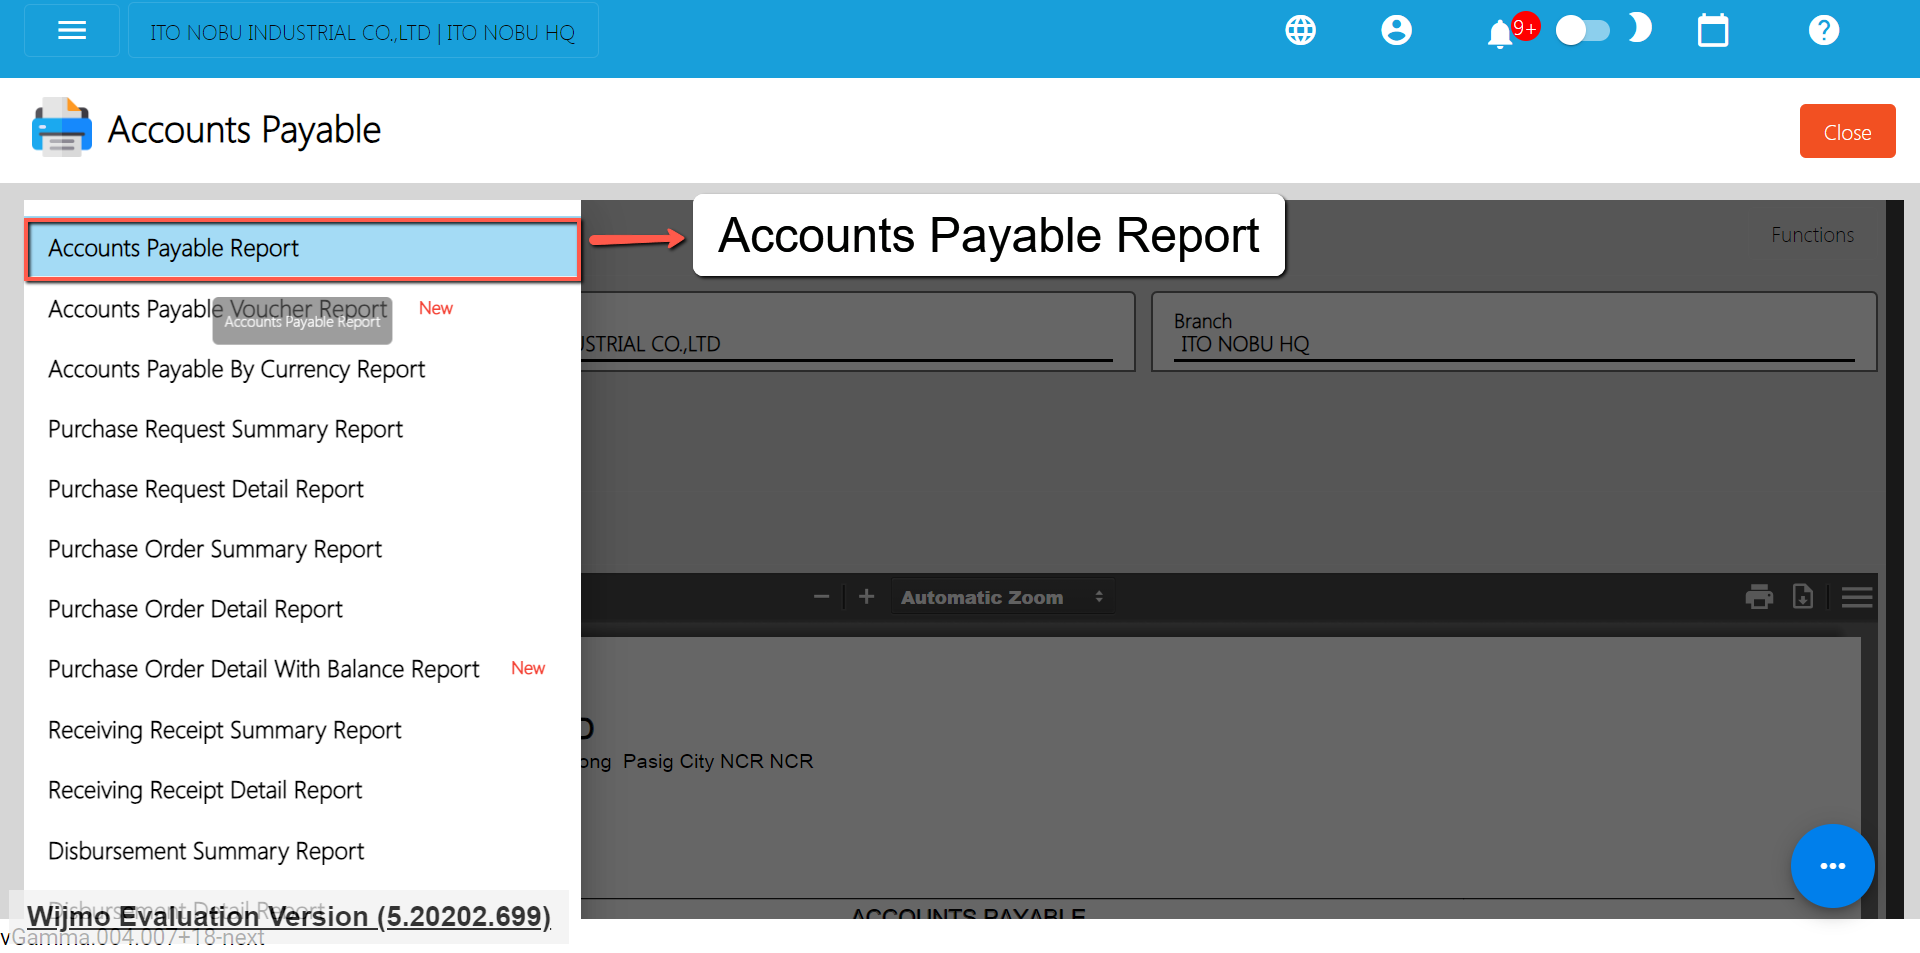
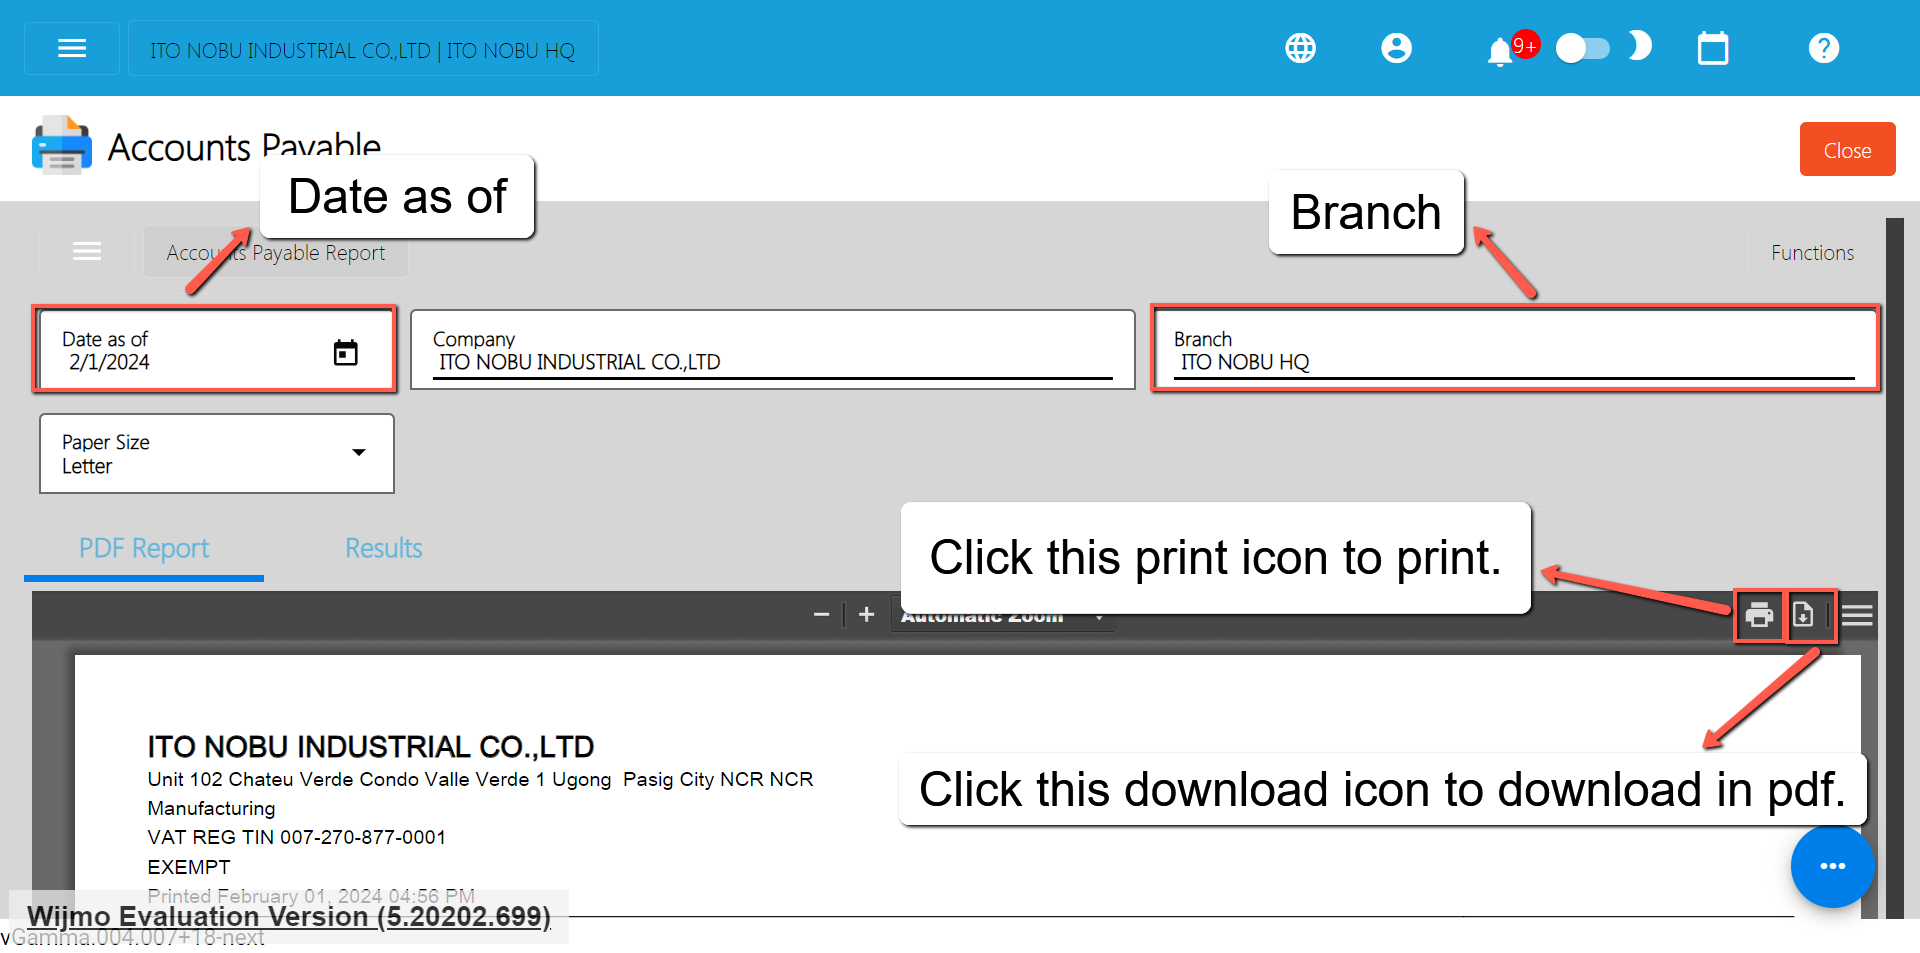
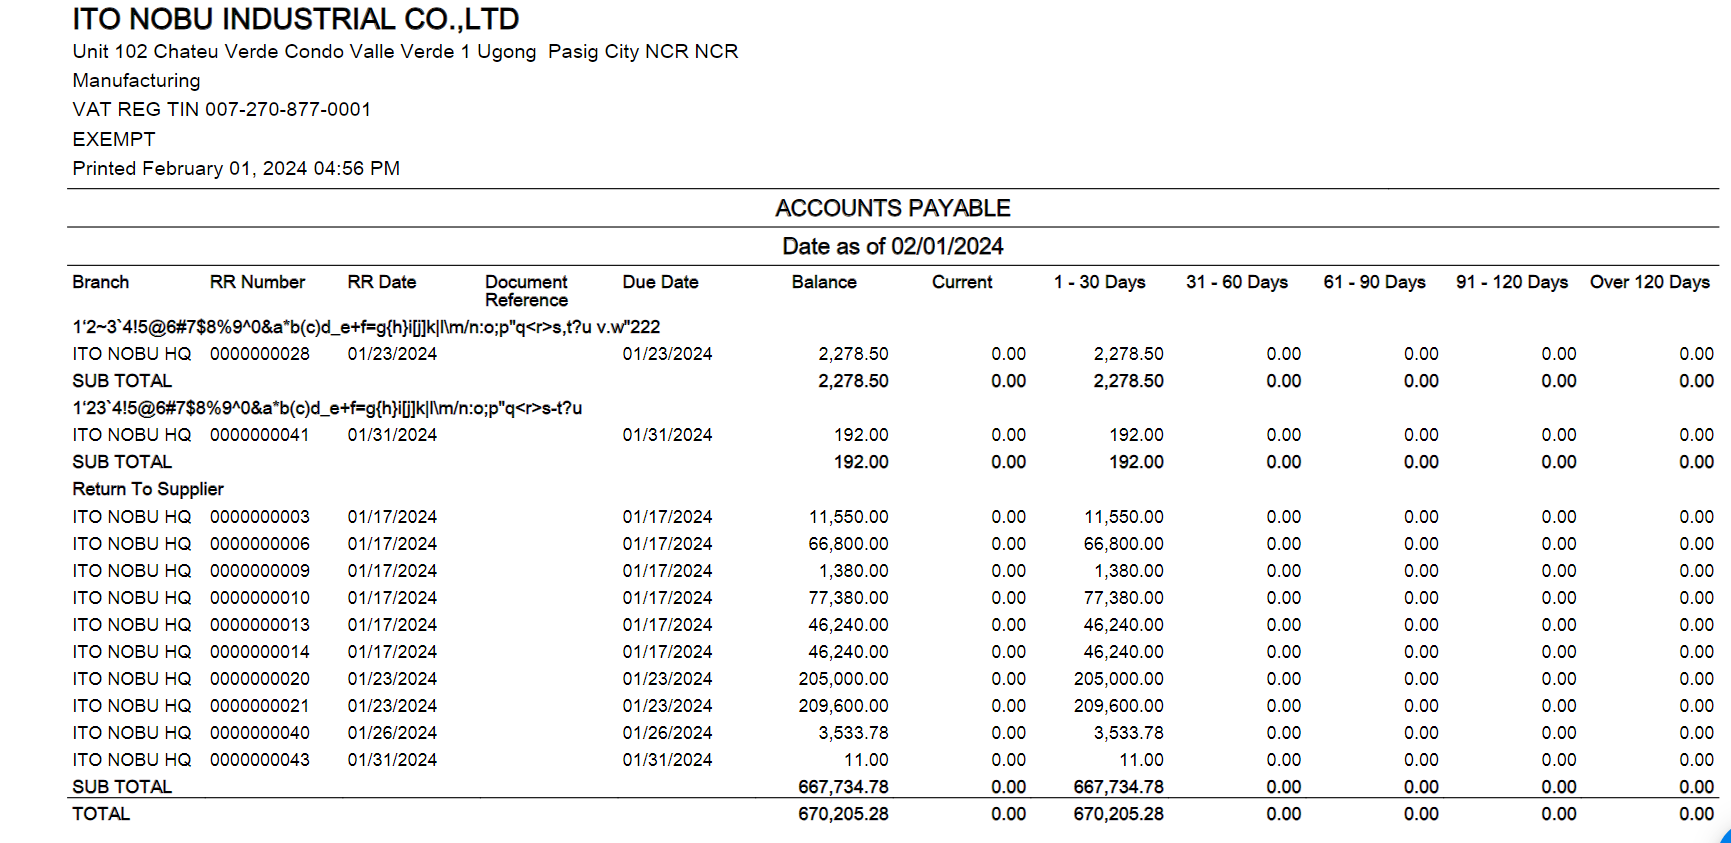
Accounts Payable Voucher Report
Accounts Payable Voucher Report is a report wherein you can generate the Total Accounts Payable that are DUE on the specified dates.
What is this Report for?
Accounts Payable Voucher Report is a report where the users, Accounts Payable in charge or the management can check the total Payable that is not yet paid or due for payment on the specified dates. The report has the following columns:
- Branch – this is the indicator where the RR Transaction was made
- Supplier Name – Name of the Supplier where you purchase your goods or services
- RR Number – refers to the transaction number
- RR Date – date of transaction was made
- Document Reference – document reference or manual reference or delivery receipt reference
- Due Date – Date when the payments should be made
- Amount Due – Total Amount of the transaction
- Paid – total amount that has been paid
- Adjusted – total amount that has been adjusted (example of these amount are the Supplier Return Amount that was created in the Debit Memo)
- Balance – Running Balance or Outstanding Balance (Amount Due – Paid – Adjusted)
To open or generate Accounts Payable Report here are the steps to follow:
1. Go to Purchases
2. Select Accounts Payable
3. Click Accounts Payable Voucher Report
4. Enter Date Start and Date End
5. Select Branch you want to generate
6. You can have the option to Print or Download the PDF Report
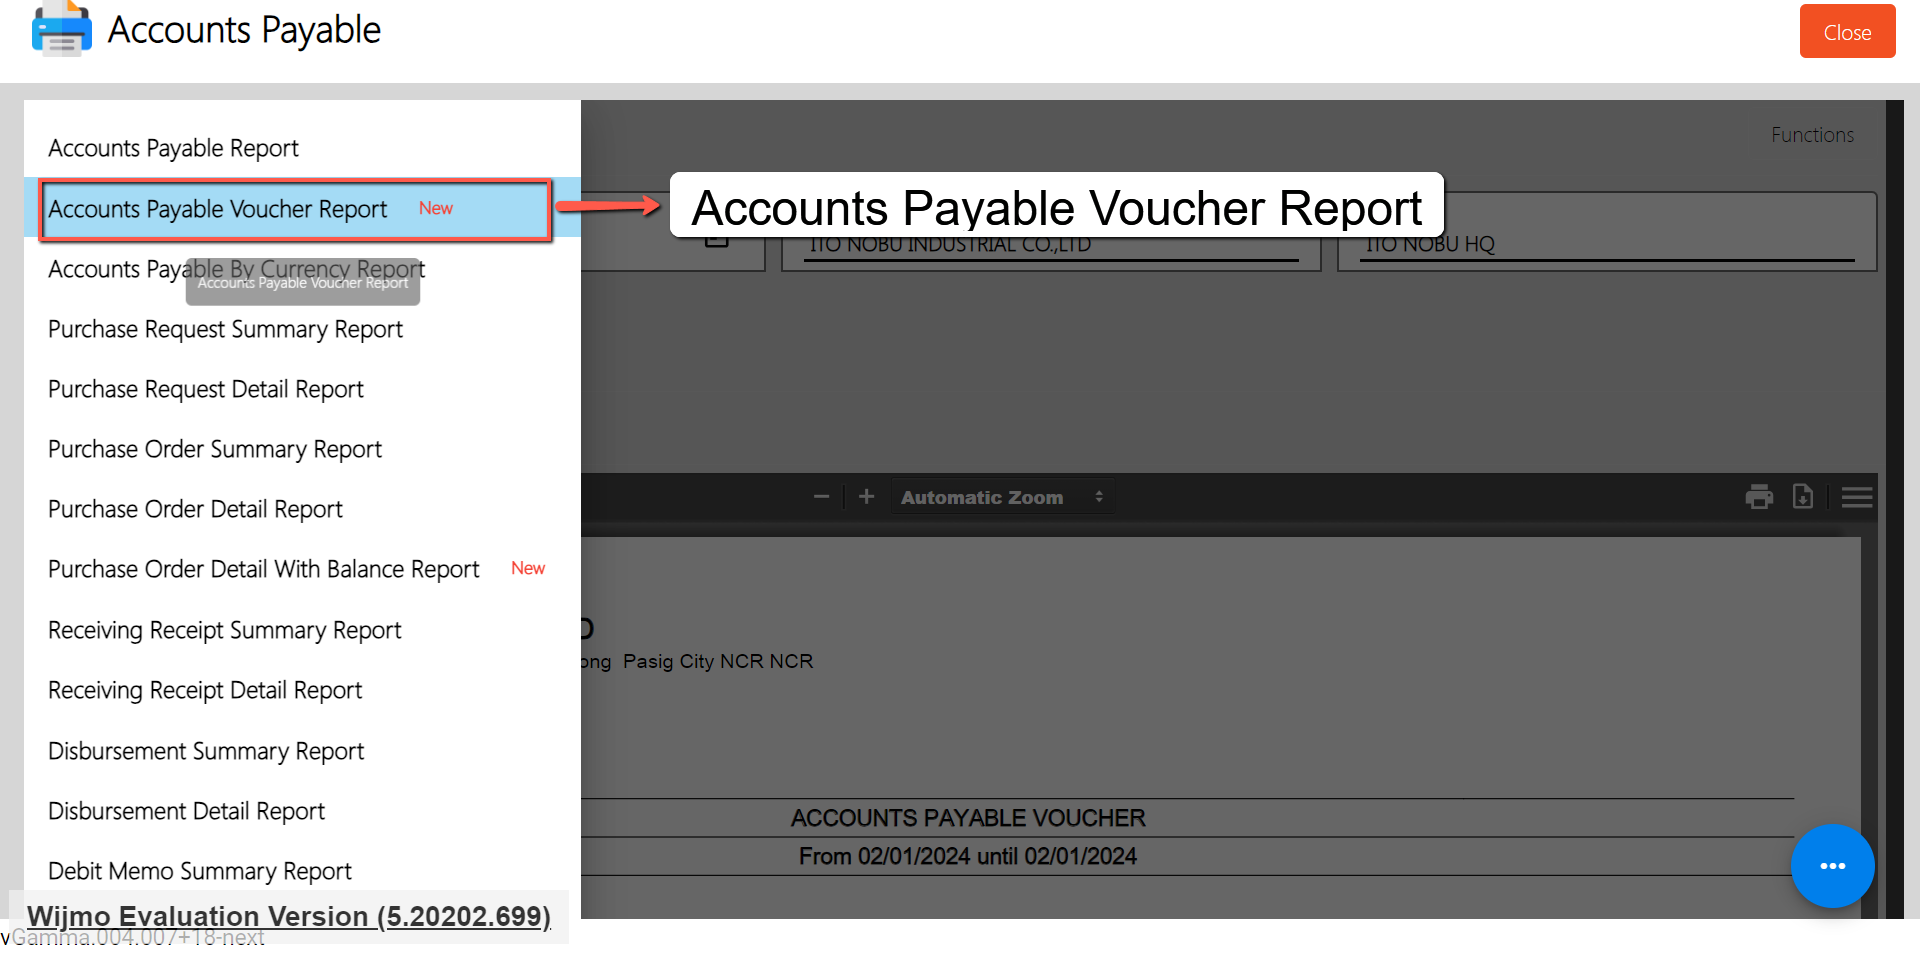
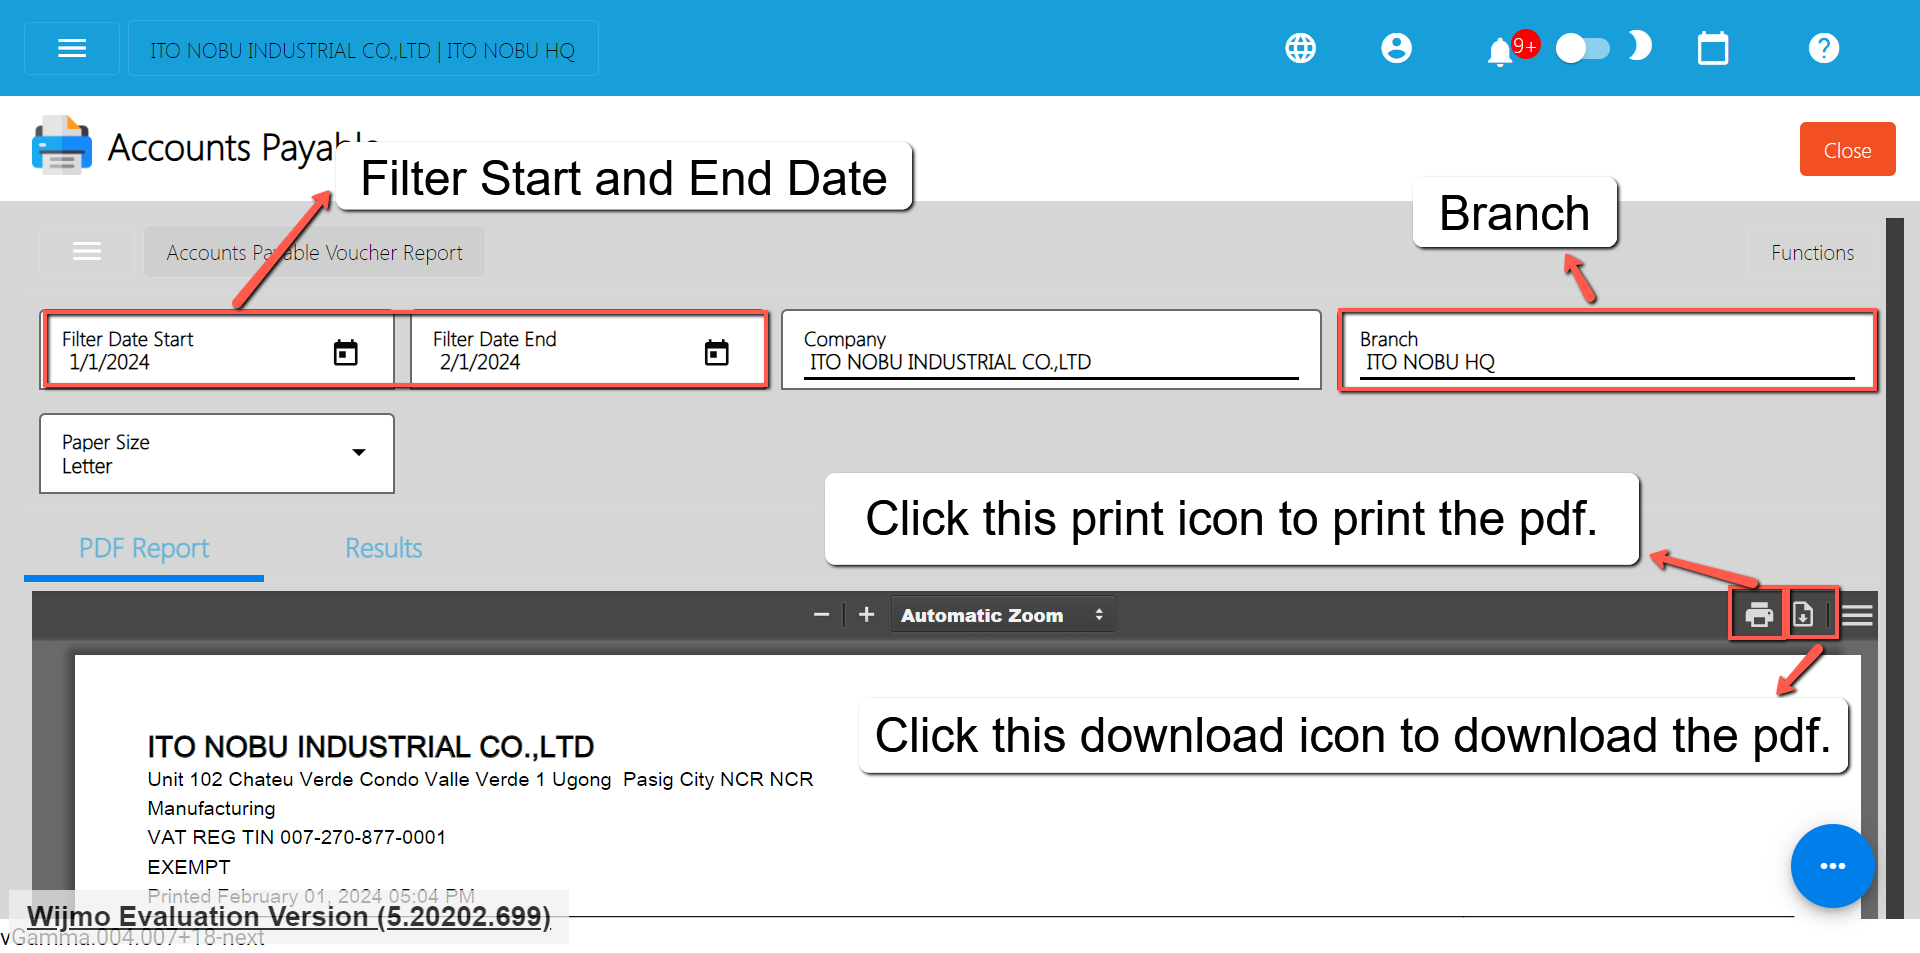
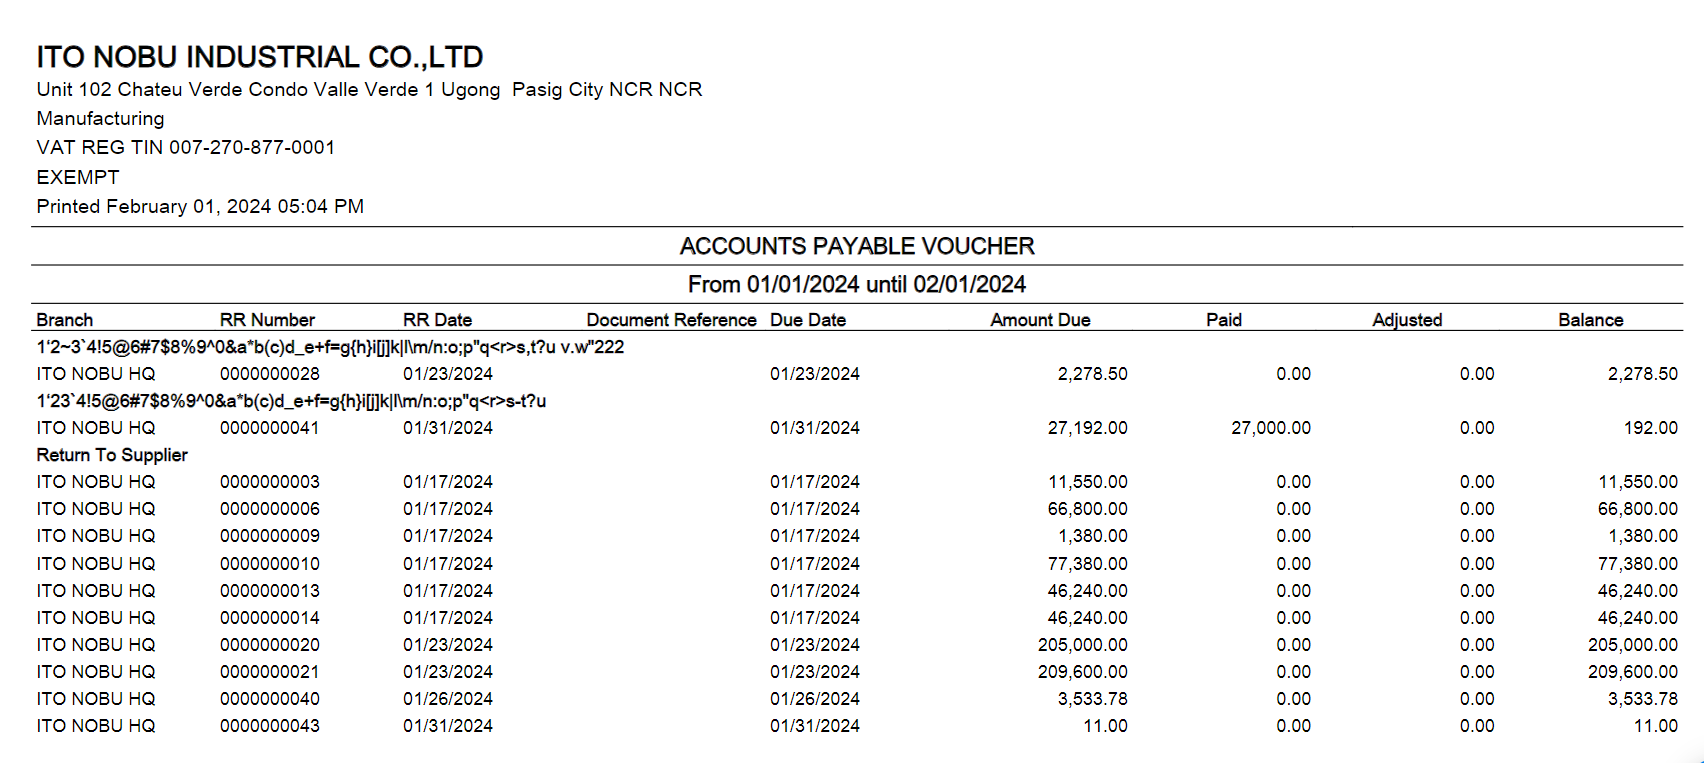
Accounts Payable By Currency Report
Accounts Payable By Currency Report is a report same with Accounts Payable but there is an indicator as to which Currency you are using during the transaction.
What is this Report for?
Accounts Payable By Currency Report is a report where the users, Accounts Payable incharge or the management can check the total Receiving Receipts that are not yet paid on a per currency. The report has the following columns:
- Currency – currency used during the transaction
- Branch – this is the indicator where the RR Transaction was made
- Supplier Name – Name of the Supplier where you purchase your goods or services
- RR Number – refers to the transaction number
- RR Date – date of transaction was made
- Document Reference – document reference or manual reference or delivery receipt reference
- Due Date – Date when the payments should be made
- Balance – Running Balance or Outstanding Balance
- Current – All Balances that are not yet due for payment
- 1-30 Days – All Balances that are overdue for 1 day to 30 days
- 31-60 Days – All Balances that are overdue for 31 day to 60 days
- 61-90 Days – All Balances that are overdue for 61 day to 90 days
- 91-120 Days – All Balances that are overdue for 91 day to 120 days
- Over 120 Days- All Balances that are overdue for over 120 Days
To open or generate Accounts Payable by Currency Report here are the steps to follow:
1. Go to Purchases
2. Select Accounts Payable
3. Click Accounts Payable by Currency Report
4. Enter Date as of
5. Select Branch you want to generate
6. You can have the option to Print or Download the PDF Report
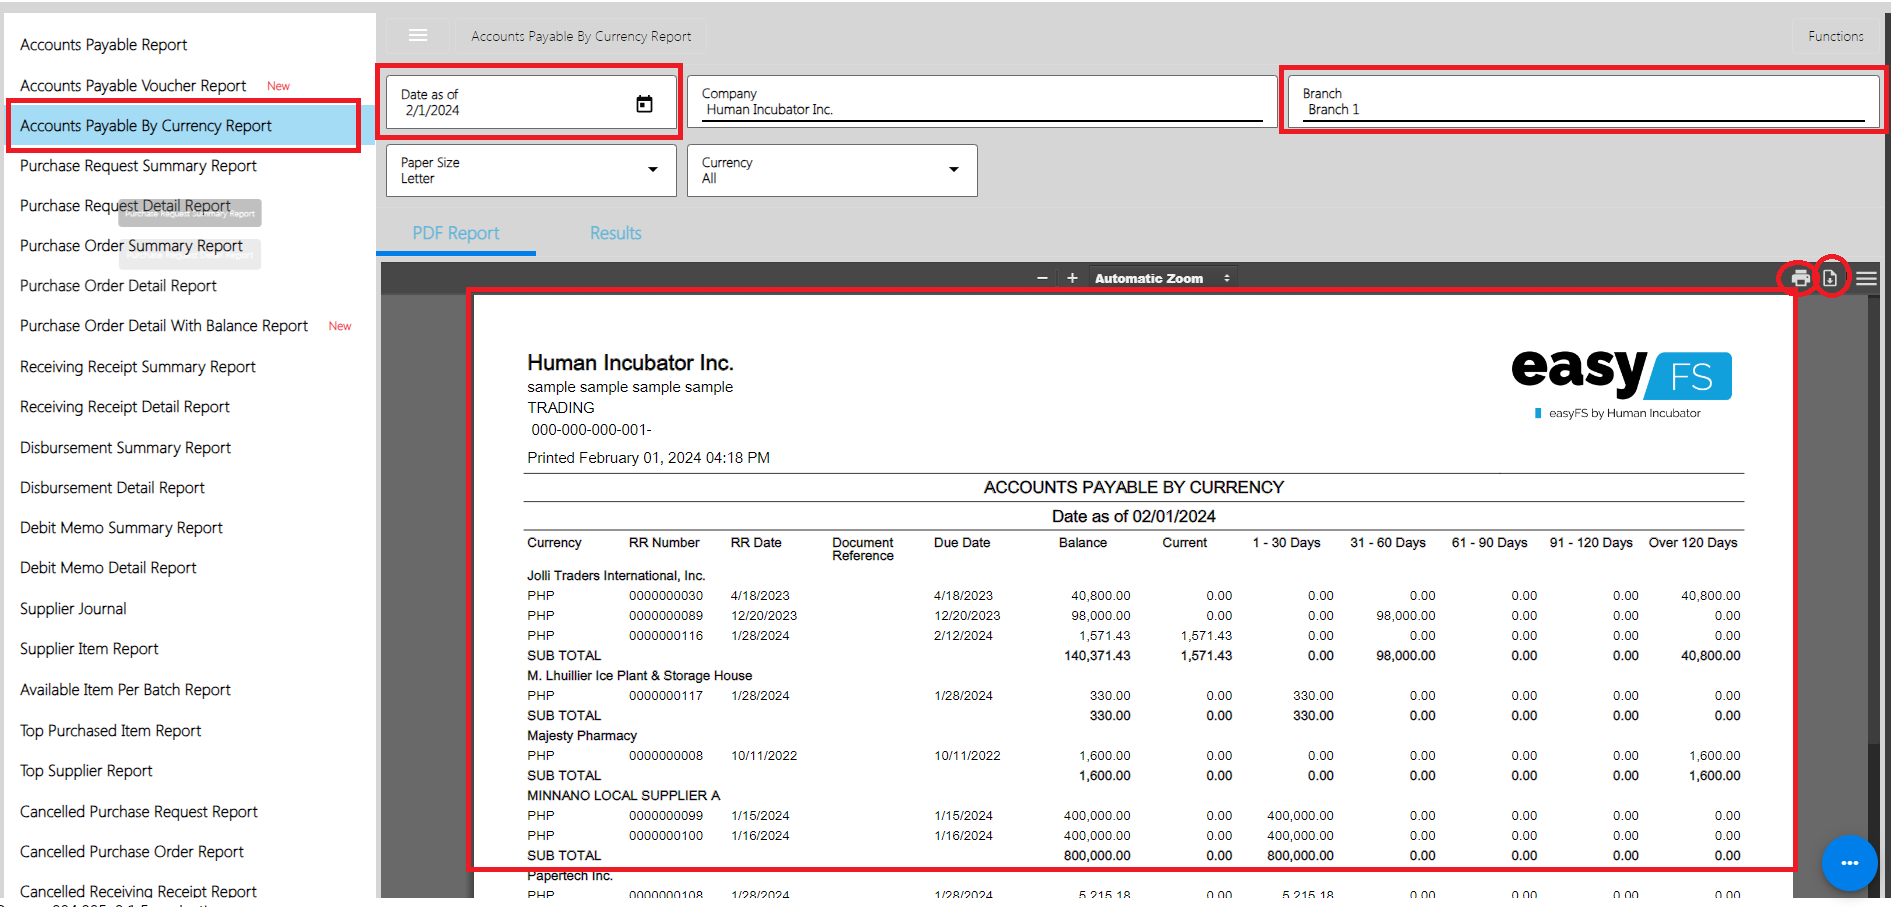
Purchase Request Summary Report
Purchase Request Summary Report is a Report wherein you can generate the Summary of All Purchase Request within the specified dates. It will only show the Summary of the Transactions.
To open or generate Purchase Request Summary Report here are the steps to follow:
1. Go to Purchases
2. Select Accounts Payable
3. Click Accounts Purchase Request Summary Report
4. Enter Start Date and End Date
5. Select Branch you want to generate
6. You need to click the Functions to download the data
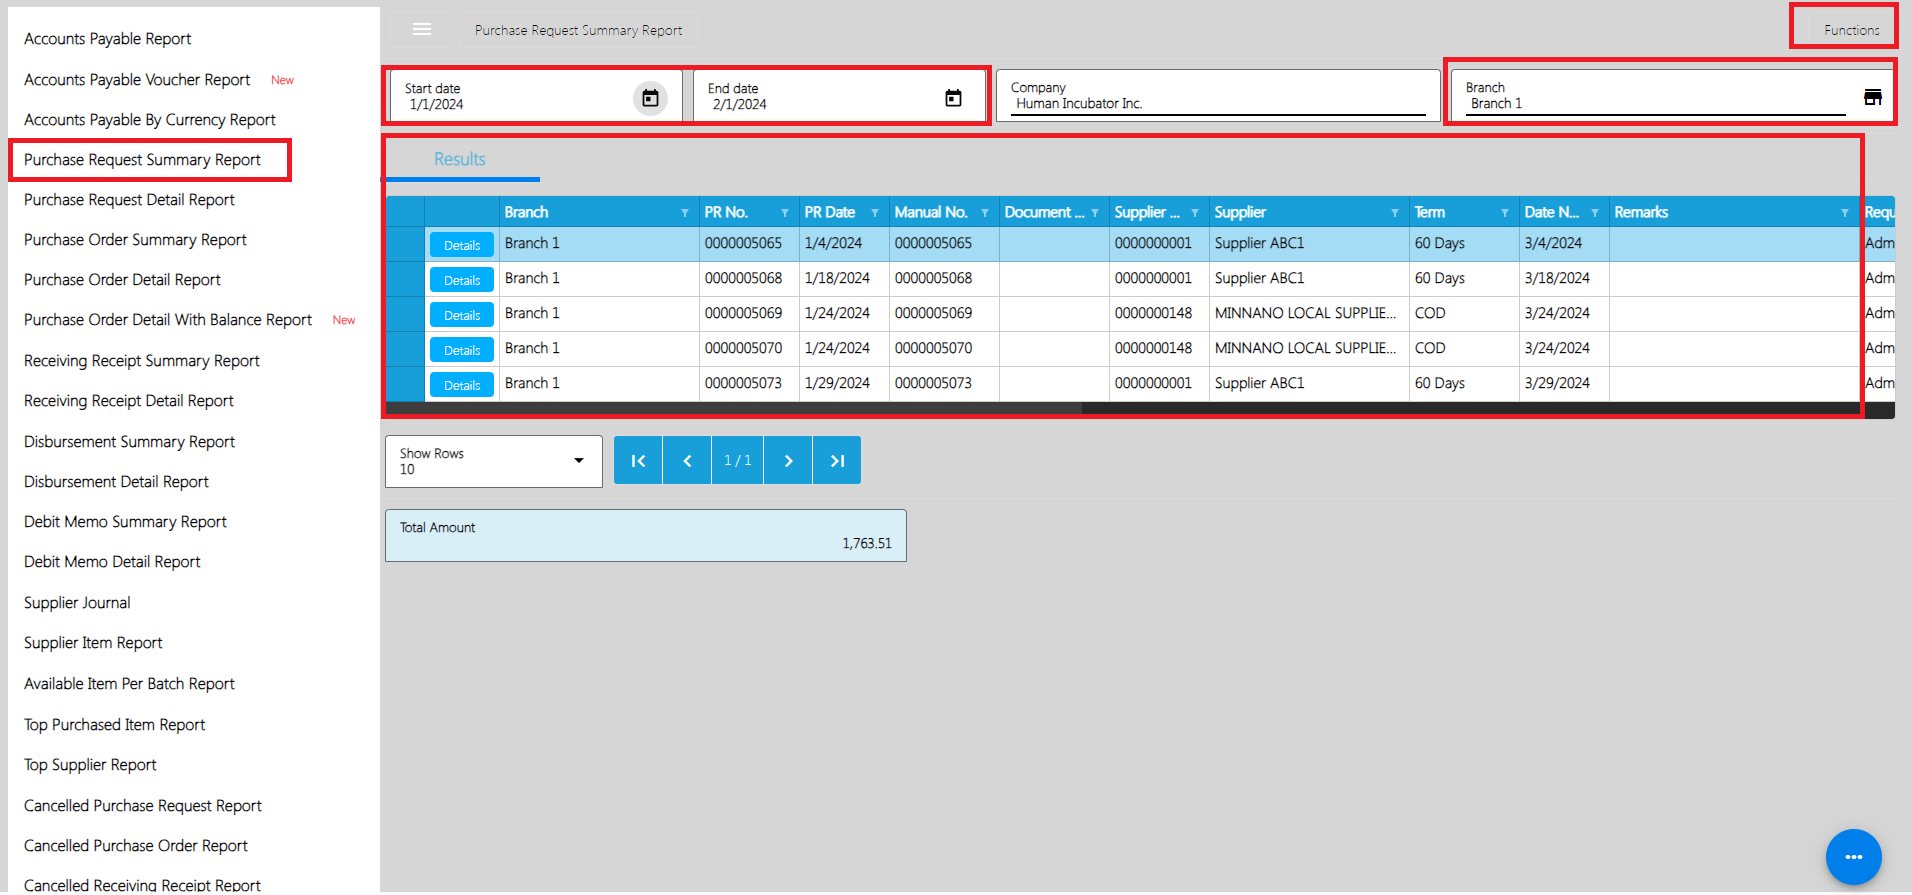
Purchase Request Detail Report
Purchase Request Detail Report is a Report wherein you can generate the All Purchase Request within the specified dates. It will show the details of each Transactions.
To open or generate Purchase Request Detail Report here are the steps to follow:
1. Go to Purchases
2. Select Accounts Payable
3. Click Accounts Purchase Request Detail Report
4. Enter Start Date and End Date
5. Select Branch you want to generate
6. You need to click the Functions to download the data
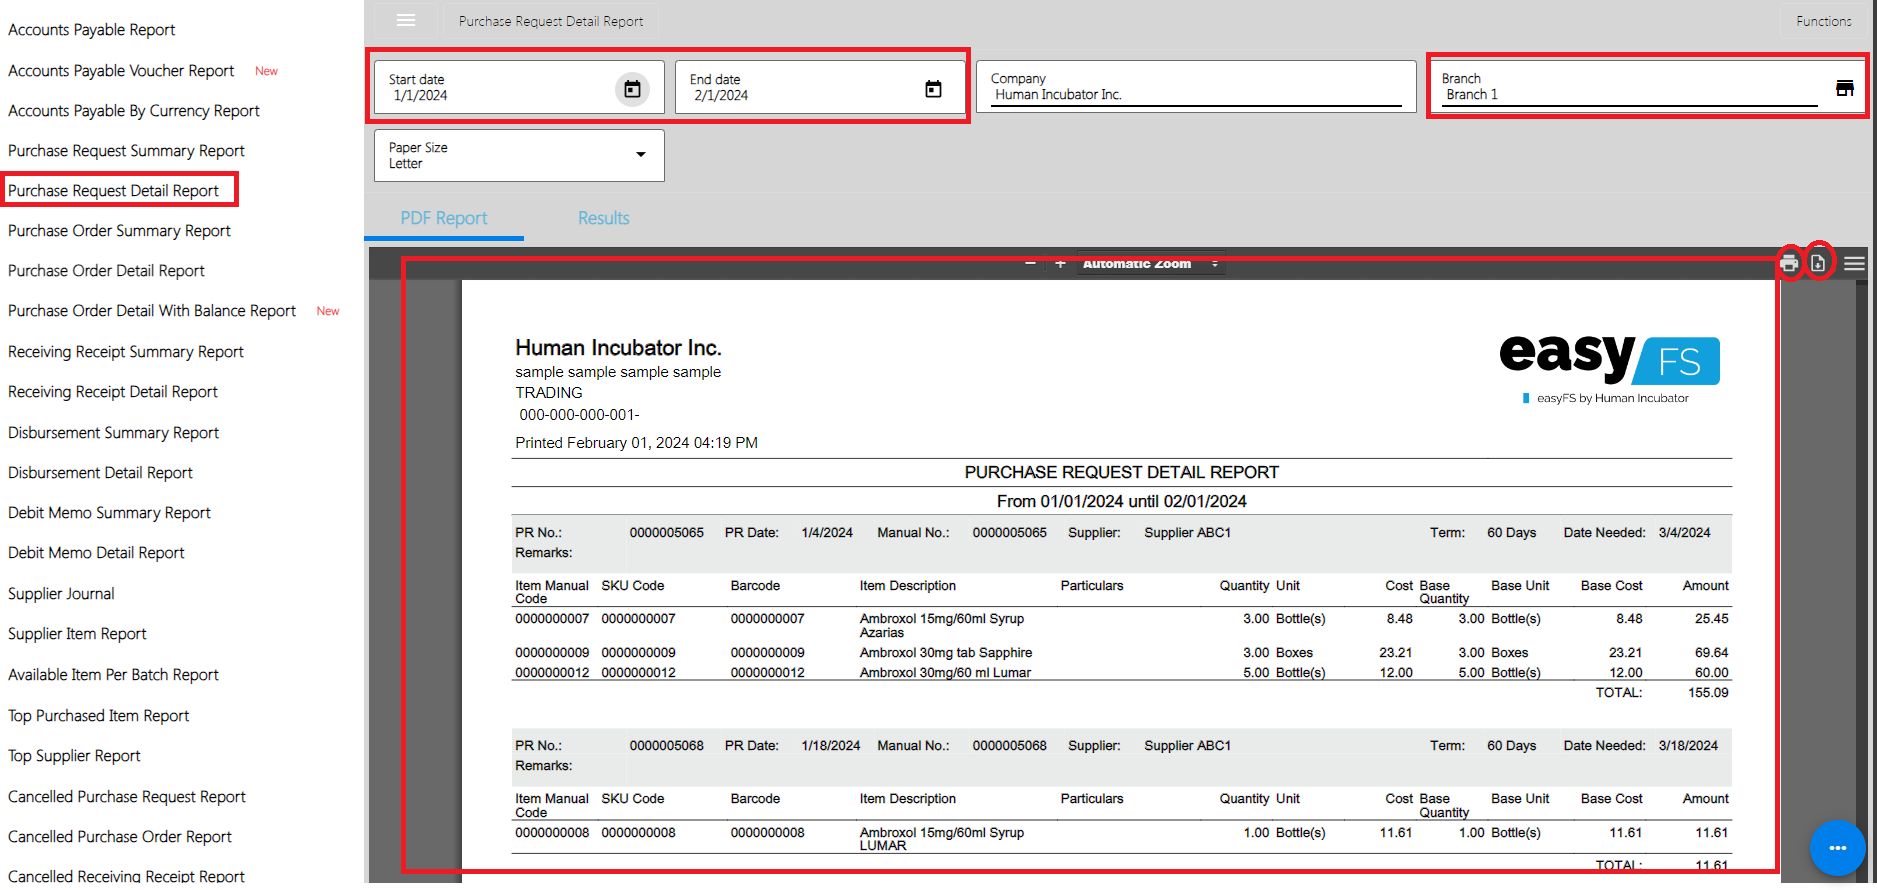
Purchase Order Summary Report
Purchase Order Summary Report is a Report wherein you can generate the summary of All Purchase Order within the specified dates.
To open or generate Purchase Order Summary Report here are the steps to follow:
1. Go to Purchases
2. Select Accounts Payable
3. Click Accounts Purchase Order Summary Report
4. Enter Start Date and End Date
5. Select Branch you want to generate
6. You need to click the Functions to download the data.
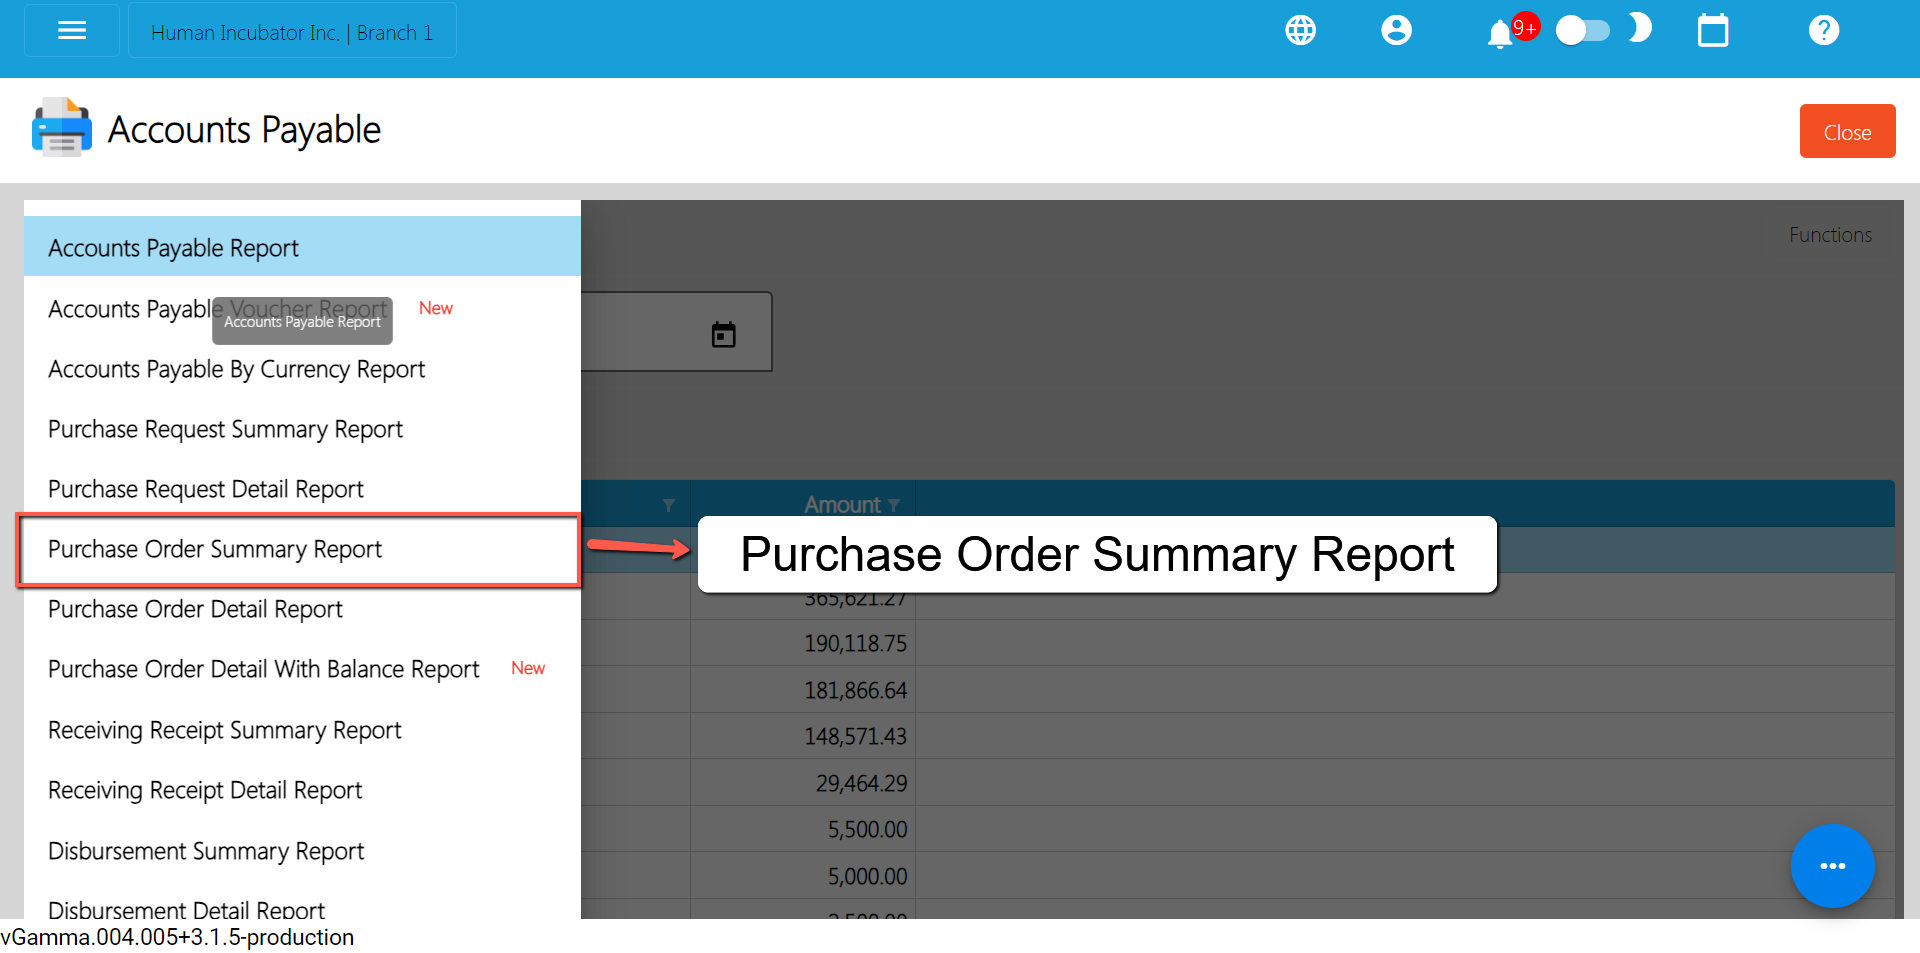
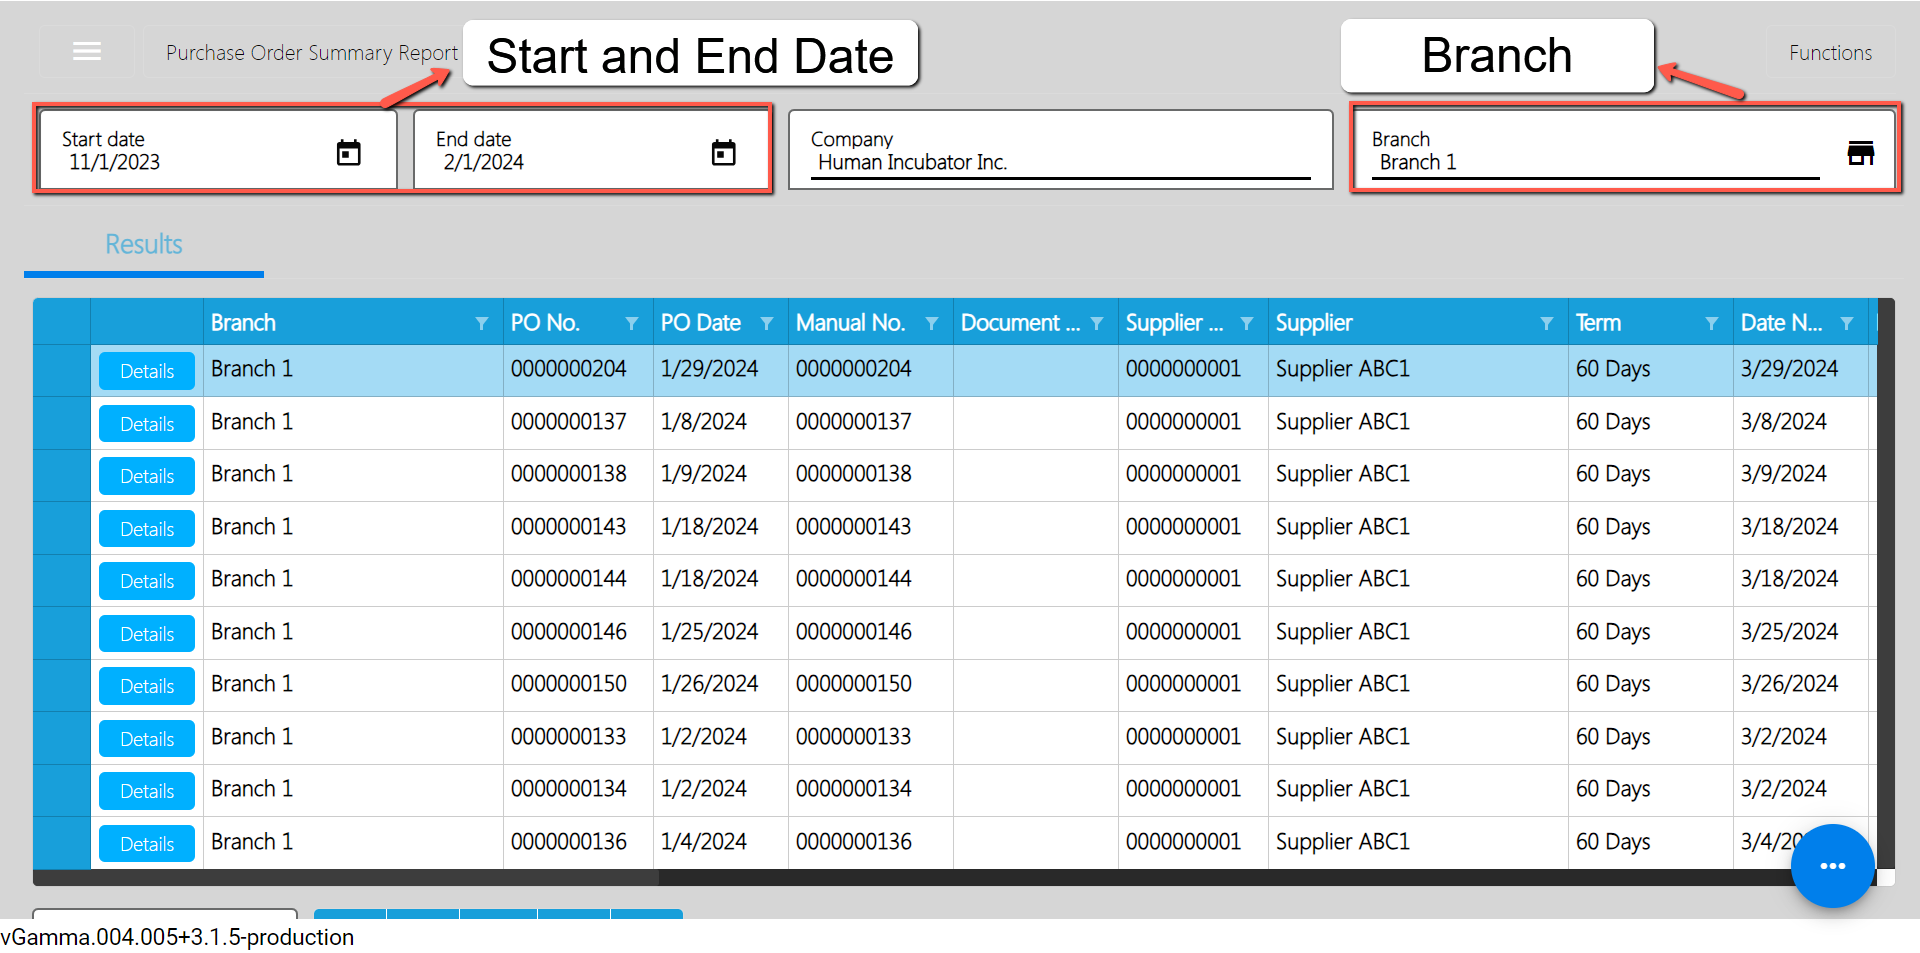
Purchase Order Detail Report
Purchase Order Detail Report is a Report wherein you can generate All Purchase Order within the specified dates. It will show the details of each Transactions.
To open or generate Purchase Order Detail Report here are the steps to follow:
1. Go to Purchases
2. Select Accounts Payable
3. Click Accounts Purchase Order Detail Report
4. Enter Start Date and End Date
5. Select Branch you want to generate
6. You need to click the Functions to download the data.
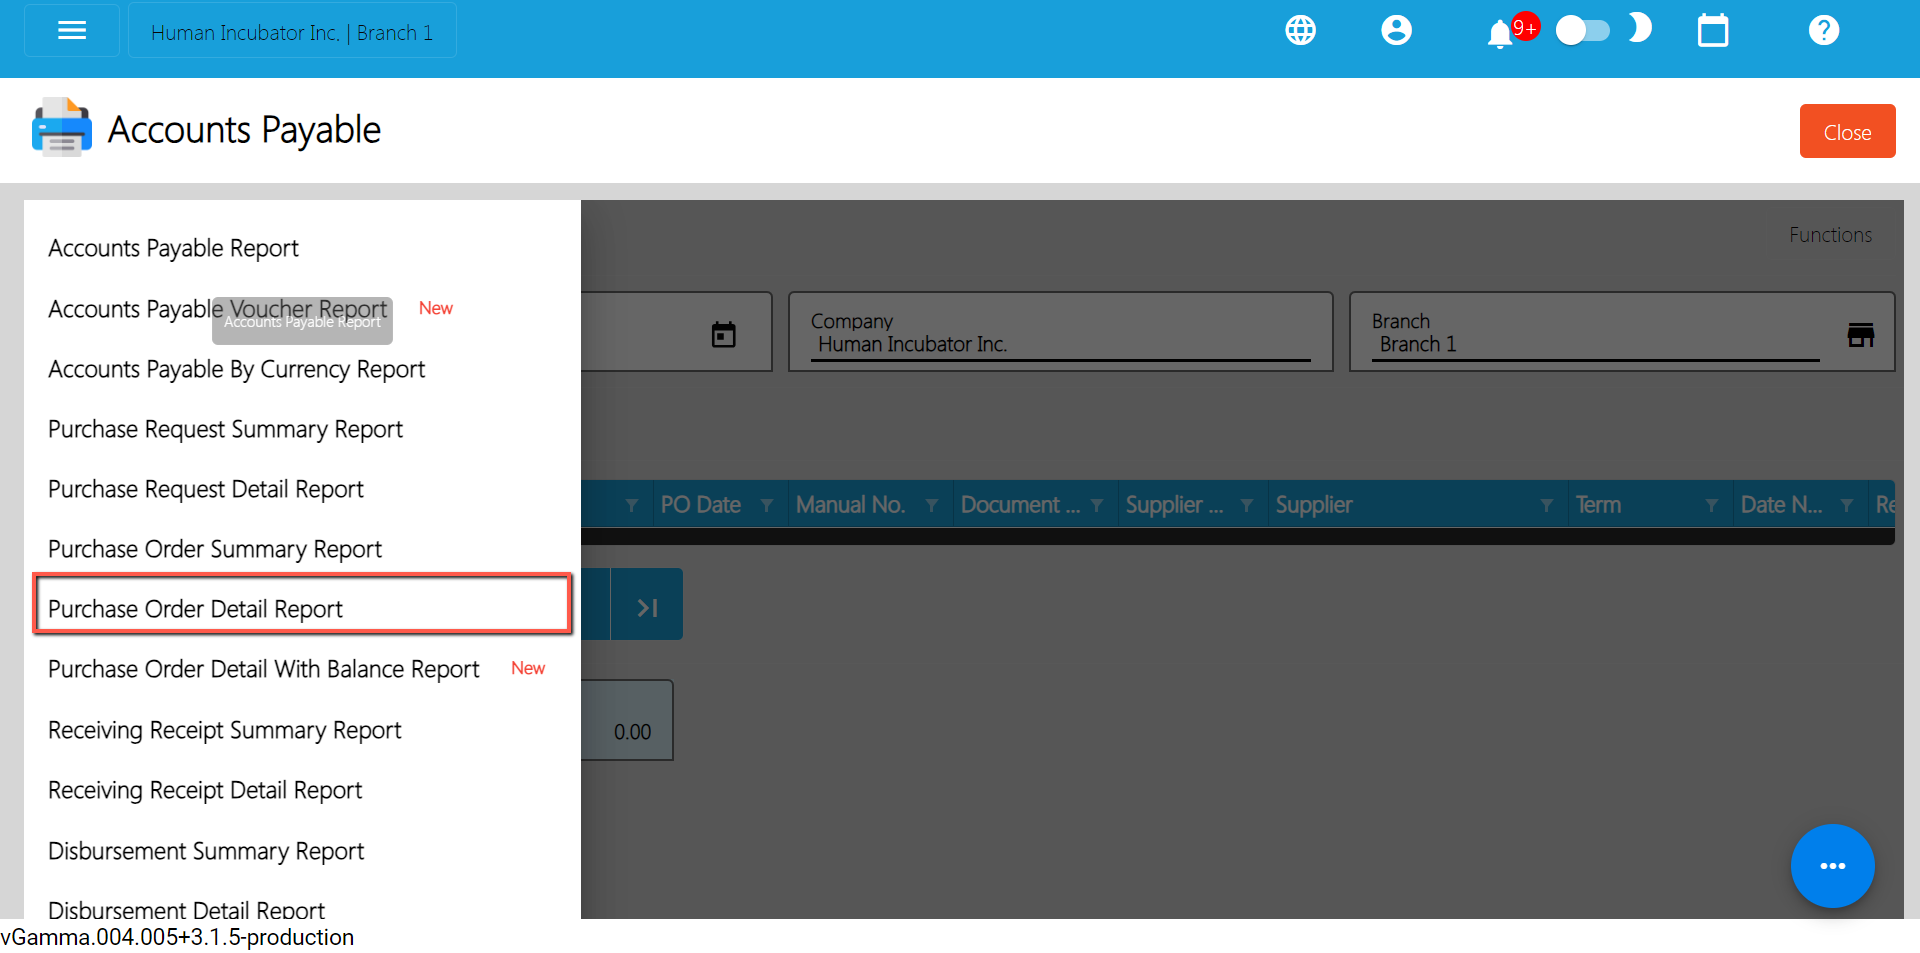
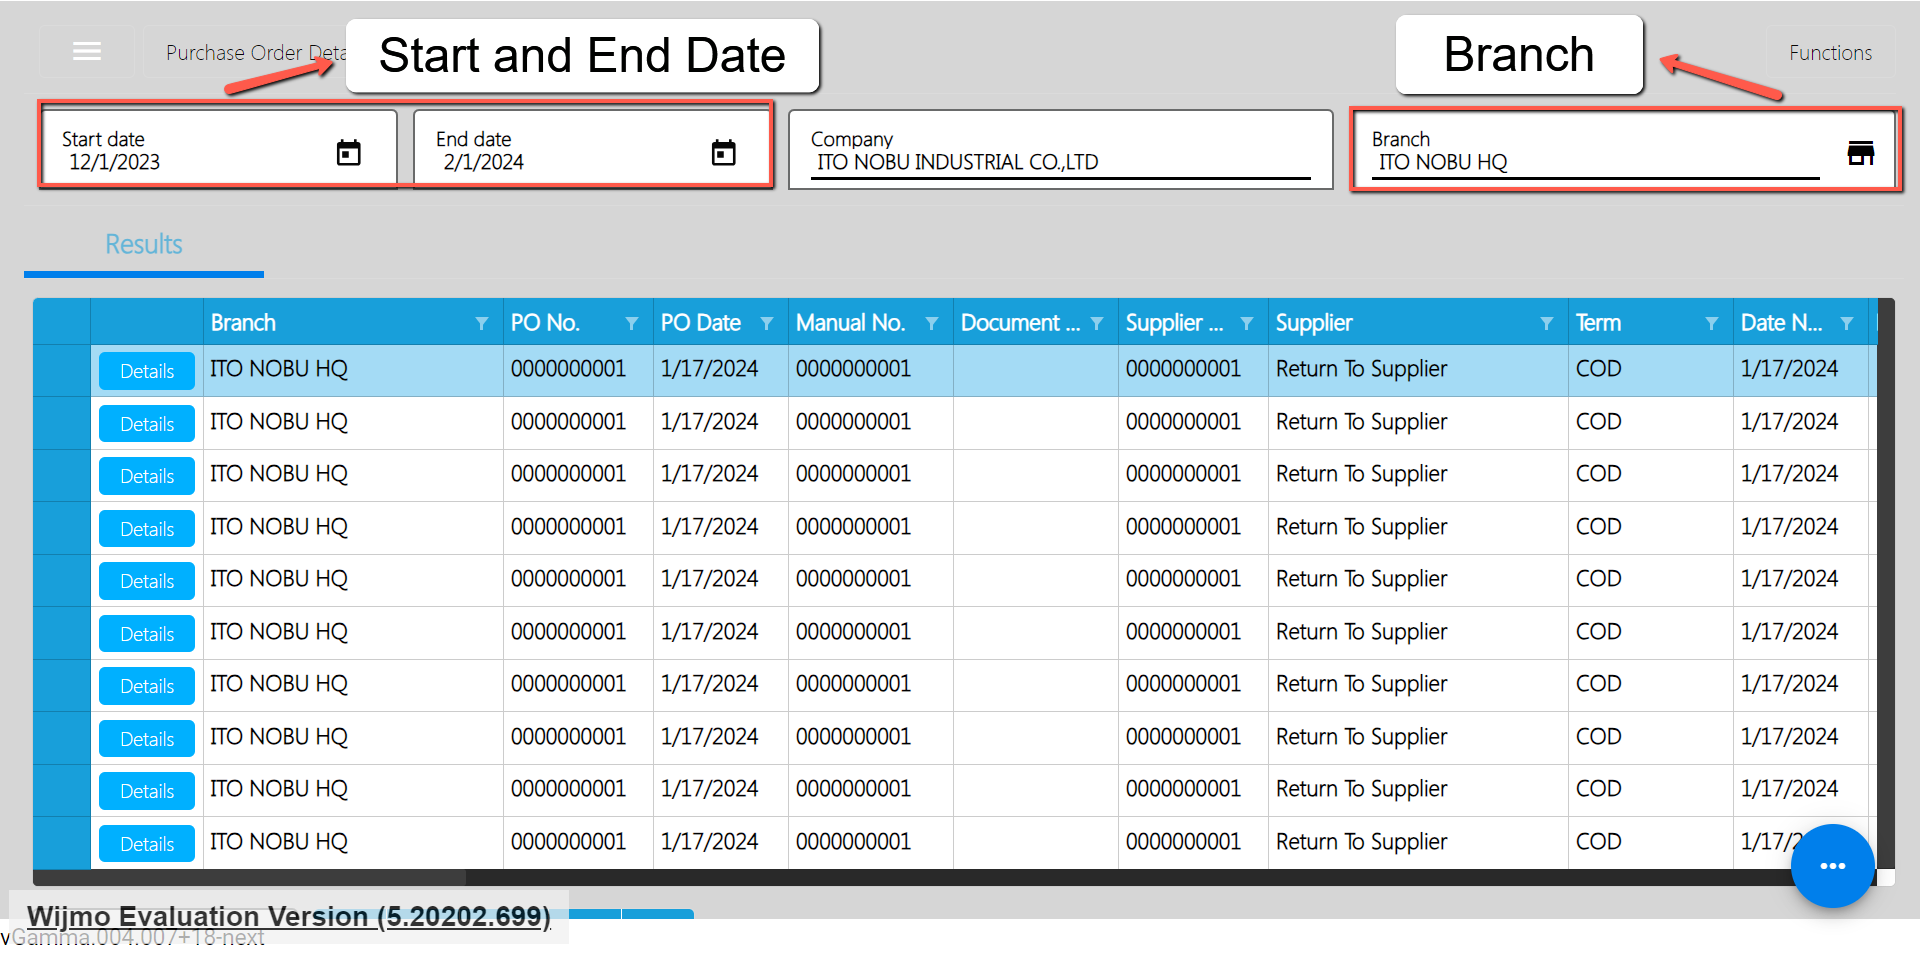
Purchase Order Detail With Balance Report
Purchase Order Detail with Balance Report is a report where you can generate all purchase orders with balance within the specified dates.
To generate Purchase Order Detail with Balance Reports here are the steps to follow:
- Go to Purchases
- Select Accounts Payable
- Click Purchase Order Detail with balance Report
- Enter Start and End Date
- Select the Branch
- You need to click Functions to download the data
- Then Select download data to generate the excel file
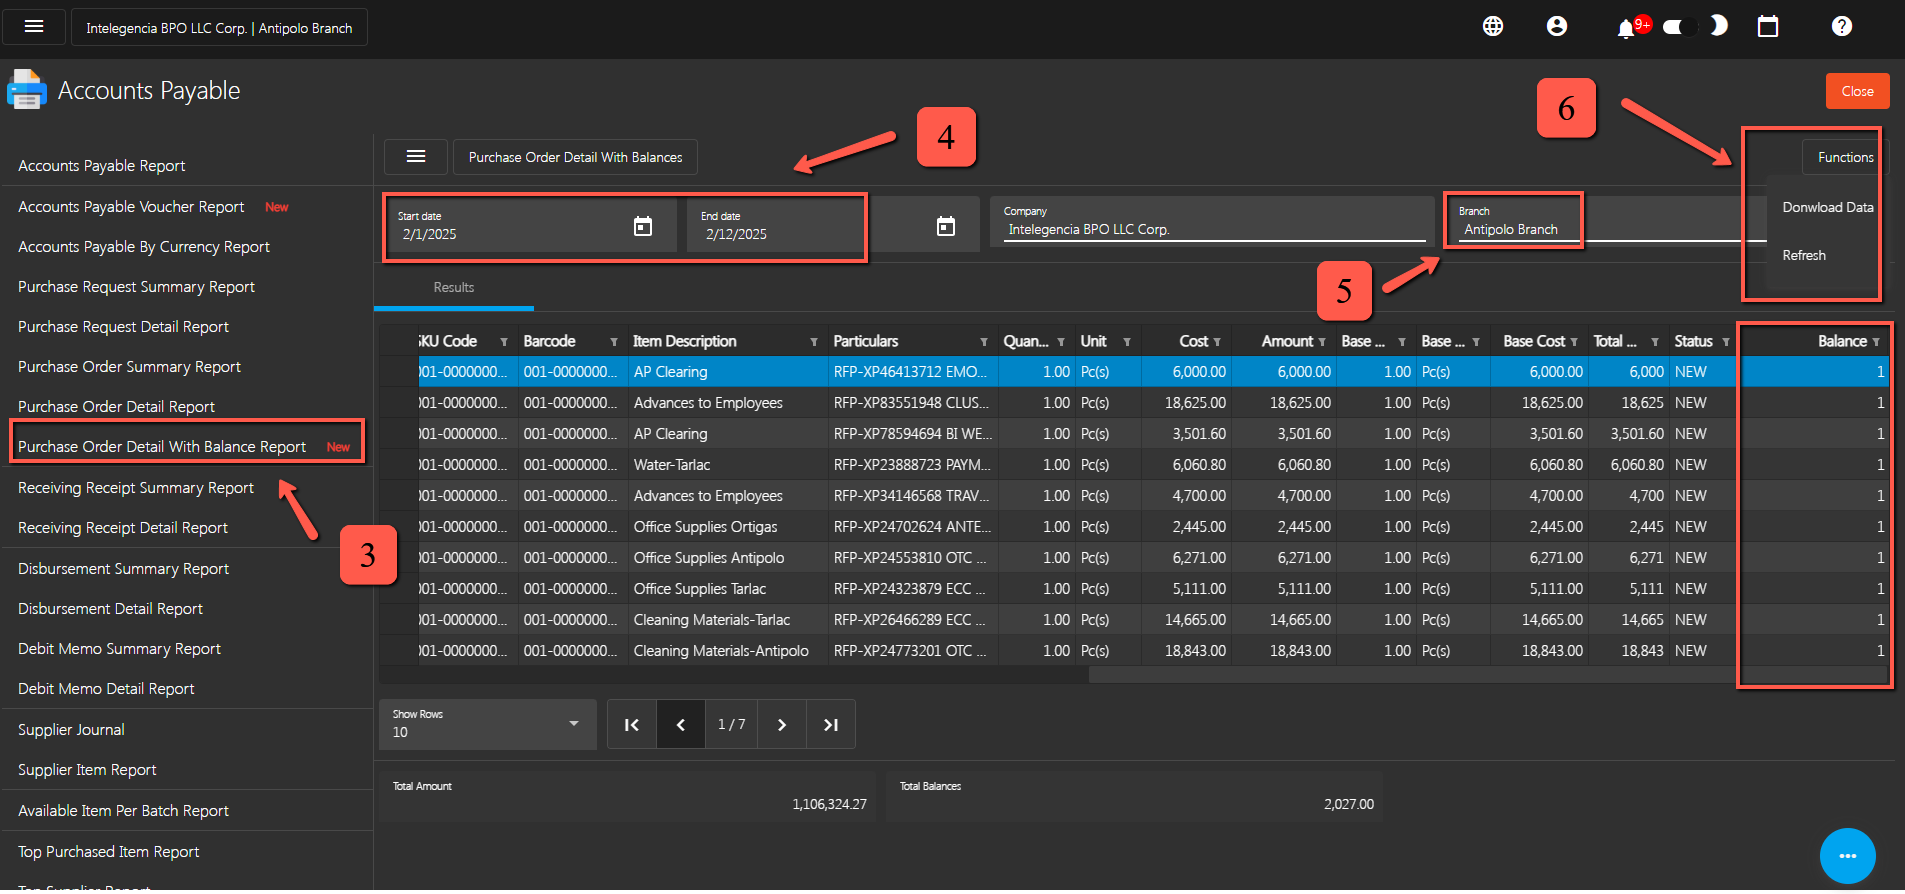
- Here is the excel file that was extracted from system
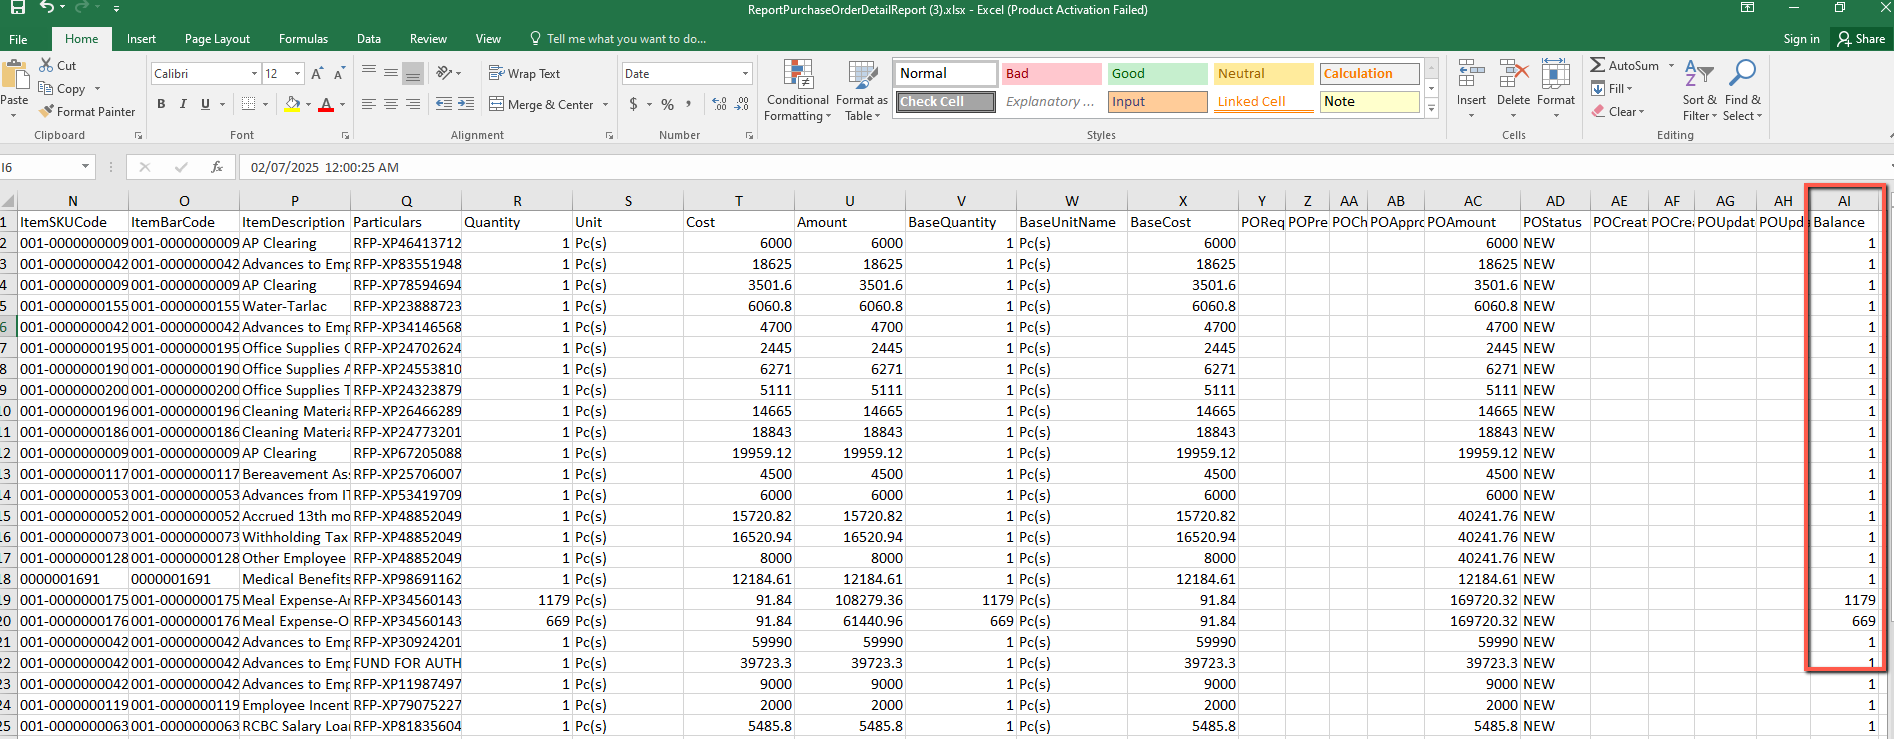
Receiving Receipt Summary Report
Receiving Receipt Summary Report is a Report wherein you can generate All Receiving Receipt within the specified dates.
To open or generate Receiving Receipt Summary Report here are the steps to follow:
1. Go to Purchases
2. Select Accounts Payable
3. Click Accounts Receiving Receipt Summary Report
4. Enter Start Date and End Date
5. Select Branch you want to generate
6. You need to click the Functions to download the data.
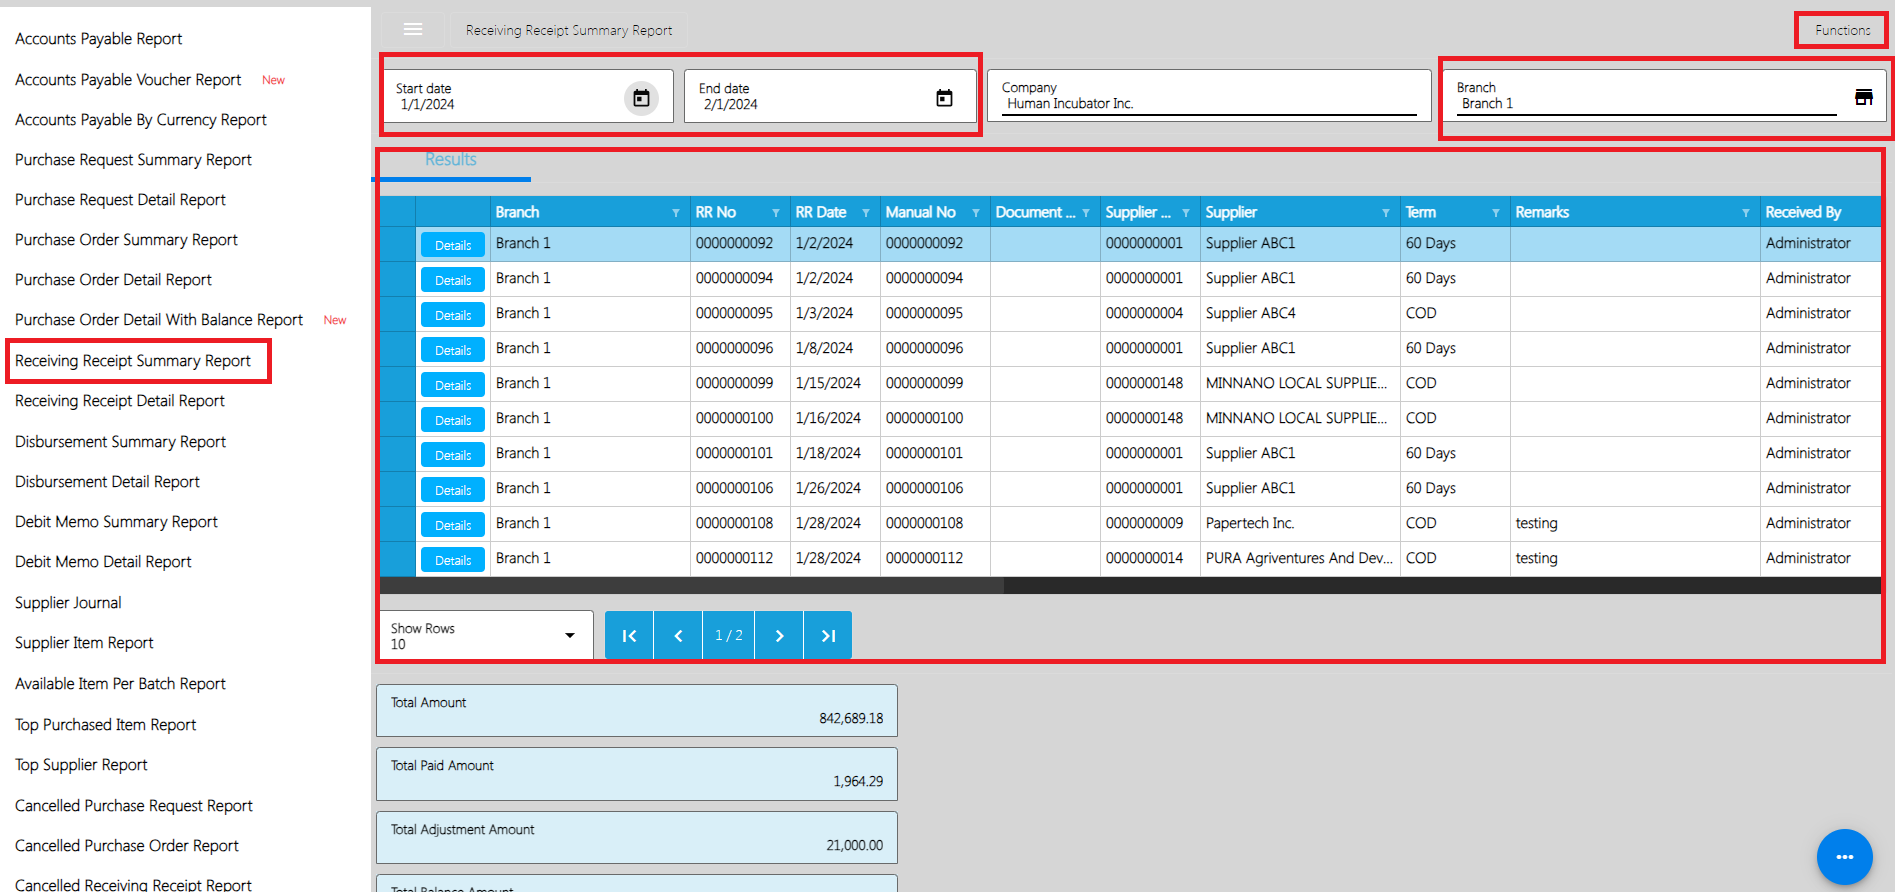
Receiving Receipt Detail Report
Receiving Receipt Detail Report is a Report wherein you can generate All Receiving Receipt within the specified dates. It will show the details of each Transactions.
To open or generate Receiving Receipt Detail Report here are the steps to follow:
1. Go to Purchases
2. Select Accounts Payable
3. Click Accounts Receiving Receipt Detail Report
4. Enter Start Date and End Date
5. Select Branch you want to generate
6. Click Functions to Download Data
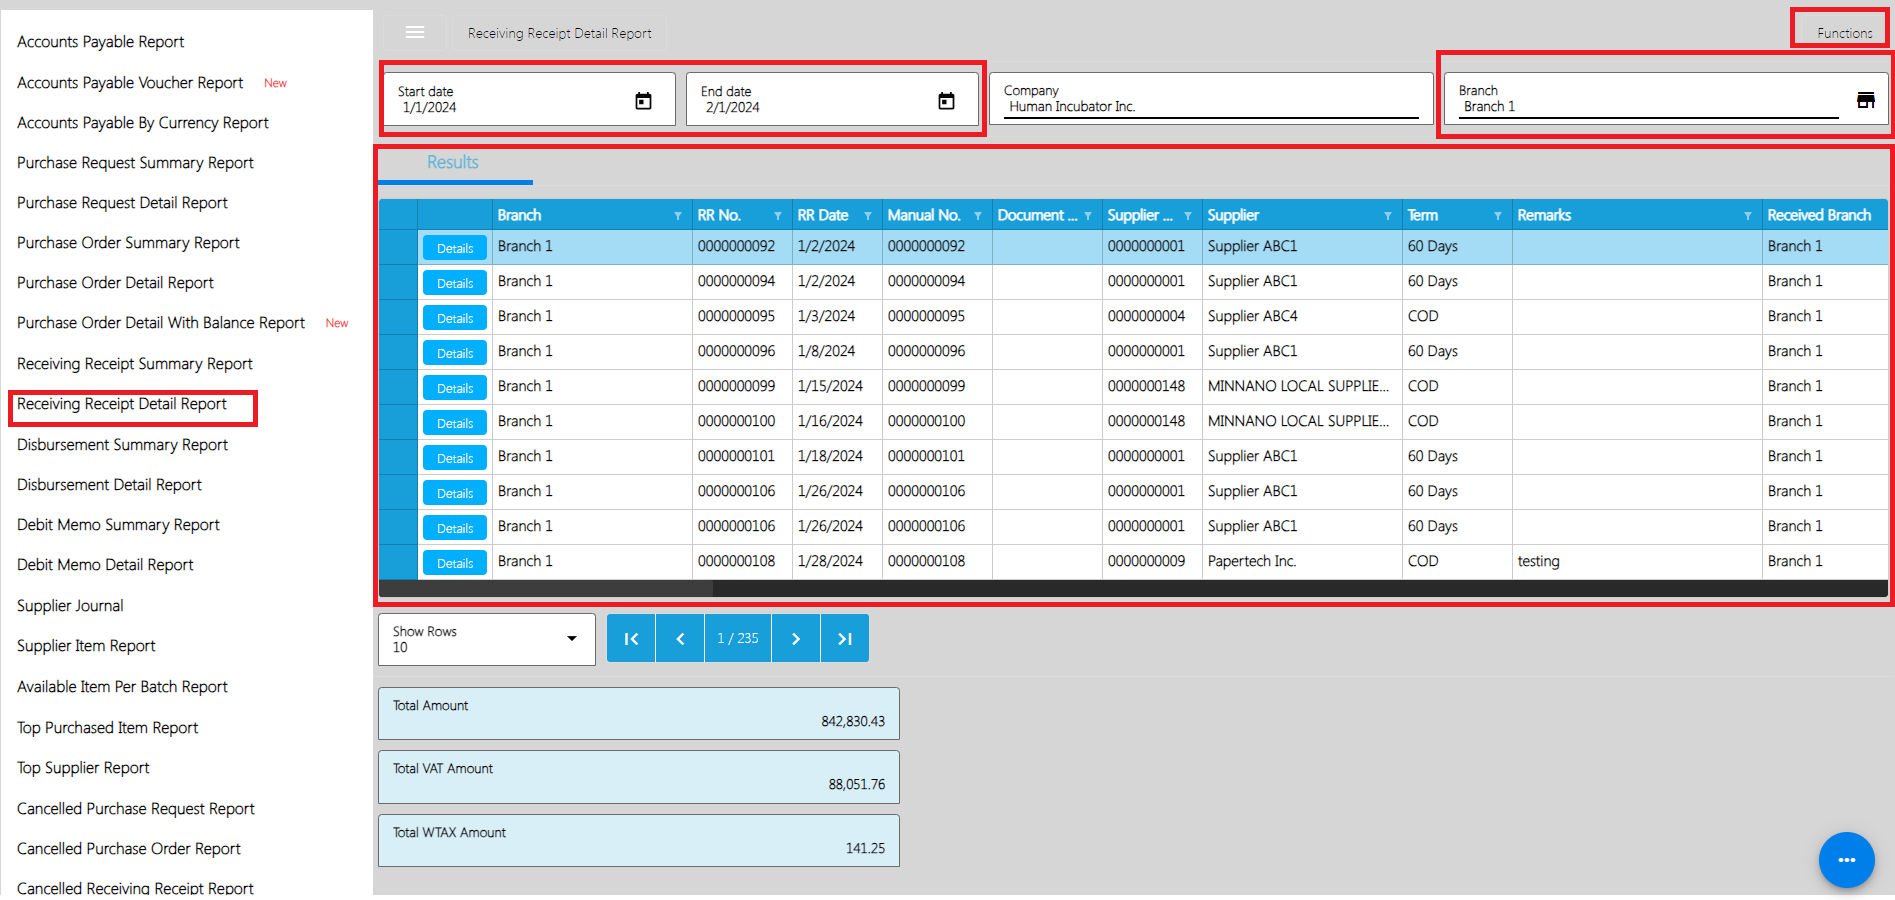
Disbursement Summary
Disbursement Summary Report is a Report wherein you can generate All Disbursement Transaction within the specified dates.
To open or generate Disbursement Summary Report here are the steps to follow:
1. Go to Purchases
2. Select Accounts Payable
3. Click Accounts Disbursement Summary Report
4. Enter Start Date and End Date
5. Select Branch you want to generate
6. Click Functions to Download Data
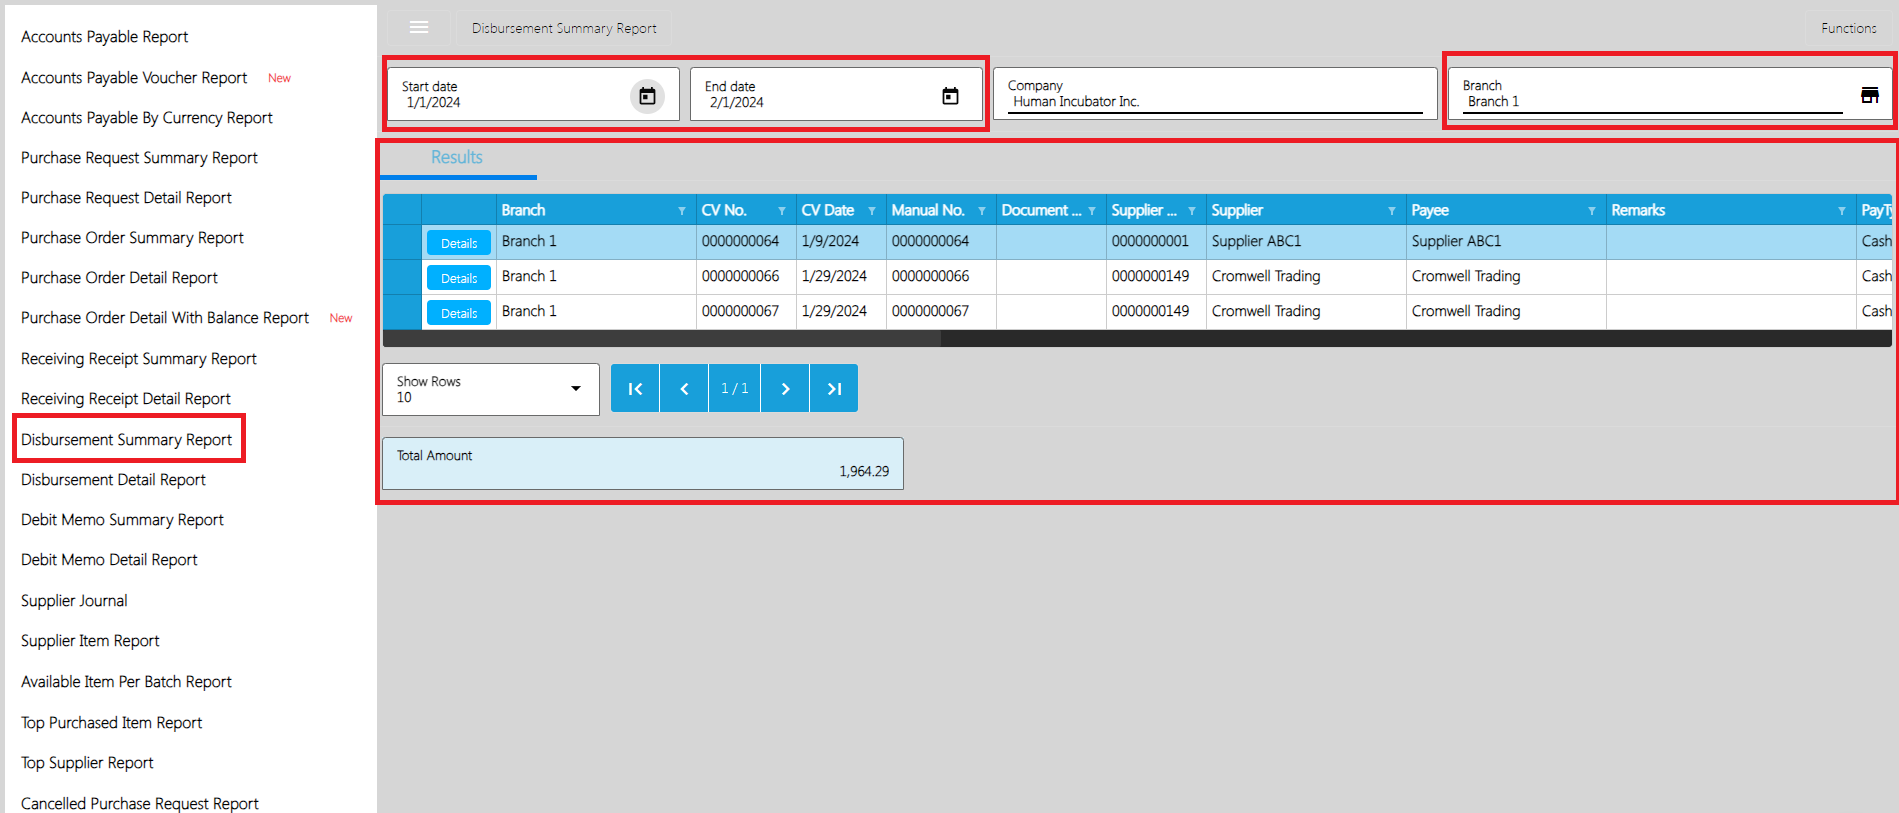
Disbursement Detail Report
Disbursement Detail Report is a Report wherein you can generate All Disbursements within the specified dates. It will show the details of each Transactions.
To open or generate Disbursement Detail Report here are the steps to follow:
1. Go to Purchases
2. Select Accounts Payable
3. Click Accounts Disbursement Detail Report
4. Enter Start Date and End Date
5. Select Branch you want to generate
6. You can have the option to Print or Download the PDF Report
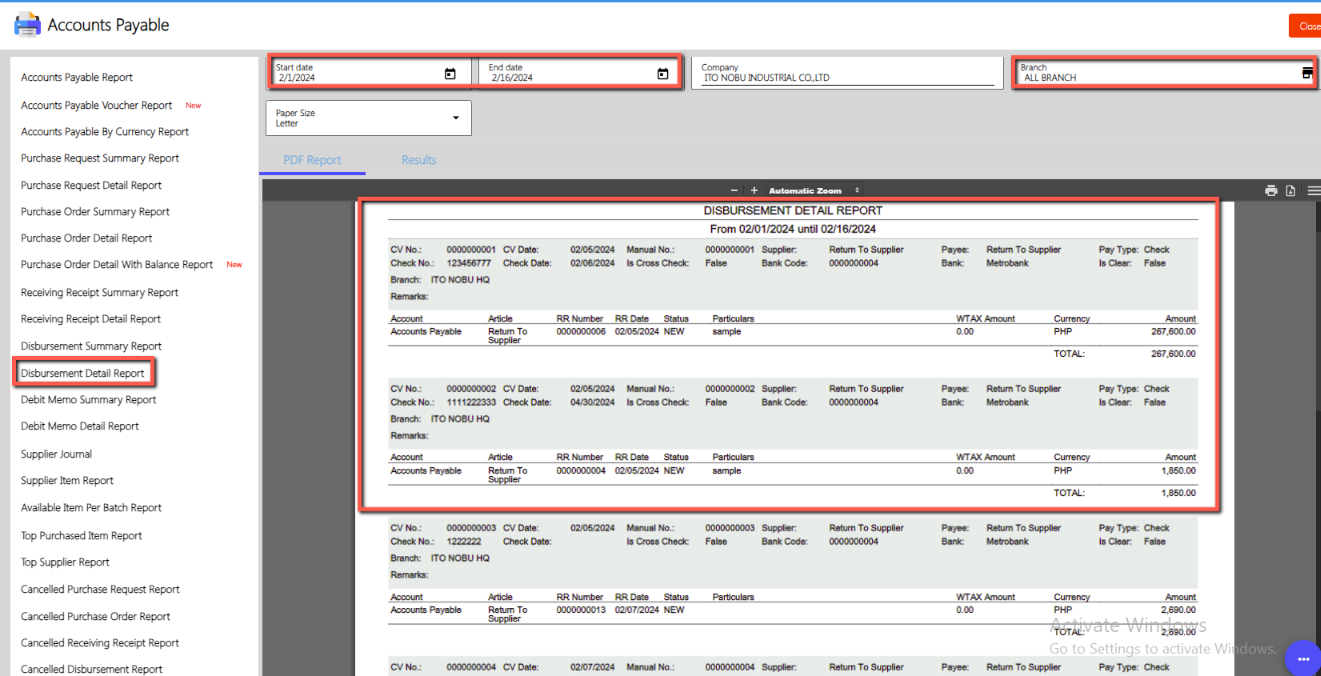
Debit Memo Summary Report
Debit Memo Summary Report is a Report wherein you can generate All Debit Memo Transaction within the specified dates.
To open or generate Debit Memo Summary Report here are the steps to follow:
1. Go to Purchases
2. Select Accounts Payable
3. Click Accounts Debit Memo Summary Report
4. Enter Start Date and End Date
5. Select Branch you want to generate
6. You need to click Functions to Download the Data
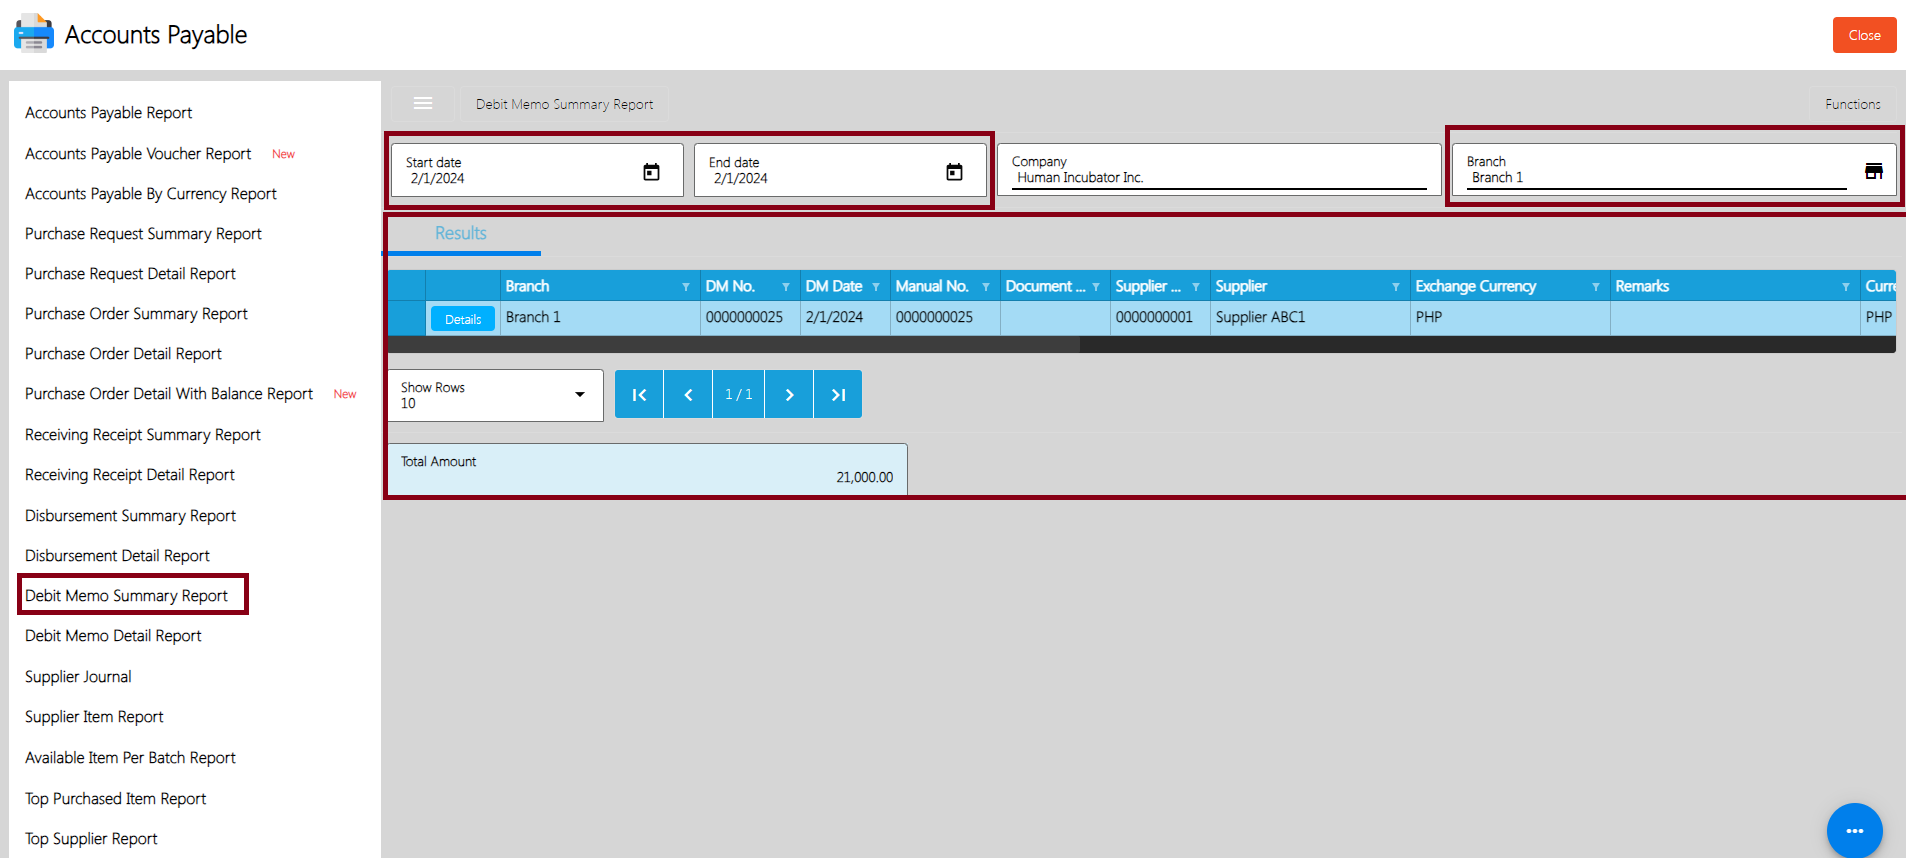
Debit Memo Detail Report
Debit Memo Detail Report is a Report wherein you can generate All Debit Memo Transactions within the specified dates. It will show the details of each Transactions.
To open or generate Debit Memo Detail Report here are the steps to follow:
1. Go to Purchases
2. Select Accounts Payable
3. Click Accounts Debit Memo Detail Report
4. Enter Start Date and End Date
5. Select Branch you want to generate
6.You need to click Functions to Download the Data
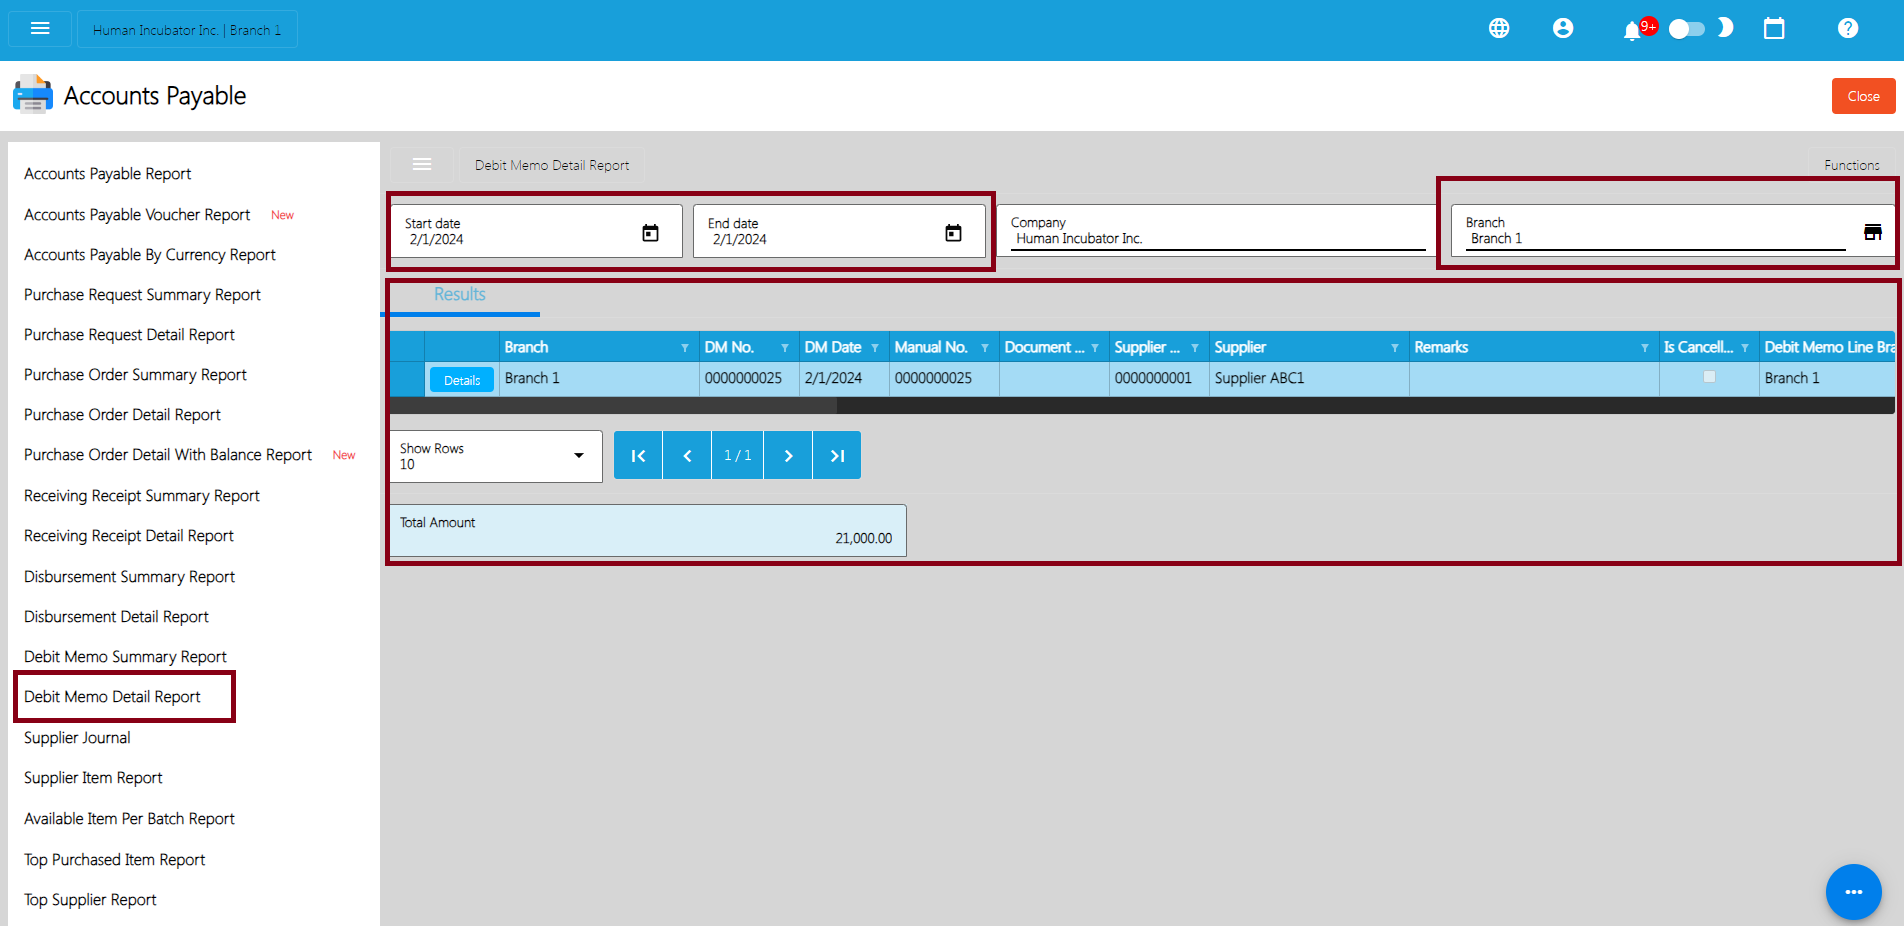
Supplier Journal
Supplier Journal is a report where users can generate the list of Supplier journals per item within the specified date range.
To generate Supplier Journal Report, here are the following steps:
- Go to Purchases
- Select Accounts Payable
- Click Supplier Journal
- Enter Start and End Date
- Select Supplier
- Printing and PDF download are also available
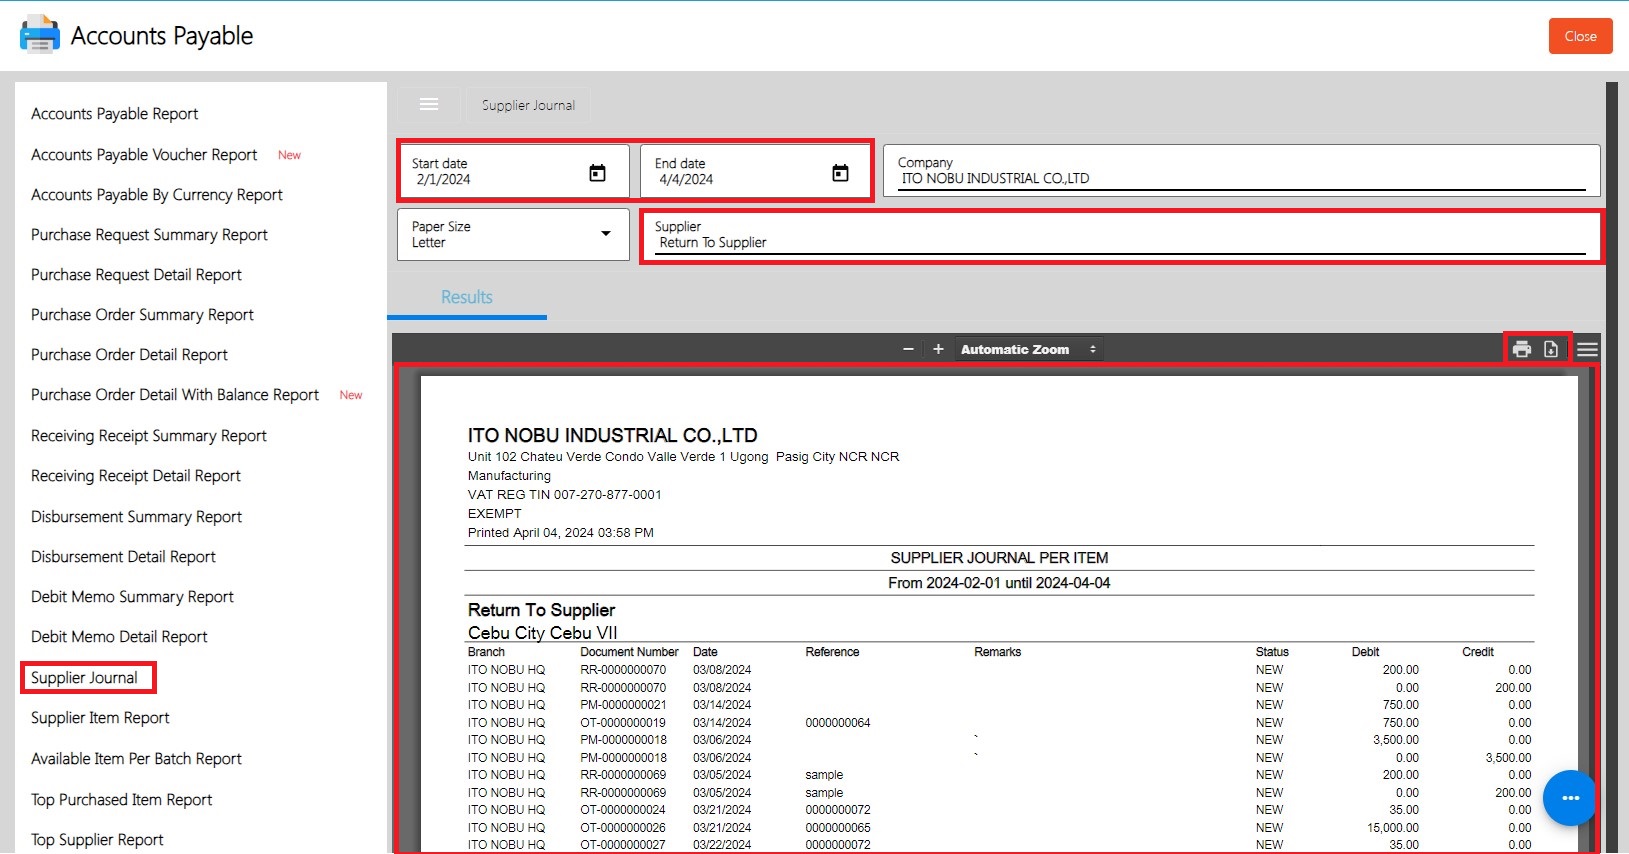
Supplier Item Report
Supplier Item Report is a report where users can generate a list of Supplier Item Reports within the specified date range.
To generate Supplier Item Report, here are the following steps:
- Go to Purchases
- Select Accounts Payable
- Click Supplier Item Report
- Enter Start and End Date
- Click Supplier
- Select Branch
- Printing and PDF download are also available
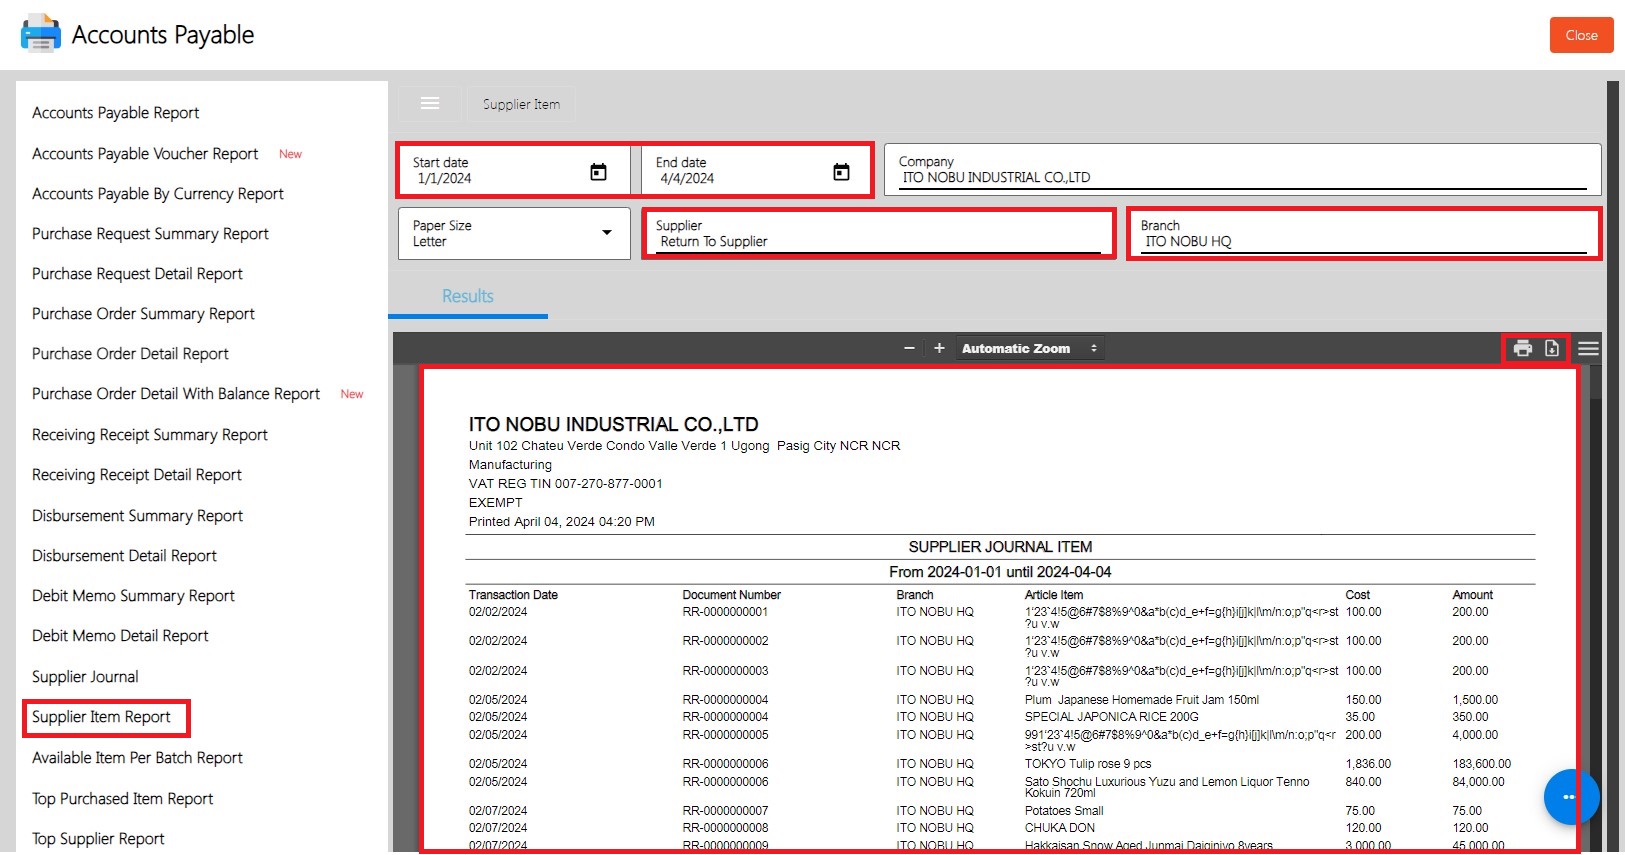
Available Item Per Batch Report
Available Item Per Batch Report is a report where users can generate the available item per batch report within the specified date range.
To generate Available Item Per Batch Report, here are the following steps:
- Go to Purchases
- Select Accounts Payable
- Click Available Item Per Batch Report
- Enter Date as of
- Select the Branch
- Printing and PDF download are also available
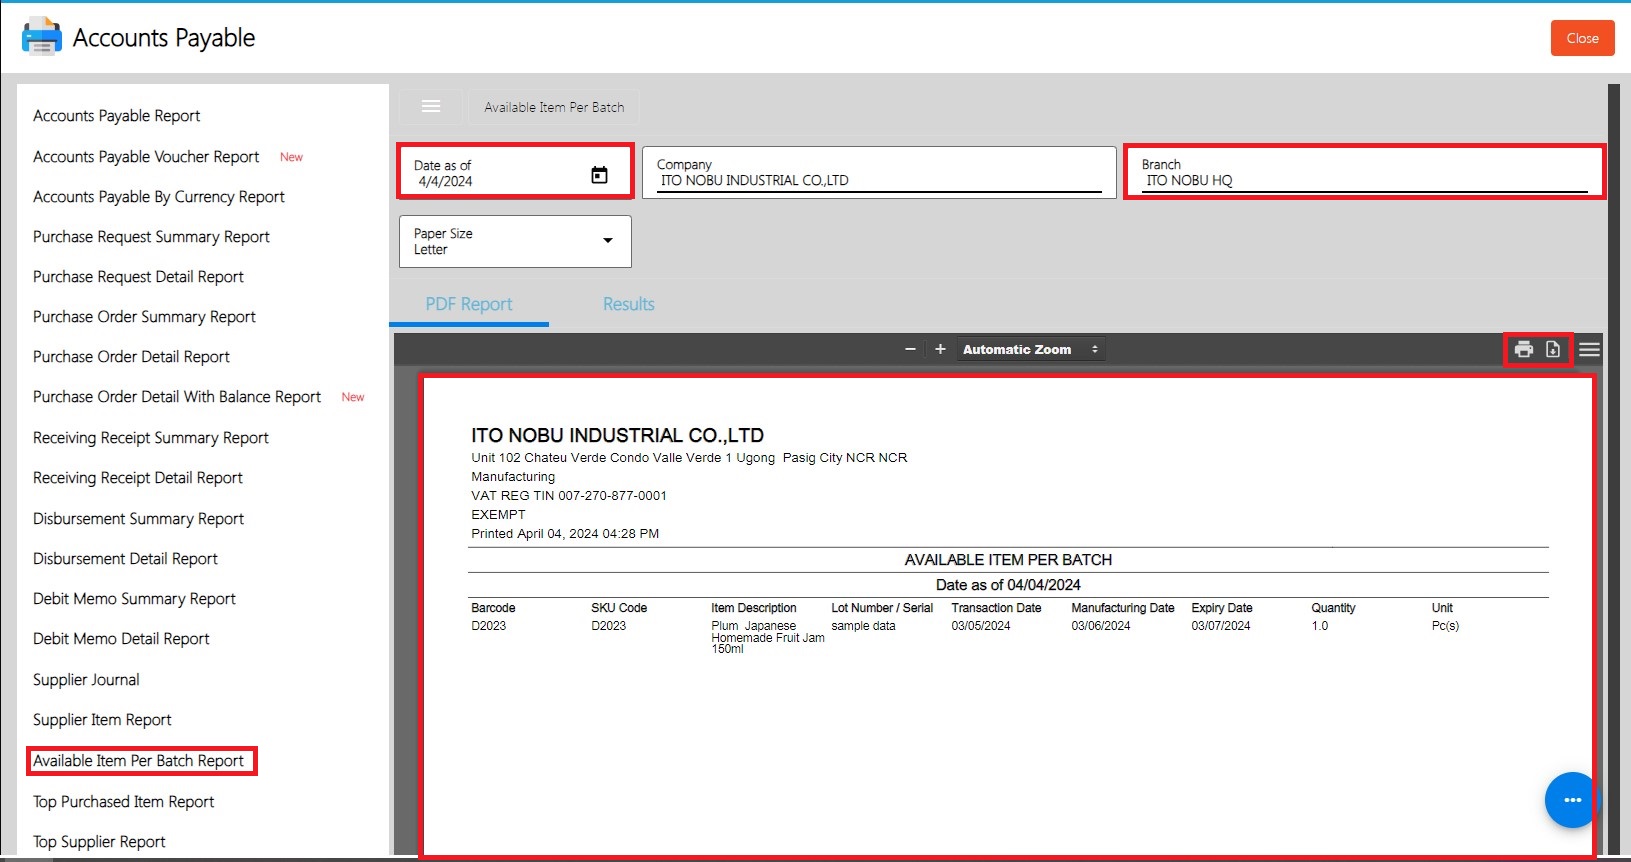
Top Purchased Item Report
The Top Purchased Item Report is a report where users or management can generate the top purchased items within a specified date range. This report only displays or generates the top 10 items that were most frequently purchased during the specified period.
To open or generate Purchase Order Detail Report here are the steps to follow:
1. Go to Purchases
2. Select Accounts Payable
3. Click Top Purchase Item Report
4. Enter Start Date and End Date
5. Click Functions to Download Data
6. XLS File will be downloaded
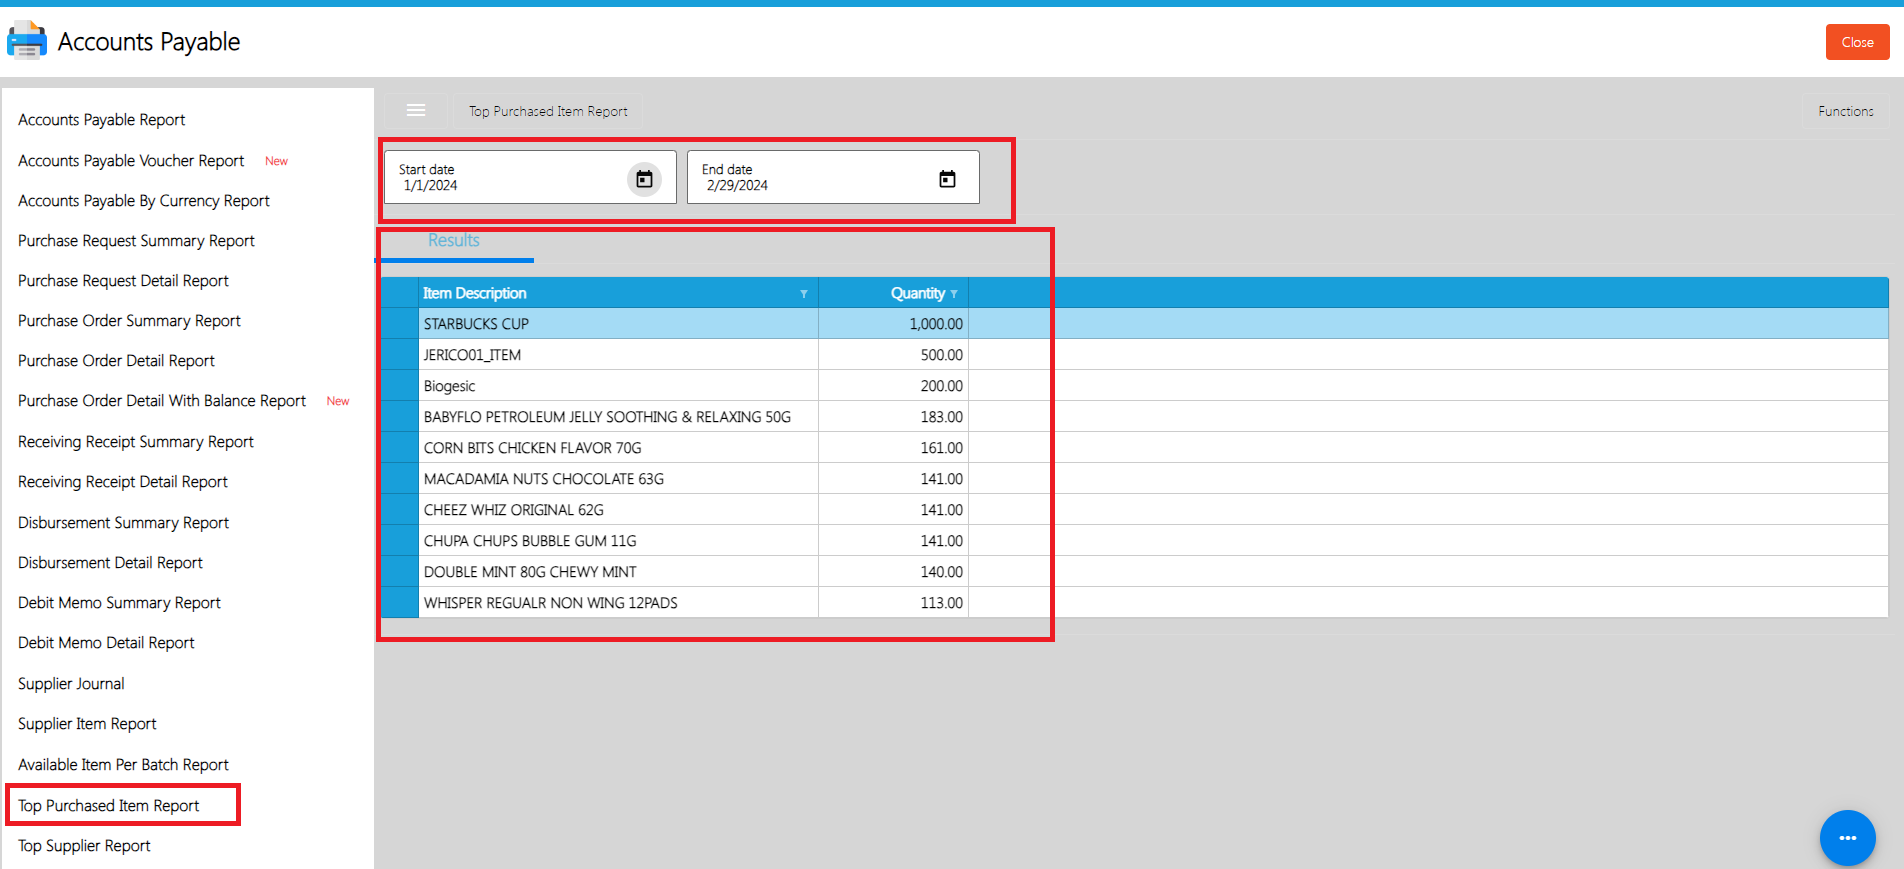
Top Supplier Report
The Top Supplier Report is a report where users or management can generate the top suppliers based on the amount purchased within a specified date range. This report displays or generates the top 10 suppliers that were most frequently purchased from during the specified period.
To open or generate Purchase Order Detail Report here are the steps to follow:
1. Go to Purchases
2. Select Accounts Payable
3. Click Top Supplier Report
4. Enter Start Date and End Date
5. Click Functions to Download Data
6. XLS File will be downloaded
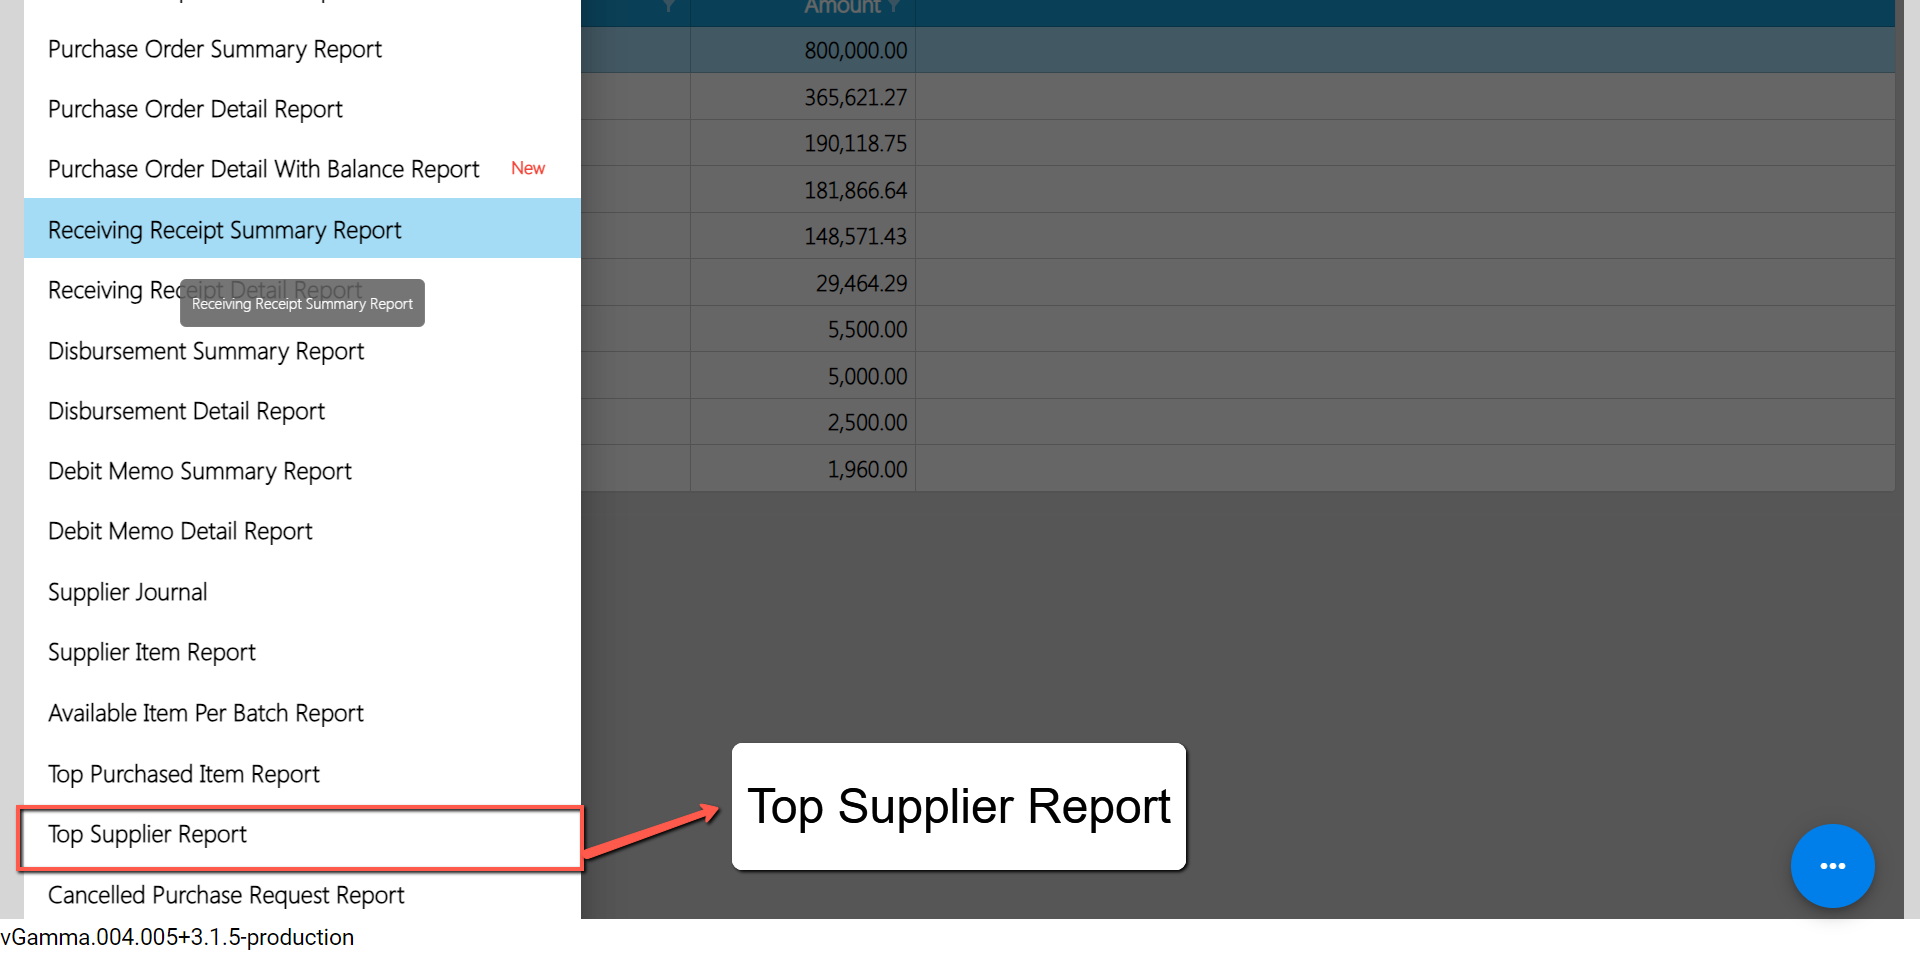
Cancelled Purchase Request Report
Cancelled Purchase Request Report is a report where users or management can generate the report of All Cancelled Purchase Request Transactions.
To open or generate Cancelled Purchase Request Report here are the steps to follow:
1. Go to Purchases
2. Select Accounts Payable
3. Click Cancelled Purchase Request
4. Enter Start Date and End Date
5. Select branch you want to generate
5. Click Functions to Download Data
6. XLS File will be downloaded
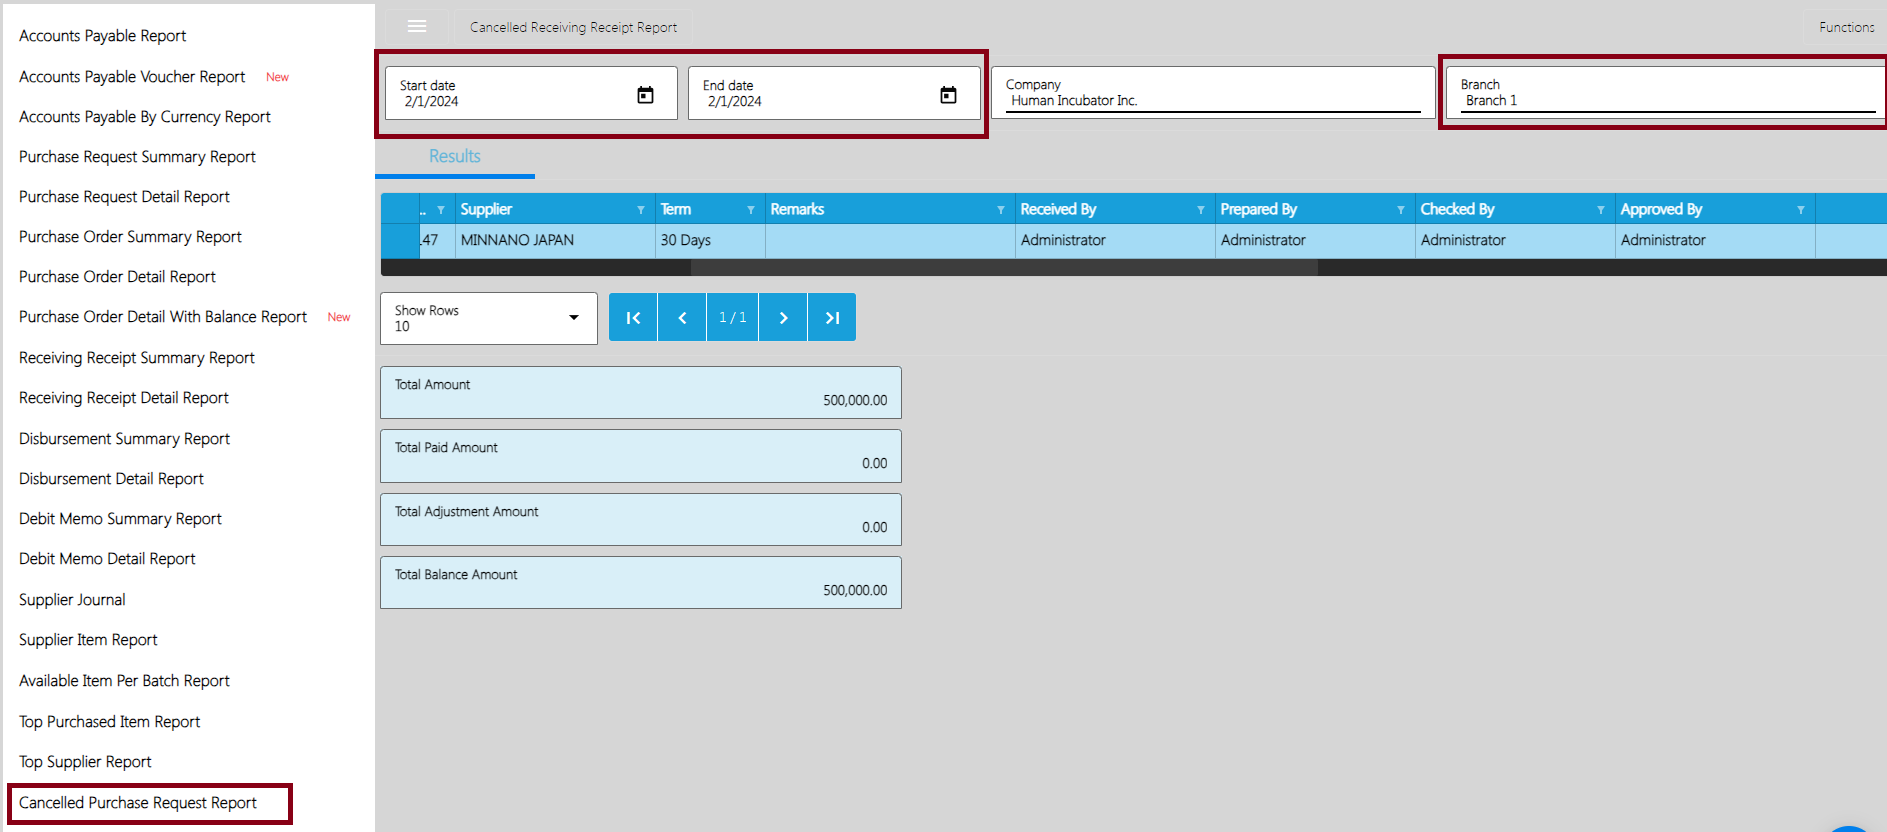
Cancelled Purchase Order Report
Cancelled Purchase Order Report is a report where users or management can generate the report of All Cancelled Purchase Order Transactions.
To open or generate Cancelled Purchase Order Report here are the steps to follow:
1. Go to Purchases
2. Select Accounts Payable
3. Click Cancelled Purchase Order
4. Enter Start Date and End Date
5. Select branch you want to generate
5. Click Functions to Download Data
6. XLS File will be downloaded
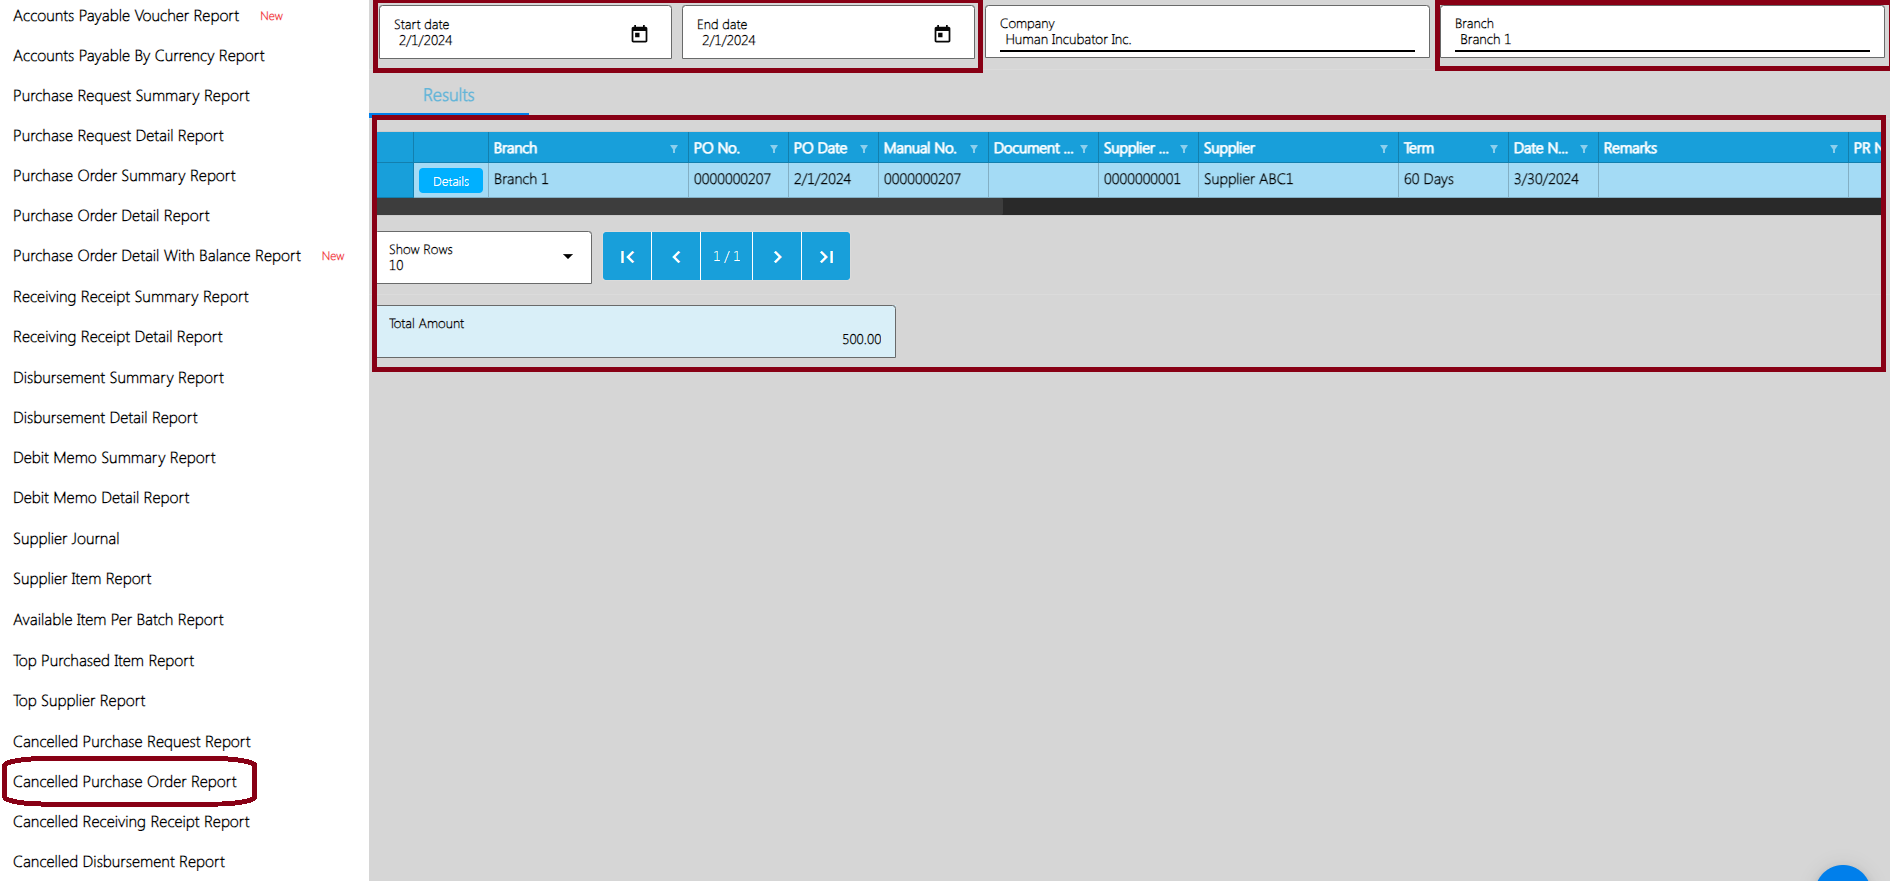
Cancelled Receiving Receipt Report
Cancelled Receiving Receipt Report is a report where users or management can generate the report of All Cancelled Receiving Receipt Transactions.
To open or generate Cancelled Receiving Receipt Report here are the steps to follow:
1. Go to Purchases
2. Select Accounts Payable
3. Click Cancelled Receiving Receipt
4. Enter Start Date and End Date
5. Select branch you want to generate
6. Click Functions to Download Data
7. XLS File will be downloaded
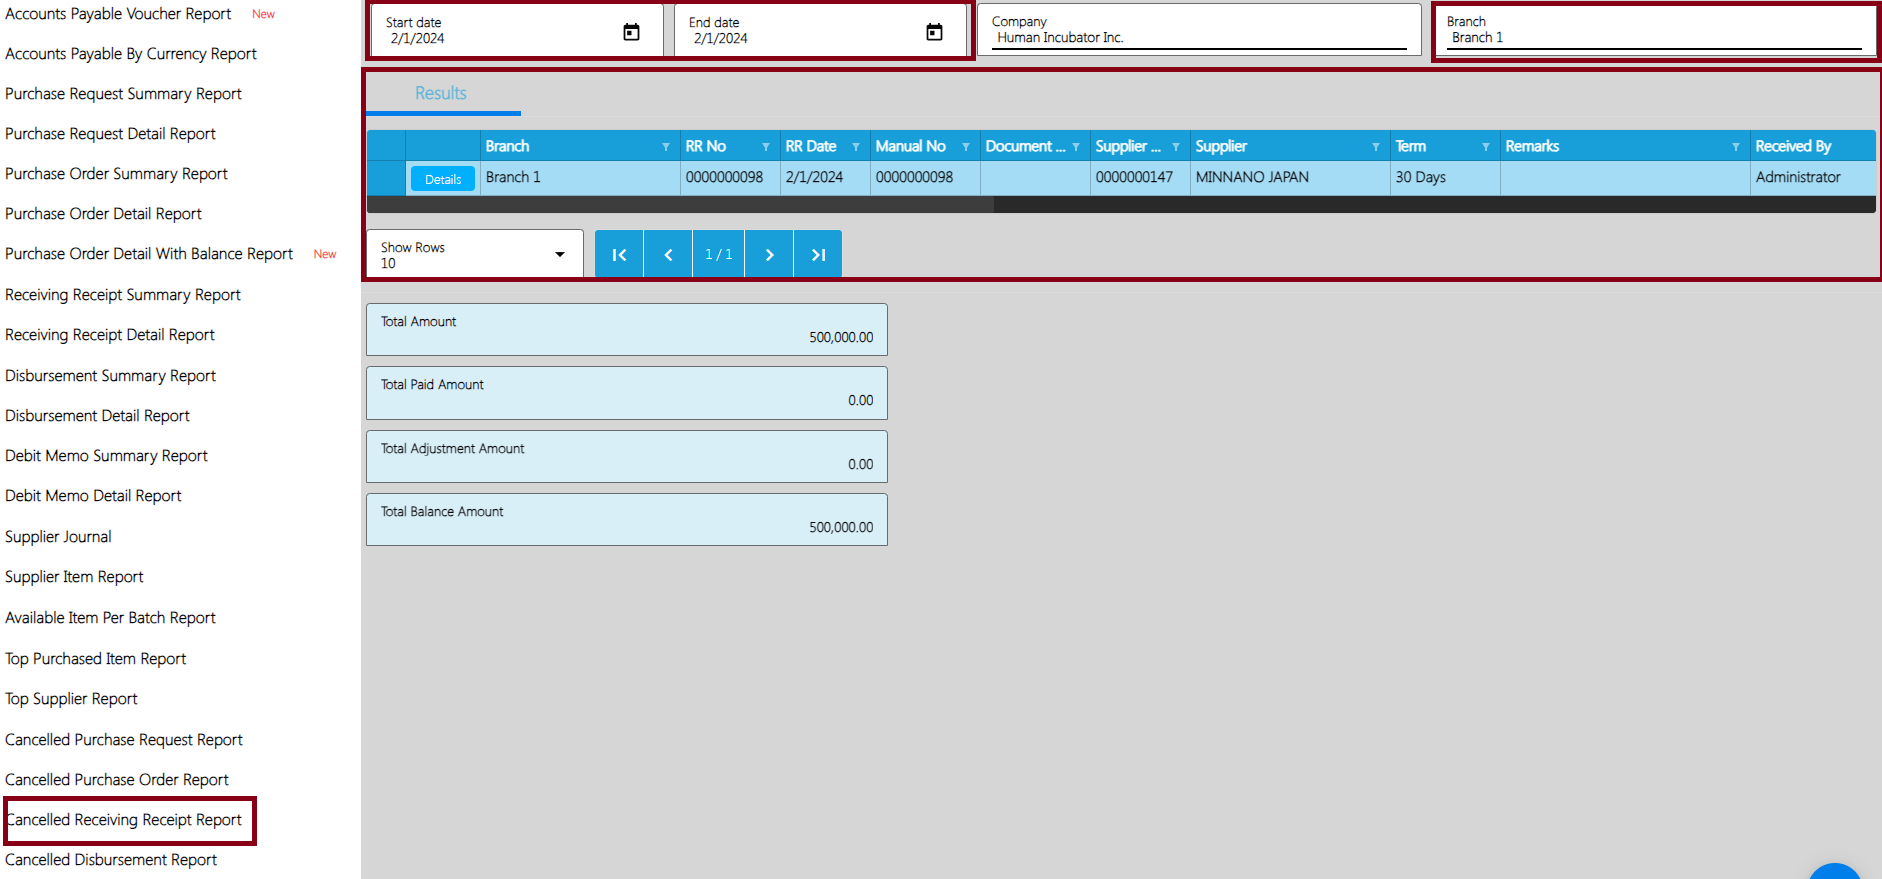
Cancelled Disbursement Report
Cancelled Disbursement Report is a report where users or management can generate the report of All Cancelled Disbursement Receipt Transactions.
To open or generate Cancelled Disbursement Report here are the steps to follow:
1. Go to Purchases
2. Select Accounts Payable
3. Click Cancelled Disbursement
4. Enter Start Date and End Date
5. Select branch you want to generate
6. Click Functions to Download Data
7. XLS File will be downloaded
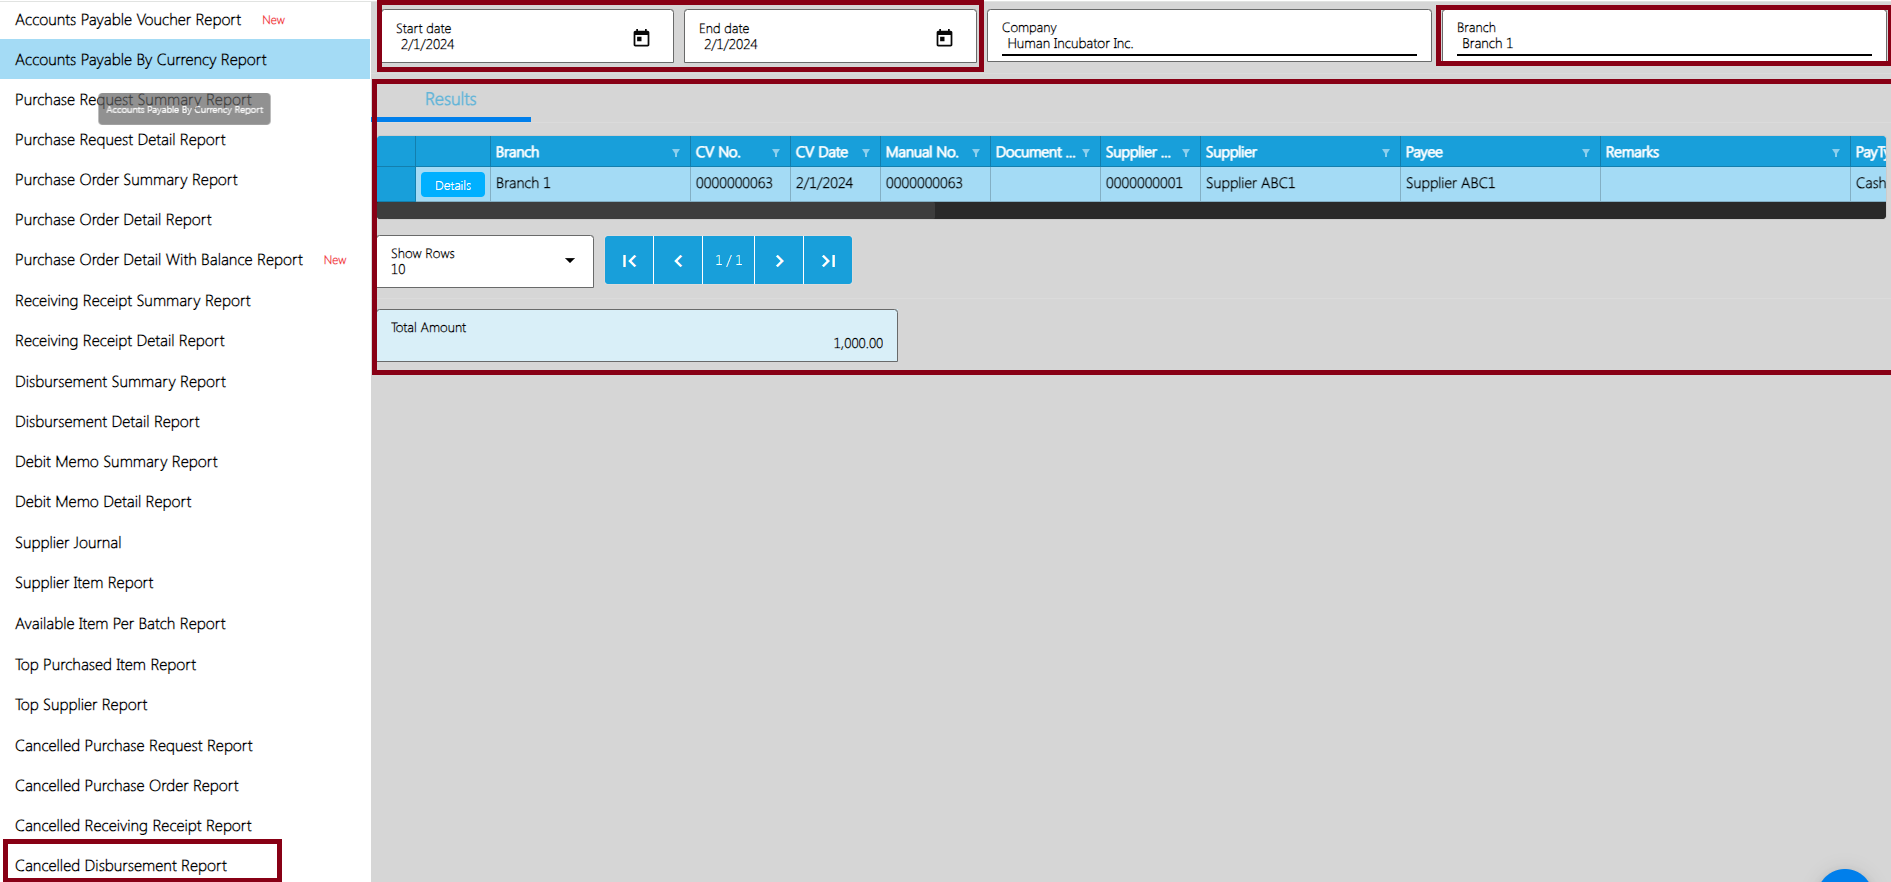
Accounts Receivable Report
Accounts Receivable is an aging report in which the total amount per Sales Invoice transaction is reflected. It shows outstanding receivables or collectibles from a customer within specified terms, such as 30 days, 60 days, 90 days, and over 120 days.
Accounts Receivable are recorded as part of the assets on the Balance Sheet. These receivables are typically settled through the collection of money or credit memos (adjustments) from customers according to the agreed-upon terms.
To open or generate Accounts Receivable Report here are the steps to follow:
1. Go to Sales
2. Select Accounts Receivable
3. Click Accounts Receivable Report
4. Enter Date as of
5. Select branch you want to generate
6. You can have the option to Print or Download the PDF Report.
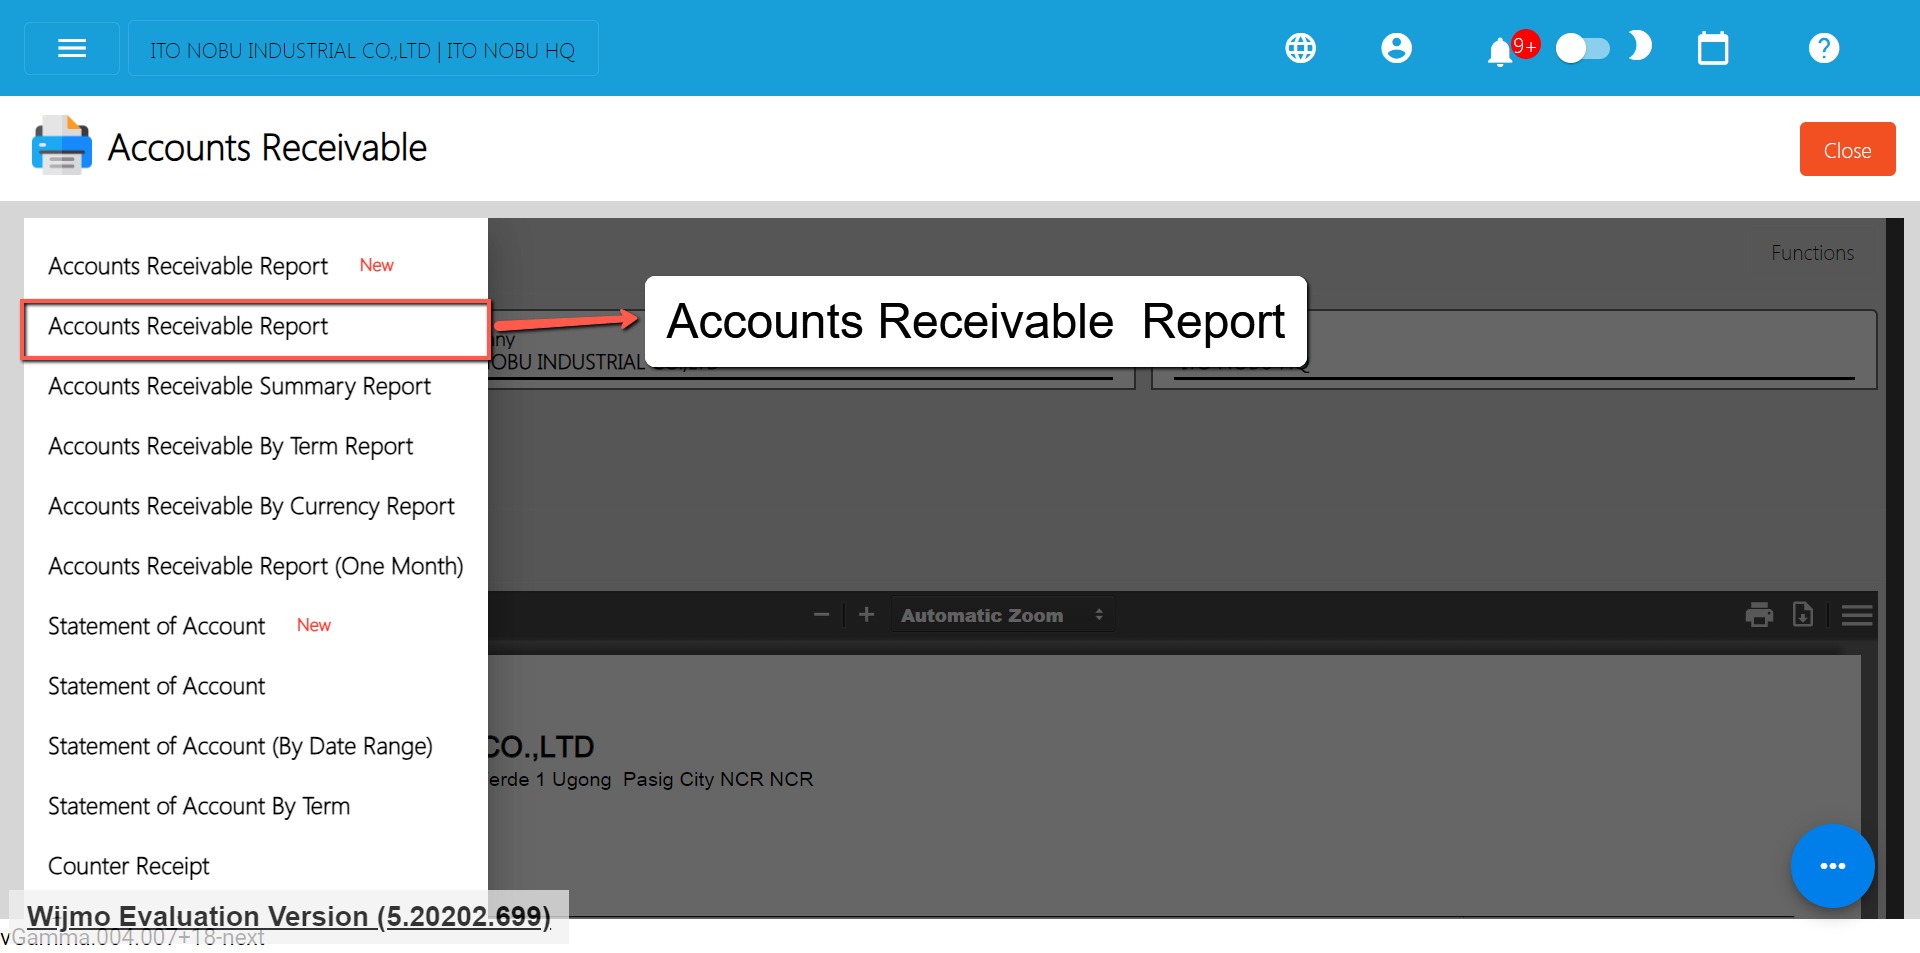
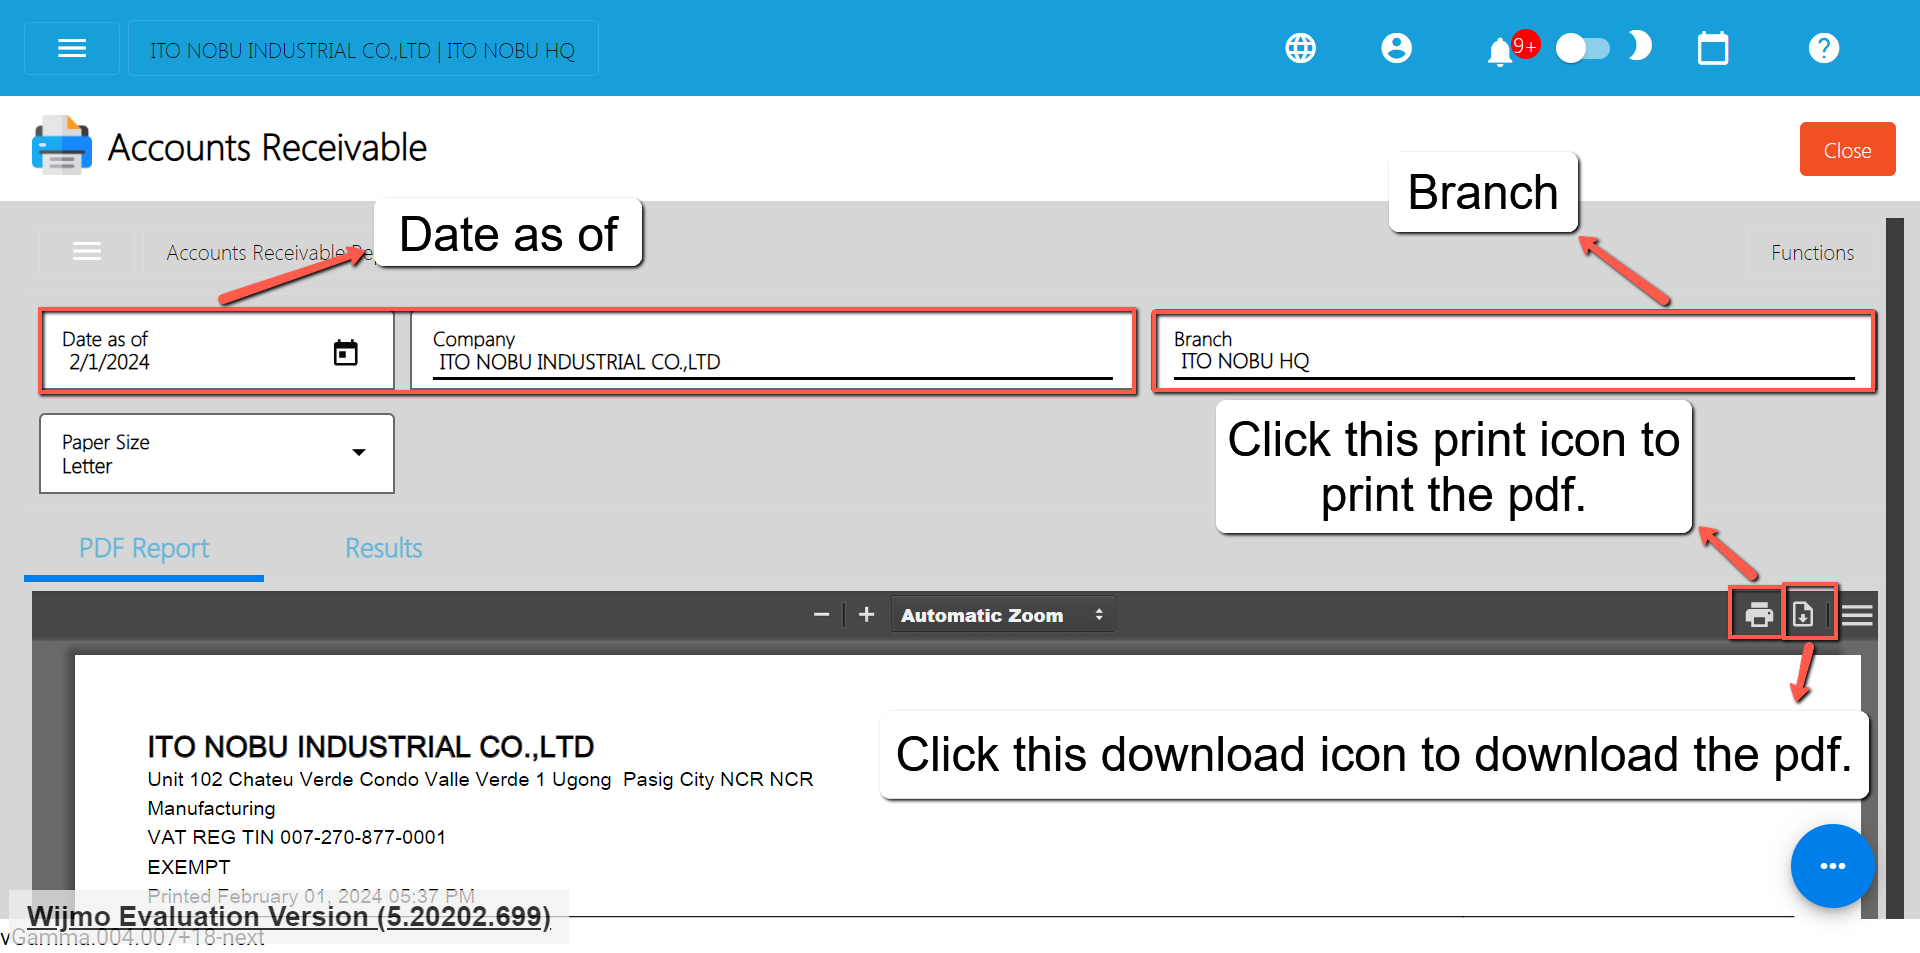
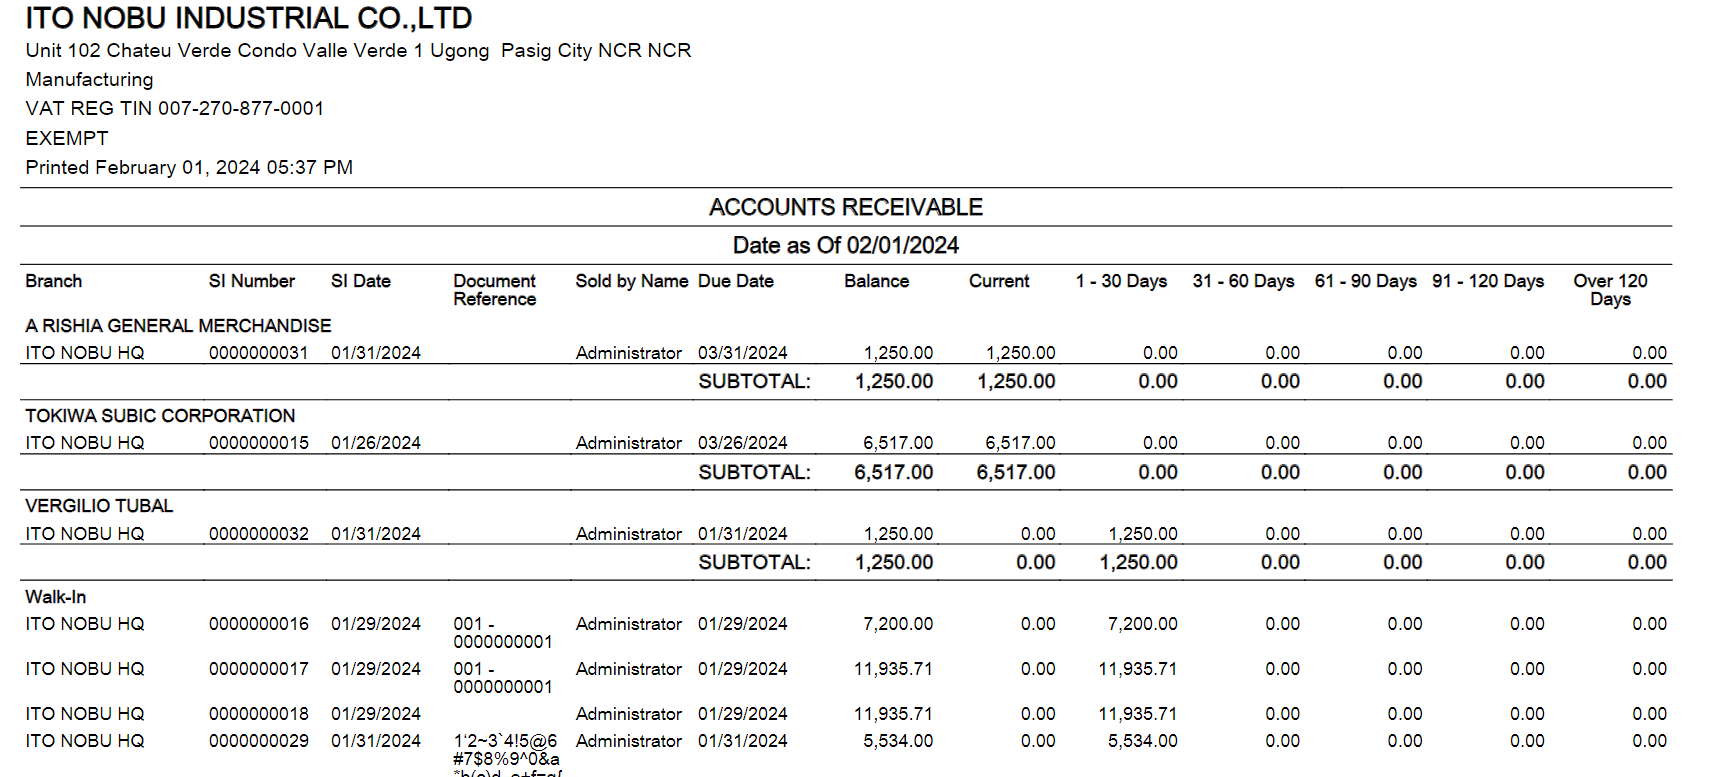
Accounts Receivable Summary Report
Accounts Receivable is a summary report which generates the total accounts receivable per customer.
To open or generate Accounts Receivable Report here are the steps to follow:
1. Go to Sales
2. Select Accounts Receivable
3. Click Accounts Receivable Summary Report
4. Enter Date as of
5. Select branch you want to generate
6. You can have the option to Print or Download the PDF Report
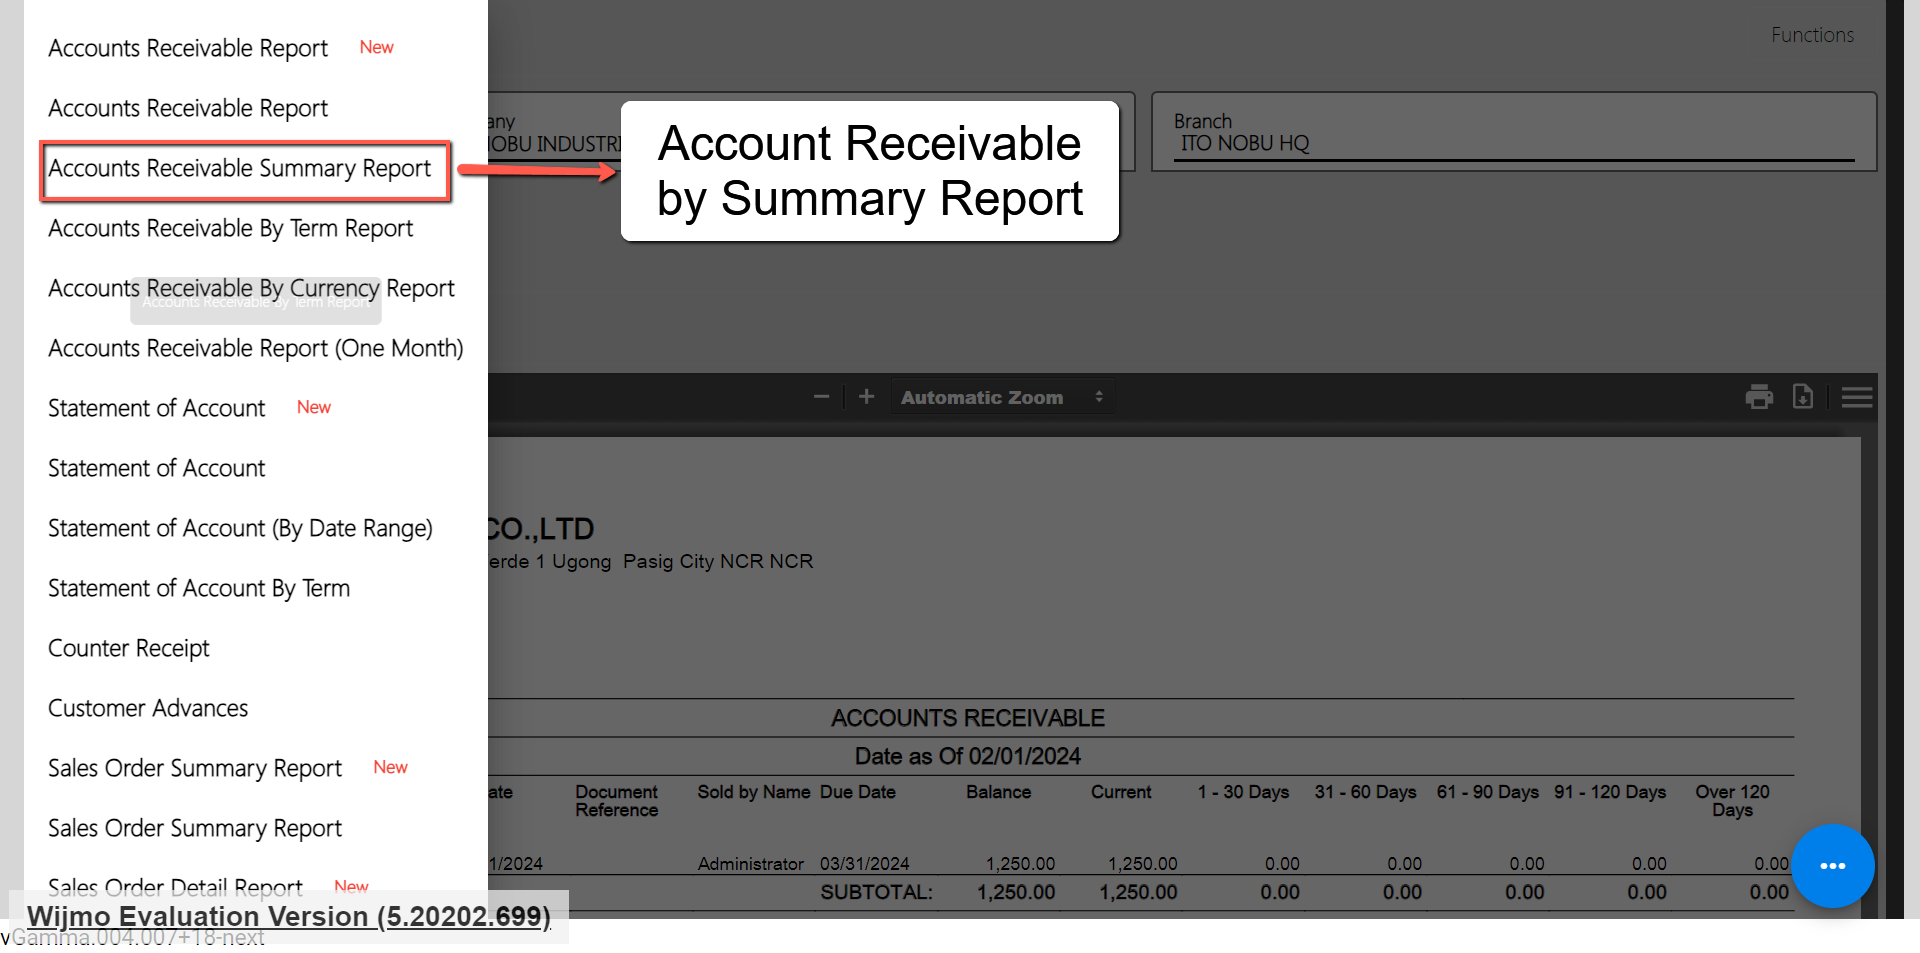
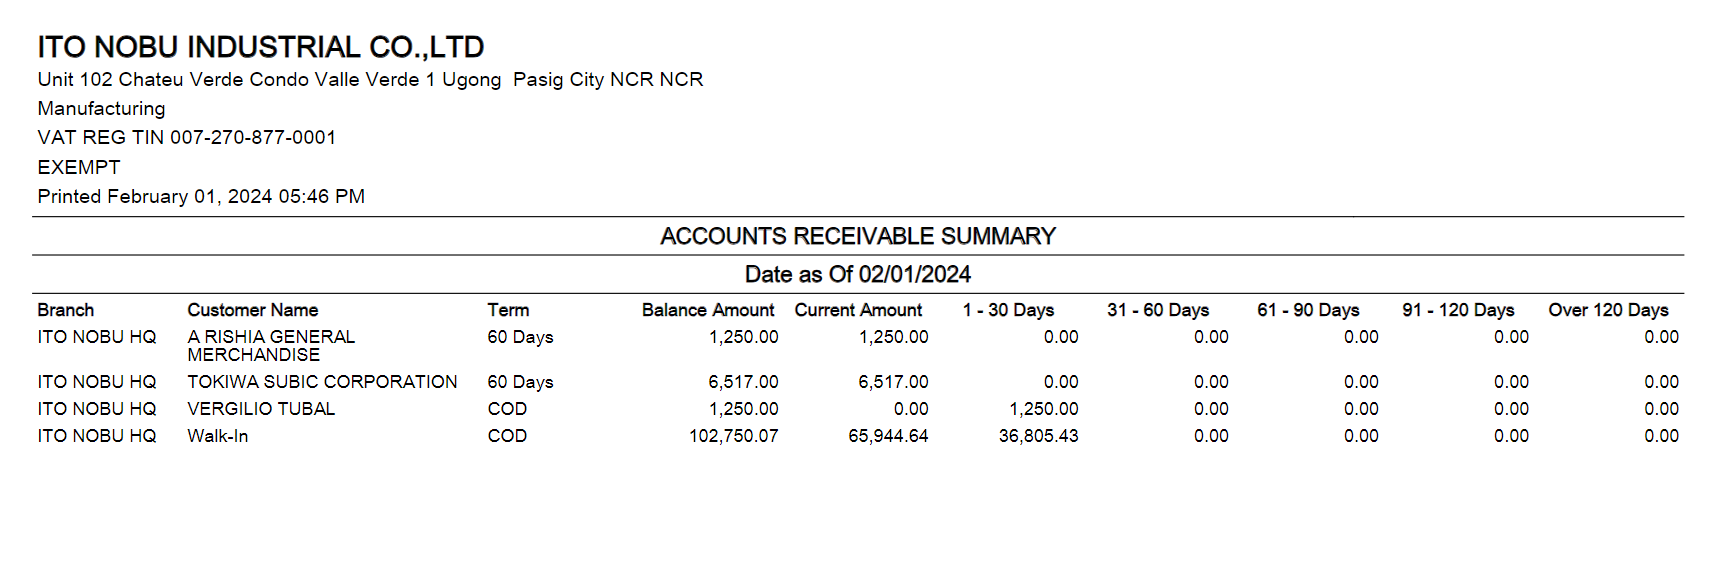
Accounts Receivable by Term Report
Accounts Receivable by Term Report is a summary report which generates the total accounts receivable per customer with Aging Days.
To open or generate Accounts Receivable by Term Report here are the steps to follow:
1. Go to Sales
2. Select Accounts Receivable
3. Click Accounts Receivable by Term Report
4. Enter Date as of
5. Select branch you want to generate
6. You can have the option to Print or Download the PDF Report
Accounts Receivable by Currency Report
Accounts Receivable by Currency Report is a summary report which generates the total accounts receivable per customer with Currency.
To open or generate Accounts Receivable by Currency Report here are the steps to follow:
- Go to Sales
- Select Accounts Receivable
- Click Accounts Receivable by Currency Report
- Enter Date as of
- Select branch you want to generate
- Select Currency you want to generate
- You can have the option to Print or Download the PDF Report
Accounts Receivable Report (One Month)
The Accounts Receivable Report (One Month) is a comprehensive summary of outstanding receivables from customers within a specified time frame, typically one month. This report categorizes the receivables based on the age of the invoices, including segments such as 7 days, 10 days, 15 days, 30 days, and over 30 days. By organizing receivables in this manner, businesses can efficiently track and manage their outstanding invoices, aiding in timely collections and financial decision-making.
To generate Account Receivables Report (One Month), here are the steps for you to follow:
- Go to Sales modules: Navigate to Sales modules, then select Accounts Receivable.
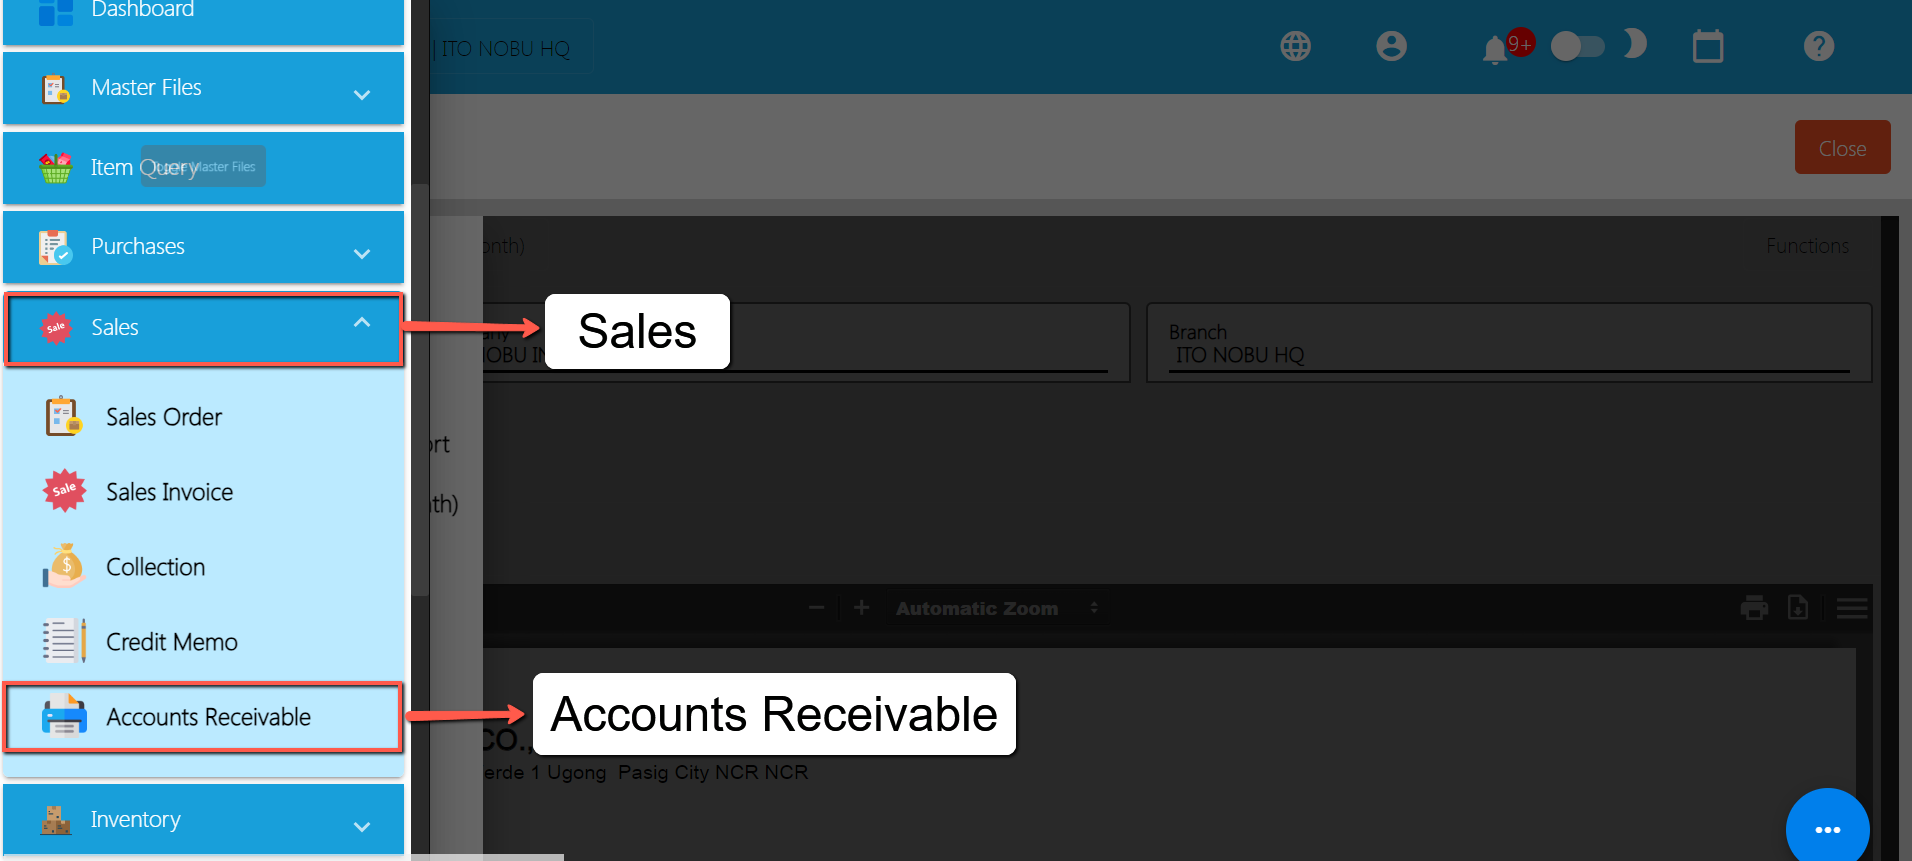
- Click Account Receivables Report (One Month): Under the menus from Accounts Receivable, look for Account Receivables Report (One Month) then click the menu to navigate.
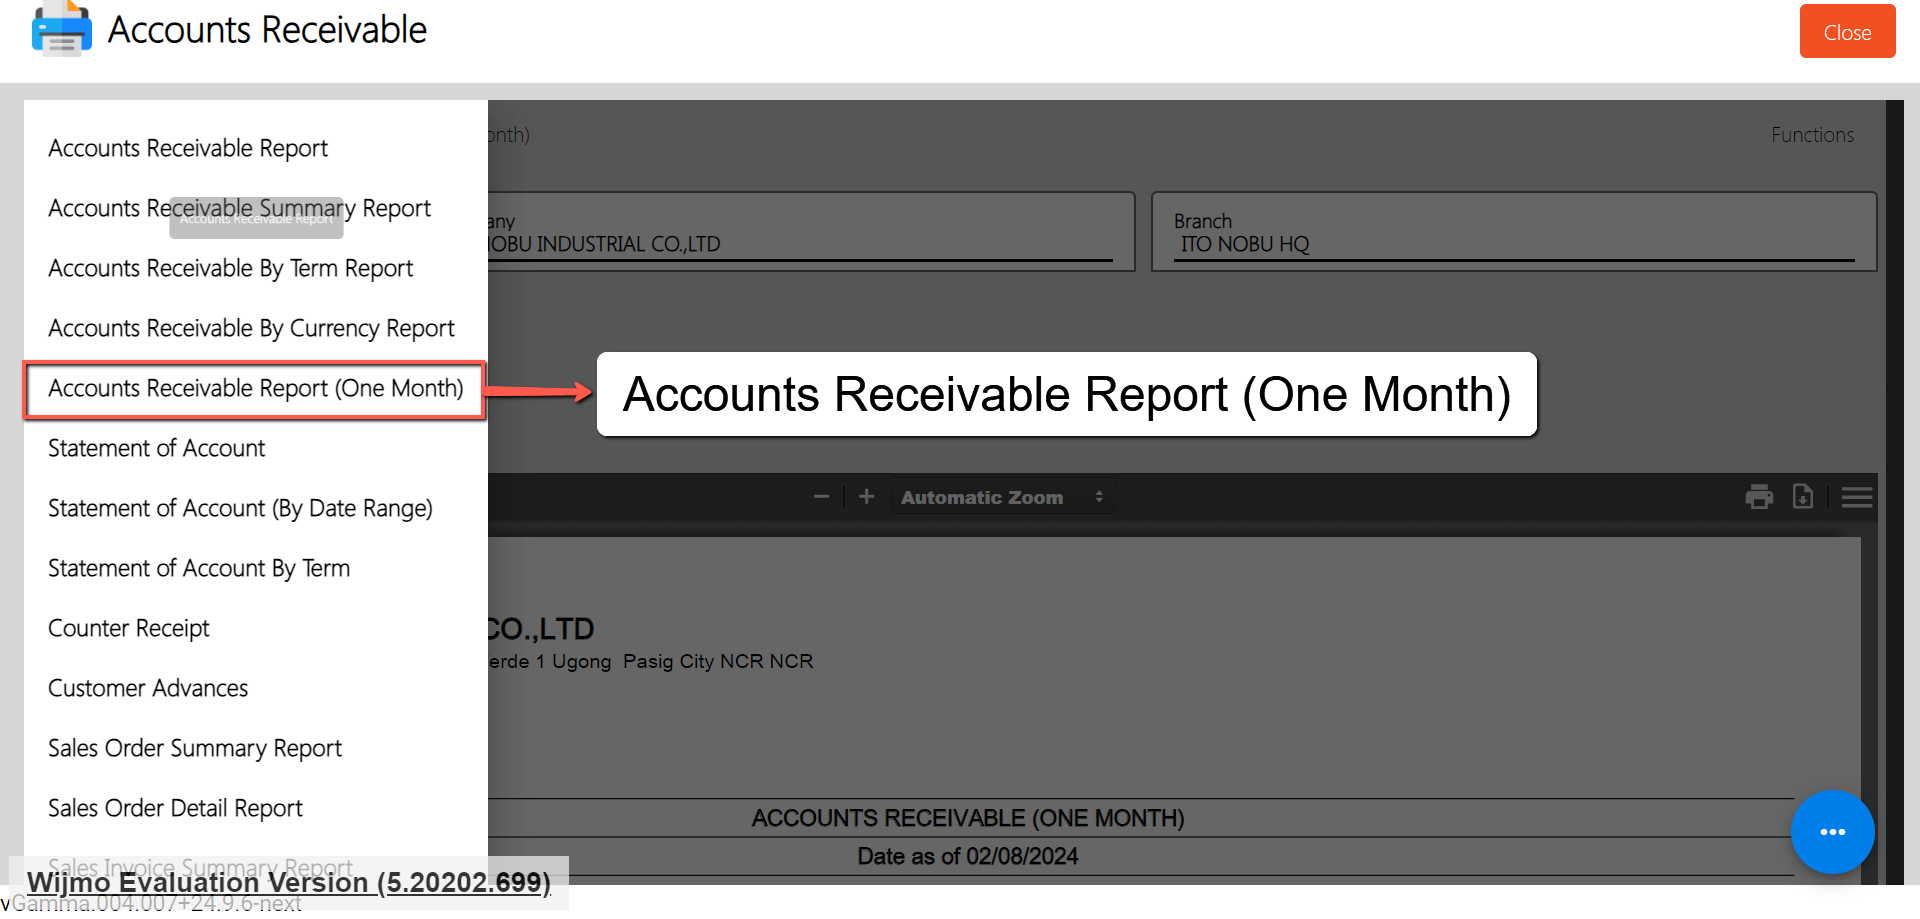
- Provide Date as of: Provide an exact date you want to generate a report by clicking on the Date as of field, then select an exact date.
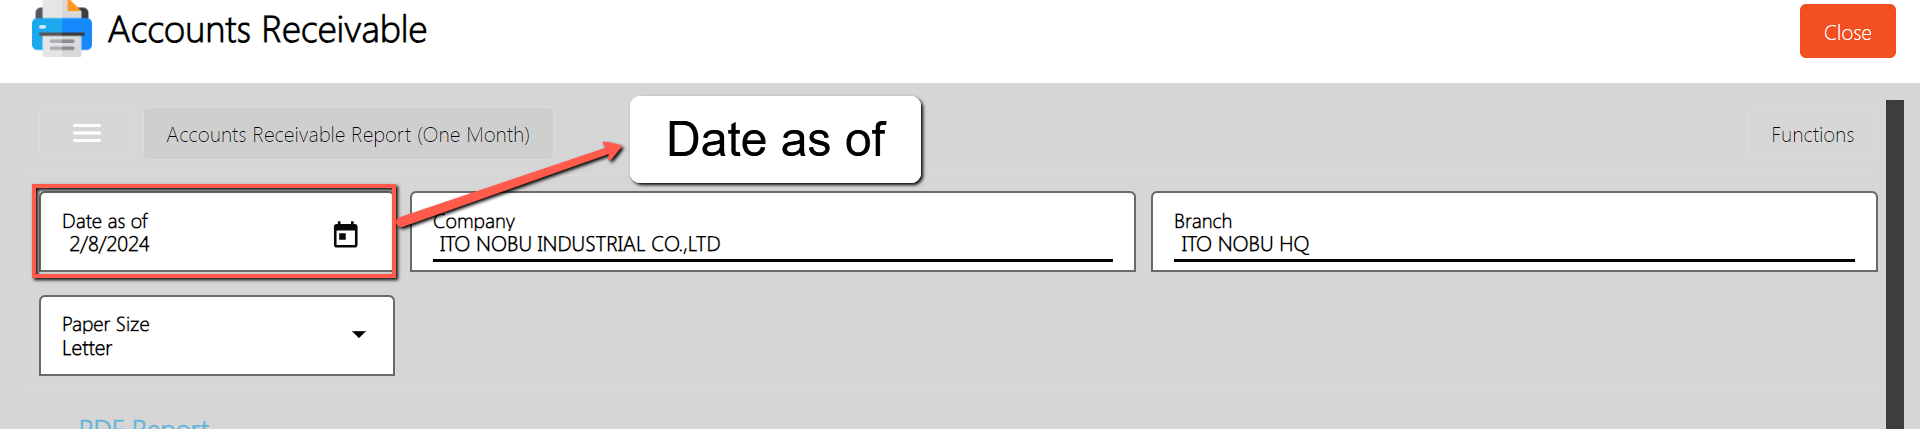
- Provide Branch (if needed): By default, the value of the Branch field is based on your login branch.
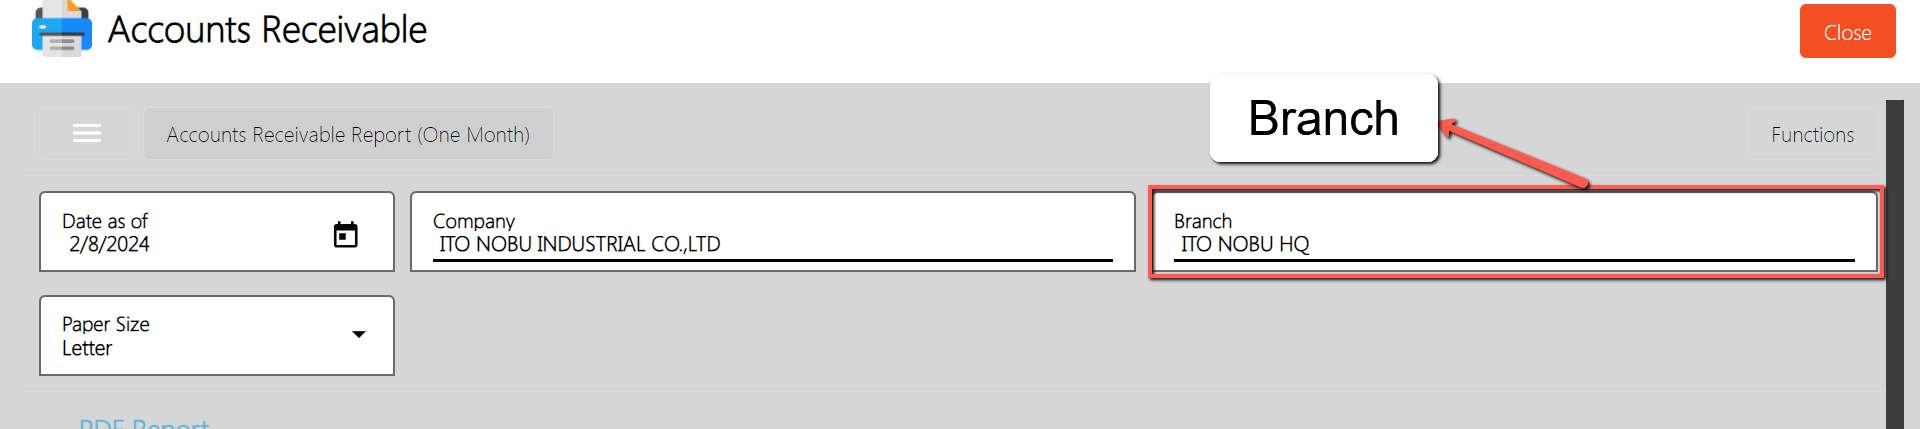
- PDF Report is automatically generated: After providing the Date as of and the Branch, the PDF Report will automatically generated.
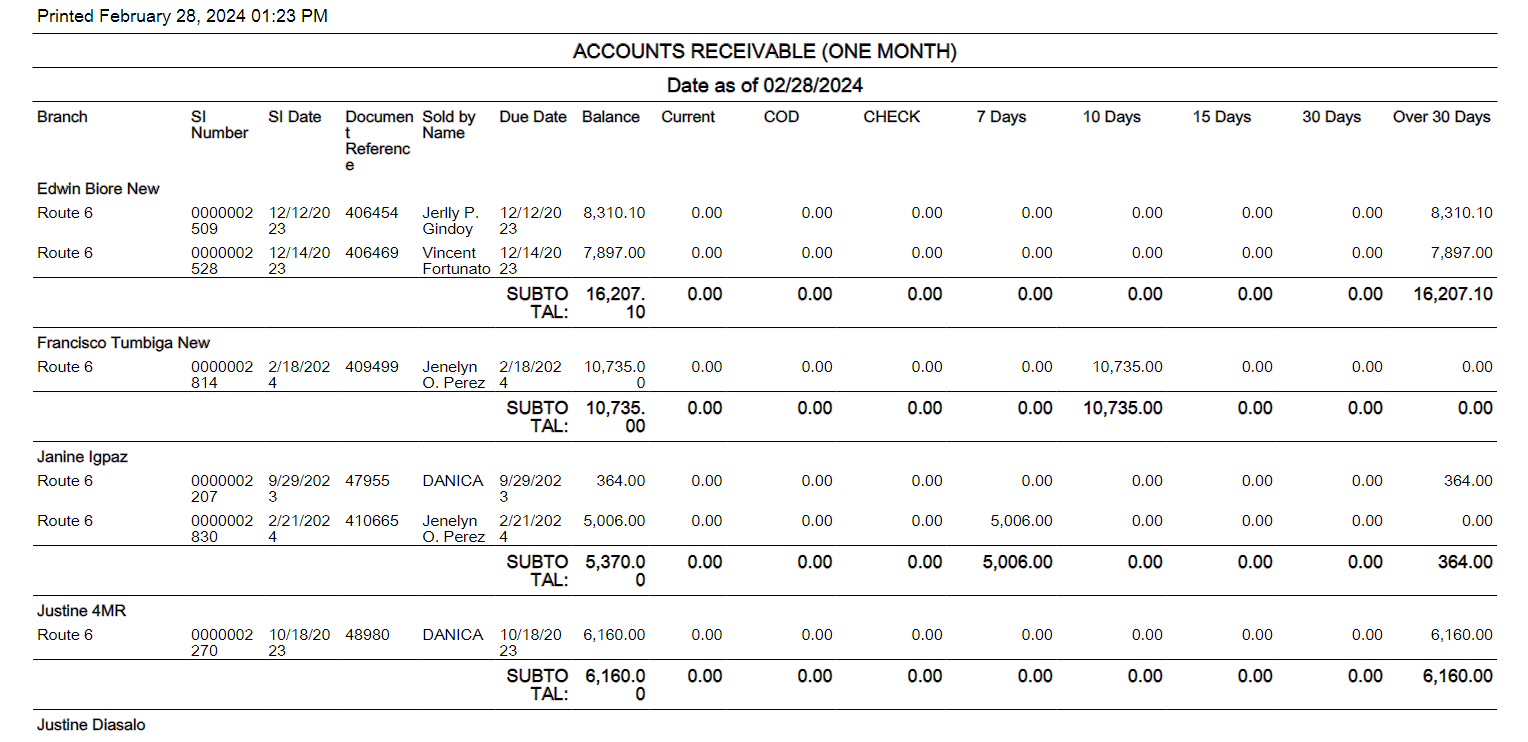
Sample Printout
- Download PDF (if needed): If you want to download the pdf, look for the download icon then click.
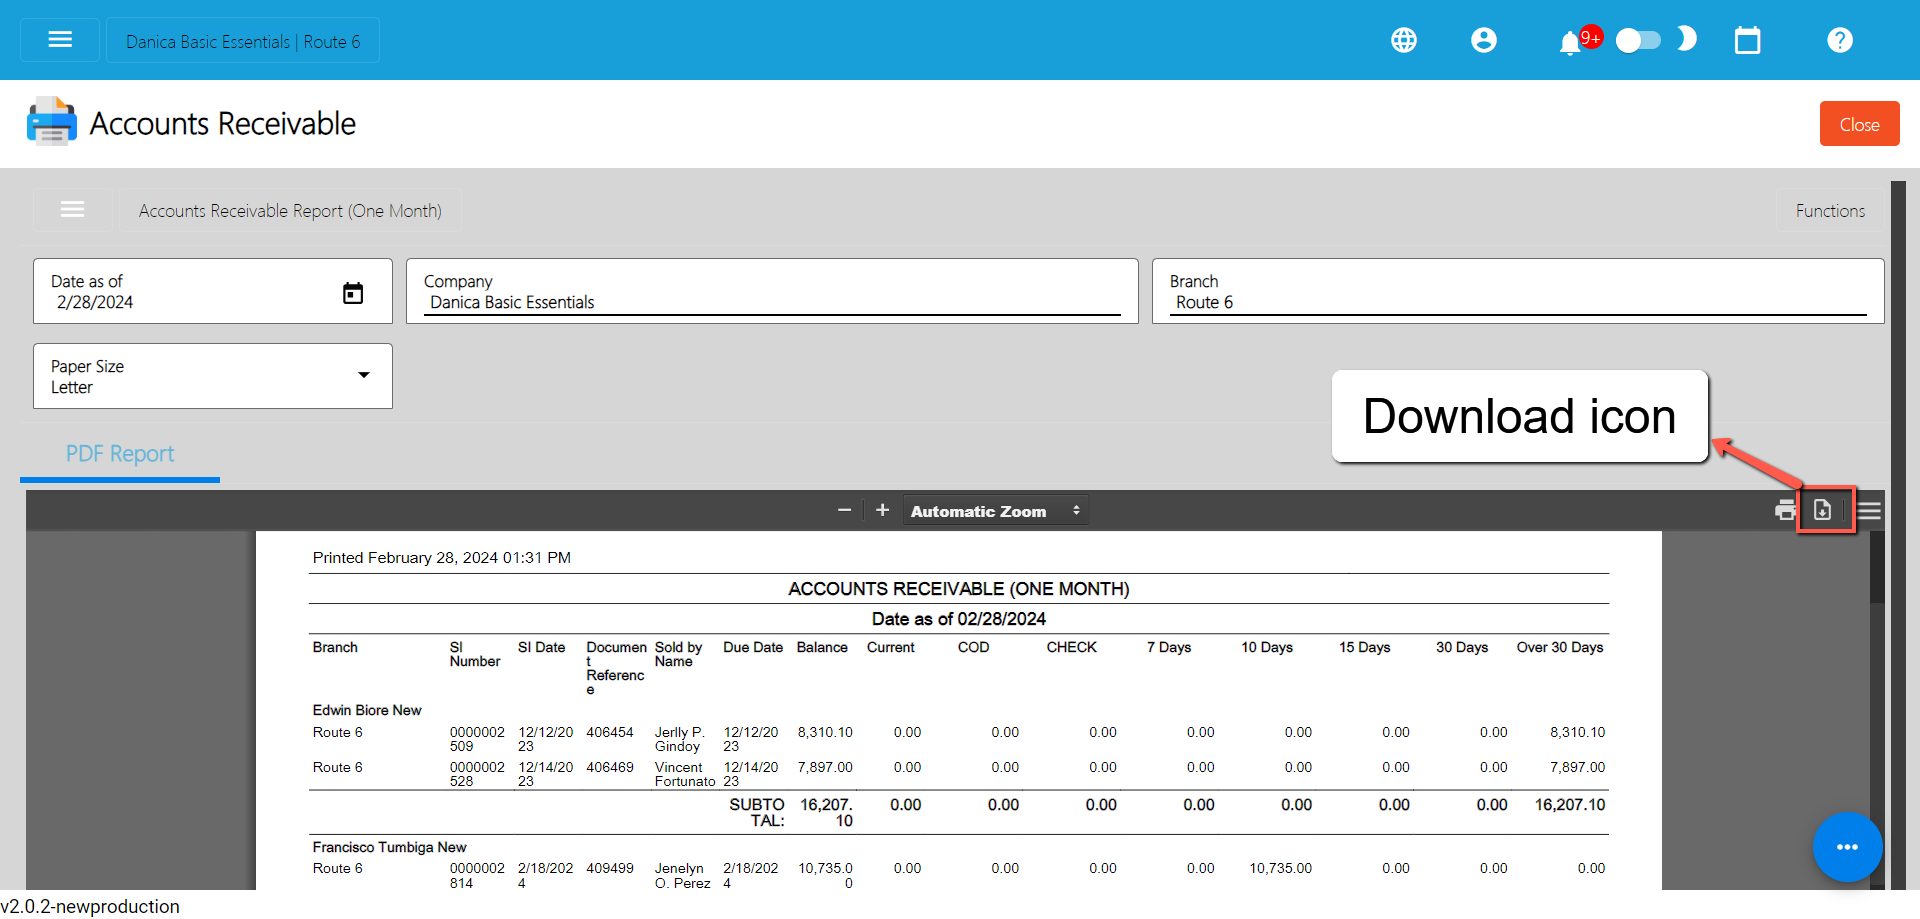
- Print PDF (if needed): If you want to print the pdf, look for the print icon then click.
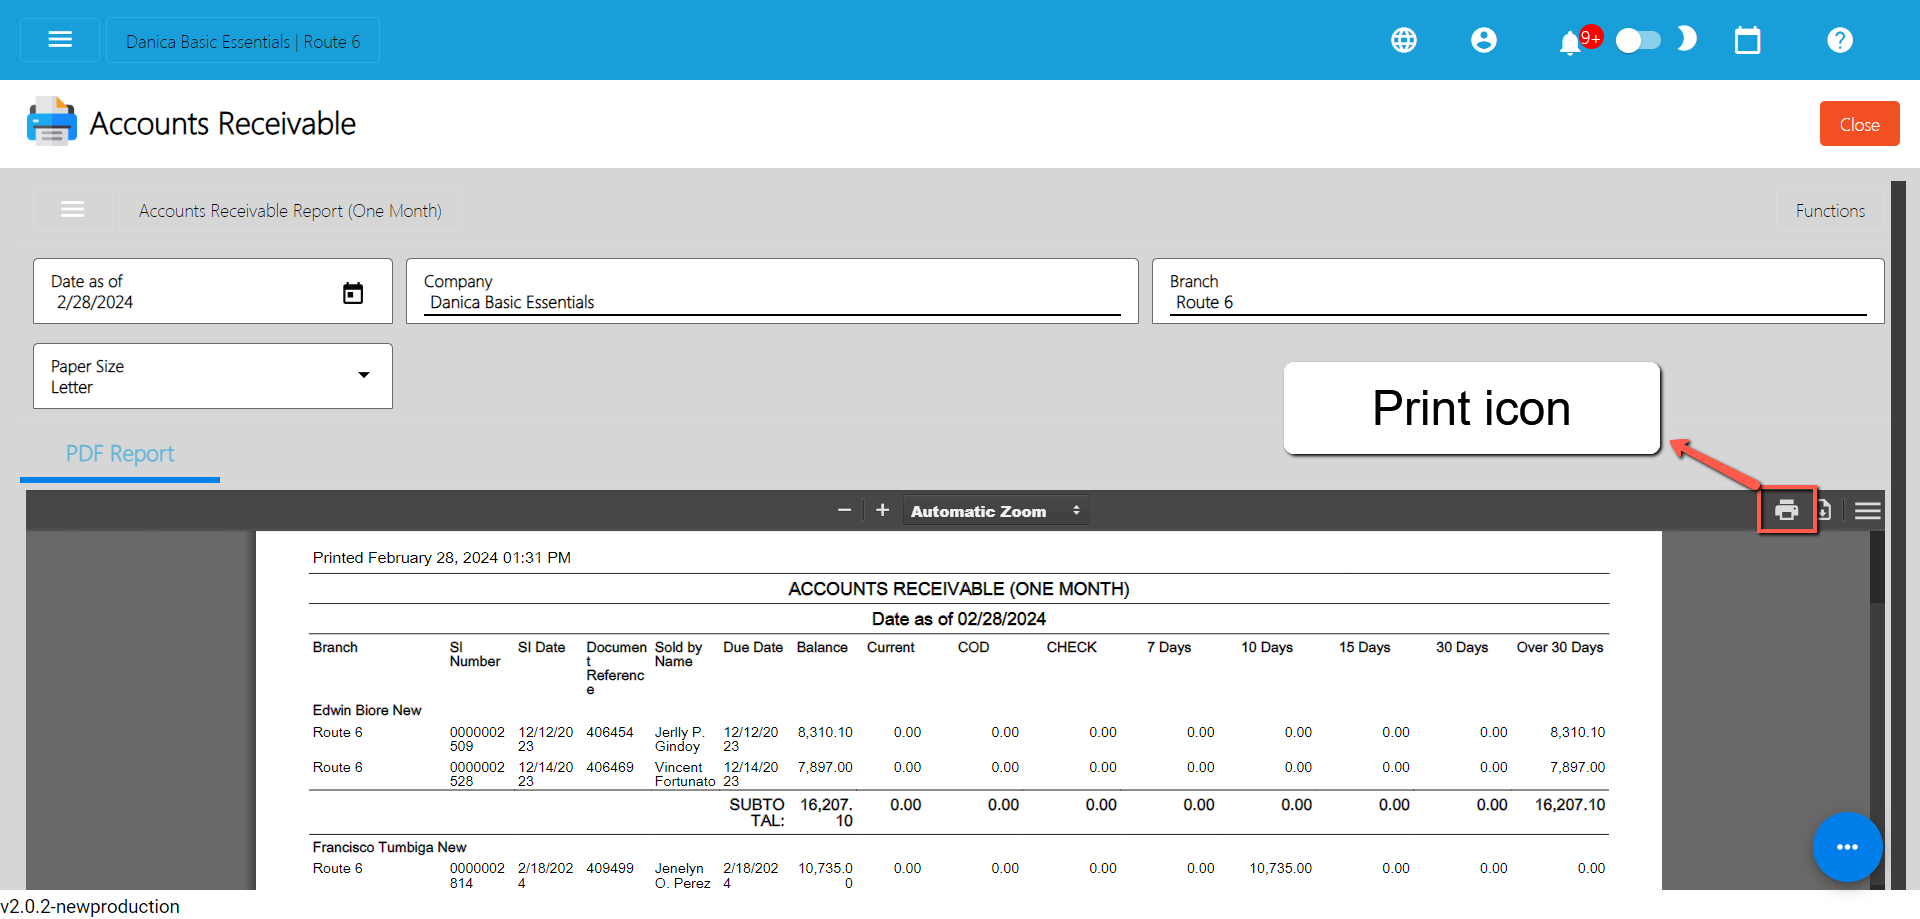
Statement of Account
Statement of Account is a financial document that provides a summary of transactions between a business and its customers over a specific period. It typically includes details such as invoice numbers, dates, document references, due dates, total amount owed, payments made, adjustments, and outstanding balances.
This statement helps both parties keep track of their financial obligations and activities, providing a clear record of what has been billed, paid, and is still outstanding. It serves as a crucial tool for reconciling accounts, resolving discrepancies, and ensuring accurate financial records.
To open or generate Statement of Account here are the steps to follow:
1. Go to Sales
2. Select Accounts Receivable
3. Click Statement of Account
4. Enter Date as of
5. Select branch you want to generate
6. Select Specific customer
7. You can have the option to Print or Download the PDF Report
Statement of Account (By Date Range)
The Statement of Account by Date Range is a report similar to the Statement of Account, allowing you to generate the total Accounts Receivable for a specific customer on a specified date.
To open or generate Statement of Account by Date Range here are the steps to follow:
1. Go to Sales
2. Select Accounts Receivable
3. Click Statement of Account by Date Range
4. Enter Start Date and End Date
5. Select branch you want to generate
6. Select Specific customer
7. You can have the option to Print or Download the PDF Report
Statement of Account By Term
The Statement of Account by Term is a specialized report designed to provide a comprehensive overview of a customer's accounts receivable based on specific payment terms. Similar to the Statement of Account by Date Range, this report allows you to view the total amount owed by the customer, but it categorizes this information according to the agreed-upon payment terms, such as 7 days, 15 days, 30 days, etc. By specifying a date, you can generate this report for a particular period, enabling you to track and manage receivables efficiently.
To generate Statement of Account by Term report, here are the steps for you to follow:
- Go to Sales modules: Navigate to Sales modules, then select Accounts Receivable.
- Click Statement of Account by Term: Under the menus from Accounts Receivable, look for Statement of Account by Term then click the menu to navigate.
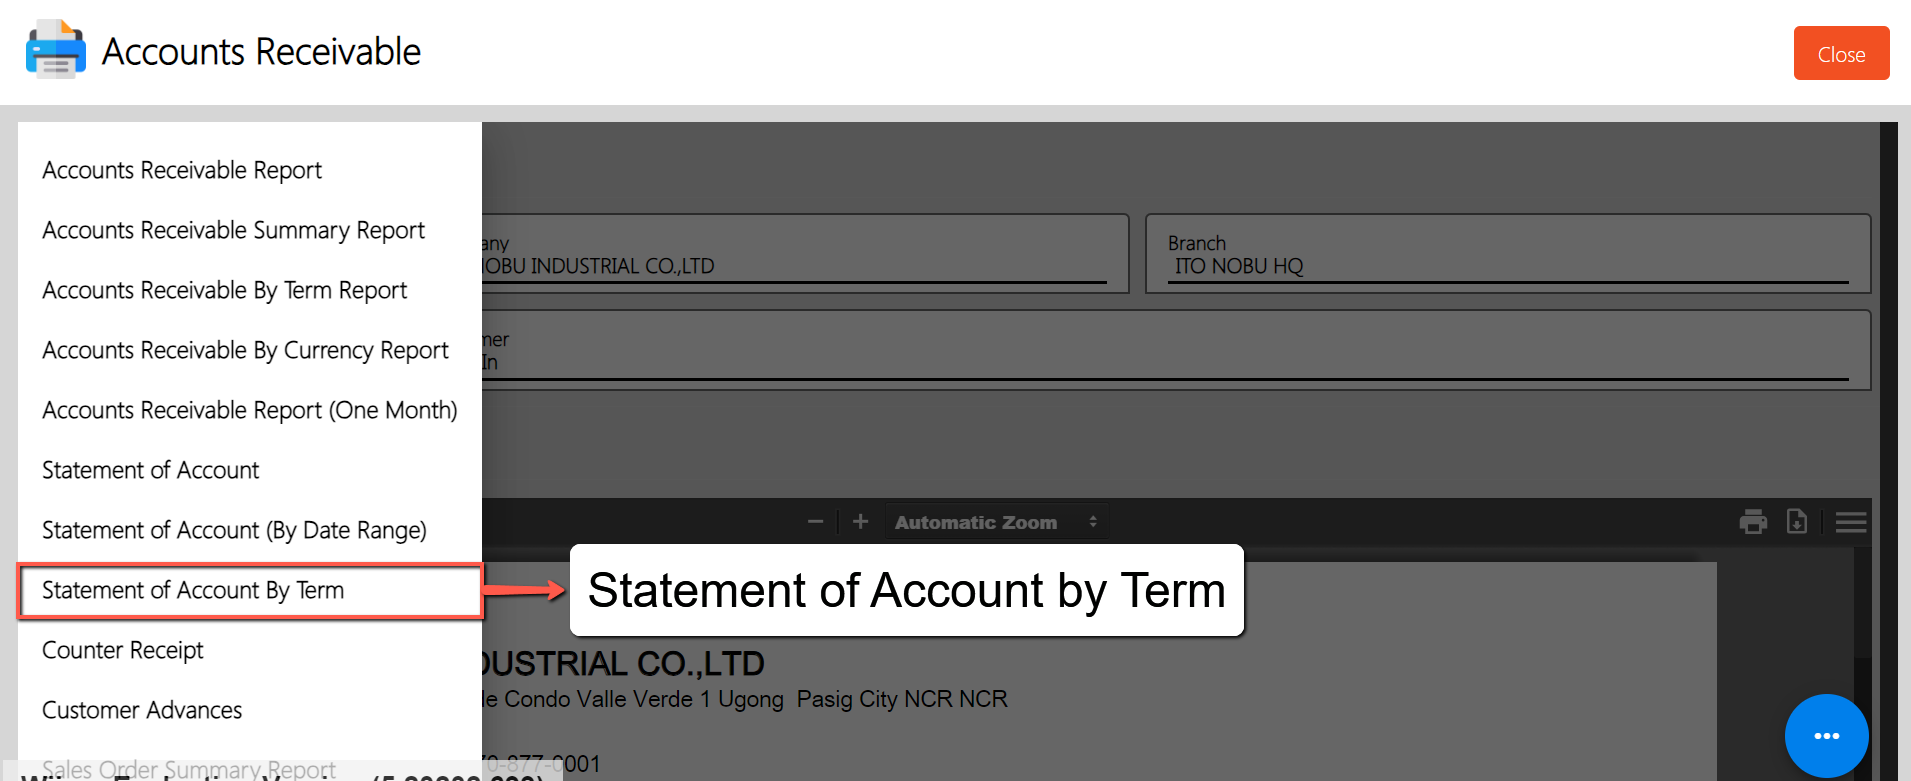
- Select Date as of: Provide an exact date you want to generate a report by clicking on the Date as of field, then select an exact date.
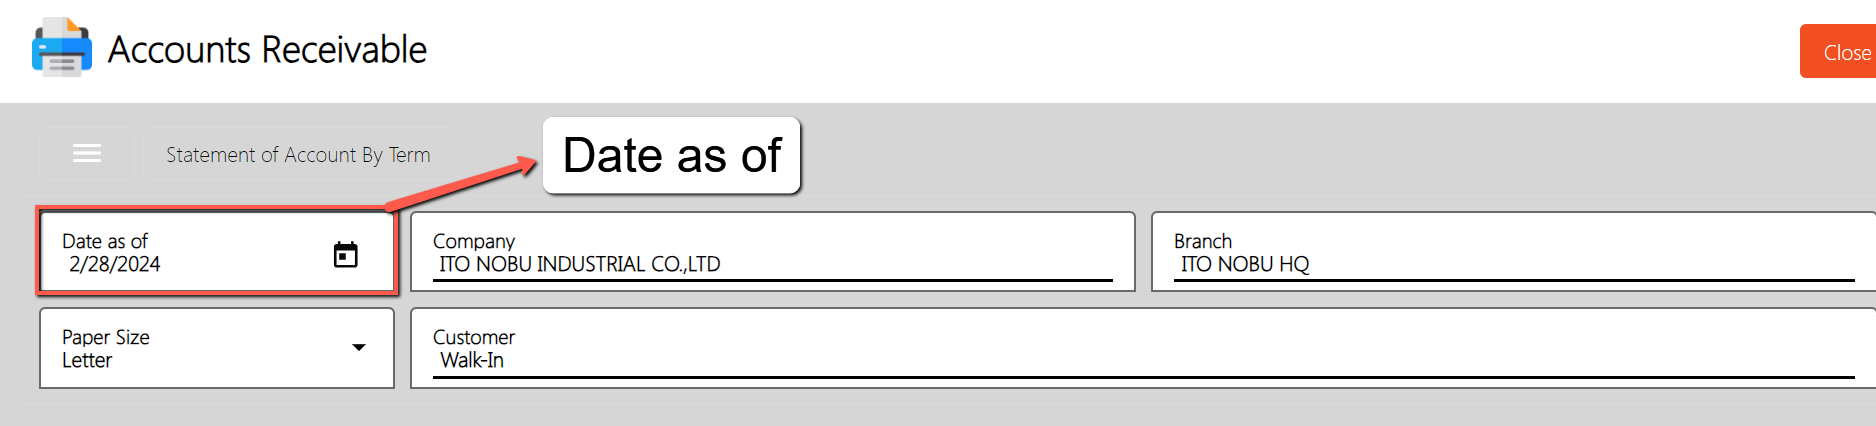
- Select a Customer: To display data on the pdf, select a Customer you want to generate a Statement of Account by Term report.
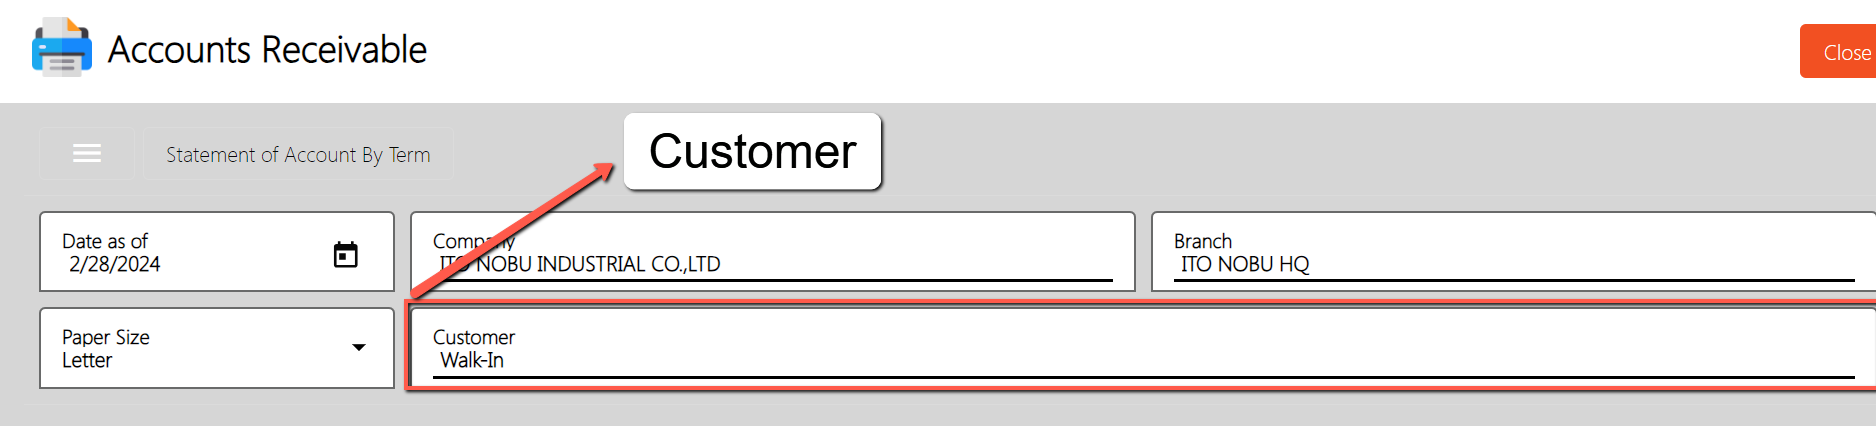
- Select a Branch (if needed): By default, the value of the Branch field is based on your login branch.
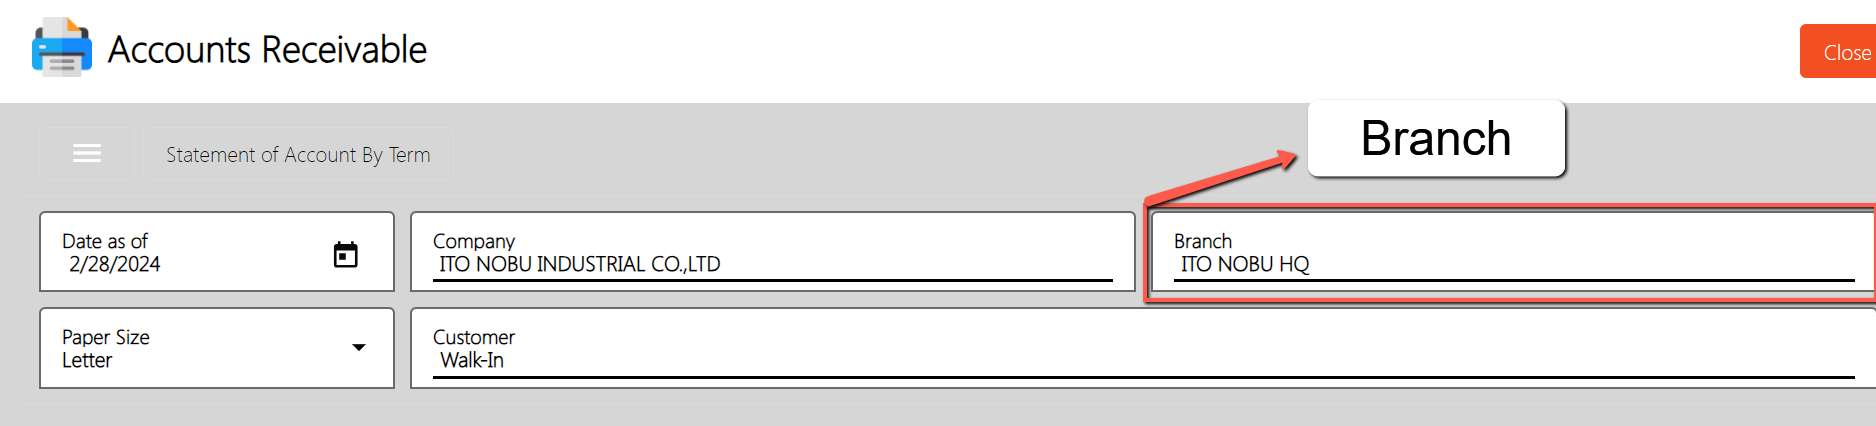
- PDF Report is automatically generated: After providing the Date as of and the Branch, the PDF Report will automatically generated.
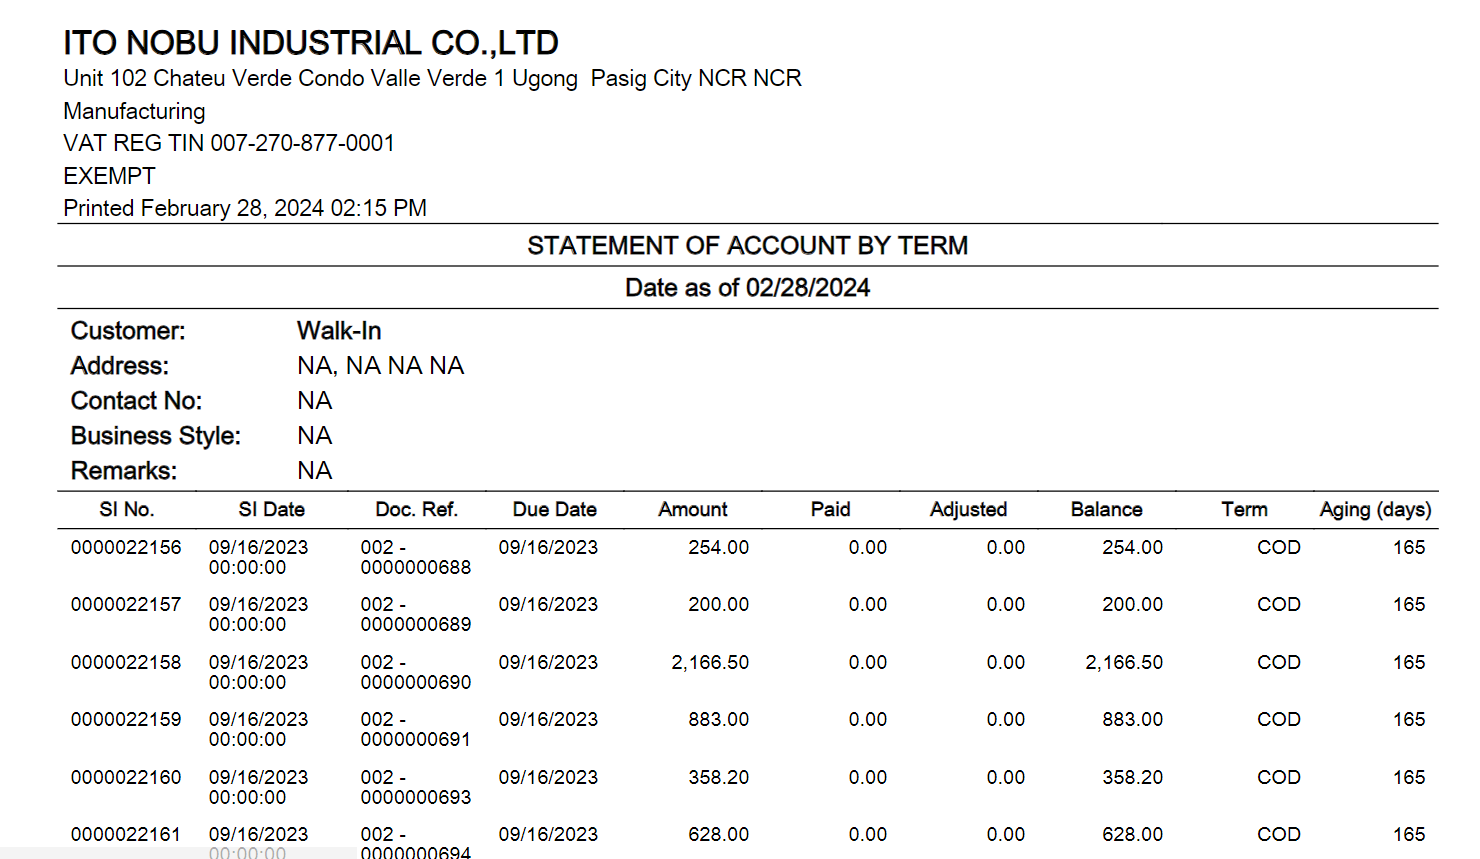
Sample Printout
- Download PDF (if needed): If you want to download the pdf, look for the download icon then click.
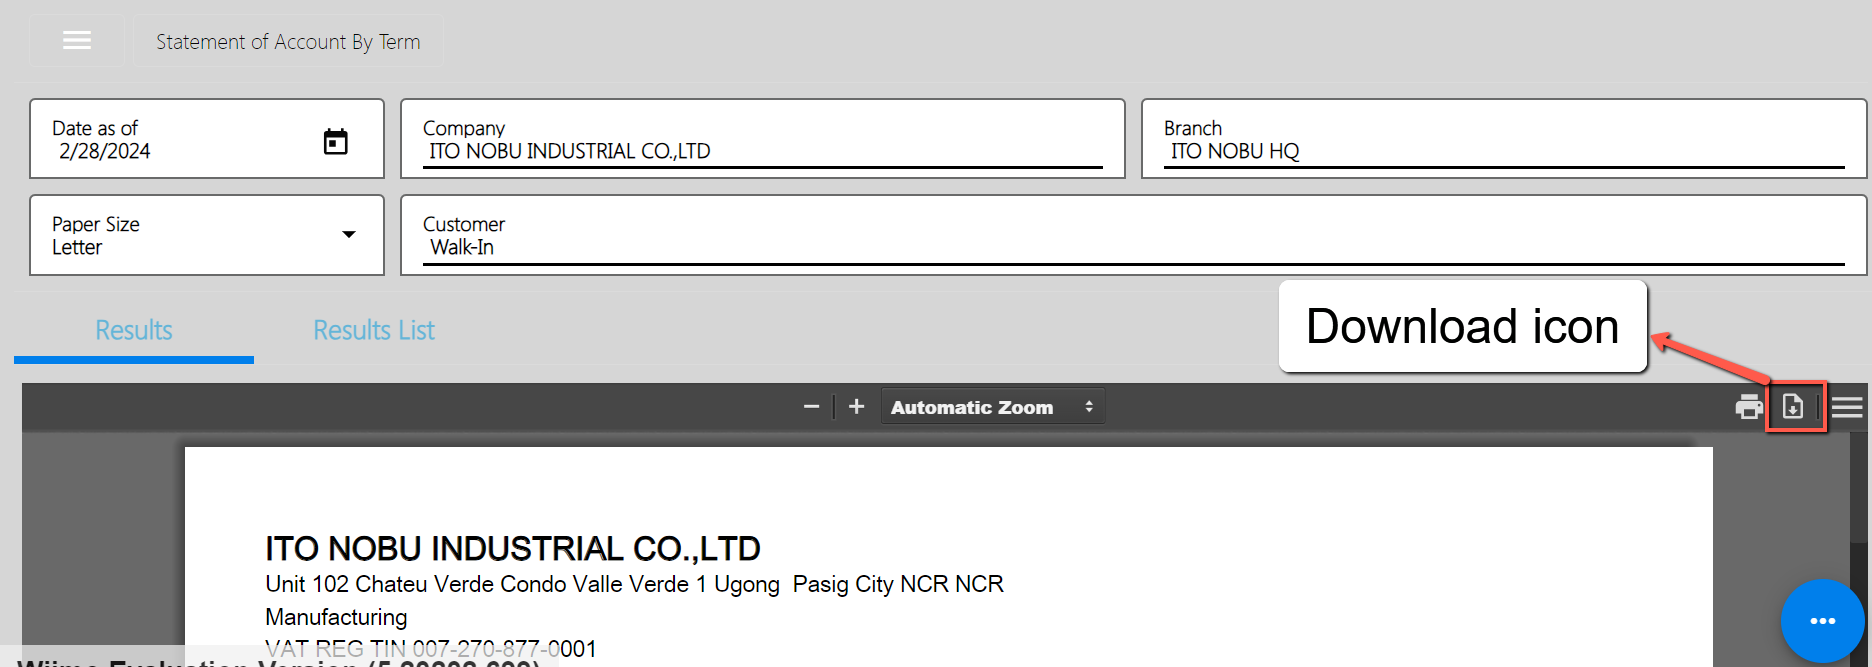
- Print PDF (if needed): If you want to print the pdf, look for the print icon then click.
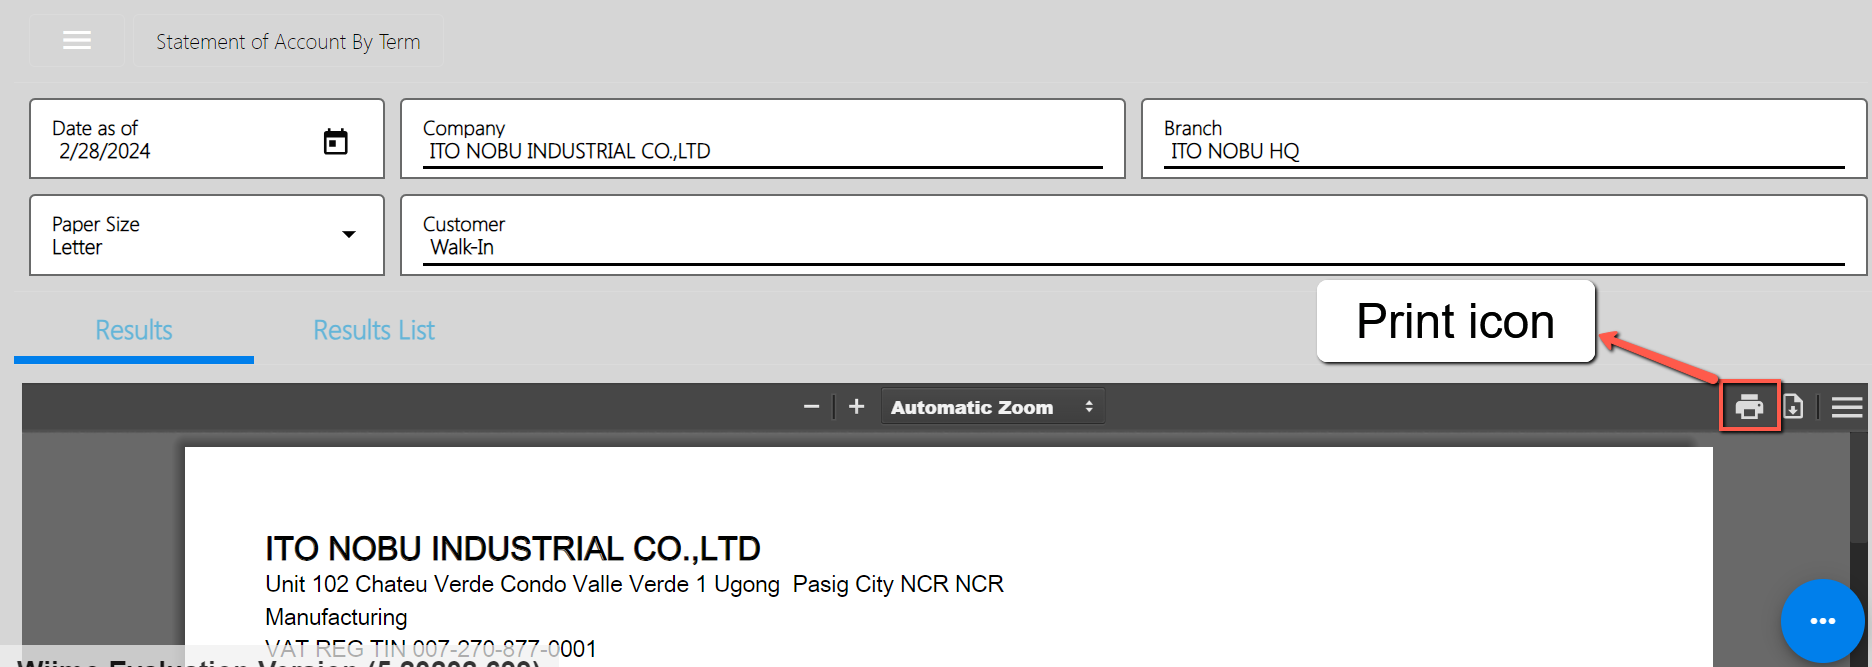
Counter Receipt
A Counter Receipt is a document issued by a company to acknowledge the payment received from a customer or client at the company's physical location, such as a storefront or office counter. This receipt serves as proof of payment and typically includes details such as the payment amount, date, customer name, invoice number (if applicable), and any other relevant transaction information. It provides both the company and the customer with a record of the payment made, aiding in accurate accounting and reconciliation of accounts receivable.
To generate Counter Receipt report, here are the steps for you to follow:
- Go to Sales modules: Navigate to Sales modules, then select Accounts Receivable.
- Click Counter Receipt : Under the menus from Accounts Receivable, look for Counter Receipt then click the menu to navigate.
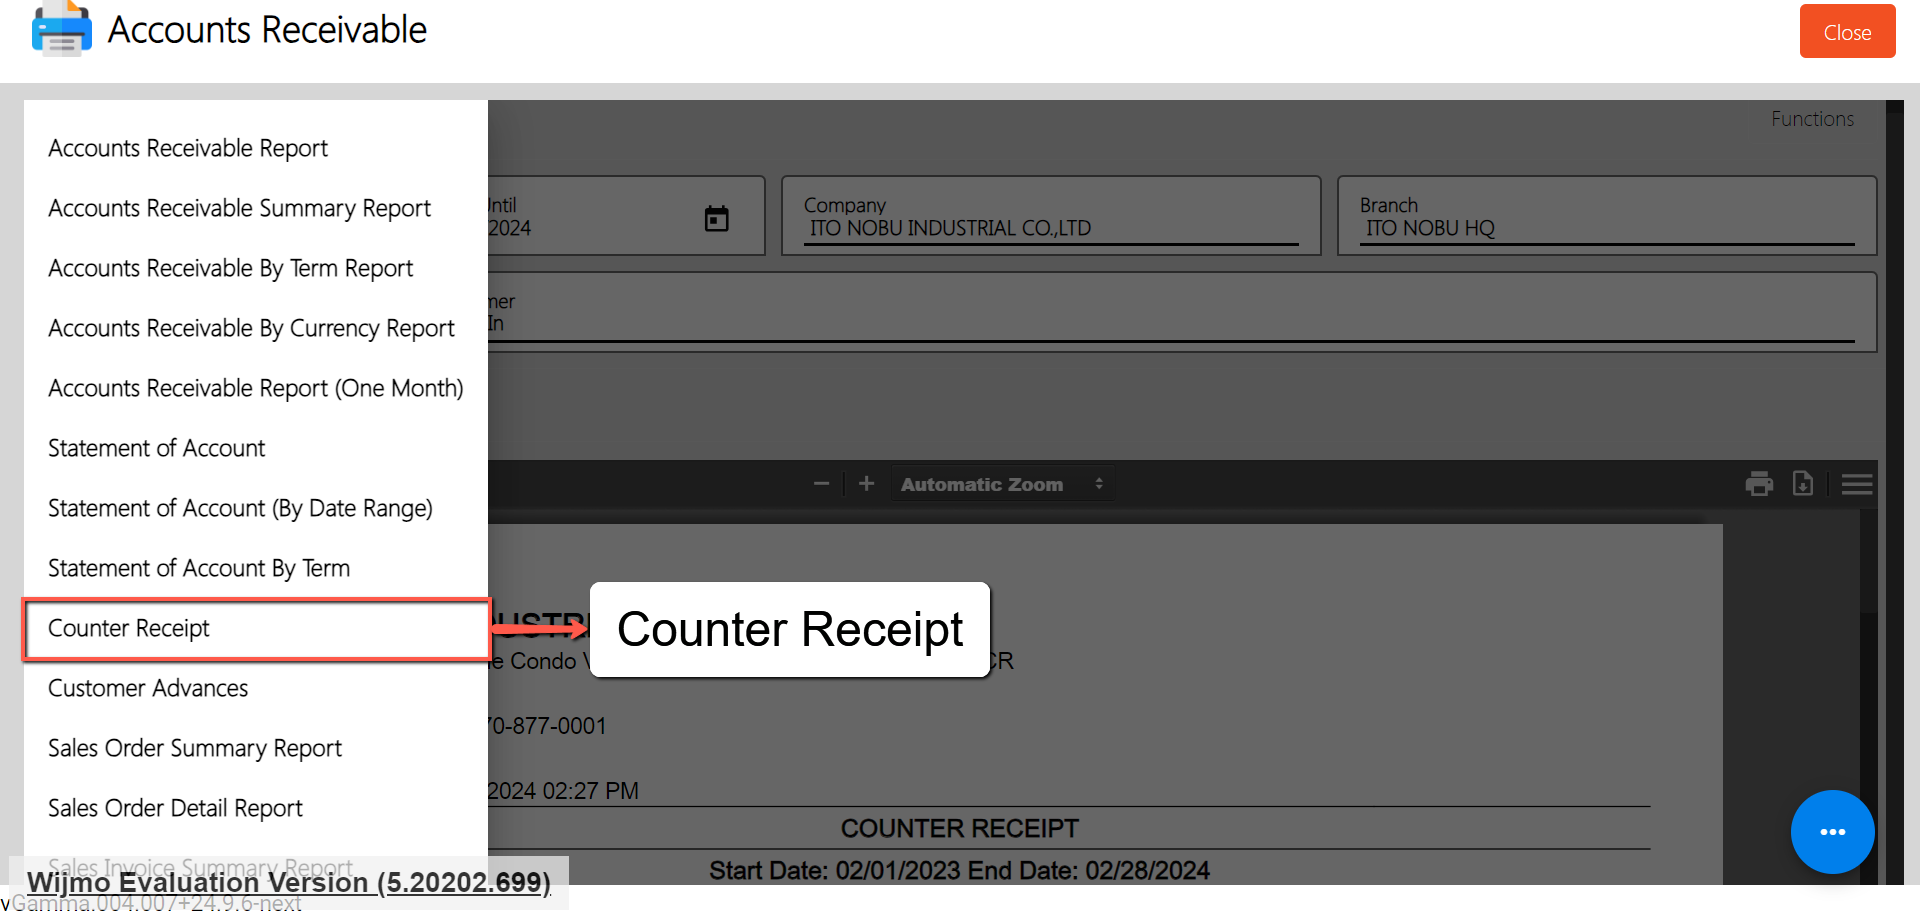
- Select Date From and Date Until: Provide an exact date you want to generate a report by clicking on the Date From and Date Until.
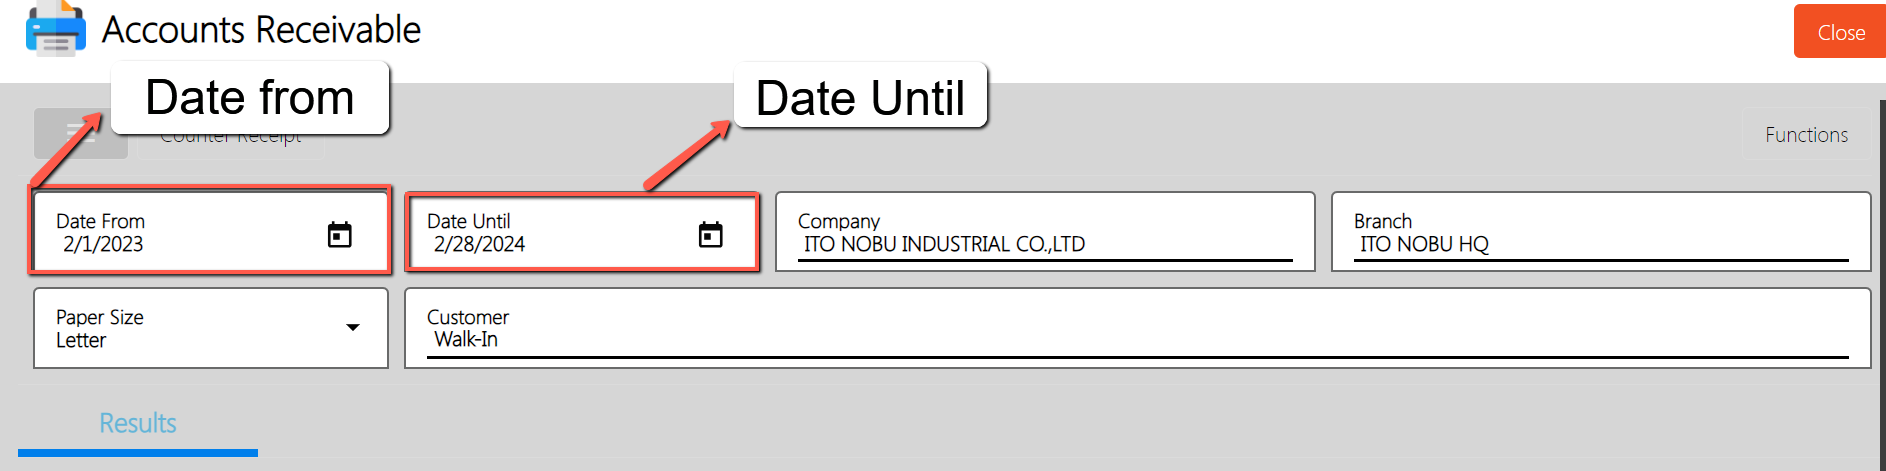
- Select a Customer: To display data on the pdf, select a Customer you want to generate a Counter Receipt report.
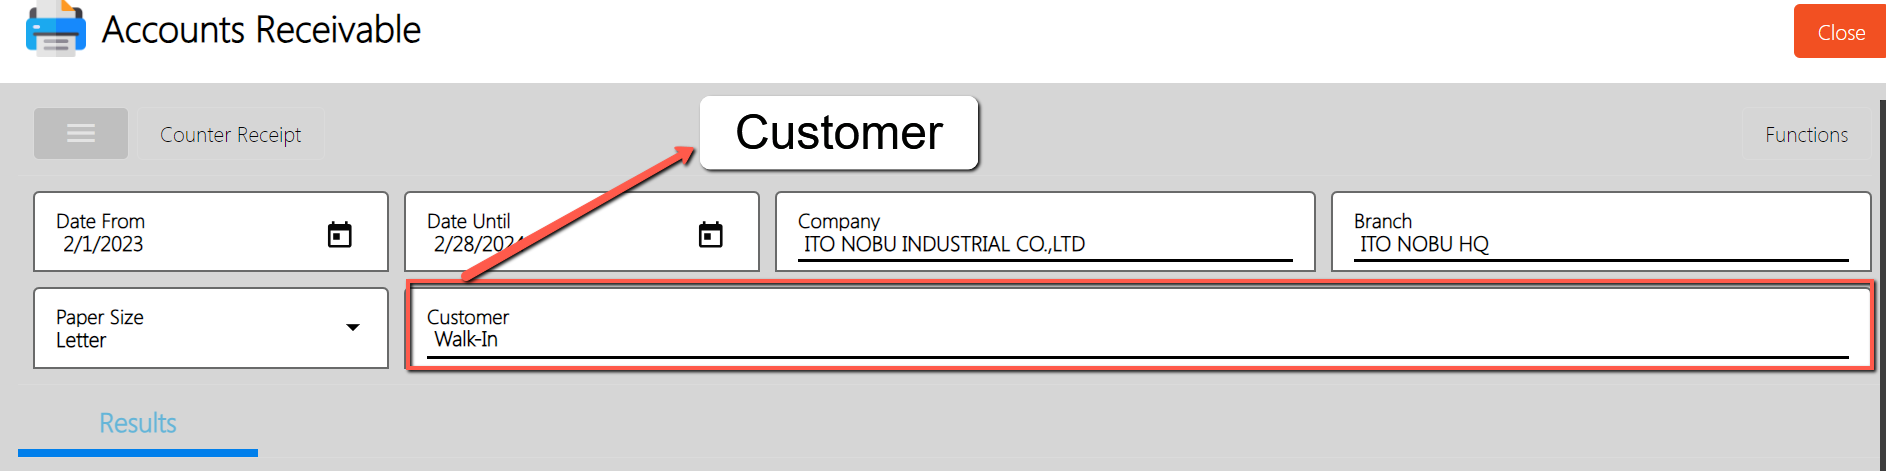
- Select a Branch (if needed): By default, the value of the Branch field is based on your login branch.
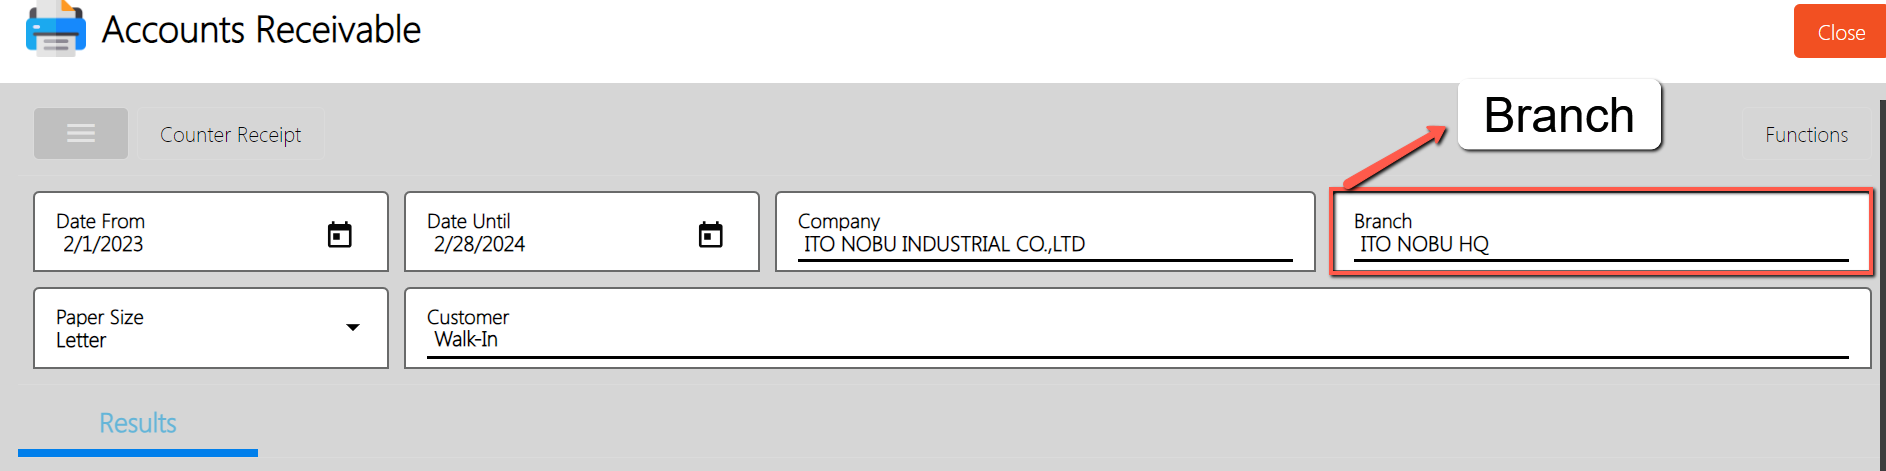
- PDF Report is automatically generated: After providing the Date as of and the Branch, the PDF Report will automatically generated.
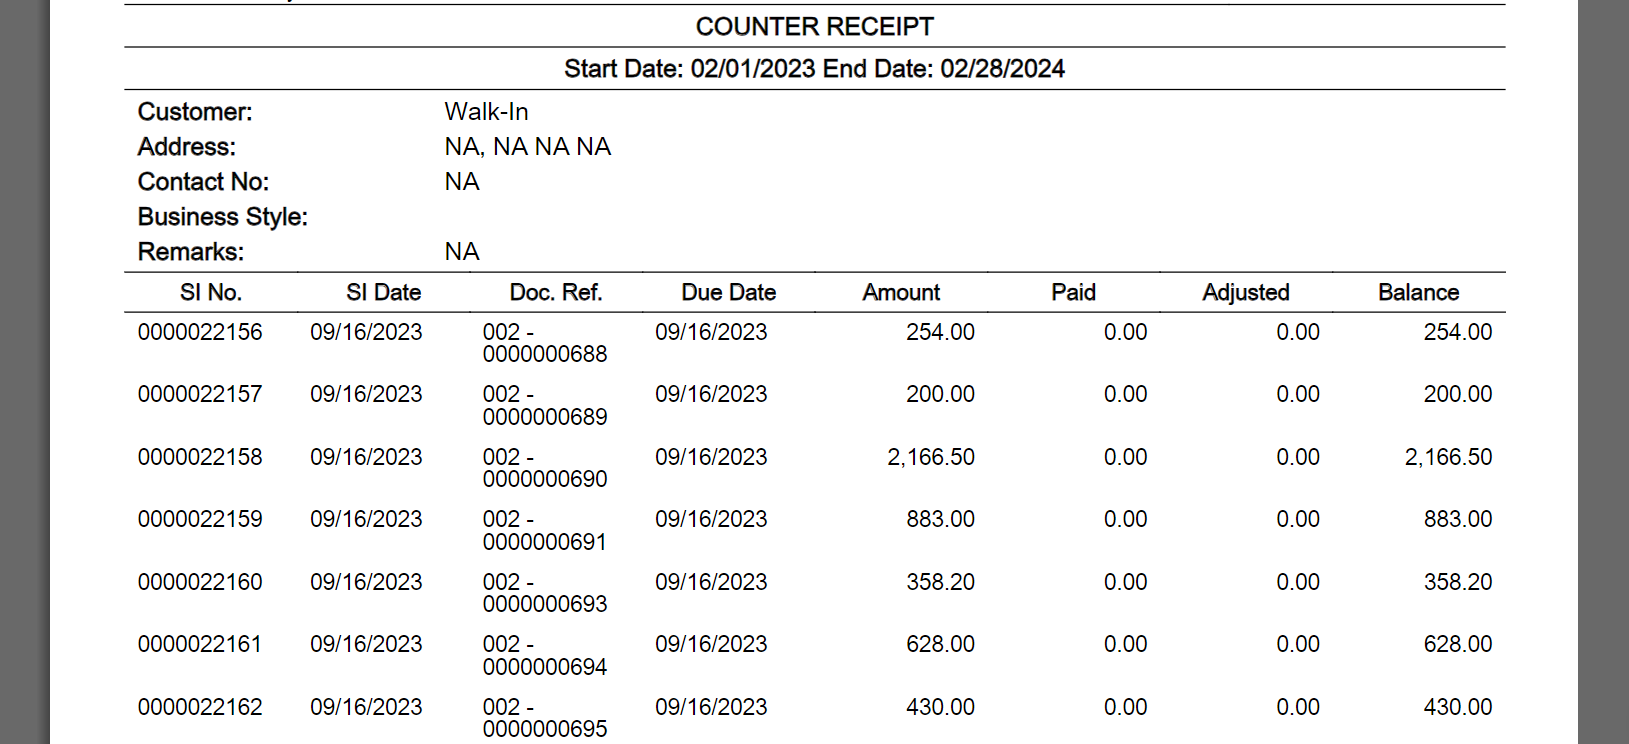
Sample Printout
- Download PDF (if needed): If you want to download the pdf, look for the download icon then click.
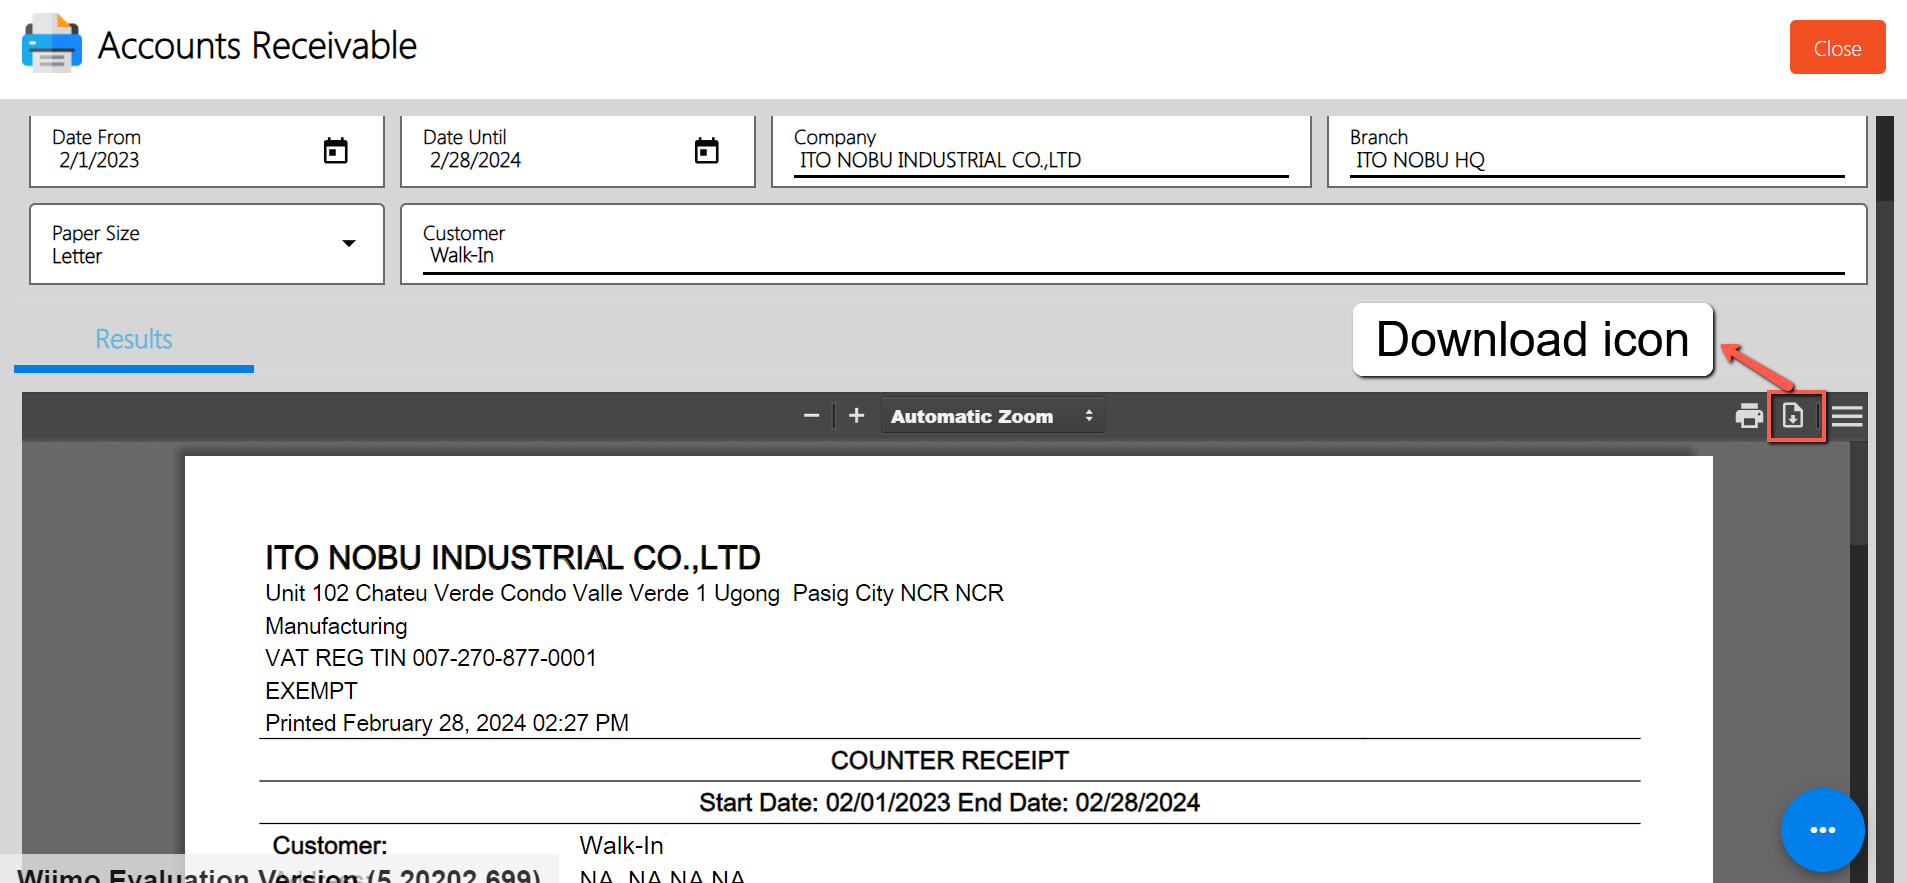
- Print PDF (if needed): If you want to print the pdf, look for the print icon then click.
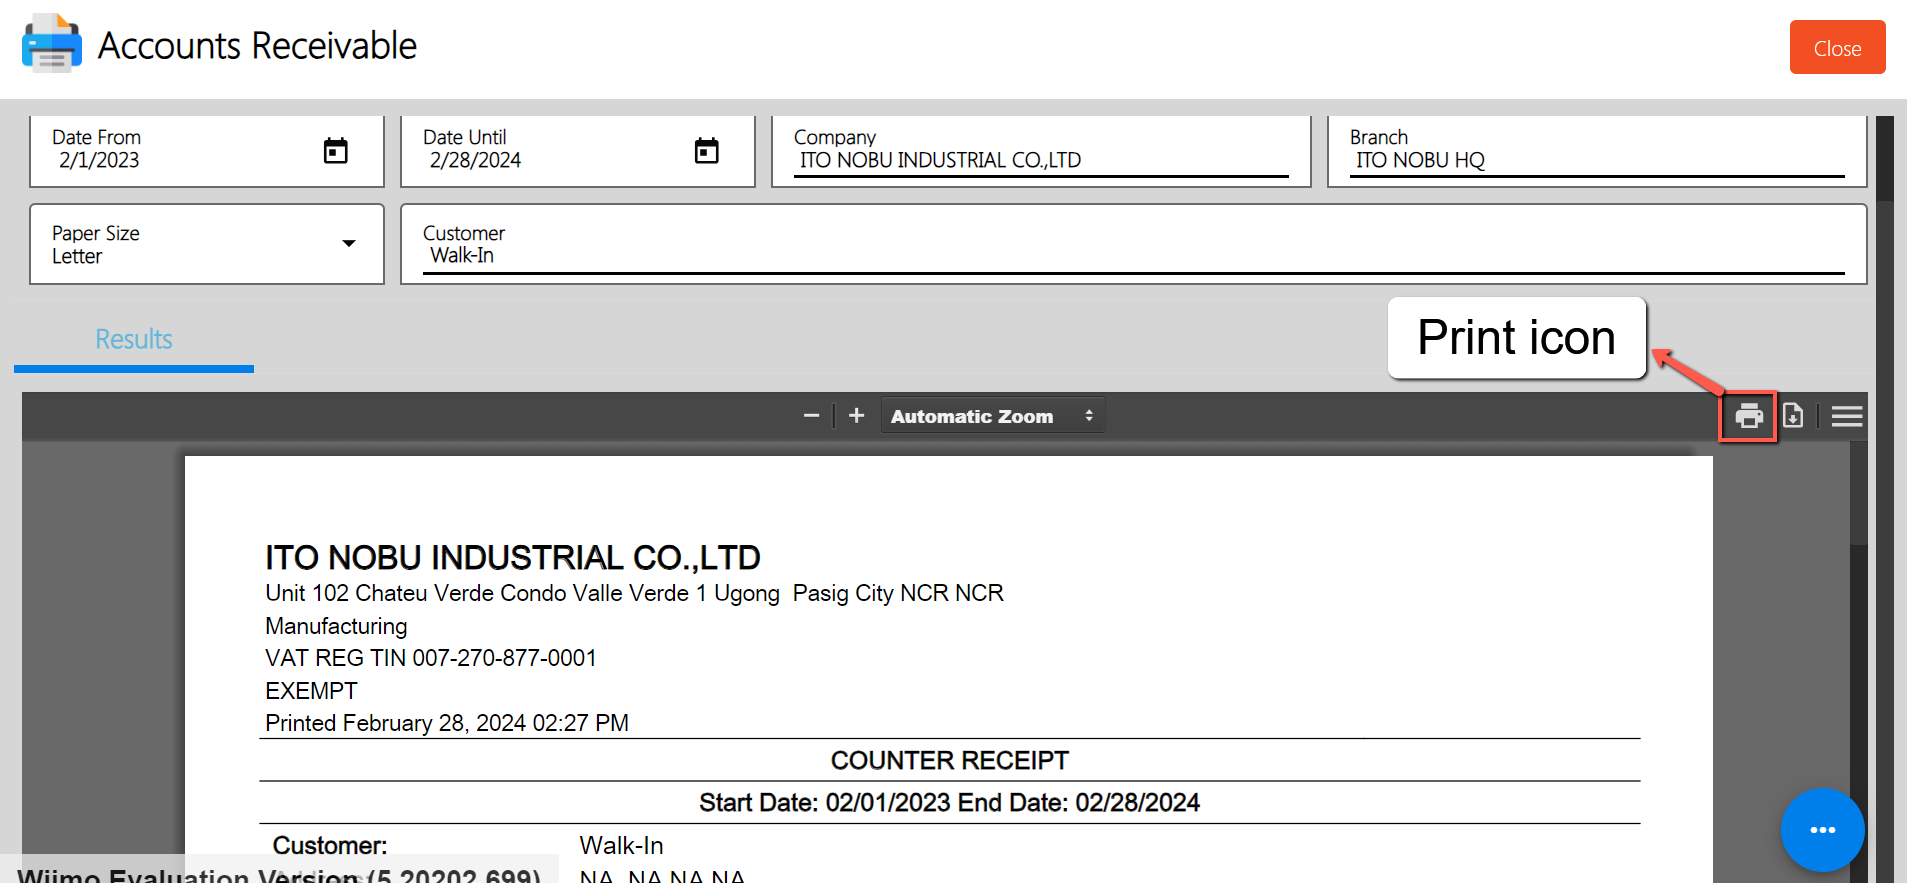
Customer Advances
The Customer Advances Report provides a comprehensive overview of all customer advance transactions within a specified period. It allows businesses to track the status of customer advances, identify outstanding balances, and monitor trends over time. Additionally, by leveraging this report, businesses can effectively manage their customer advance transactions and optimize their cash flow management strategies.
To generate Counter Receipt report, here are the steps for you to follow:
- Go to Sales modules: Navigate to Sales modules, then select Accounts Receivable.
- Click Customer Advances: Under the menus from Accounts Receivable, look for Customer Advances then click the menu to navigate.
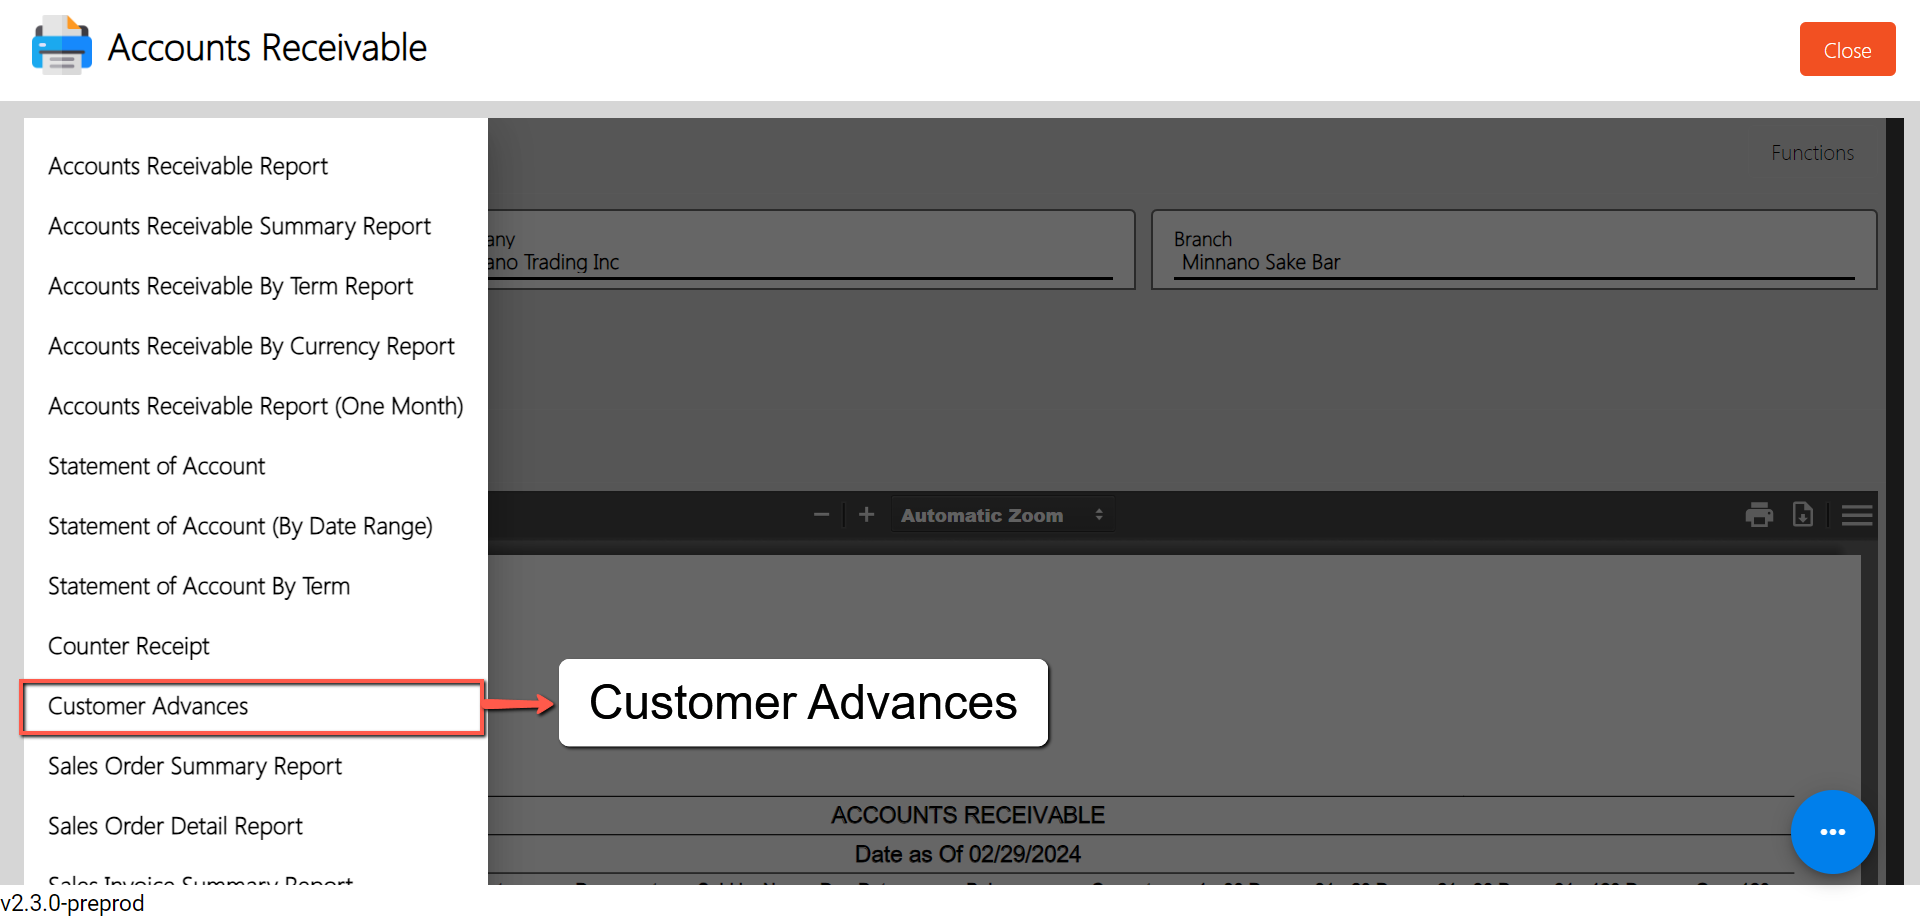
- Select Date as of: Provide an exact date you want to generate a report by clicking on the Date as of.
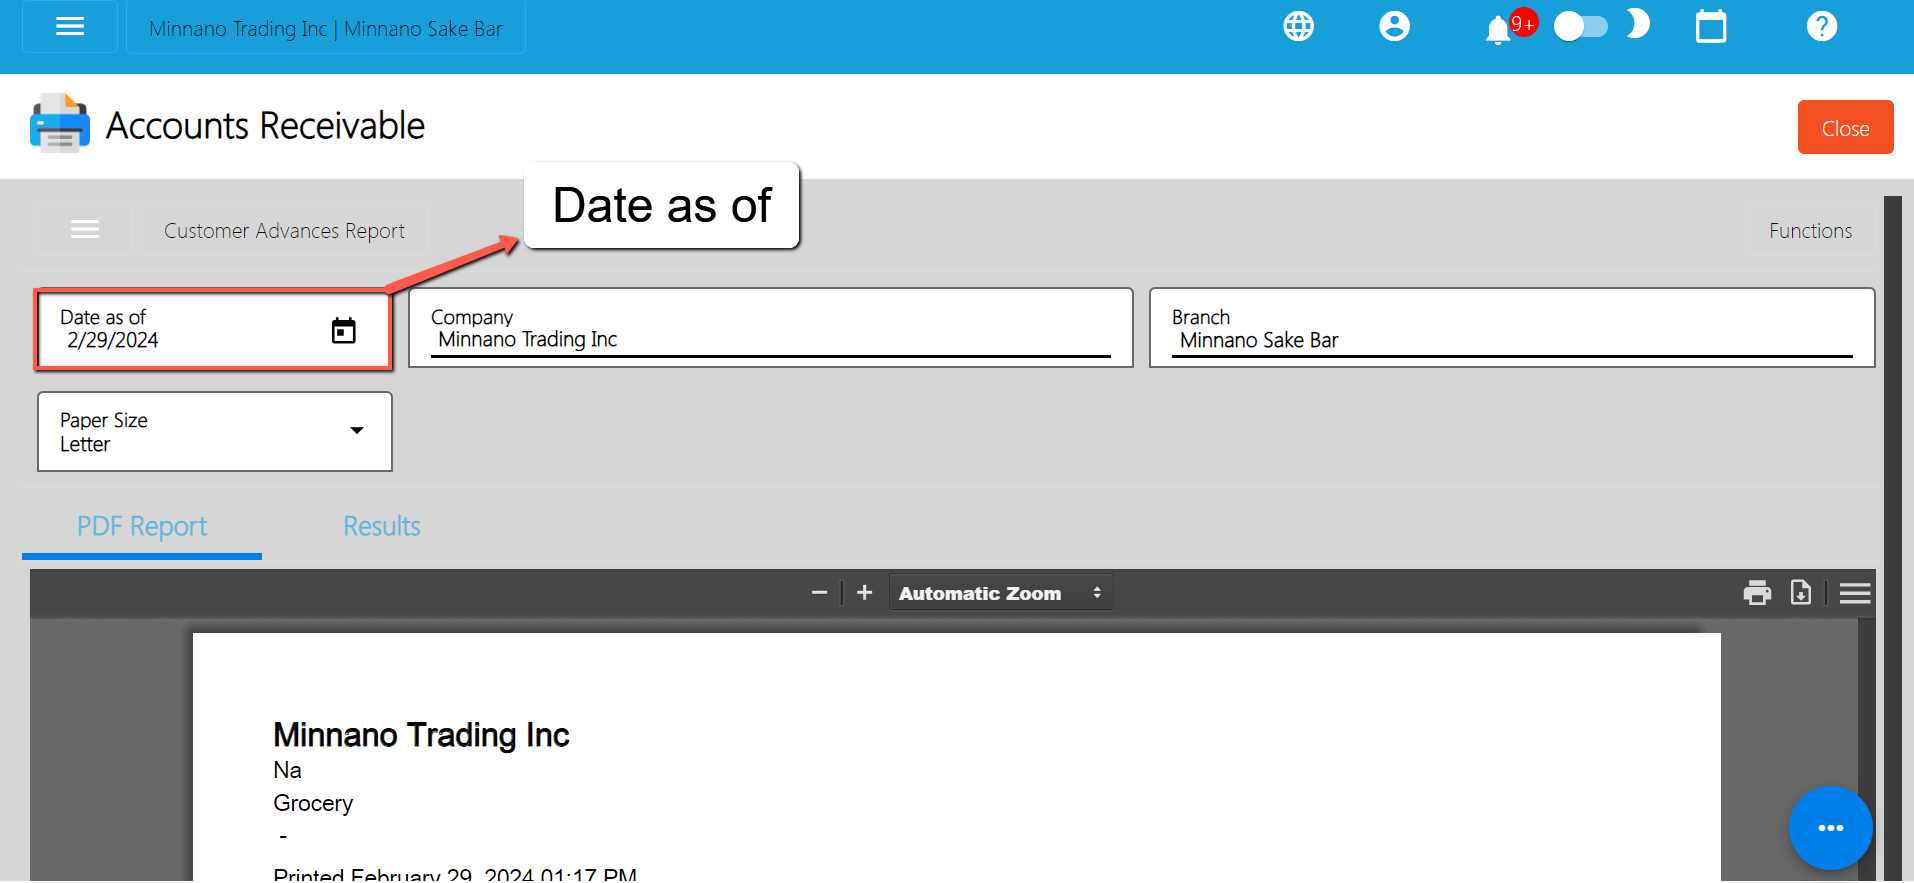
- Select a Branch (if needed): By default, the value of the Branch field is based on your login branch.
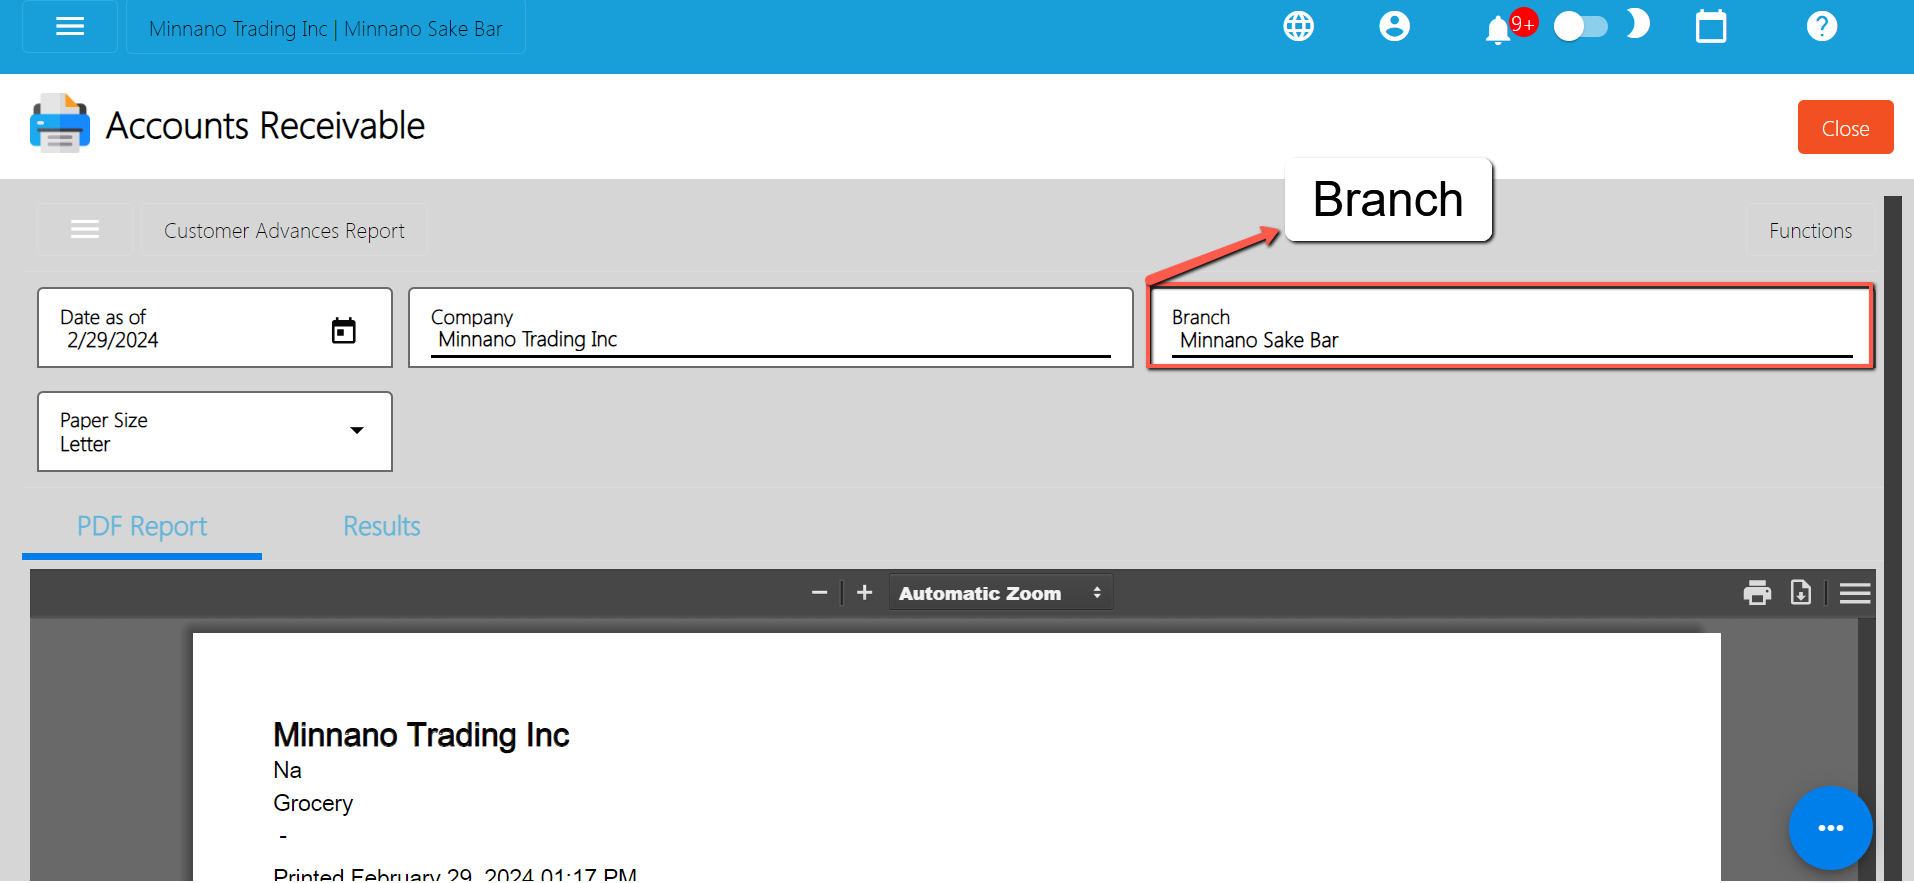
- PDF Report is automatically generated: After providing the Date as of and the Branch, the PDF Report will automatically generated.
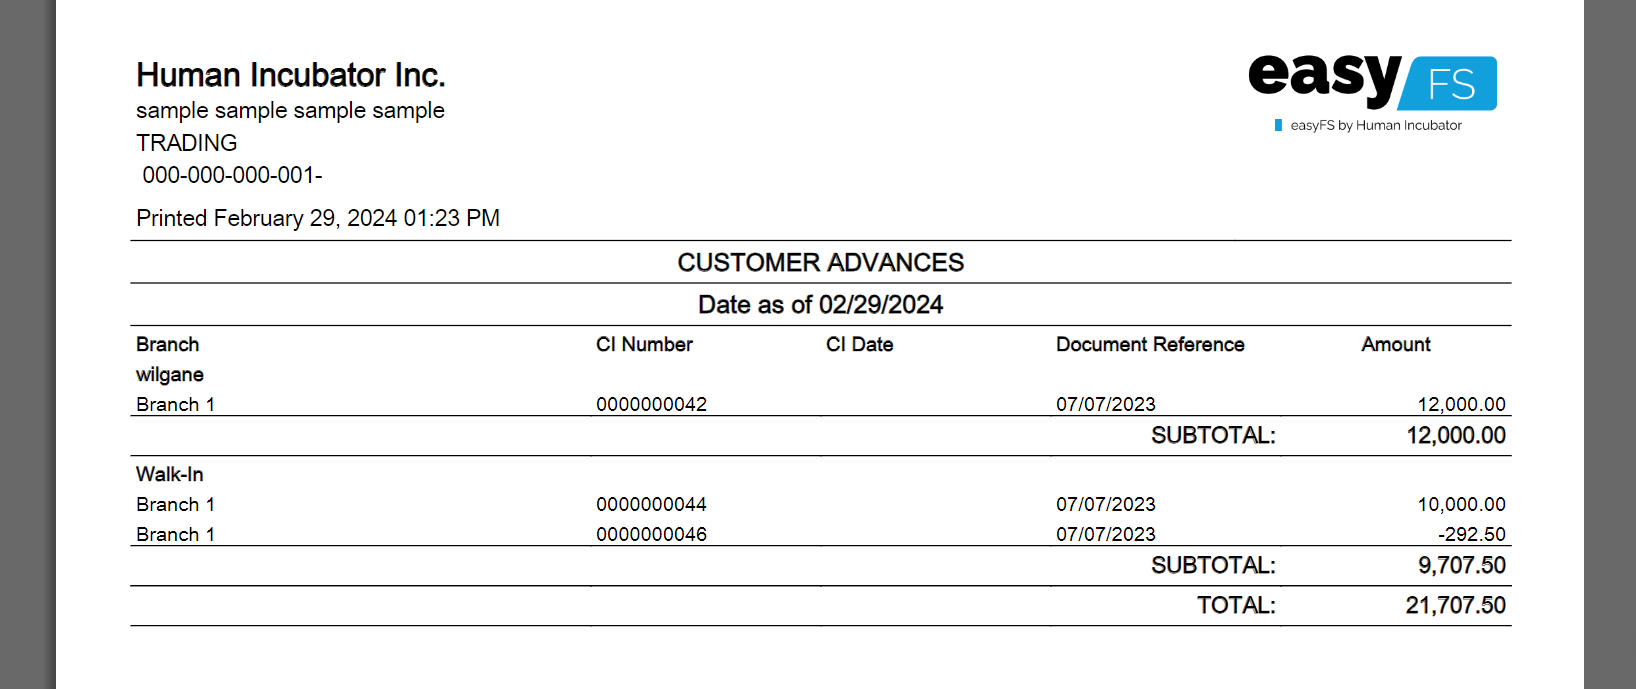
Sample Printout
- Download PDF (if needed): If you want to download the pdf, look for the download icon then click.
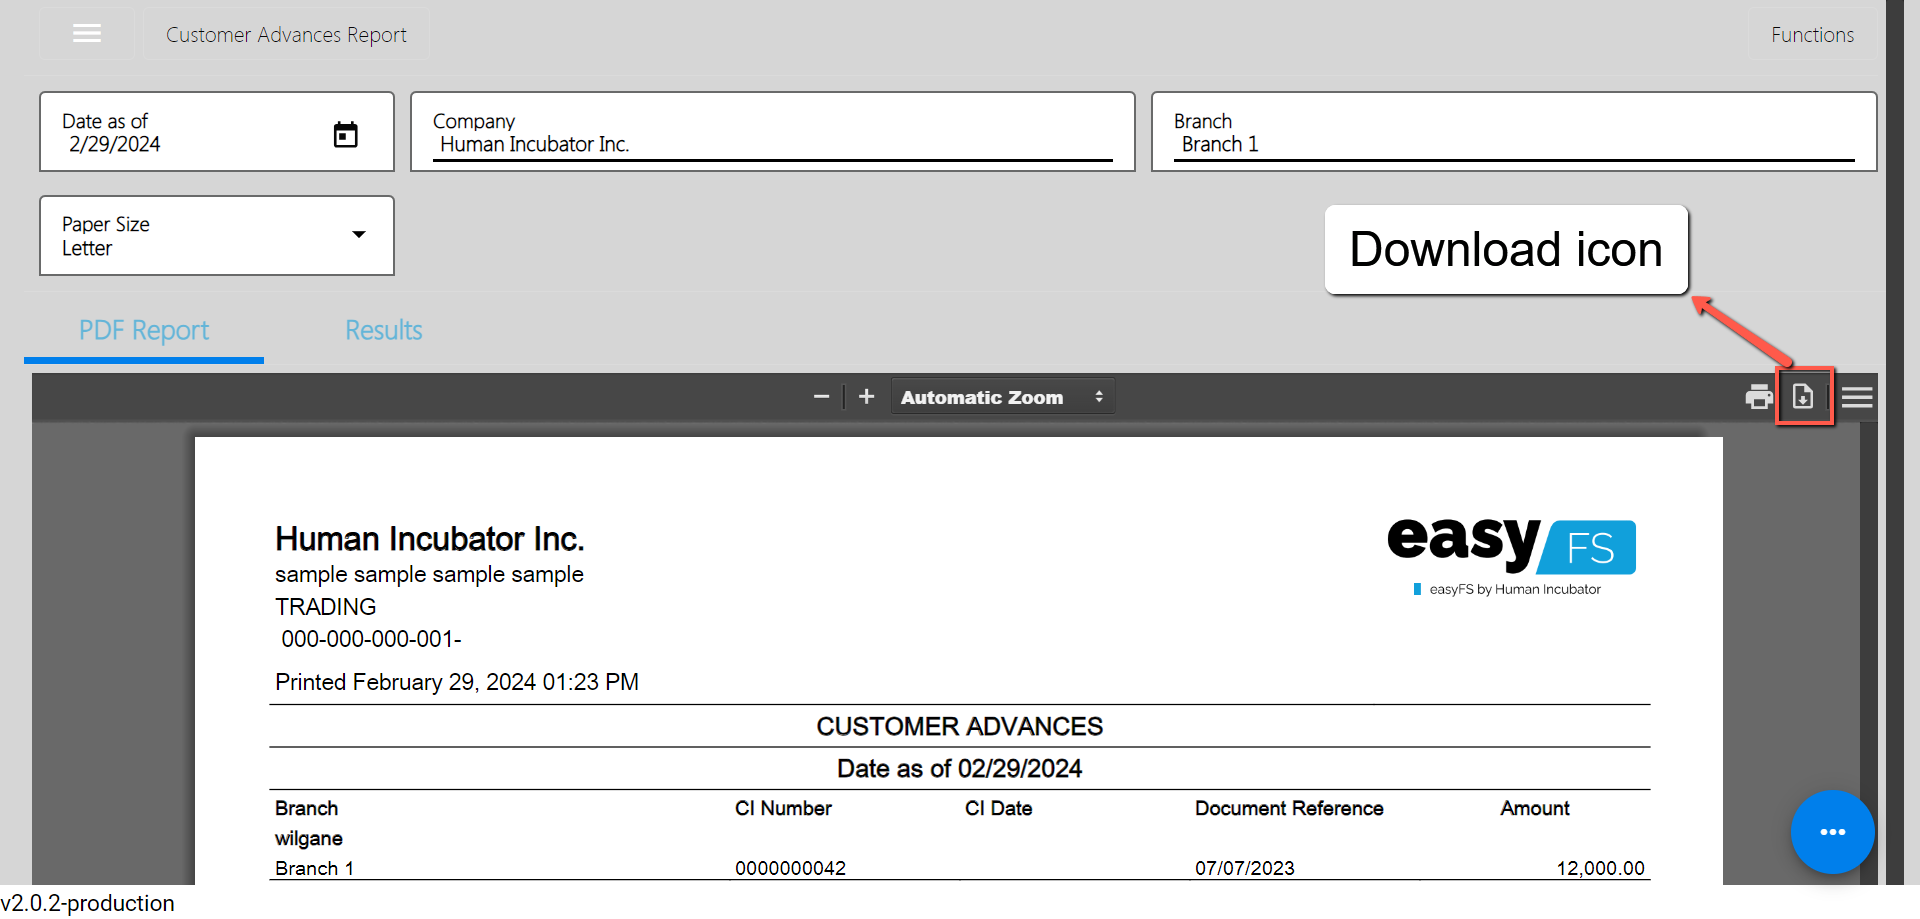
- Print PDF (if needed): If you want to print the pdf, look for the print icon then click.
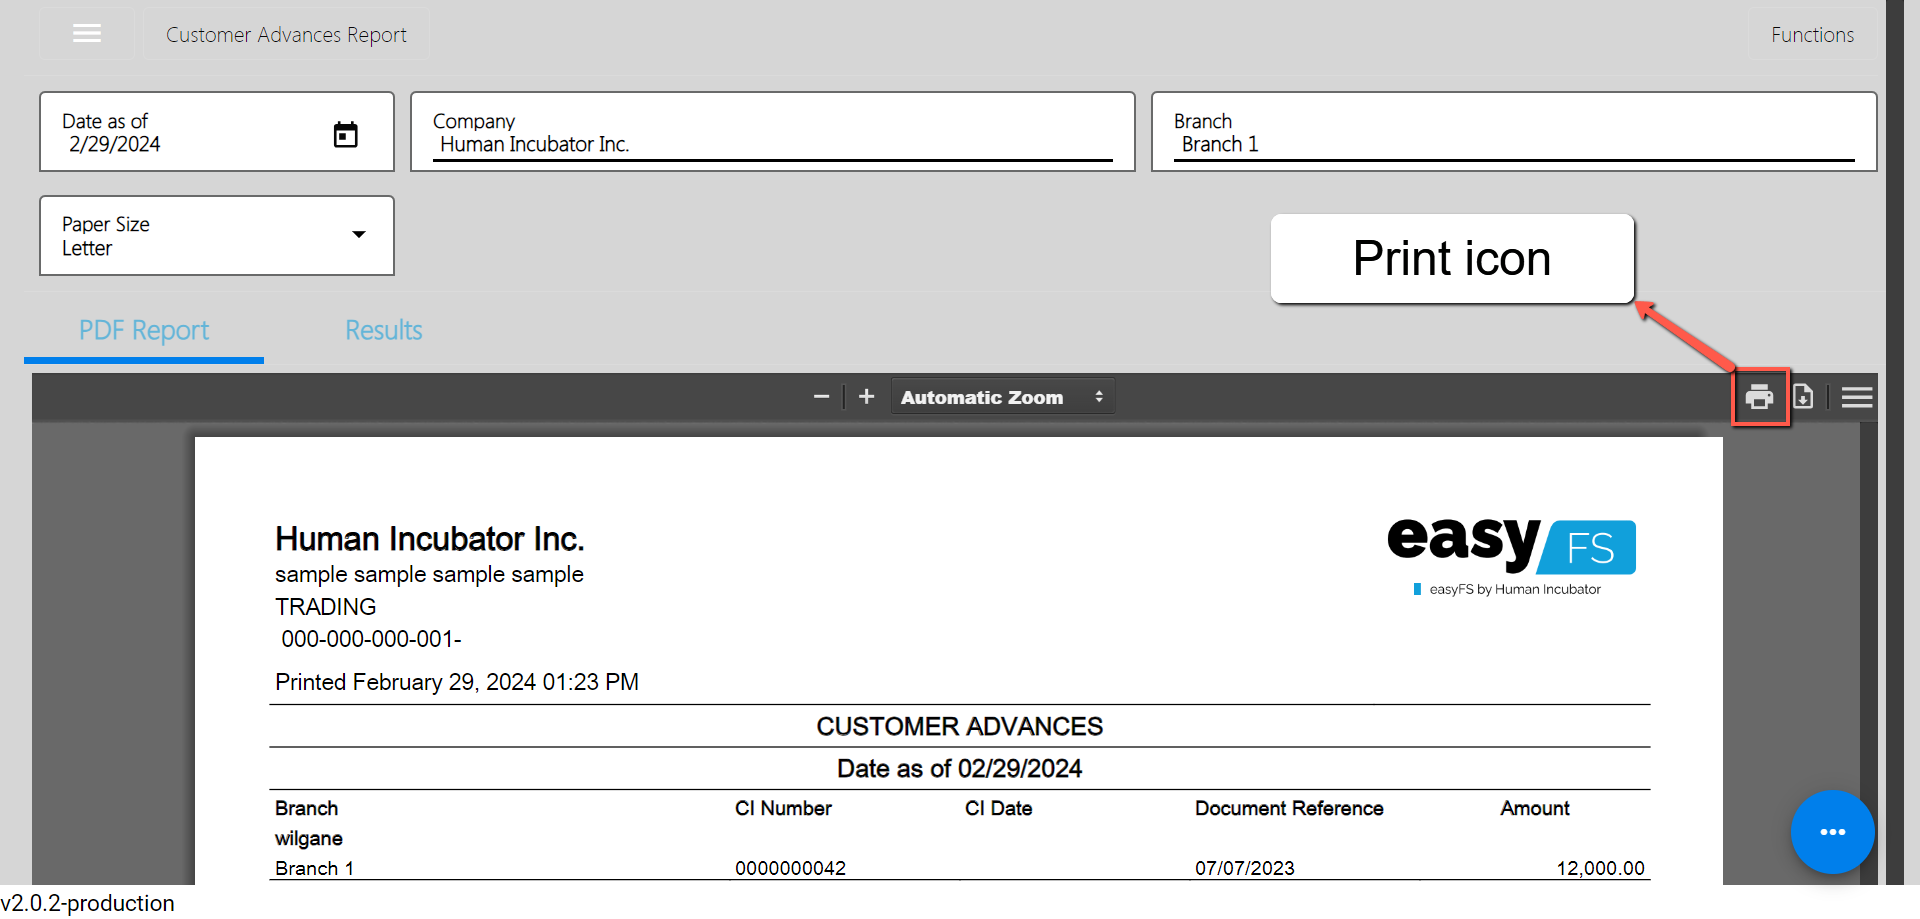
Sales Order Summary Report
Sales Order Summary Report provides an overview or summary of sales orders within a specific period.
To generate Sales Order Summary report, here are the steps for you follow:
- Go to Sales modules: Navigate to Sales modules, then select Accounts Receivable.
- Click Customer Advances: Under the menus from Accounts Receivable, look for Sales Order Summary Report then click the menu to navigate.
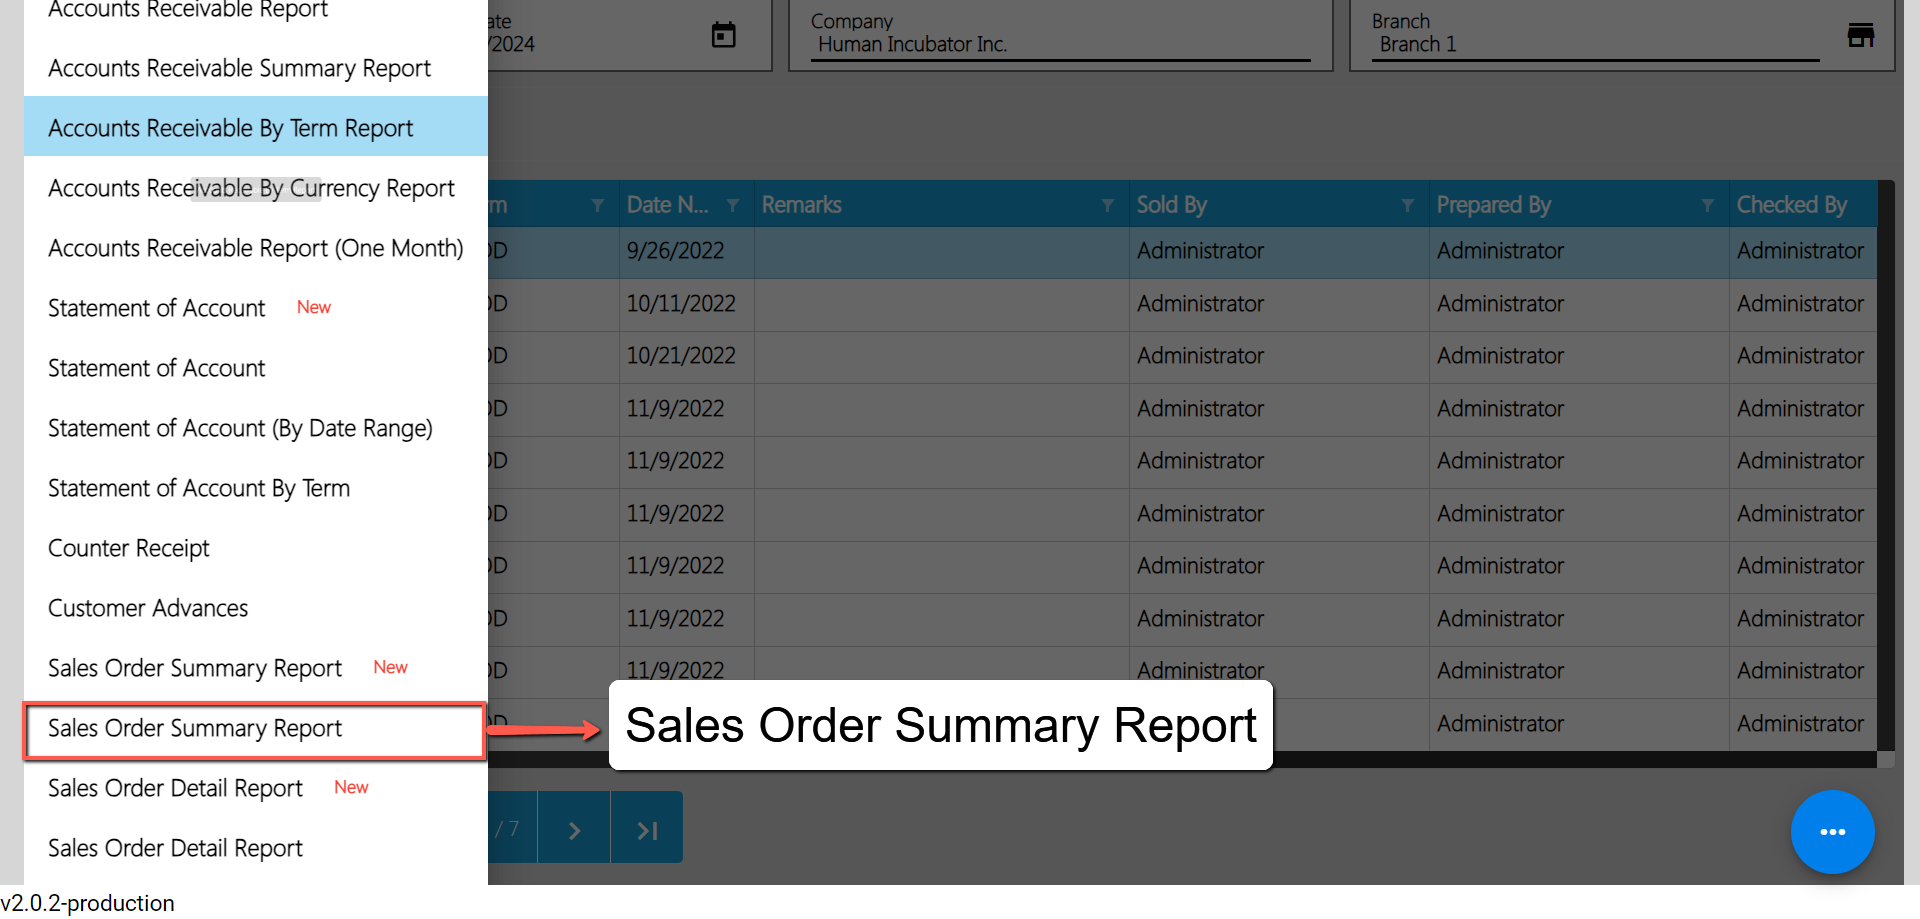
- Select Start and End Date: Provide an exact date you want to generate a report by clicking on the Start Date and End Date.
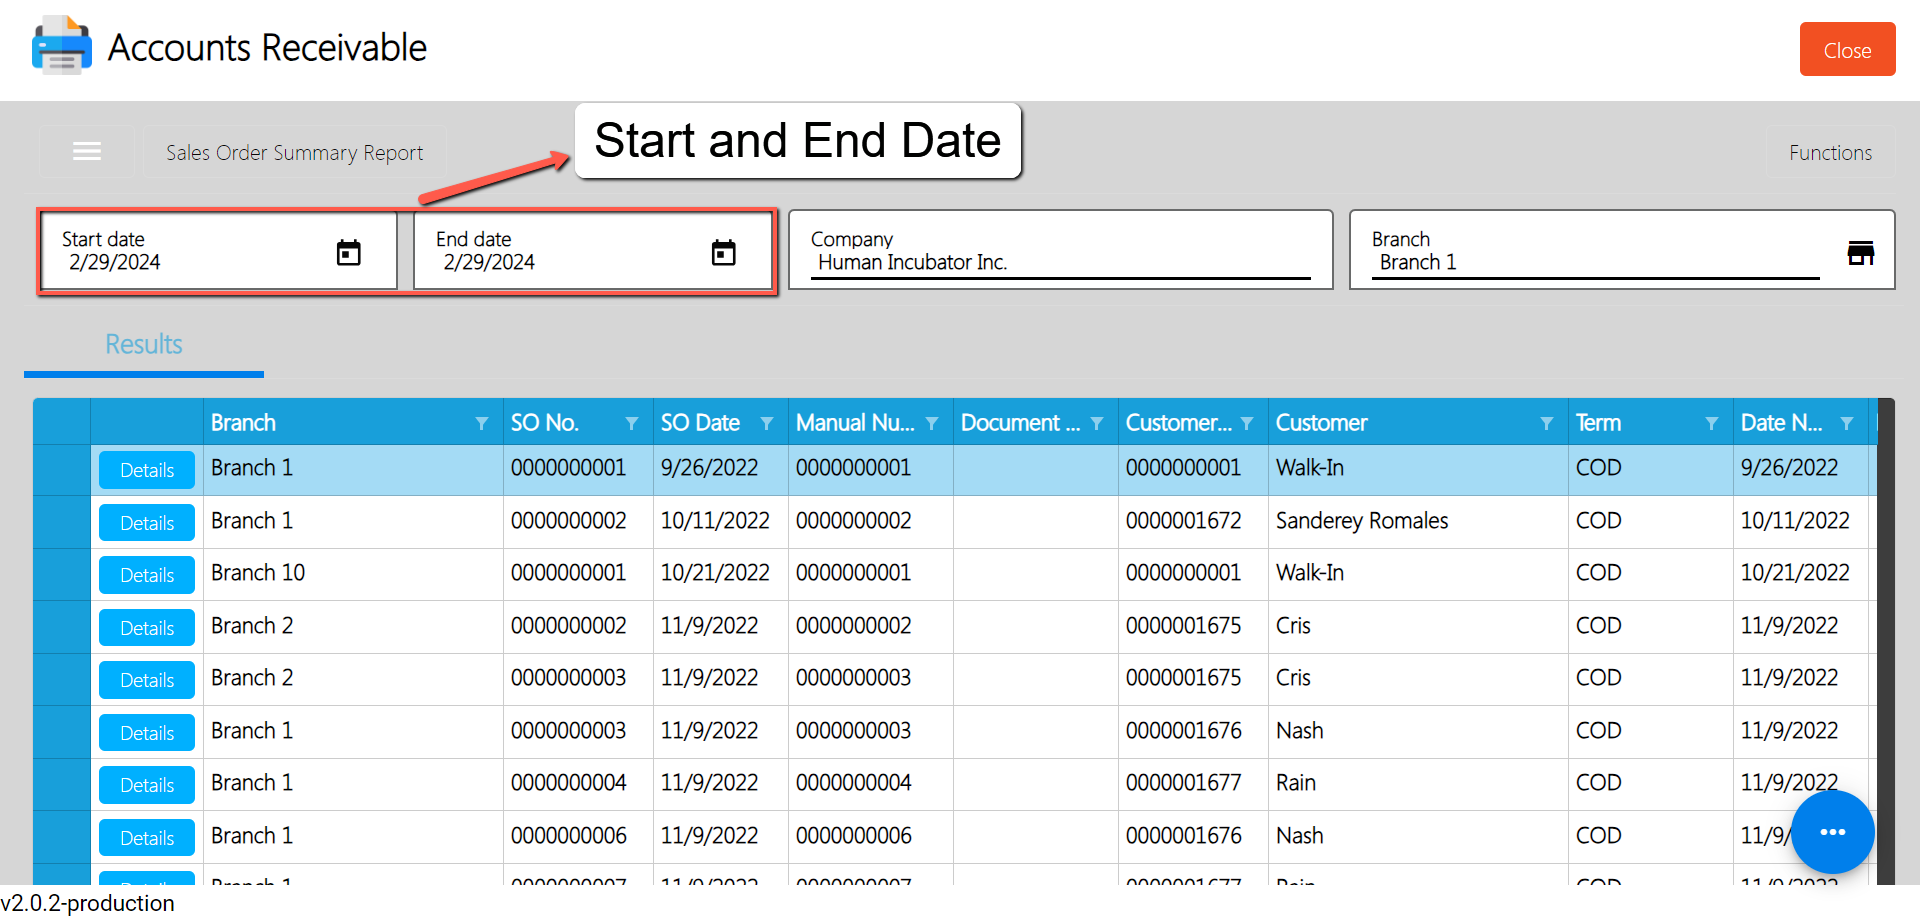
- Select a Branch (if needed): By default, the value of the Branch field is based on your login branch.
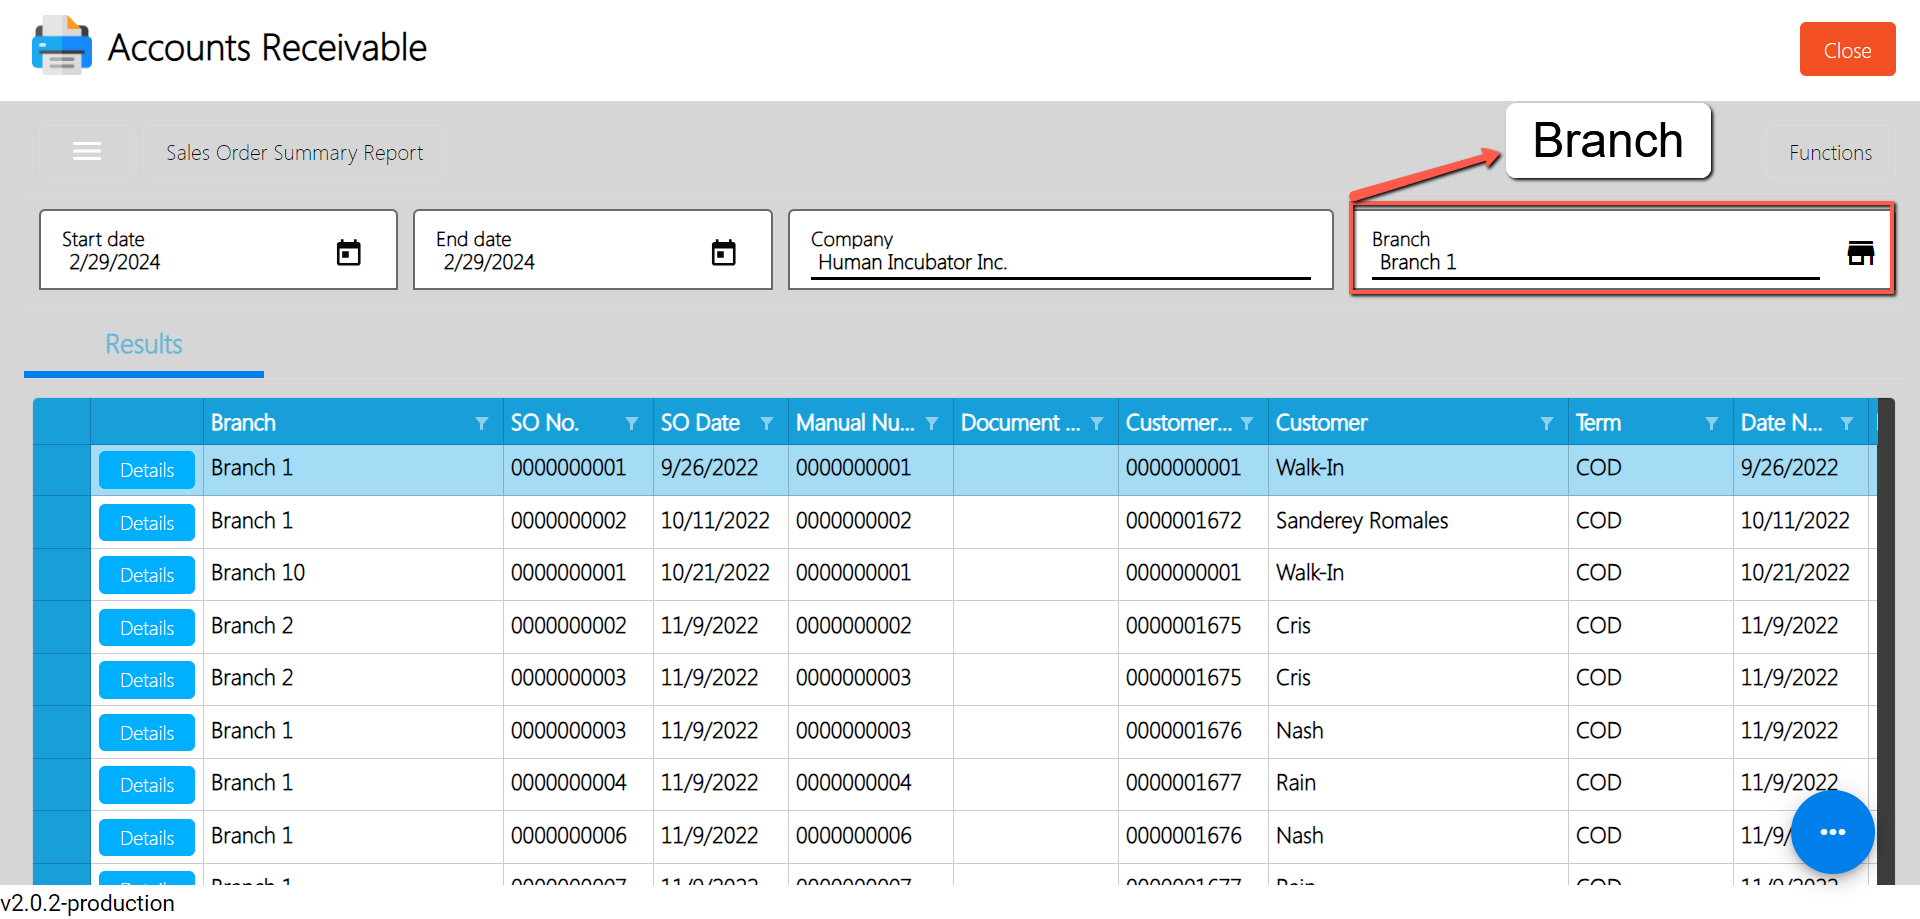
- Report is automatically generated in list: After providing the Date as of and the Branch, the report will automatically generated on list.
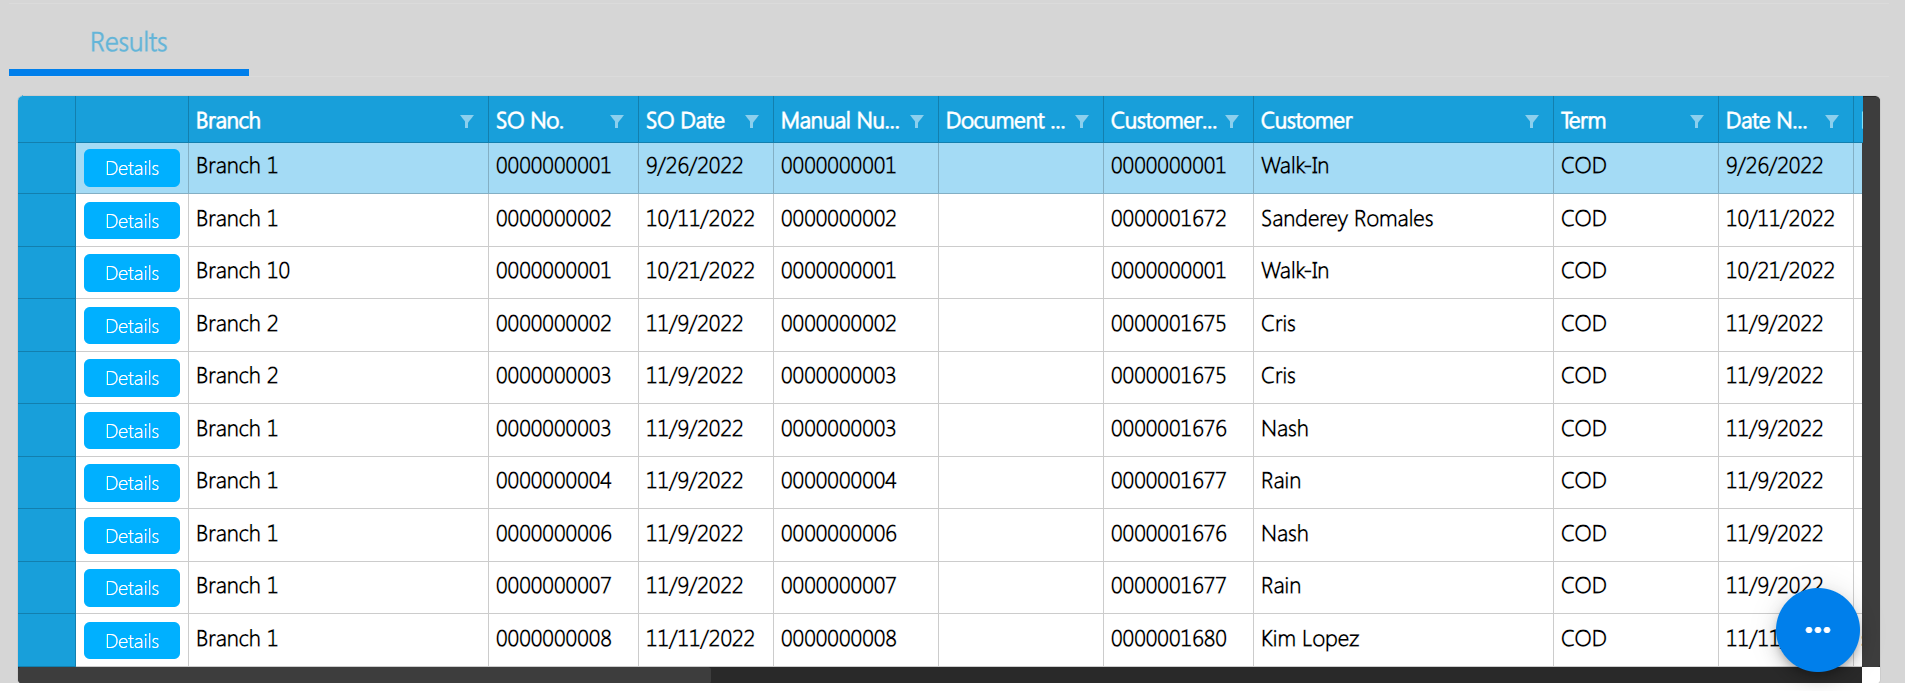
Sample Data
- Download report in excel file(if needed): If you want to download the report in excel file, look for the Functions button then click the Download Data menu. An excel file will automatically download.
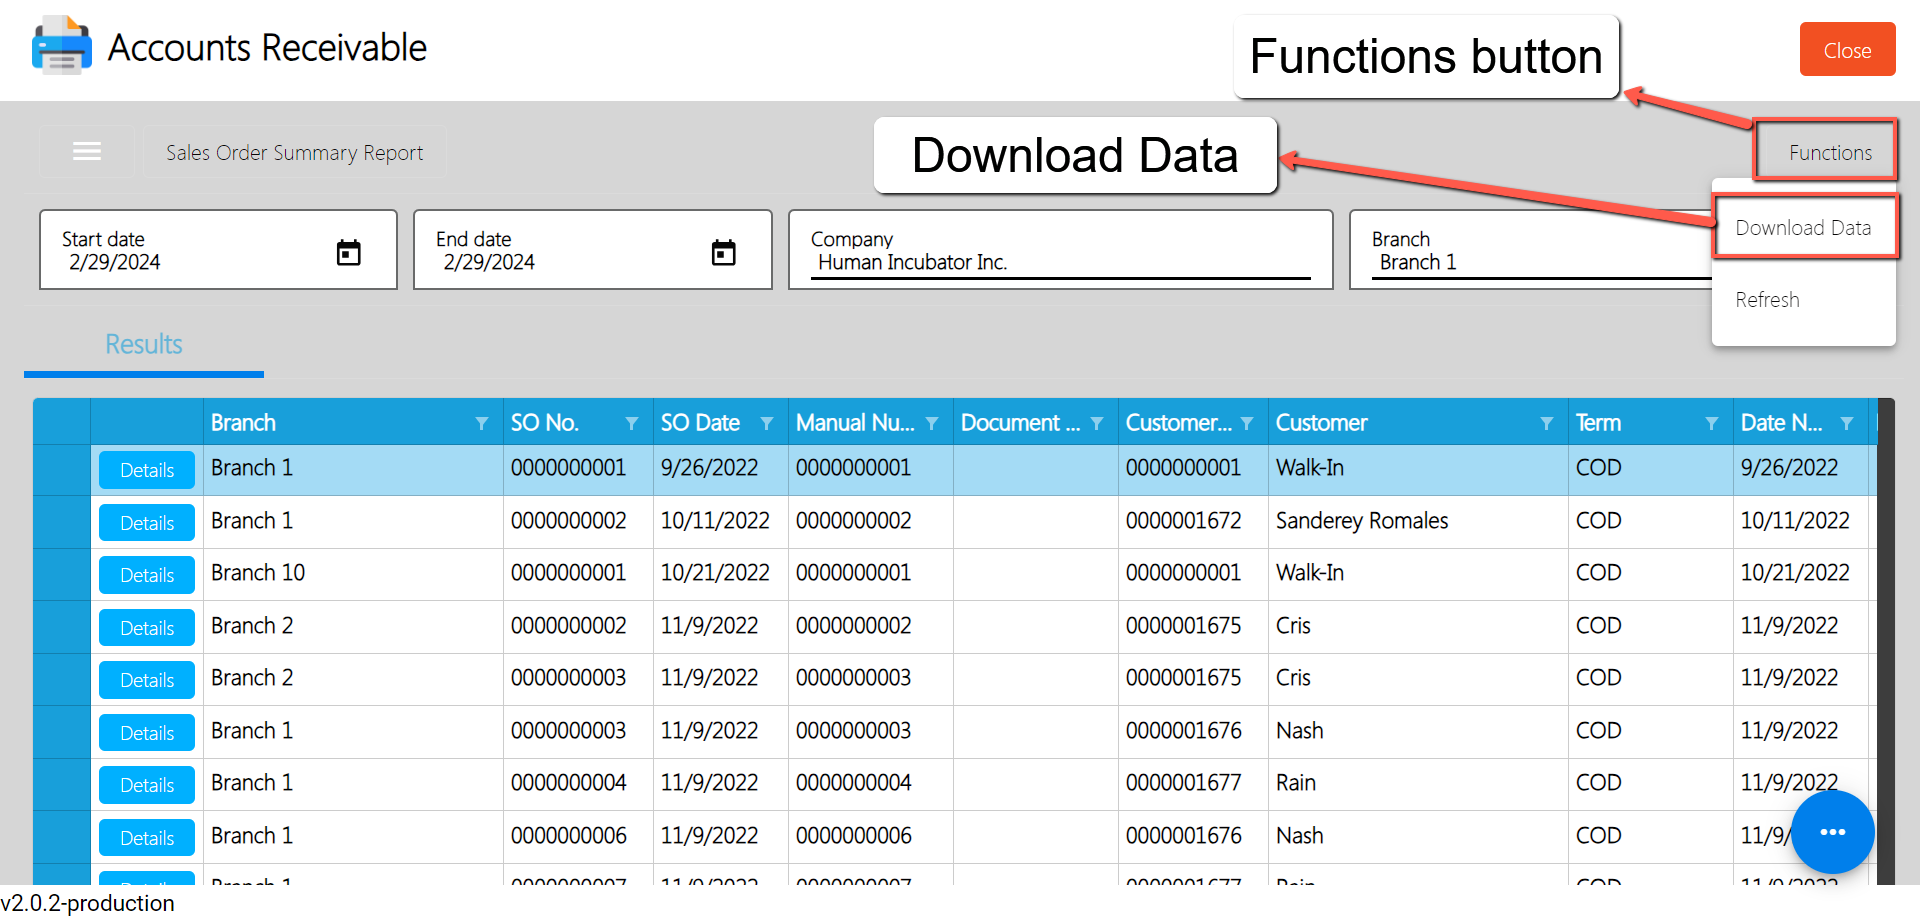
Sales Order Detail Report
Sales Order Detail Report provides individual Sales Orders, typically listing each other separately along with detailed information. These include specifics such as Sales Order number, Customer Name, Sales Order Date, and Sales Order Line Items, Discount, Quantity and Total Amounts.
To generate Sales Order Detail report, here are the steps for you follow:
- Go to Sales modules: Navigate to Sales modules, then select Accounts Receivable.
- Click Sales Order Detail Report: Under the menus from Accounts Receivable, look for Sales Order Detail Report then click the menu to navigate.
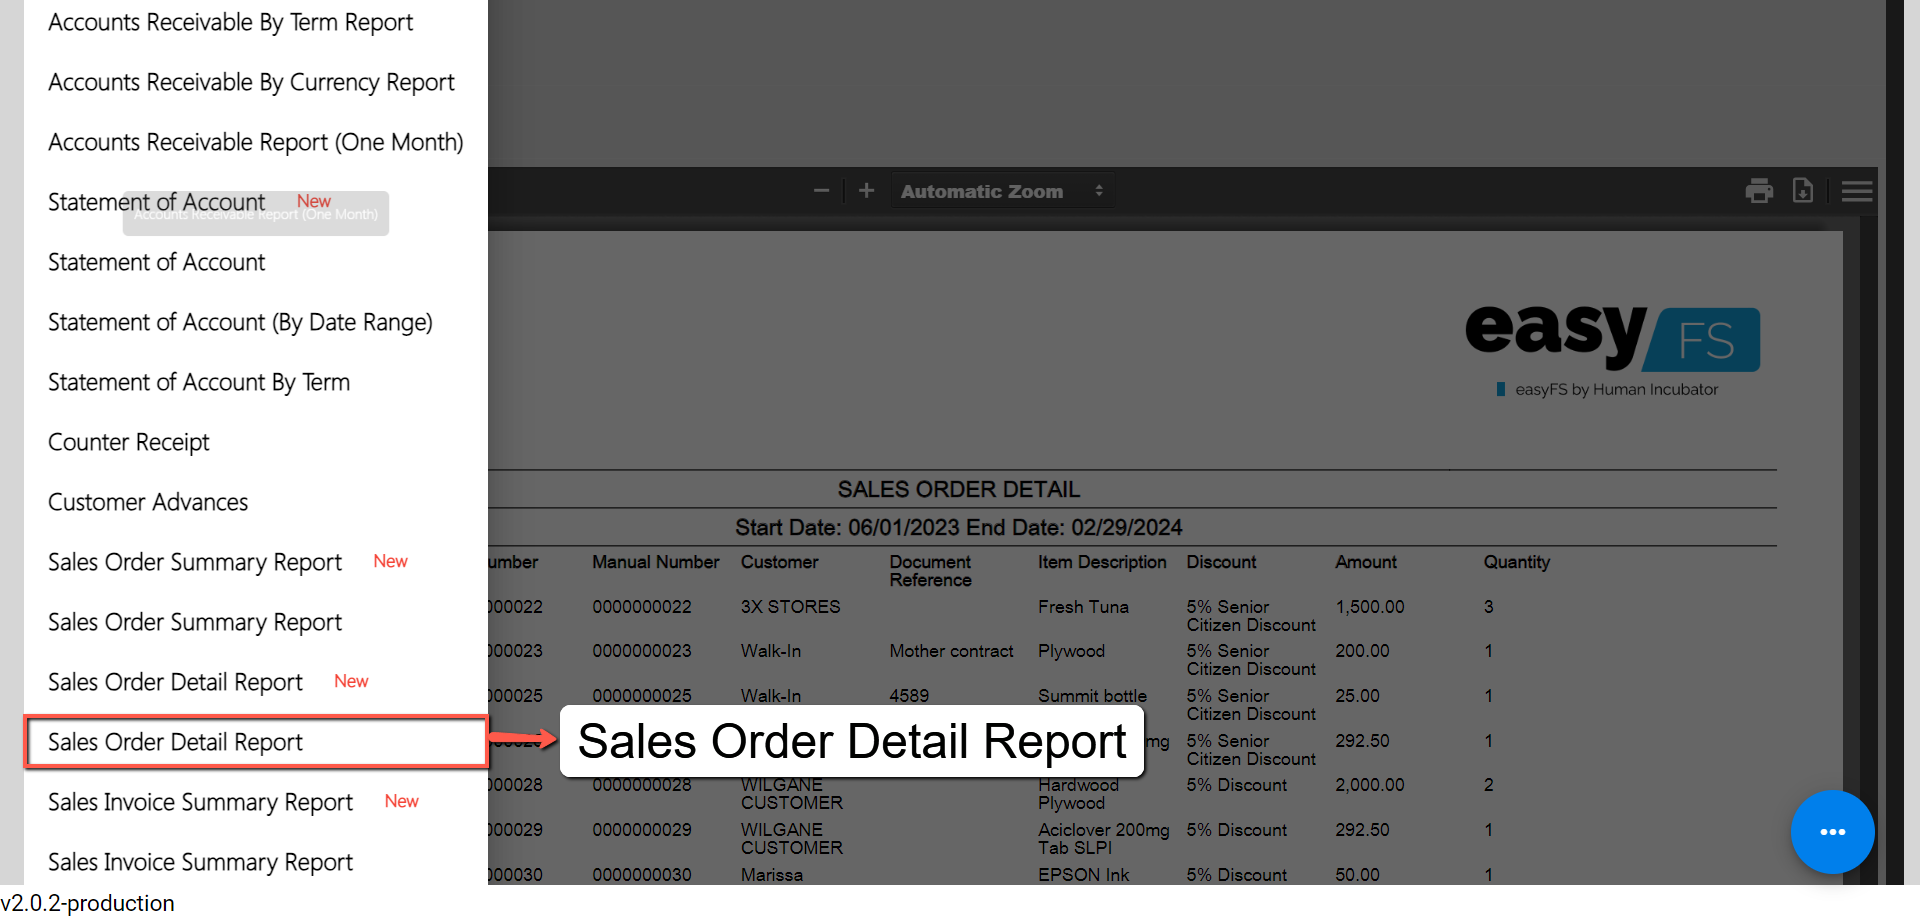
- Select Start and End Date: Provide an exact date you want to generate a report by clicking on the Start Date and End Date.
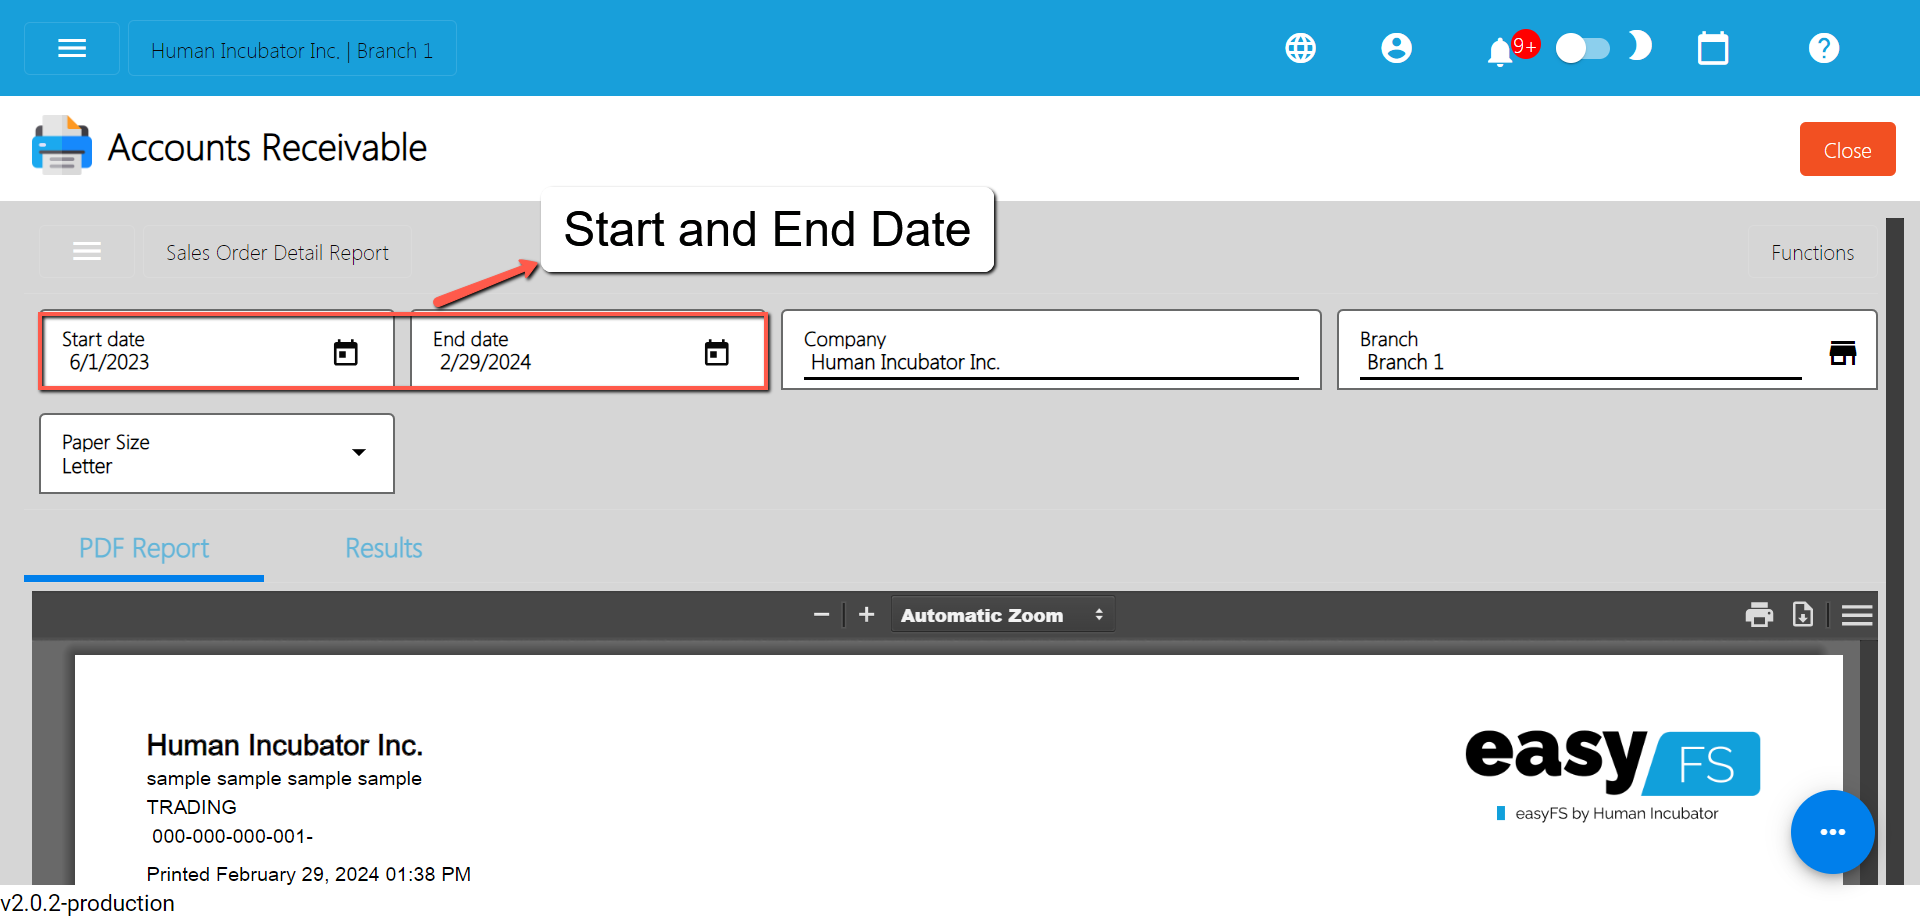
- Select a Branch (if needed): By default, the value of the Branch field is based on your login branch.
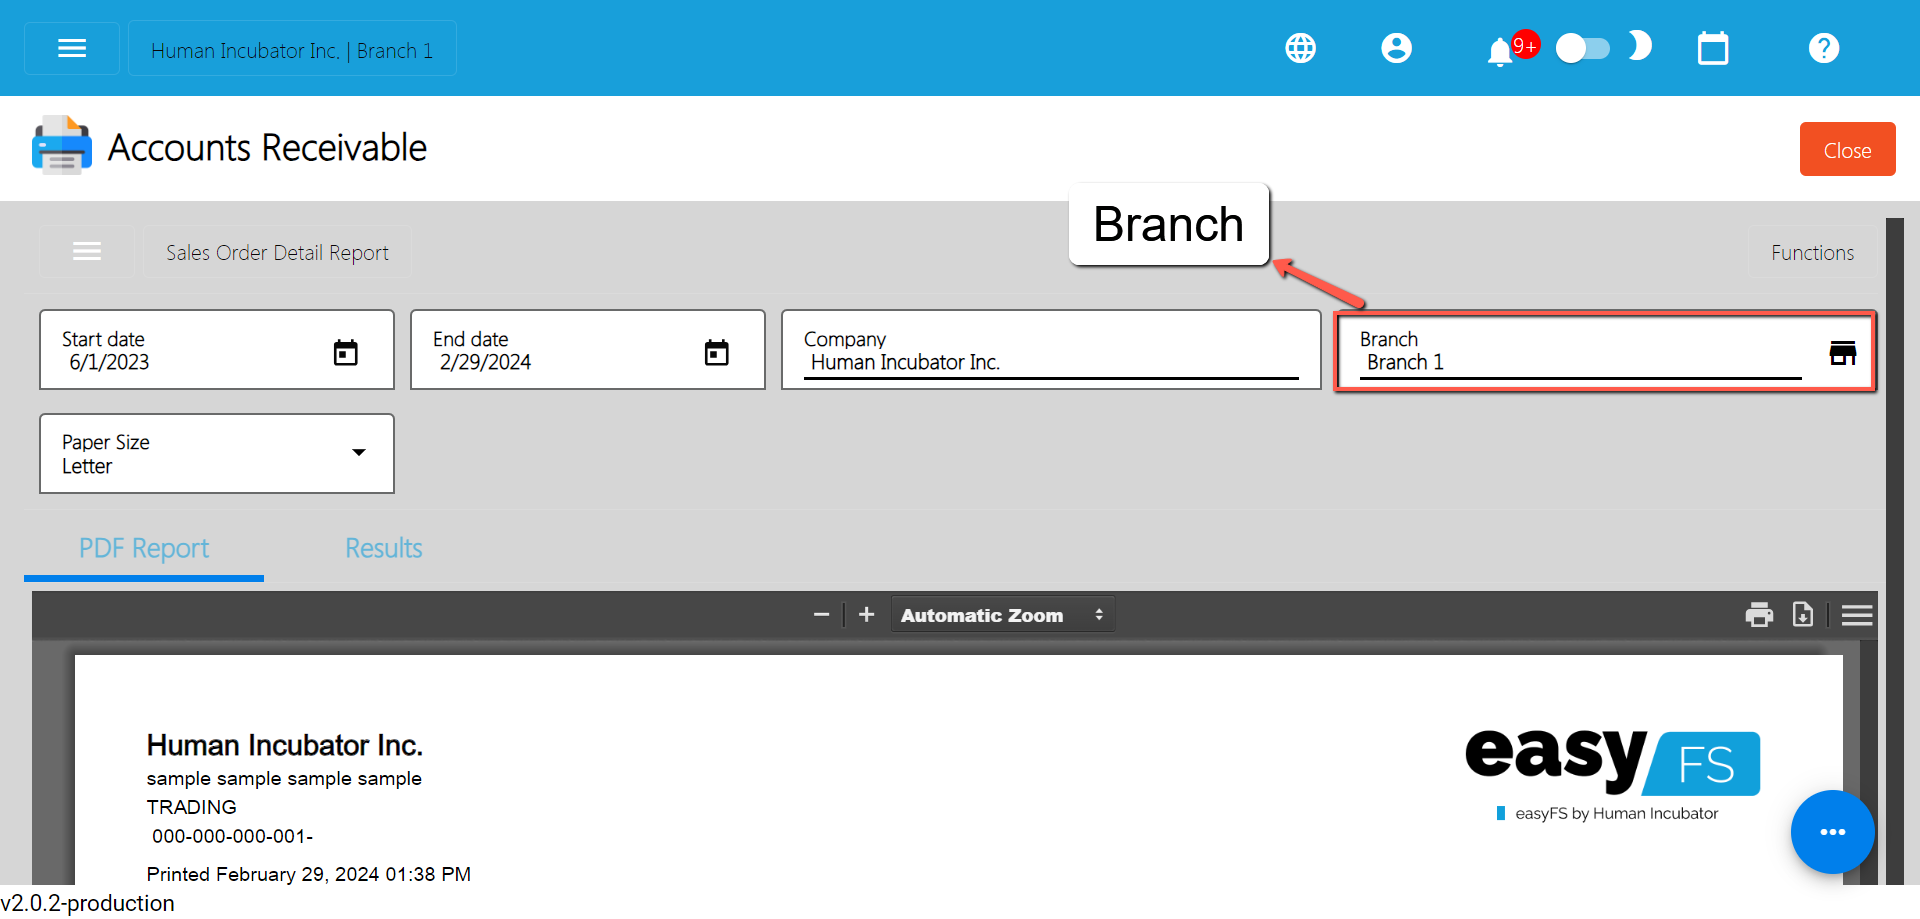
- PDF Report is automatically generated: After providing the Date as of and the Branch, the PDF Report will automatically generated.
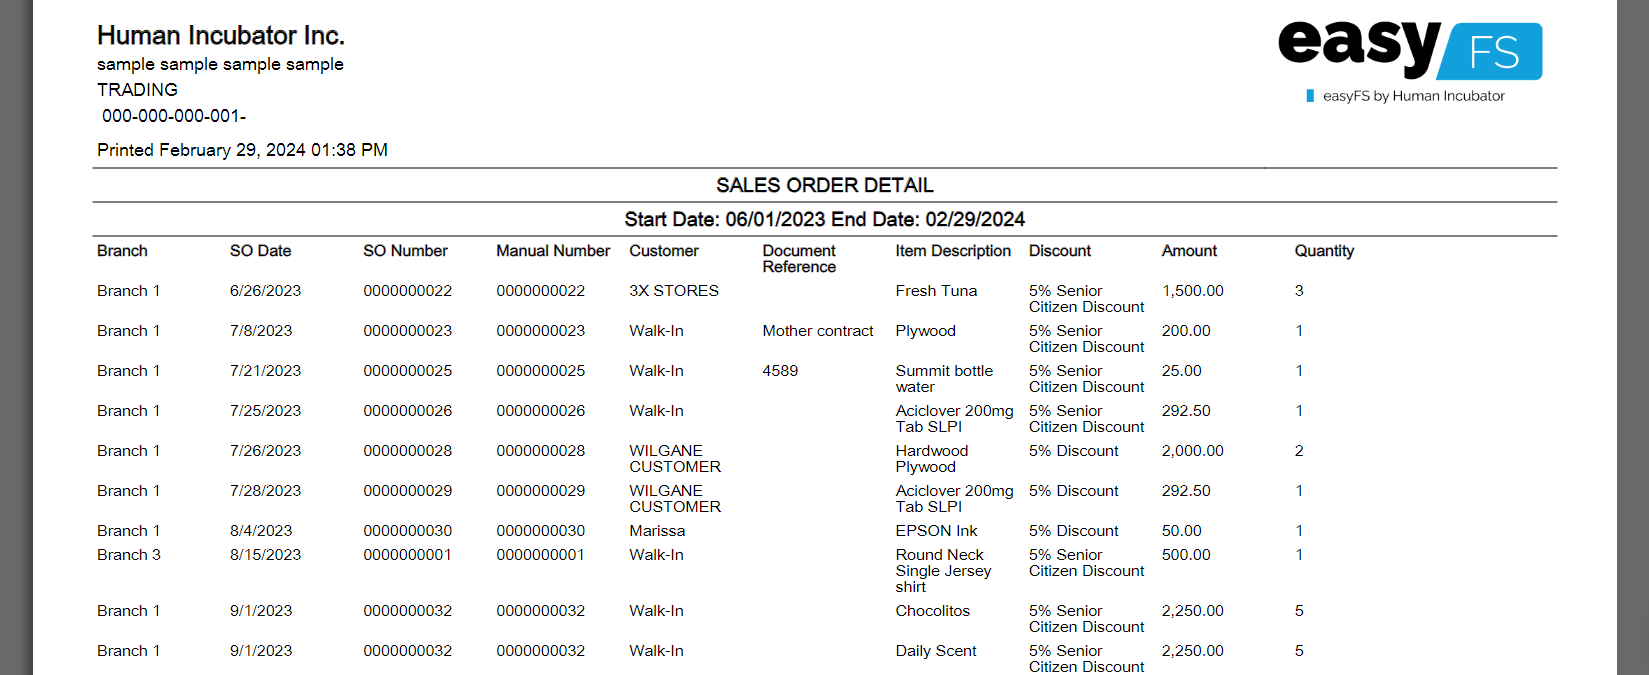
Sample Printout
- Download PDF (if needed): If you want to download the pdf, look for the download icon then click.
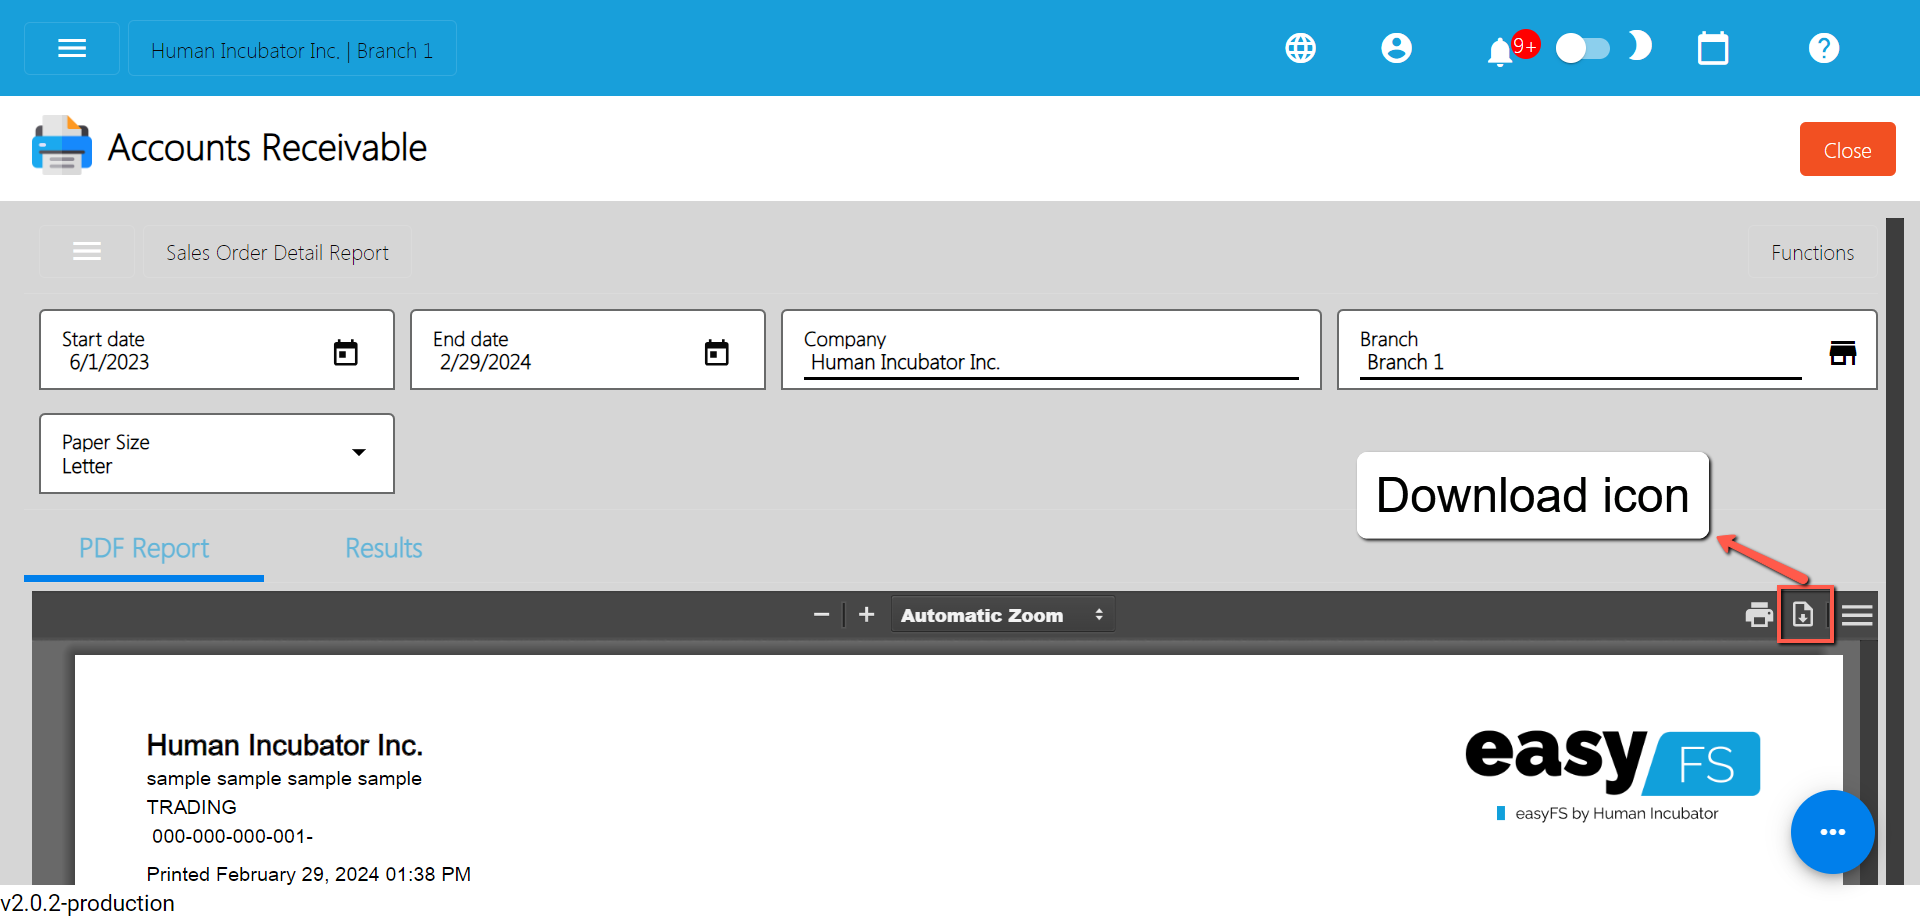
- Print PDF (if needed): If you want to print the pdf, look for the print icon then click.
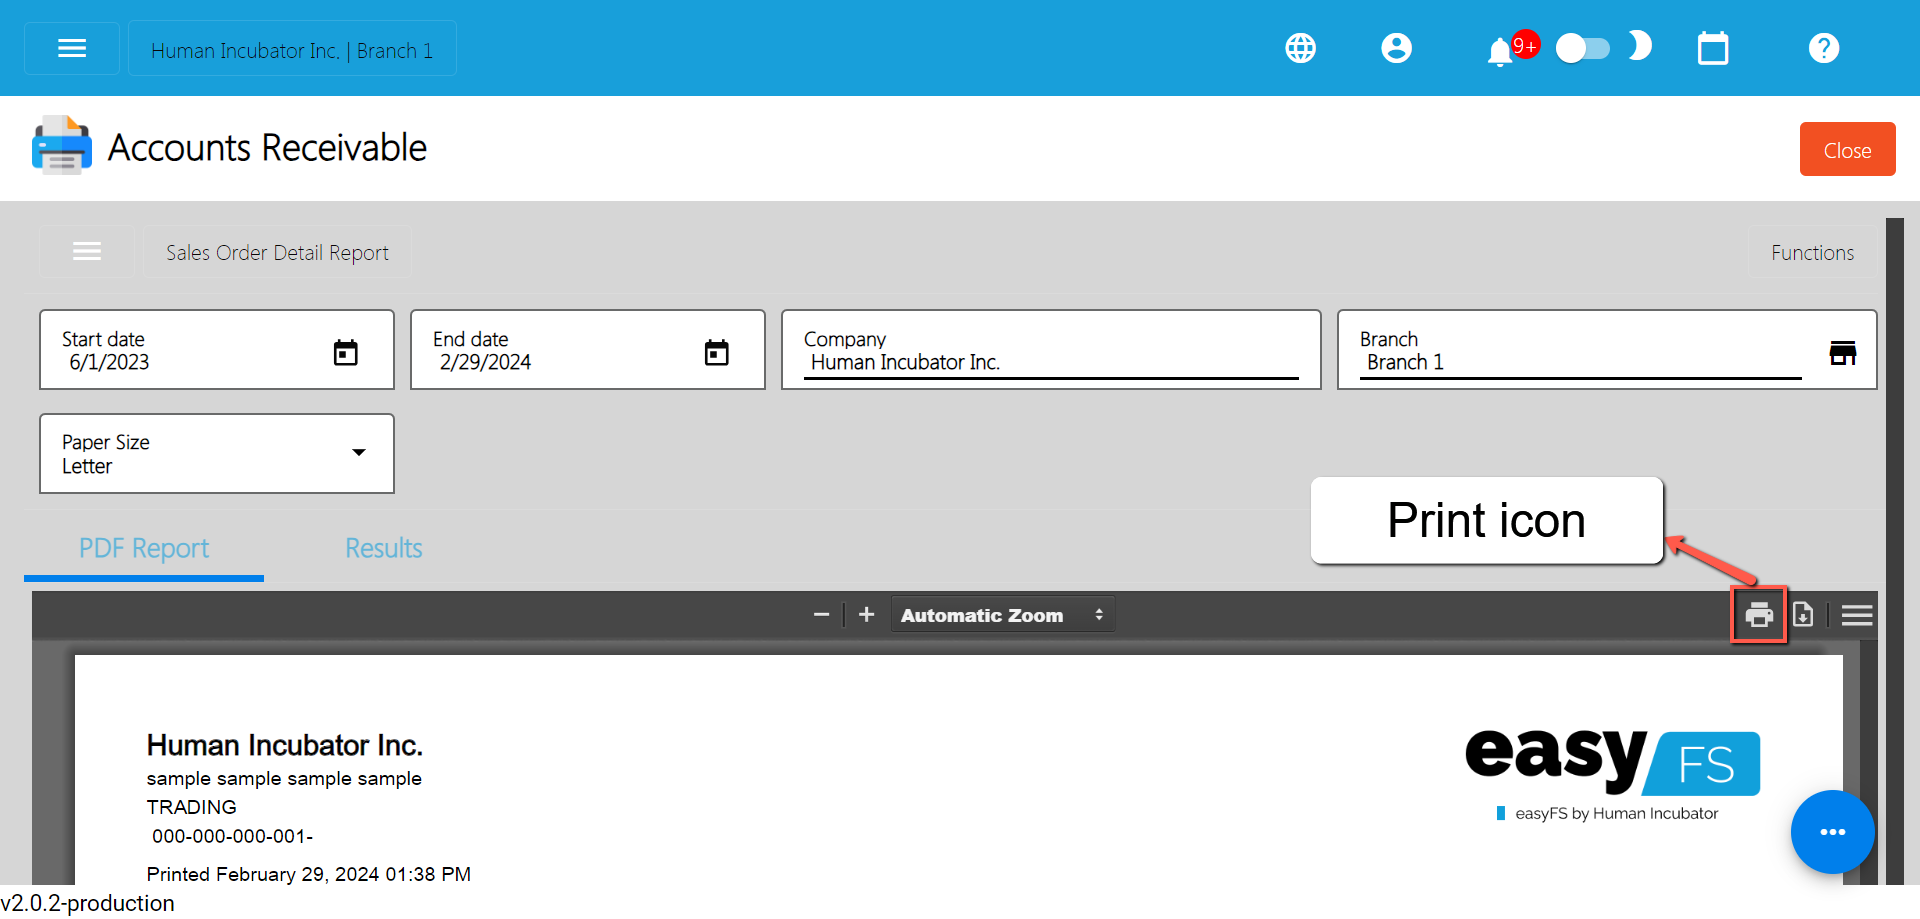
Sales Invoice Summary Report
Sales Order Summary Report provides an overview or summary of sales invoice within a specific period.
To generate Sales Invoice Summary report, here are the steps for you follow:
- Go to Sales modules: Navigate to Sales modules, then select Accounts Receivable.
- Click Sales Invoice Summary Report: Under the menus from Accounts Receivable, look for Sales Invoice Summary Report then click the menu to navigate.
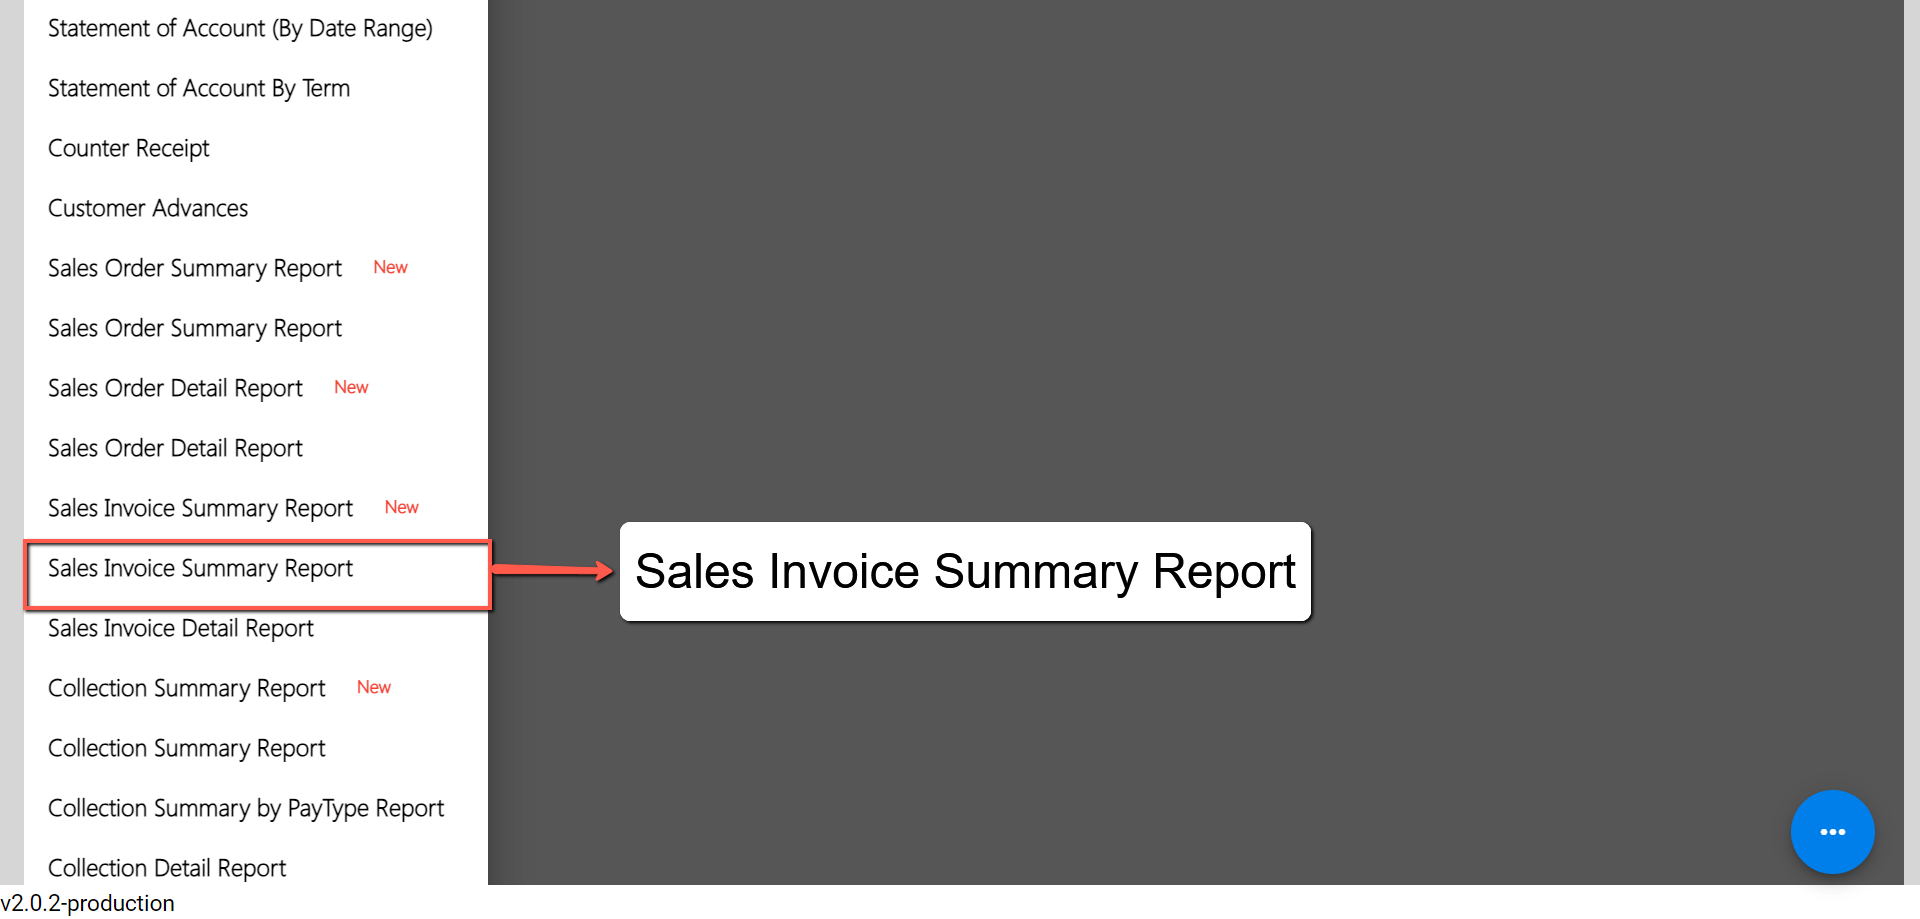
- Select Start and End Date: Provide an exact date you want to generate a report by clicking on the Start Date and End Date.
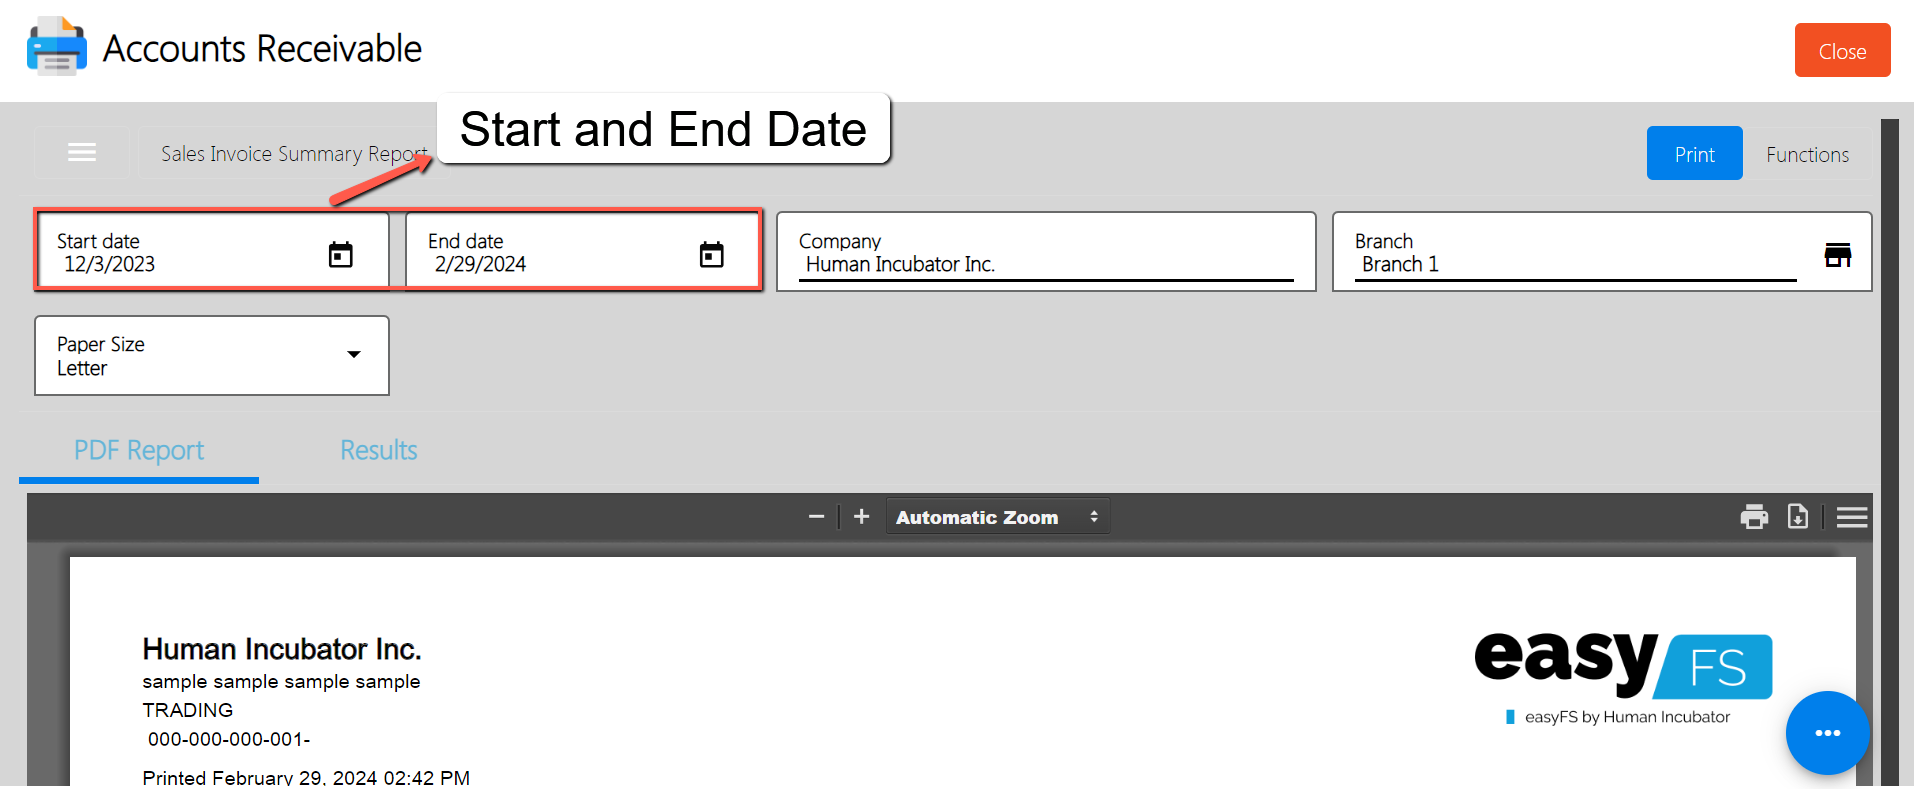
- Select a Branch (if needed): By default, the value of the Branch field is based on your login branch.
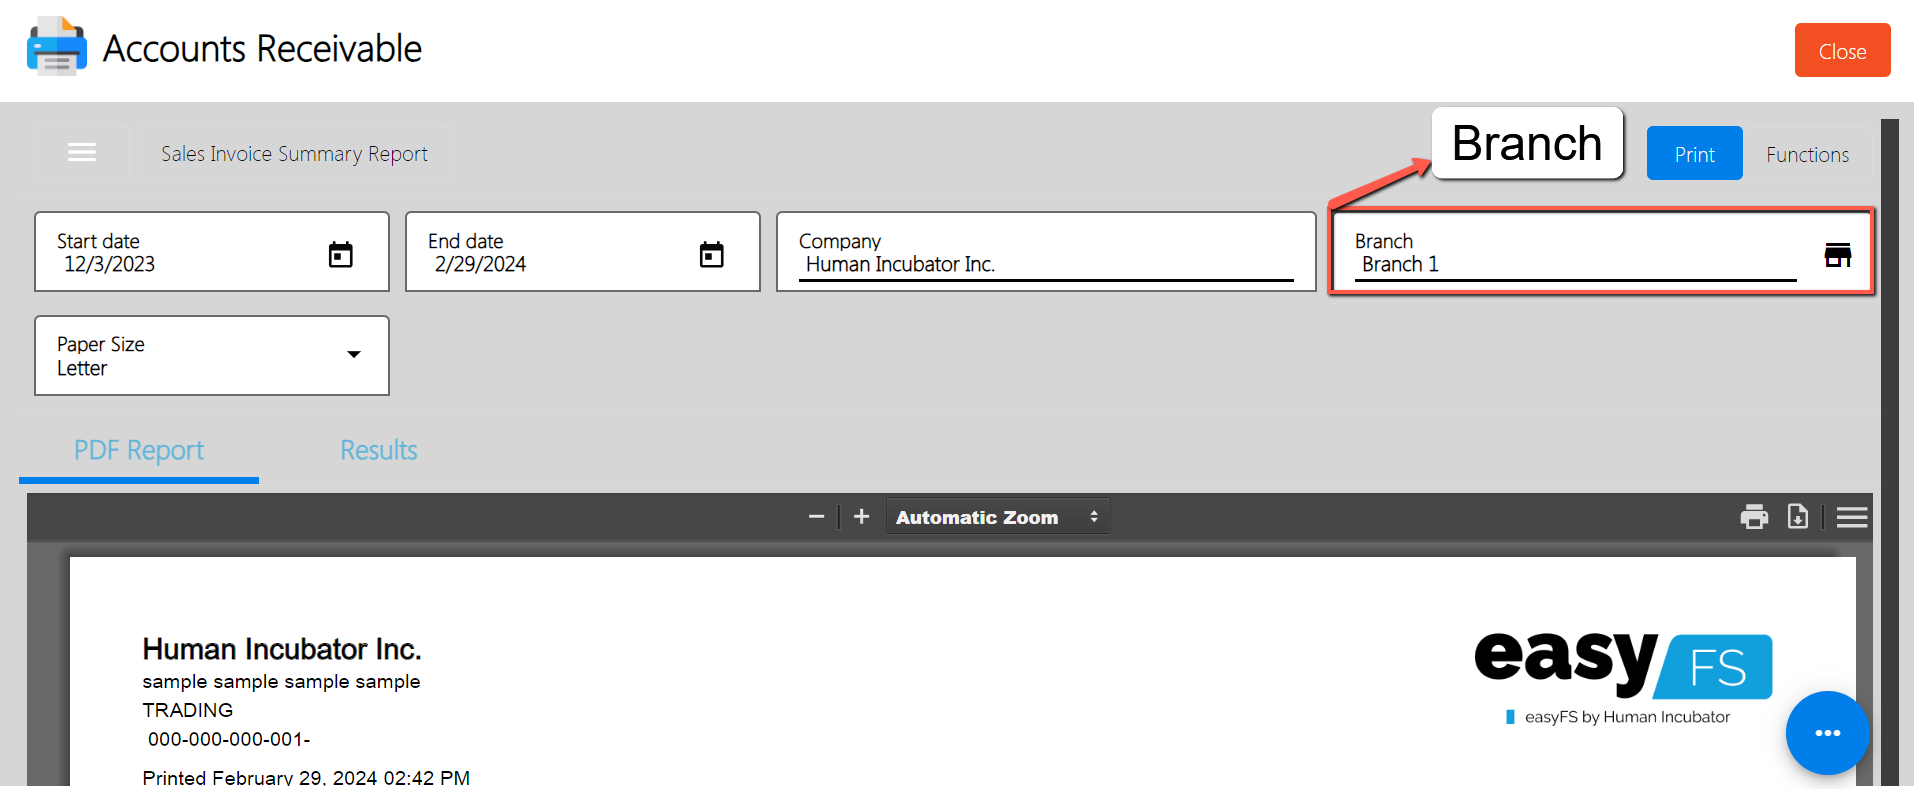
- Click Print button to generate PDF Report: Look for the Print button then click to generate the pdf report.
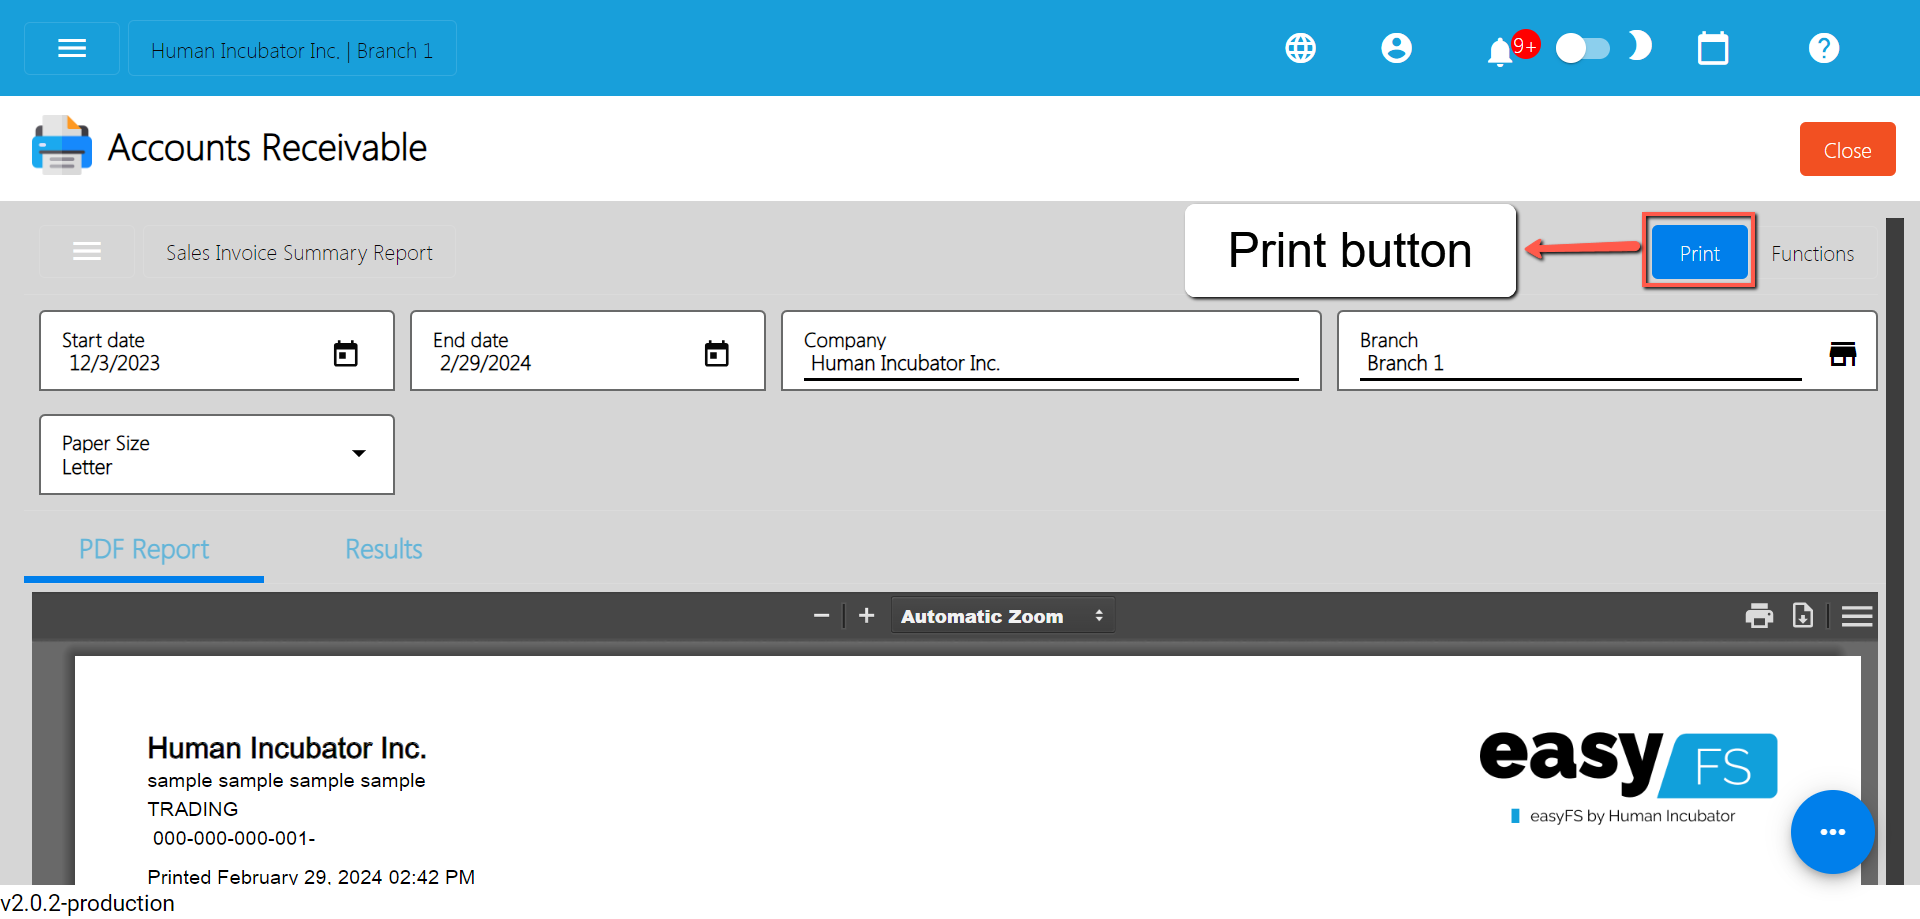
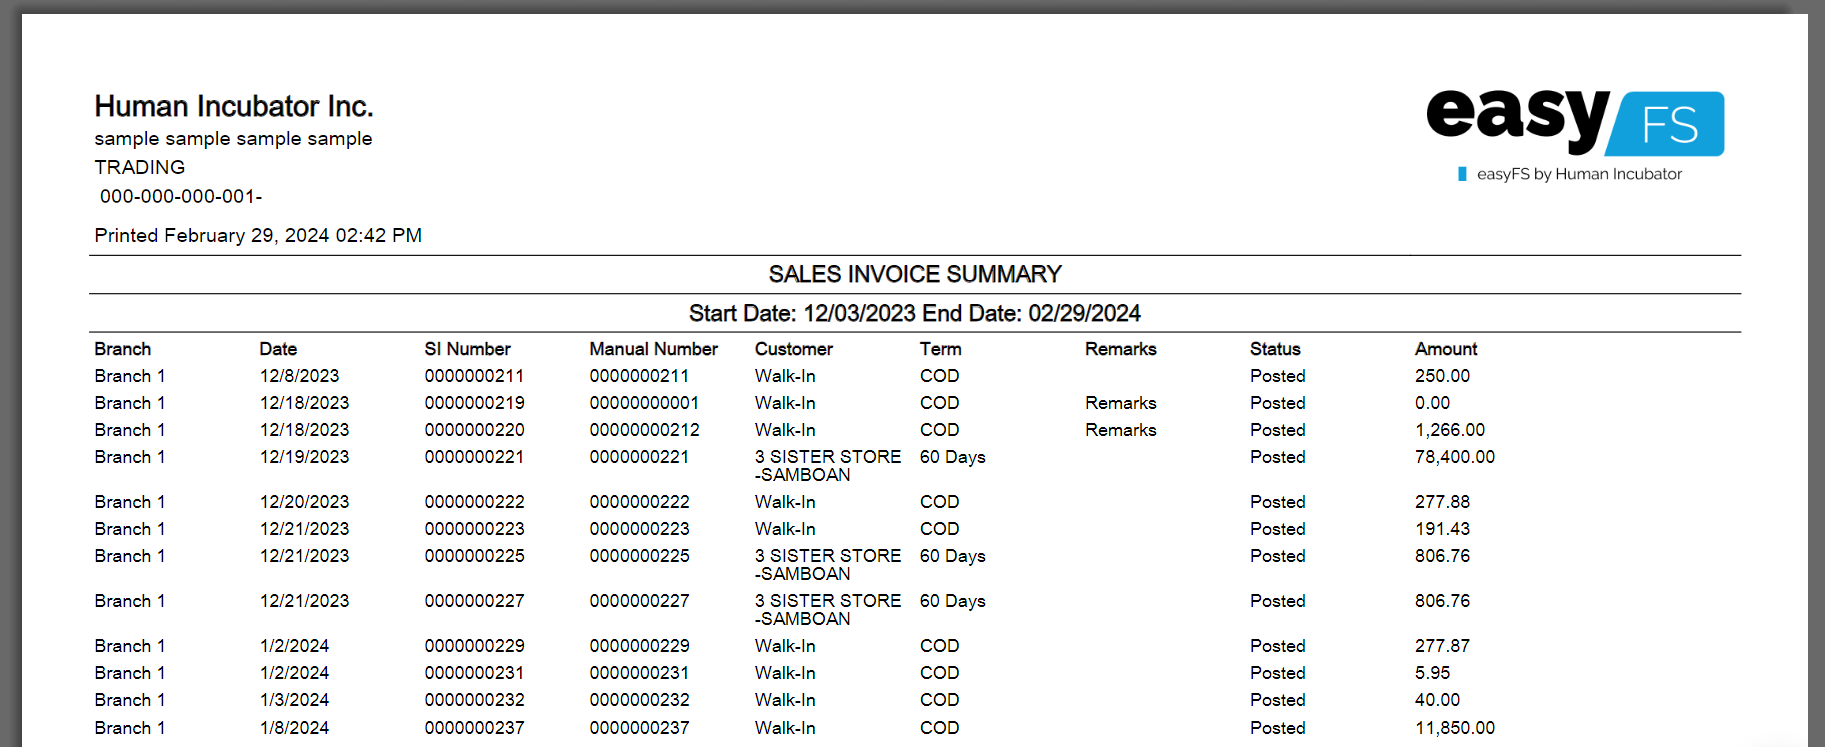
Sample Printout
- Download PDF (if needed): If you want to download the pdf, look for the download icon then click.
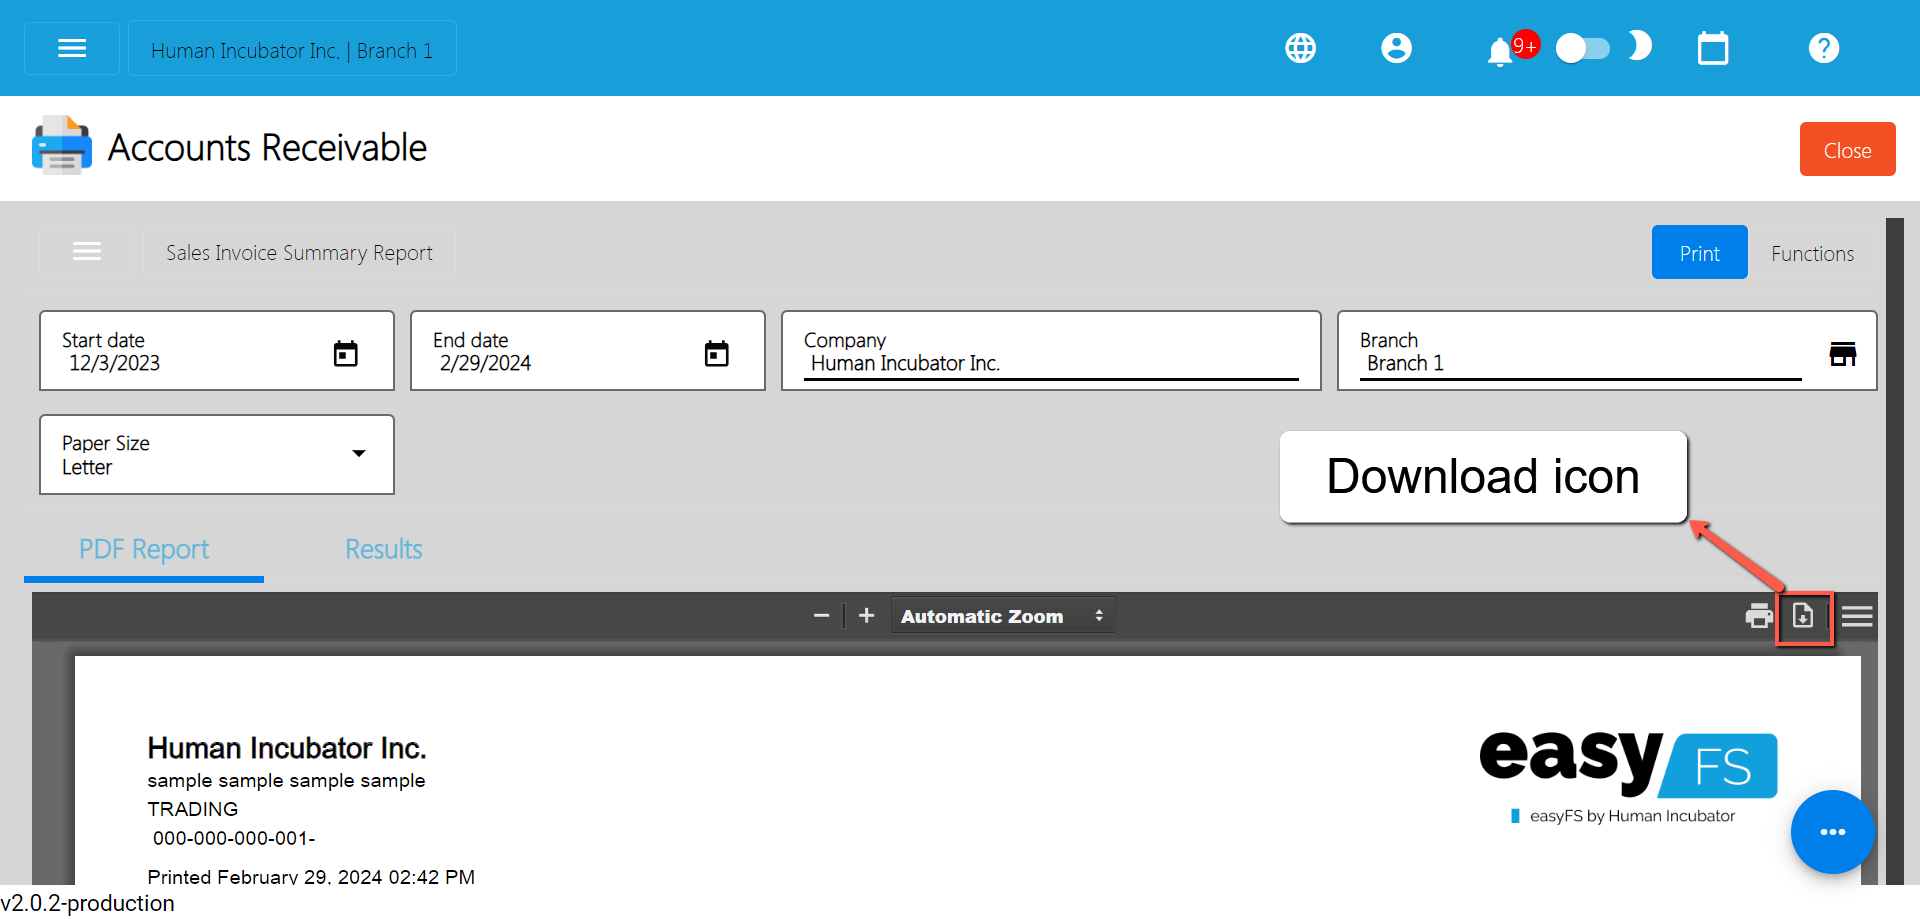
- Print PDF (if needed): If you want to print the pdf, look for the print icon then click.
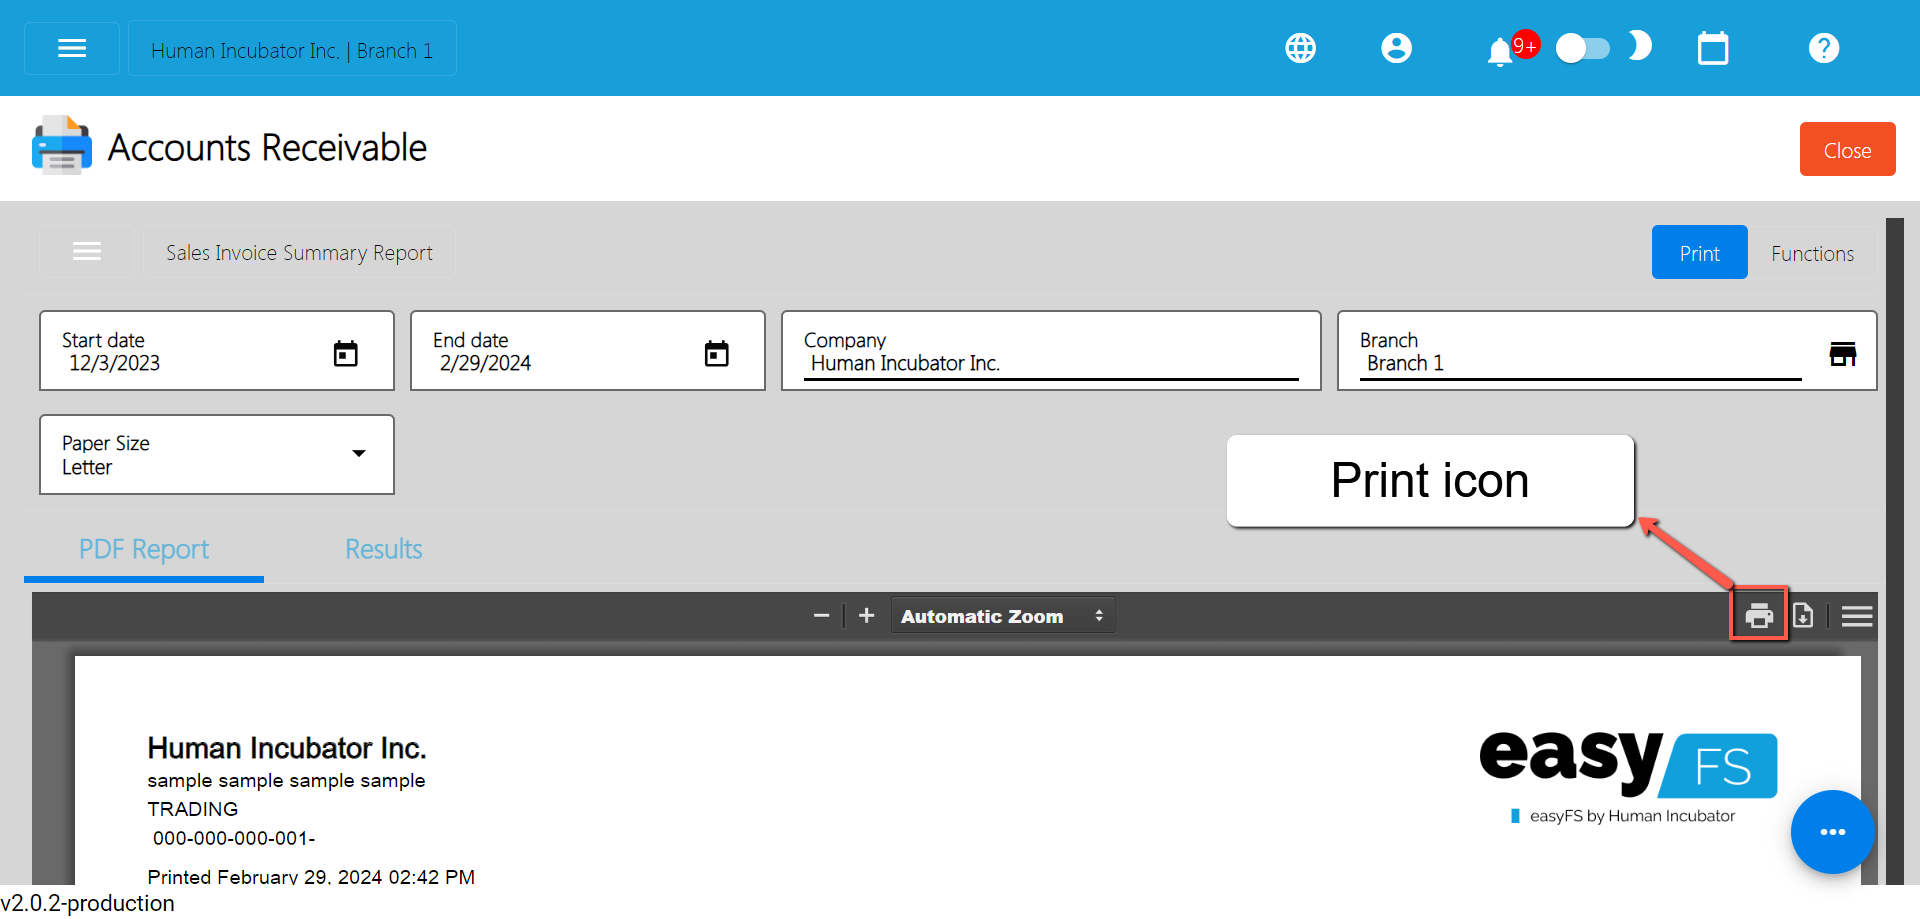
Sales Invoice Detail Report
Sales Invoice Detail Report provides individual Sales Invoices, typically listing each other separately along with detailed information. These include specifics such as Sales Invoice number, Customer Name, Sales Invoice Date, Sales Invoice Line Items, Discount, Price ,Quantity and Total Amounts.
To generate Sales Invoice Detail report, here are the steps for you follow:
- Go to Sales modules: Navigate to Sales modules, then select Accounts Receivable.
- Click Sales Invoice Detail Report: Under the menus from Accounts Receivable, look for Sales Invoice Detail Report then click the menu to navigate.
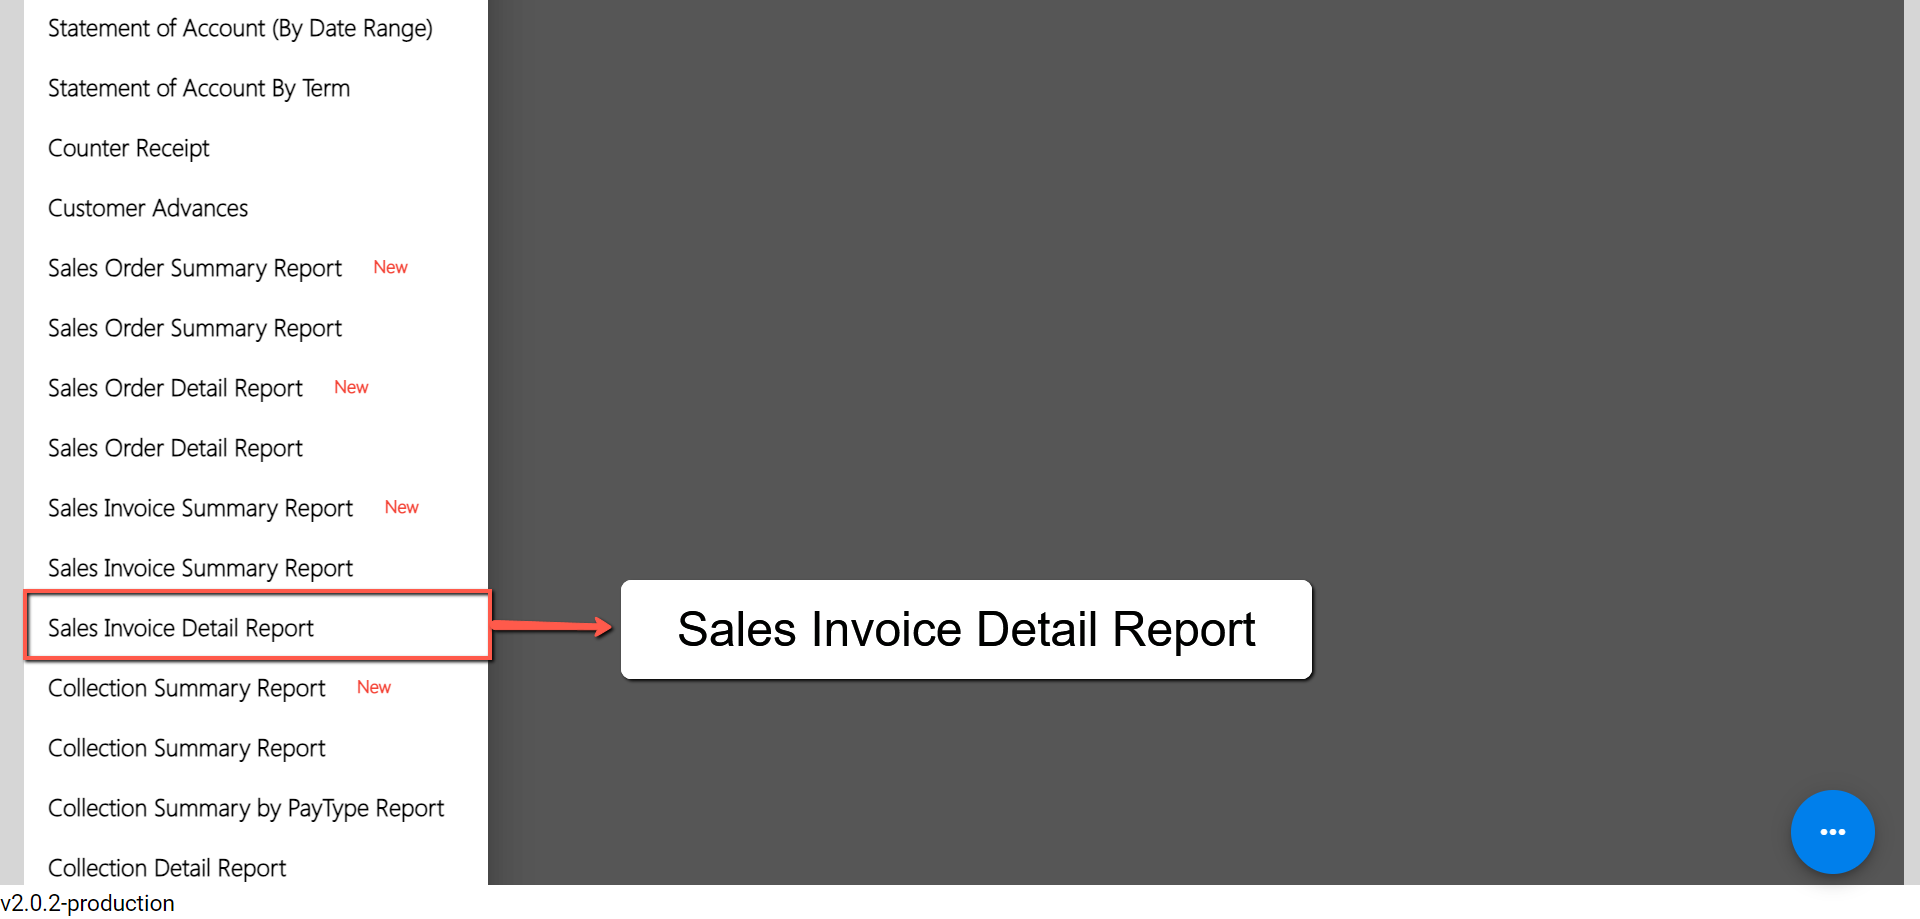
- Select Start and End Date: Provide an exact date you want to generate a report by clicking on the Start Date and End Date.
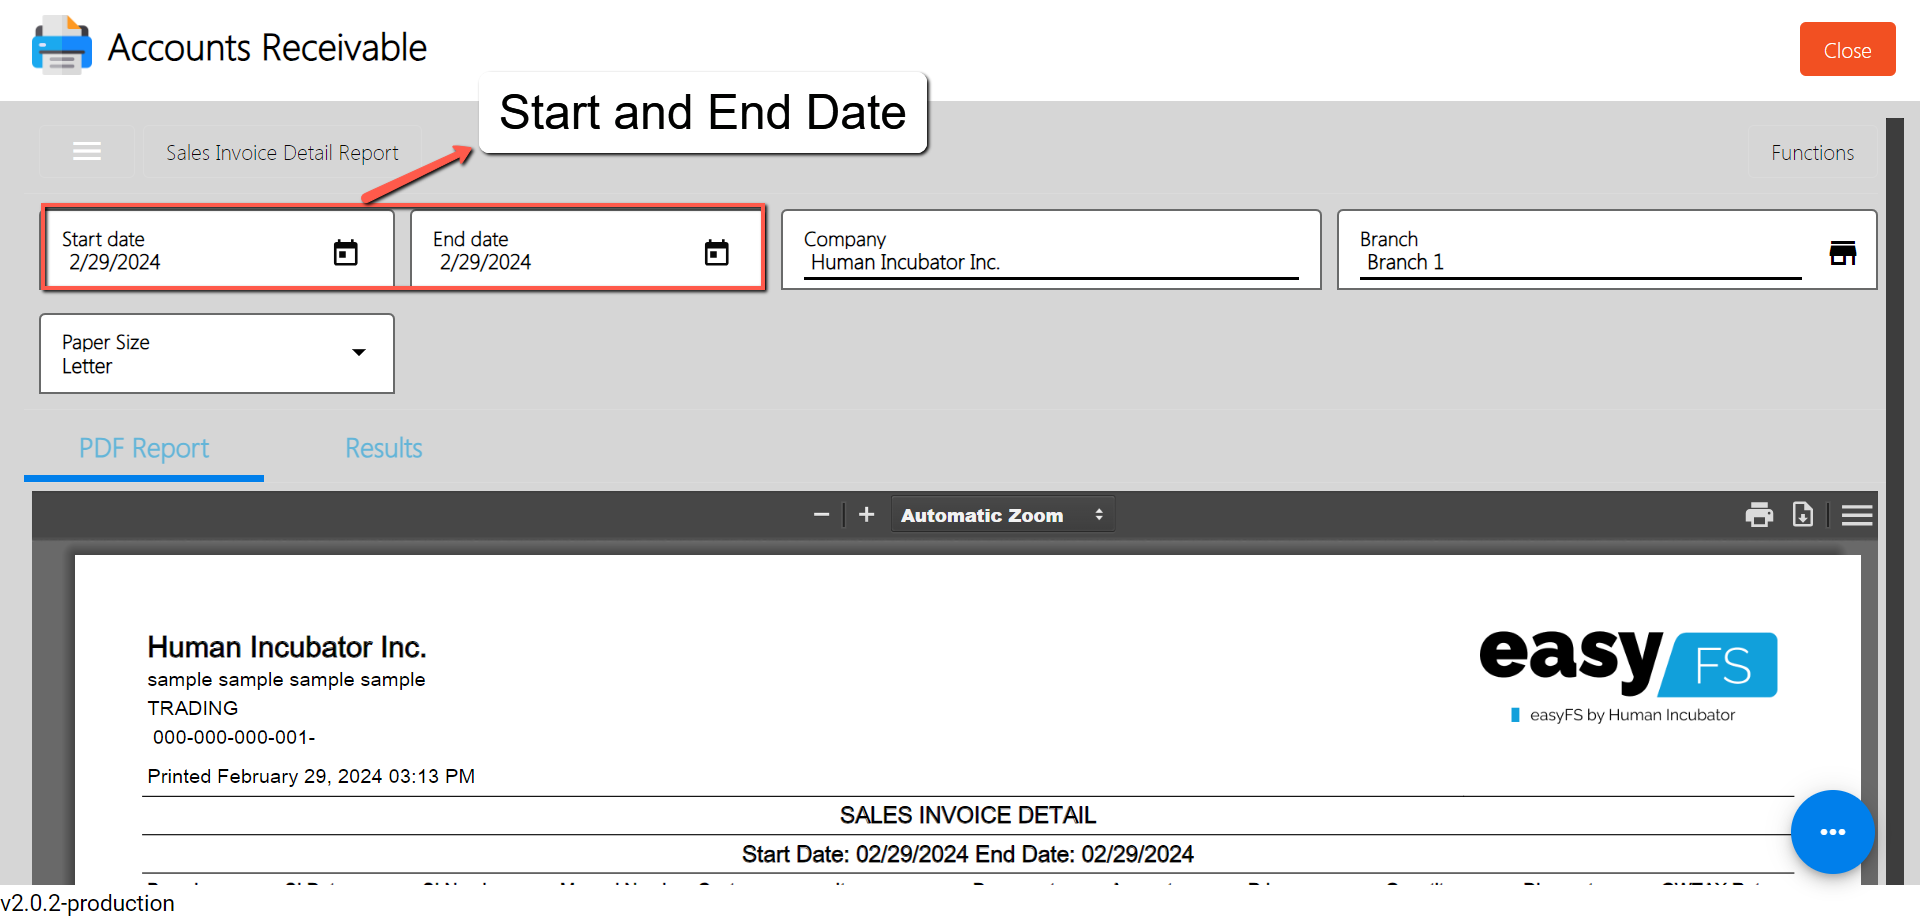
- Select a Branch (if needed): By default, the value of the Branch field is based on your login branch.
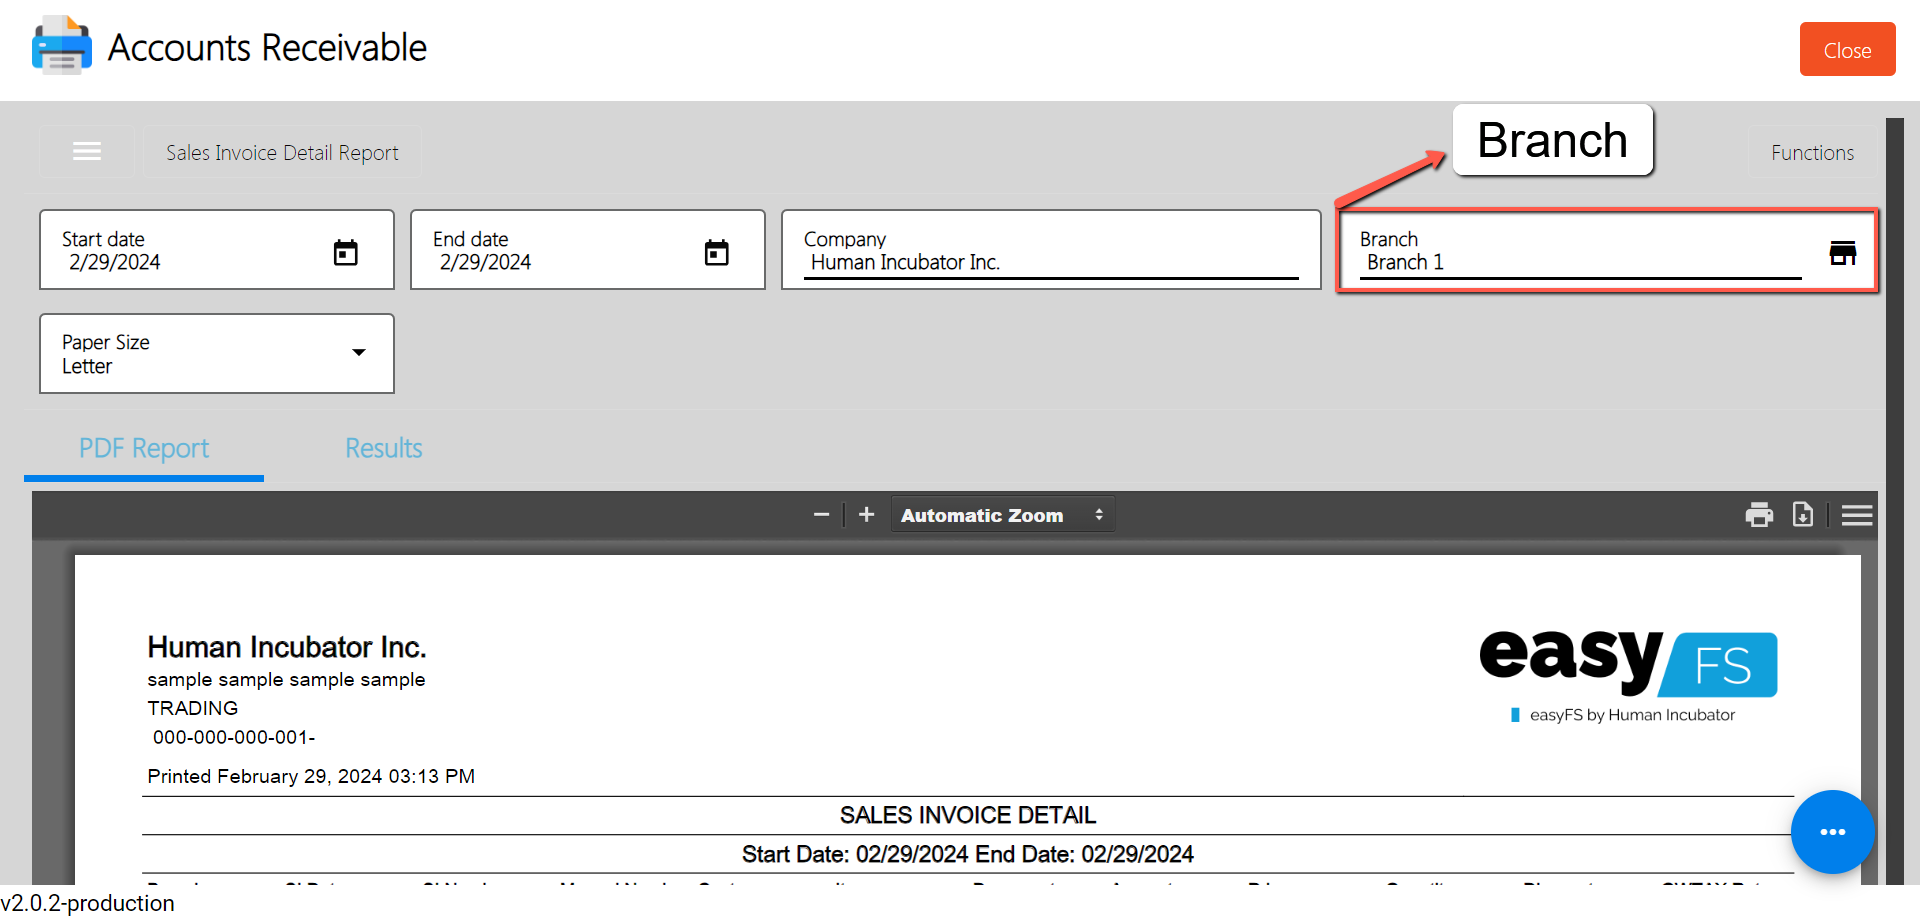
- PDF Report is automatically generated: After providing the Start and End Date and the Branch, the PDF Report will automatically generated.
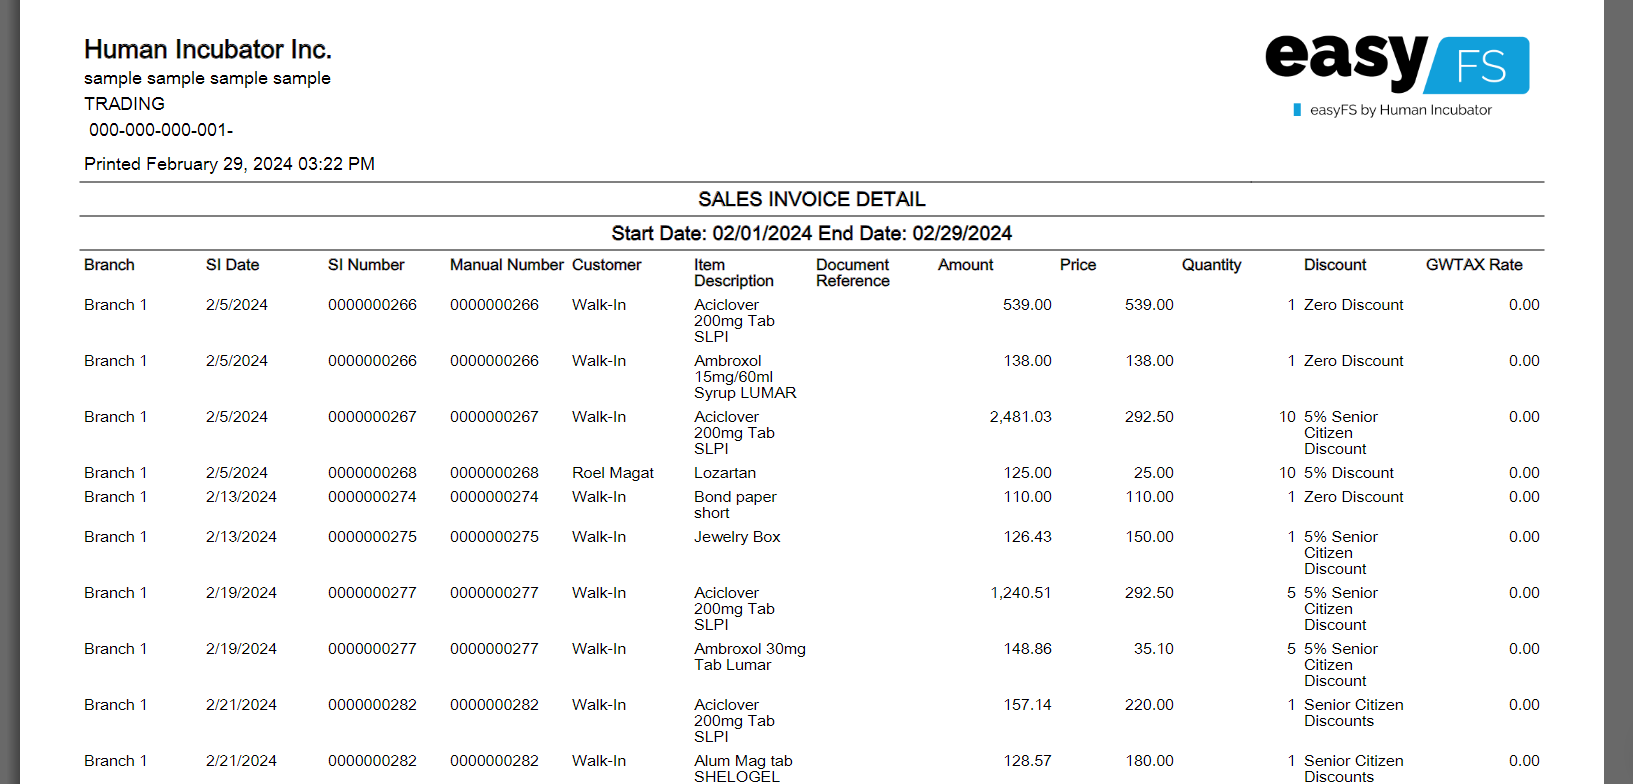
Sample Printout
- Download PDF (if needed): If you want to download the pdf, look for the download icon then click.
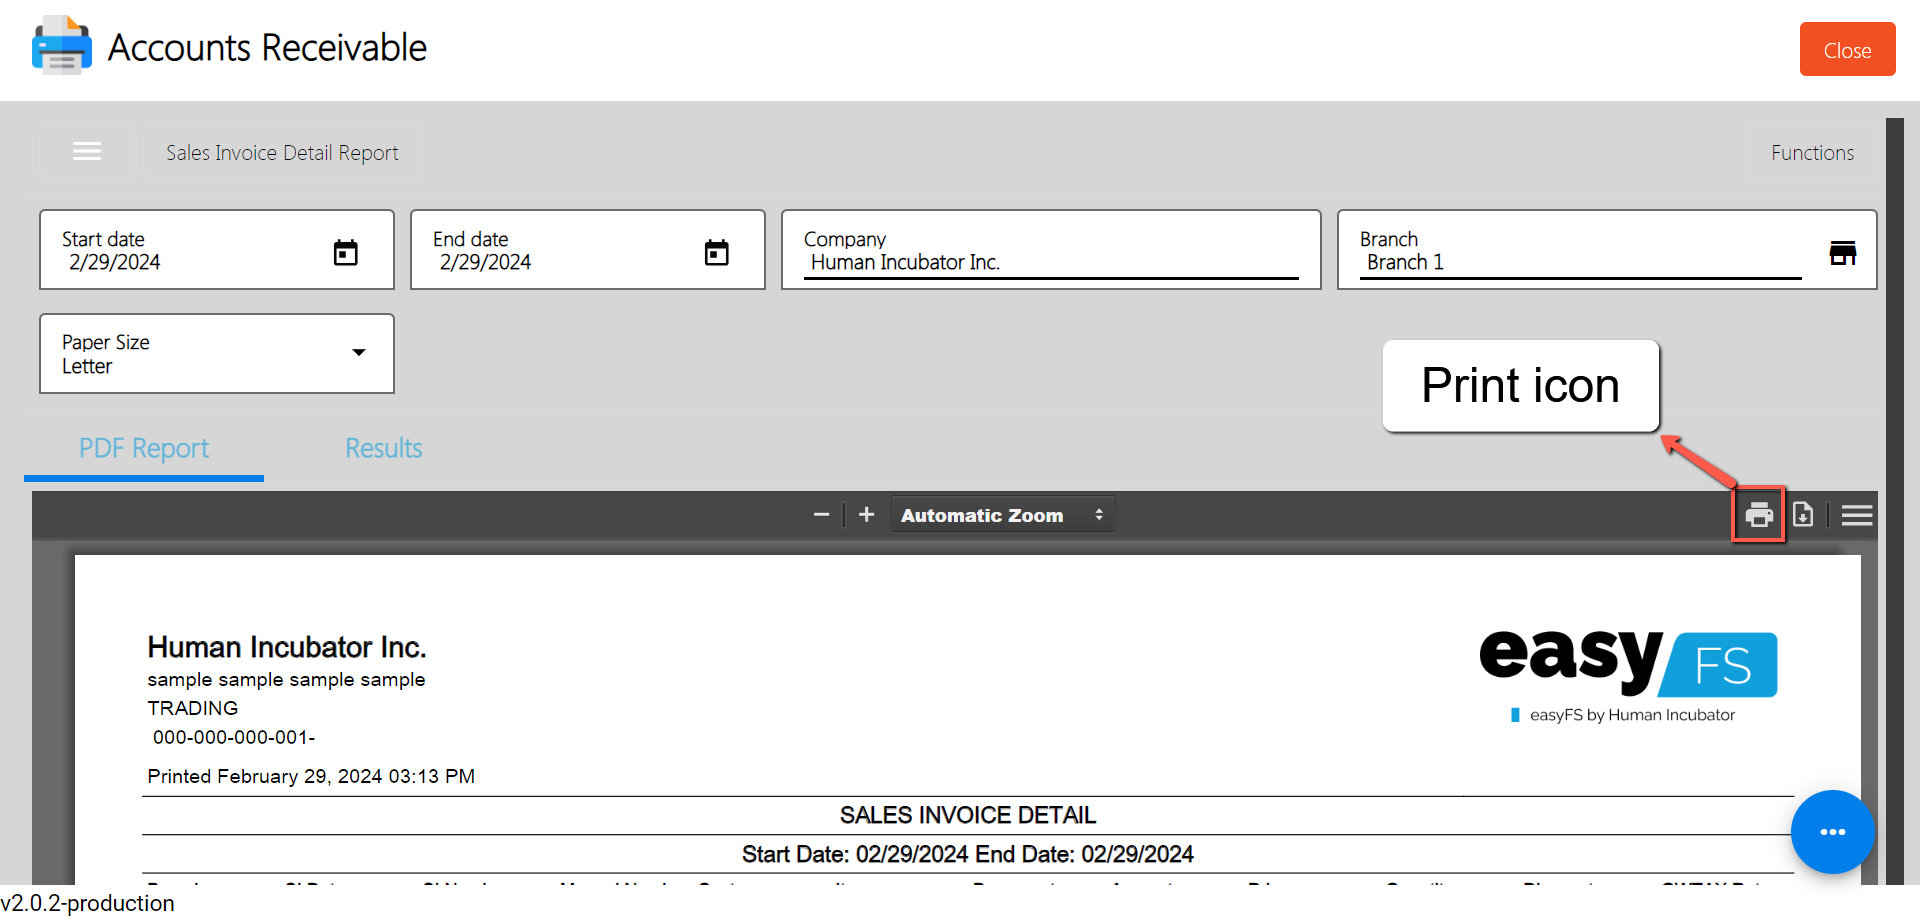
- Print PDF (if needed): If you want to print the pdf, look for the print icon then click.
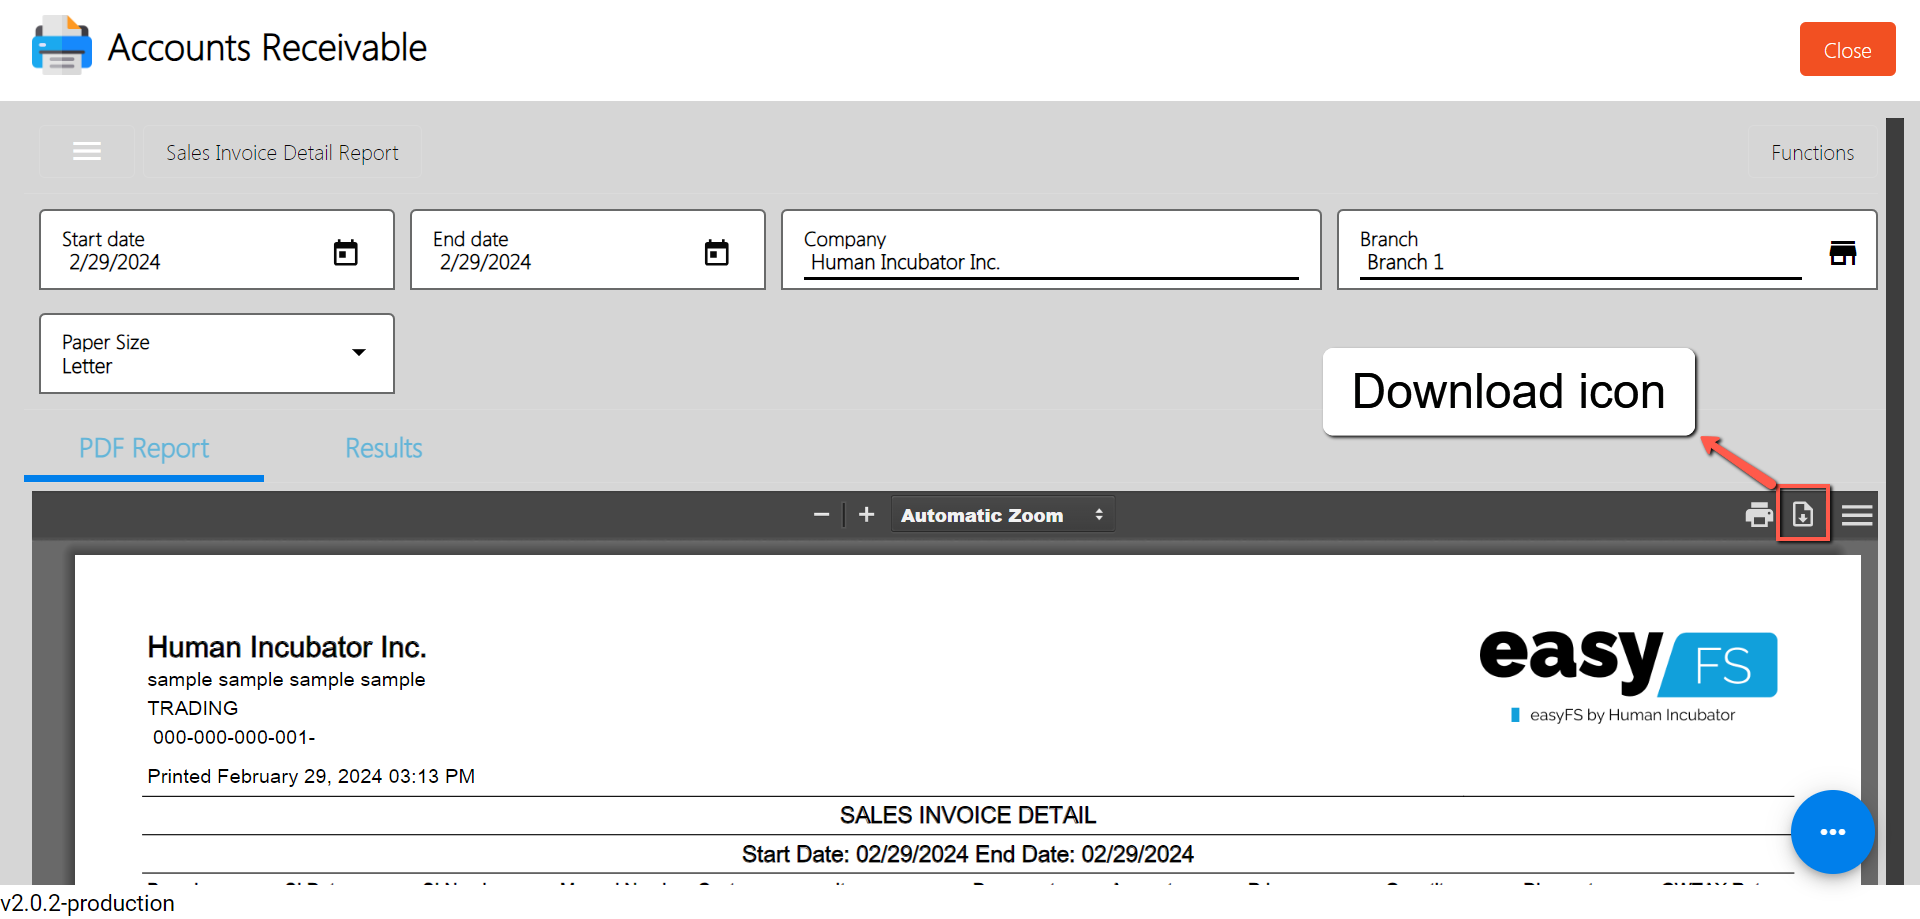
Collection Summary Report
Collection Summary Report provides an overview of the collections from customers made within a specific period. It includes a total amount collected and the collection number. It offers a general summary of overall collection activity without detailed breakdowns.
To generate Collection Summary report, here are the steps for you follow:
- Go to Sales modules: Navigate to Sales modules, then select Accounts Receivable.
- Click Collection Summary Report : Under the menus from Accounts Receivable, look for Collection Summary Report then click the menu to navigate.
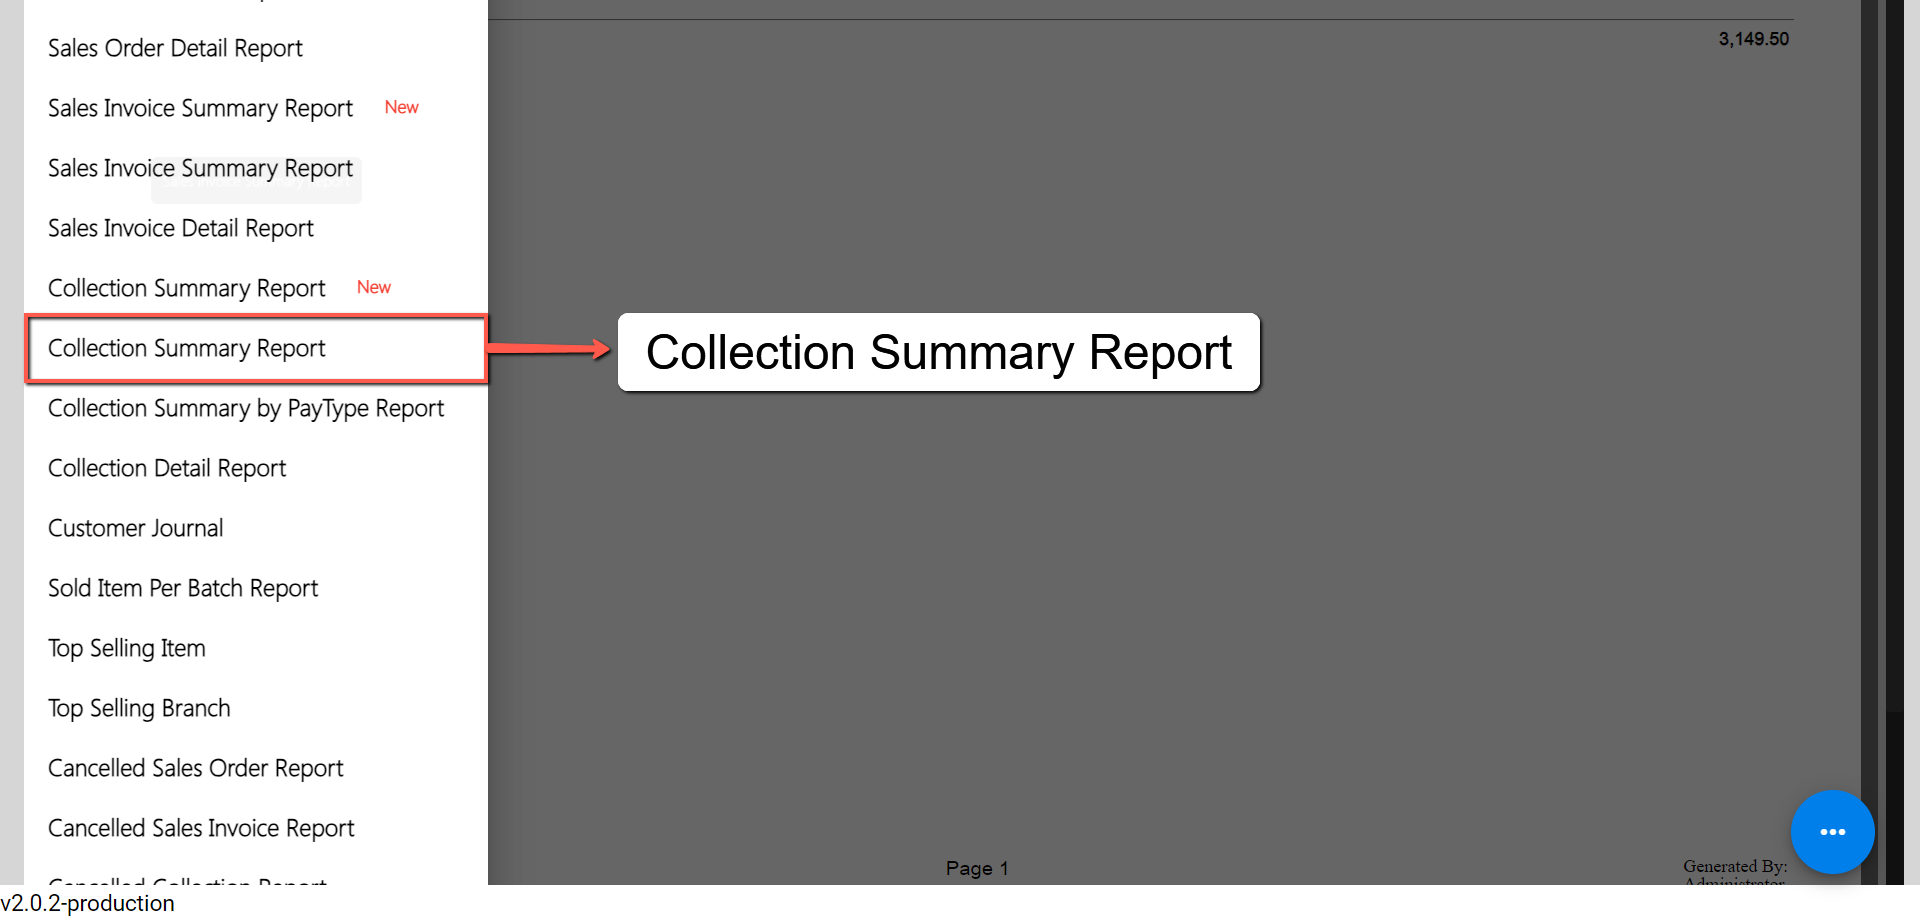
- Select Start and End Date: Provide an exact date you want to generate a report by clicking on the Start Date and End Date.
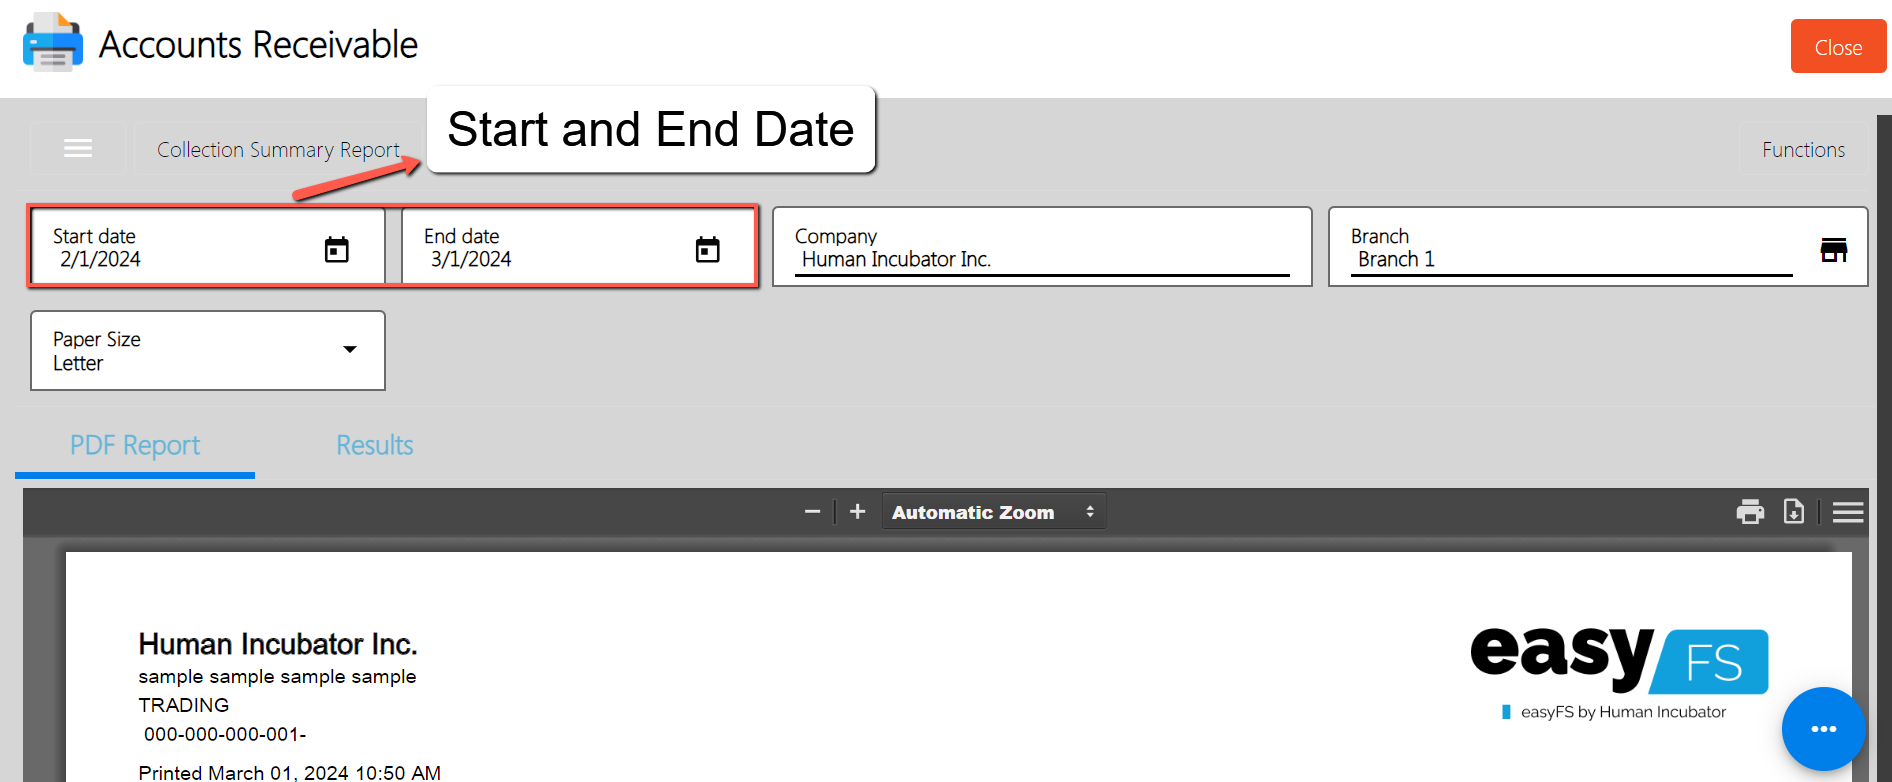
- Select a Branch (if needed): By default, the value of the Branch field is based on your login branch.
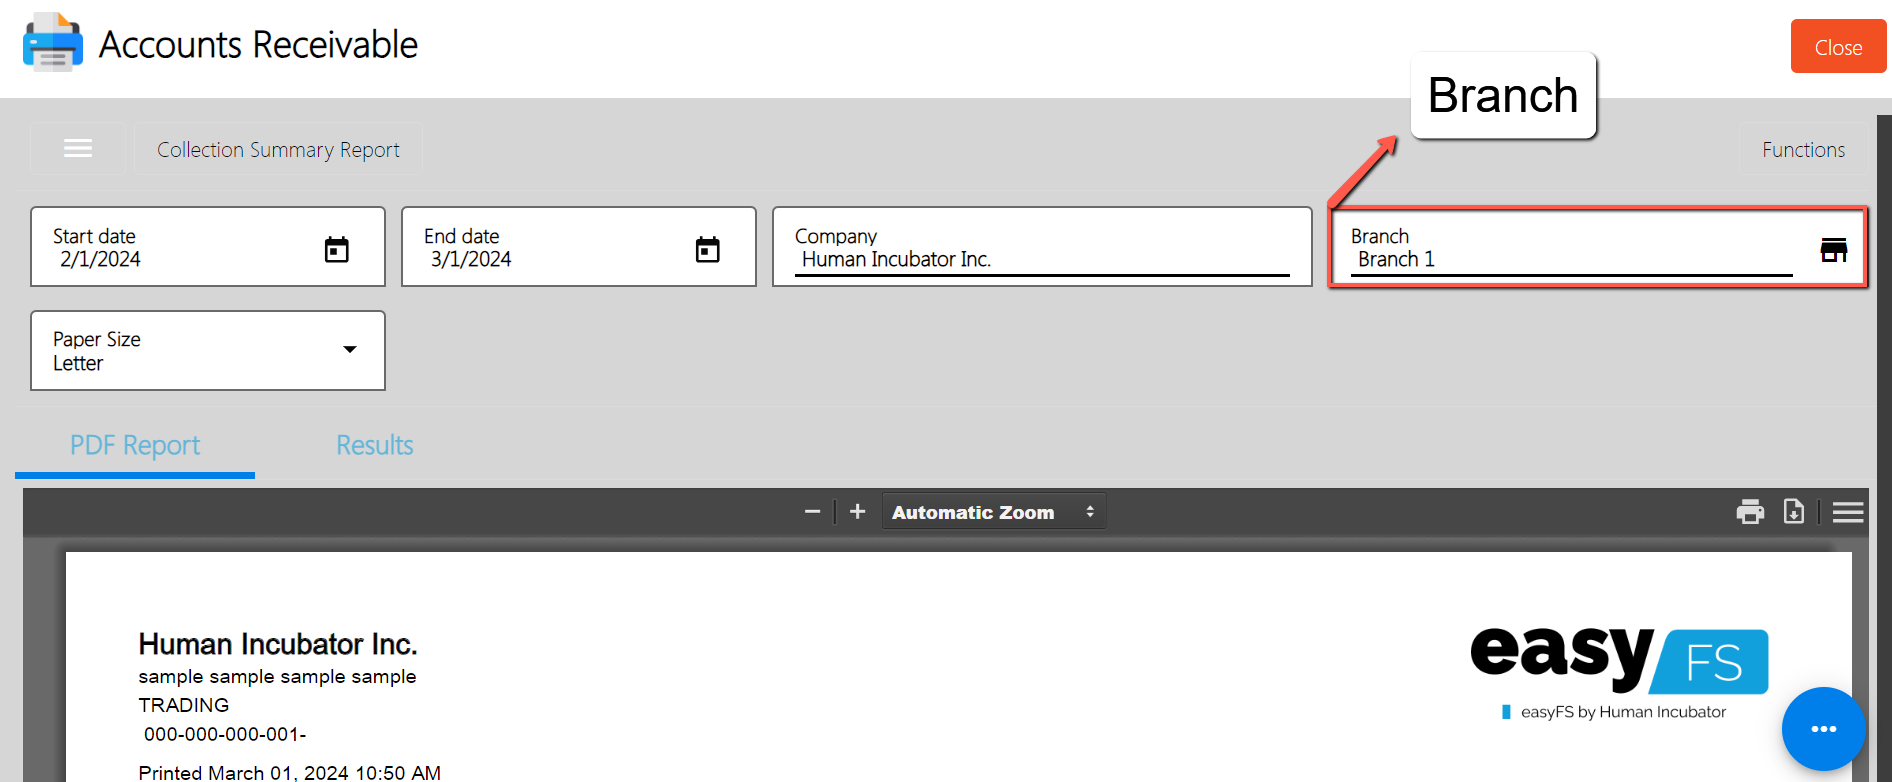
- PDF Report is automatically generated: After providing the Date as of and the Branch, the PDF Report will automatically generated.
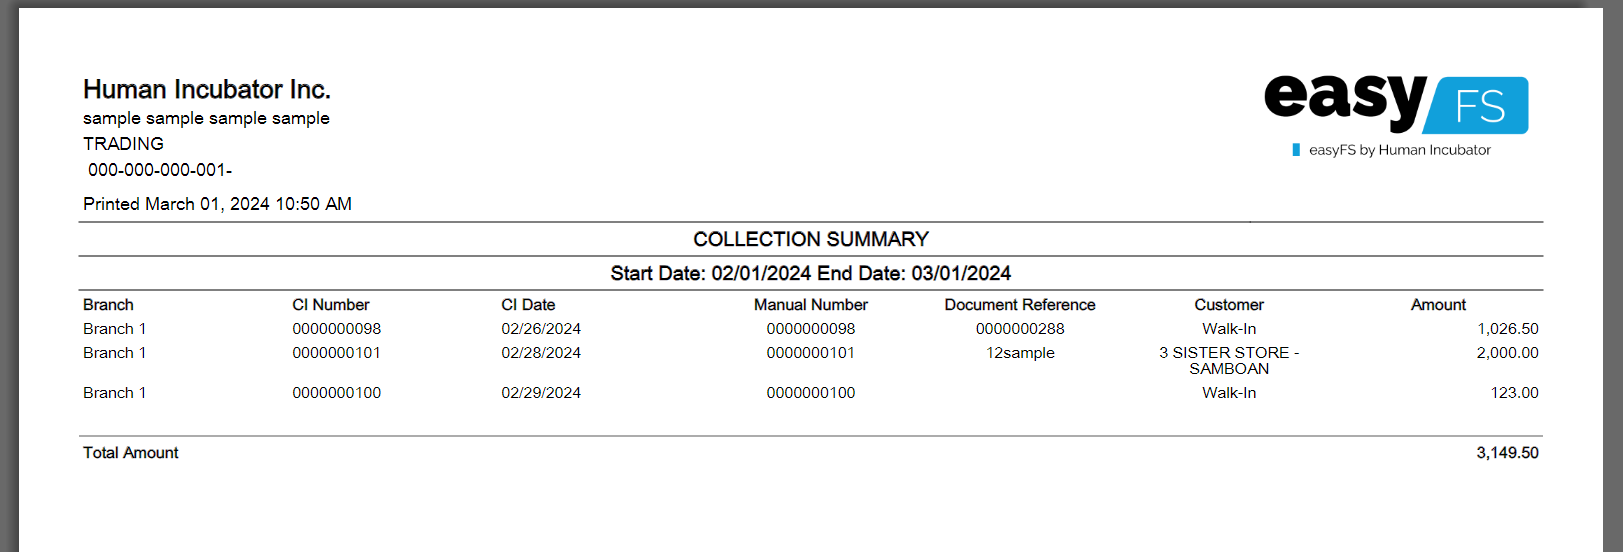
Sample Printout
- Download PDF (if needed): If you want to download the pdf, look for the download icon then click.
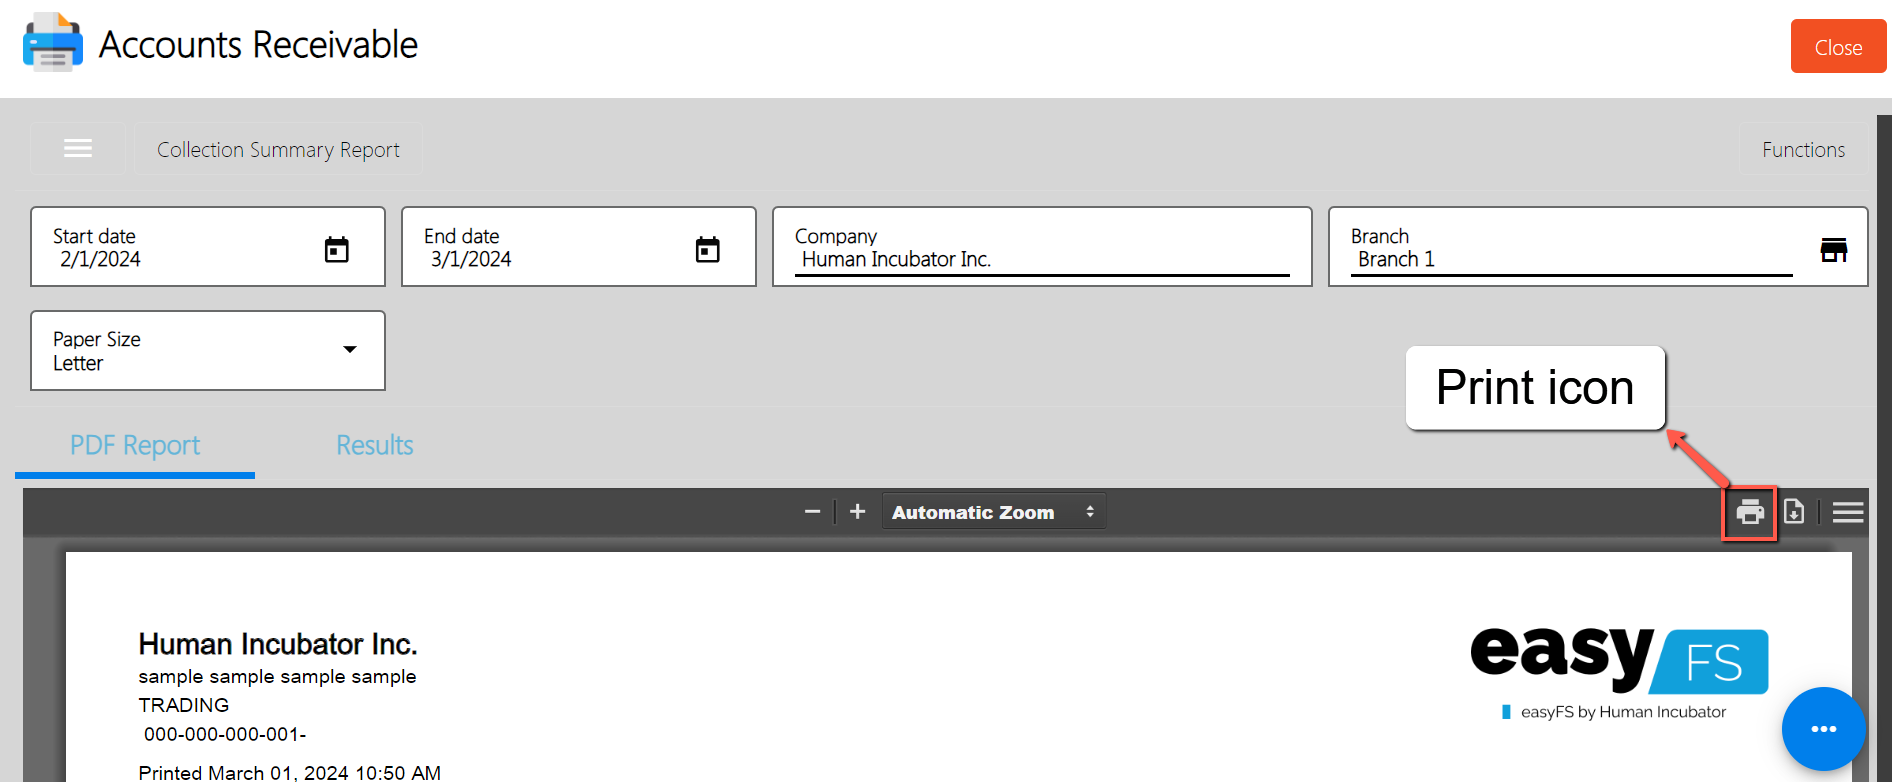
- Print PDF (if needed): If you want to print the pdf, look for the print icon then click.
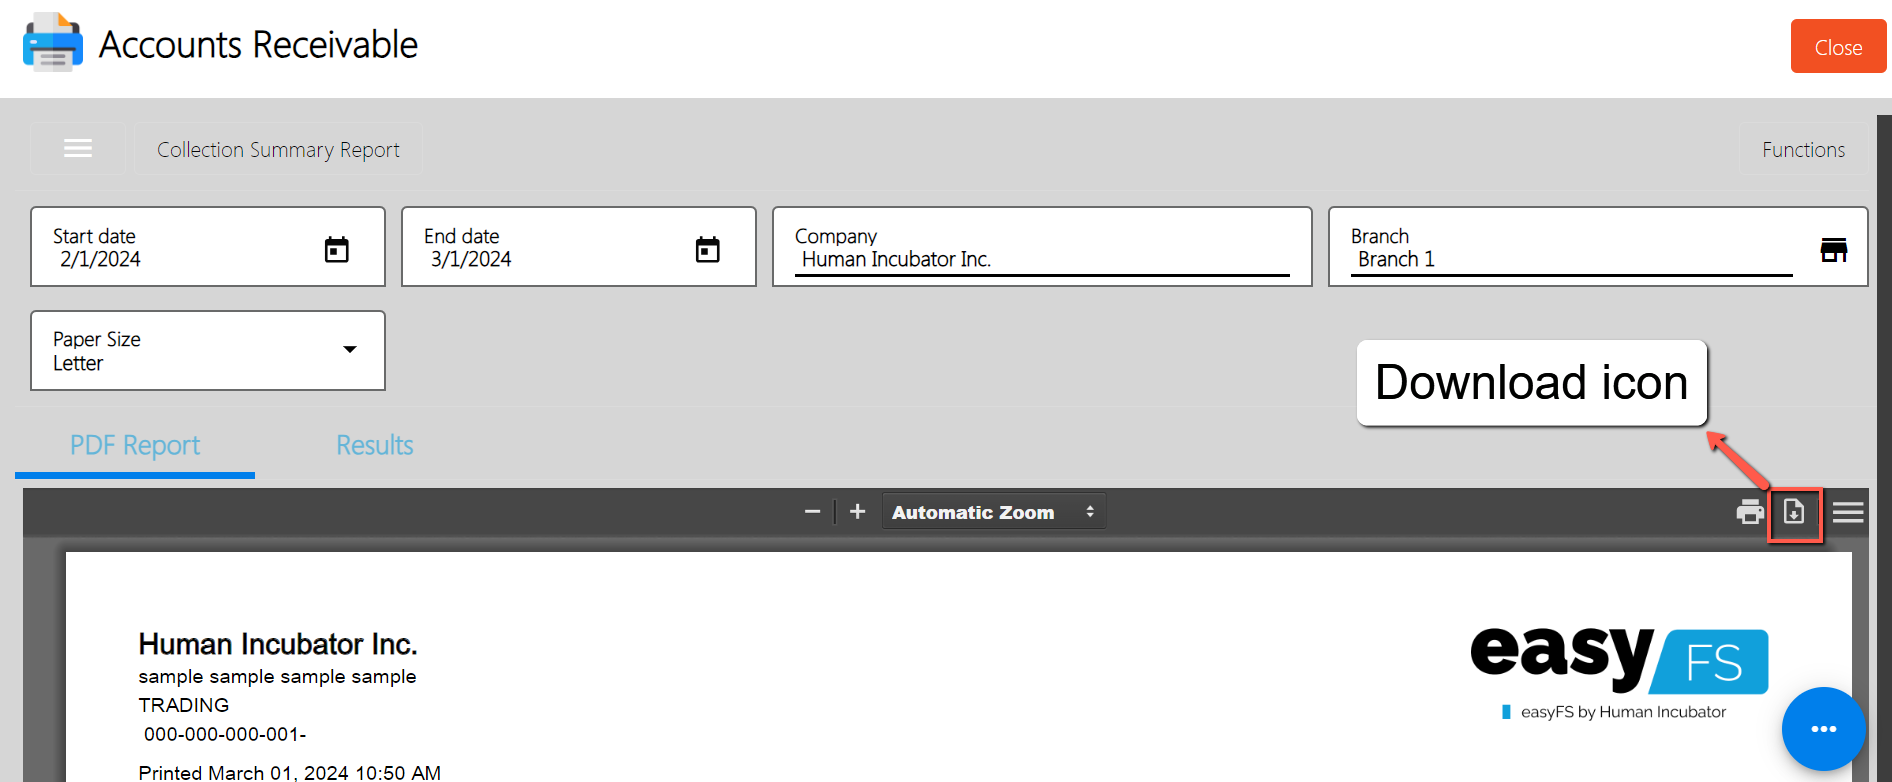
Collection Summary by PayType Report
Collection Summary by PayType Report focuses on categorizing collections based on different payment methods or types. It provides breakdown of collections by payment type such as cash, credit card, check, etc.
To generate Collection Summary by PayType report, here are the steps for you follow:
- Go to Sales modules: Navigate to Sales modules, then select Accounts Receivable.
- Click Collection Summary by PayType Report: Under the menus from Accounts Receivable, look for Collection Summary by PayType Report then click the menu to navigate.
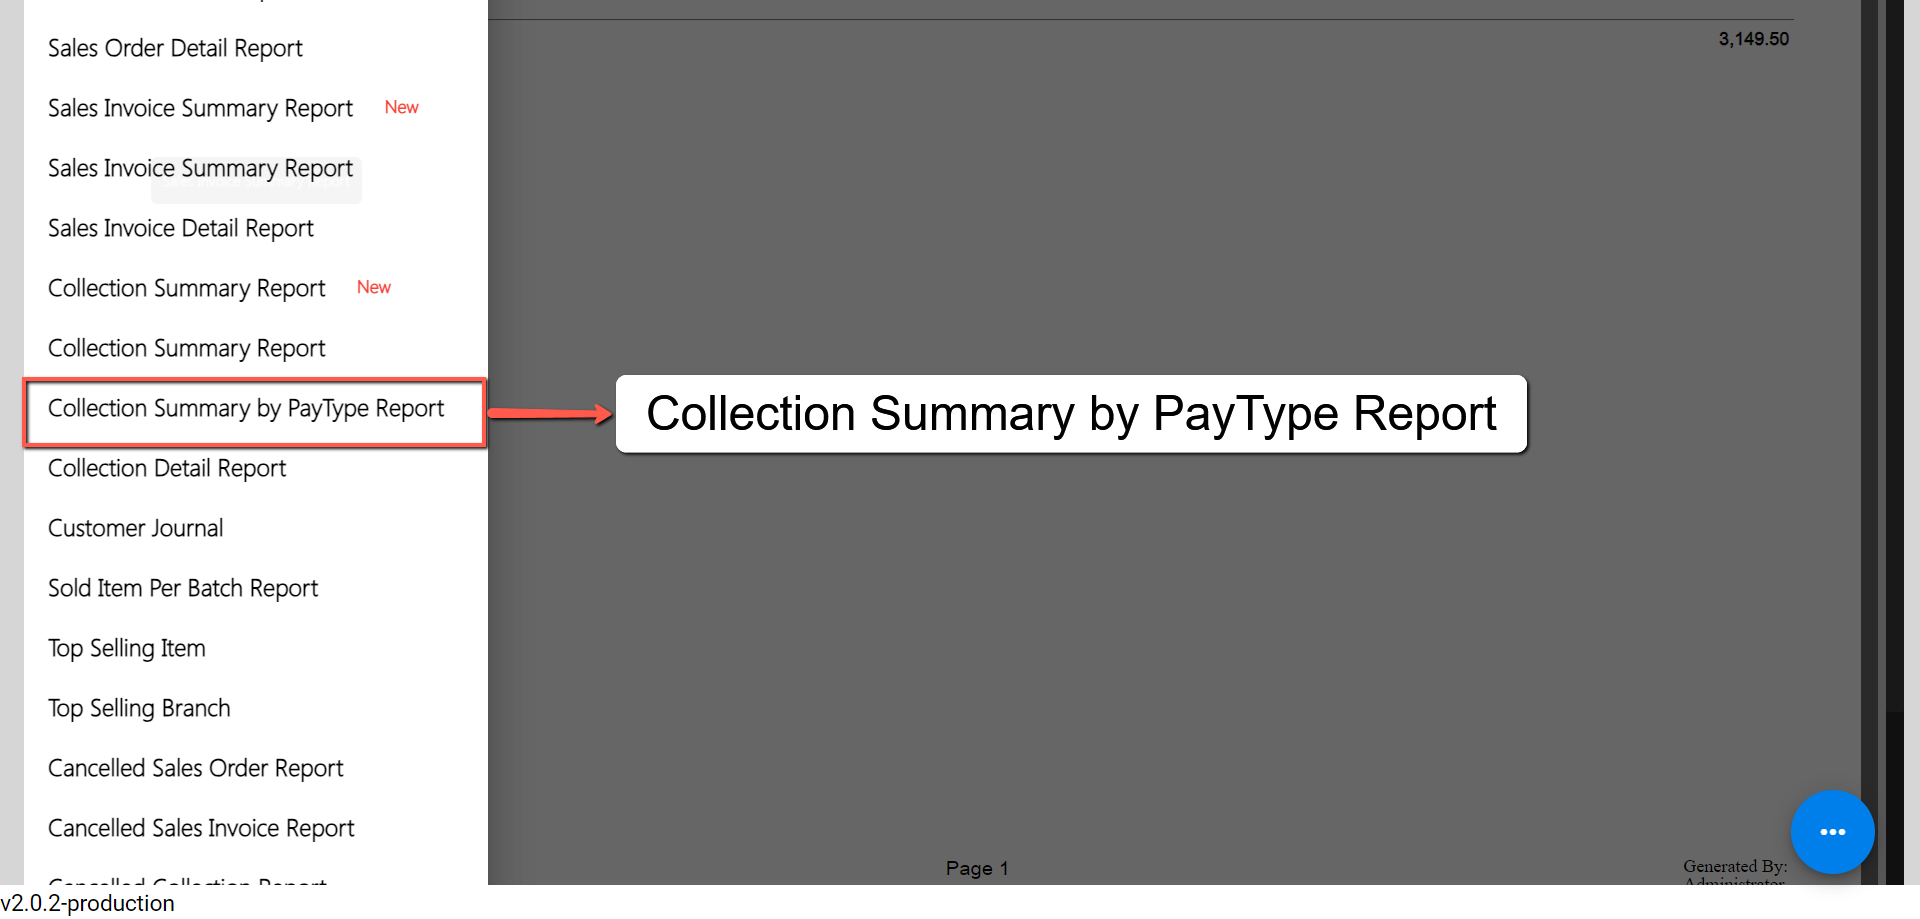
- Select Start and End Date: Provide an exact date you want to generate a report by clicking on the Start Date and End Date.
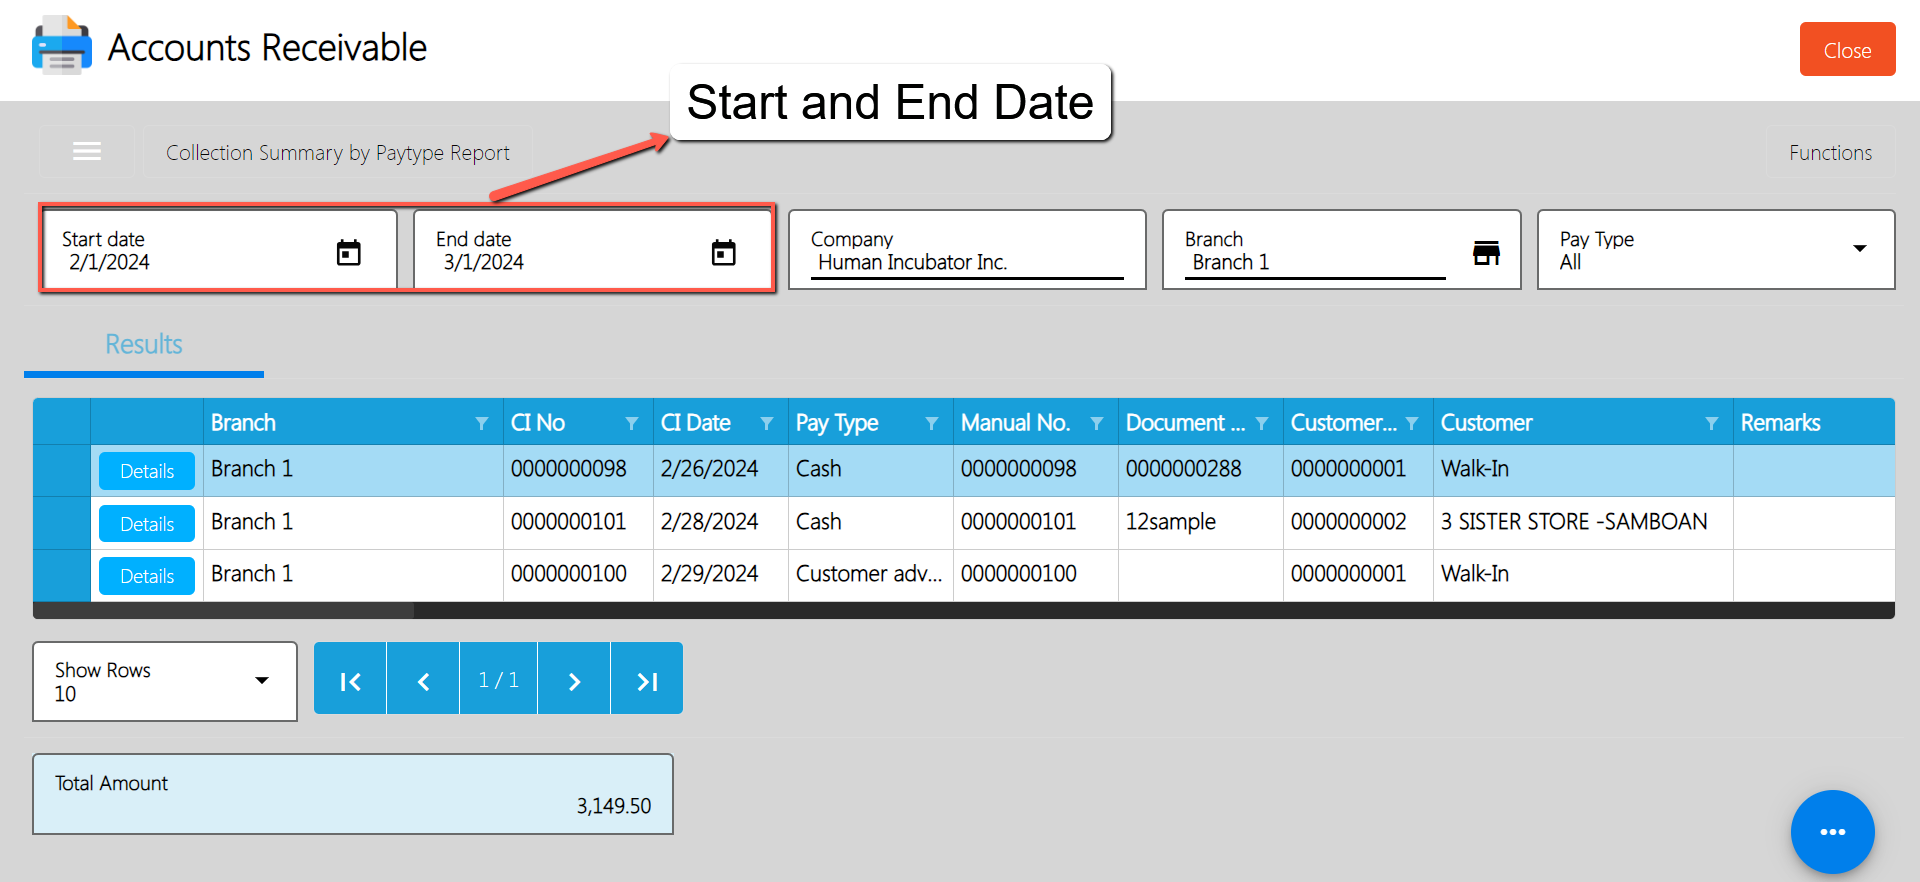
- Select a Branch (if needed): By default, the value of the Branch field is based on your login branch.
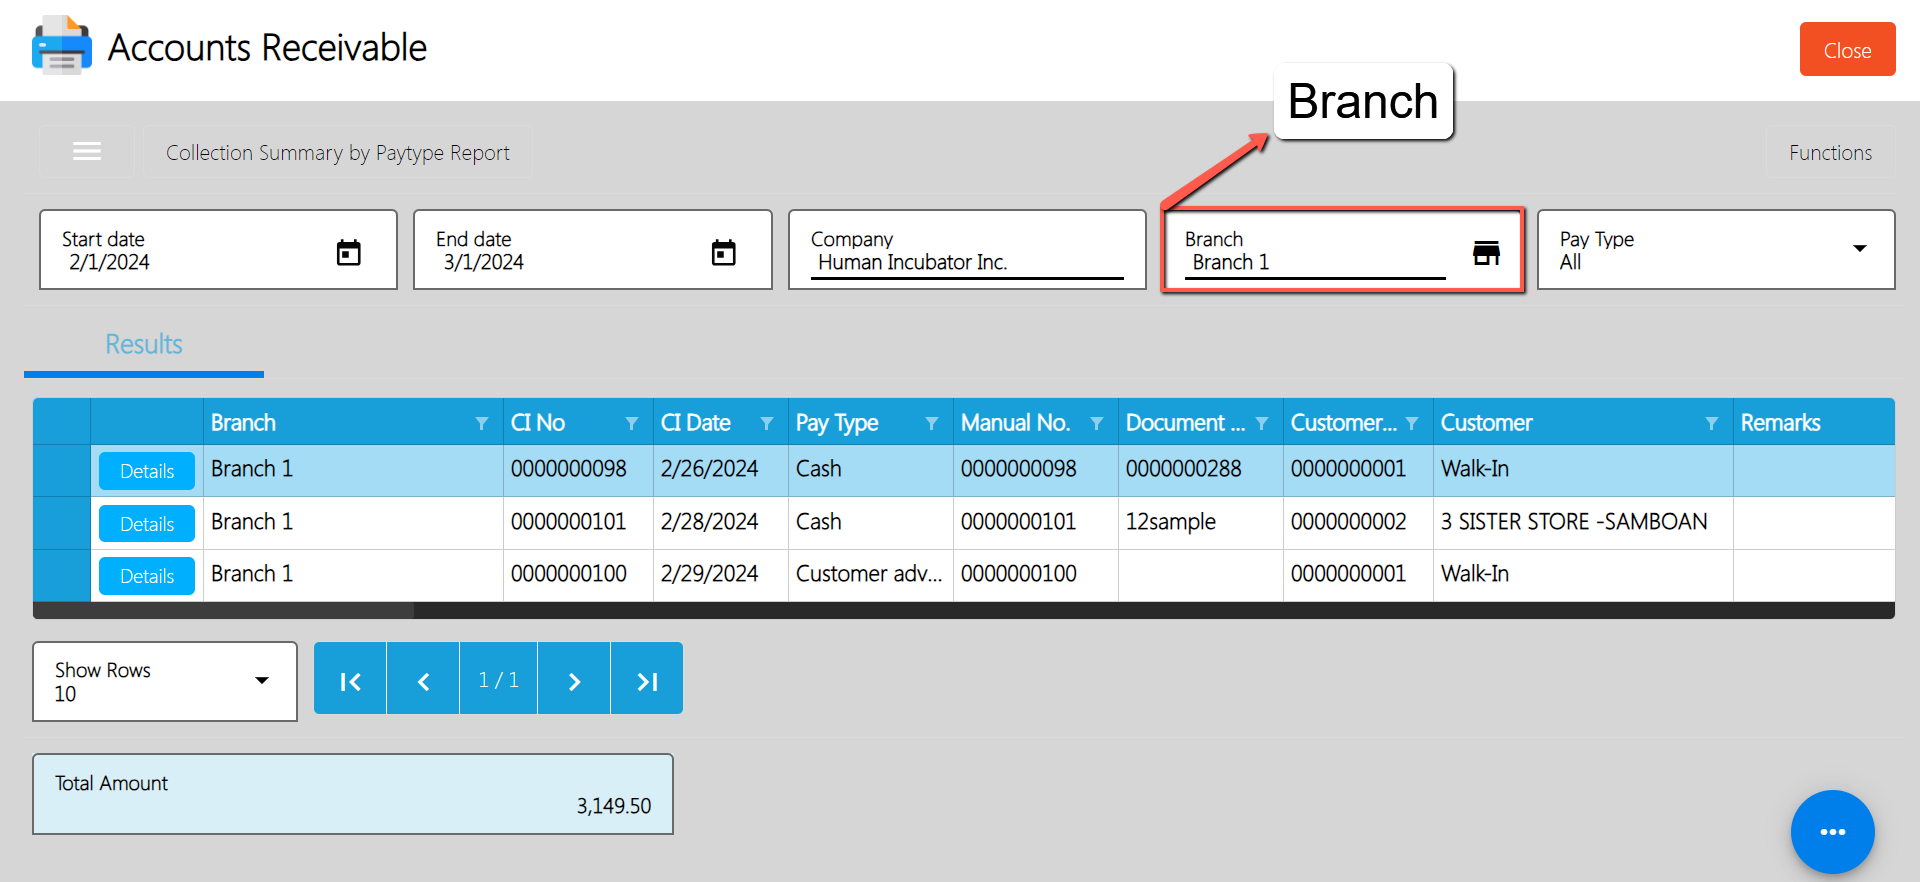
- Select a PayType: By default, the value of the Pay Type is ALL which means the report will display based on all pay types available. If you want to view a report per pay type, select the correct pay type on the Pay Type field.
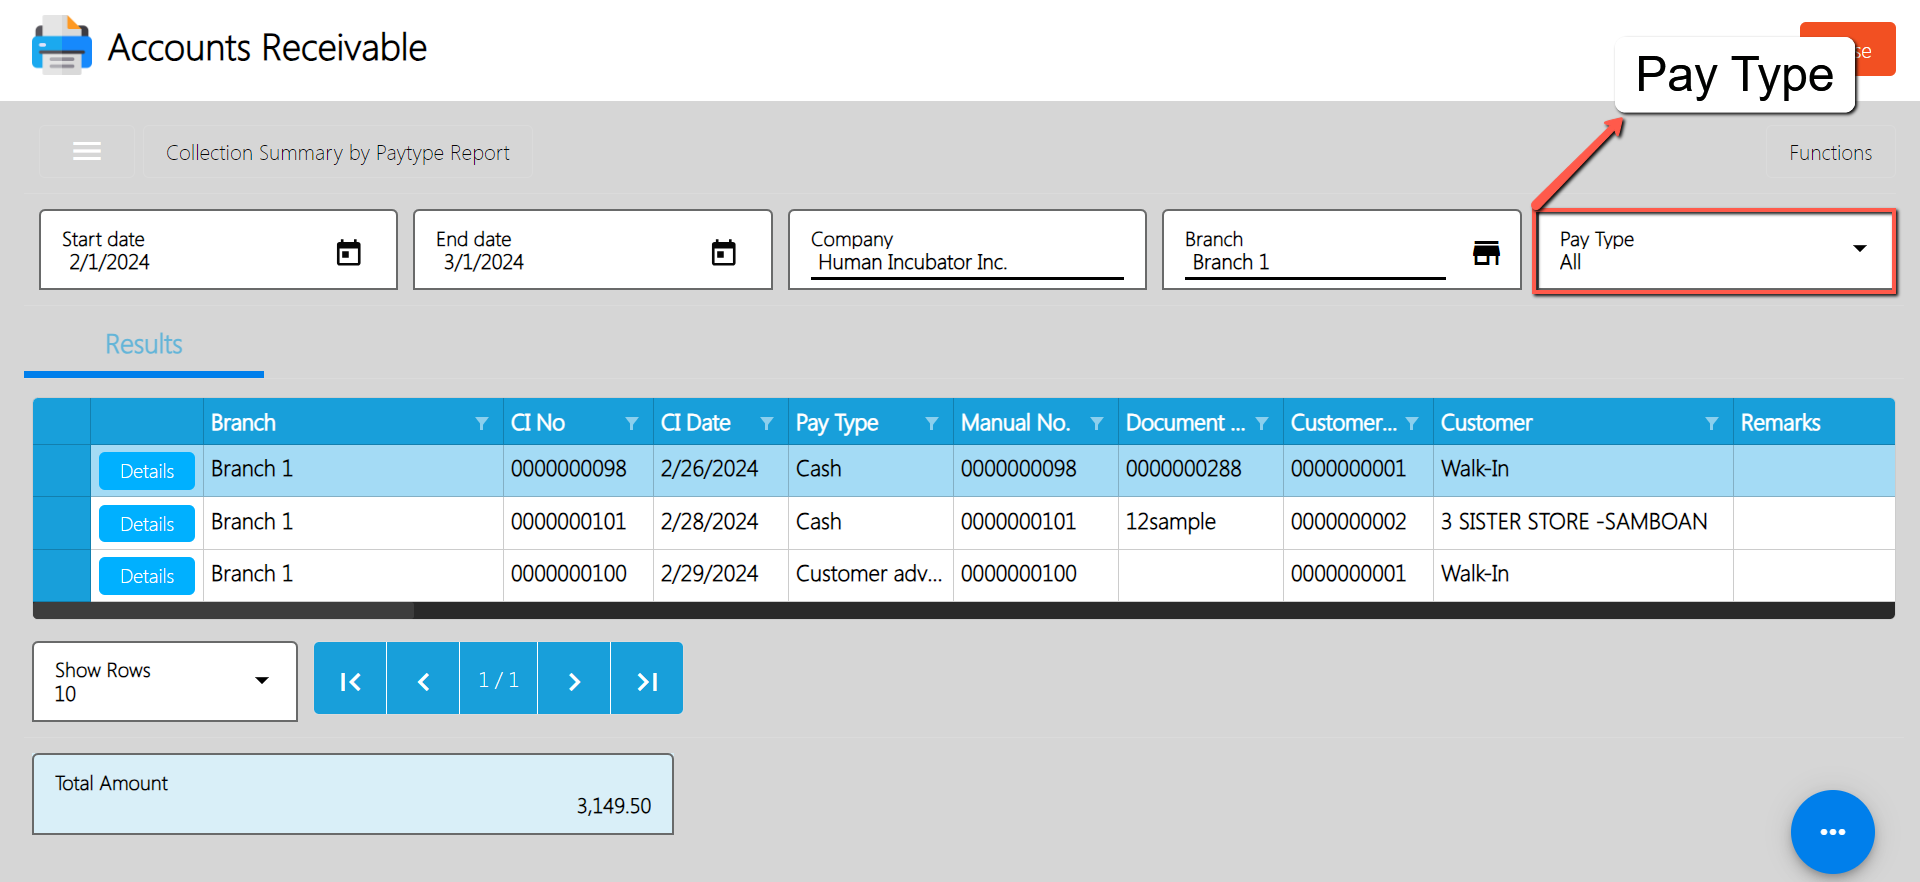
- Report is automatically generated in list: After providing the start and end date, the report will automatically be generated on list.

Sample Report
- Download report in excel file(if needed): If you want to download the report in excel file, look for the Functions button then click the Download Data menu. An excel file will automatically download.
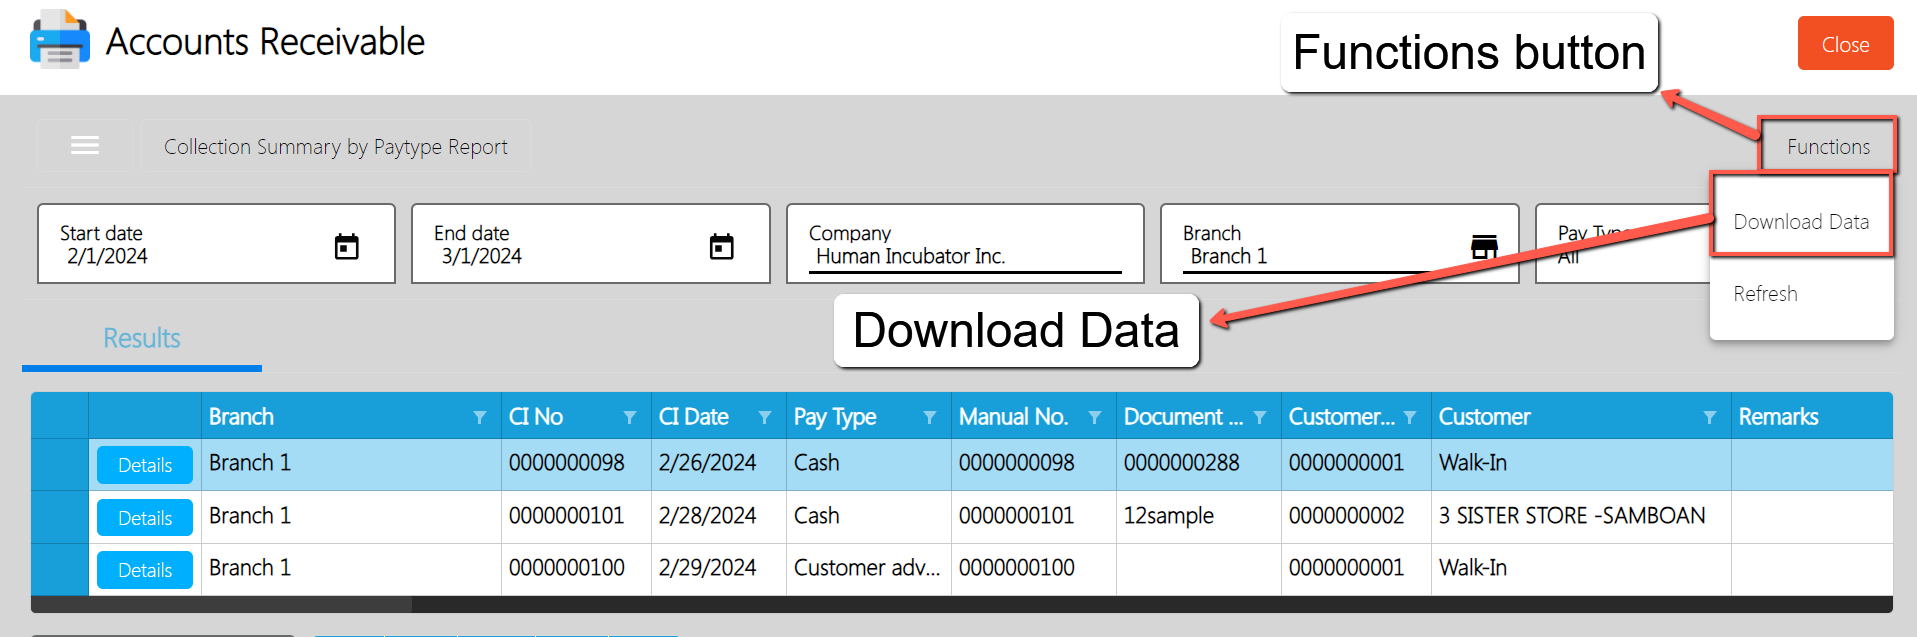
Collection Detail Report
Collection Detail Report offers a detailed view of individual collection transactions. It includes specifics such as collection date, customer name, payment amount, collection number, etc.
To generate Collection Detail report, here are the steps for you follow:
- Go to Sales modules: Navigate to Sales modules, then select Accounts Receivable.
- Click Collection Detail Report: Under the menus from Accounts Receivable, look for Collection Detail Report then click the menu to navigate.
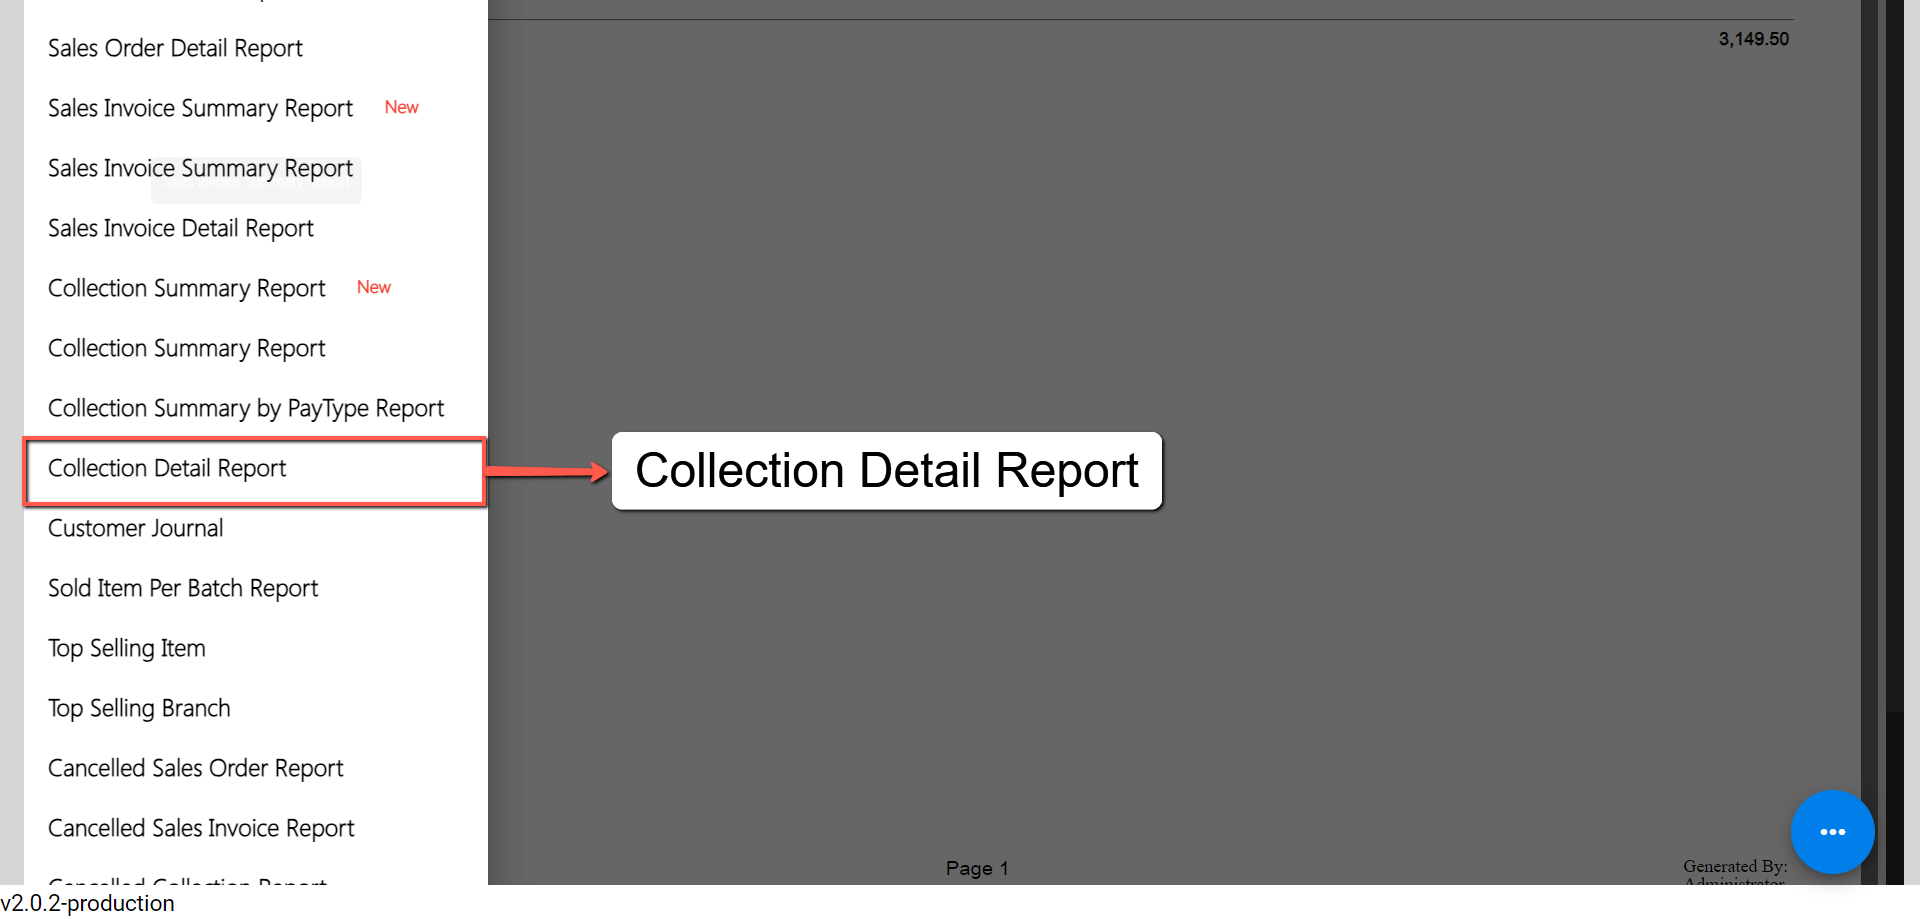
- Select Start and End Date: Provide an exact date you want to generate a report by clicking on the Start Date and End Date.
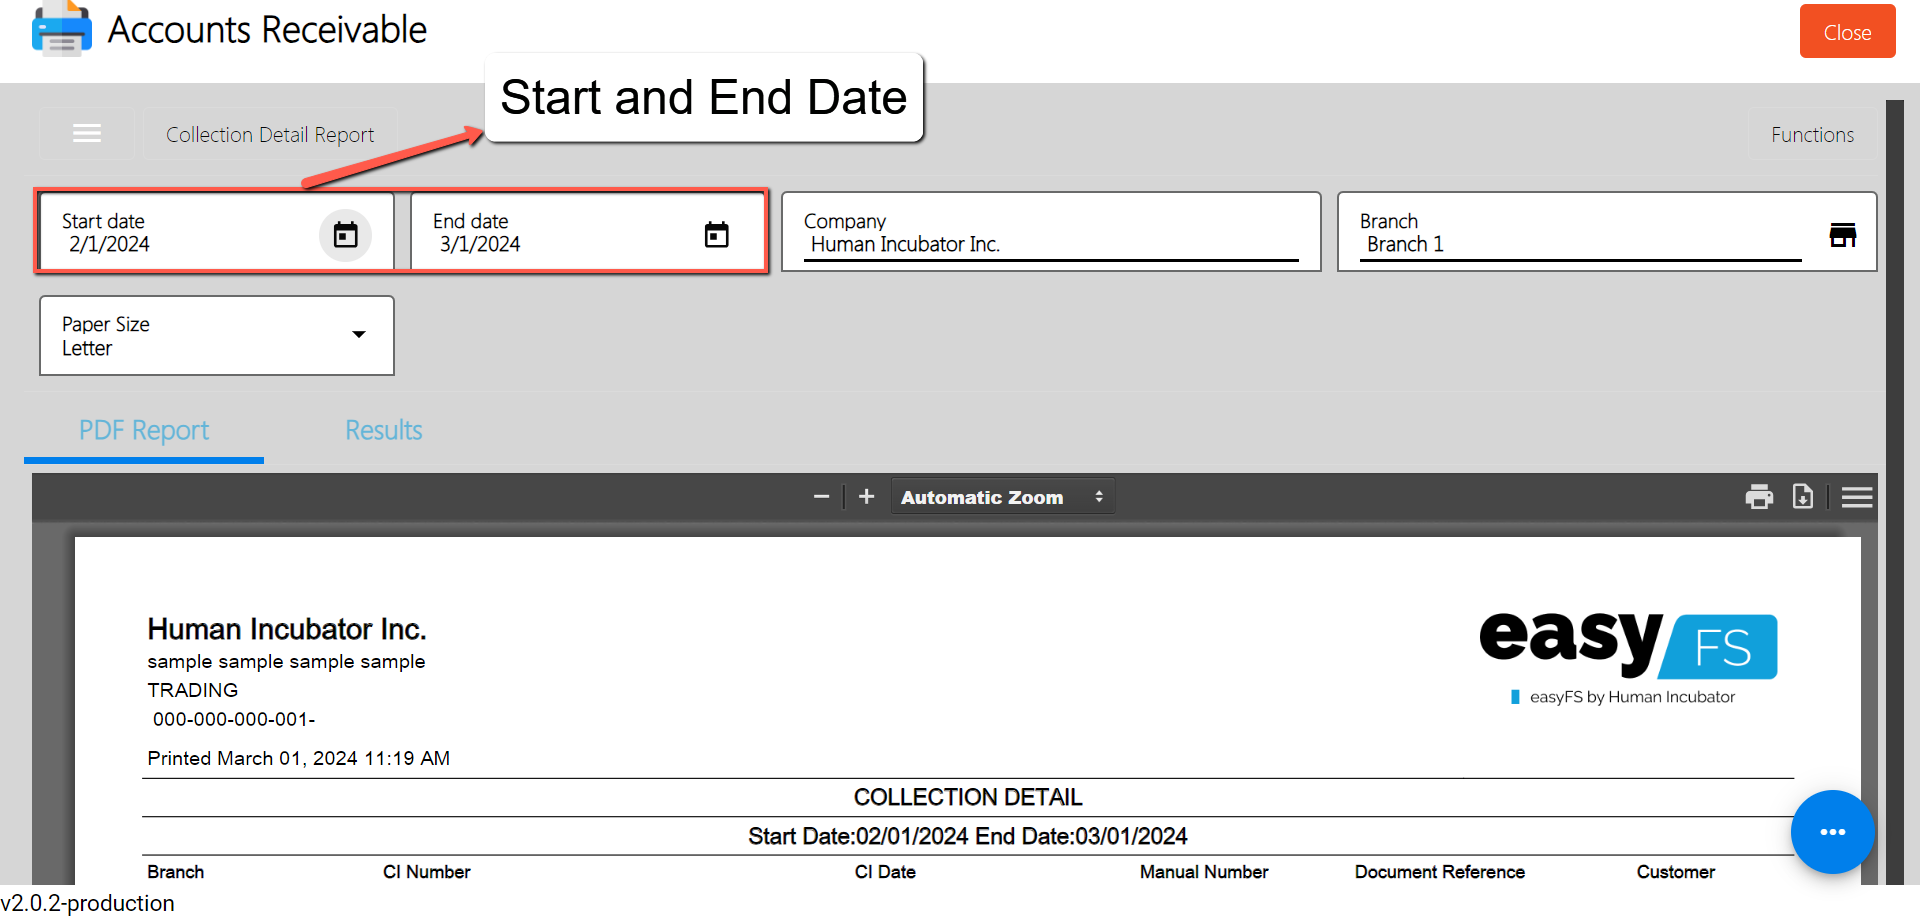
- Select a Branch (if needed): By default, the value of the Branch field is based on your login branch.
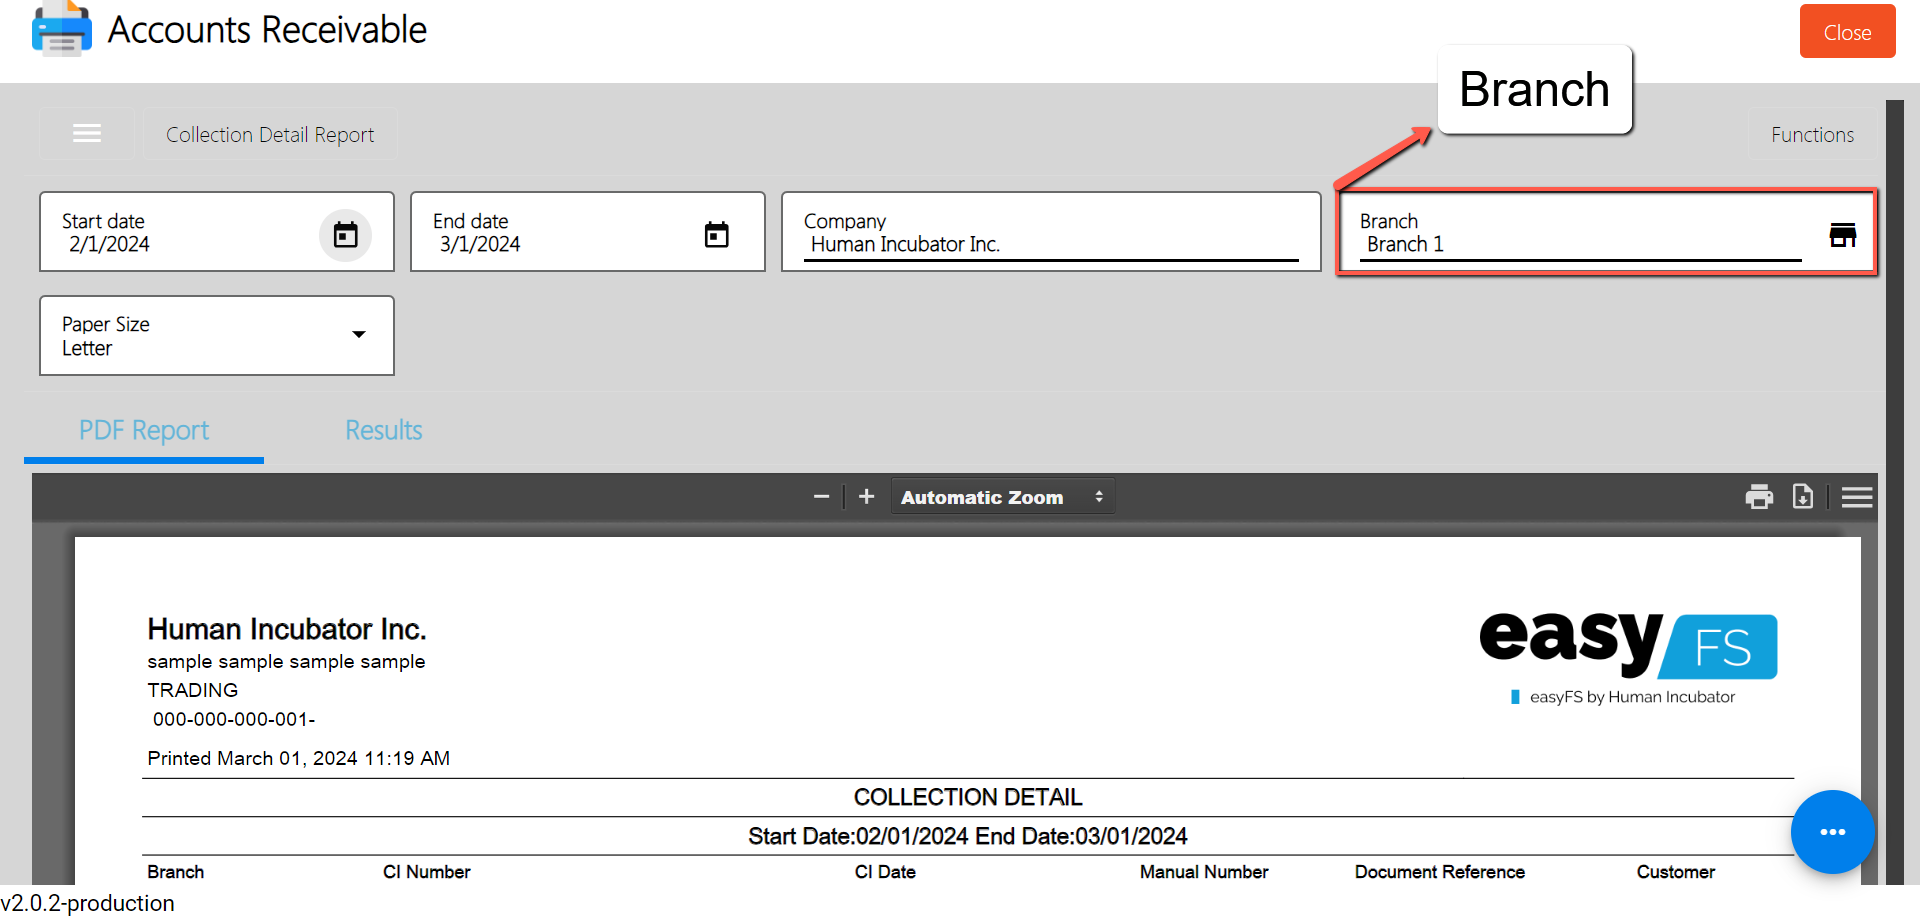
- PDF Report is automatically generated: After providing the Date as of and the Branch, the PDF Report will automatically generated.
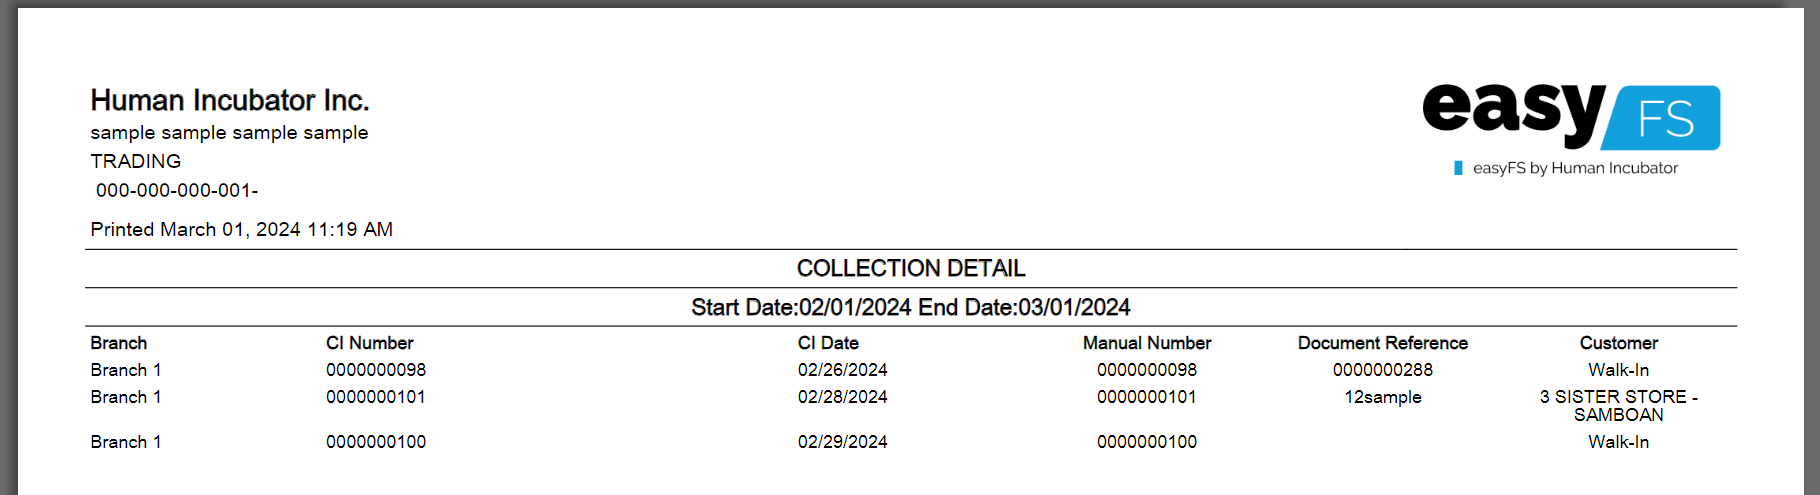
Sample Printout
- Download PDF (if needed): If you want to download the pdf, look for the download icon then click.
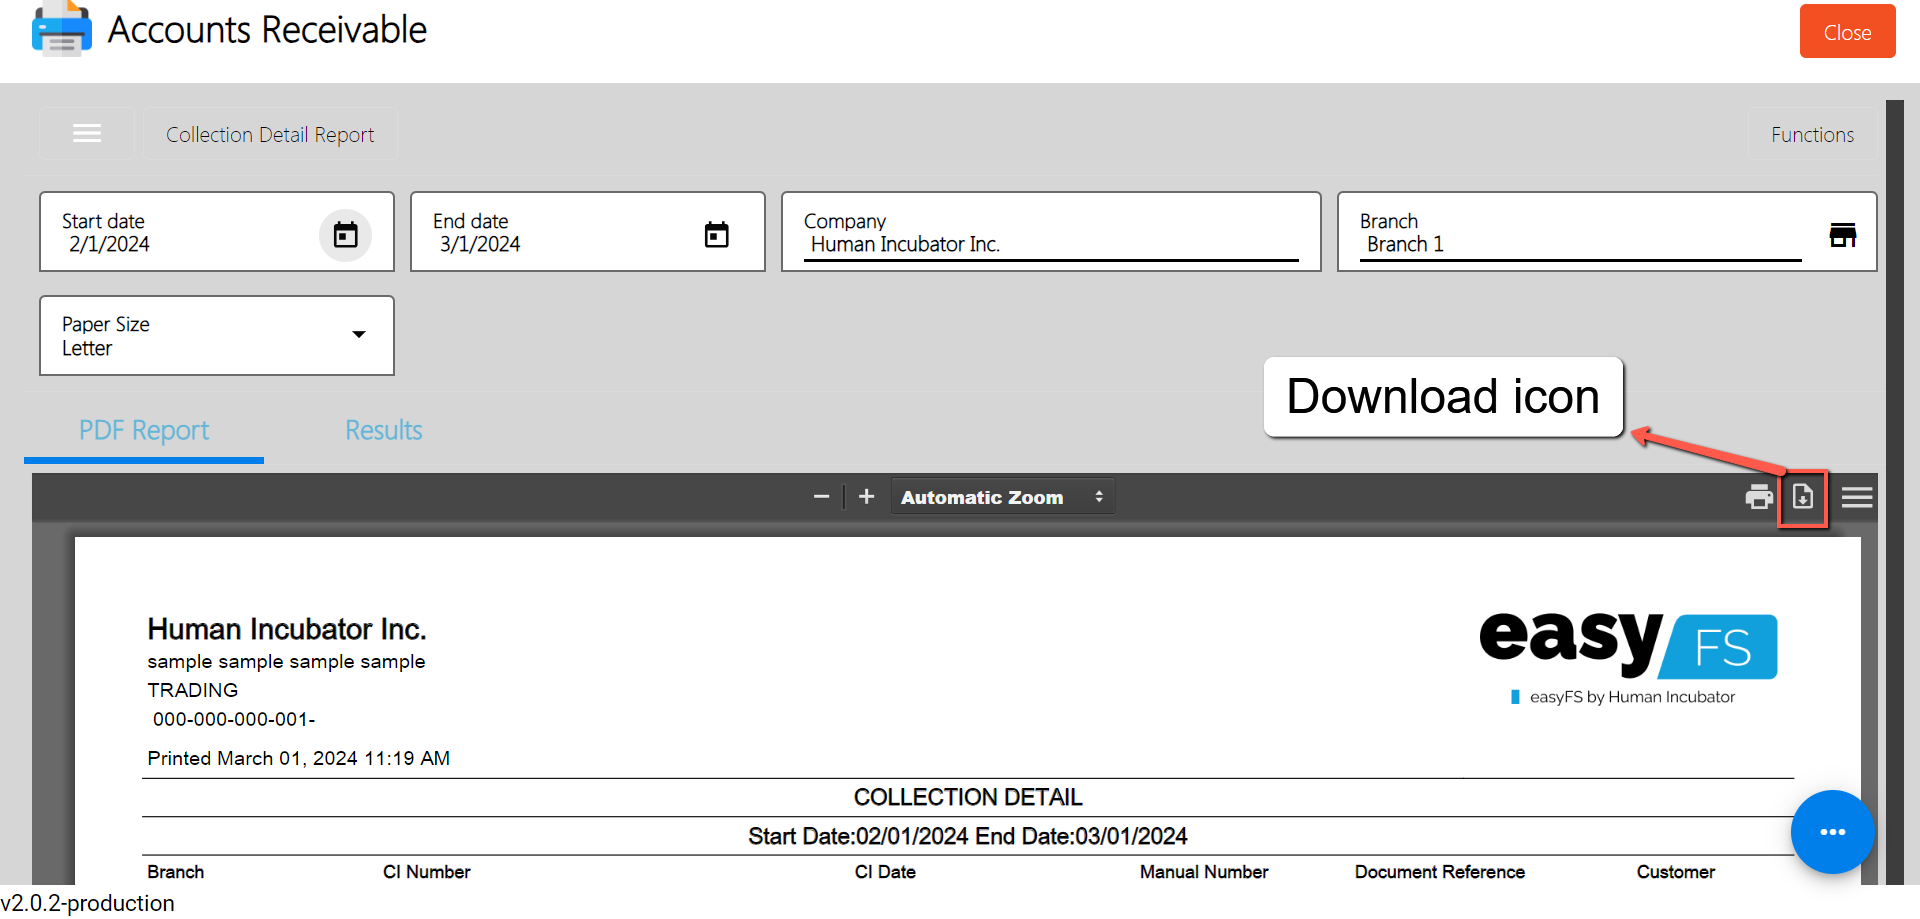
- Print PDF (if needed): If you want to print the pdf, look for the print icon then click.
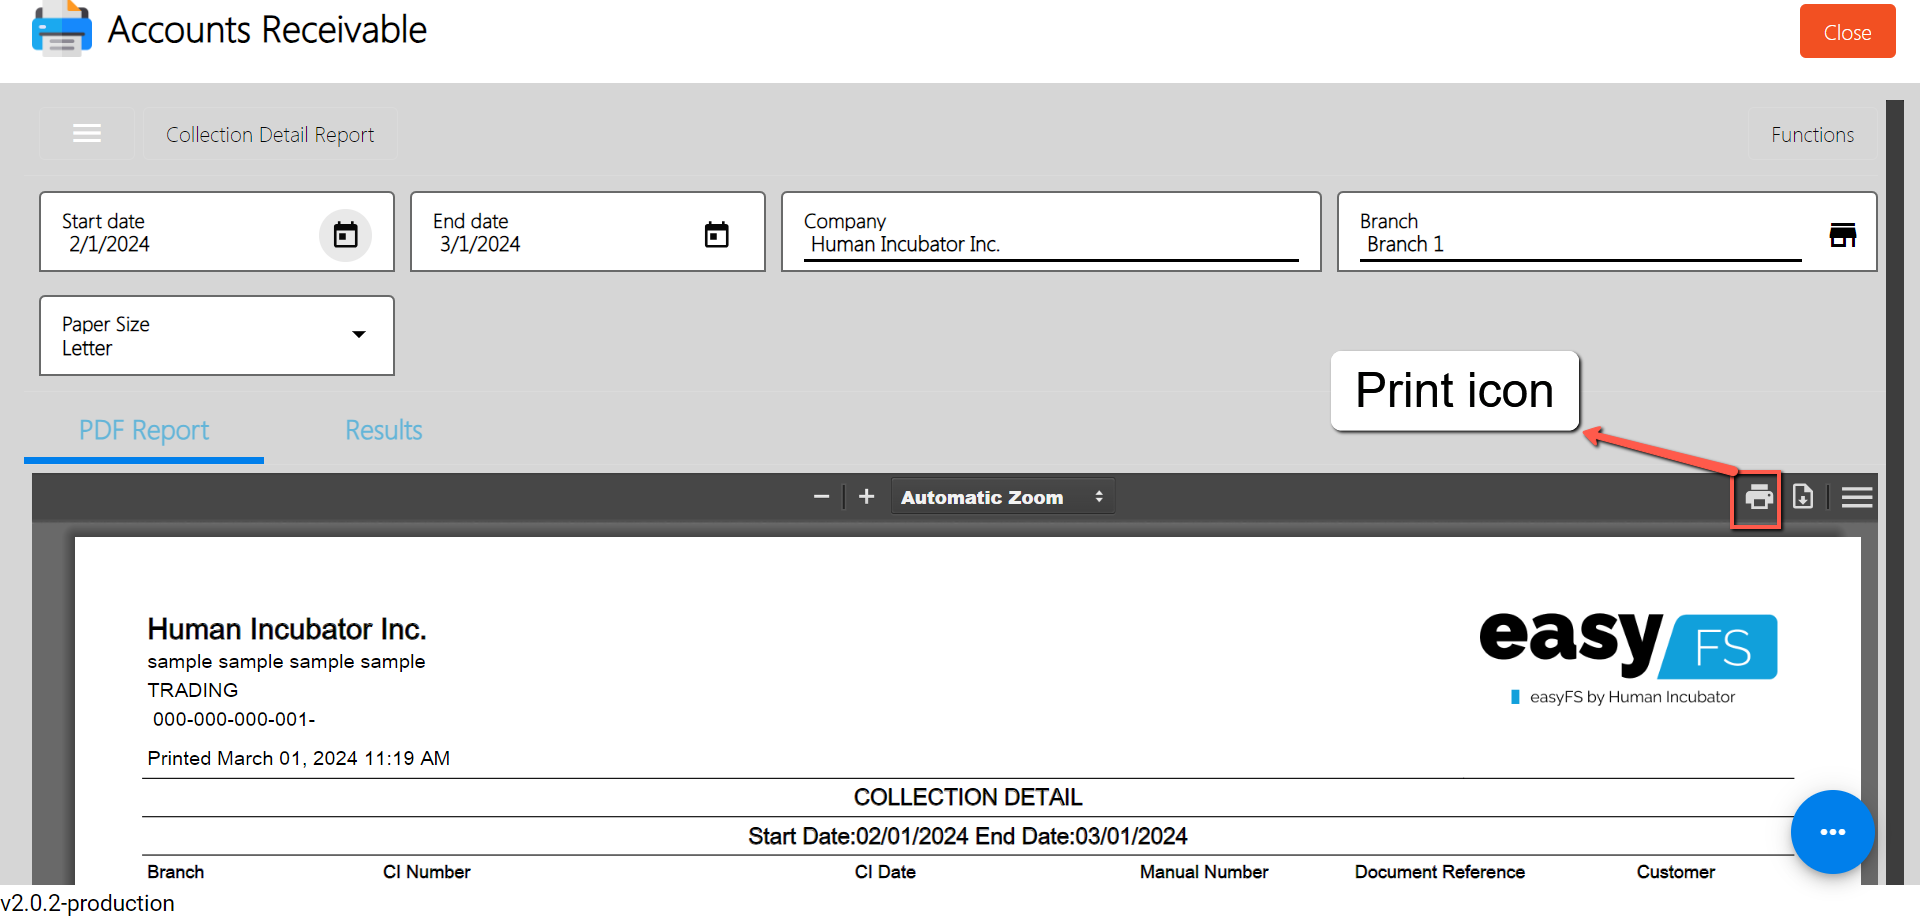
Customer Journal
Customer Journal report is a report wherein the user can see the Customer’s Journal which includes the Branch, the Document number, the debit, the credit etc. within specified date range.
To generate Customer Journal, here are the steps to follow:
- Go to Sales
- Select Accounts Receivable
- Click Customer Journal
- Enter Start and End Date
- Select the Customer
- Printing and PDF download are also available
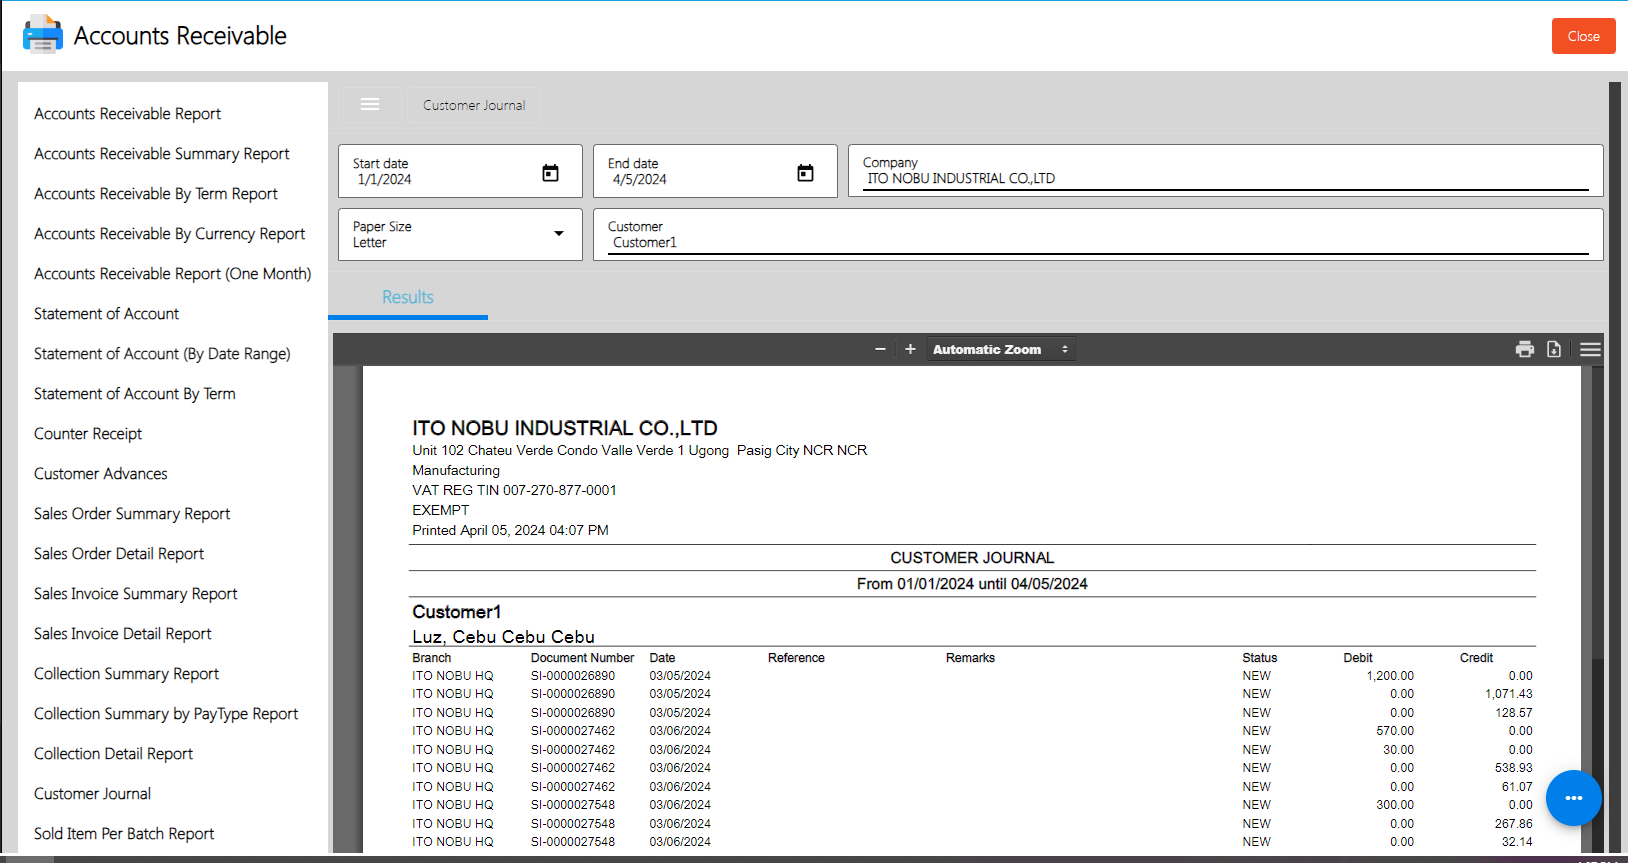
Sold Item Per Batch Report
Sold Item per Batch Report is a report wherein the user can view, download in PDF or even print the report which shows the Sold SKU, Barcode, Item Description etc. per Batch up to date.
To generate Sold Item per Batch Report, here are the steps to follow:
- Go to Sales
- Select Accounts Receivable
- Click Sold Item per Batch Report
- Select Date as of
- Select the Branch
- Printing and PDF download are also available
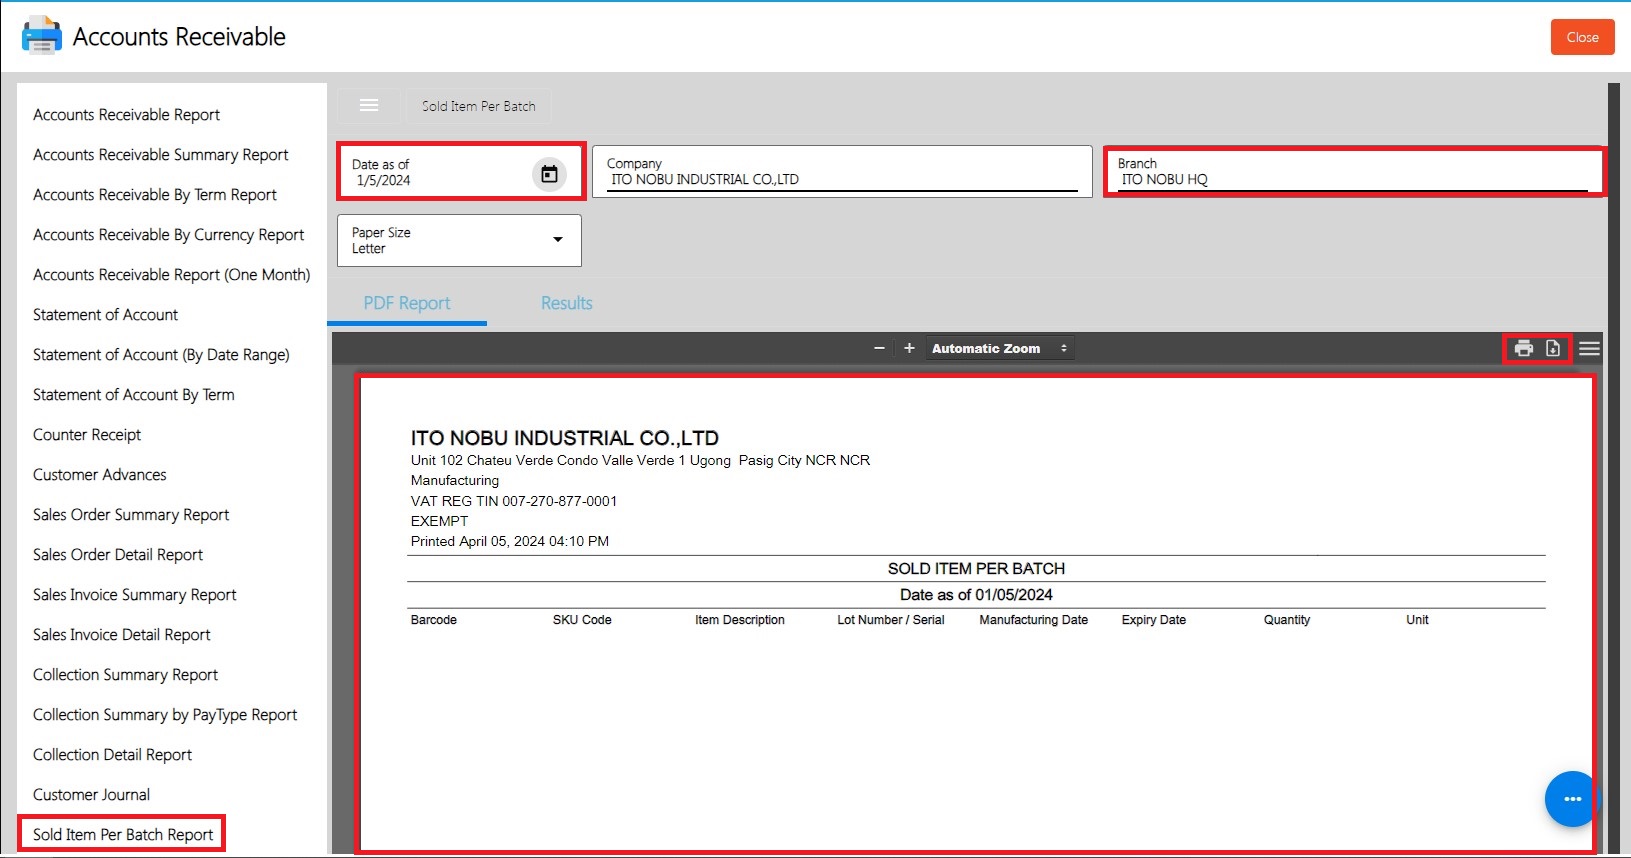
Top Selling Item
Top Selling Item is a report wherein the user can check the top selling item they have, the report shows 10 top selling items based on the date range the user enters
To generate Top Selling Item, here are the steps to follow:
- Go to Sales
- Select Accounts Receivable
- Click Top Selling Item
- Enter Start and End Date
- Download the report (optional)
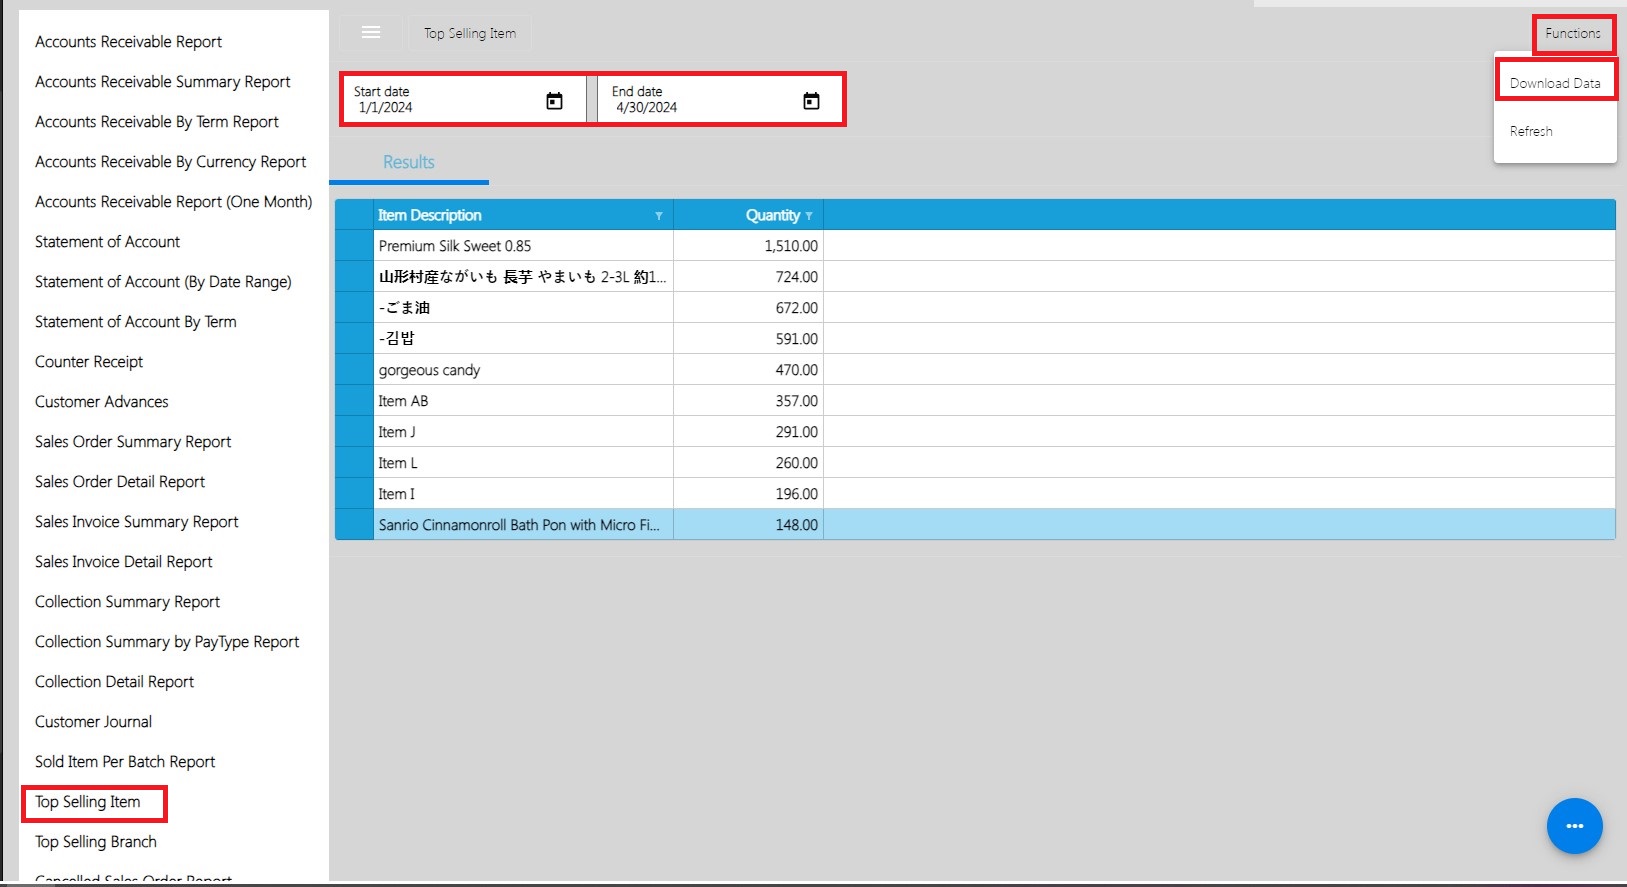
Top Selling Branch
Top Selling Branch is a report wherein the user can check the top selling branch they have, the report shows 1 top selling branch based on the date range the user enters.
To generate Top Selling Branch, here are the steps to follow:
- Go to Sales
- Select Accounts Receivable
- Click Top Selling Item
- Enter Start and End Date
- Download the report (optional)
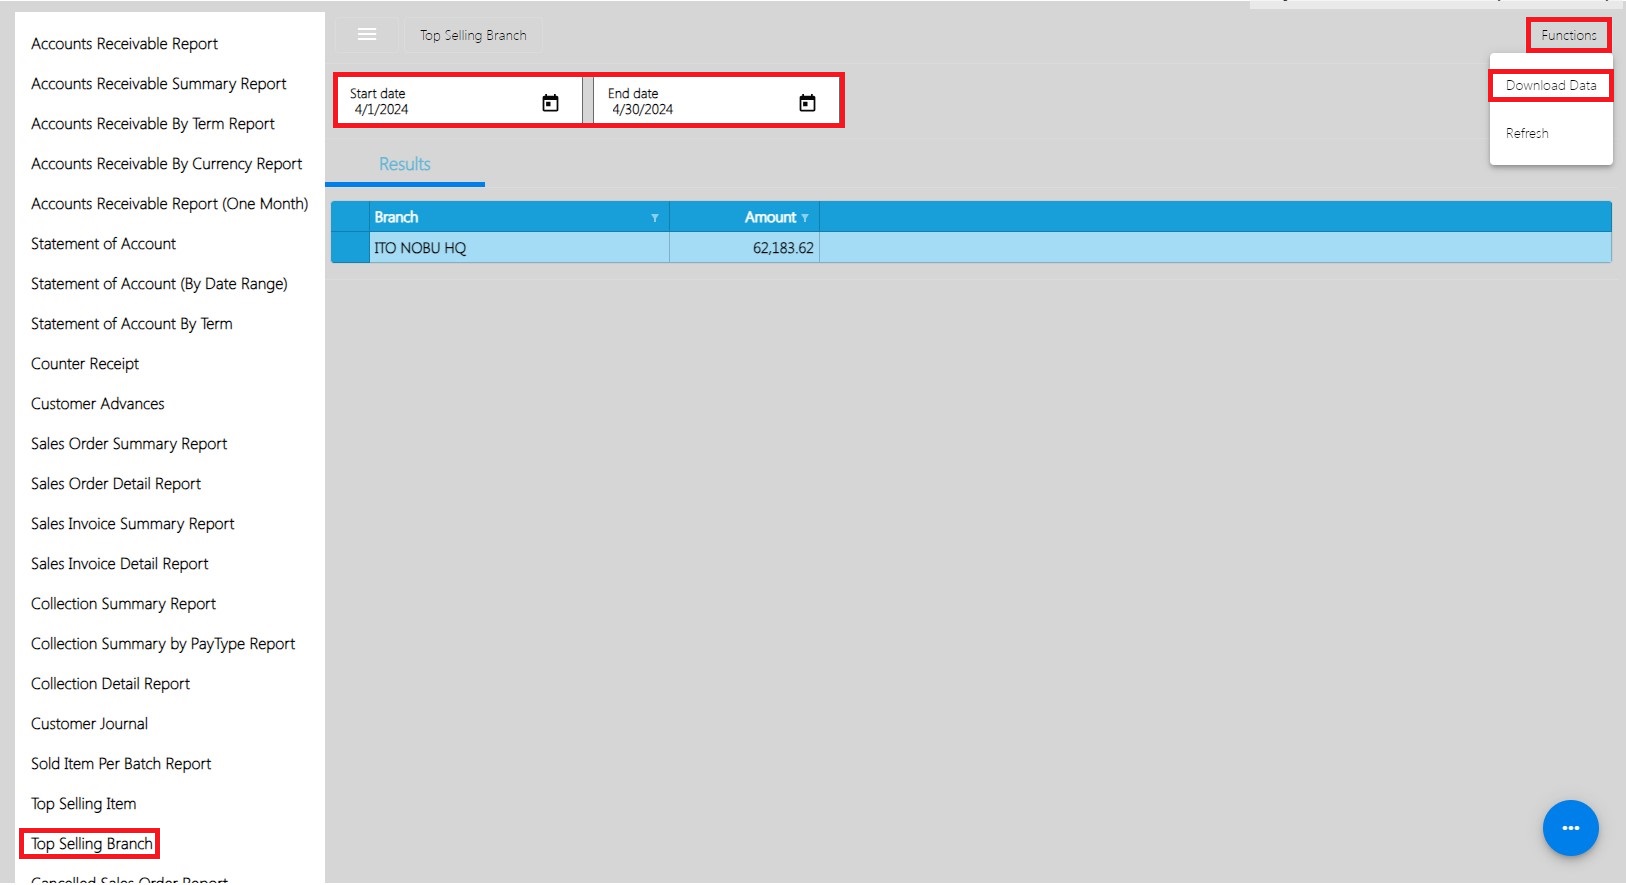
Cancelled Sales Order Report
Cancelled Sales Order Report is a report wherein the user can see all of the canceled orders based on the date range provided, in line with that the report shows the branch, the Sales order date, the created date, the status of canceled etc.
To generate Cancelled Sales Order Report, here are the steps to follow:
- Go to Sales
- Select Account Receivable
- Click Cancelled Sales Order Report
- Enter Start and End Date
- Select the Branch
- Download the report (optional)
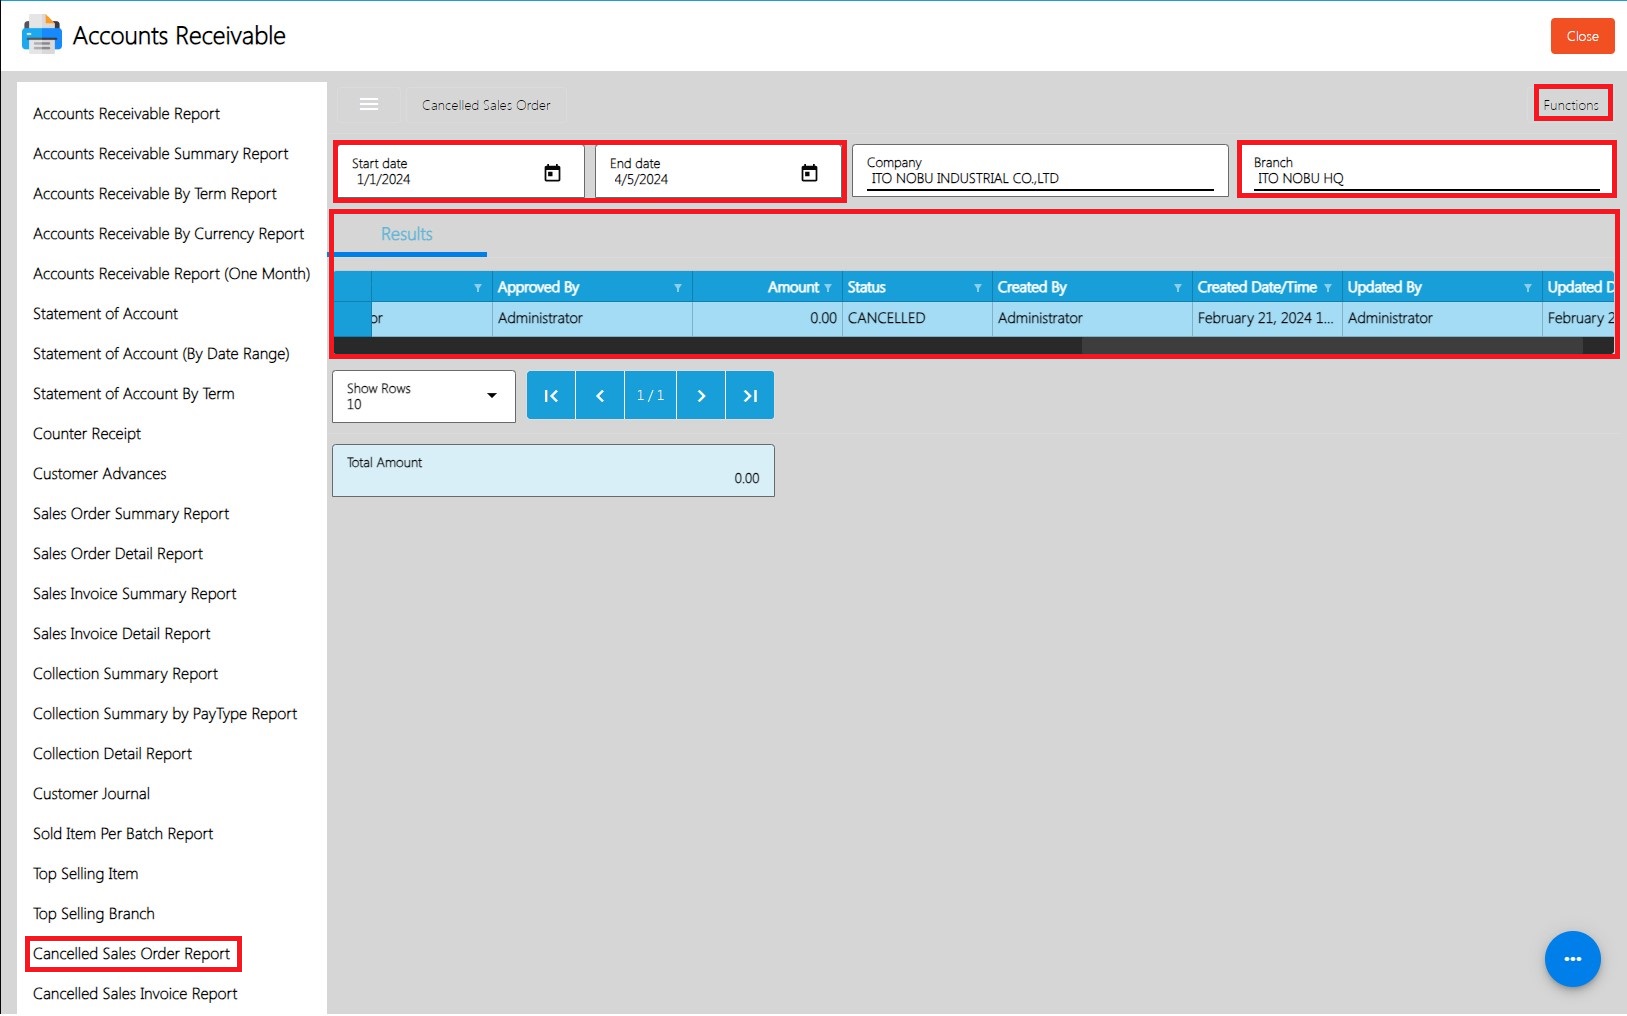
Cancelled Sales Invoice Report
Cancelled Sales Invoice Report is a report wherein the user can see all of the canceled Sales Invoices based on the date range provided, in line with that the report shows the branch, the Sales Invoice date, the created date, the status of canceled etc.
To generate Cancelled Sales Invoice Report, here are the steps to follow:
- Go to Sales
- Select Account Receivable
- Click Cancelled Sales Invoice Report
- Enter Start and End Date
- Select the Branch
- Download the report (optional)
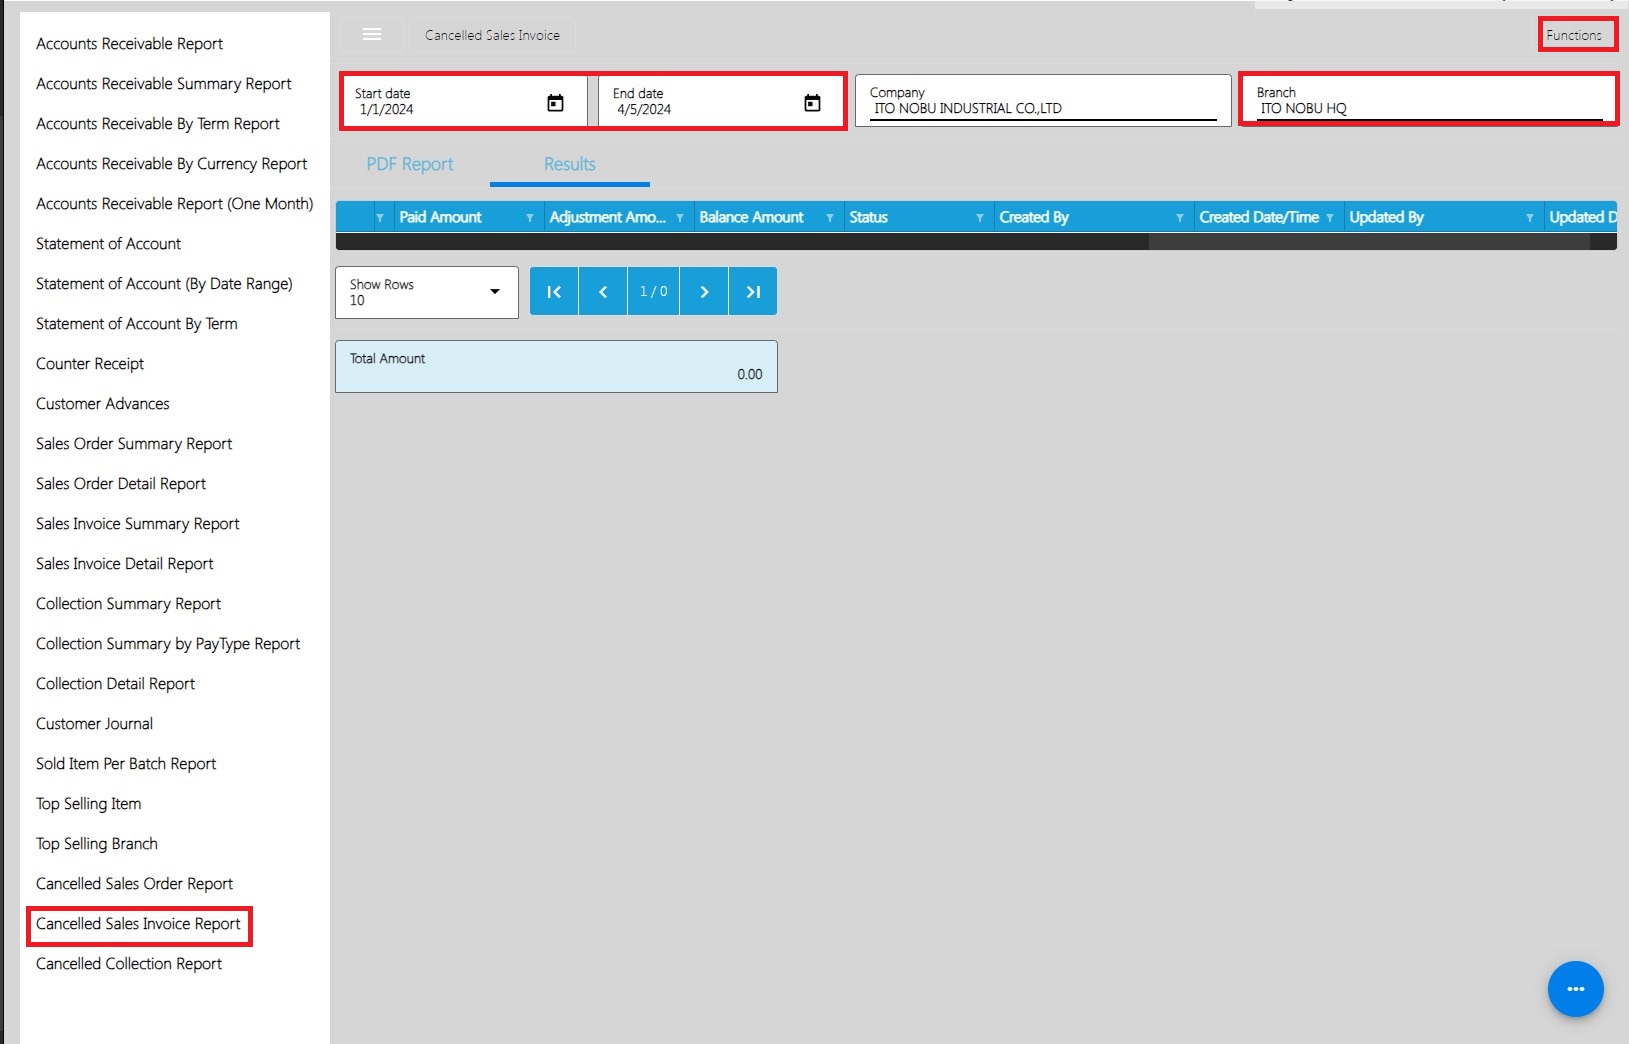
Cancelled Collection Report
Cancelled Collection Report is a report wherein the user can see all of the canceled Collection based on the date range provided, in line with that the report shows the branch, the Collection date, the created date, the status of canceled etc.
To generate Cancelled Collection Report, here are the steps to follow:
- Go to Sales
- Select Account Receivable
- Click Cancelled Sales Invoice Report
- Enter Start and End Date
- Select the Branch
- Download the report (optional)
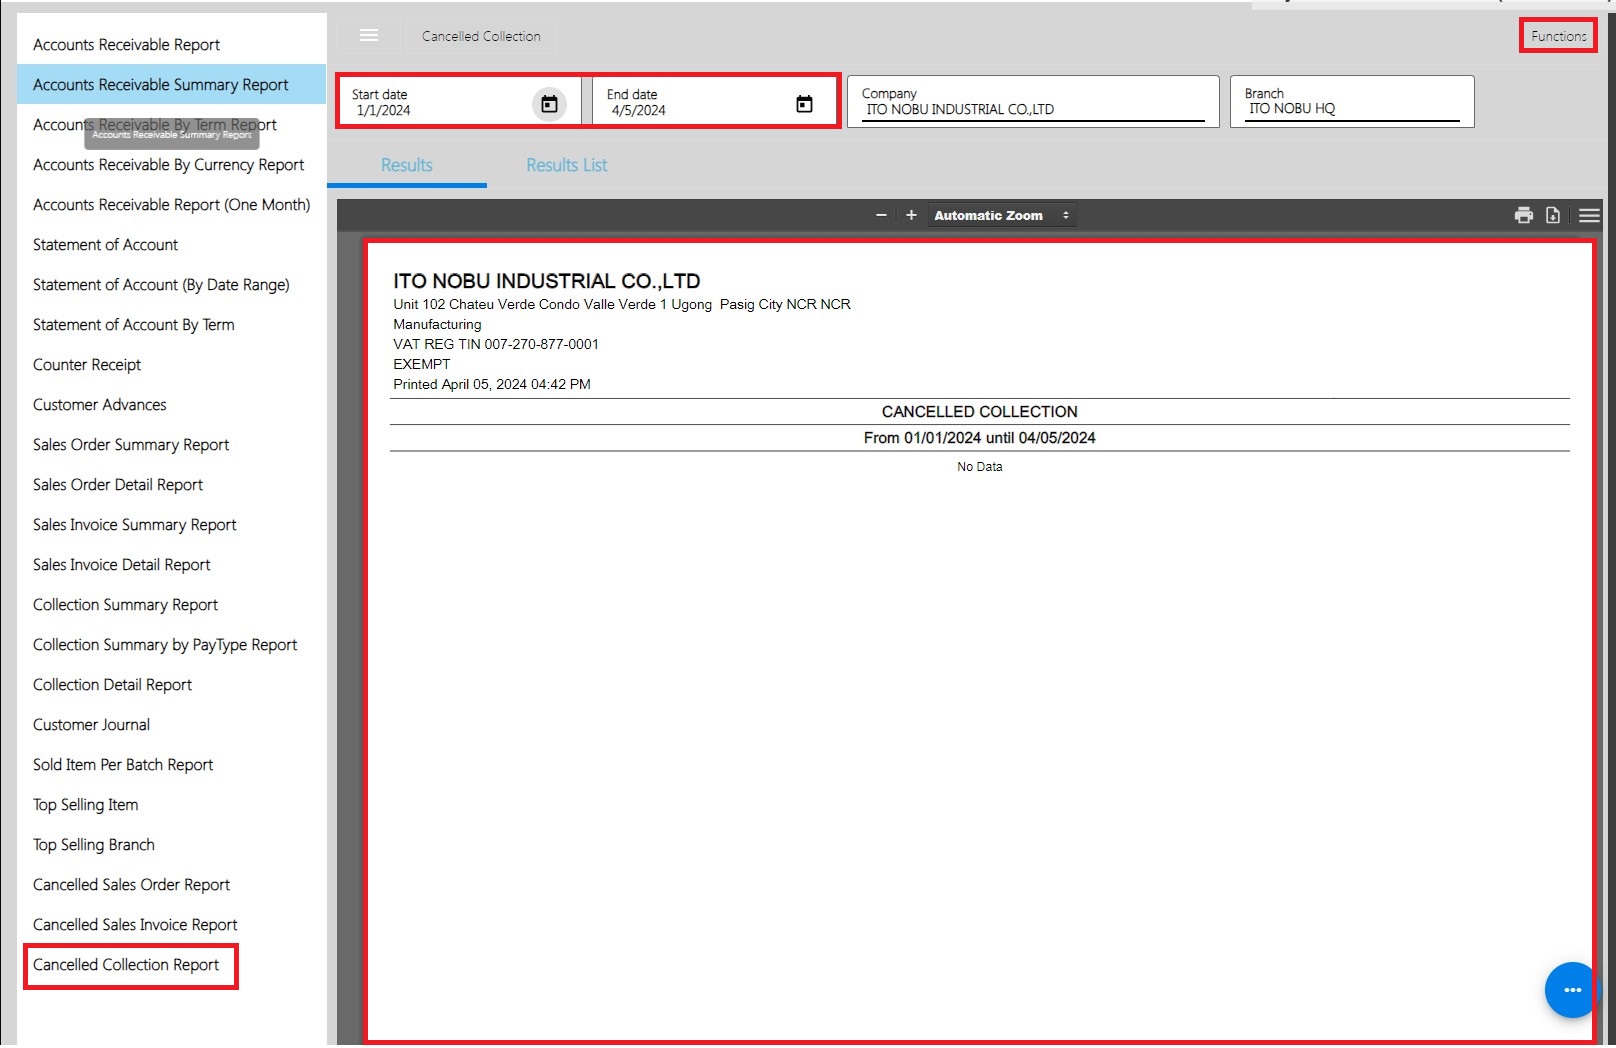
Credit Memo Summary Report
Credit Memo Detail Report
Sales Invoice Detail Report with Cost
Sales Invoice Detail Report with Cost provides an overview or summary of sales invoice within a specific period that includes Cost and Gross Margins.
To generate Sales Invoice Summary report, here are the steps for you follow:
- Go to Sales modules: Navigate to Sales modules, then select Accounts Receivable.
- Click Sales Invoice Detail Report with Cost: Under the menus from Accounts Receivable, look for Sales Invoice Detail Report then click the menu to navigate.
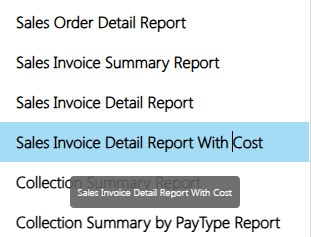
- Select Start and End Date: Provide an exact date you want to generate a report by clicking on the Start Date and End Date.
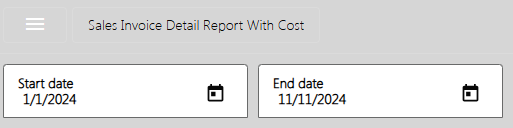
- Select a Branch (if needed): By default, the value of the Branch field is based on your login branch.

- PDF Report is automatically generated: After providing the Start and End Date and the Branch, the PDF Report will automatically generated.
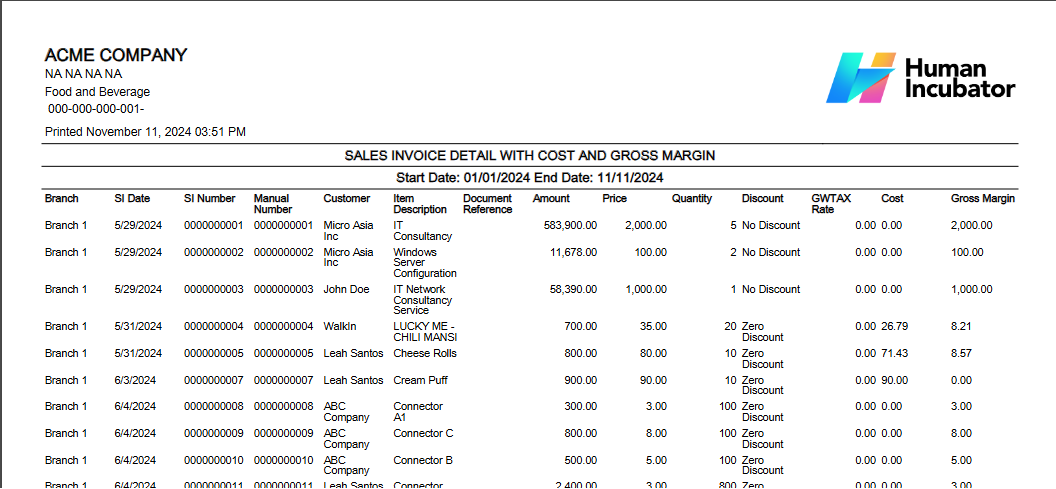
- Download PDF (if needed): If you want to download the pdf, look for the download icon then click.
- Print PDF (if needed): If you want to print the pdf, look for the print icon then click.
Financial Reports
The financial module generates the Financial Statements such as Trial Balance, General Ledger, Balance Sheet and Income Statement. It collates all the journal entry transactions from Sales, Purchasing and Inventory Modules.
Aside from the Financial Statements that are generated by management, BIR mandates the following reports for CAS (Computerized Accounting System), which can be seen under this section of easyFS.
Among them are:
- General Journal – is a chronological record of financial transactions of a business. It is a book where all accounting entries are initially recorded before they are transferred to the ledger accounts. The general journal is part of the double-entry accounting system, which means that for every transaction recorded in the journal, there are at least two accounts involved—one account is debited, and another account is credited.
- General Ledger – is a core component of the accounting system in which a business maintains a complete record of all its financial transactions. It serves as a central repository for all accounts, organized by account type, and provides a comprehensive overview of the company's financial position. The general ledger is organized into various accounts, each representing a different aspect of the business, such as assets, liabilities, equity, revenue, and expenses.
- Sales Journal – is a specialized accounting journal used to record all sales transactions of a business. It is part of the broader accounting system and is particularly helpful for businesses that have a high volume of sales transactions. The Sales Journal is one of the subsidiary journals, each designed for a specific type of transaction, which together with the general journal, form the complete accounting system.
- Purchase Journal – also known as the Purchases Journal, is another specialized accounting journal used to record all purchases of goods on credit by a business. Similar to the Sales Journal, it is a subsidiary journal designed for a specific type of transaction. The Purchase Journal is particularly useful for businesses that engage in a significant volume of credit purchases.
- Inventory Book / Inventory Ledger – The inventory ledger keeps detailed information about the quantity, cost, and value of inventory items.
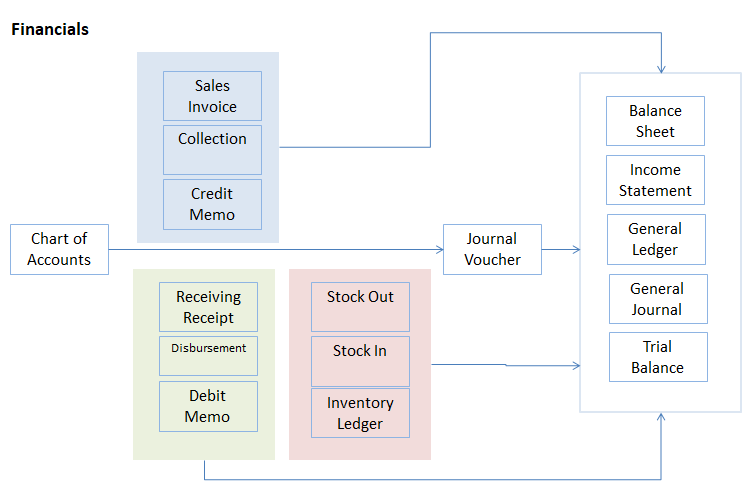
General Journal
- This is automatically generated by the system after Posting of Transactions on the Sales, Purchasing, Inventory and Journal Voucher
- A journal entry documents the dual-entry accounting system, where each transaction affects at least two accounts with equal and opposite debits and credits.
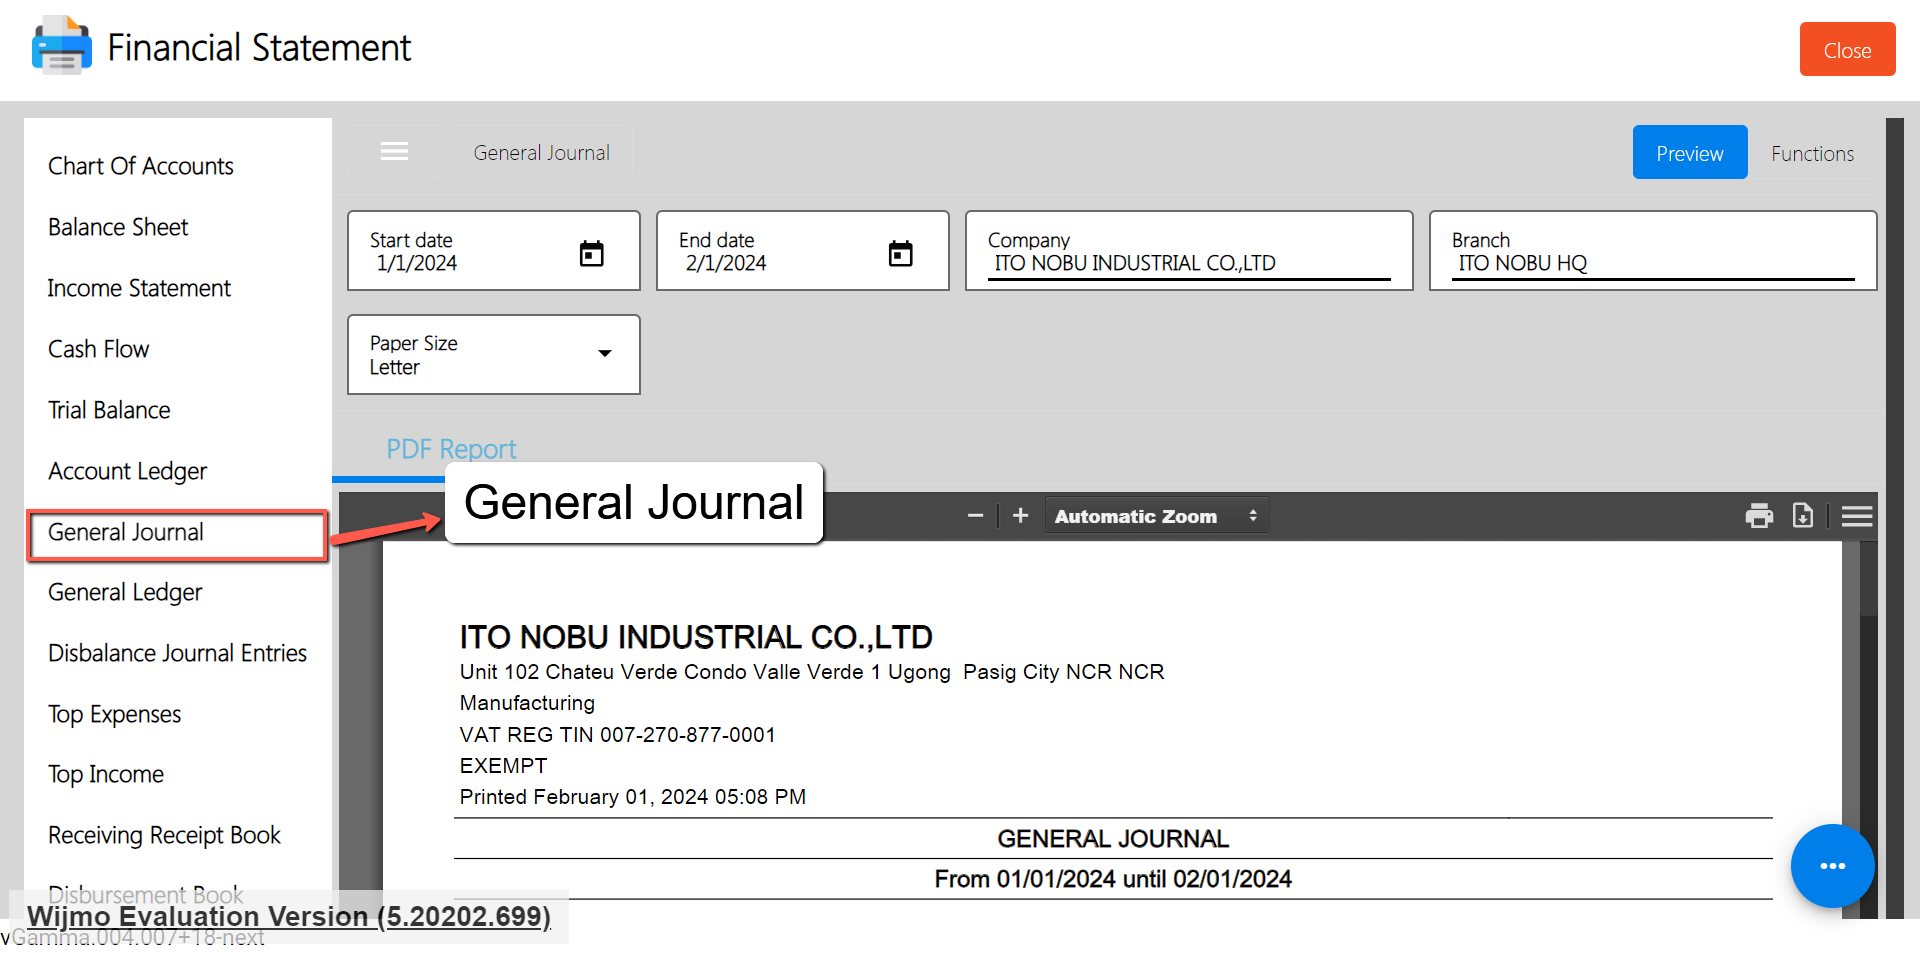
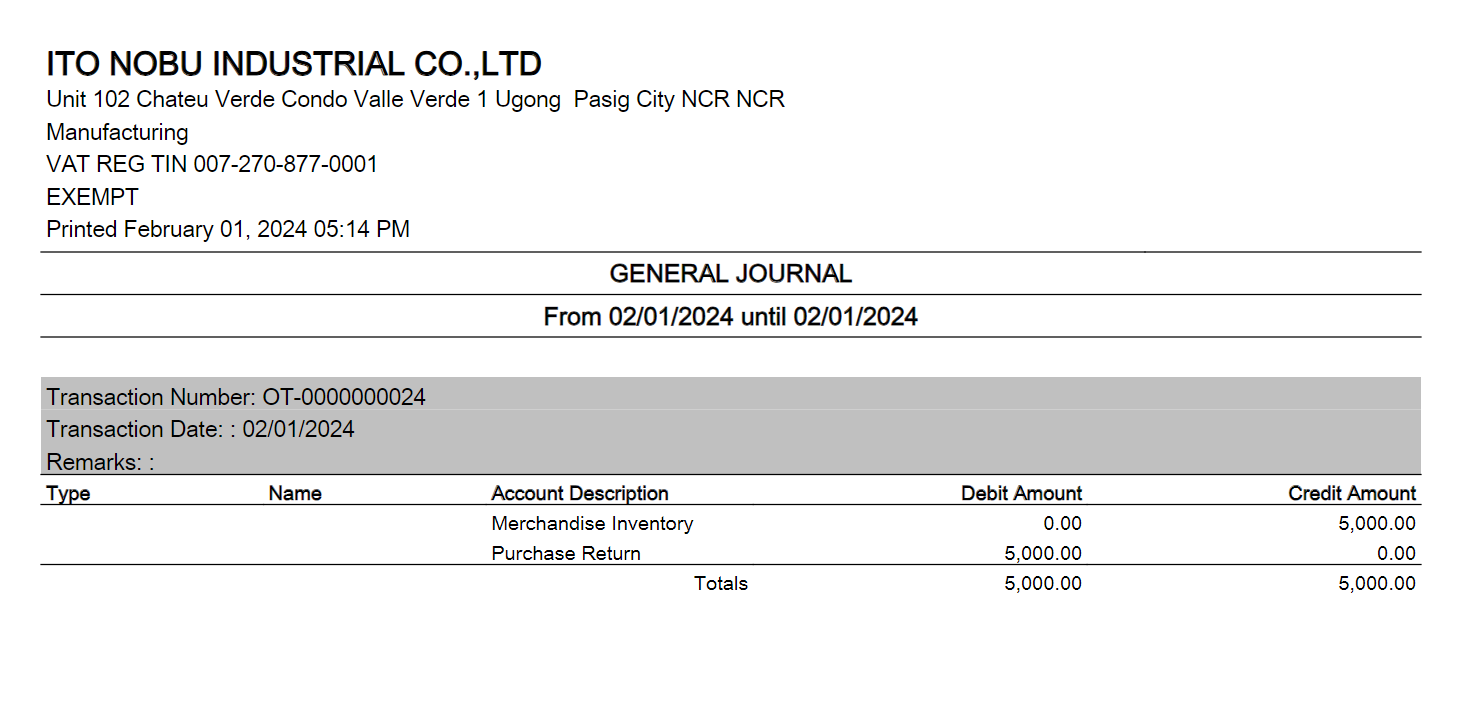
General Ledger
- The general ledger is a complete record of all financial transactions organized by account. It shows the account balances over time.
- This is automatically updated each time there is a posting of transactions in the Sales, Purchasing and Inventory
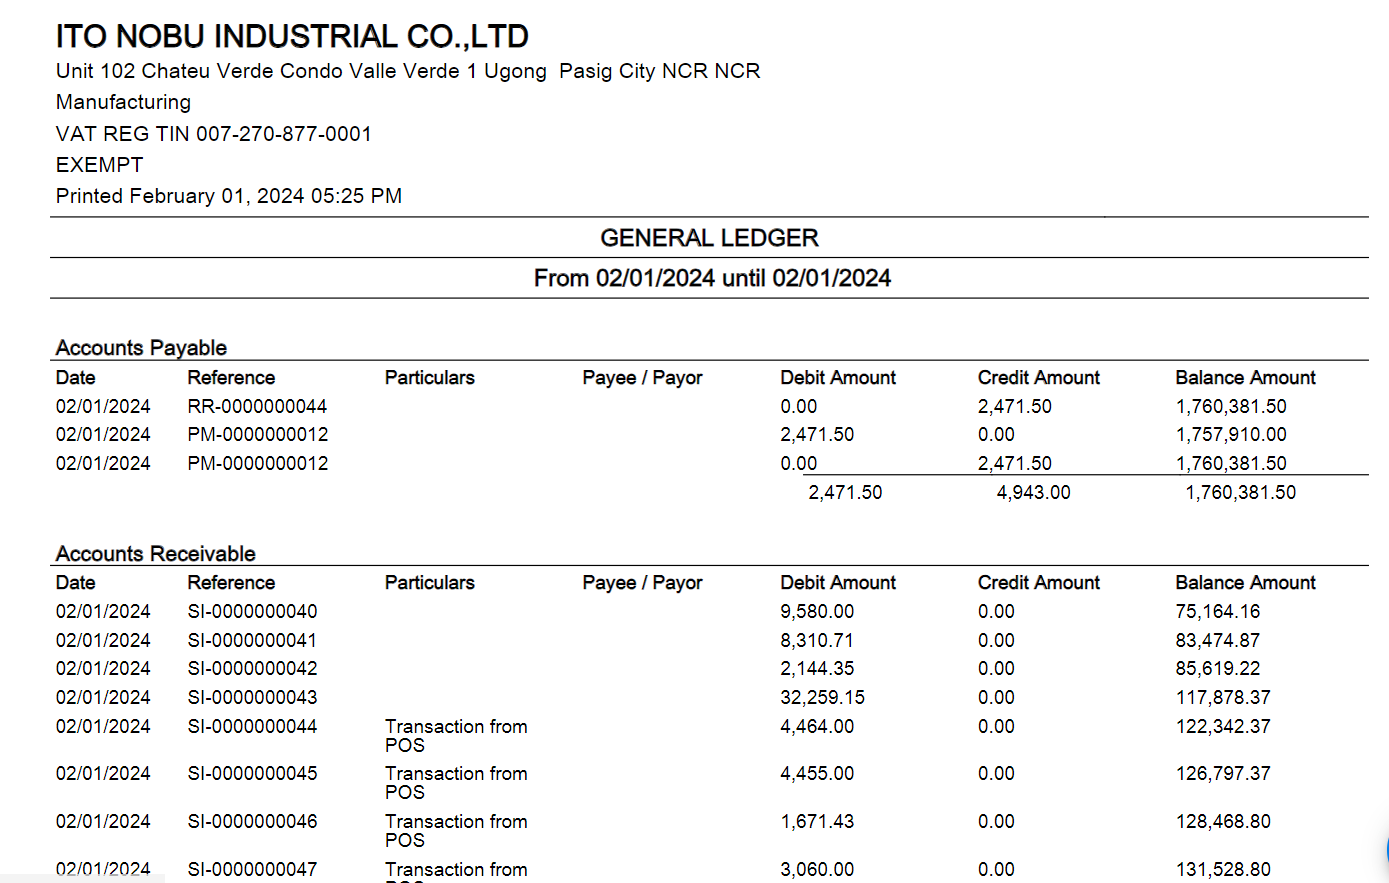
Trial Balance
- An auto generated trial balance can be printed and viewed to ensure that the total debits equal the total credits.
- The trial balance lists all the account balances at a period of time.
Balance Sheet
- A balance sheet provides a snapshot of the company's financial position at a specific date.
- The balance sheet includes assets, liabilities, and equity.
- It is one of the three main financial statements used by businesses, alongside the income statement and cash flow statement. The balance sheet is also known as the "statement of financial position" because it presents an overview of the company's assets, liabilities, and equity at a particular moment.
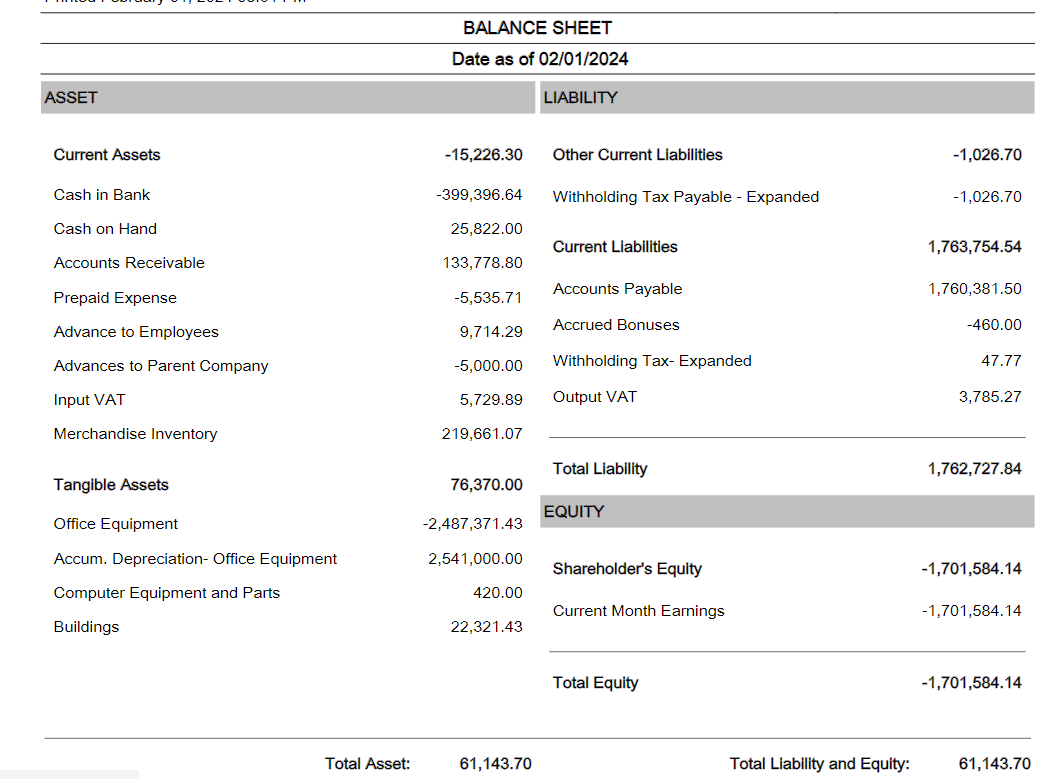
Here's what a balance sheet does and what it includes:
- Assets:
- Current Assets: These are assets that are expected to be converted into cash or used up within one year. Examples include cash, accounts receivable, and inventory.
- Non-current Assets: Also known as long-term assets, these are resources that are expected to provide value for more than one year. Examples include property, equipment, and intangible assets like patents or trademarks.
- Liabilities:
- Current Liabilities: These are obligations that are due within one year, such as accounts payable, short-term loans, and accrued expenses.
- Non-current Liabilities: Long-term obligations that are not due within the next year, such as long-term debt and deferred tax liabilities.
- Equity:
- Shareholders' Equity: This represents the owners' residual interest in the company's assets after deducting liabilities. It includes common stock, retained earnings, and additional paid-in capital.
- Equation:
- The balance sheet follows the accounting equation: Assets = Liabilities + Equity. This equation must always balance, ensuring that a company's resources (assets) are financed by its obligations (liabilities) and the owners' stake (equity).
What the balance sheet does:
- Financial Position: It provides a snapshot of the company's financial position, indicating what it owns (assets), owes (liabilities), and the residual interest of the owners (equity).
- Liquidity and Solvency: It helps assess the company's ability to meet short-term obligations (liquidity) and its overall financial health and ability to meet long-term obligations (solvency).
- Investor and Creditor Perspective: Investors and creditors use the balance sheet to evaluate a company's financial stability, risk, and overall attractiveness as an investment or lending opportunity.
- Decision-Making: Management uses the balance sheet to make decisions about financing, investing, and operating activities. It aids in strategic planning and resource allocation.
In summary, the balance sheet is a crucial financial statement that provides a comprehensive view of a company's financial health and position. It is used by various stakeholders to make informed decisions about the company's financial stability, performance, and potential for growth.
Account Ledger
Account Ledger Report is a record or a book where financial transactions of a business or an individual are systematically and chronologically recorded. It serves as a detailed and organized account of all financial activities, including income, expenses, assets, and liabilities.
Think of an account ledger as a financial diary that helps track and manage money-related transactions. Each account (such as cash, bank, expenses, etc.) has its own ledger, and entries are made for every transaction, providing a clear overview of the financial health and history of an entity. Ledger entries typically include details like date, description of the transaction, and the corresponding amounts for debit and credit.
To generate Account Ledger Report here are the steps to follow:
1. Go to Financials.
2. Select Financial Statement.
3. Click Account Ledger.
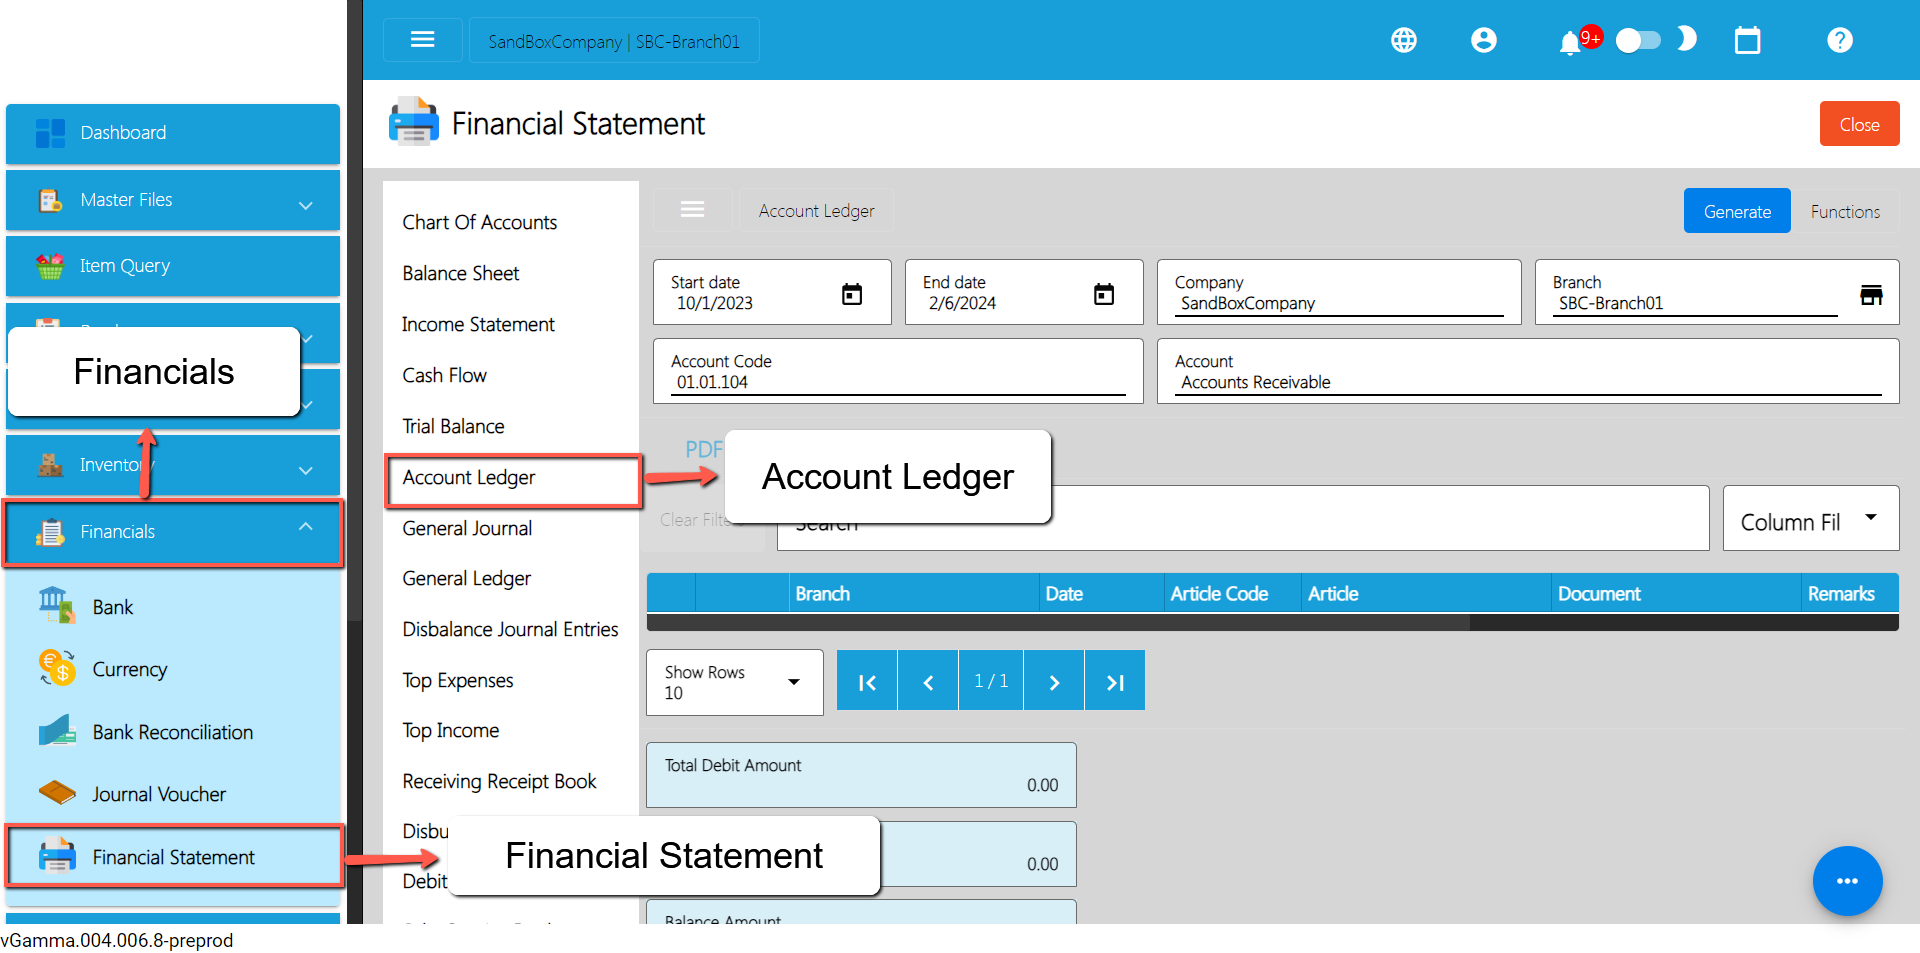
4. Enter Start Date and End Date.
5. Select the branch you want to generate.
6. Select the correct Account.
7. Click the Preview button to generate the PDF.
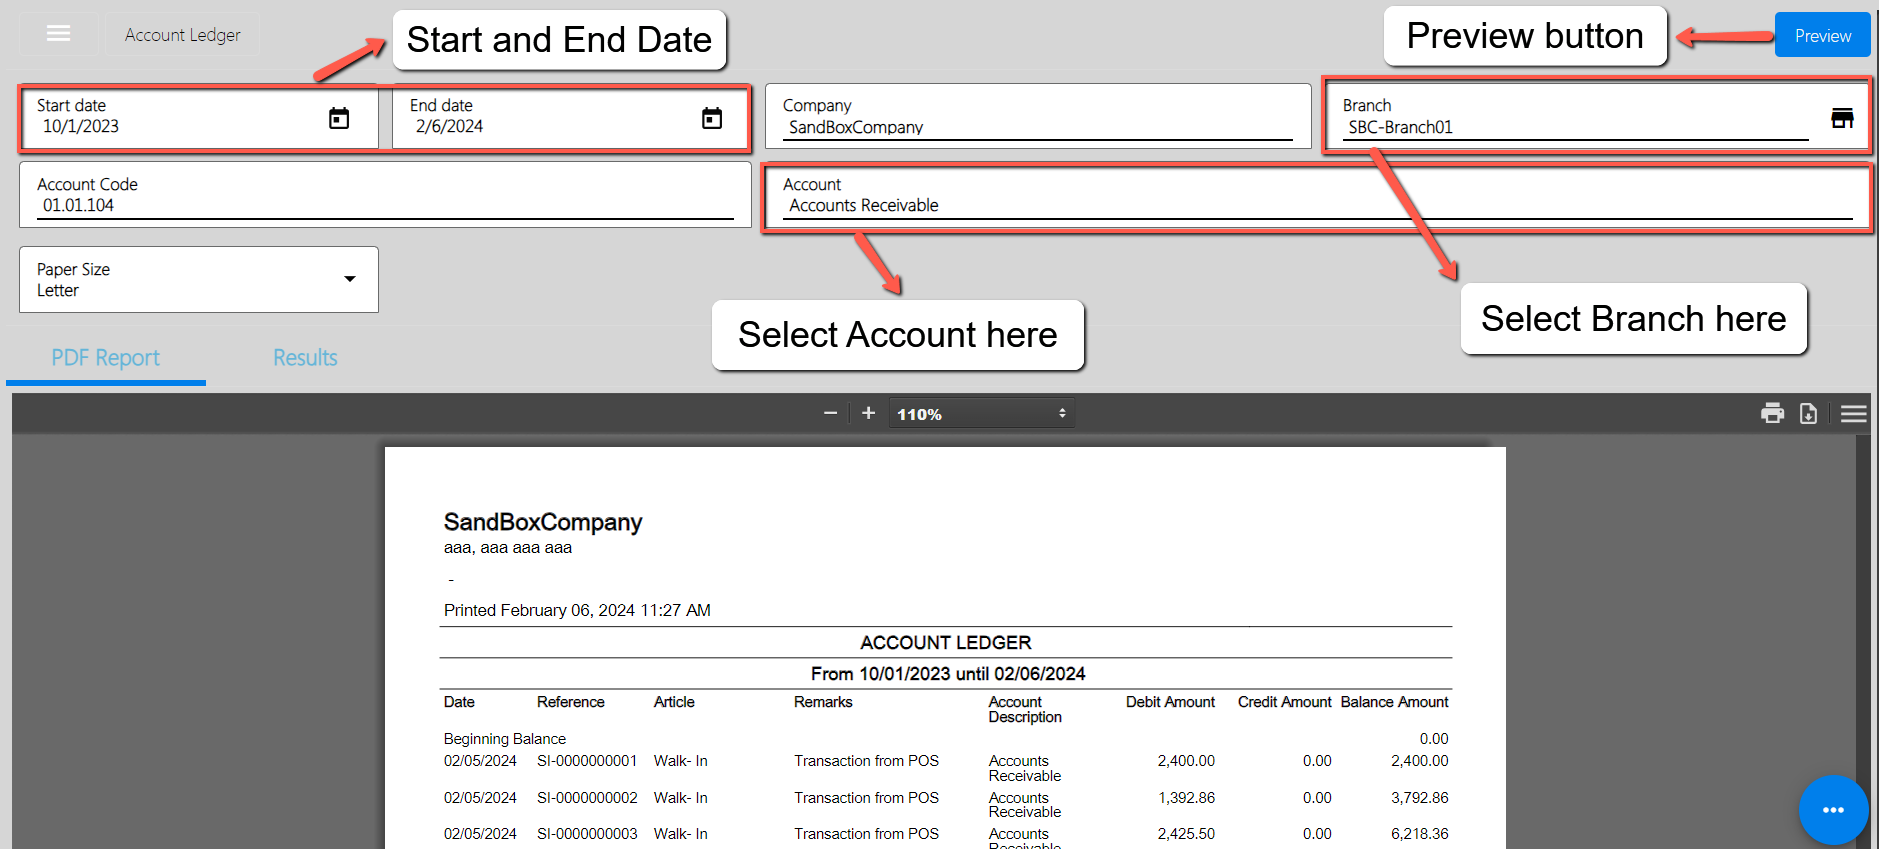
Sample Printout of Account Ledger
8. If you wish to export it in an excel file, click the results tab. Click the Generate button first to display the data on the list. Once okay, click the Functions button, then click Download Data to download.
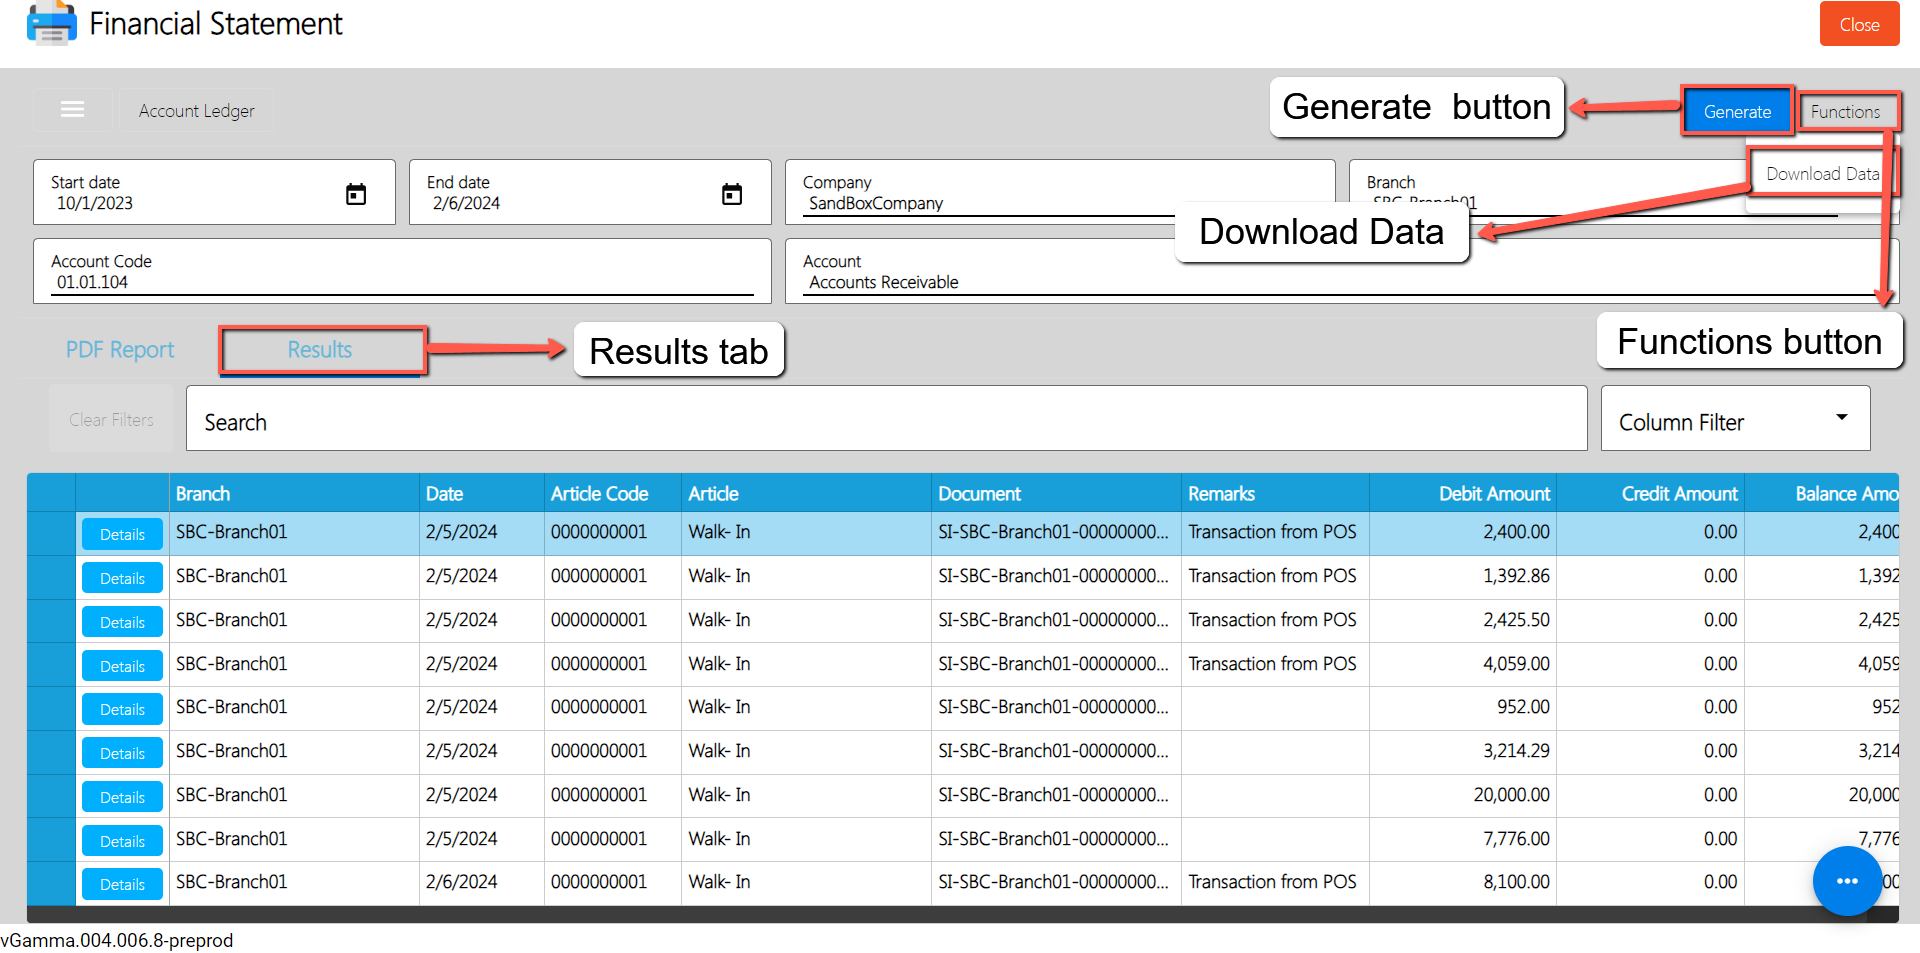
Disbalance Journal Entries
Disbalance Journal Entries refer to transactions recorded in a company's books that result in an imbalance or discrepancy in the accounting equation. The accounting equation states that assets equal liabilities plus equity. When a disbalance occurs, it means that the total debits don't equal the total credits in a transaction. This could happen due to errors, omissions, or incorrect recording of transactions. Identifying and correcting these disbalances is important to ensure accurate financial reporting.
To generate Disbalance Journal Entries Report here are the steps to follow:
1. Go to Financials.
2. Select Financial Statement.
3. Click Disbalance Journal Entries.
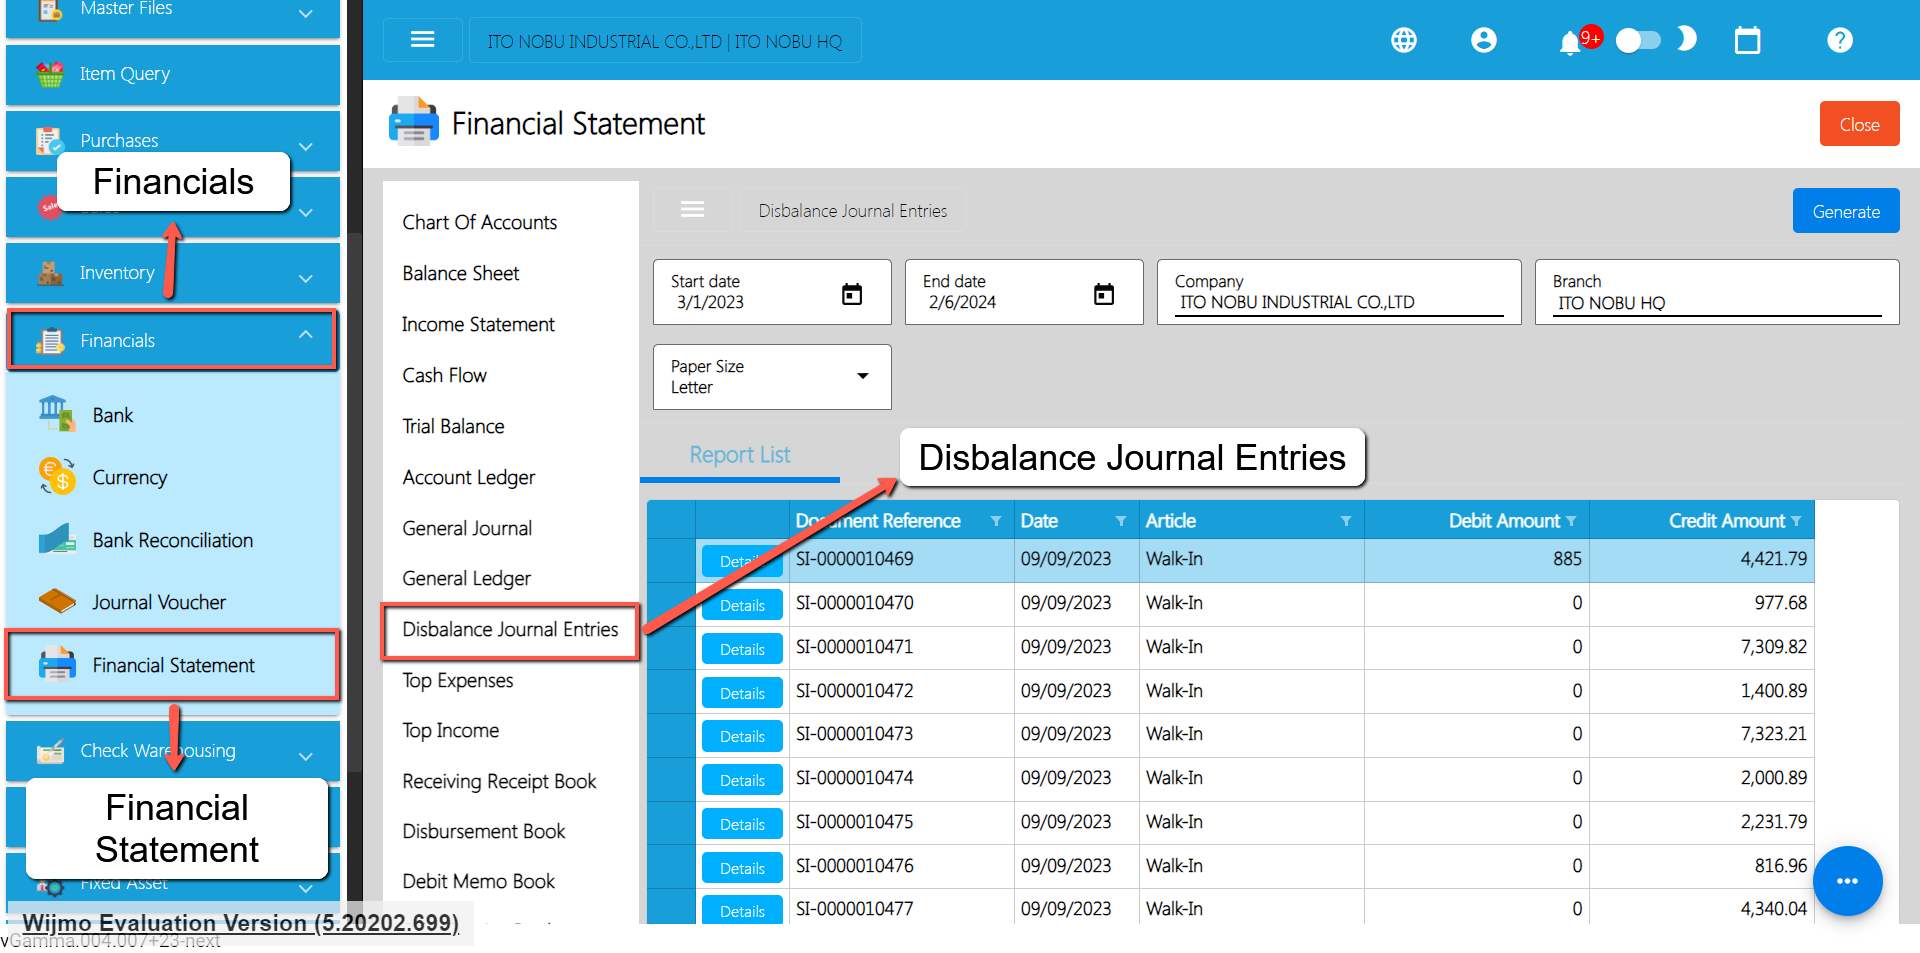
4. Enter Start Date and End Date.
5. Select the branch you want to generate.
6. Click the Generate button to display the data on the list.
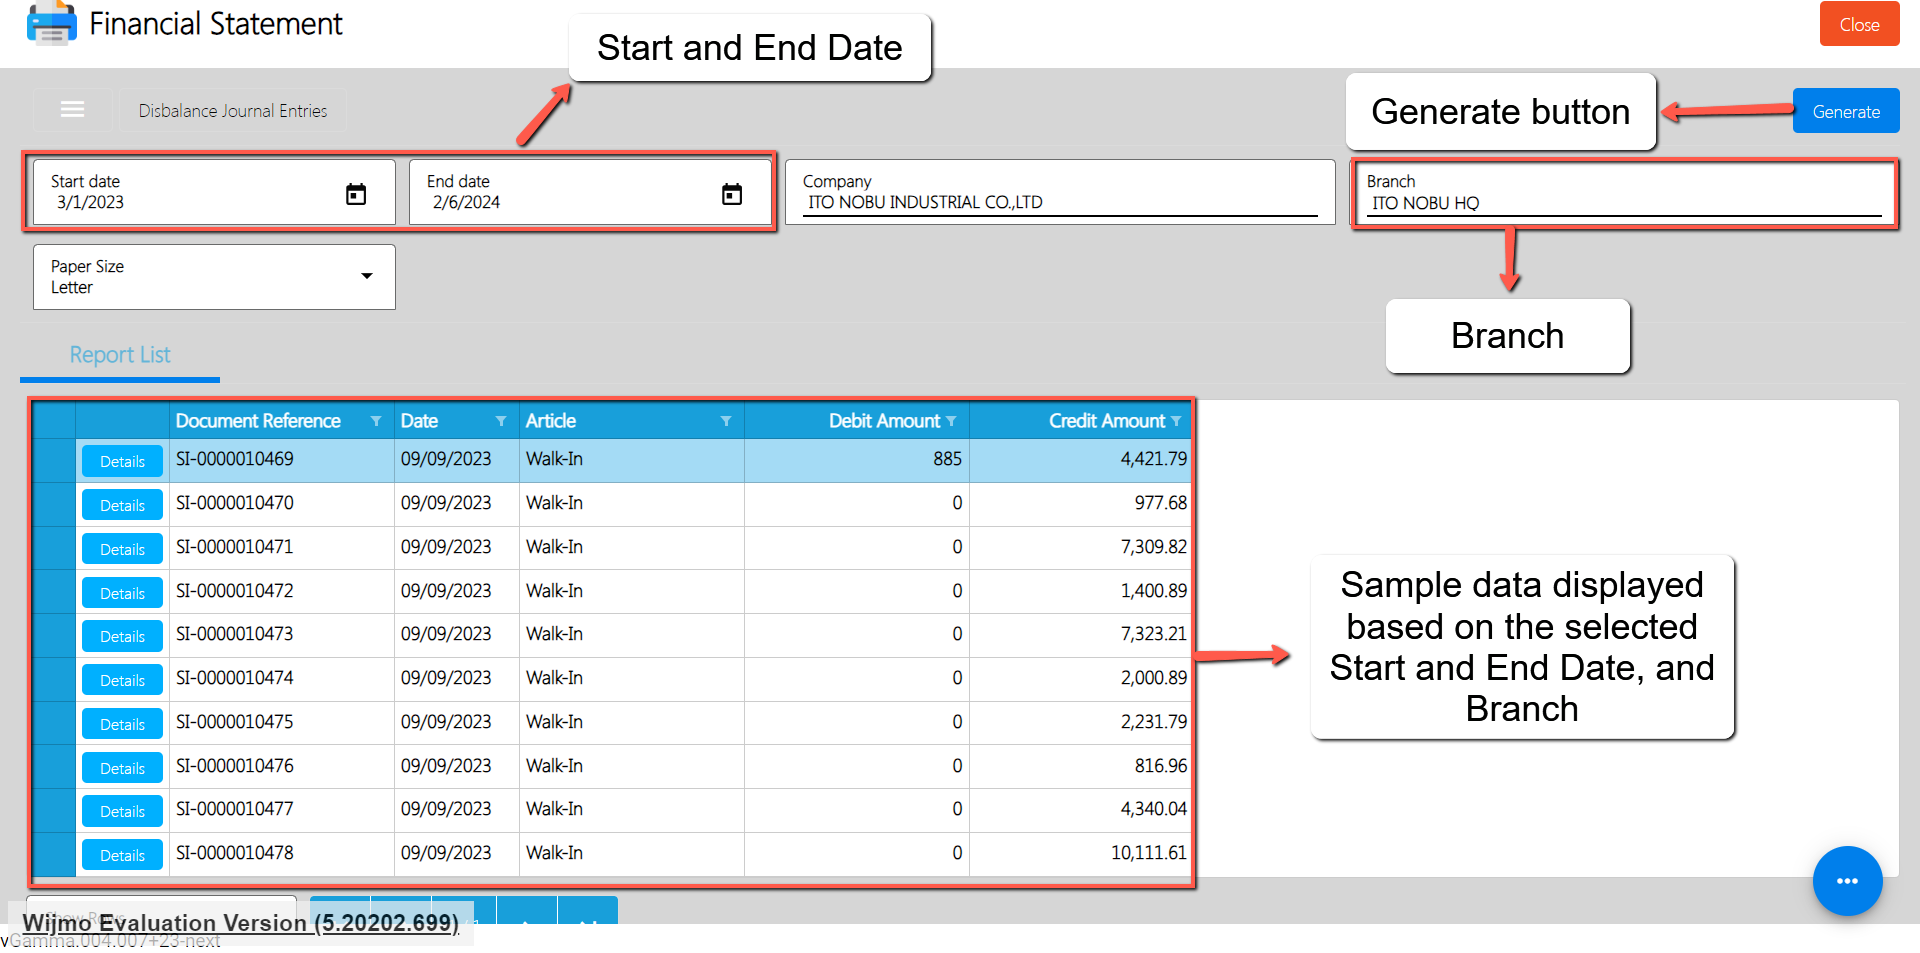
Income Statement
An income statement, also known as a profit and loss statement (P&L), is a financial statement that summarizes the revenues, expenses, and profits or losses of a business over a specific period of time. The primary purpose of the income statement is to show the company's ability to generate profit by increasing revenue, controlling costs, and managing expenses.
Here's what an income statement does and what it typically includes:
- Revenue:
- Represents the total amount of money earned from the sale of goods or services.
- Revenue is sometimes broken down into categories, such as sales revenue, service revenue, or other sources of income.
- Cost of Goods Sold (COGS):
- Represents the direct costs associated with producing goods or services.
- This includes costs like raw materials, labor, and manufacturing overhead directly tied to production.
- Gross Profit:
- Calculated by subtracting the cost of goods sold from total revenue.
- Gross profit reflects the profitability of a company's core business activities.
- Operating Expenses:
- Includes expenses related to the day-to-day operations of the business, such as salaries, rent, utilities, marketing, and administrative costs.
- Operating expenses are deducted from the gross profit to arrive at operating profit.
- Operating Profit (Operating Income):
- Obtained by subtracting operating expenses from gross profit.
- Operating profit represents the profit generated from the core business operations before considering interest and taxes.
- Other Income and Expenses:
- Includes non-operating items such as interest income, interest expenses, gains, and losses from investments.
- These items are not directly related to the main business activities.
- Profit Before Tax (PBT):
- Calculated by adding other income and subtracting other expenses from operating profit.
- PBT represents the company's profit before considering income taxes.
- Income Tax Expense:
- Represents the amount of income tax owed by the company based on its taxable income.
- The income tax expense is subtracted from PBT to arrive at net profit.
- Net Profit (Net Income):
- The final line on the income statement, representing the company's profit after all expenses, taxes, and other income or losses.
- Net profit is a key indicator of a company's overall financial performance.
What the income statement does:
- Performance Measurement: It provides a summary of the company's financial performance over a specific period, indicating whether the business is generating a profit or incurring a loss.
- Profitability Analysis: Investors, creditors, and management use the income statement to assess the company's ability to generate profit, control costs, and manage its operations efficiently.
- Decision-Making: The income statement helps management make informed decisions regarding pricing strategies, cost management, and overall business operations.
- Financial Planning: It serves as a basis for financial planning and forecasting, helping businesses set realistic goals and allocate resources effectively.
In summary, the income statement is a crucial financial statement that provides insights into a company's ability to generate profit and manage its expenses. It is a key tool for assessing financial performance and making informed decisions about the business.
In the Income Statement Report in the system there are different types of report
Here are the report types of the income statement
- Default
- The default report type is the consolidated report of all the branches in the specific company.
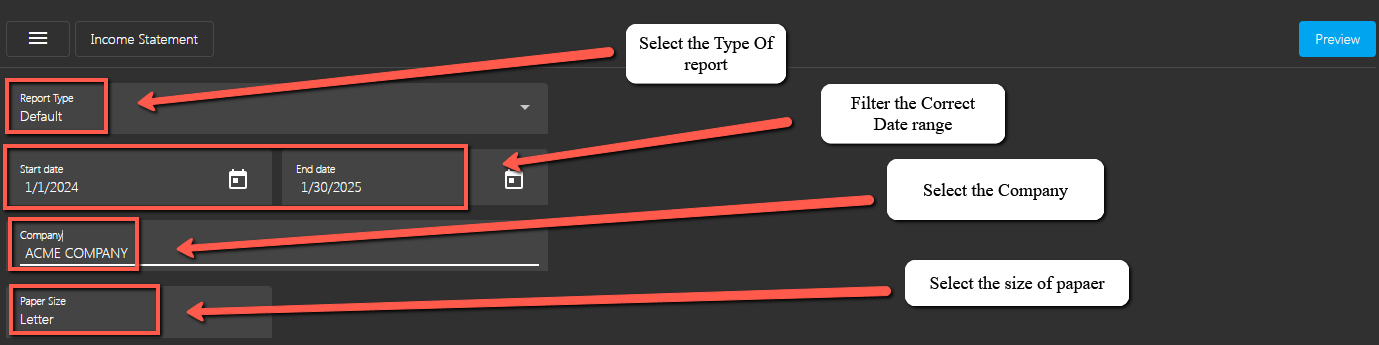
- Here is an example of the Income Statement, Report type Default.
- Per Branch Report
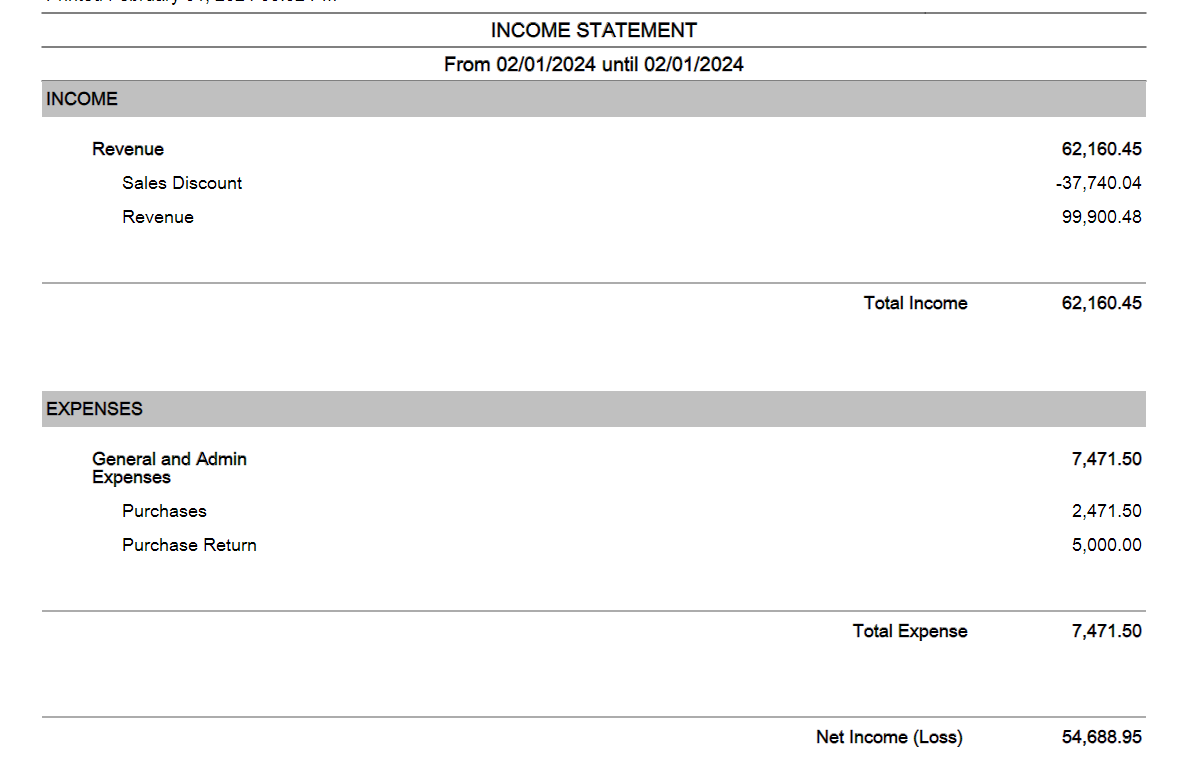
- Per Branch Report type is a type of report that shows only a specific branch for the income statement.
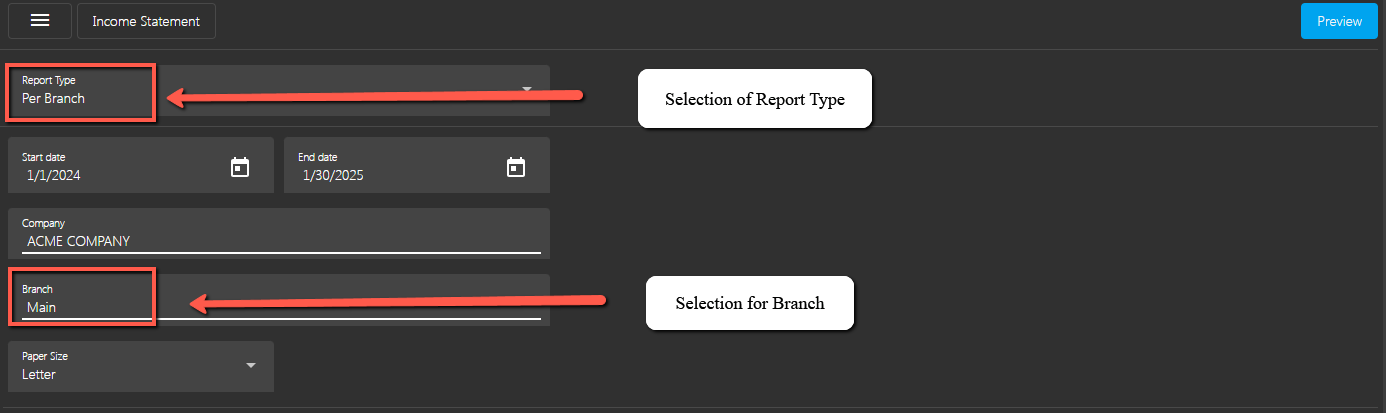
- Here is an example of the Income Statement Per Branch Report
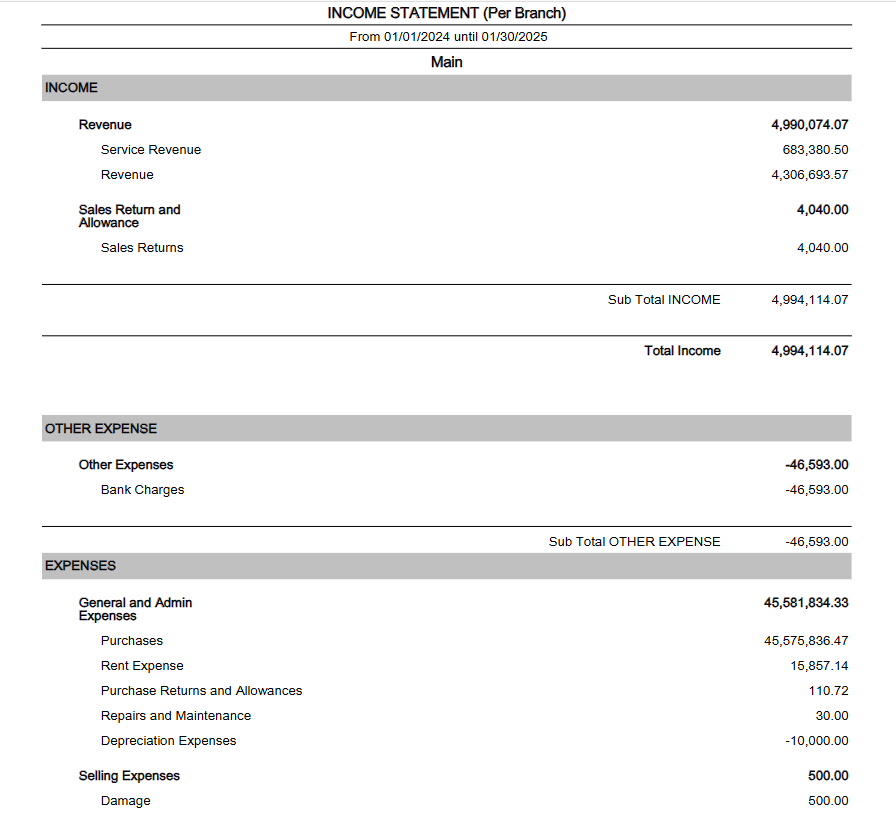
- Monthly Comparison
- This report will generate a comparison depending on the date range that was selected. The data that is generated in this report is still consolidated Income Statement
- Here is an example of the Monthly Comparison Report of Income Statement
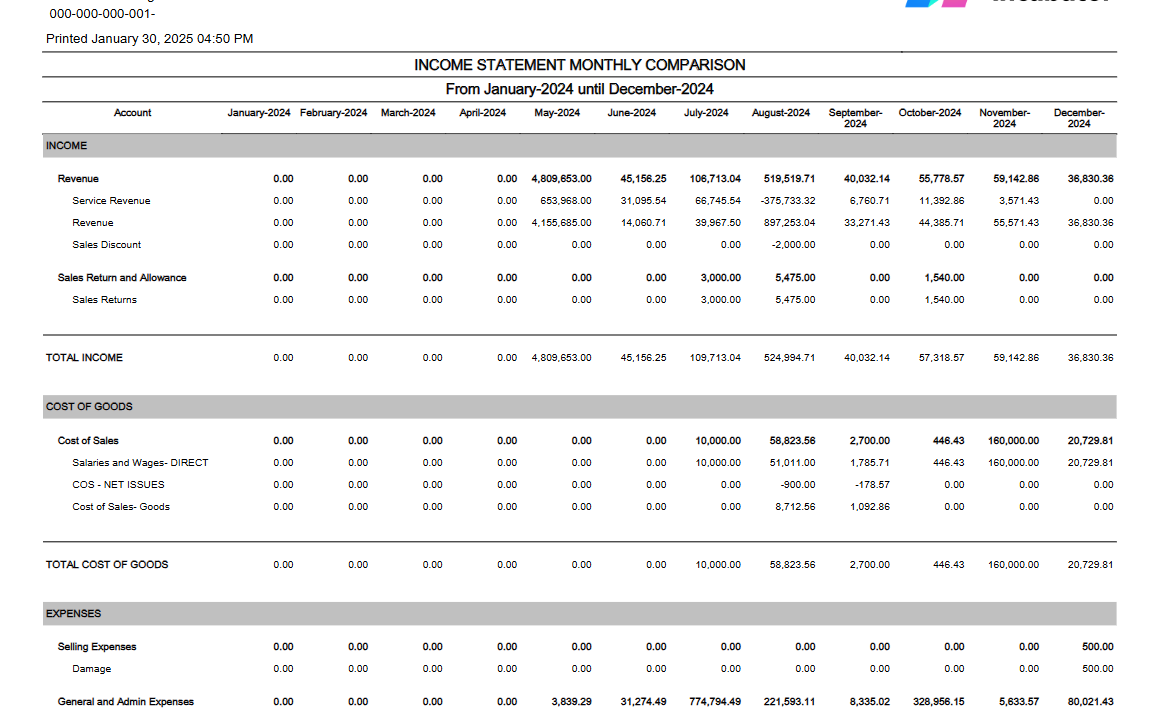
- Comparative
- This report is different from monthly comparison, this will only show two specific dates, months or years to compare.
- Here is an example of the comparative report
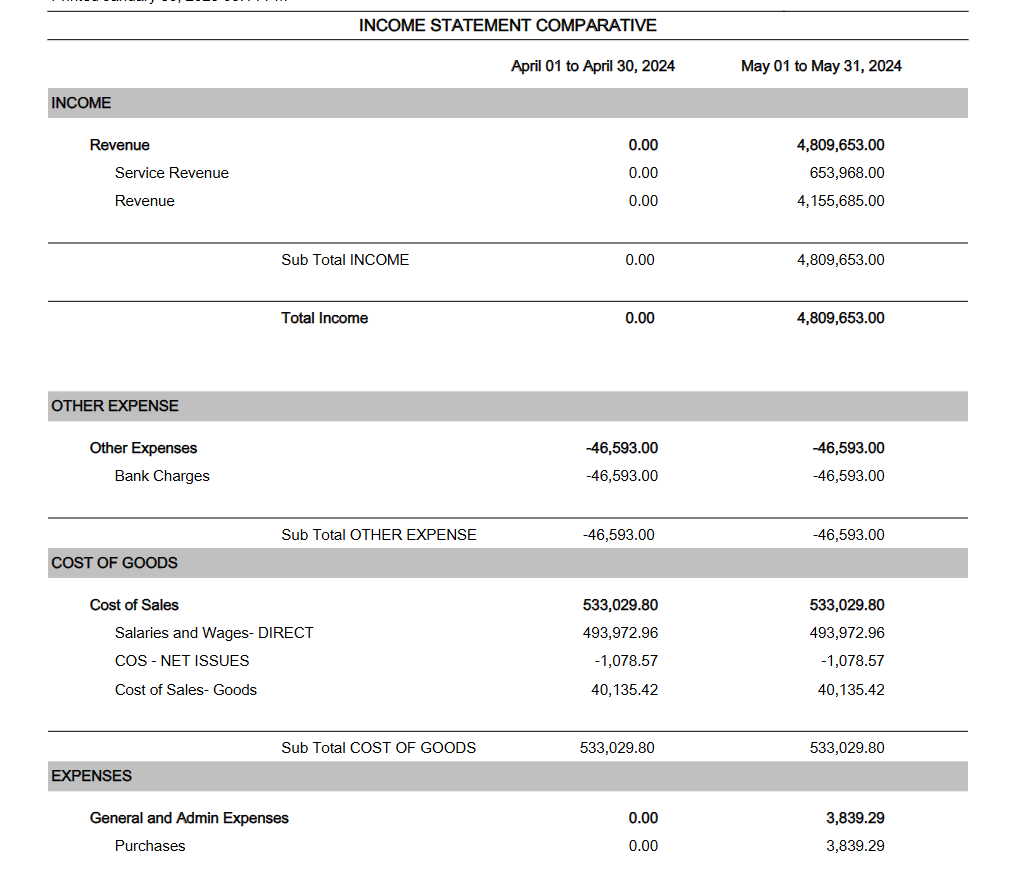
Note: All the report types in the income statement should be sorted by manual code of the account and account type.
Cash Flow Statement
The cash flow statement is a financial statement that provides an overview of how cash and cash equivalents move in and out of a business during a specific period. It's one of the three main financial statements, along with the income statement and balance sheet. The cash flow statement is crucial for assessing a company's liquidity, solvency, and ability to meet its financial obligations.
Here's what a cash flow statement does and what it typically includes:
- Operating Activities:
- Cash Inflows: Represents cash generated from the core business operations, such as cash received from customers, interest, and dividends.
- Cash Outflows: Represents cash payments for operating expenses, suppliers, employees, and other day-to-day operational costs.
- Investing Activities:
- Cash Inflows: Represents cash received from the sale of investments, property, plant, equipment, or other assets.
- Cash Outflows: Represents cash spent on the acquisition of investments, property, plant, equipment, or other assets.
- Financing Activities:
- Cash Inflows: Represents cash received from issuing stock or taking on debt, including loans and bond issuances.
- Cash Outflows: Represents cash payments for dividends, repayment of debt, or the repurchase of stock.
- Net Cash Flow:
- Calculate the net cash flow for each category (operating, investing, financing) by subtracting cash outflows from cash inflows.
- The net cash flow provides a summary of the overall cash movement for a specific period.
- Beginning and Ending Cash Balance:
- The beginning cash balance is the amount of cash and cash equivalents at the start of the period.
- The ending cash balance is the amount of cash and cash equivalents at the end of the period, calculated by adding the net cash flow to the beginning cash balance.
What the cash flow statement does:
- Liquidity Assessment: It helps assess a company's ability to generate cash to meet its short-term and long-term obligations.
- Operational Performance: Investors and analysts use the cash flow statement to evaluate the cash-generating capabilities of a company's core operations.
- Investment and Financing Decisions: Businesses and investors use the cash flow statement to make informed decisions about investing, financing, and overall financial strategy.
- Risk Evaluation: The statement helps assess a company's financial risk by providing insights into its cash flow trends and sources of cash.
- Reporting Transparency: It enhances financial reporting transparency by presenting a detailed breakdown of cash flows from different activities.
In summary, the cash flow statement is a crucial tool for understanding how cash moves within a business. It provides valuable insights into a company's financial health, operational efficiency, and its ability to meet financial obligations.
In the Cash Flow Report there different types of report
Here are the type of report that are shown in the system
- Default
- The Default report type is the consolidated report of all the branches for the company.
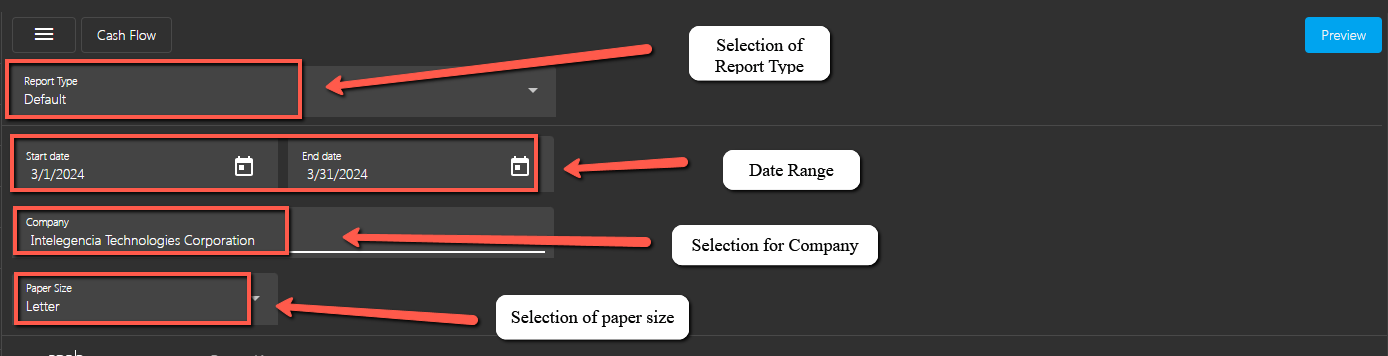
- Here is an example of default report type of Cash Flow
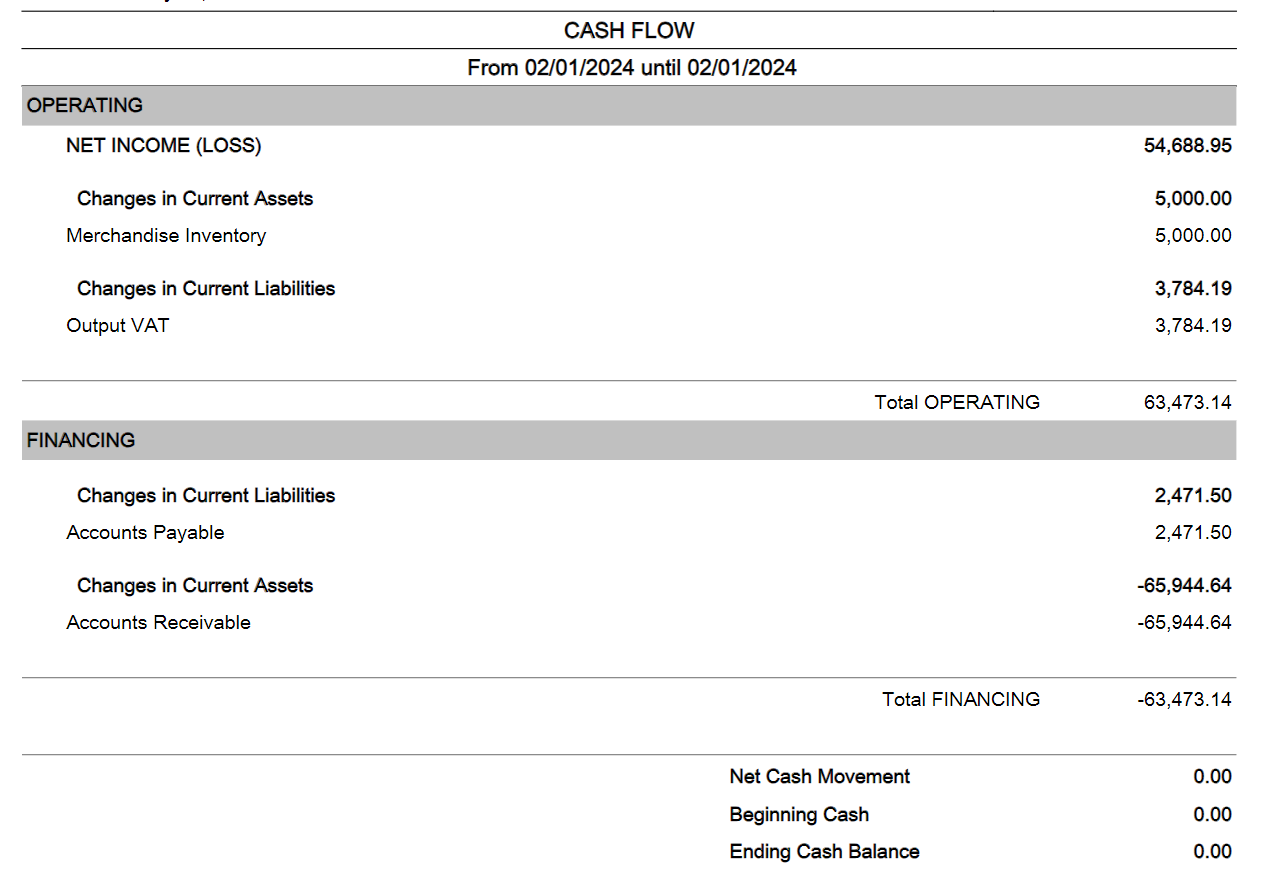
- Per Branch
- This report type will allow the user to view the Cash Flow report in a Specific branch only.
- Here is an example of Per Branch report of the Cash FLow
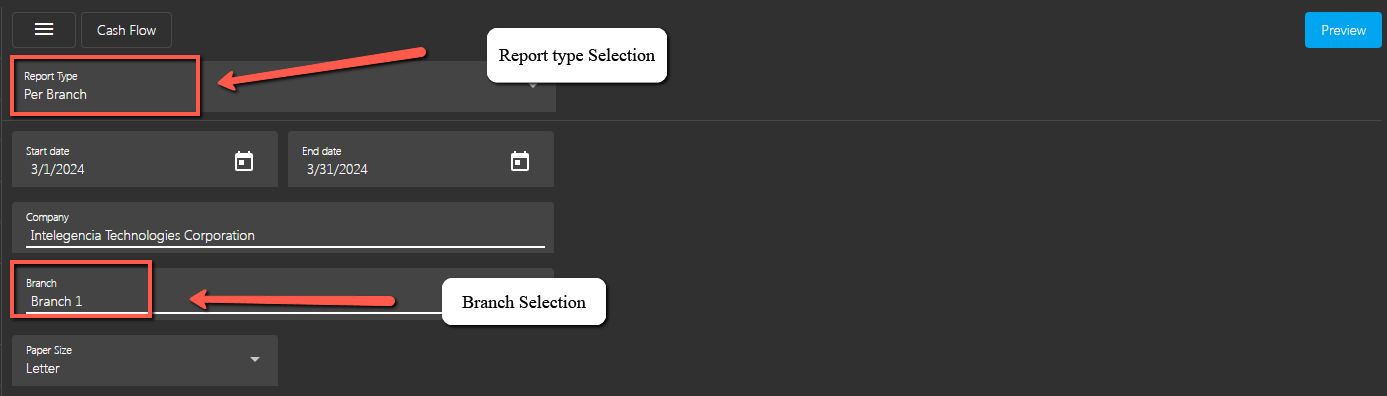
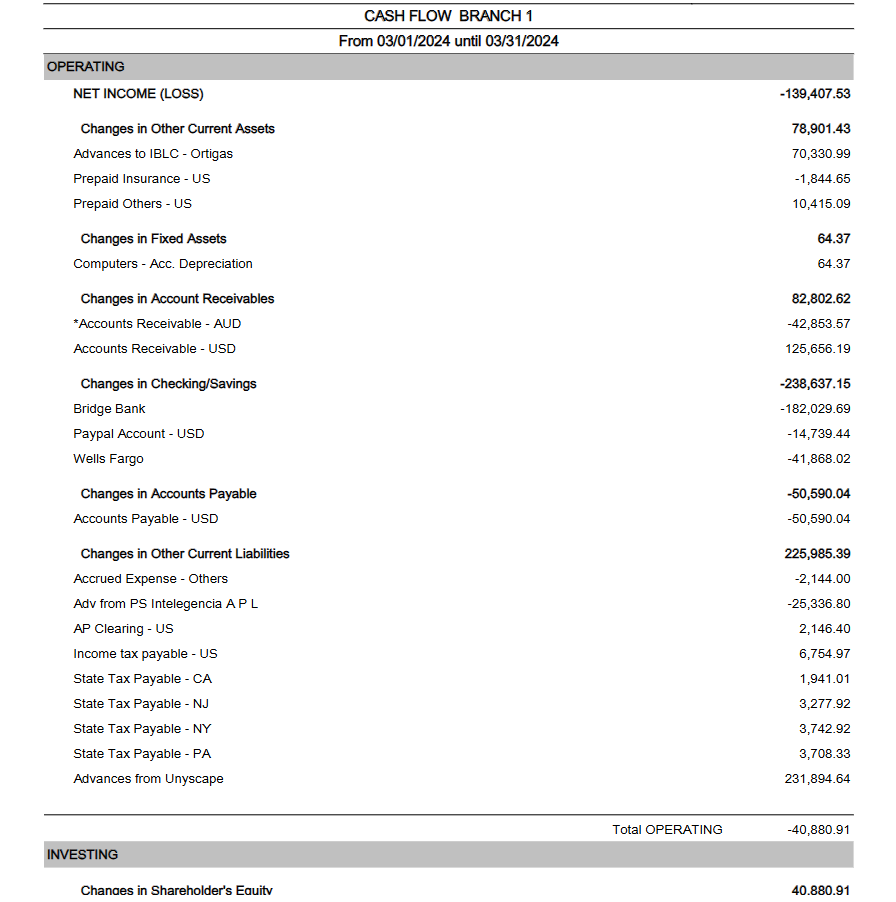
- Comparative
- This report is different from monthly comparison, this will only show two specific dates, months or years to compare.
- Here is an example of Cash Flow comparative report
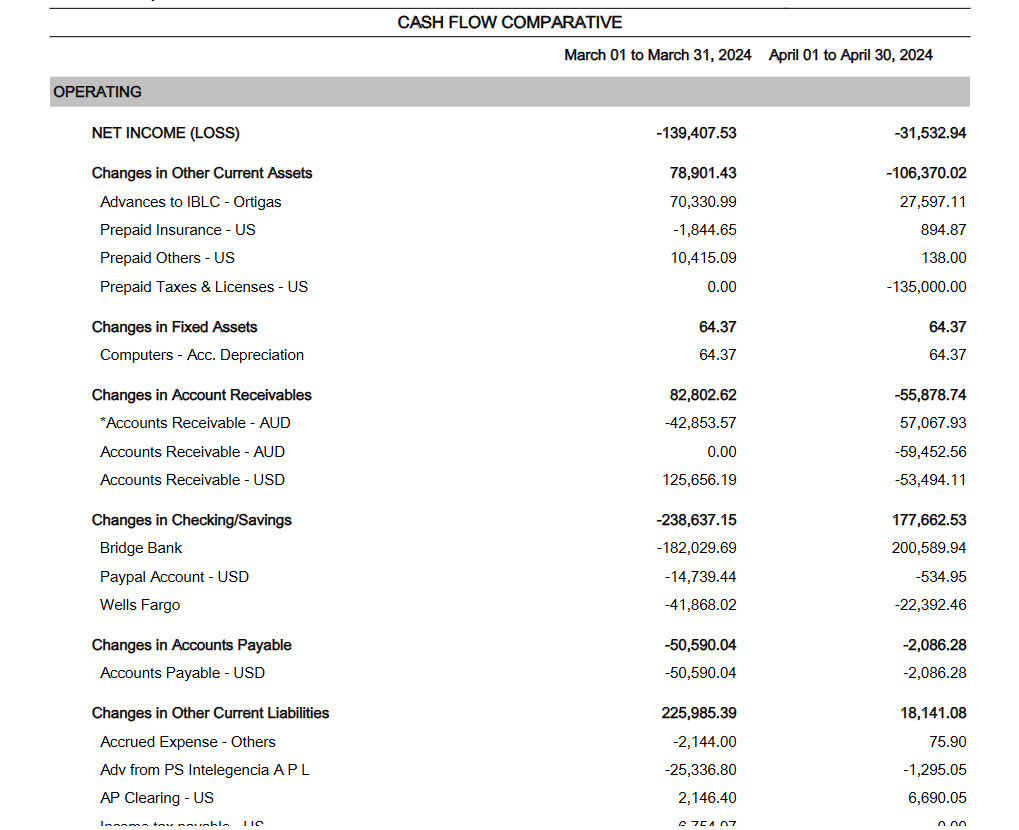
- Monthly Comparison
- This report will generate a comparison depending on the date range that was selected. The data that is generated in this report is still consolidated Cash Flow Report
- Here is an example of monthly comparison report of cash flow
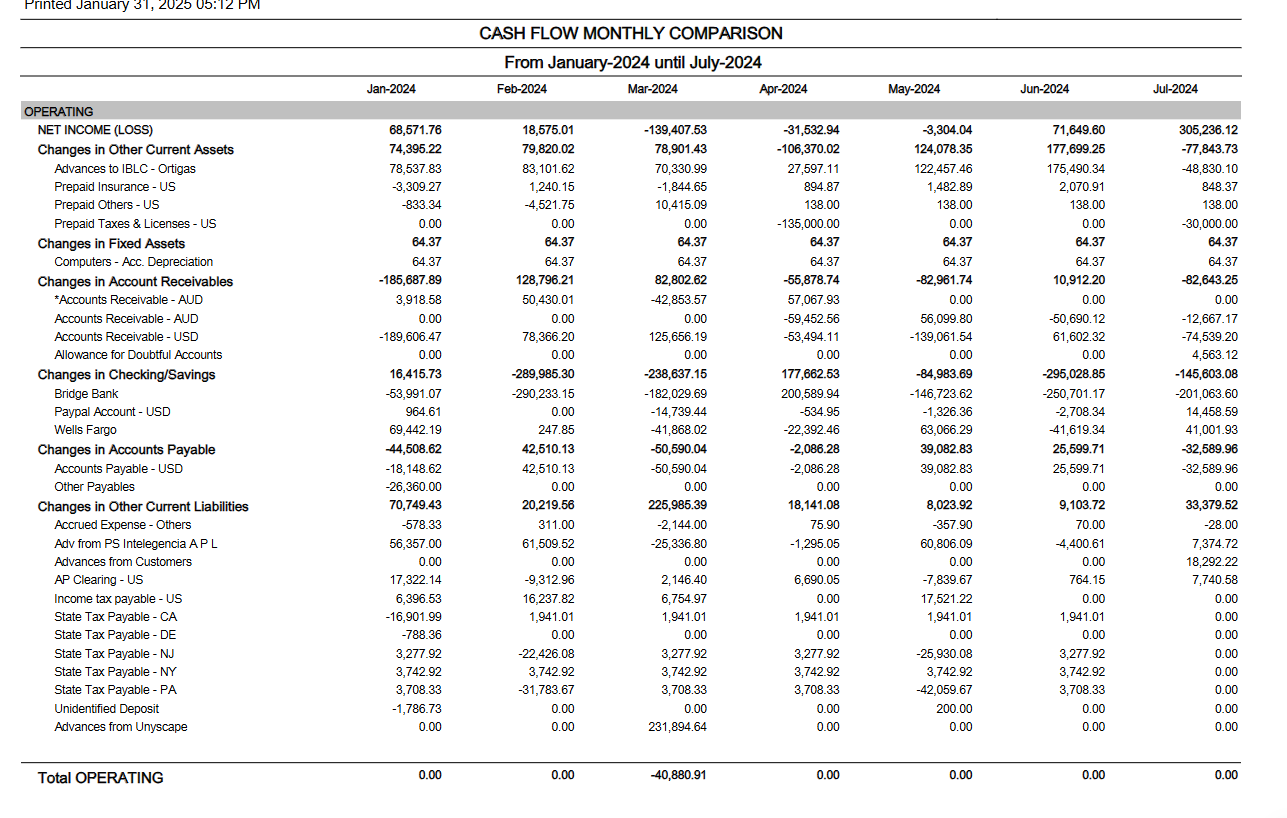
Note: All the report types in the Cash Flow should be sorted by manual code of the account and account type.
Chart of Accounts
Chart of Accounts is a report wherein the user can generate the index of all of the financial accounts in a company's general ledger. In short, it is an organizational tool that lists by category and line item all of the financial transactions that a company conducted during a specific accounting period.
To generate Chart of Accounts, here are the steps to follow:
- Go to Financials
- Select Financial Statements
- Select Chart of Accounts
- click Functions to download the data
- Printing and PDF download are also available
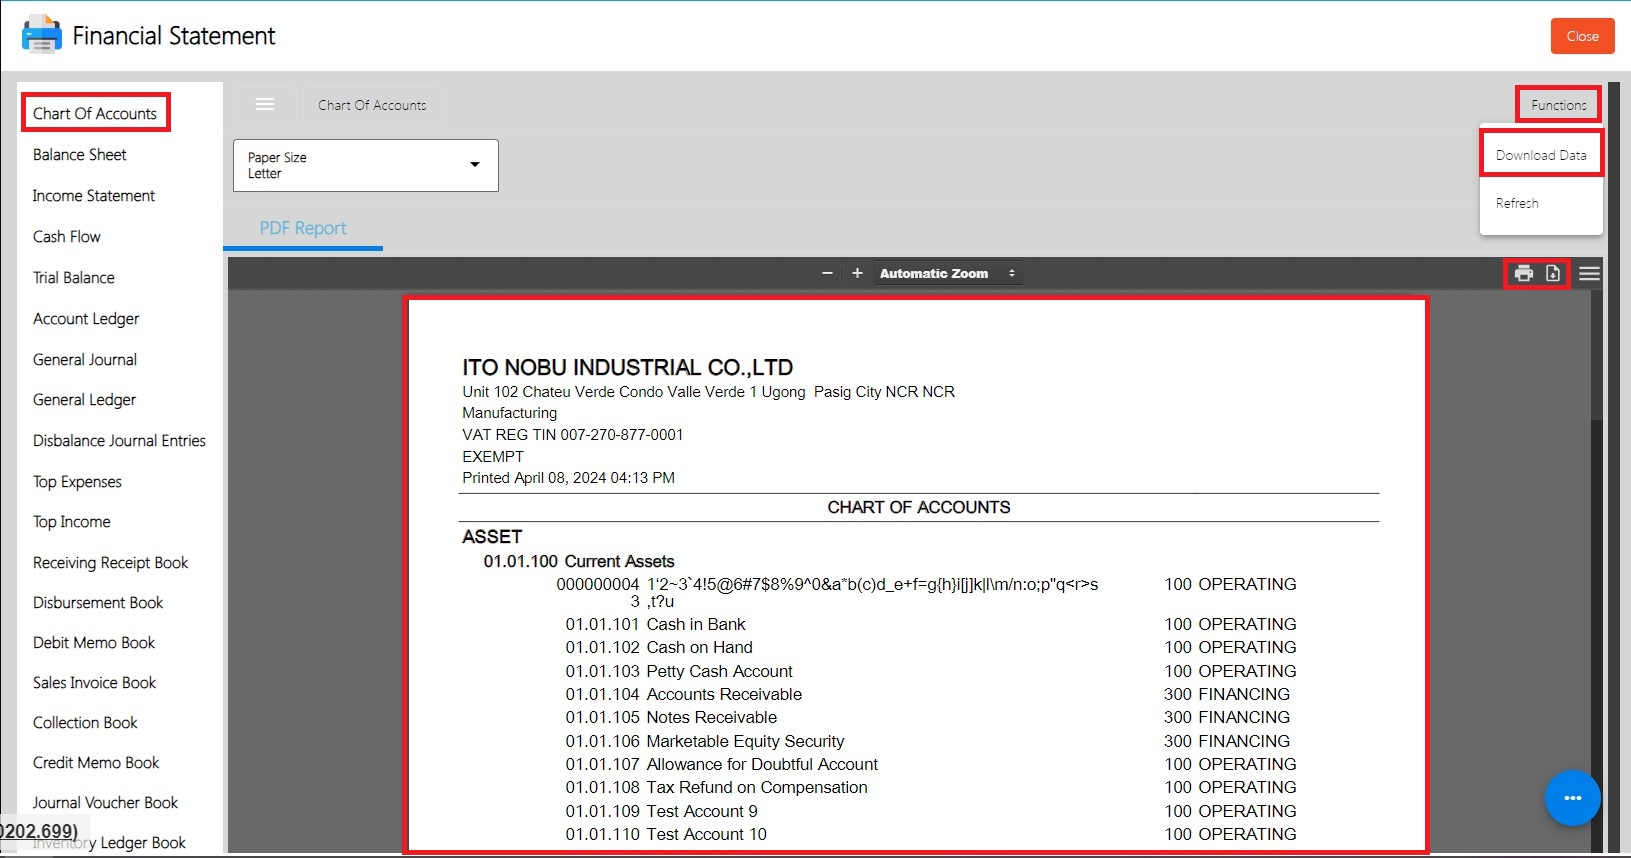
Top Expenses
Top expenses is a report wherein the user can generate all top expenses accounts and its amount base from the given date range.
To generate Top Expenses, here are the steps to follow:
- Go to Financials
- Select Financial Statements
- Select Top Expenses
- Enter the Start and End Date
- Click Functions to Download Data
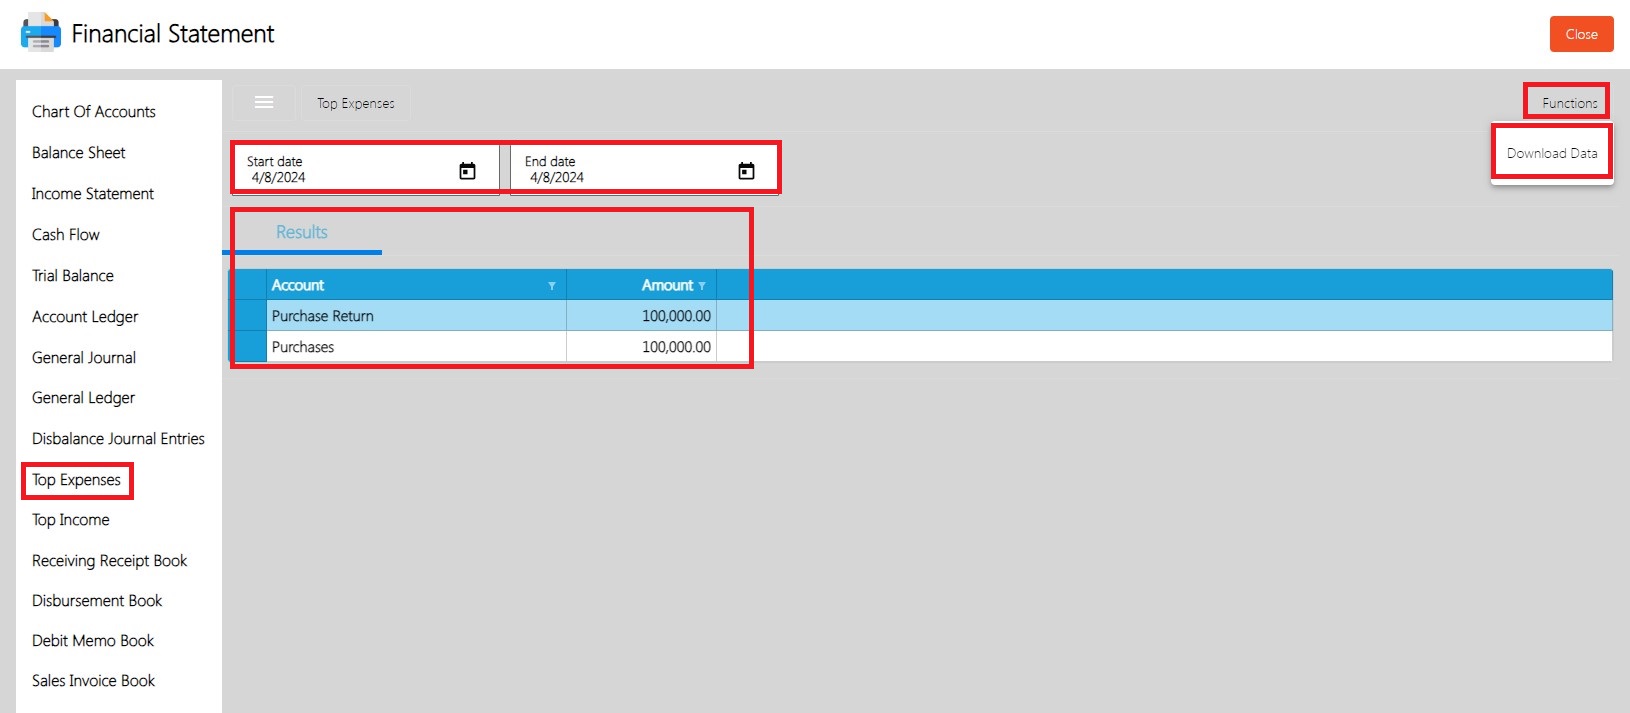
Top Income
Top Income is a report wherein the user can generate all top expenses accounts and its amount base from the given date range.
To generate Top Expenses, here are the steps to follow:
- Go to Financials
- Select Financial Statements
- Select Top Income
- Enter the Start and End Date
- Click Functions to Download Data
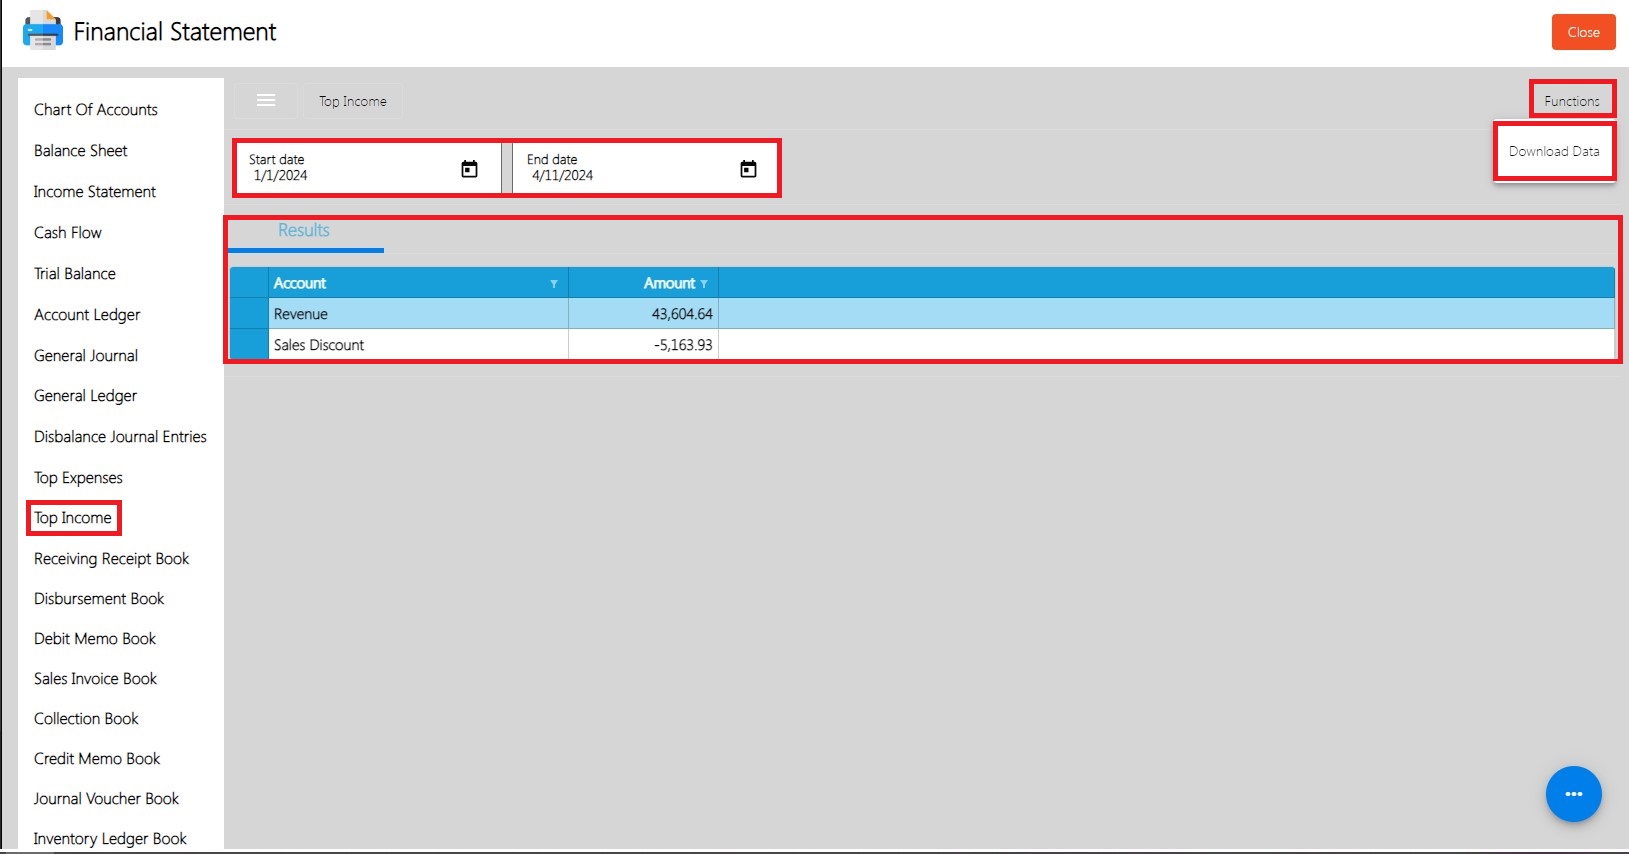
Receiving Receipt Book
Receiving Receipt Book is a document report used to record the receipt of goods or services. This book serves as a record of received goods or services, helping businesses track their inventory and expenses accurately.
To generate Receiving Receipt Book, here are the steps to follow:
- Go to Financials
- Select Financial Statements
- Click Receiving Receipt Book
- Enter Start and End Date
- Select Branch
- Click Functions to Download Data
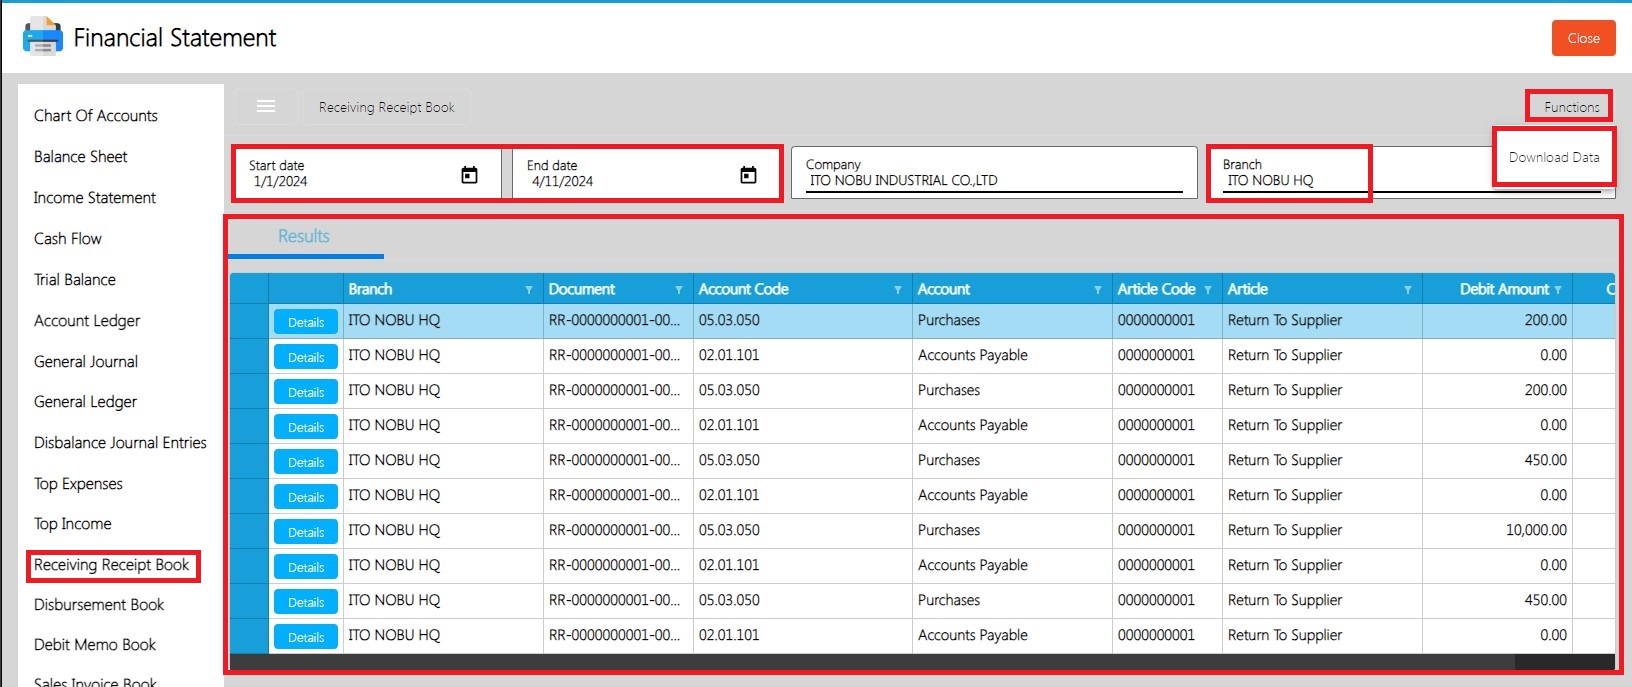
Disbursement Book
A Disbursement book, also known as a Cash Disbursement Journal, is a record of all payments made by a business. This book helps businesses track their expenses, manage cash flow, and maintain accurate financial records for accounting and auditing purposes.
To generate Disbursement Book, here are the steps to follow:
- Go to Financials
- Select Financial Statements
- Click Disbursement Book
- Enter Start and End Date
- Select Branch
- Click Functions to Download Data
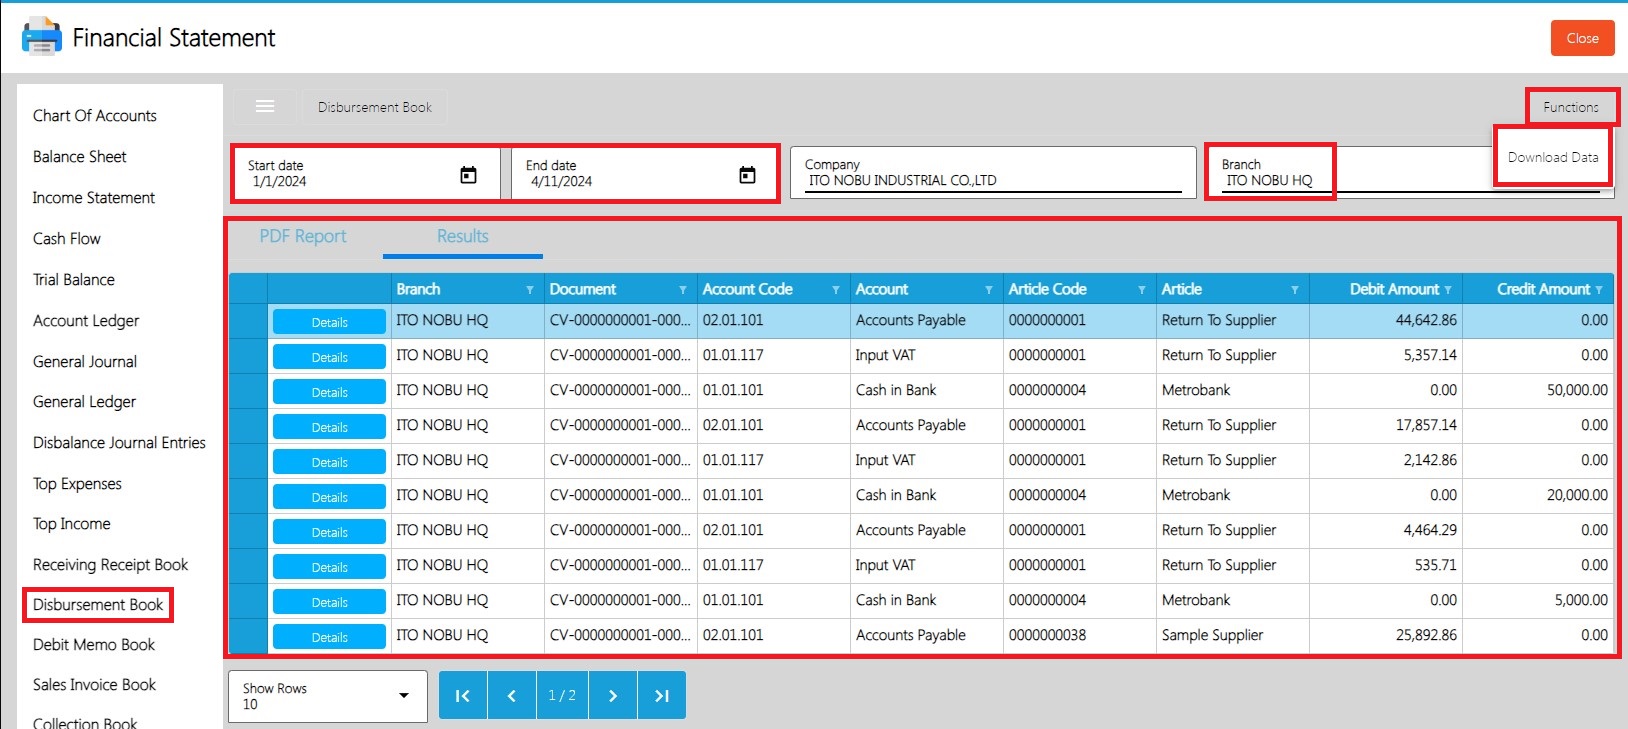
Debit Memo Book
A Debit Memo Book is a record used to document transactions where a company debits or reduces the amount owed by a customer or supplier. Debit memos are often used to correct errors in billing, adjust for returns or allowances, or resolve disputes with customers or suppliers. This book helps maintain accurate records of adjustments to accounts receivable or accounts payable.
To generate Debit Memo Book, here are the steps to follow:
- Go to Financials
- Select Financial Statements
- Click Debit Memo Book
- Enter Start and End Date
- Select Branch
- Click Functions to Download Data
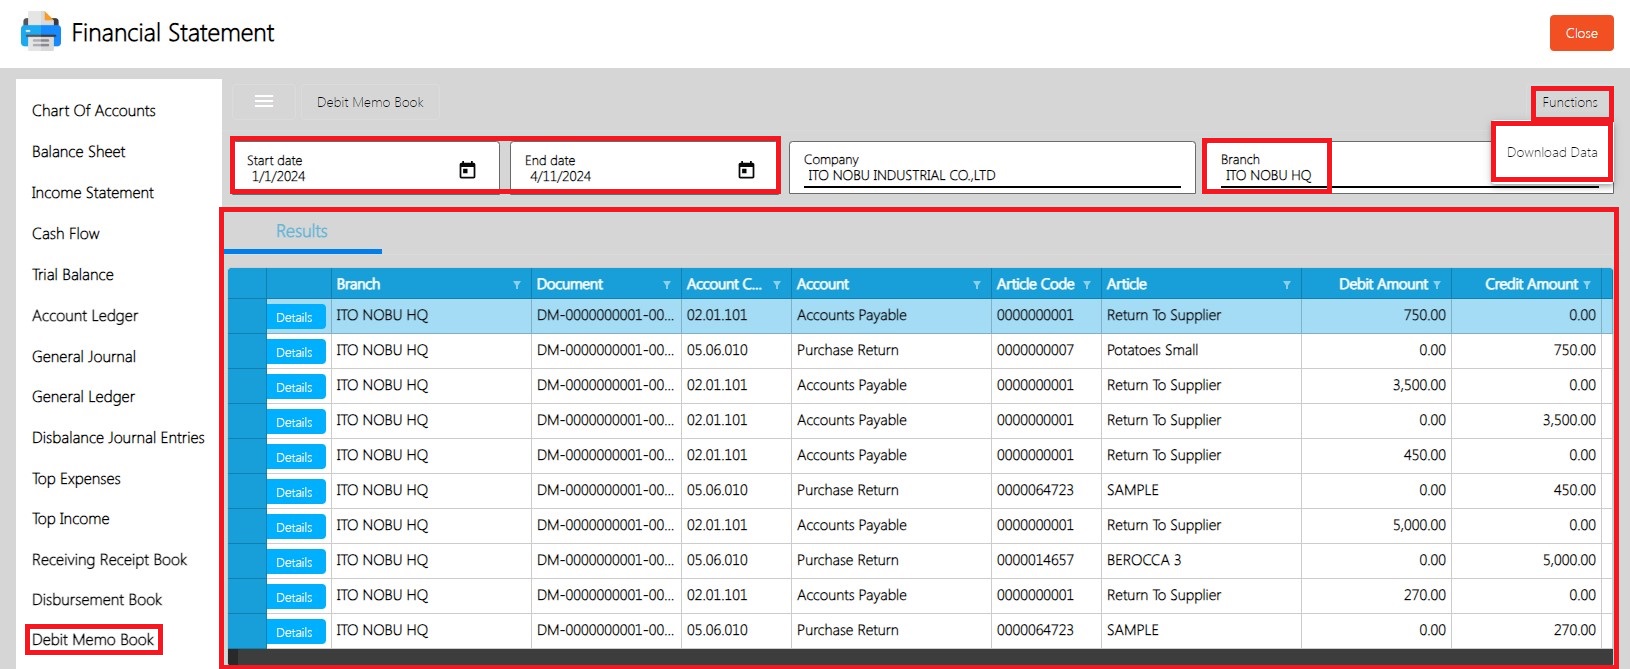
Sales Invoice Book
A Sales Invoice Book is a report used to record all sales transactions made by a business. Sales invoice books help businesses keep track of their sales revenue, monitor inventory levels, and provide customers with documentation of their purchases. Additionally, they serve as essential records for accounting, tax compliance, and financial analysis purposes.
To generate Sales Invoice Book, here are the steps to follow:
- Go to Financials
- Select Financial Statements
- Click Sales Invoice Book
- Enter Start and End Date
- Select Branch
- Click Search Button
- Click Functions to Download Data
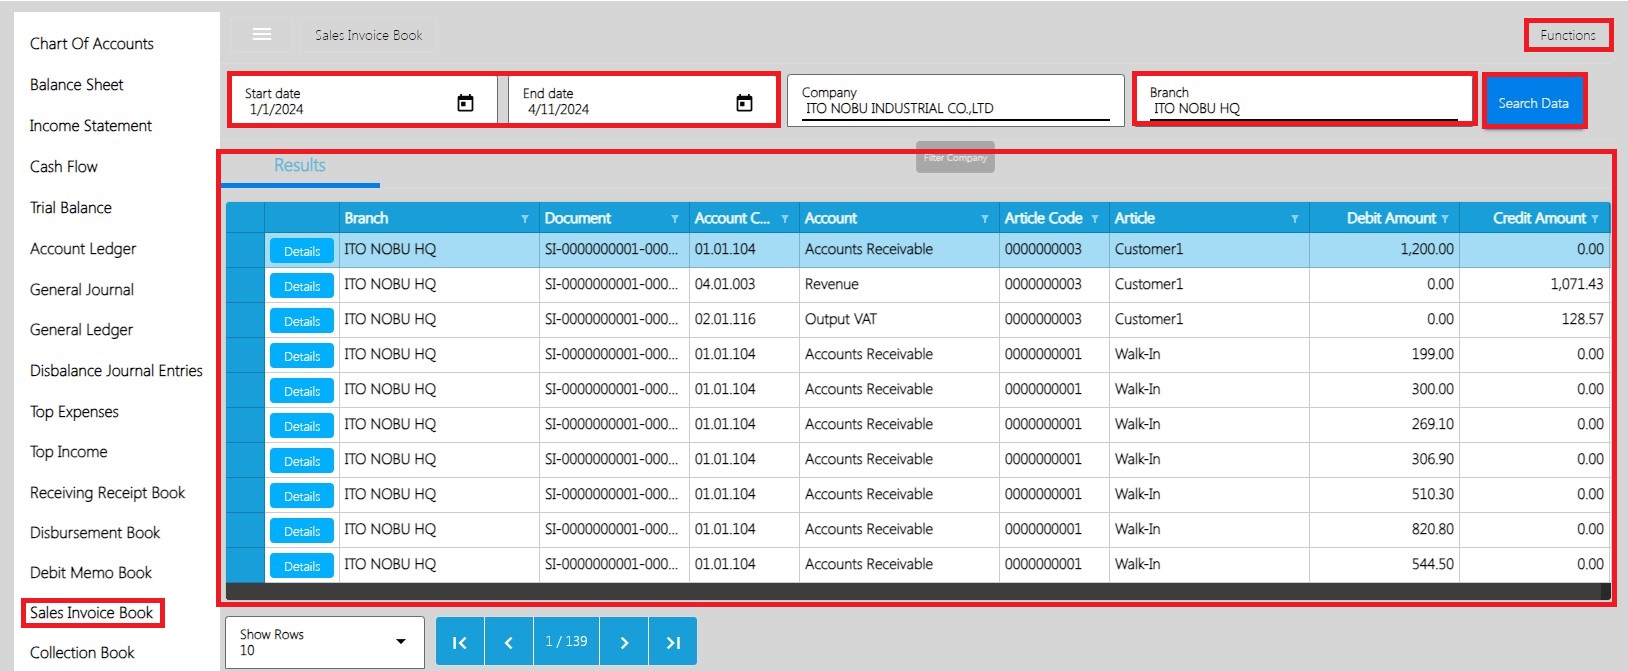
Collection Book
A Collection Book, also known as a Cash Receipts Journal or Cash Collection Register, is used to record all incoming payments or collections received by a business. Collection books help businesses track their cash inflows, monitor accounts receivable, reconcile payments with invoices, and maintain accurate financial records for accounting and auditing purposes.
To generate Collection Book, here are the steps to follow:
- Go to Financials
- Select Financial Statements
- Click Collection Book
- Enter Start and End Date
- Select Branch
- Click Functions to Download Data
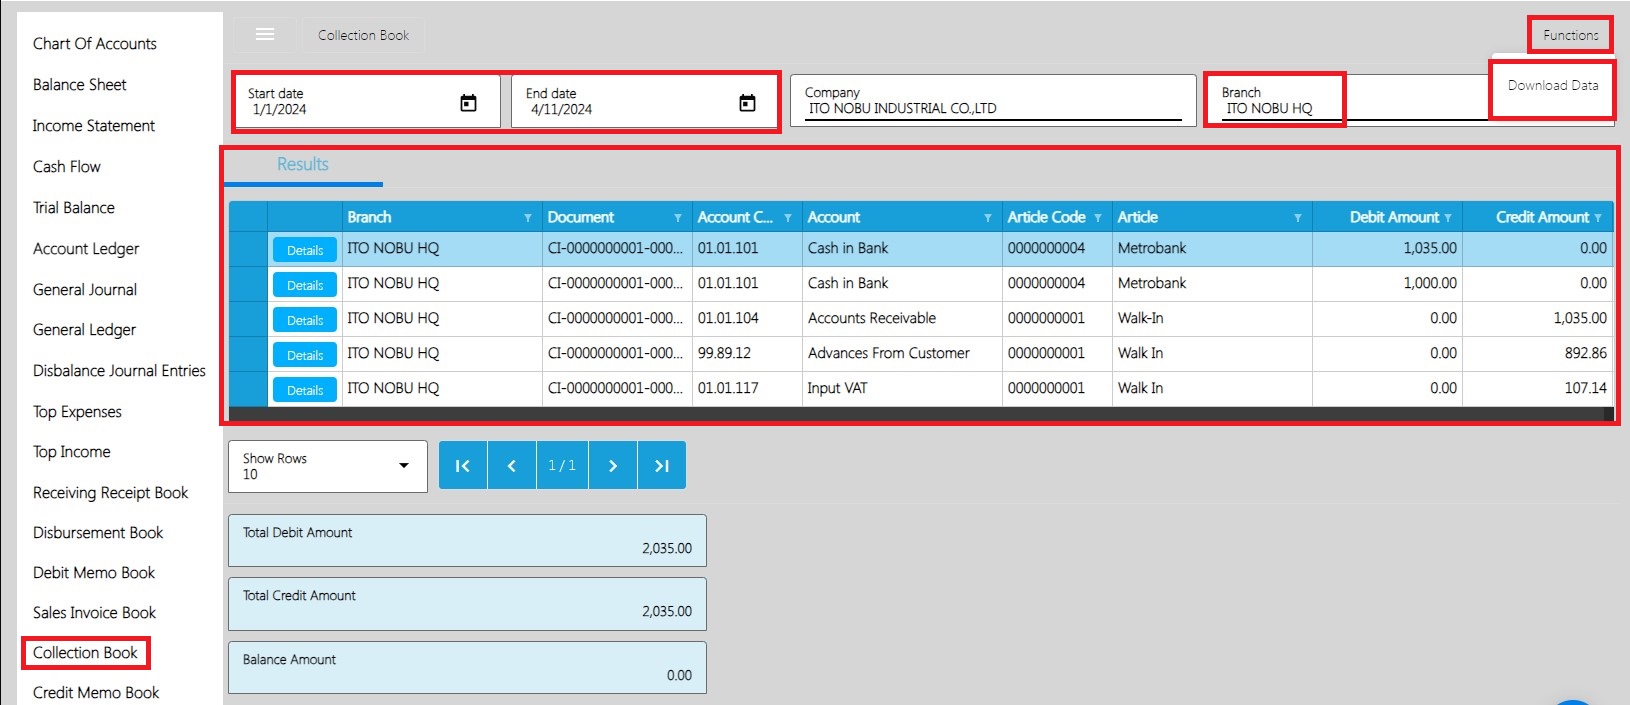
Credit Memo Book
A Credit Memo Book is a record used to document transactions where a company credits or reduces the amount owed by a customer or supplier. Credit memos are often issued to correct billing errors, adjust for returns or allowances, or resolve disputes with customers or suppliers. This book helps maintain accurate records of adjustments to accounts receivable or accounts payable.
To generate Credit Memo Book, here are the steps to follow:
- Go to Financials
- Select Financial Statements
- Click Credit Memo Book
- Enter Start and End Date
- Select Branch
- Click Functions to Download Data
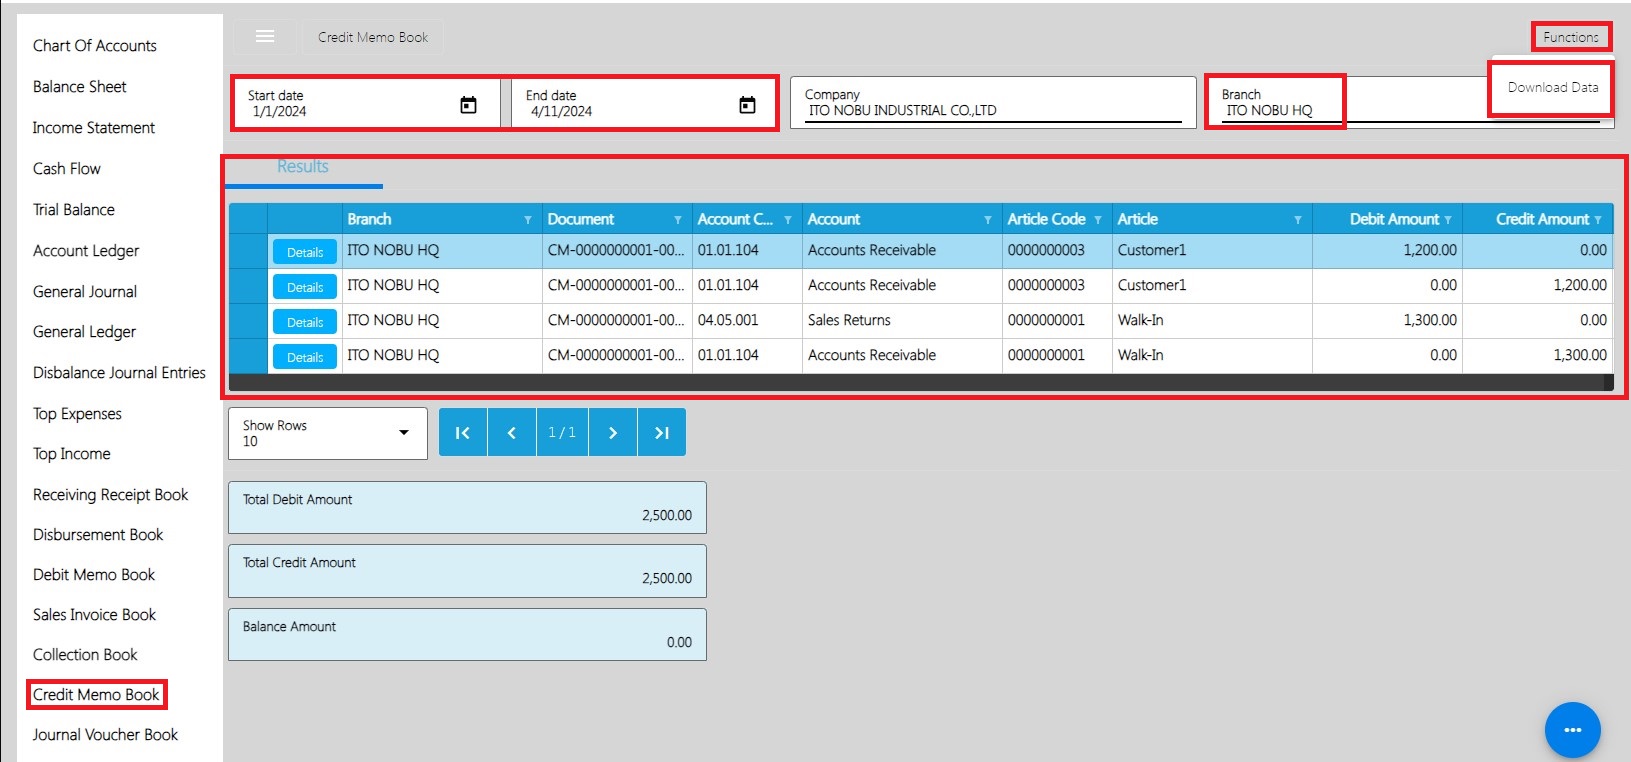
Journal Voucher Book
A Journal Voucher Book is a report used to record manual adjustments or transfers between different accounts within a business's accounting system. Journal vouchers are used to make corrections, adjustments, or transfers that cannot be handled through regular transaction processing.
To generate Journal Voucher Book, here are the steps to follow:
- Go to Financial
- Select Financial statements
- Click Journal Voucher
- Enter Start and End Date
- Select Branch
- Click Functions to Download Data
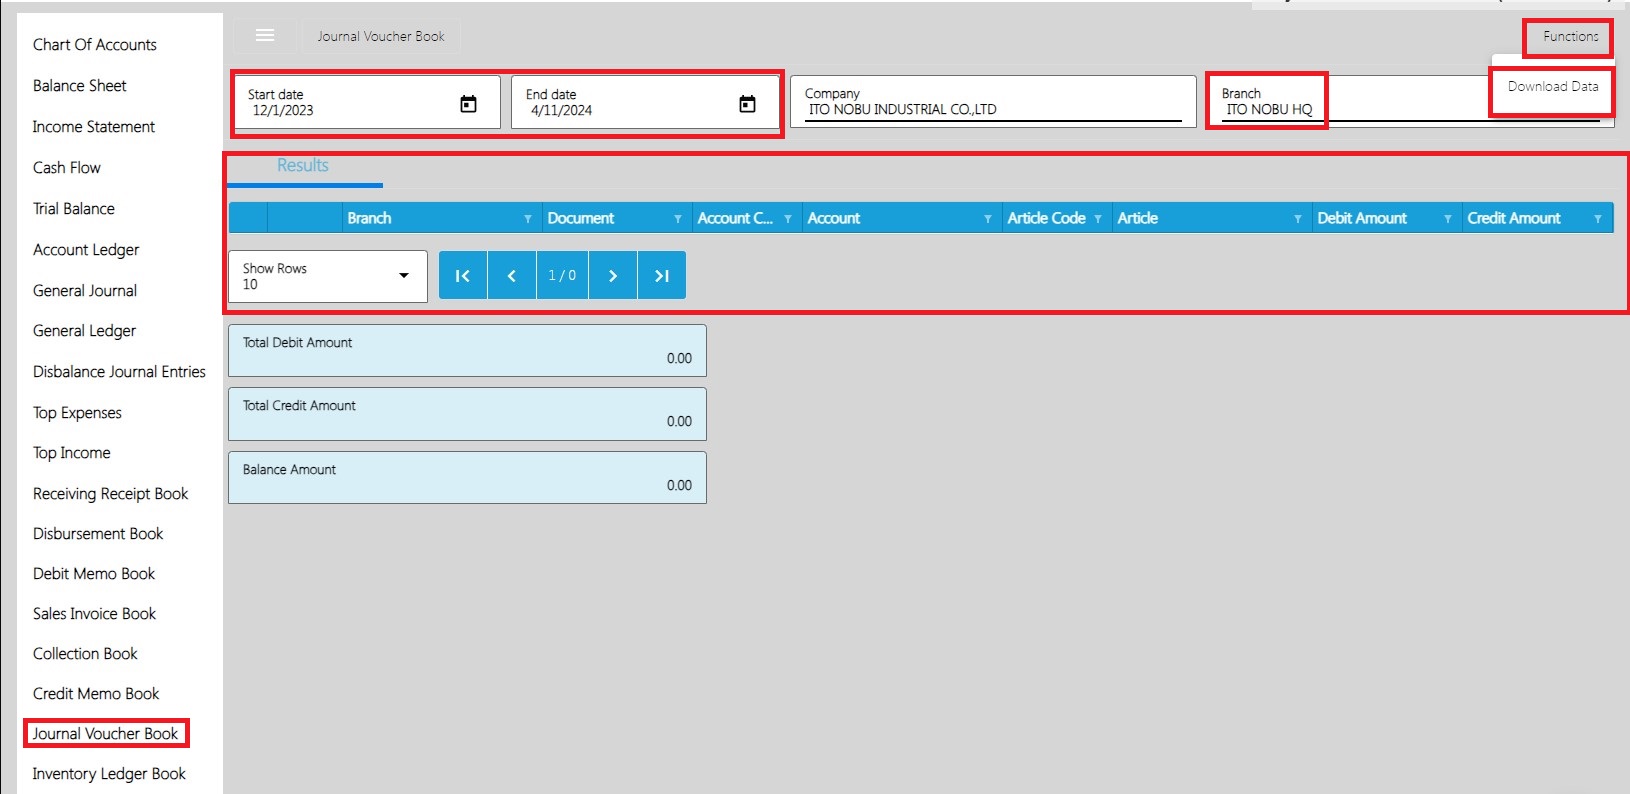
Inventory Ledger Book
An Inventory Ledger Book is a record used to track the quantities and values of inventory items held by a business over time. This ledger serves as a central repository for inventory-related information, allowing businesses to monitor stock levels, track inventory movements, reconcile physical inventory counts with book balances, and analyze inventory-related costs and trends.
To generate Inventory Ledger Book, here are the steps to follow:
- Go to Financials
- Select Financial Statements
- Click Inventory ledger
- Enter Start and End Date
- Select Branch
- Click Preview (PDF REPORT TAB)
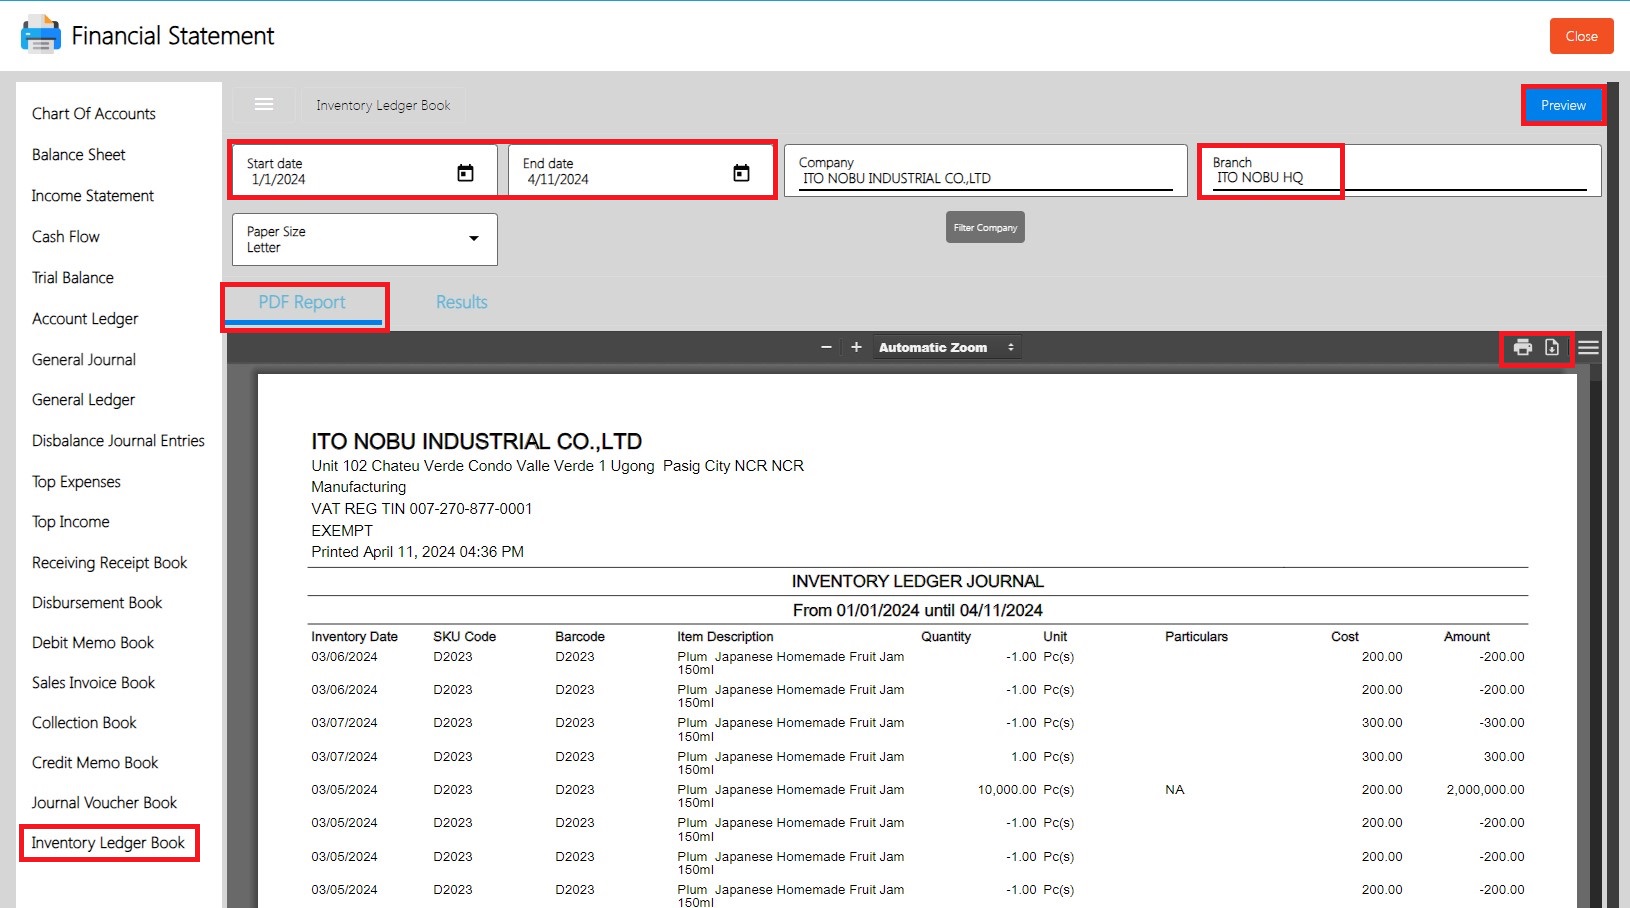
Inventory Report
An inventory report is a document that provides detailed information about the items, products, or materials a business holds in stock. It typically includes data such as the quantity of each item, its description, unit cost, total value, and any relevant notes about its condition or status.
Inventory reports are crucial for businesses to monitor and manage their stock levels effectively. They help in identifying which items are in abundance and which ones are running low, allowing businesses to make informed decisions about purchasing, production, and sales strategies. Additionally, inventory reports are often used for financial reporting purposes to assess the value of the inventory on hand and to track changes in inventory levels over time.
To generate Inventory Report, here are the steps to follow:
- Go to Inventory
- Click Inventory Report
- Select Inventory Report
- Enter Start and End Date
- Select Branch or All Branch
- Click Functions for (Download Data, Split PDF, and Refresh)
- Printing is Available too
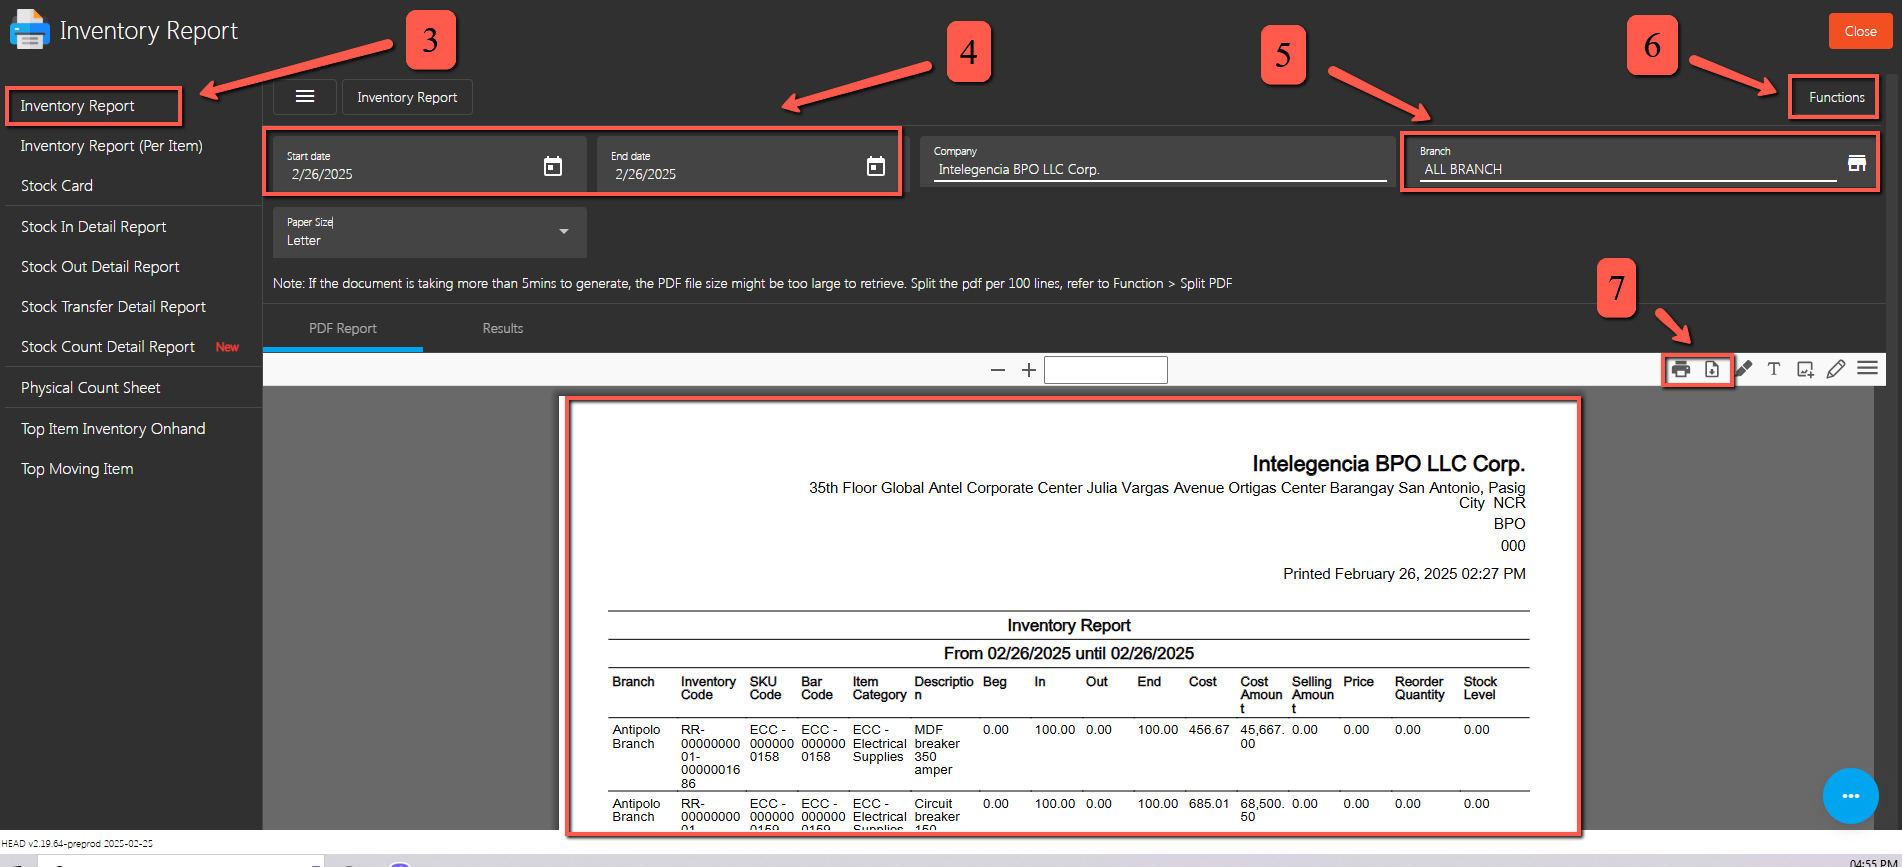
Inventory Report Per Item
An inventory report per item provides detailed information about each individual item in stock. This type of report typically includes specific details about each item, such as the Beginning Balance, In, Out, Ending Balance, as well as the Cost Amount, Selling Price Etc.
To generate Inventory Report Per Item, here are the steps to follow:
- Go to Inventory
- Select Inventory Report
- Click Inventory Report Per Item
- Enter Start and End Date
- Select Item description
- Click Functions for (Download Data and Refresh)
- Printing is Available too
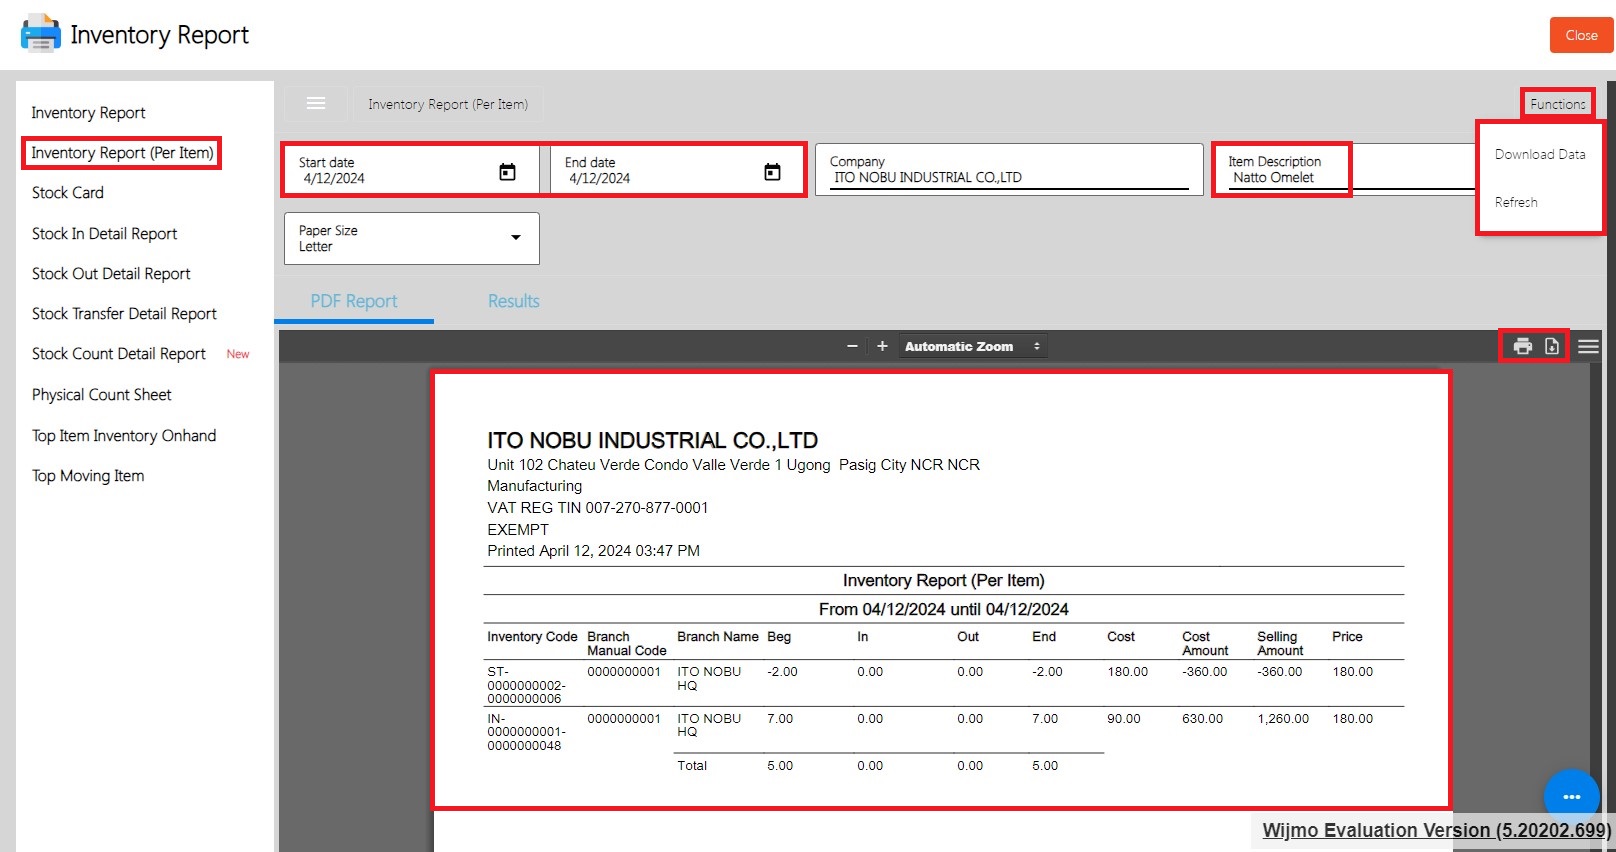
Stock Card
A stock card, also known as a stock ledger card or inventory card, is a physical or digital record used to track the movement of inventory items on a per-item basis. It serves as a detailed history of each item in stock, providing a chronological record of transactions such as receipts, issues, transfers, and adjustments.
To generate Stock Card, here are the steps to follow:
- Go to Inventory
- Select Inventory Report
- Click Stock Card
- Enter Start and End Date
- Select Branch
- Select Barcode
- Select Item Description
- Click Functions for (Download Data and Refresh)
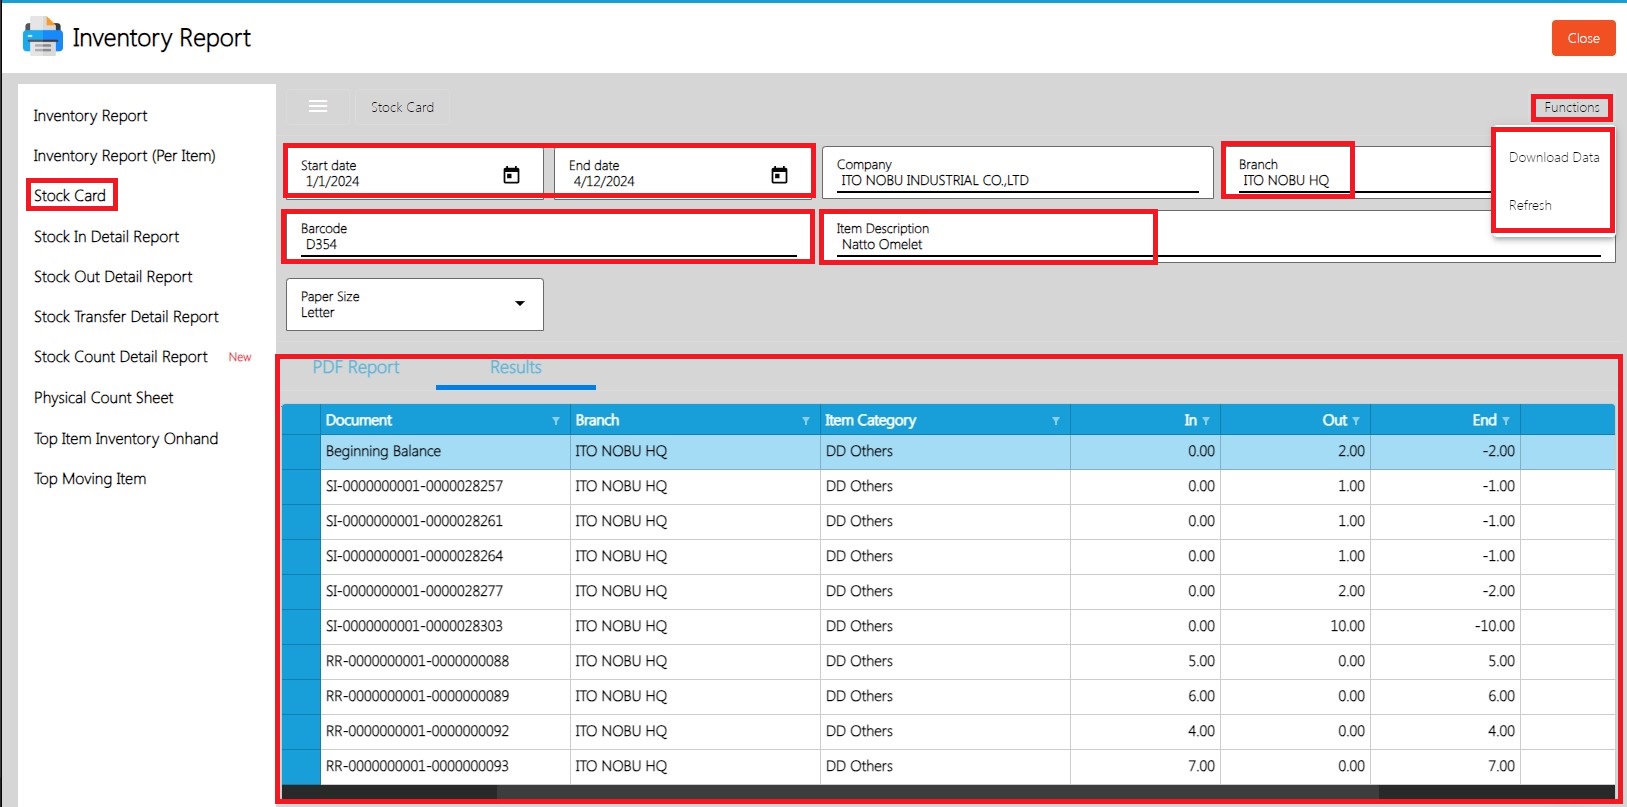
Stock In Detailed Report
A stock in detail report provides a comprehensive overview of the inventory holdings of a business in a detailed format. This report typically includes detailed information about each item in stock, similar to an inventory report per item, but with additional details and analysis.
To generate Stock In Detail Report, here are the steps to follow:
- Go to Inventory
- Select Inventory Report
- Click Stock In Detailed Report
- Enter Start and End Date
- Select Branch
- Click Functions for (Download Data and Refresh)
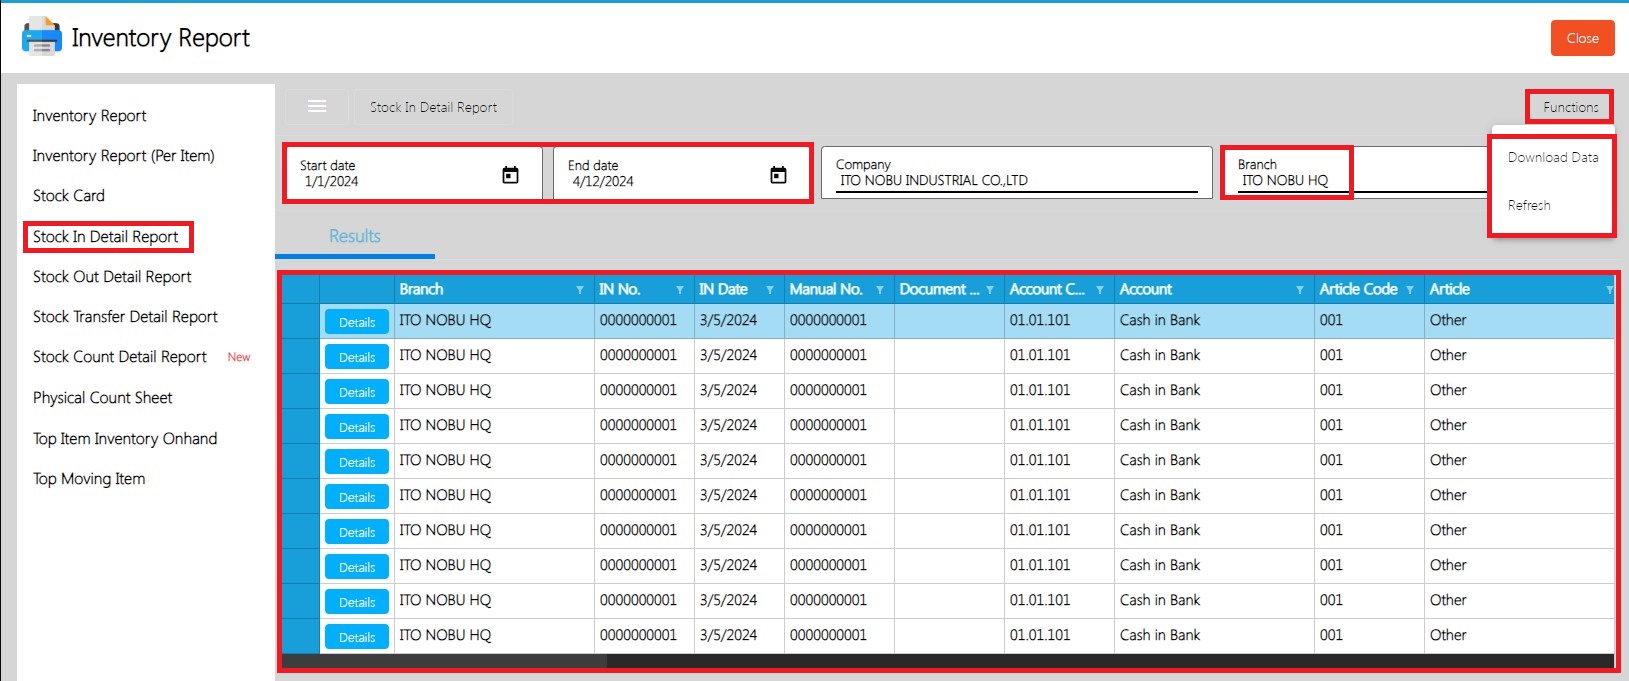
Stock Out Detailed Report
A stock-out detail report provides information about instances when a business runs out of stock of a particular item. This report is crucial for inventory management as it helps identify instances of stock-outs, analyze the causes, and take appropriate actions to prevent future occurrences.
To generate Stock Out Detail Report, here are the steps to follow:
- Go to Inventory
- Select Inventory Report
- Click Stock In Detailed Report
- Enter Start and End Date
- Select Branch
- Click Functions for (Download Data and Refresh)
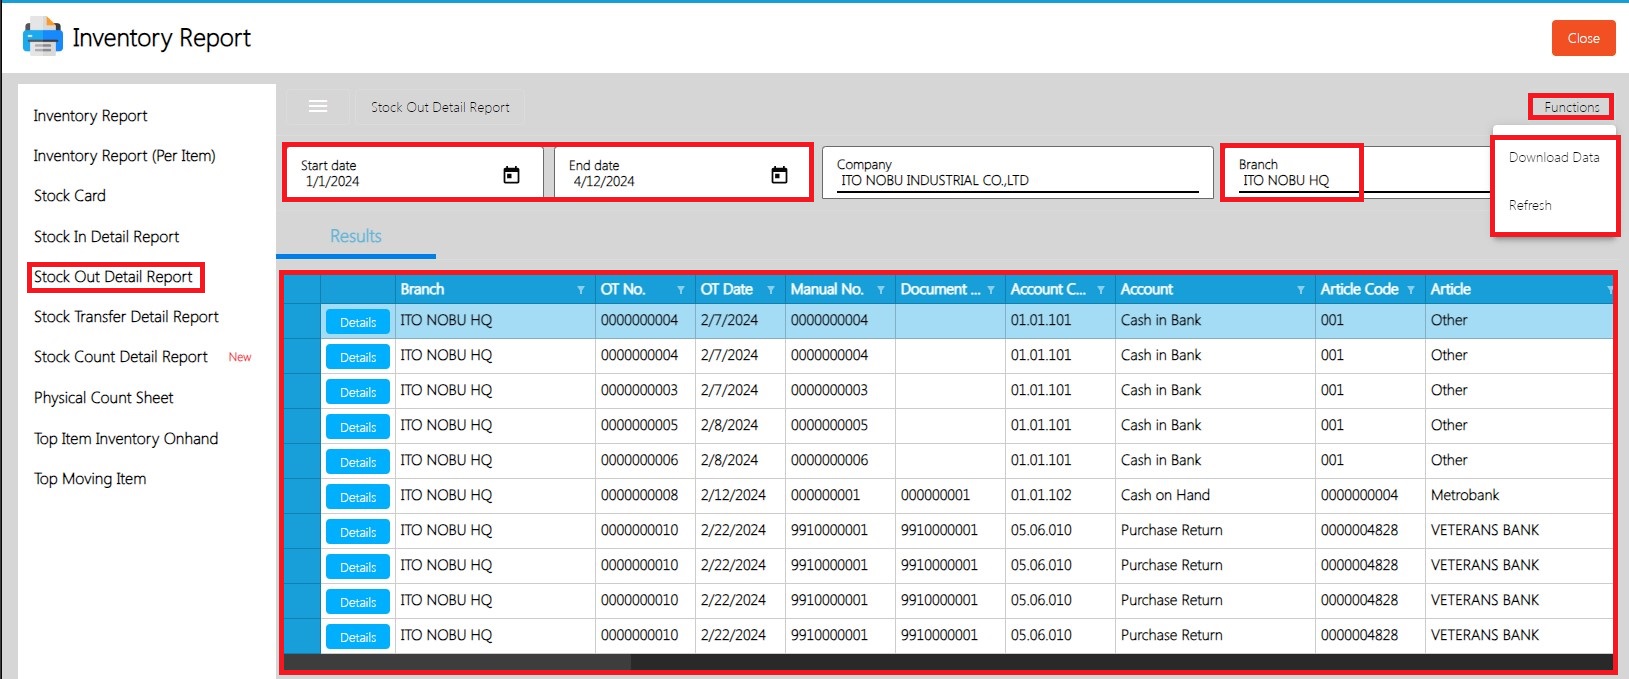
Stock Transfer Detailed Report
A Stock Transfer Detail Report is a document report that provides a comprehensive breakdown of the transfer of stock or inventory items between different locations or branches within a company.
To generate Stock Transfer Detail Report, here are the steps to follow:
- Go to Inventory
- Select Inventory Report
- Click Stock Transfer Detail Report
- Enter Start and End Date
- Select Branch
- Click Functions for (Download Data and Refresh)
Stock Count Detailed Report
A Stock Count Detail Report is a document report that provides a detailed summary of a system inventory count based on the movements of the items within the system.
To generate Stock Count Detail Report, here are the steps to follow:
- Go to Inventory
- Select Inventory Report
- Click Stock Count Detail Report
- Enter Start and End Date
- Select Branch
- Click Functions for (Download Data and Refresh)
Physical Count Sheet
A Physical Count Sheet, also known as an Inventory Count Sheet or Stock Count Sheet, is a document used during a physical inventory count or stocktaking process to record the actual quantities of items on hand in a warehouse, storeroom, or retail space. It serves as a tool for manually tallying the inventory levels of various items to compare against the records maintained in the easyFS.
To generate Physical Count Sheet, here are the steps to follow:
- Go to Inventory
- Select Inventory Report
- Click Physical Count Sheet
- Click Functions for (Download Data and Refresh)
Top Item Inventory Onhand
Top Item Inventory Onhand typically refers to a list or report displaying top 10 items with the highest quantities currently in stock or on hand in easyFS. This report helps businesses identify which items they have the most of in their inventory at a given time.
To generate Top Item Inventory Onhand, here are the steps to follow:
- Go to Inventory
- Select Inventory Report
- Click Top Item Inventory Onhand
- Enter Start and End Date
- Click Functions for (Download Data and Refresh)
Top Moving Item
Top Moving Item typically refers to an inventory item that experiences the highest rate of sales, turnover, or movement within a given period. This term is often used in inventory management and retail contexts to identify the top 10 products that are most popular or in-demand among customers.
To generate Top Moving Item, here are the steps to follow:
- Go to Inventory
- Select Inventory Report
- Click Top Moving Item
- Enter Start and End Date
- Click Functions for (Download Data and Refresh)
Stock Card
A stock Card is a document that records the inflow and outflow of goods in a business. It tracks the quantity of items received, sold, and returned, as well as the balance of items in stock.
To generate Stock Card, here are the steps to follow:
- Go to Inventory
- Select Inventory Report
- Click Stock Card
- Enter Start and End Date
- Click Functions for (Download Data and Refresh)
Check Warehousing Report
A Check Warehousing Report is a module that provides detailed information about cheques issued, received, deposited, or cleared within a specific period. Inside this module are 4 reports such as PDC Summary Report, Bounced Check Report, PDC Cleared Report, and PDC Uncleared Report
PDC Summary Report
A PDC Summary Report typically refers to a document report summarizing the status and details of Post-Dated Checks (PDCs) received or issued by an organization. Post-dated checks are checks with future dates written on them, indicating that they should not be cashed or deposited until the specified date.
To generate PDC Summary Report, here are the steps to follow:
- Go to Check Warehousing
- Select CW Reports
- Click PDC Summary Report
- Enter Date as of
- Select Branch
- Select Bank
- Select Check Type
- Download and Printing Data is available
Bounced Check Report
A Bounced Check Report is a document report that provides a record of checks that have been returned unpaid by the bank due to insufficient funds or other reasons. When a check is presented for payment but cannot be honored by the payer's bank, it is said to "bounce".
To generate Bounced Check Report, here are the steps to follow:
- Go to Check Warehousing
- Select CW Reports
- Click Bounce Checked Report
- Enter Date as of
- Select Branch
- Select Bank
- Select Check Type
- Download and Printing Data is available
PDC Cleared Report
A PDC Cleared Report refers to a document report that provides a summary or detailed record of Post-Dated Checks (PDCs) that have been successfully cleared by the bank. Post-dated checks are checks with future dates written on them, indicating that they should not be cashed or deposited until the specified date.
To generate PDC Cleared Report, here are the steps to follow:
- Go to Check Warehousing
- Select CW Reports
- Click PDC Cleared Report
- Enter Date as of
- Select Branch
- Select Bank
- Select Check Type
- Download and Printing Data is available
PDC Uncleared Report
A PDC Uncleared Report is a document that provides a summary or detailed record of Post-Dated Checks (PDCs) that have not yet been successfully cleared by the bank. Post-dated checks are checks with future dates written on them, indicating that they should not be cashed or deposited until the specified date.
To generate PDC Uncleared Report, here are the steps to follow:
- Go to Check Warehousing
- Select CW Reports
- Click PDC Uncleared Report
- Enter Date as of
- Select Branch
- Select Bank
- Select Check Type
- Download and Printing Data is available
Budget Reports
A budget report is a financial document that outlines the expected income and expenditures of an individual, company, organization, or government entity over a specified period, typically a month, quarter, or year. It serves as a tool for planning and controlling finances, providing a detailed breakdown of projected revenues, expenses, and any discrepancies between the two. Budget reports often include comparisons between planned and actual figures, helping to assess financial performance and make informed decisions about resource allocation and financial management.
Report Budget
A budget report is a summary of expected income and expenses over a specific period, helping track financial plans and performance.
To generate Report Budget, here are the steps to follow:
- Go to Budget
- Select Budget Reports
- Click Report Budget
- Select Month from and Month To
- Select Year
- Select Branch
- Click Export to Download Template
Report CashFlow Projection
A report cash flow projection is a financial forecast outlining the expected inflows and outflows of cash for a future period, typically used for planning and decision-making.
To generate Report CashFlow Projection, here are the steps to follow:
- Go to Budget
- Select Budget Reports
- Click Report Budget
- Select Month from and Month To
- Select Year
- Select Branch
- Click Export to Download Template
Fixed Asset Reports
A fixed asset report is a document that provides detailed information about the tangible assets owned by an organization, such as land, buildings, machinery, equipment, and vehicles. It typically includes details like the asset's description, acquisition cost, depreciation, current value, and location. This report helps in tracking, managing, and accounting for fixed assets within an organization.
Fixed Asset Report
A fixed asset report is a summary of the organization's tangible properties, detailing their descriptions, costs, depreciation, and current values.
To generate Report CashFlow Projection, here are the steps to follow:
- Go to Fixed Asset
- Select Reports
- Click Fixed Asset Report
- Select Branch
- Click Functions for (Download Data and Refresh)
Fixed Asset Detail Report
A Fixed Asset Detail Report provides a comprehensive overview of individual tangible assets owned by an organization, including descriptions, acquisition details, depreciation, and current values.
To generate Fixed Asset Detail Report, here are the steps to follow:
- Go to Fixed Asset
- Select Reports
- Click Fixed Asset Detail Report
- Select Asset
- Click Functions for (Download Data and Refresh)
Asset Disposal Summary Report
An Asset Disposal Summary Report is a document that provides a concise overview of assets that have been sold or disposed of by an organization.
To generate Asset Disposal Summary Report, here are the steps to follow:
- Go to Fixed Asset
- Select Reports
- Click Asset Disposal Summary Report
- Enter Start and End Date
- Select branch
- Click Functions for (Download Data and Refresh)
Asset Disposal Detail Report
An Asset Disposal Detail Report has a thorough breakdown of individual assets that have been sold or disposed of by an organization. It typically includes specific details like asset descriptions, sale prices, dates, and any associated financial transactions. This report provides a granular view of the organization's asset disposal activities for detailed analysis and record-keeping purposes.
To generate Asset Disposal Detail Report, here are the steps to follow:
- Go to Fixed Asset
- Select Reports
- Click Asset Disposal Detail Report
- Enter Start and End Date
- Select branch
- Click Functions for (Download Data and Refresh)
BIR CAS Reports
General Journal
A chronological record of financial transactions of a business. It is a book where all accounting entries are initially recorded before they are transferred to the ledger accounts. The general journal is part of the double-entry accounting system, which means that for every transaction recorded in the journal, there are at least two accounts involved—one account is debited, and another account is credited.
To generate General Journal, here are the steps to follow:
- Click Dashboard Module
- Scroll Down till you see the BIR CAS Report
- Click BIR CAS Report
- Click General Journal
- Enter Start and End Date
- Select the Branch
- Click Preview
- Click Functions Button to Download or Refresh the report
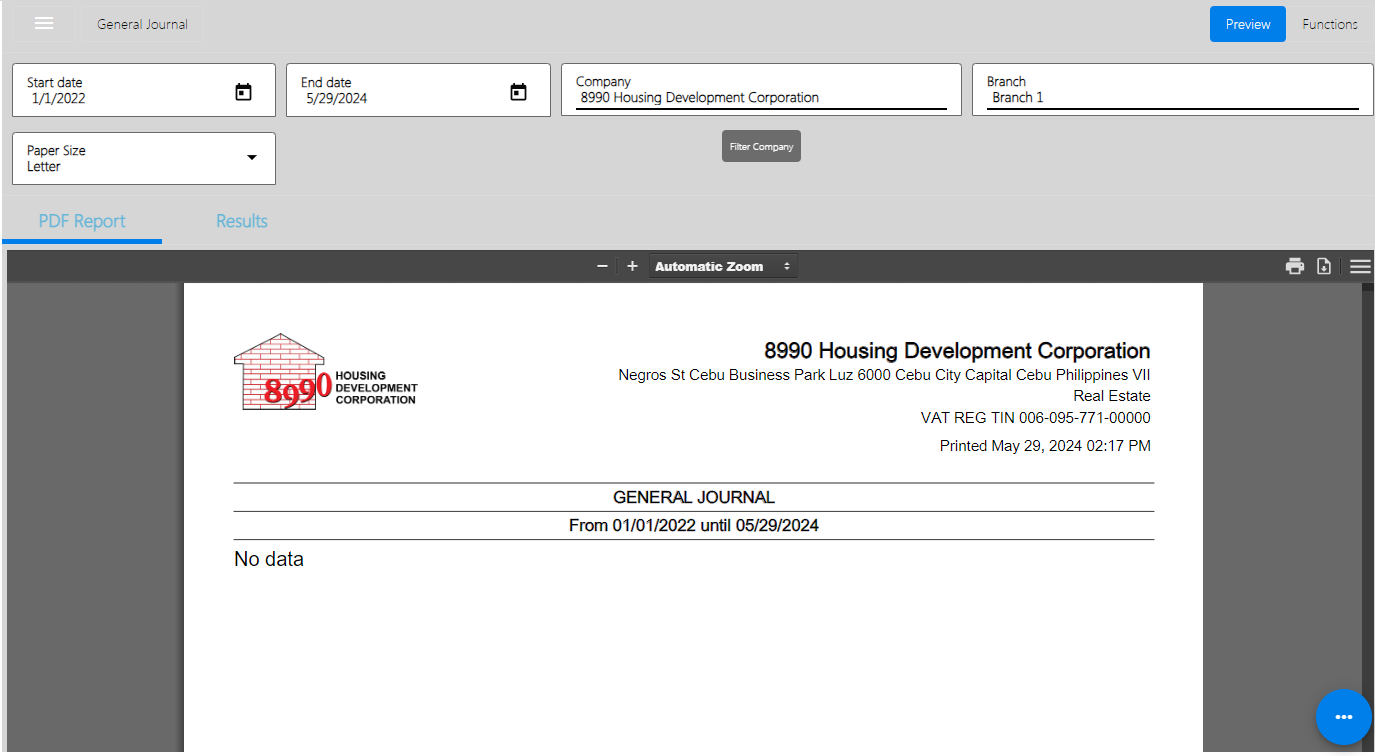
General Ledger
A core component of the accounting system in which a business maintains a complete record of all its financial transactions. It serves as a central repository for all accounts, organized by account type, and provides a comprehensive overview of the company's financial position. The general ledger is organized into various accounts, each representing a different aspect of the business, such as assets, liabilities, equity, revenue, and expenses.
To generate General Ledger, here are the steps to follow:
- Click Dashboard Module
- Scroll Down till you see the BIR CAS Report
- Click BIR CAS Report
- Click General Ledger
- Enter Start and End Date
- Select Branch
- Click Preview Button
- Click Function Button to Refresh the report
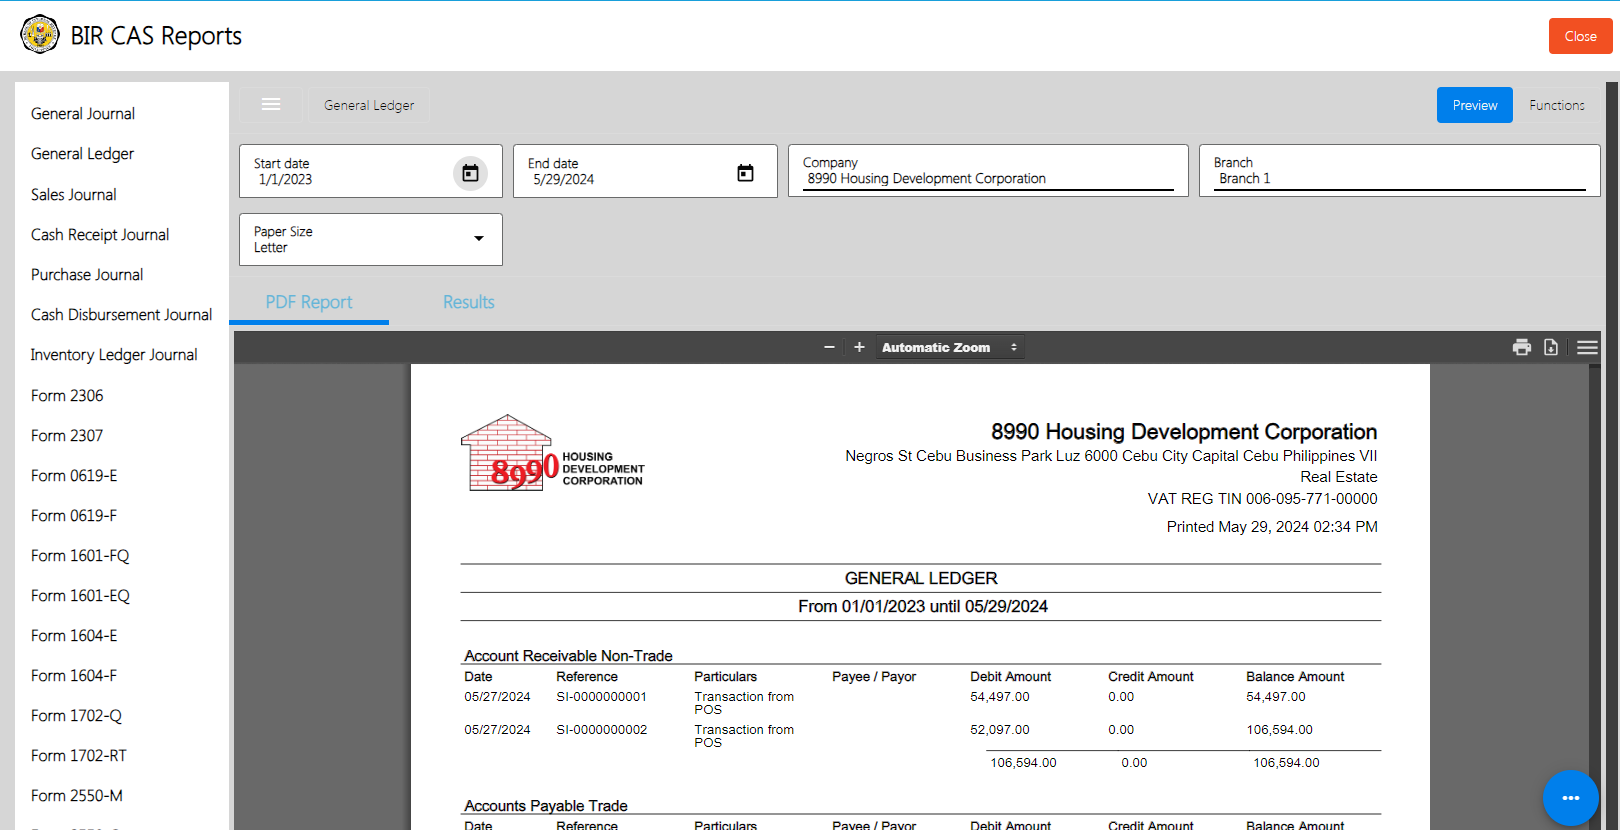
Sales Journal
A specialized accounting journal used to record all sales transactions of a business. It is part of the broader accounting system and is particularly helpful for businesses that have a high volume of sales transactions. The Sales Journal is one of the subsidiary journals, each designed for a specific type of transaction, which together with the general journal, form the complete accounting system.
To generate Sales Journal, here are the steps to follow:
- Click Dashboard Module
- Scroll Down till you see the BIR CAS Report
- Click BIR CAS Report
- Click Sales Journal
- Enter Start and End Date
- Select Branch
- Click Preview Button
- Click Function Button to Refresh the report
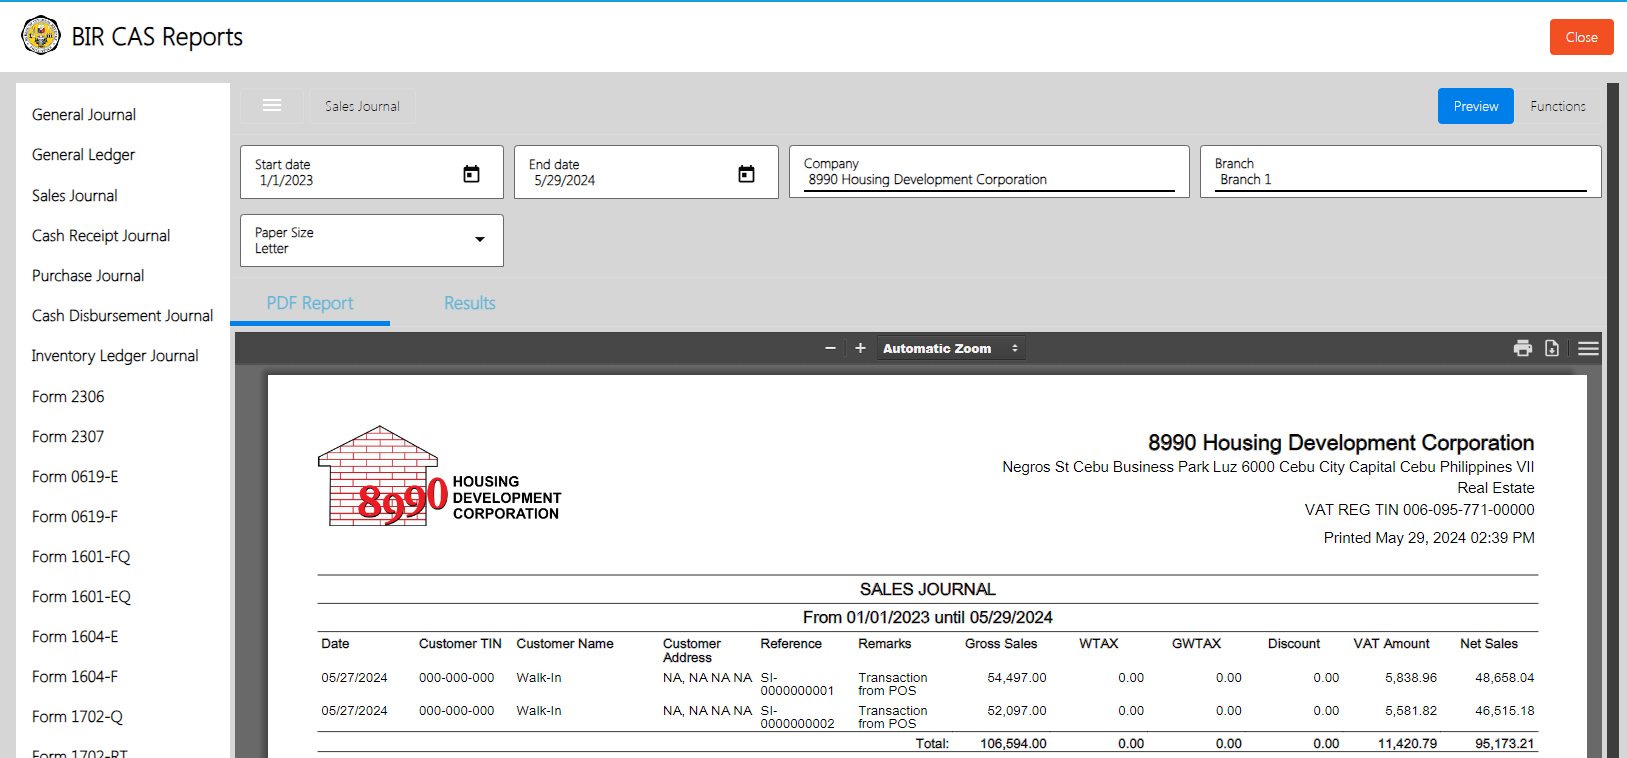
Cash Receipt Journal
A Cash Receipt Journal is a specialized accounting ledger used to record all cash inflows to a business. This journal is part of the subsidiary ledger system and is specifically designed to keep track of all transactions involving incoming cash. It typically includes detailed information about each transaction, such as the date, the amount received, the source of the cash, and the account affected by the transaction.
To generate Cash Receipt Journal, here are the steps to follow:
- Click Dashboard Module
- Scroll Down till you see the BIR CAS Report
- Click BIR CAS Report
- Click Cash Receipt Journal
- Enter Start and End Date
- Select Branch
- Click Preview Button
- Click Function Button to refresh the report
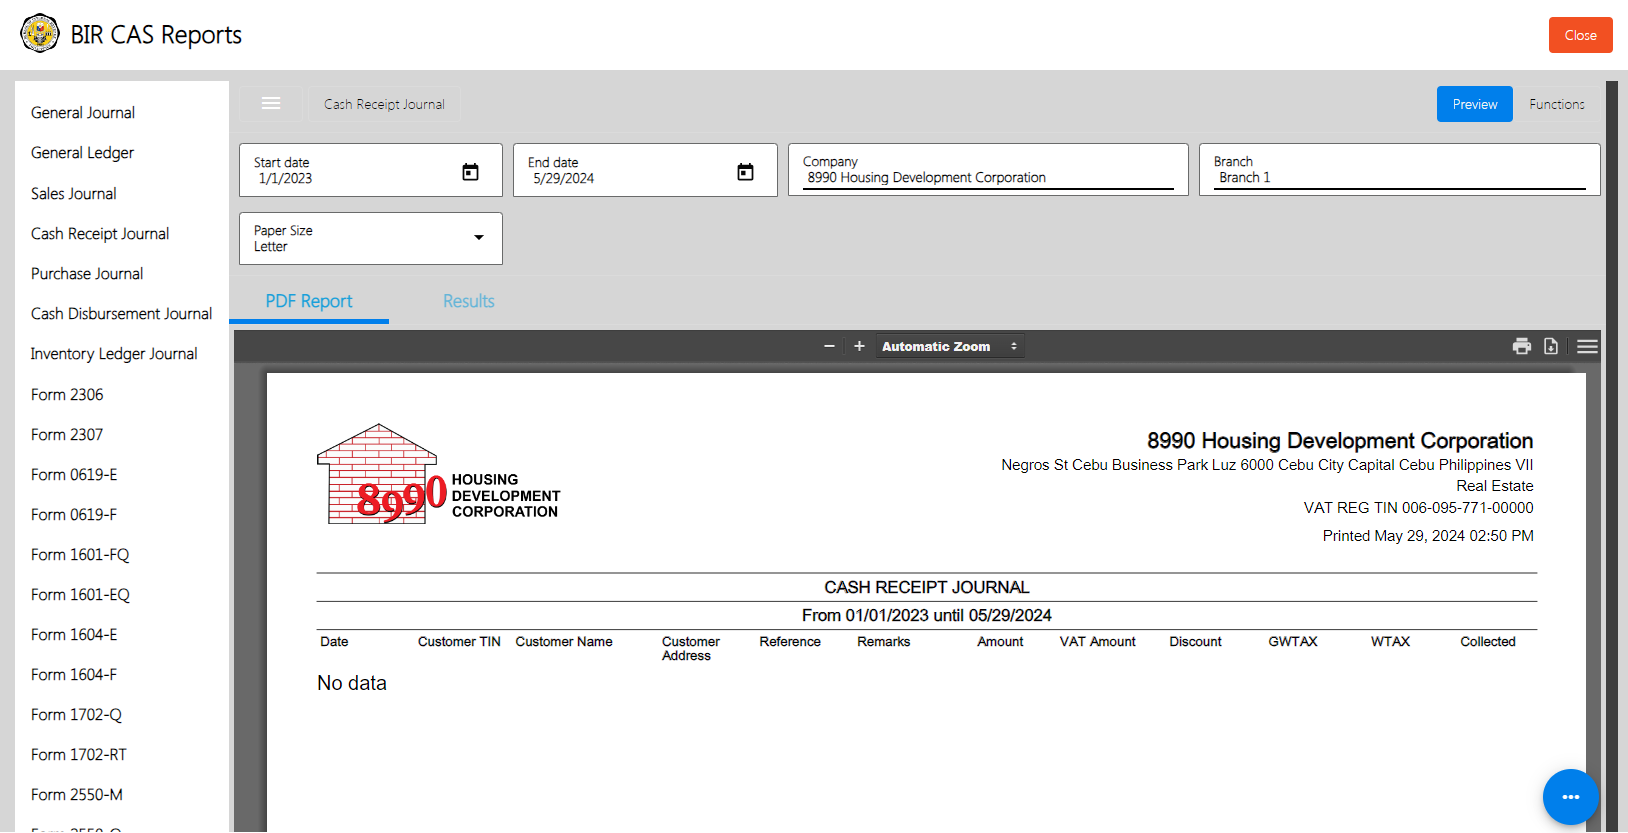
Purchase Journal
Also known as the Purchases Journal, is another specialized accounting journal used to record all purchases of goods on credit by a business. Similar to the Sales Journal, it is a subsidiary journal designed for a specific type of transaction. The Purchase Journal is particularly useful for businesses that engage in a significant volume of credit purchases.
To generate Purchase Journal, here are the steps to follow:
- Click Dashboard Module
- Scroll Down till you see the BIR CAS Report
- Click BIR CAS Report
- Click Purchase Journal
- Enter Start and End Date
- Select Branch
- Click Preview Button
- Click Function Button to refresh report
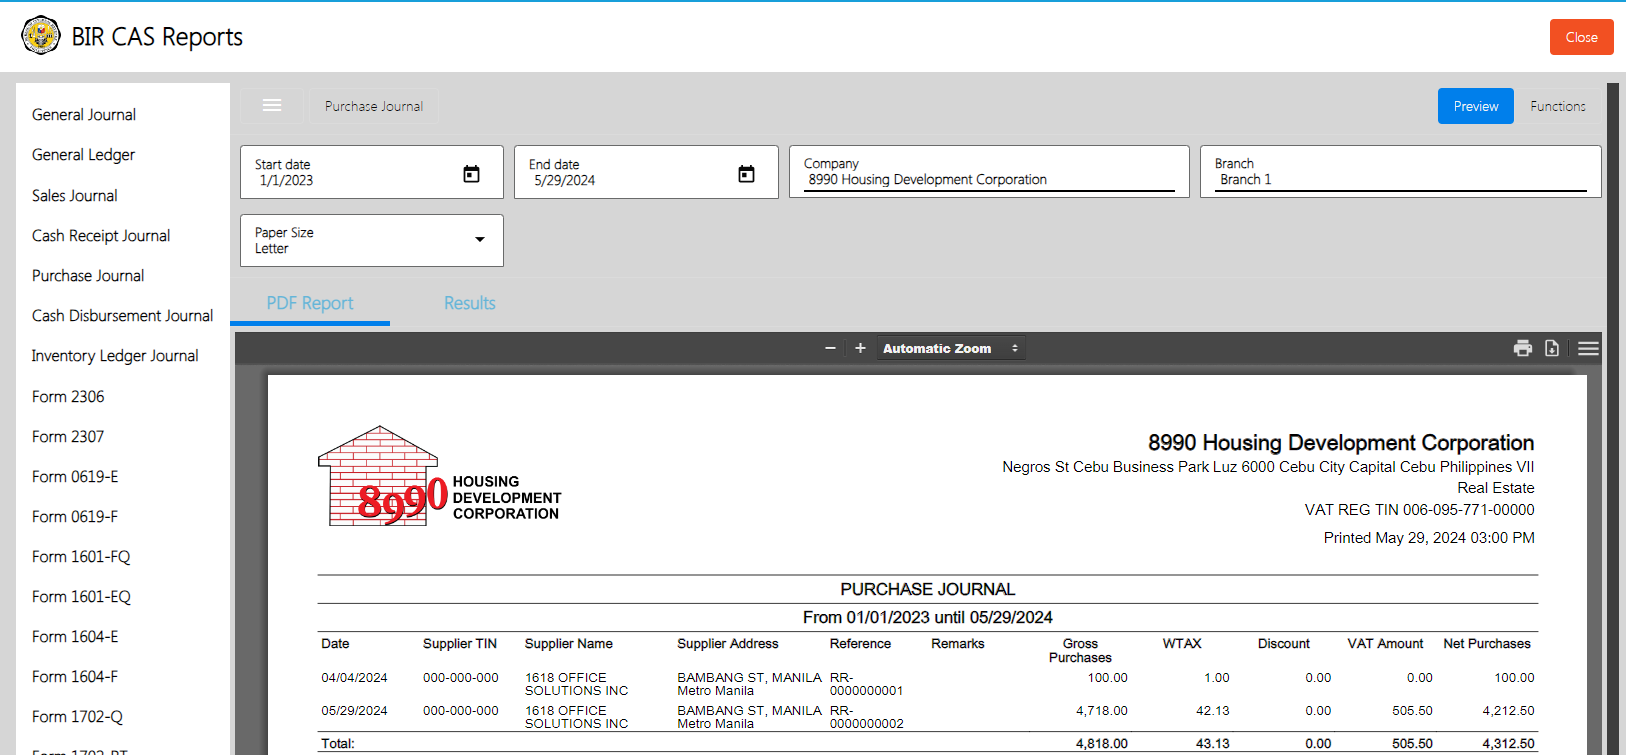
Cash Disbursement Journal
A Disbursement book, also known as a Cash Disbursement Journal, is a record of all payments made by a business. This book helps businesses track their expenses, manage cash flow, and maintain accurate financial records for accounting and auditing purposes.
To generate Cash Disbursement Journal, here are the steps to follow:
- Click Dashboard Module
- Scroll Down till you see the BIR CAS Report
- Click BIR CAS Report
- Click Cash Disbursement Journal
- Enter Start and End Date
- Select Branch
- Click Preview Button
- Click Function Button to refresh the report
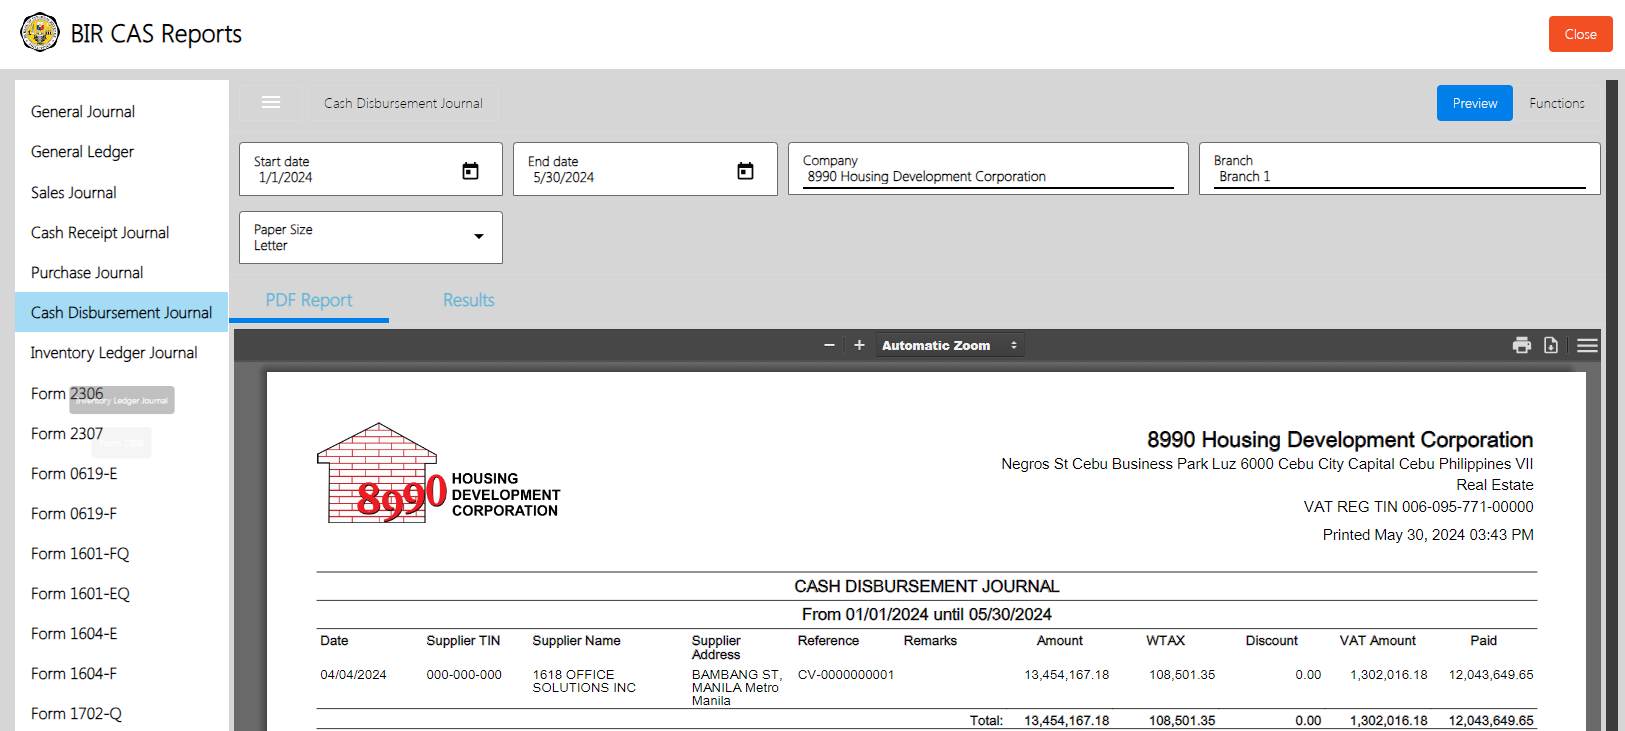
Inventory Ledger Journal
An Inventory Ledger Journal is an accounting record used to track and manage the inventory transactions of a business. It is a detailed record that captures all inventory-related movements and adjustments, providing a comprehensive view of inventory levels and values over time.
To generate Inventory Ledger Journal, here are the steps to follow:
- Click Dashboard Module
- Scroll Down till you see the BIR CAS Report
- Click BIR CAS Report
- Click Inventory Ledger Journal
- Enter Start and Ending Date
- Select Branch
- Click Preview Button
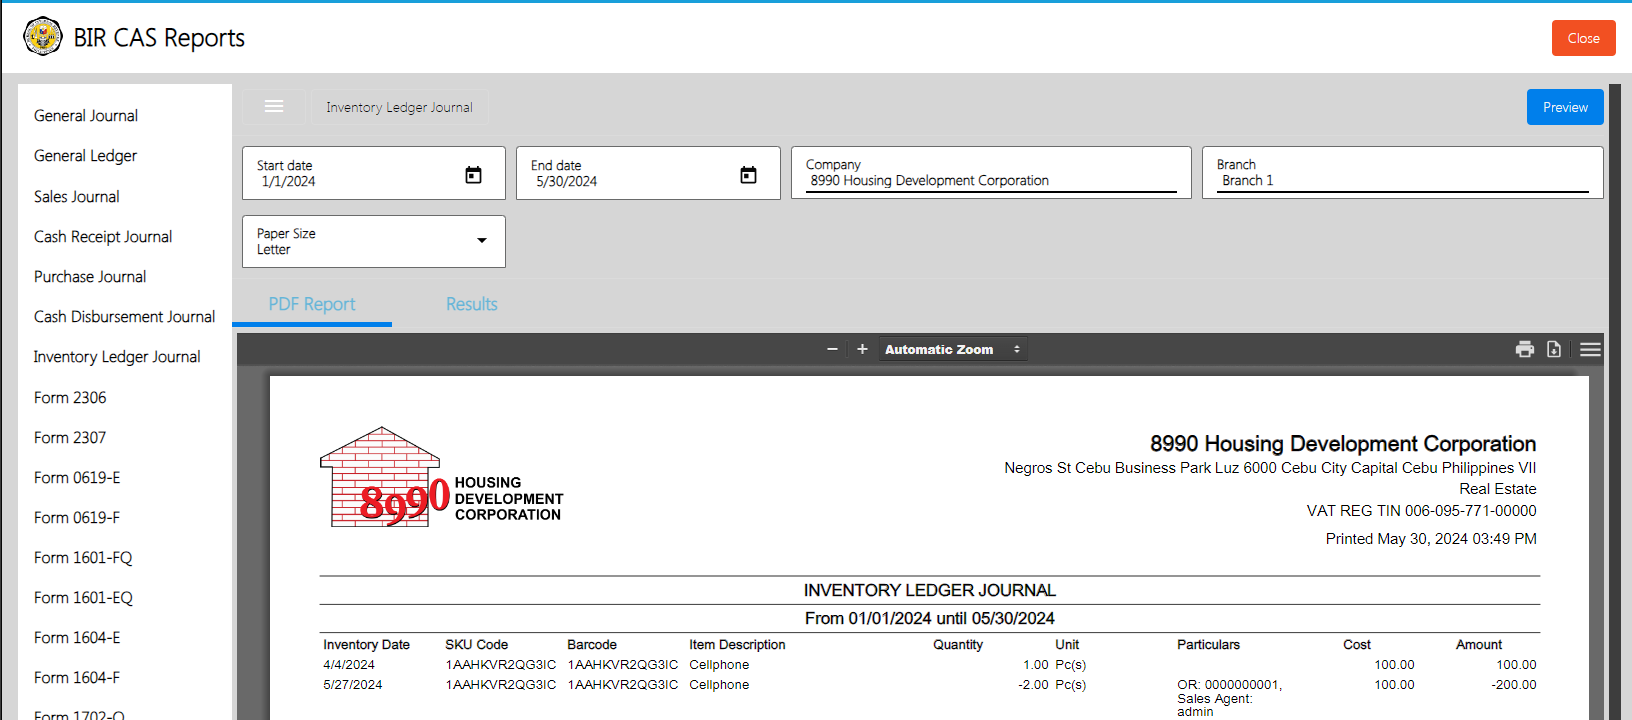
Form 2306
Form 2306 is a tax document issued by the Bureau of Internal Revenue (BIR) in the Philippines, certifying the amount of final tax withheld on certain income payments. It applies to specific types of income subject to final withholding tax, such as dividends, royalties, and interest. The form contains details about the withholding agent and the income recipient, as well as information on the nature and amount of income paid, the tax rate applied, and the amount of tax withheld. It serves as proof of tax compliance for the income recipient, ensuring accurate tax reporting and aiding in personal or corporate tax filings.
To generate Form 2306, here are the steps to follow:
- Click Dashboard Module
- Scroll Down till you see the BIR CAS Report
- Click BIR CAS Report
- Click Form 2306
- Enter Date from and Date to
- Click and Select Document Number
- Enter the Authorized Representative Field
- Enter the Date Signed
- Click Preview Button
- Click Function Button to refresh the report
NOTE: Shall be issued to payee on or before January 31 of the year following the year in which income payment was made. However upon request of the payee the payor must furnish such statement to the payee simultaneously with the income payment.
Source: https://www.bir.gov.ph/index.php/bir-forms/certificates.html
Form 2307
Form 2307 is a tax document issued by the Bureau of Internal Revenue (BIR) in the Philippines, certifying the amount of creditable tax withheld at source on certain income payments. It applies to various types of income subject to withholding tax, such as professional fees, commissions, and rental payments. The form includes details about the withholding agent and the income recipient, along with information on the nature and amount of income paid, the tax rate applied, and the amount of tax withheld. This certificate is used by the income recipient to claim the withheld tax as a credit against their tax liability, ensuring accurate tax reporting and compliance during the filing of tax returns.
To generate Form 2307, here are the steps to follow:
- Click Dashboard Module
- Scroll Down till you see the BIR CAS Report
- Click BIR CAS Report
- Click Form 2307
- Enter Date from and Date to
- Click and Select Document Number
- Enter the Authorized Representative Field
- Enter the Date Signed
- Click Preview Button
- Click Function Button to refresh the report
Note: For EWT – Shall be issued to payee on or before the 20th day of the month following the close of the taxable quarter. Upon request of the payee, however, the payor must furnish such statement to the payee simultaneously with the income payment.
For Percentage Tax On Government Money Payments – Shall be issued to the payee on or before the 10th day of the month following the month in which withholding was made. Upon request of the payee, however, the payor must furnish such statement to the payee simultaneously with the income payment.
For VAT Withholding – Shall be issued to the payee on or before the 10th day of the month following the month in which withholding was made. Upon request of the payee, however, the payor must furnish such statement to the payee simultaneously with the income payment.
Source: https://www.bir.gov.ph/index.php/bir-forms/certificates.html
Form 0619 – E
Form 0619-E is a tax document issued by the Bureau of Internal Revenue (BIR) in the Philippines, used for remitting creditable withholding taxes expanded (EWT) on specific income payments for a particular month. It applies to various payments such as professional fees, rentals, and commissions. The form includes details about the withholding agent, such as name, Taxpayer Identification Number (TIN), and address, and summarizes the income payments and taxes withheld. It ensures that withholding agents report and remit the correct amount of creditable withholding tax, aiding in accurate tax reporting and compliance for both the withholding agent and the income recipients.
To generate Form 0619 – E, here are the steps to follow:
- Click Dashboard Module
- Scroll Down till you see the BIR CAS Report
- Click BIR CAS Report
- Click Form 0619 – E
- Click The Calendar Icon in “From the Month” Field and select the Month
- Enter the Authorized Representative
- Select Branch
- Click Preview Button
- Click Function Button to refresh the report
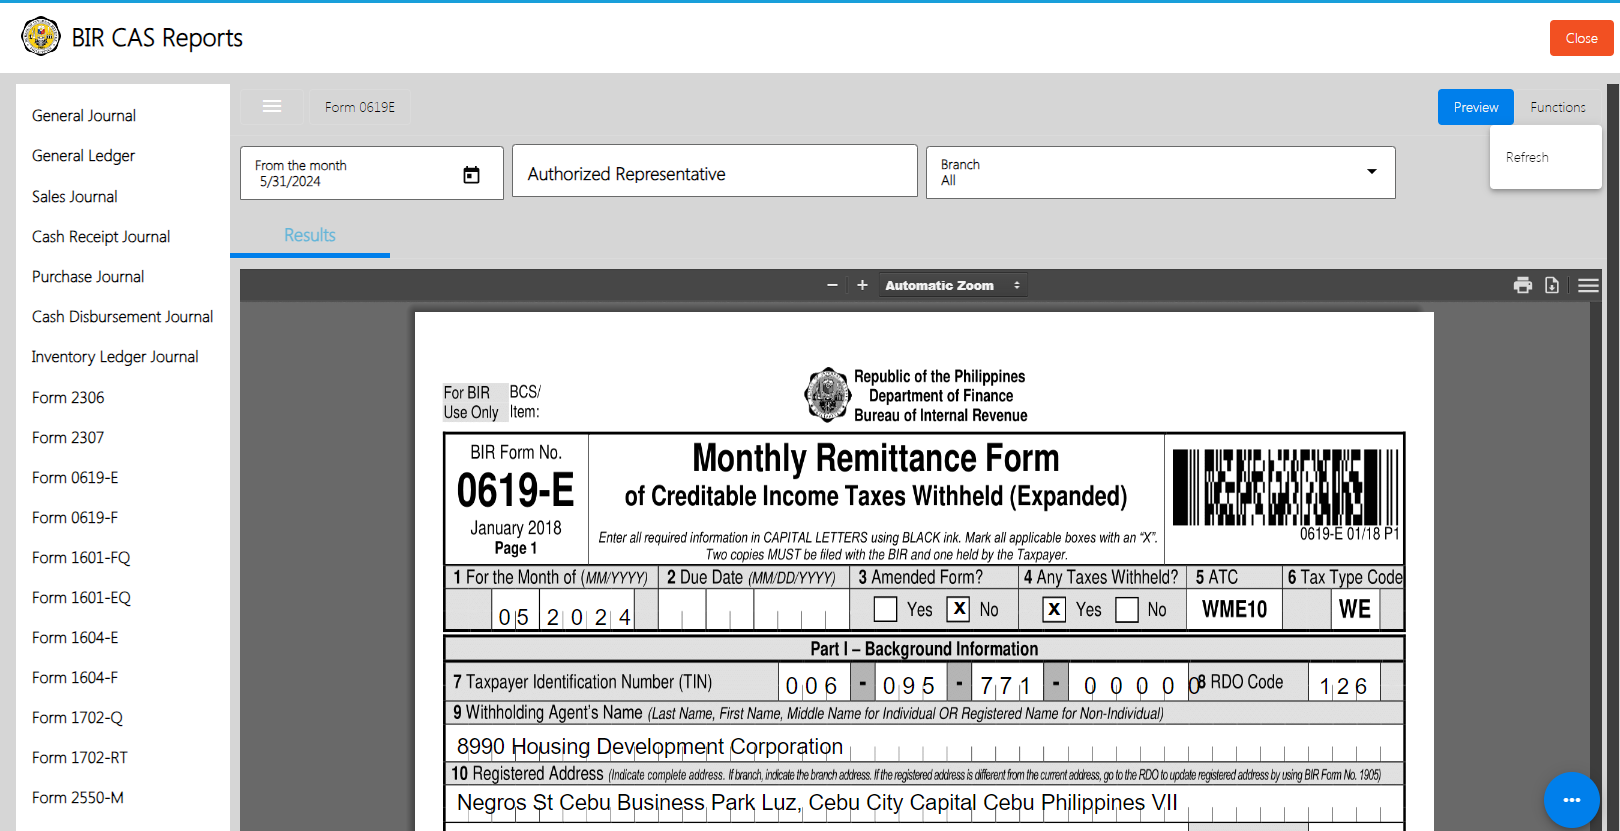
Note: Deadline – Every 10th day of after the end of each month
Requirement – Monthly Remittance Form for Creditable Income Taxes WIthheld (Expanded)
Source: http://www.cleodu-cpas.com/index.php/bir-tax-deadlines
Form 0619 – F
Form 0619-F is a tax document issued by the Bureau of Internal Revenue (BIR) in the Philippines, used for remitting final withholding taxes on certain income payments for a specific month. This form is utilized by withholding agents who deduct and remit taxes on income subject to final withholding tax, such as interest, dividends, and other specified payments. It includes details about the withholding agent, such as name, Taxpayer Identification Number (TIN), and address, and provides a summary of the income payments and the final taxes withheld. BIR Form 0619-F ensures that withholding agents correctly report and remit the final withholding taxes, facilitating accurate tax reporting and compliance for both the withholding agent and the income recipients.
To generate Form 0619 – F, here are the steps to follow:
- Click Dashboard Module
- Scroll Down till you see the BIR CAS Report
- Click BIR CAS Report
- Click Form 0619 – F
- Click The Calendar Icon in “From the Month” Field and select the Month
- Enter the Authorized Representative
- Select Branch
- Click Preview Button
- Click Function Button to refresh the report
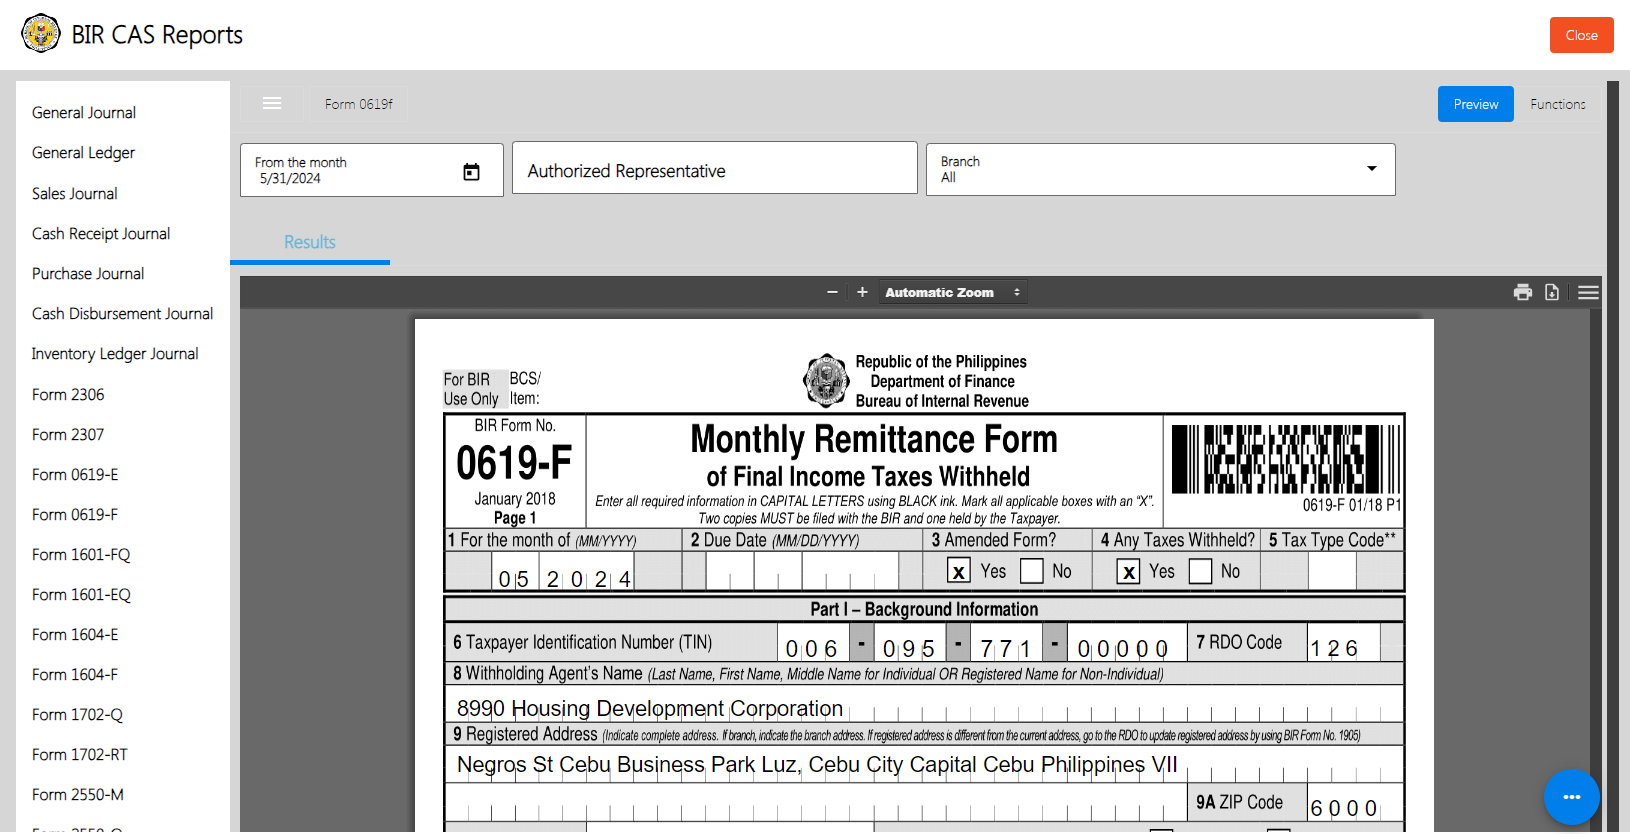
Note: Deadline – Every 10th day of after the end of each month
Requirement – Monthly Remittance Form for Final Income Taxes Withheld
Source: http://www.cleodu-cpas.com/index.php/bir-tax-deadlines
Form 1601 – FQ
Form 1601-FQ is a tax document issued by the Bureau of Internal Revenue (BIR) in the Philippines, used for the quarterly remittance of final withholding taxes. This form is used by withholding agents to report and remit taxes withheld on income payments subject to final withholding tax, such as interest, royalties, dividends, and other specified payments, for each quarter. It includes details about the withholding agent, such as name, Taxpayer Identification Number (TIN), and address, and provides a summary of the income payments and final taxes withheld for the quarter. BIR Form 1601-FQ ensures that withholding agents accurately report and remit the final withholding taxes on a quarterly basis, aiding in tax compliance and accurate reporting for both the withholding agent and the income recipients.
To generate Form 1601 – FQ, here are the steps to follow:
- Click Dashboard Module
- Scroll Down till you see the BIR CAS Report
- Click BIR CAS Report
- Click Form 0601 – FQ
- Select Quarter
- Select Year
- Select Branch
- Enter the Authorized Representative
- Click Preview Button
- Click Function Button to refresh, Download DAT File, and/or Download Excel File.
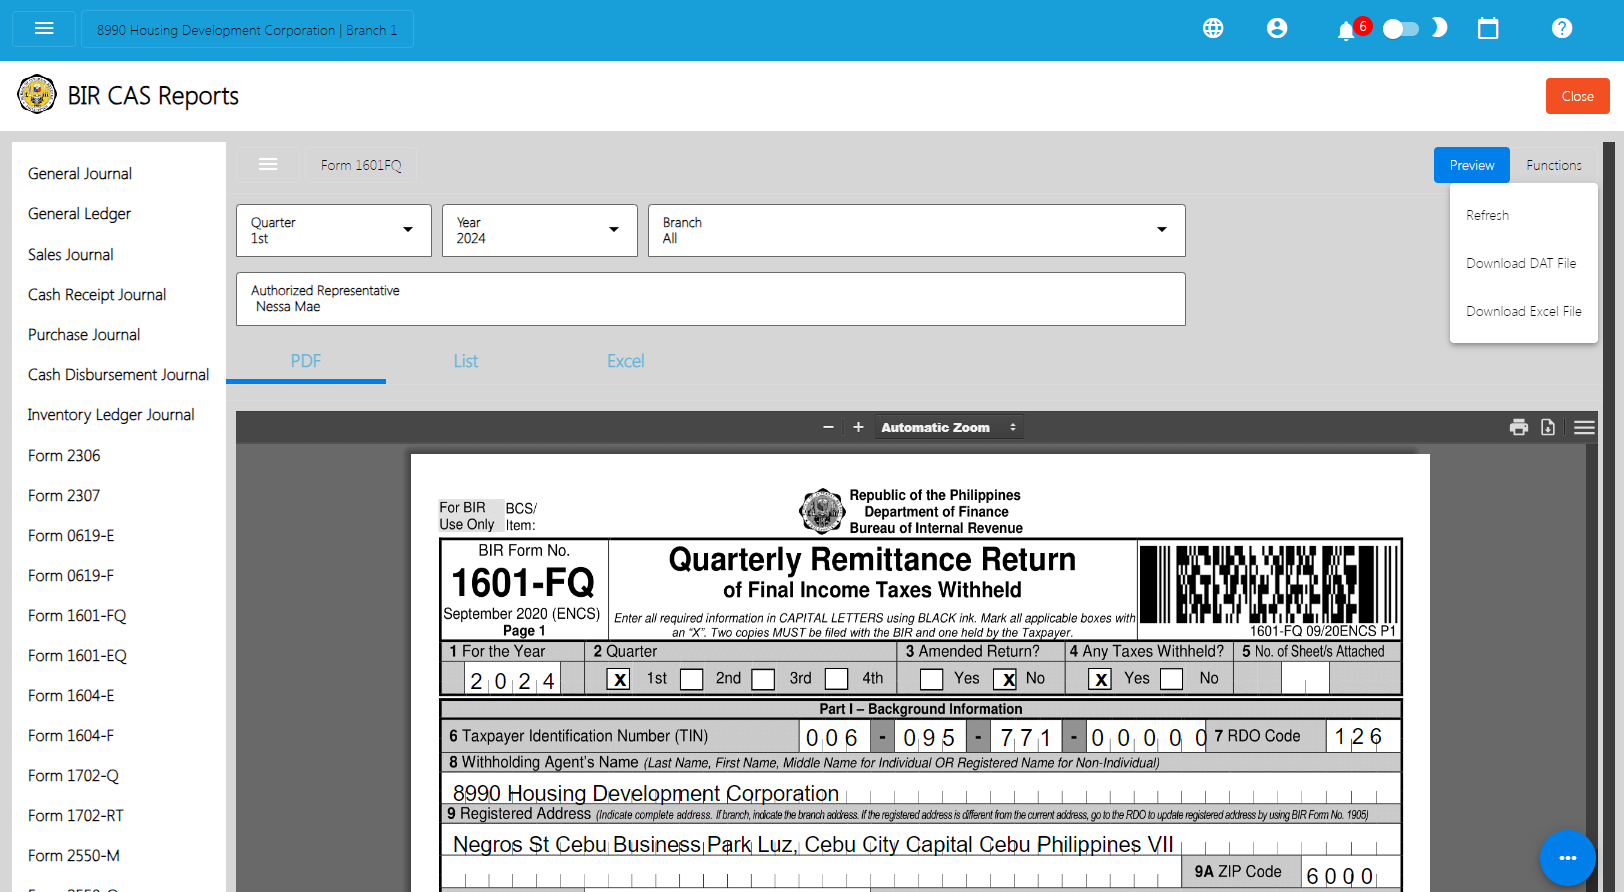
Note: Deadline – Every Last Day of the month after the end of each quarter
Requirement – Quarterly Remittance Return of Final Income Taxes Withheld
Source: http://www.cleodu-cpas.com/index.php/bir-tax-deadlines
Form 1601 – EQ
Form 1601-EQ is a tax form used in the Philippines for the quarterly filing of creditable withholding taxes. This form is designed to report and remit taxes withheld by a payor (withholding agent) from various income payments made to individuals and businesses. The EQ in the form's name stands for "Expanded Quarterly," indicating its use for expanded withholding tax purposes. The form ensures compliance with the Bureau of Internal Revenue (BIR) regulations, helping to accurately document and pay the taxes withheld on payments such as professional fees, commissions, and rental income, among others.
To generate Form 1601 – EQ, here are the steps to follow:
- Click Dashboard Module
- Scroll Down till you see the BIR CAS Report
- Click BIR CAS Report
- Click Form 0601 – EQ
- Select Quarter
- Select Year
- Enter Over Remittance
- Select Branch
- Enter Authorized Representative
- Click Preview Button
- Click Function to refresh, Download DAT File, and/or Download Excel File
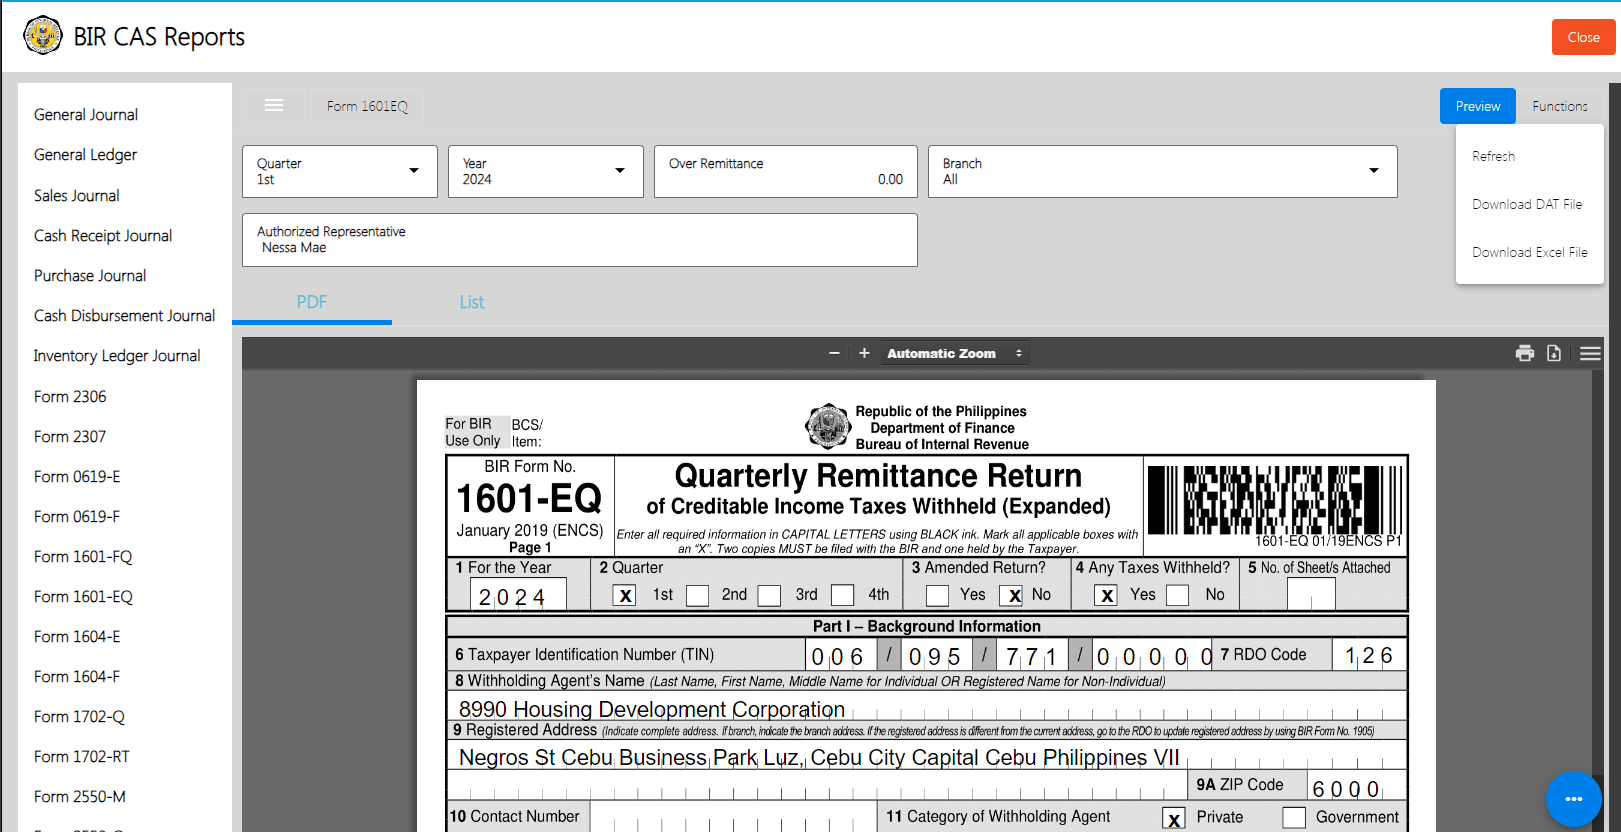
Note: Deadline – Every Last Day of the month after the end of each quarter
Requirement – Quarterly Remittance Return of Creditable Income Taxes Withheld (Expanded) (together with the Quarterly Alphabetical List of Payees)
Source: http://www.cleodu-cpas.com/index.php/bir-tax-deadlines
Form 1604 – E
Form 1604-E is a tax form used in the Philippines for the annual filing of creditable withholding taxes on compensation. This form is utilized to report the total amount of taxes withheld by employers from the salaries and wages of their employees throughout the year. It ensures compliance with the Bureau of Internal Revenue (BIR) regulations, summarizing the annual withholding tax remittances. Employers submit this form to provide a comprehensive account of the taxes withheld, helping to ensure accurate reporting and remittance of employee income taxes.
To generate Form 1604 – E, here are the steps to follow:
- Click Dashboard Module
- Scroll Down till you see the BIR CAS Report
- Click BIR CAS Report
- Click Form 0604 – E
- Enter the 1st-4th Quarter Data
- Select Year
- Enter Authorized Representative
- Select Branch
- Click Preview Button
- Click Function Button to refresh, Download DAT File, and/or Download Excel File
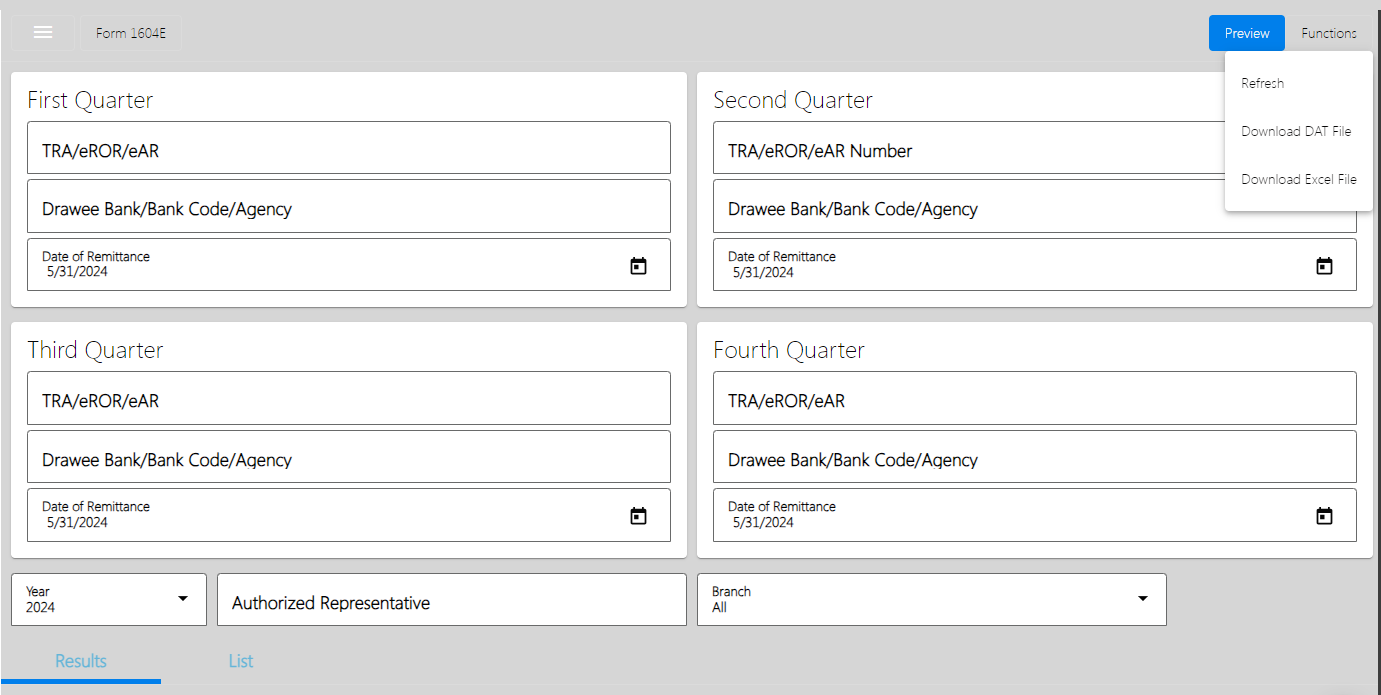
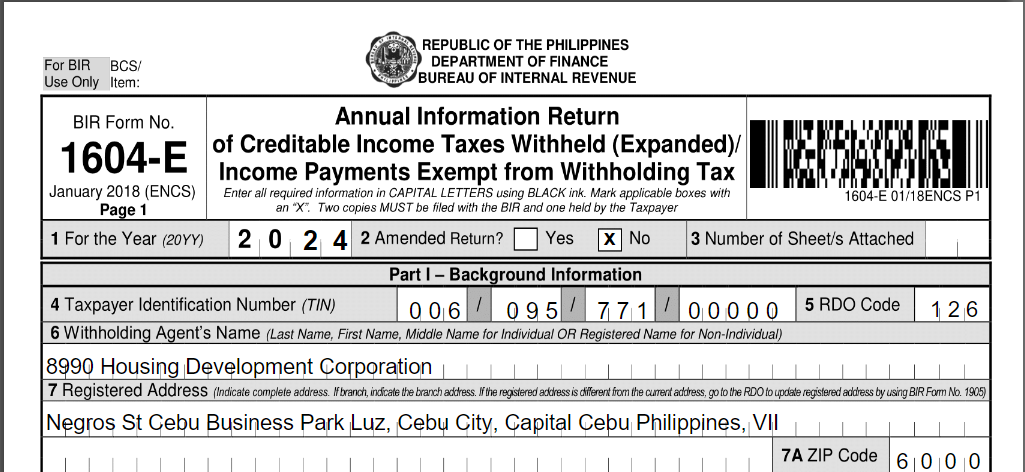
Note: Deadline – March 1
Requirement – Annual Information Return of Creditable Income Taxes Withheld (Expanded)
Source: http://www.cleodu-cpas.com/index.php/bir-tax-deadlines
Form 1604 – F
Form 1604-F is a tax form used in the Philippines for the annual filing of final withholding taxes. This form is used to report the total amount of taxes withheld on various income payments that are subject to final withholding tax, such as interest, dividends, and other specific types of income. It ensures compliance with the Bureau of Internal Revenue (BIR) regulations by summarizing the final withholding tax remittances for the year. By submitting this form, withholding agents provide a comprehensive account of the taxes withheld at source, ensuring accurate reporting and remittance of final income taxes.
To generate Form 1604 – F, here are the steps to follow:
- Click Dashboard Module
- Scroll Down till you see the BIR CAS Report
- Click BIR CAS Report
- Click Form 0604 – F
- Enter the 1st-4th Quarter Data
- Select Year
- Enter Authorized Representative
- Select Branch
- Click Preview Button
- Click Function Button to refresh, Download DAT File, and/or Download Excel File
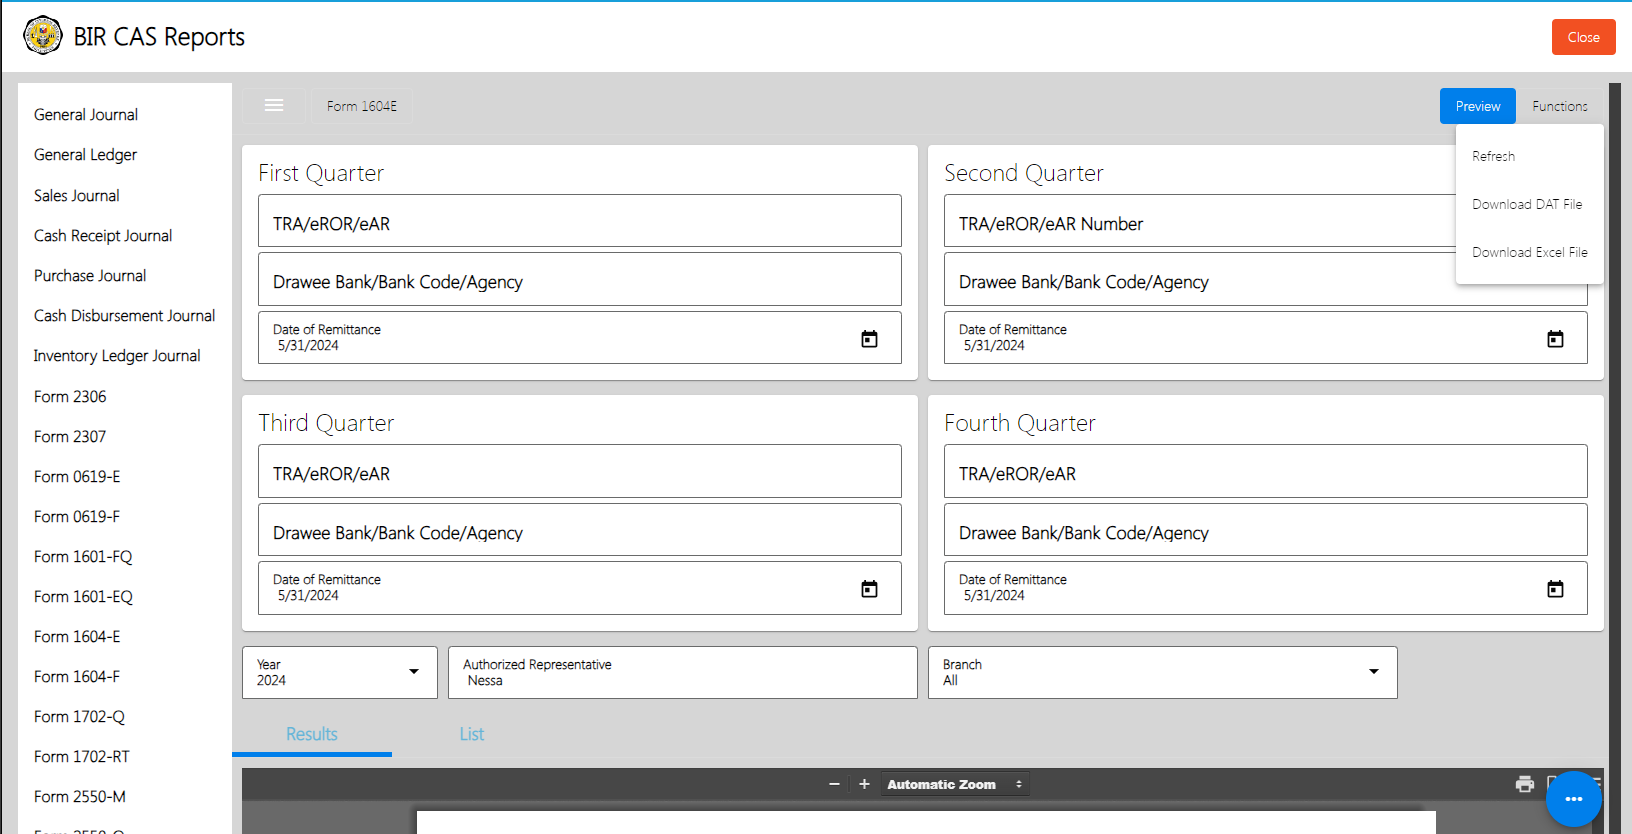
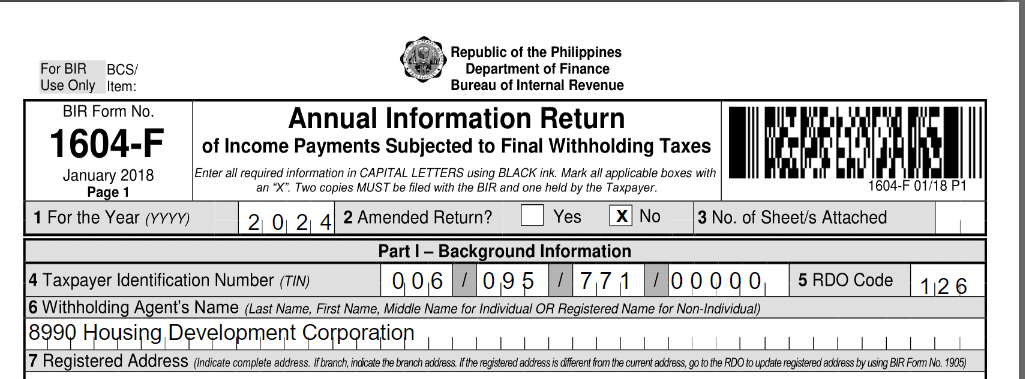
Note: Deadline – On or before March 1 of the year following the calendar year
Requirement – Annual Information Return of Creditable Income TaxesWithheld (Expanded)/ Income Payments Exempt fromWithholding Tax
Source:https://www.studocu.com/ph/document/pasig-catholic-college/cost-accounting/list-of-bir-forms-and-its-deadline/15273421
Form 1702 – Q
Form 1702-Q is a tax form used in the Philippines for the quarterly filing of income tax returns by corporations, partnerships, and other non-individual taxpayers. This form is designed to report the income earned and the corresponding taxes due for each quarter of the fiscal year. It ensures compliance with the Bureau of Internal Revenue (BIR) regulations, helping businesses to accurately document their quarterly income, allowable deductions, and tax liabilities. The form facilitates the timely payment of income taxes, thereby aiding in the proper monitoring and collection of corporate and partnership taxes by the BIR.
To generate Form 1702 – Q, here are the steps to follow:
- Click Dashboard Module
- Scroll Down till you see the BIR CAS Report
- Click BIR CAS Report
- Click Form 1702 – Q
- Select Quarter
- Select Year
- Enter Excess Credit
- Select Branch
- Click Preview Button
- Click Function Button to refresh, Download DAT File, and/or Download Excel File
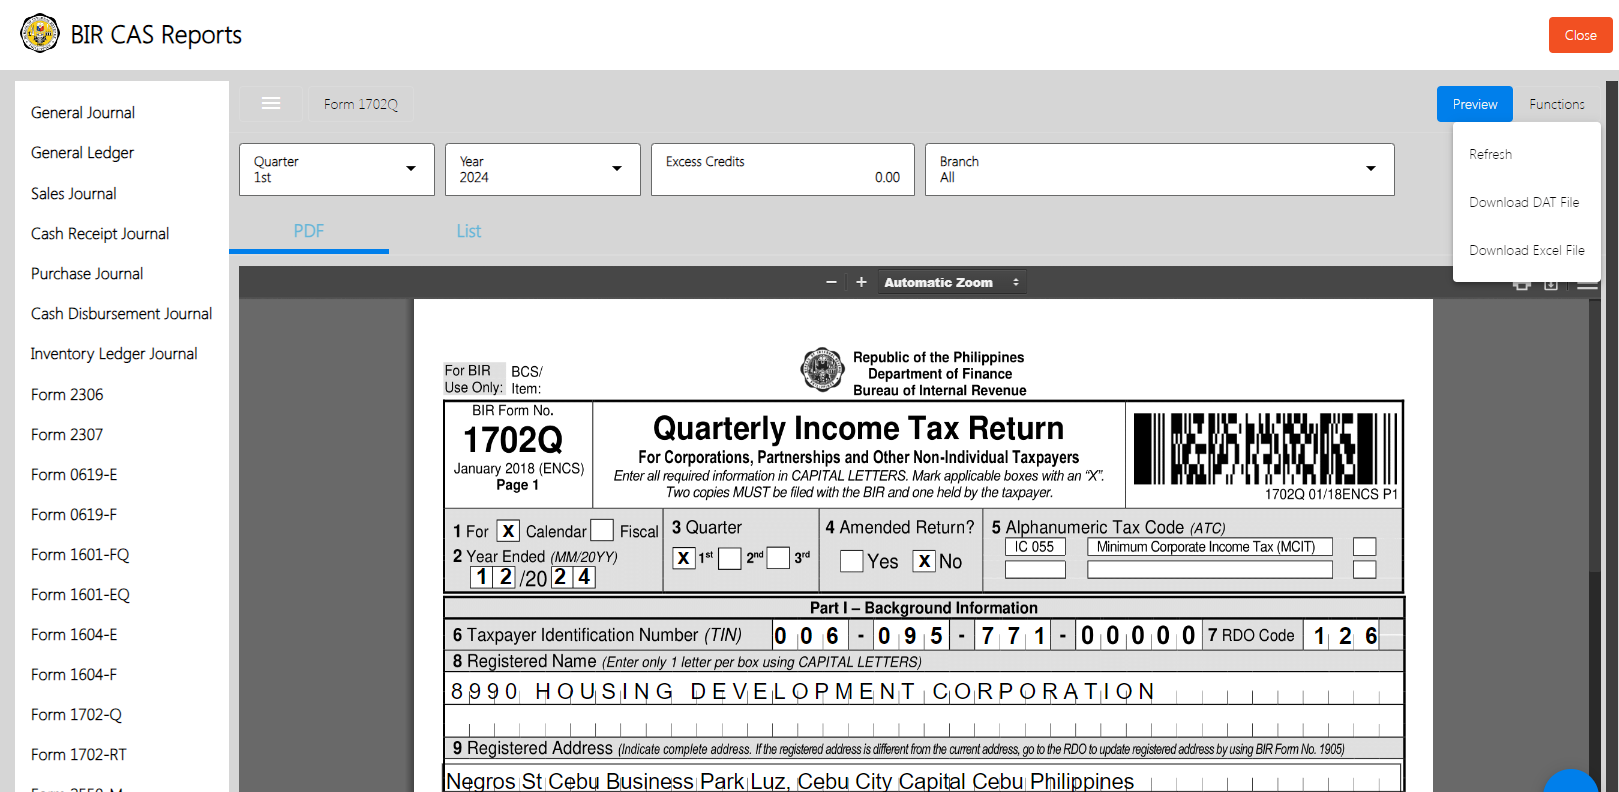
Note: Deadline – Within sixty (60) days following the close of each of the first three (3) quarters of the taxable year whether calendar or fiscal year
Requirement – Quarterly Income Tax Return for Corporations,Partnerships and Other Non-Individual Taxpayers
Source:https://www.studocu.com/ph/document/pasig-catholic-college/cost-accounting/list-of-bir-forms-and-its-deadline/15273421
Form 1702 – RT
Form 1702-RT is a tax form used in the Philippines for the annual filing of income tax returns by corporations, partnerships, and other non-individual taxpayers subject to the regular corporate income tax rate. This form is designed to report the annual income, allowable deductions, and the corresponding taxes due for the entire fiscal year. It ensures compliance with the Bureau of Internal Revenue (BIR) regulations by providing a detailed account of the taxpayer's financial activities and tax obligations. By submitting Form 1702-RT, businesses help ensure accurate reporting and remittance of their annual income taxes, aiding in the proper monitoring and collection of taxes by the BIR.
To generate Form 1702 – RT, here are the steps to follow:
- Click Dashboard Module
- Scroll Down till you see the BIR CAS Report
- Click BIR CAS Report
- Click Form 1702 – RT
- Select Year
- Select Branch
- Click Preview Button
- Click Function Button to refresh, Download DAT File, and/or Download Excel File
Note: Deadline – On or before the 15th day of the 4th month following close of the taxpayer's taxable year
Requirement – Annual Income Tax Return for Corporation, Partnership And Other Non-Individual Taxpayer Subject Only toREGULAR Income Tax Rate
Source:https://www.studocu.com/ph/document/pasig-catholic-college/cost-accounting/list-of-bir-forms-and-its-deadline/15273421
Form 2550 – M
Form 2550-M is a tax form used in the Philippines for the monthly filing of value-added tax (VAT) returns. This form is designed to report the VAT payable for each month, including the details of sales, purchases, output VAT, and input VAT. It ensures compliance with the Bureau of Internal Revenue (BIR) regulations, helping businesses accurately document their monthly VAT transactions and obligations. By submitting Form 2550-M, taxpayers provide a comprehensive account of their VAT-related activities, facilitating the timely payment of VAT and aiding in the proper monitoring and collection of VAT by the BIR.
To generate Form 2550 – M, here are the steps to follow:
- Click Dashboard Module
- Scroll Down till you see the BIR CAS Report
- Click BIR CAS Report
- Click Form 2550 – M
- Click the Calendar Icon and Select Month from
- Select Branch
- Click Preview Button
- Click Function Button to refresh the report
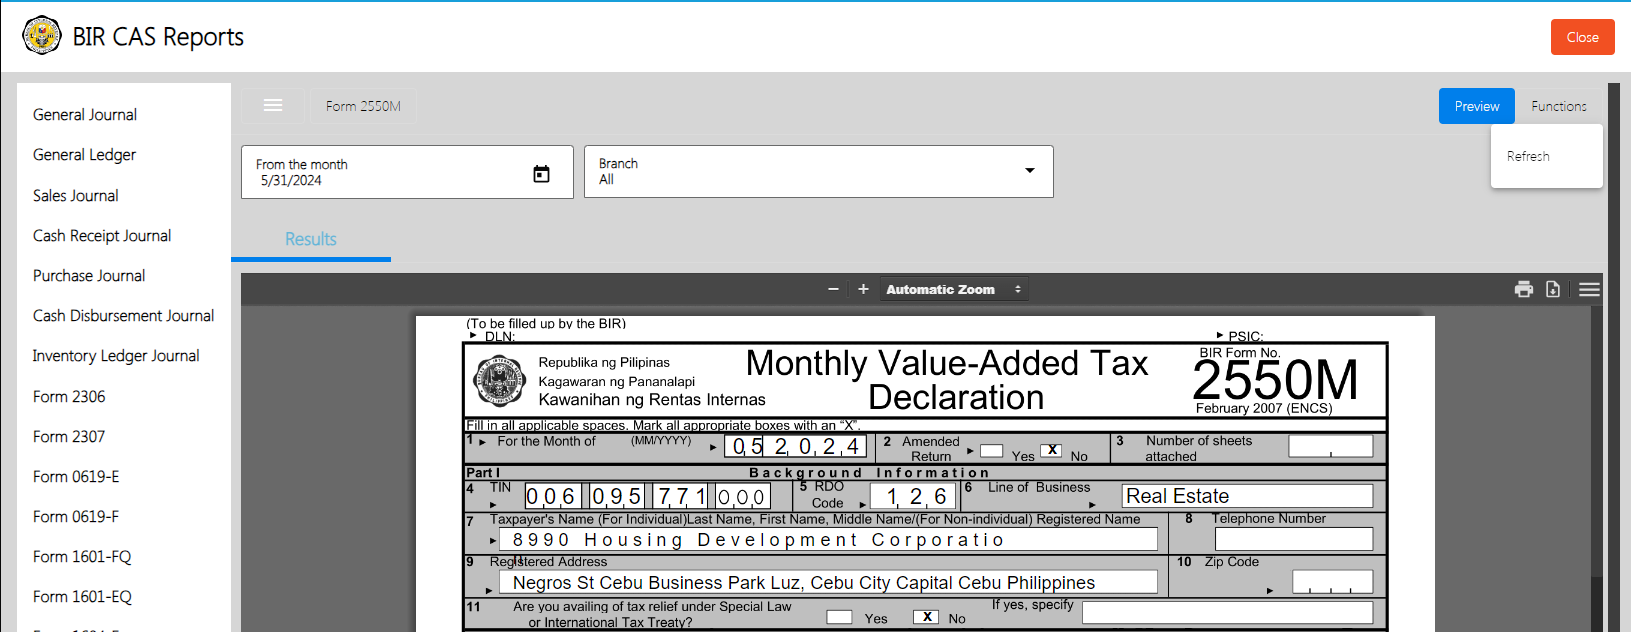
Note: Deadline – Not later than the 20th day following the close of the month
Requirement – Monthly Value-Added Tax Declaration
Source:https://www.studocu.com/ph/document/pasig-catholic-college/cost-accounting/list-of-bir-forms-and-its-deadline/15273421
Form 2550 – Q
Form 2550-Q is a tax form used in the Philippines for the quarterly filing of value-added tax (VAT) returns. This form is designed to report the VAT payable for each quarter, including detailed information on sales, purchases, output VAT, and input VAT for the period. It ensures compliance with the Bureau of Internal Revenue (BIR) regulations by helping businesses accurately document their VAT transactions and obligations on a quarterly basis. By submitting Form 2550-Q, taxpayers provide a comprehensive account of their VAT-related activities, facilitating the accurate reporting and timely payment of VAT, and aiding the BIR in proper monitoring and collection of VAT.
To generate Form 2550 – M, here are the steps to follow:
- Click Dashboard Module
- Scroll Down till you see the BIR CAS Report
- Click BIR CAS Report
- Click Form 2550 – Q
- Select Quarter
- Select Year
- Select Branch
- Click Preview Button
- Click Function Button to refresh, Download DAT File, And/or Download Excel File
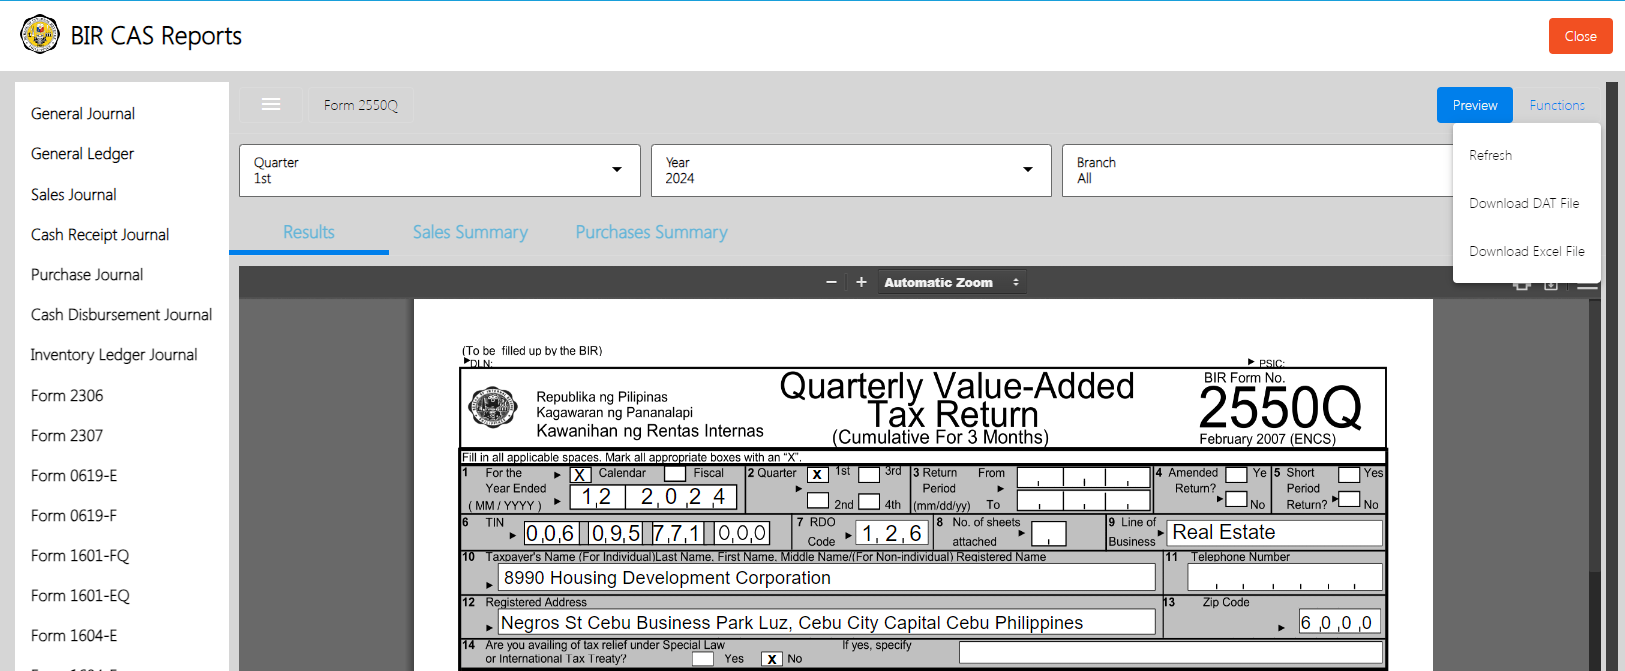
Note: Deadline – Not later than the 25th day following the close of each taxable quarter
Requirement – Quarterly Value-Added Tax Return (Cumulative for 3 Months
Source:https://www.studocu.com/ph/document/pasig-catholic-college/cost-accounting/list-of-bir-forms-and-its-deadline/15273421
VIII : Check Warehousing
8.1 Check Warehousing
easyFS Check Warehousing involves the safekeeping of checks received from clients, mostly Post-Dated Checks (PDC)
Check Warehousing List
- List of All Check Warehousing that were added to the System
- Here the user can add Check Warehousing to set up for them to use in their transactions
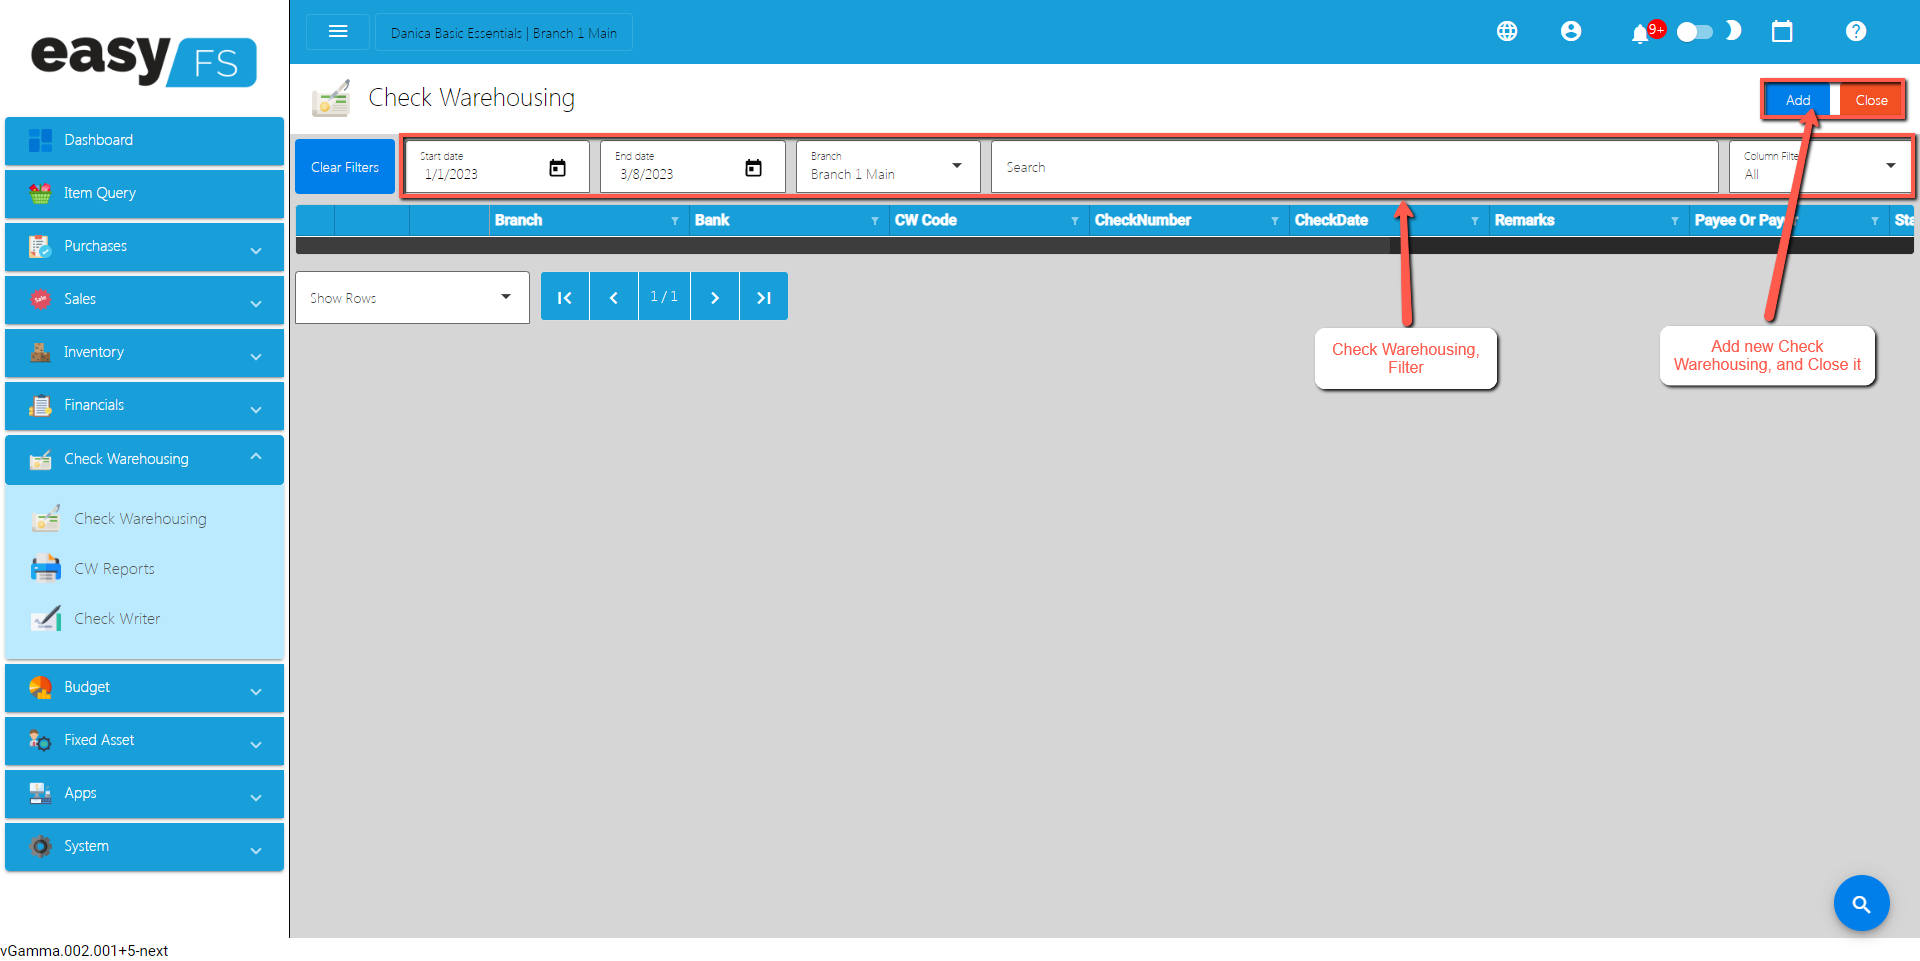
Check Warehousing Detail
- To add a new Check Warehousing detail, click the Add that can be seen in the Check Warehousing list.
- Fill up the required field for adding a new Check Warehousing.
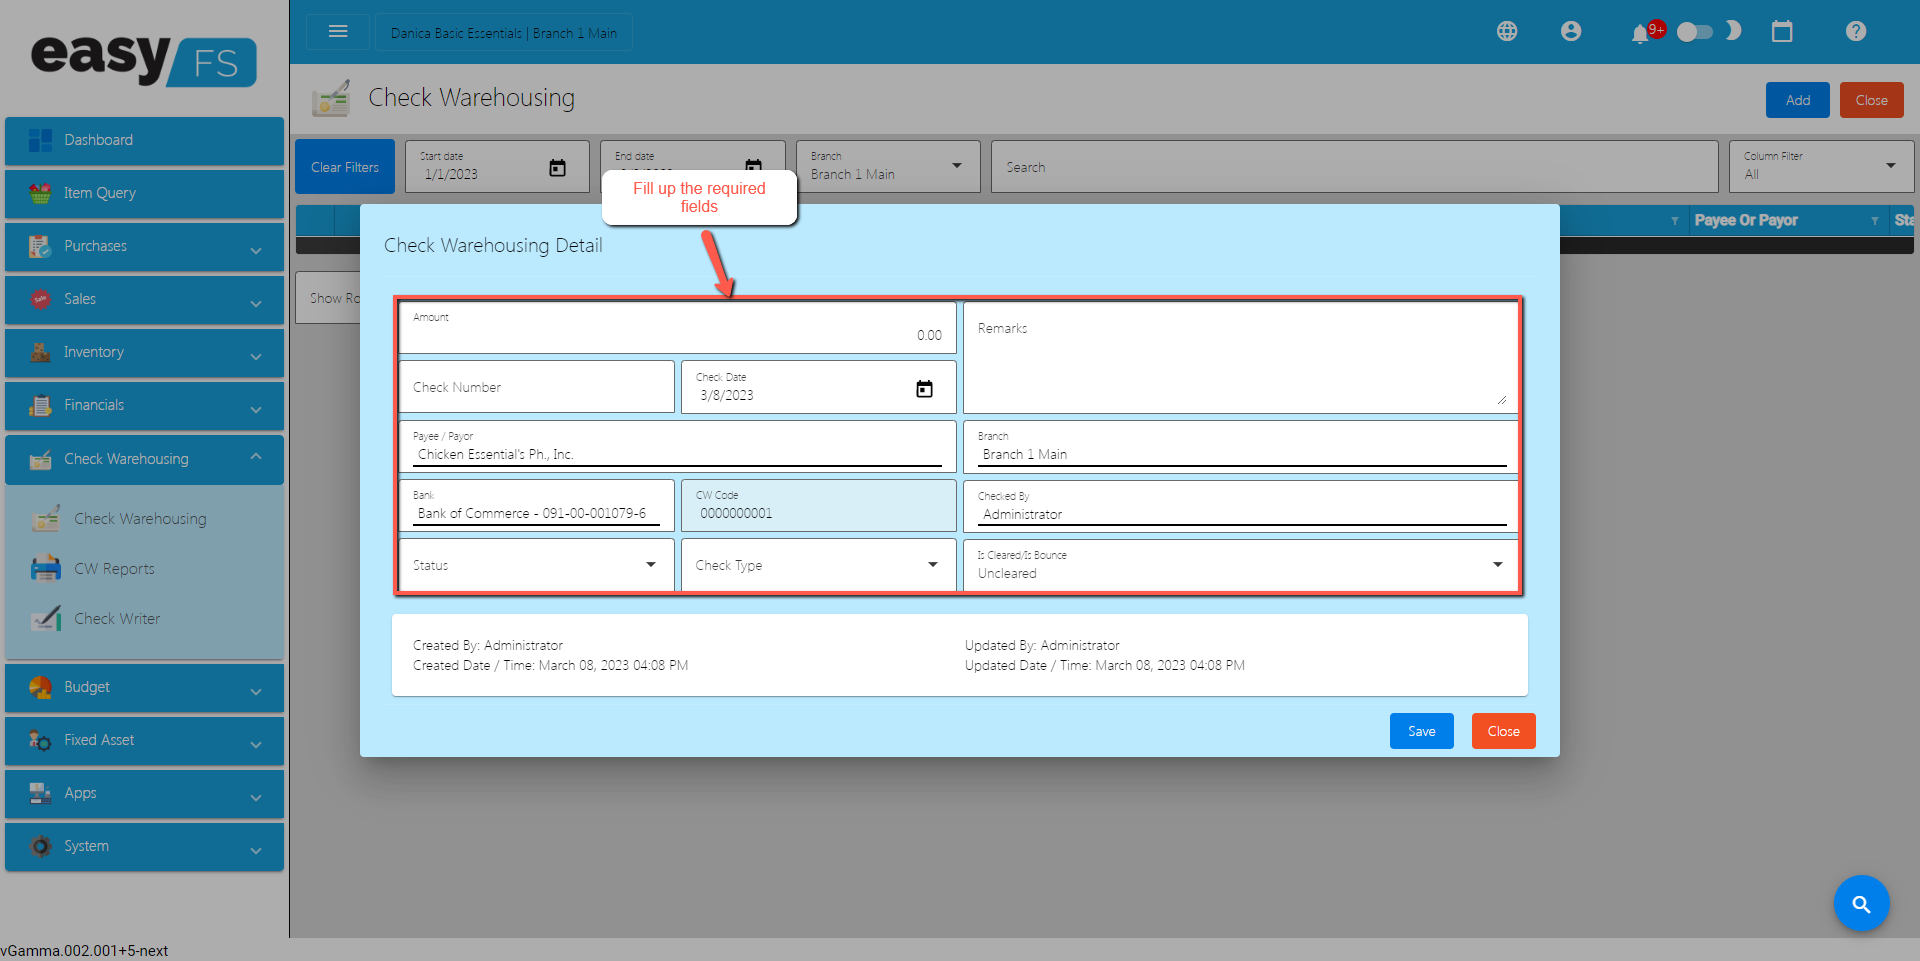
8.2 Check Writer
Overview
- Check Writer allows the user to enter the cheque information in an advanced/automated way (without manually writing the cheque information).
Check Writer Detail
- The user needs to provide the following information needed for Check Writer such as:
- Check Date
- Issued To
- Amount
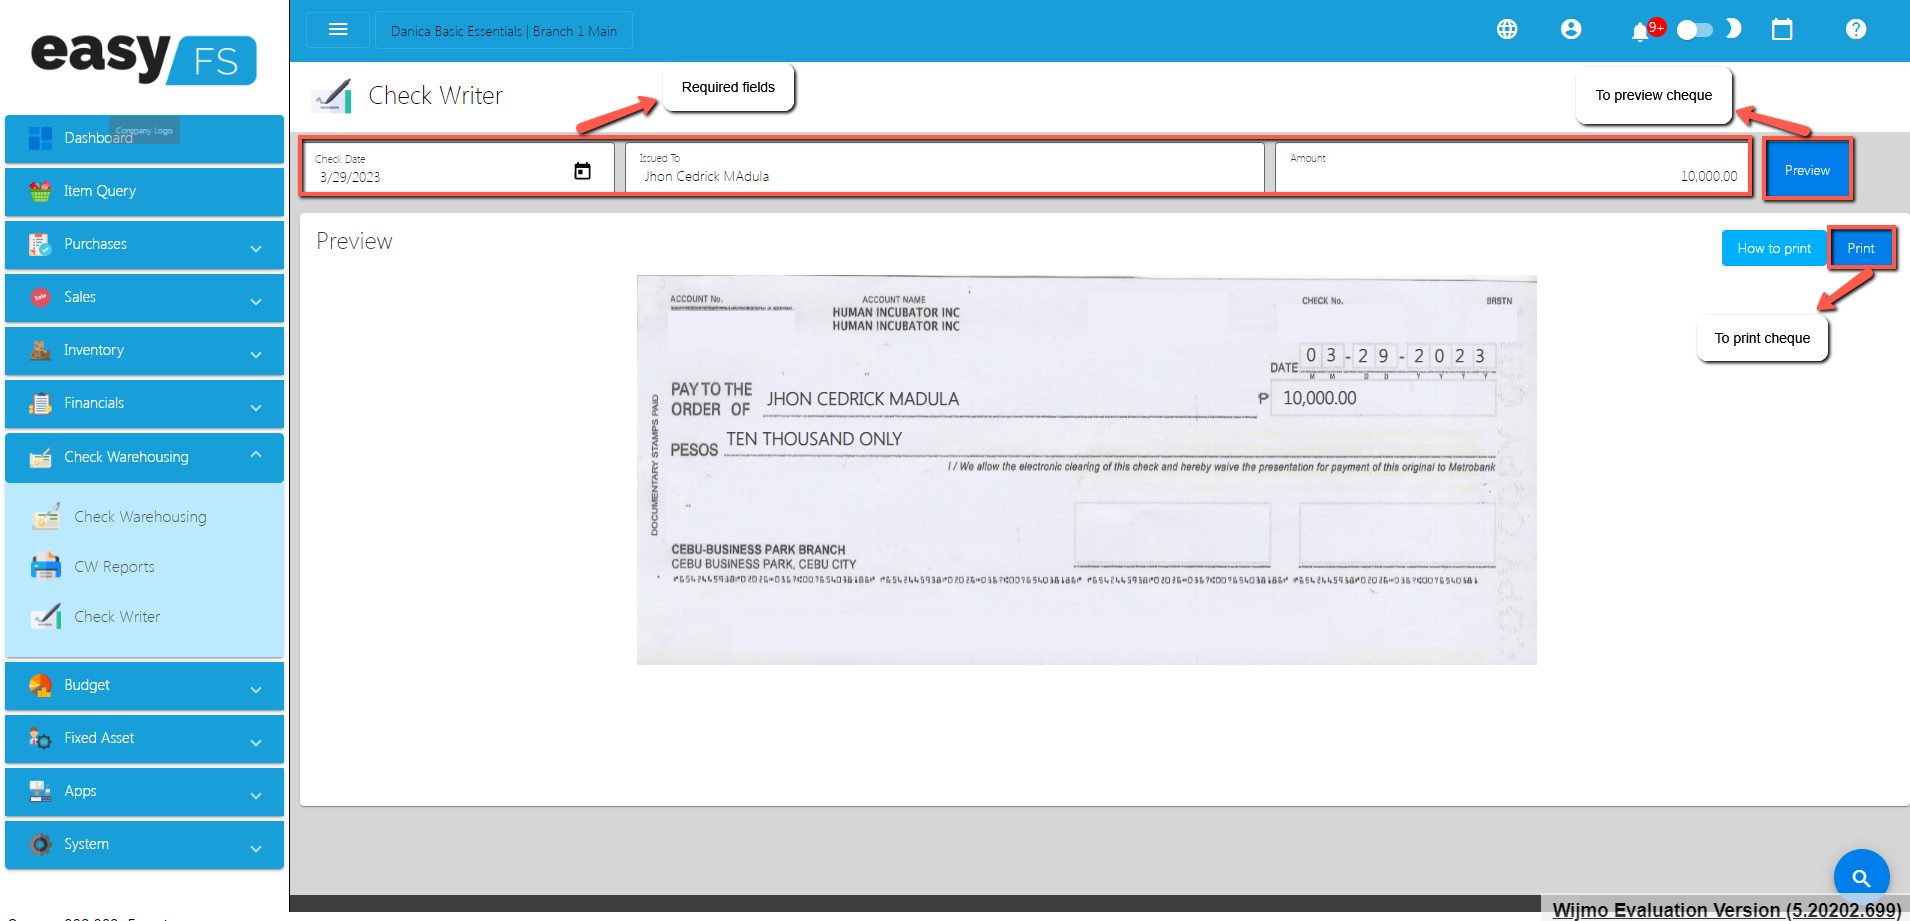
- To preview the Cheque, click the Preview button beside the Amount field.
- To print the generated Cheque, click the Print button.
IX : Budget
9.0 Overview
easyFS budget manager is a financial plan that outlines the expected revenues and expenses over a specific period, typically a fiscal year or a quarter. It serves as a roadmap for managing and allocating financial resources to achieve specific goals and objectives. Budgets are used by individuals, businesses, nonprofits, and governments to plan and control their financial activities.
9.1 Budget Manager
Budget Manager List
- List of All Budgets that were added to the System
- Here the user can add Budgets to set up for them to use to their transaction.
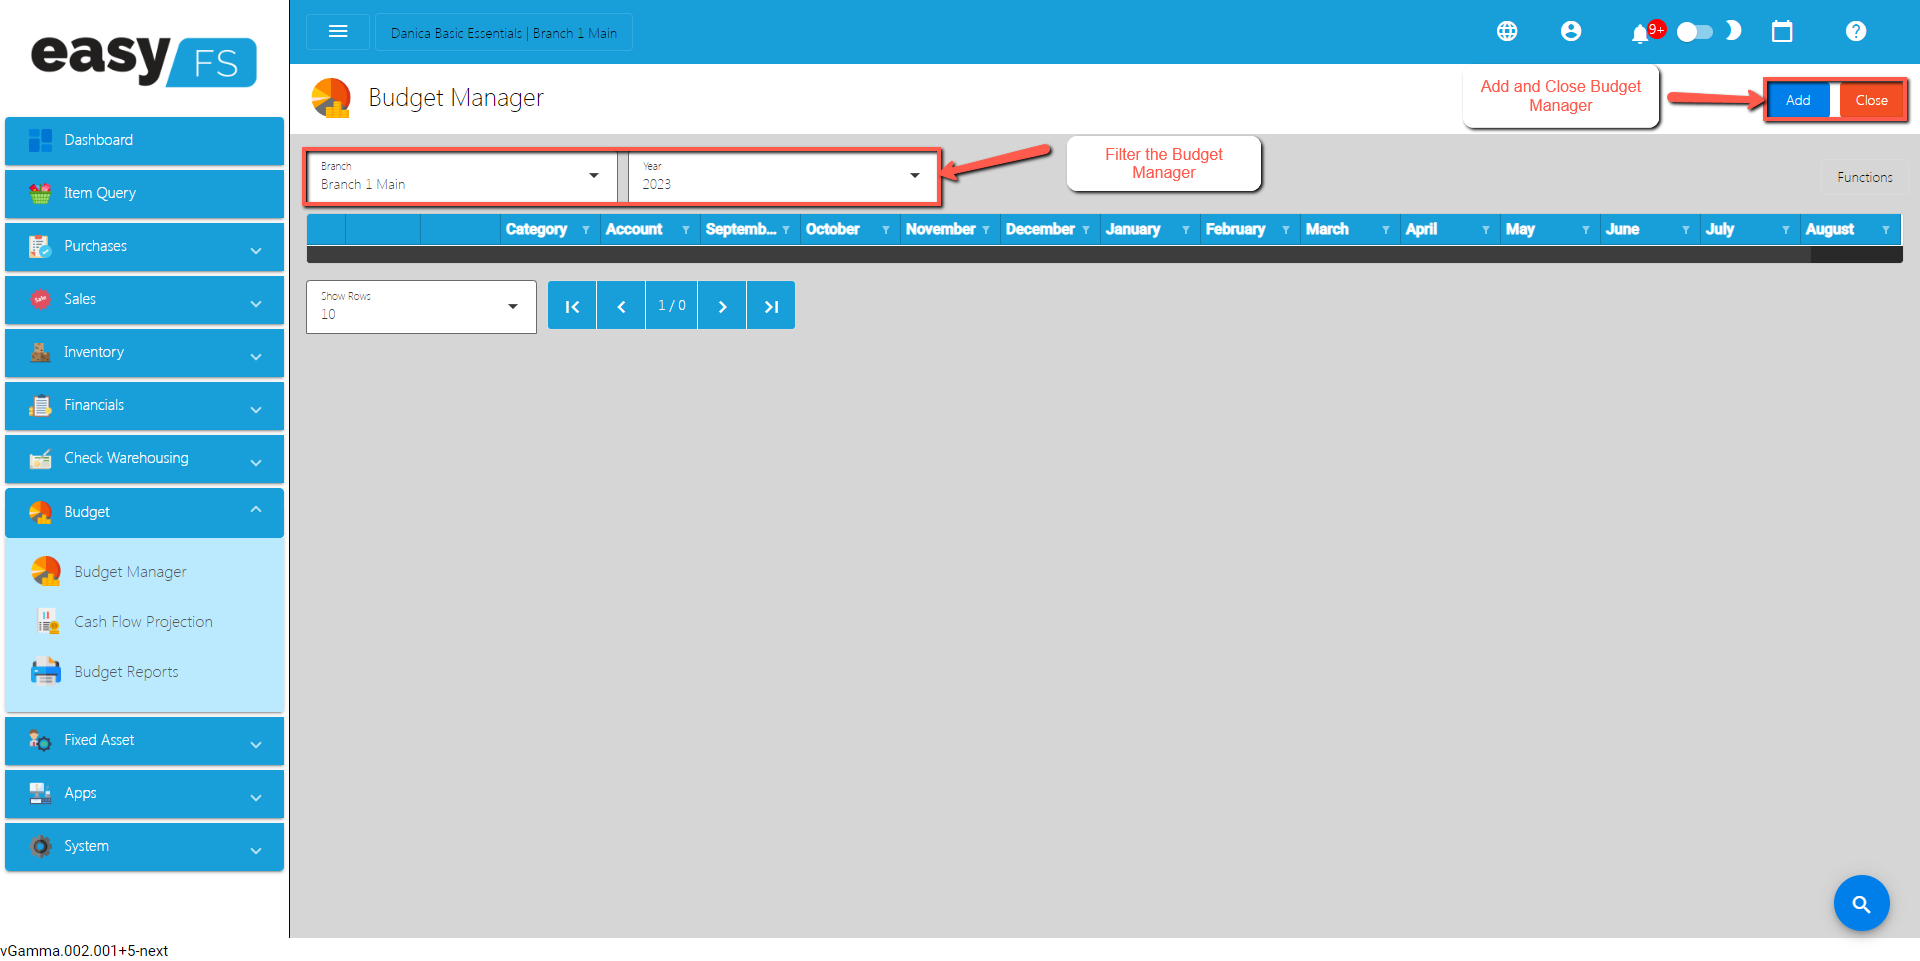
Budget Manager Detail
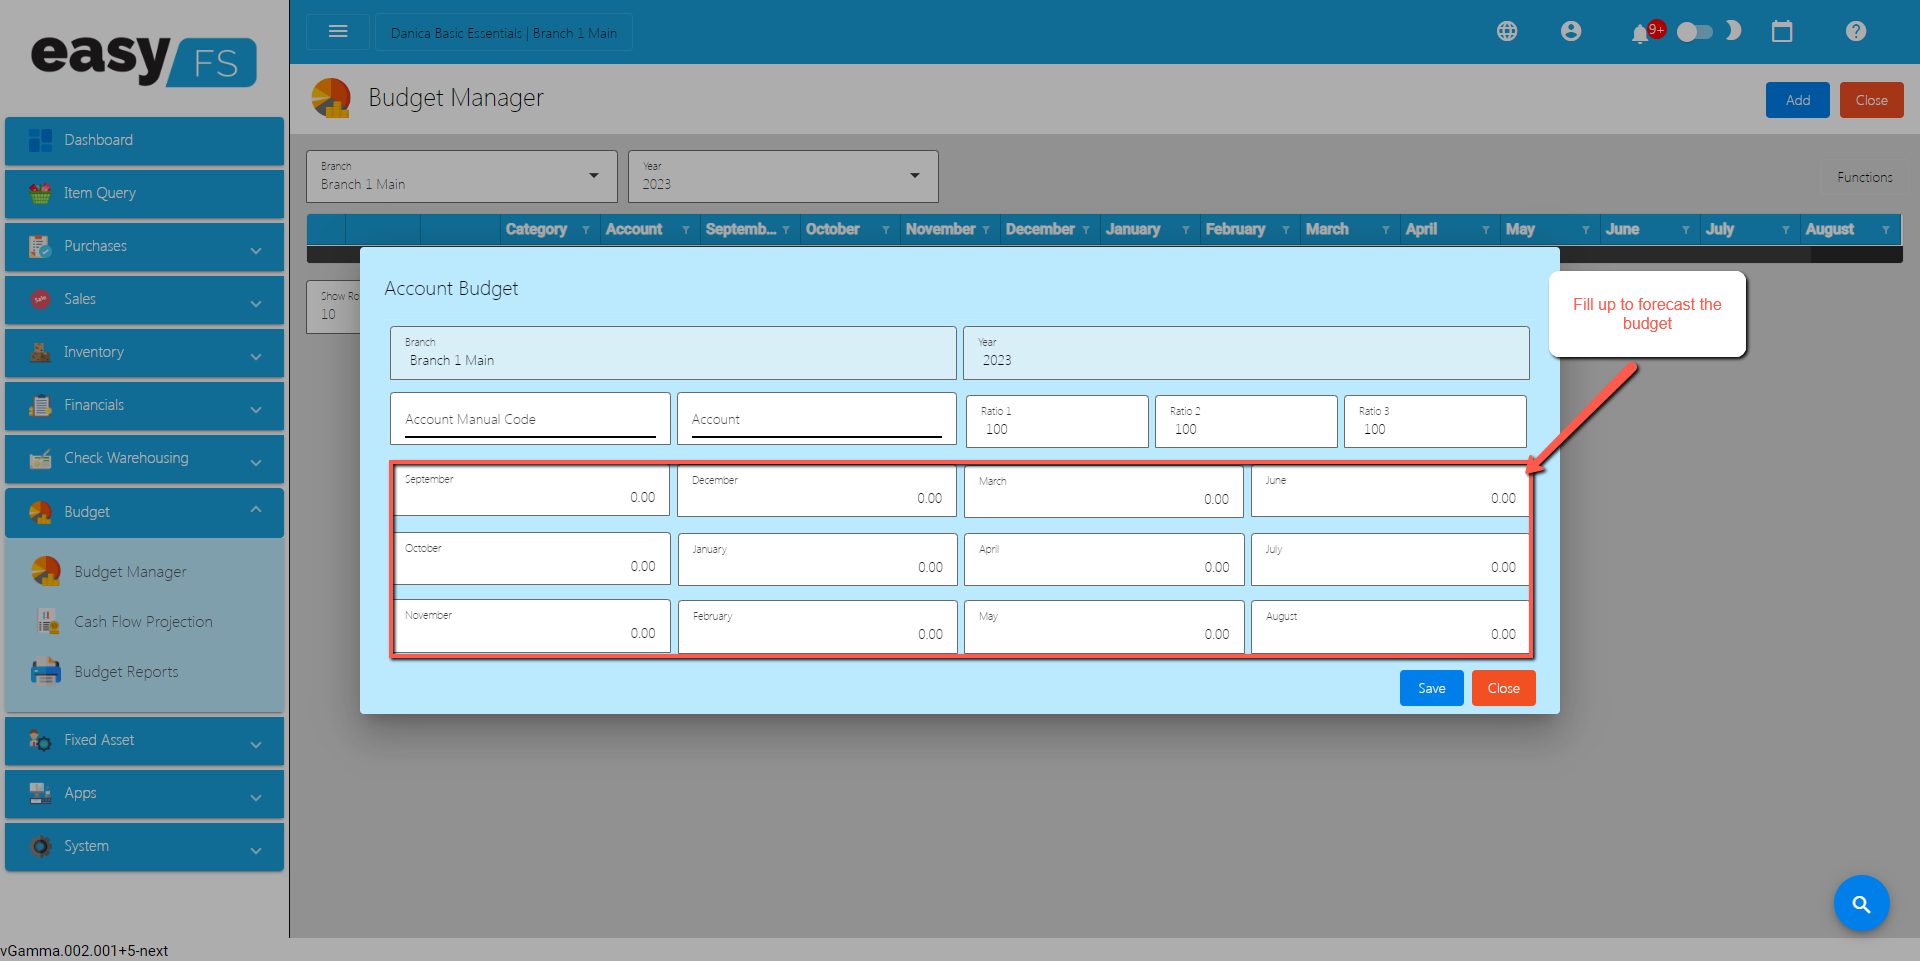
- Fill up the required fields for Budget
9.2 Cash Flow Projection
Cash Flow Projection List
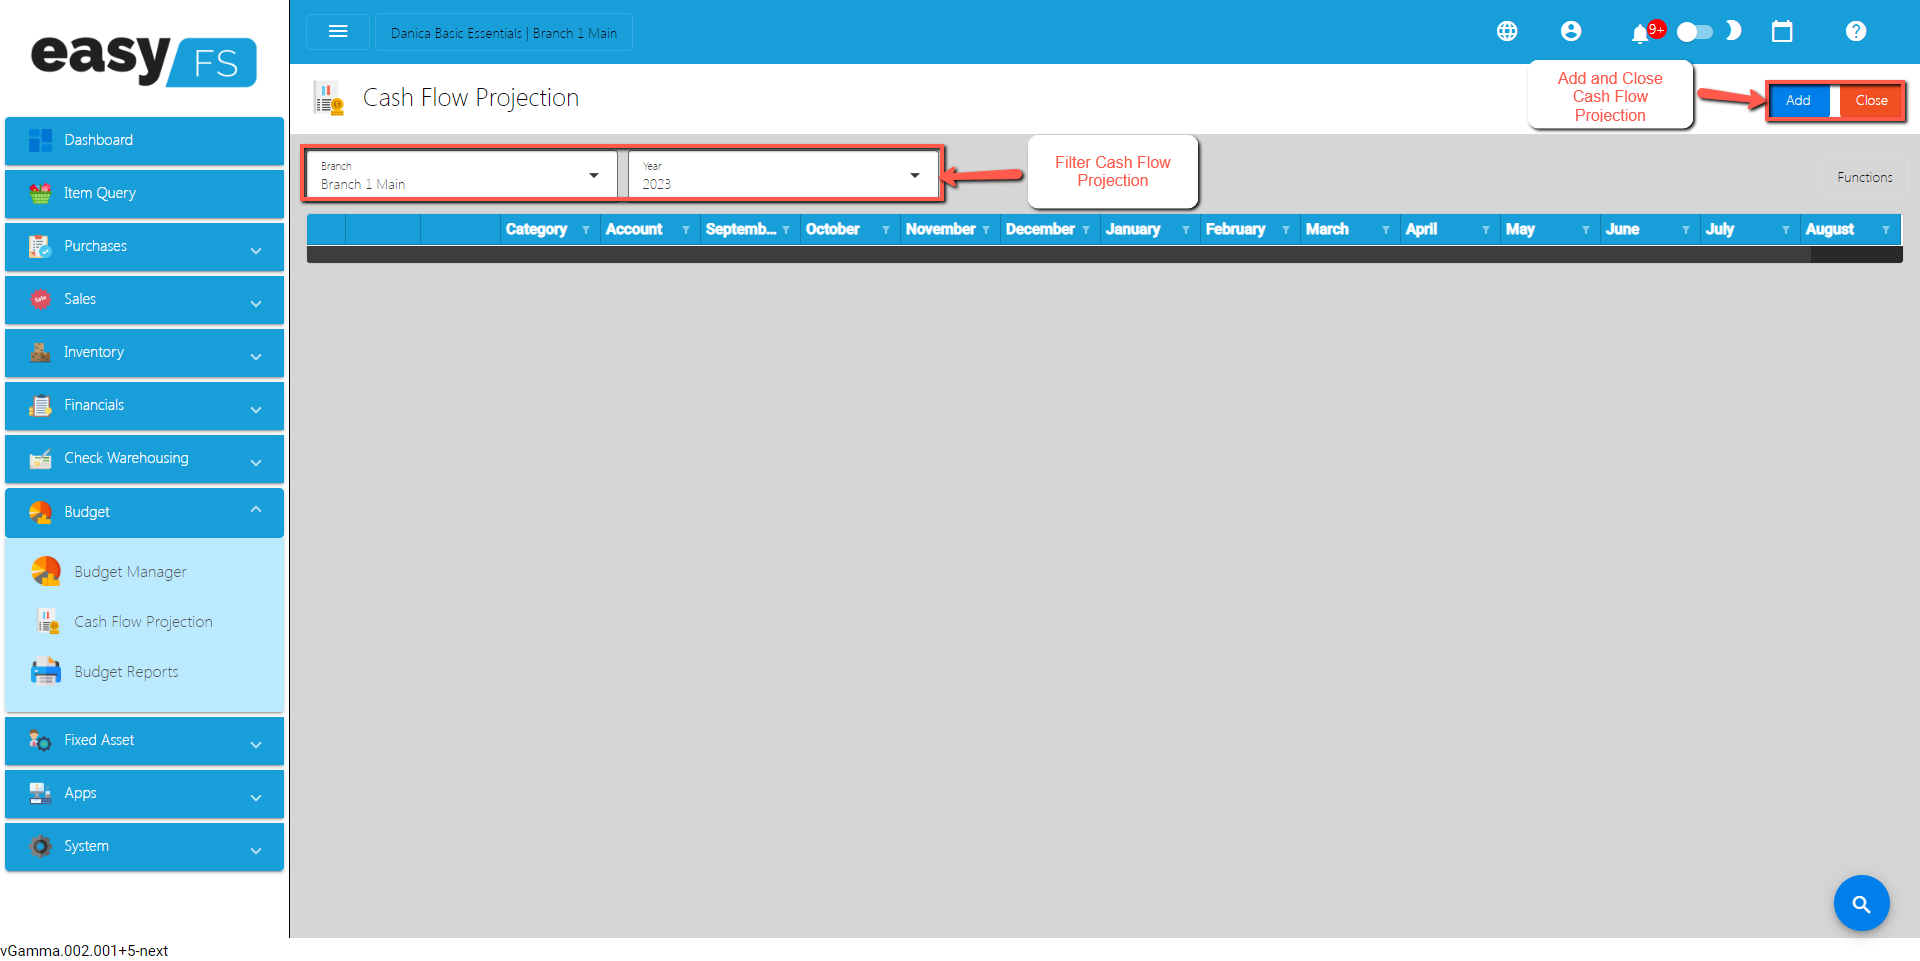
- List of All Cash Flow Projection that were added to the System
- Here the user can add Cash Flow Projection to set up for them to use to their transaction
Cash Flow Projection Detail
- Fill up the required fields to project the Cash Flow for the Cash
Flow Projection.
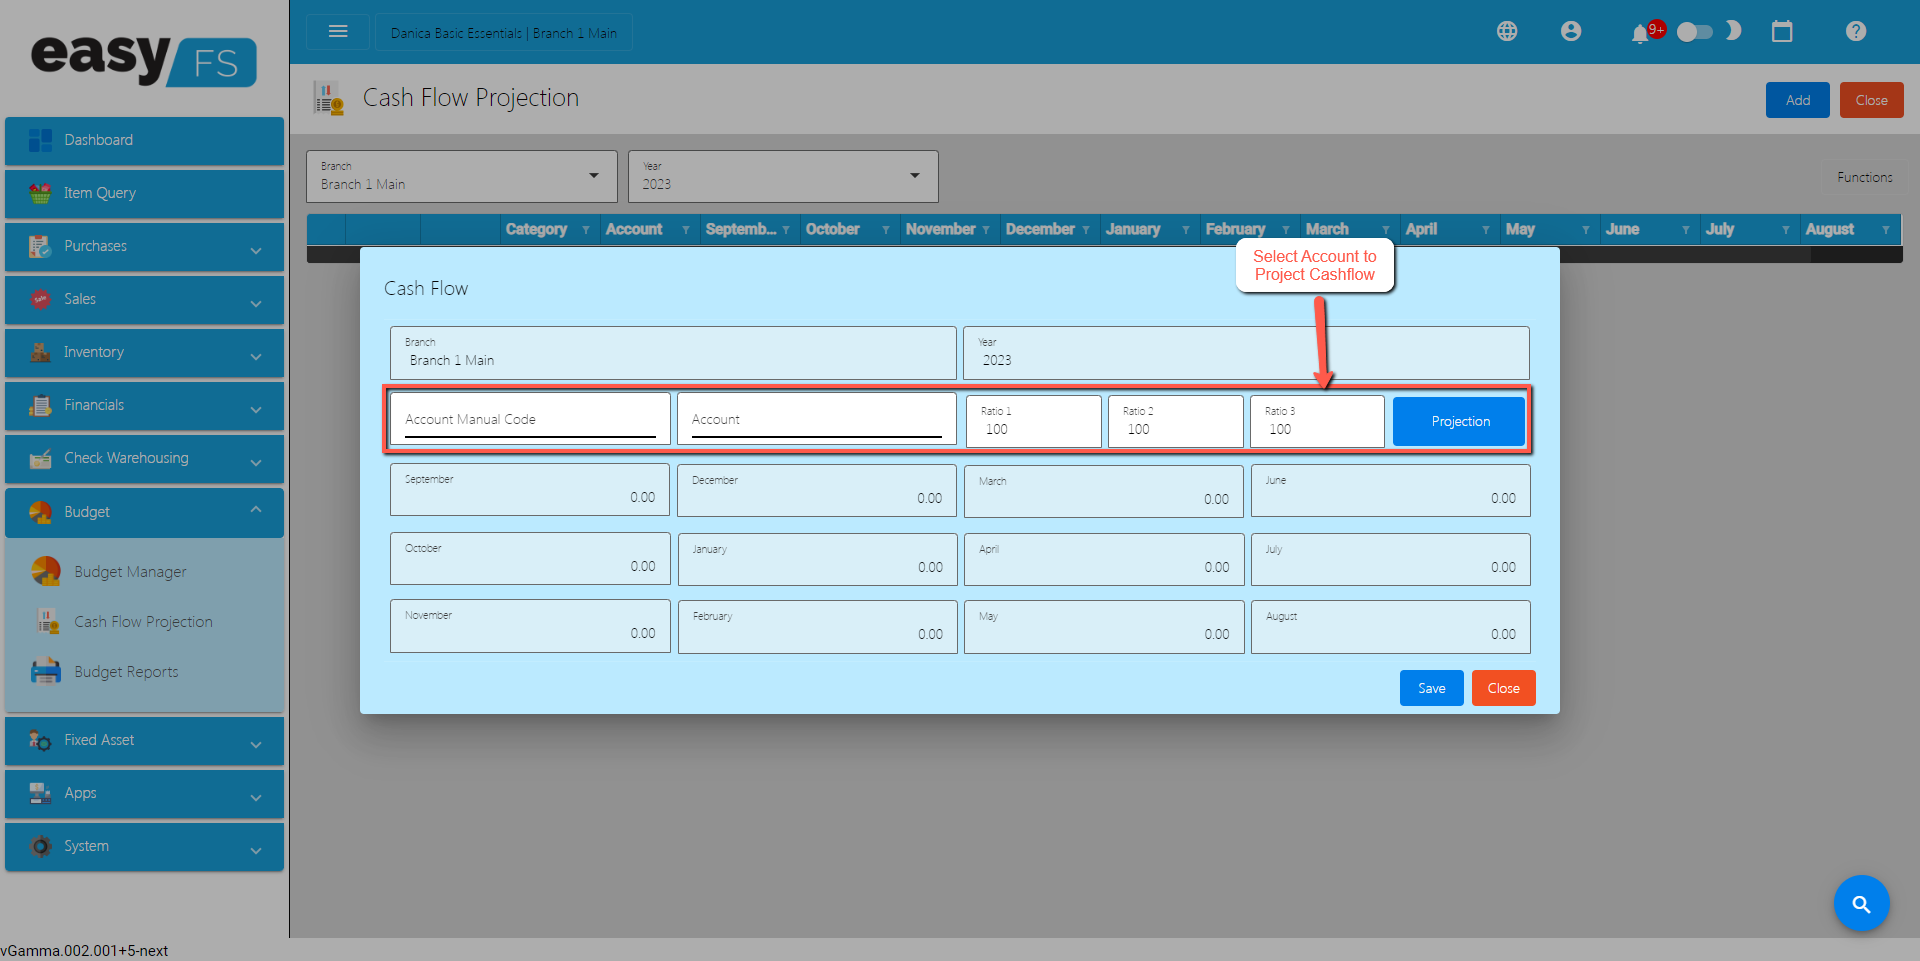
X : Fixed Asset
10.0 Overview
easyFS Fixed Asset, also known as a Fixed Asset Ledger or Fixed Asset Schedule, is a detailed record that systematically tracks and manages an organization's fixed assets. Fixed assets are long-term, tangible assets with a useful life of more than one accounting period. Examples include buildings, machinery, vehicles, furniture, and land.
The Fixed Asset Register serves several purposes:
Asset Registration: It provides a unique identification for each fixed asset, typically through an asset tag or serial number. This helps in easy identification and tracking.
Description and Details: The register includes detailed information about each fixed asset, such as its description, location, acquisition date, purchase cost, depreciation method, salvage value, and useful life.
Cost and Valuation: The register records the original cost of acquiring the asset, any subsequent improvements or additions, and the current valuation. This information is crucial for financial reporting and tax purposes.
Depreciation: For assets subject to depreciation (the allocation of the asset's cost over its useful life), the register includes details on the depreciation method used, the rate of depreciation, and the accumulated depreciation to date.
Maintenance and Repairs: It may include records of maintenance activities, repairs, and any upgrades or improvements made to the fixed asset.
Location Changes: If a fixed asset is moved within the organization, the register is updated to reflect the new location.
Disposal: When a fixed asset is disposed of or sold, details of the disposal, including the date, selling price, and reason for disposal, are recorded in the register.
Compliance: The Fixed Asset Register helps in complying with accounting standards and regulatory requirements related to the reporting and management of fixed assets.
Insurance: It aids in managing insurance coverage by providing accurate information about the value and location of fixed assets.
The Fixed Asset Register is a critical tool for financial management, accounting, and asset tracking. It helps organizations make informed decisions about their asset portfolio, assess the financial impact of fixed asset transactions, and maintain accurate records for financial reporting and auditing purposes.
10.1 Fixed Asset
Fixed Asset List
- List of All Fixed Asset that were added to the System
- Here the user can add Fixed Asset to set up for them to use to their transaction, these are the tabs that can found in the Fixed Asset:
- Draft – A draft refers to a preliminary or provisional version of a document or agreement that is subject to revision or further editing. It is often used as a starting point for the creation of a final version.
- Registered – Registered refers to the process of formally recording something with an official authority. This could include registering a business with the government, registering a trademark or copyright with the appropriate agency, or registering a vehicle with the department of motor vehicles.
- Sold or Dispose – Sold or disposed refers to the process of getting rid of a fixed asset, either by selling it to another party or disposing of it in another way, such as scrapping it. This process typically involves removing the asset from the company's balance sheet and accounting for any gains or losses that result from the sale or disposal.
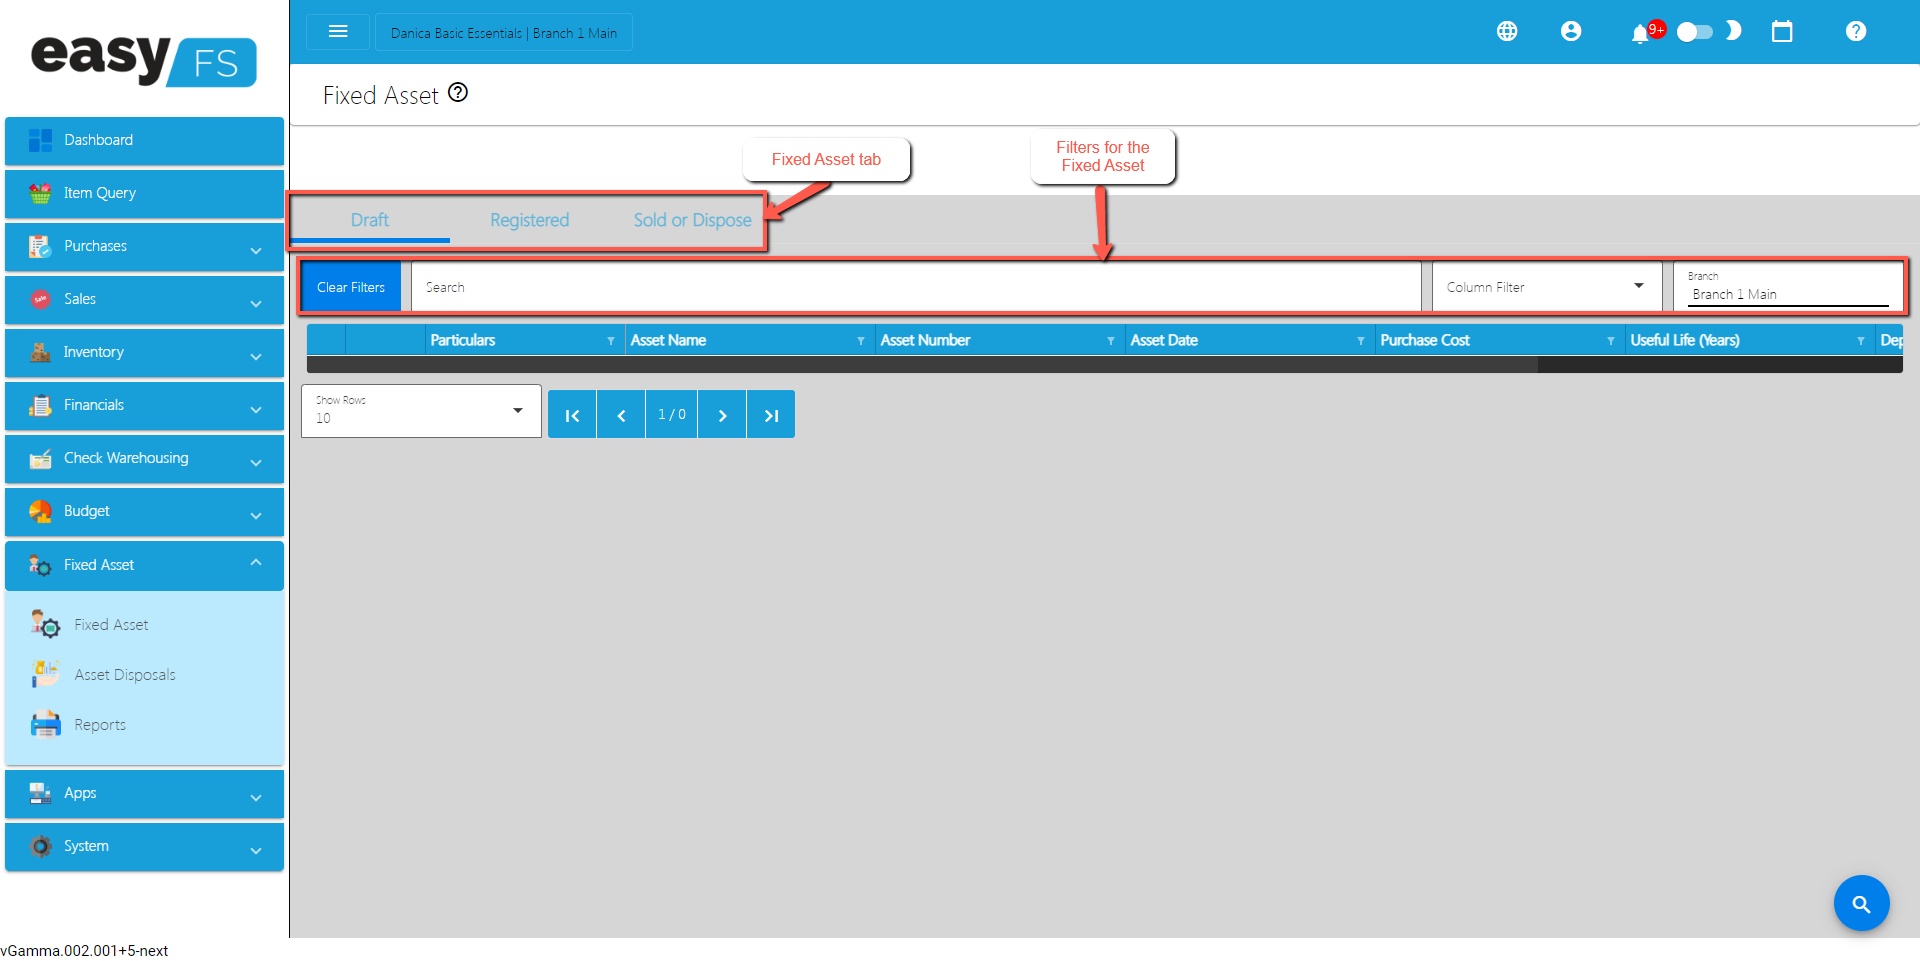
10.2 Asset Disposal
Asset Disposal List
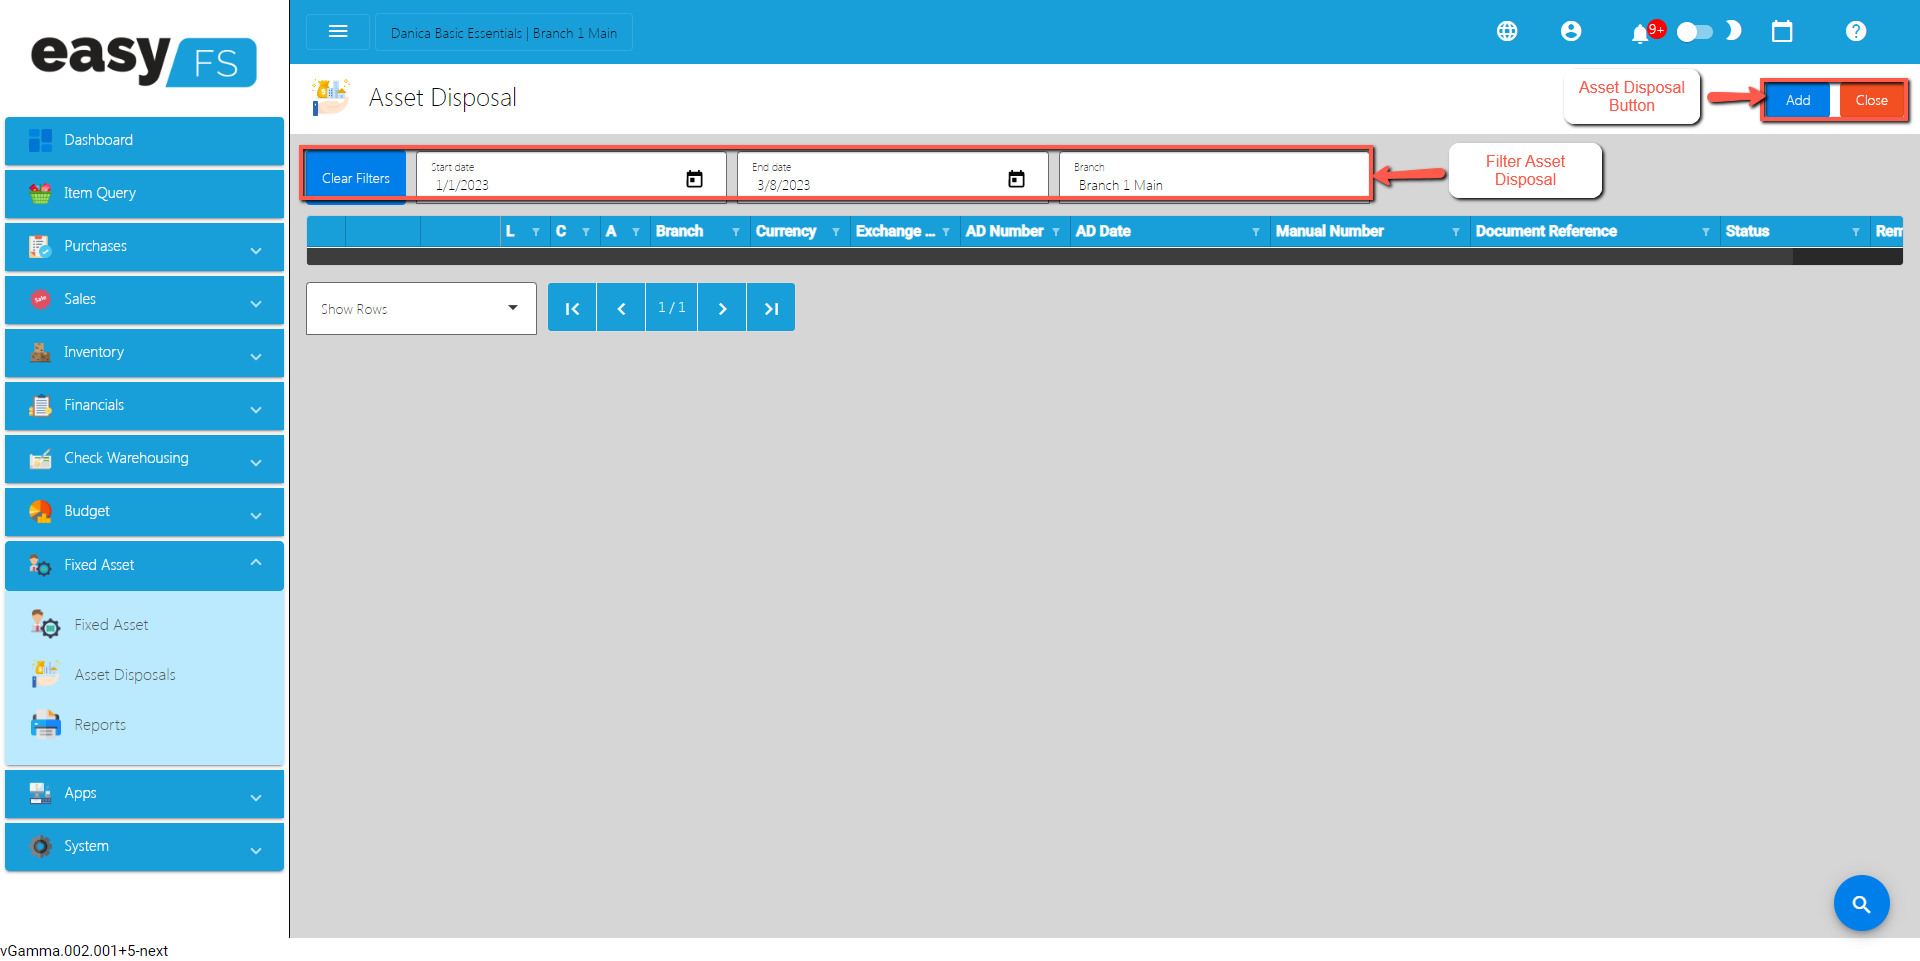
- List of All Asset Disposal that were added to the System
Asset Disposal Detail
- Here the user fills up the required fields, and add new Items for the Asset Disposal detail
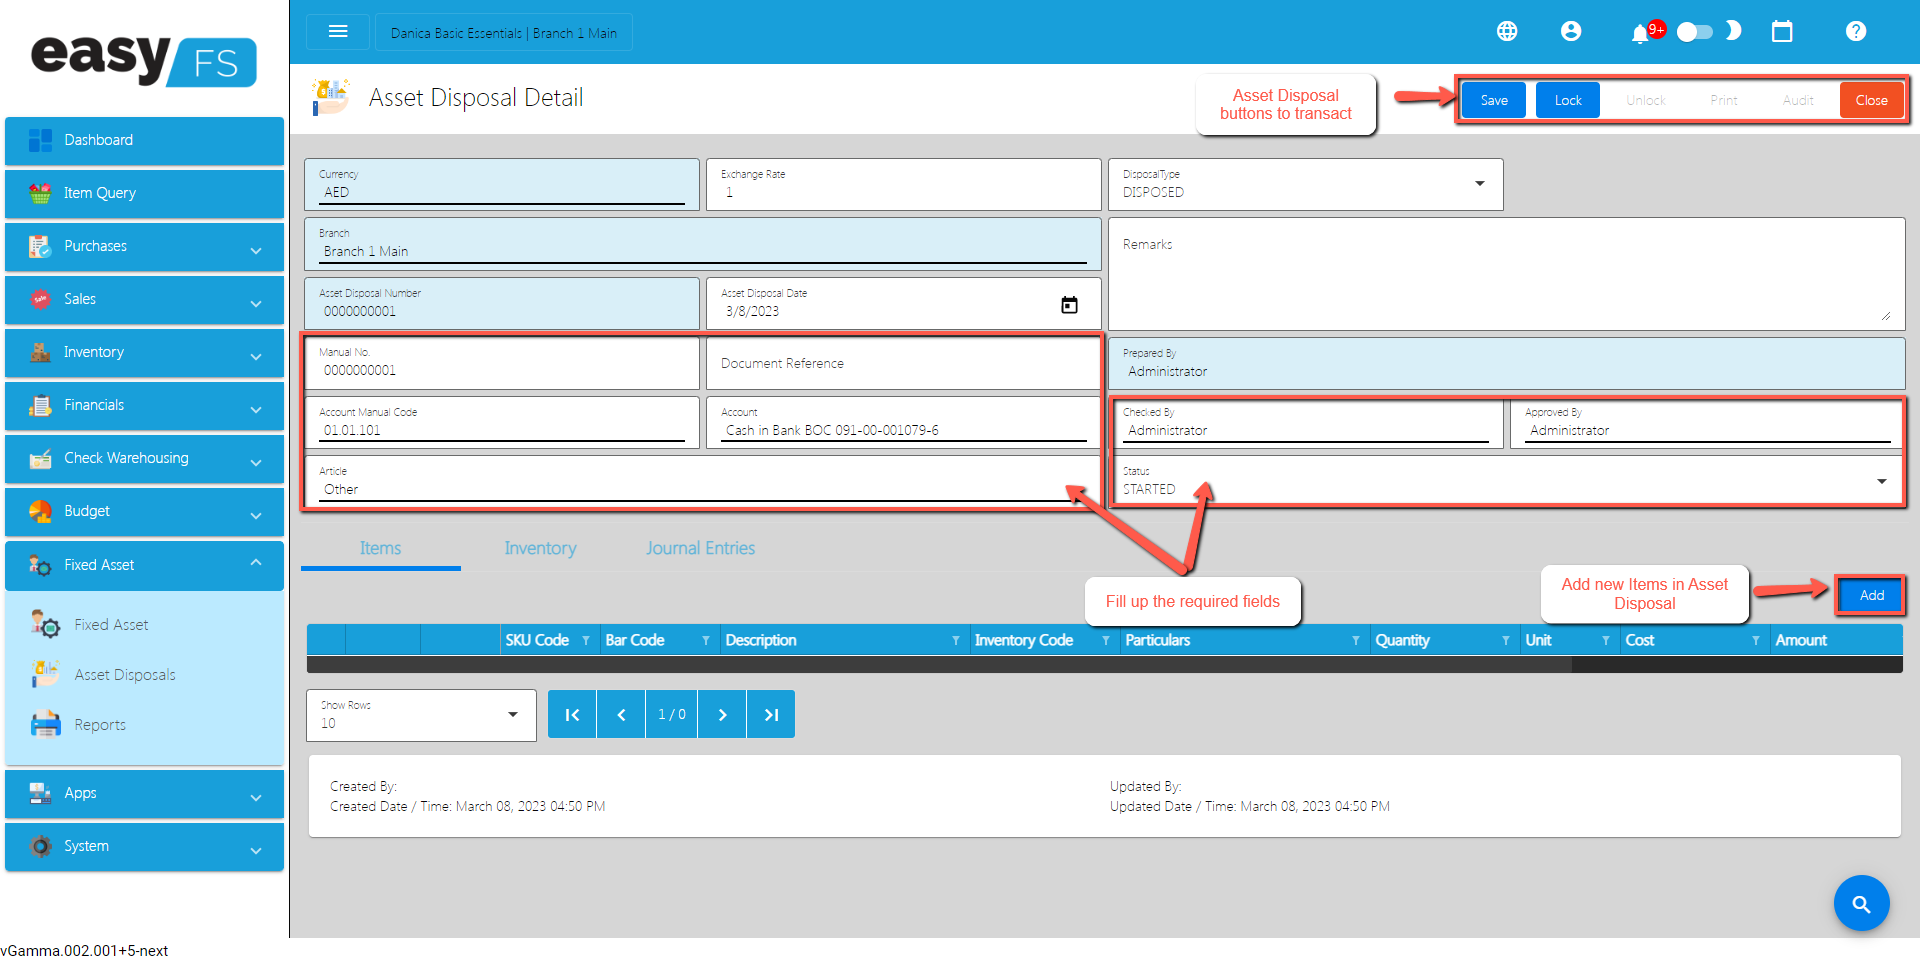
XI : Apps
11.0 Overview
The Apps Module of easyFS is where you can find the following functions:
- POS Integrations and links to EasyCM
- POS Pricing Updates on a scheduled time
- POS Discount on a Scheduled time
11.1 Price
Disclaimer: Price under Apps is not yet functional. Please refrain from using this feature or contact our support team.
11.1.1 Overview
This feature on easyFS is designed for clients who have an integration with our EasyPOS. Its main purpose is to accommodate businesses with multiple branches by allowing them to set different prices for each item at each branch.
11.1.2 How to Setup a Price
- Go to Apps>Price.
- You will be redirected to the Price list.
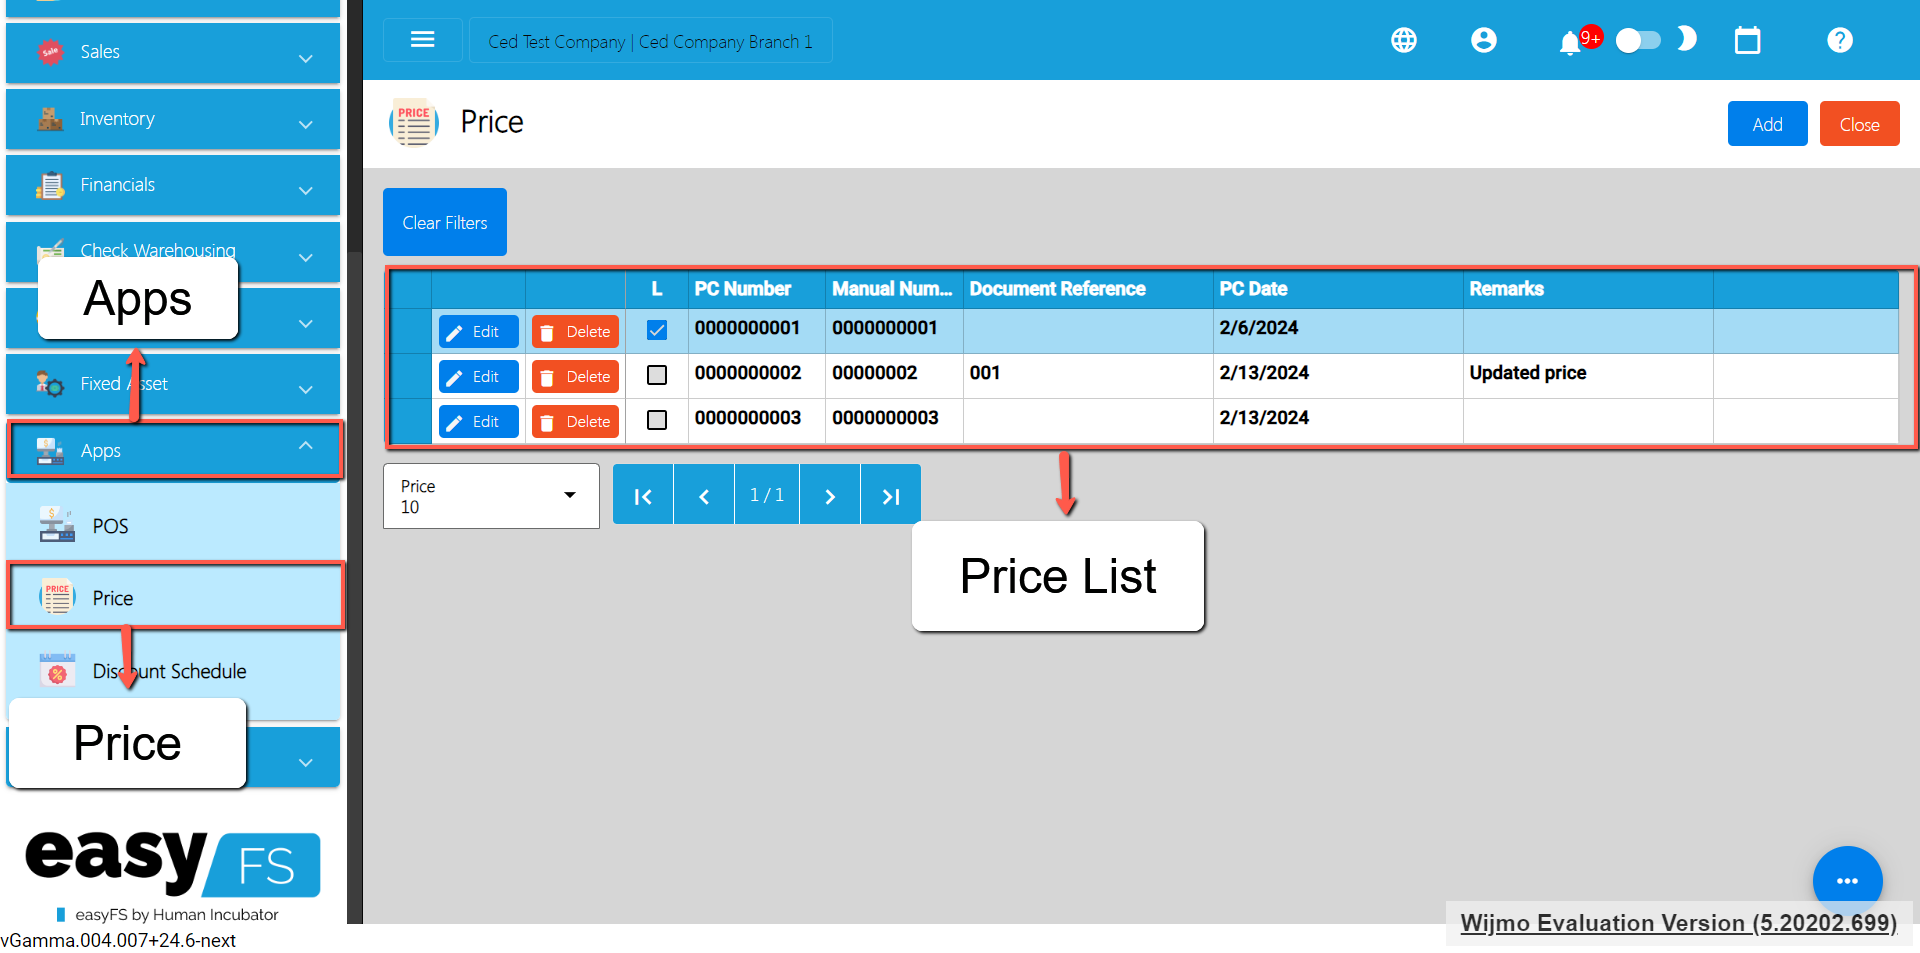
- To add a new Price setup, click the Add button.
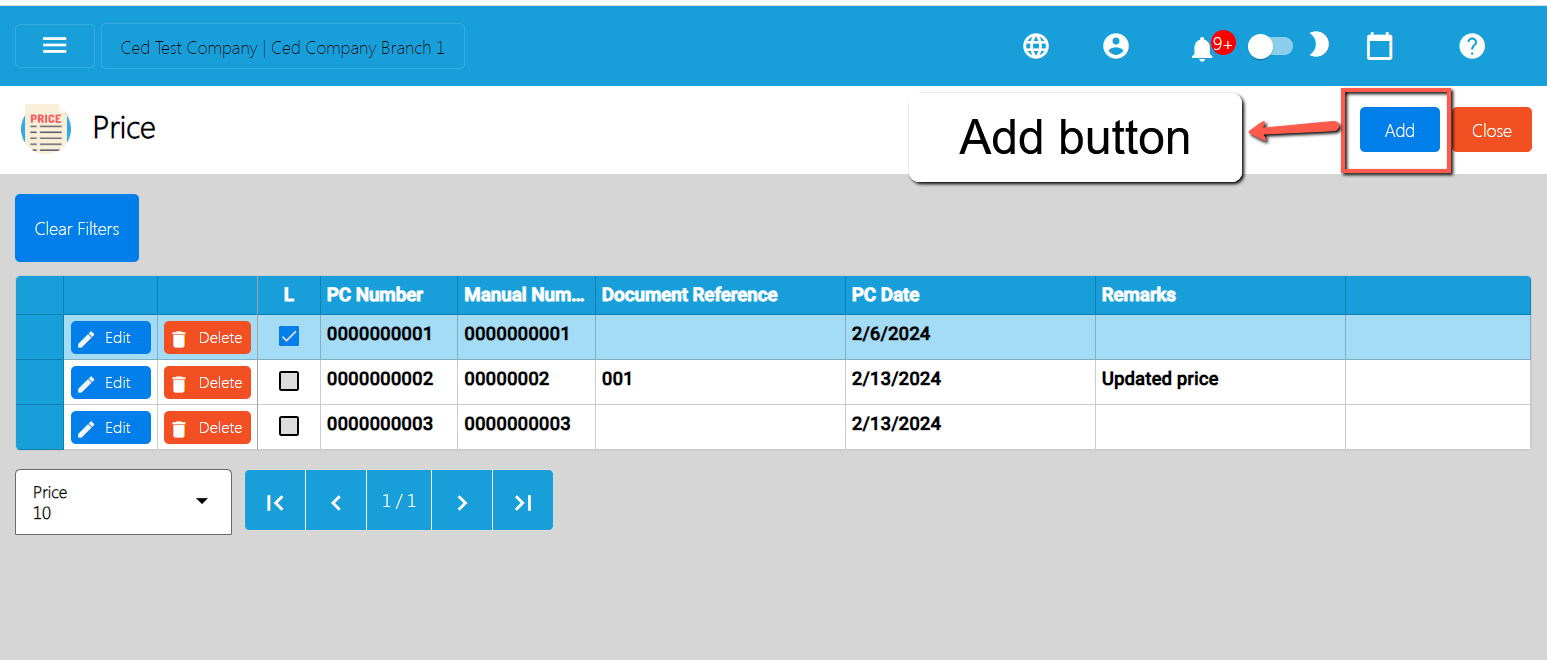
- Provide correct Price Detail like:
- Manual Code
- Document Reference
- Remarks
- PCDate
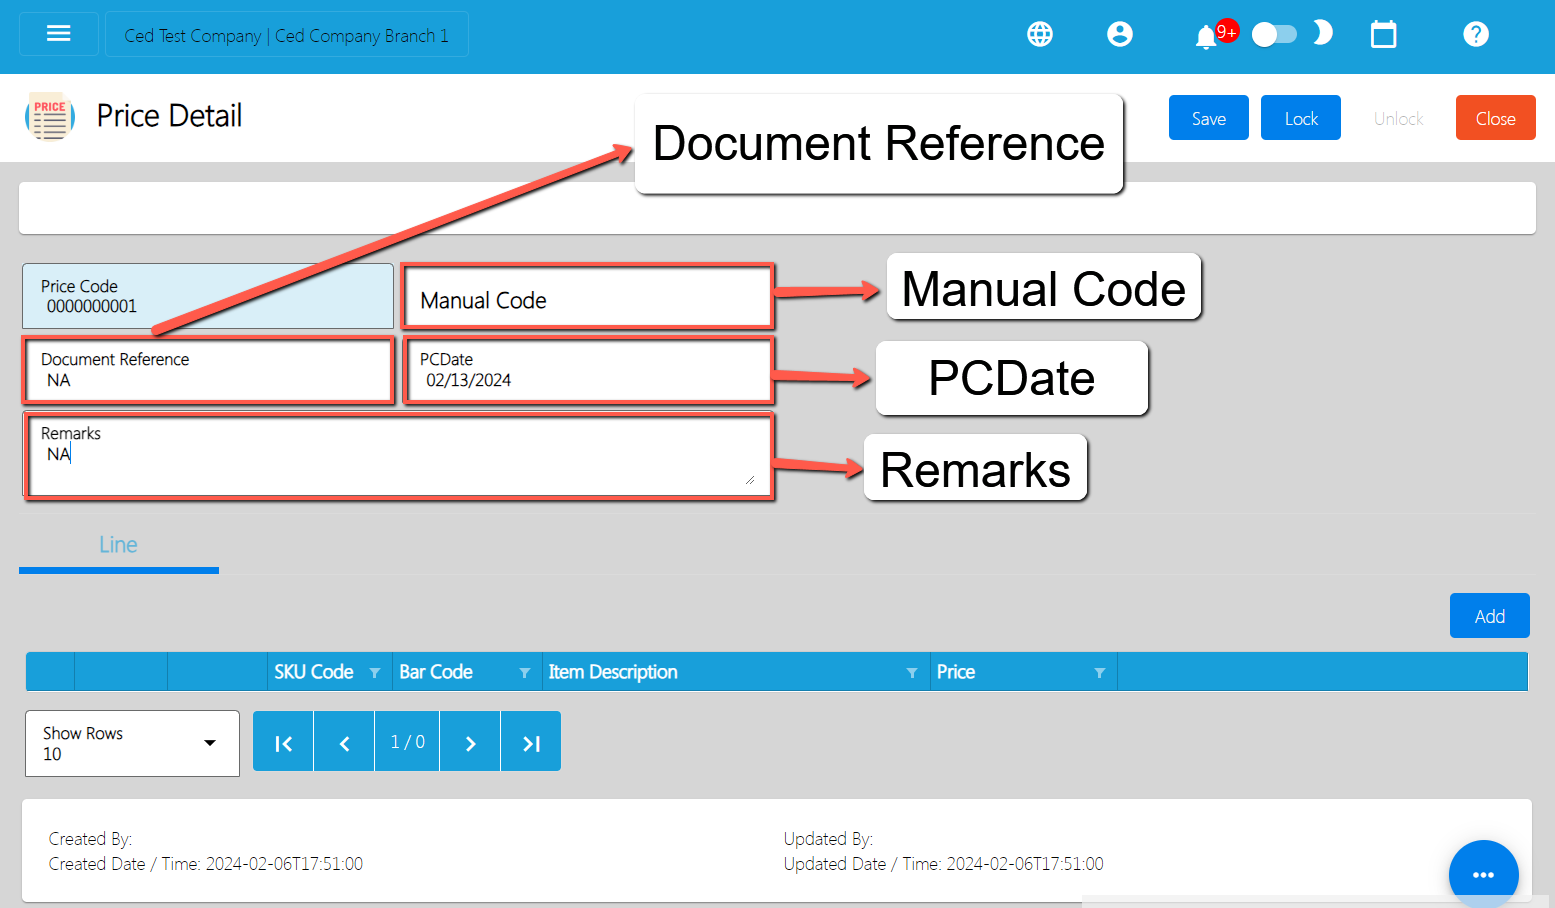
- To setup a different price per item, follows these steps:
- Click the Add button under the Line tab.
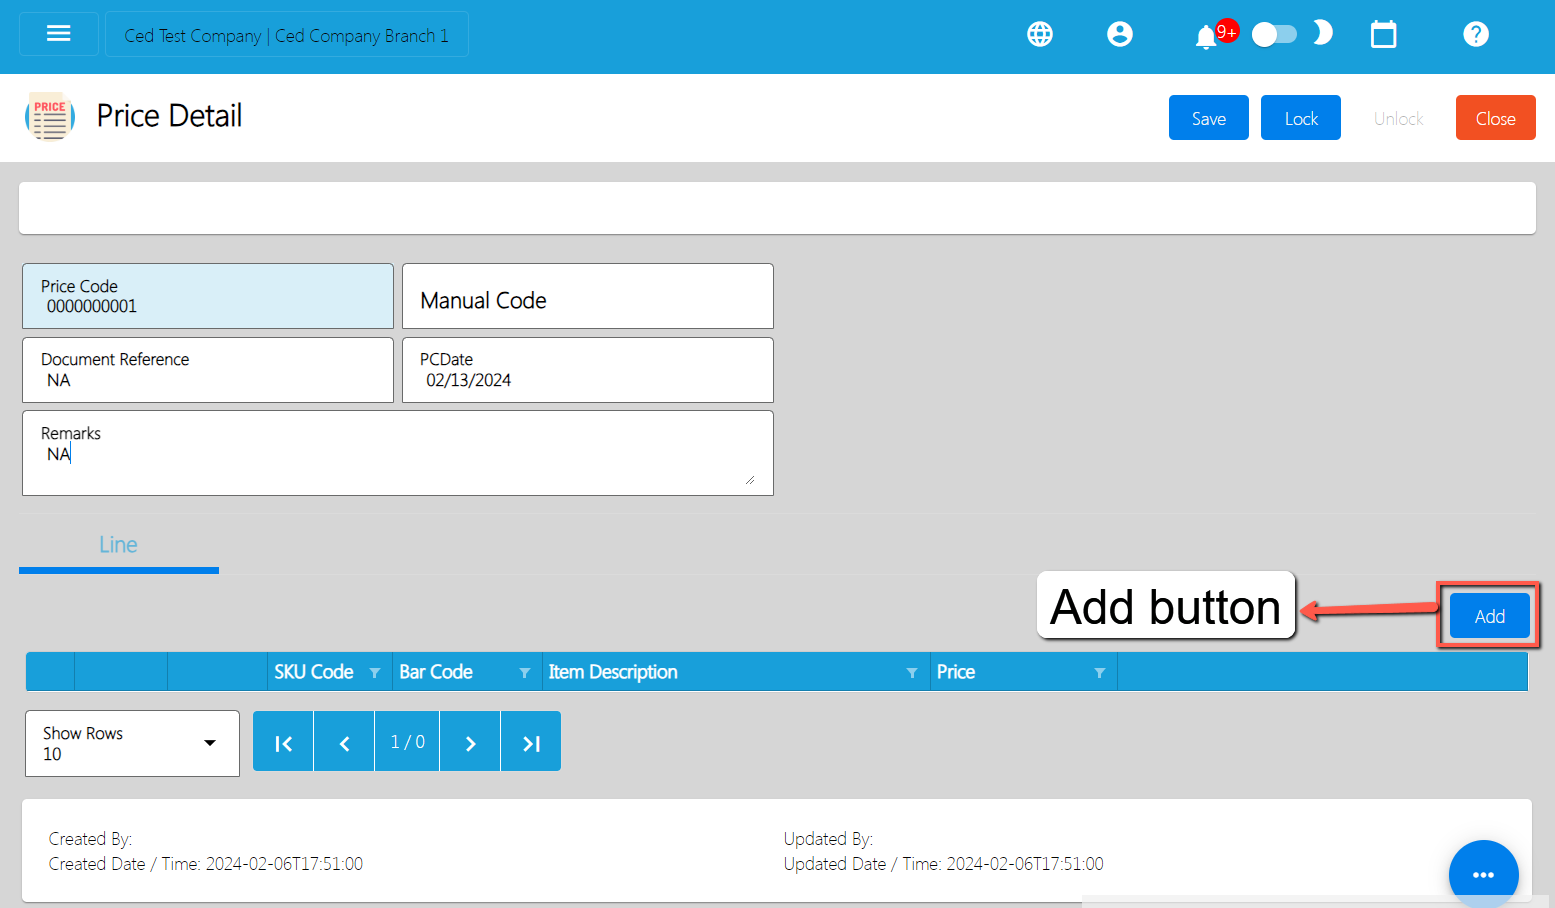
- A Pick Item window will display.
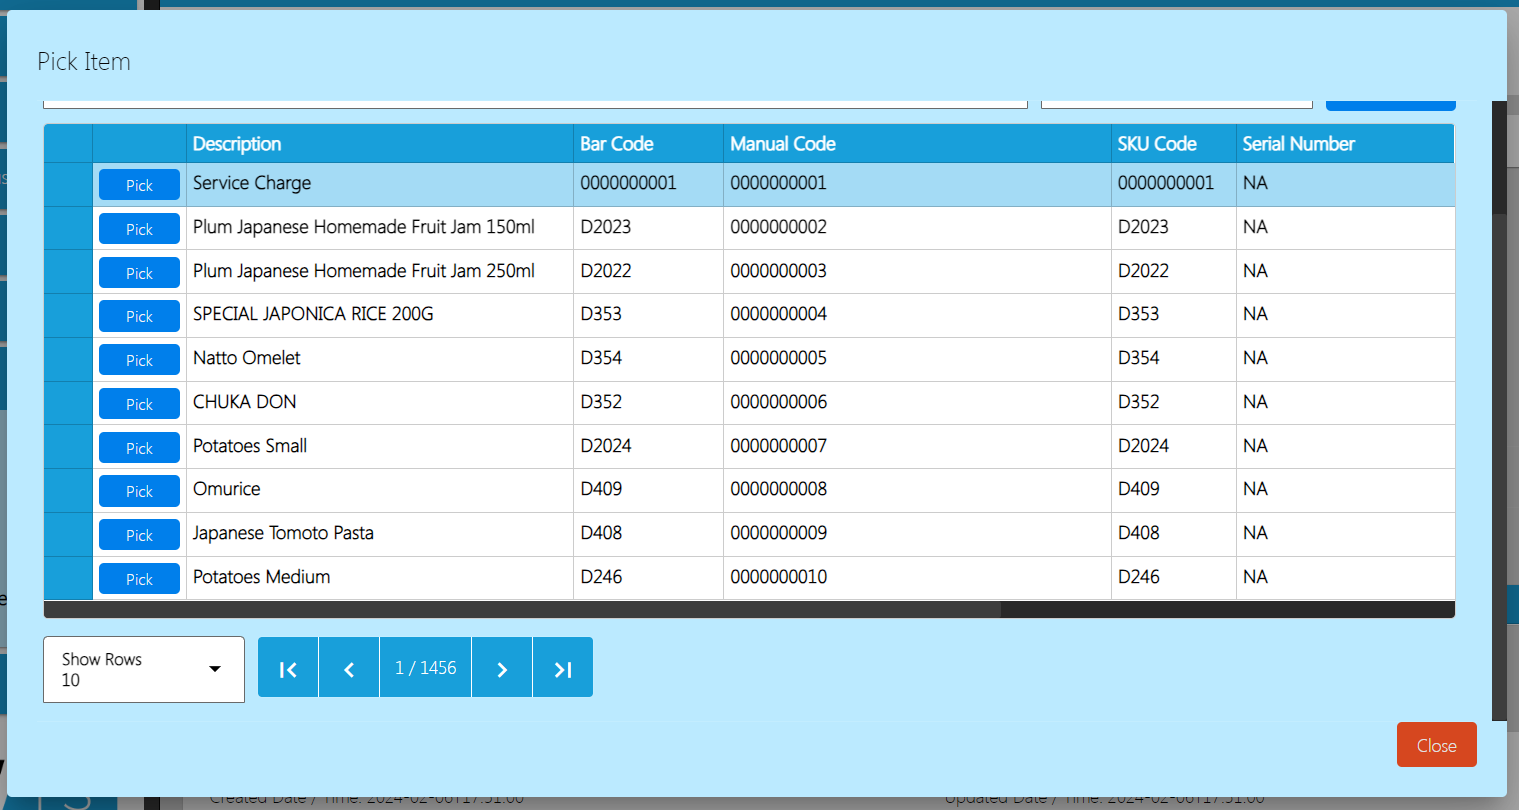
- Look for the item you wanted to set up a Price, then click the Pick button.
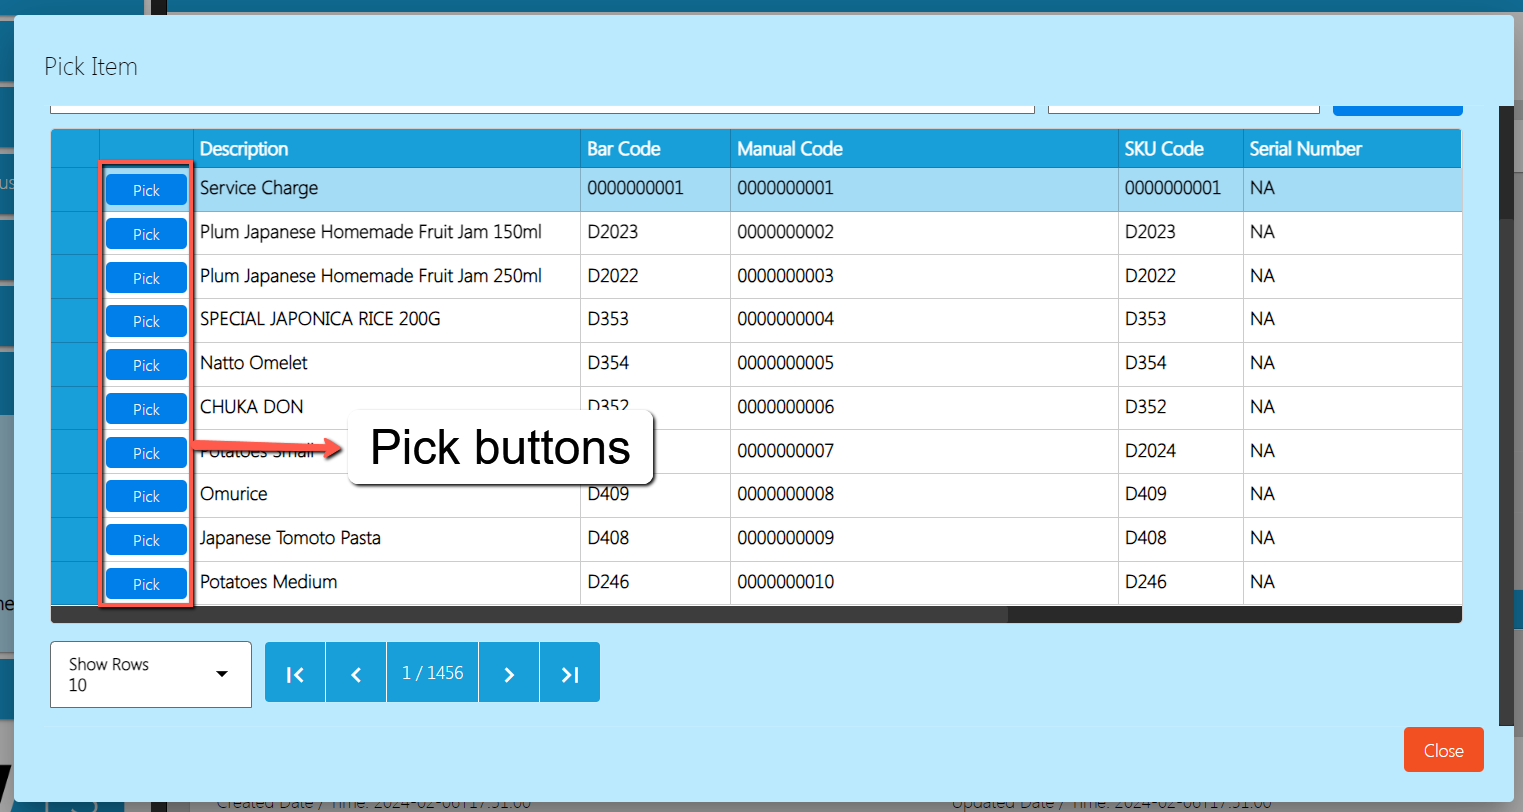
- After clicking the Pick button, a new Add Price Line window will display.
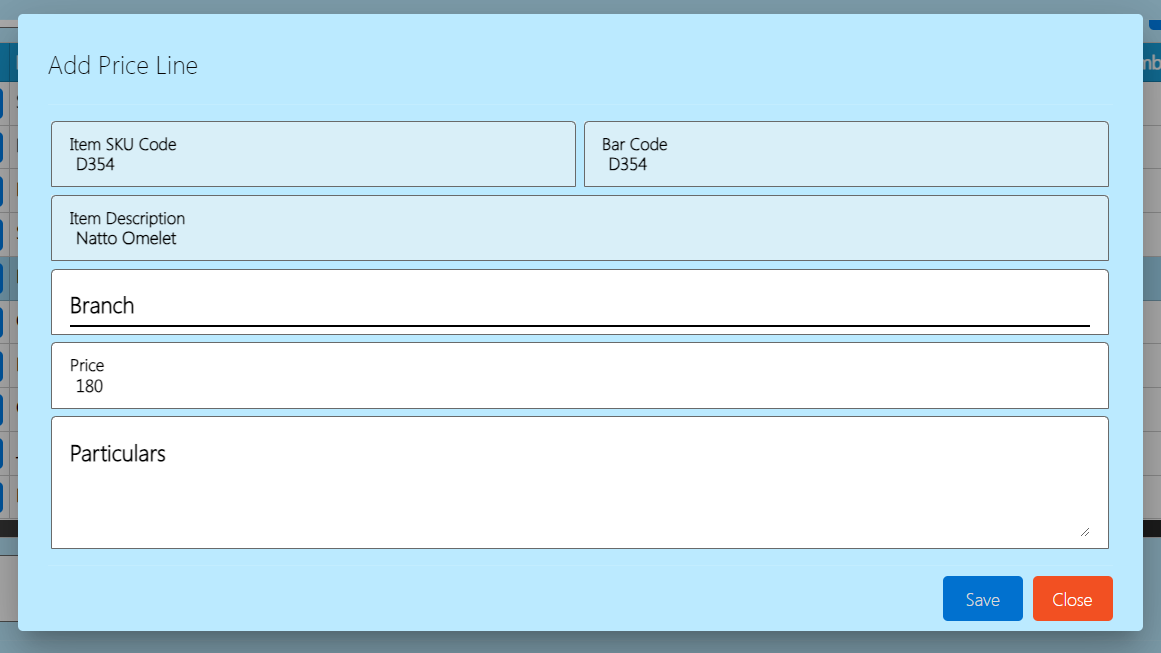
- Select the correct branch where you want to set up an item’s price.
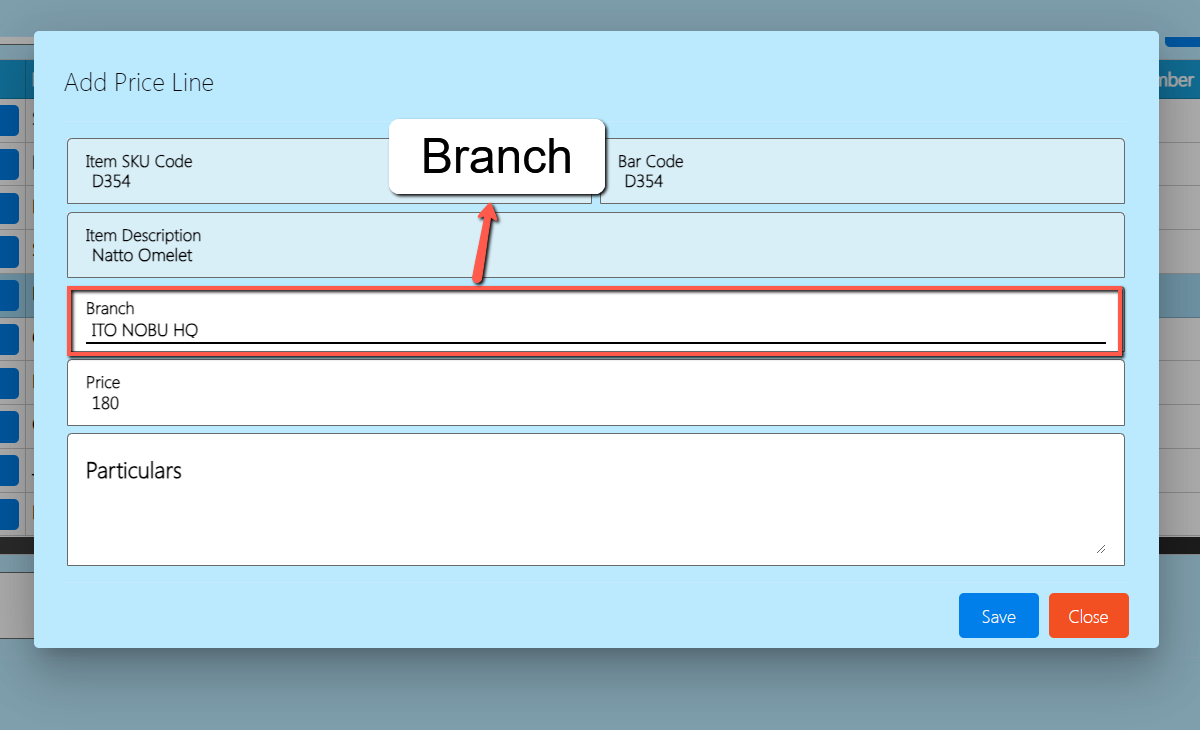
- Provide a correct Price value under the Price field.
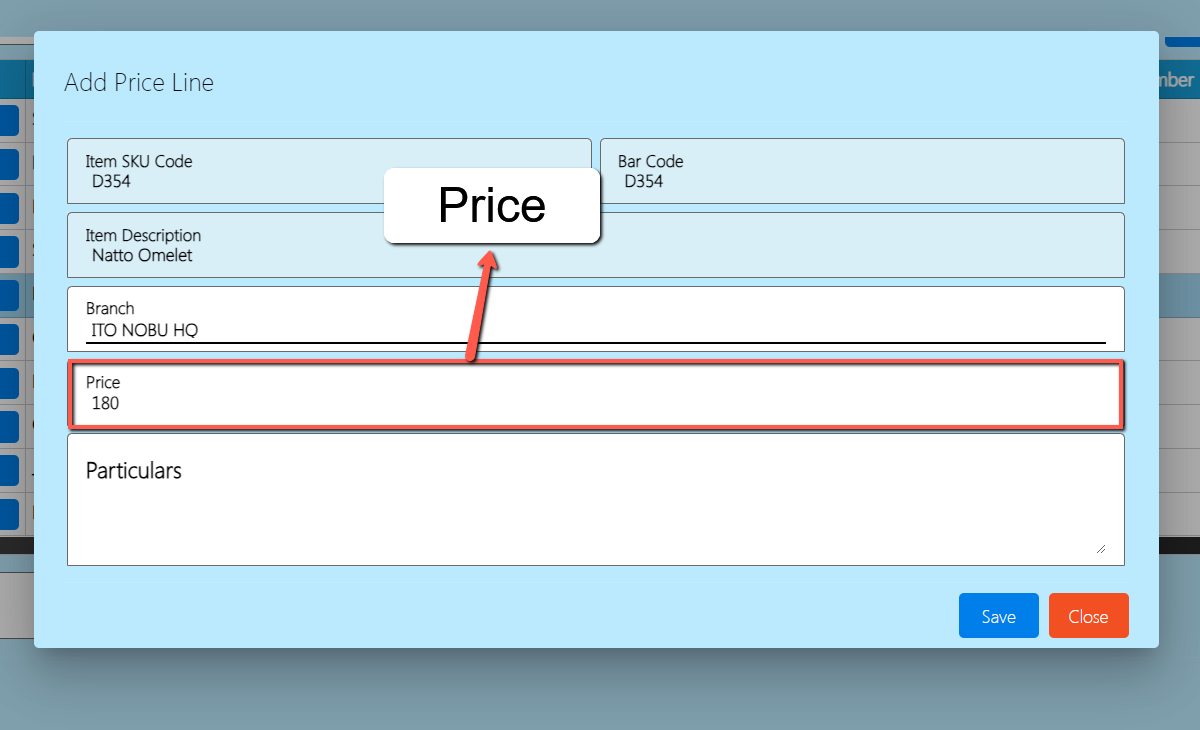
- Click the Save button.
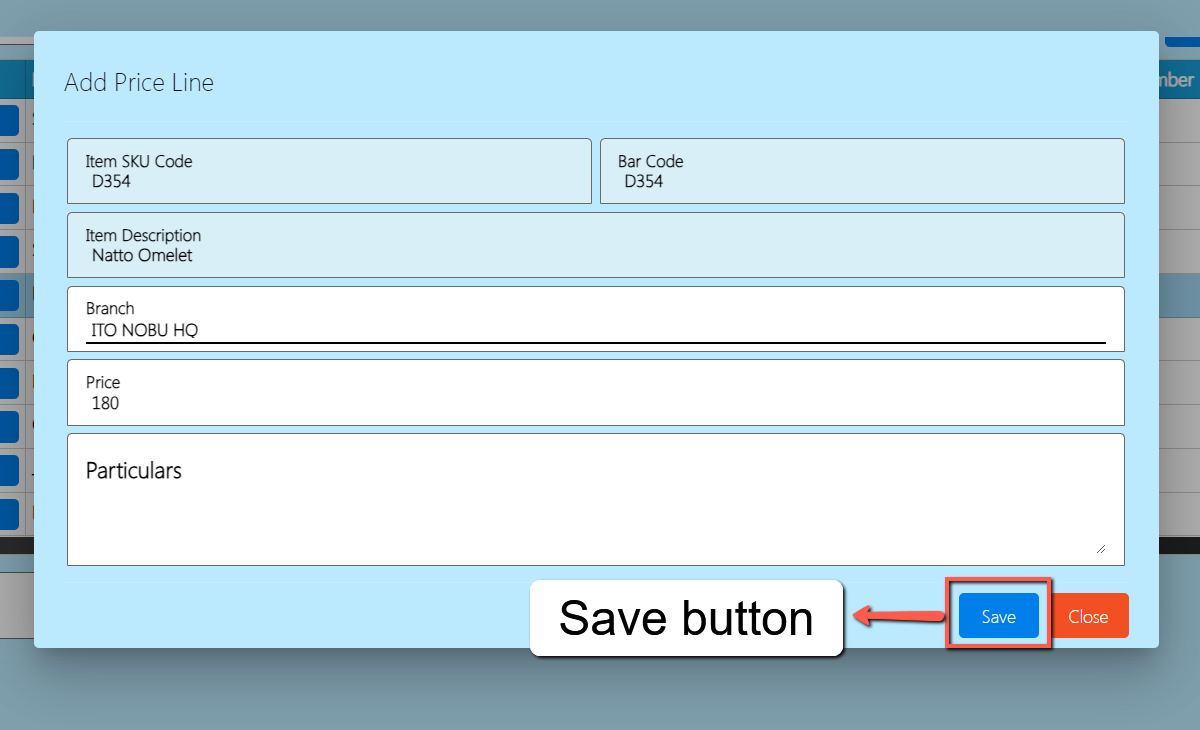
- If you wish to add more, please follow steps a-g.
- Once everything is okay, click Save and Lock buttons.
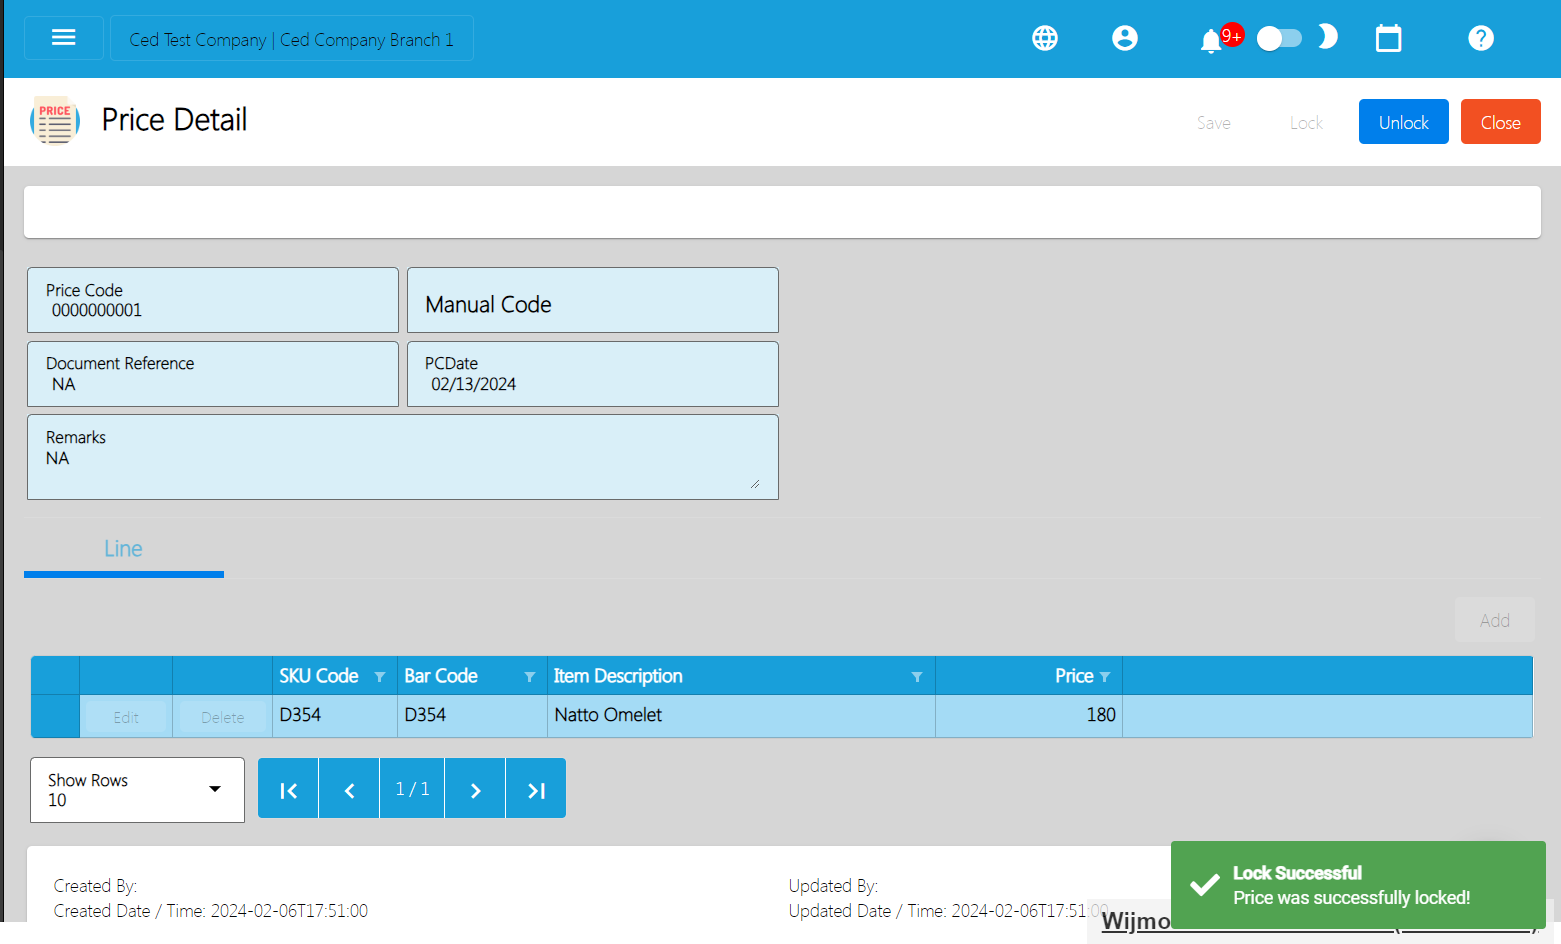
XII : System
12.0 Overview
The system module shows the following features of easyFS. This module is rarely used and is part of the system setup when configuring the easyFS for the first time.
Included in these modules are:
- System Tables – includes the other masterfiles aside from the Major masterfiles such as Customer, Supplier, Items. This is where the user can add Discount Codes, Pay Types, Unit, Terms, Article Groups and Other Articles.
XIII: Integration
13.1 Overview
Our accounting system seamlessly integrates with other EasySeries products to enhance the overall functionality of your business operations. Below is an overview of key integrations:
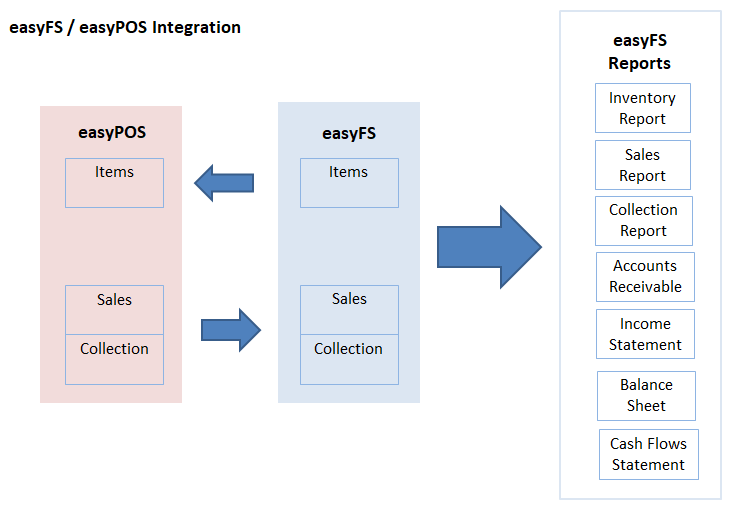
|
Modules |
Integration |
easyPOS |
easyFS |
Remarks |
|
Items |
easyFS –> easyPOS |
View Only |
Can Add, View, No Edit and Delete, Can Invisible |
|
|
Unit |
easyFS –> easyPOS |
View Only |
Can Add, View, No Edit and Delete, Can Invisible |
PCS, Bottle, Dozen, Grams |
|
Supplier |
easyFS –> easyPOS |
– |
Can Add, View, No Edit and Delete, Can Invisible |
|
|
Customer |
easyFS –> easyPOS |
Can Vew, No ADD, Edit and Delete |
Can Add, View, No Edit and Delete, Can Invisible |
|
|
PO |
No Integration |
– |
Can Add, View, No Edit and Delete, Can Invisible |
|
|
RR |
easyFS –> easyPOS |
Can Vew, No ADD, Edit and Delete |
Can Add, View, No Edit and Delete, Can Invisible |
|
|
Stock IN |
easyFS –> easyPOS |
Can Vew, No ADD, Edit and Delete |
Can Add, View, No Edit and Delete, Can Invisible |
|
|
Stock OUT |
easyFS –> easyPOS |
Can Vew, No ADD, Edit and Delete |
Can Add, View, No Edit and Delete, Can Invisible |
|
|
Transfer |
easyFS –> easyPOS |
– |
Can Add, View, No Edit and Delete, Can Invisible |
|
|
Sales |
easyPOS –> easyFS |
All Rights |
Cannot Edit, Delete, View Only |
Booking / Invoicing |
|
Collection |
easyPOS –> easyFS |
All Rights |
Cannot Edit, Delete, View Only |
Cash, Credit, Other Payments |
|
|
|
|
|
|
|
Reports |
Integration |
easyPOS |
easyFS |
Remarks |
|
Inventory |
|
XXX |
View Only |
|
|
Sales |
easyPOS –> easyFS |
View Only |
View Only |
|
|
Collection |
easyPOS –> easyFS |
View Only |
View Only |
|
13.1.1 Benefits of Integration
Integration between easyPOS and easyFS can offer various benefits for businesses, streamlining operations and improving overall efficiency. Here are some key advantages of integrating POS and accounting systems:
Real-Time Data Accuracy
Integration ensures that sales transactions are automatically recorded in the accounting system in real-time. This reduces the risk of errors and provides accurate and up-to-date financial information.
Efficient Financial Management
By automating the transfer of sales data to the accounting system, businesses can efficiently manage financial processes, including invoicing, expense tracking, and reconciliation.
Time Savings
Integration eliminates the need for manual data entry, reducing the time and effort spent on reconciling sales and financial data. This allows employees to focus on more value-added tasks.
Inventory Management
easyPOS and easyFS integration helps synchronize inventory data. When a sale is made, inventory levels are automatically updated in both systems, preventing discrepancies and ensuring accurate stock information.
Improved Decision-Making
Access to real-time, accurate financial data allows business owners and managers to make informed decisions promptly. They can analyze sales trends, track expenses, and identify opportunities for growth.
Financial Reporting
Generate comprehensive financial reports that include sales data, expenses, and other relevant metrics. This allows for a better understanding of overall business performance.
Compliance and Accuracy
Integration helps ensure compliance with accounting standards and government regulations (Ex. BIR and SEC). Accurate financial records are crucial for regulatory compliance and can contribute to the smooth auditing process.
Cash Flow Management
Real-time tracking of sales and expenses facilitates better cash flow management. Business owners can monitor cash flow trends, identify potential issues, and plan for future financial needs.
Scalability
As businesses grow, integrated systems can easily scale to accommodate increased transaction volumes and additional functionalities. This scalability supports the evolving needs of the business.
Reduced Manual Errors
Automation reduces the likelihood of errors associated with manual data entry. This improves data accuracy and minimizes the risk of discrepancies between sales and financial records.
Streamlined End-of-Day Processes
Integration simplifies end-of-day processes by automatically updating the accounting system with the day's sales data. This streamlines the closing procedures for each business day.
13.2 Types of Integration
13.2.1 EasyPOS Integration Overview
Integration with our Point of Sale (POS) system, easyPOS, allows for direct recording of sales transactions into the accounting system, ensuring accurate and up-to-date financial records.
Benefits:
- Seamless sales-to-accounting data flow
- Reduced data entry errors
- Efficient inventory management.
13.3 How to Set Up Integrations
13.3.1 EasyPOS Integration
When integrating easyFS to easyPOS, the following master files, purchases and inventory transactions should be set up on the easyFS side:
- Master Files
- Item
- Customer
- Supplier
- Purchase Transactions
- Purchase Order
- Receiving Receipt
- Inventory Transactions
- Stock In
- Stock Out
- Stock Transfer
Inorder for this to be integrated to easyPOS, the easyPOS side should be the one to setup the correct configuration e.g.:
- easyFS Domain (ex: https://easyfis-perrochikoph.hi-api.io )
- easyFS Branch (ex: 0000000001)
- User Code (ex: admin)
13.4 Managing Integrations
13.4.1 EasyPOS Integration
In this section, I will walk through the process of managing easyPOS transactions using our easyFS:
- Go to Apps, then click POS.
- Under the Sales menu, this is where you will monitor the sales transactions from the easyPOS:
- Select a correct Terminal Code and Date:
- Terminal Code → based on the easyPOS settings
- Date → easyPOS sales transaction
- After that, Sales transactions from easyPOS will be displayed based on the provided Terminal Code and Date.
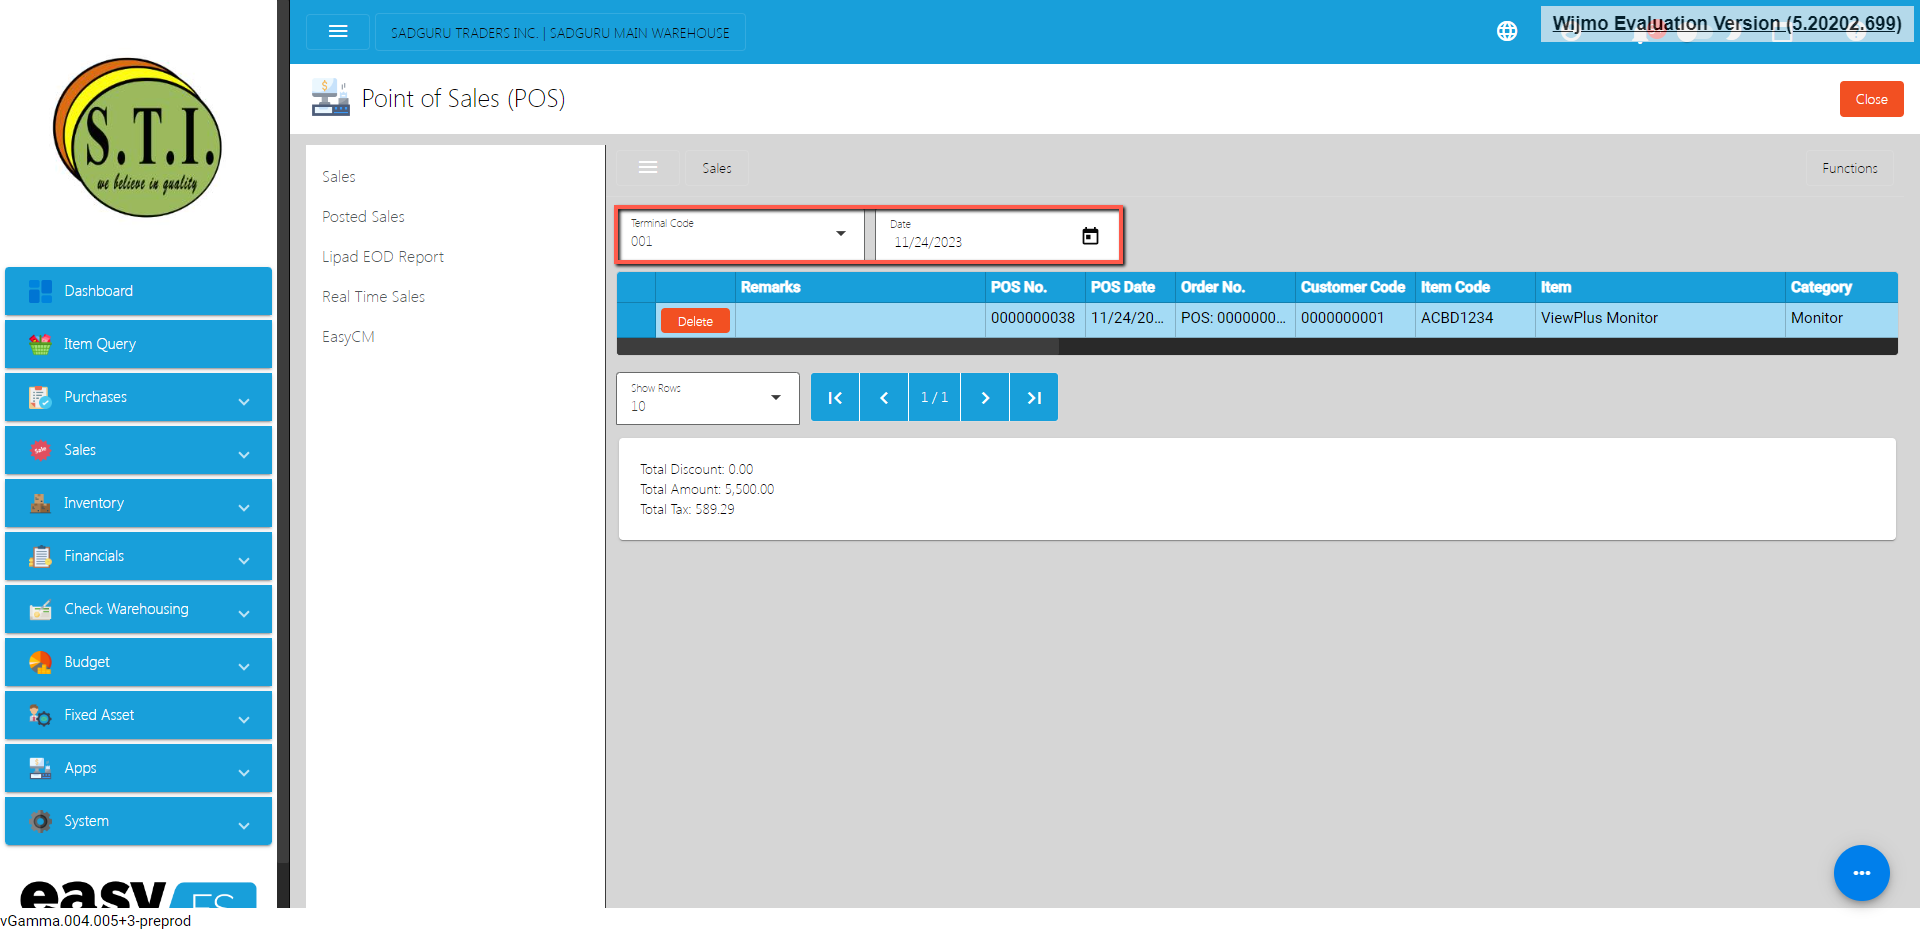
- Before posting it to the easyFS Sales Invoice, you need to validate it first.
- To validate the sales transactions, click the Functions button then click Validate button.
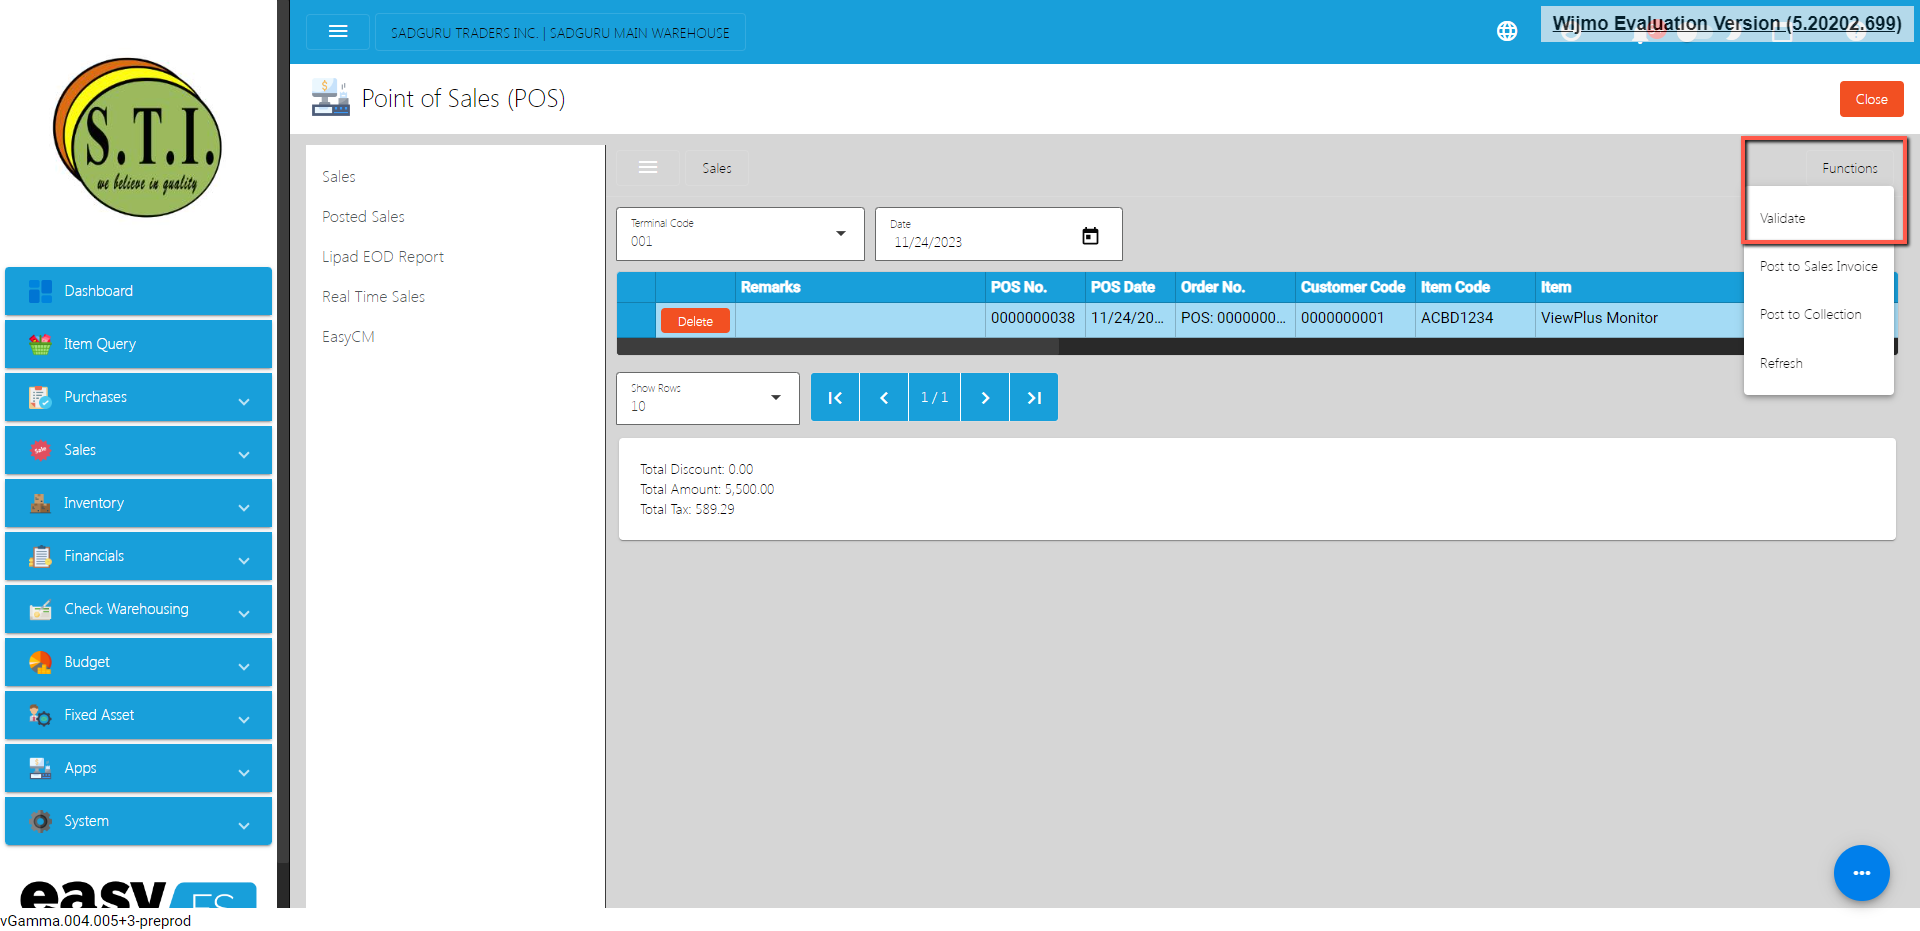
- Once validation is complete, check the Remarks column value:
- Remarks is equal to VALIDATED, this means that you can now post this to the Sales Invoice.
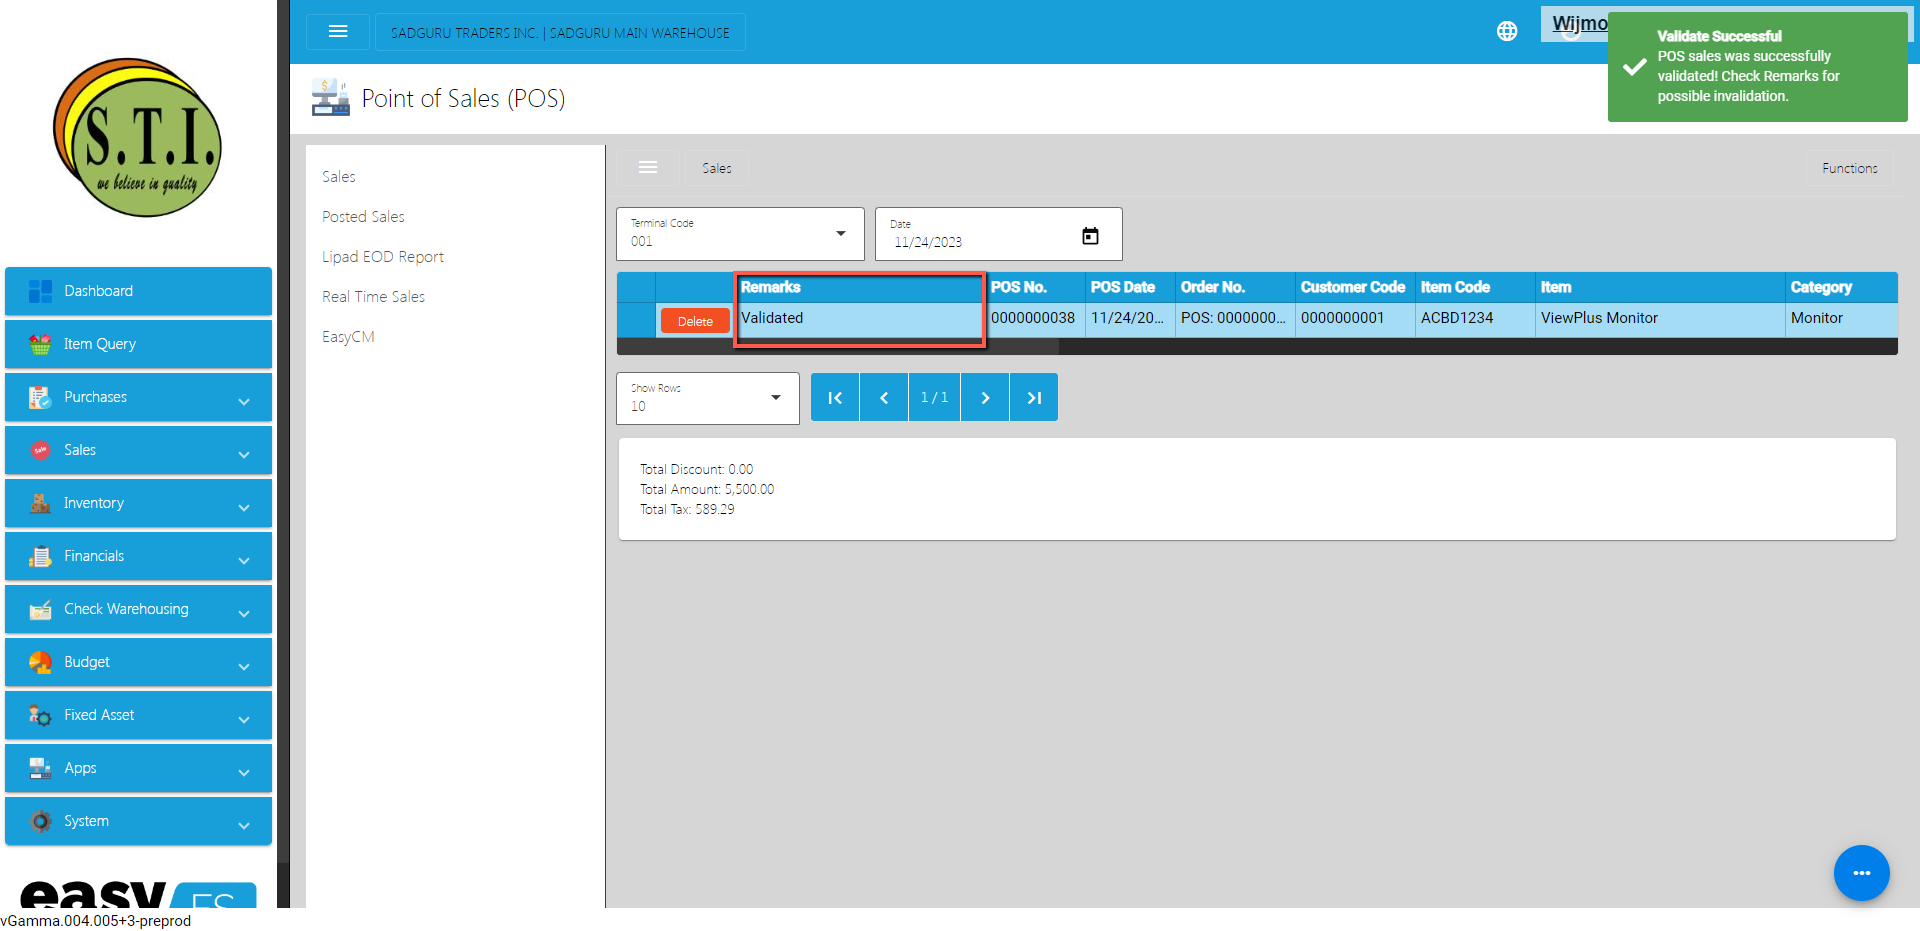
- Remarks are not equal to VALIDATED. Below are the listed errors along with their explanations and recommended actions for resolution:
- Item is Unlock
- Explanation: This error indicates that the Item is currently in an unlock.Leaving an item in an unlocked state will result in it being excluded from sales transactions and will not be deducted from inventory. This situation can lead to discrepancies in both sales records and inventory levels between the easyPOS system and the easyFS.
- Resolution: To solve this issue, follow these simple steps:
- Go to the Master Files, then select Item.
- Search the item using the item barcode. The barcode should be found where it says the item is unlocked. Check the screenshot below to see where to find the barcode with the error.
- Click the Edit button.
- Look for the Lock button, then click.
- Customer not Found
- Explanation: This error indicates that the Customer is currently unlocked or not added on the easyFS system.
- Resolution: To solve this issue, follow these simple steps:
- Discount not Found
- Explanation: This error indicates that the Discount is not added on the easyFS system or its Manual Code from easyFS does not match to the easyPOS.
- Resolution:
- Item Barcode not Found
- Explanation: This error indicates that the Item Barcode is not added on the easyFS system.
- Resolution:
- Tax Mismatch
- Explanation: This error indicates that the Taxes Manual Code from the easyFS system does not match to the easyPOS.
- Resolution:
- Service Item not Found
- Explanation: This error indicates that the Service Charge item is unlocked or not added on the easyFS system.
- Resolution:
- To post the validated sales to the Sales Invoice, click again the Functions button, then click the Post to Sales Invoice button.
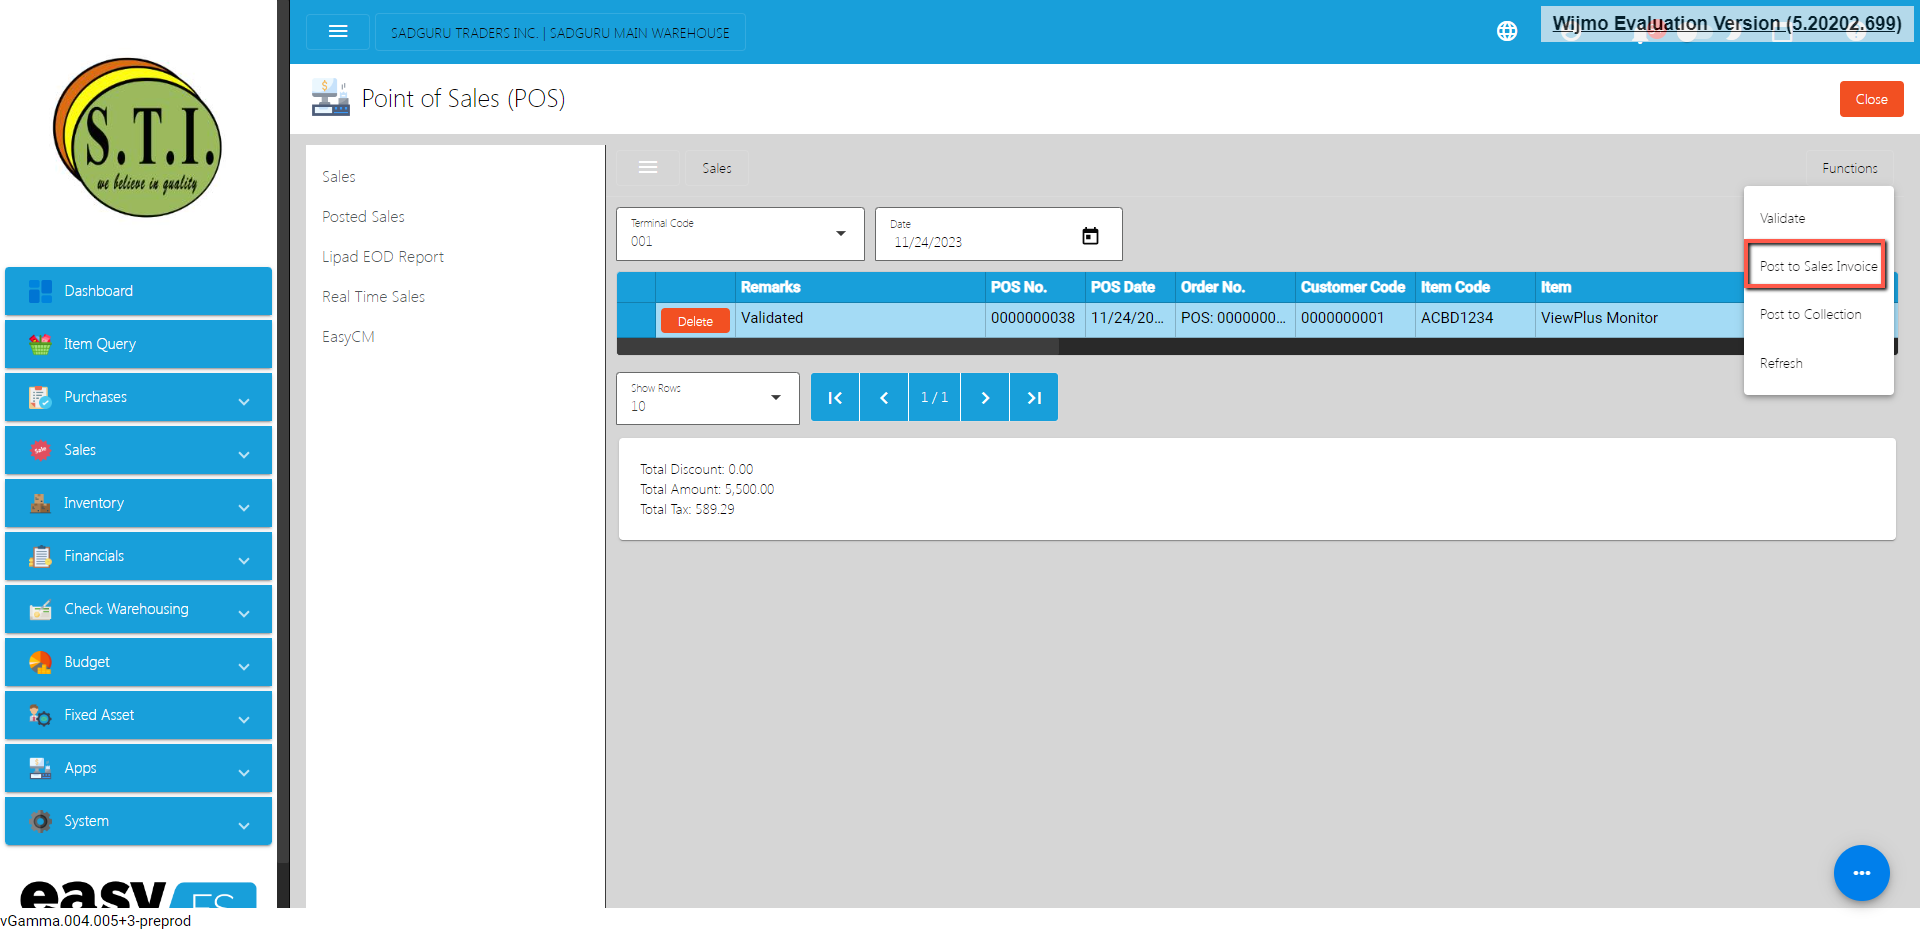
- This time, validated sales transactions are removed from the Sales module, and are moved to the Posted Sales module.
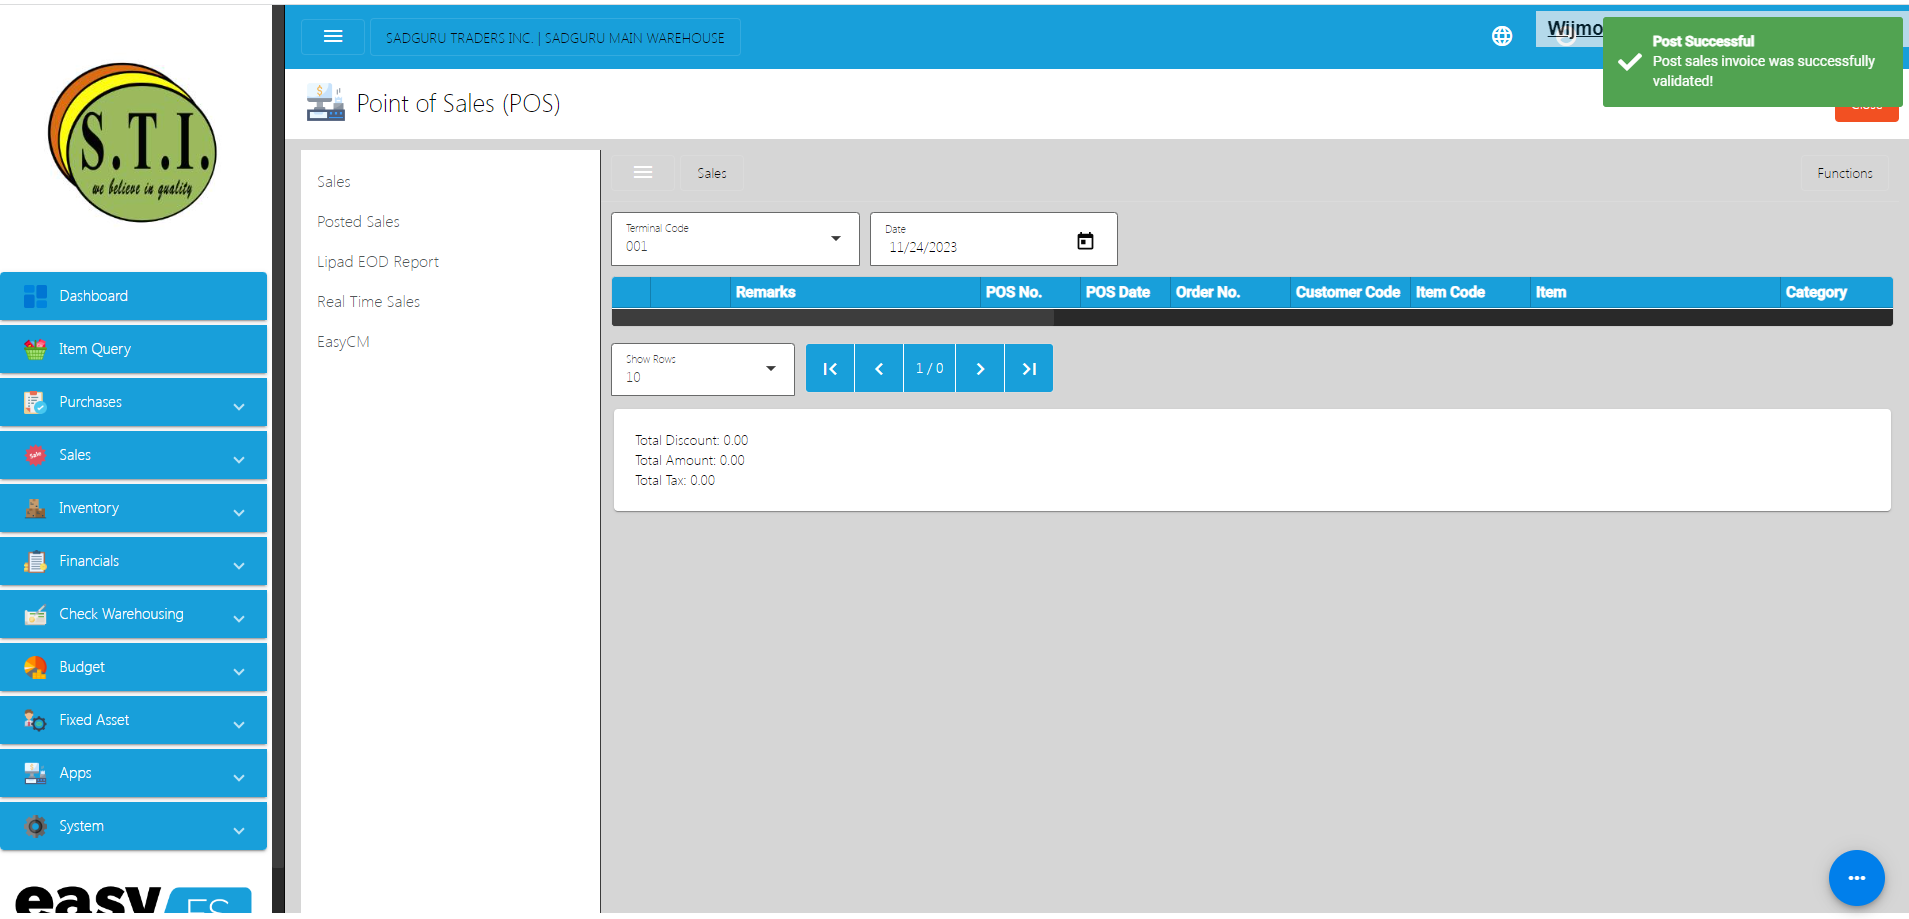
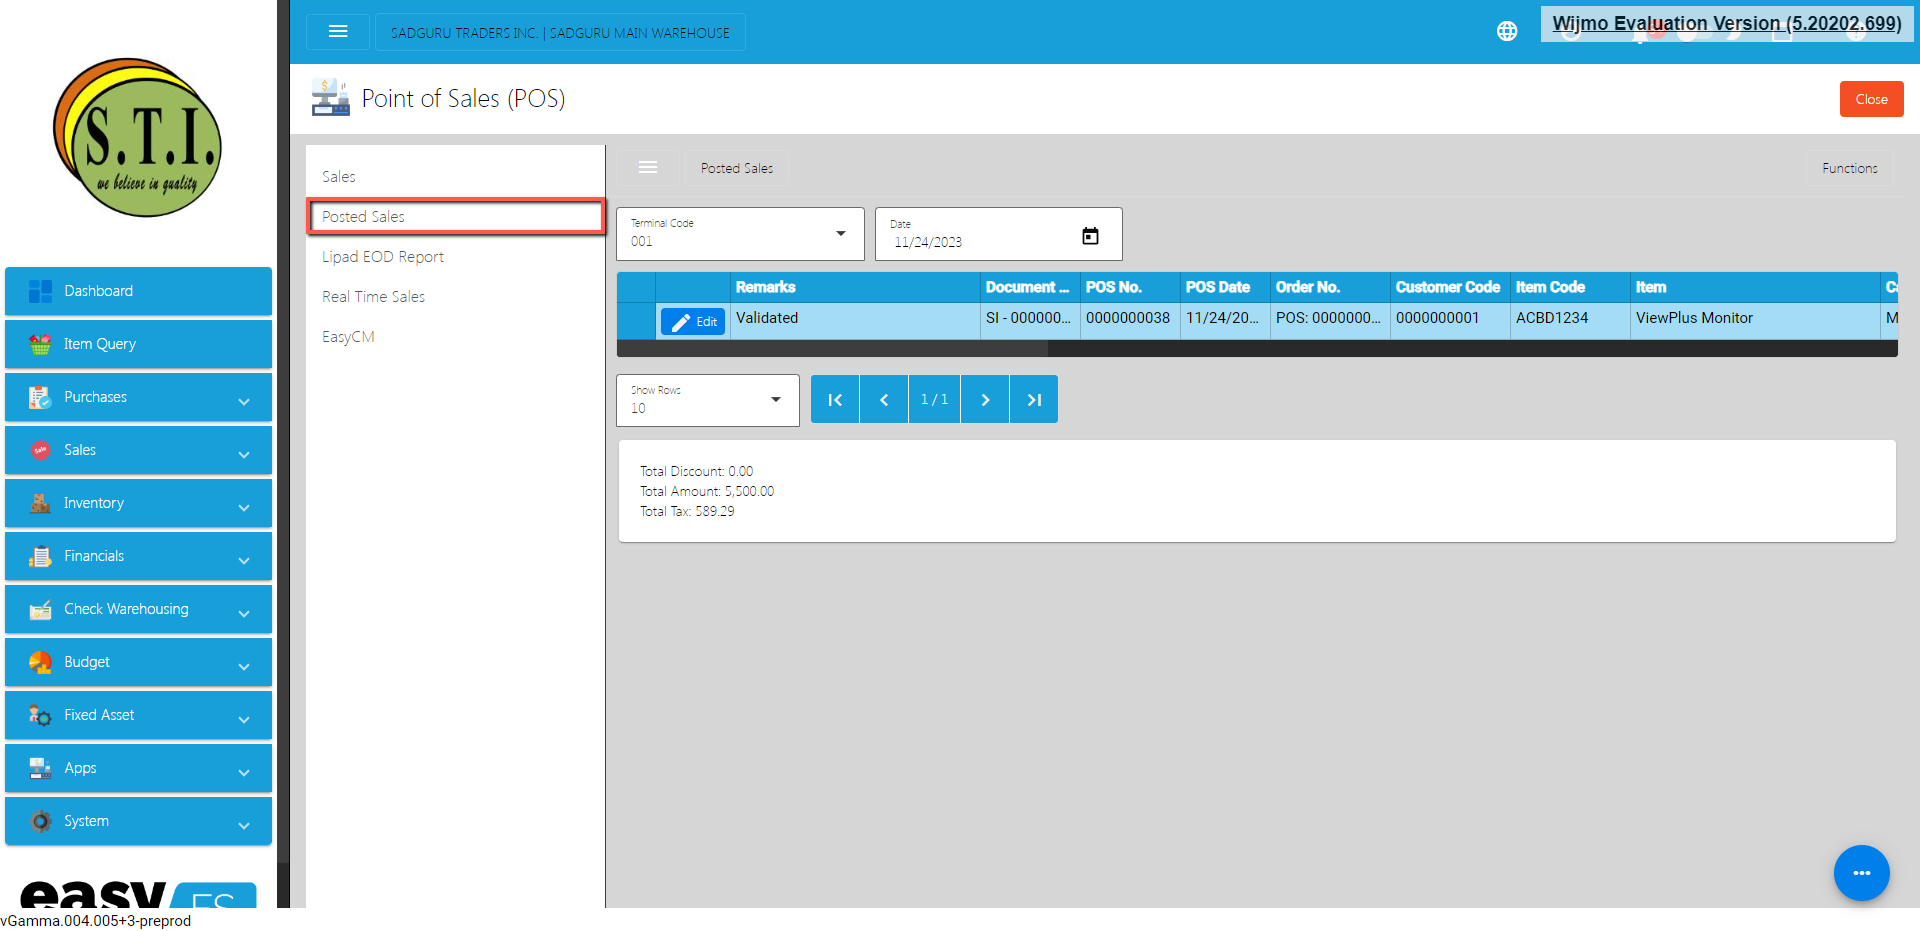
- Inorder to check if it is successfully posted to the Sales Invoice, check first the Document Reference column under the Posted Sales to get the Sales Invoice No.
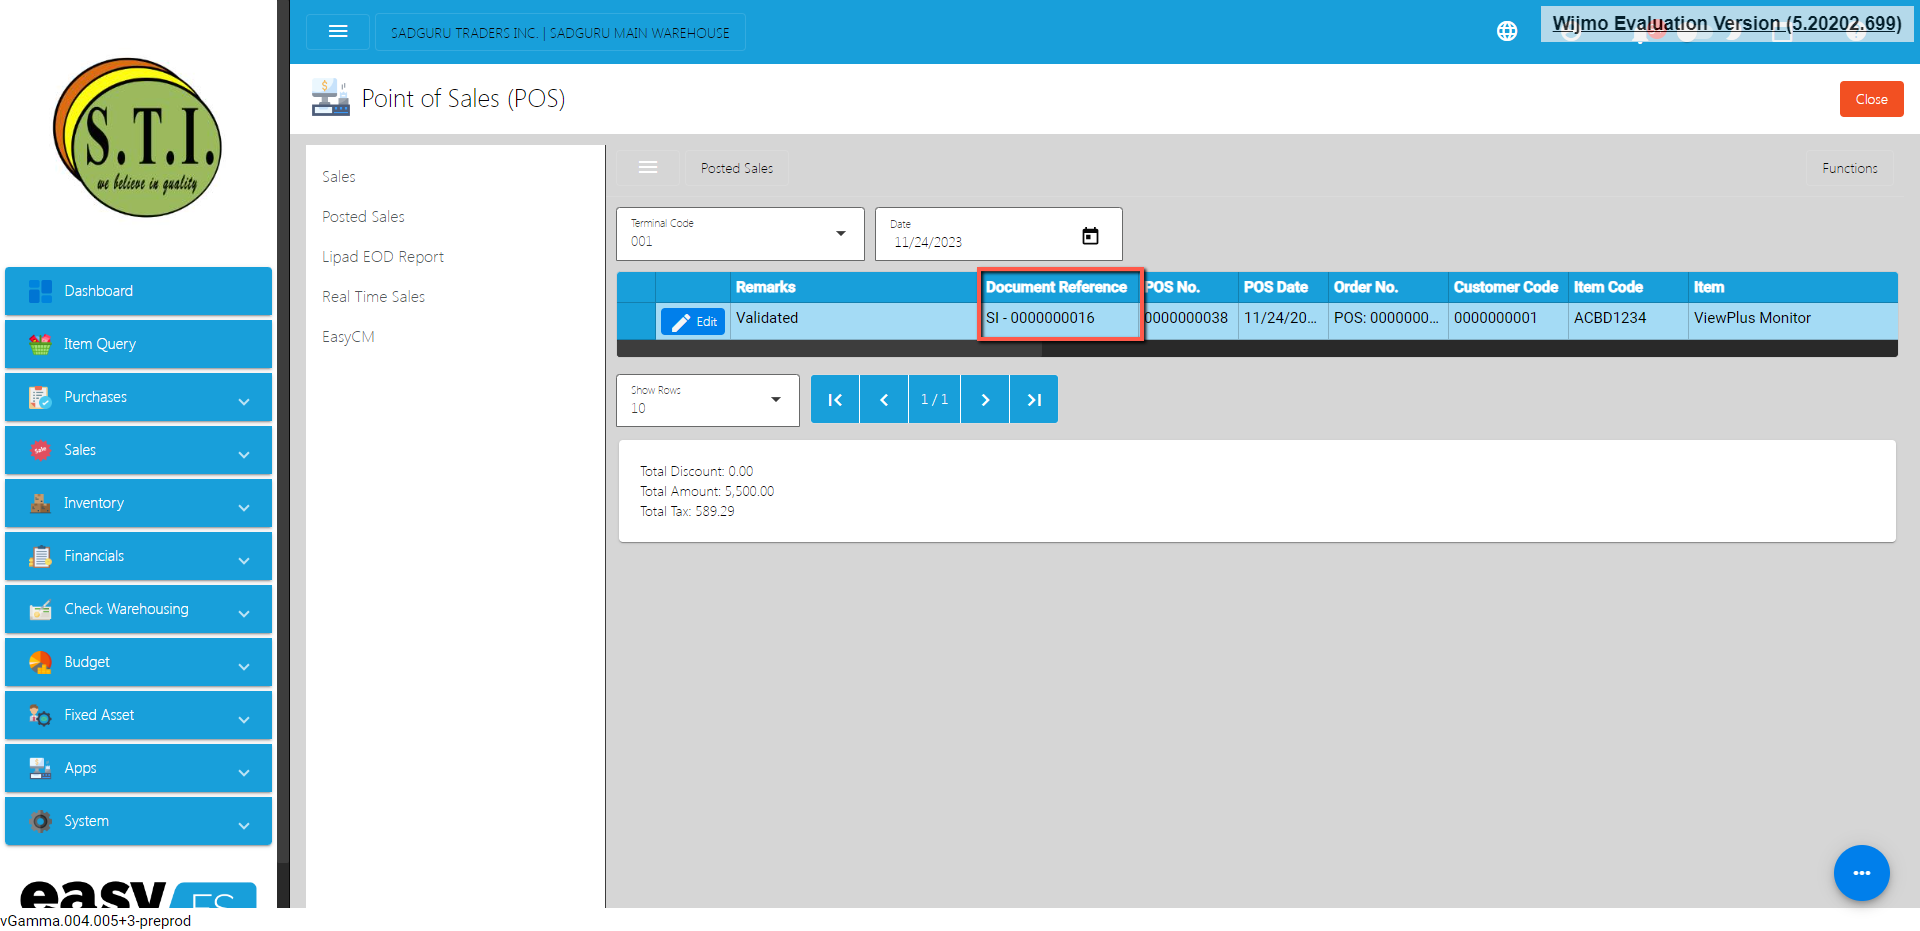
- Since you now know the Sales Invoice Number for the easyPOS sales transaction, you may go to the Sales Invoice module by clicking on the Sales, then Sales Invoice.
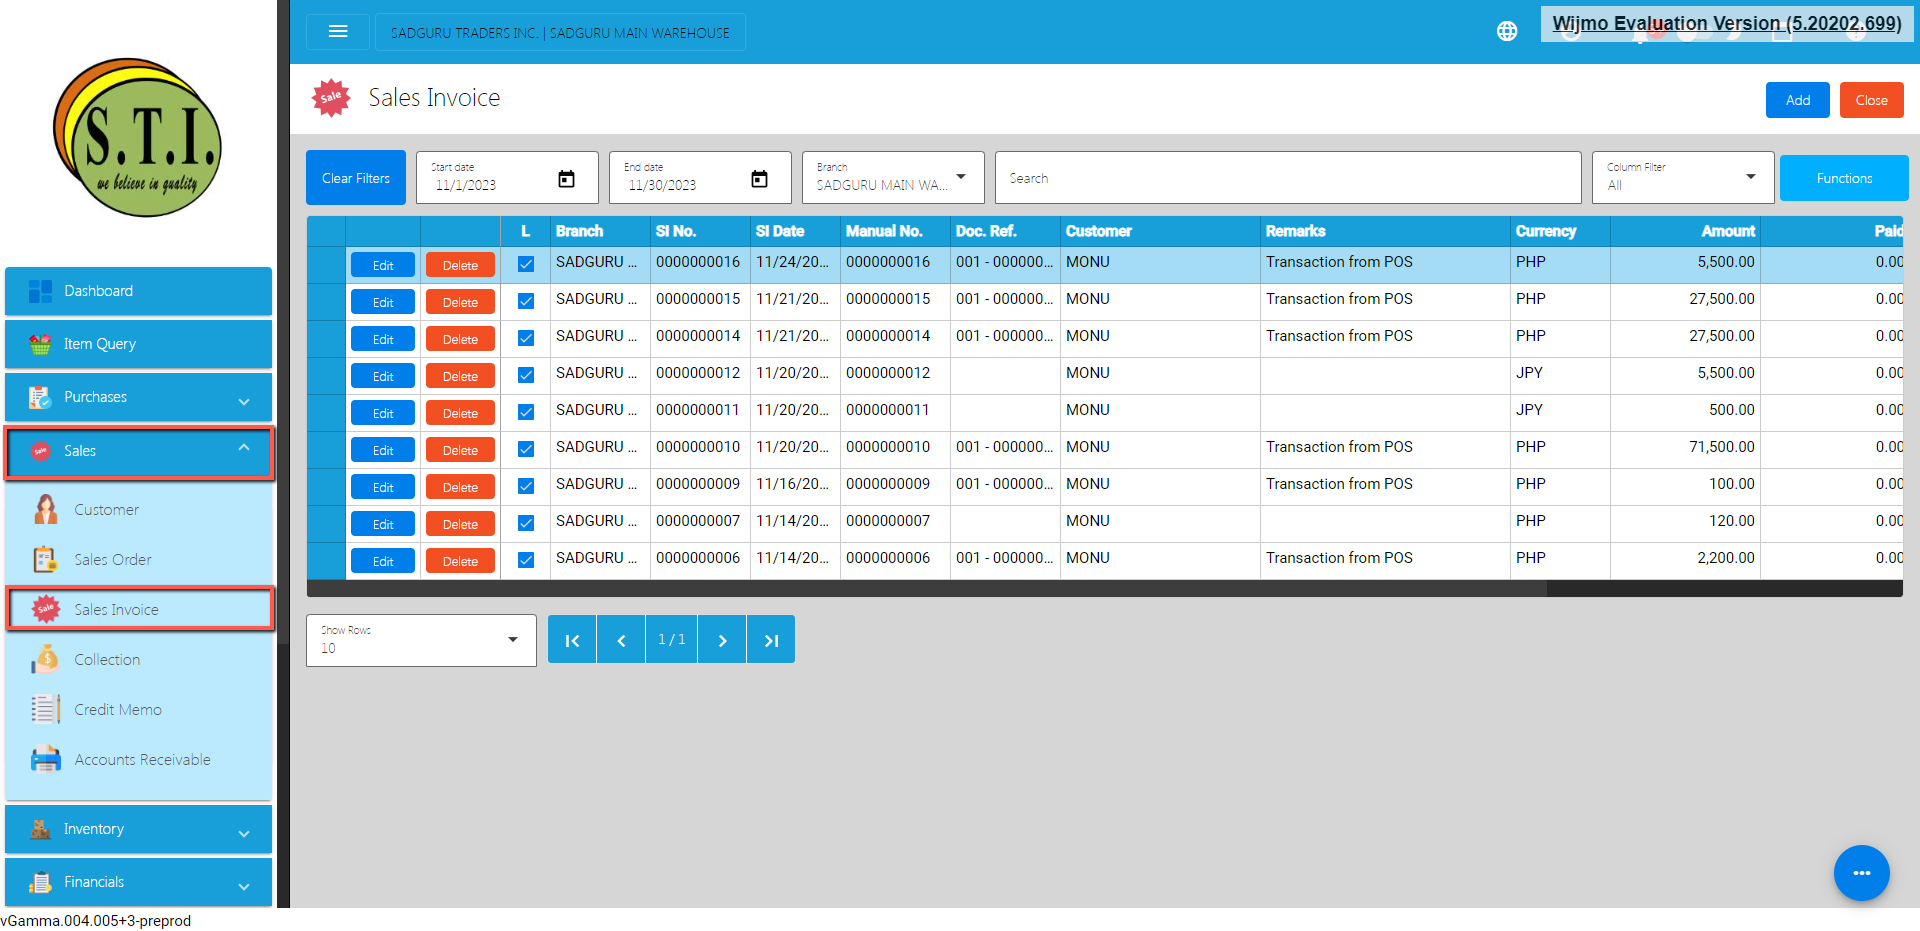
- Look for the Sales Invoice Number or you may use the Search bar to look for the Sales Invoice Number.
- Click the Edit button to review the details. To give you a hint that it is coming from the easyPOS:
- Sales Invoice’s Remarks field is automatically provided with “Transaction from POS”.
- Sales Invoice’s Document Reference is automatically provided with this format: {terminalCode} – {OR Number}.
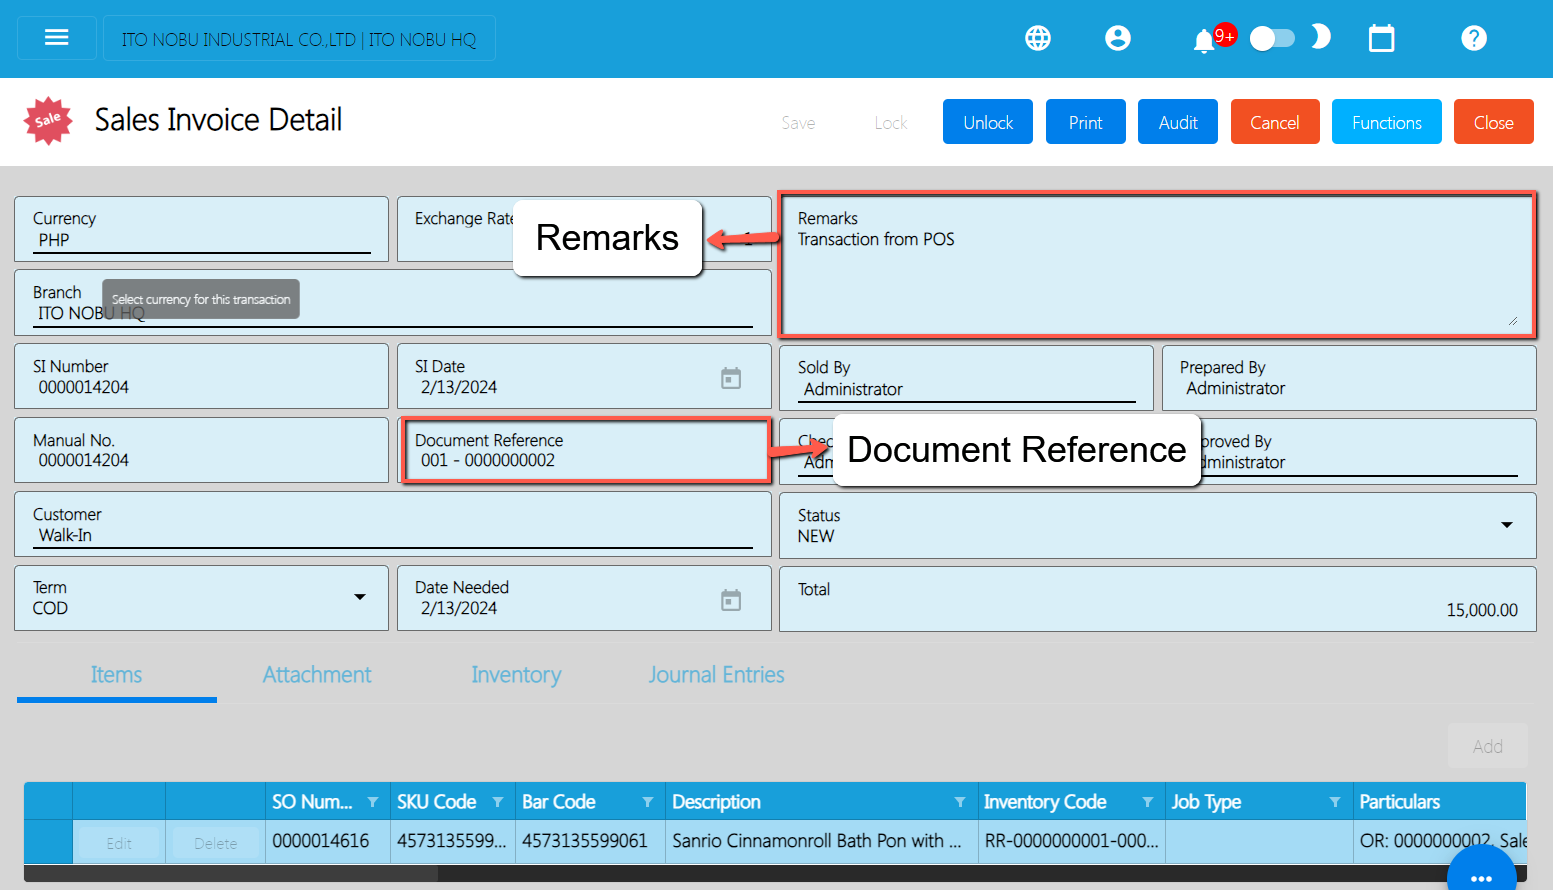
- If you want to see who is the POS Agent doing that sales, just click the Print button to print the sales invoice and look for the POS Agent.
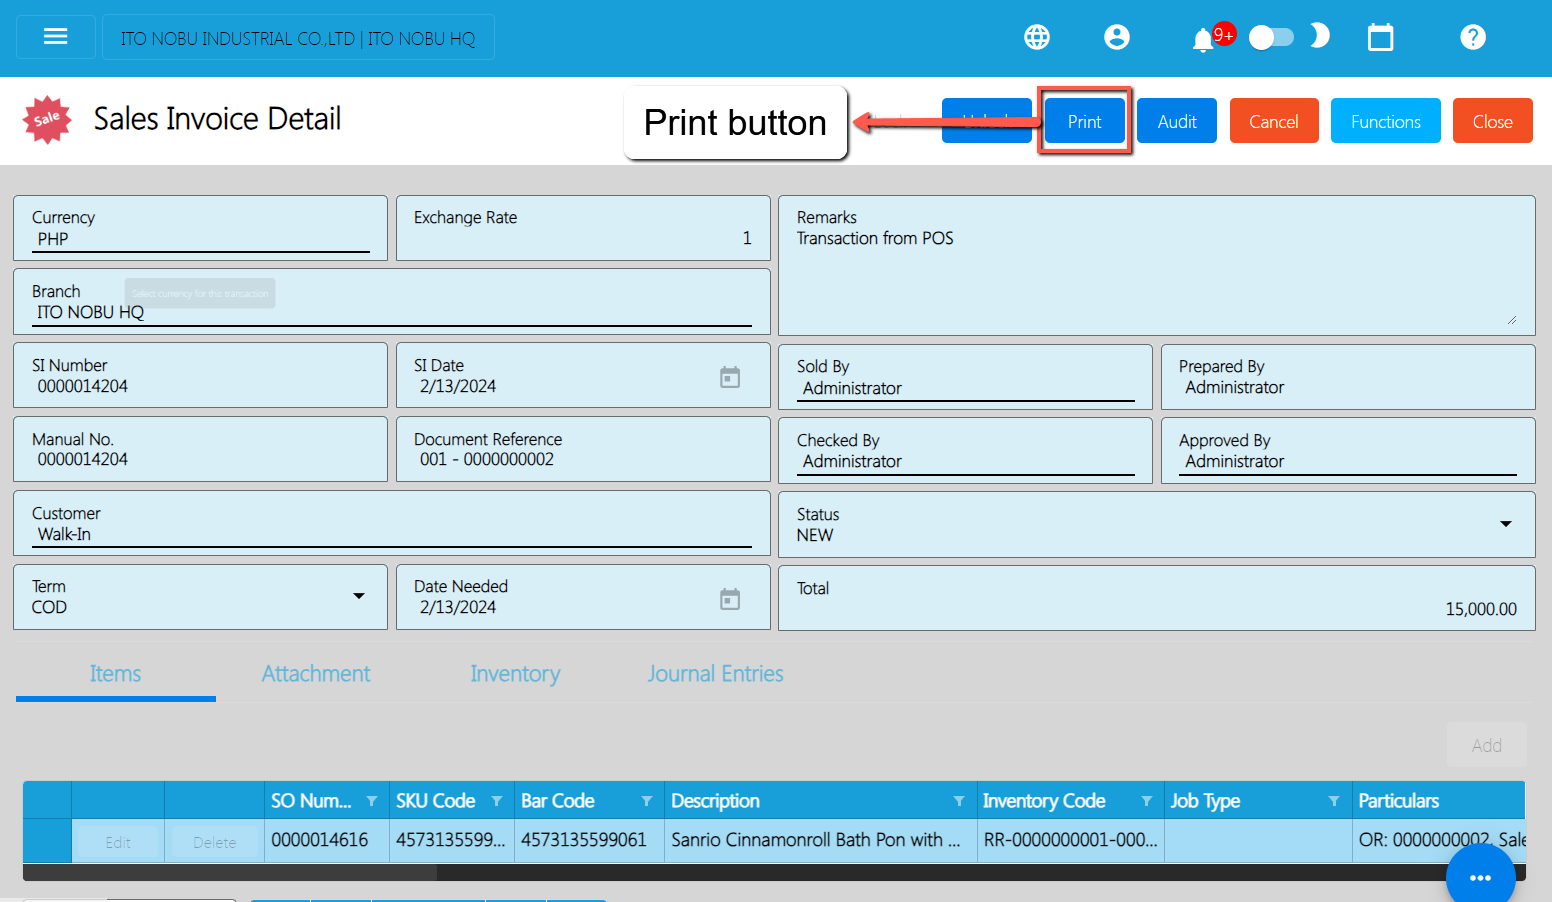
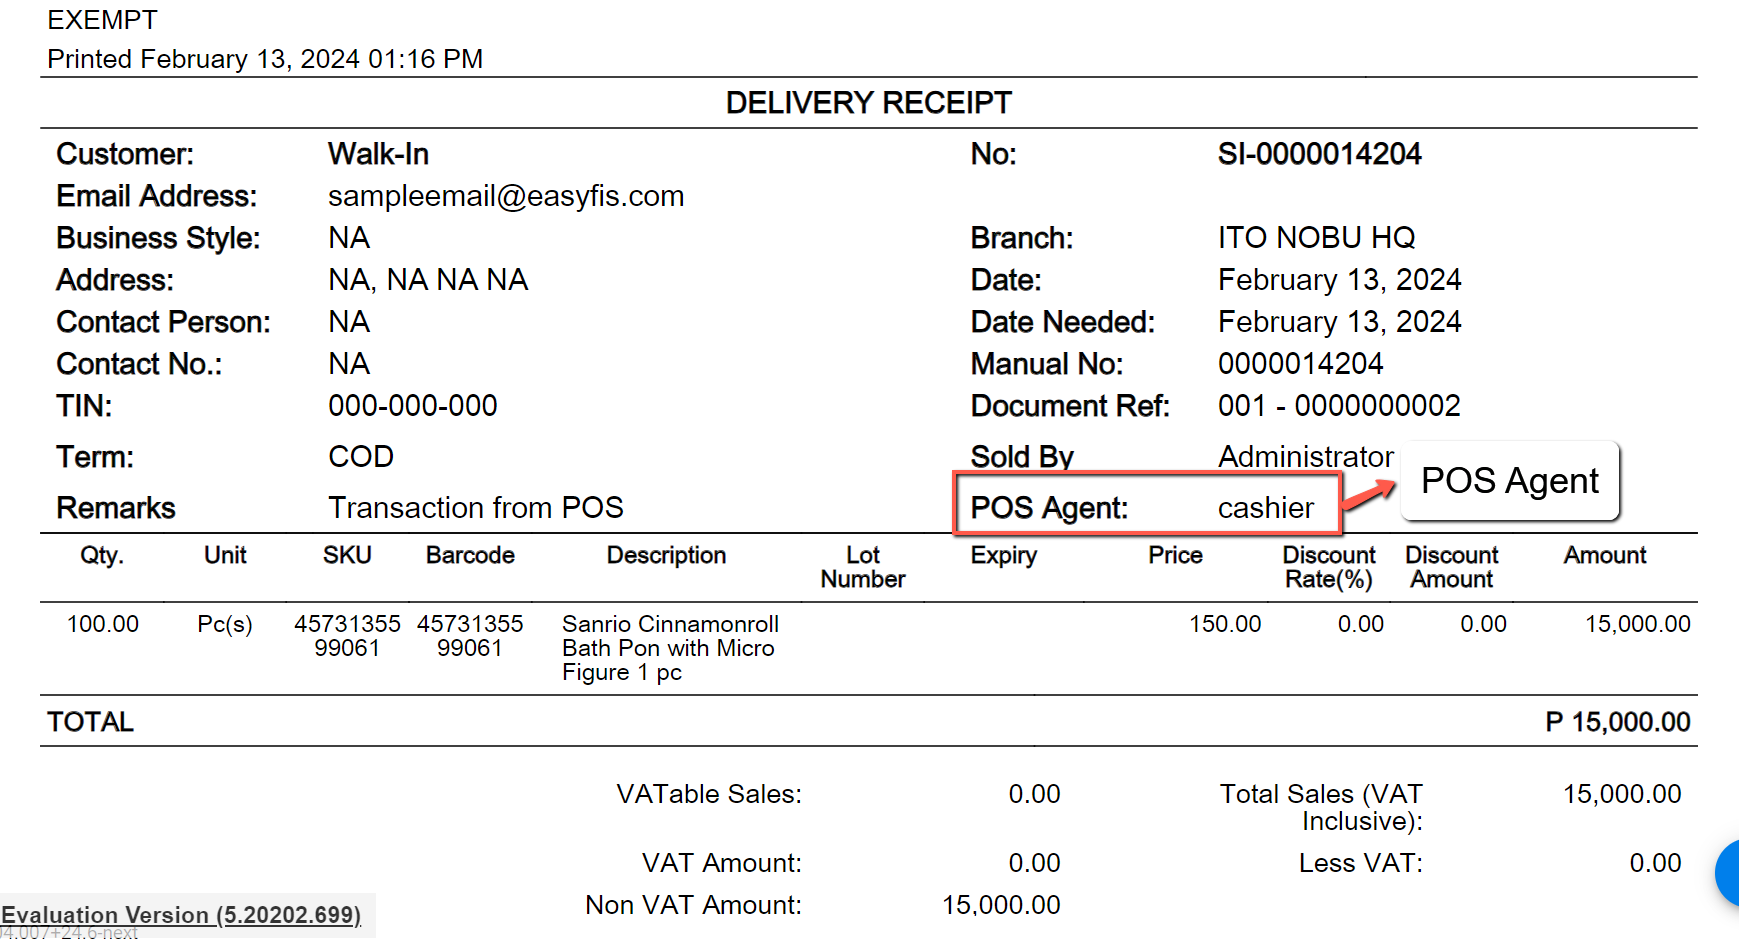
13.5 Guidelines for Integrations: Do’s and Don'ts
13.5.1 EasyPOS Integration
To prevent errors during integration with easyPOS, adhere to the following steps:
- Make sure that the Manual Code for Discounts should be the same on the easyPOS’ Discount Code.
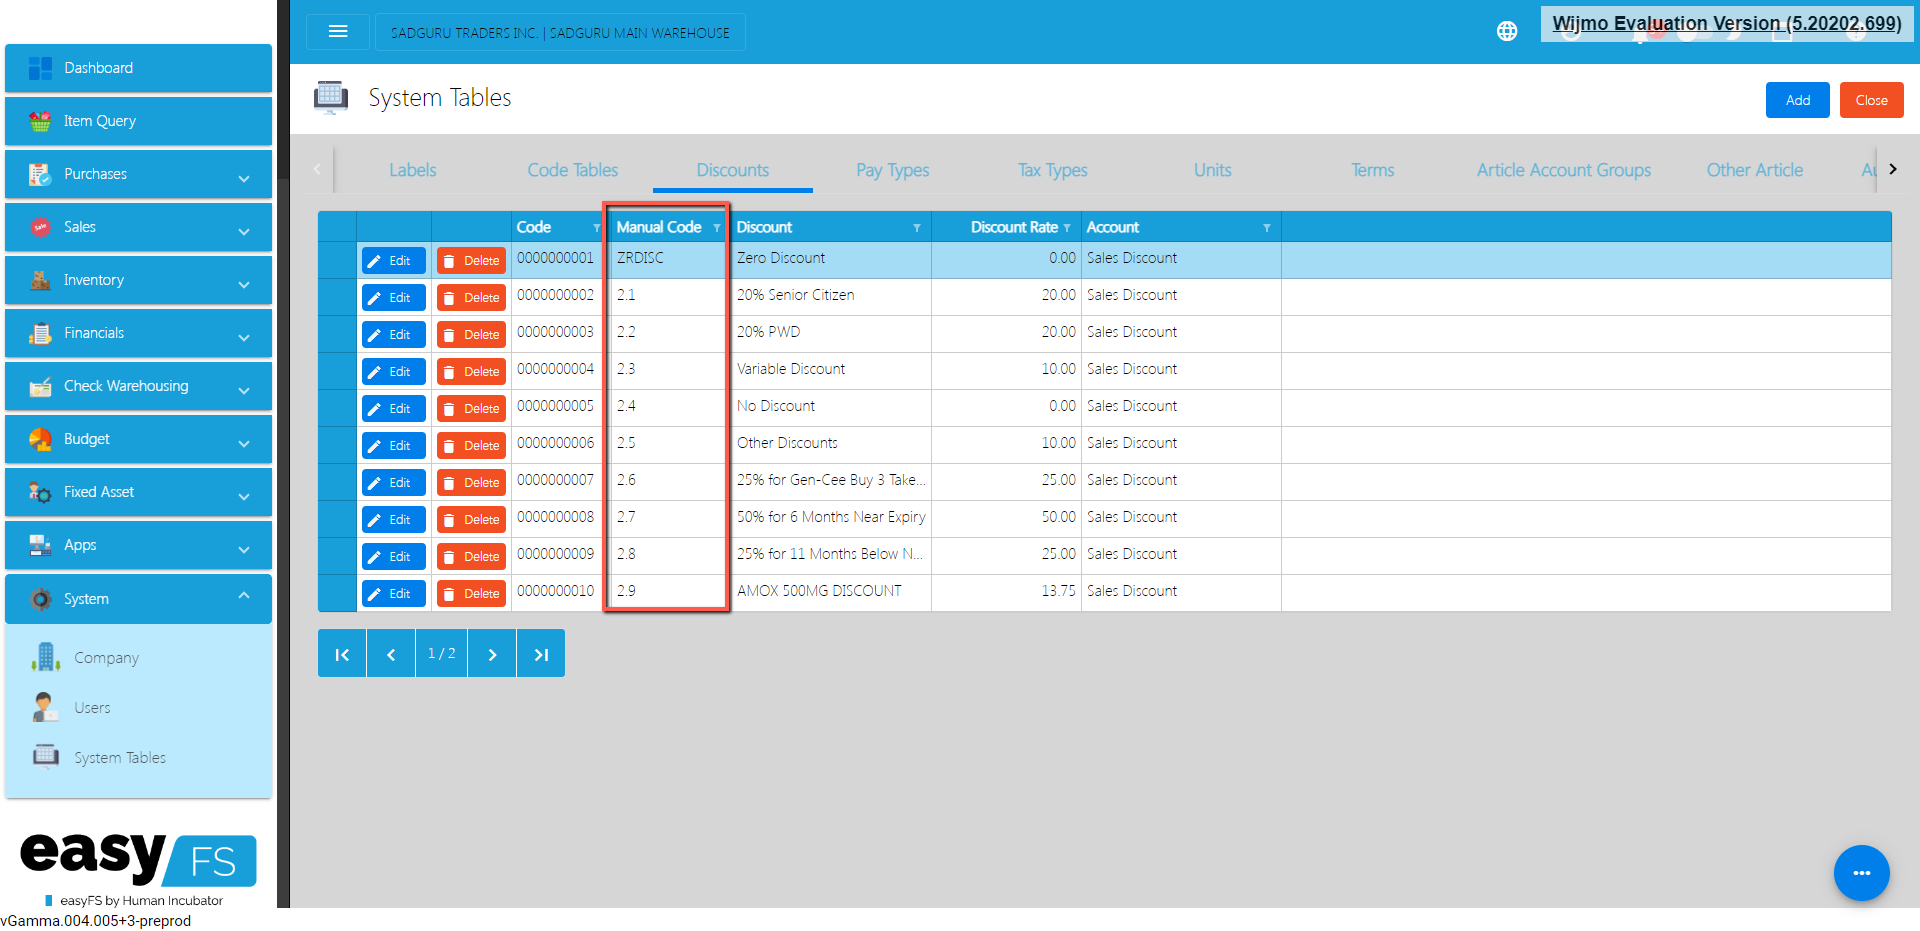
- Make sure that the Manual Code for Pay Types should be the same on the easyPOS’ Pay Type Code.
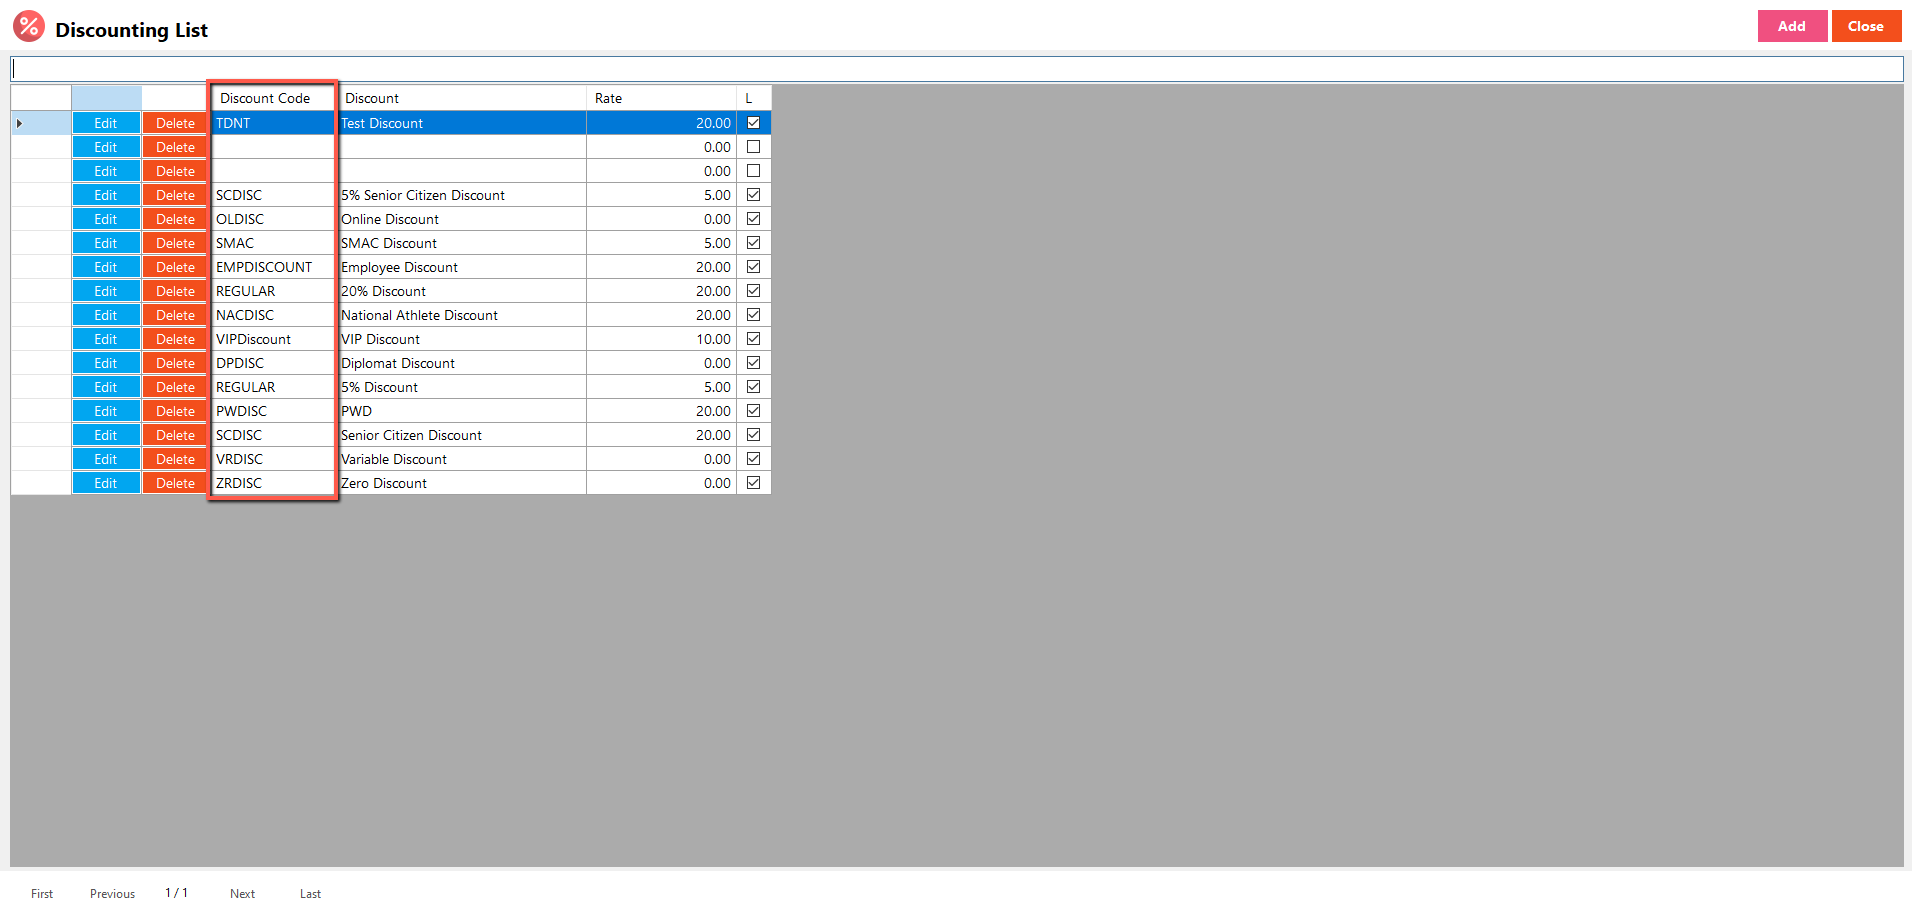
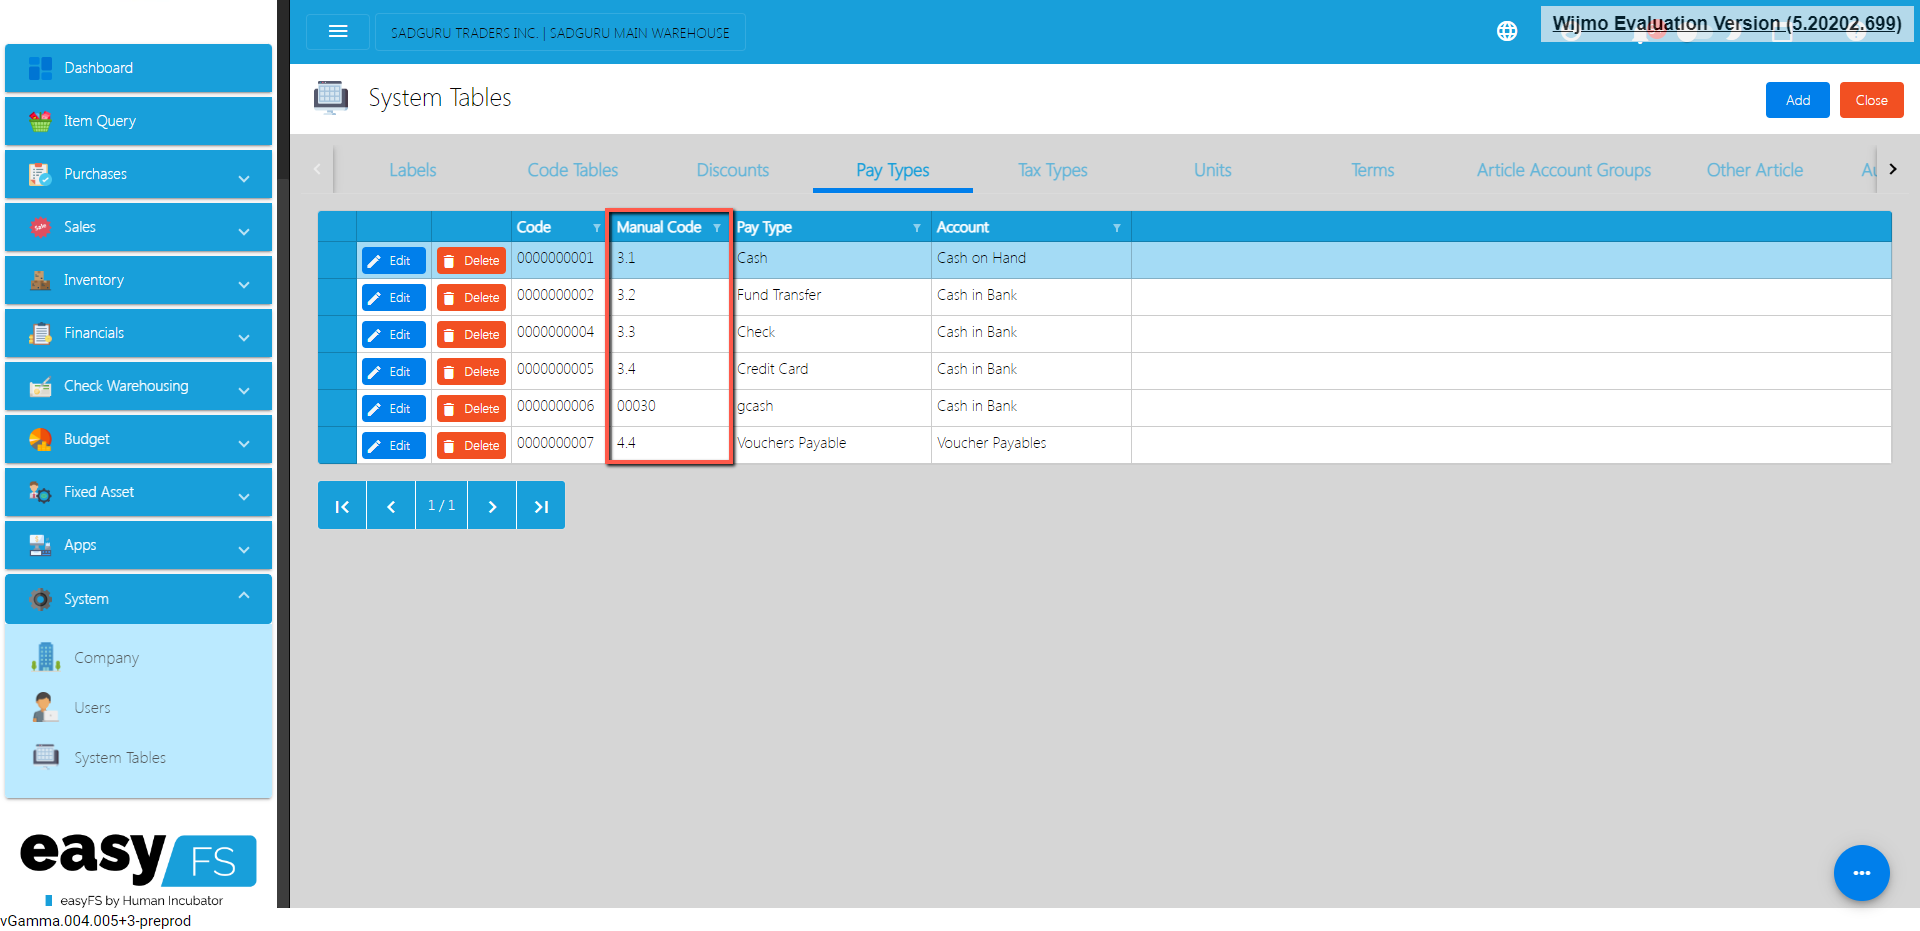
- Make sure that the Manual Code for Tax Types should be the same on the easyPOS’ Tax Code.
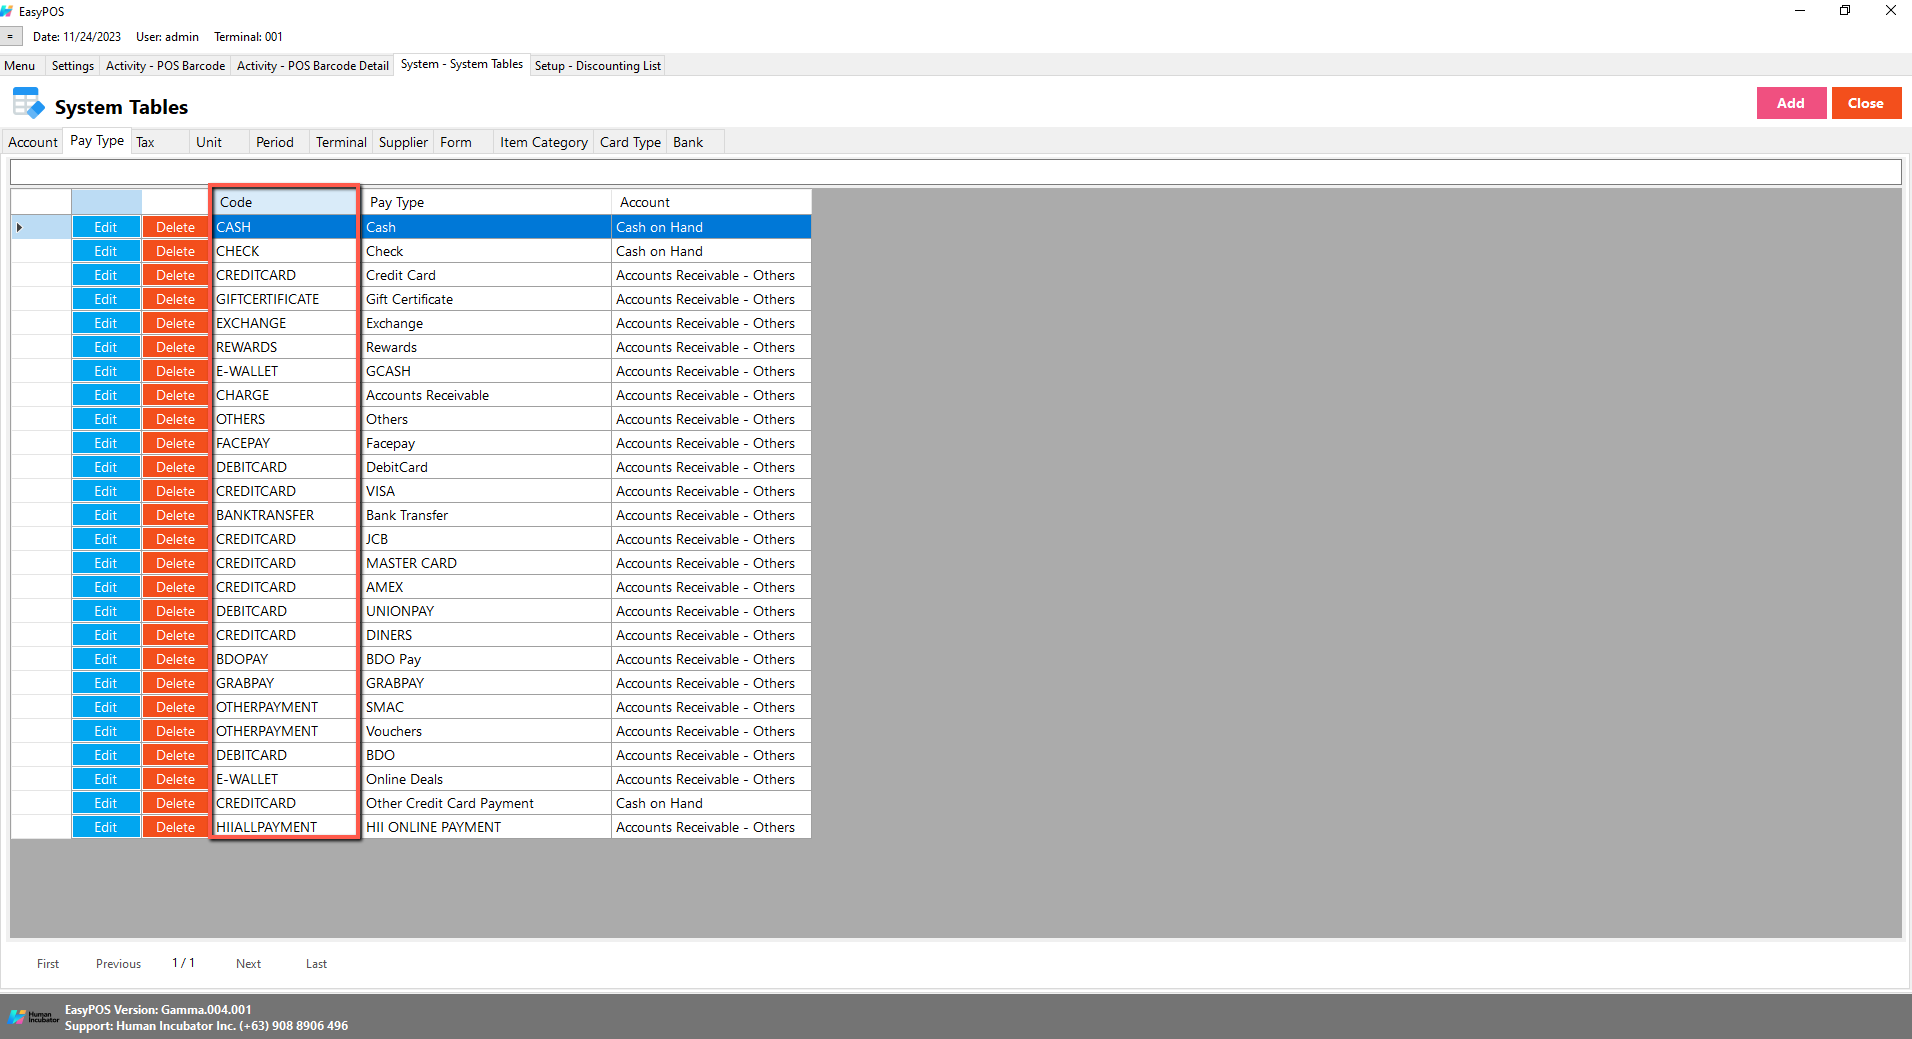
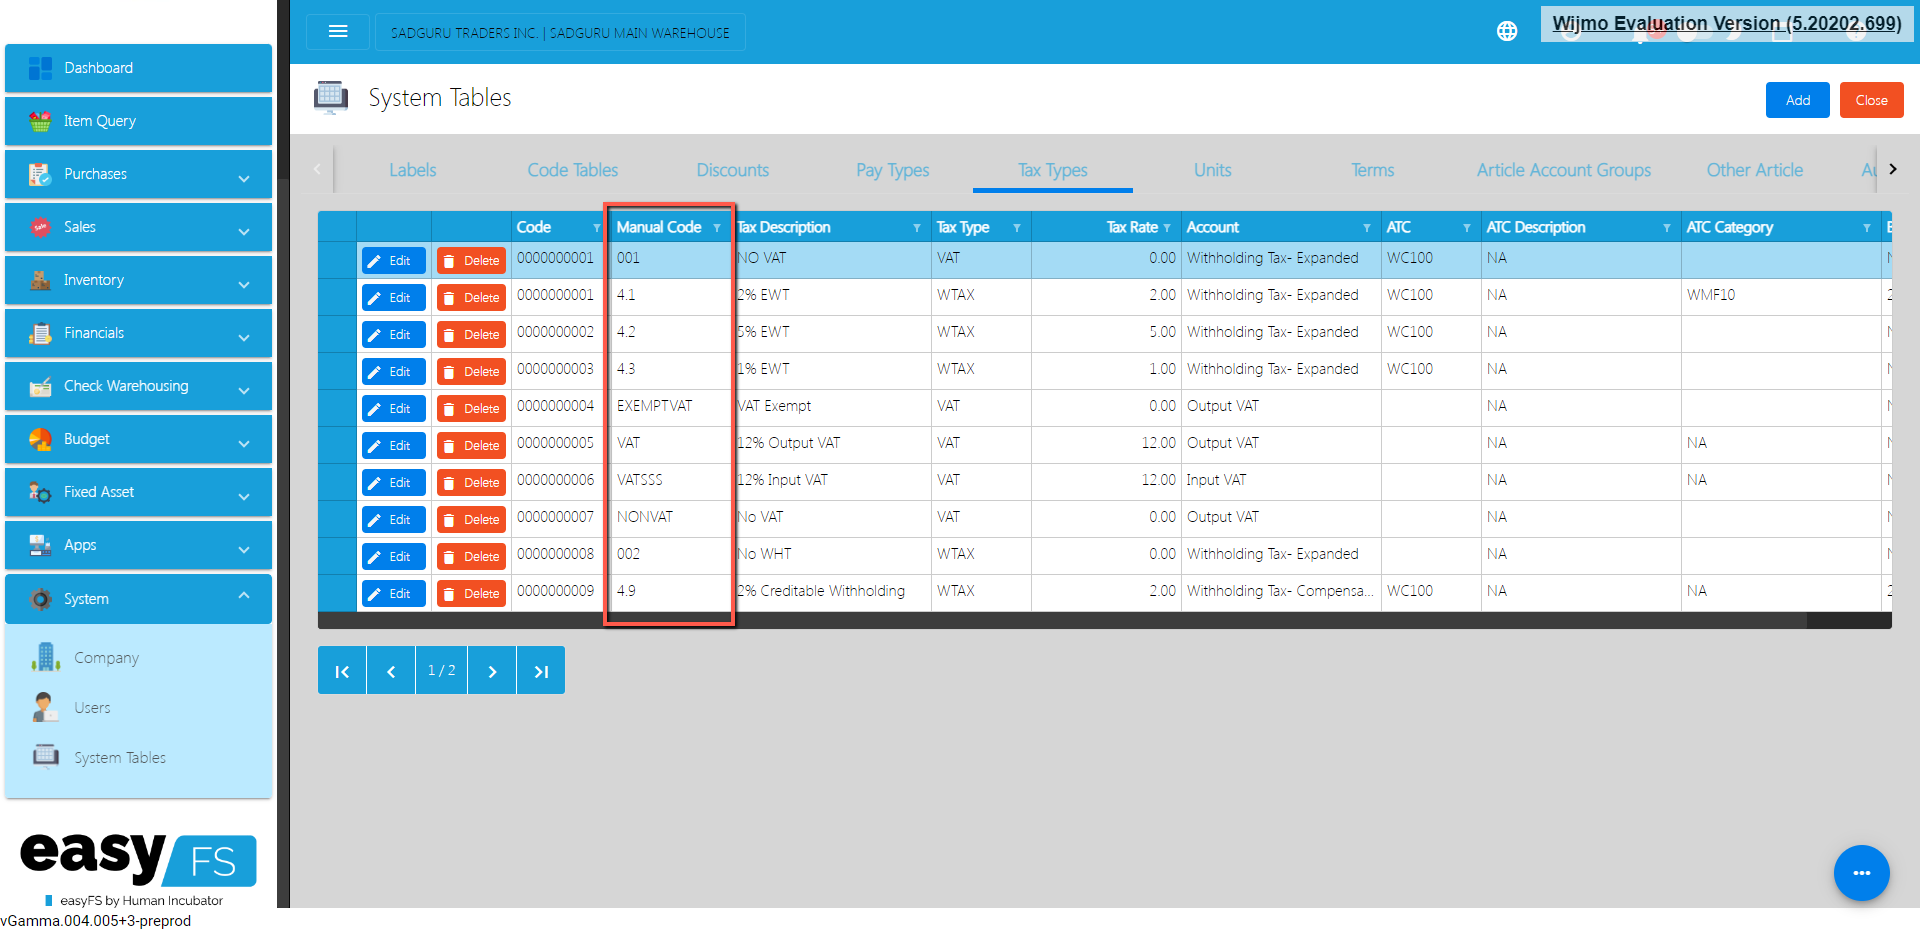
- The Item detail that you should be attentive to is the “Tax Code” for each “Tax Type” saved in each system. In easyFS it is “SI VAT” and in EasyPOS it is “Sales VAT”. Otherwise you will be getting an error in integration that says “Output Tax Mismatch”.
- Once the Items have been integrated to easyPOS, you can ONLY change or update the Price. If you want to change the Unit of Measure or Barcode, what you should do is to create a new entry or should I say add a new item with the updated item UOM/Barcode and then unlock the old entry of that item. If you insist on changing the Item detail directly, issues in the EasyPOS will start to show up like duplicated barcodes with the same item description which will cause system error as well as user confusion In making transactions in the EasyPOS. To avoid problems please follow what we have stated above.
- For the inventory transaction, all “Stock In”, “Stock Out” and “Stock Transfer” should be made in the easyFS.
- As for the sales transaction, as much as possible no “sales transaction” should be manually made in easyFS “Sales Invoice”. All sales transactions should be made in EasyPOS. Because if you don’t inventory discrepancies between the two systems will occur which takes time fixing it. To avoid conflicts or problems that will affect your business’s operation. Be attentive to the process that was instructed in this document.
IX: Definition of Terms
X: FAQ
- Question: What is the relationship between Inventory report, stock count and inventory ledger posting. Which one is the parent feature among three?
Answer: The relationship between Inventory Report, Stock Count and Inventory Ledger is this. Inventory Report is the Final Output of the Two. Stock Count and Inventory Ledger are transaction forms to finally Generate an Accurate Inventory Report.