1.3 Purpose of this User Manual
1.4 Who Should Use This Manual
1.4 Best Practices and System Limitations
1.4.1 Setting up the Master Files
4.1.1.1 How to Add an Item Manually
4.1.1.2 Add Item Via Import Function
4.1.2.2 Add Customer Via Import Function
4.1.3.2 Add Supplier Via Import Function
List of All Users that were added to the System
4.1.6.1 Chart of Accounts Lists
4.1.6.2 Manual Add Chart of Accounts
4.1.6.2 Add Chart of Accounts via Upload Account
4.1.8.2 Manual Add of Currency
4.2.1.1 Manual Update Item Detail
4.2.1.2 Update Item Detail in Bulk
4.2.2.1 Manual Update Supplier Detail
4.2.2.1 Update Supplier Detail in Bulk
4.2.3.1 Manual Update Customer Detail
4.2.3.1 Update Customer Detail in Bulk
5.2 Purchases Transaction Module
Cancel Purchase Request Transaction
Purchase Order Transaction via Upload Template
Cancel Purchase Order Transaction
Cancel Receiving Receipt Transaction
Cancel Disbursement Transaction
Debit Memo Transaction via Upload Template
Sales Order Transaction via Upload Template
Cancel Sales Order Transaction
Sales Invoice Transaction via Upload Template
Cancel Sales Invoice Transaction
Collection Transaction via Upload Template
Scenario 3: Extra-Ordinary Activities
Scenario 4: Multi-Branch with EasyPOS Integration
Accounts Payable Voucher Report
Accounts Payable By Currency Report
Purchase Request Summary Report
Purchase Request Detail Report
Purchase Order Detail With Balance Report
Receiving Receipt Summary Report
Receiving Receipt Detail Report
Print or Download the PDF Report
Available Item Per Batch Report
Cancelled Purchase Request Report
Cancelled Purchase Order Report
Cancelled Receiving Receipt Report
Accounts Receivable Summary Report
Accounts Receivable by Term Report
Accounts Receivable by Currency Report
Accounts Receivable Report (One Month)
Statement of Account (By Date Range)
Collection Summary by PayType Report
Cancelled Sales Invoice Report
Sales Invoice Detail Report with Cost
Stock Transfer Detailed Report
13.1.1 Benefits of Integration
13.2.1 EasyPOS Integration Overview
13.3 How to Set Up Integrations
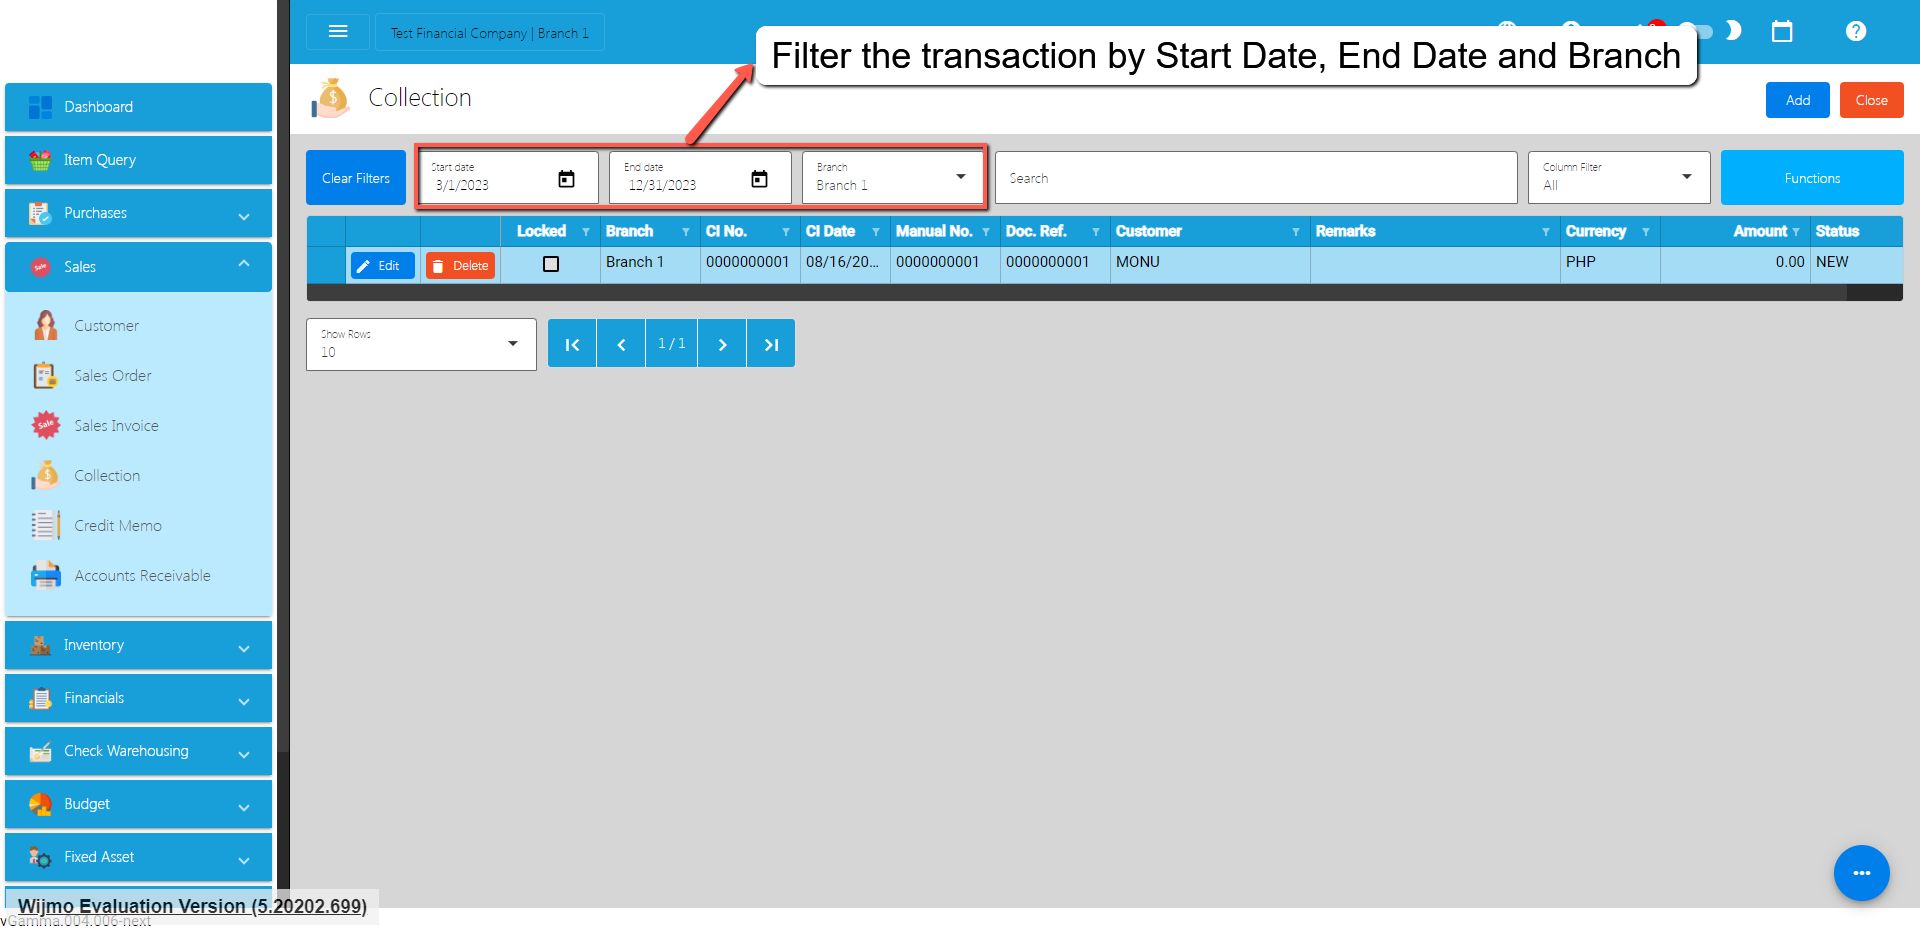
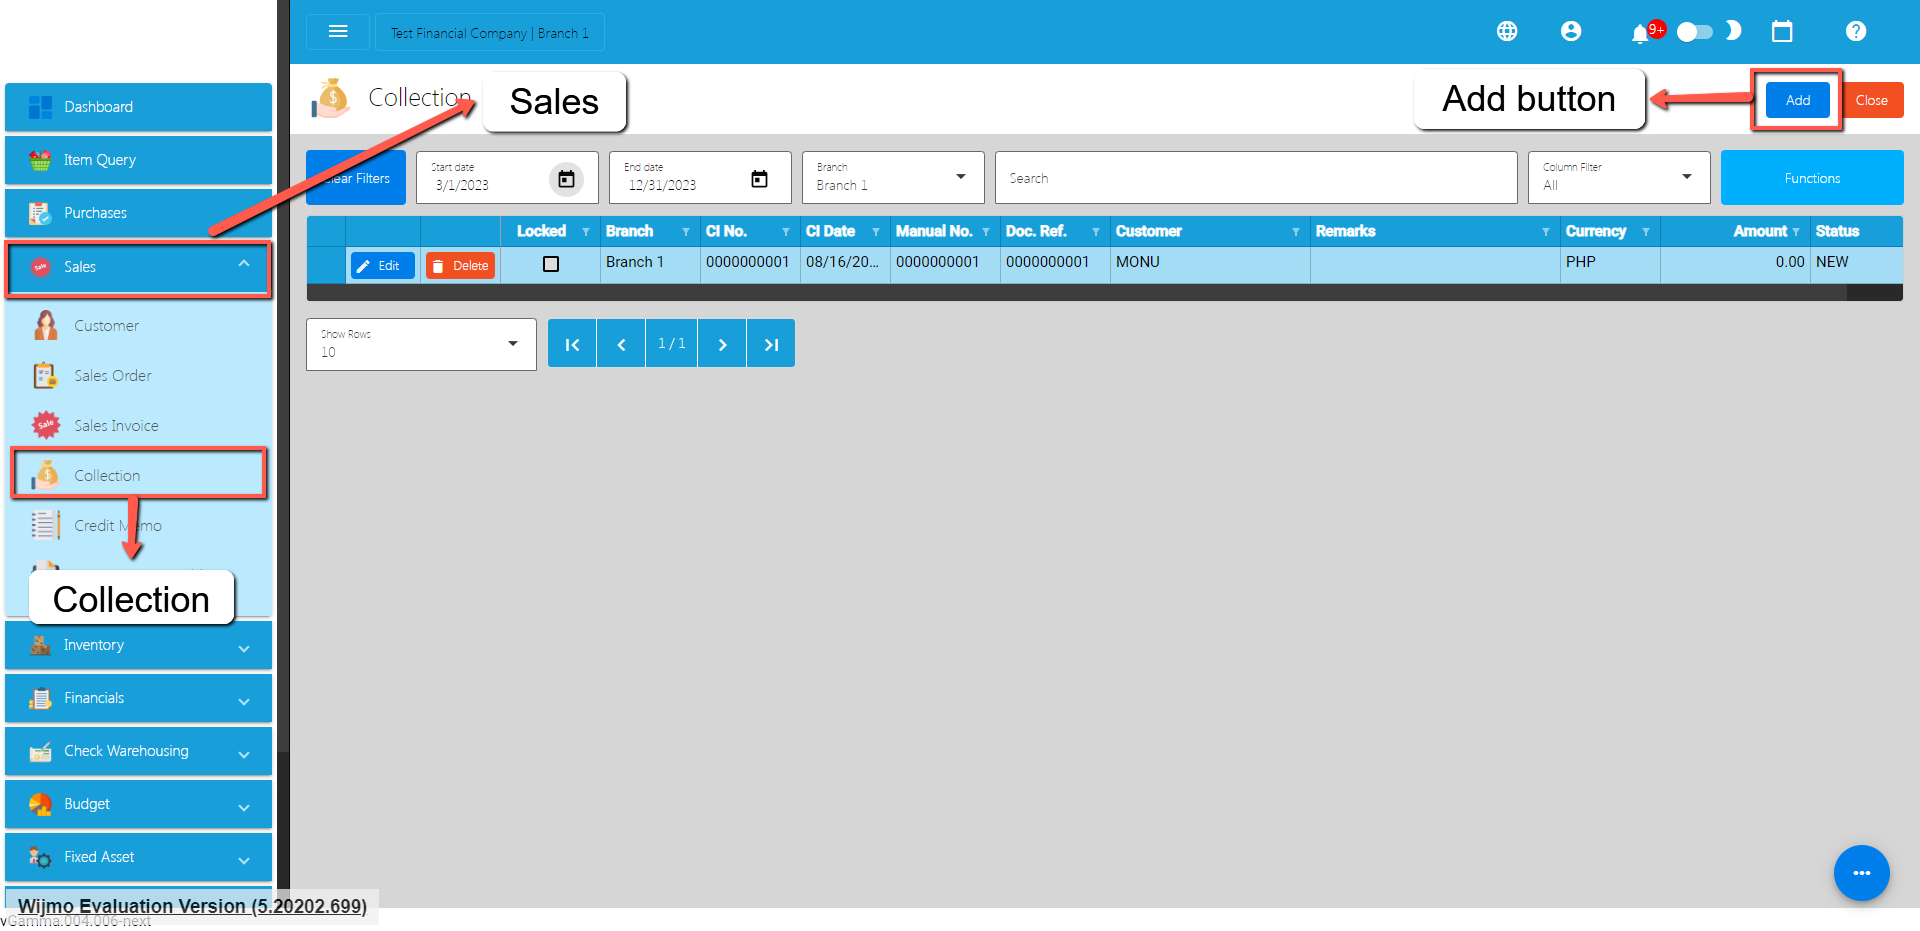
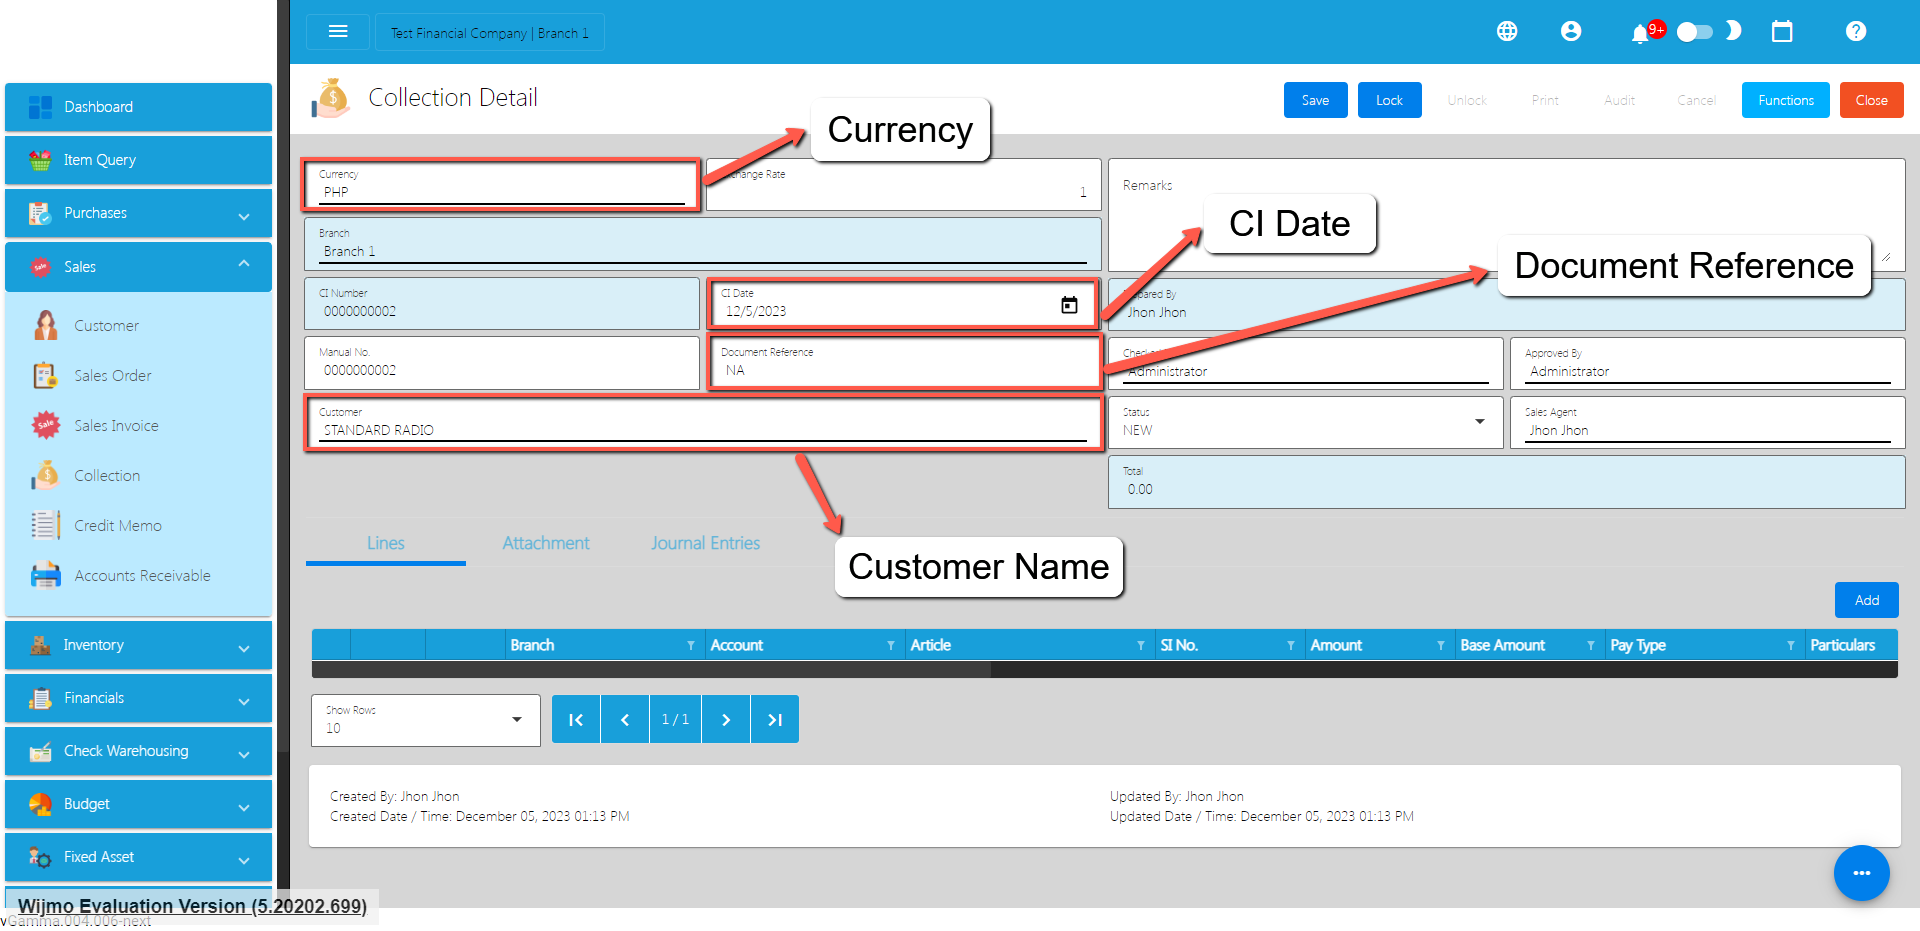
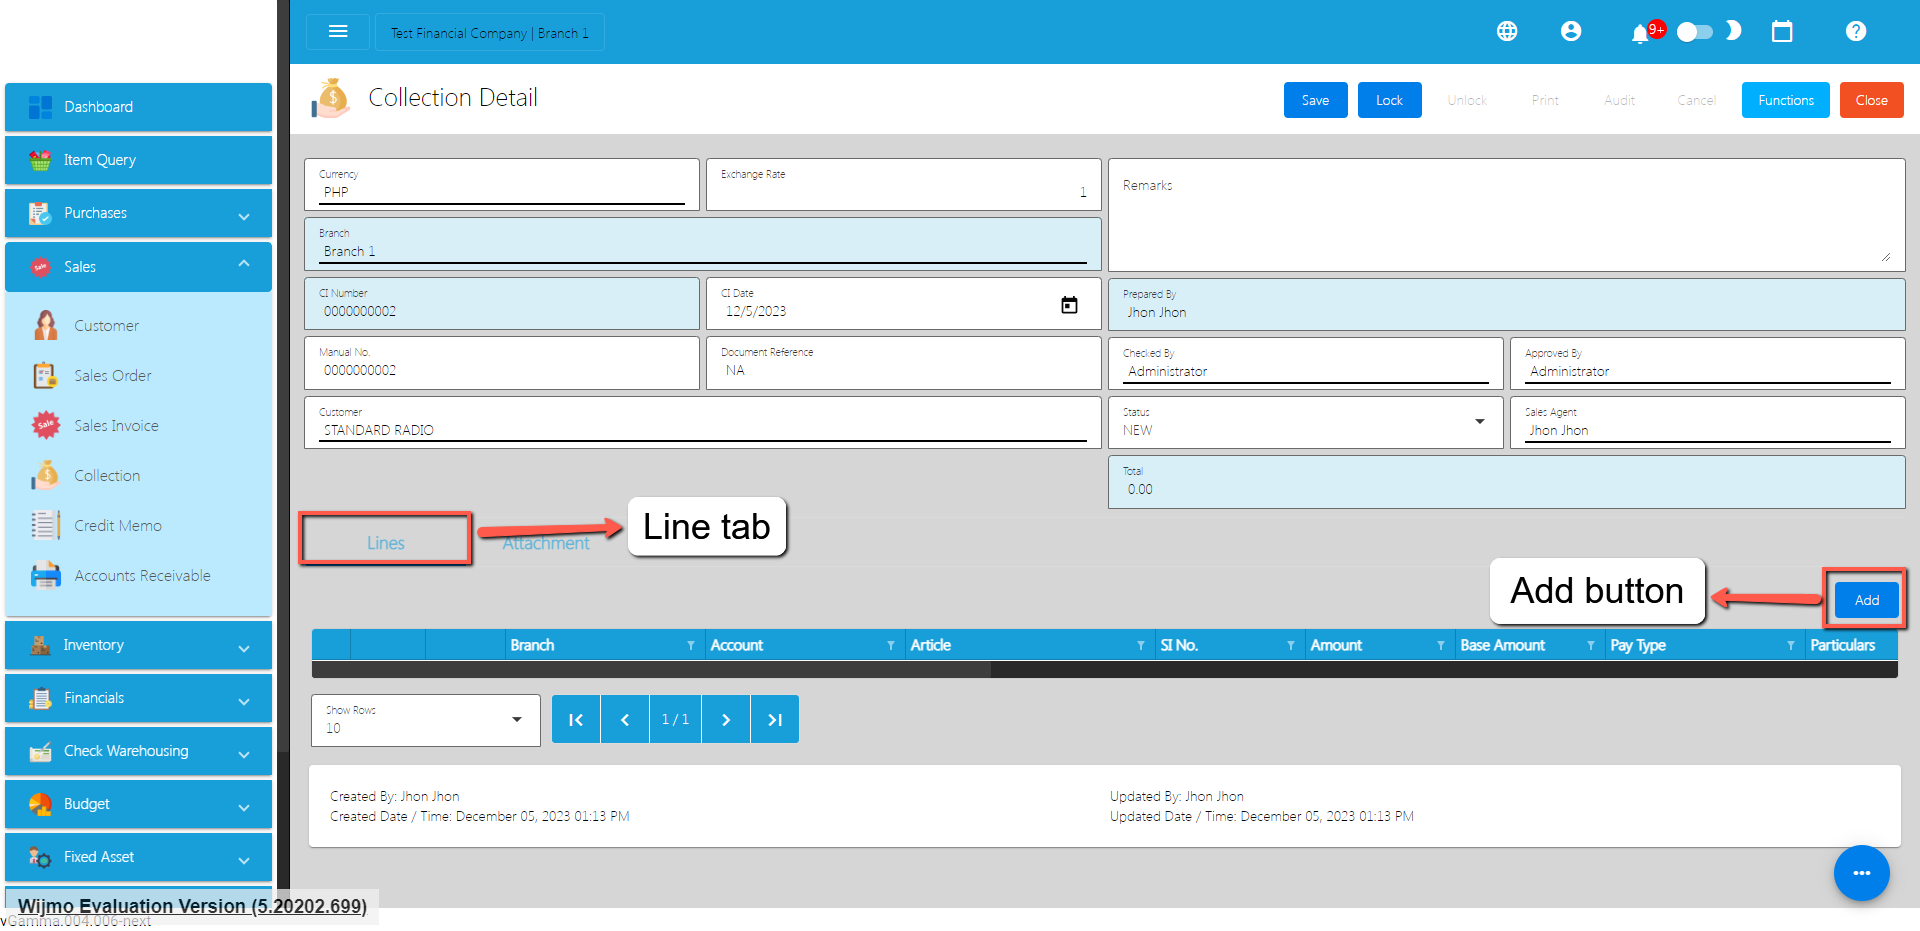
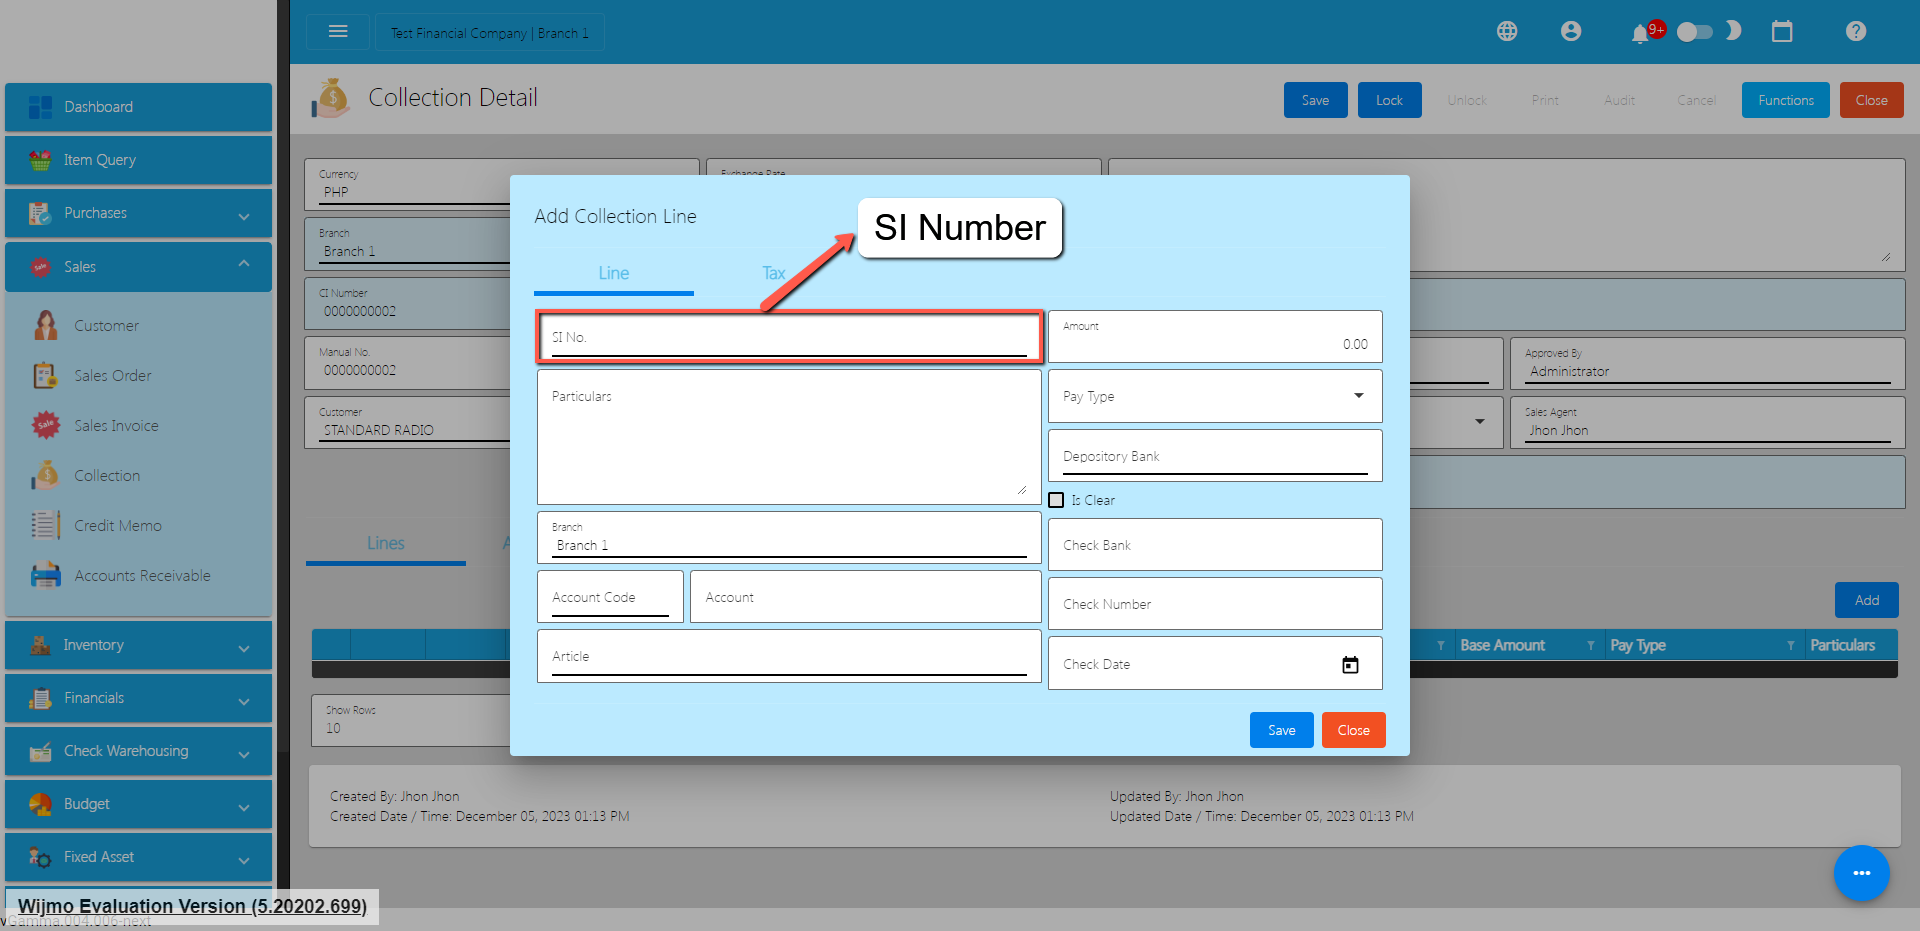
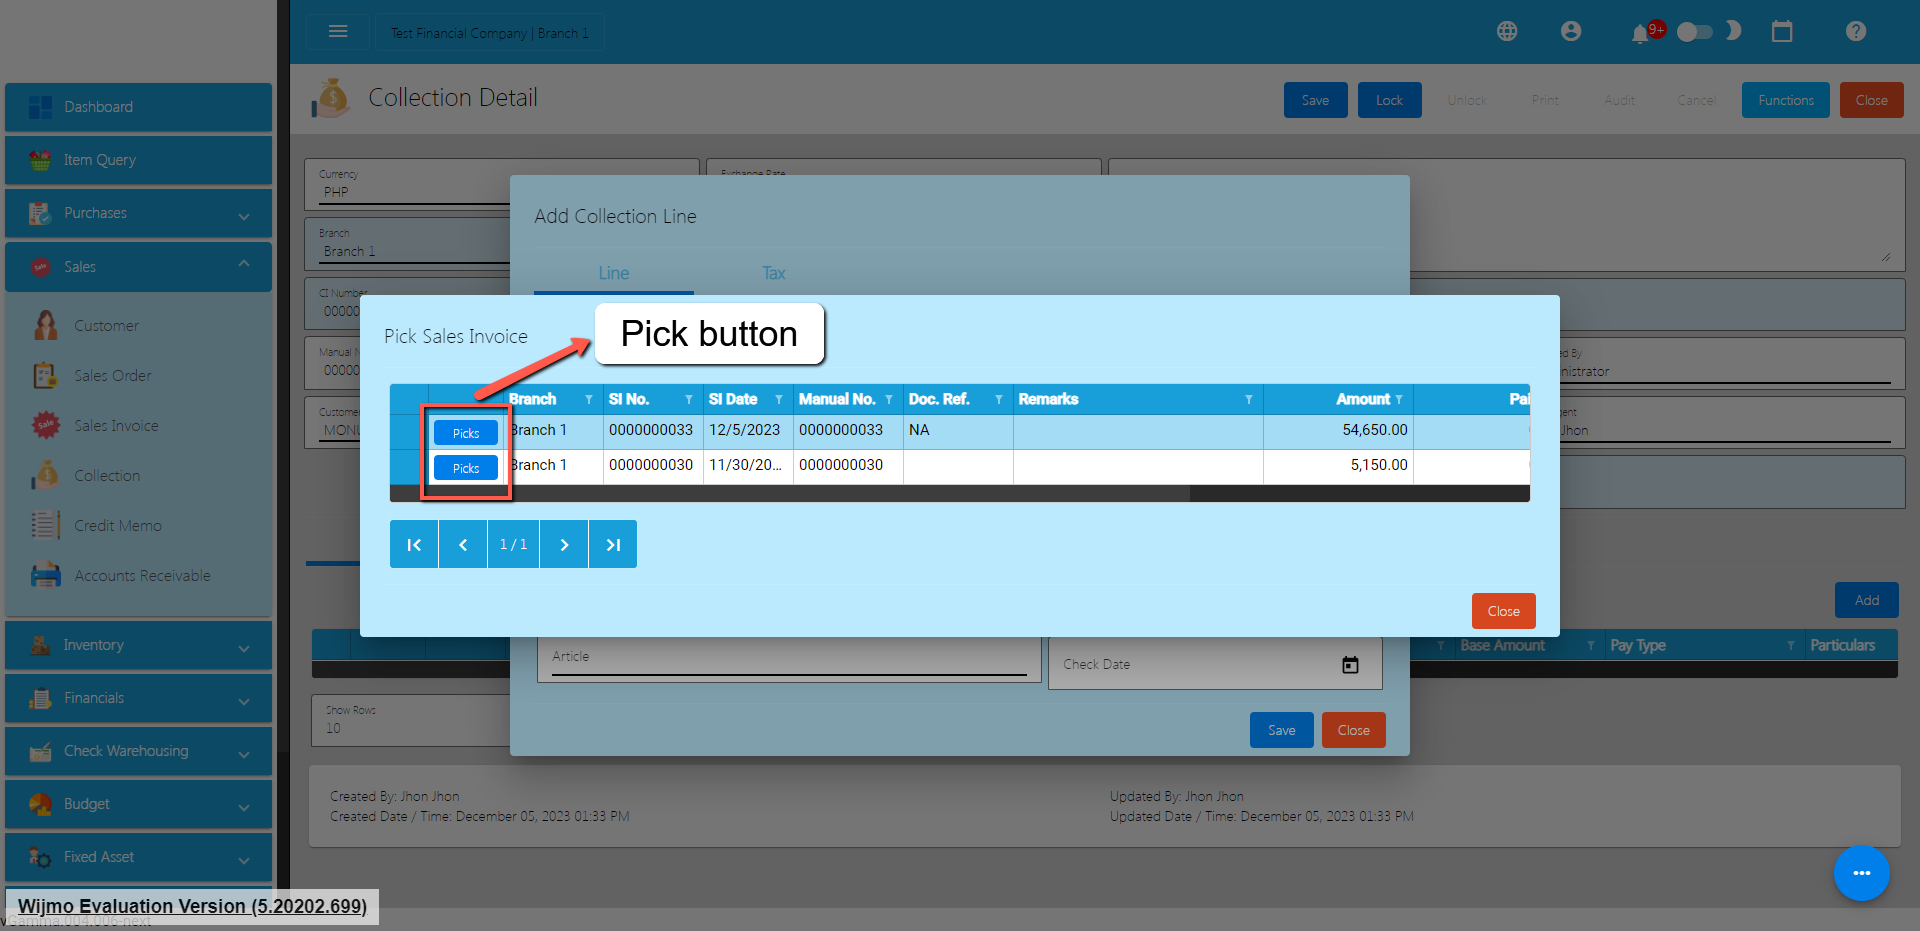
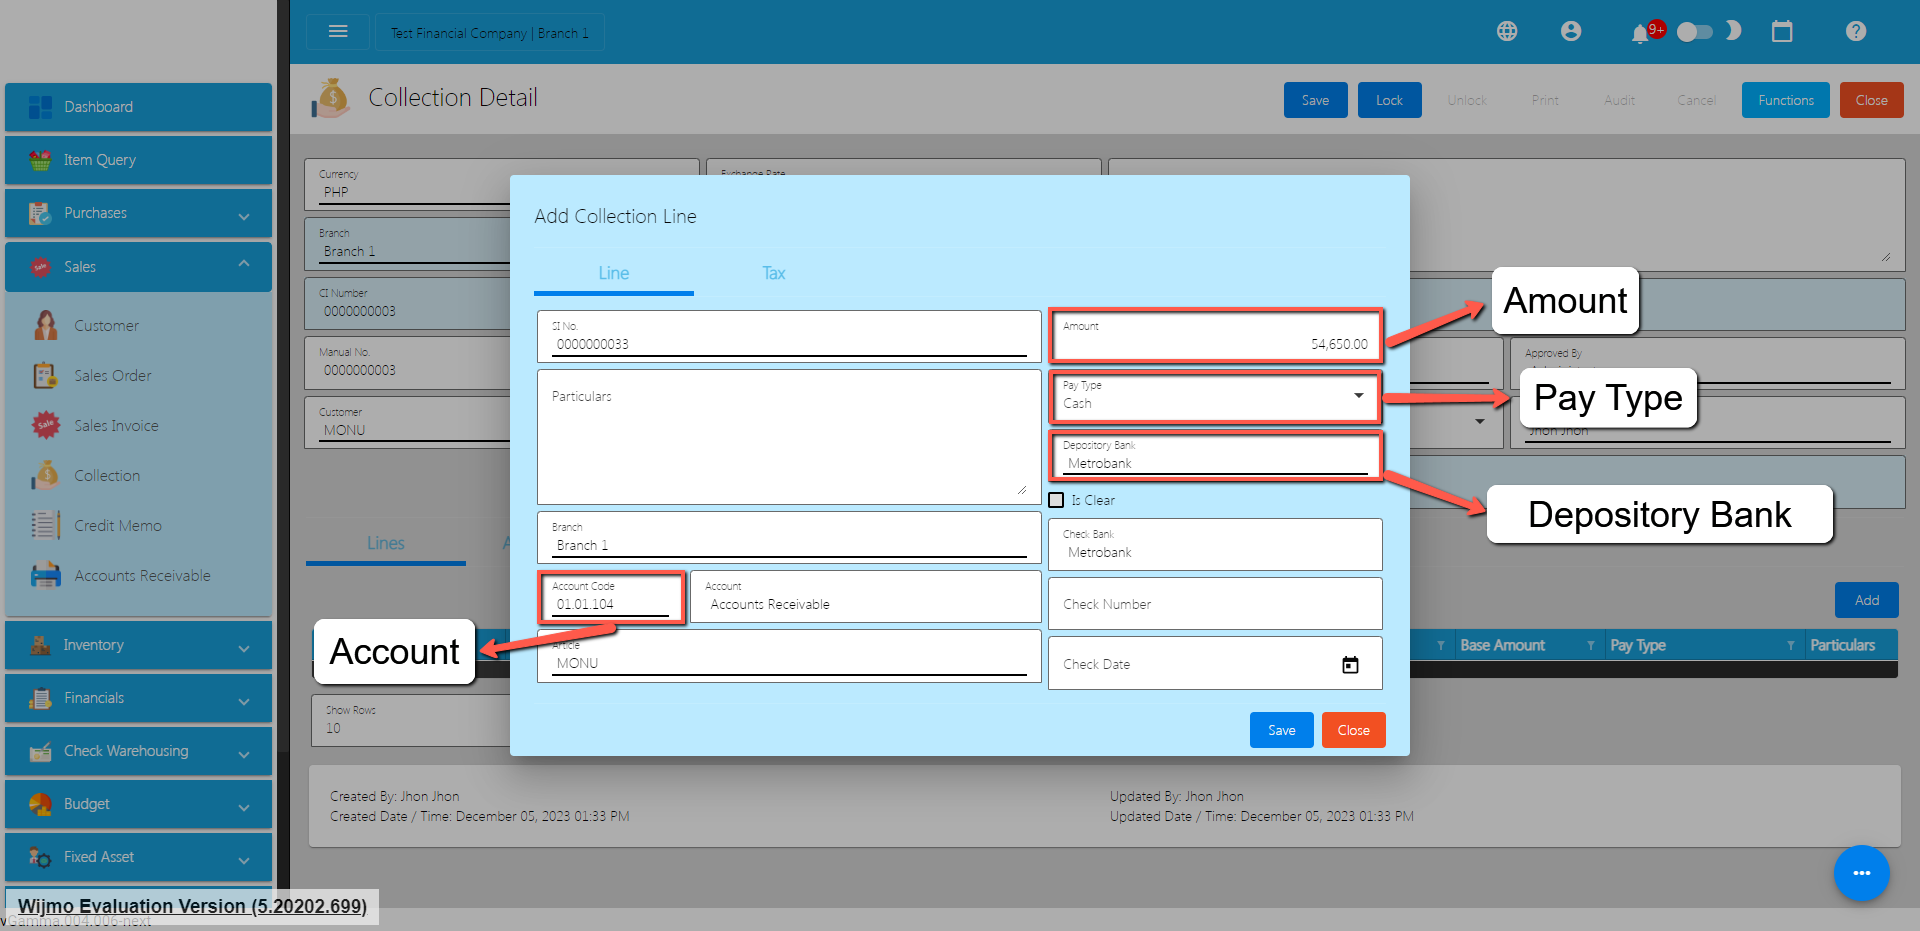
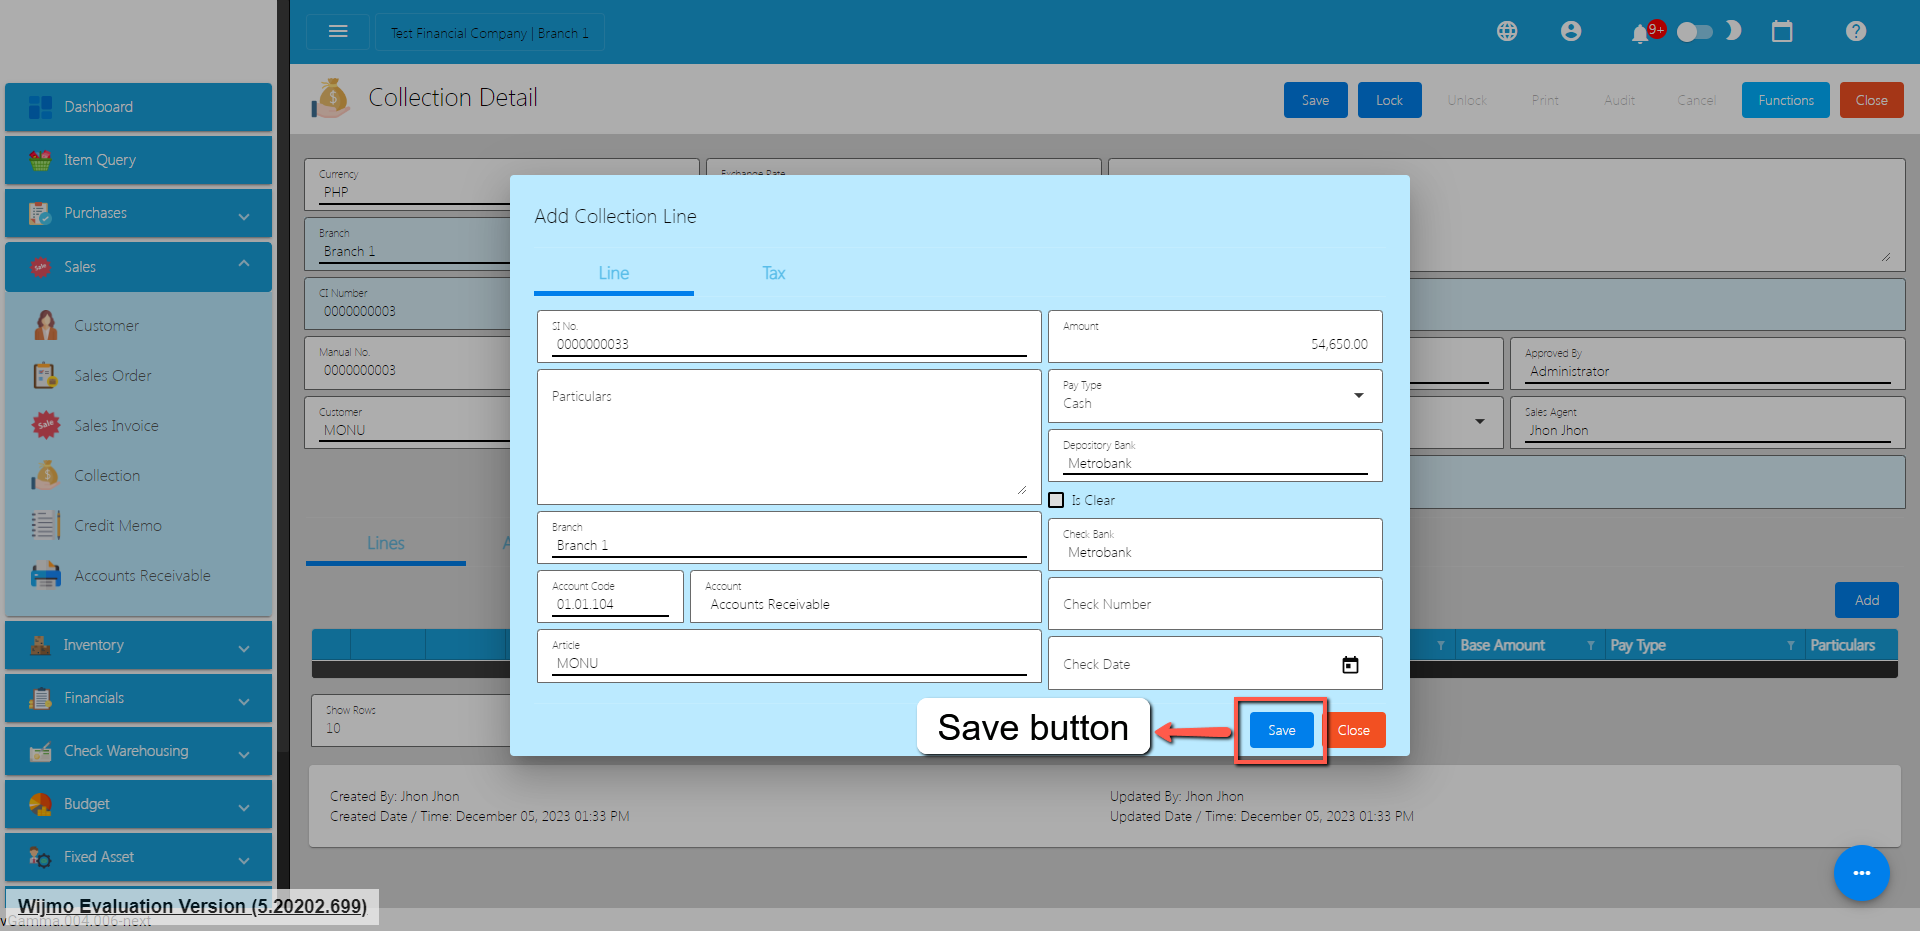
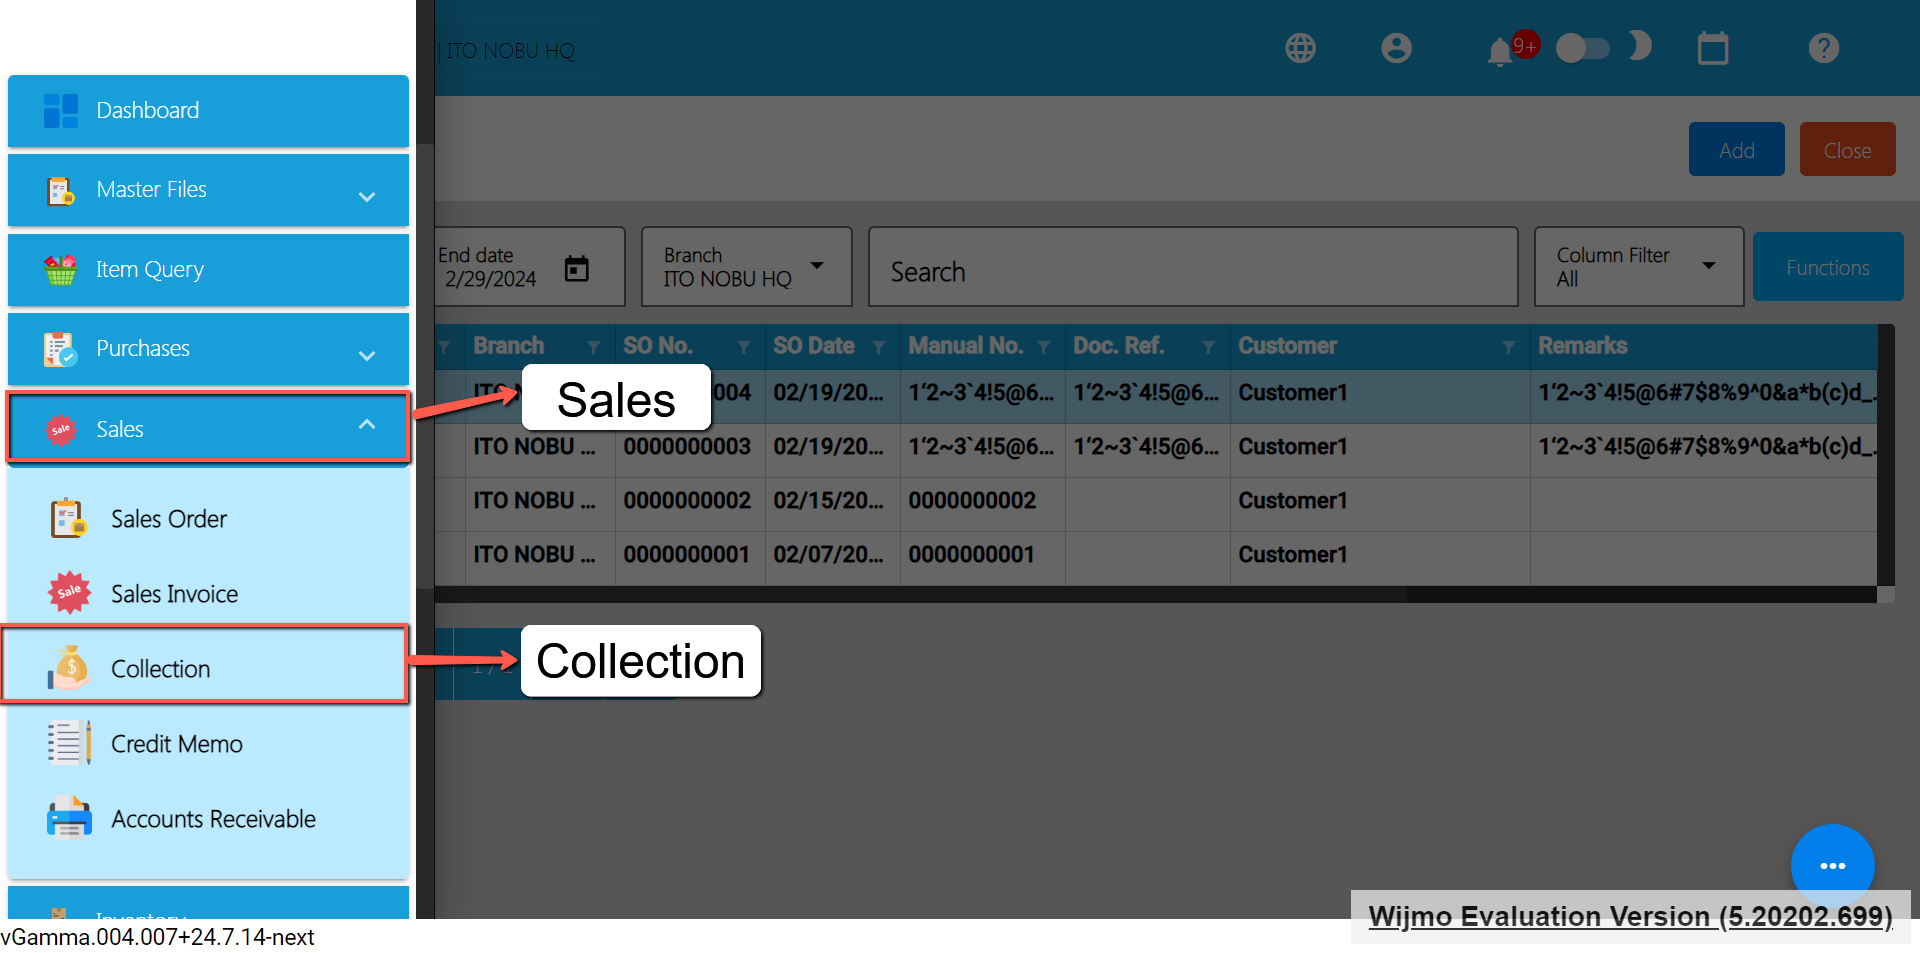
.toc-wrapper .c27{margin-left: 6pt}.toc-wrapper .c46{margin-left:14pt}.toc-wrapper .c46 .c14 a,.toc-wrapper .c50 a{font-size:13px}.toc-wrapper .c50{margin-left:18pt;} .manual-content table td, .manual-content table th{padding:0;border: 1px #aaa solid;padding: 10px;} .manual-content table td span,.manual-content table td p,.manual-content table td li{font-size:11px!important;}Collection is created when Sales Invoice payment is already collected.
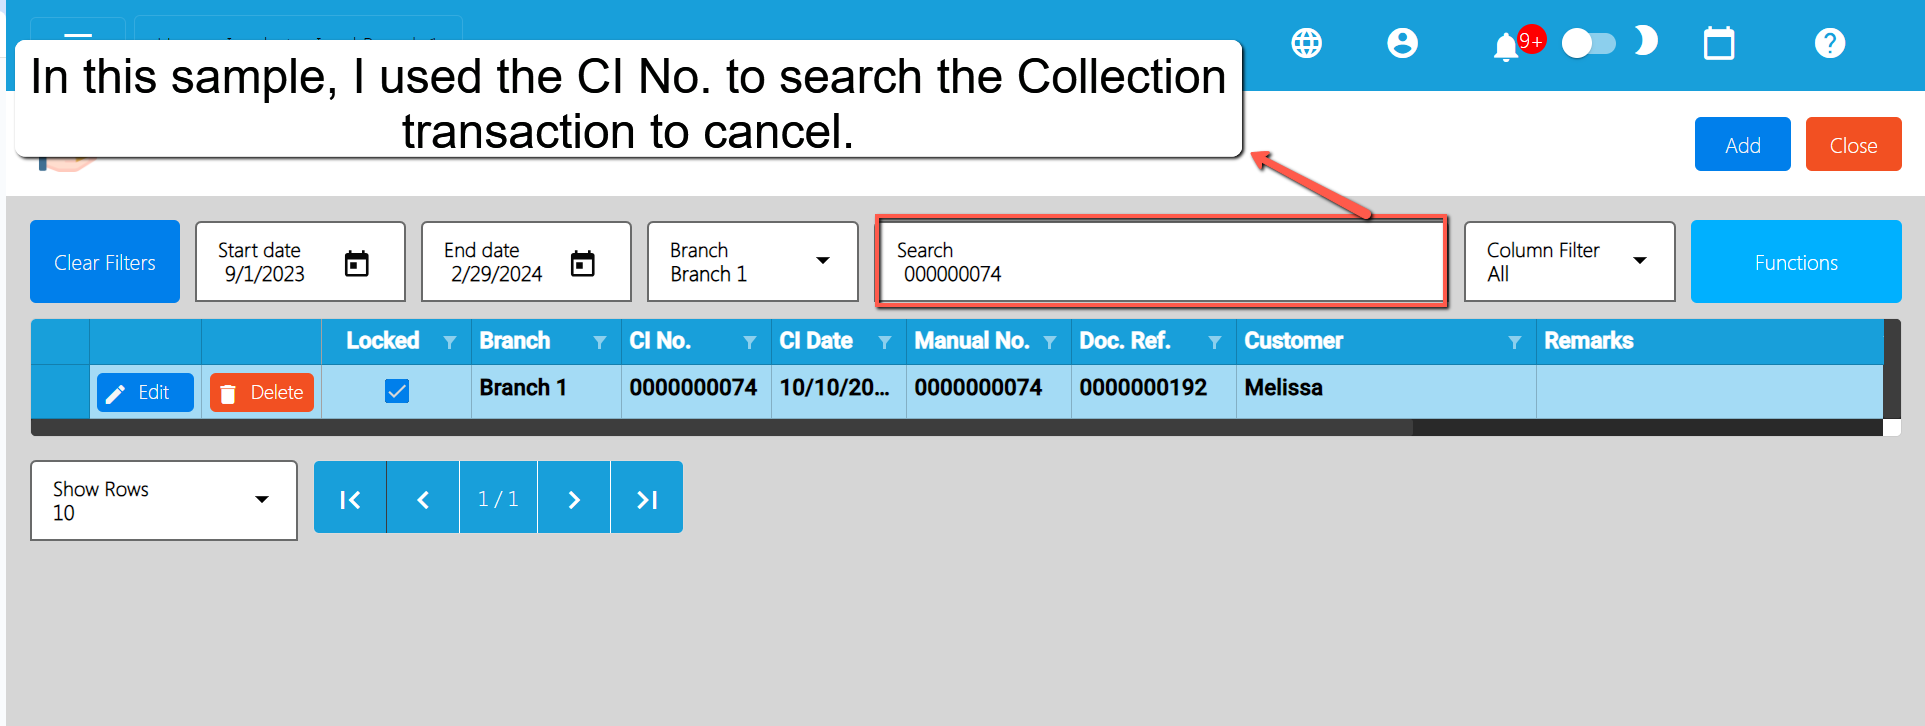
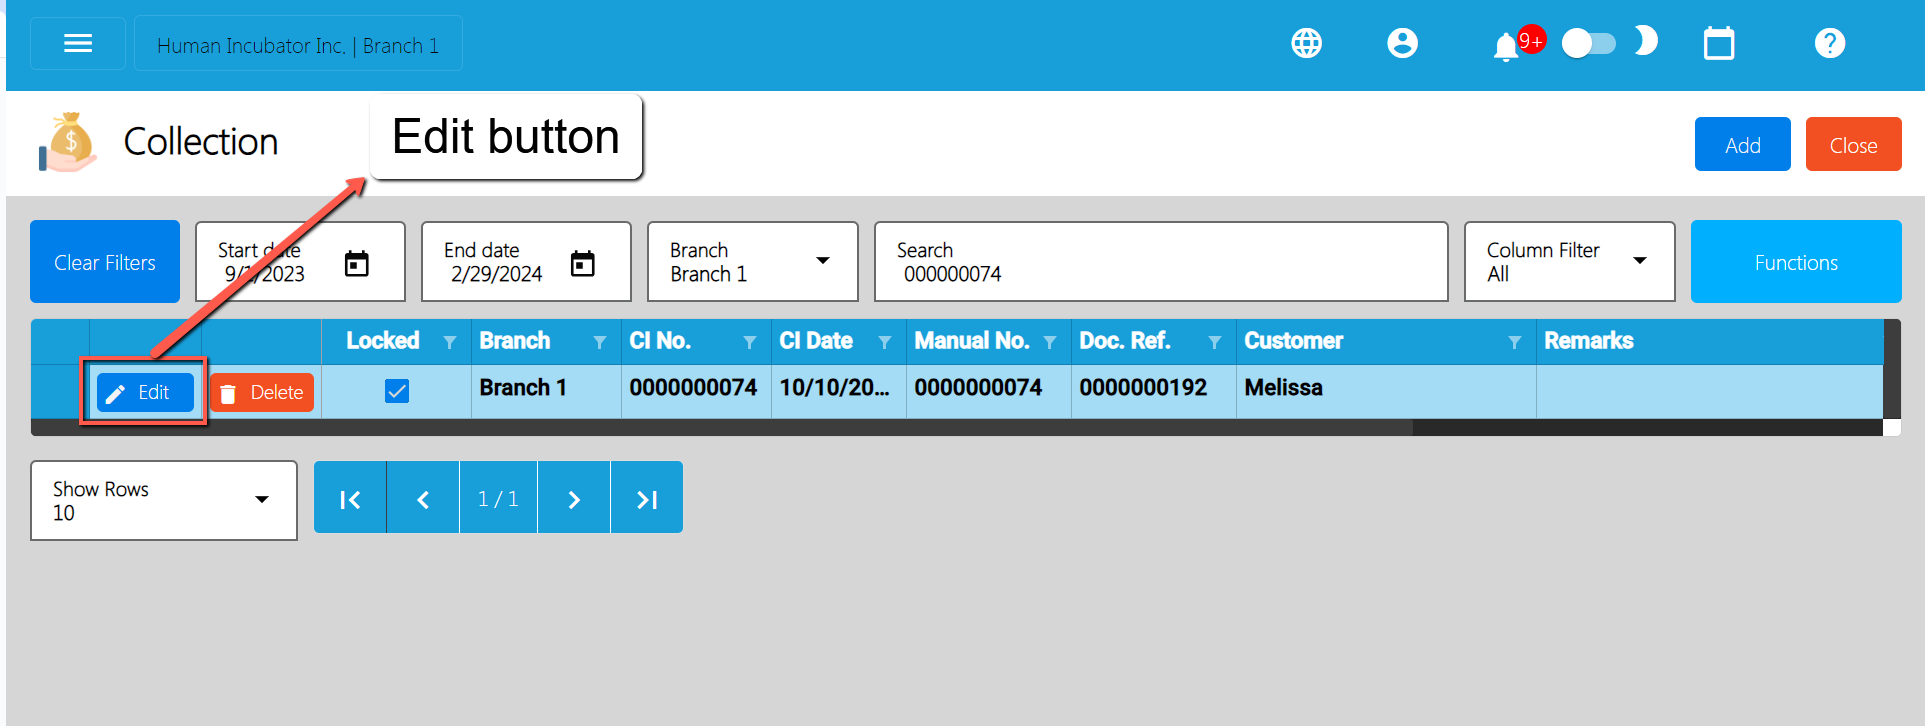
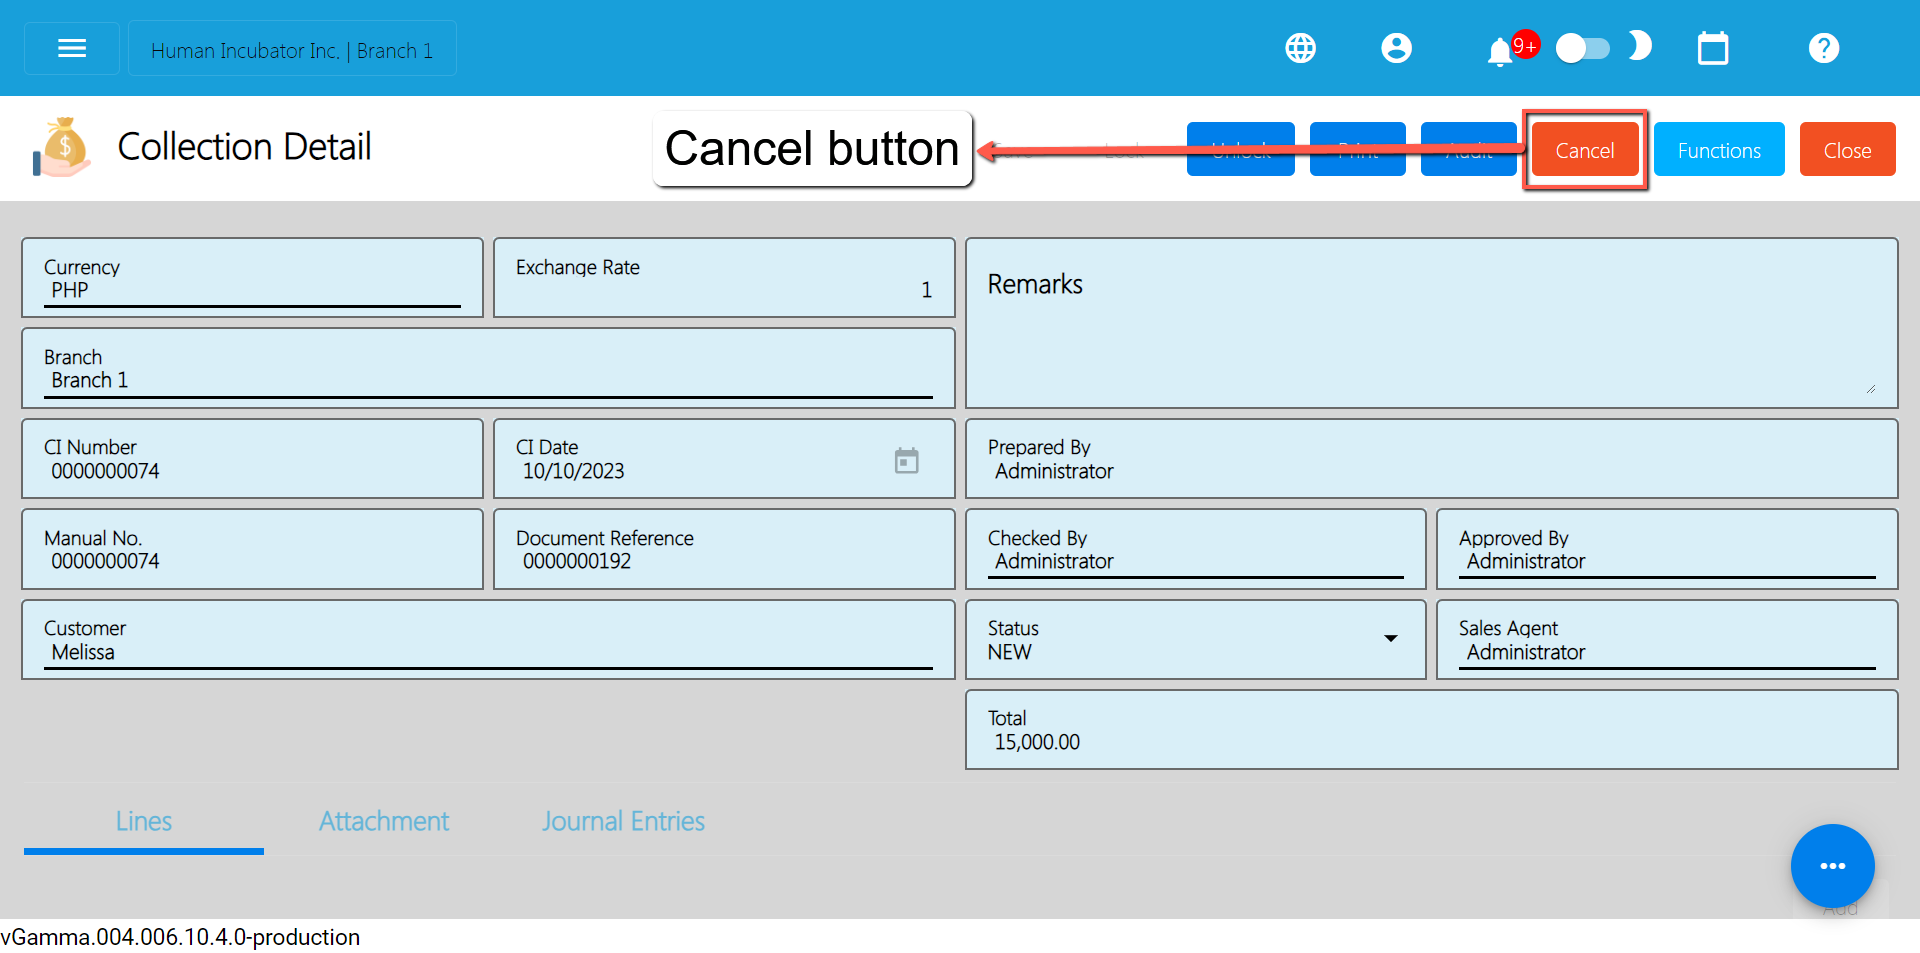
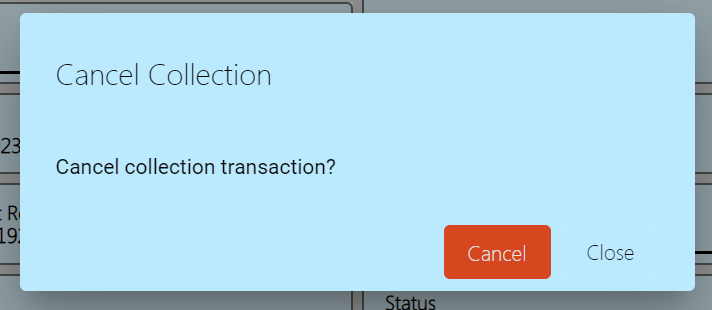
If you want to cancel / void the transaction
3.1 In the Excel File
Example: 1‘23`4!5@6#7$8%9^0&a*b(c)d_e+f=g{h}i[j]k|l\m/n:o;p”q<r>st?u v.w
– if the Manual Number starts with 000, don’t forget to put an apostrophe (‘) at the beginning of the Manual Number.
Example: ‘00000111231414
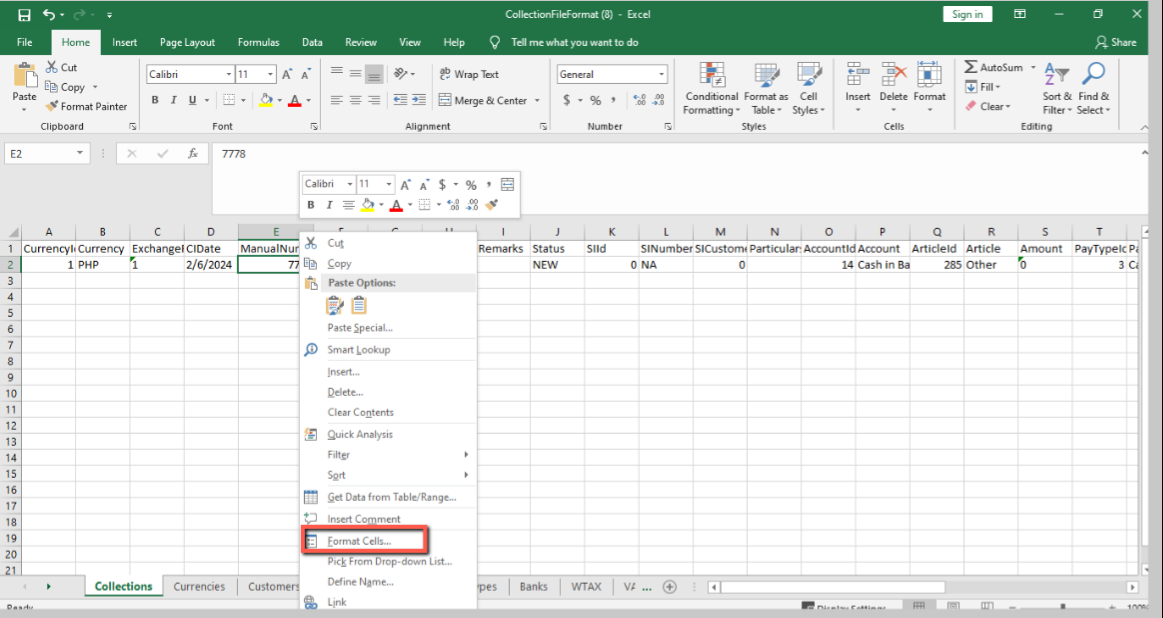
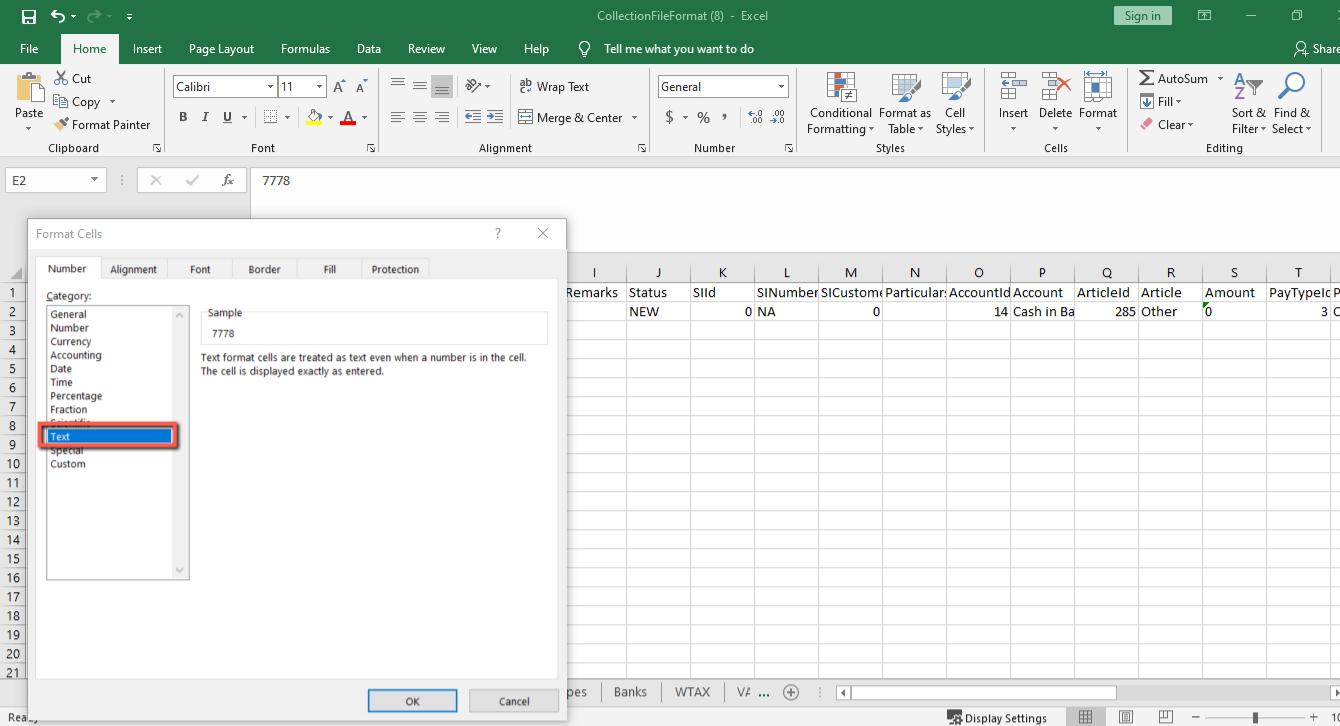
– if the Manual Number starts with a number but exceeds more than 10 digits, format the cell to Text to show all the numbers.
Steps on how to change the format to Text:
1. Right Click the Cell
2. Click Format Cell
3. Choose Text
4. Click OK
5. Then reselect the field
Example: 1‘23`4!5@6#7$8%9^0&a*b(c)d_e+f=g{h}i[j]k|l\m/n:o;p”q<r>st?u v.w
– if the Document Reference starts with 000, don’t forget
to put an apostrophe (‘) at the beginning of the Manual Code.
Example: ‘00000111231414
– if the Document Reference starts with a number but exceeds more than 10 digits, format the cell to Text to show all the numbers.
Steps on how to change the format to Text:
1. Right Click the Cell
2. Click Format Cell
3. Choose Text
4. Click OK
5. Then reselect the field
Never edit the AccountId since it will automatically change after selecting the account.
Never edit the PaytypeId since it will automatically change after selecting the paytype.
Never edit the BankId since it will automatically change after selecting the Bank.
4. Go Back to the Collection List Transaction
In Collection
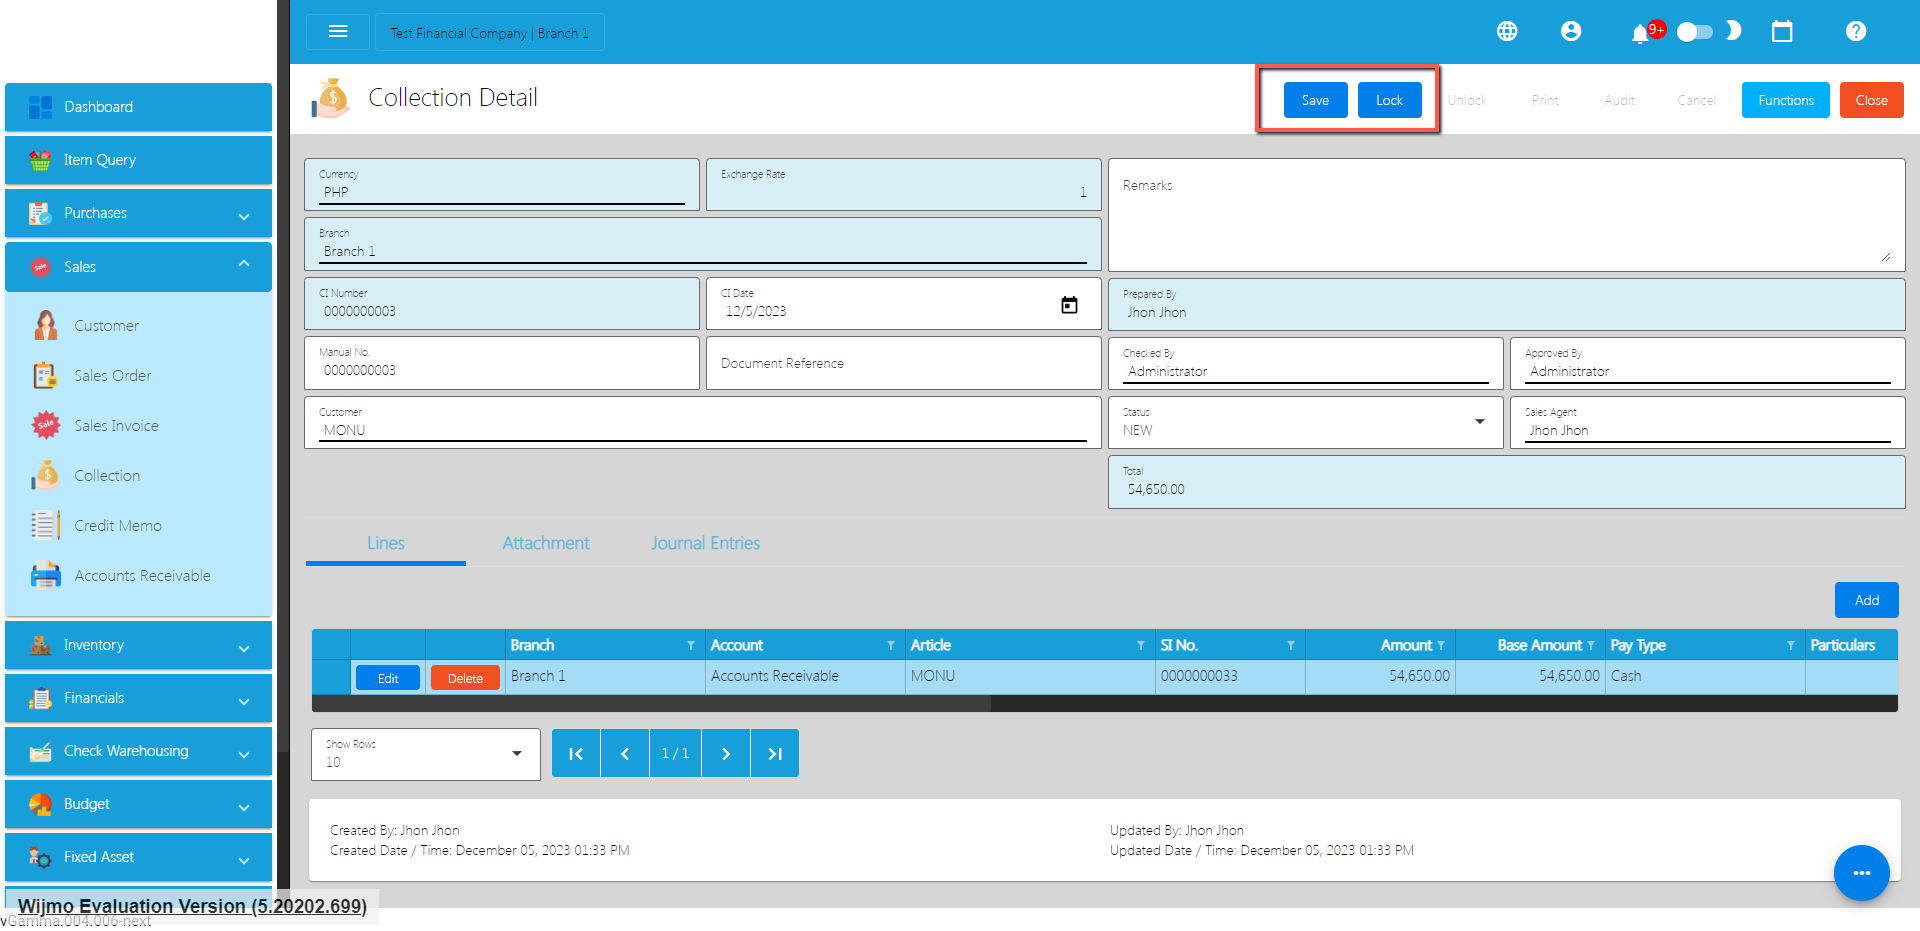
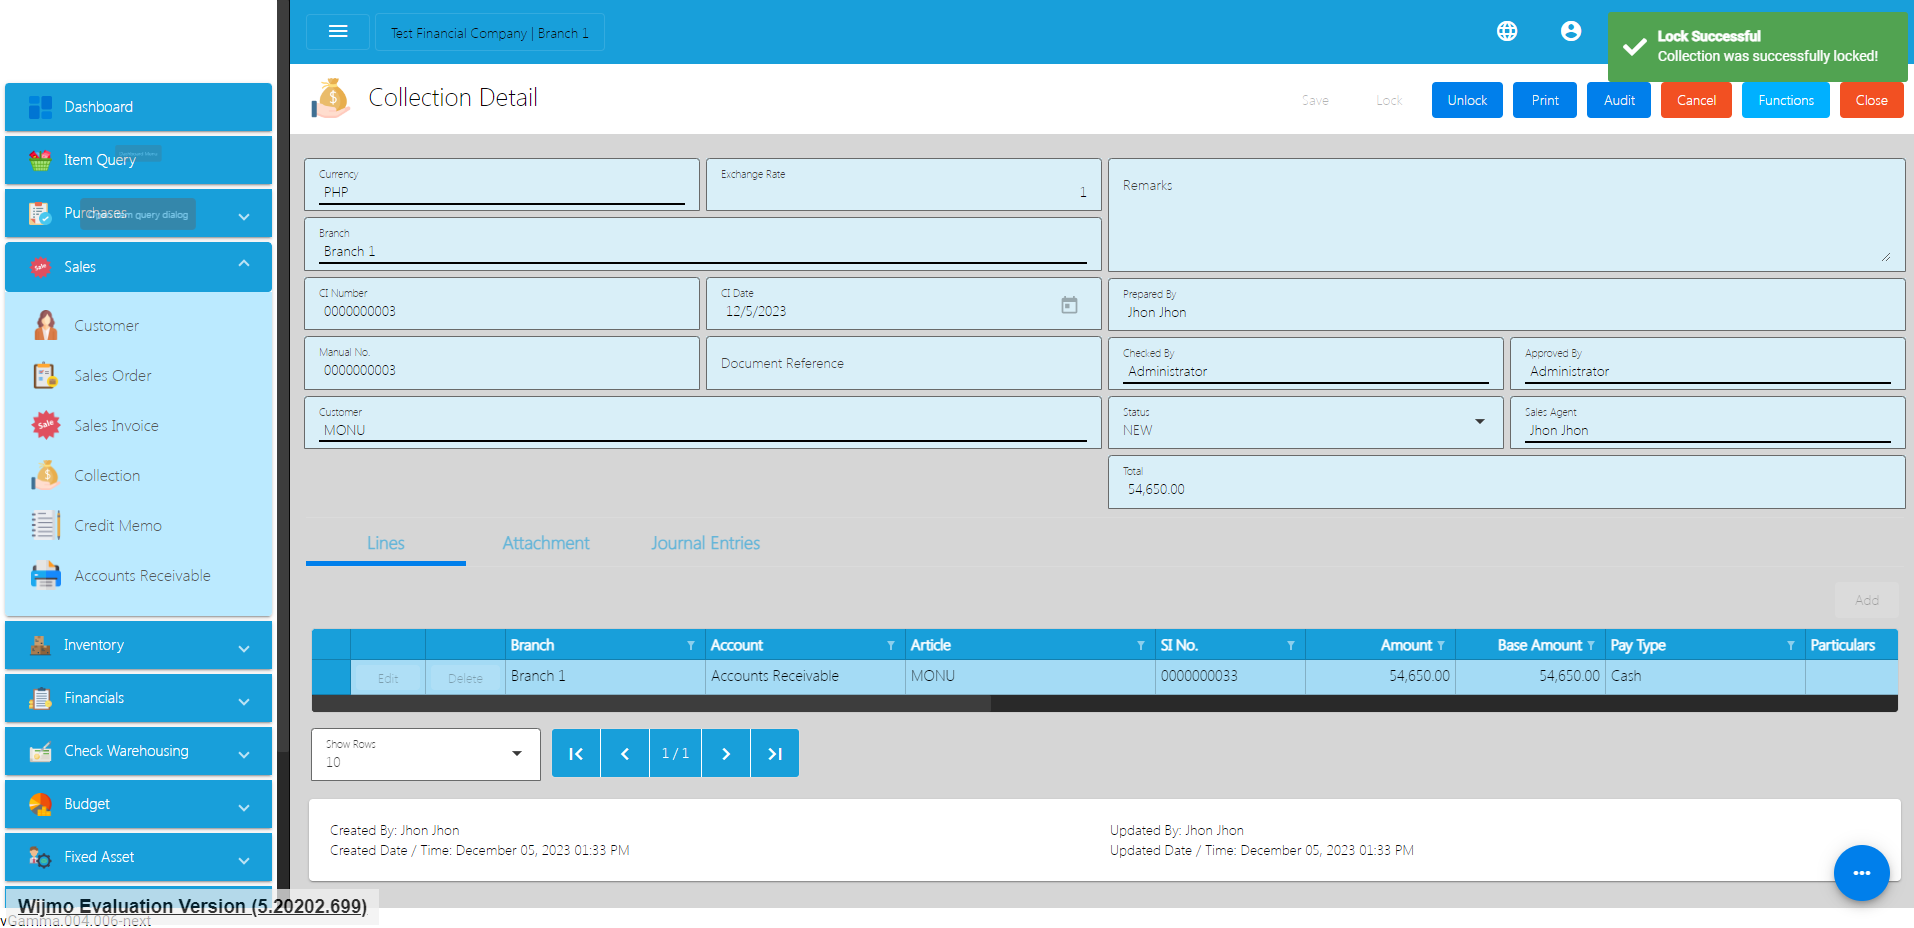
e. Lock the Transaction
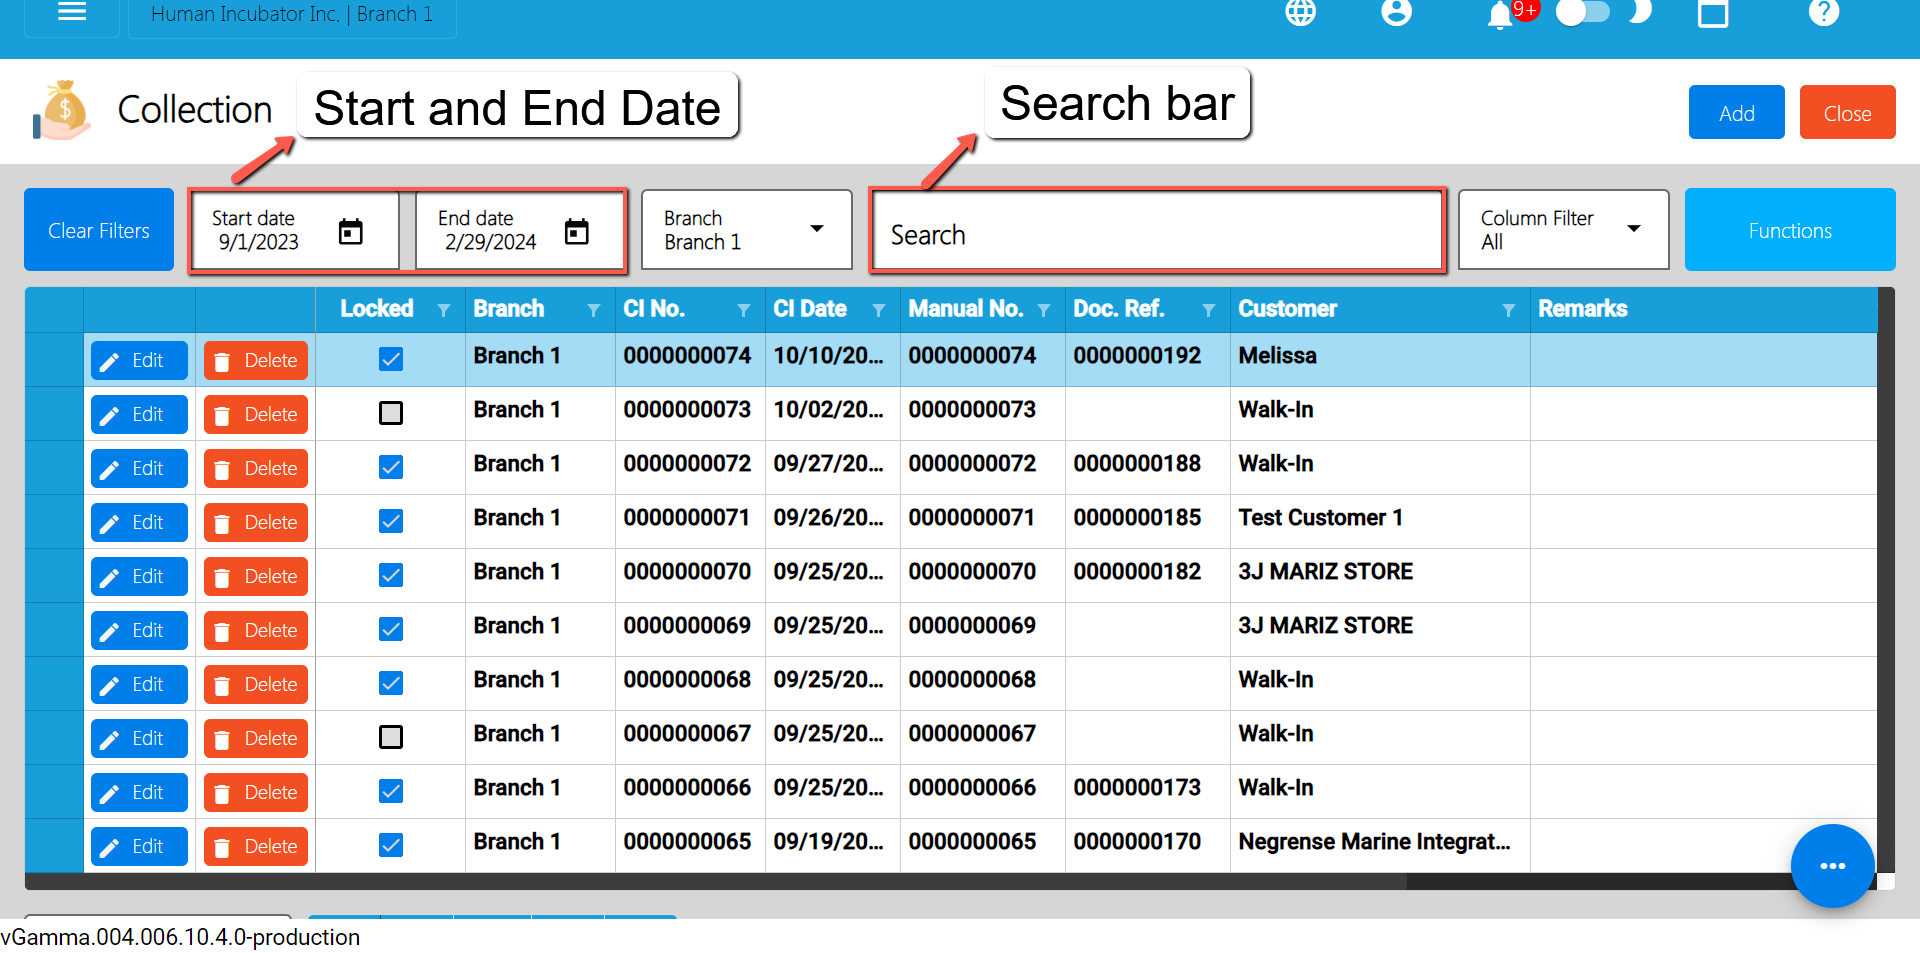
When you need to cancel a Collection, it’s important to follow these simple steps:
Take note: Don’t forget to change the Start Date and End Date to your Collection’s transaction date to display the correct result.

Typically replies within a few hours
 Log in to Messenger