1.3 Purpose of this User Manual
1.4 Who Should Use This Manual
1.4 Best Practices and System Limitations
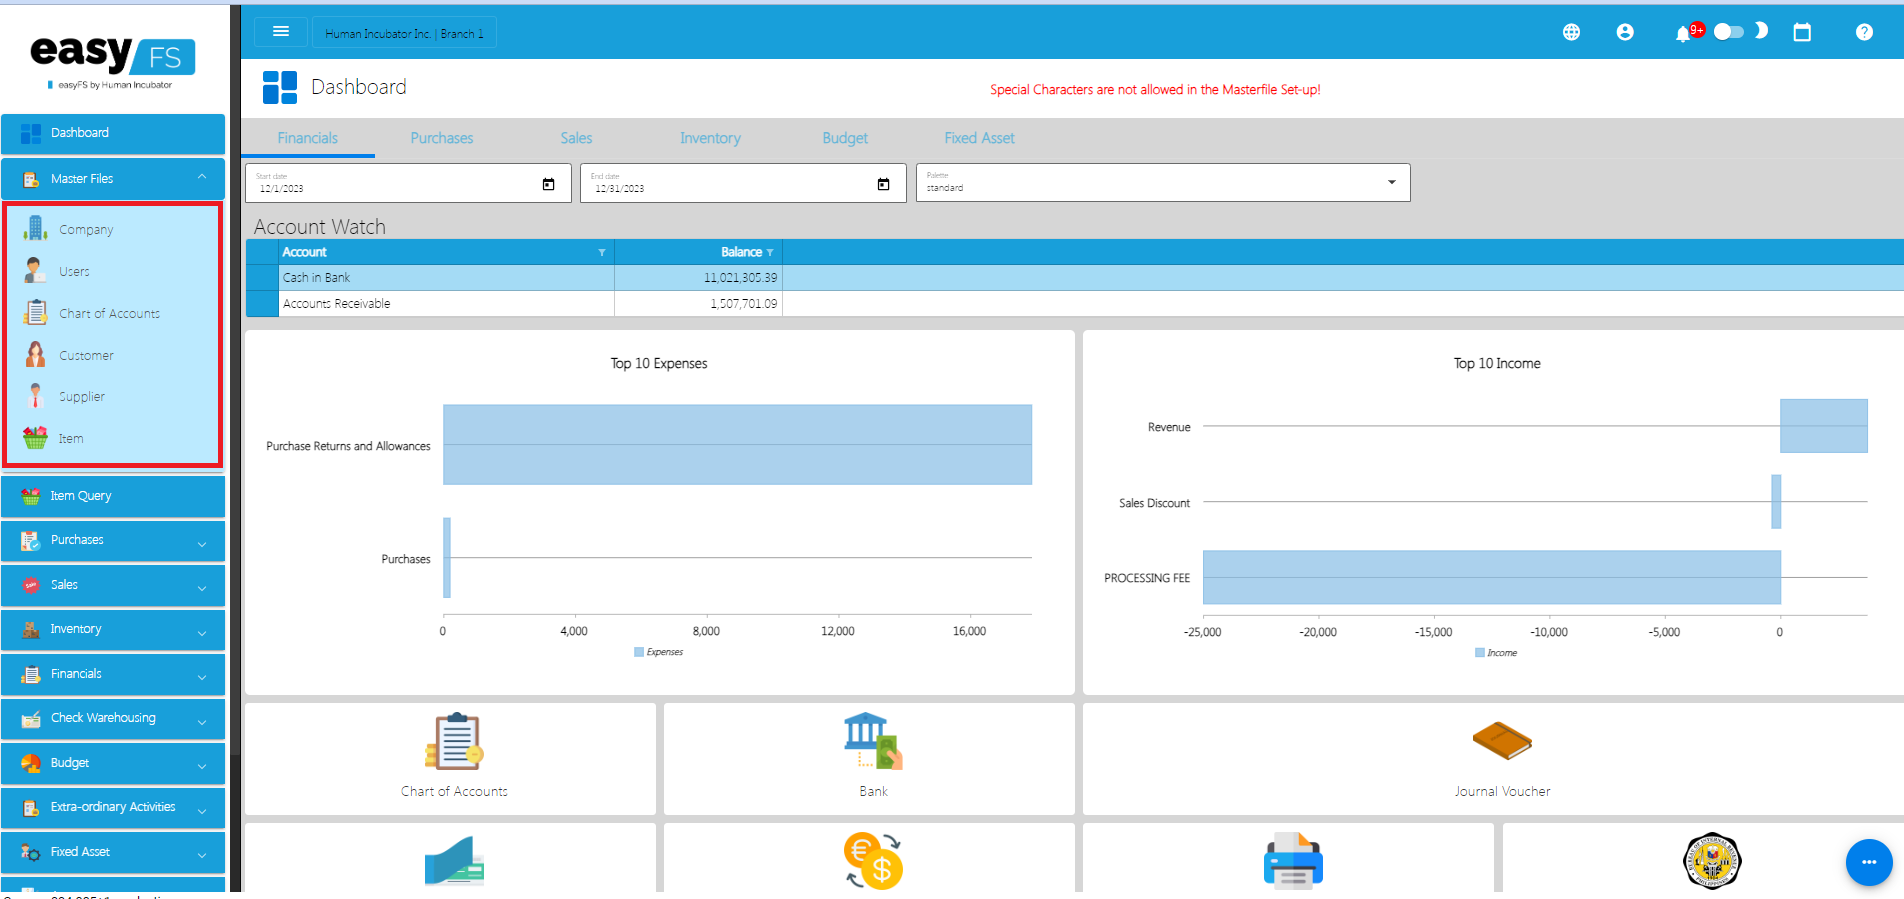
1.4.1 Setting up the Master Files
4.1.1.1 How to Add an Item Manually
4.1.1.2 Add Item Via Import Function
4.1.2.2 Add Customer Via Import Function
4.1.3.2 Add Supplier Via Import Function
List of All Users that were added to the System
4.1.6.1 Chart of Accounts Lists
4.1.6.2 Manual Add Chart of Accounts
4.1.6.2 Add Chart of Accounts via Upload Account
4.1.8.2 Manual Add of Currency
4.2.1.1 Manual Update Item Detail
4.2.1.2 Update Item Detail in Bulk
4.2.2.1 Manual Update Supplier Detail
4.2.2.1 Update Supplier Detail in Bulk
4.2.3.1 Manual Update Customer Detail
4.2.3.1 Update Customer Detail in Bulk
5.2 Purchases Transaction Module
Cancel Purchase Request Transaction
Purchase Order Transaction via Upload Template
Cancel Purchase Order Transaction
Cancel Receiving Receipt Transaction
Cancel Disbursement Transaction
Debit Memo Transaction via Upload Template
Sales Order Transaction via Upload Template
Cancel Sales Order Transaction
Sales Invoice Transaction via Upload Template
Cancel Sales Invoice Transaction
Collection Transaction via Upload Template
Scenario 3: Extra-Ordinary Activities
Scenario 4: Multi-Branch with EasyPOS Integration
Accounts Payable Voucher Report
Accounts Payable By Currency Report
Purchase Request Summary Report
Purchase Request Detail Report
Purchase Order Detail With Balance Report
Receiving Receipt Summary Report
Receiving Receipt Detail Report
Print or Download the PDF Report
Available Item Per Batch Report
Cancelled Purchase Request Report
Cancelled Purchase Order Report
Cancelled Receiving Receipt Report
Accounts Receivable Summary Report
Accounts Receivable by Term Report
Accounts Receivable by Currency Report
Accounts Receivable Report (One Month)
Statement of Account (By Date Range)
Collection Summary by PayType Report
Cancelled Sales Invoice Report
Sales Invoice Detail Report with Cost
Stock Transfer Detailed Report
13.1.1 Benefits of Integration
13.2.1 EasyPOS Integration Overview
13.3 How to Set Up Integrations
.toc-wrapper .c27{margin-left: 6pt}.toc-wrapper .c46{margin-left:14pt}.toc-wrapper .c46 .c14 a,.toc-wrapper .c50 a{font-size:13px}.toc-wrapper .c50{margin-left:18pt;} .manual-content table td, .manual-content table th{padding:0;border: 1px #aaa solid;padding: 10px;} .manual-content table td span,.manual-content table td p,.manual-content table td li{font-size:11px!important;}Welcome to the “Getting Started” section of the EasyFS User Manual. This section is your gateway to entering the world of secure financial management. By this section, you will be guided through the initial steps to access and navigate our system effectively.
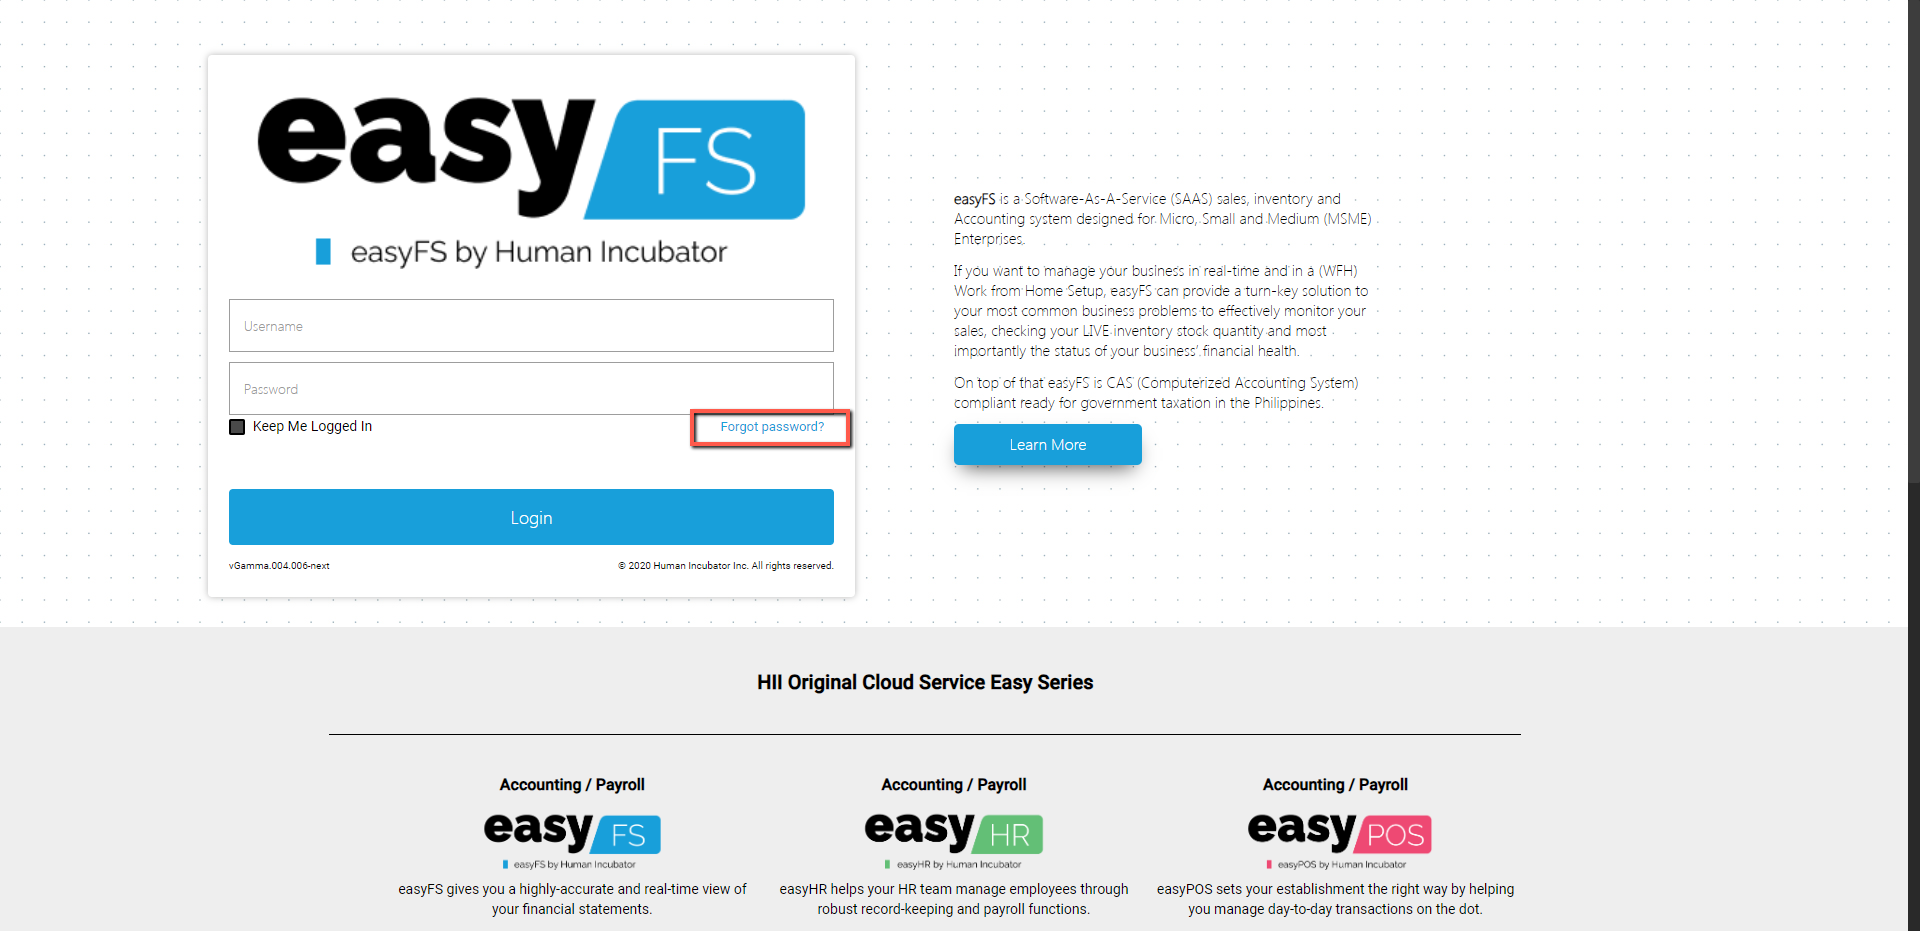
If you’ve forgotten your password, no need to worry. Simply click the “Forgot Password” link on the login page. You’ll receive instructions on how to reset your password via your registered email address.
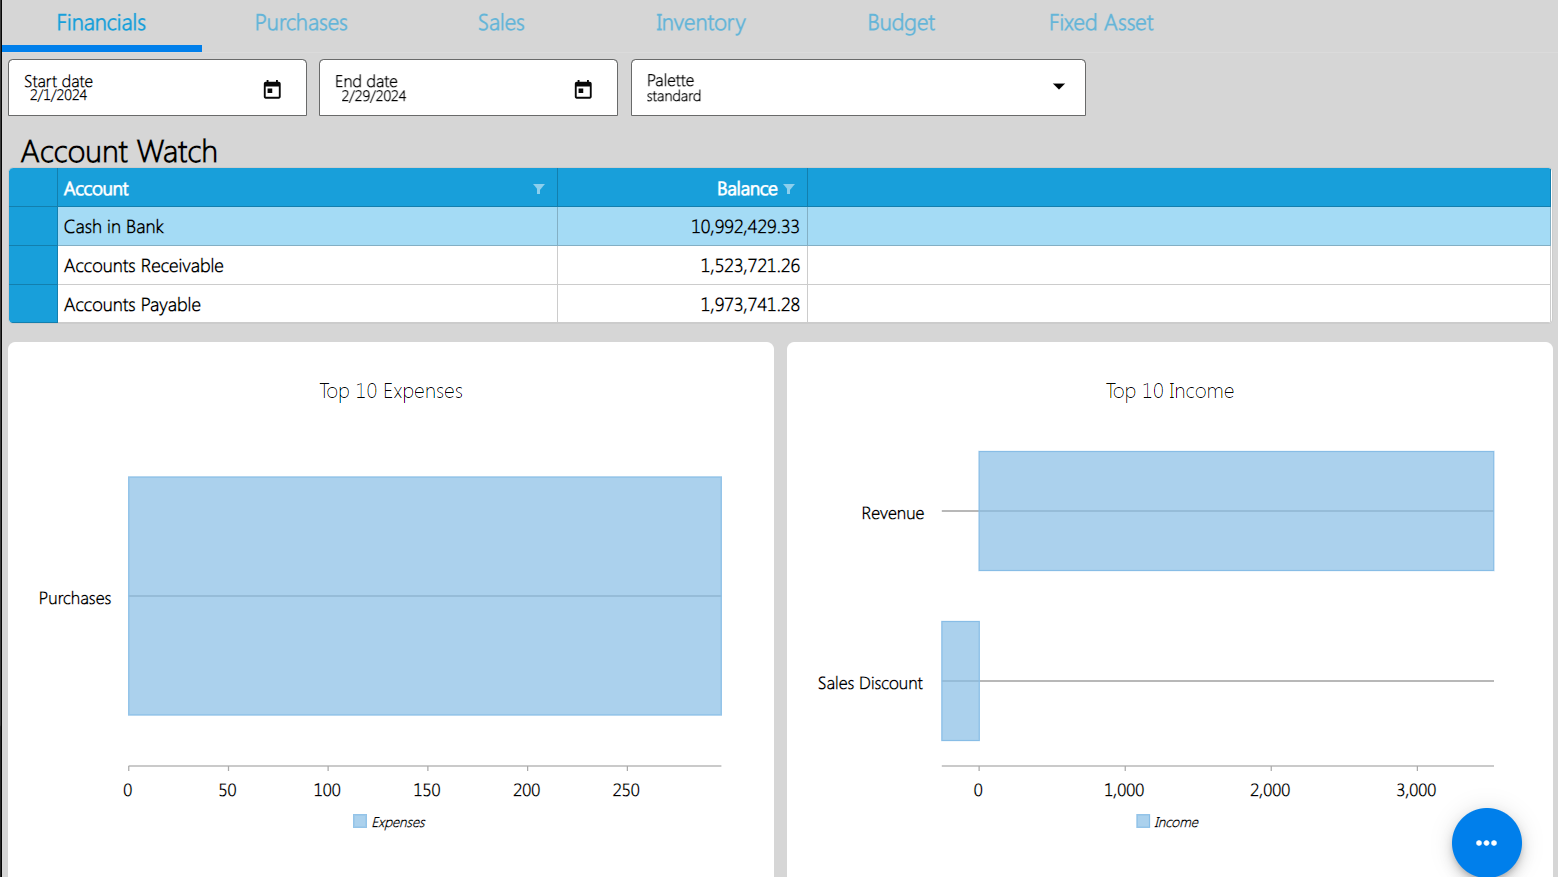
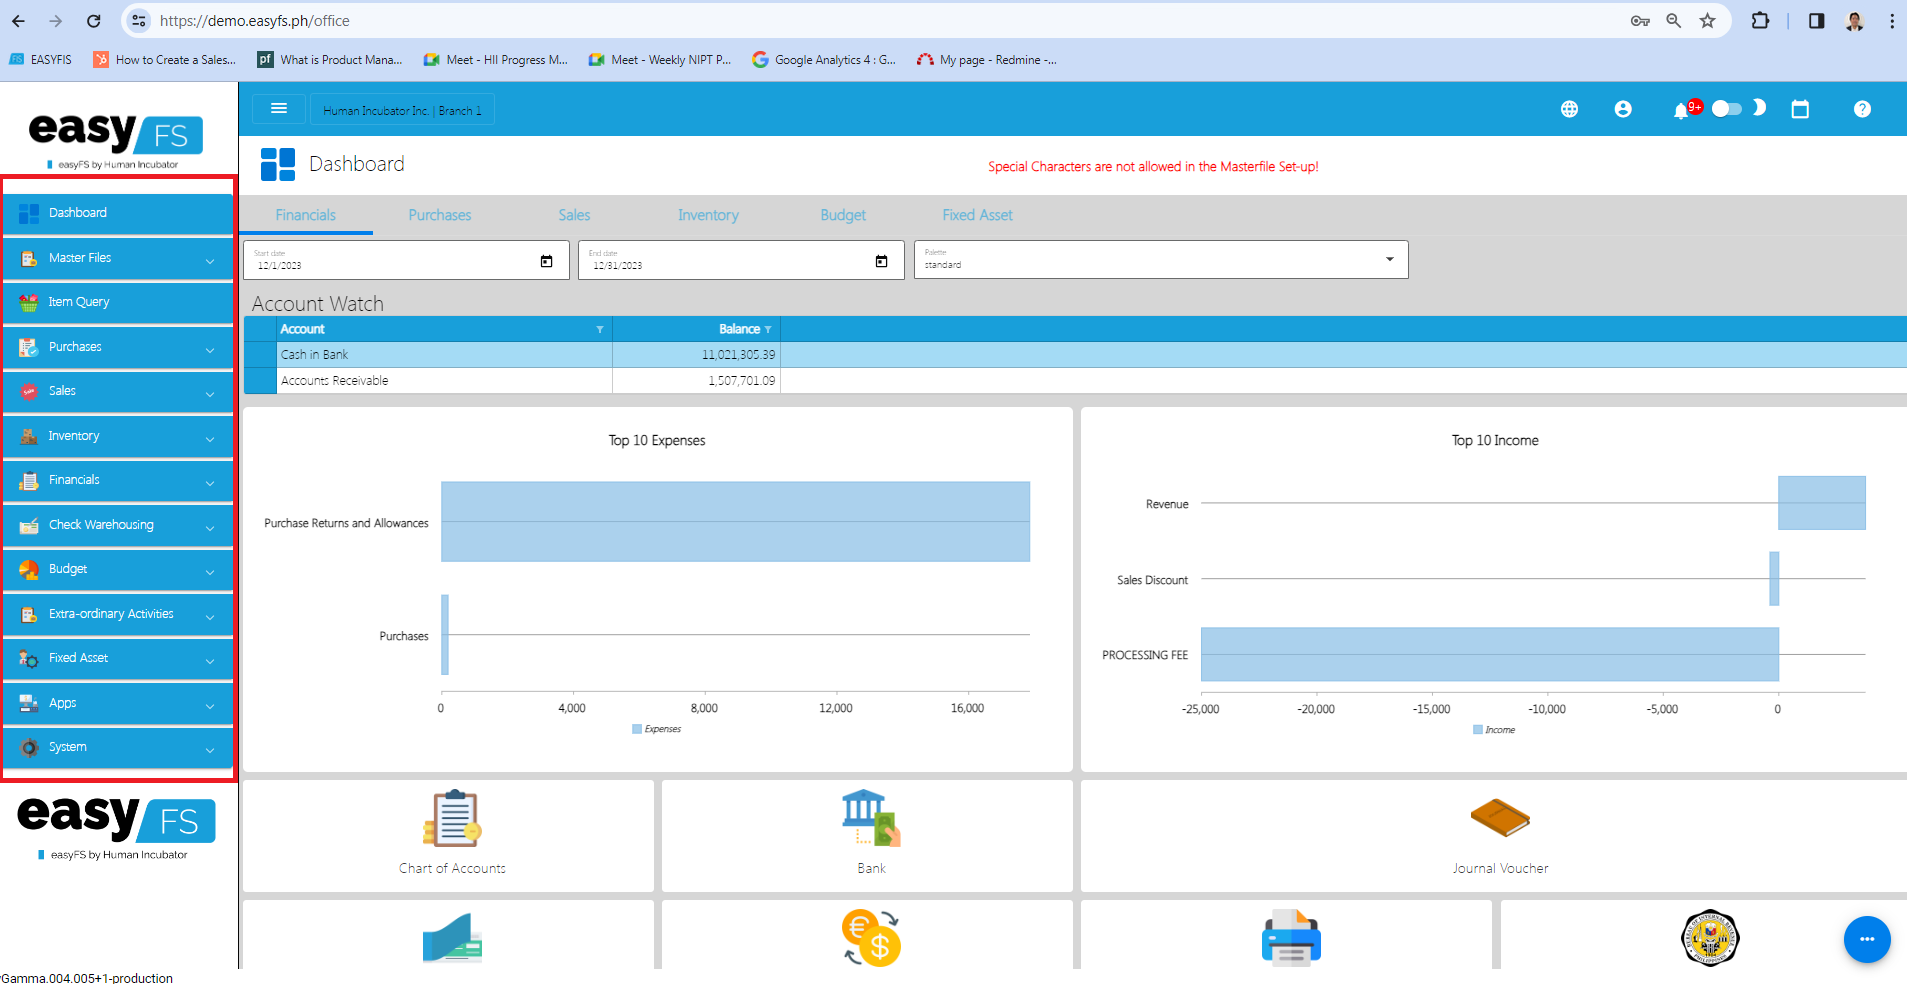
Once login is successful, you will be redirected to this Dashboard page. The EasyFS Dashboard is a visual representation of key information, data, or functionalities that provides users with a quick and accessible overview of the application’s state or performance. Dashboards are designed to present information in a way that is easy to understand, typically through charts, graphs, widgets, or other visual elements
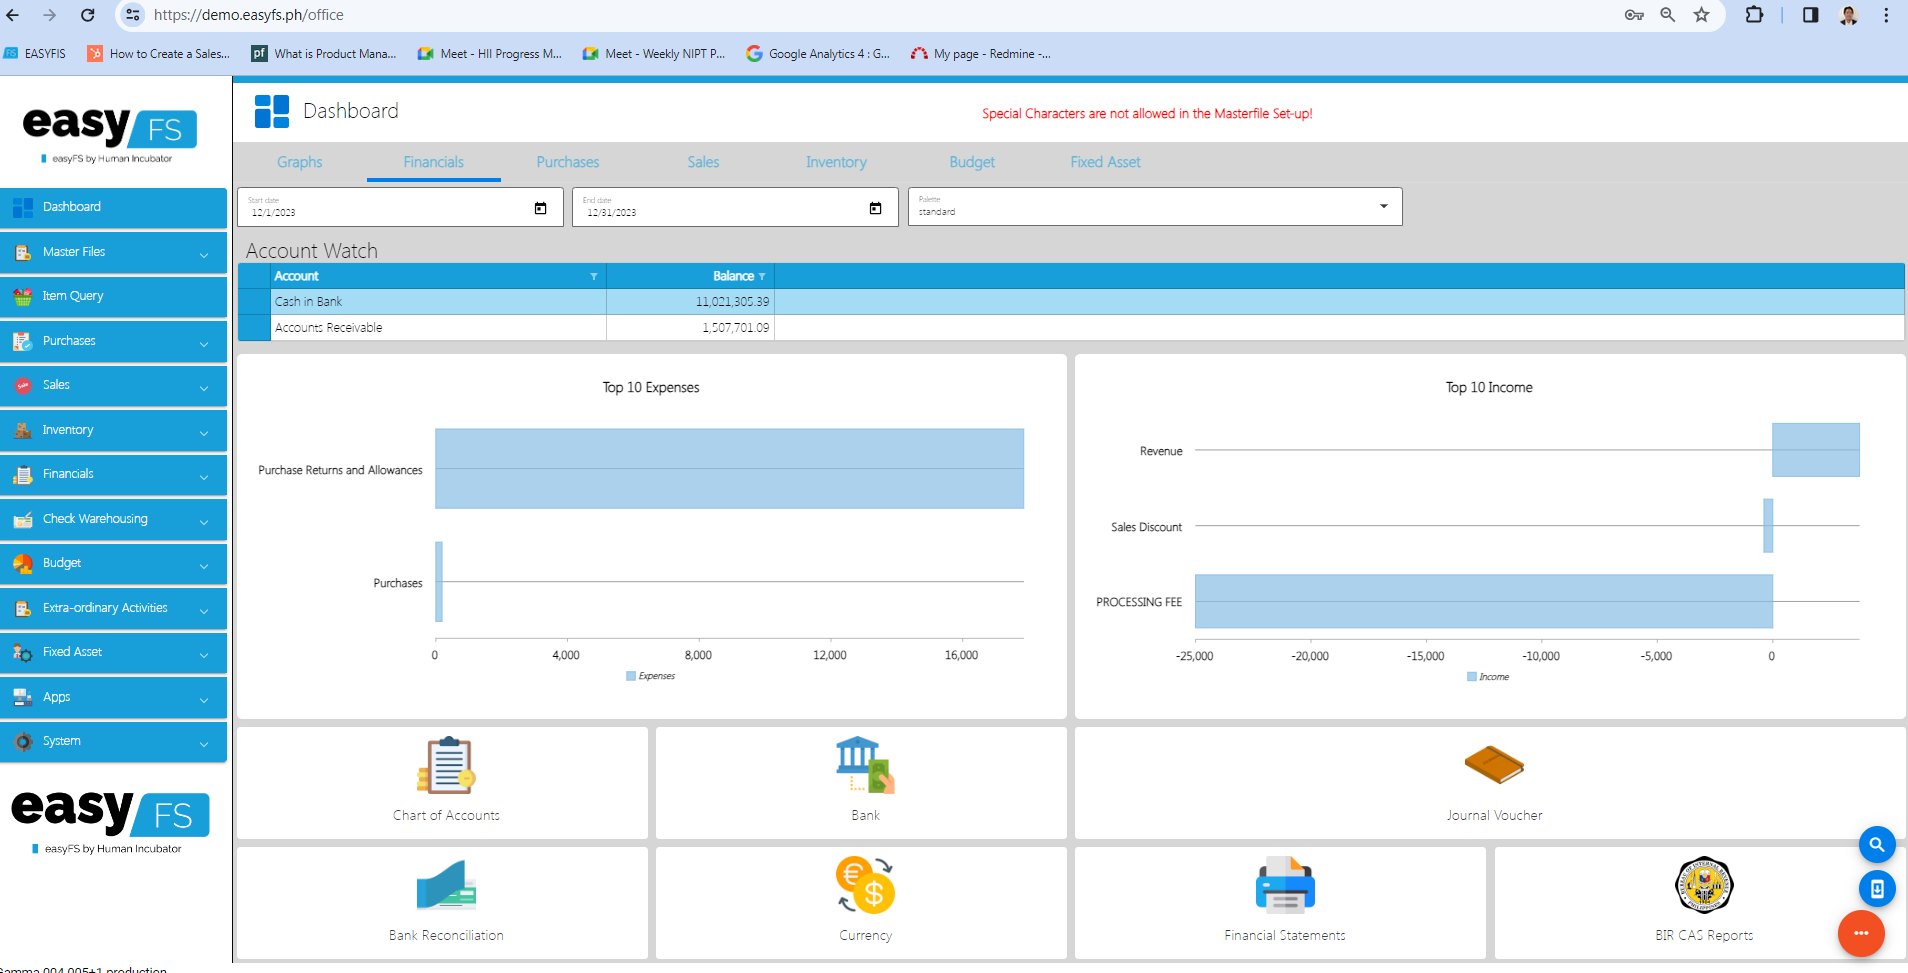
EasyFS Dashboard – shows the most important things in the system such as the Graphs, Financials, Purchases Sales, Inventory, Budget, and Fixed Asset.
Financials Dashboard – shows the top income and expense items in real time data.
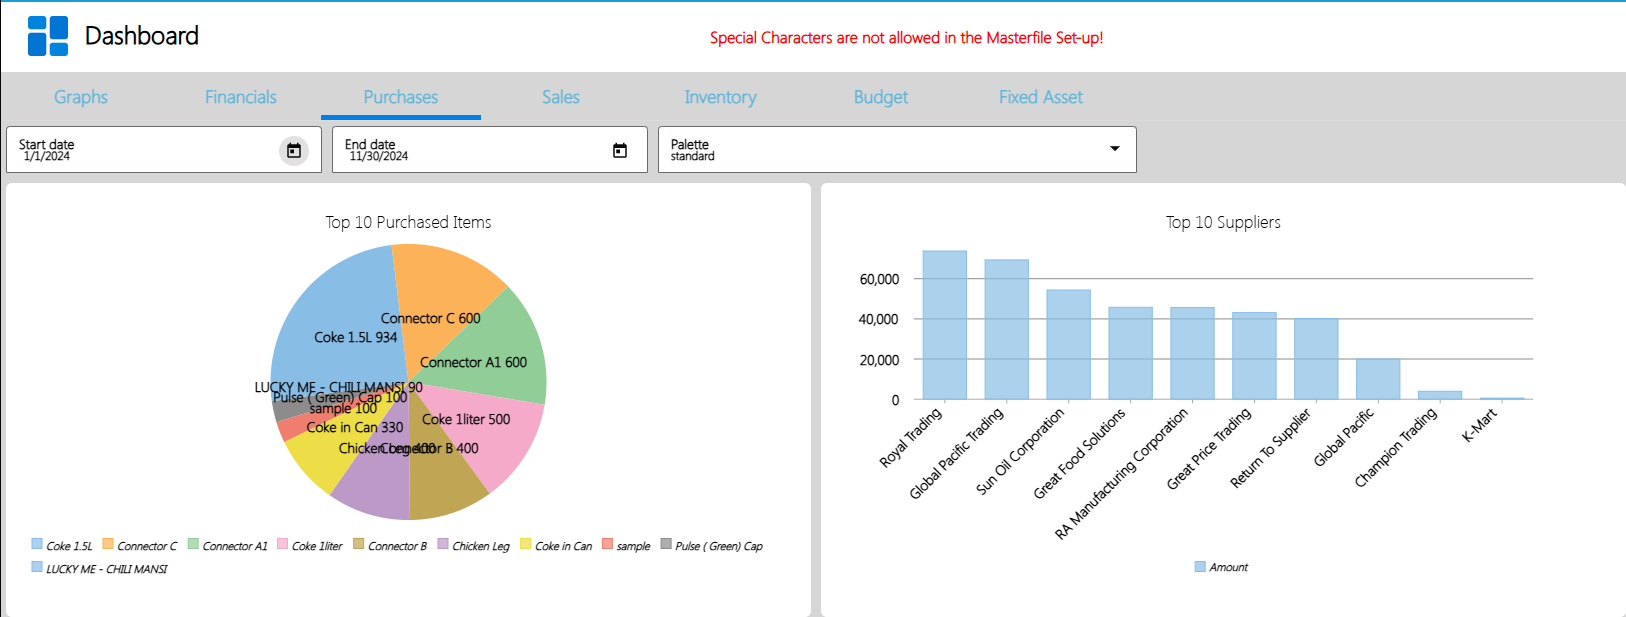
Purchases Dashboard – shows the top 10 Purchased Items and top 10 Suppliers in graphical representation.
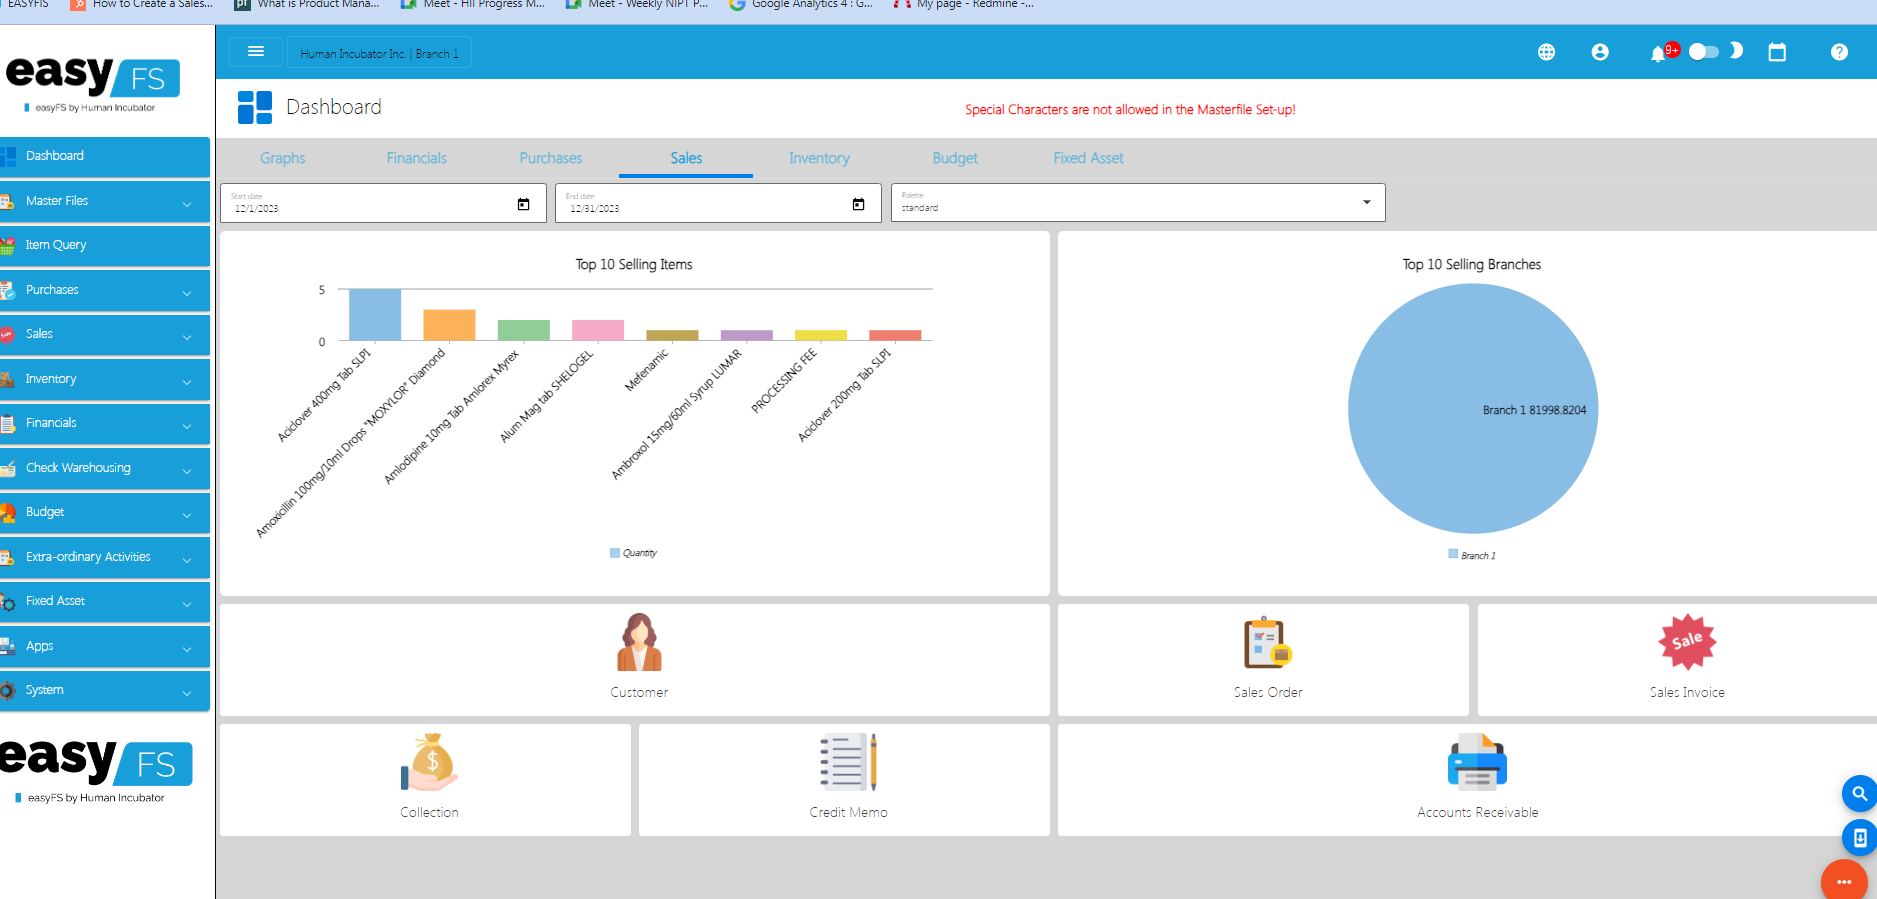
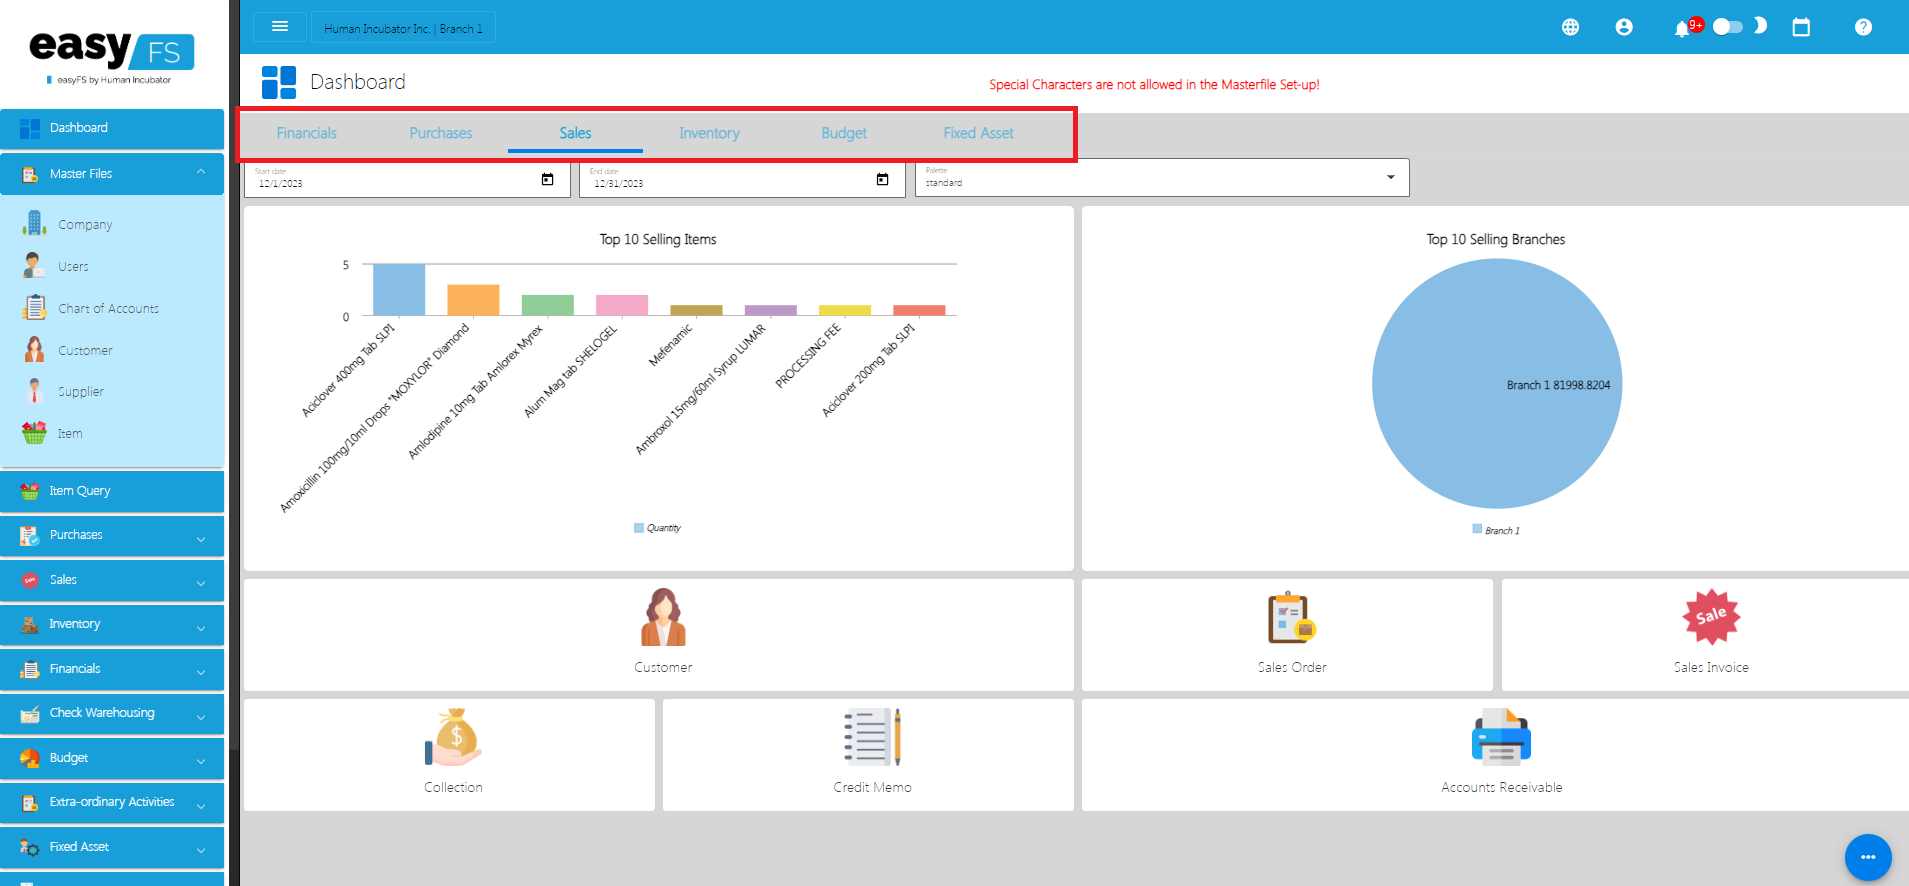
Sales Dashboard – shows the top 10 sellable items and the top 10 branch that has the most sale
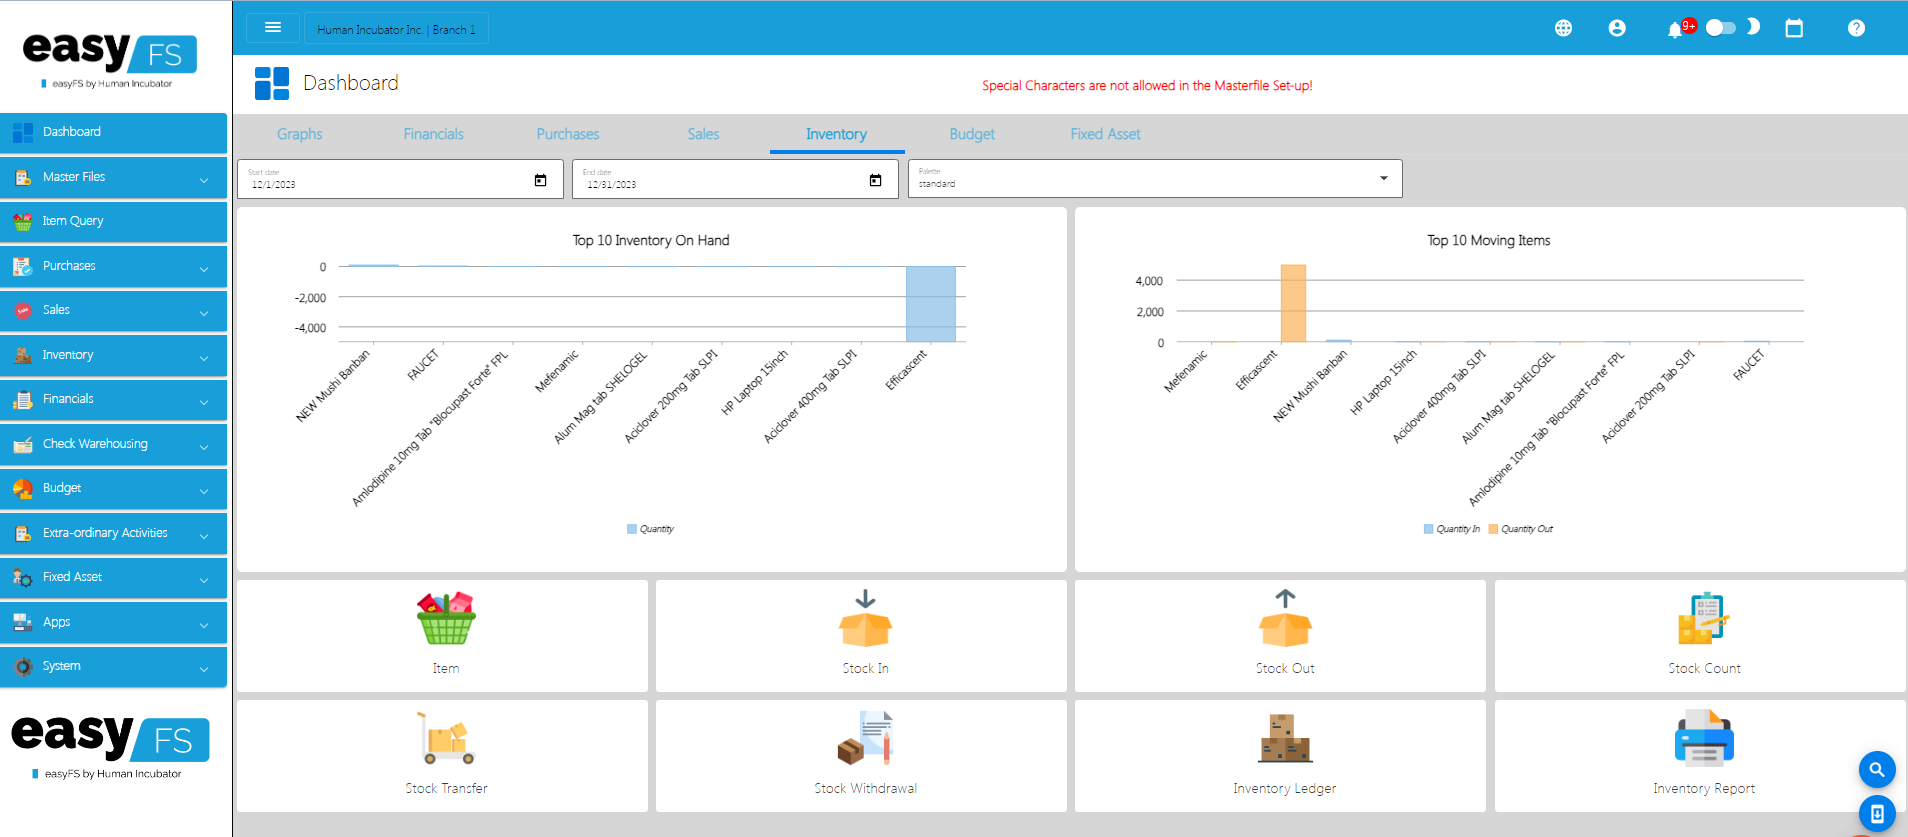
Inventory Dashboard – Displays the top 10 Inventory on Hand Quantity and top 10 fast moving items
Budget Dashboard – Displays 2 buttons, budget button: once clicked the user will be redirected to the budget list module and the Budget Variance button: once clicked the user will be redirected to the budget variance list module
Fixed Asset Dashboard – Displays 3 buttons, Fixed Asset button: once clicked the user will be redirected to the Fixed Asset list module, Assets Disposals button: once clicked the user will be redirected to the Asset Disposal list module and last is Report Button: once clicked the user will be redirected to the Fixed Assets Reports Module.
To assist users in navigating through EasyFS these are the most common terms used in this manual and in the EasyFS system for you to understand easily the User Interface (UI)
Contains high-level options that represent major sections or functionalities of the application.
Dark and Light Mode Toggle – refers to easyFS feature that allows users to switch between different color schemes or visual themes for an application or website. The two primary modes are typically a “dark mode” with dark backgrounds and light text, and a “light mode” with light backgrounds and dark text. Users can choose their preferred mode based on personal preference, situational needs, or simply for aesthetic reasons.
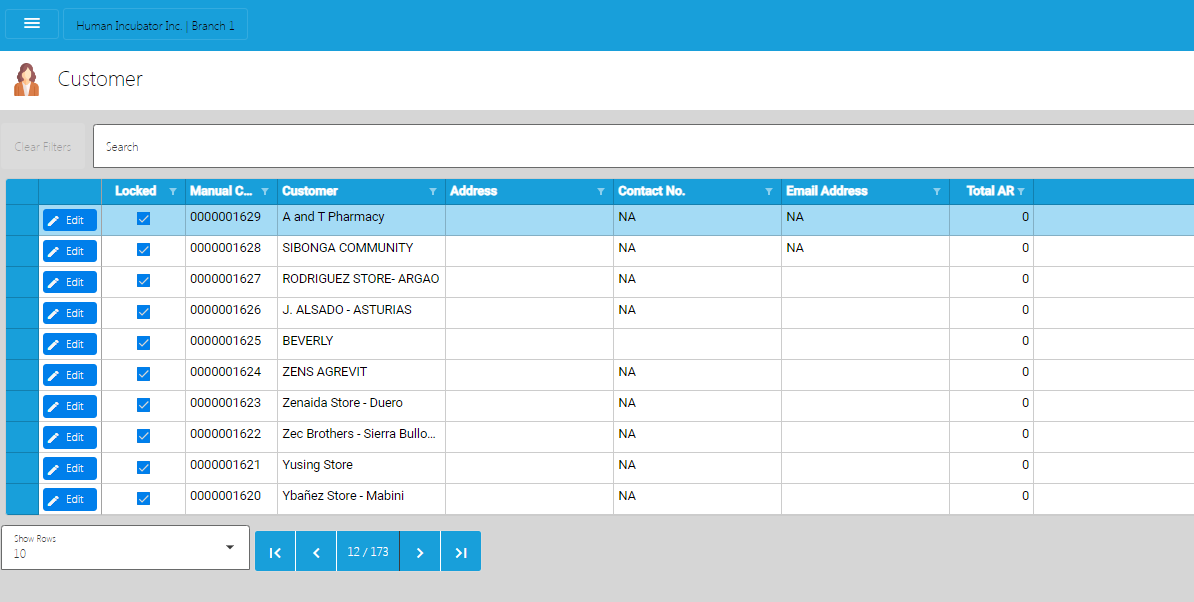
Example is the screenshot below which shows the List of Customers.
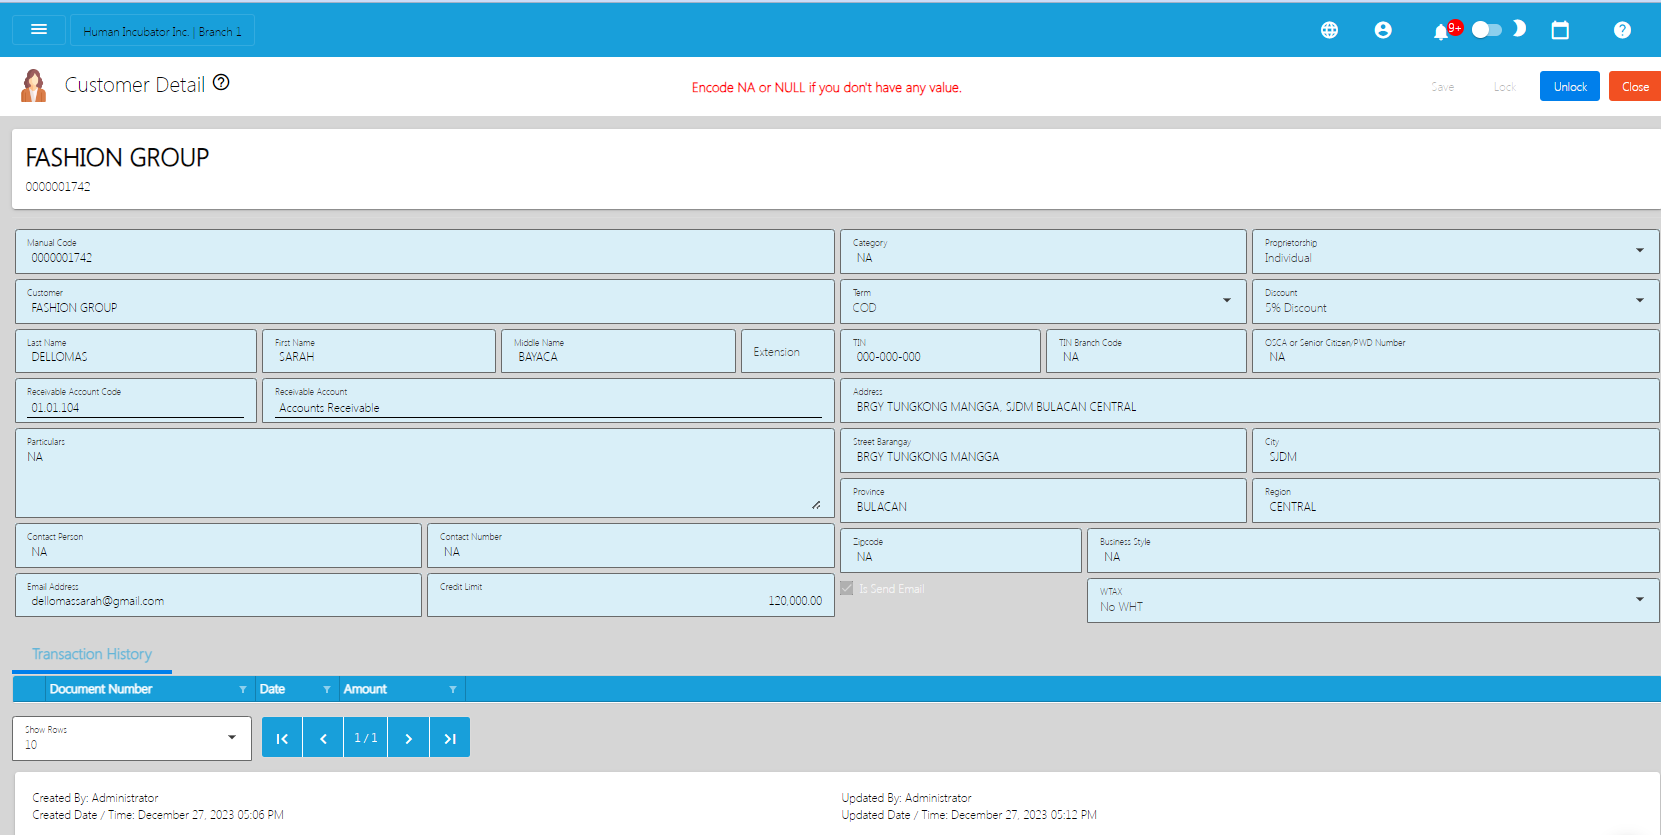
The detailed view provides a more comprehensive set of information about the selected item and may allow users to edit or update the details.

Typically replies within a few hours
 Log in to Messenger