A “supplier” refers to an entity or individual that provides goods or services to a business. This could include companies from which a business purchases inventory, materials, or services necessary for its operations. The supplier is essentially the counterpart to the customer in the context of buying and selling transactions. In the accounting records, transactions with suppliers are recorded to track expenses, manage inventory, and maintain accurate financial records. Moreover, we’ve improved the way you see Supplier details so that you don’t have to wait too long to view them.
4.1.3.1 Add Supplier Manually
Go to Purchasesthen click Supplier.
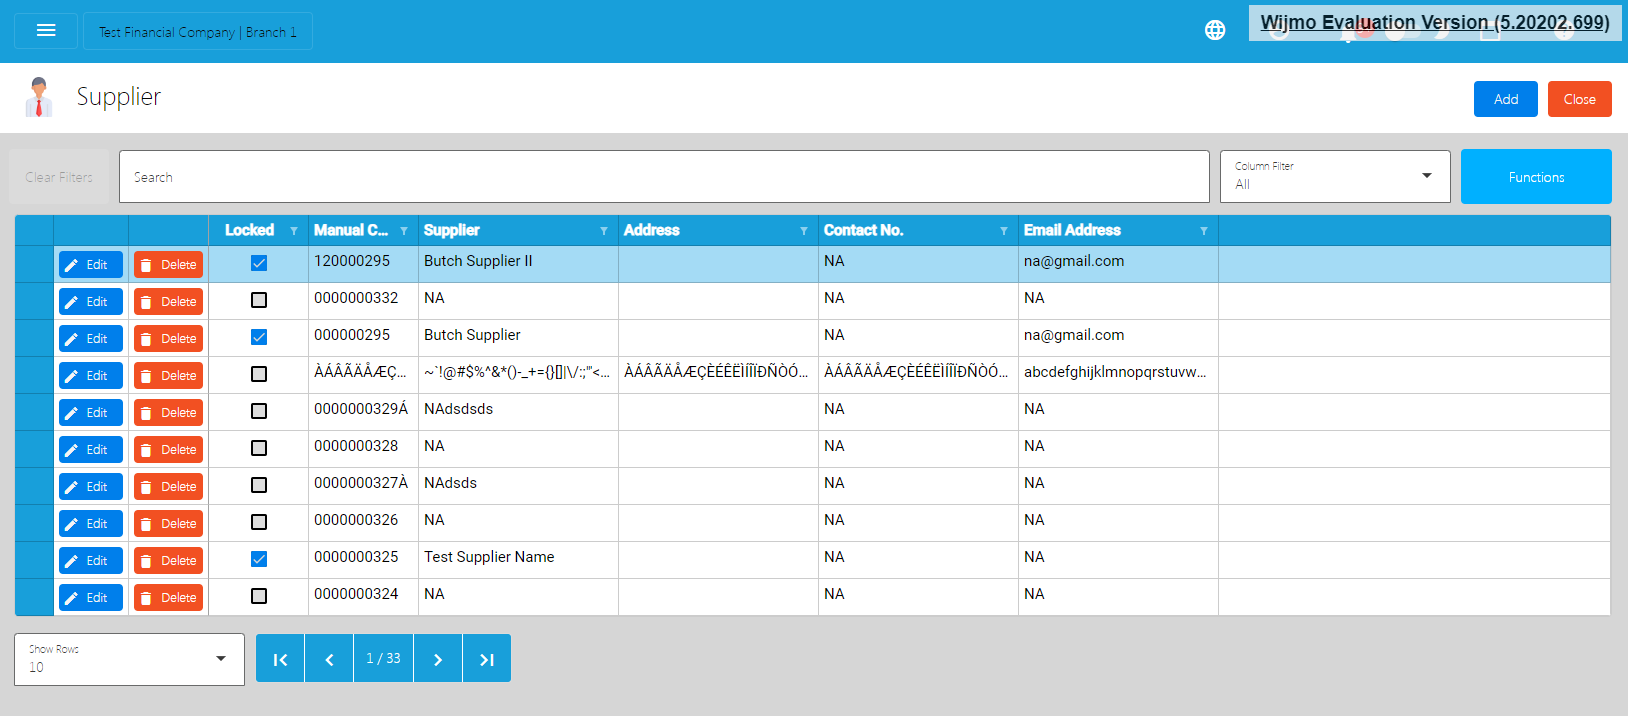
To add a new Supplier, click the Add button that can be seen on the Supplier List.
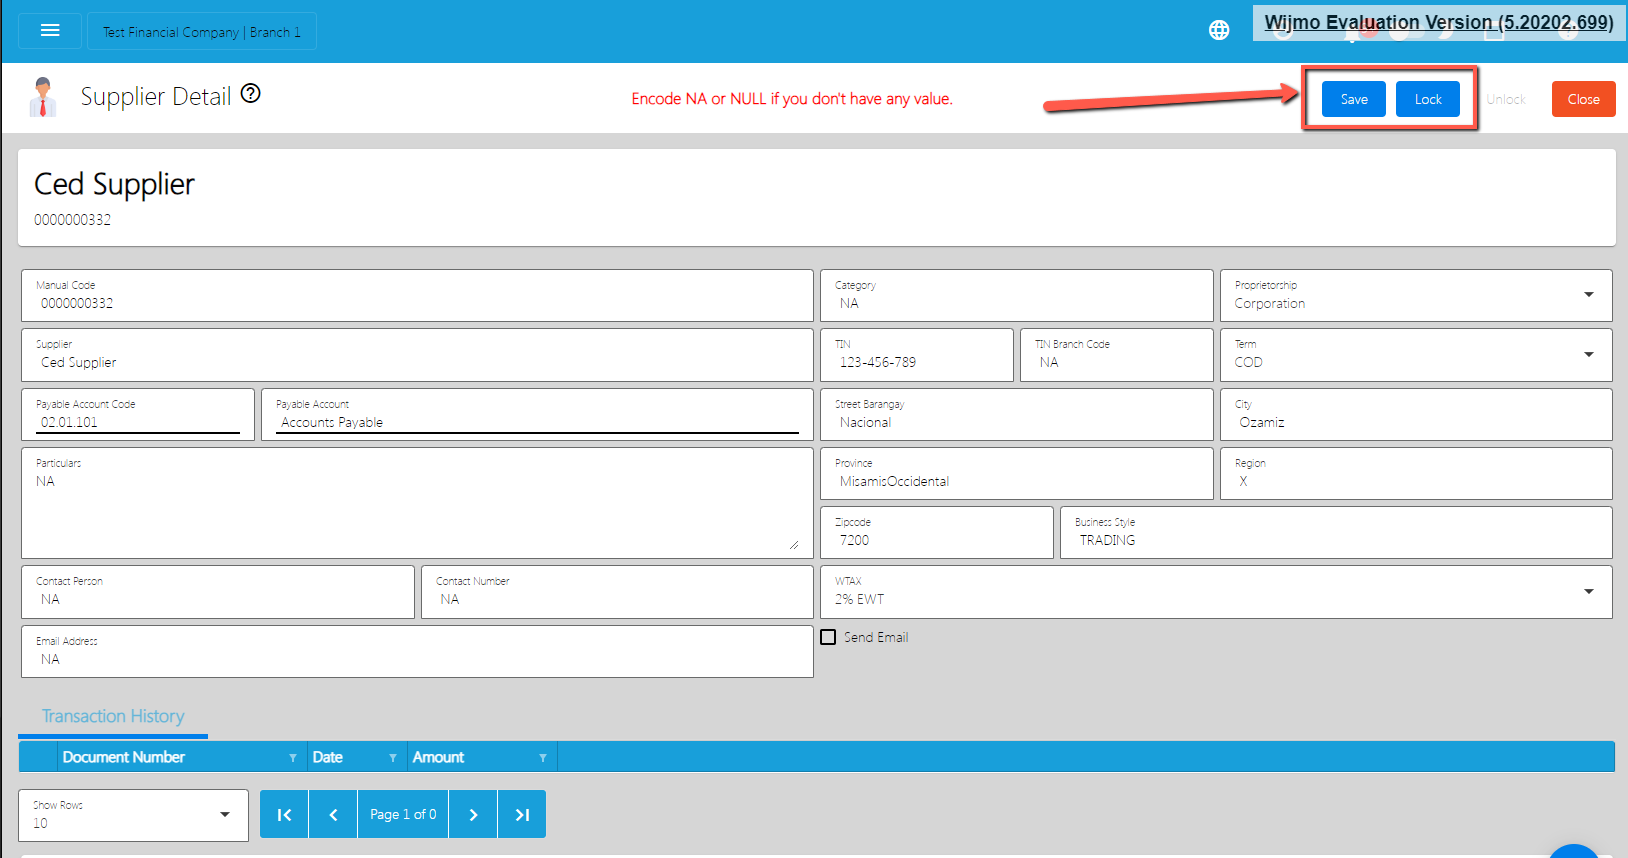
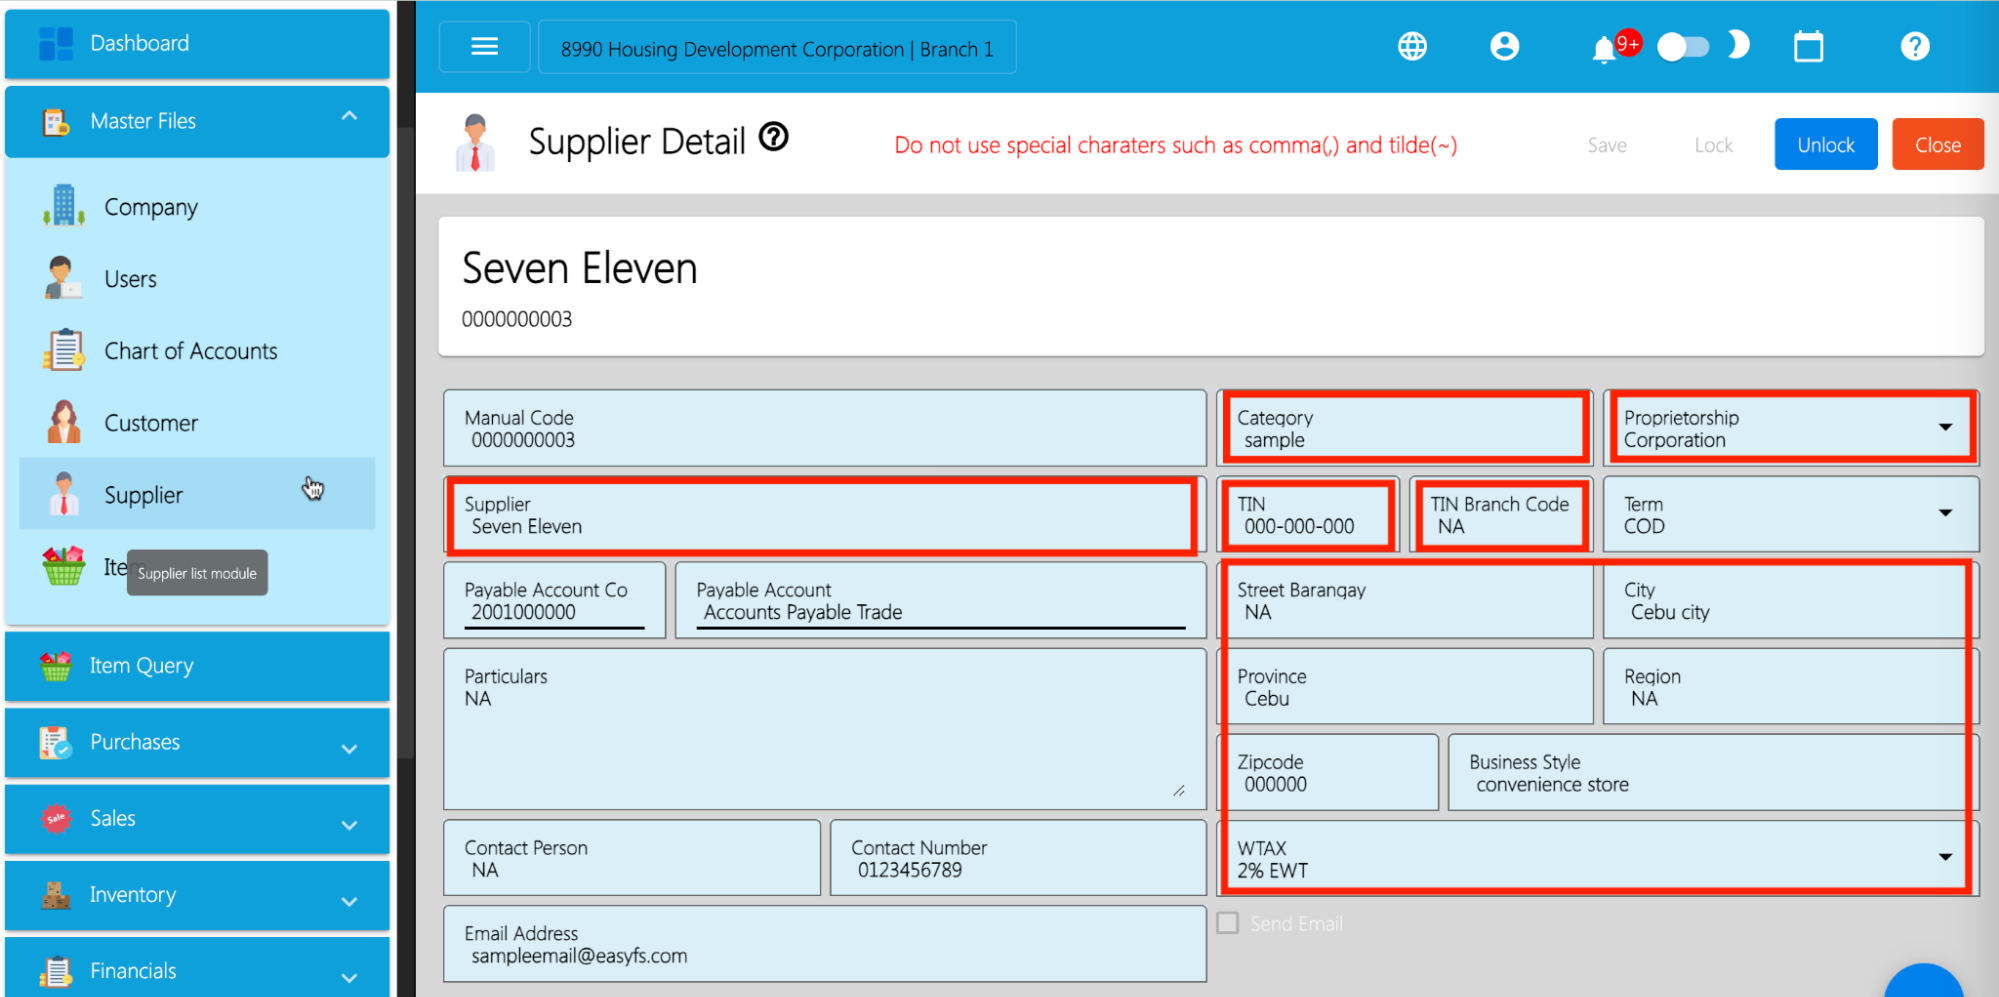
Fill all the important fields for Supplier Detail like:
Note: Highlighted with Orange are required fields. If there is no value, just put NA. In addition, do not provide special characters like ~ ` ! @ # $ % ^ & * ( ) – _ + = { } [ ] | \ / : ; ” ‘ < > , . ? .
Supplier (Name of the Supplier)
Contact Person
Contact Number
Email Address
Proprietorship
First Name
Middle Name
Last Name
TIN
TIN Branch Code
Address lines (Street Barangay, City, Province, Region, Zip Code)
Category
Business Style
WTAX
After filling up the important fields, click Save then Lock buttons.
4.1.3.2 Add Supplier Via Import Function
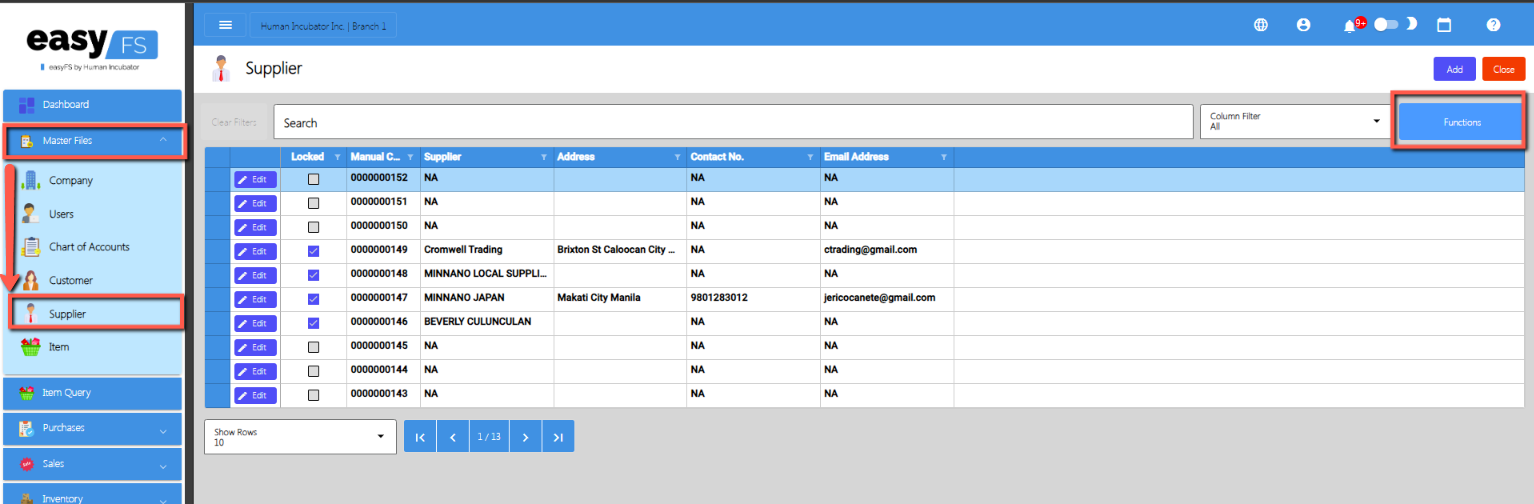
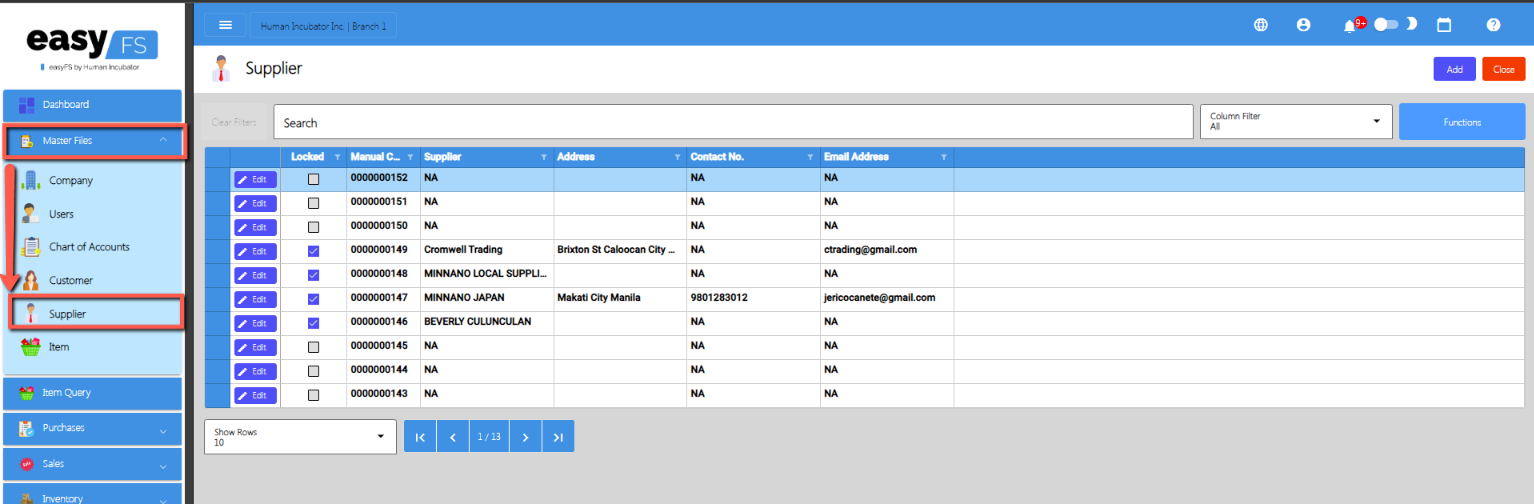
Go to Master Files, then select Supplier.
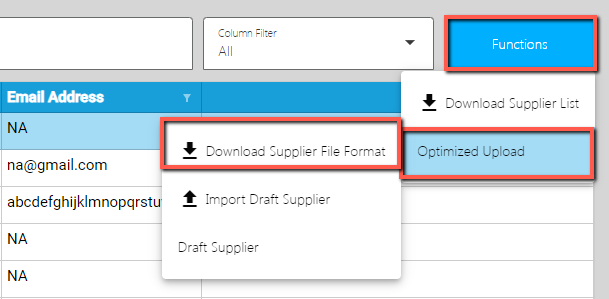
Click the Functions button, then click Optimized Upload, and click Download Supplier File Format.
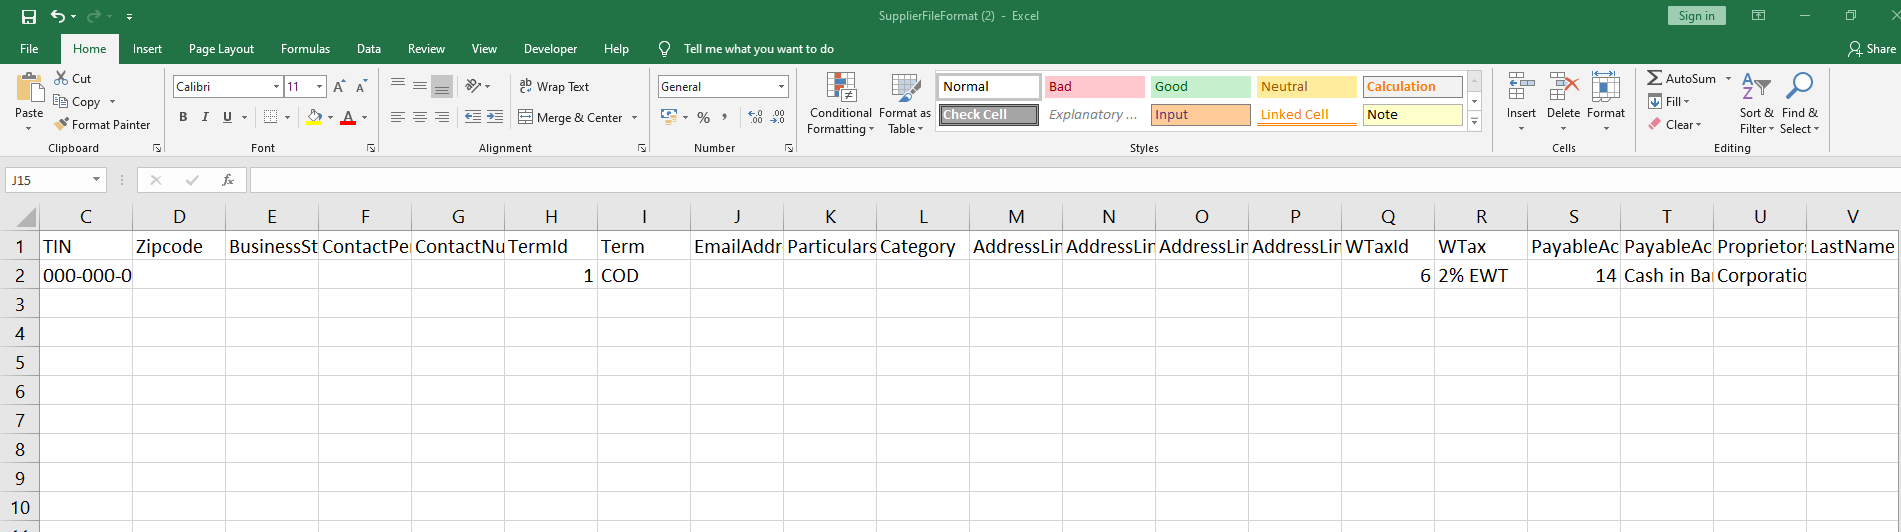
An excel file is automatically downloaded for the Supplier File Format. As your indicator, the file is named SupplierFileFormat.
Open the file. The file is used if you want to import multiple Suppliers in our system. Just keep in mind, we advise with a maximum of 500 Suppliers per upload.
As you can see on the file, it has sample data where you can see the following columns (all in all, there are 25 columns):
ManualCode
Supplier
TIN
Zipcode
BusinessStyle
ContactPerson
ContactNumber
TermId
Term
EmailAddress
Particulars
Category
AddressLineStrtBarangay
AddressLineCity
AddressLineProvince
AddressLineRegion
WTaxId
WTax
PayableAccountId
PayableAccount
Proprietorship
LastName
FirstName
MiddleName
TINBranchCode
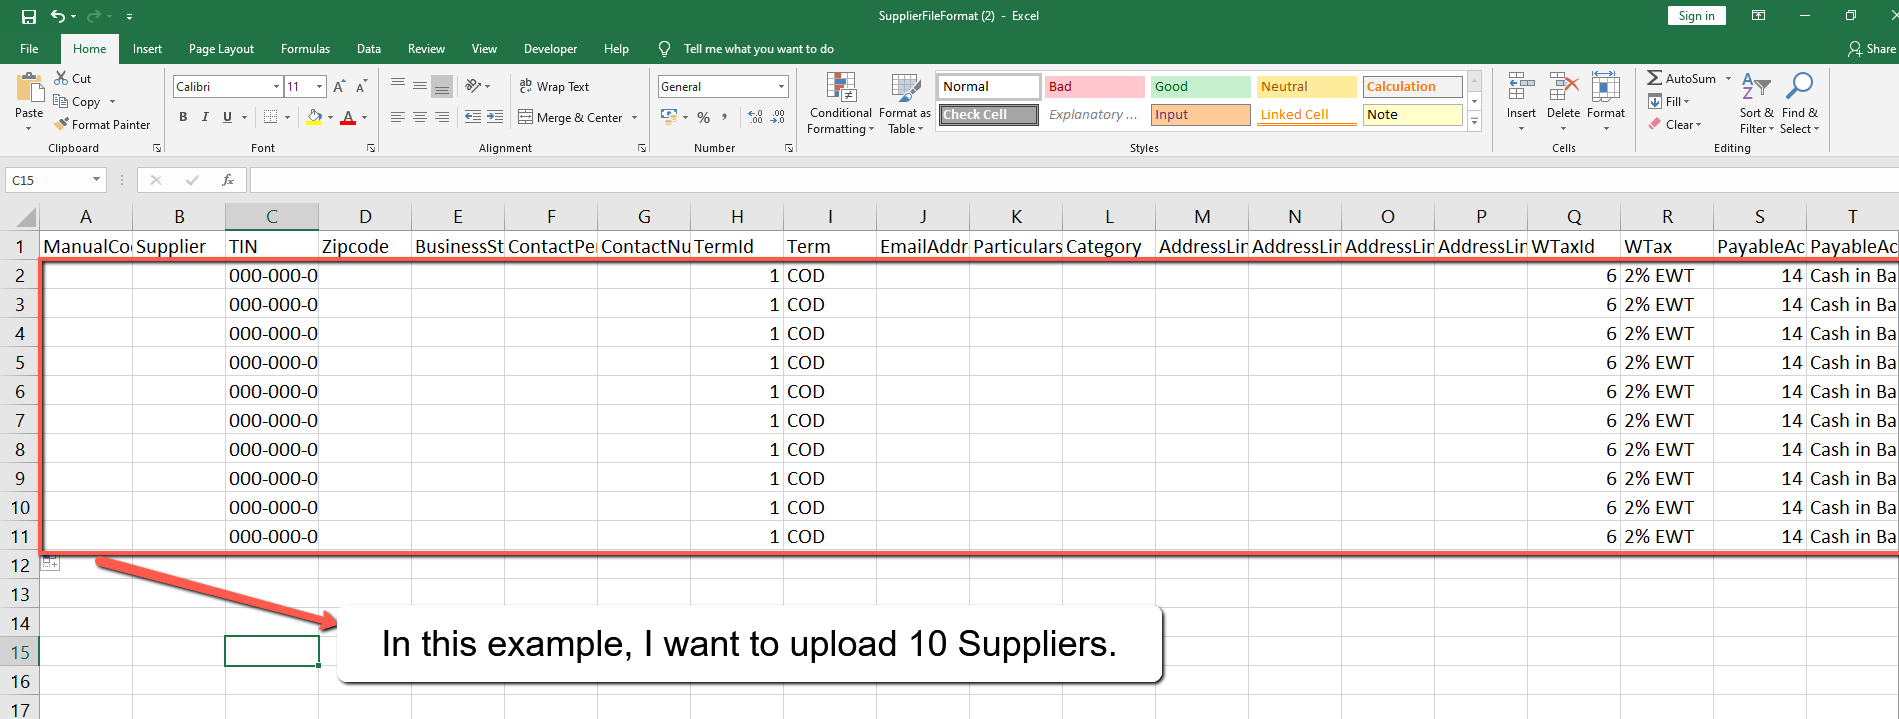
If you have multiple Suppliers to be uploaded, we suggest copying first the sample data then pasting on the next row until it reaches out on the number of items to be uploaded. Take note, there is a limitation of the number of Suppliers to be uploaded. Better read the “Best Practices” section first.
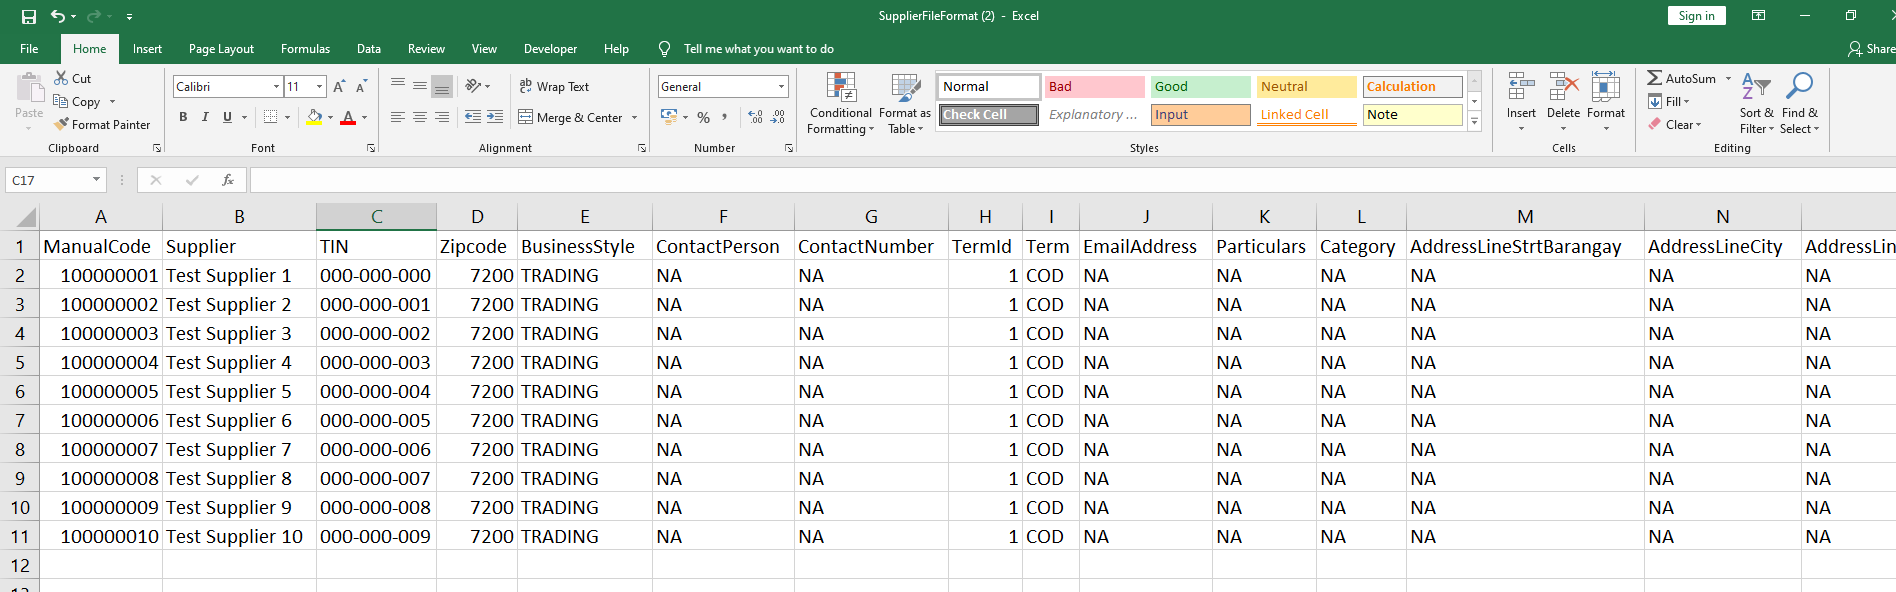
Next, provide a correct value for each column especially on the following column(s):
Take note: Highlighted with ORANGE are the required column, otherwise put NA as value:
Manual Code→ should be unique and has no special characters
Supplier
Category
TIN → format should be 000-000-000
Zipcode → should be numeric
BusinessStyle → should have no special characters (if none, default to NA)
ContactPerson → should have no special characters (if none, default to NA)
ContactNumber → should have no special characters (if none, default to NA)
Term → you can select a Term value from the dropdown. Do not edit the TermId.
EmailAddress → should be valid email address, (if none, default to NA)
Particulars → if none, default to NA
AddressLineStrtBarangay → should have no special characters (if none, default to NA)
AddressLineCity → should have no special characters (if none, default to NA)
AddressLineProvince → should have no special characters (if none, default to NA)
AddressLineRegion → should have no special characters (if none, default to NA)
WTax→ you can select a WTAX value from the dropdown. Do not edit the WTaxId.
PayableAccount→ you can select an Account Receivable value from the dropdown. Do not edit the PayableAccountId.
Proprietorship → just select Corporation or Individual
LastName → if none, default to NA
FirstName → if none, default to NA
MiddleName → if none, default to NA
TINBranchCode → should be numeric
Once okay, save the file.
Go back to the Master Files, then select Supplier.
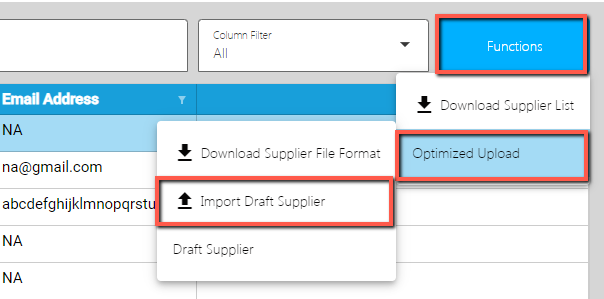
Click again the Functions button,then click Optimized Upload, and click Import Draft Supplier.
Look for the Supplierfile format, then double click.
Wait until it will successfully be imported. At this stage, the Supplier(s) is not yet added to the Supplier list. Instead, it will be added on the Draft Supplier List. Meaning, the Supplier(s) being imported are subject for a review.
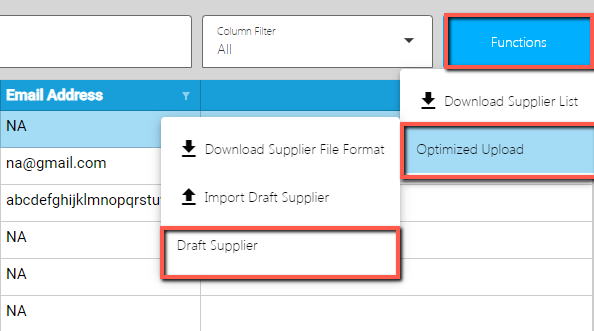
To view the Supplier(s) on the Draft Supplier, click the Functions button, then click on the Draft Supplier.
Review if the Supplier(s) being imported are added on the Draft Supplier list.
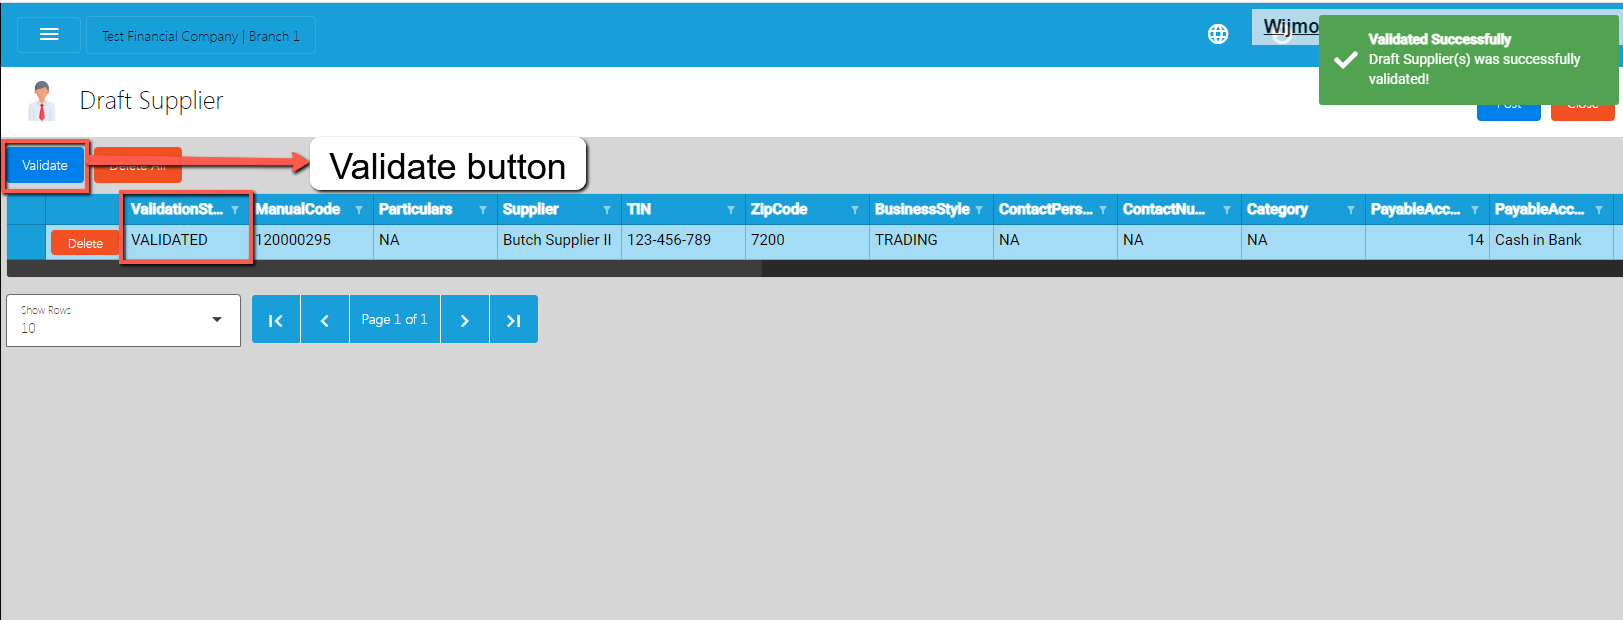
Once okay, click the Validate button. This is to validate first the Supplier detail if everything is correct before it can be posted. Please refer to the following validation status:
No ManualCode provided → means that ManualCode column has no value.
ManualCode already exists. → means that ManualCode column value exists on the Supplier list.
No Particulars provided → means that Particulars column has no value.
No Supplier provided → means that the Supplier column has no value.
Invalid TIN Format → means that the TIN column has an invalid format. Format should be: 000-000-000.
No TIN provided → means that the TIN column has no value.
No ZipCode provided → means that the ZipCode column has no value.
No BusinessStyle provided → means that the BusinessStyle column has no value.
No ContactPerson provided → means that the ContactPerson column has no value.
No ContactNumber provided → means that the ContactNumber column has no value.
No Category provided → means that the Category column has no value.
No CreditLimit provided → means that the CreditLimit column has no value.
No EmailAddress provided → means that the EmailAddress column has no value.
Invalid EmailAddress → means that the provided email address is not in the format of email.
No AdddressLineStrtBarangay provided → means that the AdddressLineStrtBarangay column has no value.
No AdddressLineCity provided → means that the AdddressLineCity column has no value.
No AdddressLineProvince provided → means that the AdddressLineProvince column has no value.
No AdddressLineRegion provided → means that the AdddressLineRegion column has no value.
No Proprietorship provided → means that the Proprietorship column has no value.
InvalidProprietorship → means that the Proprietorship is not equal to Individual OR Corporation.
No LastName provided → means that the LastName column has no value.
No FirstName provided → means that the FirstName column has no value.
No MiddleName provided → means that the MiddleName column has no value.
No TINBranchCode provided → means that the TINBranchCode column has no value.
Supplier already exists → means that Supplier column value exists on the Supplier list.
PayableAccountId not found → means that the PayableAccountId column value does not exist on the database.
TermId not found → means that the TermIdcolumn value does not exist on the database.
WTAXId not found → means that the WTAXIdcolumn value does not exist on the database.
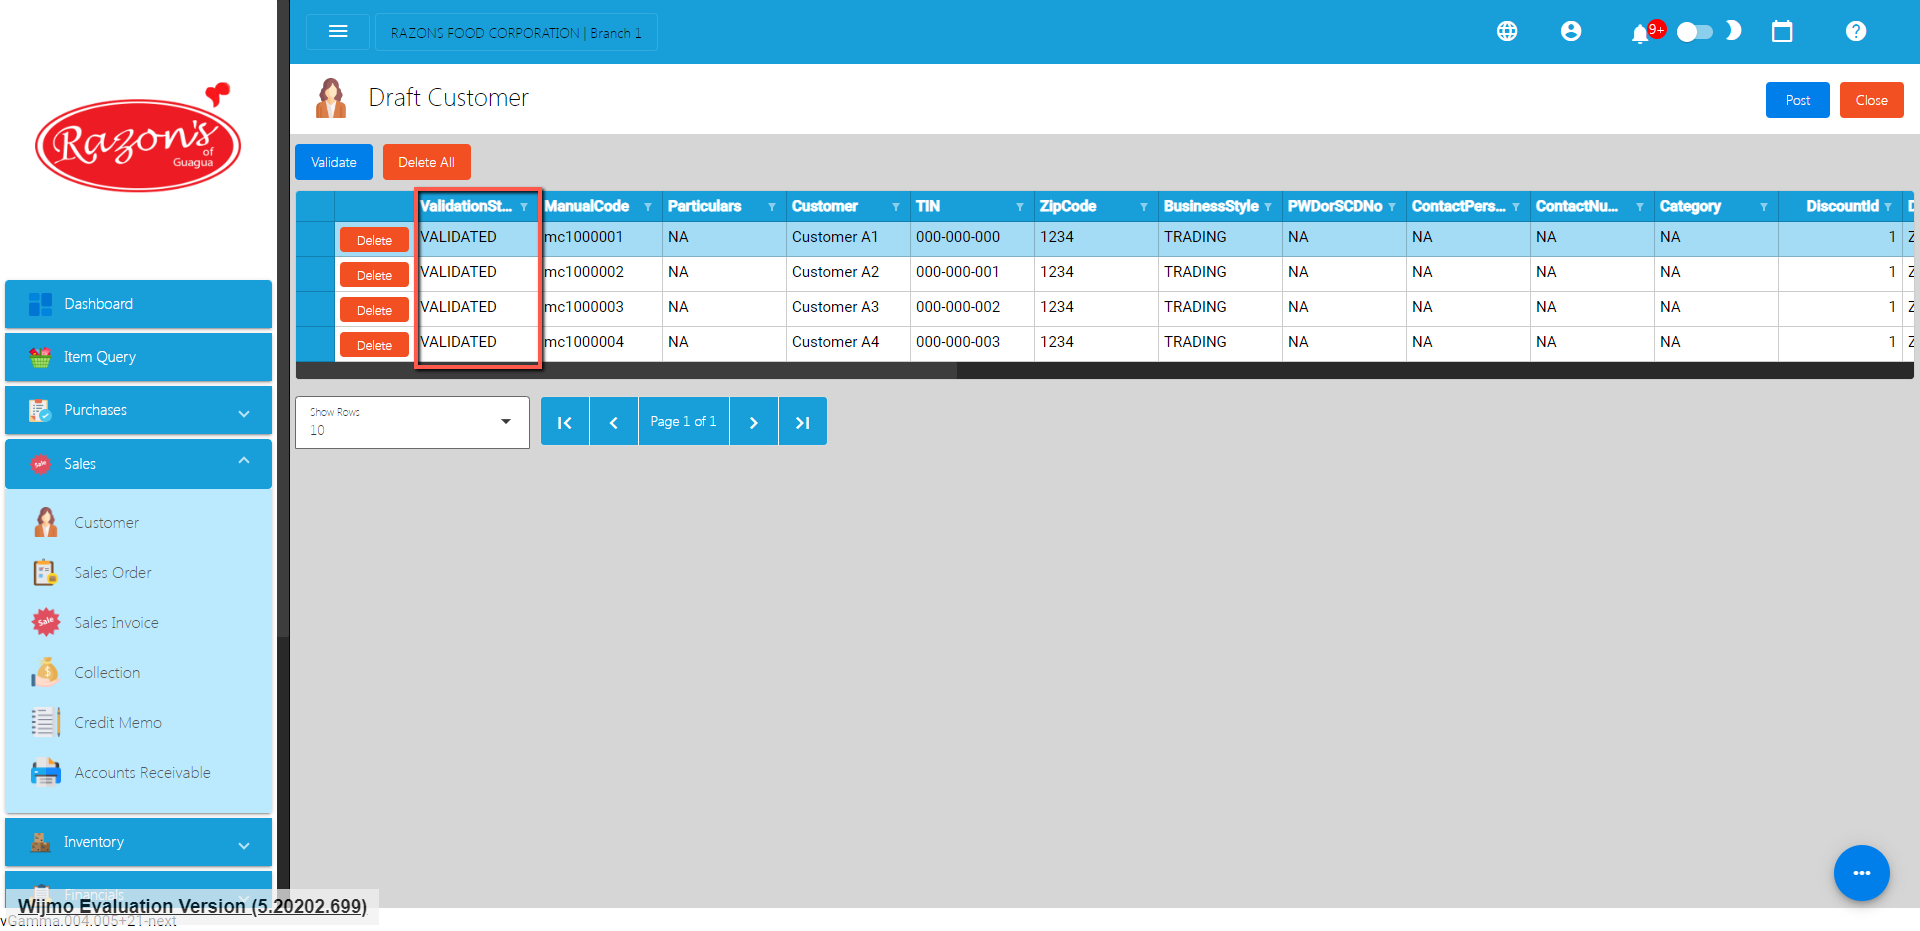
Once validation is okay, it will update the ValidationStatus. Read the validationStatus on what issues are being found. To correct the Supplier detail, double click on the column where it has an issue then enter a valid value, then press Enter. After that, validate again by clicking the Validate button.
Once everything is okay (ValidationStatus is equal to Validated), click the Post button. A confirmation message will display, click the Confirm button. This will now add the validated Supplier(s) on the Supplier list.
To check if the Supplier(s) are added on the Item list, click the Close button then look for the Supplier on the Supplier List.
Struggling to accept online payments? Discover how HII Online Payment Service solves your credit card merchant dilemma. HII Online Payment Service. Coming soon!
Struggling to accept online payments? Discover how HII Online Payment Service solves your credit card merchant dilemma. HII Online Payment Service. Coming soon!
Take advantage of Free easyFS Usage for Accounting Firms in the Philippines. Contact Us at +639176280355 or email at hiisales@humedit.ph
Take advantage of Free easyFS Usage for Accounting Firms in the Philippines. Contact Us at +639176280355 or email at hiisales@humedit.ph
Struggling to accept online payments? Discover how HII Online Payment Service solves your credit card merchant dilemma. HII Online Payment Service. Coming soon!
Struggling to accept online payments? Discover how HII Online Payment Service solves your credit card merchant dilemma. HII Online Payment Service. Coming soon!
Take advantage of Free easyFS Usage for Accounting Firms in the Philippines. Contact Us at +639176280355 or email at hiisales@humedit.ph
Take advantage of Free easyFS Usage for Accounting Firms in the Philippines. Contact Us at +639176280355 or email at hiisales@humedit.ph
Struggling to accept online payments? Discover how HII Online Payment Service solves your credit card merchant dilemma. HII Online Payment Service. Coming soon!
Struggling to accept online payments? Discover how HII Online Payment Service solves your credit card merchant dilemma. HII Online Payment Service. Coming soon!
Take advantage of Free easyFS Usage for Accounting Firms in the Philippines. Contact Us at +639176280355 or email at hiisales@humedit.ph
Take advantage of Free easyFS Usage for Accounting Firms in the Philippines. Contact Us at +639176280355 or email at hiisales@humedit.ph
Struggling to accept online payments? Discover how HII Online Payment Service solves your credit card merchant dilemma. HII Online Payment Service. Coming soon!
Struggling to accept online payments? Discover how HII Online Payment Service solves your credit card merchant dilemma. HII Online Payment Service. Coming soon!
Take advantage of Free easyFS Usage for Accounting Firms in the Philippines. Contact Us at +639176280355 or email at hiisales@humedit.ph
Take advantage of Free easyFS Usage for Accounting Firms in the Philippines. Contact Us at +639176280355 or email at hiisales@humedit.ph
Struggling to accept online payments? Discover how HII Online Payment Service solves your credit card merchant dilemma. HII Online Payment Service. Coming soon!
Struggling to accept online payments? Discover how HII Online Payment Service solves your credit card merchant dilemma. HII Online Payment Service. Coming soon!
Take advantage of Free easyFS Usage for Accounting Firms in the Philippines. Contact Us at +639176280355 or email at hiisales@humedit.ph
Take advantage of Free easyFS Usage for Accounting Firms in the Philippines. Contact Us at +639176280355 or email at hiisales@humedit.ph
Struggling to accept online payments? Discover how HII Online Payment Service solves your credit card merchant dilemma. HII Online Payment Service. Coming soon!
Struggling to accept online payments? Discover how HII Online Payment Service solves your credit card merchant dilemma. HII Online Payment Service. Coming soon!
Take advantage of Free easyFS Usage for Accounting Firms in the Philippines. Contact Us at +639176280355 or email at hiisales@humedit.ph
Take advantage of Free easyFS Usage for Accounting Firms in the Philippines. Contact Us at +639176280355 or email at hiisales@humedit.ph
Struggling to accept online payments? Discover how HII Online Payment Service solves your credit card merchant dilemma. HII Online Payment Service. Coming soon!
Struggling to accept online payments? Discover how HII Online Payment Service solves your credit card merchant dilemma. HII Online Payment Service. Coming soon!
Take advantage of Free easyFS Usage for Accounting Firms in the Philippines. Contact Us at +639176280355 or email at hiisales@humedit.ph
Take advantage of Free easyFS Usage for Accounting Firms in the Philippines. Contact Us at +639176280355 or email at hiisales@humedit.ph
Struggling to accept online payments? Discover how HII Online Payment Service solves your credit card merchant dilemma. HII Online Payment Service. Coming soon!
Struggling to accept online payments? Discover how HII Online Payment Service solves your credit card merchant dilemma. HII Online Payment Service. Coming soon!

 Log in to Messenger