1.3 Purpose of this User Manual
1.4 Who Should Use This Manual
1.4 Best Practices and System Limitations
1.4.1 Setting up the Master Files
4.1.1.1 How to Add an Item Manually
4.1.1.2 Add Item Via Import Function
4.1.2.2 Add Customer Via Import Function
4.1.3.2 Add Supplier Via Import Function
List of All Users that were added to the System
4.1.6.1 Chart of Accounts Lists
4.1.6.2 Manual Add Chart of Accounts
4.1.6.2 Add Chart of Accounts via Upload Account
4.1.8.2 Manual Add of Currency
4.2.1.1 Manual Update Item Detail
4.2.1.2 Update Item Detail in Bulk
4.2.2.1 Manual Update Supplier Detail
4.2.2.1 Update Supplier Detail in Bulk
4.2.3.1 Manual Update Customer Detail
4.2.3.1 Update Customer Detail in Bulk
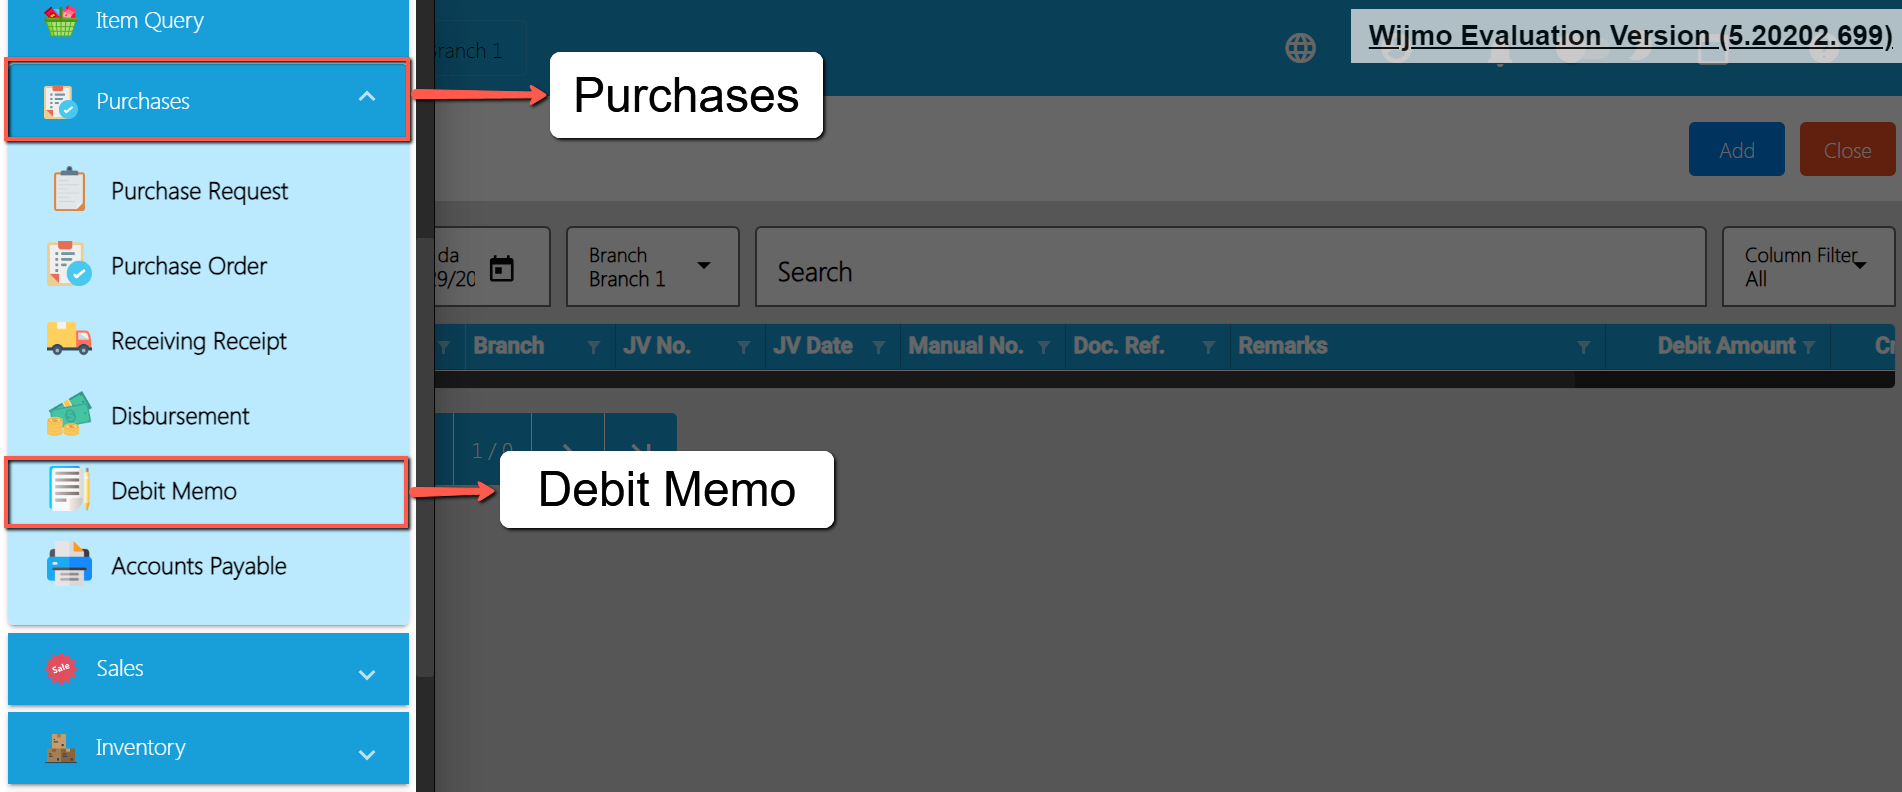
5.2 Purchases Transaction Module
Cancel Purchase Request Transaction
Purchase Order Transaction via Upload Template
Cancel Purchase Order Transaction
Cancel Receiving Receipt Transaction
Cancel Disbursement Transaction
Debit Memo Transaction via Upload Template
Sales Order Transaction via Upload Template
Cancel Sales Order Transaction
Sales Invoice Transaction via Upload Template
Cancel Sales Invoice Transaction
Collection Transaction via Upload Template
Scenario 3: Extra-Ordinary Activities
Scenario 4: Multi-Branch with EasyPOS Integration
Accounts Payable Voucher Report
Accounts Payable By Currency Report
Purchase Request Summary Report
Purchase Request Detail Report
Purchase Order Detail With Balance Report
Receiving Receipt Summary Report
Receiving Receipt Detail Report
Print or Download the PDF Report
Available Item Per Batch Report
Cancelled Purchase Request Report
Cancelled Purchase Order Report
Cancelled Receiving Receipt Report
Accounts Receivable Summary Report
Accounts Receivable by Term Report
Accounts Receivable by Currency Report
Accounts Receivable Report (One Month)
Statement of Account (By Date Range)
Collection Summary by PayType Report
Cancelled Sales Invoice Report
Sales Invoice Detail Report with Cost
Stock Transfer Detailed Report
13.1.1 Benefits of Integration
13.2.1 EasyPOS Integration Overview
13.3 How to Set Up Integrations
.toc-wrapper .c27{margin-left: 6pt}.toc-wrapper .c46{margin-left:14pt}.toc-wrapper .c46 .c14 a,.toc-wrapper .c50 a{font-size:13px}.toc-wrapper .c50{margin-left:18pt;} .manual-content table td, .manual-content table th{padding:0;border: 1px #aaa solid;padding: 10px;} .manual-content table td span,.manual-content table td p,.manual-content table td li{font-size:11px!important;}Debit memos are commonly used in various business transactions, such as in accounts payable processes or when correcting billing errors.
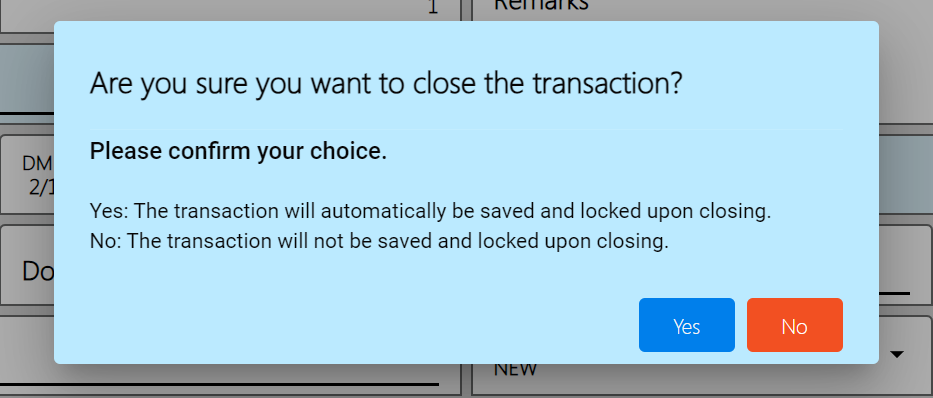
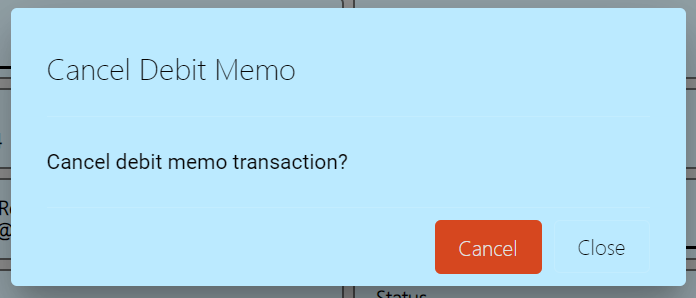
Important: If you forget to lock the Debit Memo transaction and quickly click the Close button, you’ll see a popup asking for a confirmation:
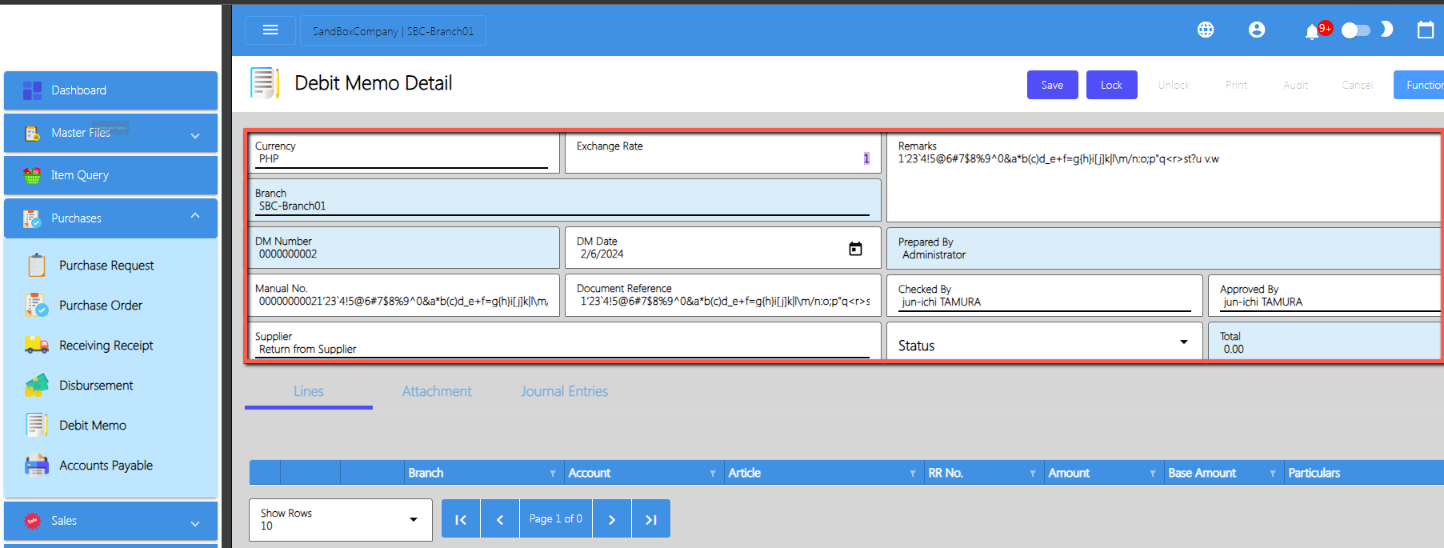
Example: 1‘23`4!5@6#7$8%9^0&a*b(c)d_e+f=g{h}i[j]k|l\m/n:o;p”q<r>st?u v.w
– if the Manual Code starts with 000, don’t forget to put an apostrophe (‘) at the beginning of the Manual Code.
Example: ‘00000111231414
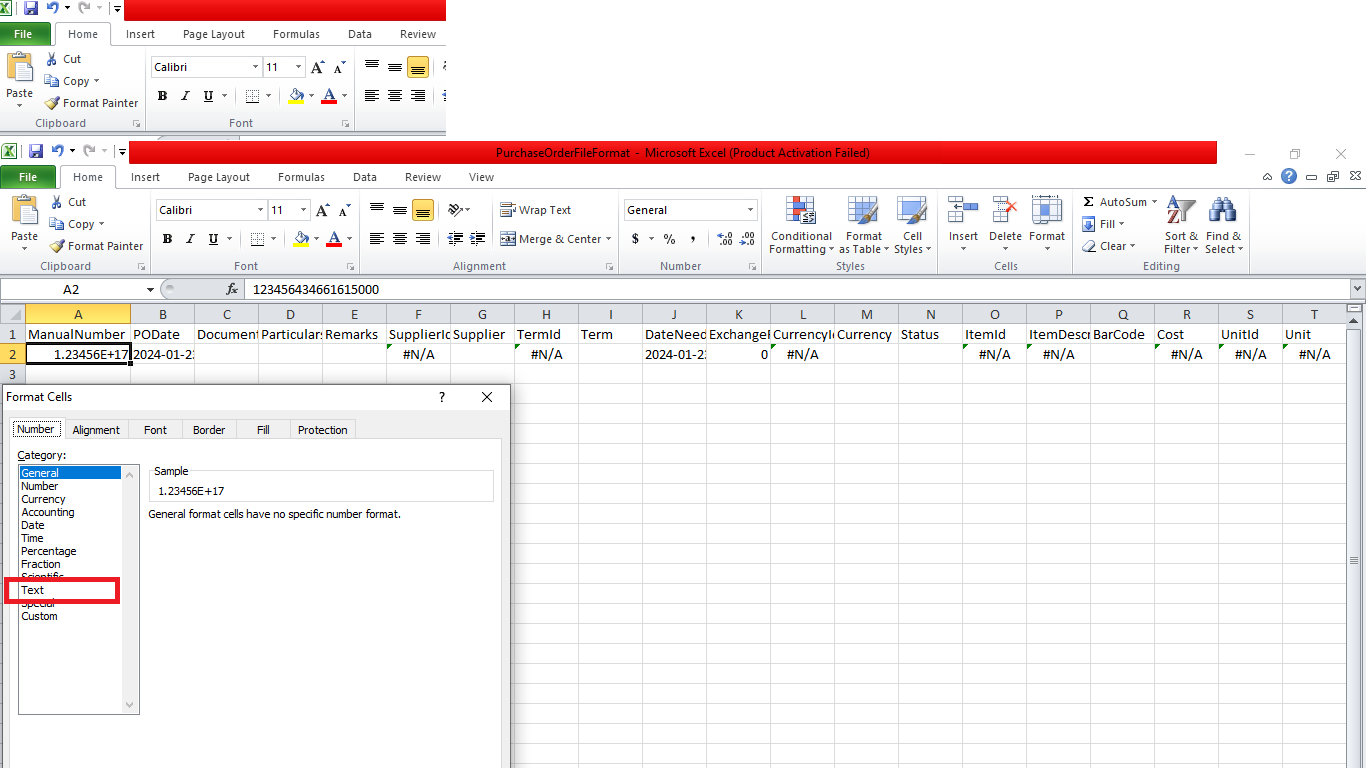
– if the Manual Code starts with a number but exceeds more than 10 digits, format the cell to Text to show all the numbers.
Steps on how to change the format to Text:
1. Right Click the Cell
2. Click Format Cell
3. Choose Text
4. Click OK
5. Then reselect the field
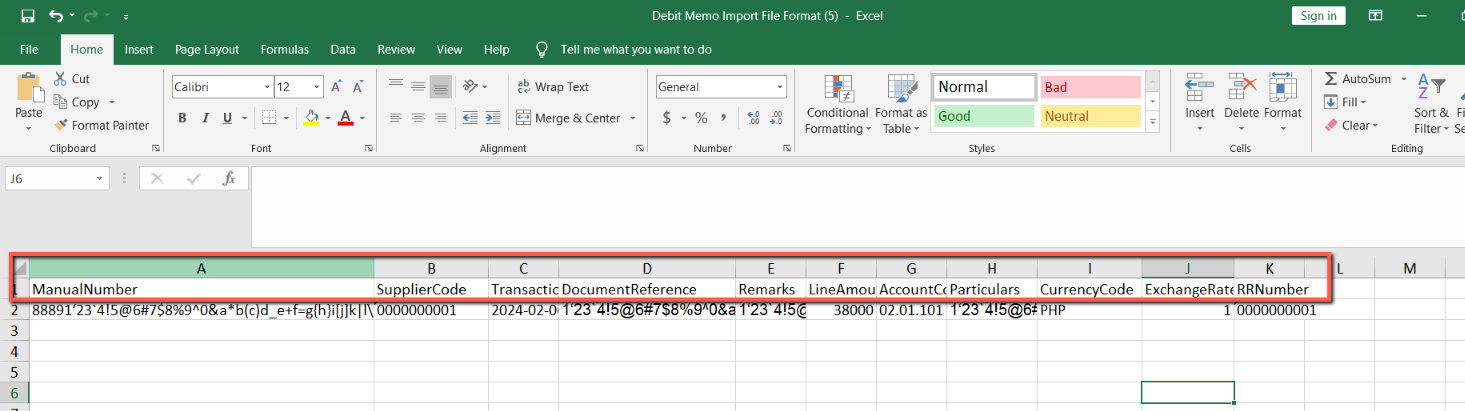
B. Supplier Code Add supplier code
C. Document Reference should be unique per transaction,alphanumeric and special characters should not exceed 255 characters.
Example: 1‘23`4!5@6#7$8%9^0&a*b(c)d_e+f=g{h}i[j]k|l\m/n:o;p”q<r>st?u v.w
– if the Document Reference starts with 000, don’t forget to put an apostrophe (‘) at the beginning of the Manual Code.
Example: ‘00000111231414
– if the Document Reference starts with a number but exceeds more than 10 digits, format the cell to Text to show all the numbers.
Steps on how to change the format to Text:
1. Right Click the Cell
2. Click Format Cell
3. Choose Text
4. Click OK
5. Then reselect the field
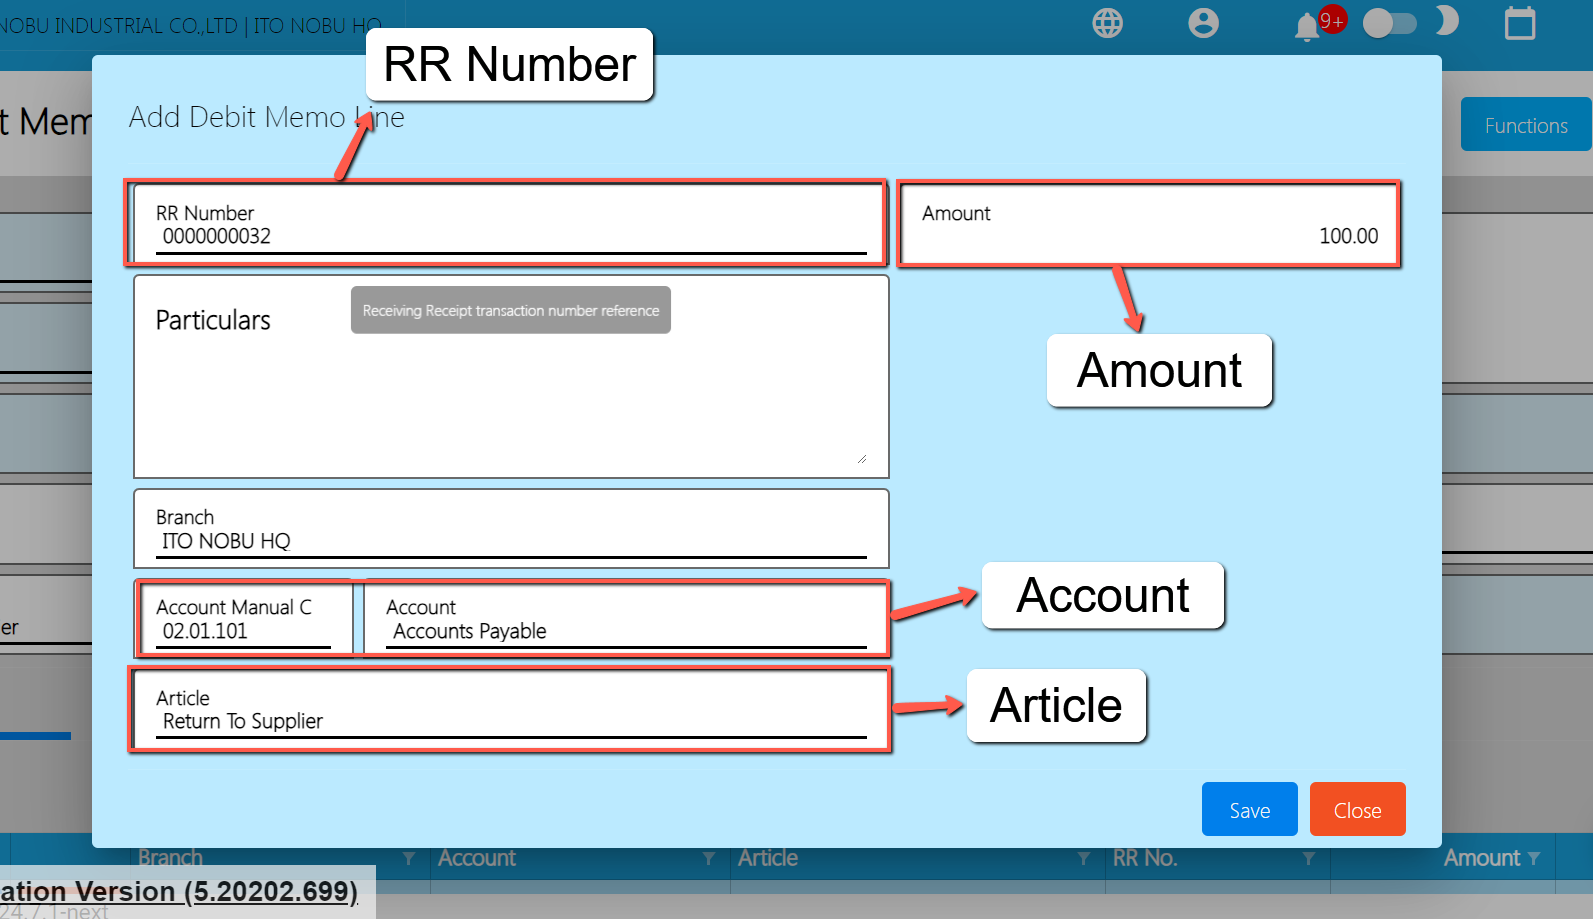
D. Remarks – in this column are basically the remarks for the whole transaction, it should be alphanumeric and Special characters should not exceed 255 characters.
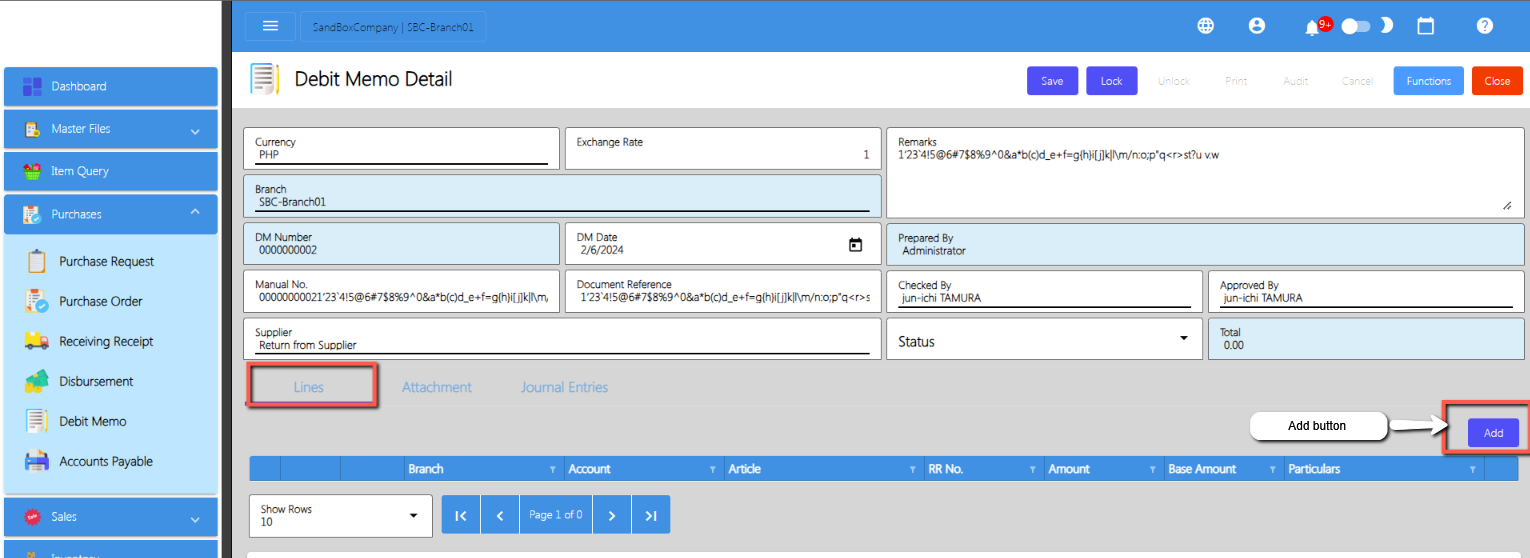
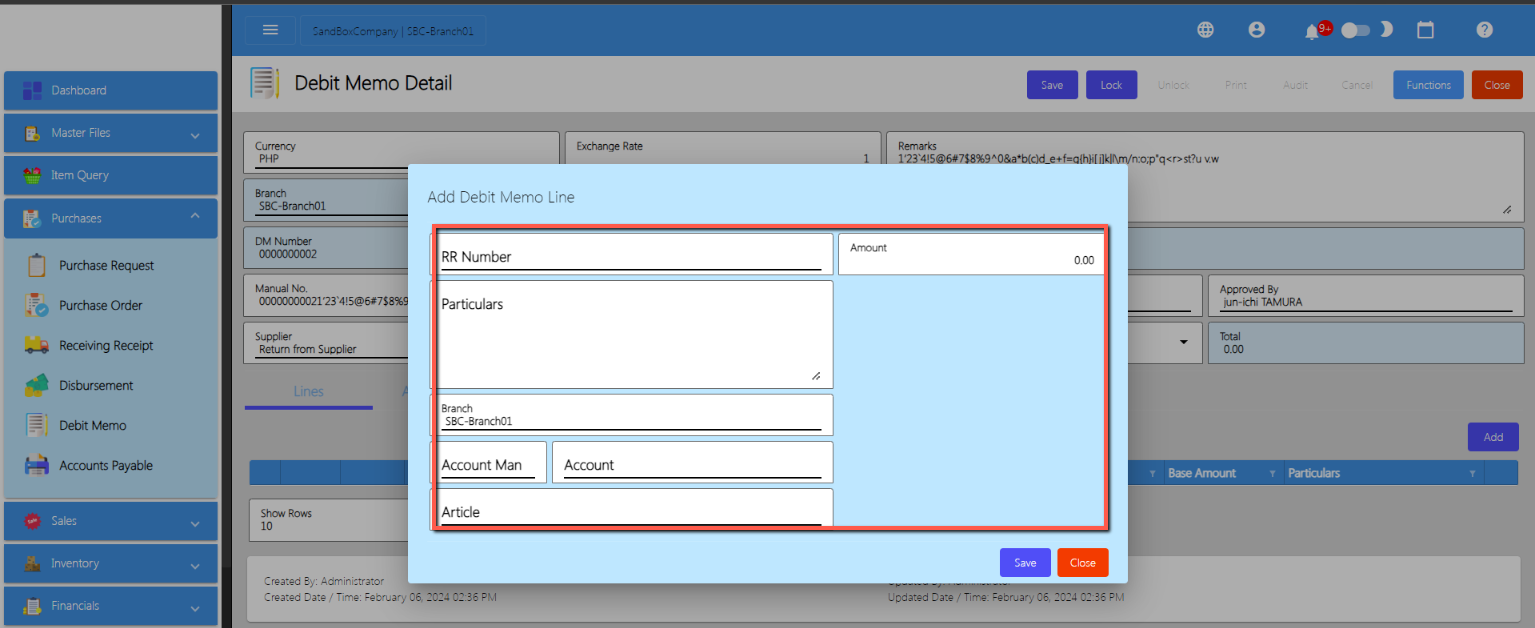
E. Particulars – in this column this is basically the remarks for each item line, it should be alphanumeric and Special characters should not exceed 255 characters.
F. Line Amount – Input amount to correct/adjust customer bill
G. Account – Input Account Code in column
H. Currency – Input specific Currency in column
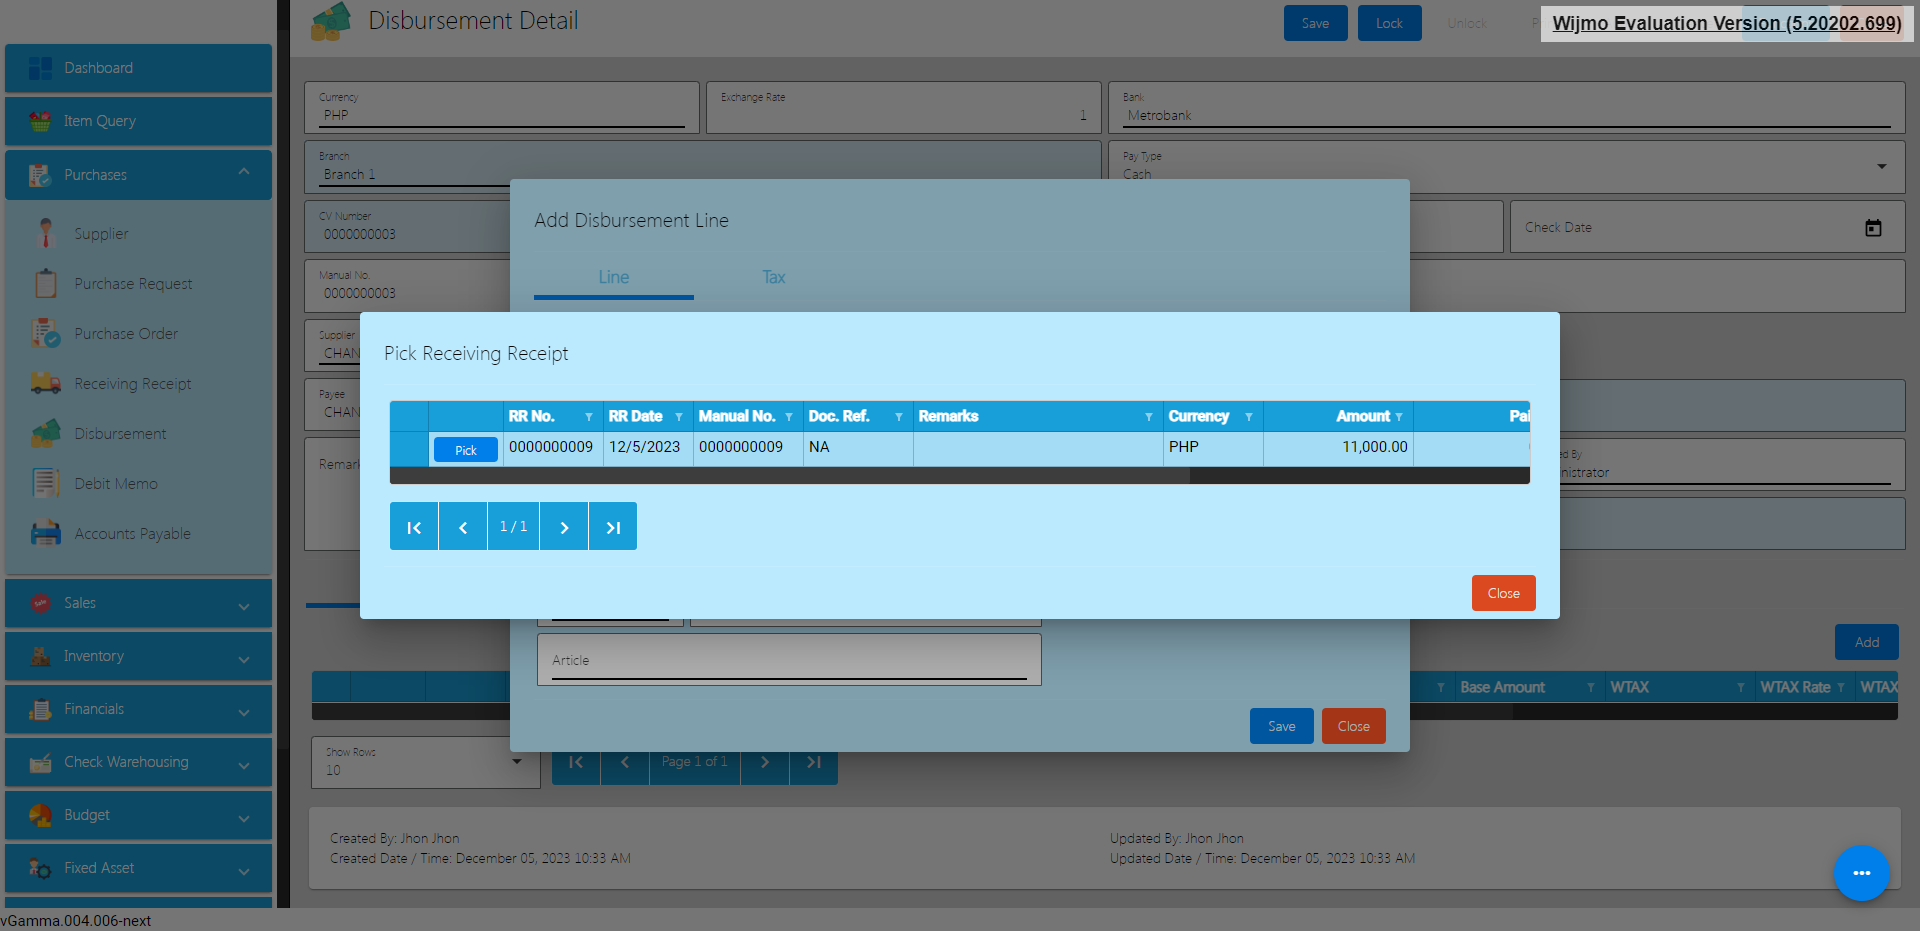
I. RR Number – Add RRNumber
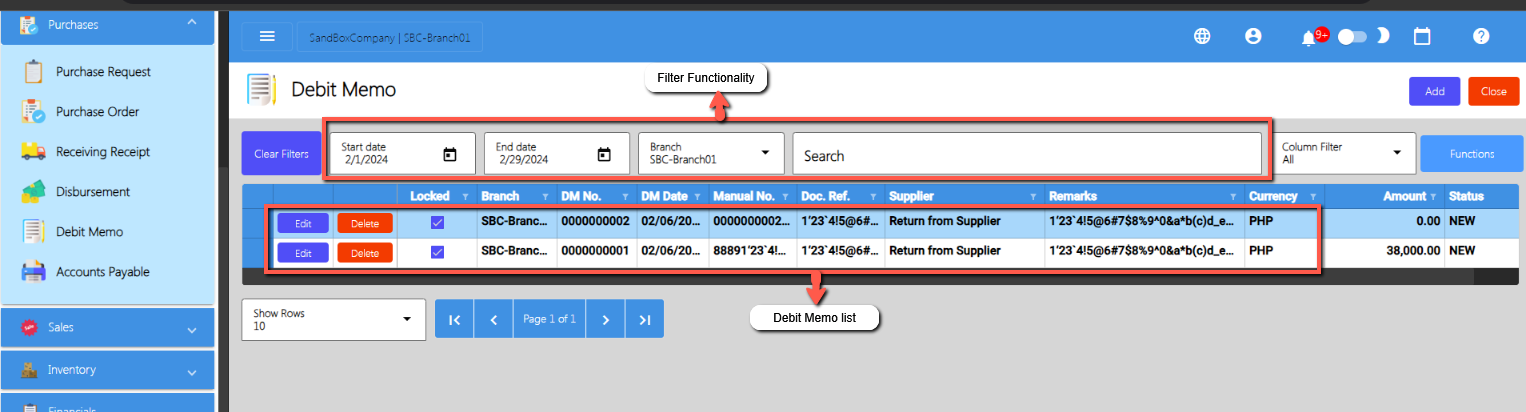
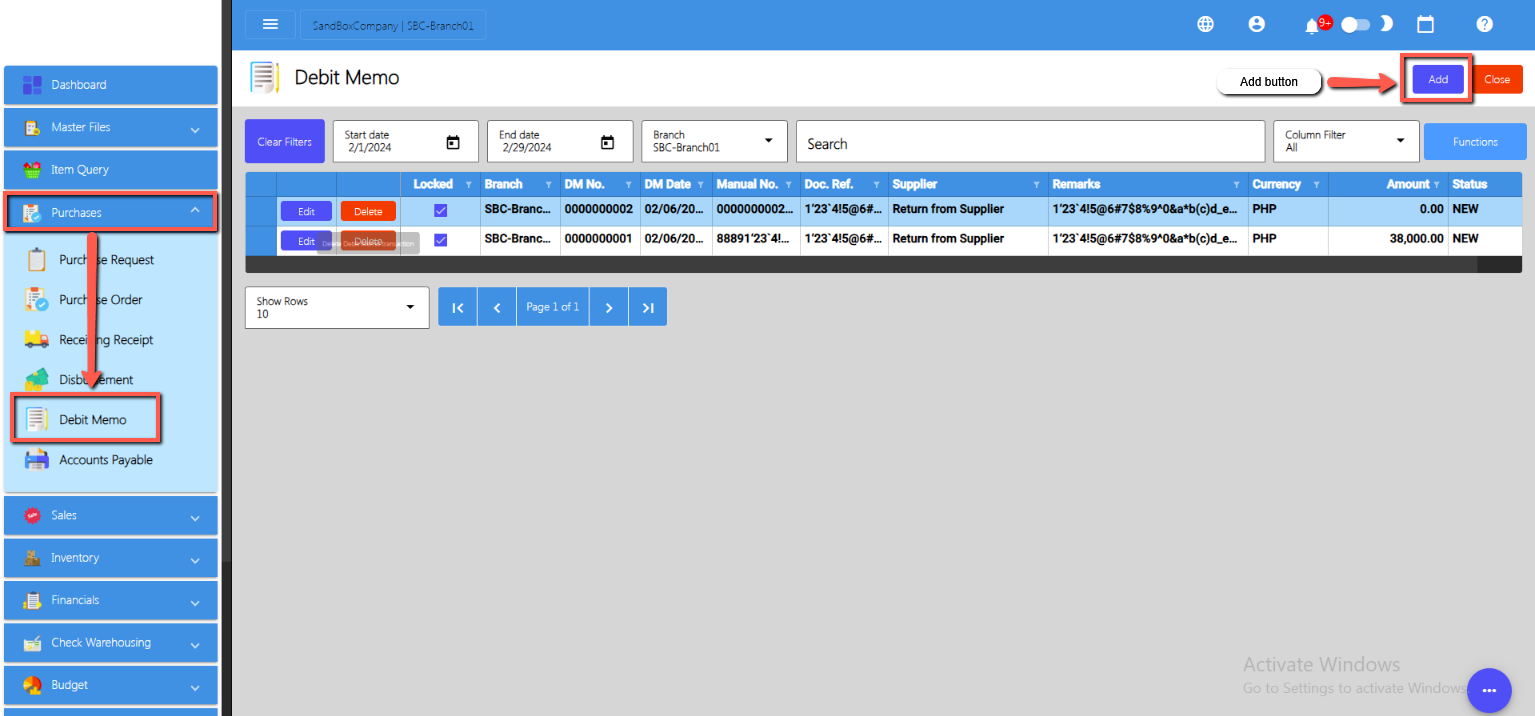
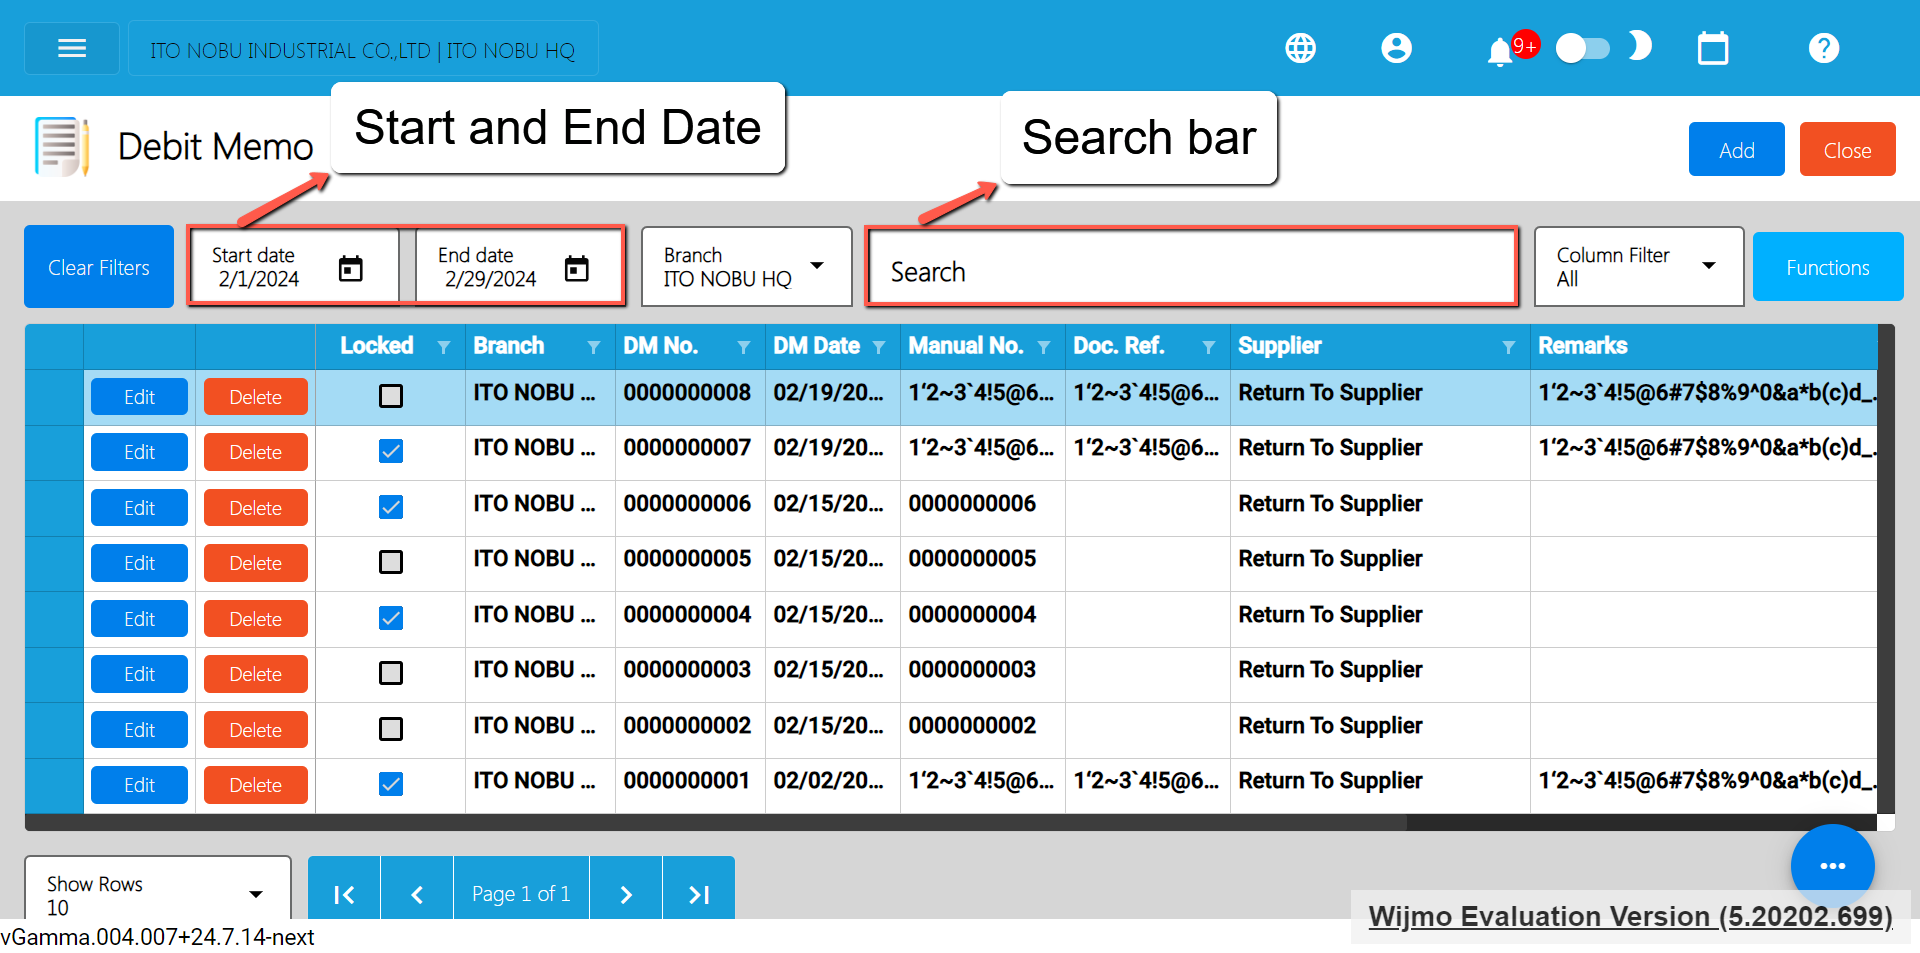
4.Go back to Debit Memo list
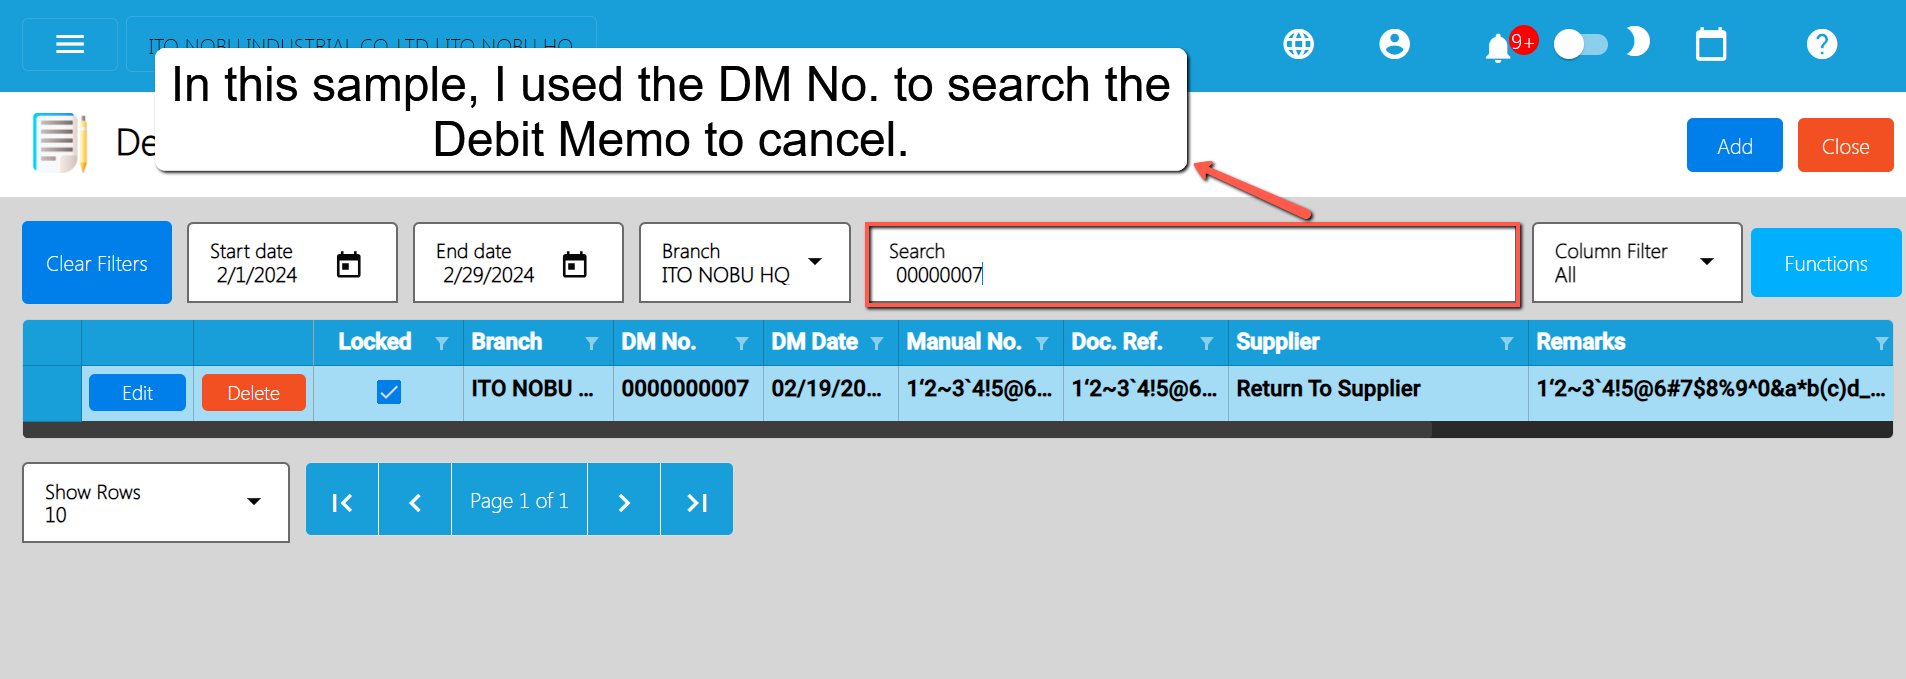
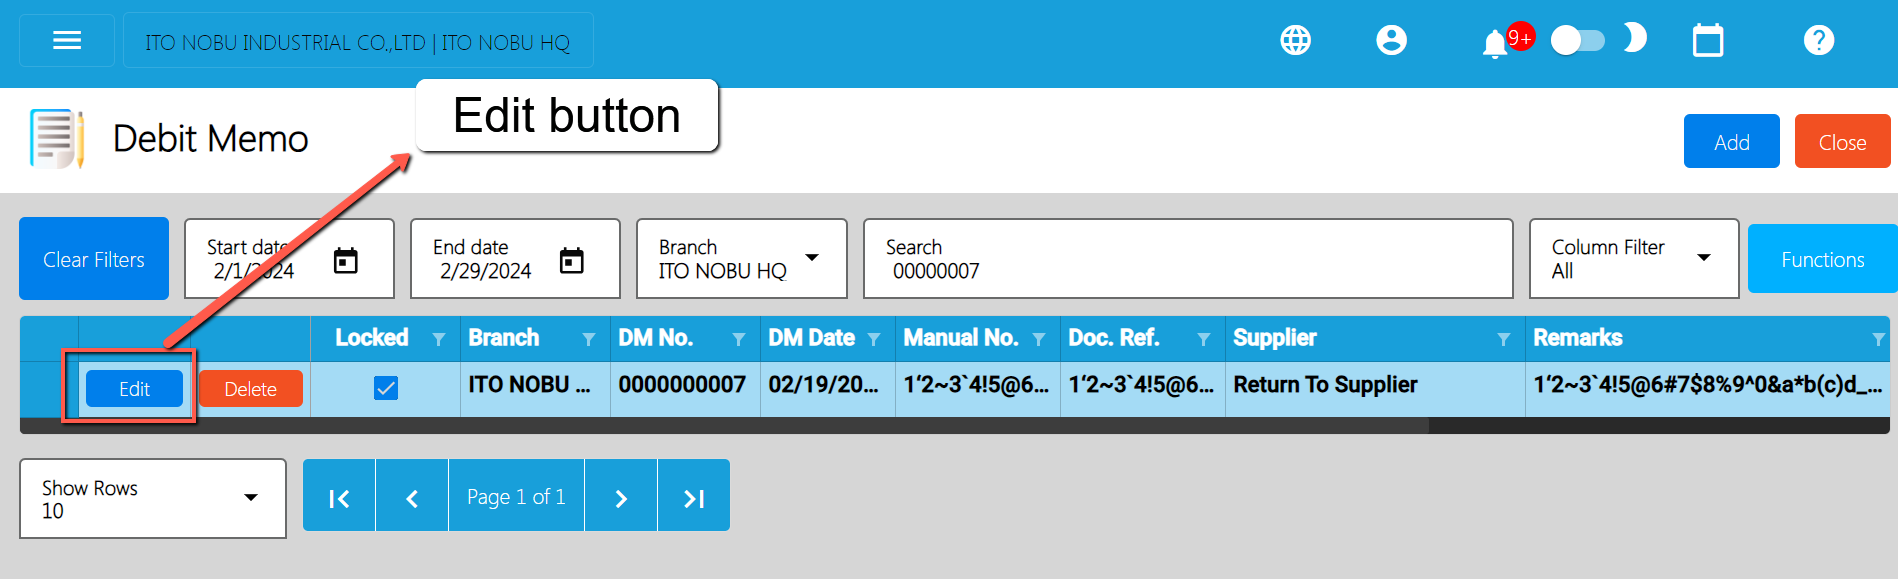
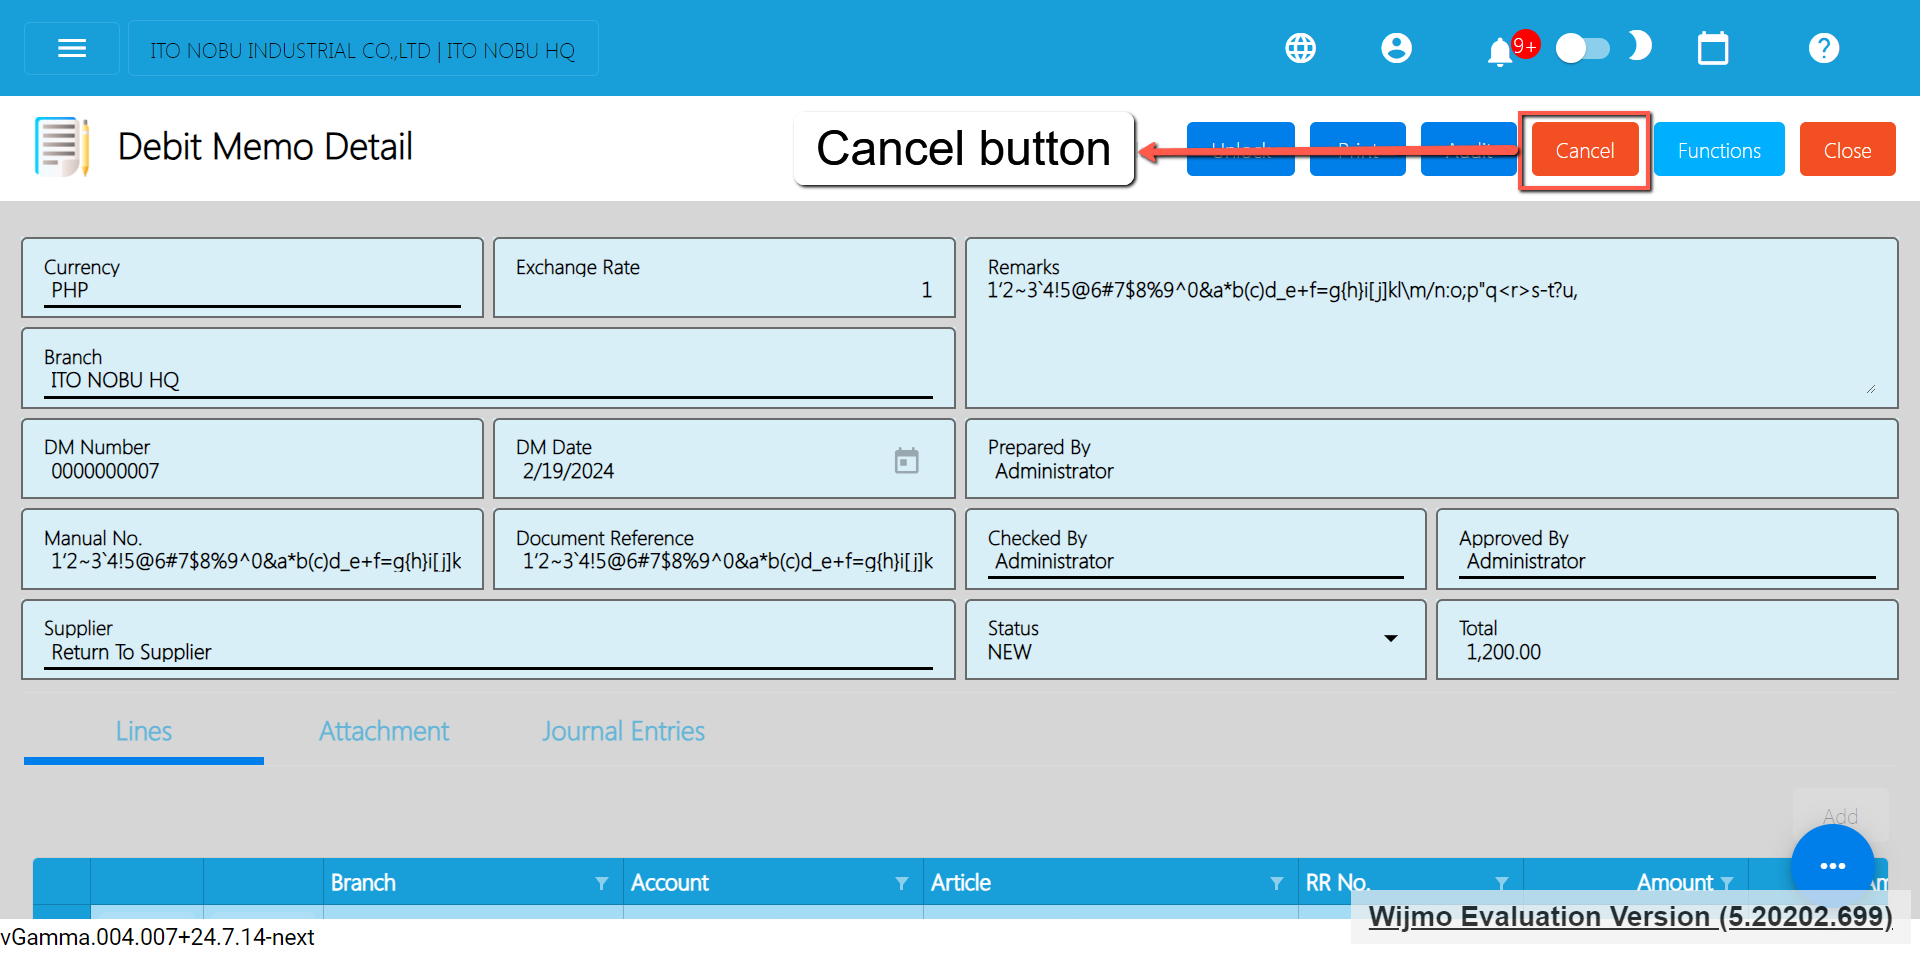
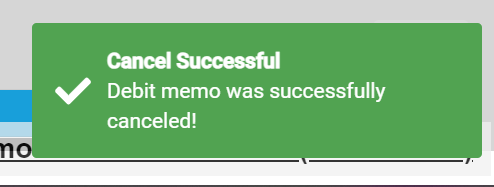
When you need to cancel a Debit Memo, it’s important to follow these simple steps:
Take note: Don’t forget to change the Start Date and End Date to your Debit Memo’s transaction date to display the correct result.
The Sales Module includes the whole Sales Cycle from adding a Customer up to generating Invoices and Sales Reports. Here’s the flow of the Sales Module
Customer Creation/Management
Sales Order
Order Fulfillment
Sales Invoice
Accounts Receivable
Collection/ Payment
Credit Memo (if necessary)
Sales Module Reporting and Analytics
Following this flow, businesses can effectively manage their sales transactions, monitor cash flow, and maintain accurate records of customer interactions. The integration of these steps within the accounting system streamlines the financial processes associated with sales and contributes to a more efficient and accurate overall accounting process.

Typically replies within a few hours
 Log in to Messenger